

AC Filter Replacement Workflow for Optimal Home Comfort
Replacing your AC filter is one of the easiest ways for an American homeowner in Tampa Bay to save money and protect a major investment. A clogged or incorrect filter can slash system efficiency by up to 15 percent, raising energy bills and wearing down your equipment faster. Learning the right DIY steps helps keep your HVAC running smooth while saving on costly repairs. Get ready to make your home’s air cleaner and your system’s life longer with a simple filter change.
Table of Contents
- Step 1: Gather Necessary Tools And Correct Filter
- Step 2: Power Off HVAC System Safely
- Step 3: Remove Existing AC Filter Carefully
- Step 4: Insert New Filter With Proper Orientation
- Step 5: Restore Power And Inspect Airflow
Quick Summary
| Key Takeaway | Explanation |
|---|---|
| 1. Gather essential tools first | Collect items like a stepladder, gloves, and a vacuum before starting the filter replacement process. |
| 2. Ensure safety before starting | Always turn off your HVAC system at the thermostat and circuit breaker to prevent accidents during maintenance. |
| 3. Install the filter with care | Insert the new filter in the correct orientation based on the airflow direction arrow for optimal efficiency. |
| 4. Check airflow after replacement | After installation, restore power and verify that the airflow is consistent and there are no unusual sounds from the system. |
| 5. Keep track of replacement dates | Use a permanent marker to note the installation date on the filter frame for timely future replacements. |
Step 1: Gather Necessary Tools and Correct Filter
Preparing for your AC filter replacement starts with collecting the right tools and finding the perfect replacement filter. Your goal is simple: assemble everything you need before getting started to make the process smooth and efficient.
First, walk around your home and gather a few essential items. You will need a stepladder (if your AC filter is in a hard to reach location), work gloves to keep your hands clean, a vacuum cleaner with a hose attachment, and a fresh replacement filter that matches your system’s exact specifications. Check your current filter’s size printed along its frame – this number is crucial for getting the right replacement. For Tampa Bay homeowners, most residential systems use standard sizes like 16×20 or 20×25 inches, but always verify your specific measurement to avoid purchasing the wrong filter.
While selecting your filter, consider the MERV rating that indicates its efficiency level. Higher MERV ratings trap more particles but can restrict airflow, so consult your HVAC system’s manual for recommended ratings. Standard home filters typically range between MERV 8 to 13, balancing air quality and system performance.
Here’s a quick comparison of common MERV ratings and their effects on home HVAC systems:
| MERV Rating | Particle Filtration | Airflow Impact | Typical Application |
|---|---|---|---|
| 8 | Captures dust, pollen, lint | Minimal restriction | Standard residential use |
| 11 | Filters finer allergens and pet dander | Slight airflow reduction | Homes with pets or allergies |
| 13 | Captures bacteria and smoke | Moderate airflow impact | Premium home filtration, sensitive occupants |

Pro Tip: Keep a permanent marker near your filter replacement area to quickly note the size and date of last replacement directly on the old filter housing.
Step 2: Power Off HVAC System Safely
Before diving into your AC filter replacement, you must completely power down your HVAC system to prevent electrical accidents. This critical safety step protects both you and your expensive equipment from potential damage during maintenance.
Start by turning off your system at the thermostat completely. Then follow the professional safety protocol of switching off the dedicated circuit breaker controlling your indoor air handler. Look for the breaker panel typically located in your garage, utility room, or basement. Pull the designated breaker switch to the off position to cut electrical power. Next, locate the outdoor disconnect switch near your condenser unit – this is usually a large rectangular box mounted on the exterior wall close to the unit. Flip this switch to the off position as an additional safety measure.
To verify that power is completely disconnected, use a non contact voltage tester. Checking for residual electrical current is crucial because HVAC systems can have capacitors that store energy even after the main power is switched off. Touch the voltage tester to electrical connections to confirm zero electrical activity before proceeding with your filter replacement.
Pro Tip: Keep a flashlight and voltage tester together in your home maintenance kit to always be prepared for electrical safety checks.
Step 3: Remove Existing AC Filter Carefully
Removing your existing AC filter requires a gentle touch and careful attention to detail. Your primary goal is to extract the old filter without releasing accumulated dust and debris into your home’s air circulation system.
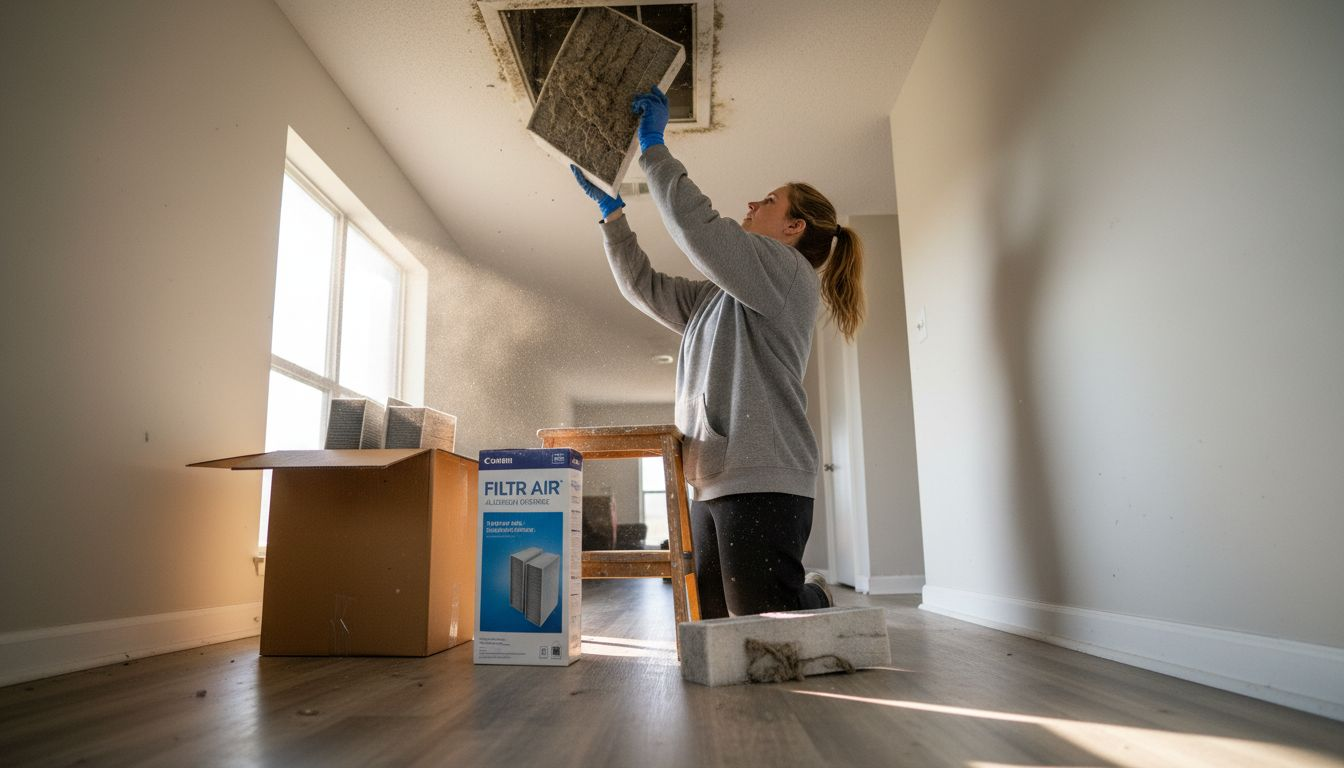
Carefully inspect the filter location within your return air duct or air handler. Most systems have a designated filter slot with a simple sliding mechanism. Before removing the filter, take note of the airflow direction arrow printed on its frame – this indicates how the new filter should be installed. Slowly slide the filter out of its housing using both hands to support its weight and prevent it from bending or breaking. Be prepared for potential dust buildup around the edges and consider having a trash bag nearby to immediately contain the old filter.
As you remove the filter, hold it away from your face and body to minimize dust dispersion. If possible, remove the filter over a hard surface like a tile floor or outside to prevent dust from spreading across carpets or furniture. Inspect the filter housing for any accumulated debris or signs of damage while the area is exposed. This is an excellent opportunity to do a quick visual check of your HVAC system’s internal components before installing the new filter.
Pro Tip: Wear a dust mask and work gloves during filter removal to protect yourself from airborne particles and maintain a clean workspace.
For easy reference, here’s a summary of essential tools and safety equipment for AC filter replacement:
| Tool/Item | Purpose | Safety Benefit |
|---|---|---|
| Stepladder | Reaches high filter slots | Prevents falls |
| Work Gloves | Protects hands from debris | Reduces cuts and irritation |
| Vacuum Cleaner | Cleans dust around filter area | Improves air quality |
| Voltage Tester | Confirms power is off | Prevents electrical shocks |
| Dust Mask | Shields from airborne particles | Protects lungs |
| Flashlight | Illuminates dark HVAC spots | Helps avoid accidents |
Step 4: Insert New Filter With Proper Orientation
Installing your new AC filter correctly is crucial for maintaining optimal airflow and system performance. Proper orientation ensures that your HVAC system operates efficiently and filters air effectively throughout your home.
Begin by examining the airflow direction arrow on the new filter frame. This arrow must point toward the air handler or furnace blower, indicating the correct airflow direction. Carefully slide the new filter into the filter housing using both hands, making sure it fits snugly without any gaps around the edges. The filter should sit flush within the mounting frame without forcing or bending the filter material. Pay close attention to ensure the arrow is pointing in the correct direction your system requires airflow to move.
As you insert the filter, take a moment to check the filter frame fits smoothly into the designated slot. Gentle pressure might be needed to seat the filter completely, but avoid using excessive force that could damage the filter or the housing. A properly installed filter will sit evenly and create a tight seal to prevent unfiltered air from bypassing the filter media.
Pro Tip: Mark the date of installation on the filter frame with a permanent marker to help you track when the next replacement is due.
Step 5: Restore Power and Inspect Airflow
With your new filter installed, it is time to carefully restore power to your HVAC system and verify everything is functioning correctly. This final step ensures your system operates efficiently and maintains optimal performance after the filter replacement.
Begin by systematically restoring power starting with the circuit breaker. Switch the dedicated HVAC circuit breaker back to its on position, then return to your thermostat and turn the system on. Listen carefully during the startup process for any unusual sounds that might indicate potential issues. Watch the system closely as it begins operating observe the initial airflow from your vents. The air should emerge smoothly and consistently without any sputtering or weak spots.
Take a few moments to walk through different rooms in your home and check the temperature and airflow from various vents. Verify that the air feels consistent and that the system is cooling or heating as expected. If you notice any strange noises such as grinding, rattling, or unusually loud operational sounds, it might indicate a need for professional inspection. Your new filter should help improve overall system efficiency and air quality.
Pro Tip: Set a reminder on your phone or calendar for the next filter replacement to maintain consistent HVAC system health.
Keep Your Home Comfortable With Expert AC Filter Care
Replacing your AC filter is key to maintaining clean air and efficient cooling in your home. This article highlights common challenges like choosing the right filter size and MERV rating, safely powering off your system, and correctly installing the filter to prevent airflow issues. If this process feels overwhelming or you want to avoid possible mistakes that can lead to costly repairs and poor air quality, professional help is just a call away.
Experience peace of mind with Home Therapist Cooling, Heating, and Plumbing, your trusted Tampa Bay experts. Our certified technicians handle everything from filter replacements to full HVAC inspections so you can enjoy optimal comfort all year long. Don’t wait for system problems to grow. Visit Home Therapist Cooling, Heating, and Plumbing now to schedule service and keep your home’s air fresh and your HVAC running flawlessly.
Frequently Asked Questions
How do I determine the right size for my AC filter?
To find the correct size for your AC filter, check the dimensions printed on the frame of your current filter. Measure and note these dimensions (e.g., 16×20 inches) to ensure you purchase the correct replacement.
What should I consider when choosing an AC filter’s MERV rating?
When selecting an AC filter, consider its Minimum Efficiency Reporting Value (MERV) rating, which indicates its ability to trap particles. Aim for a MERV rating between 8 to 13 for standard home use to balance air quality and system performance.
What steps should I take to safely turn off my HVAC system before replacing the filter?
To safely turn off your HVAC system, first switch off the system at the thermostat. Then, turn off the dedicated circuit breaker and the outdoor disconnect switch to ensure complete power disconnection before starting any maintenance.
How can I avoid dust dispersion when removing my old AC filter?
To prevent dust from spreading, hold the old AC filter away from your face and body while removing it. Consider removing the filter over a hard surface or outdoors, and have a trash bag ready to contain any debris immediately.
What are the signs that my new AC filter is not installed correctly?
If your new AC filter is not installed correctly, you might notice unusual sounds from your HVAC system or inconsistent airflow from the vents. Make sure the arrow on the filter points in the correct direction and that it fits snugly in the housing to maintain optimal performance.
When should I schedule my next AC filter replacement?
Mark your calendar for the next AC filter replacement about every 30 to 90 days, depending on your usage and indoor air quality. Setting reminders will help you maintain consistent HVAC system health and efficiency.
Recommended
- FAQ: Routine Air Filter Replacement for HVAC Systems in Tampa Bay FL Services – Home Therapist Cooling, Heating, and Plumbing
- 7 Essential HVAC Maintenance Checklist Tips for Homeowners – Home Therapist Cooling, Heating, and Plumbing
- HVAC Retrofitting Explained: Enhancing Home Comfort – Home Therapist Cooling, Heating, and Plumbing
- HVAC Troubleshooting Steps for Homeowners: Easy Guide – Home Therapist Cooling, Heating, and Plumbing


