

Clean AC Coils: Boost Efficiency 30% in Tampa Bay
Your air conditioner struggles in Tampa Bay’s thick humidity, working harder yet cooling less every month. Dirty coils are the hidden culprit, choking your system’s ability to transfer heat and driving up your electric bill. This guide shows you exactly how to clean your AC coils safely, restore peak efficiency, and cut energy waste without risking damage or voiding warranties.
Table of Contents
- Introduction To AC Coil Cleaning
- Prerequisites: Tools, Materials, And Safety Preparations
- Step-By-Step Cleaning Process
- Common Mistakes And Troubleshooting
- Expected Results And Outcomes
- Keep Your Tampa Bay AC Running Smoothly With Home Therapist
- Frequently Asked Questions About Cleaning AC Coils
Key Takeaways
| Point | Details |
|---|---|
| Efficiency Impact | Dirty coils reduce AC efficiency by up to 30%, directly increasing energy bills and reducing cooling power. |
| Essential Tools | Use commercial coil cleaner, soft brush, low-pressure water, gloves, and goggles for safe cleaning. |
| Safety First | Always shut off power at the breaker before starting any coil cleaning work. |
| Avoid Mistakes | Never use bleach or high-pressure water, both damage coils and void warranties. |
| Expected Savings | Proper cleaning can reduce energy use by 10-15% within 24 hours and restore airflow. |
Introduction to AC Coil Cleaning
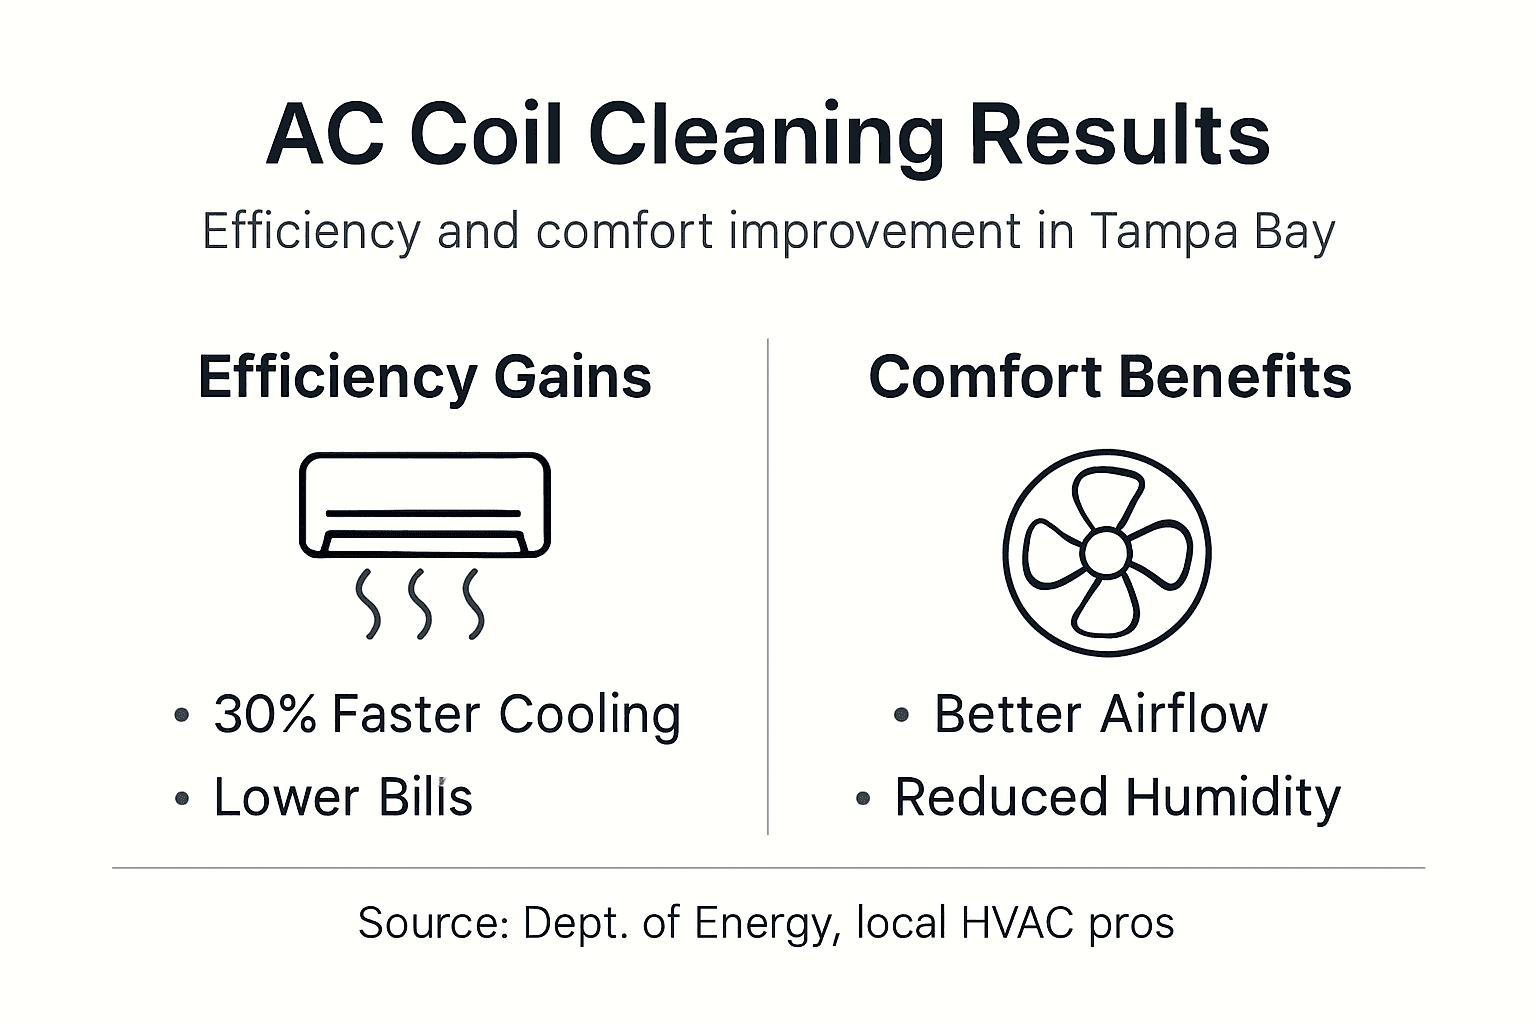
Your AC coils are the heart of your cooling system, transferring heat from inside your home to the outdoors. When dirt, pollen, and mold coat these coils, they lose their ability to move heat efficiently. According to the Department of Energy, dirty air conditioner evaporator and condenser coils reduce system efficiency by 30% or more due to impaired heat transfer. In Tampa Bay, where humidity stays high year-round, this problem accelerates rapidly.
Our local climate creates perfect conditions for grime buildup. Salt air from the Gulf, combined with constant moisture, means your outdoor condenser coils collect debris faster than in drier regions. Inside, evaporator coils face mold and dust accumulation that thrives in humid environments. This double threat forces your AC to run longer cycles, consuming more electricity while delivering weaker cooling.
Regular coil cleaning prevents this cascade of problems. Clean coils transfer heat efficiently, reducing the workload on your compressor and other components. This cuts your energy bills and extends your system’s lifespan by preventing overheating and mechanical stress. For Tampa Bay homeowners, staying ahead of coil maintenance means comfort without the shock of soaring summer utility bills. Check out our Tampa Bay AC maintenance guide for additional seasonal care tips.
Key benefits of maintaining clean coils include:
- Restored cooling capacity and faster temperature drops
- Lower monthly energy costs through improved heat transfer
- Reduced risk of compressor failure from overwork
- Prevention of mold growth that affects indoor air quality
- Extended AC system life by minimizing mechanical strain
Prerequisites: Tools, Materials, and Safety Preparations
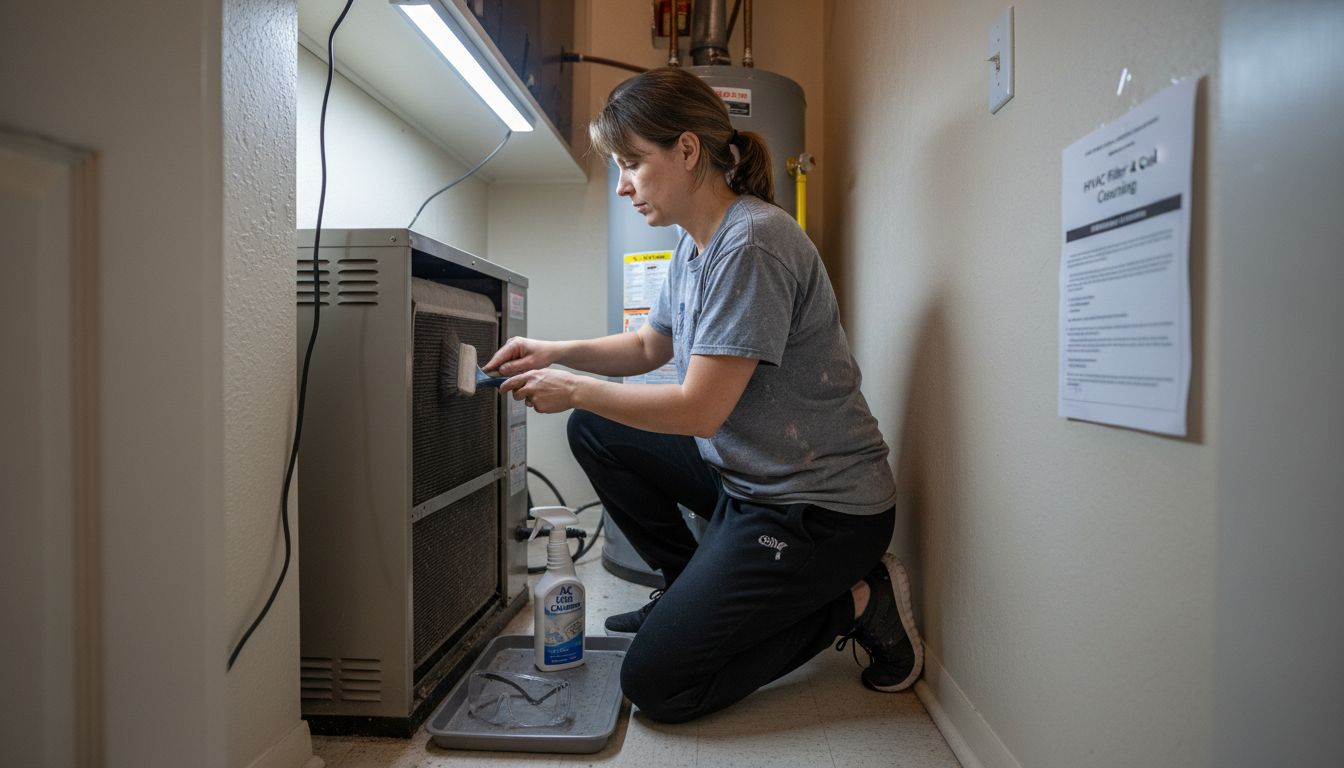
Gathering the right tools before you start saves time and prevents coil damage. You need specific supplies designed for HVAC systems, not general household cleaners. Here’s your complete checklist.
Essential Tools and Supplies:
- Commercial foaming coil cleaner (no-rinse or rinsing type)
- Soft-bristle brush or fin brush
- Garden hose with adjustable low-pressure nozzle
- Safety goggles and chemical-resistant gloves
- Fin comb for straightening bent fins
- Shop vacuum with brush attachment
- Flashlight for inspecting coils
| Item | Purpose | Why It Matters |
|---|---|---|
| Commercial Coil Cleaner | Breaks down grease and organic matter | Household cleaners damage protective coatings |
| Soft Brush | Removes loose debris gently | Hard bristles bend delicate aluminum fins |
| Low-Pressure Water | Rinses away cleaner and dirt | High pressure permanently bends fins |
| Safety Gear | Protects eyes and skin | Cleaners contain acids or alkaline compounds |
Safety comes first, always. Shut off power to your AC unit at the circuit breaker before touching any components. This prevents electric shock and protects sensitive electronics from water damage. Label the breaker so no one accidentally turns it back on while you work.
Never use bleach, ammonia, or abrasive household cleaners on AC coils. According to ACHR News, using harsh chemicals like bleach or abrasives damages coil fins and voids many HVAC warranty terms, leading to costly repairs and replacements. Stick to products specifically labeled for HVAC coil cleaning. These formulas are engineered to remove buildup without corroding metal or degrading protective coatings.
Pro Tip: Wear safety goggles throughout the cleaning process. Foaming coil cleaners can splash unexpectedly when applied, and even diluted formulas irritate eyes severely. Keep a water source nearby to flush any accidental contact immediately.
For more detailed preparation steps, review our HVAC cleaning steps guide. Proper preparation makes the actual cleaning faster and safer.
Step-by-Step Cleaning Process
Now that you have your tools ready and safety measures in place, follow this detailed process to clean your AC coils effectively. Each step builds on the previous one, so don’t skip ahead.
Power Down Completely: Go to your electrical panel and flip the breaker for your AC unit to the OFF position. Verify power is off by attempting to turn on your thermostat. Wait five minutes for capacitors to discharge fully.
Access the Coils: For outdoor condenser coils, remove the protective grille or fan guard using a screwdriver. For indoor evaporator coils, open the access panel on your air handler. Take a photo of wire connections before disconnecting anything to ensure proper reassembly.
Remove Loose Debris: Use your shop vacuum with a brush attachment to gently remove surface dirt, leaves, and dust. Work carefully around the fins, which bend easily. A soft-bristle brush helps dislodge stubborn particles stuck between fins.
Apply Coil Cleaner: Spray the commercial coil cleaner evenly across all coil surfaces, following the product’s instructions precisely. Most foaming cleaners need to sit for 5 to 10 minutes to break down grease and organic matter. Cover the entire coil surface but avoid oversaturating electrical components.
Rinse Thoroughly: Using a garden hose with a low-pressure nozzle, rinse the coils gently from the inside out for condenser coils (opposite of normal airflow direction). This pushes dirt out rather than deeper into the fins. For evaporator coils, rinse carefully to avoid water damage to the air handler cabinet. Some no-rinse cleaners skip this step entirely.
Inspect and Straighten Fins: Check for bent fins that restrict airflow. Use a fin comb to carefully straighten any damaged sections. Work slowly; fins are delicate and break if forced.
Allow Complete Drying: Let coils air dry for at least one hour before restoring power. On humid Tampa Bay days, drying may take longer. Never power up your AC with wet coils, as moisture can cause electrical shorts.
The Department of Energy confirms proper coil cleaning involves turning off power, gentle debris removal, applying commercial coil cleaner, rinsing with low-pressure water, and thorough drying. Following these steps protects your equipment while maximizing cleaning effectiveness.
Pro Tip: Schedule your coil cleaning on a mild, breezy day. Lower humidity and airflow speed up drying time significantly, getting your AC back in service faster and reducing the risk of moisture-related issues.
For visual learners, our detailed coil cleaning steps guide includes diagrams showing exactly where to apply cleaner and how to rinse effectively.
Common Mistakes and Troubleshooting
Even experienced DIYers make mistakes when cleaning AC coils. Recognizing these errors early prevents permanent damage and costly repairs.
Mistake 1: Using High-Pressure Water
Many homeowners grab a pressure washer thinking it will clean faster. High-pressure water bends aluminum fins instantly, permanently reducing airflow and efficiency. According to ACHR News, using high-pressure water sprays and bleach are common errors that lead to coil damage and voided warranties. Always use a standard garden hose with a gentle spray nozzle. Effective cleaning comes from the chemical action of the cleaner, not water pressure.
Mistake 2: Applying Bleach or Harsh Household Cleaners
Bleach seems like a logical choice for killing mold, but it corrodes aluminum and copper components. It also damages the protective coating on coils, making future buildup worse. Similarly, degreasers and all-purpose cleaners contain compounds too aggressive for HVAC use. Stick to products explicitly labeled for AC coils.
Mistake 3: Cleaning with Power On
Failing to shut off power at the breaker risks electric shock and can damage control boards when water contacts electrical connections. The thermostat switch isn’t enough; you need to cut power at the main panel. This mistake sends people to the emergency room every year.
Mistake 4: Neglecting Fin Straightening
Bent fins block airflow just like dirt does. If you clean coils but ignore fin damage, you won’t see the efficiency improvements you expect. Invest in a fin comb and spend time carefully straightening bent sections.
| Problem | Cause | Solution |
|---|---|---|
| Bent Fins | High-pressure water or careless handling | Use fin comb to gently straighten; work slowly |
| Persistent Dirt | Inadequate cleaner contact time | Reapply cleaner and let sit longer per instructions |
| Reduced Cooling | Incomplete rinsing left residue | Re-rinse thoroughly with clean water |
| Electrical Issues | Power not shut off before cleaning | Always disconnect power at breaker first |
Troubleshooting Incomplete Cleaning:
If your AC still runs poorly after cleaning, look for these signs:
- Dark spots or visible dirt remaining on coils indicate incomplete cleaning
- Weak airflow from vents suggests bent fins or internal blockage
- No improvement in cooling suggests refrigerant issues beyond coil cleaning
- Strange odors point to mold growth inside the air handler requiring professional attention
When these issues persist, it’s time to call professionals. Our AC troubleshooting guide walks through additional diagnostic steps to identify problems beyond dirty coils. Some situations, like refrigerant leaks or compressor issues, require licensed technicians with specialized equipment.
Expected Results and Outcomes
Understanding what to expect after cleaning your AC coils helps you gauge success and know when to seek additional help.
Immediate Improvements:
Most homeowners notice changes within the first 24 hours. Your AC should reach set temperatures faster, and air from vents should feel noticeably cooler. According to the Department of Energy, dirty coils reduce system efficiency by 30%, while cleaning can improve energy usage by 10 to 15% within 24 hours and enhance cooling. You won’t see these savings on your bill immediately, but smart thermostats and energy monitors show reduced runtime almost instantly.
Time Investment:
A typical coil cleaning session takes one to two hours for both indoor and outdoor coils. Heavily soiled coils or first-time cleanings may require three hours. Factor in drying time of one to two hours before you can restore power. Plan to dedicate a half day to the project to avoid rushing.
Performance Metrics:
| Metric | Before Cleaning | After Cleaning | Improvement |
|---|---|---|---|
| Supply Air Temperature | 62°F | 55°F | 7°F cooler |
| Energy Consumption | 3.8 kW/hour | 3.2 kW/hour | 15% reduction |
| Time to Cool 5°F | 35 minutes | 22 minutes | 37% faster |
| Airflow at Register | Weak | Strong | Noticeably improved |
Long-Term Benefits:
Beyond immediate cooling improvements, clean coils deliver lasting advantages:
- Extended Equipment Life: Reducing strain on your compressor and fan motor prevents premature failure, often adding two to three years to your AC’s lifespan.
- Mold Prevention: Clean coils eliminate the organic matter mold feeds on, improving indoor air quality and reducing allergy symptoms.
- Consistent Comfort: Your AC maintains temperature more steadily, reducing hot spots and temperature swings throughout your home.
- Lower Repair Costs: Well-maintained systems experience fewer breakdowns, saving hundreds in emergency service calls.
For Tampa Bay homeowners, these benefits compound over time. Our humid climate challenges AC systems year-round, making regular maintenance even more valuable. Explore our maintenance benefits guide for a comprehensive maintenance schedule tailored to local conditions.
When Results Fall Short:
If you don’t see improvement after cleaning, other issues may be at play. Low refrigerant, failing compressors, or duct leaks all mimic dirty coil symptoms. At this point, professional diagnosis becomes necessary to avoid wasting time and money on the wrong repairs.
Keep Your Tampa Bay AC Running Smoothly with Home Therapist
Cleaning your own coils saves money and gives you hands-on knowledge of your AC system. But some situations call for professional expertise, especially when dealing with warranty concerns, heavily damaged coils, or persistent performance issues despite proper maintenance.
Home Therapist offers comprehensive AC cleaning and maintenance services specifically designed for Tampa Bay’s challenging climate. Our certified technicians use professional-grade equipment and techniques that ensure thorough cleaning without risking damage to your system. We handle everything from basic coil cleaning to complete system tune-ups, all while maintaining your manufacturer’s warranty requirements.
Whether you prefer the DIY approach or want professional support, we provide resources to keep your home comfortable year-round. Our comprehensive AC maintenance guide covers seasonal tasks beyond coil cleaning, while our HVAC troubleshooting guide helps you diagnose problems quickly. For homeowners just starting their maintenance journey, our beginner HVAC maintenance guide breaks down essential tasks into manageable steps.
Frequently Asked Questions About Cleaning AC Coils
How often should AC coils be cleaned?
Clean your AC coils at least twice yearly, ideally before summer and again before winter if you use heat. Tampa Bay’s humidity and salt air accelerate buildup, so quarterly cleaning may benefit homes near the coast or under heavy tree cover. Monitor your energy bills and cooling performance; increases signal it’s time to clean regardless of schedule.
Can I use household chemicals like bleach to clean AC coils?
Never use bleach, ammonia, or general-purpose household cleaners on AC coils. These chemicals corrode aluminum and copper, damage protective coatings, and void manufacturer warranties. Commercial coil cleaners are specifically formulated to remove buildup safely without harming metal components or seals. The small additional cost prevents thousands in replacement expenses.
What if I accidentally bend the coil fins?
Straighten bent fins immediately using a fin comb, available at hardware stores for under twenty dollars. Insert the comb’s teeth into the fin spacing and gently pull straight. Work slowly; forcing bent fins causes breaks. Our AC troubleshooting guide includes detailed instructions with photos. Severe fin damage covering more than 20% of the coil surface may require professional repair or coil replacement.
How long do cleaning benefits last?
Cleaning effects typically last three to six months depending on your environment. Homes near construction, with pets, or surrounded by vegetation see faster re-soiling. Tampa Bay’s year-round pollen and humidity mean you’ll need more frequent cleaning than homeowners in arid climates. Regular filter changes extend the time between coil cleanings by capturing debris before it reaches coils.
When should I hire a professional instead of DIY?
Call professionals if you’re uncomfortable working with electrical systems, lack the necessary tools, or notice severe coil damage like corrosion or leaks. Professional service makes sense for first-time cleanings on neglected systems, when warranty compliance matters, or if your AC shows no improvement after DIY cleaning. Home Therapist’s professional AC coil cleaning service includes complete system inspection, identifying problems DIY cleaning can’t address.
Recommended
- Ac Coil Cleaning Service Project in Tampa FL 33615 Home Therapist Cooling, Heating, and Plumbing
- Optimizing for Air Conditioner Installation & Repair in Tampa, FL: Essential Services to Maintain Comfort Home Therapist Cooling, Heating, and Plumbing
- Air Conditioning System Maintenance And Cleaning Project in Tampa FL 33615 Home Therapist Cooling, Heating, and Plumbing
- Coil Replacement For Hvac System Project in Tampa FL 33629 Home Therapist Cooling, Heating, and Plumbing


