
Tag: refrigerant recovery process

HVAC Maintenance Tune-Up in Clearwater, FL 33756

During a recent premium maintenance visit for a homeowner in Clearwater, FL 33756, we performed a routine HVAC tune-up that turned into a very important preventative visit. The system was still cooling the home, but a few underlying issues were quietly developing in the background. By the end of the appointment, we had a clear picture of the system’s health, identified a couple of components that are nearing failure, and gave the homeowner practical options without any pressure.

Case Recap

  • Location: Single-family home in Clearwater, FL 33756
  • Service type: Premium Home Therapy Plan routine HVAC tune-up
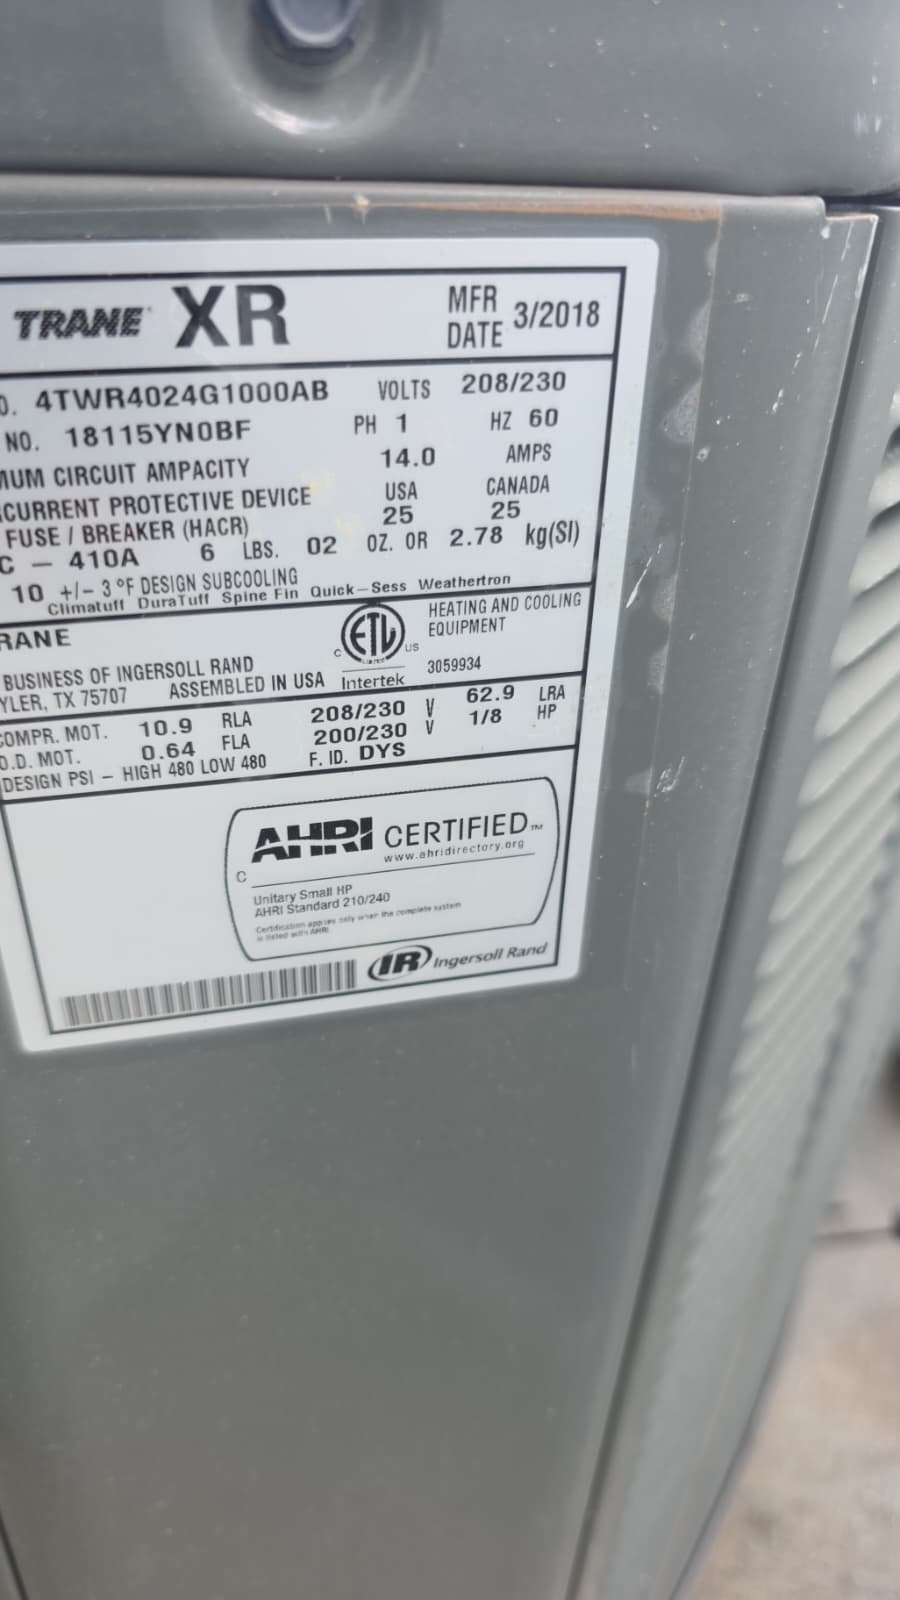
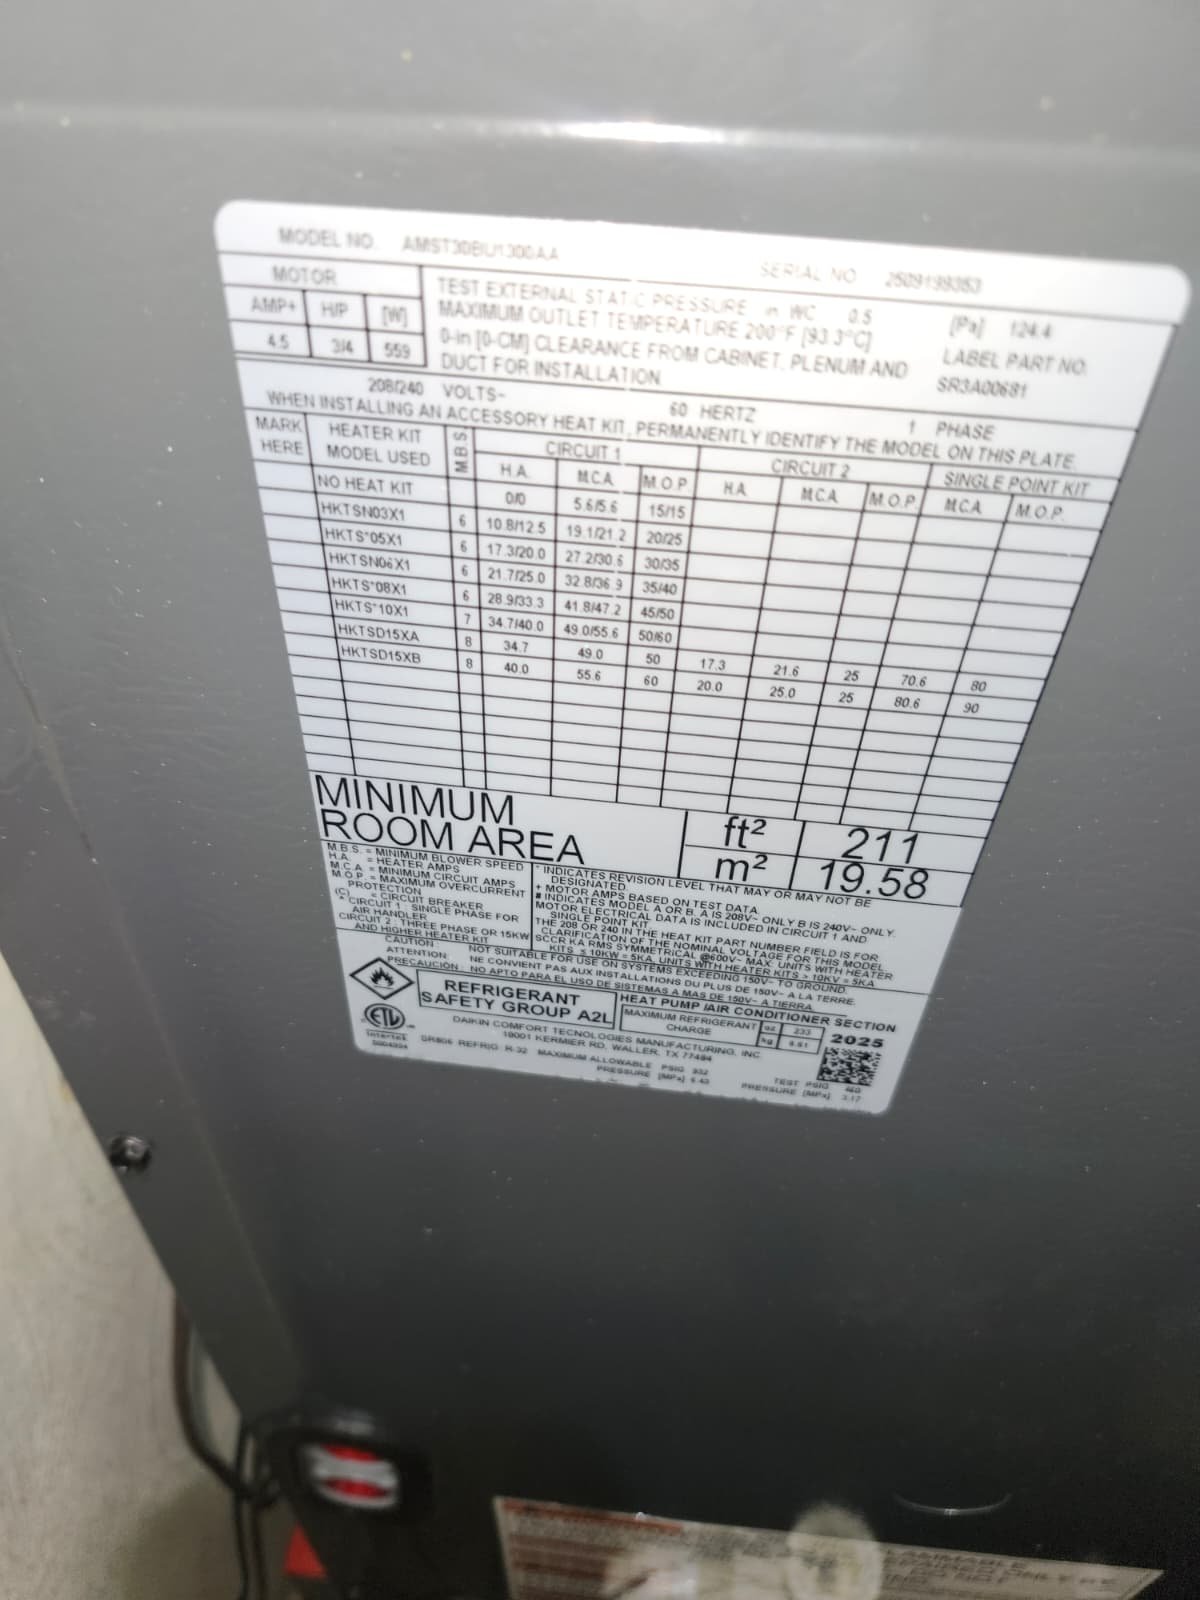
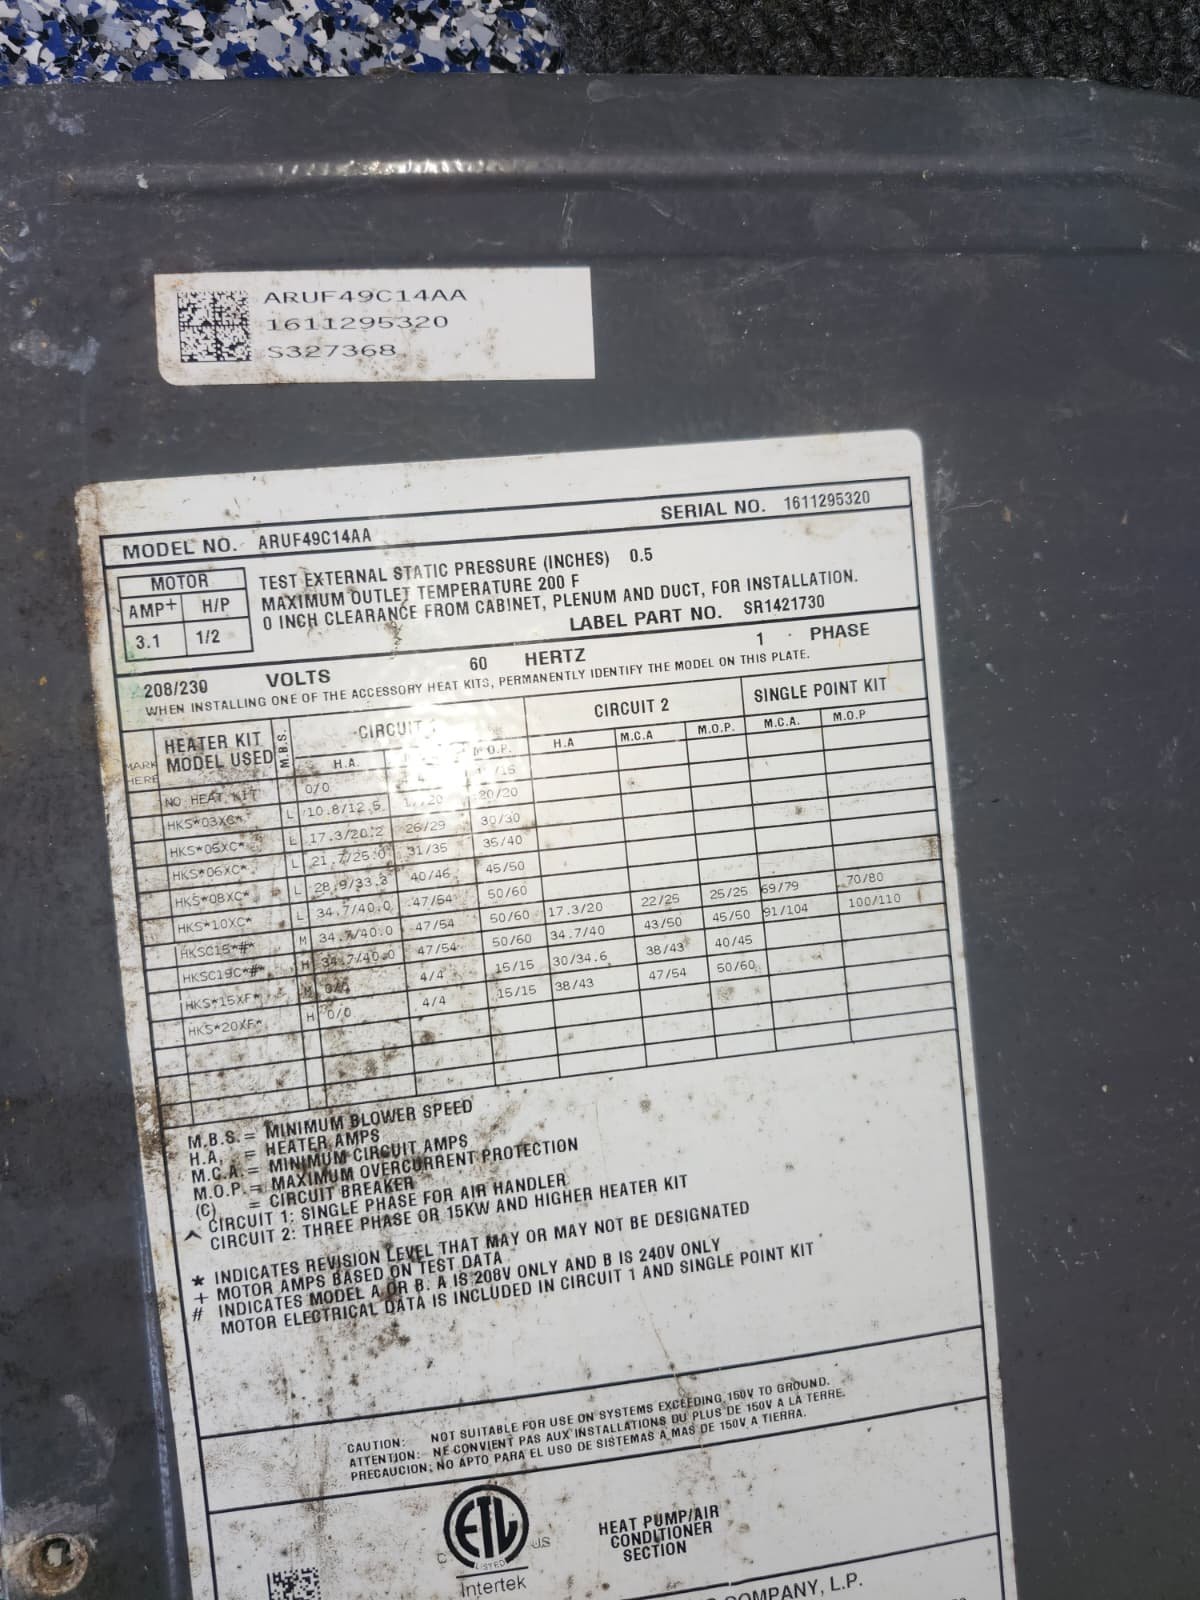
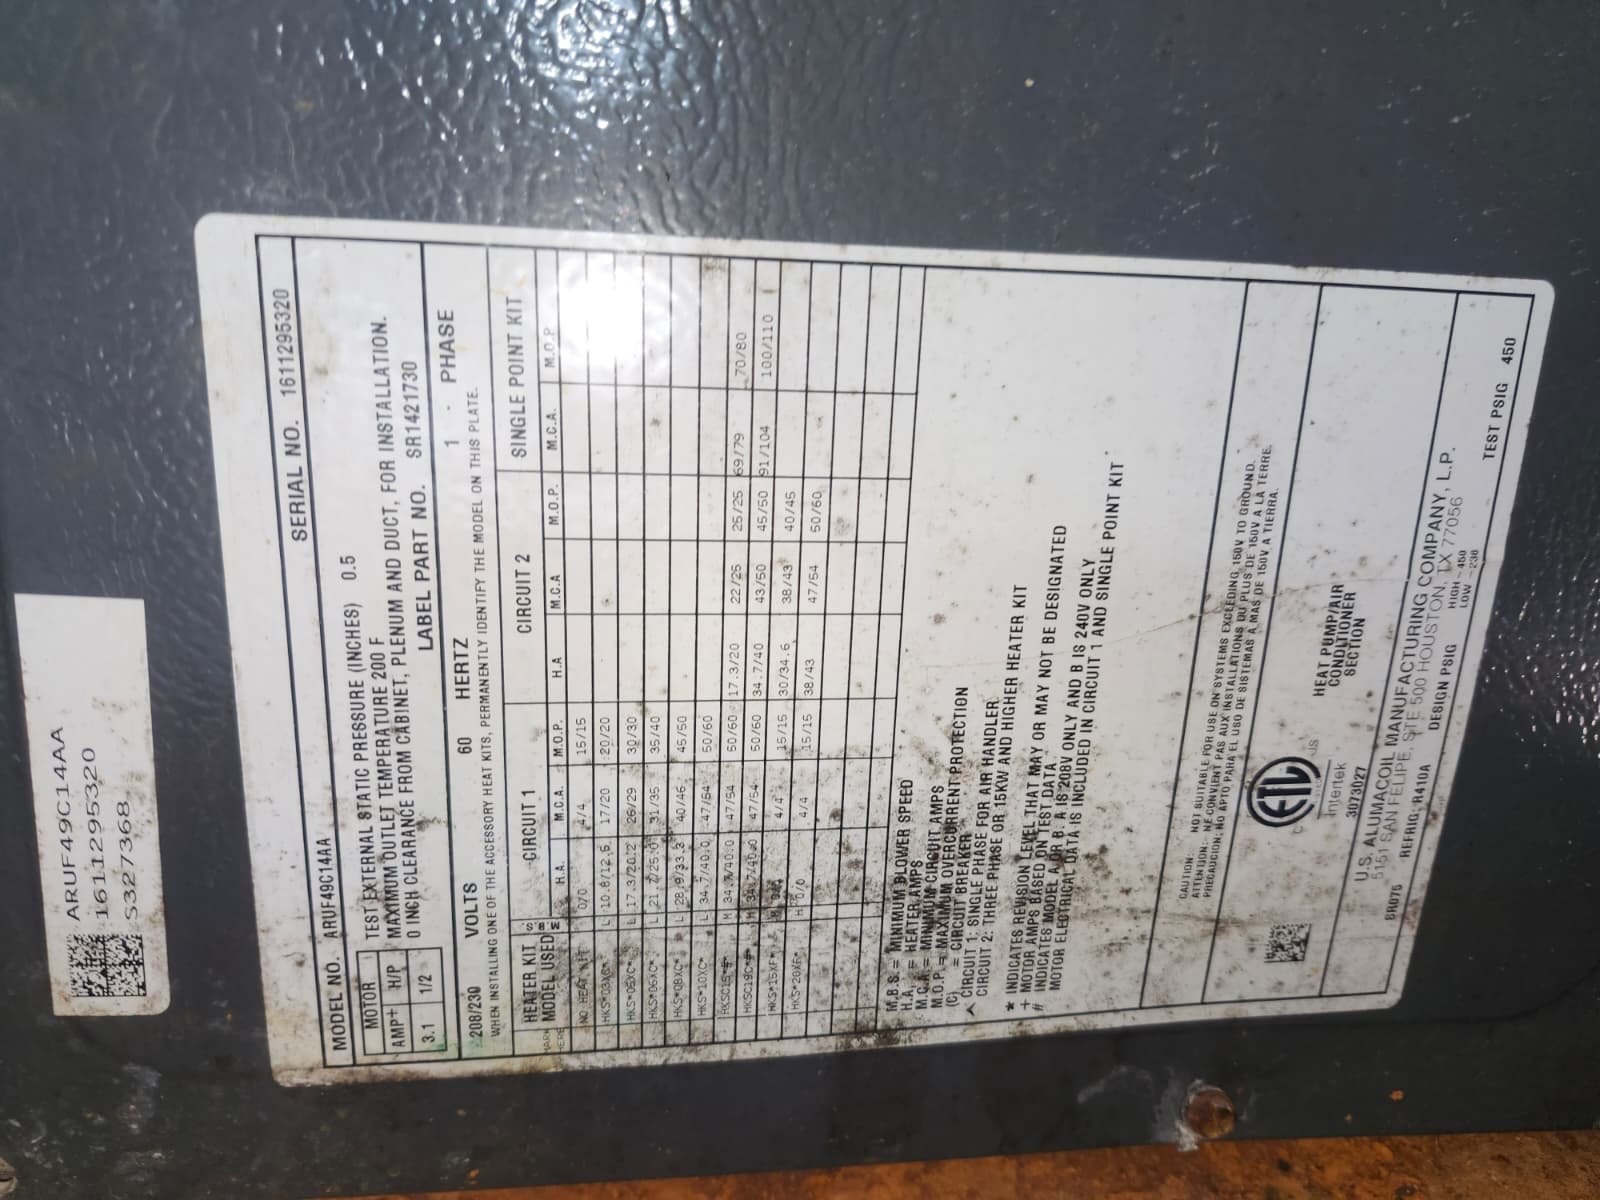
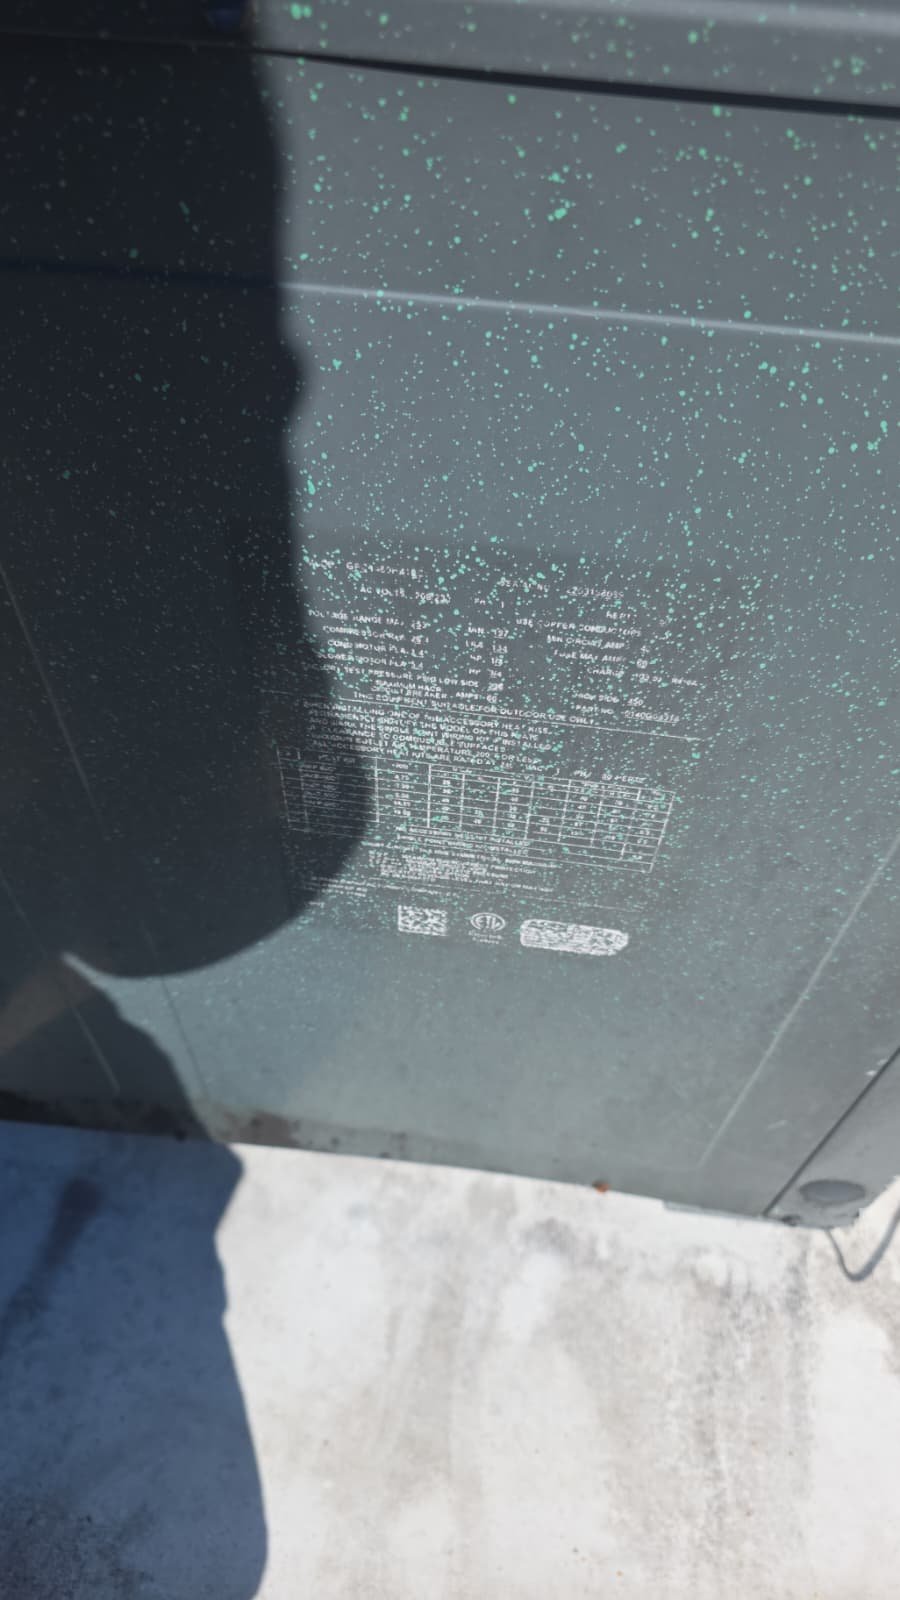
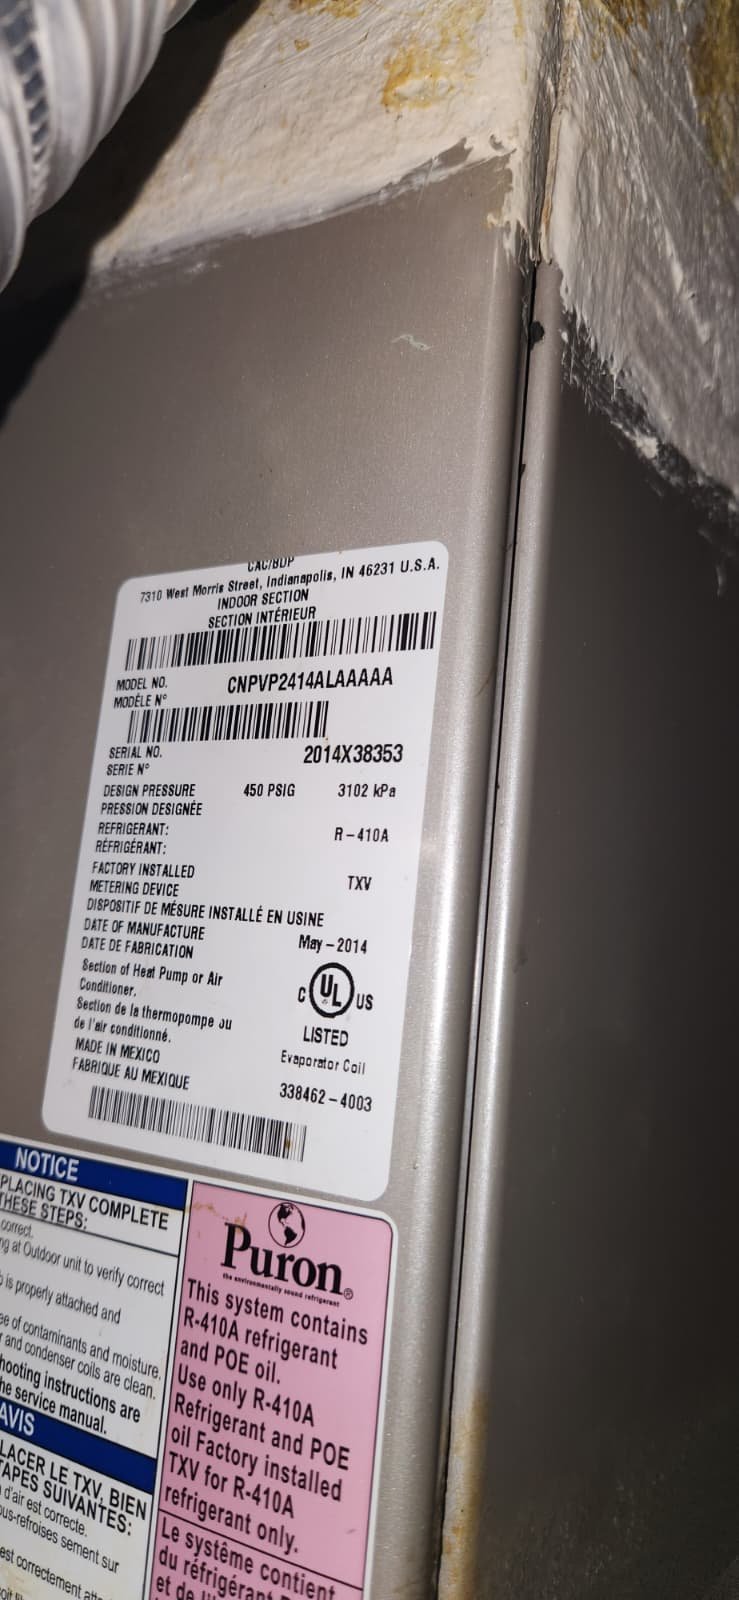
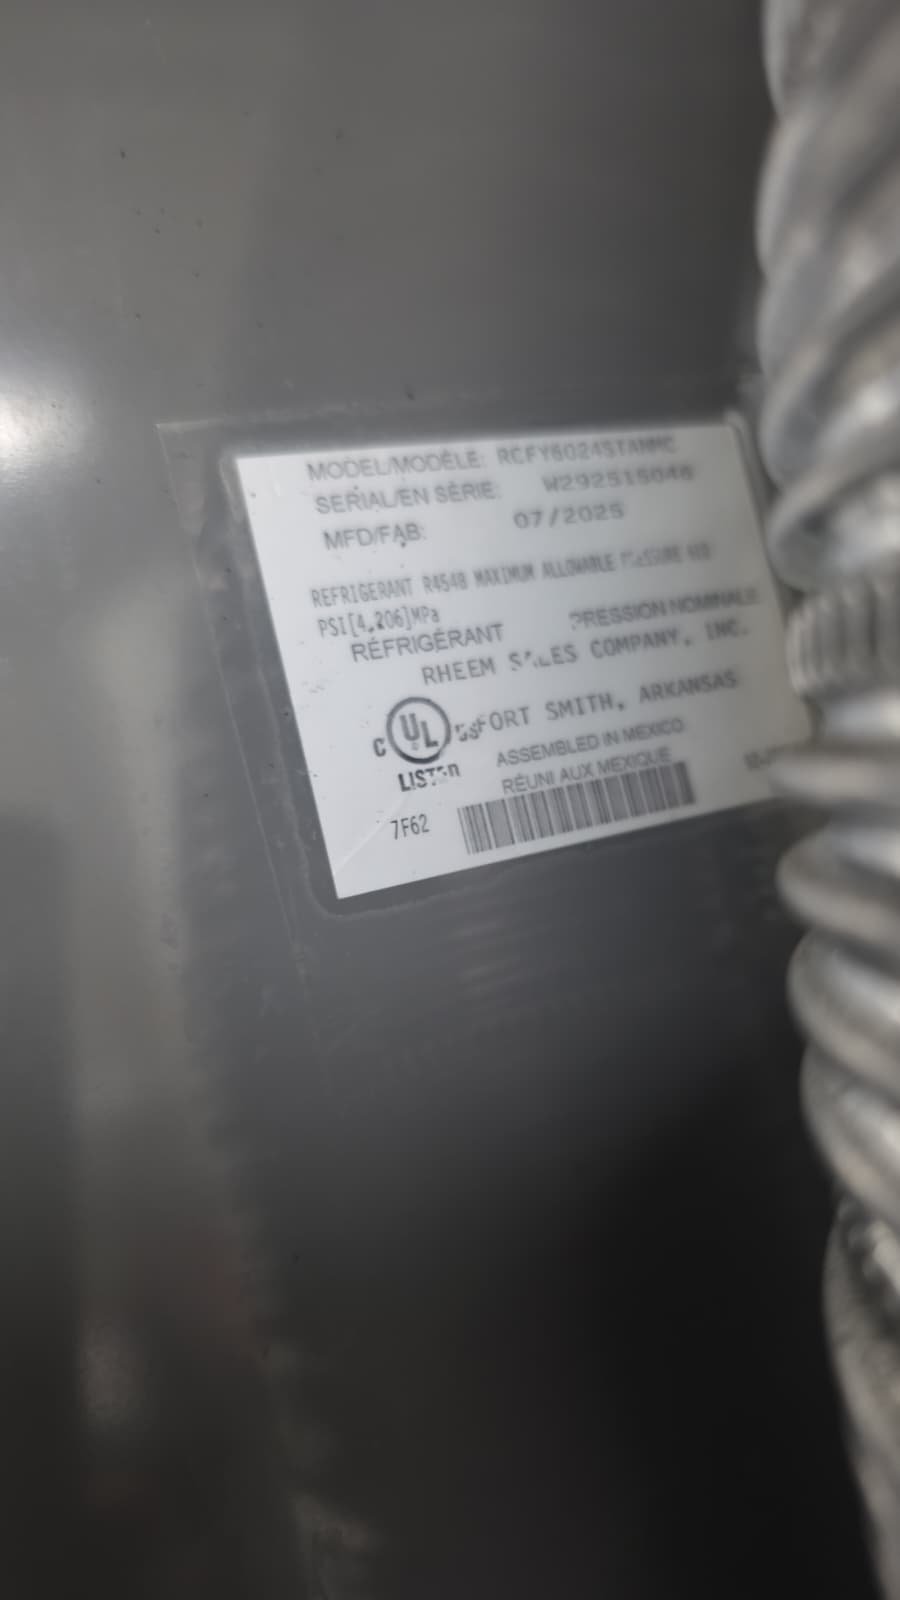
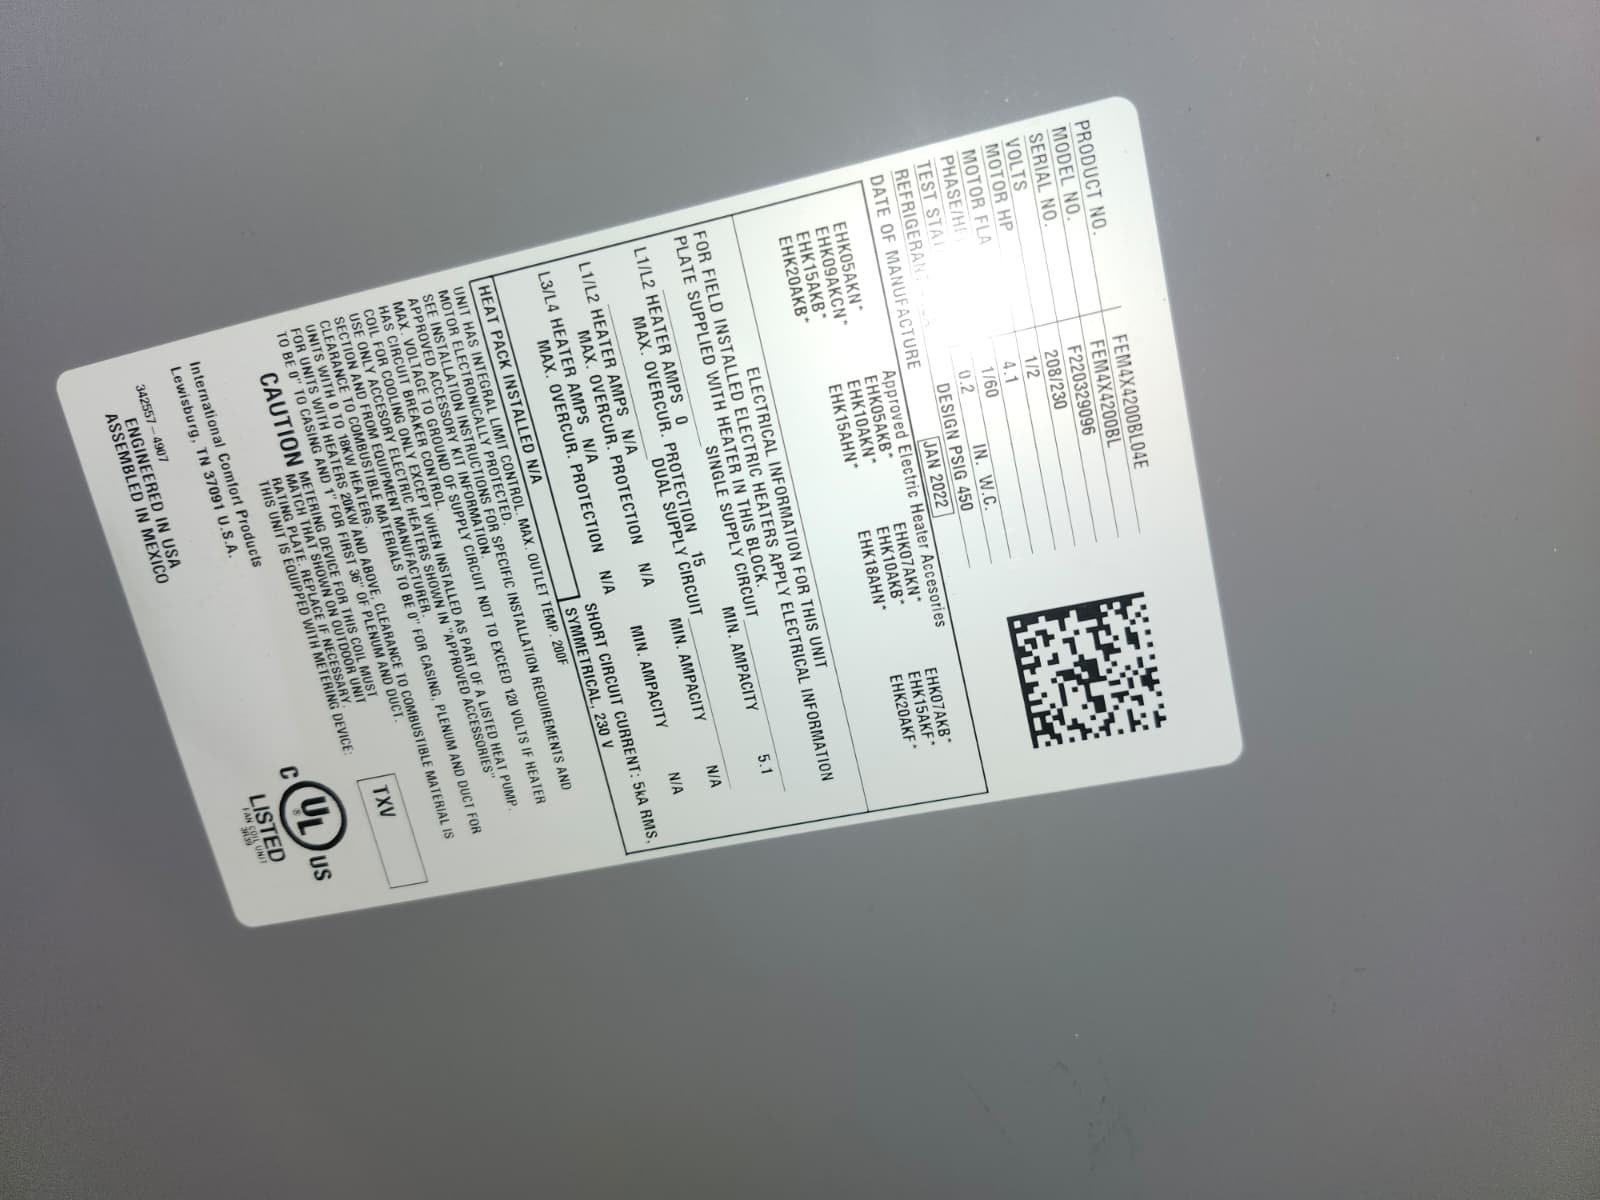
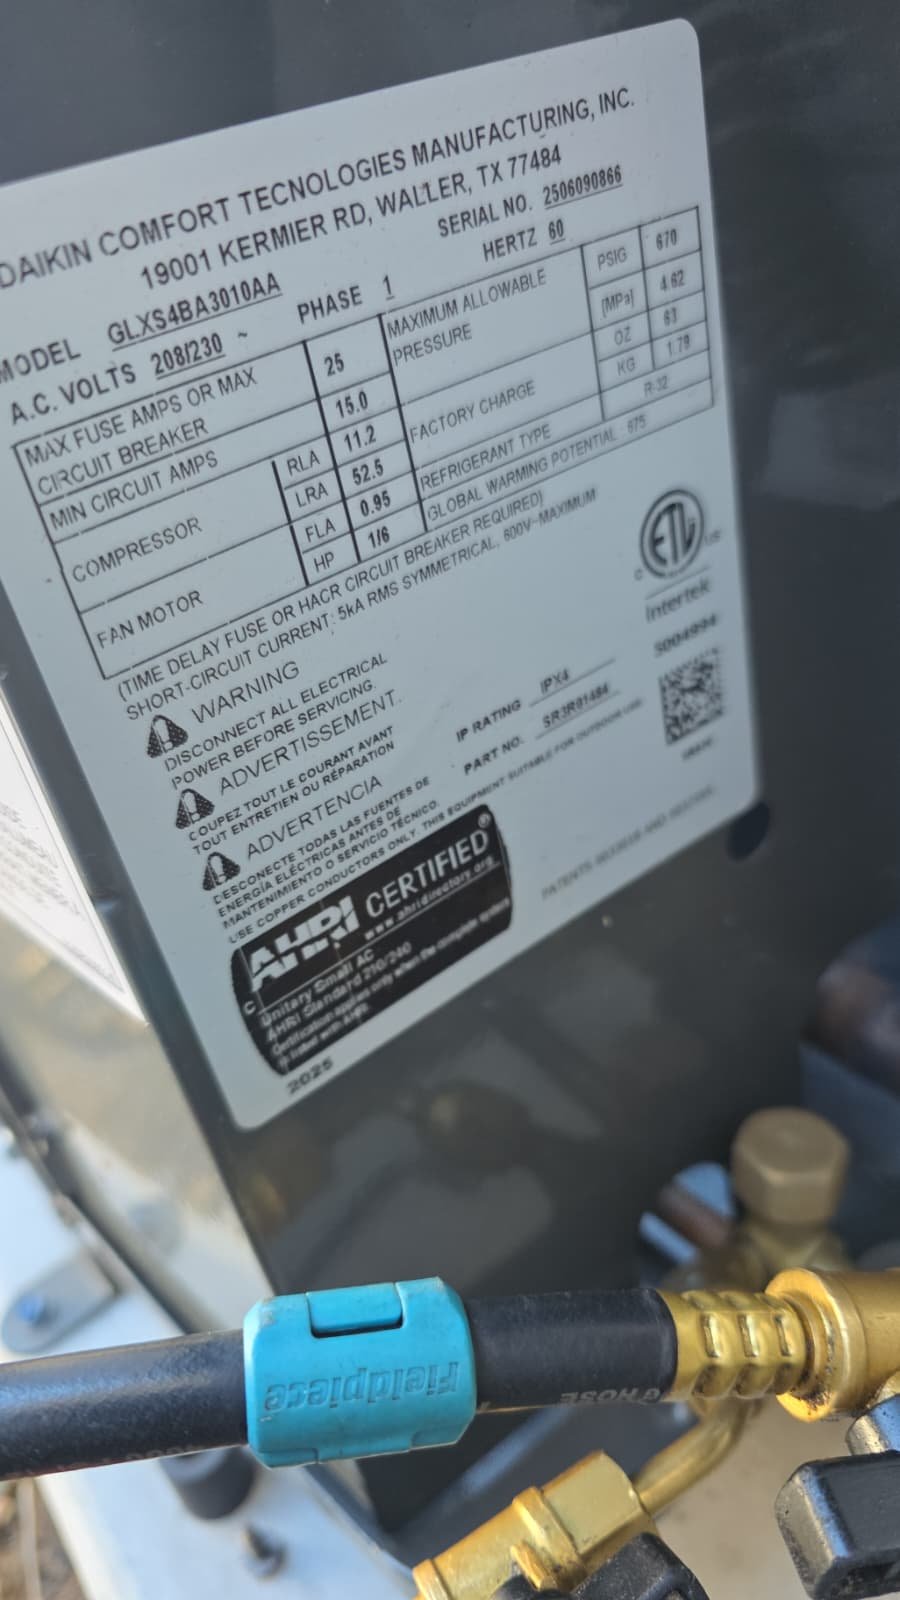
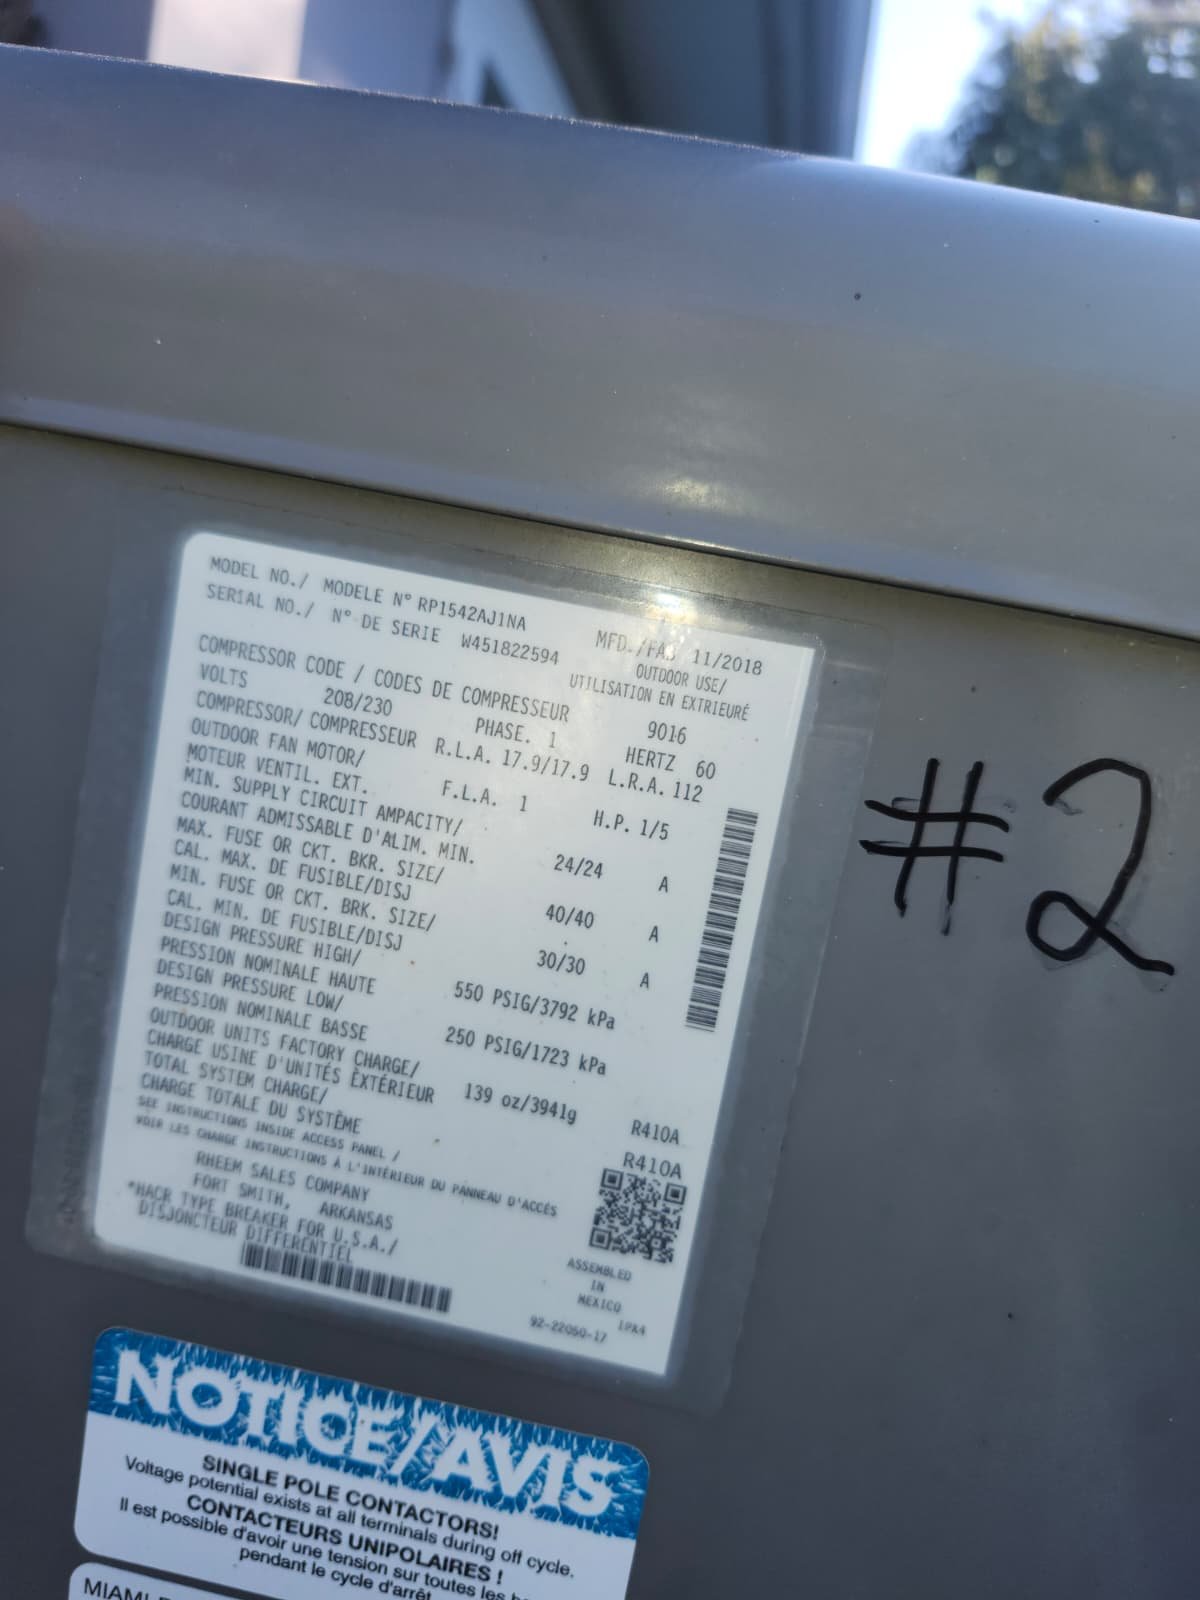
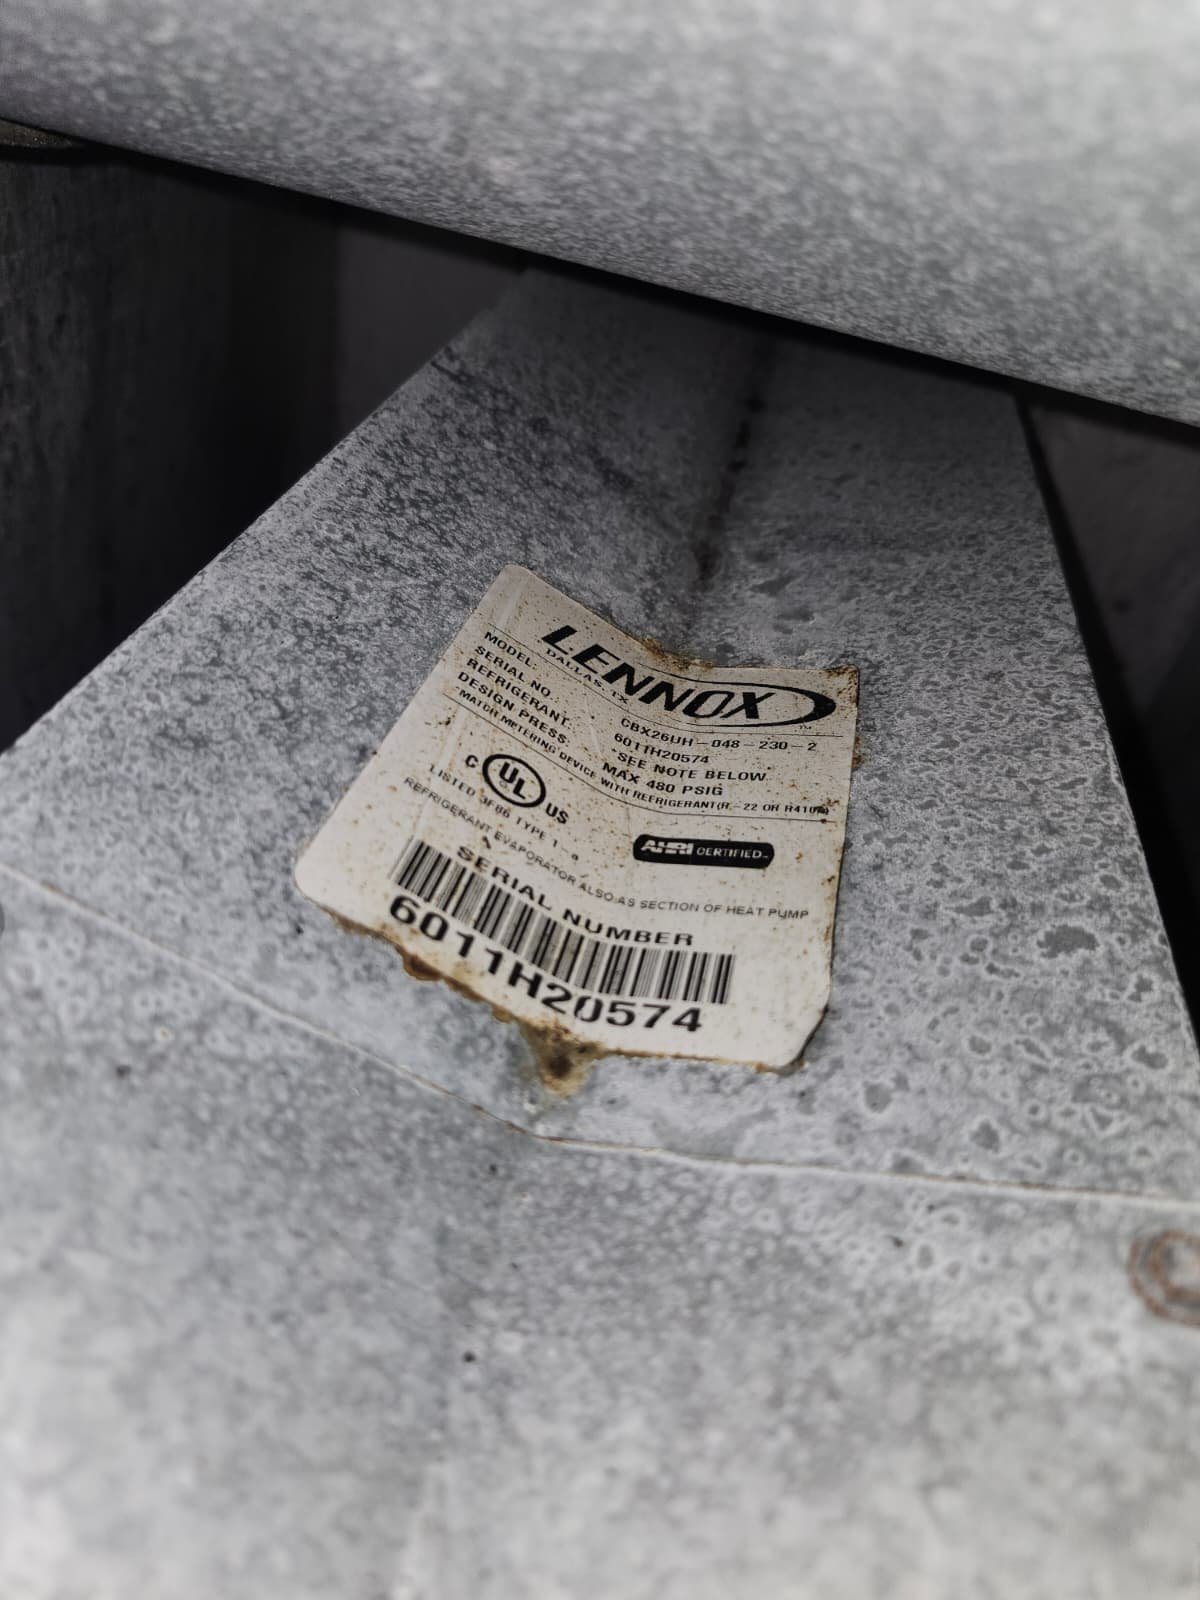
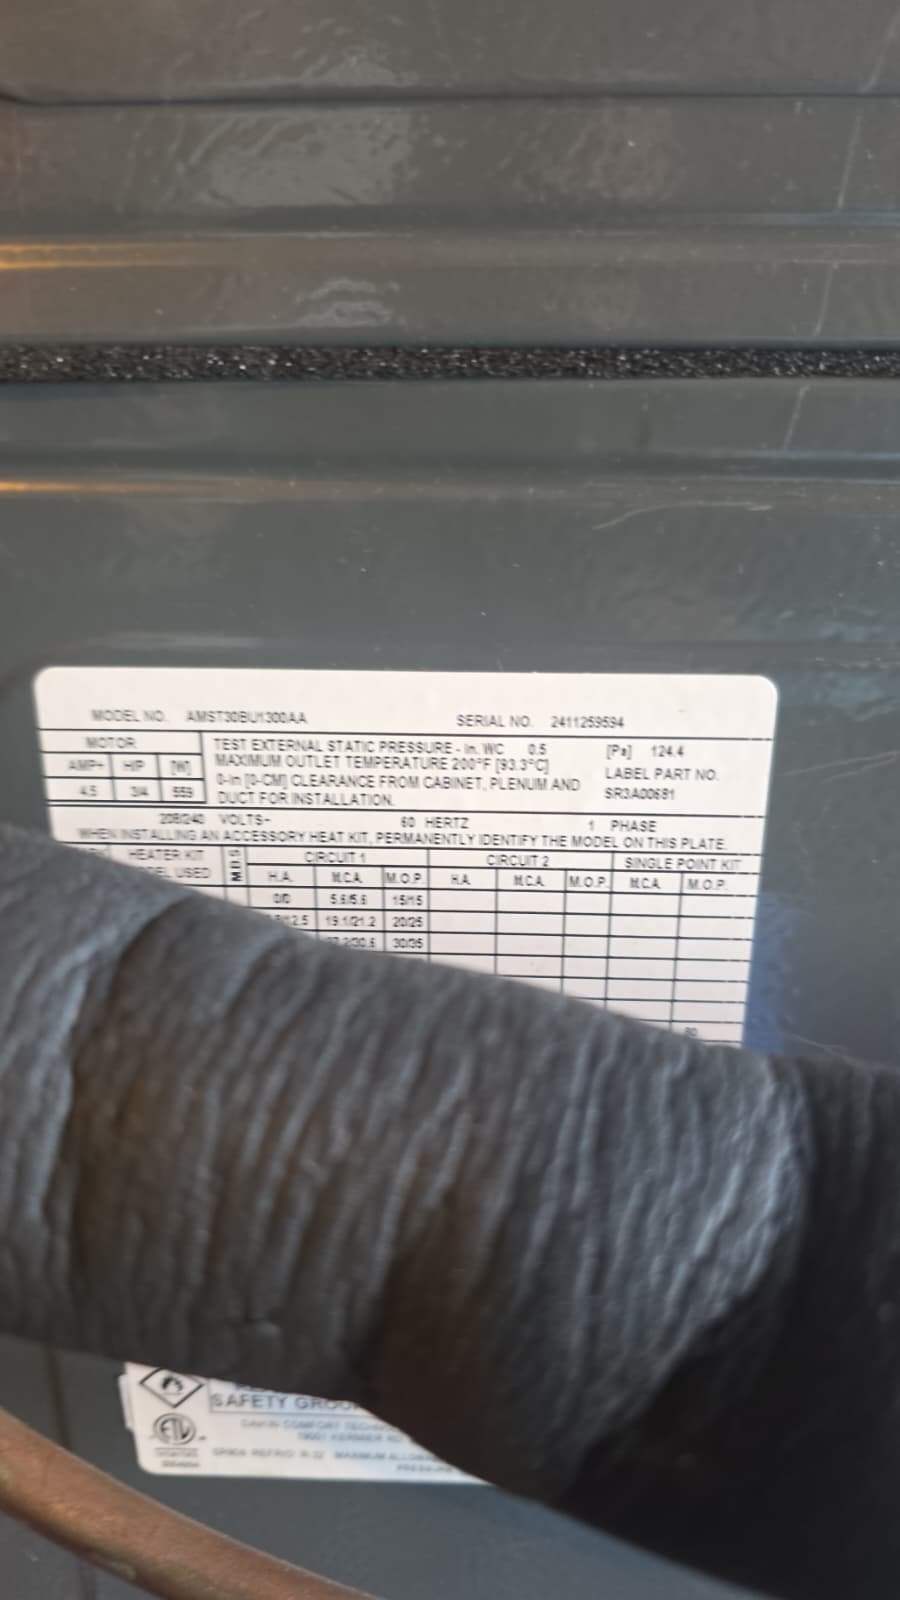
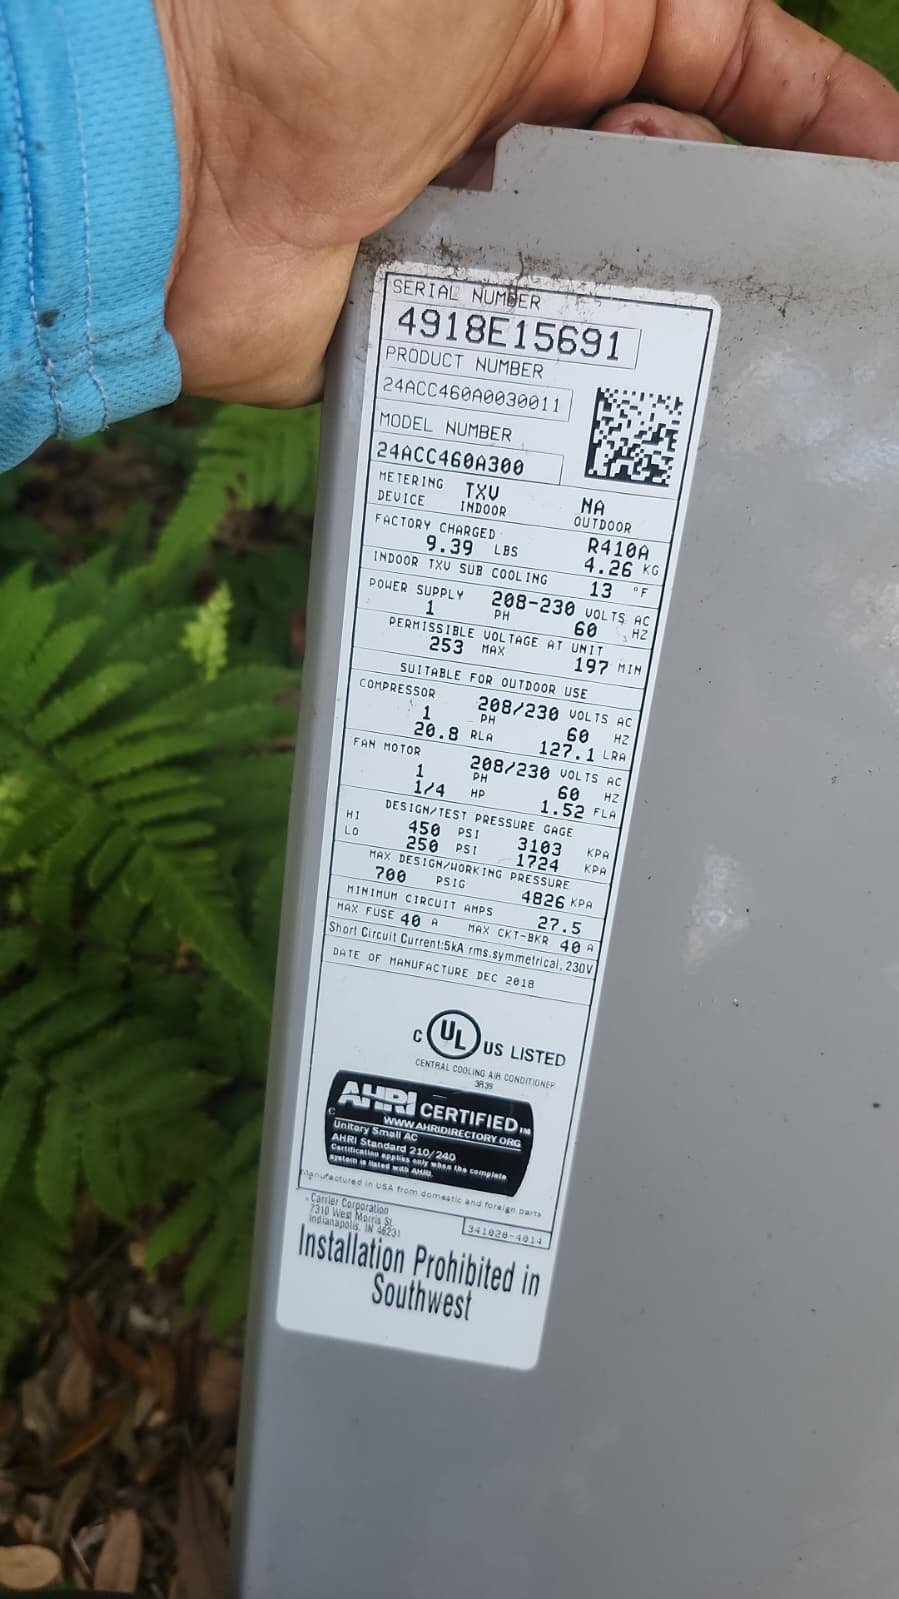
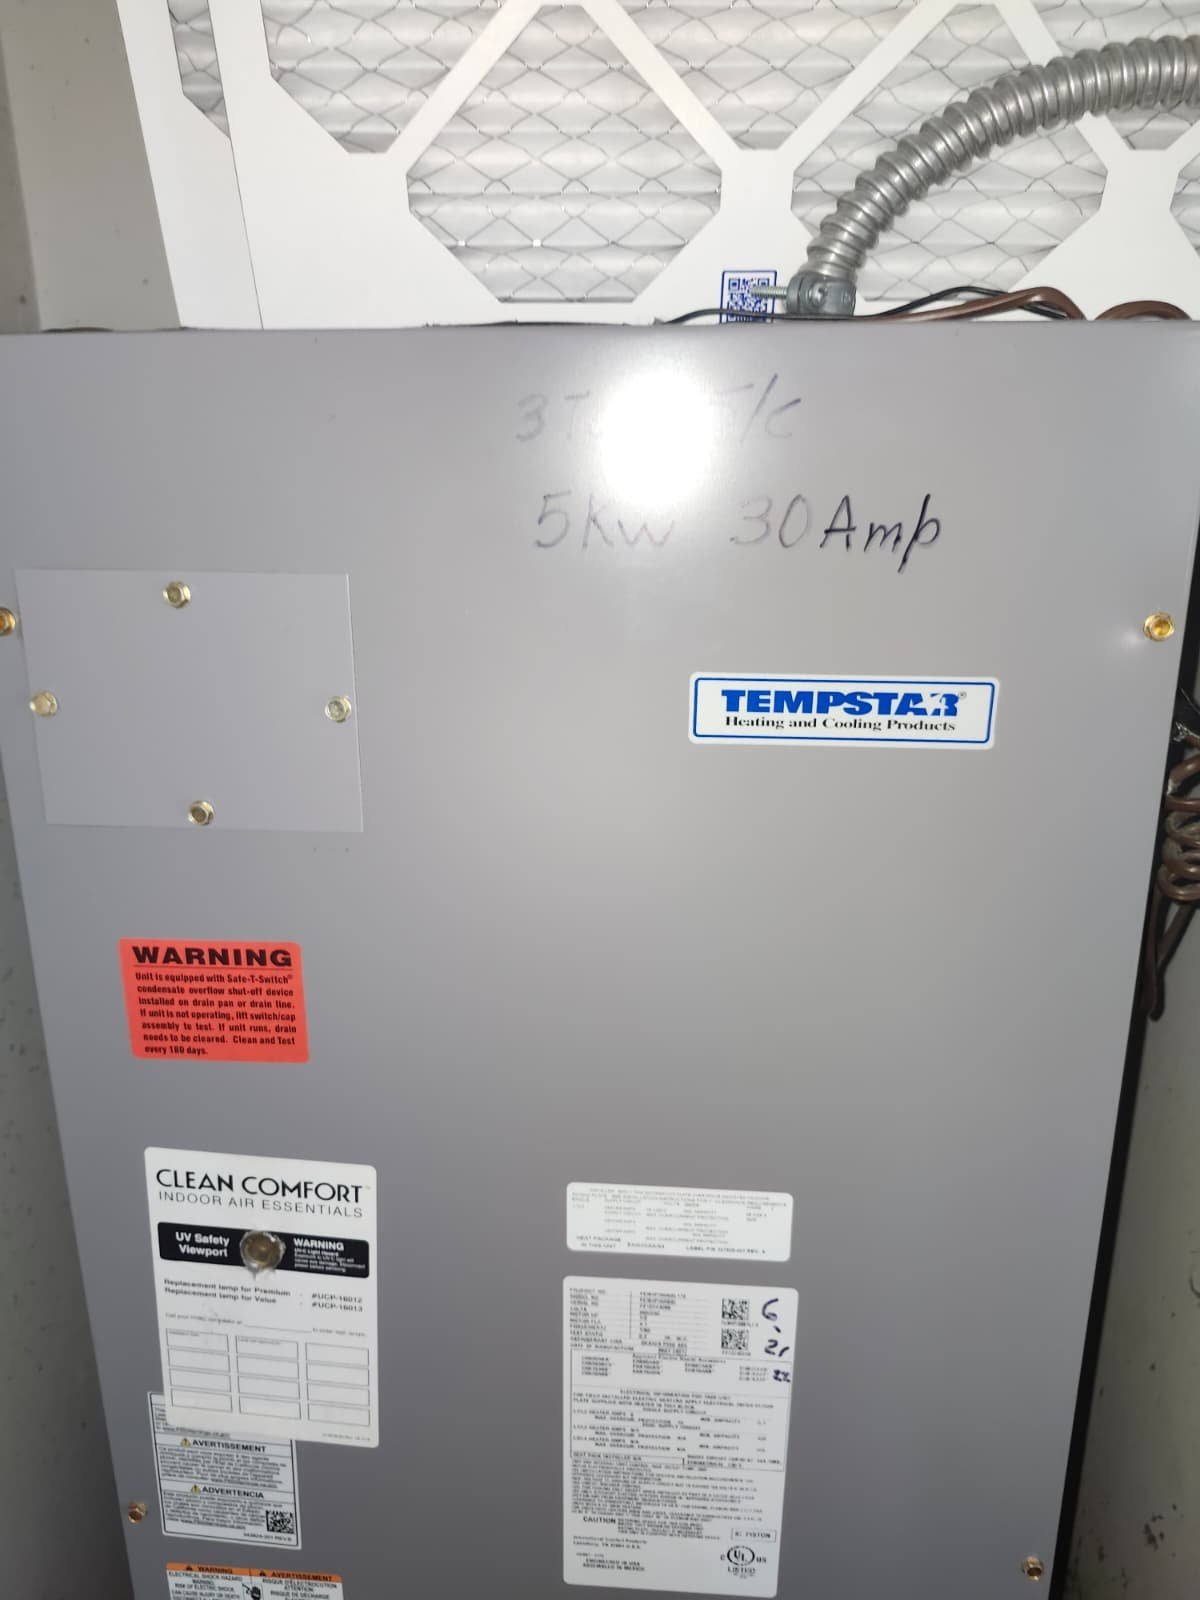
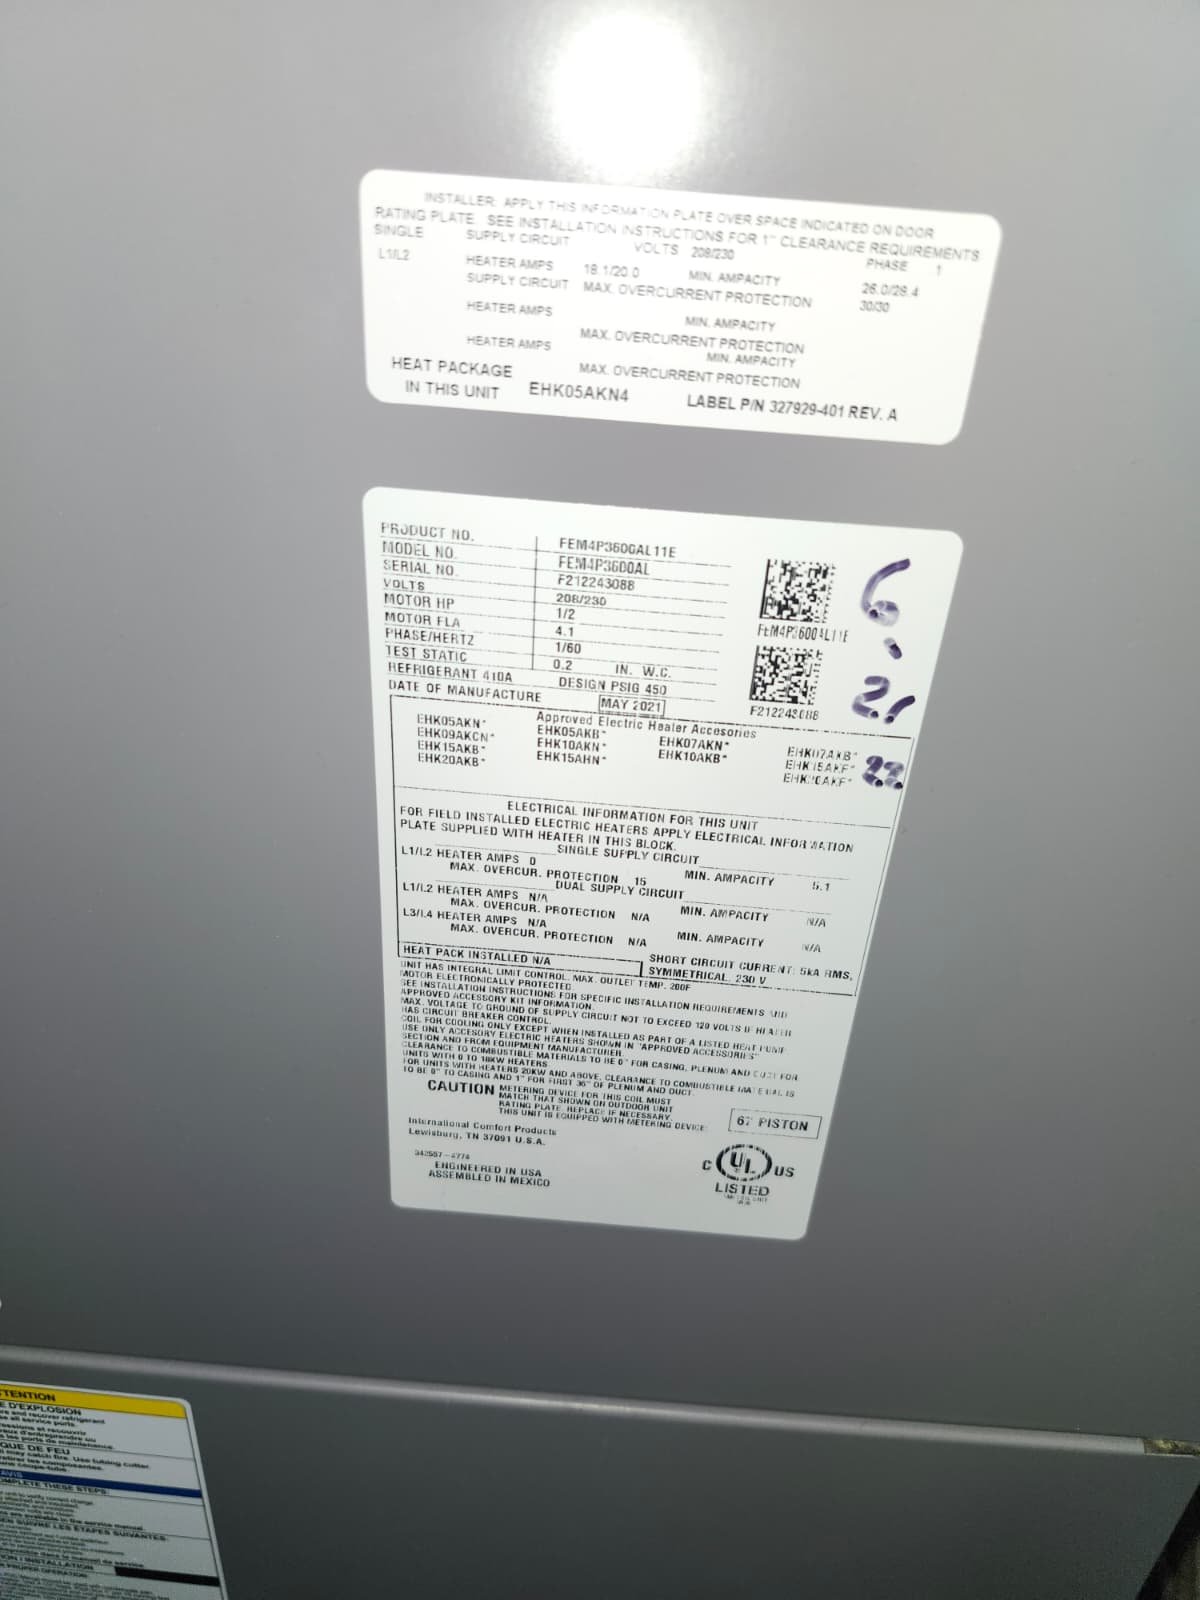
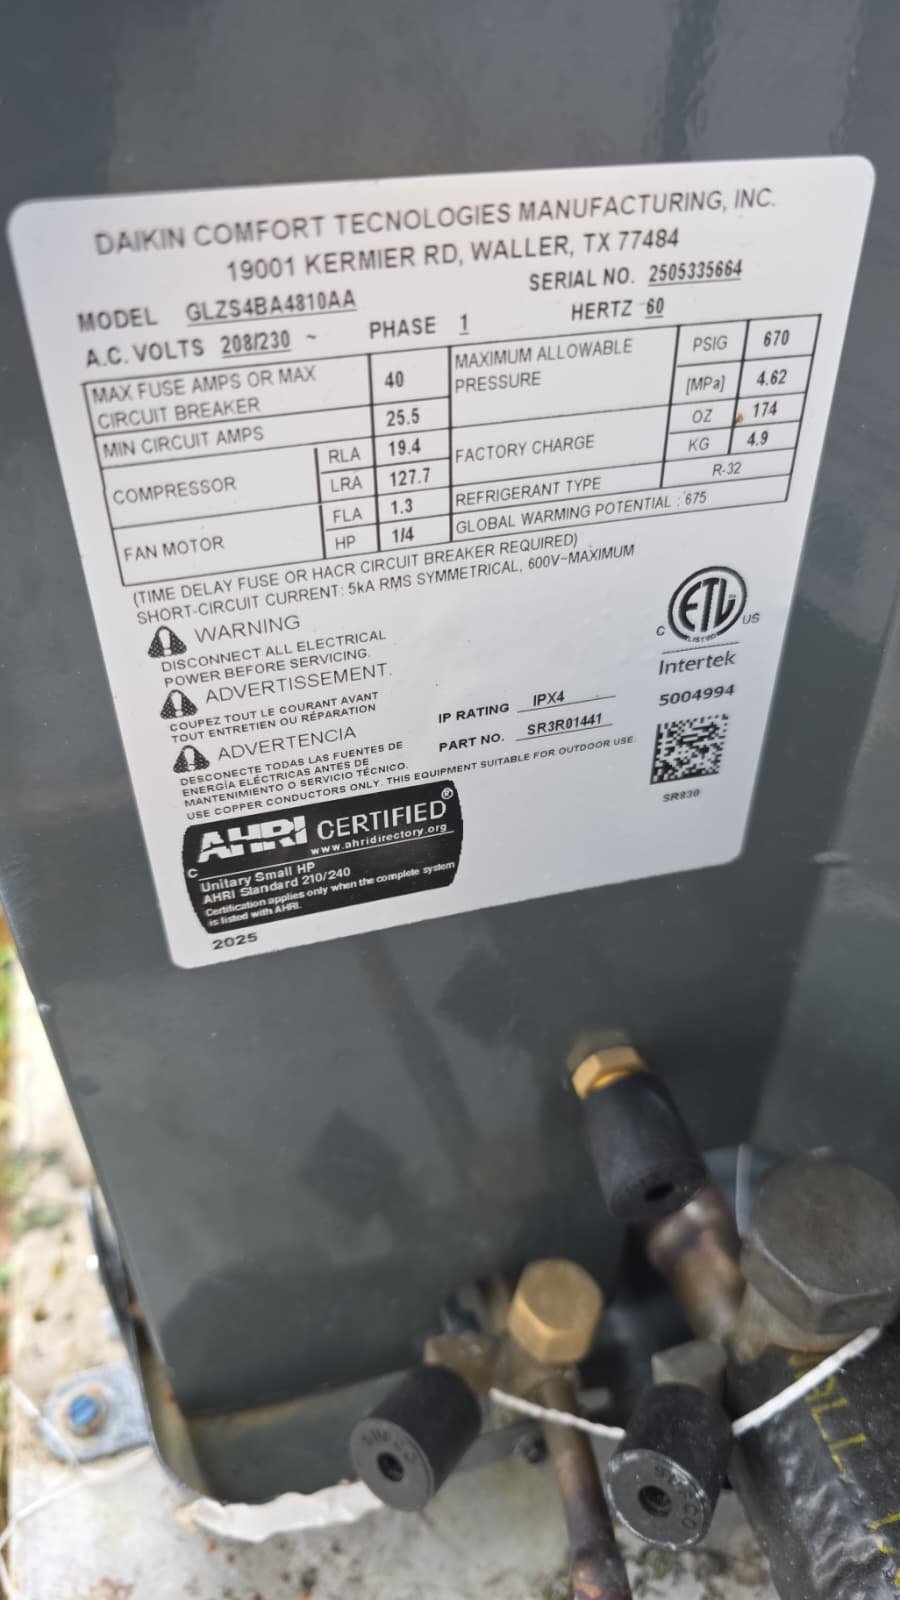
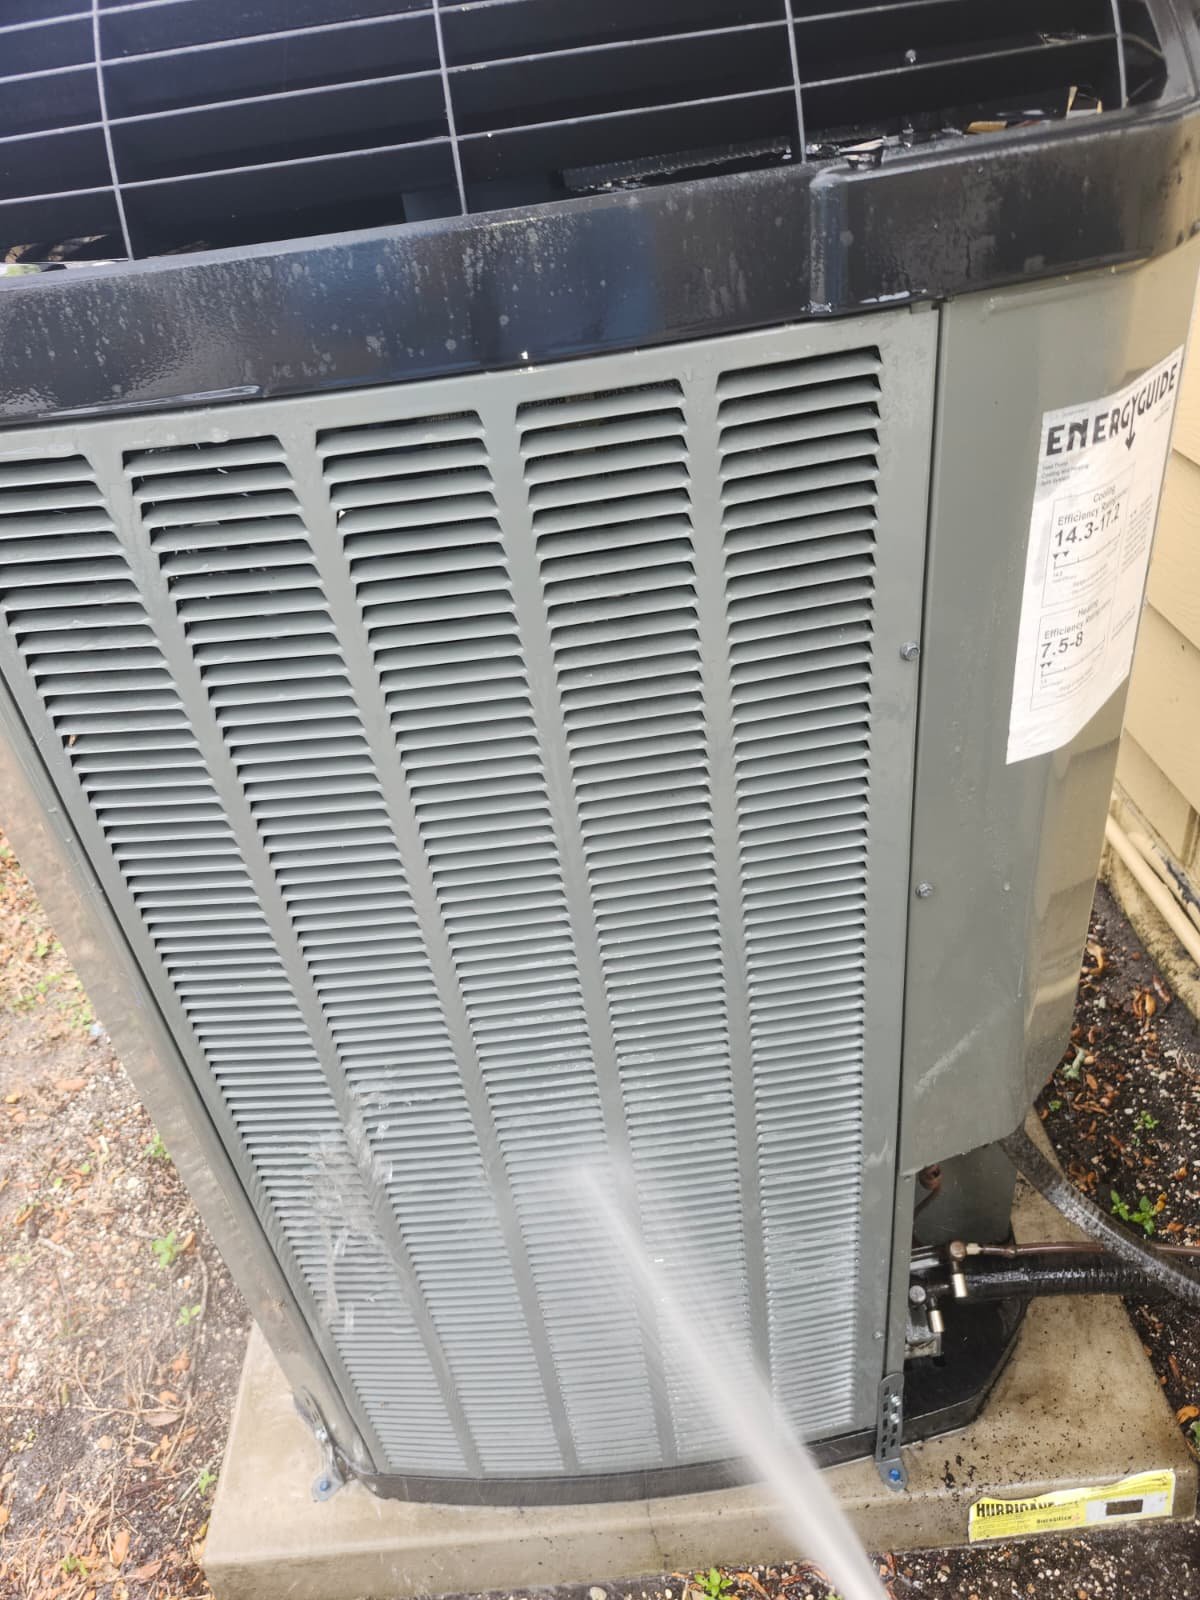
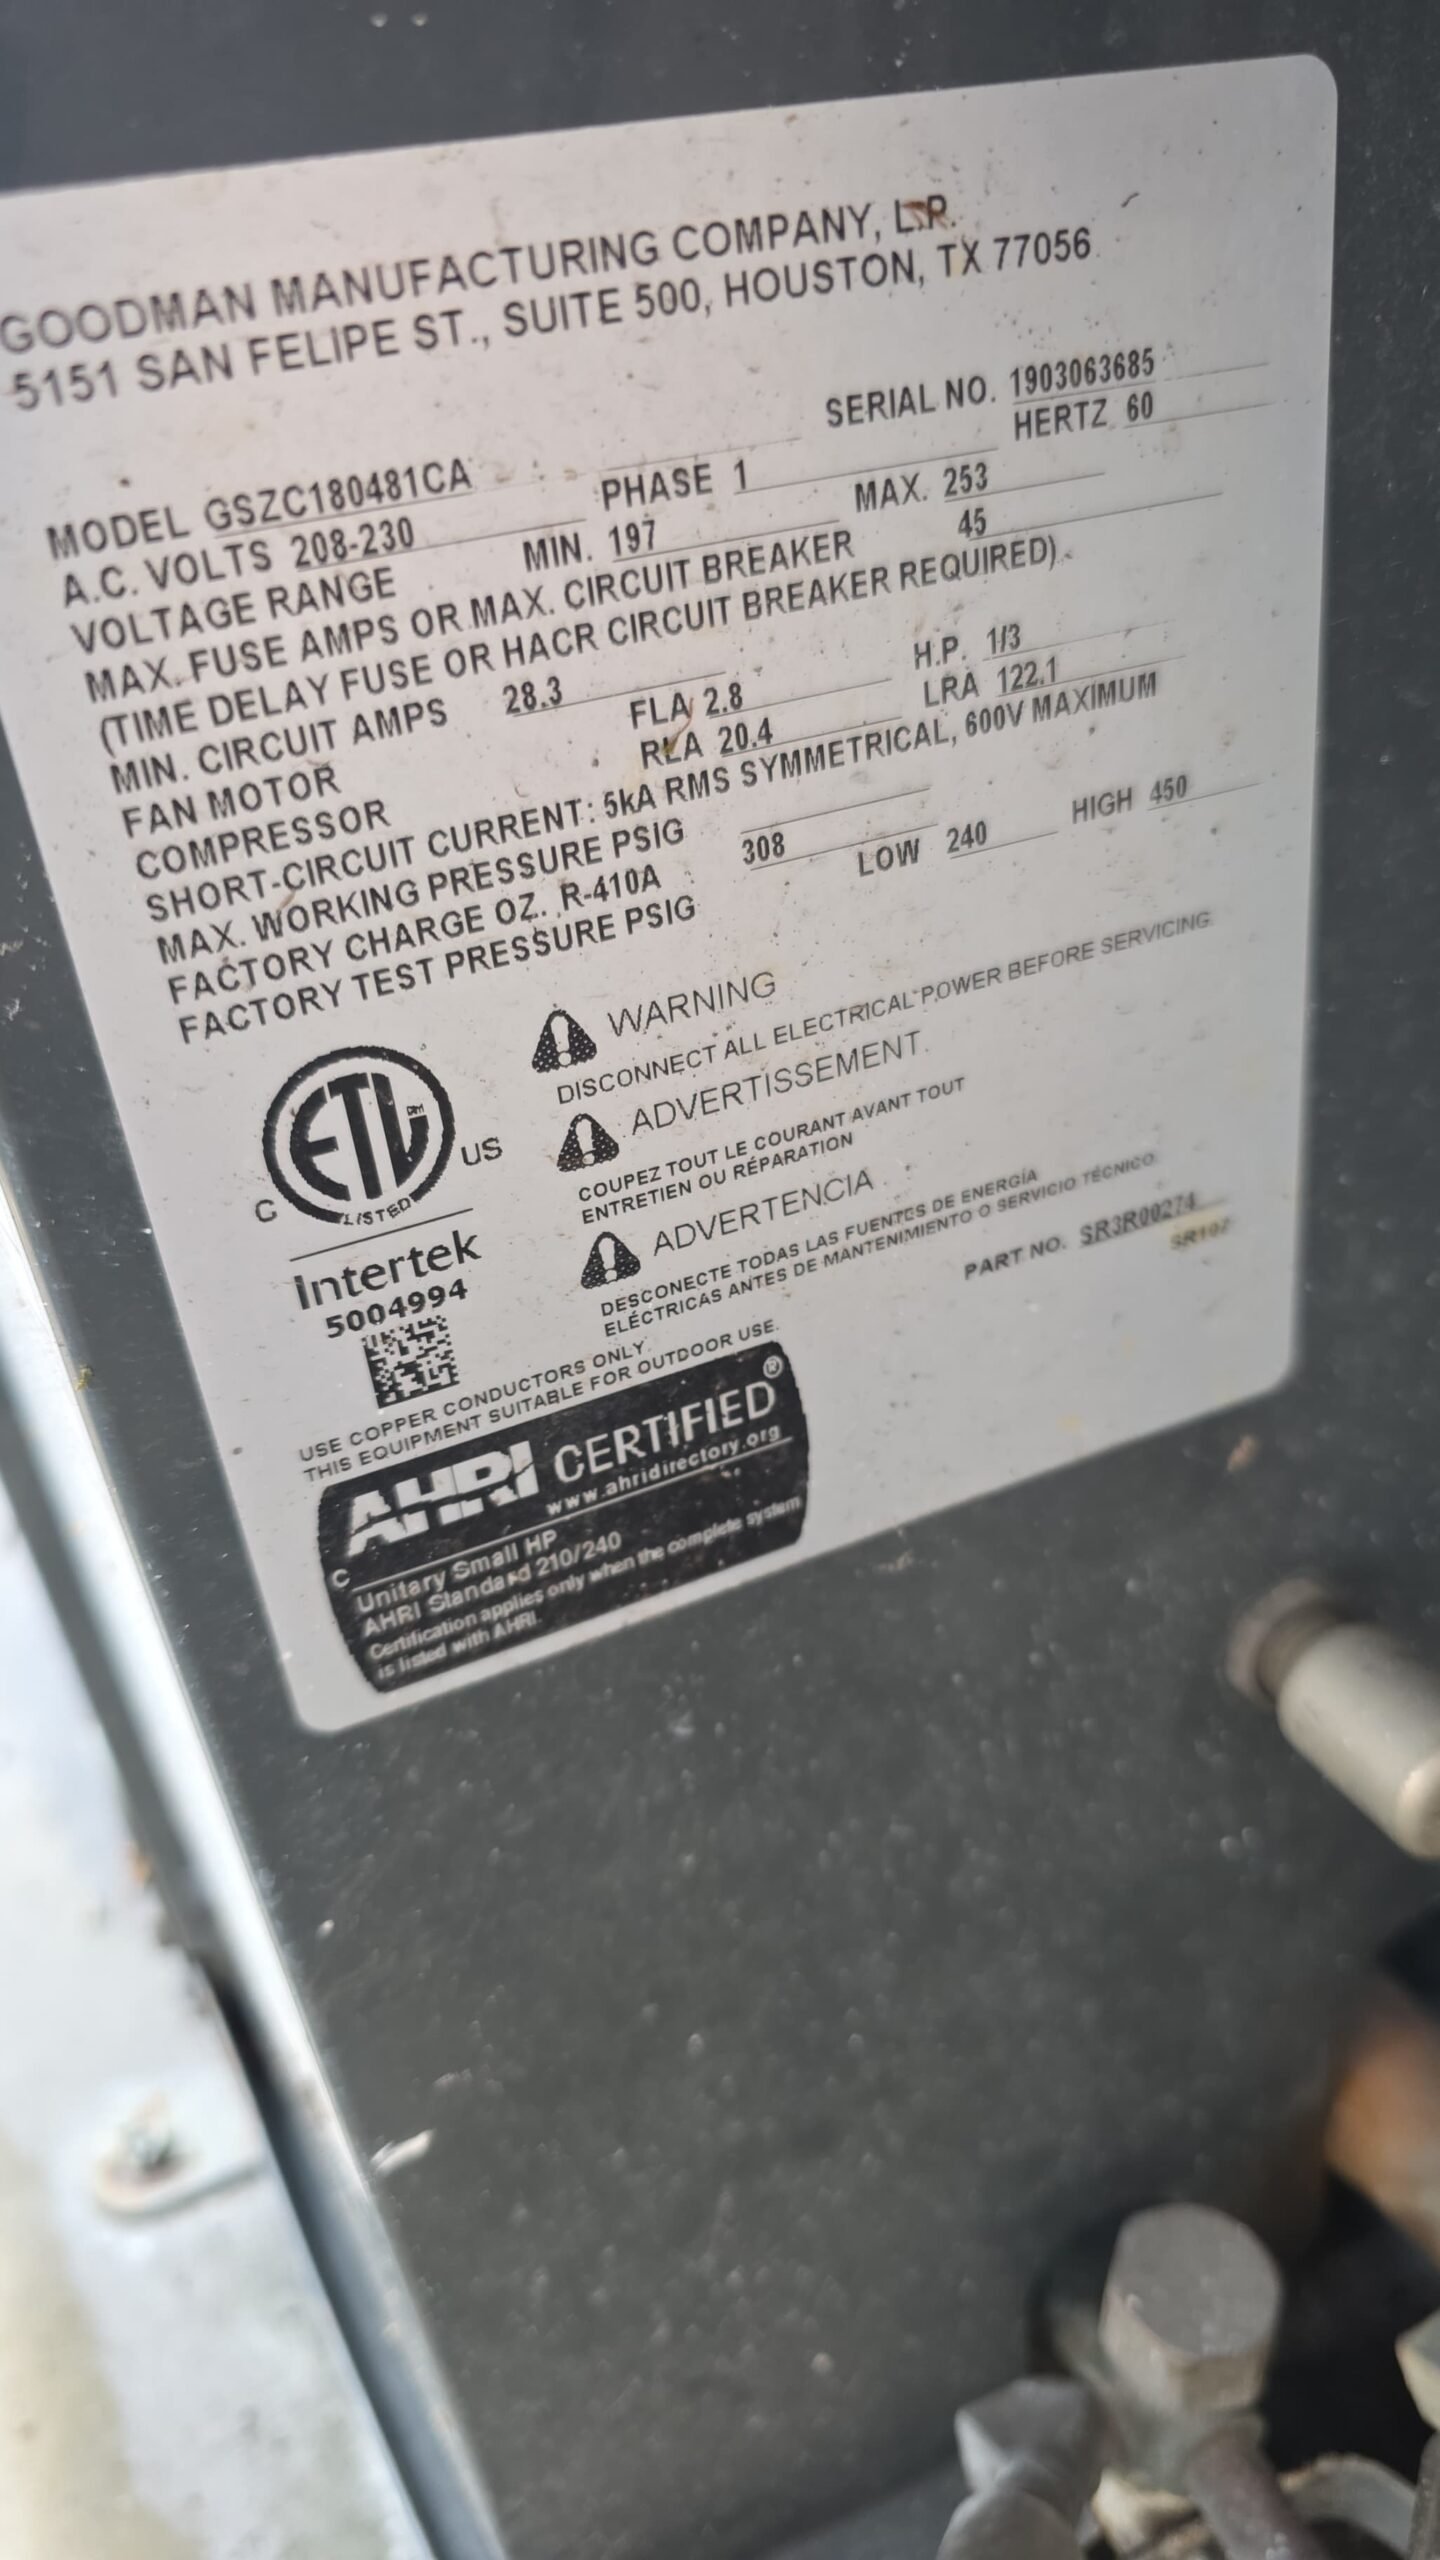
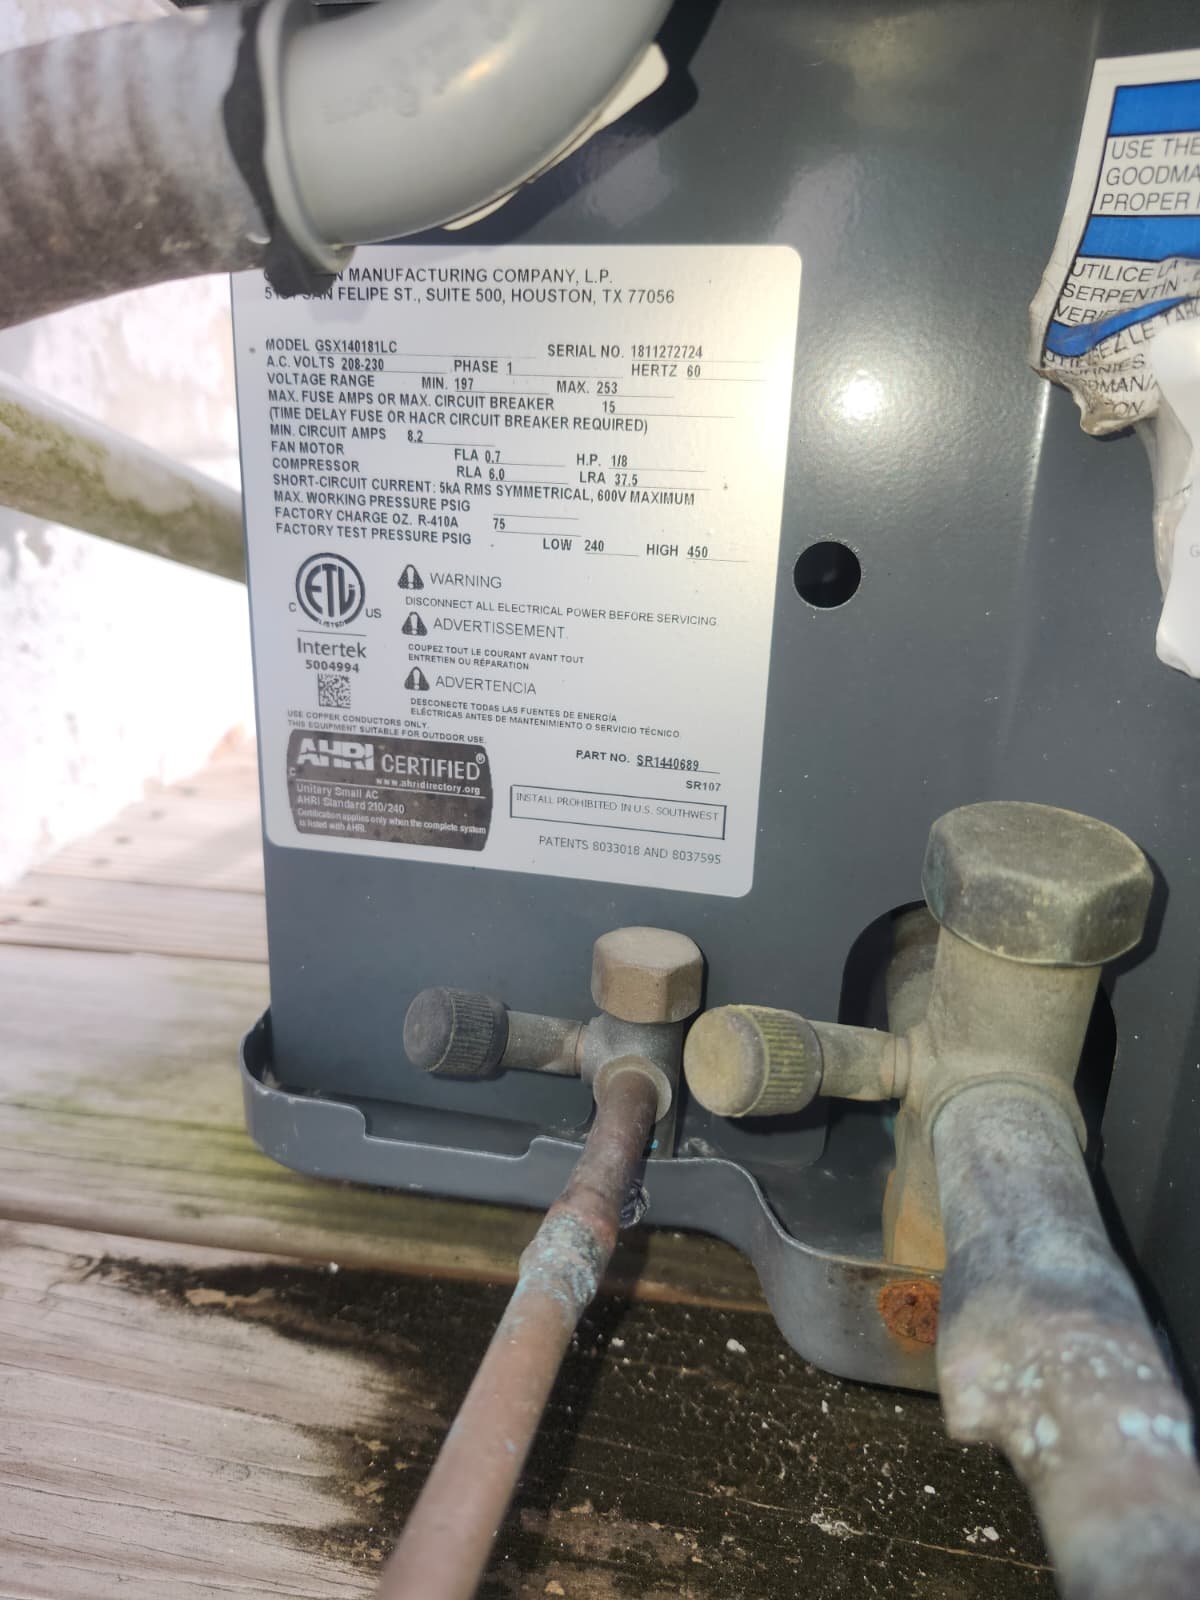
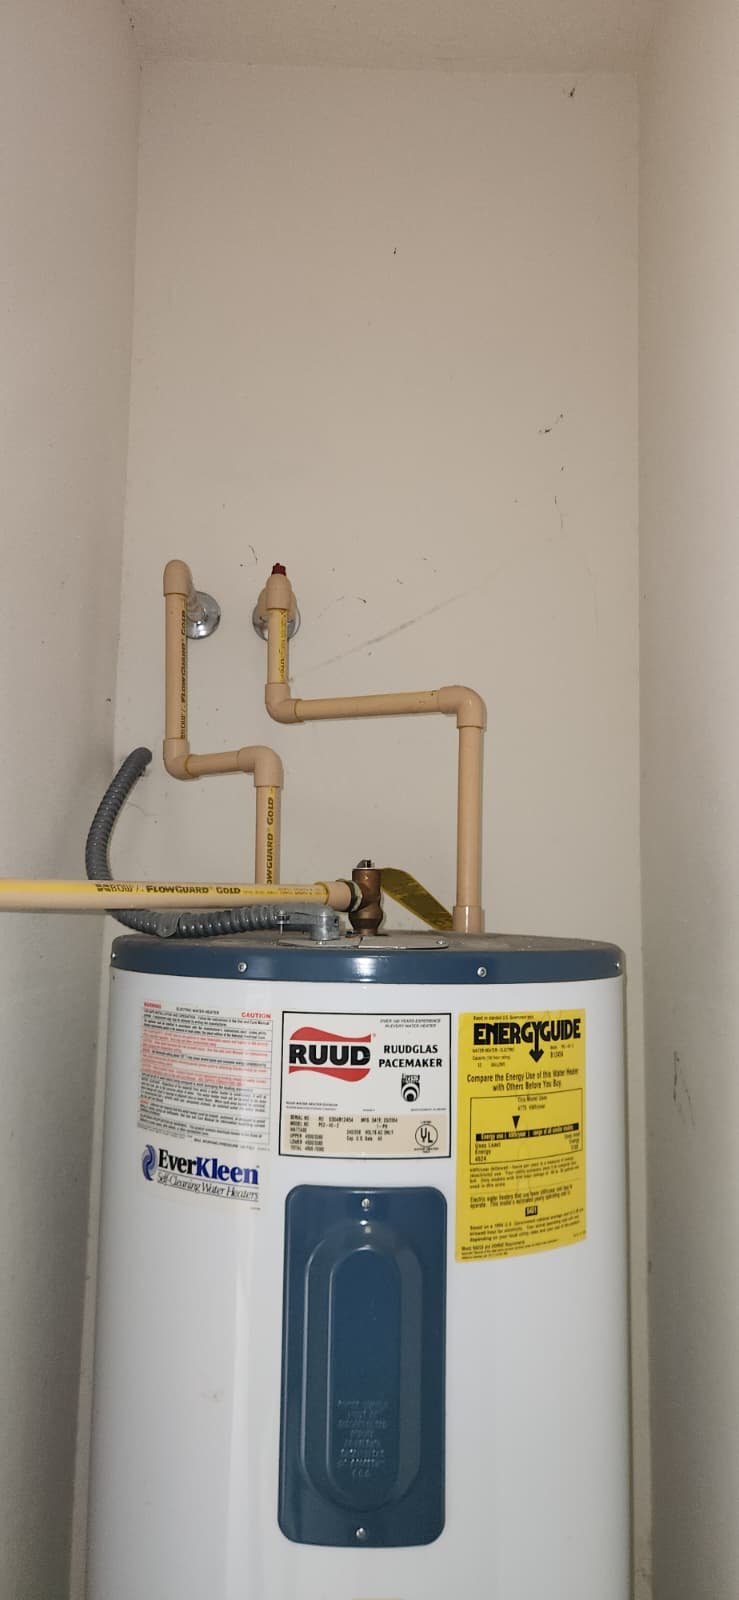
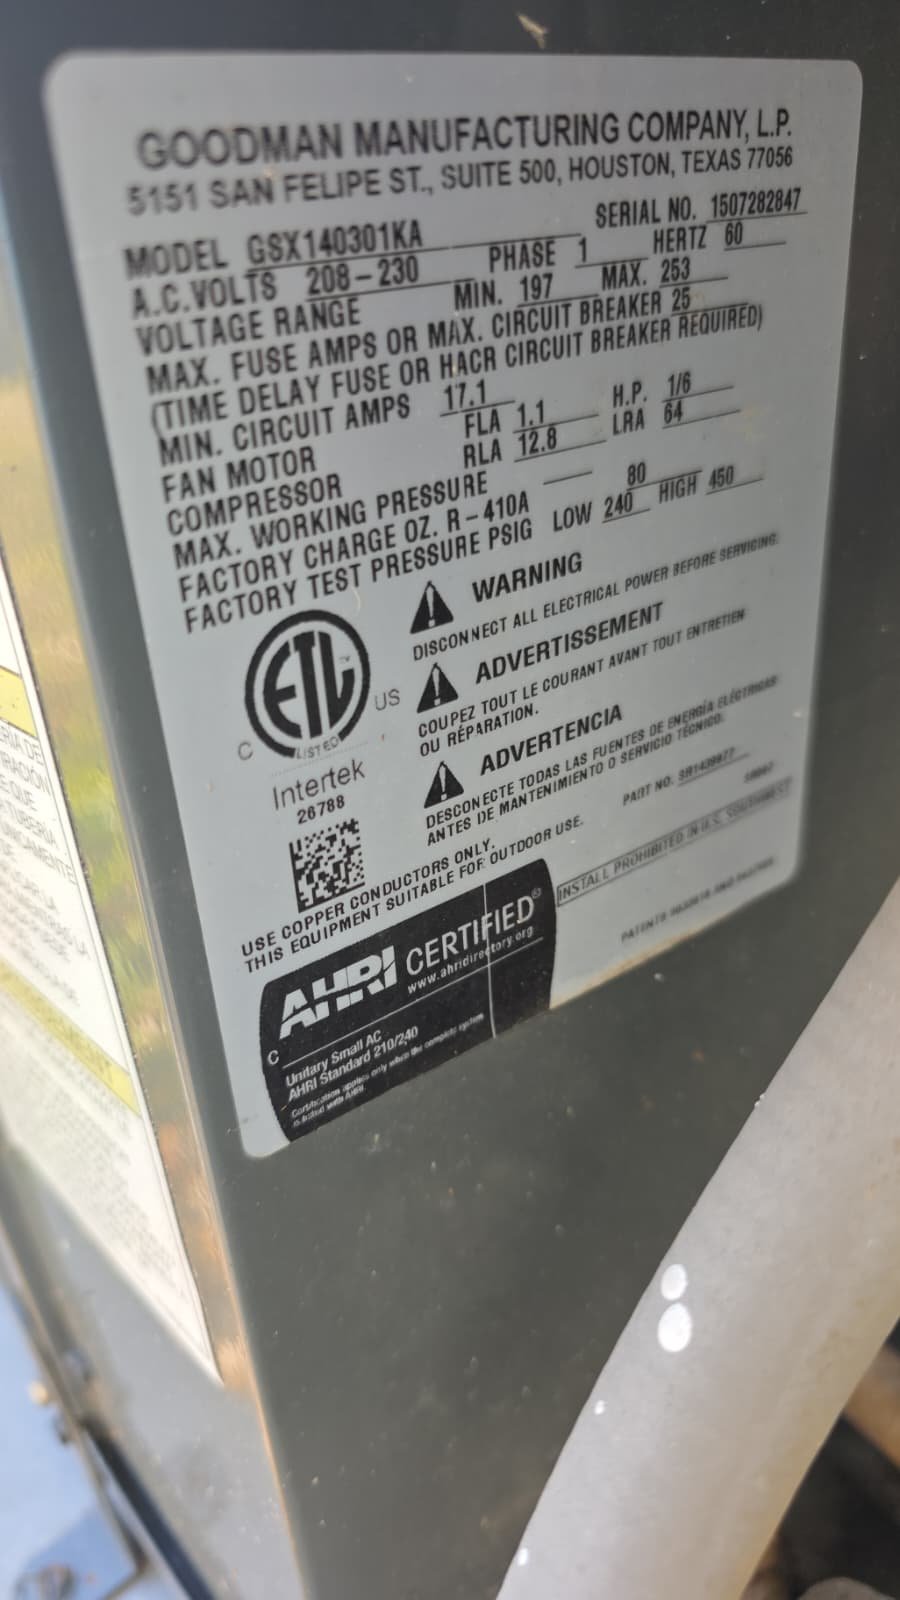
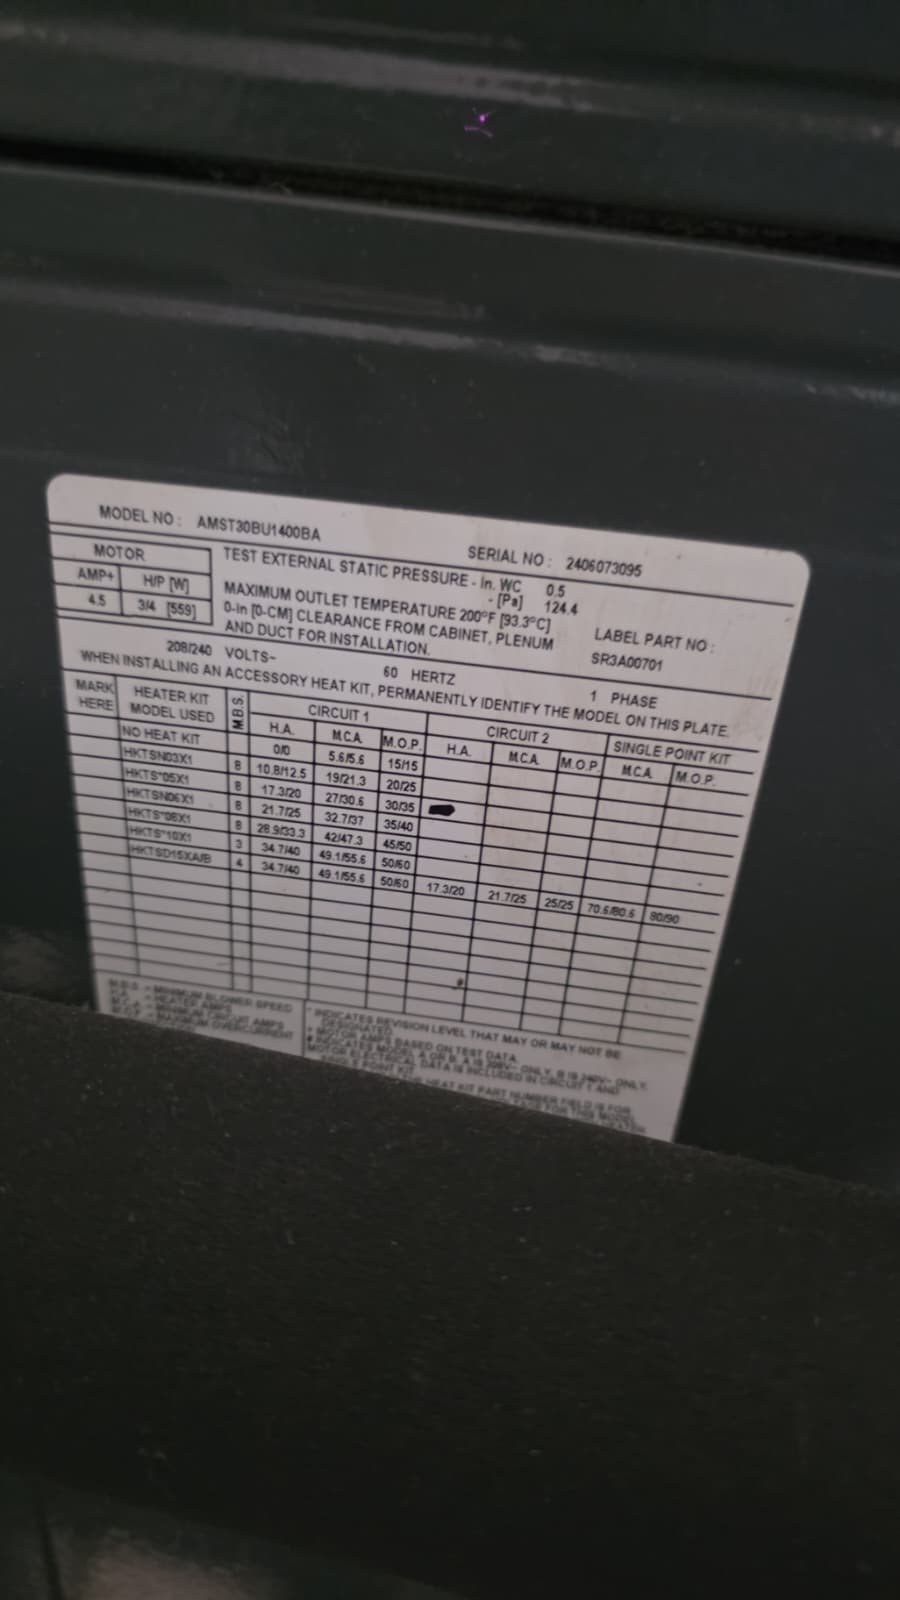
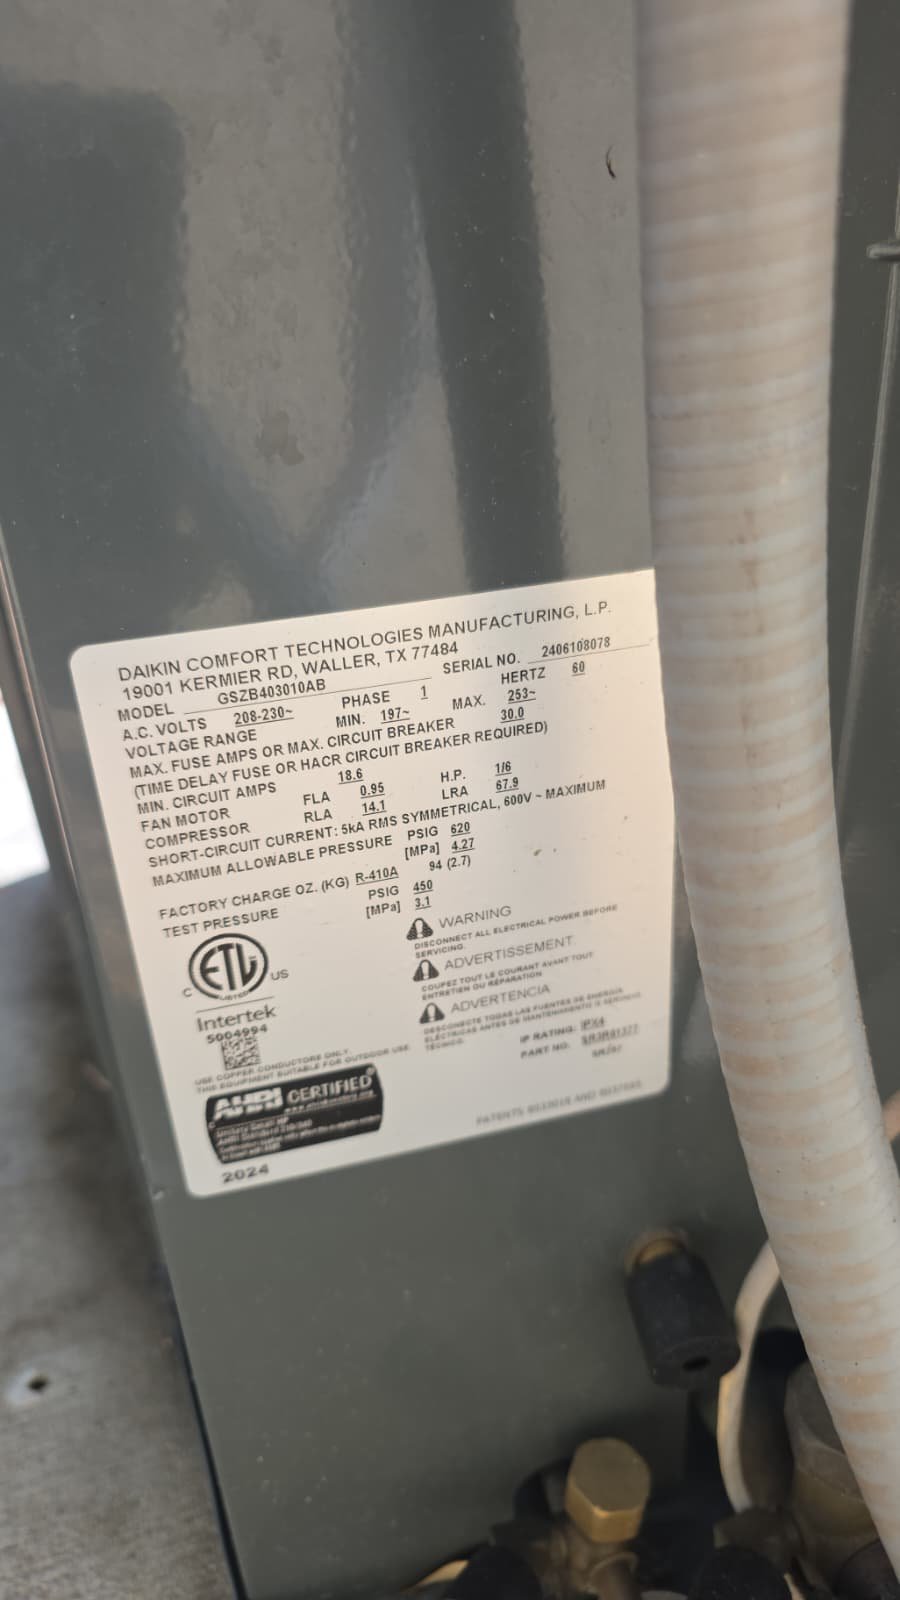
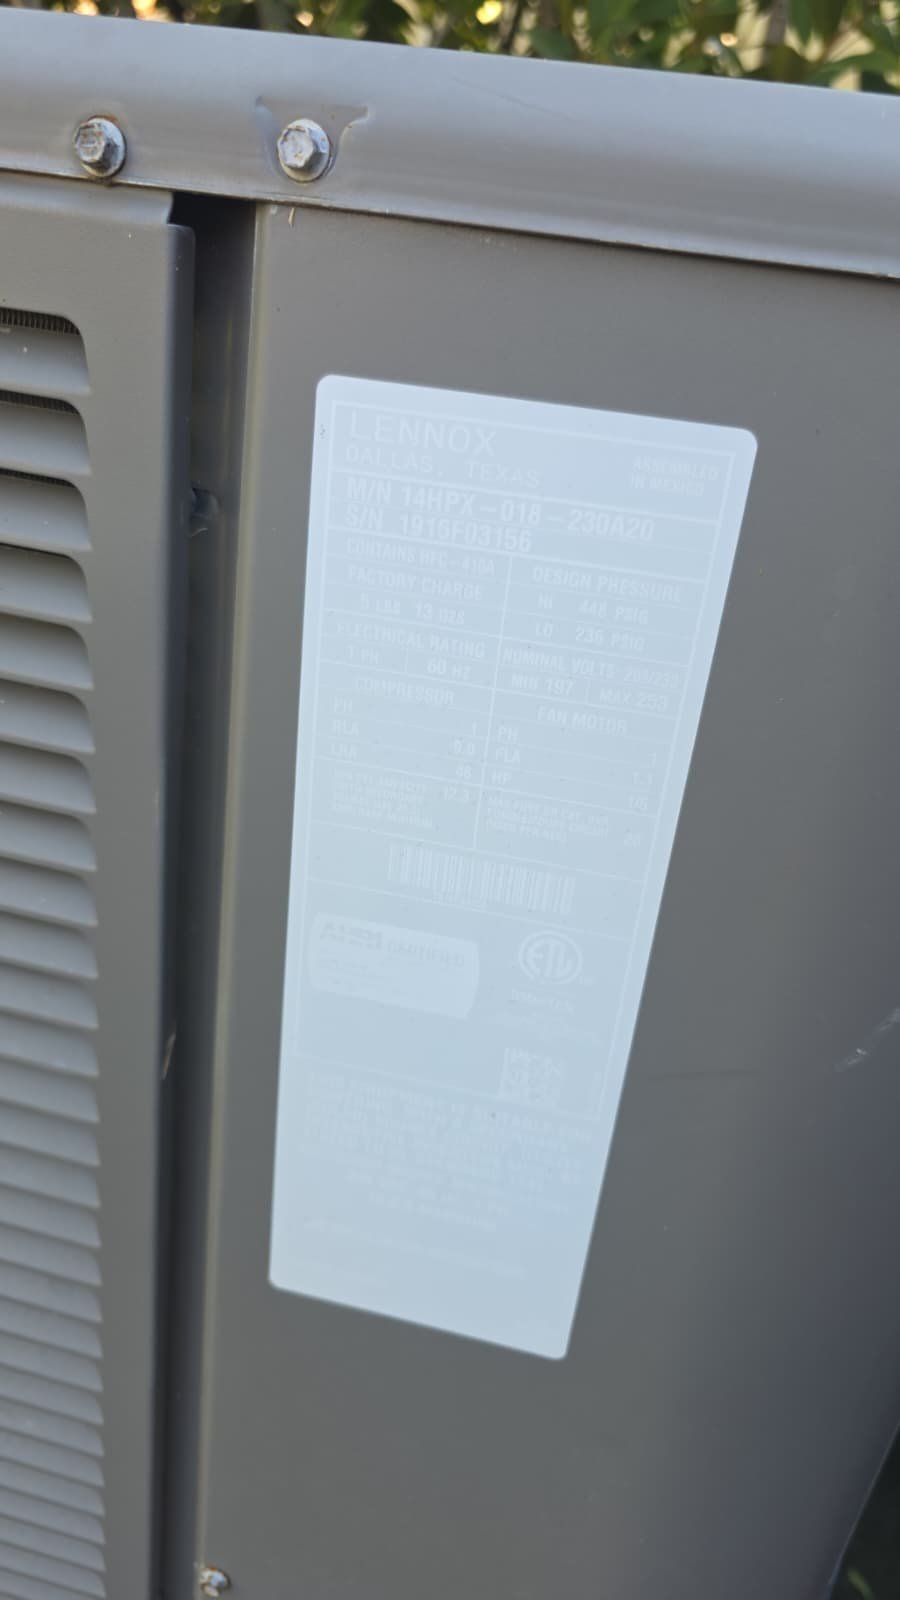
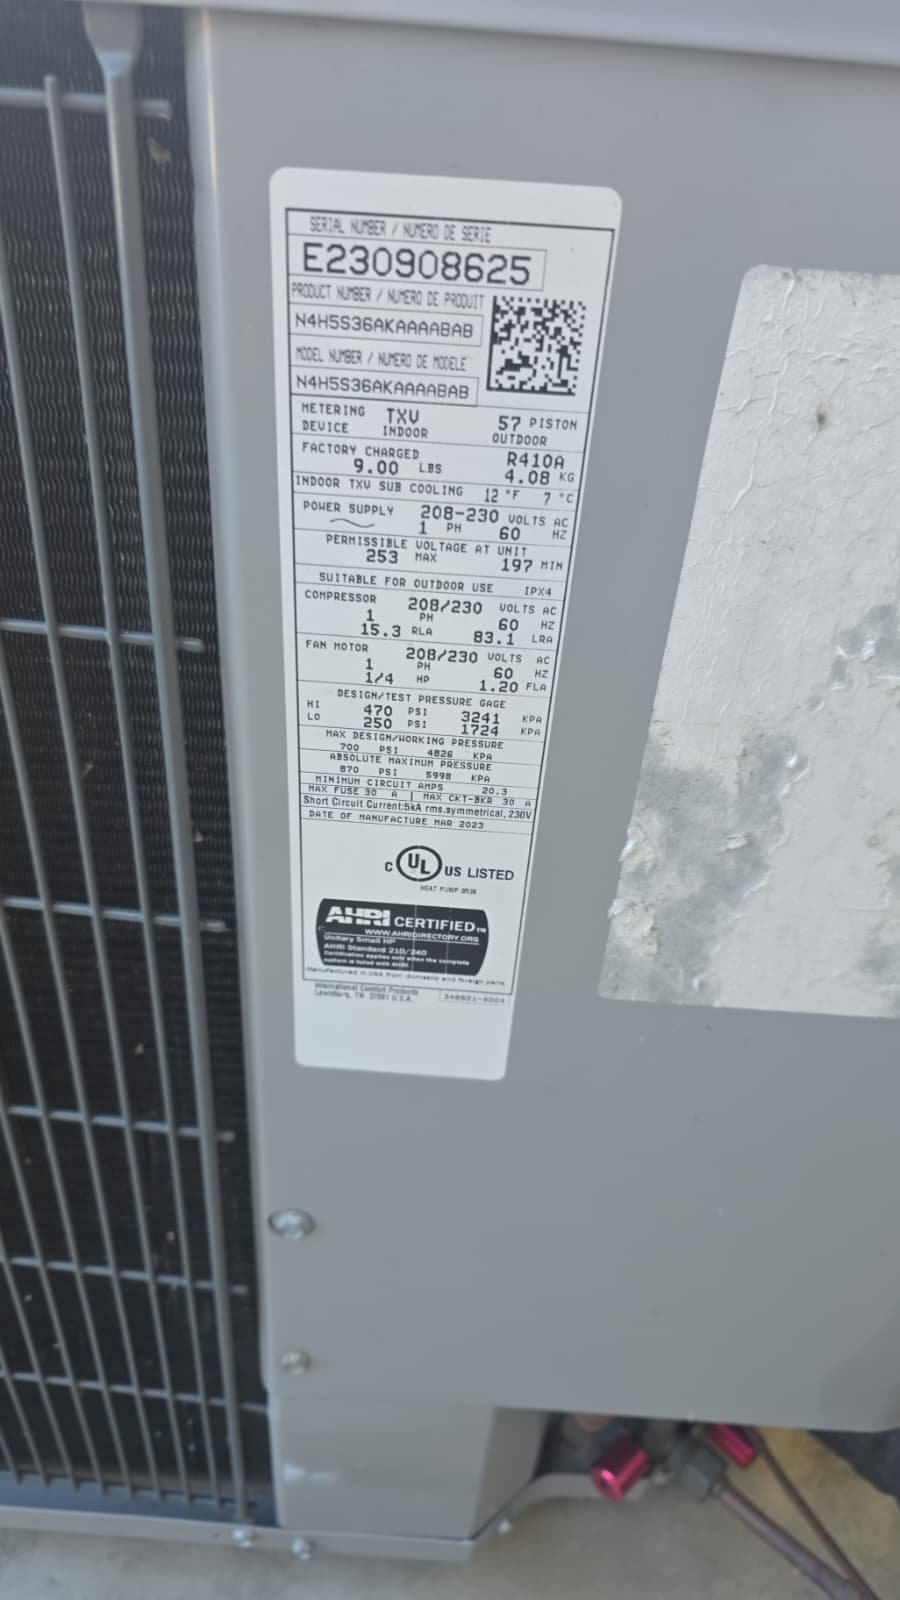
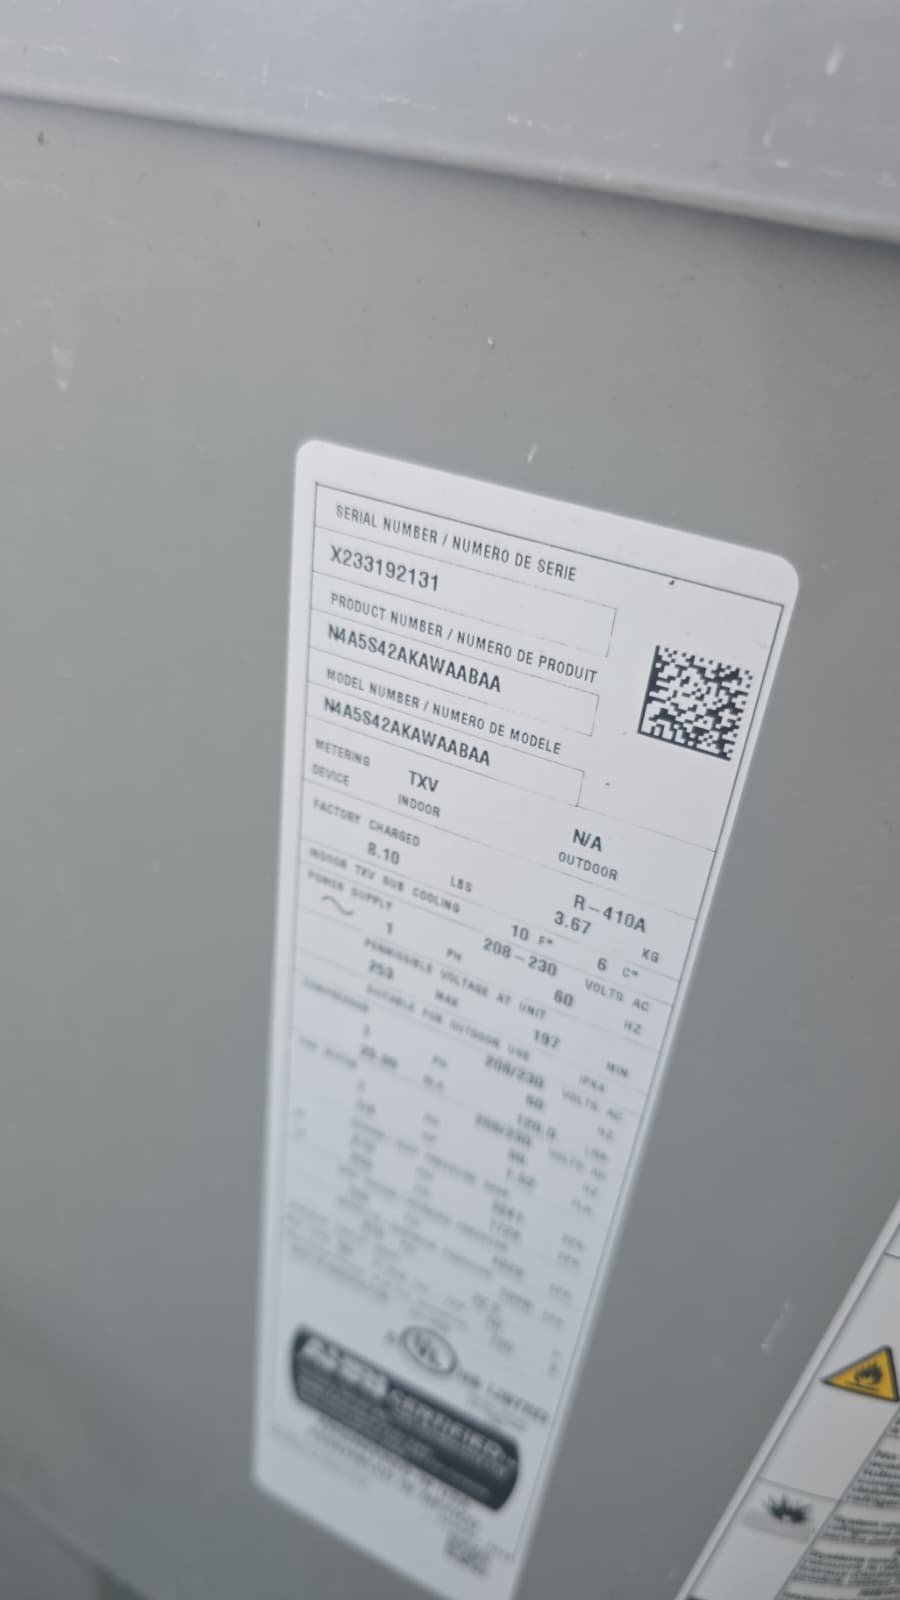
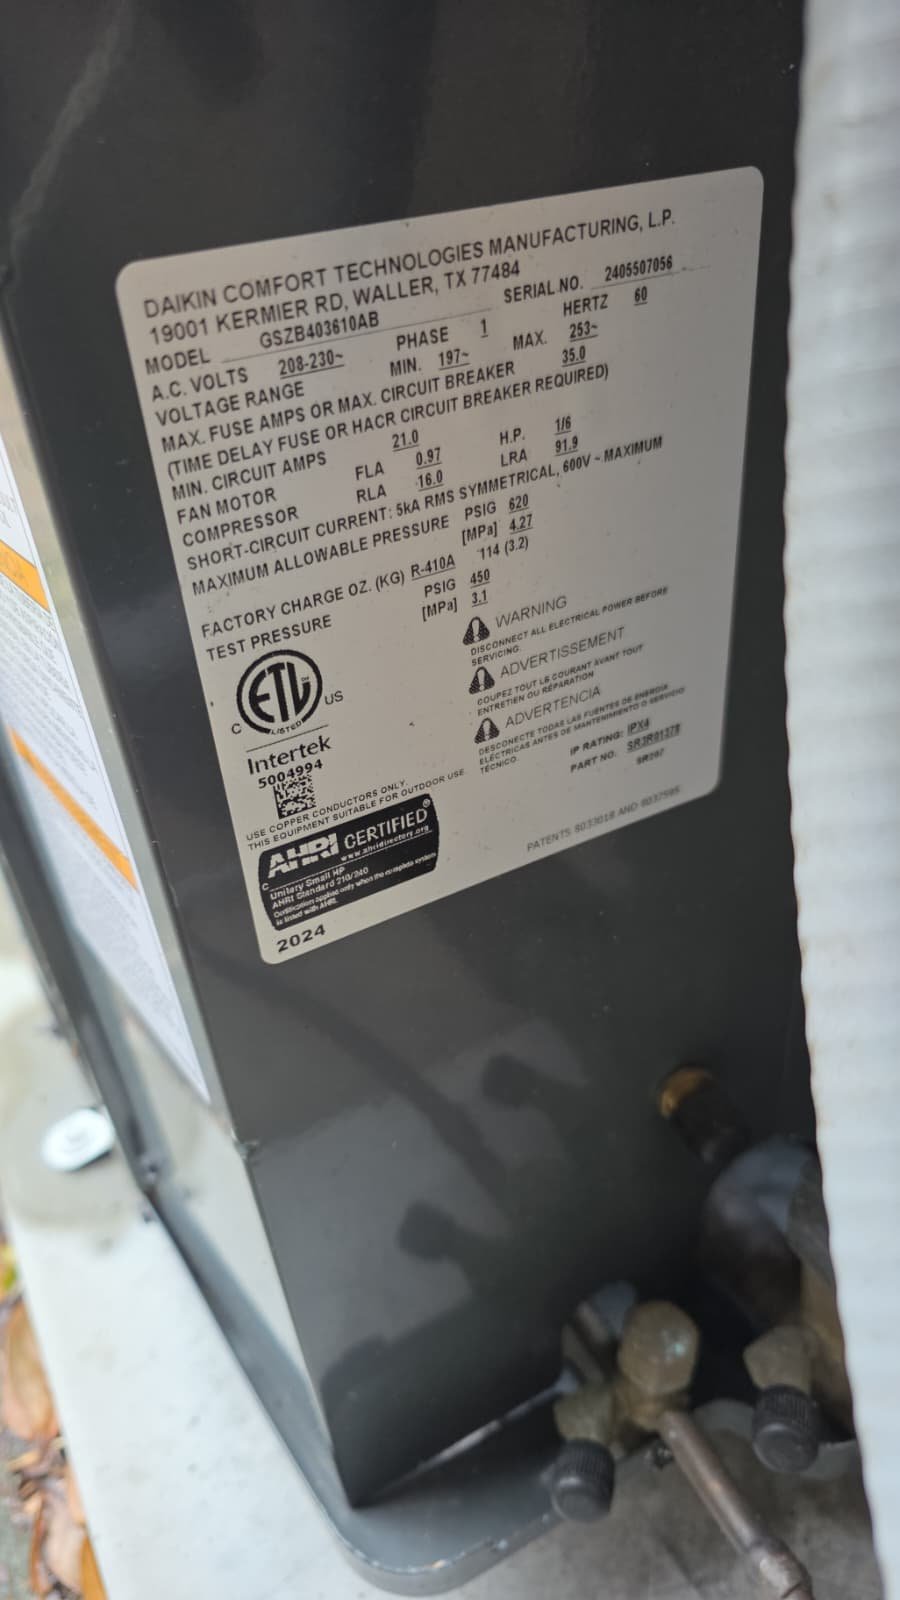
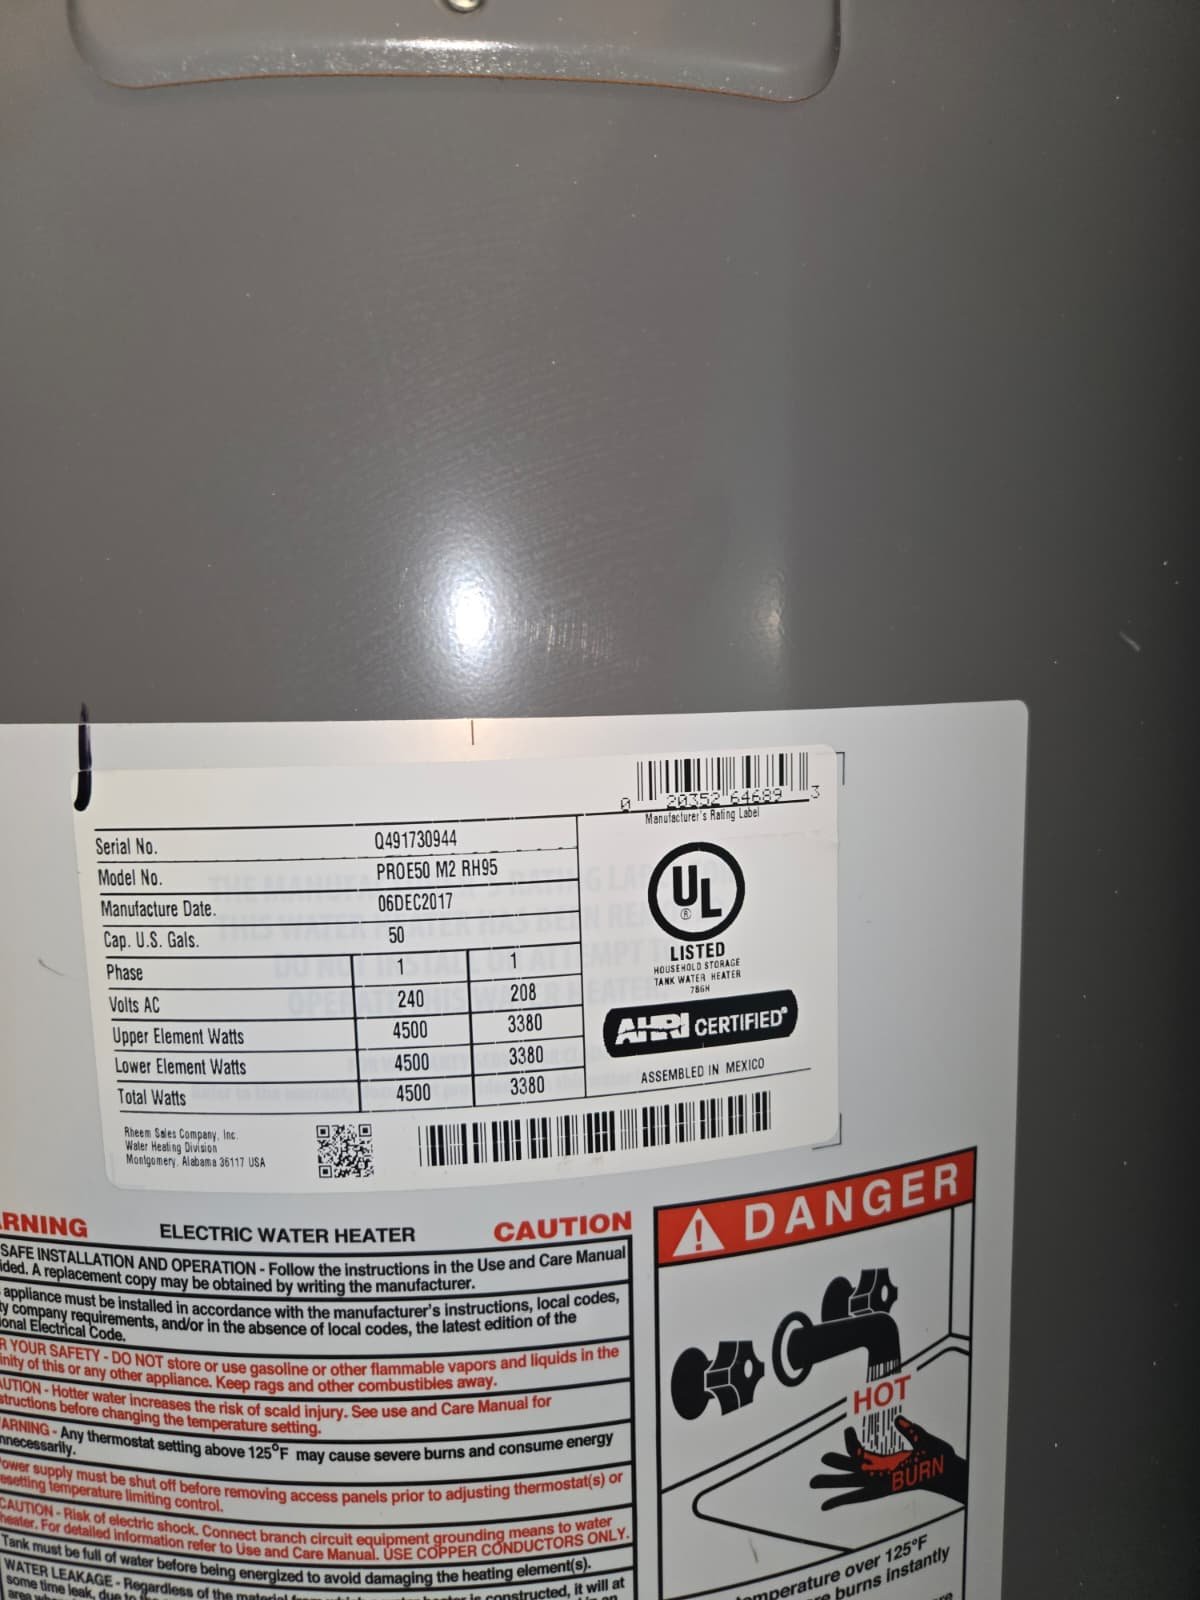
  • System age: Approximately 8 years old and out of manufacturer’s warranty
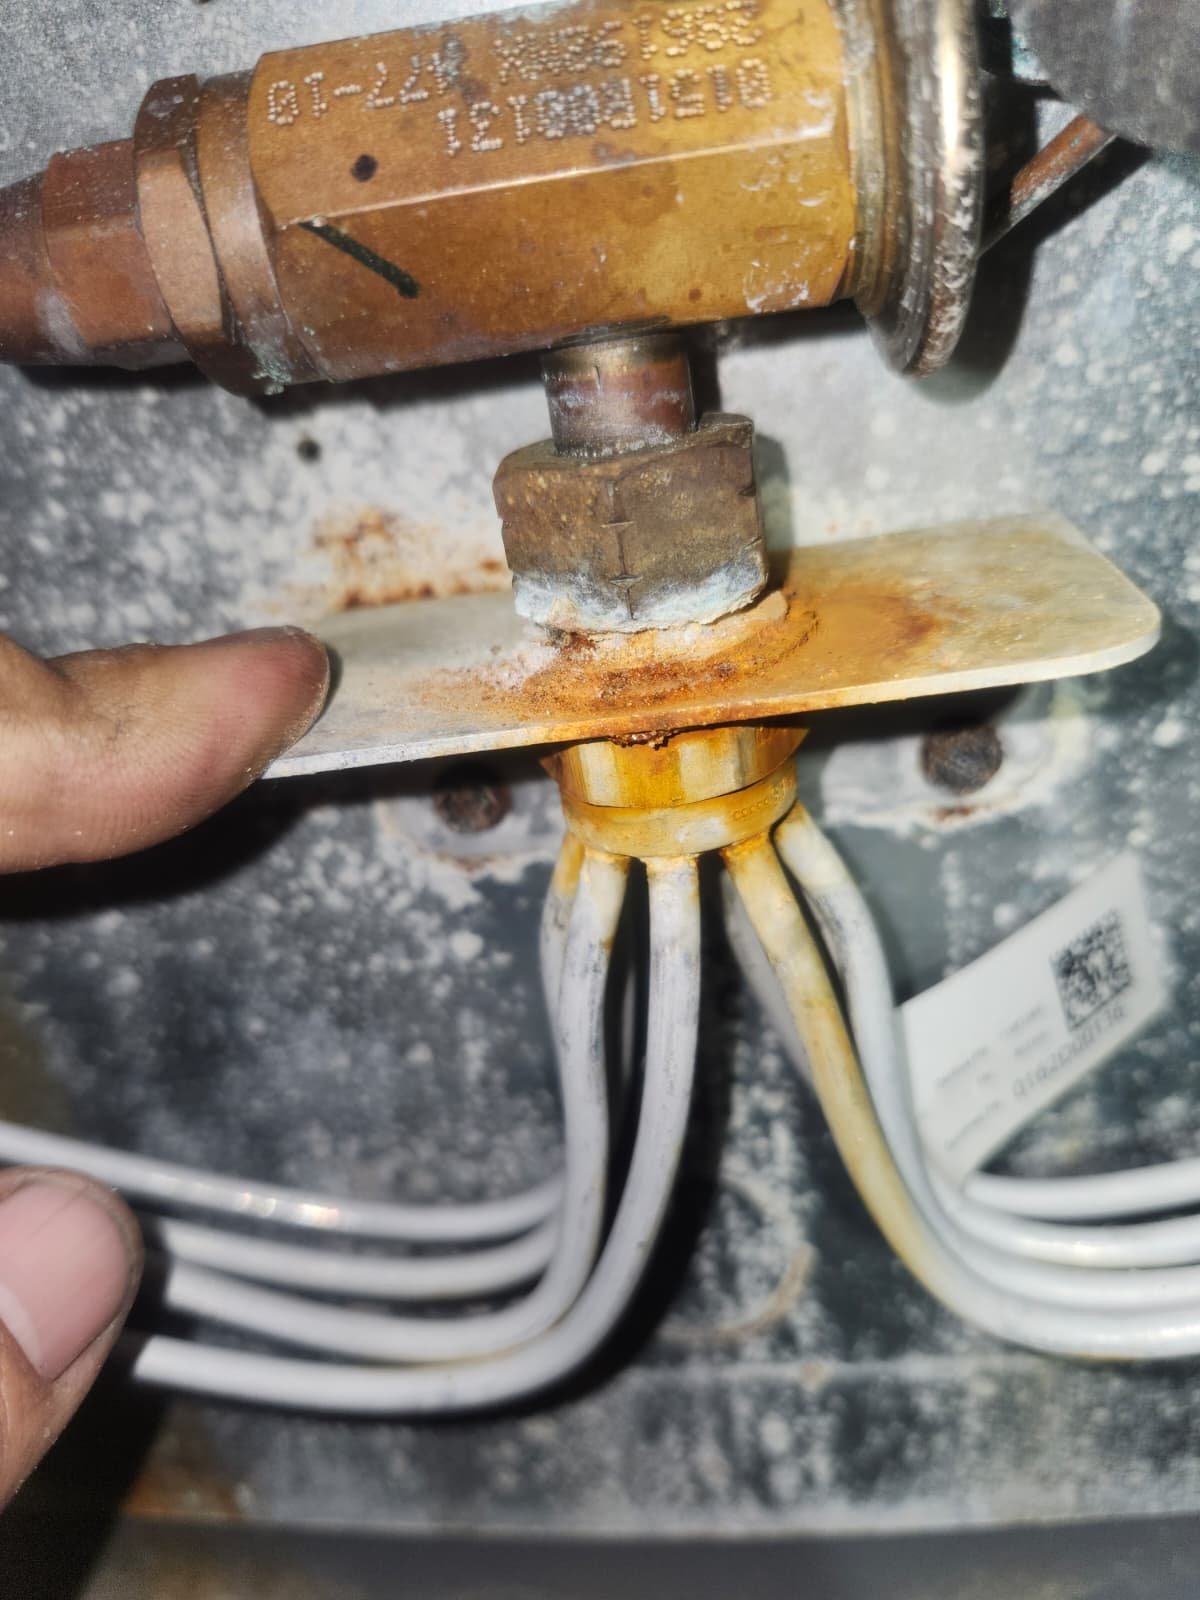
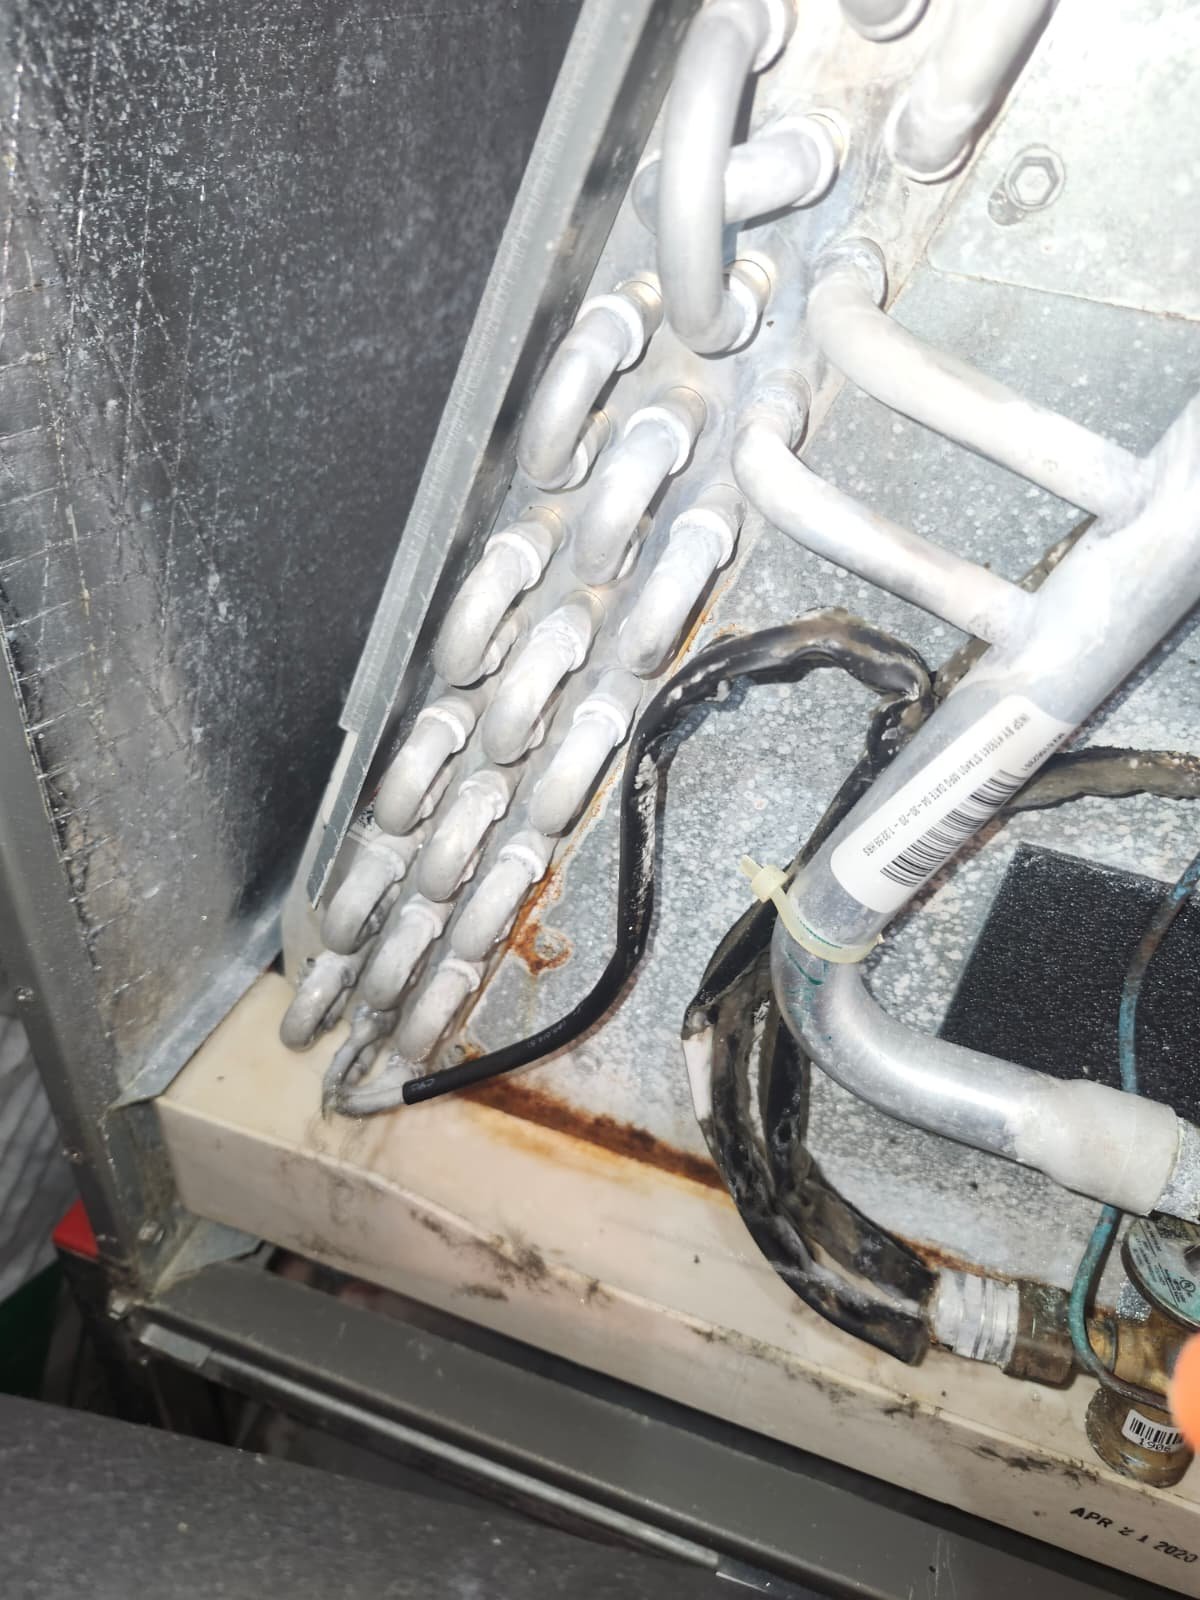
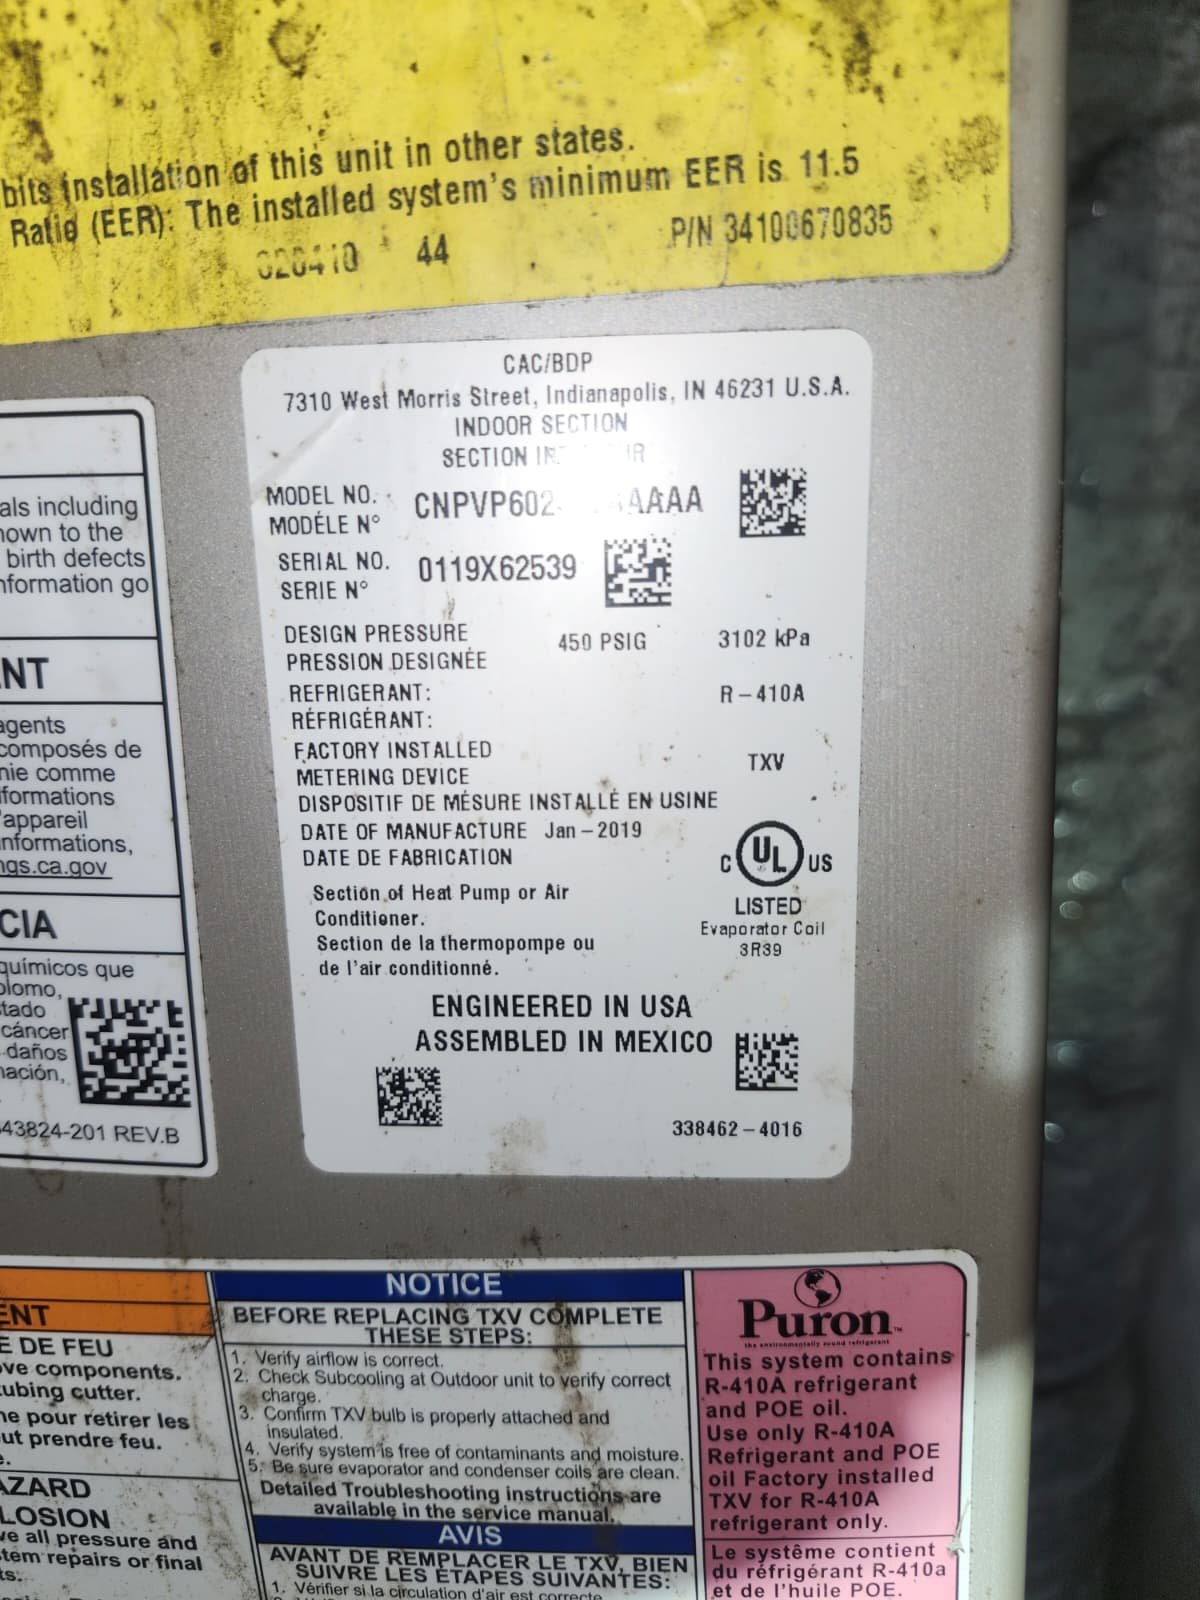
  • Previous work: Indoor coil and TXV were replaced last year
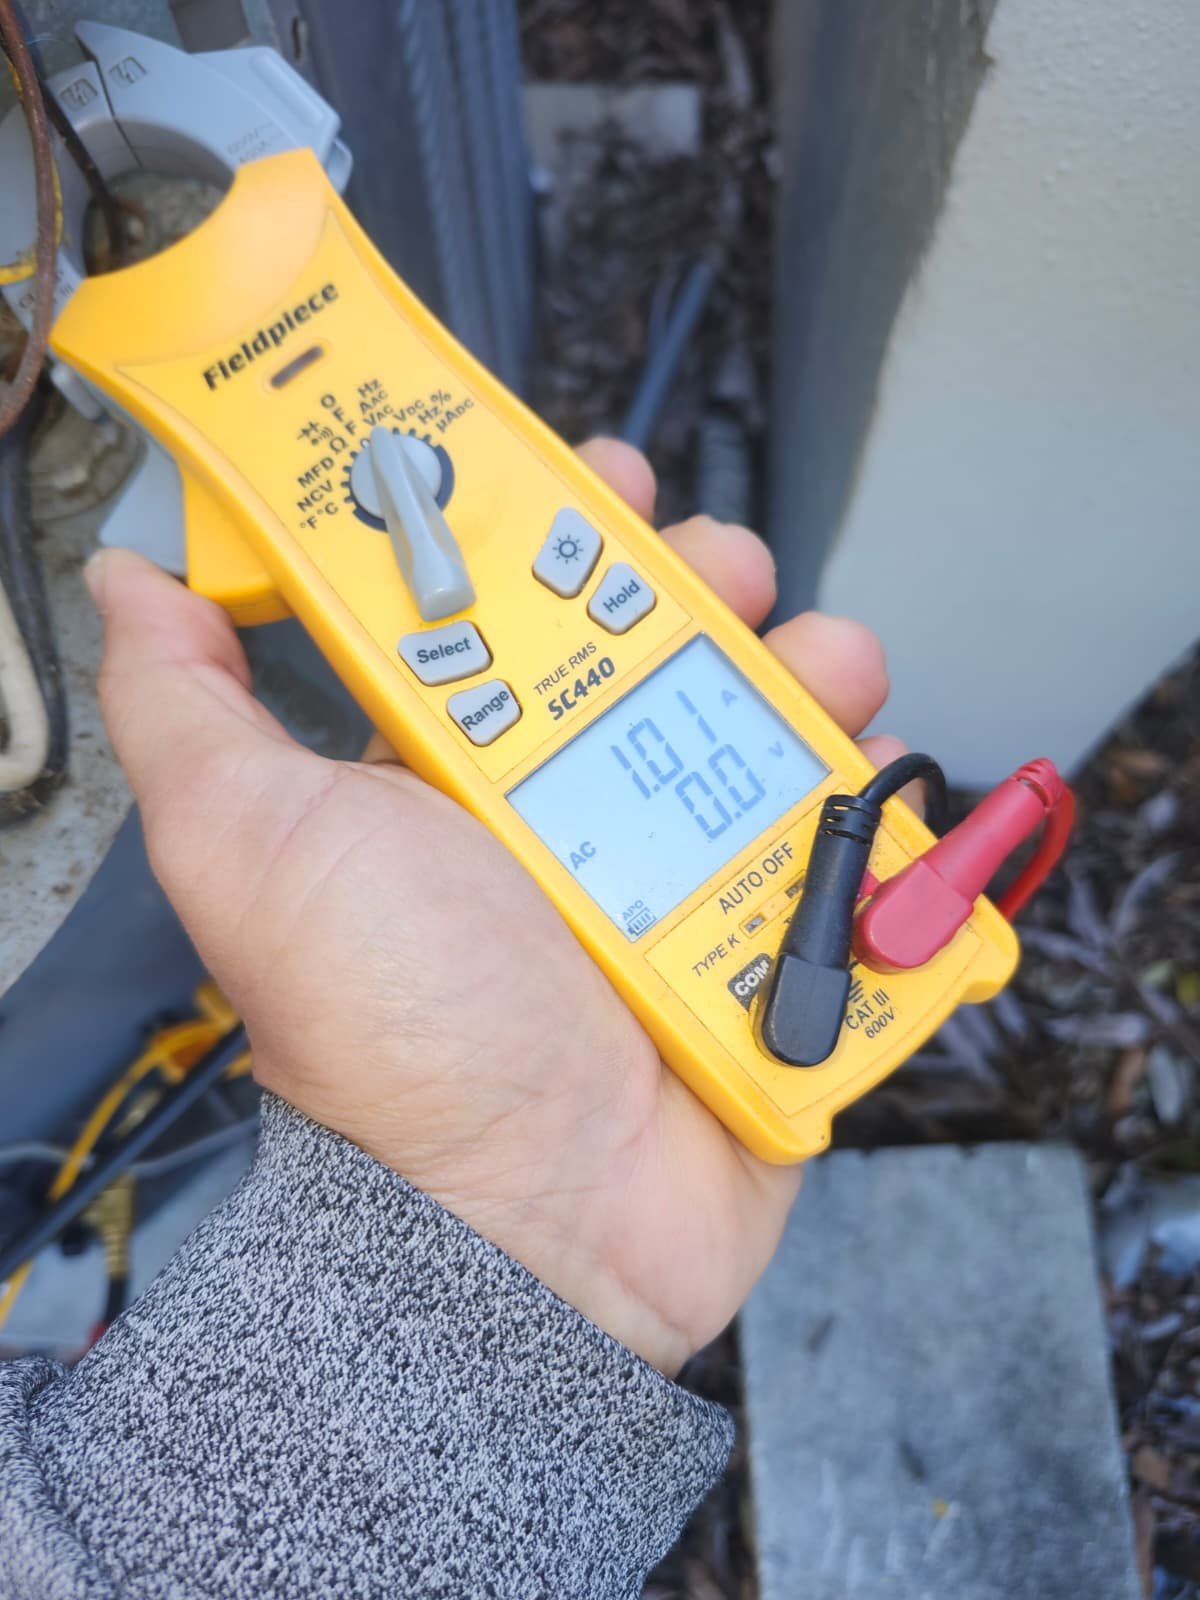
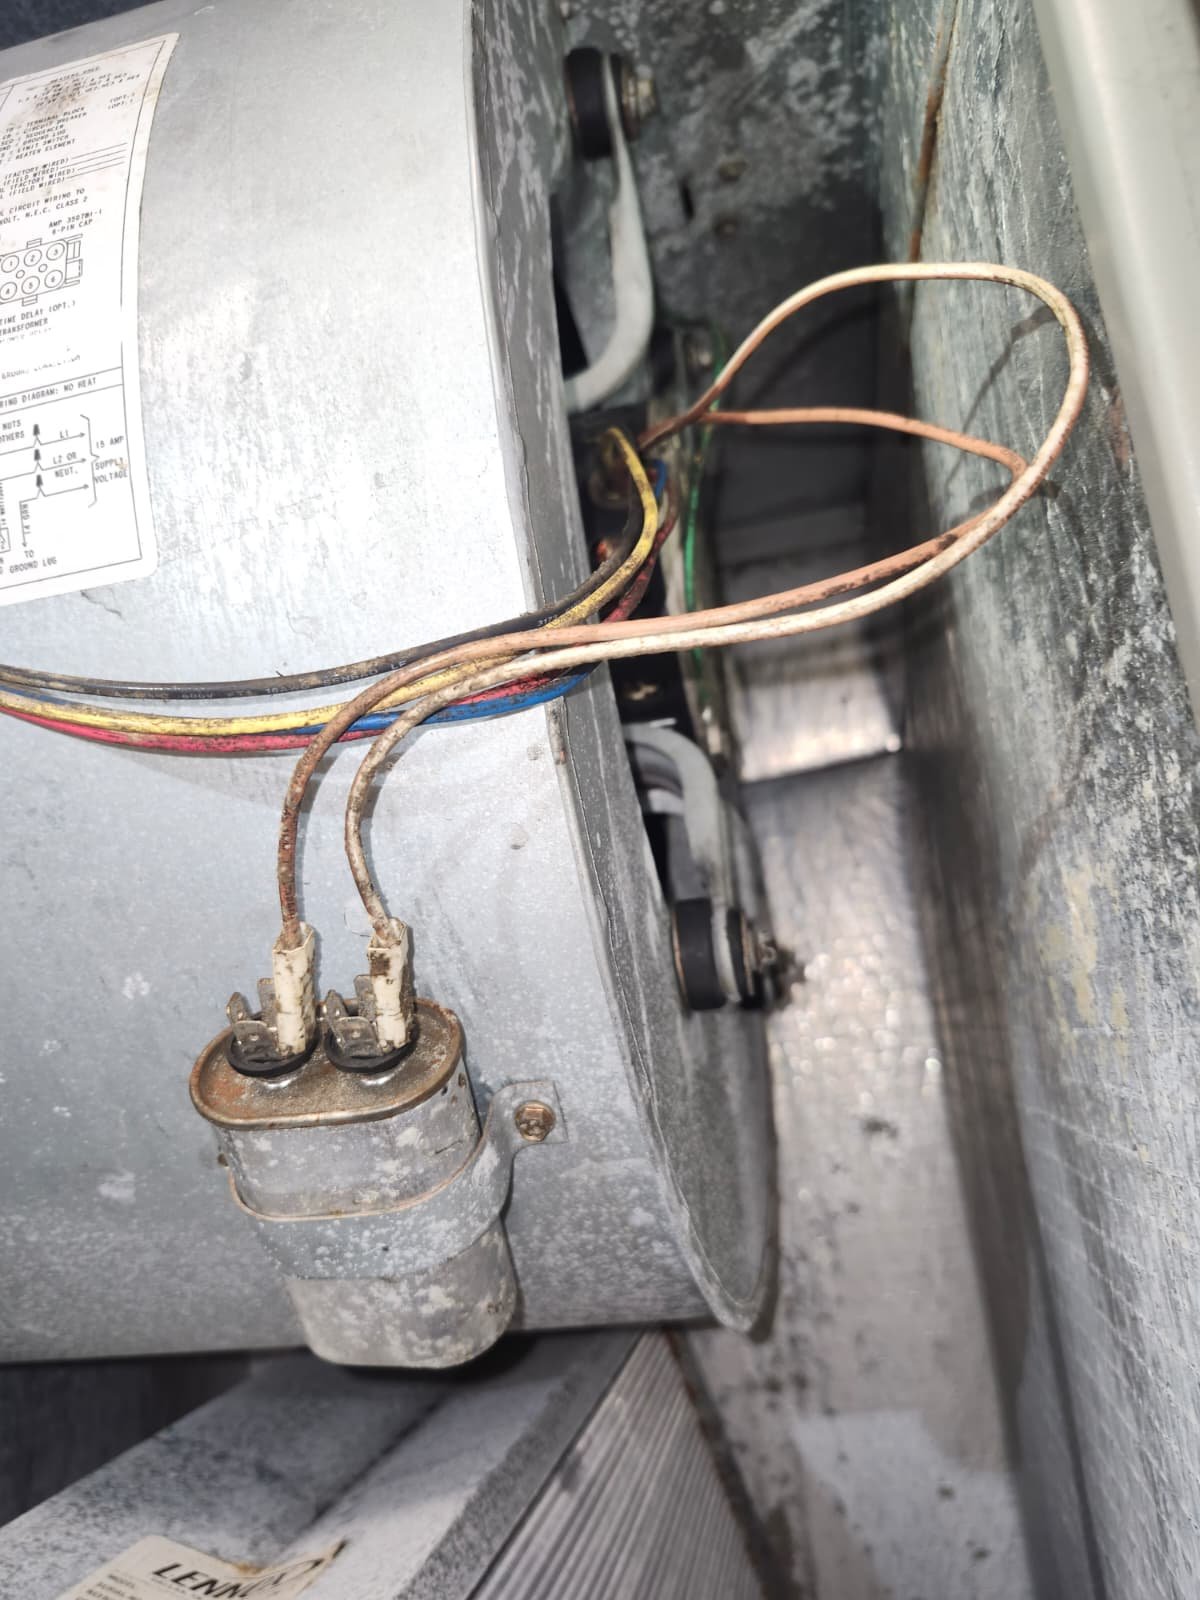
  • New findings: High electrical consumption on the condenser fan motor and a failed UV light in the air handler
  • Outcome: System left operating, homeowner informed, and clear estimates provided for future decisions

Customer Problem

This visit in Clearwater wasn’t an emergency call. The homeowner is enrolled in our Premium Home Therapy Plan, so this was a scheduled checkup to keep the system running efficiently and to catch small issues before they turn into big problems.

The air conditioner was still cooling the home, but there were a few important details about this particular system:

  • The unit is about 8 years old.
  • The homeowner is the second owner, so the original manufacturer warranty (registered for 5 years) no longer applies.
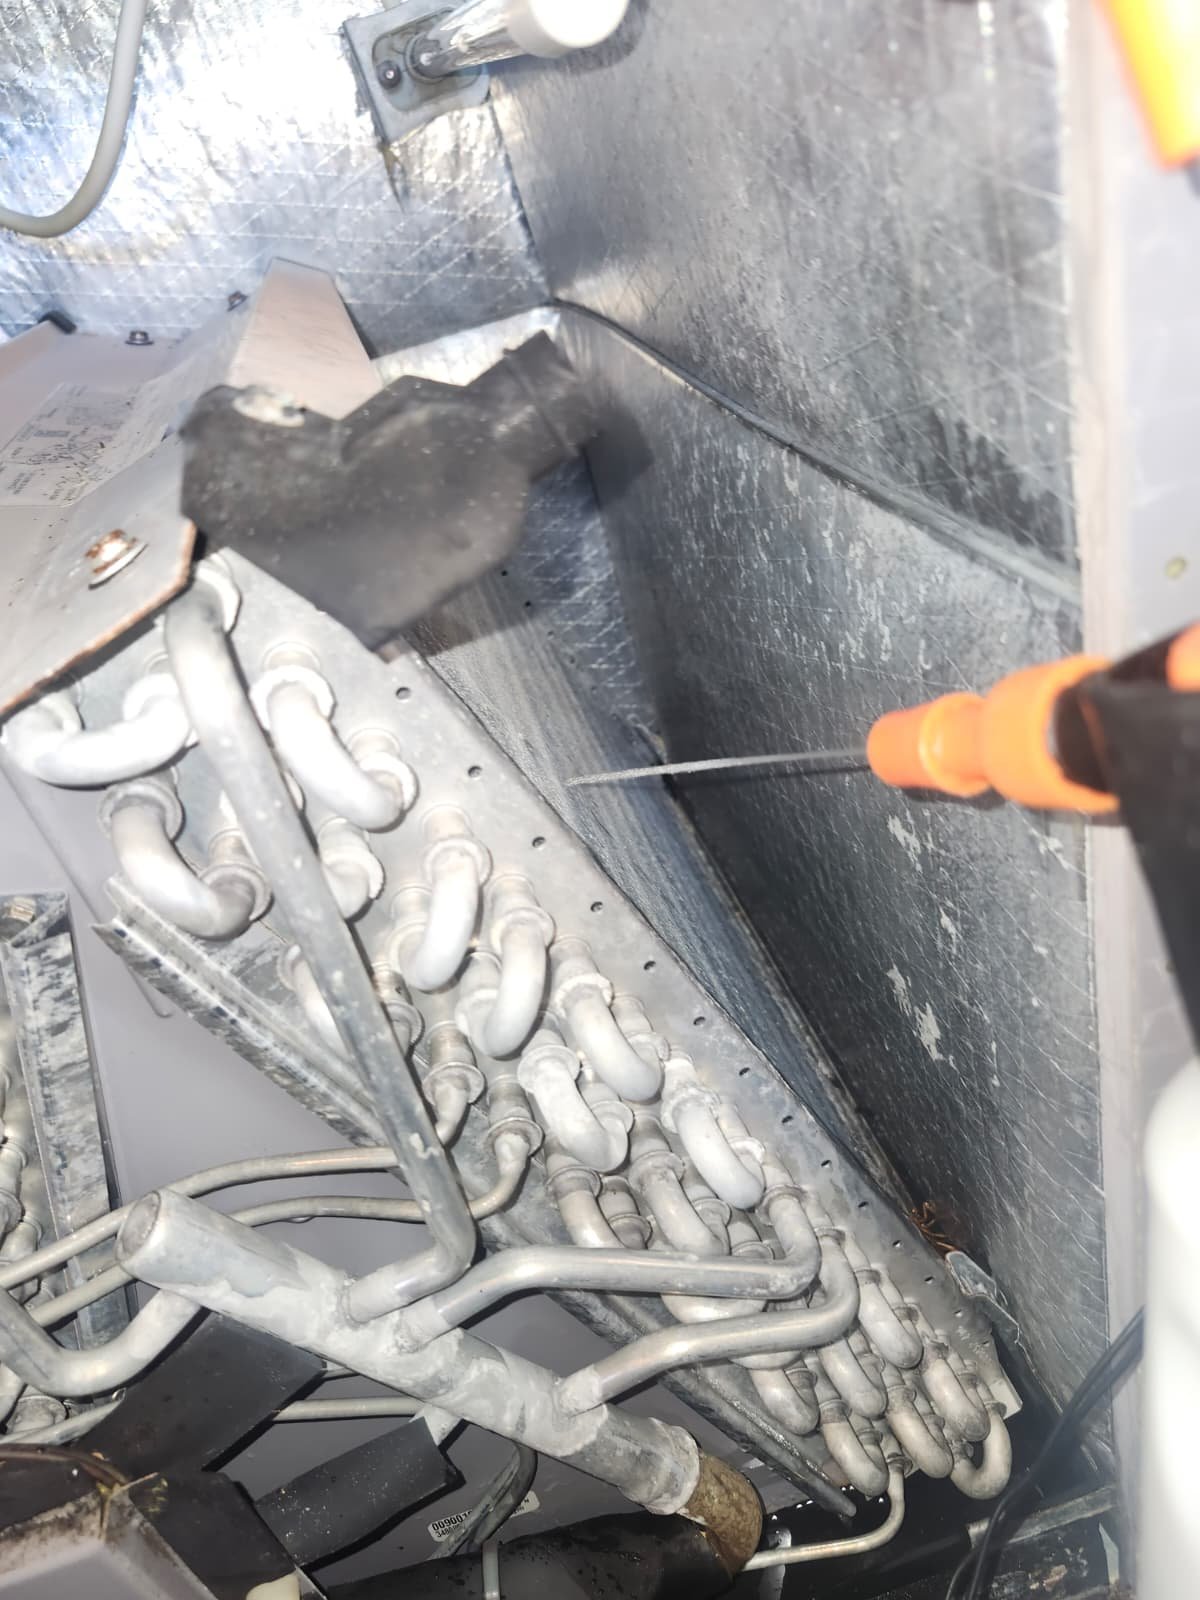
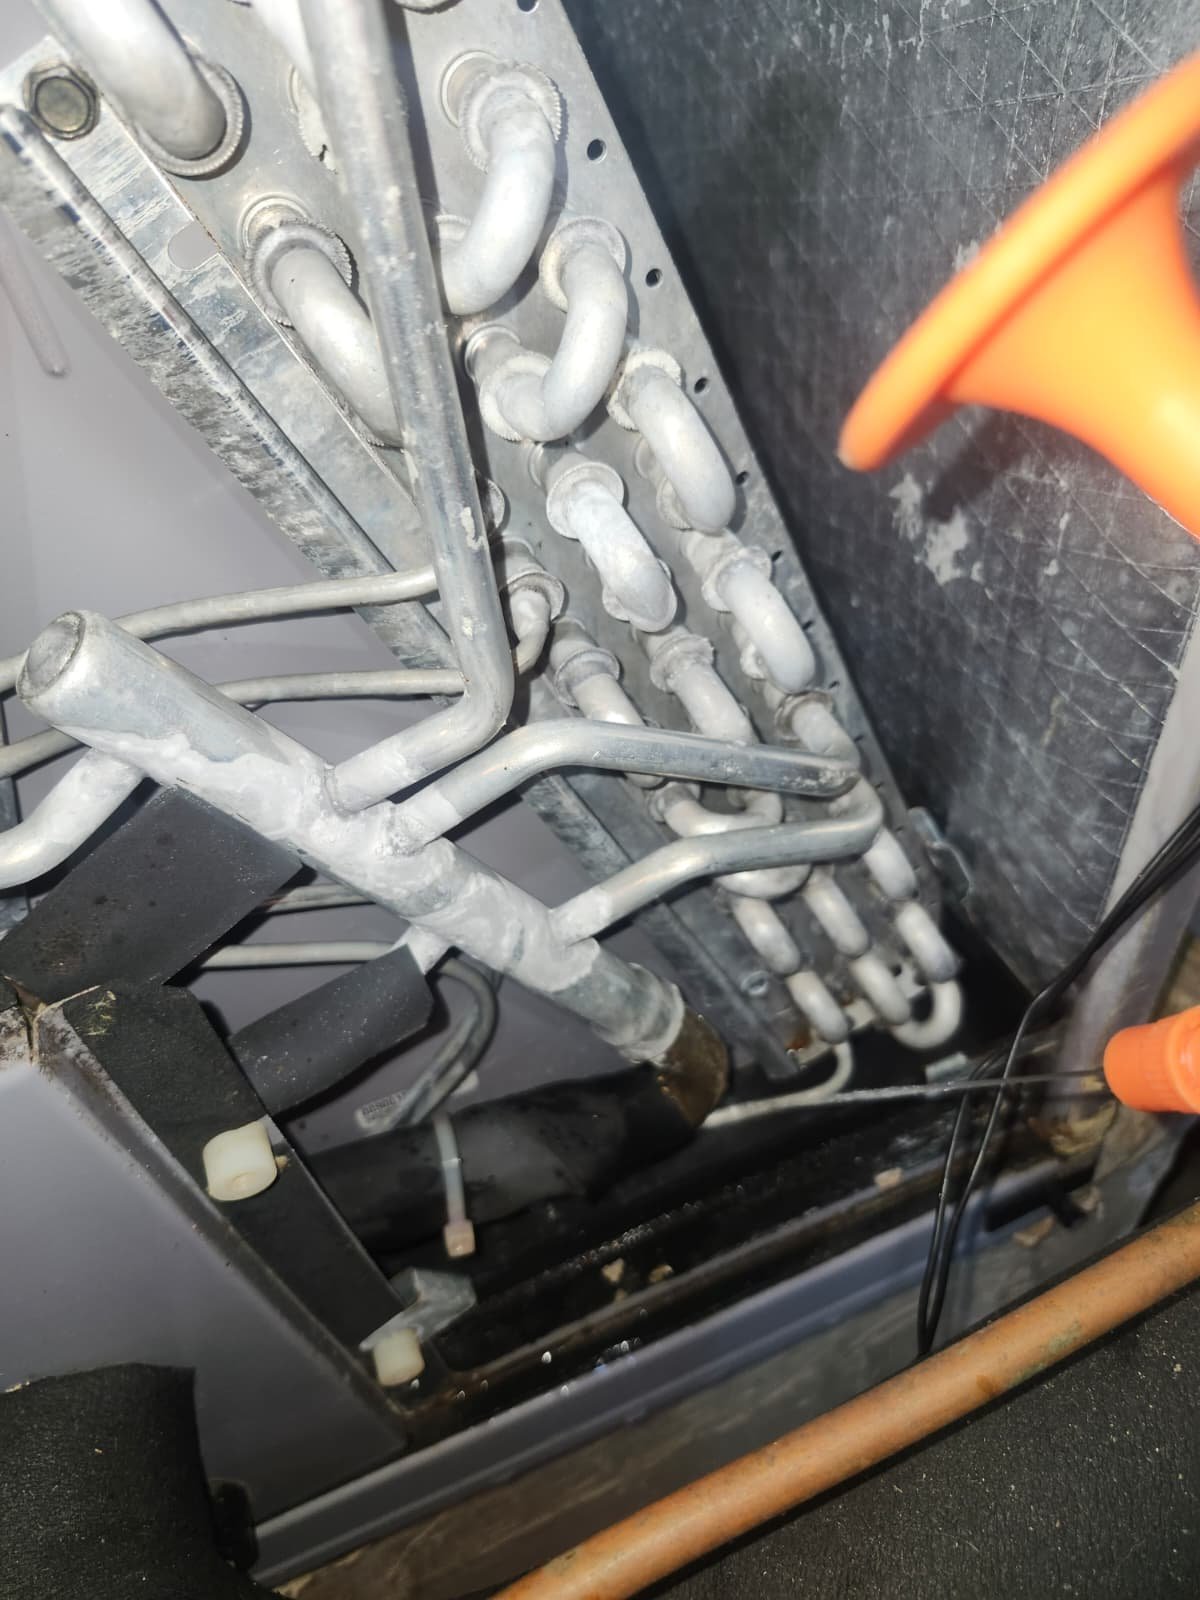
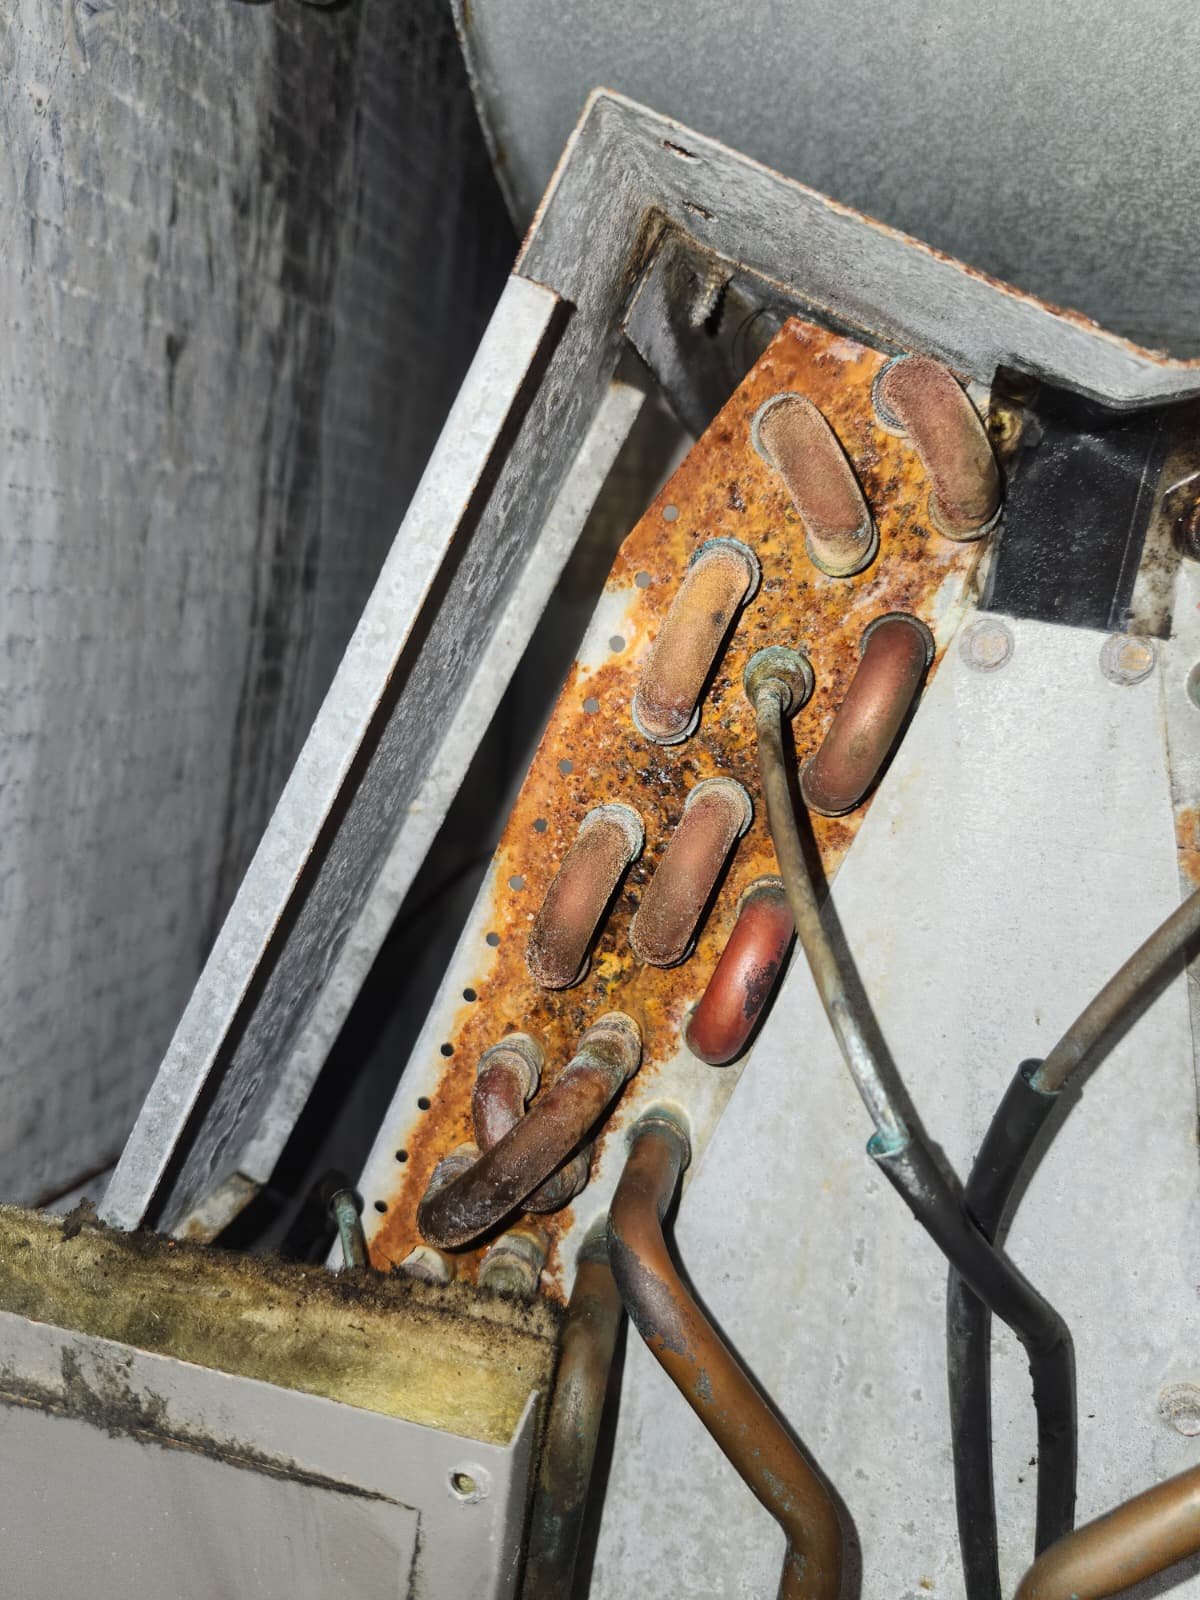
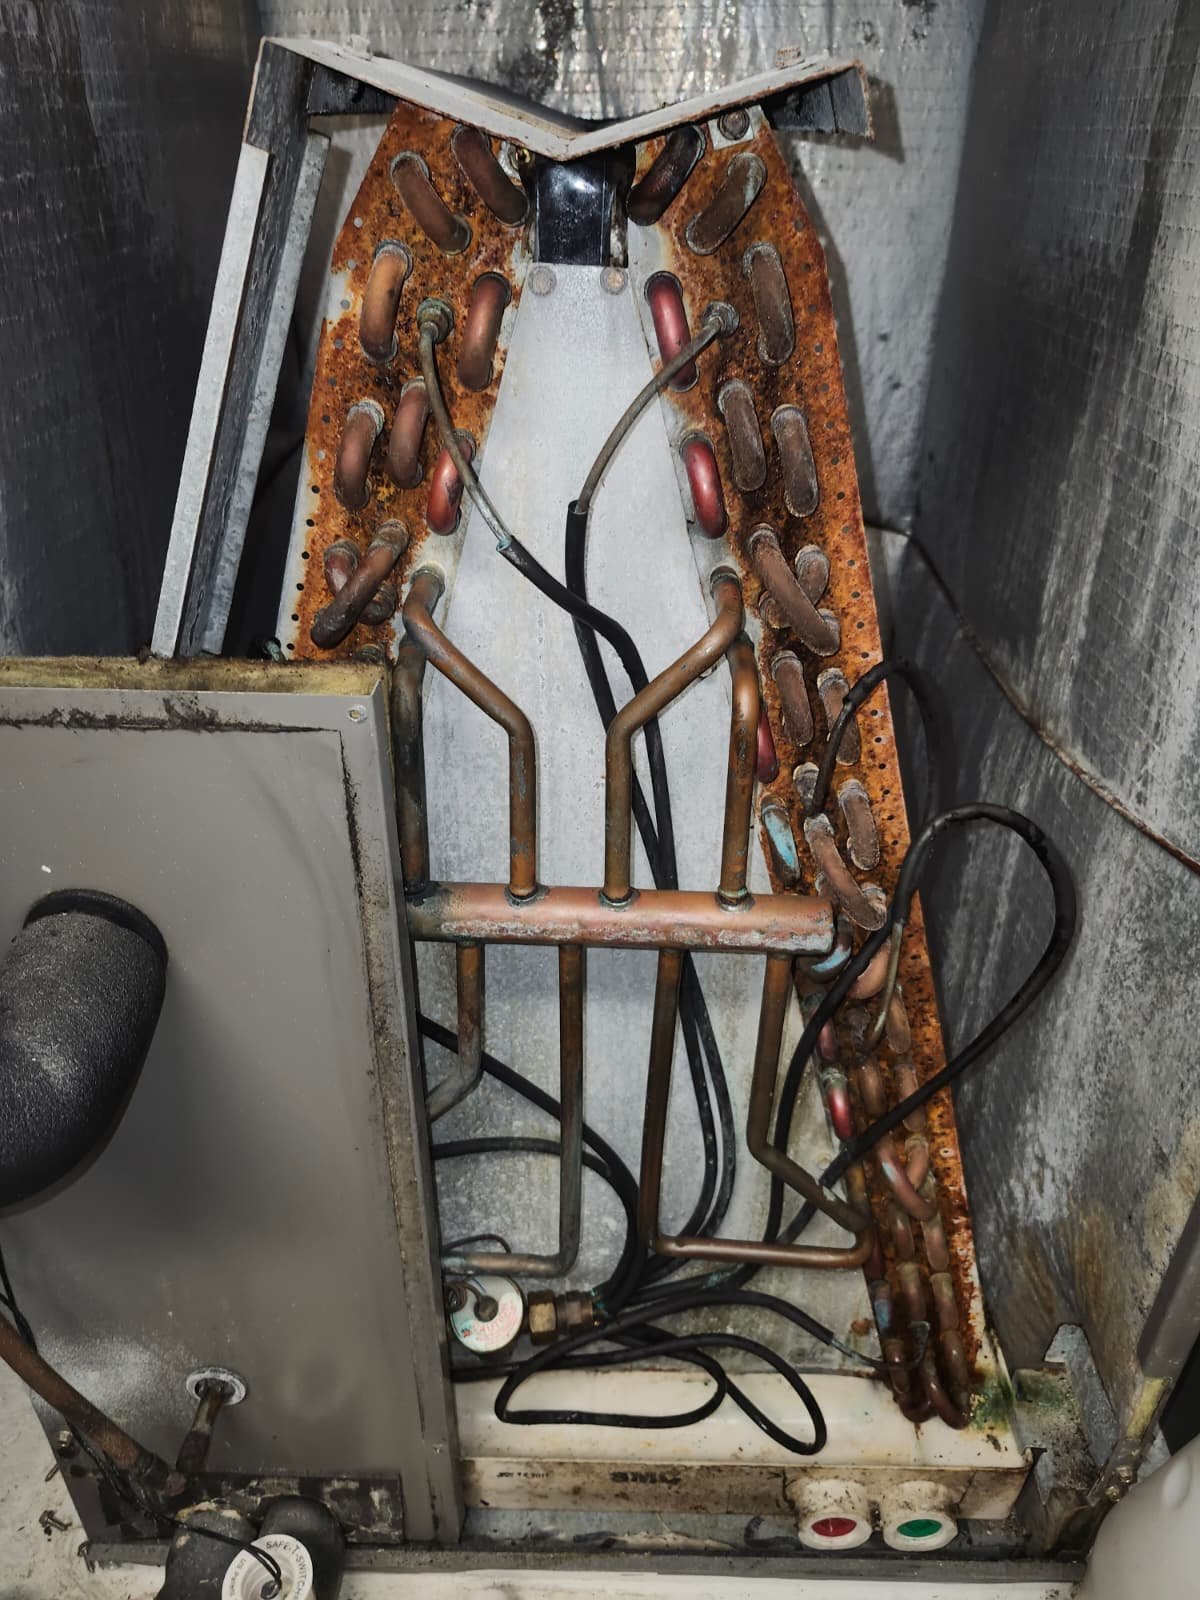
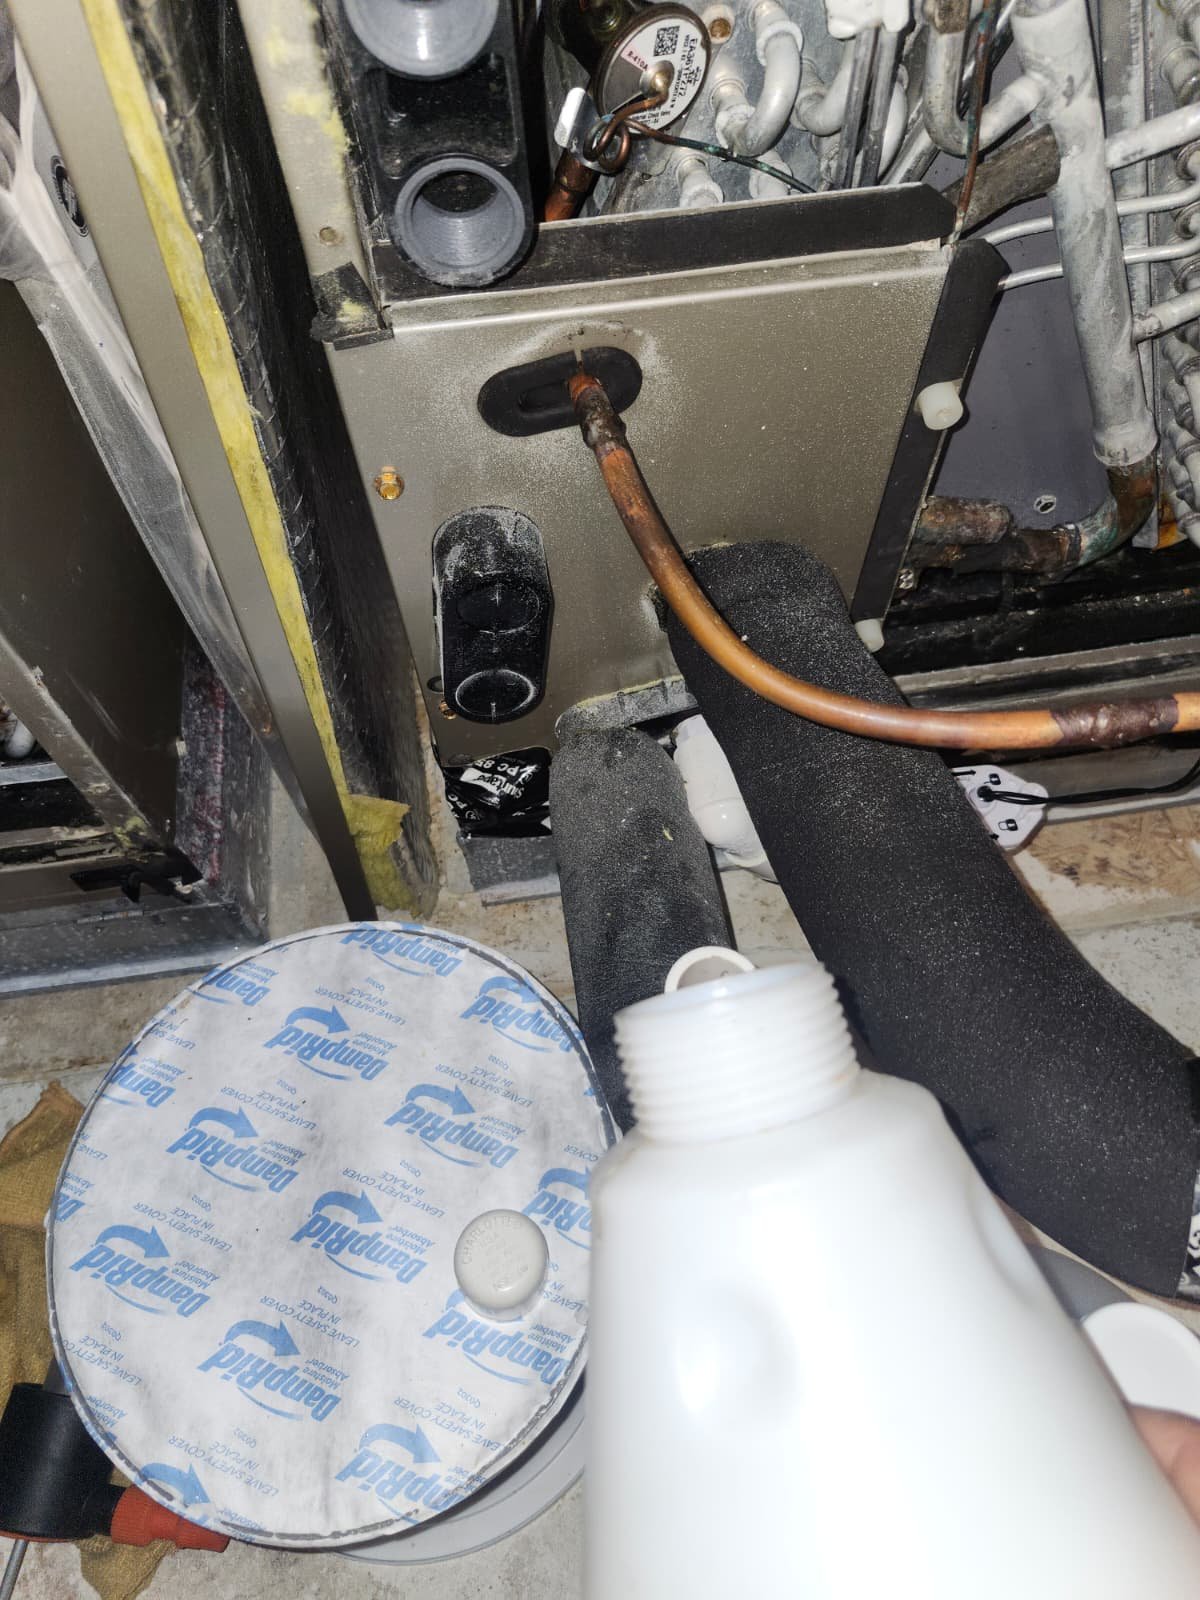
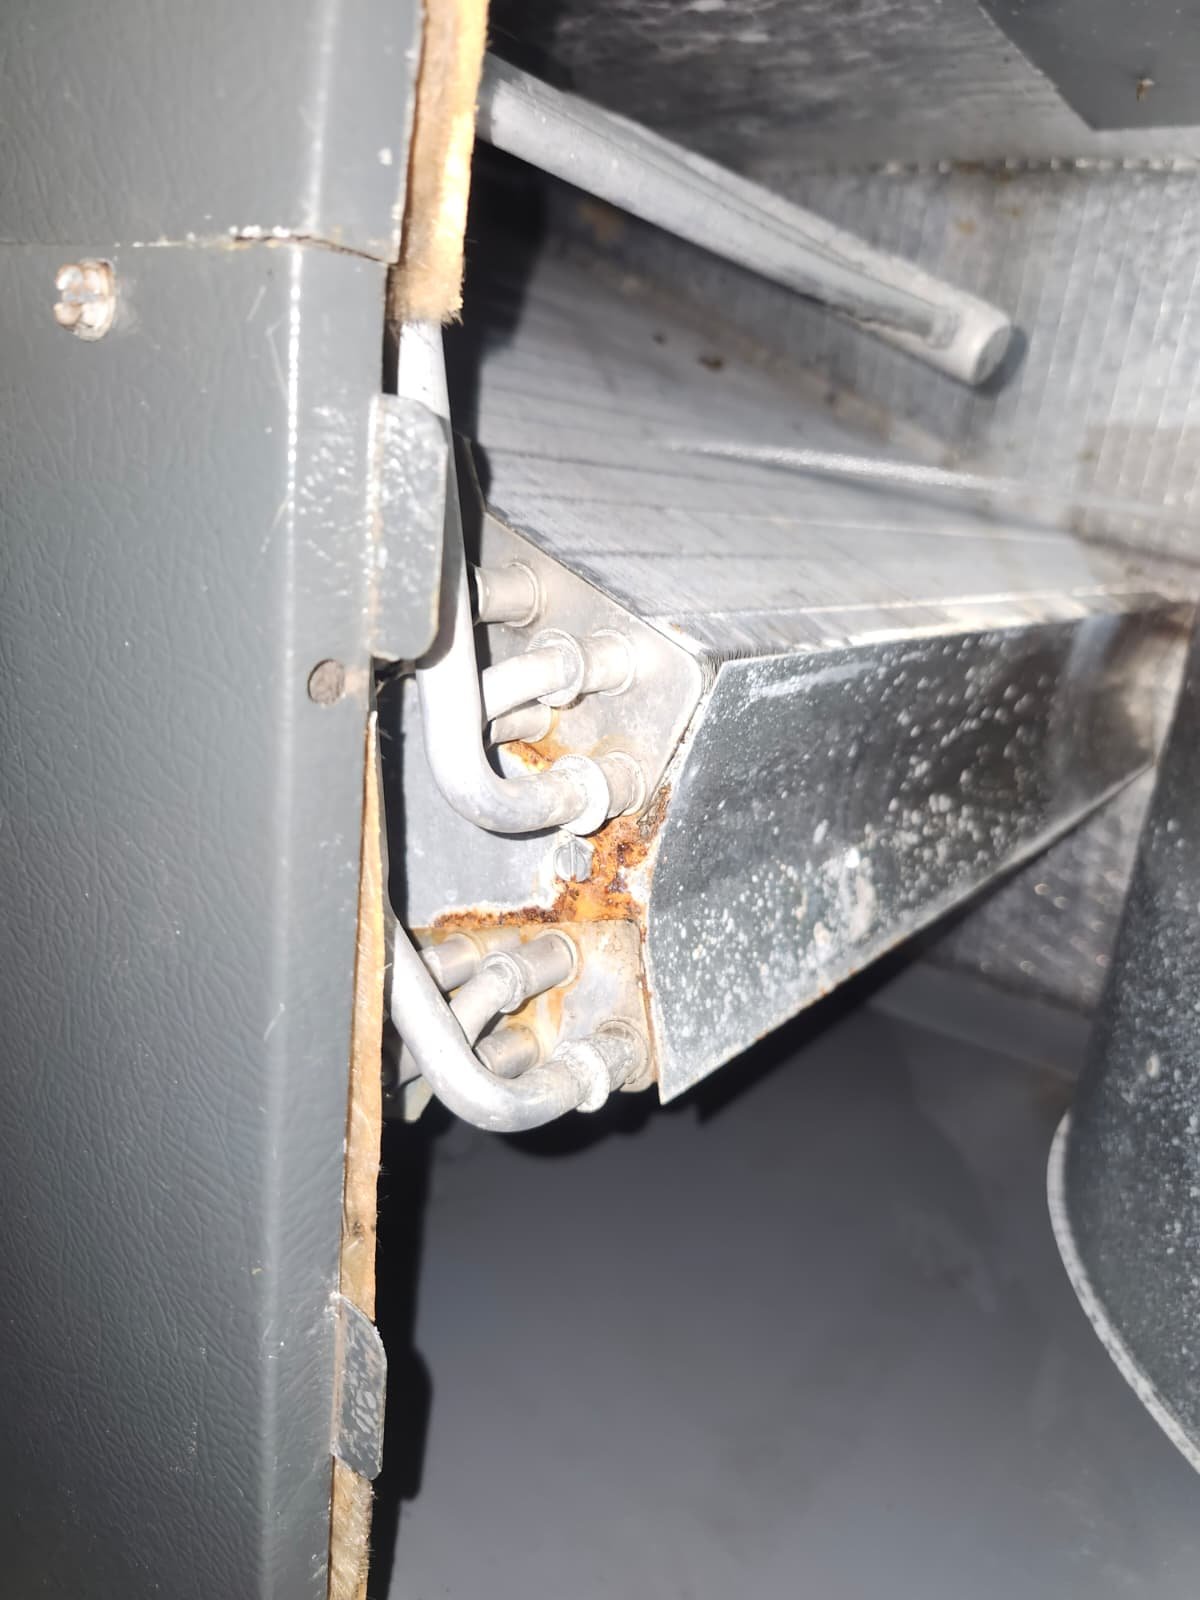
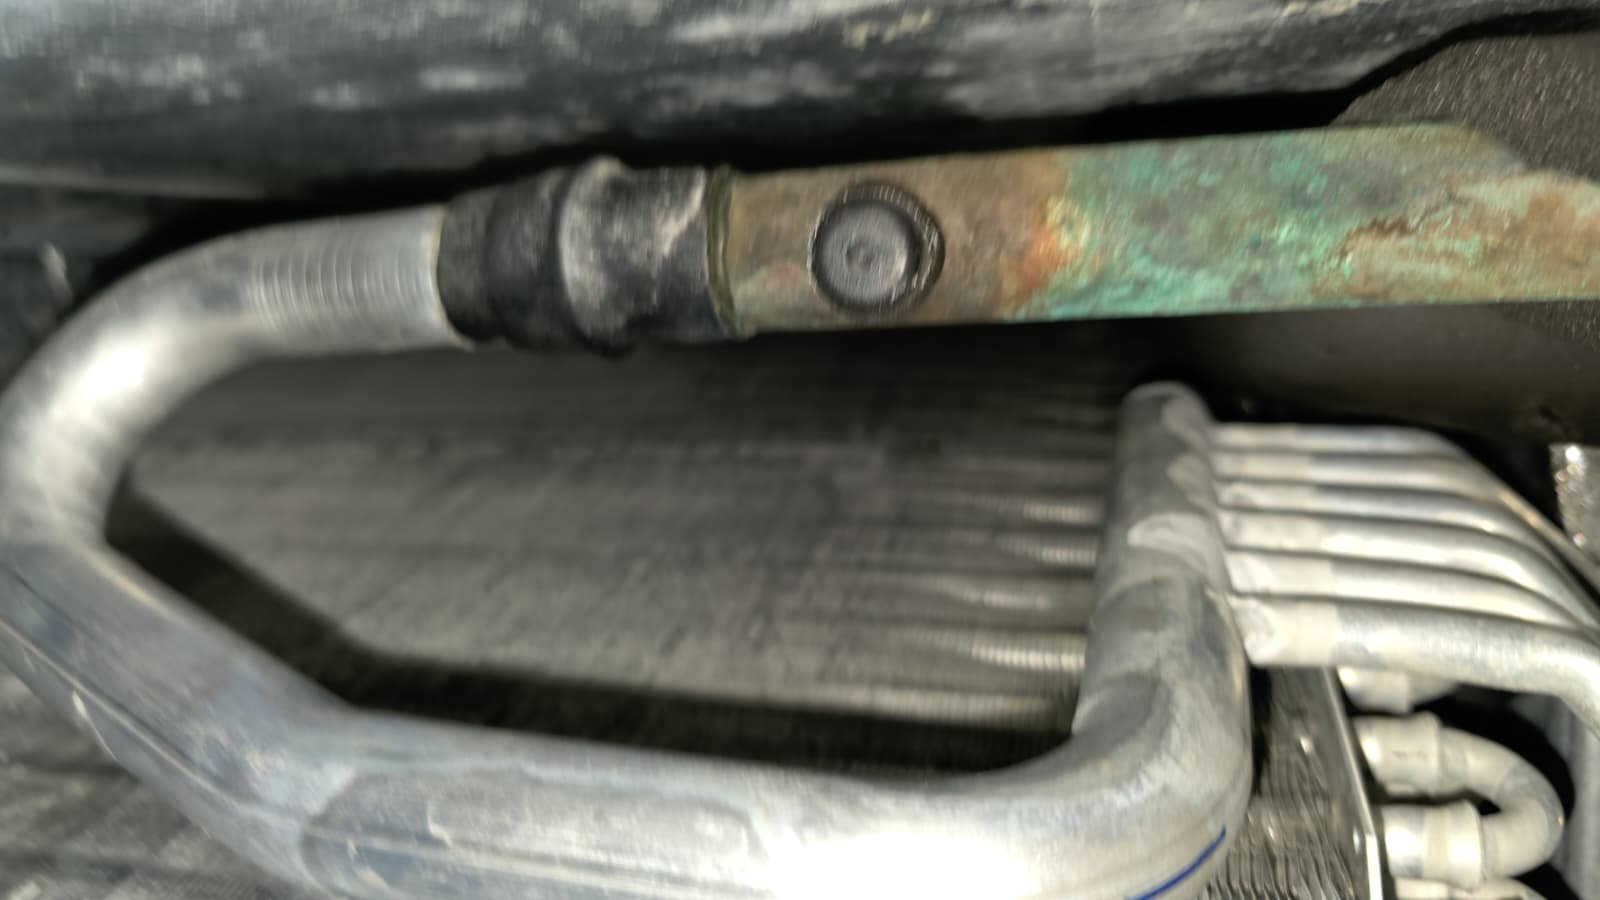
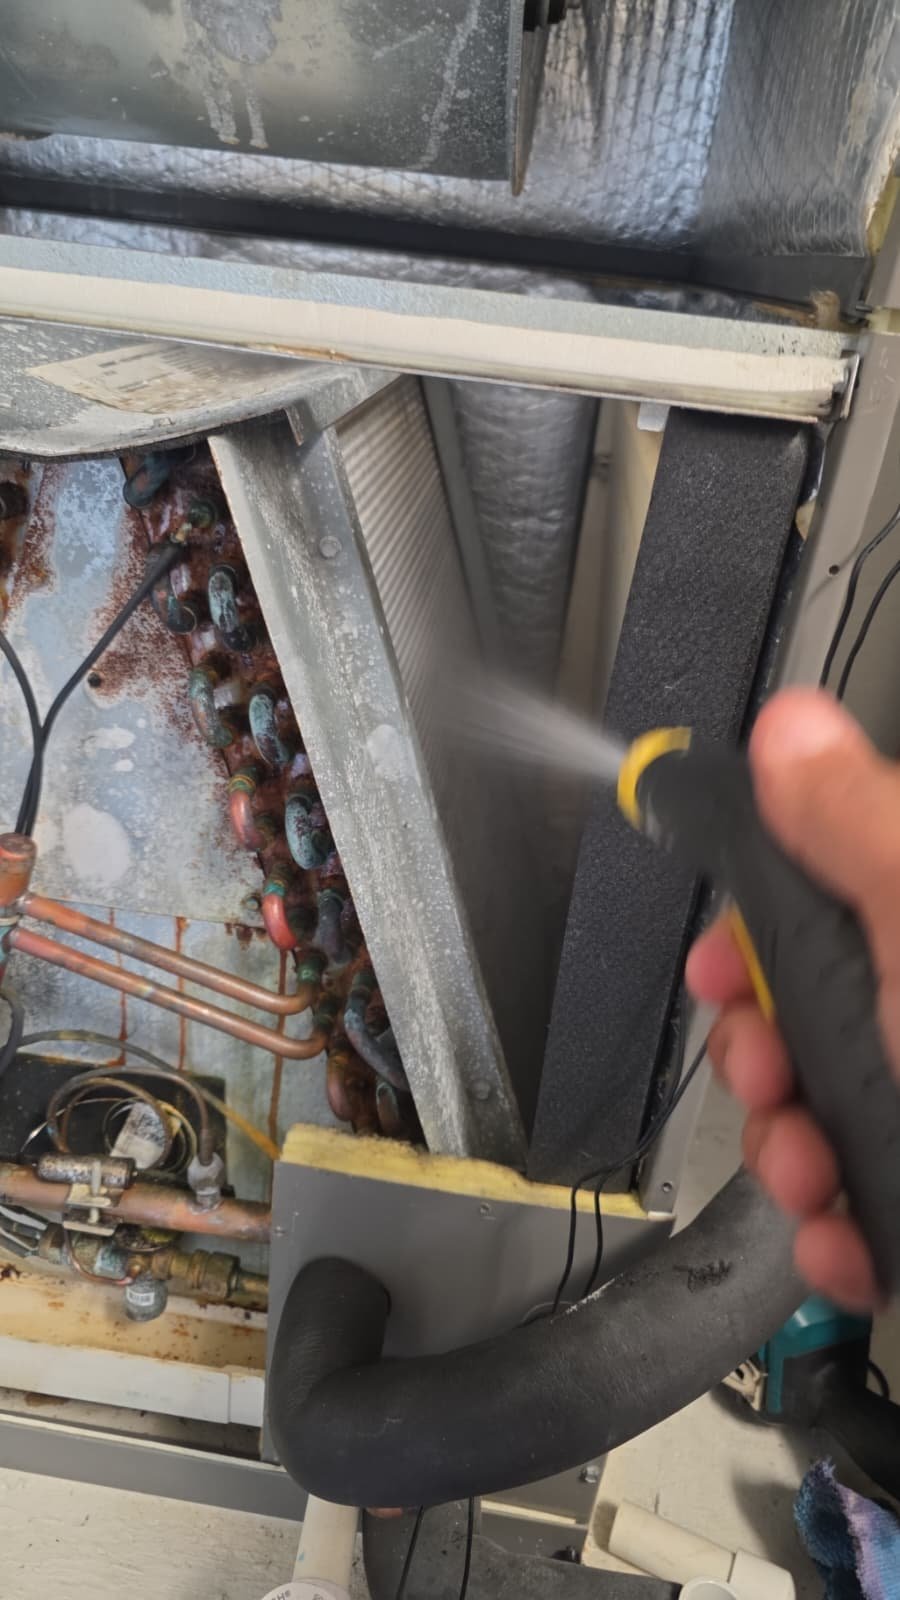
  • Last year, we replaced the evaporator coil and TXV in the air handler due to a separate issue.

Because of the lack of warranty and the age of the equipment, any major component failure from this point forward becomes a bigger decision: repair versus replace. This is especially important for homeowners in Clearwater, where the A/C runs hard for much of the year.

On a previous visit, we had already noted that the outdoor condenser fan motor was drawing higher than normal electrical current and advised the homeowner to keep an eye on it. During this latest maintenance visit, part of our job was to re-check that concern and see how the system was trending.

Inspection and Diagnosis

As part of our Premium Home Therapy Plan tune-up in Clearwater, FL 33756, we go beyond a quick visual glance. We follow a structured process to look at both performance and long-term reliability. On this visit, we focused on a few key areas.

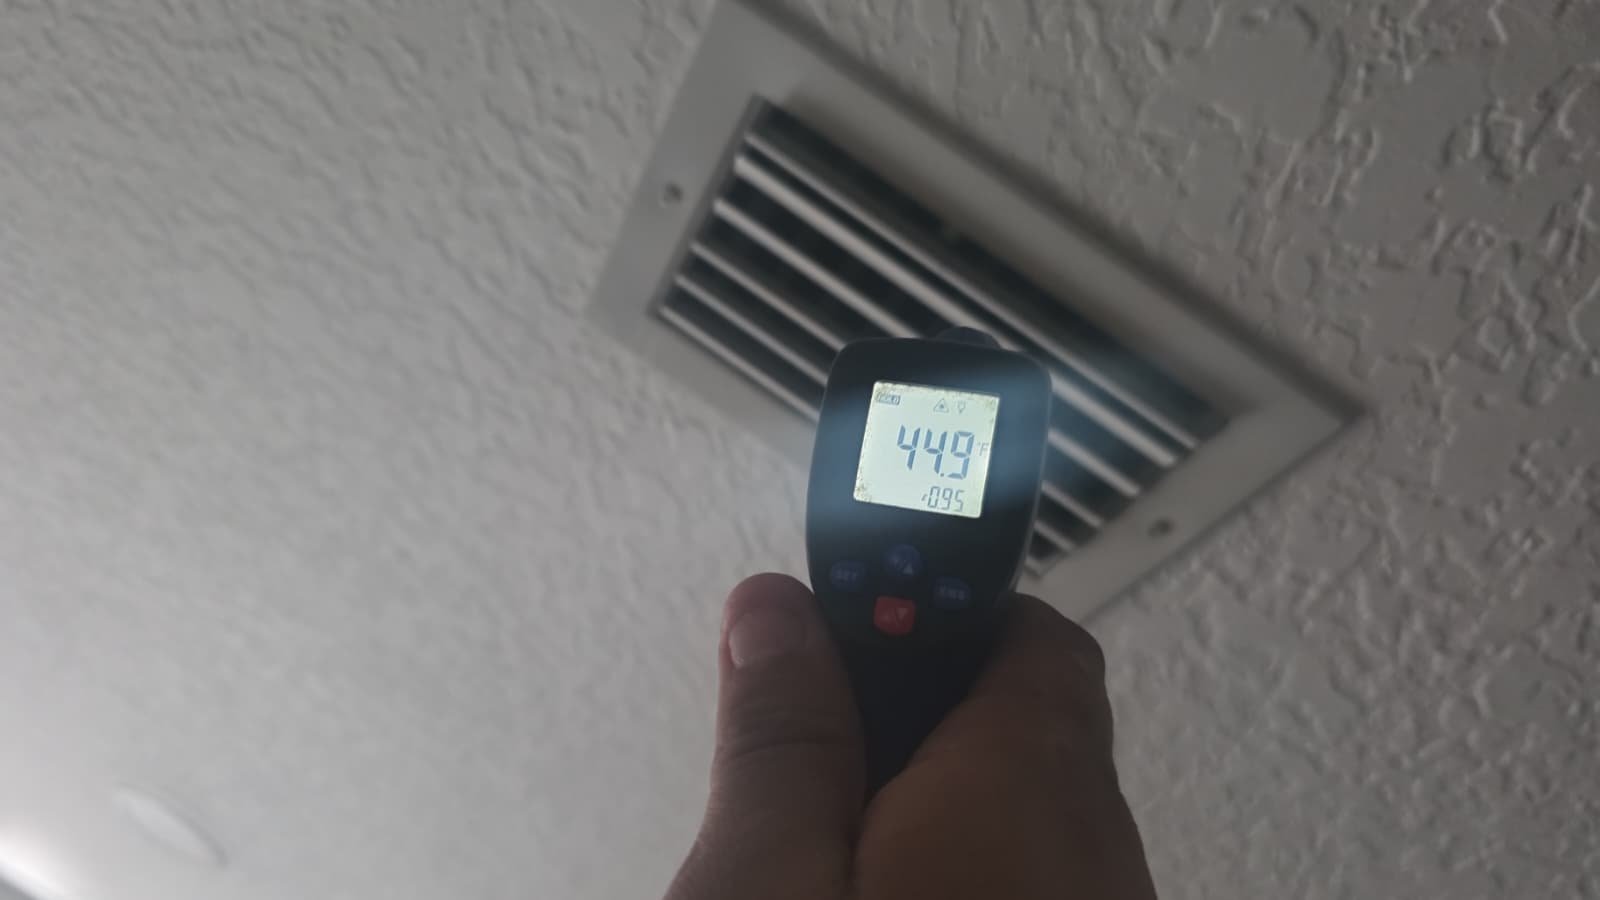
1. Overall System Check

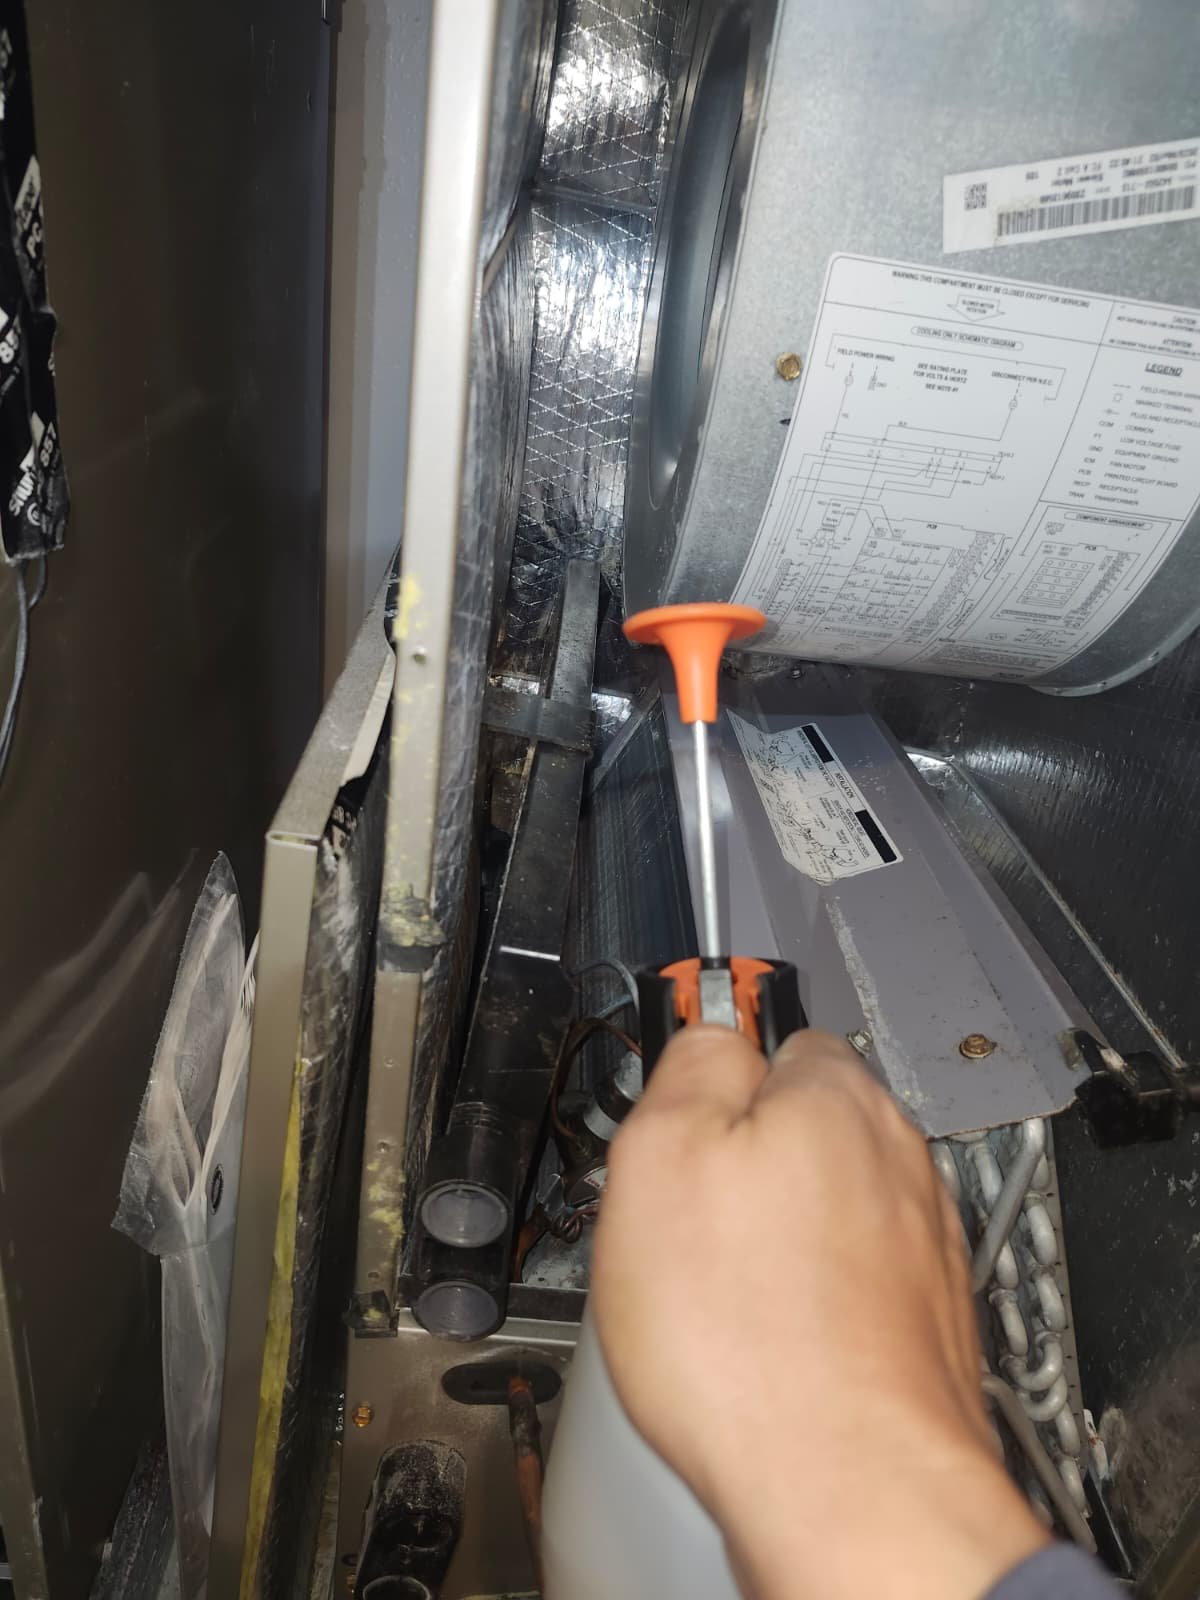
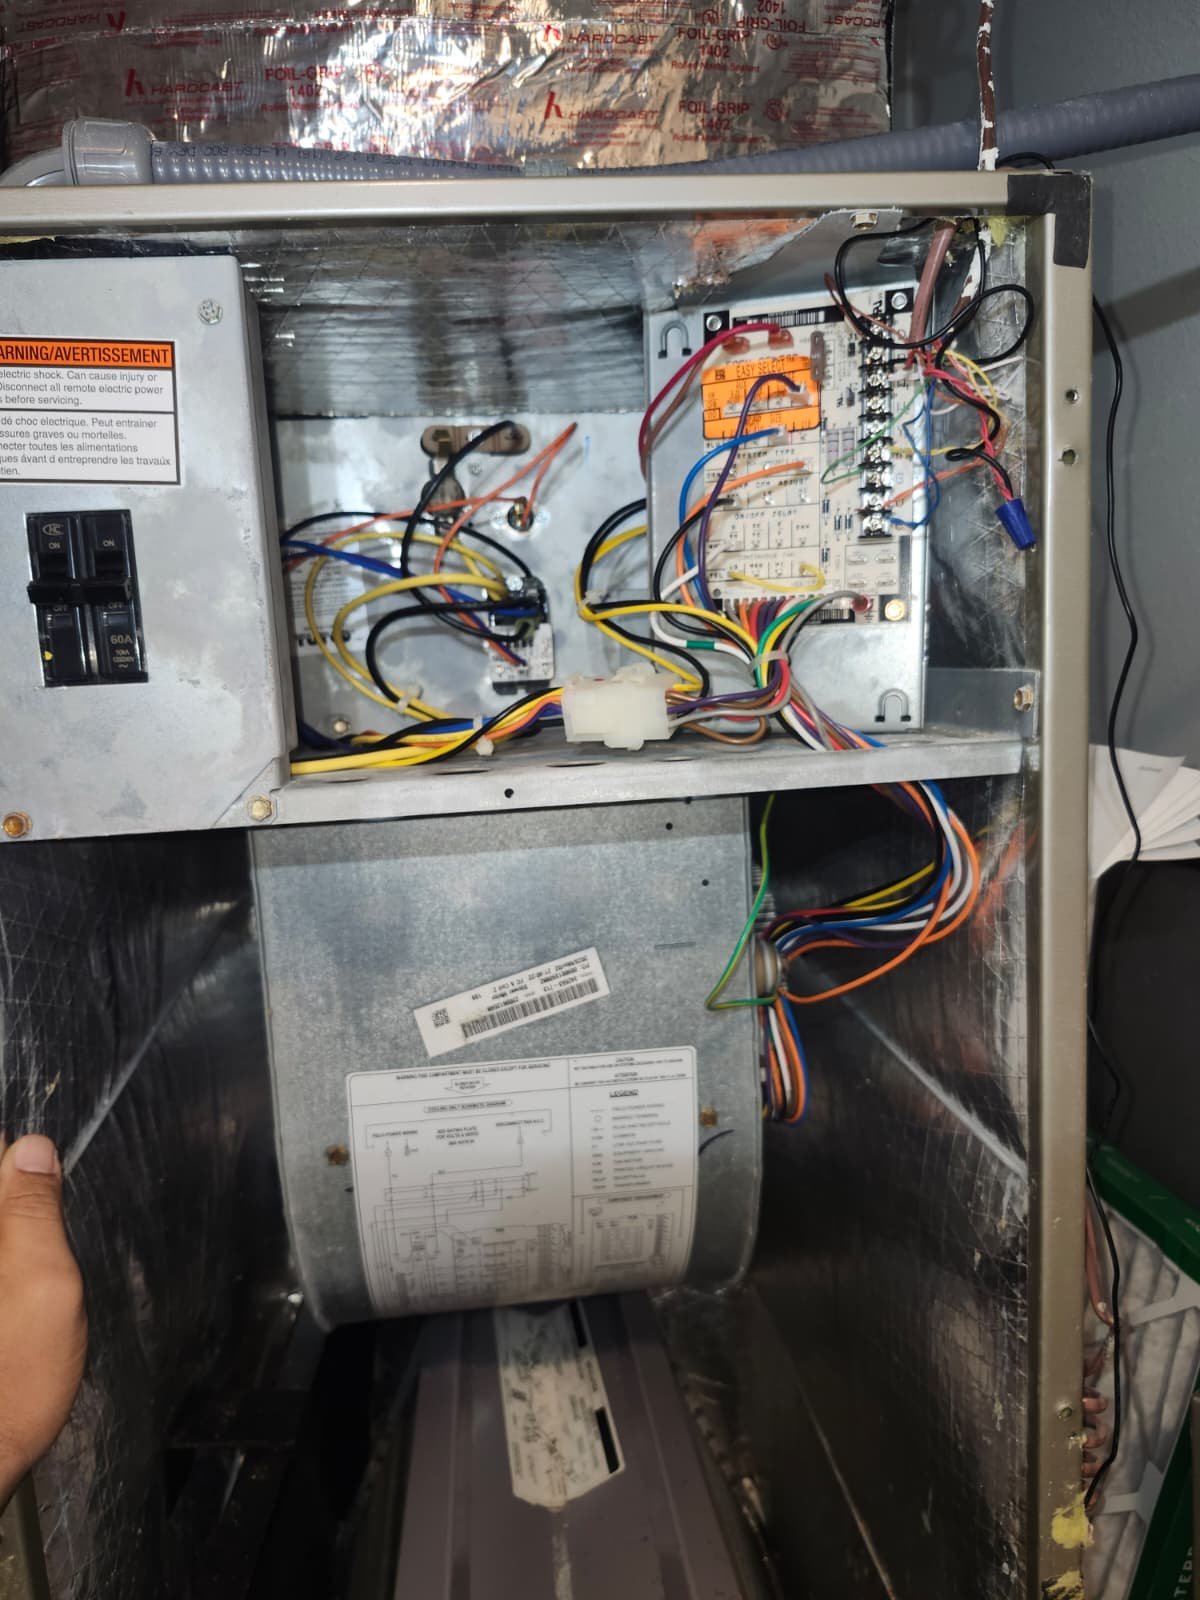
We started with a full system inspection, including:

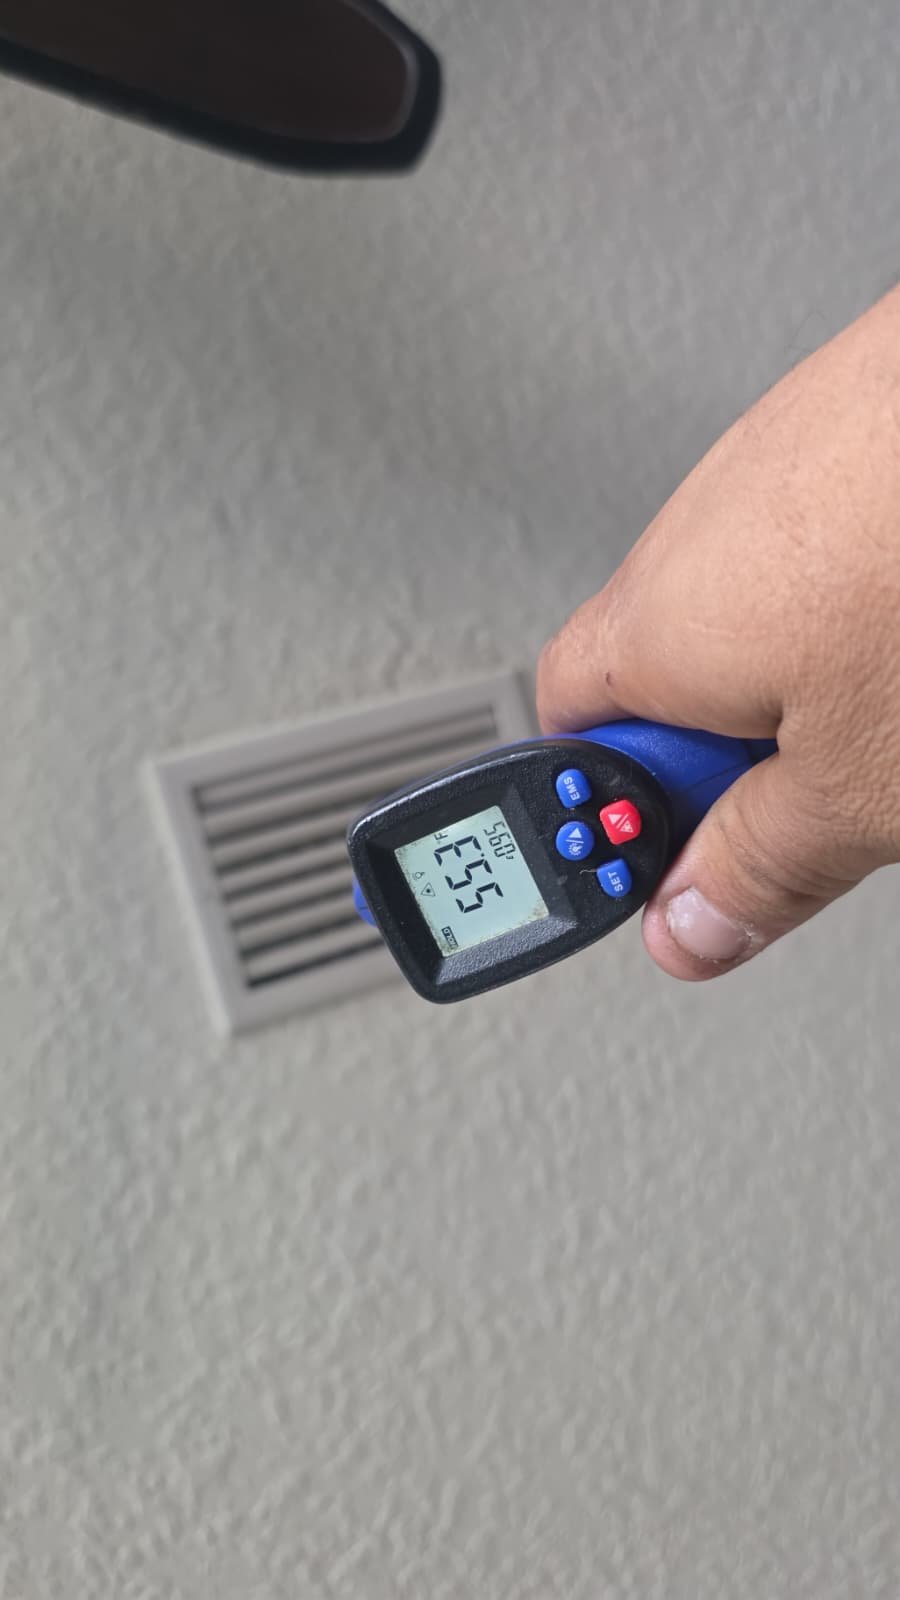
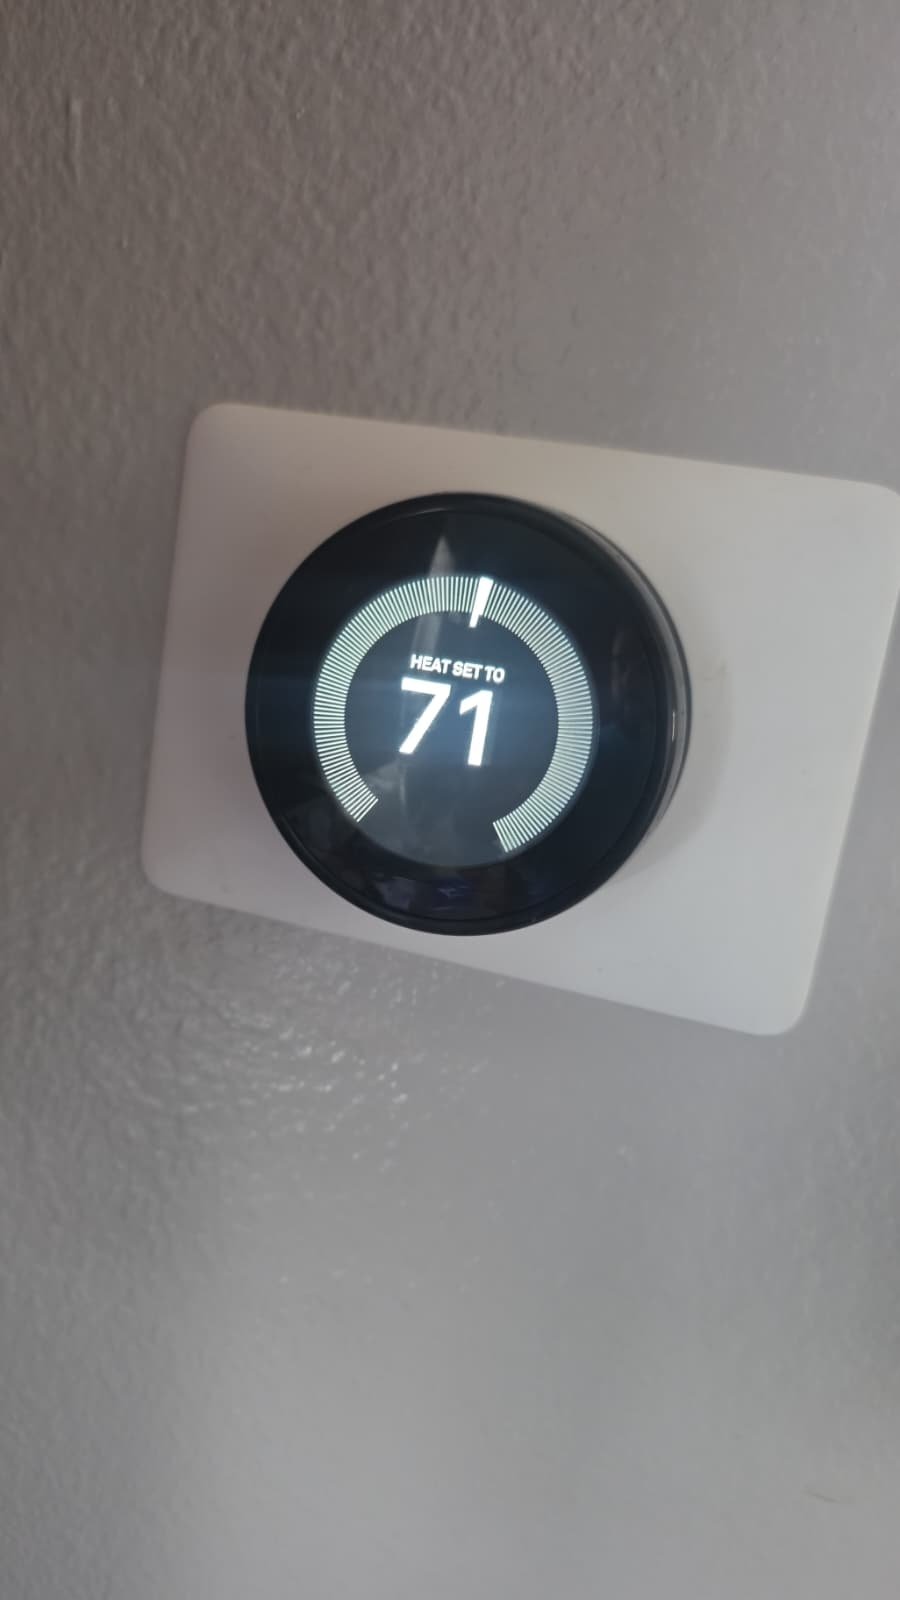
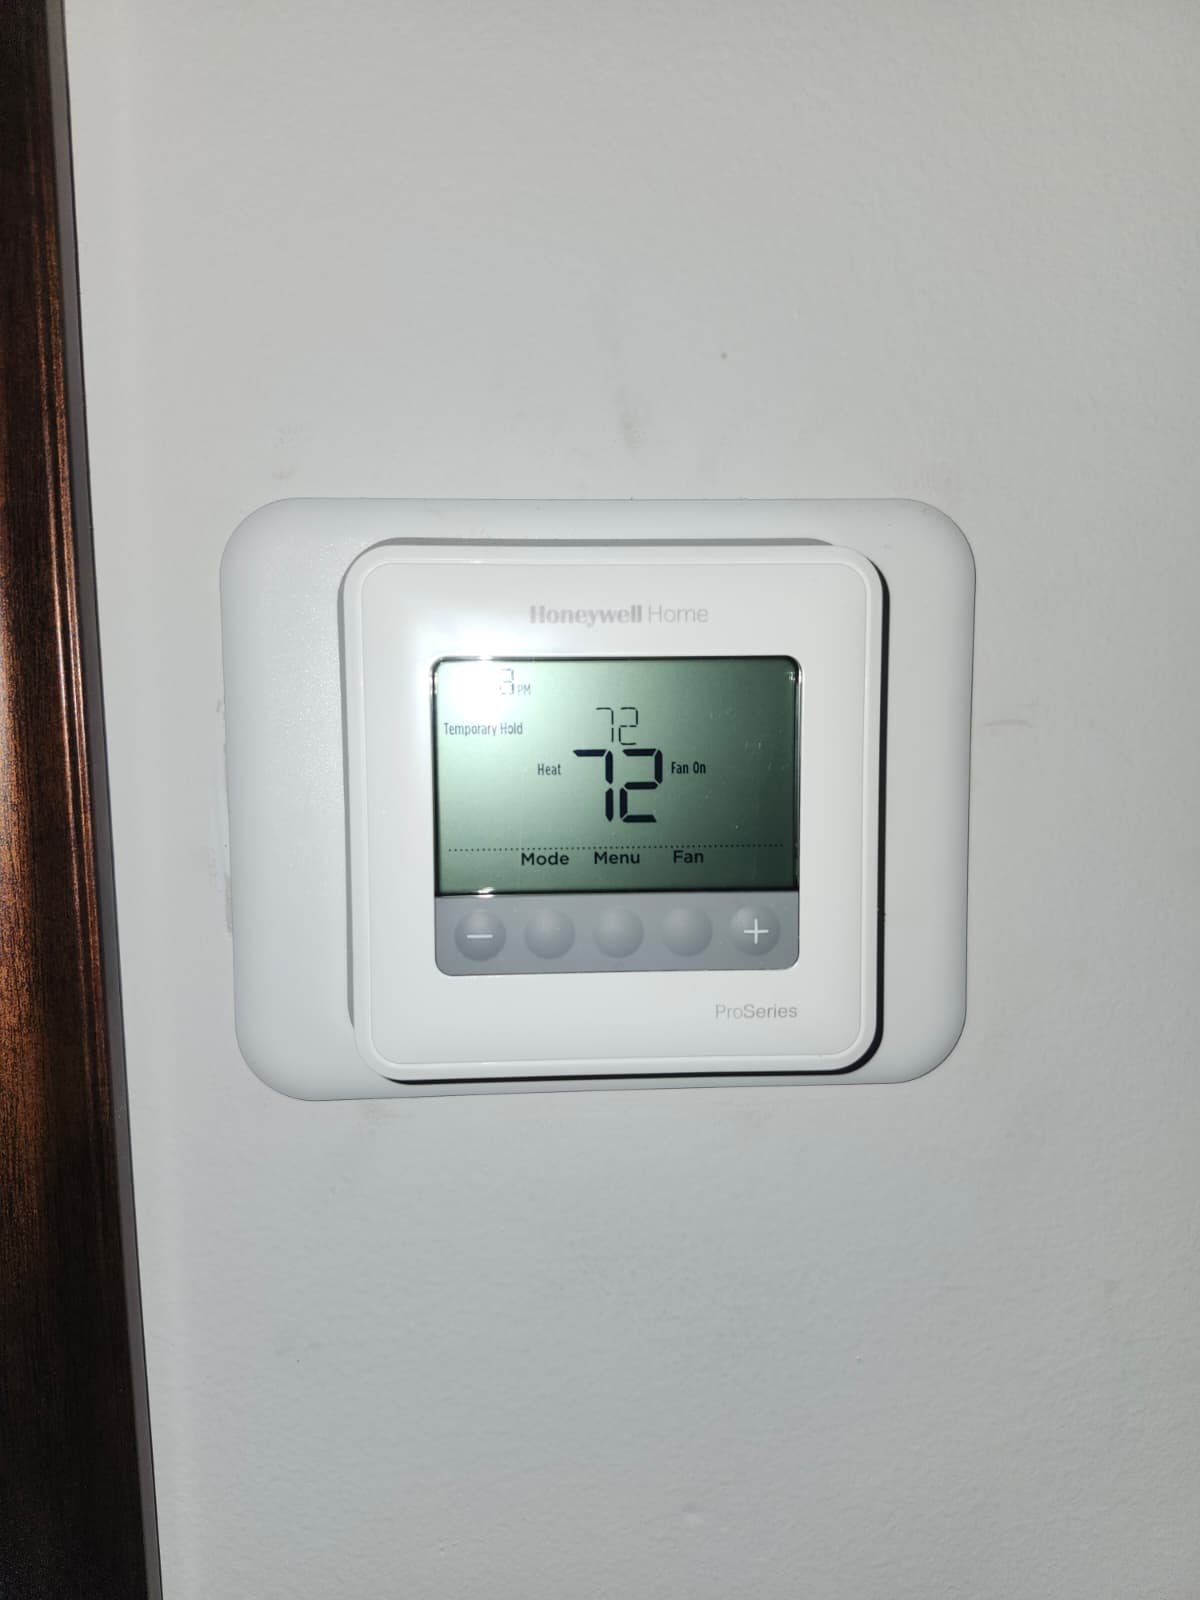
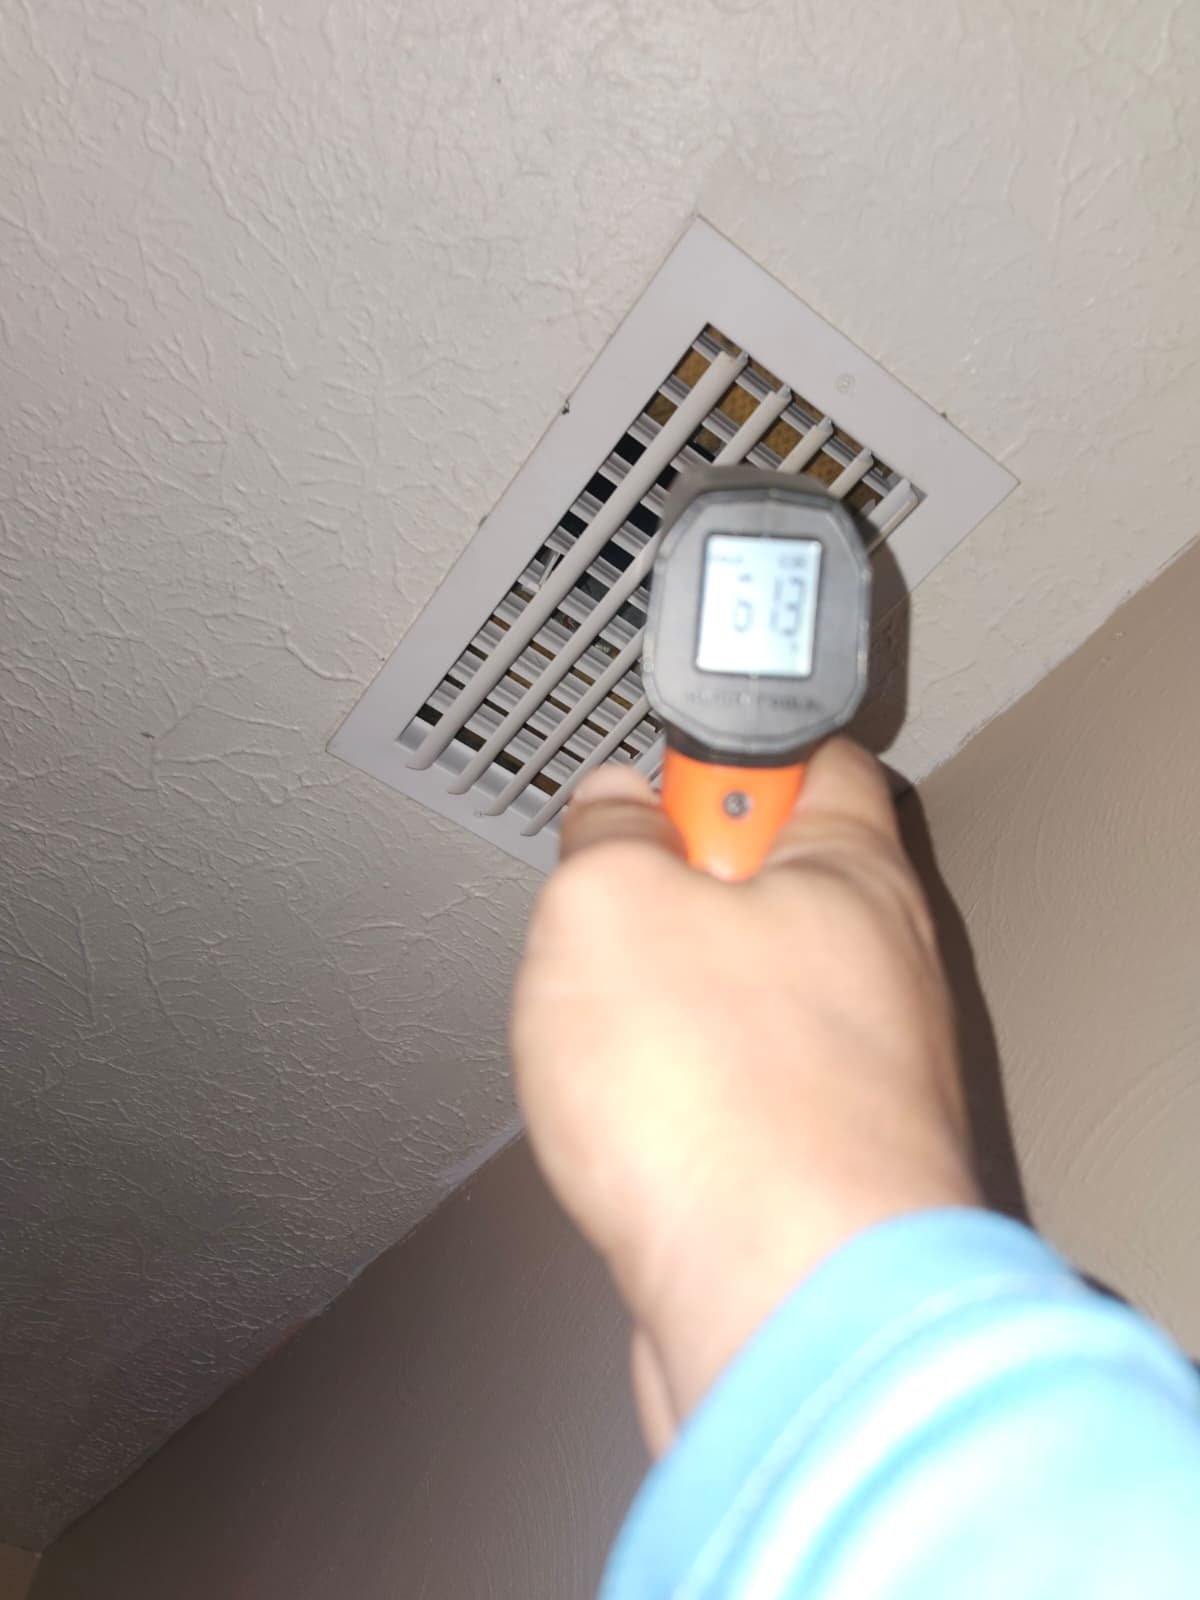
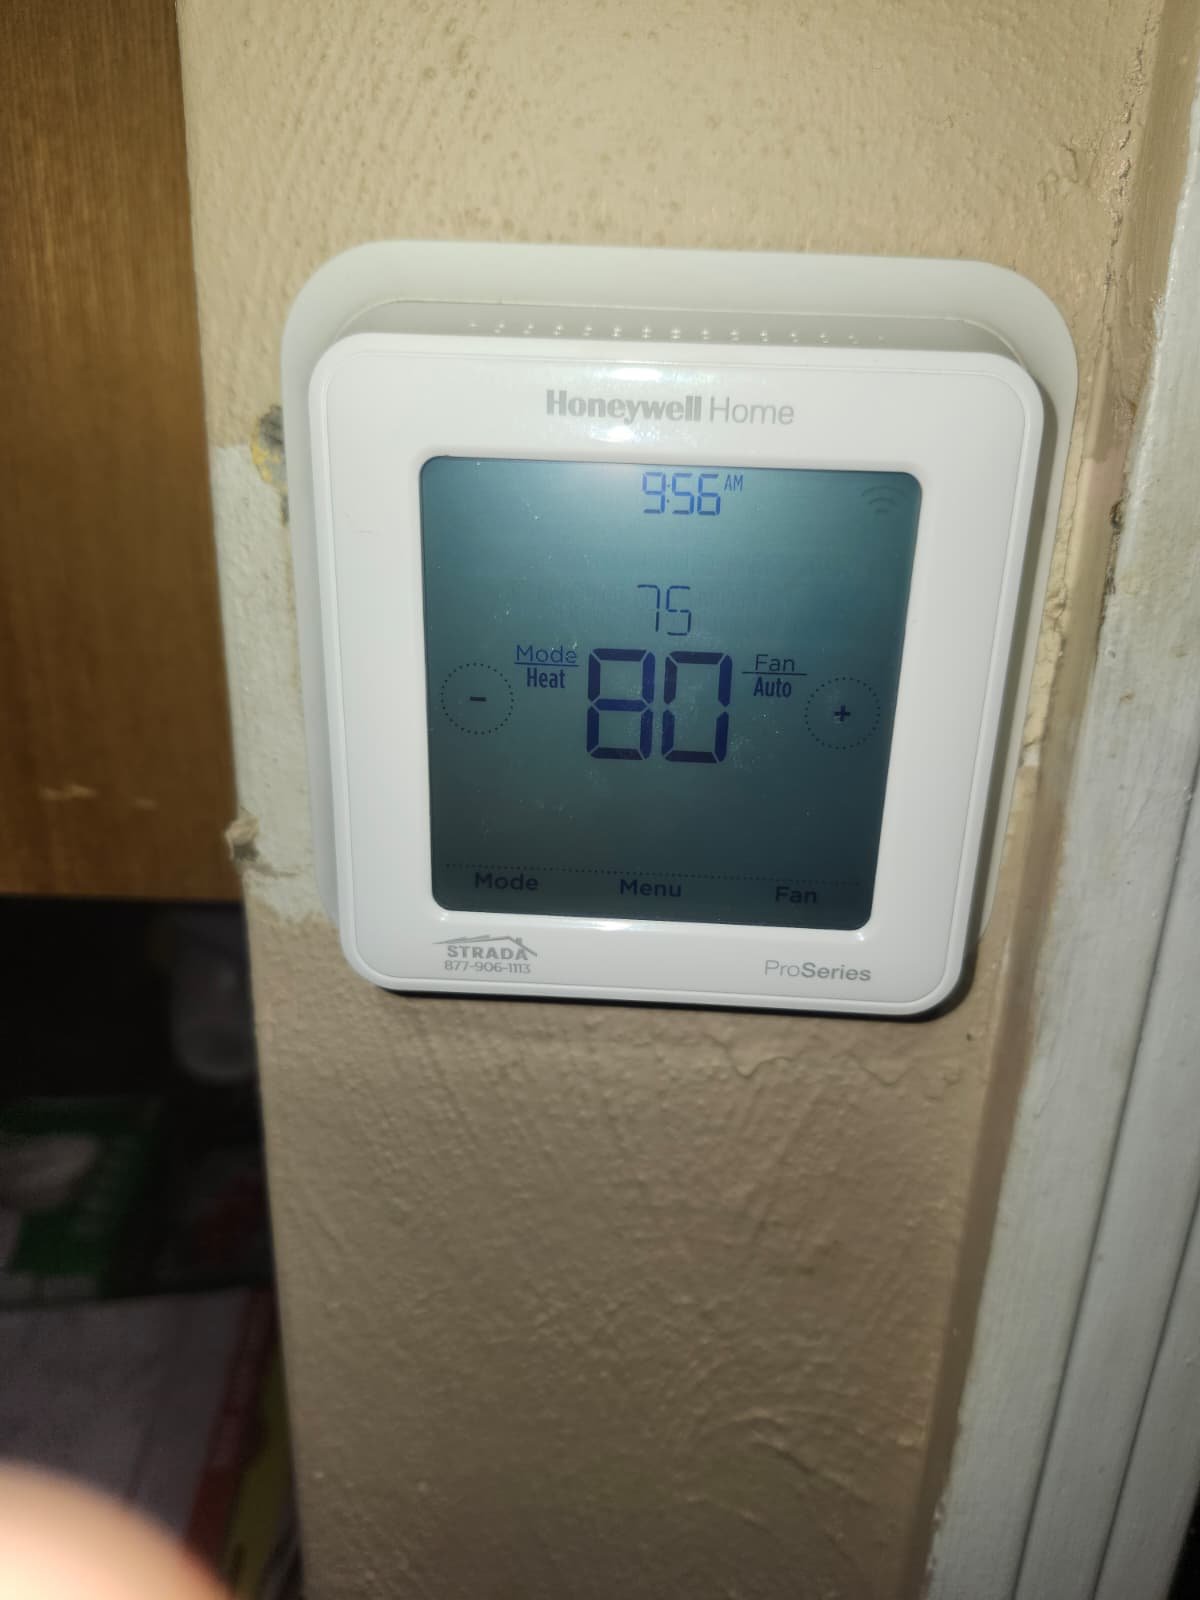
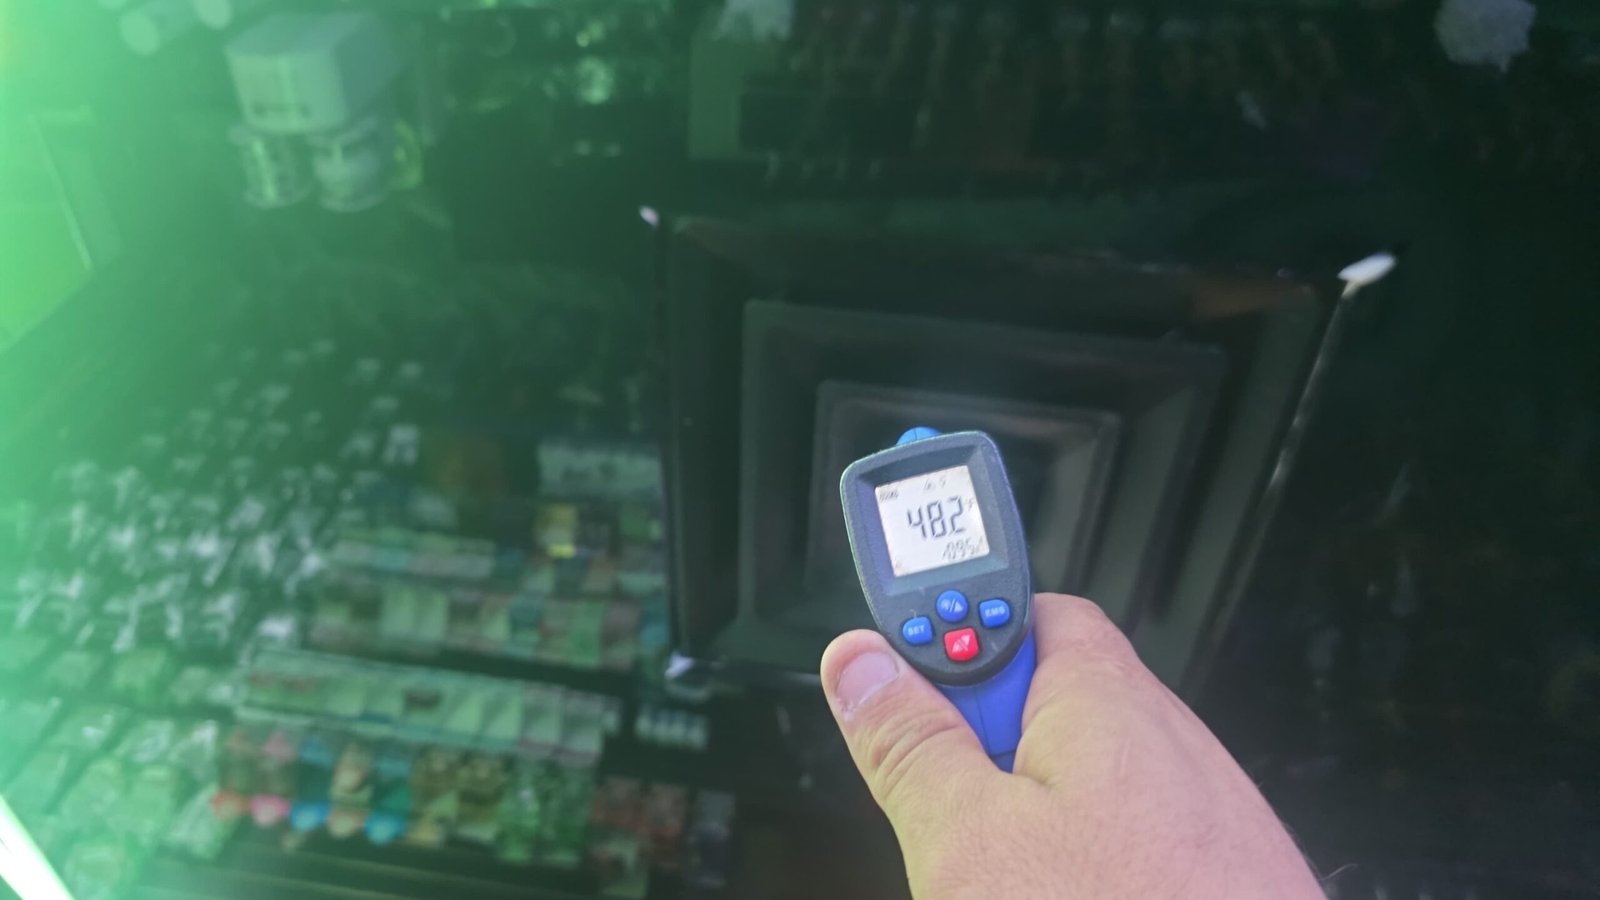
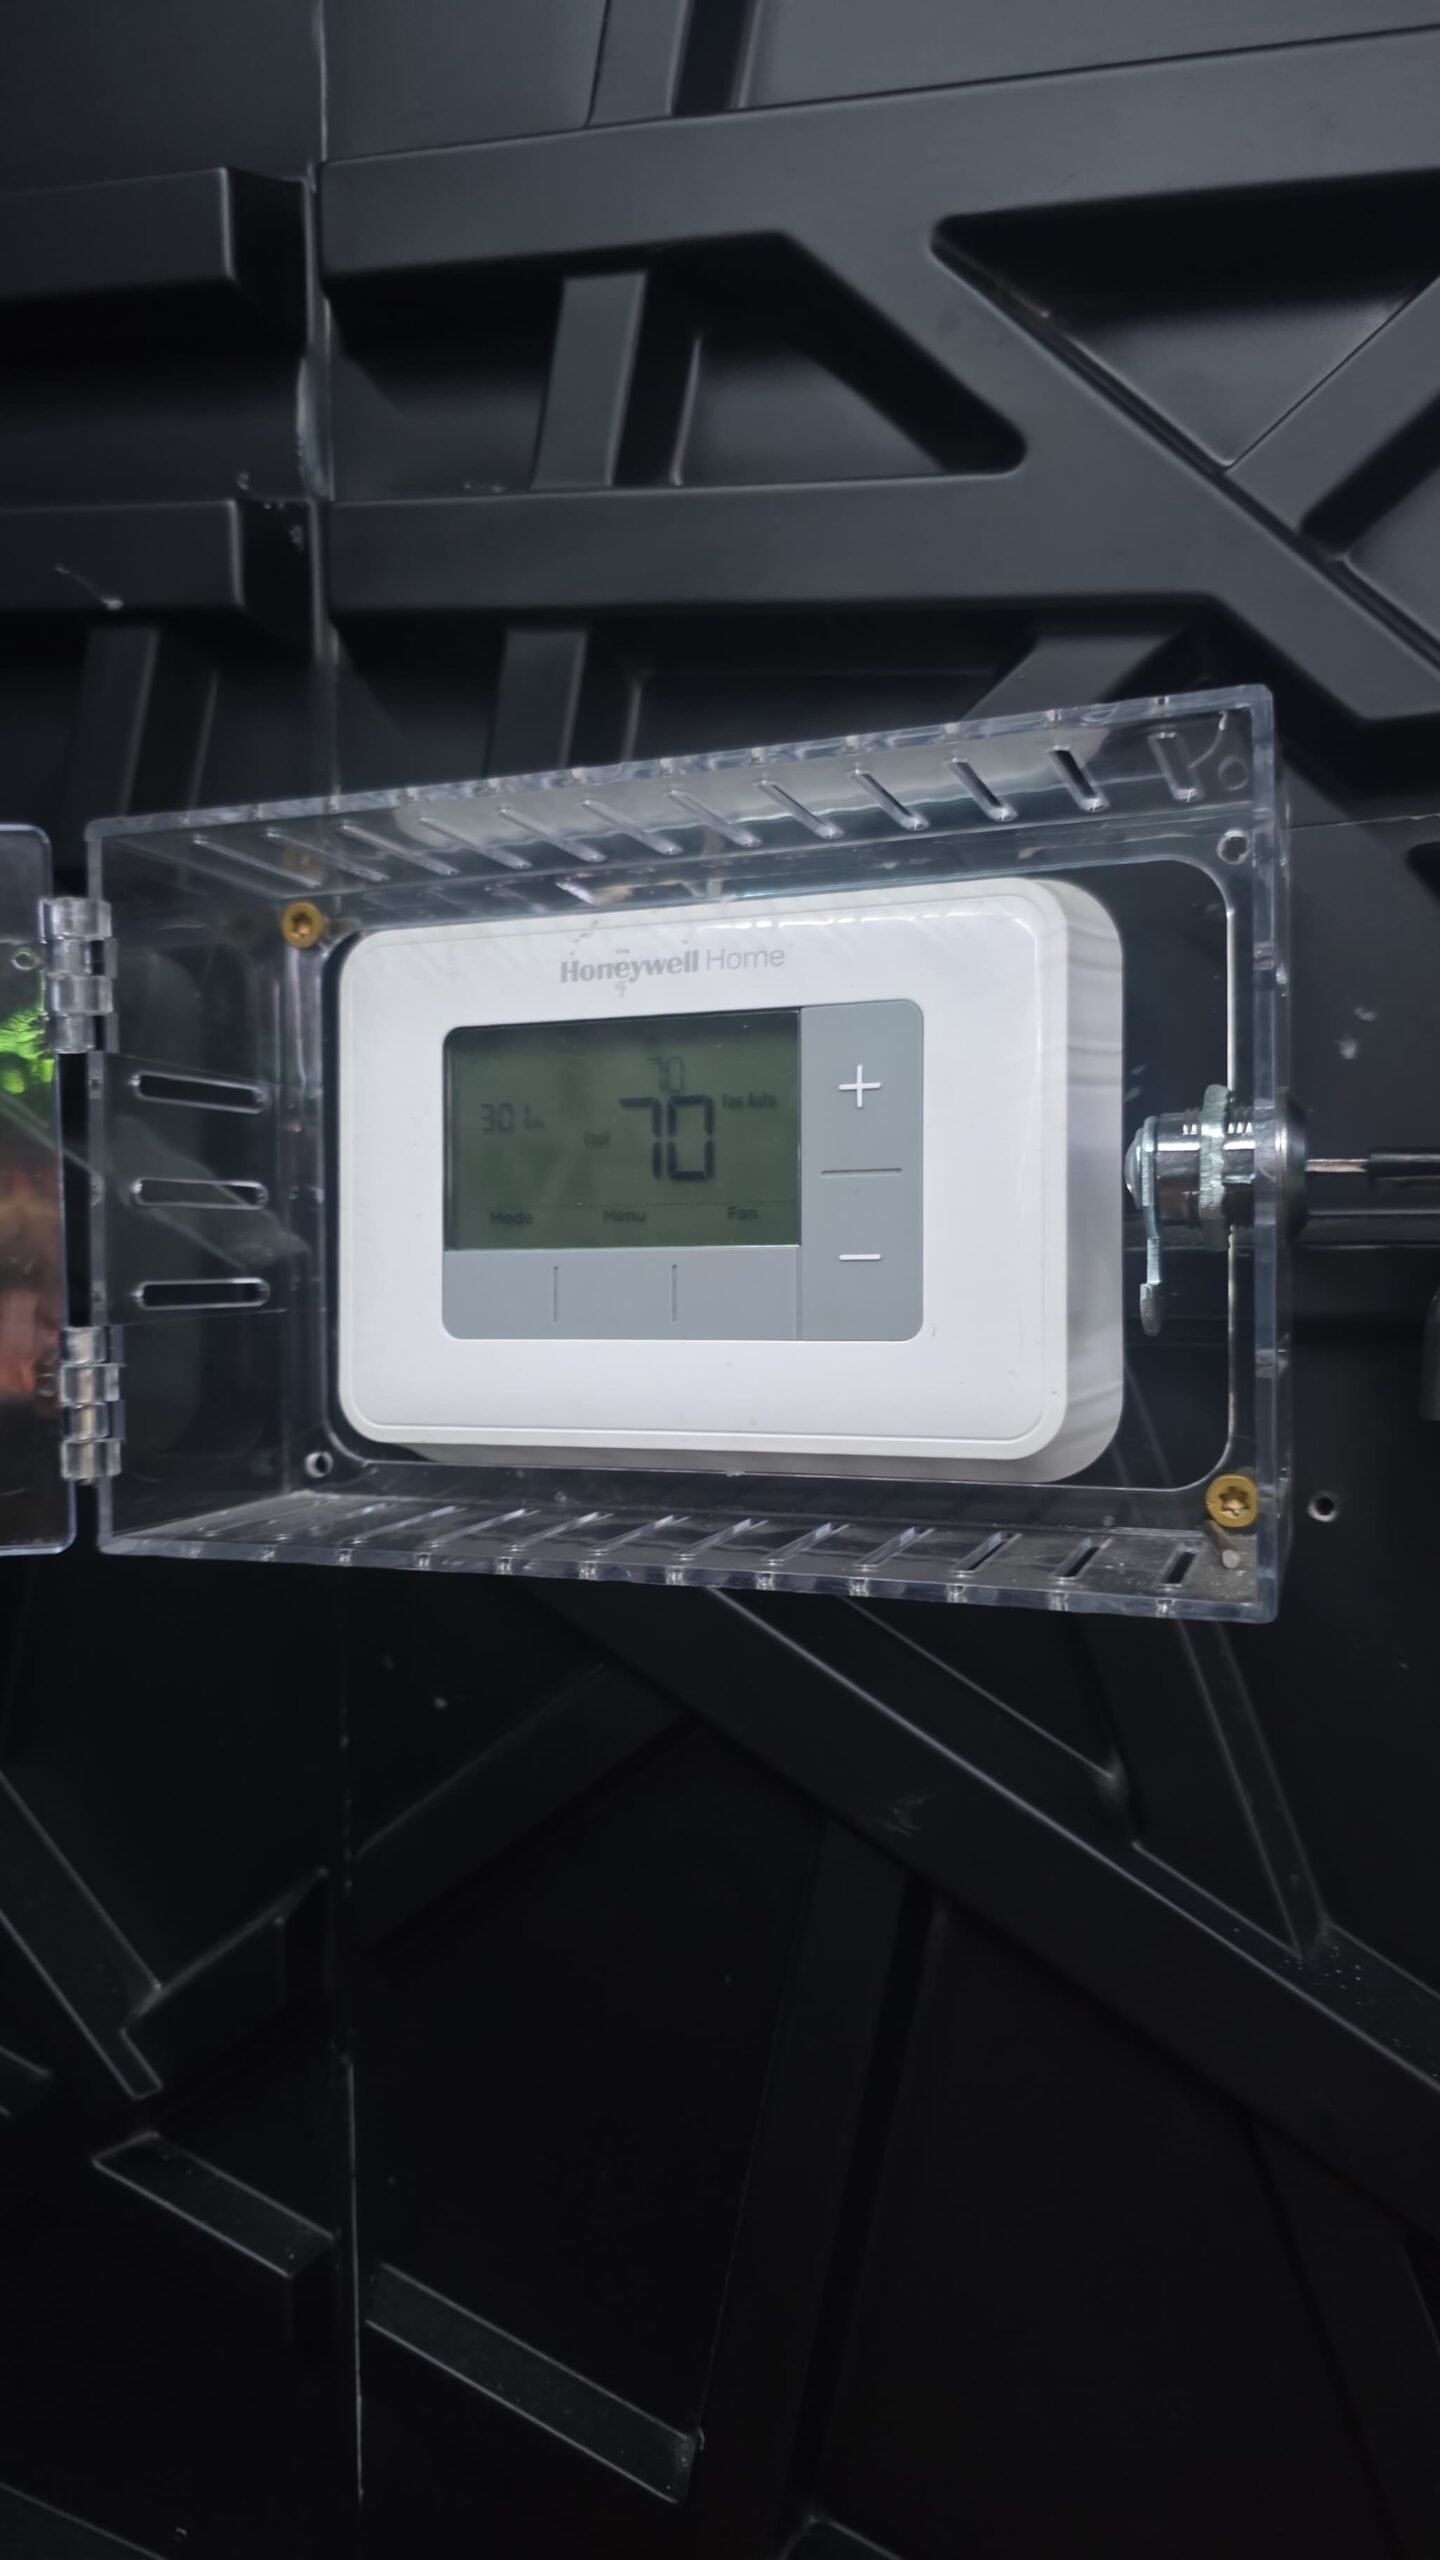
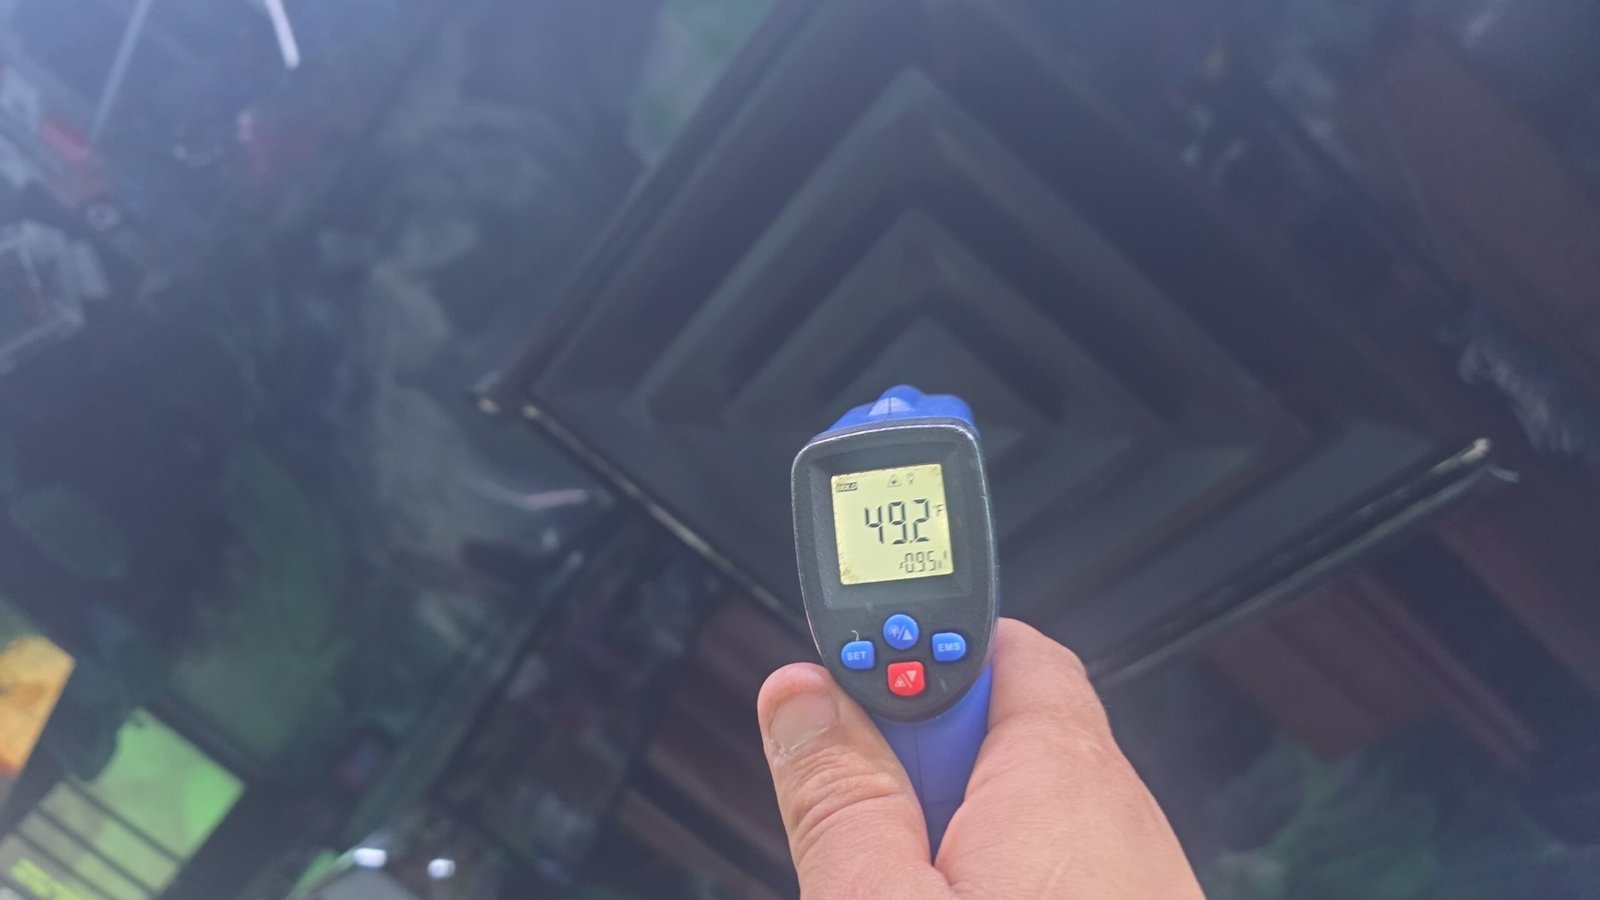
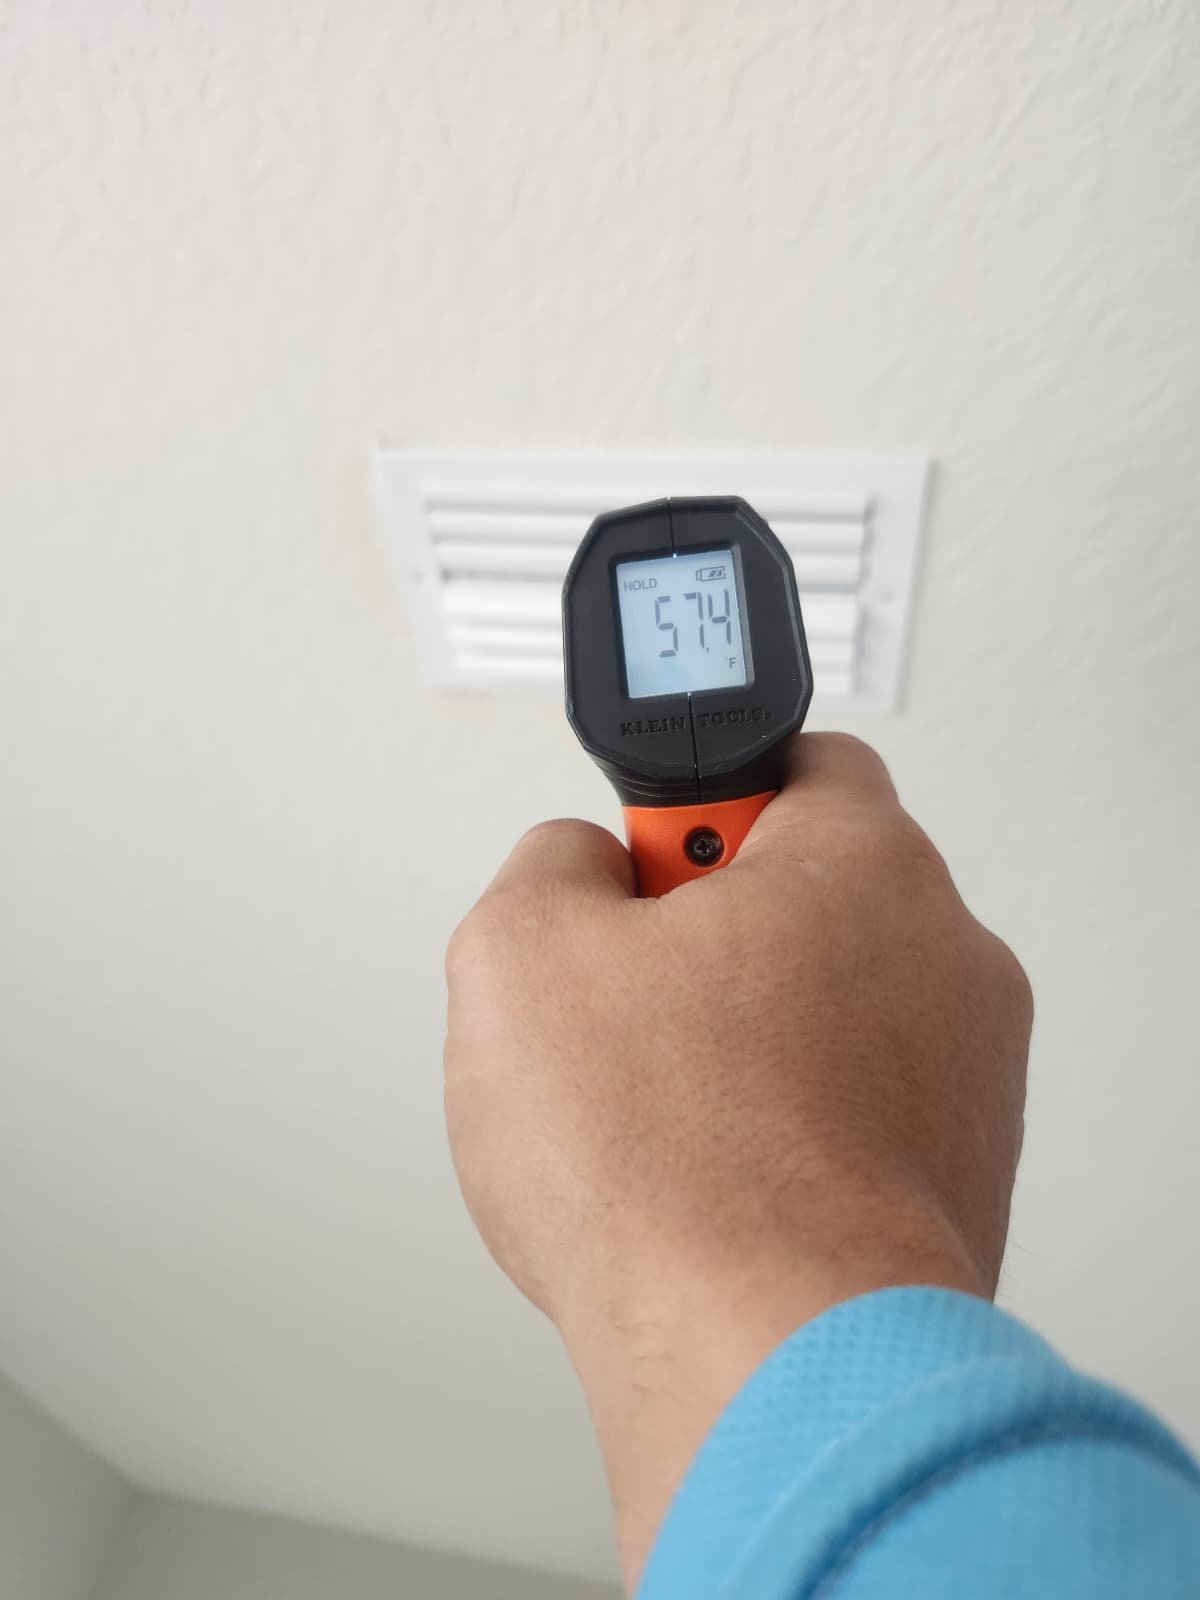
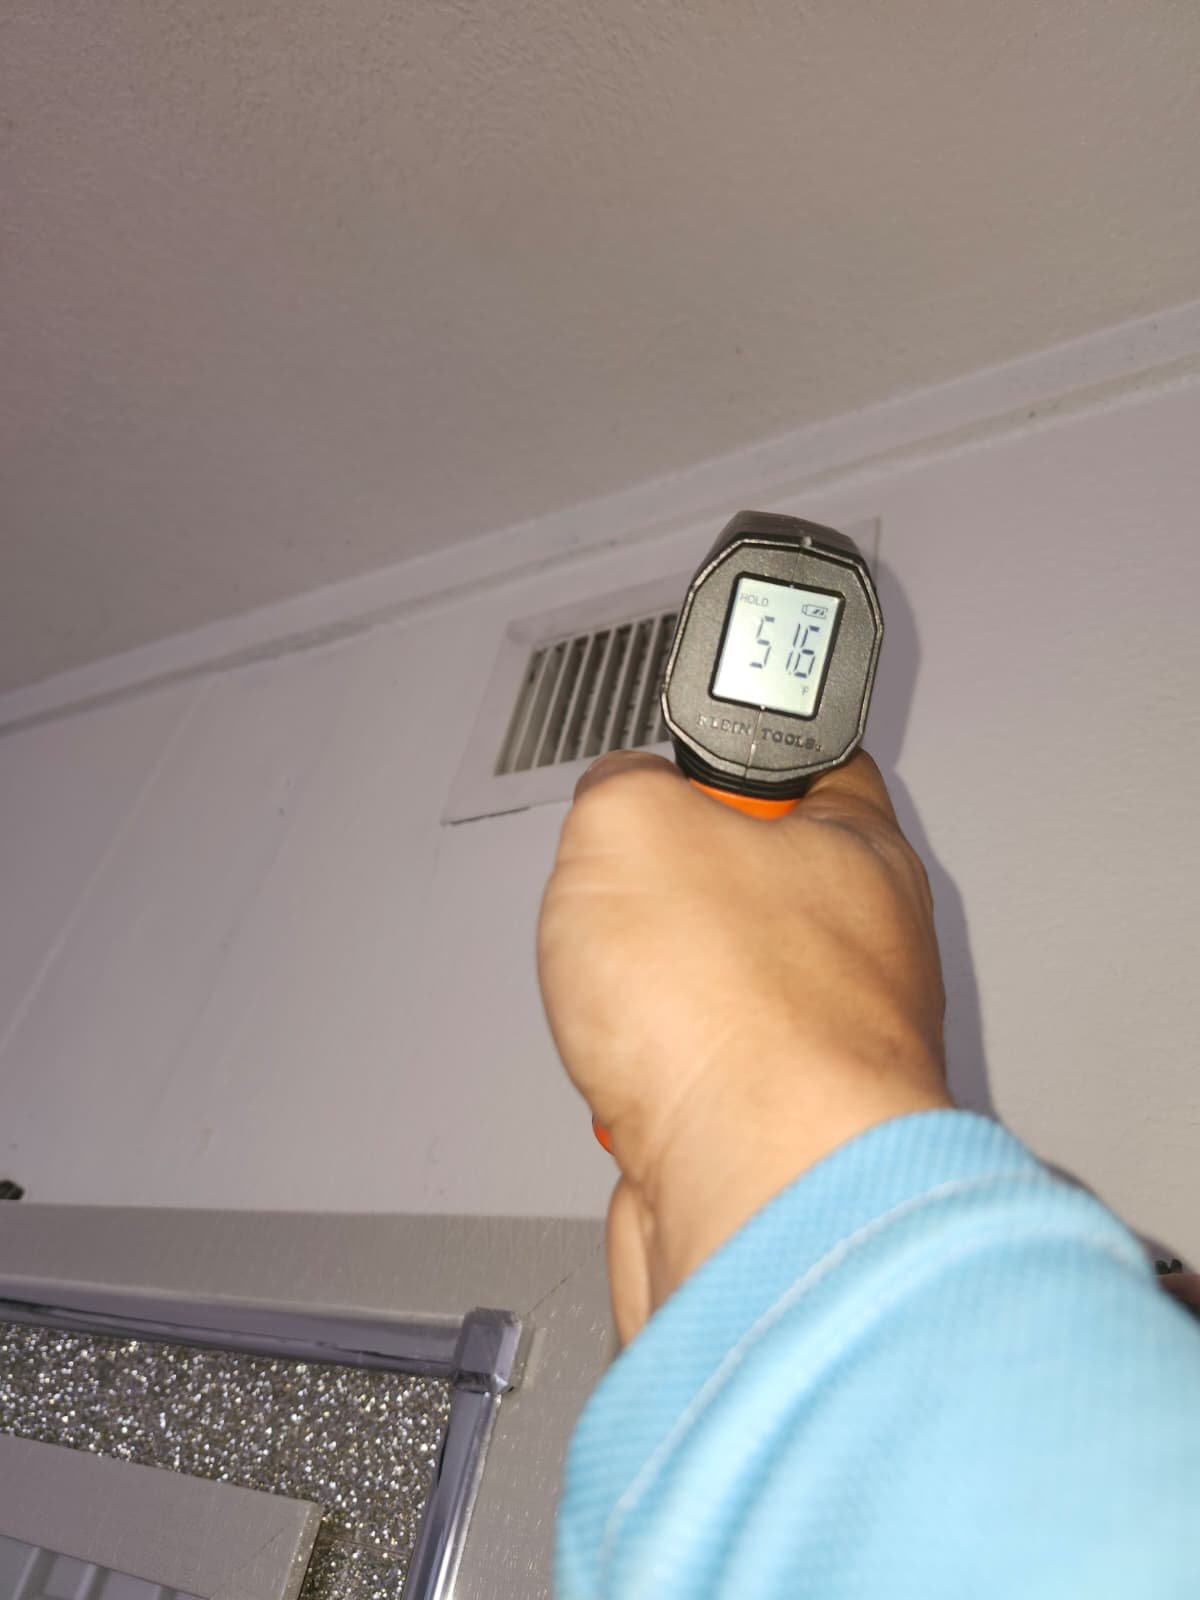
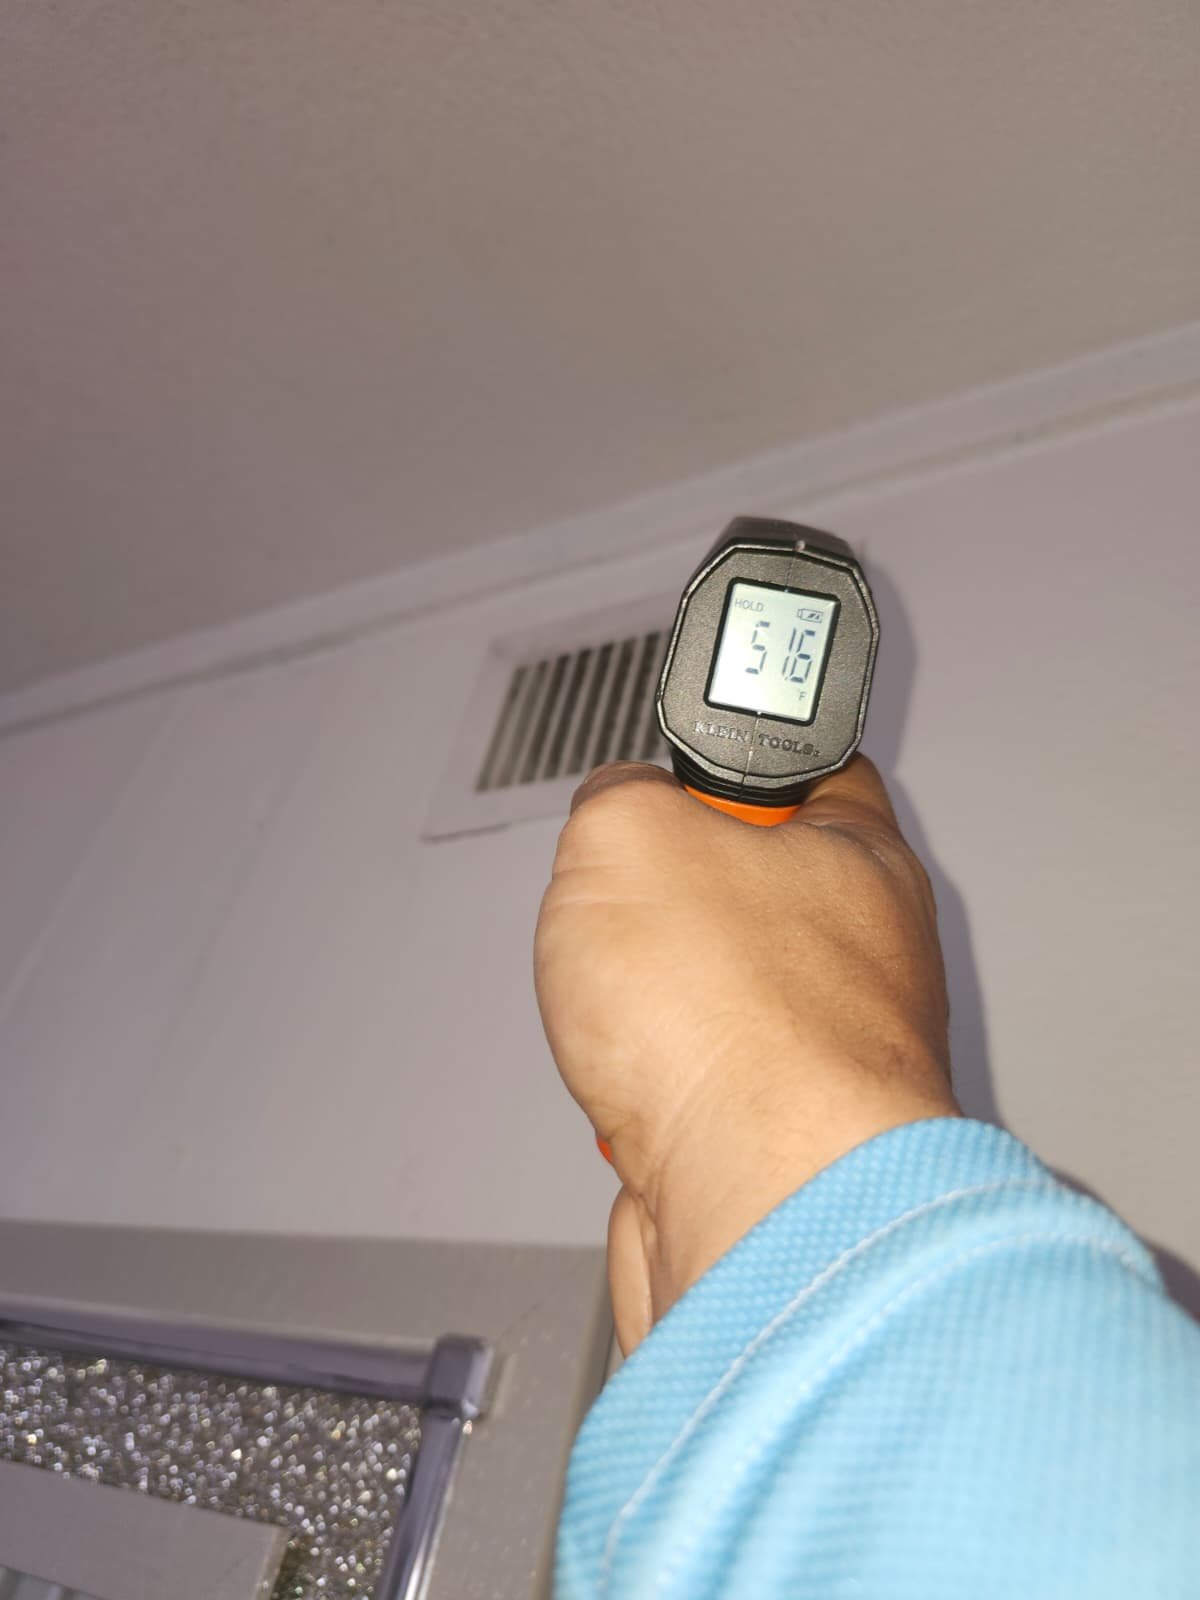
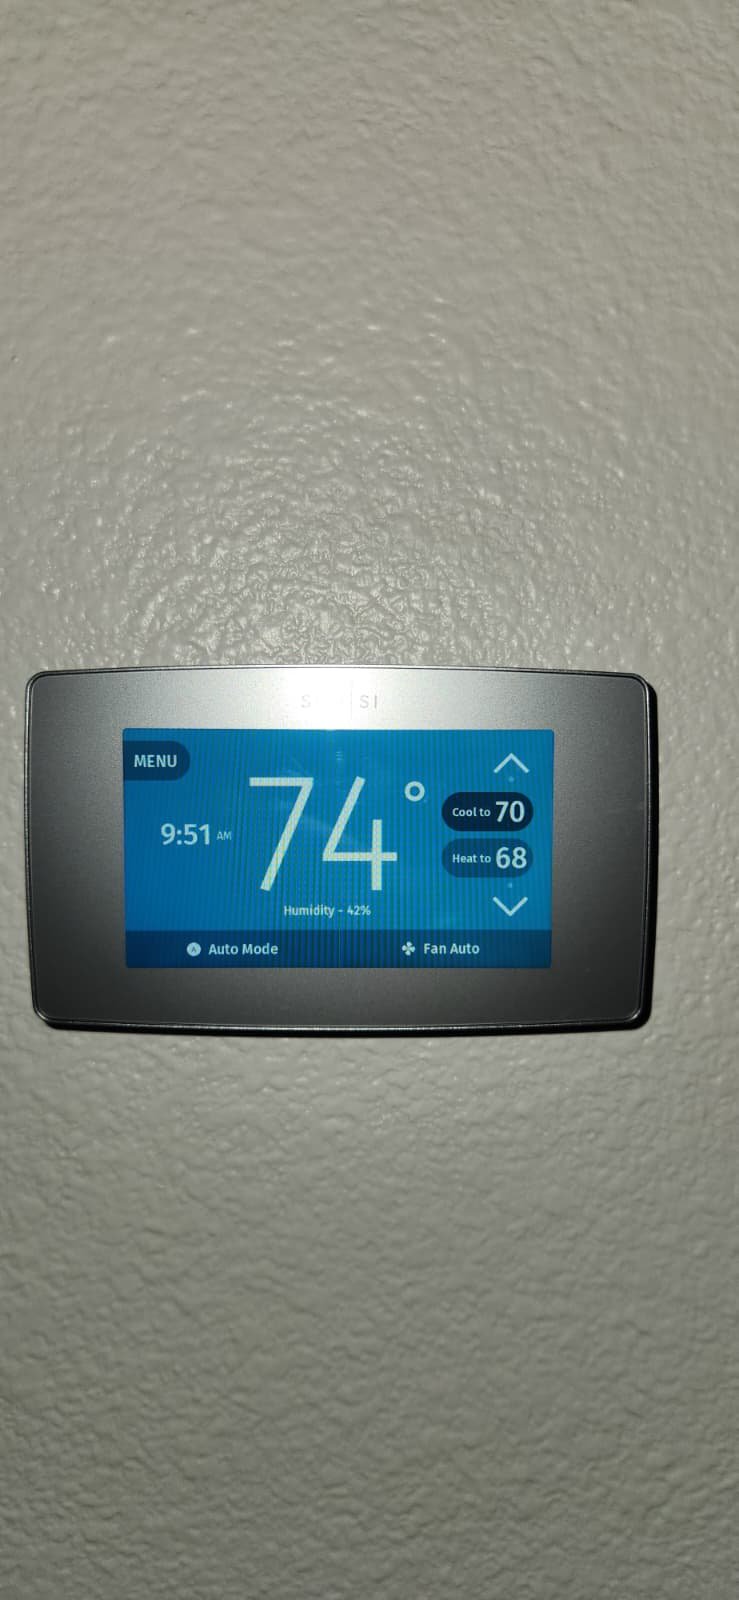
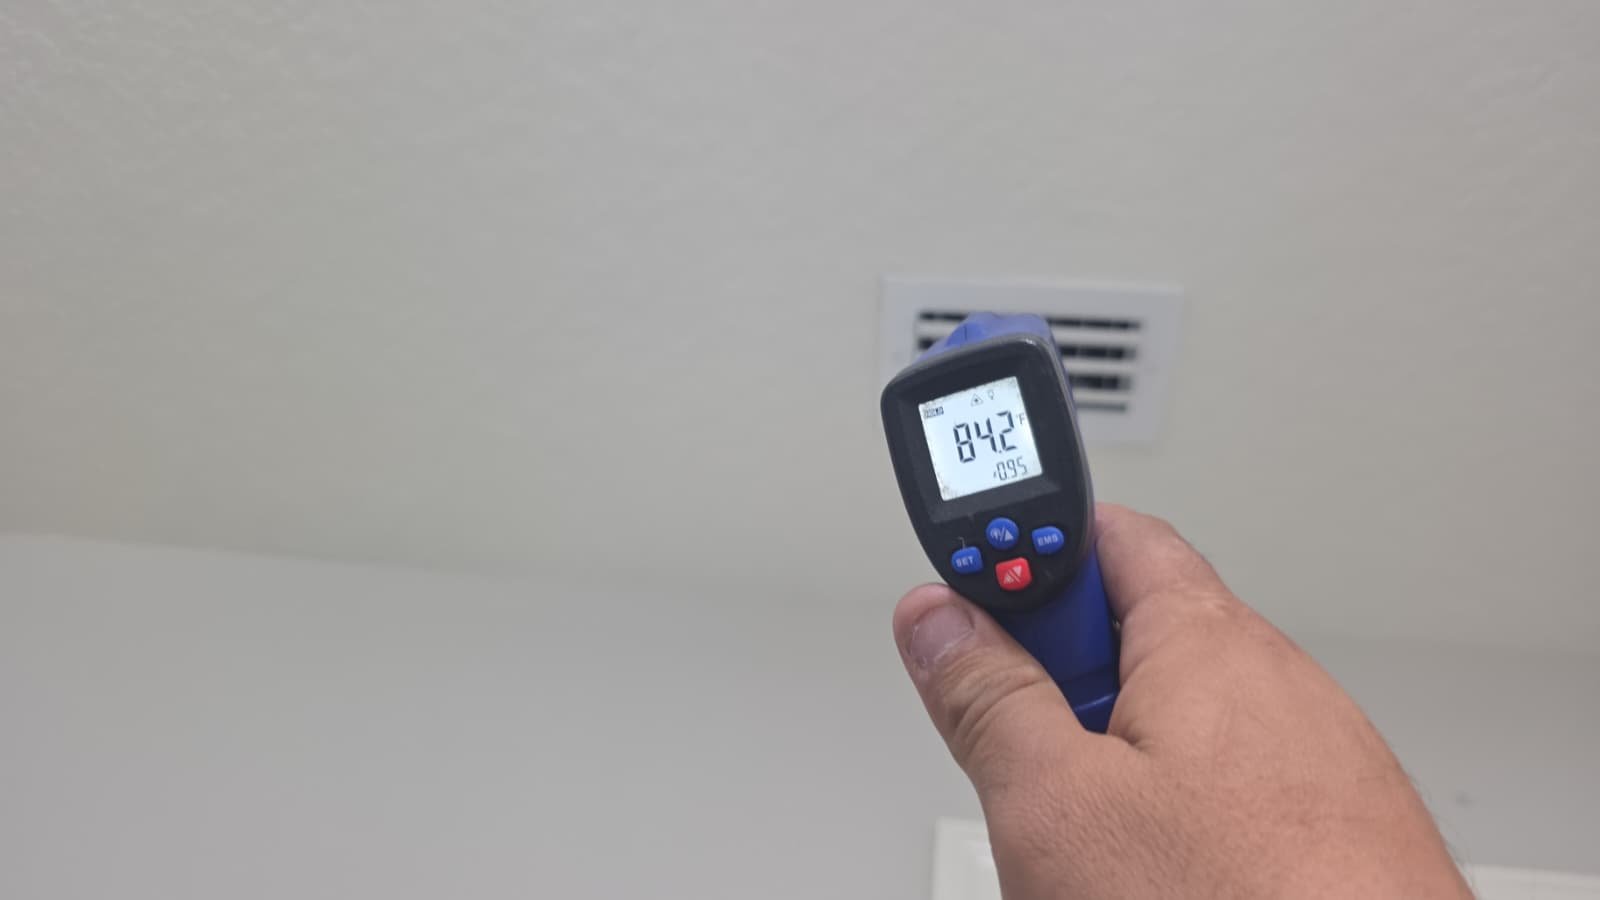
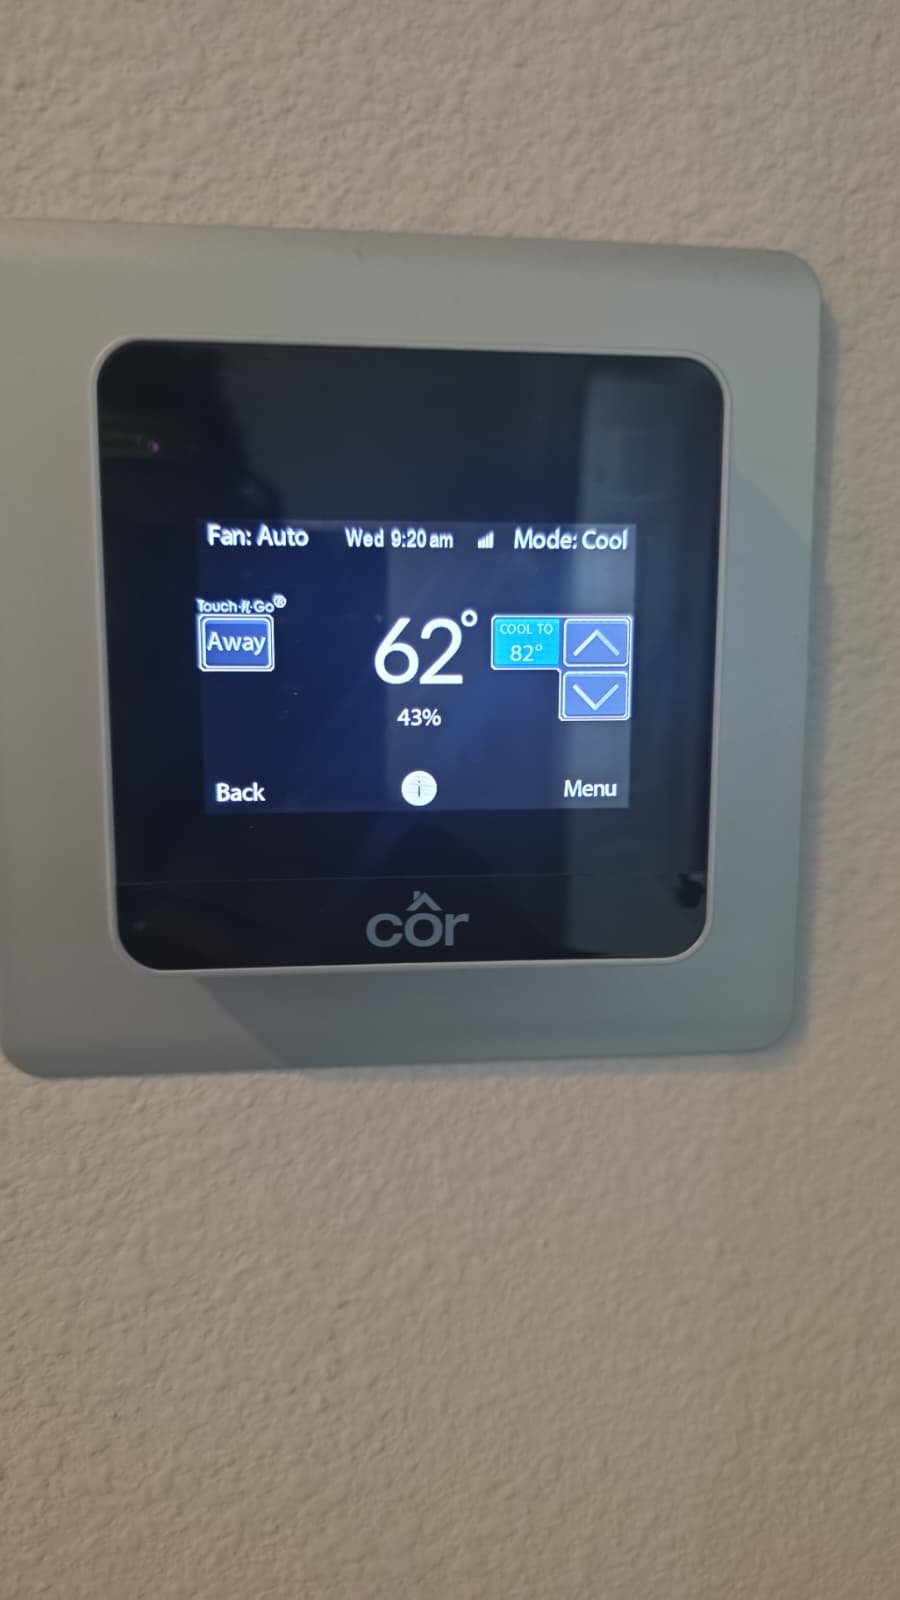
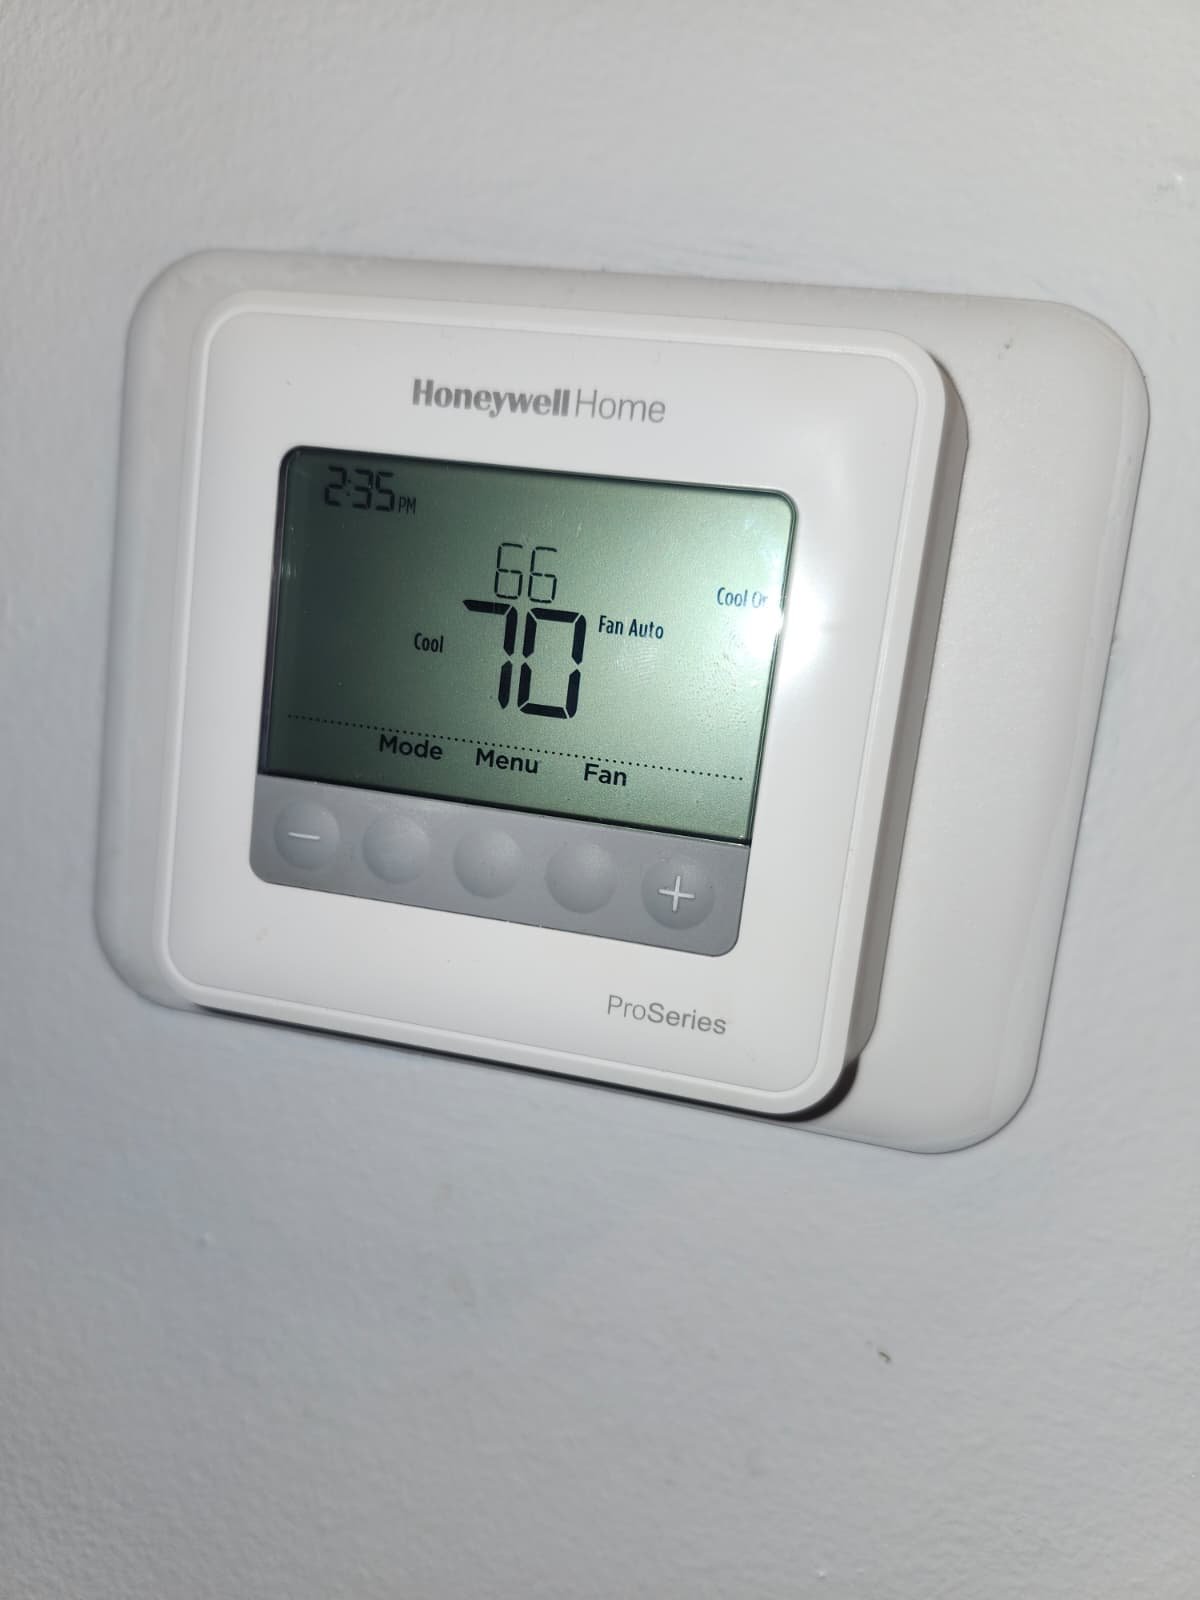
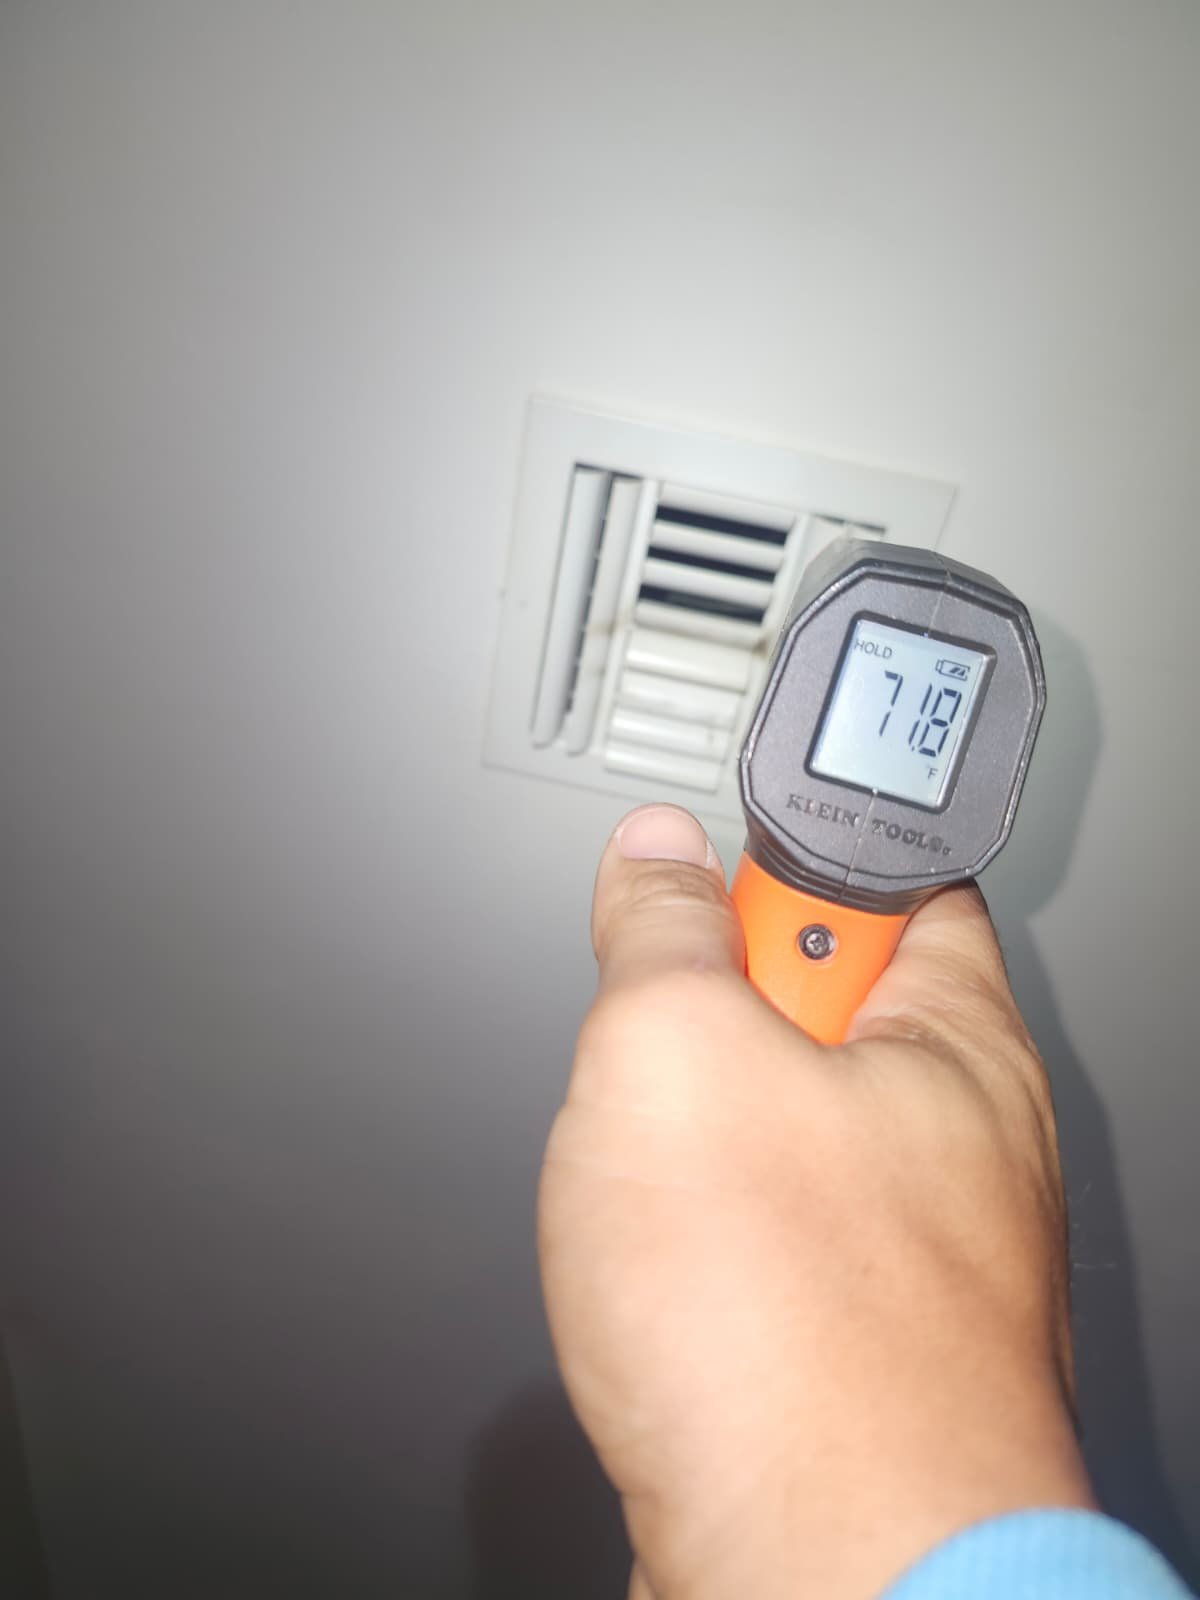
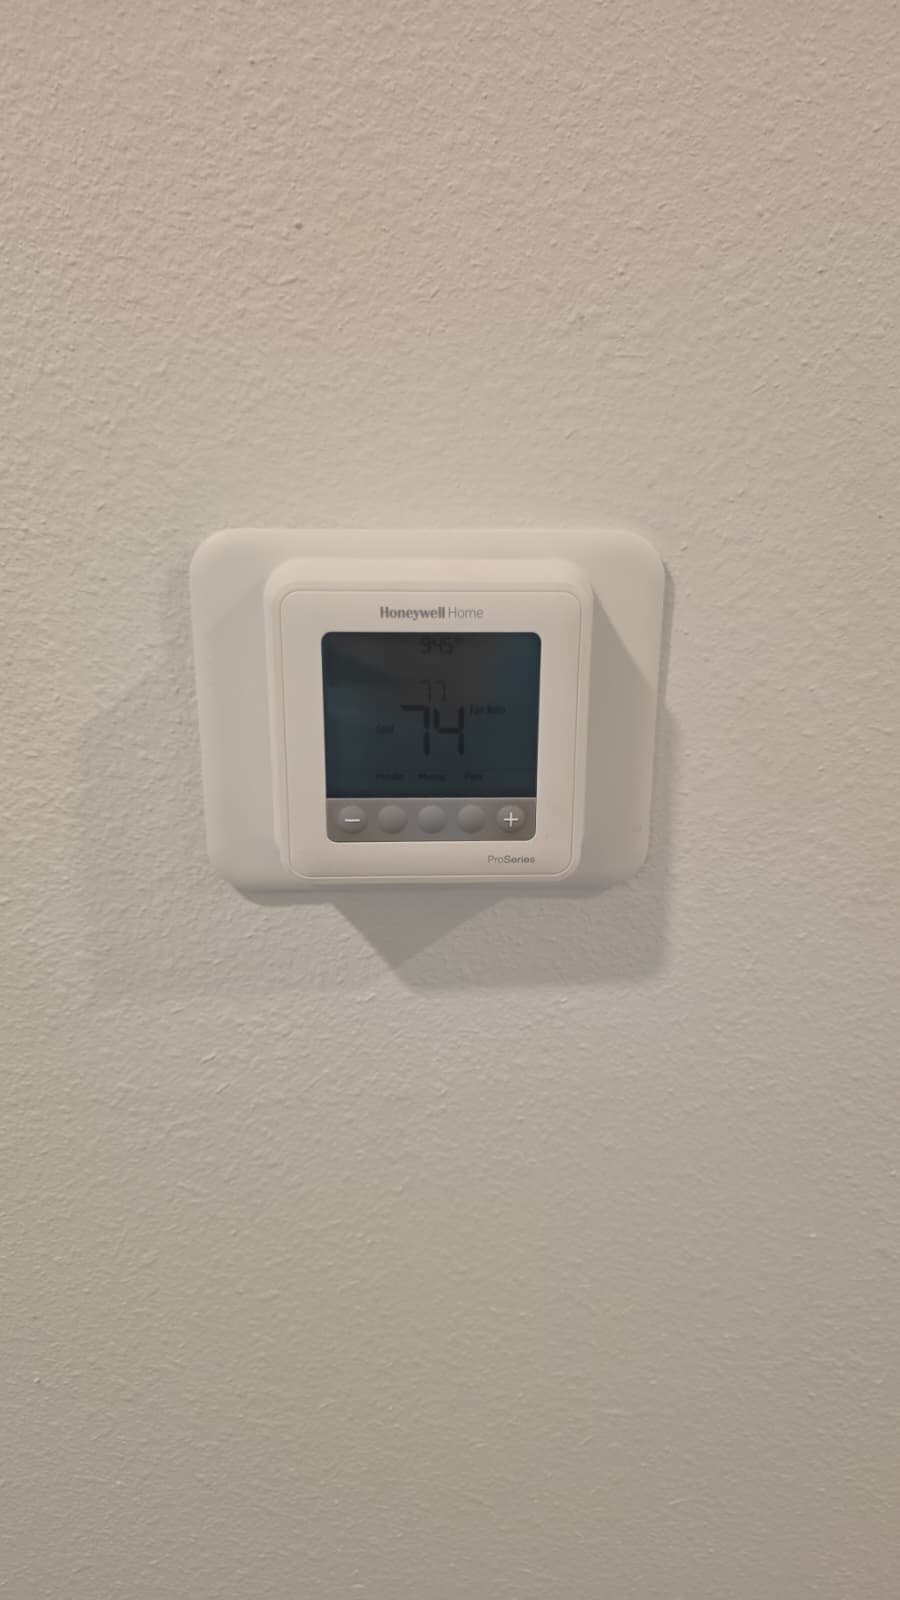
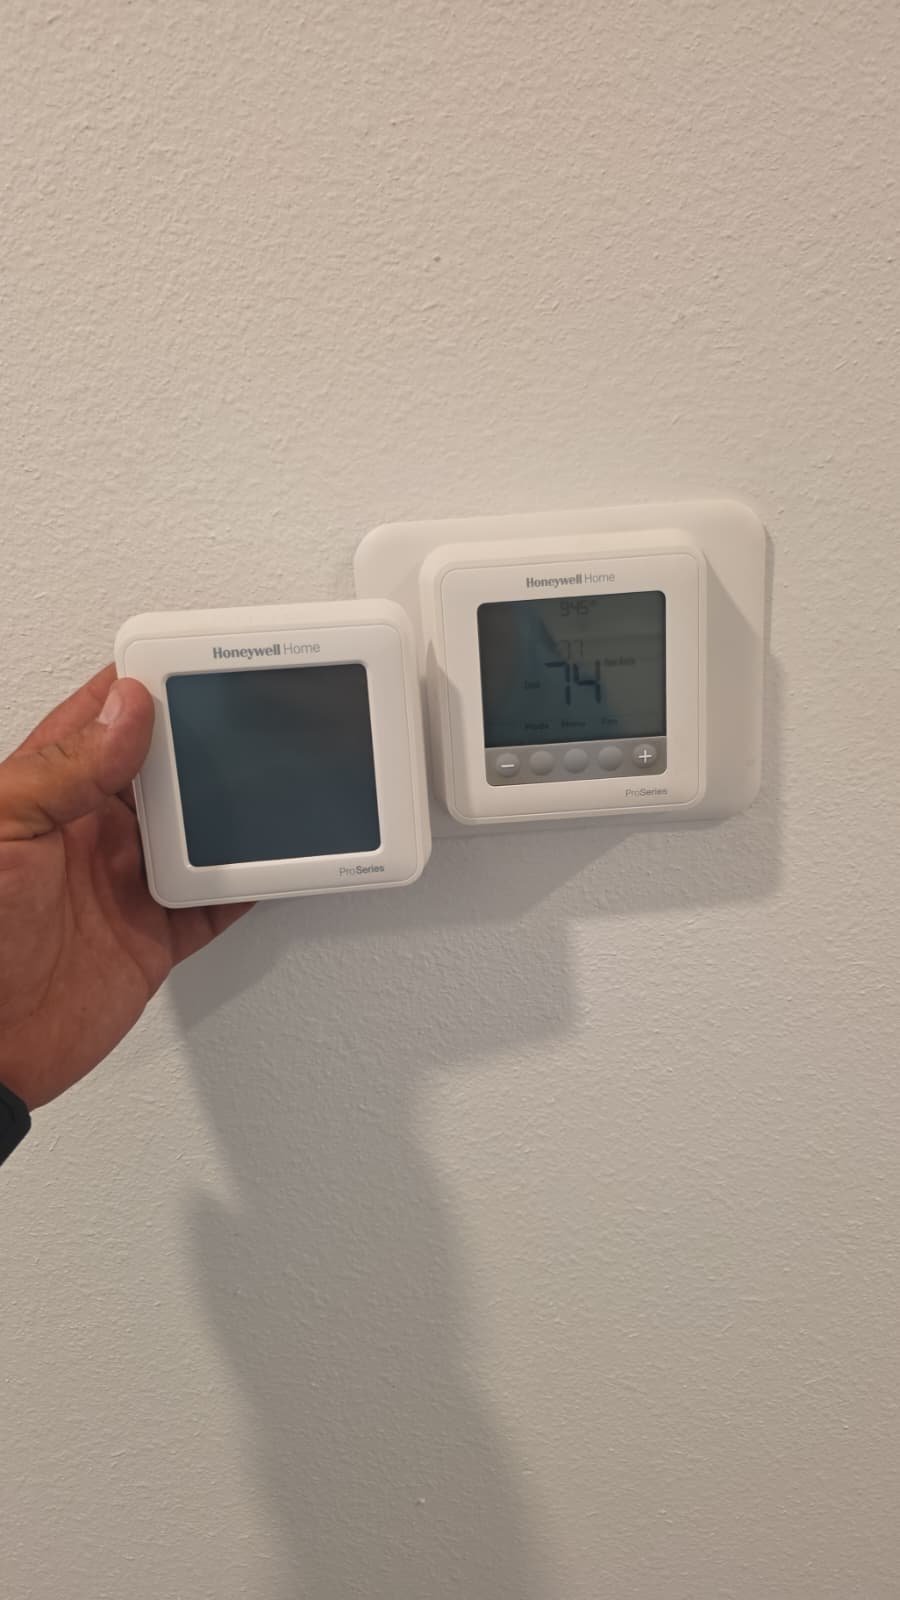
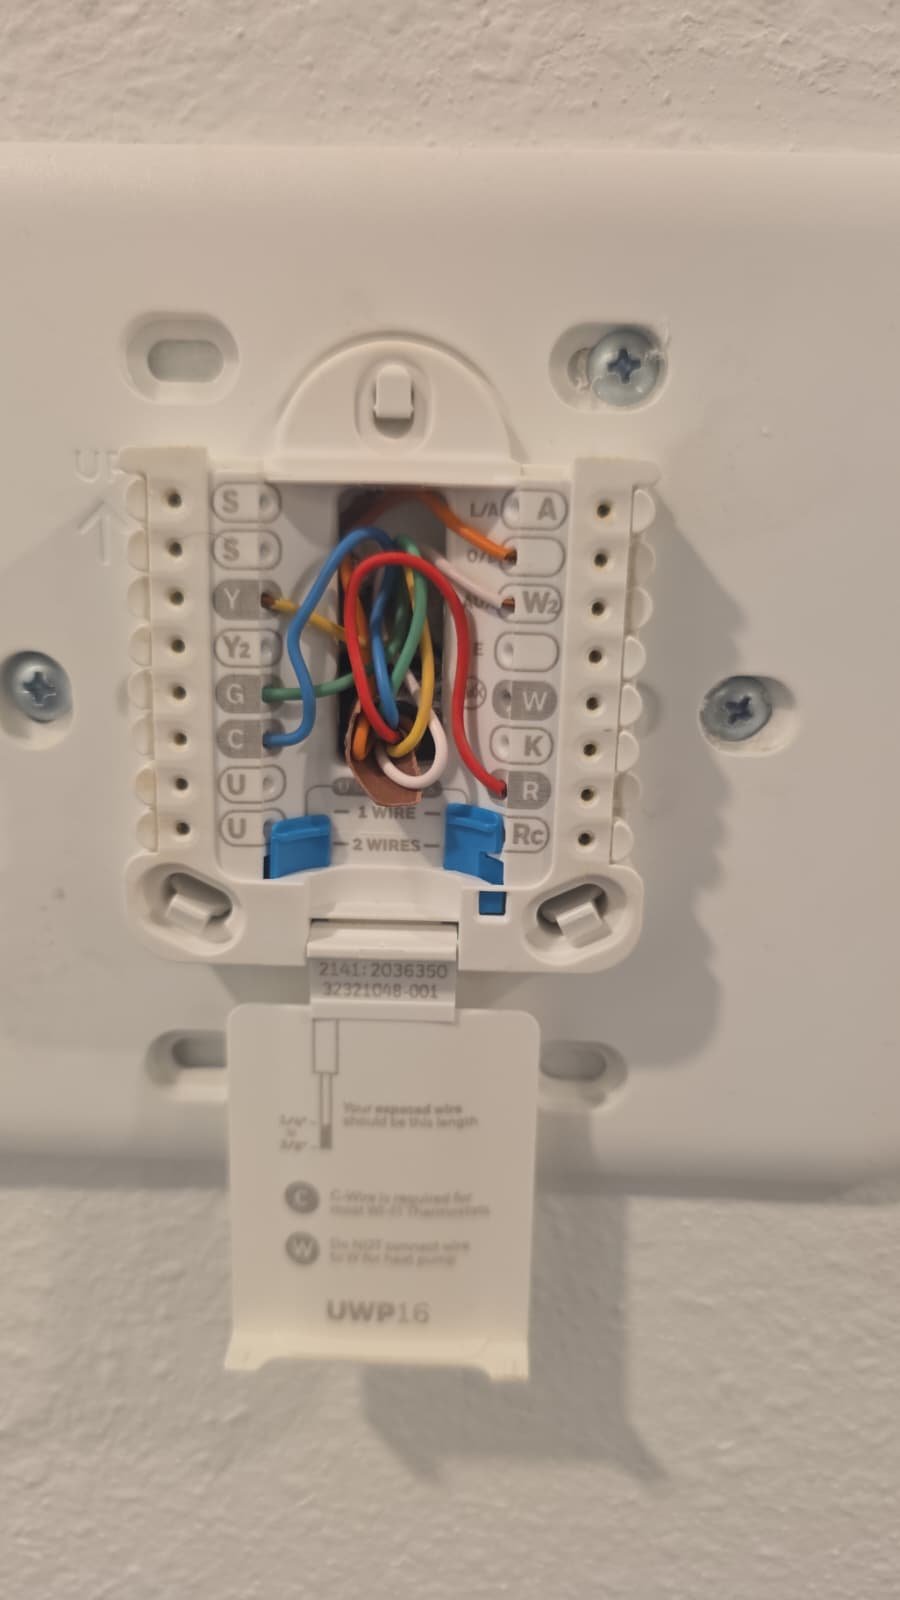
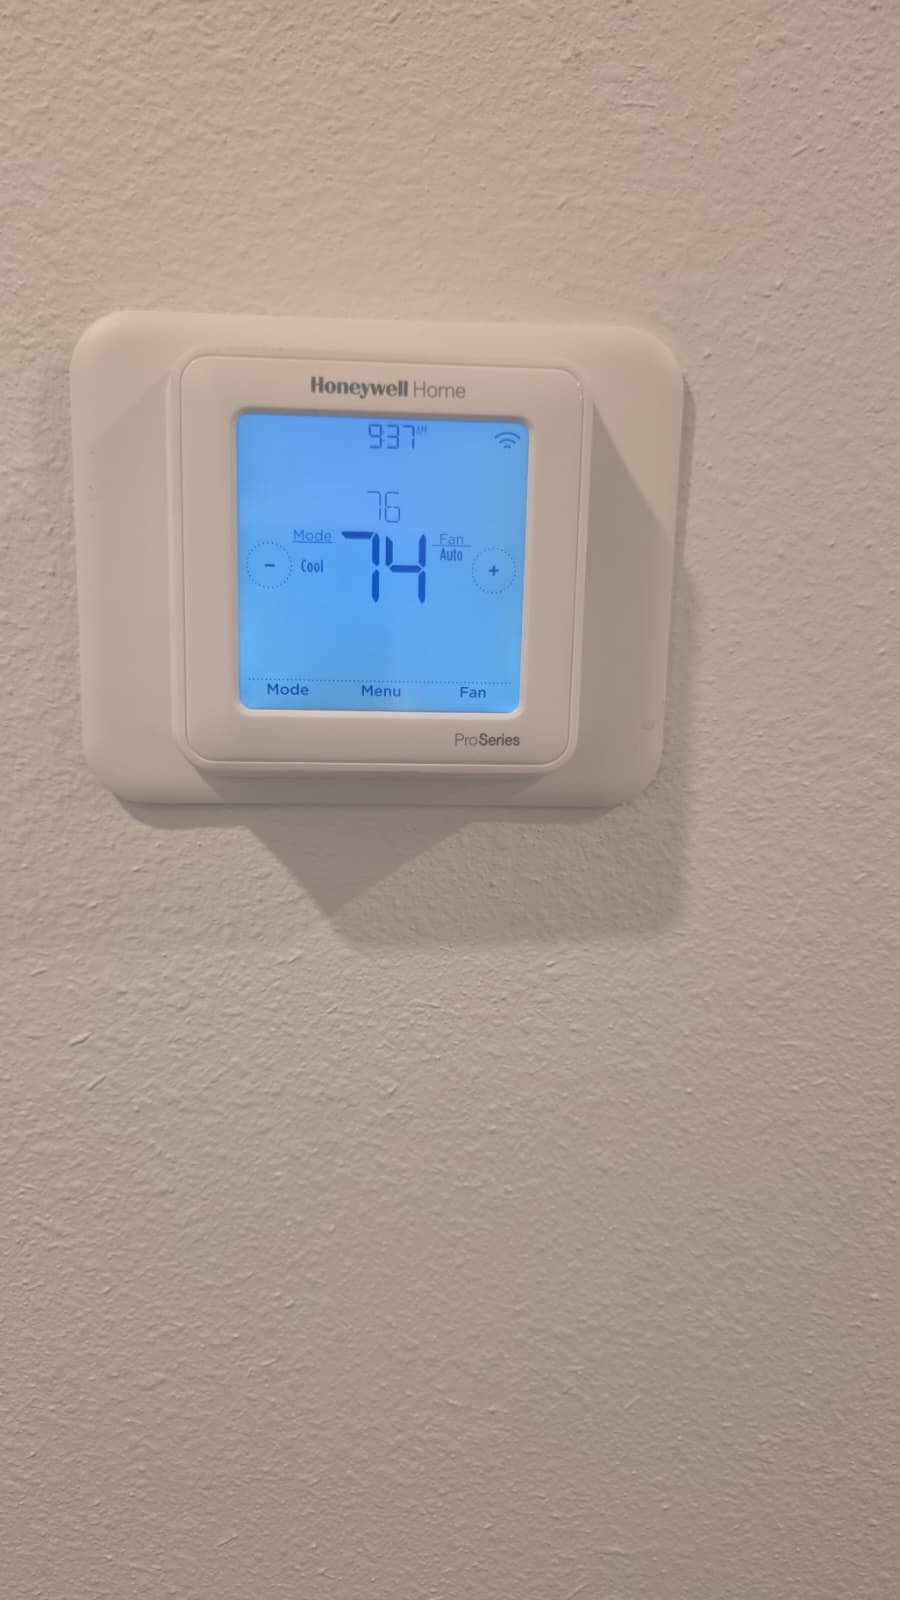
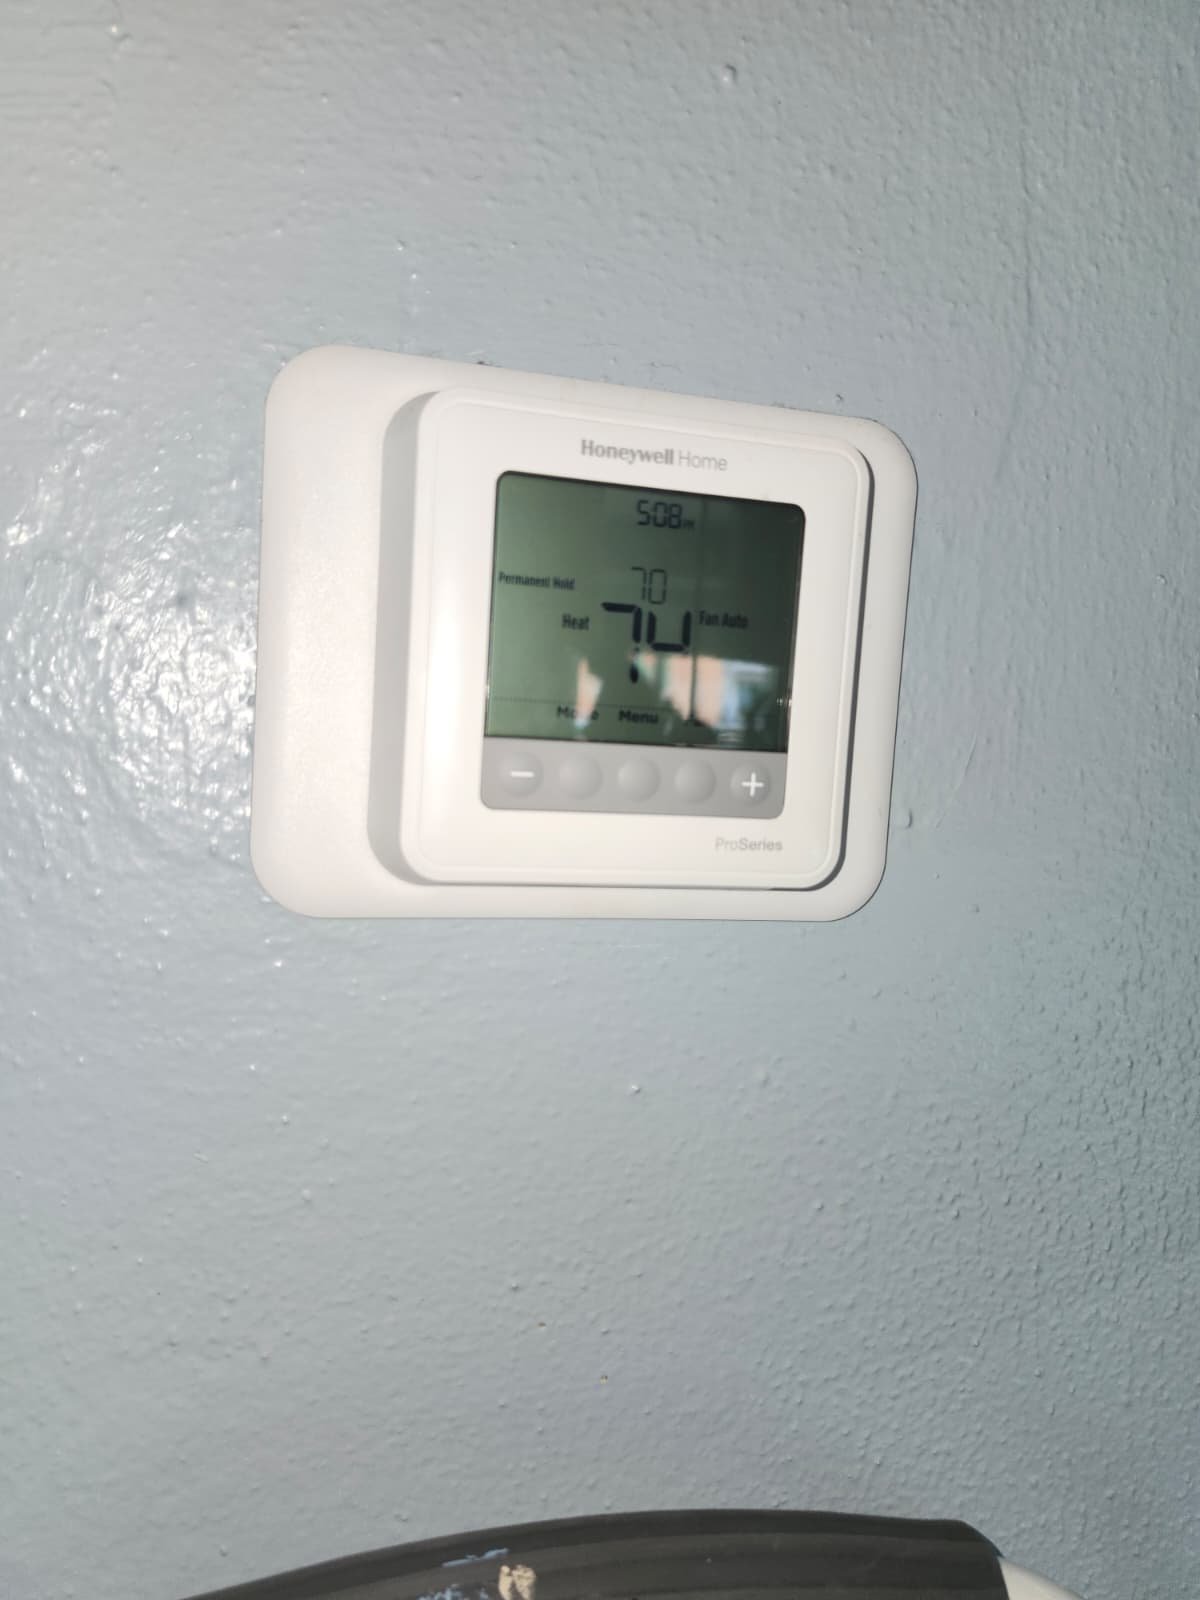
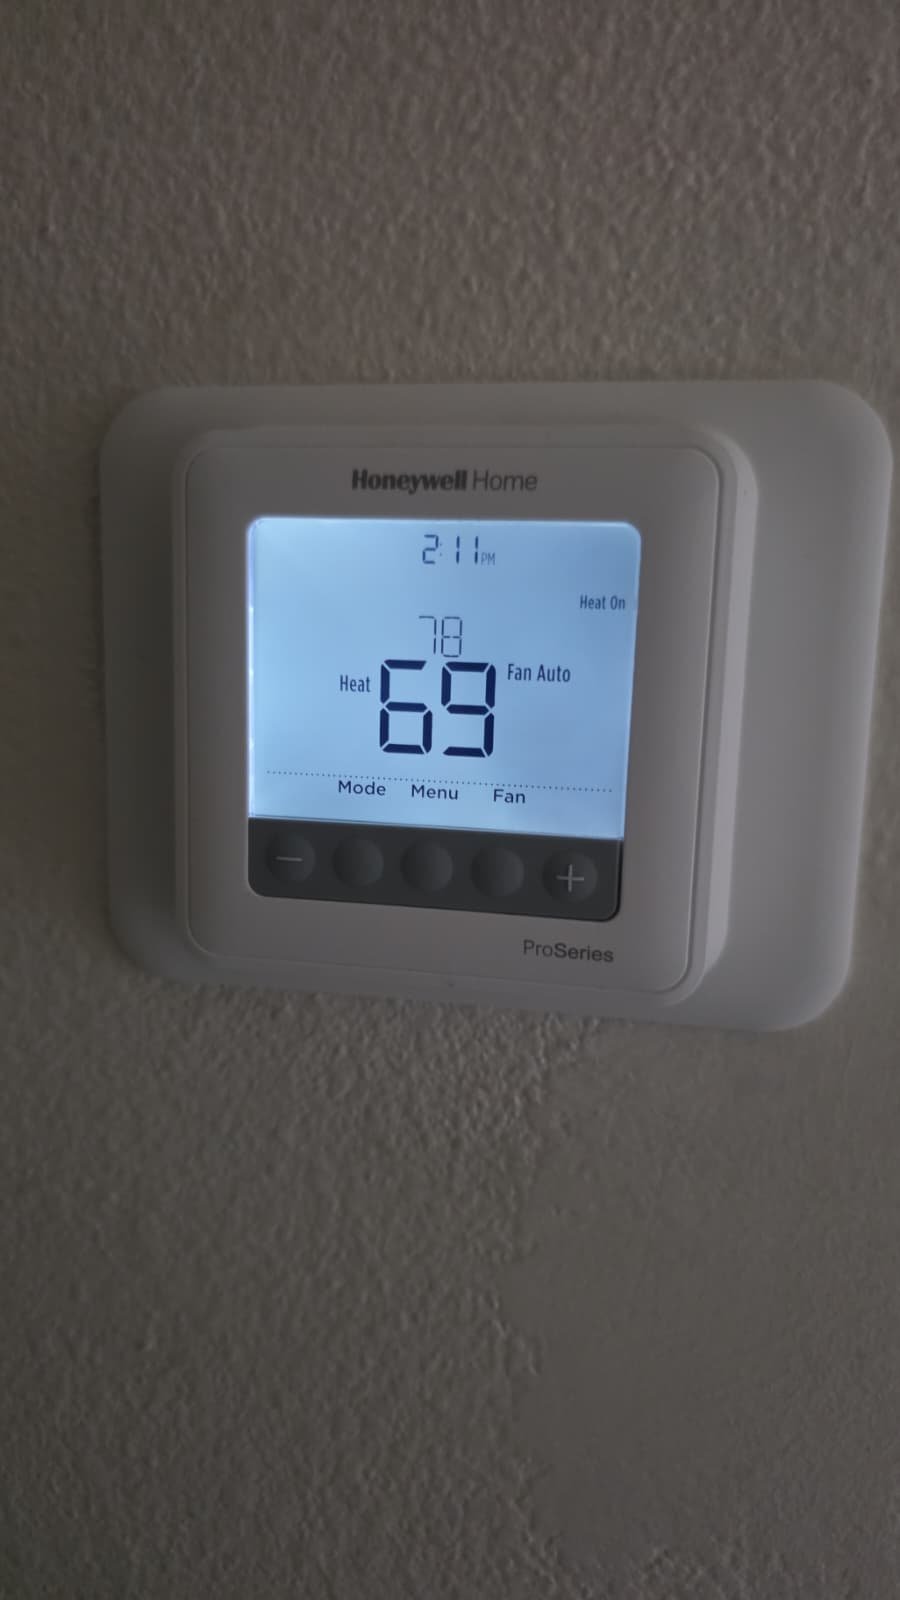
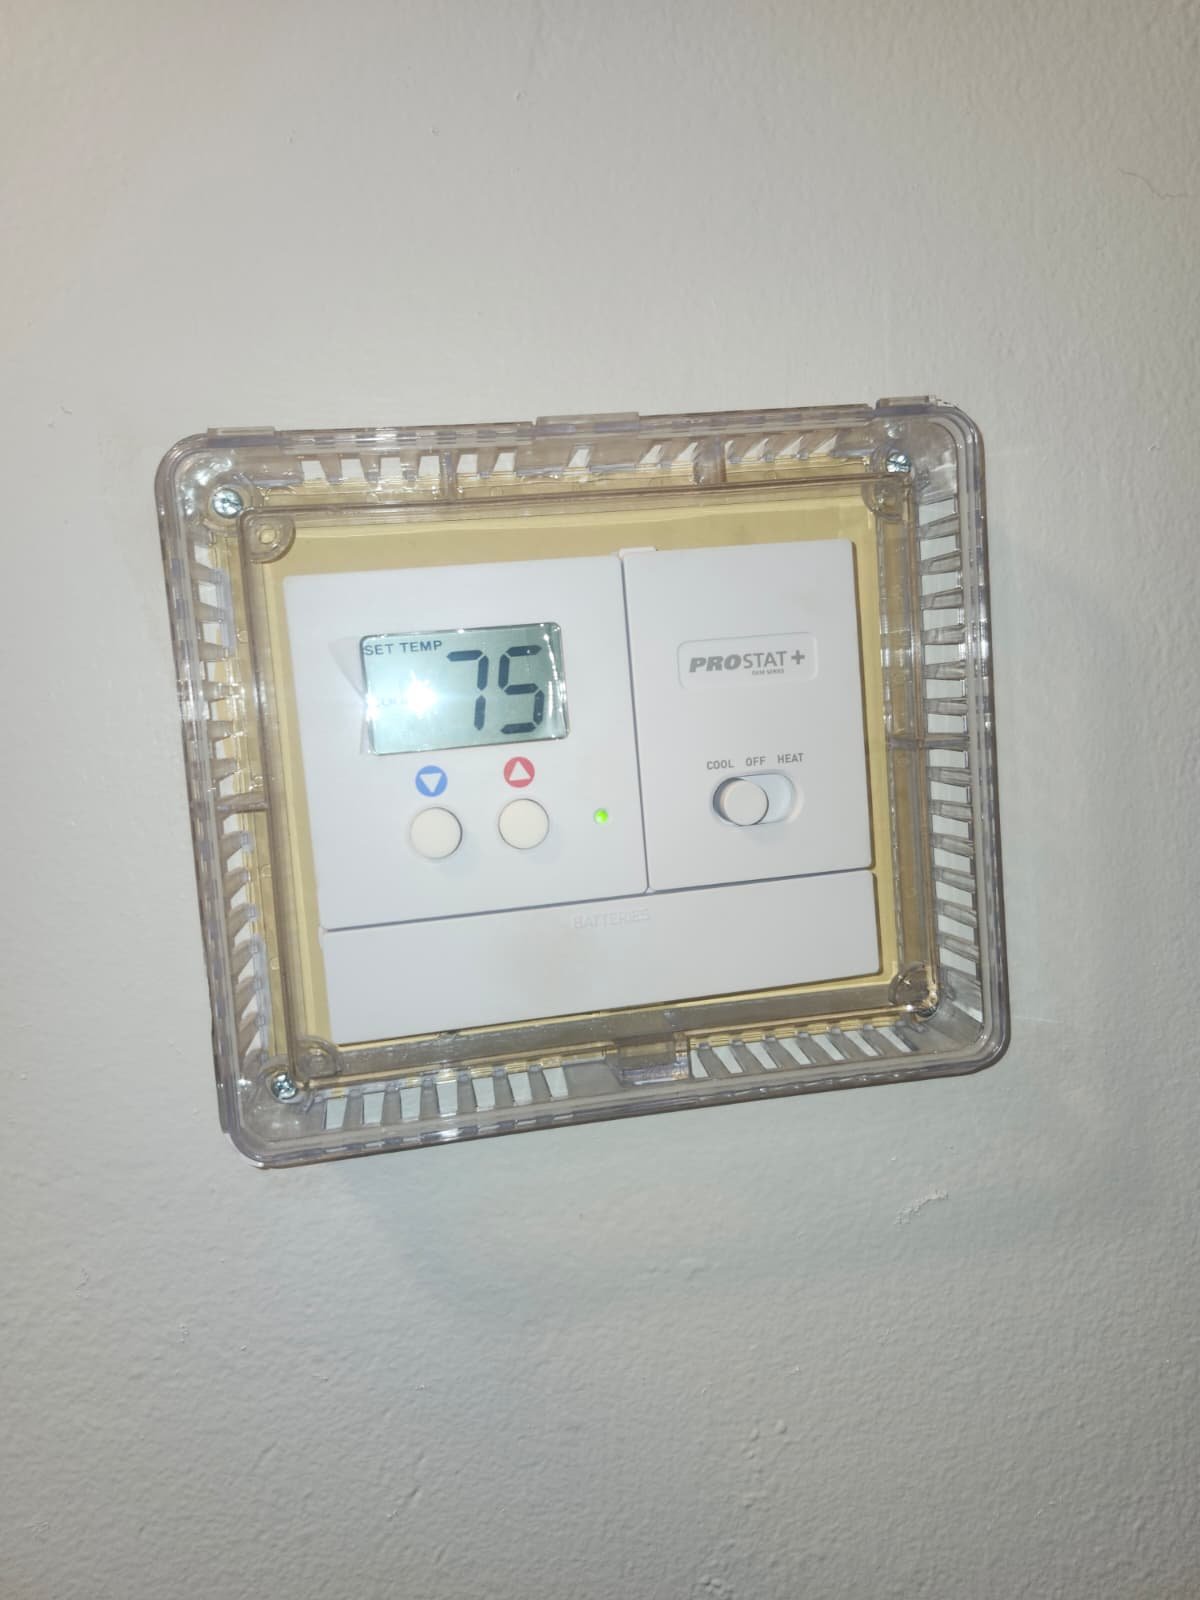
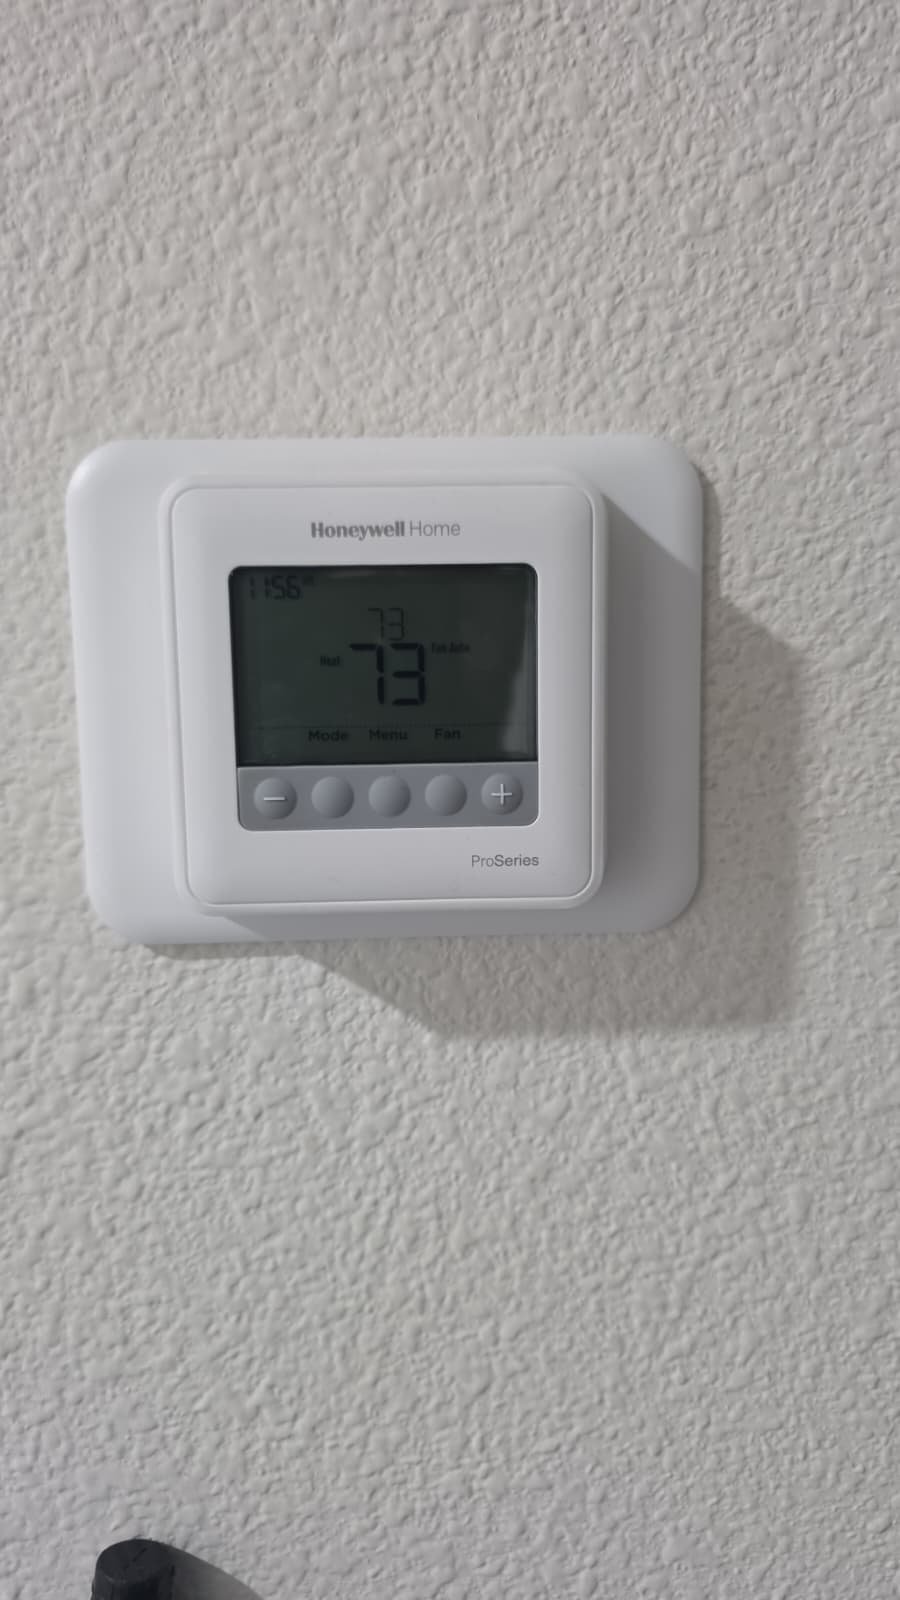
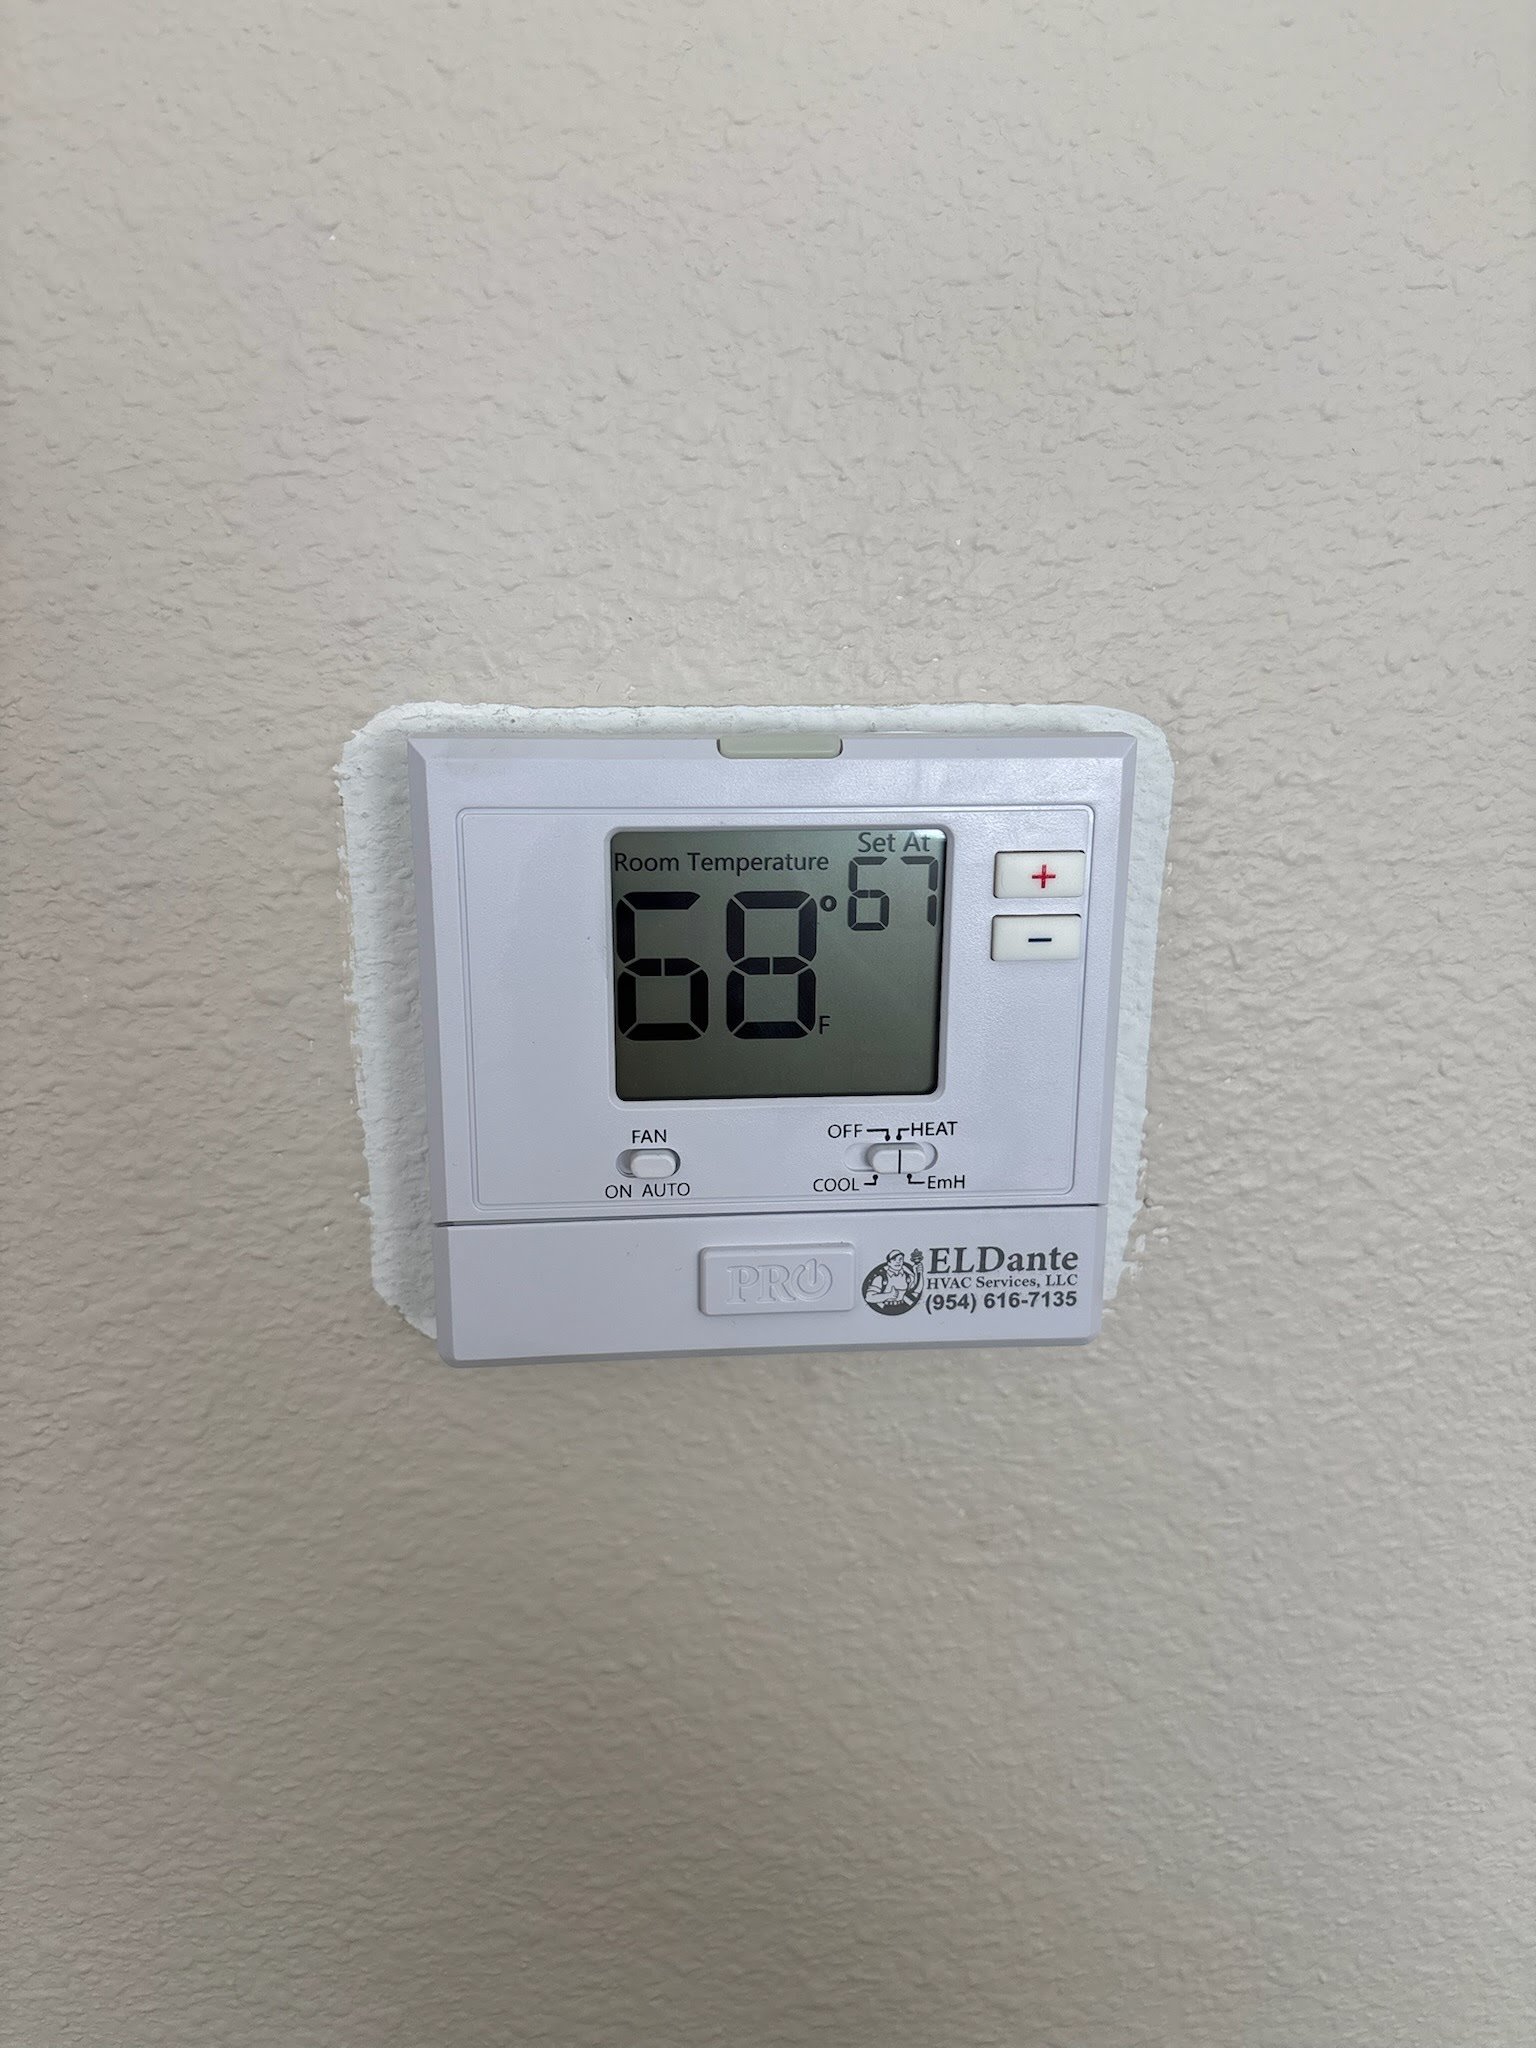
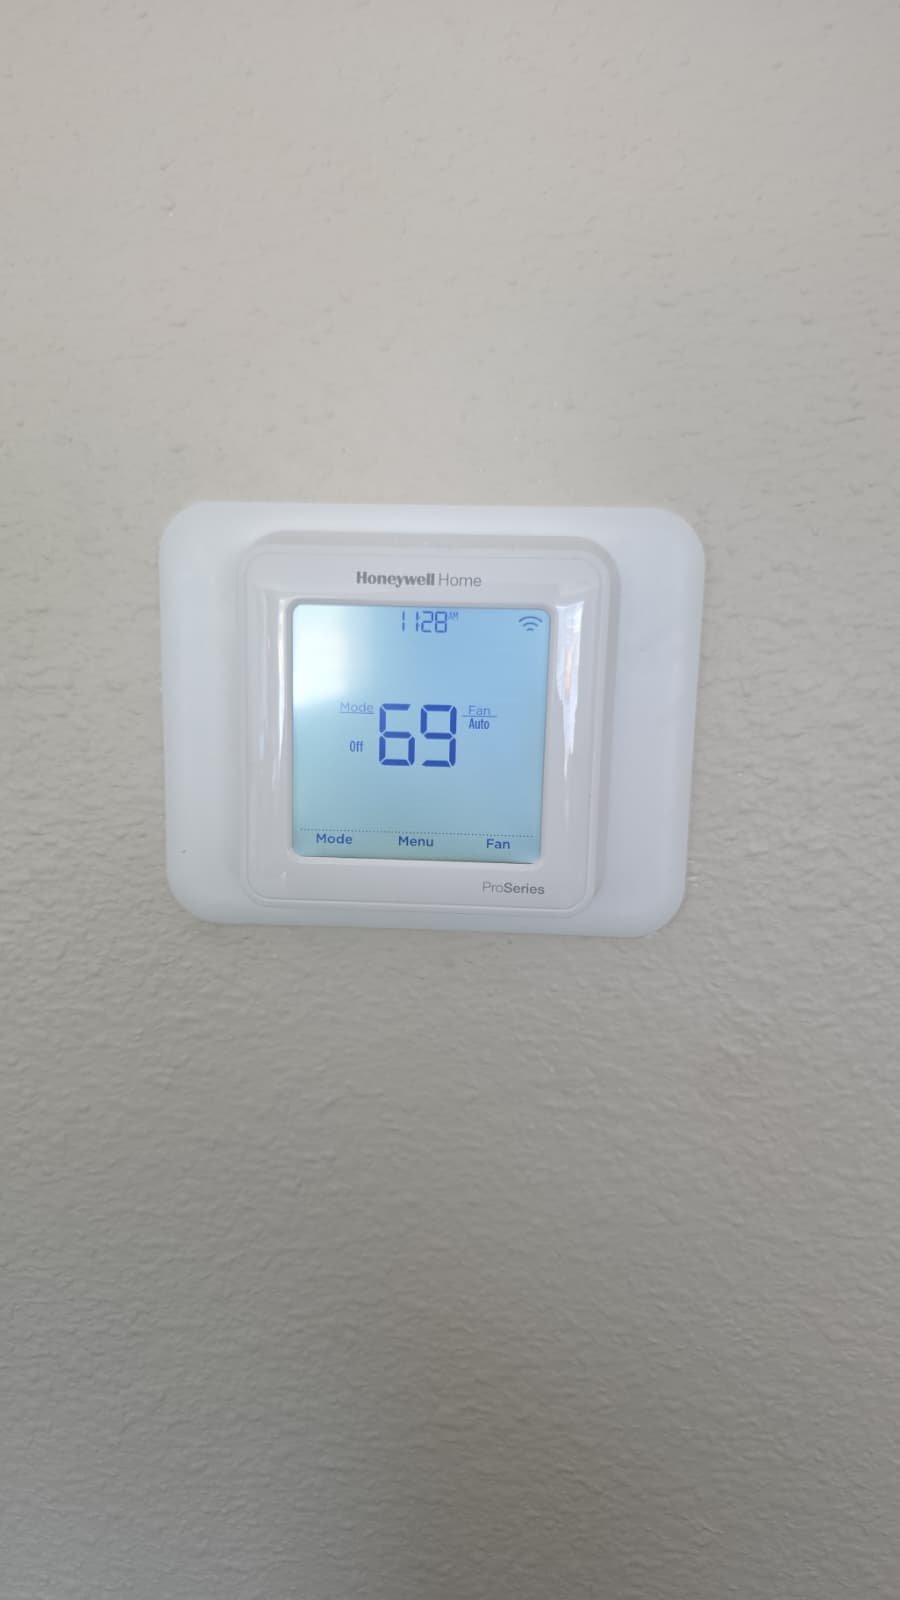
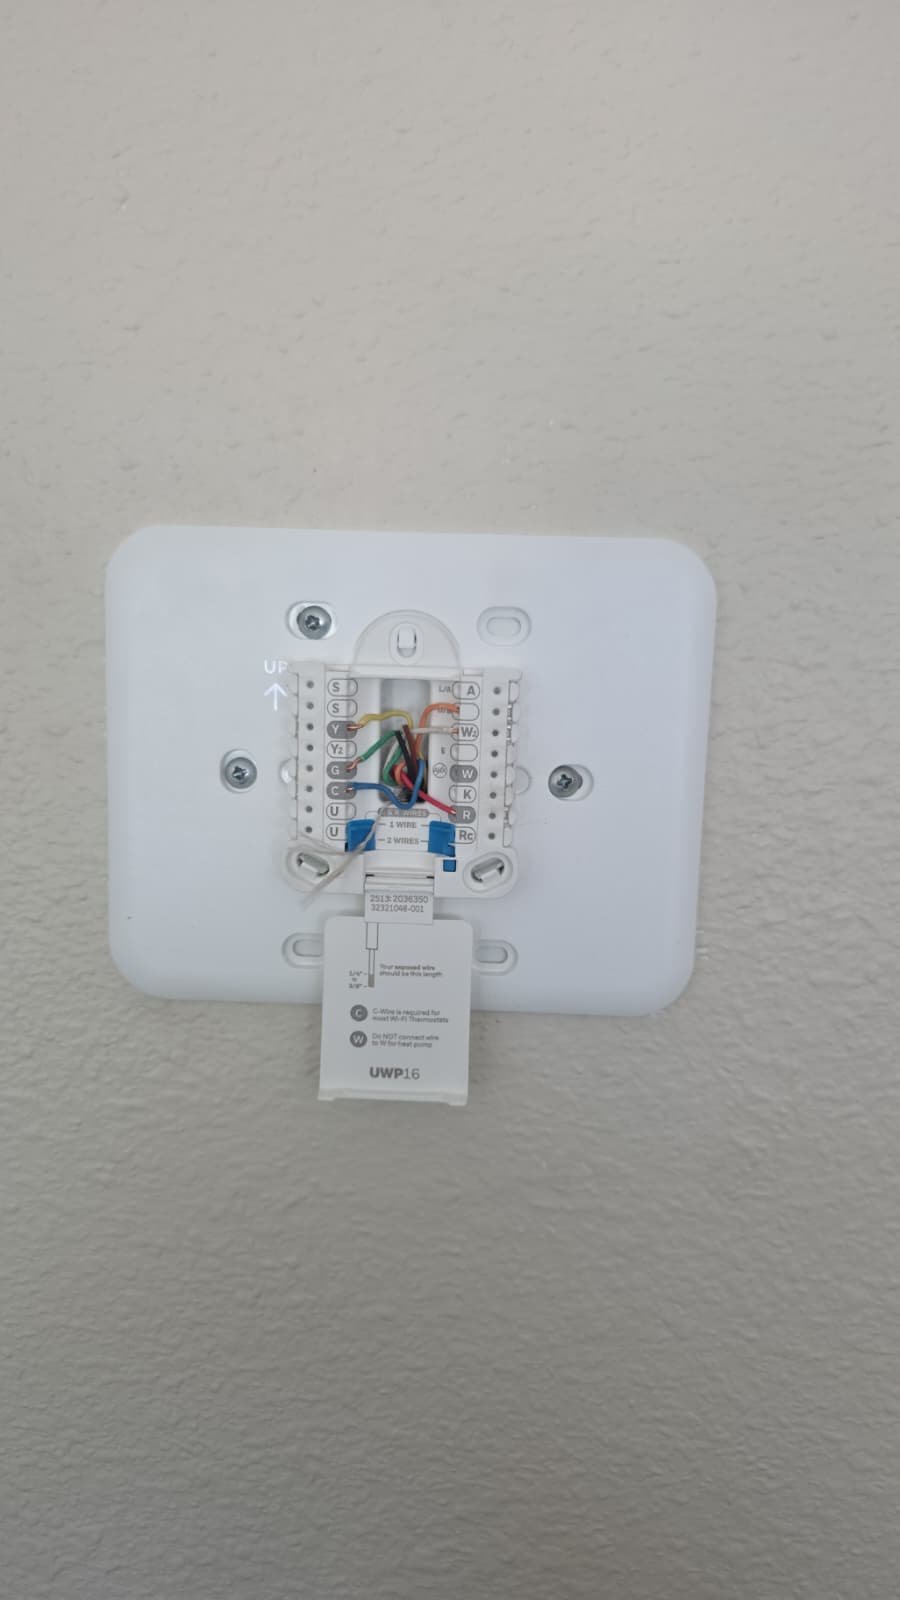
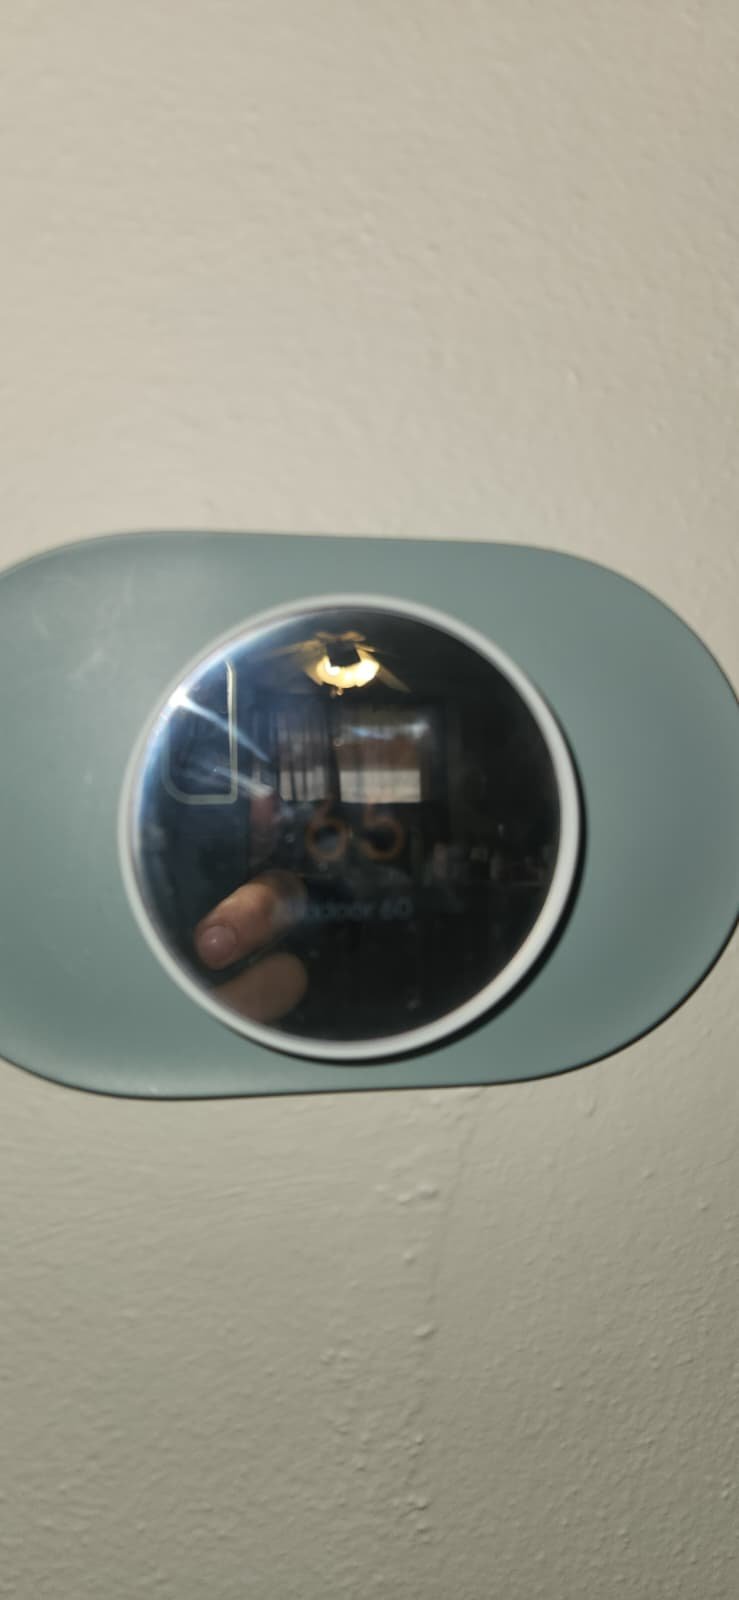
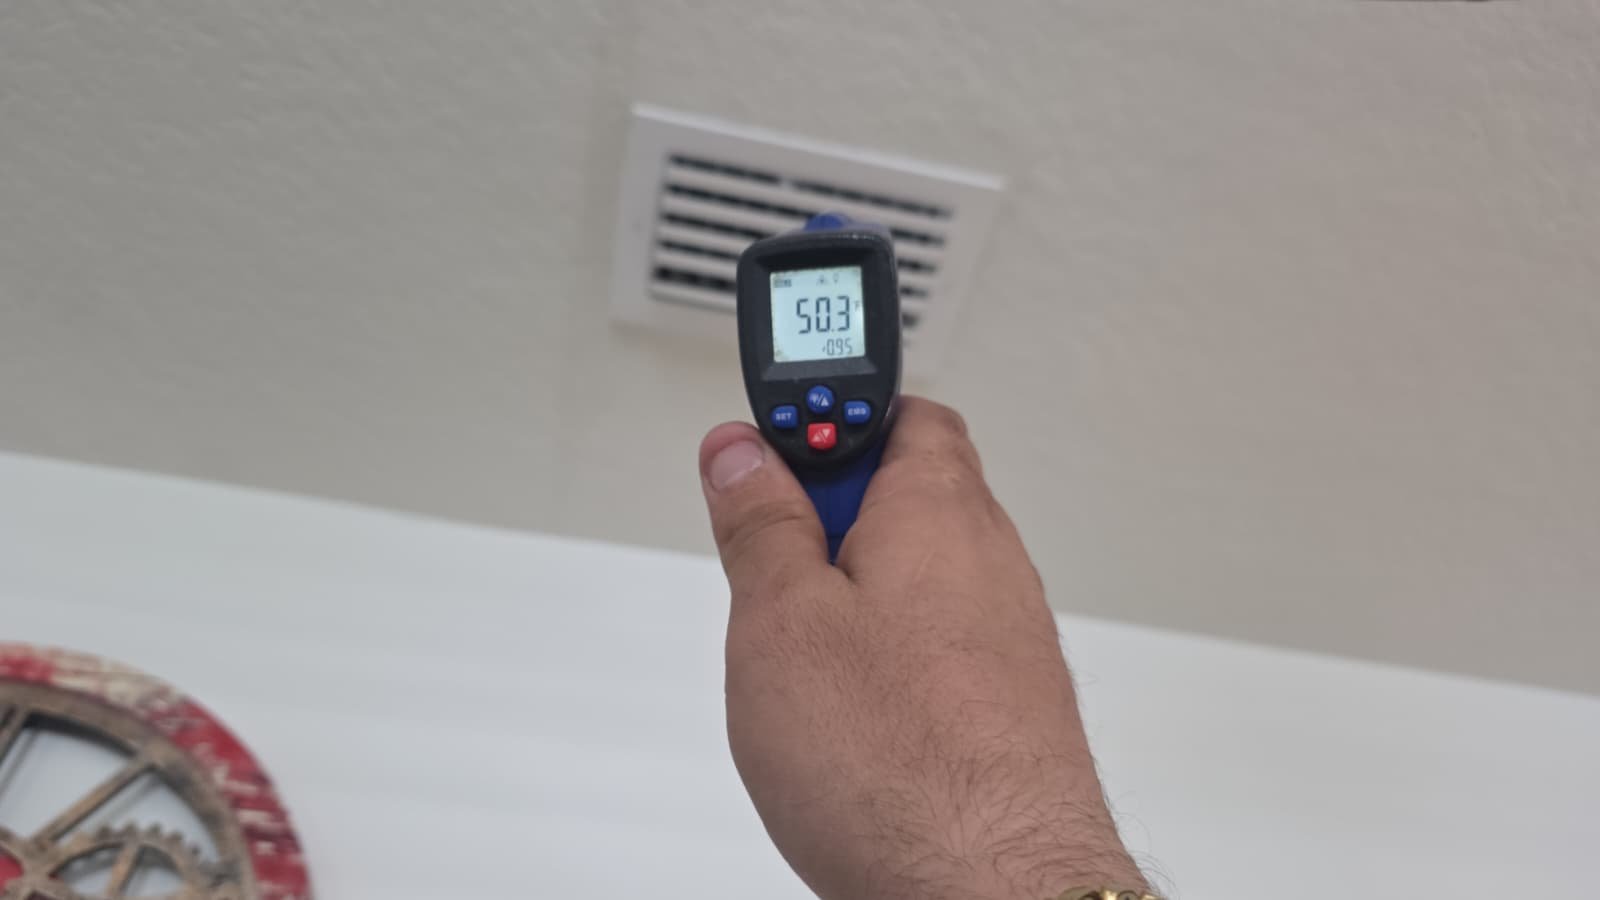
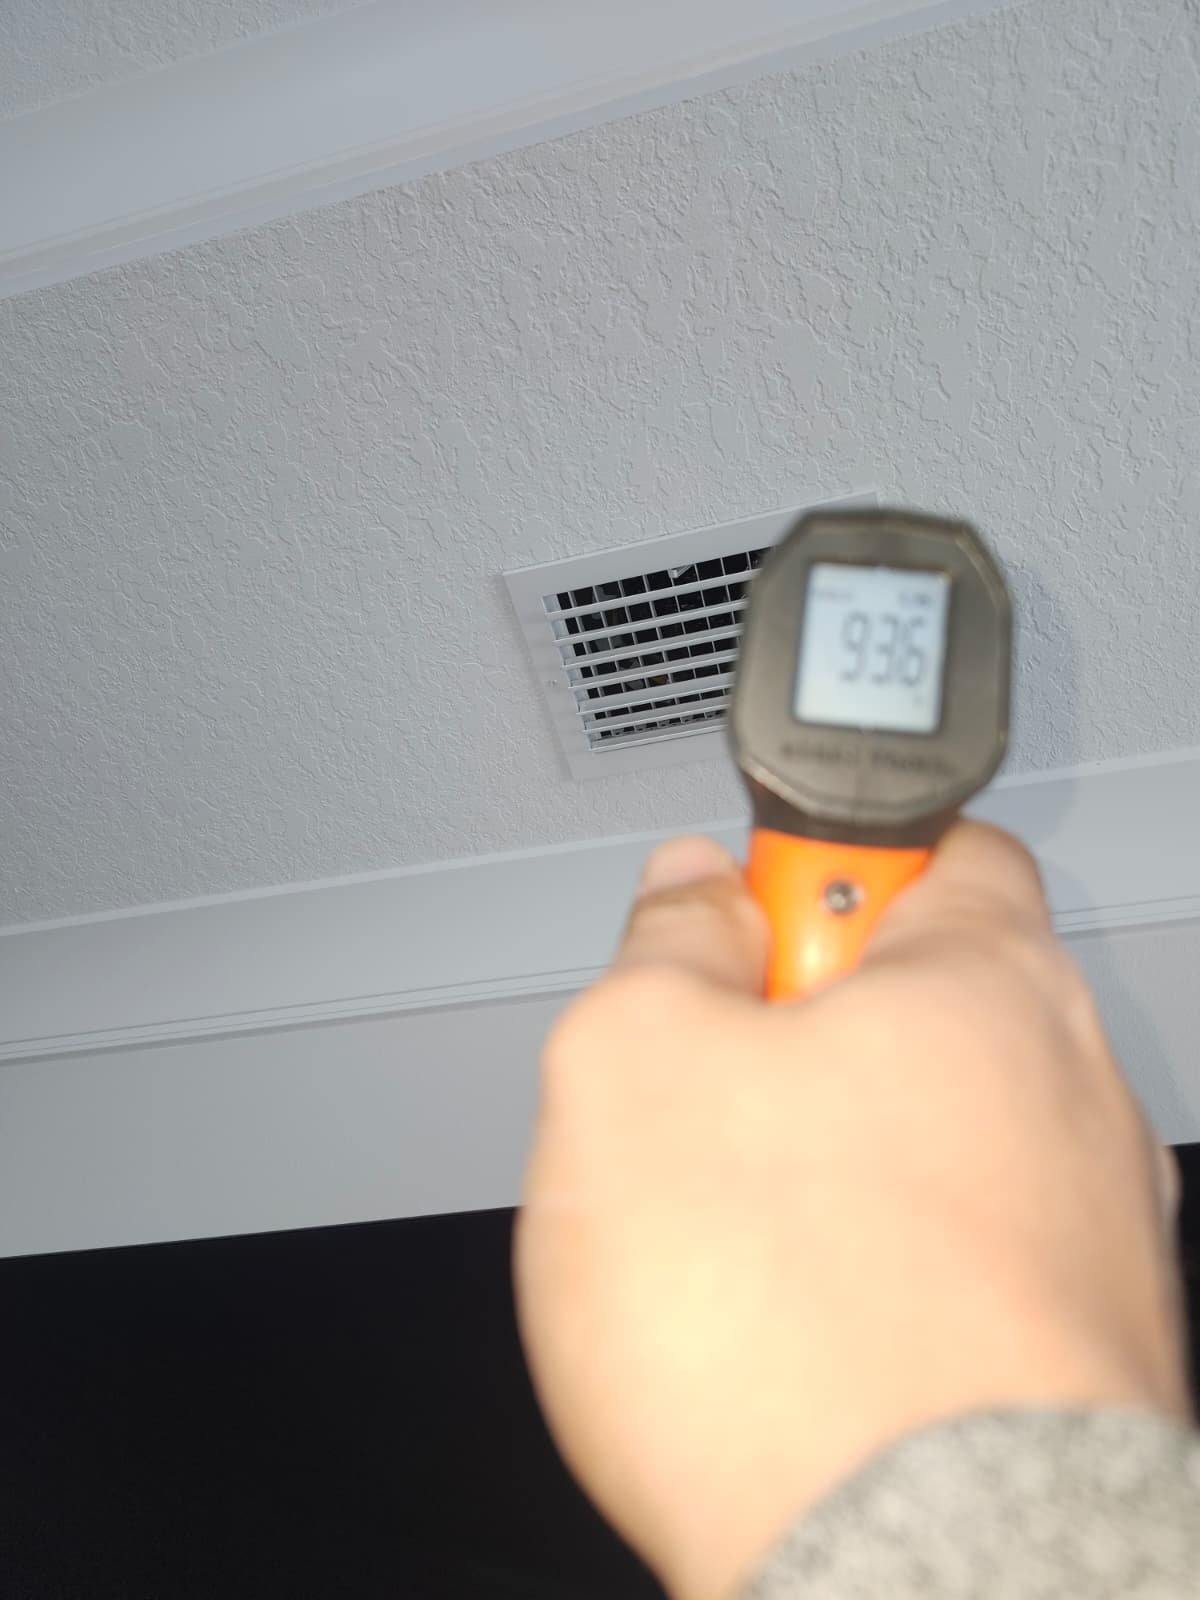
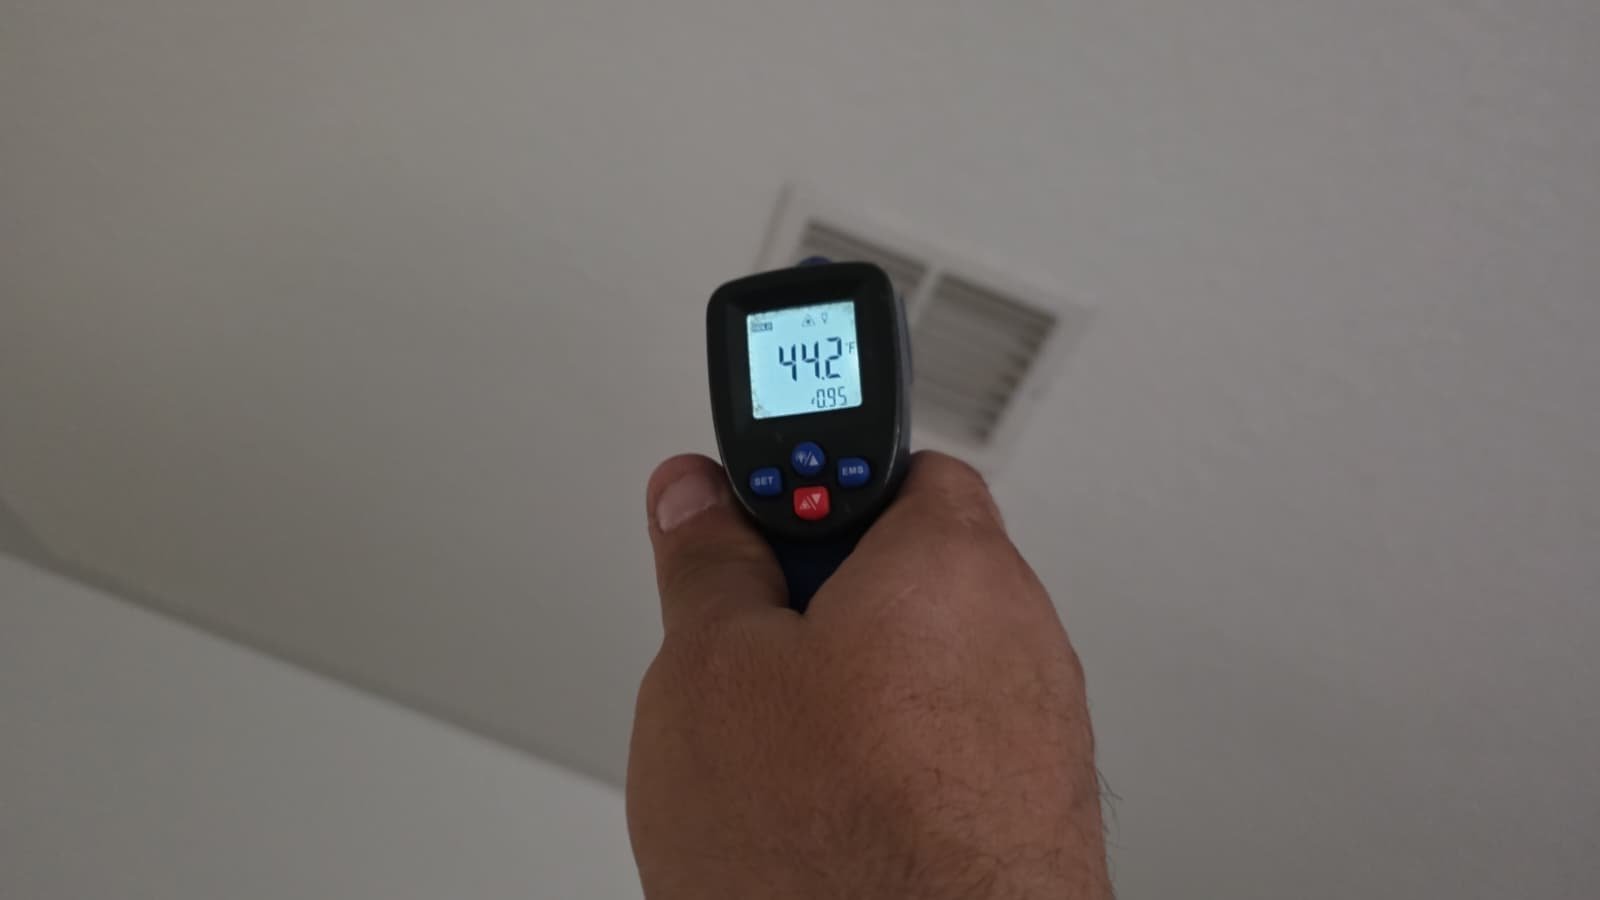
  • Verifying thermostat operation and system response
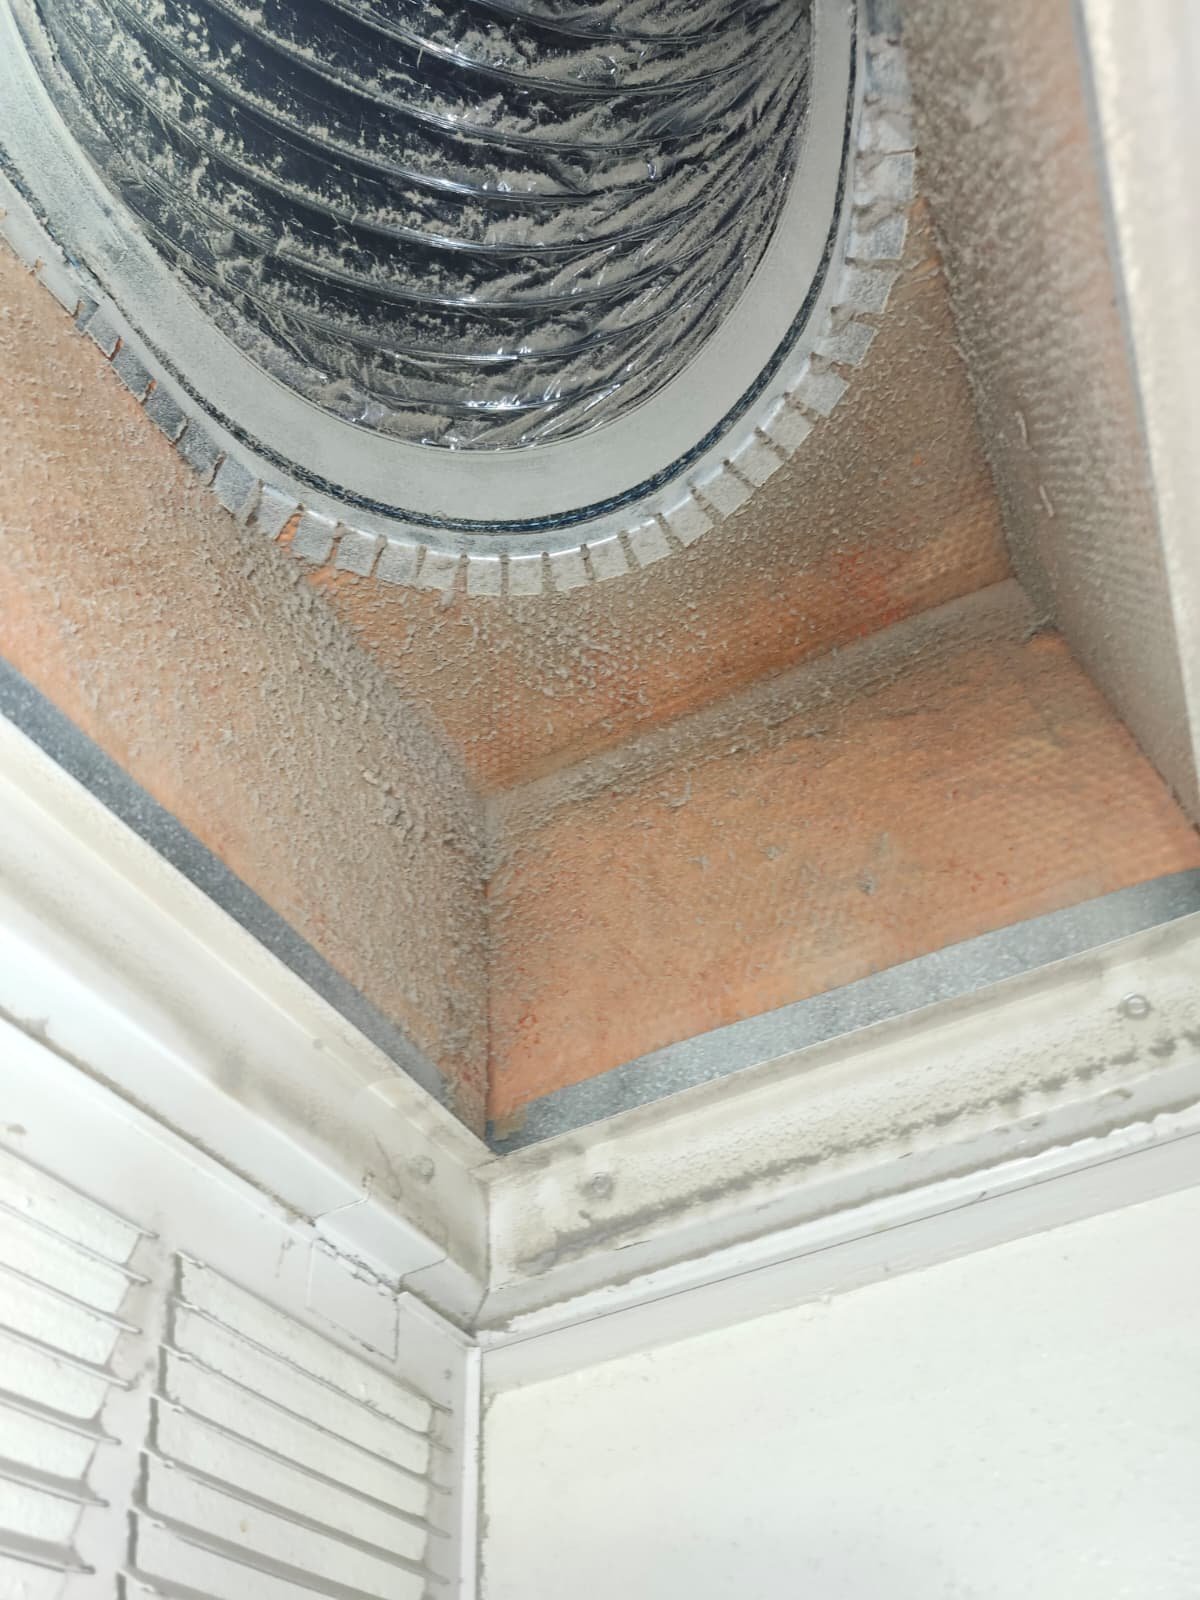
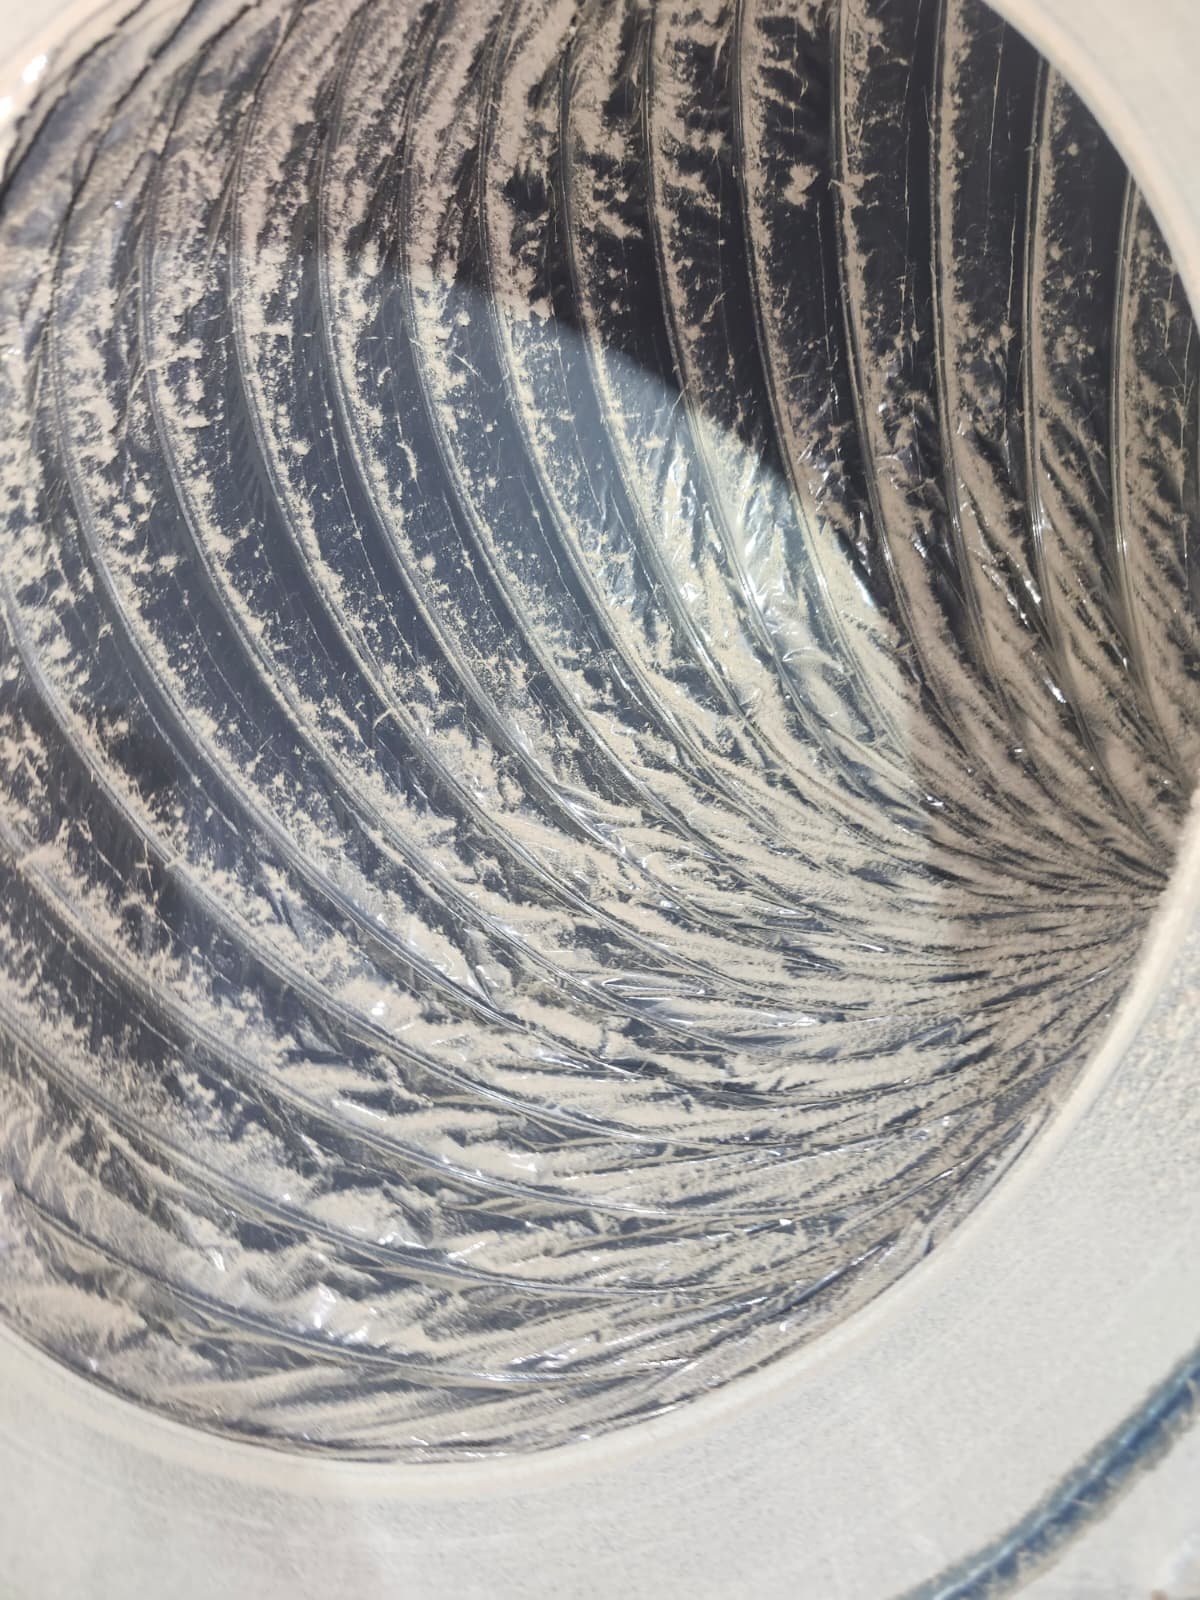
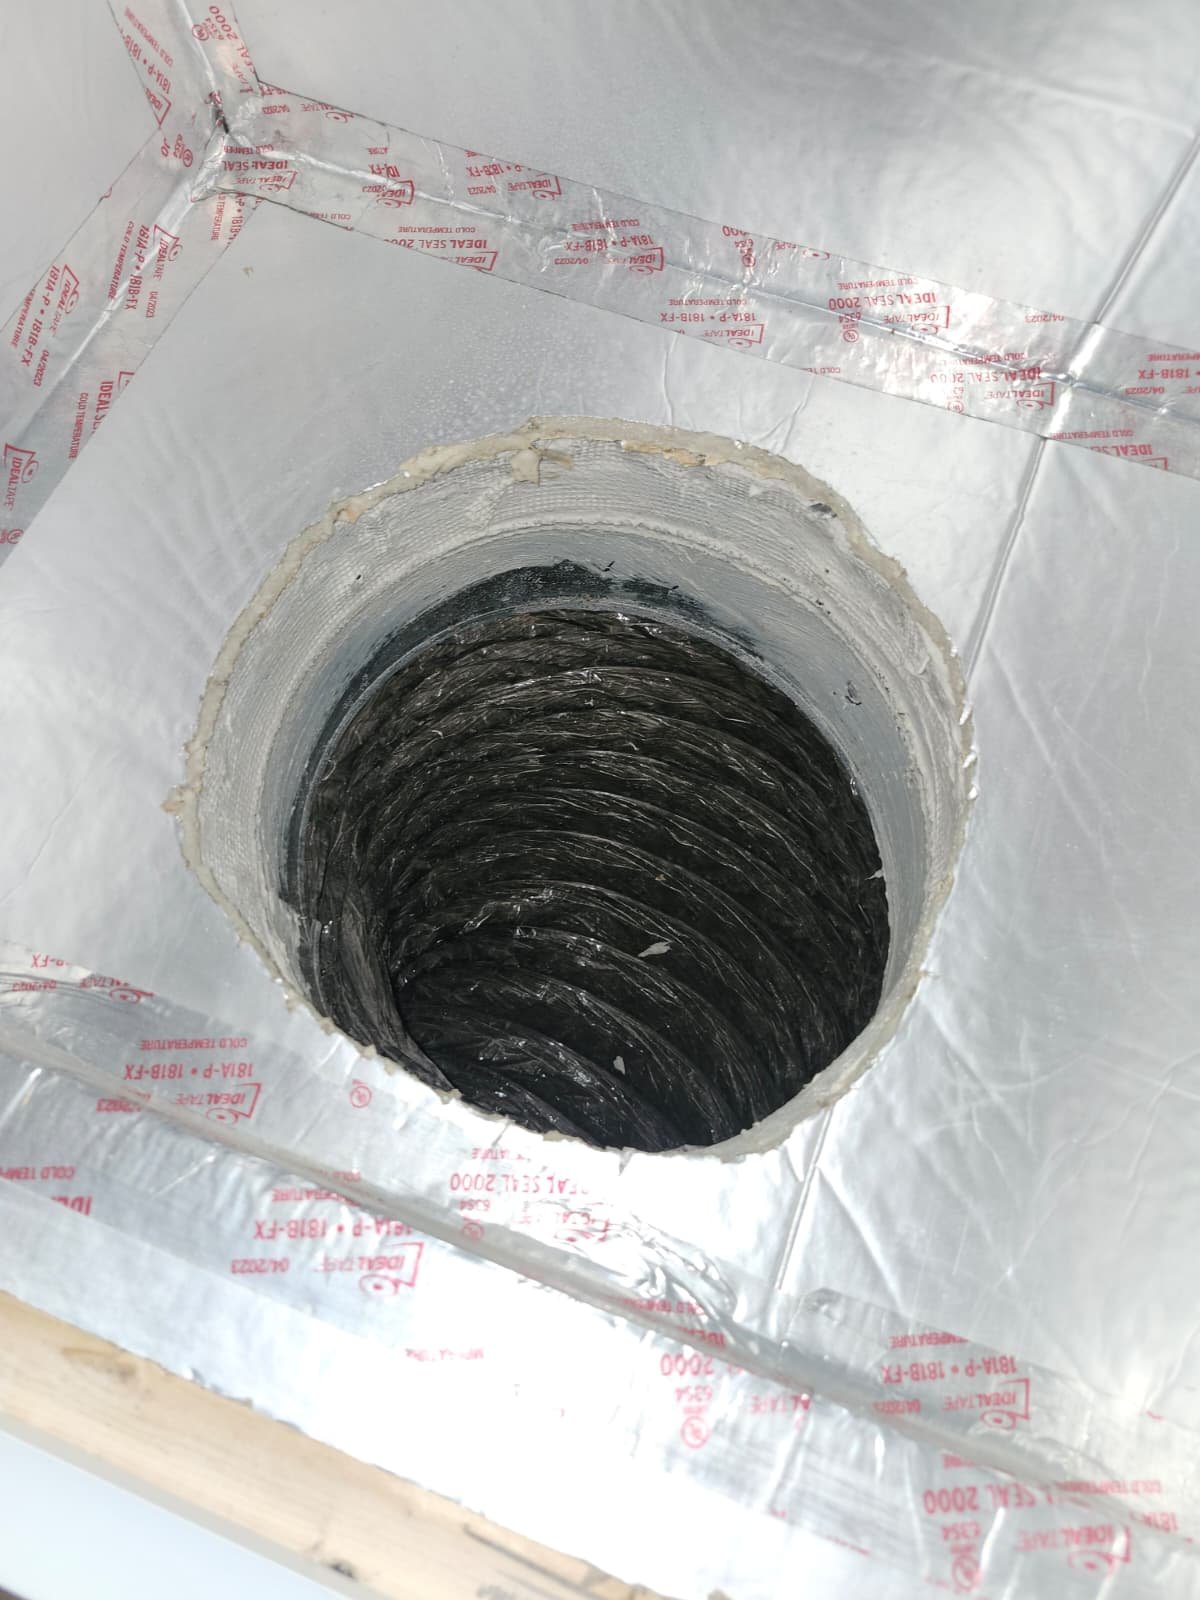
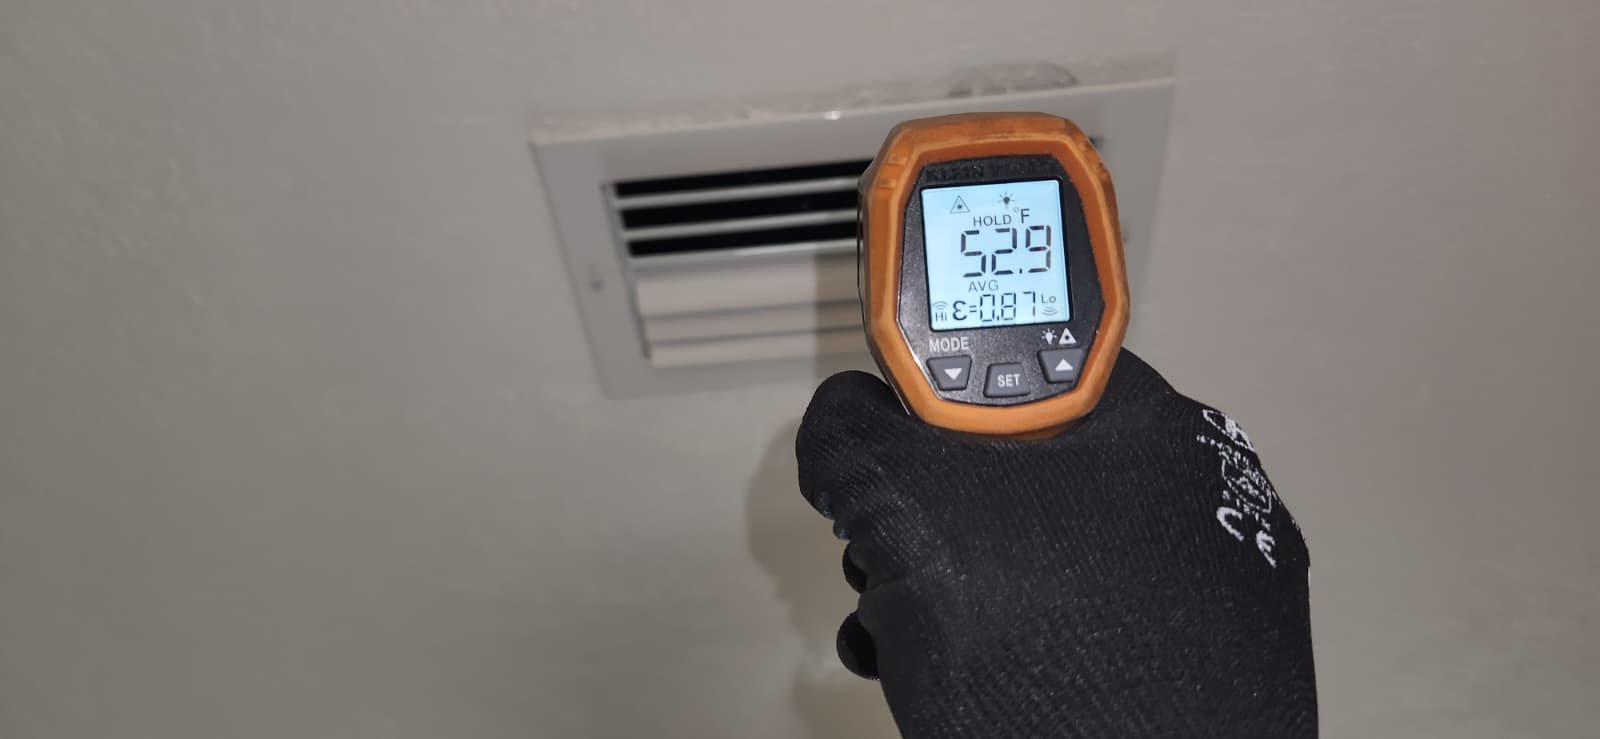
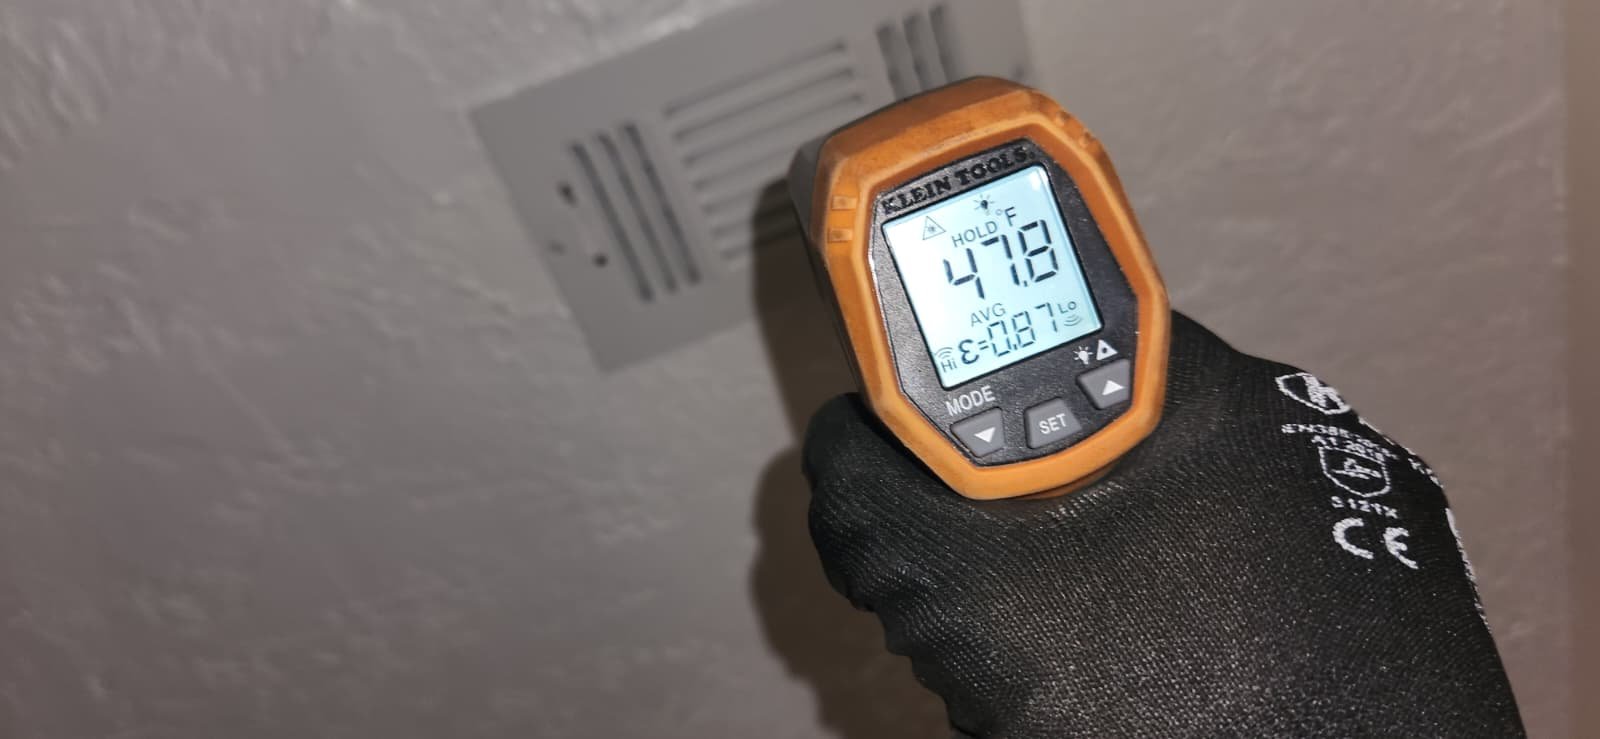
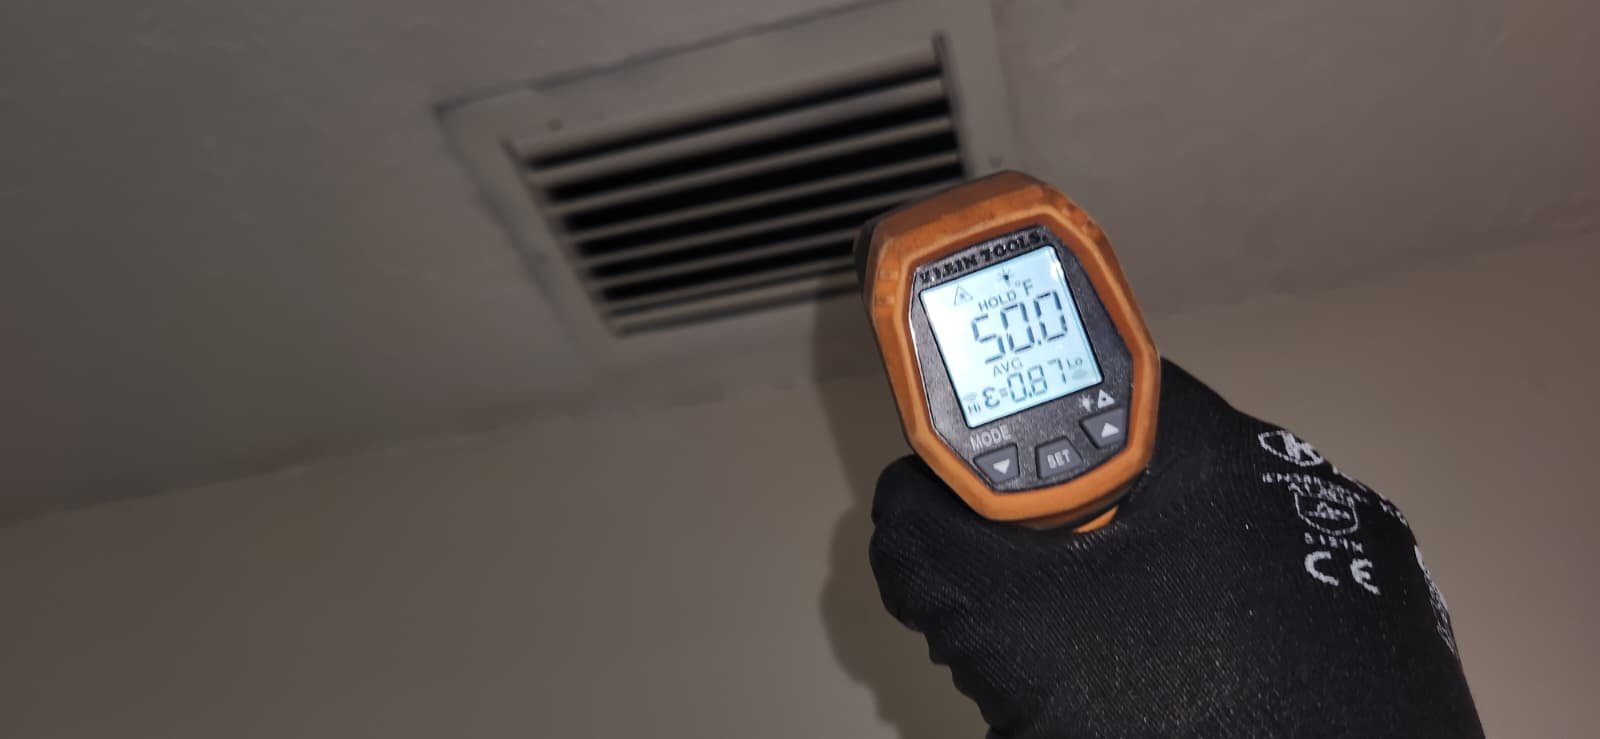
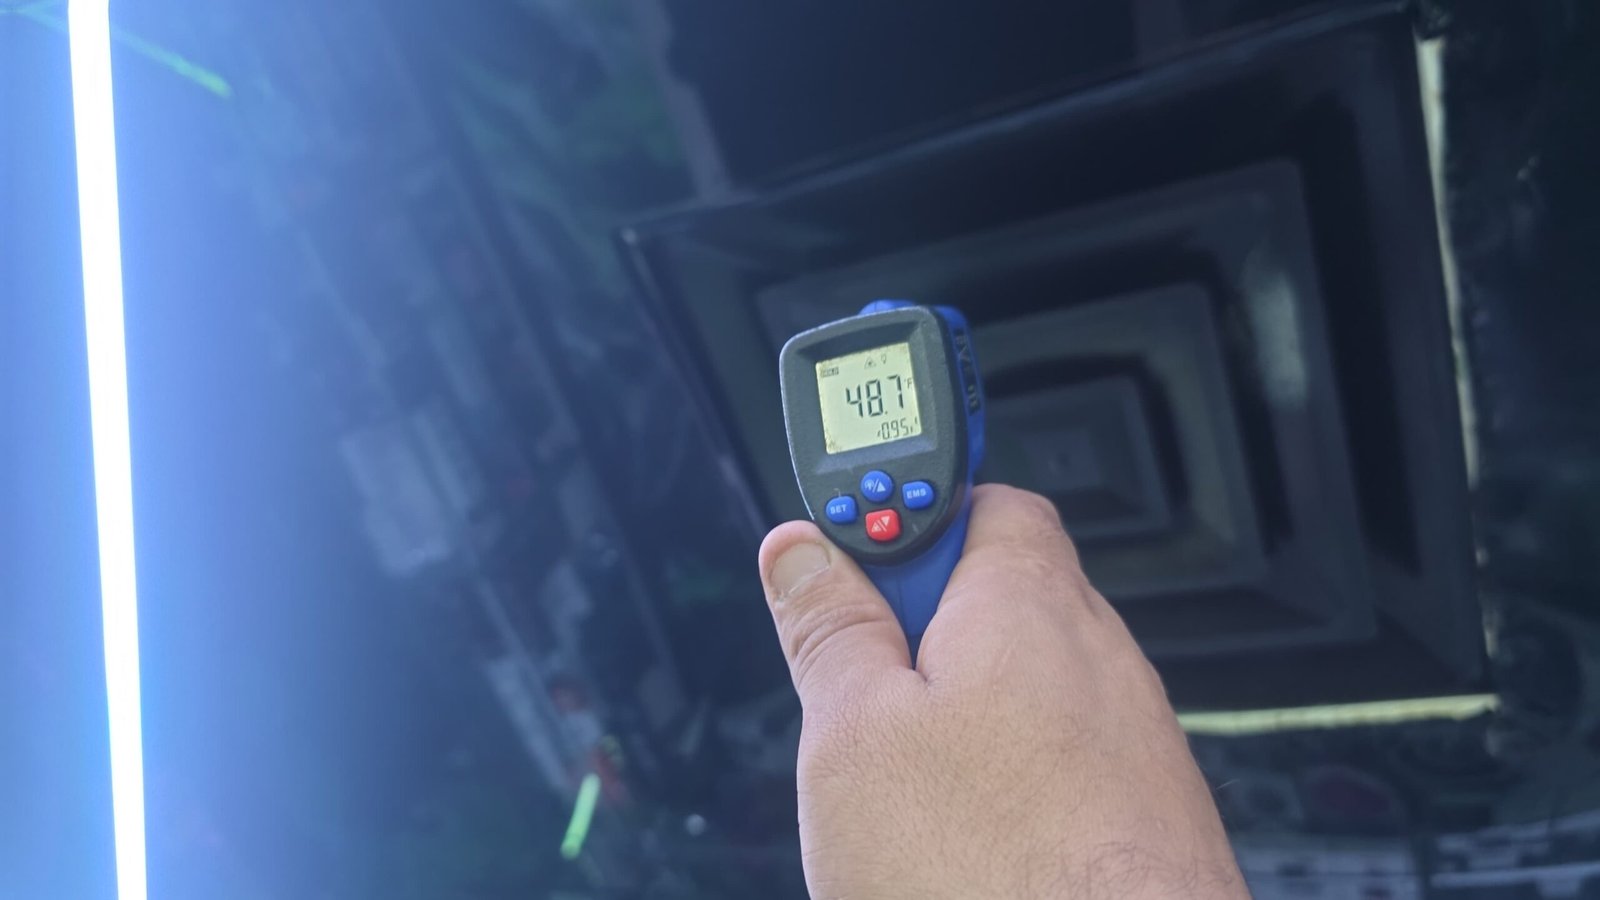
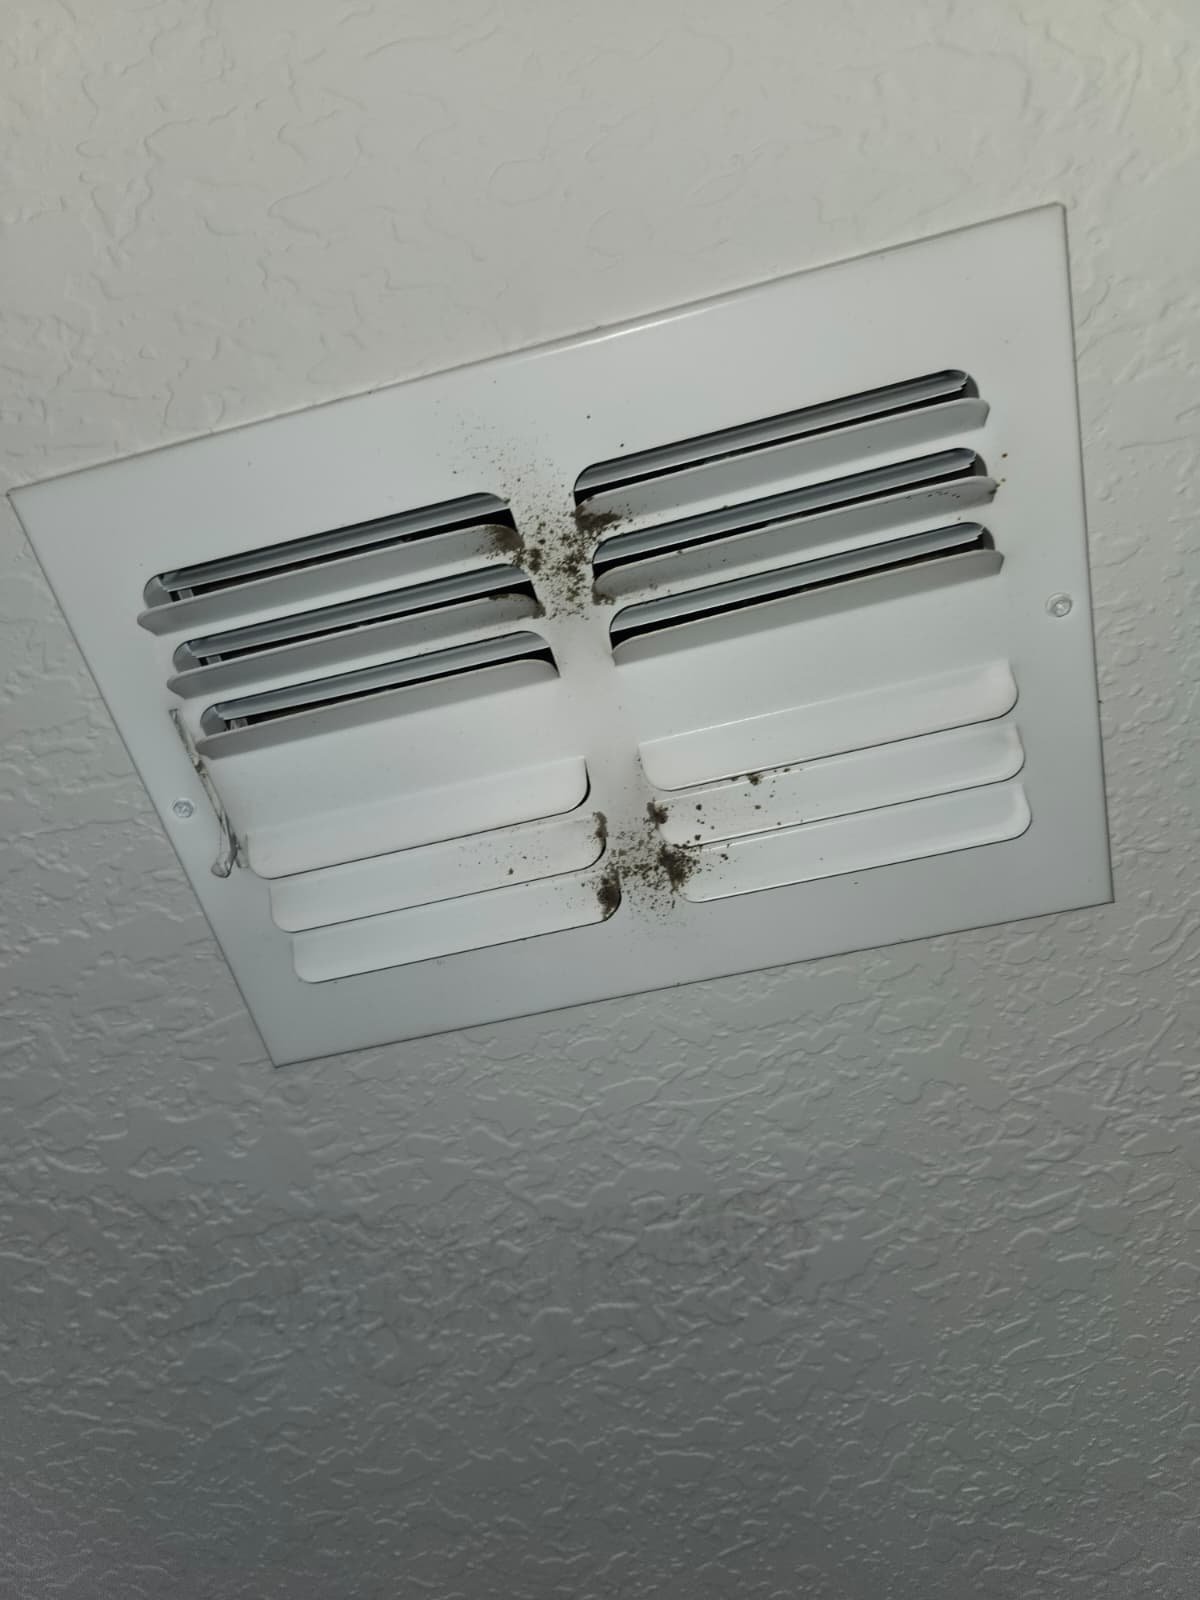
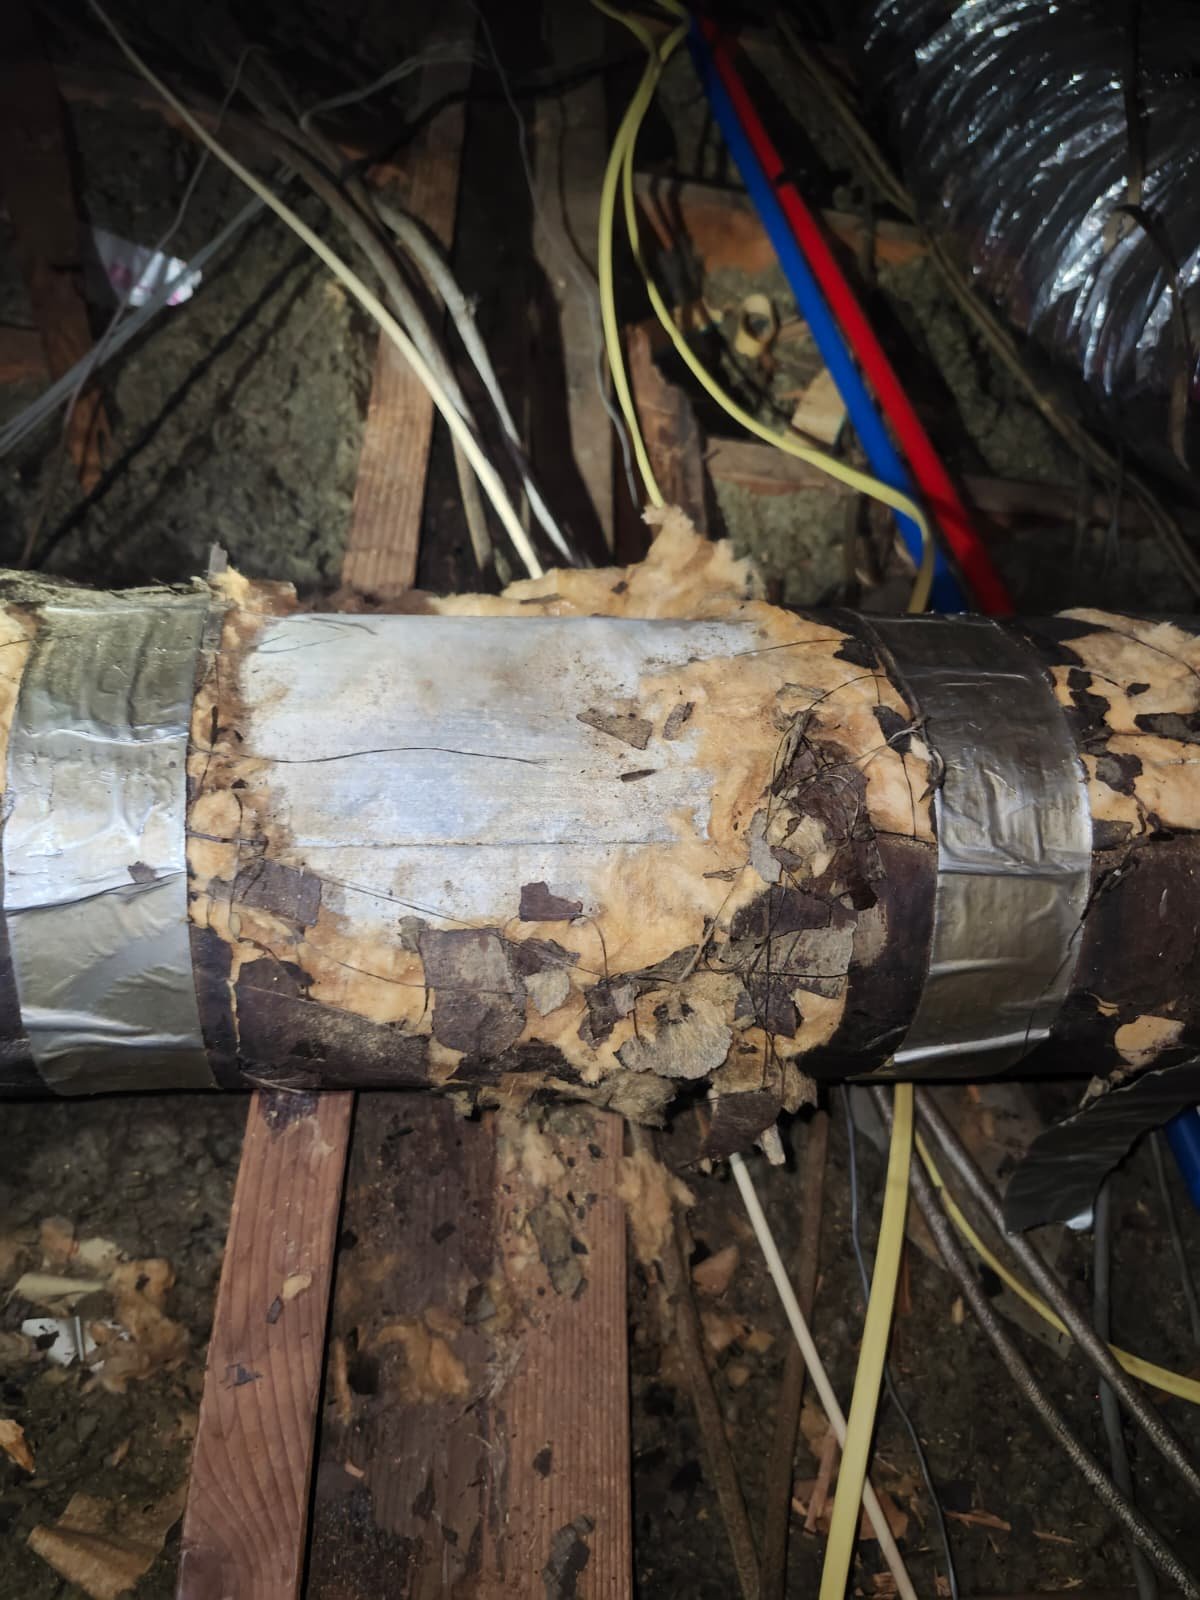
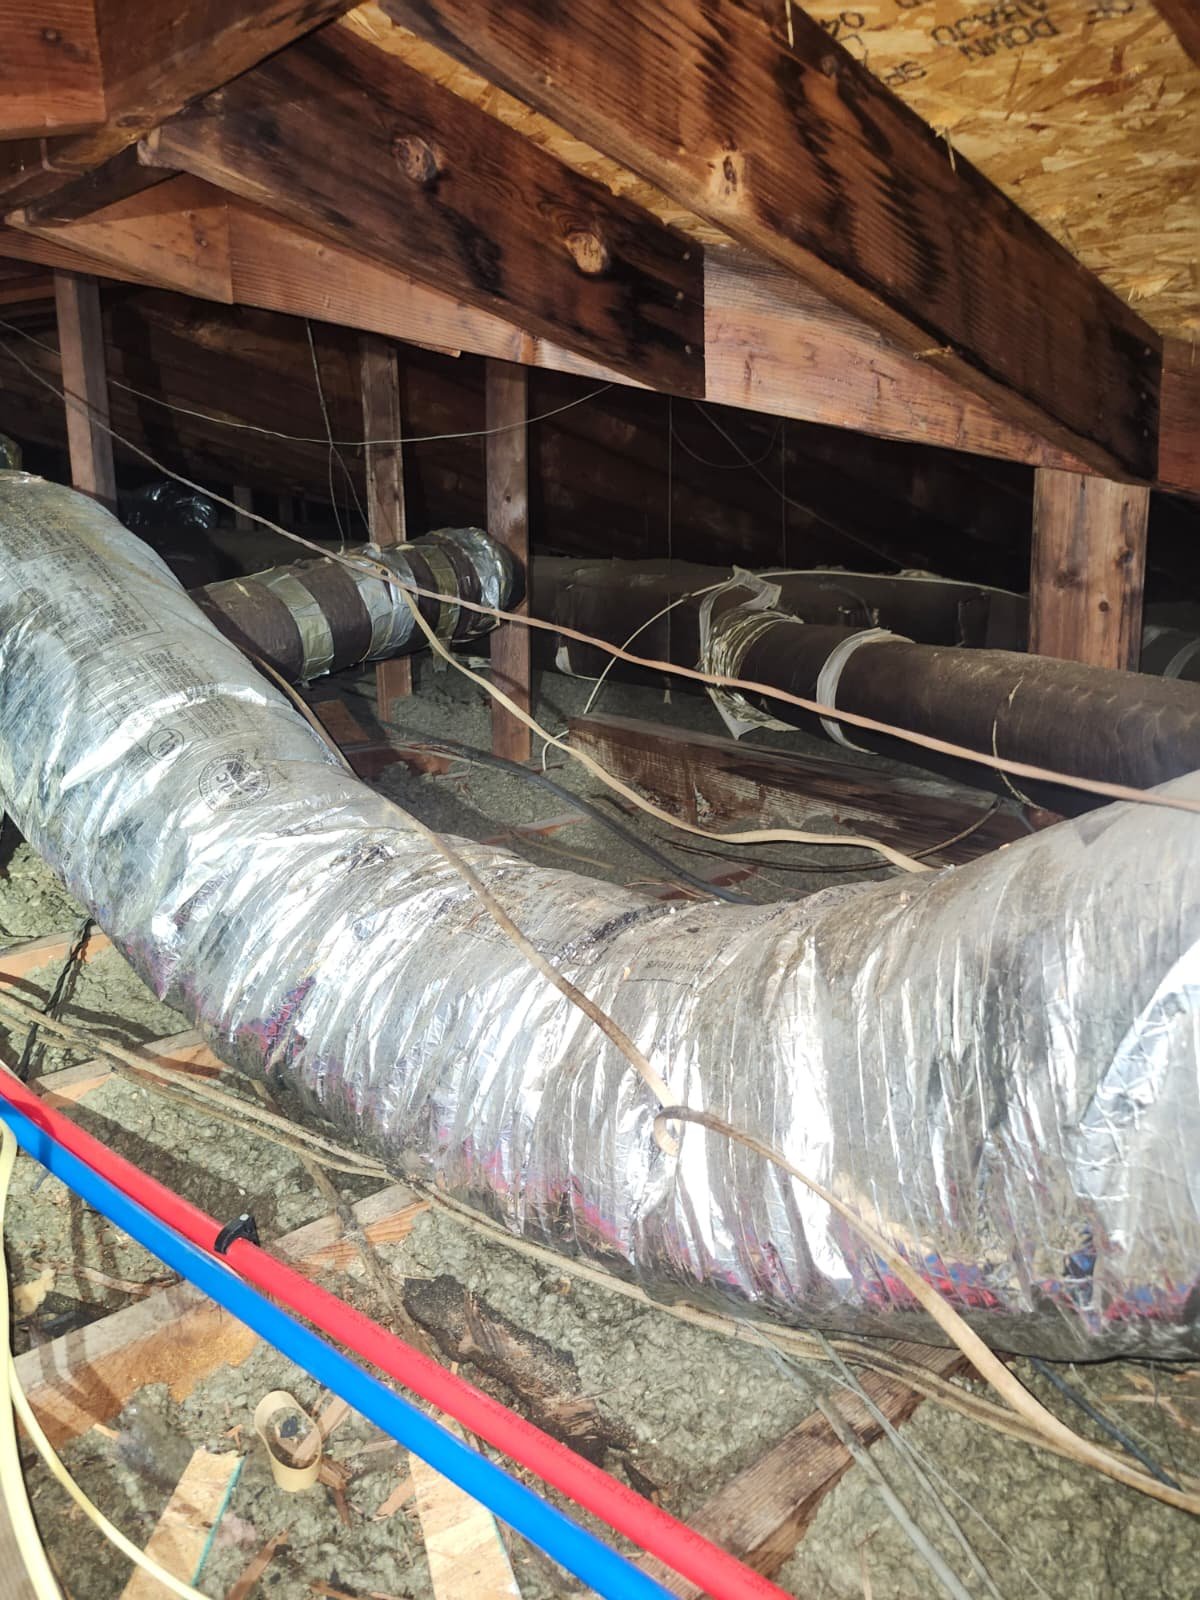
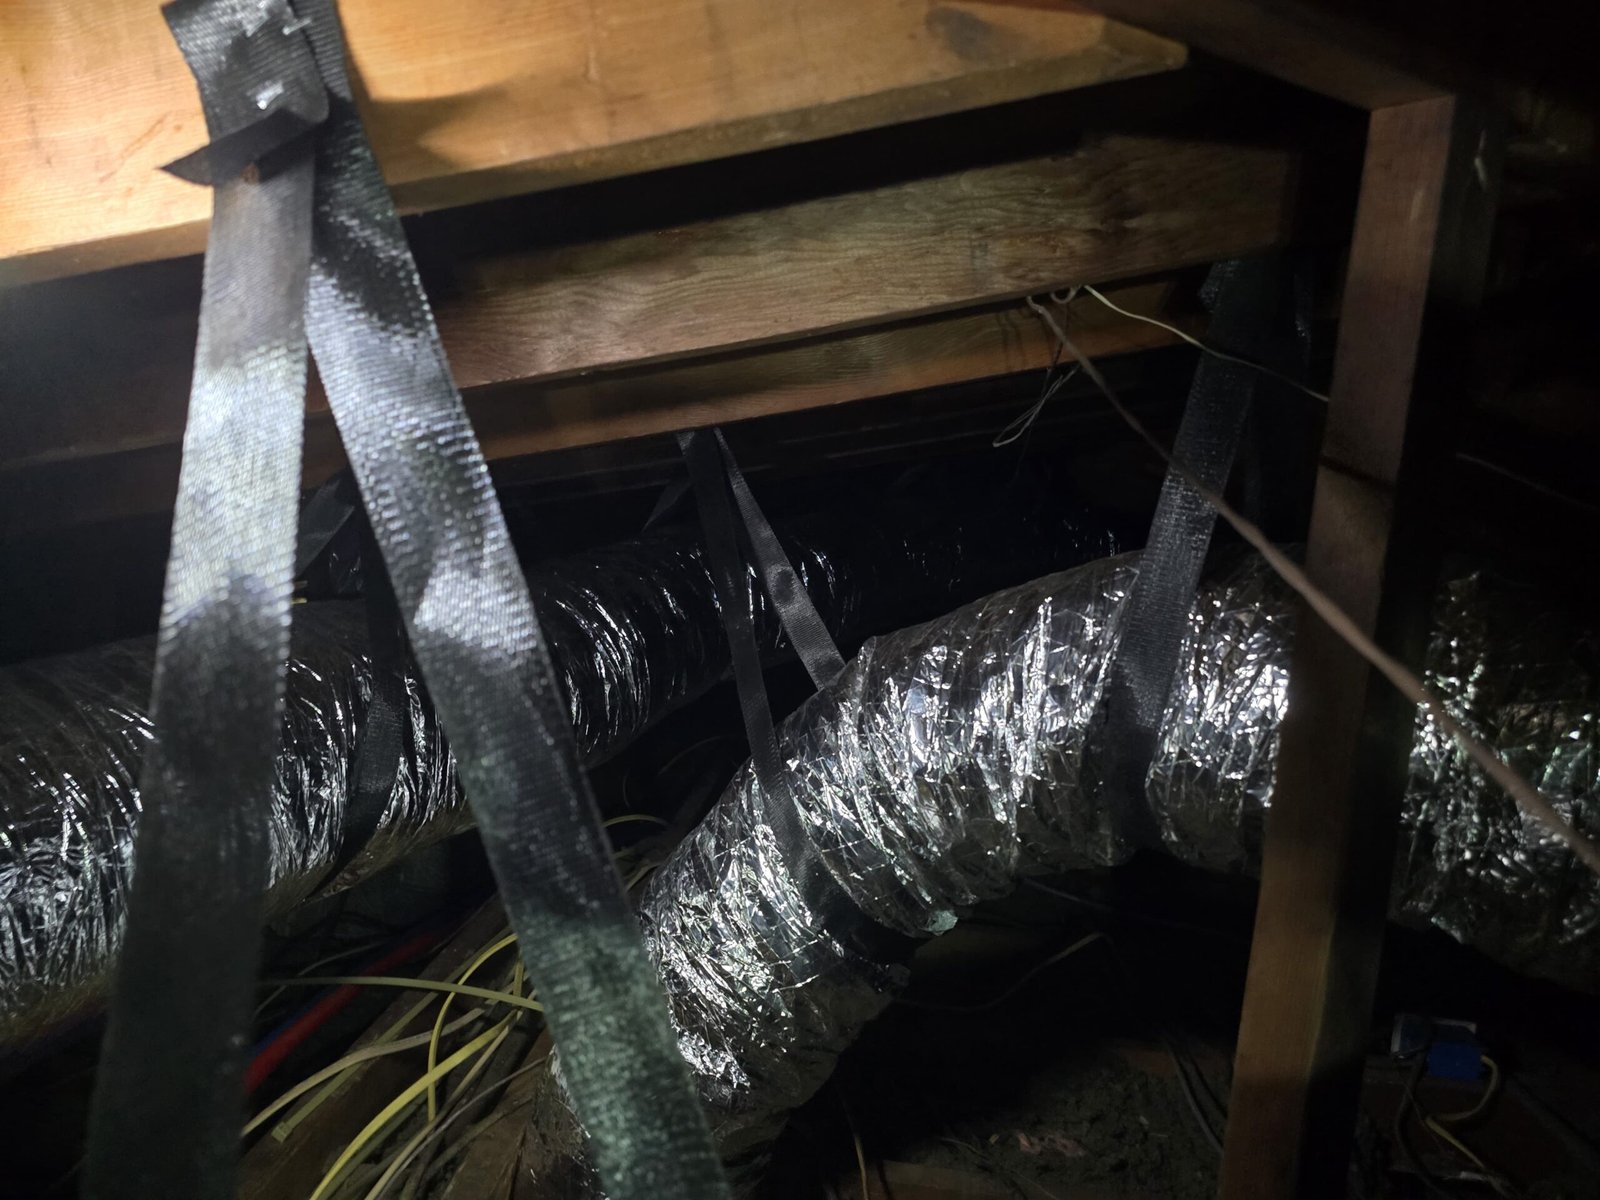
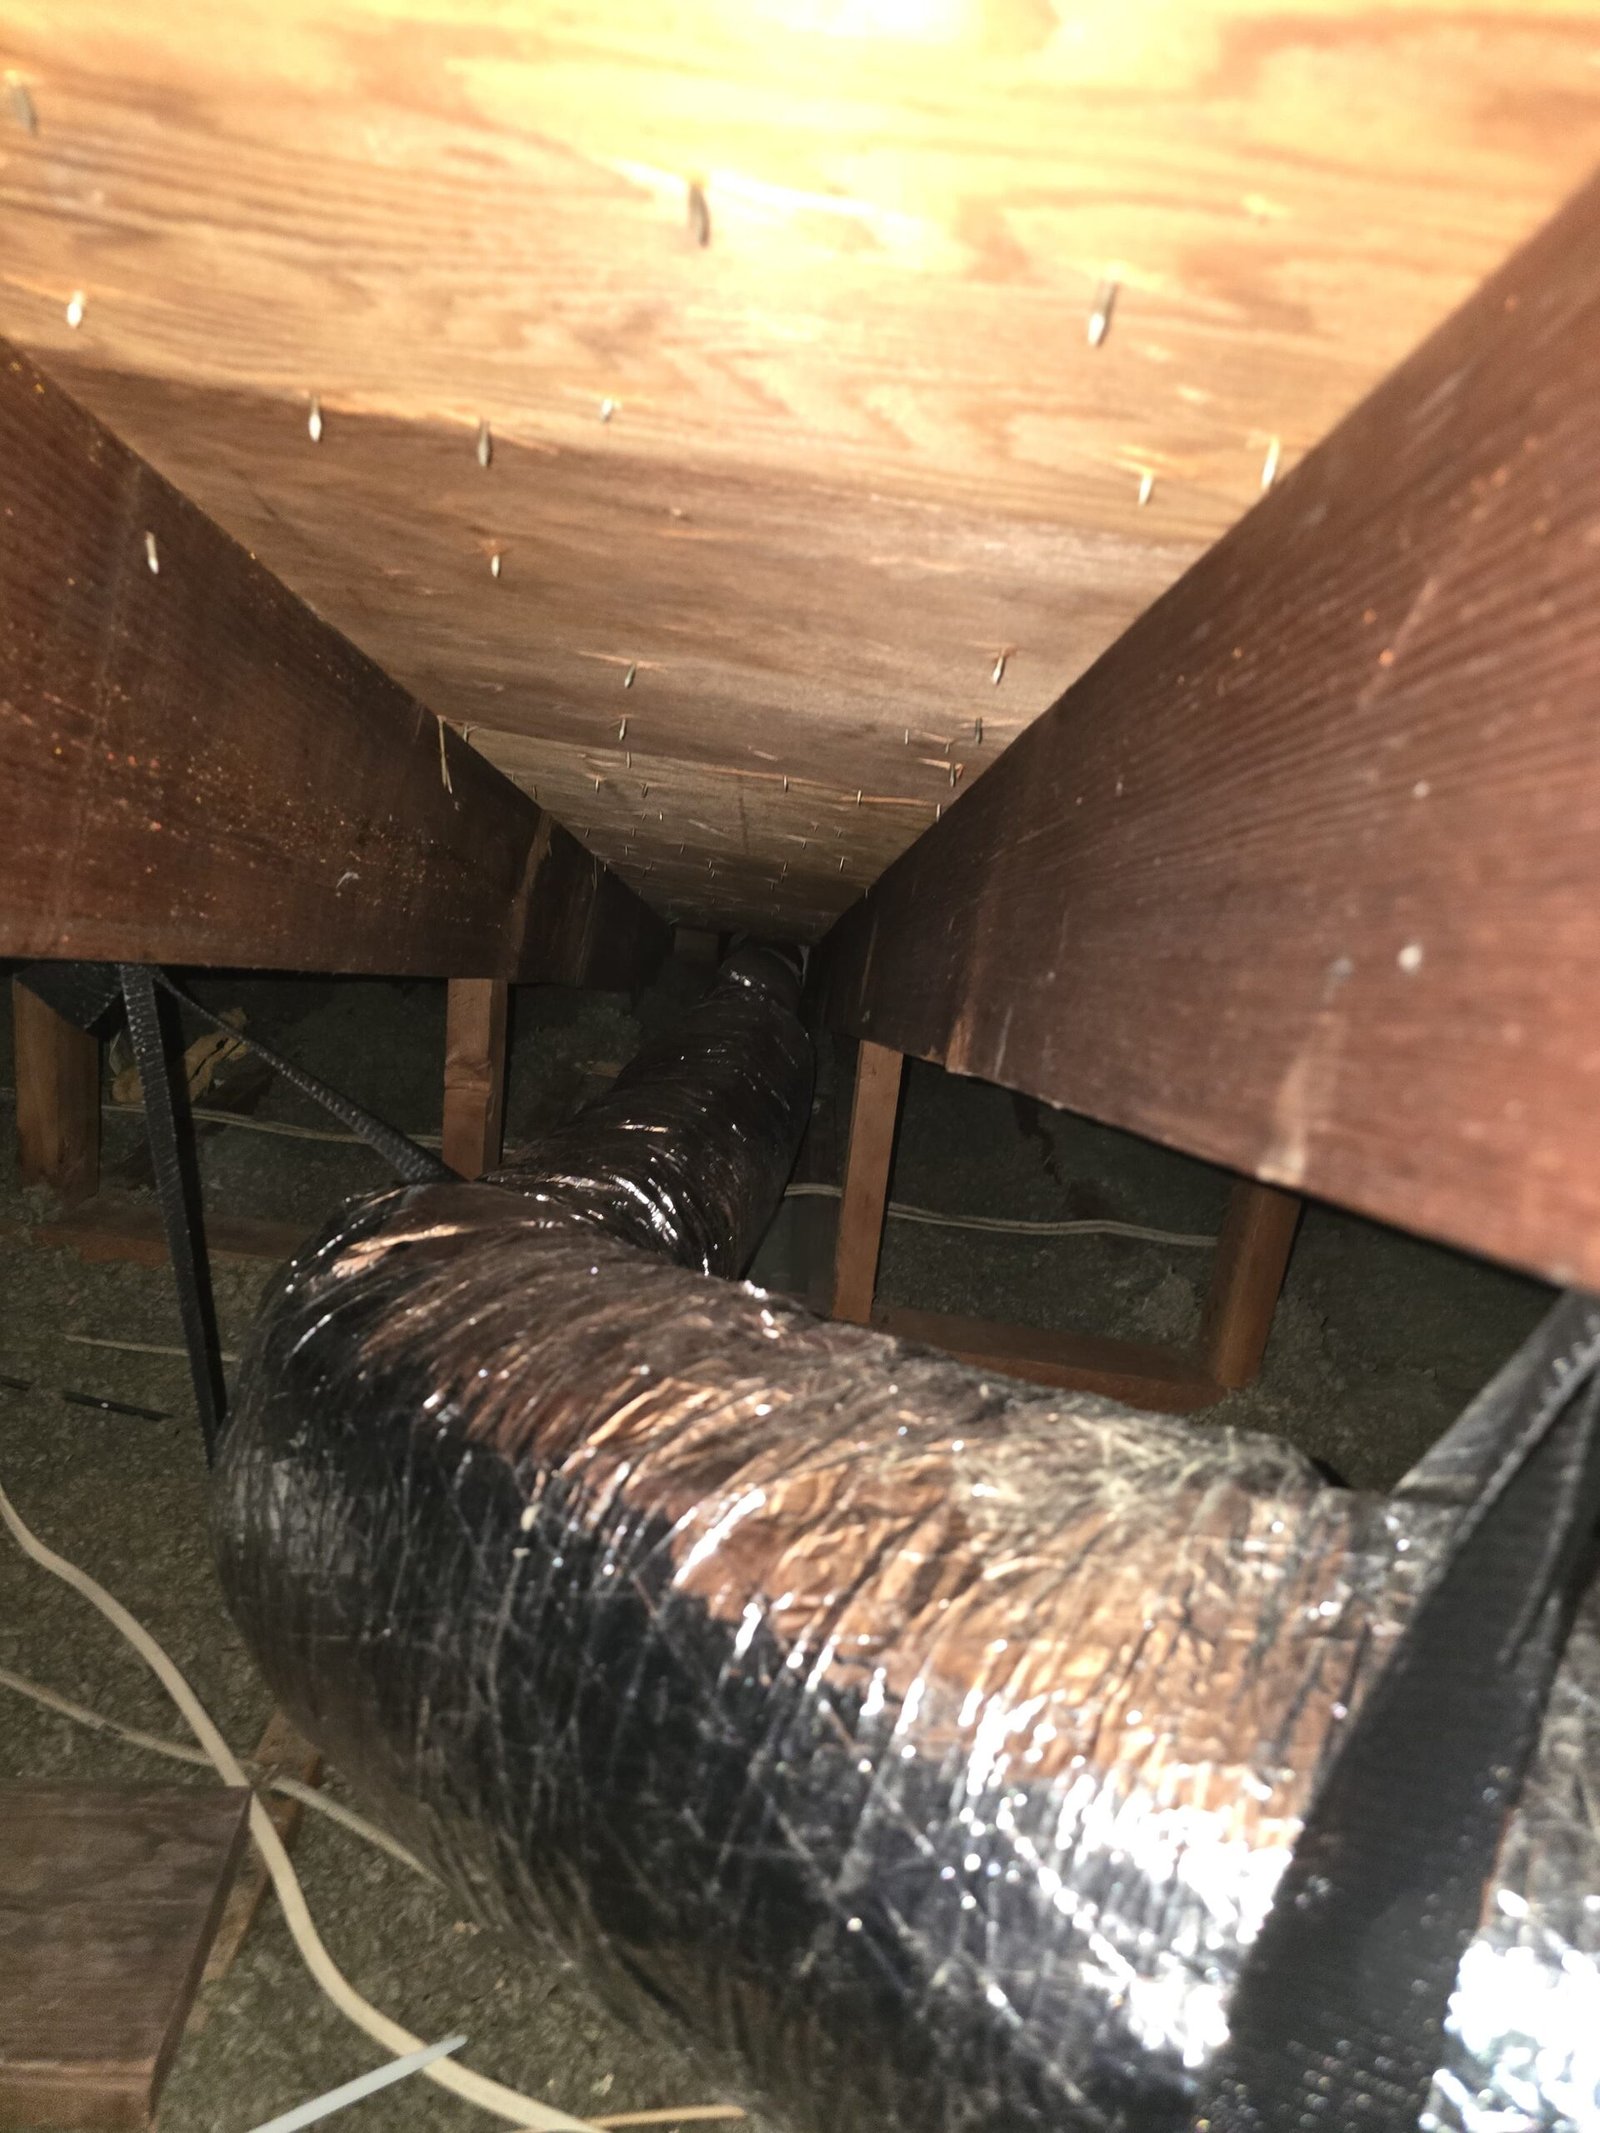
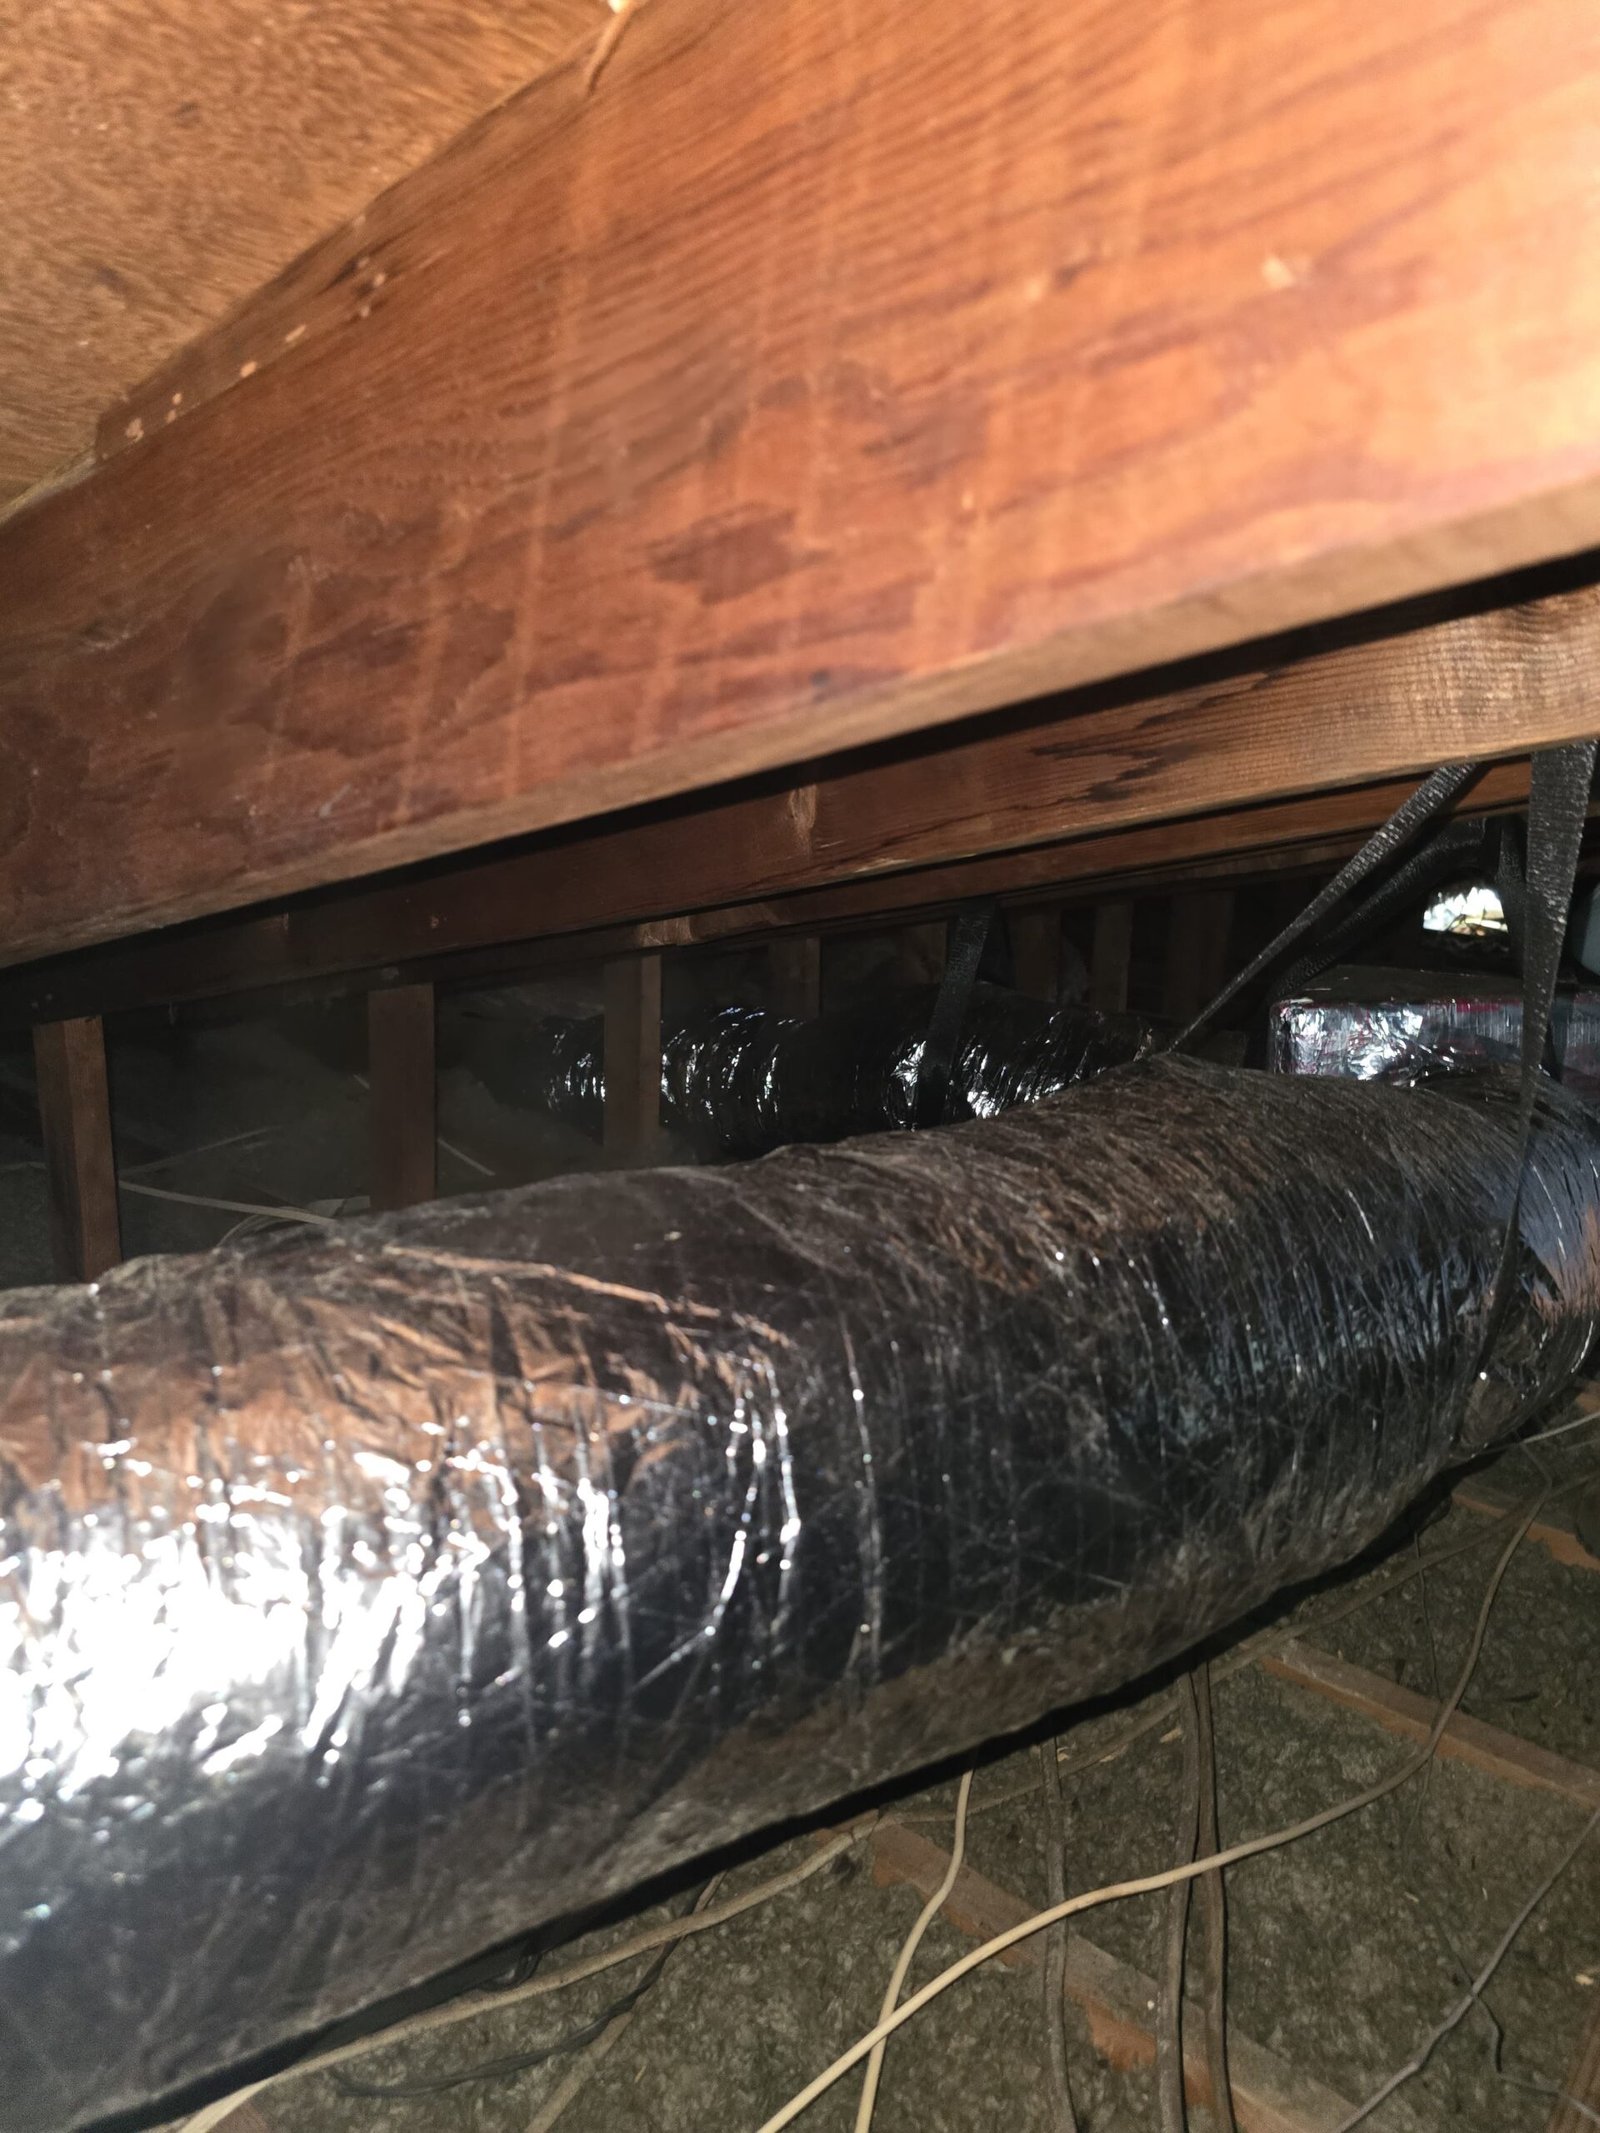
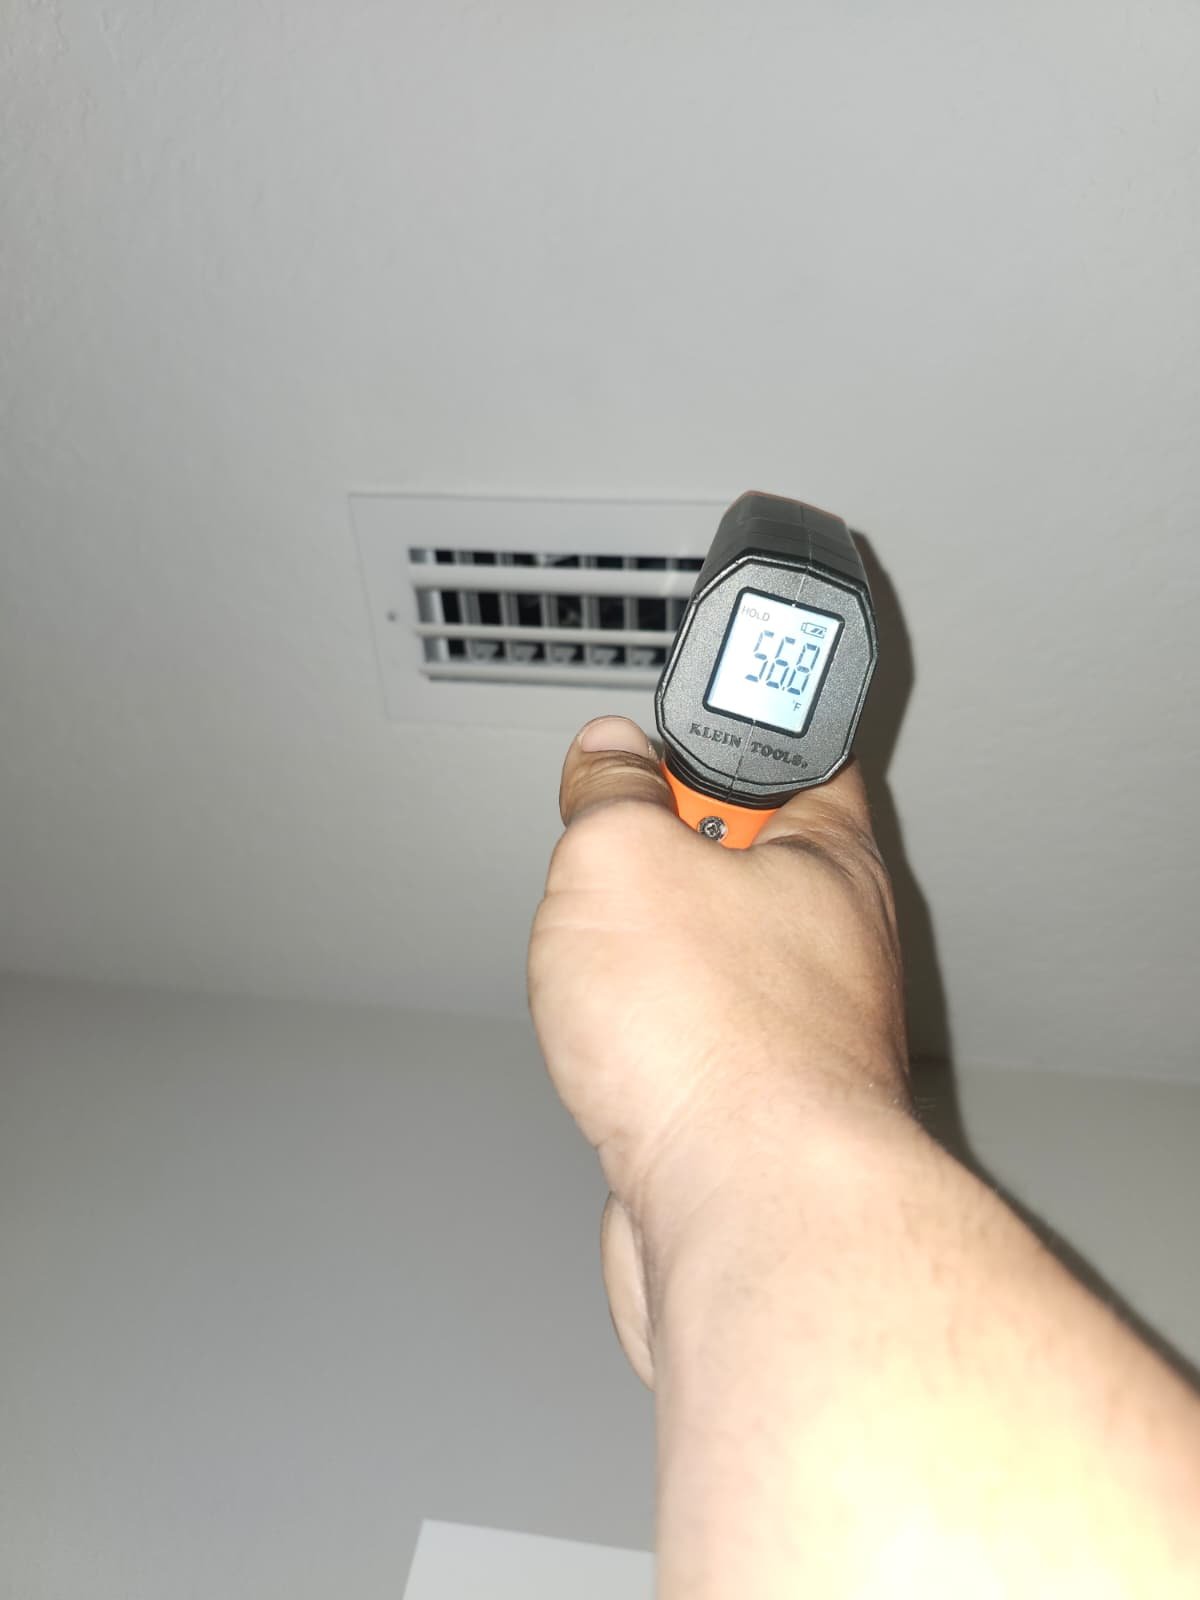
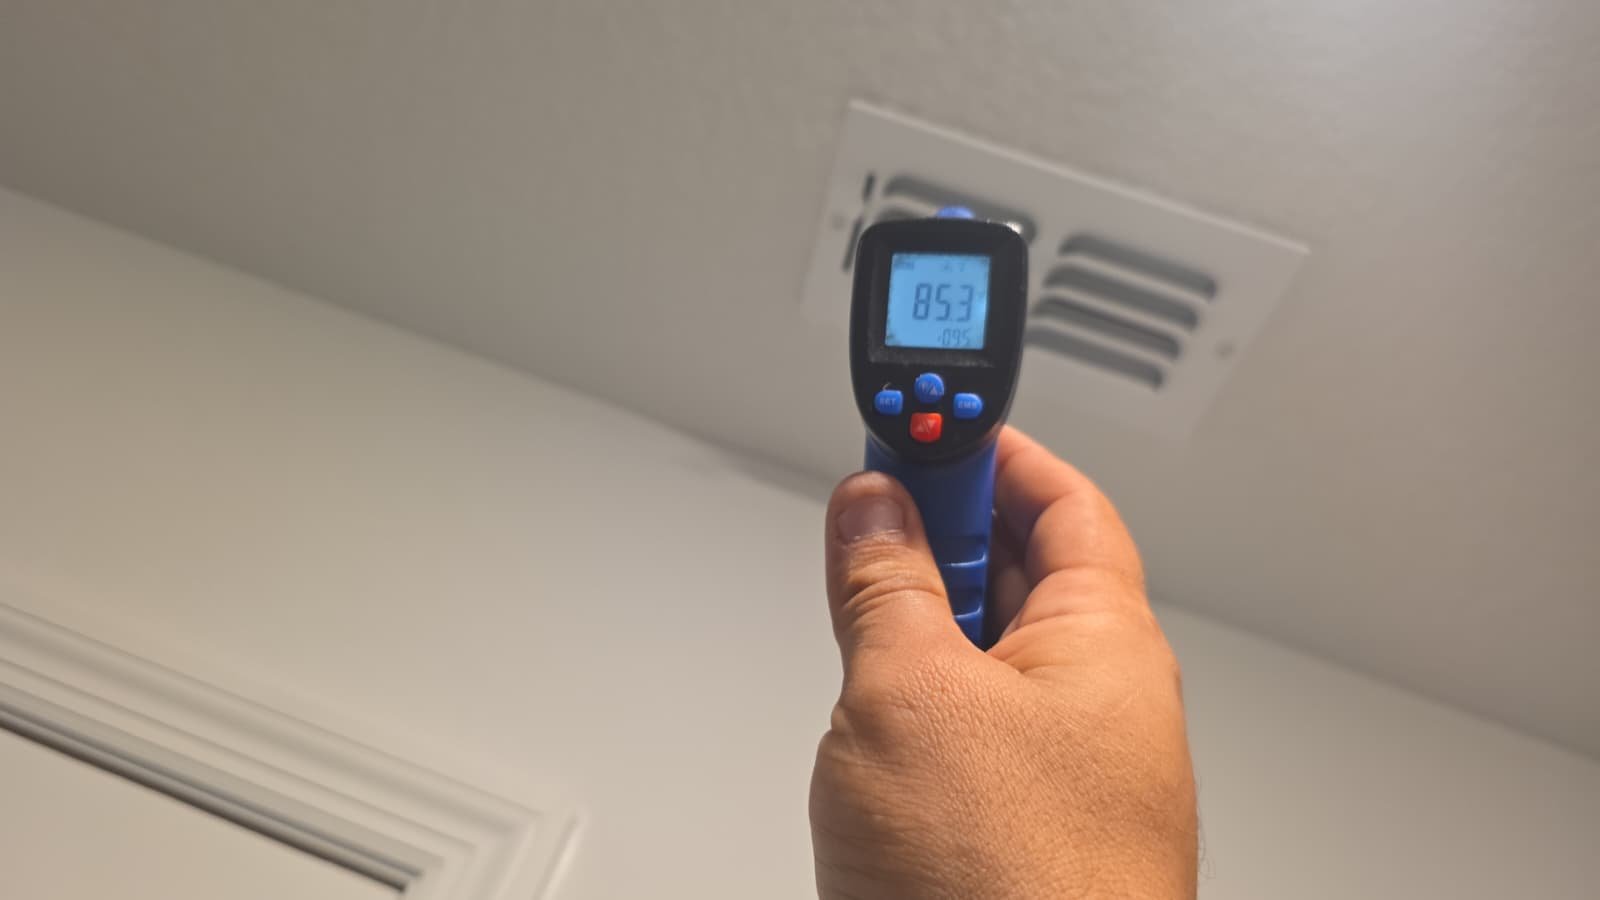
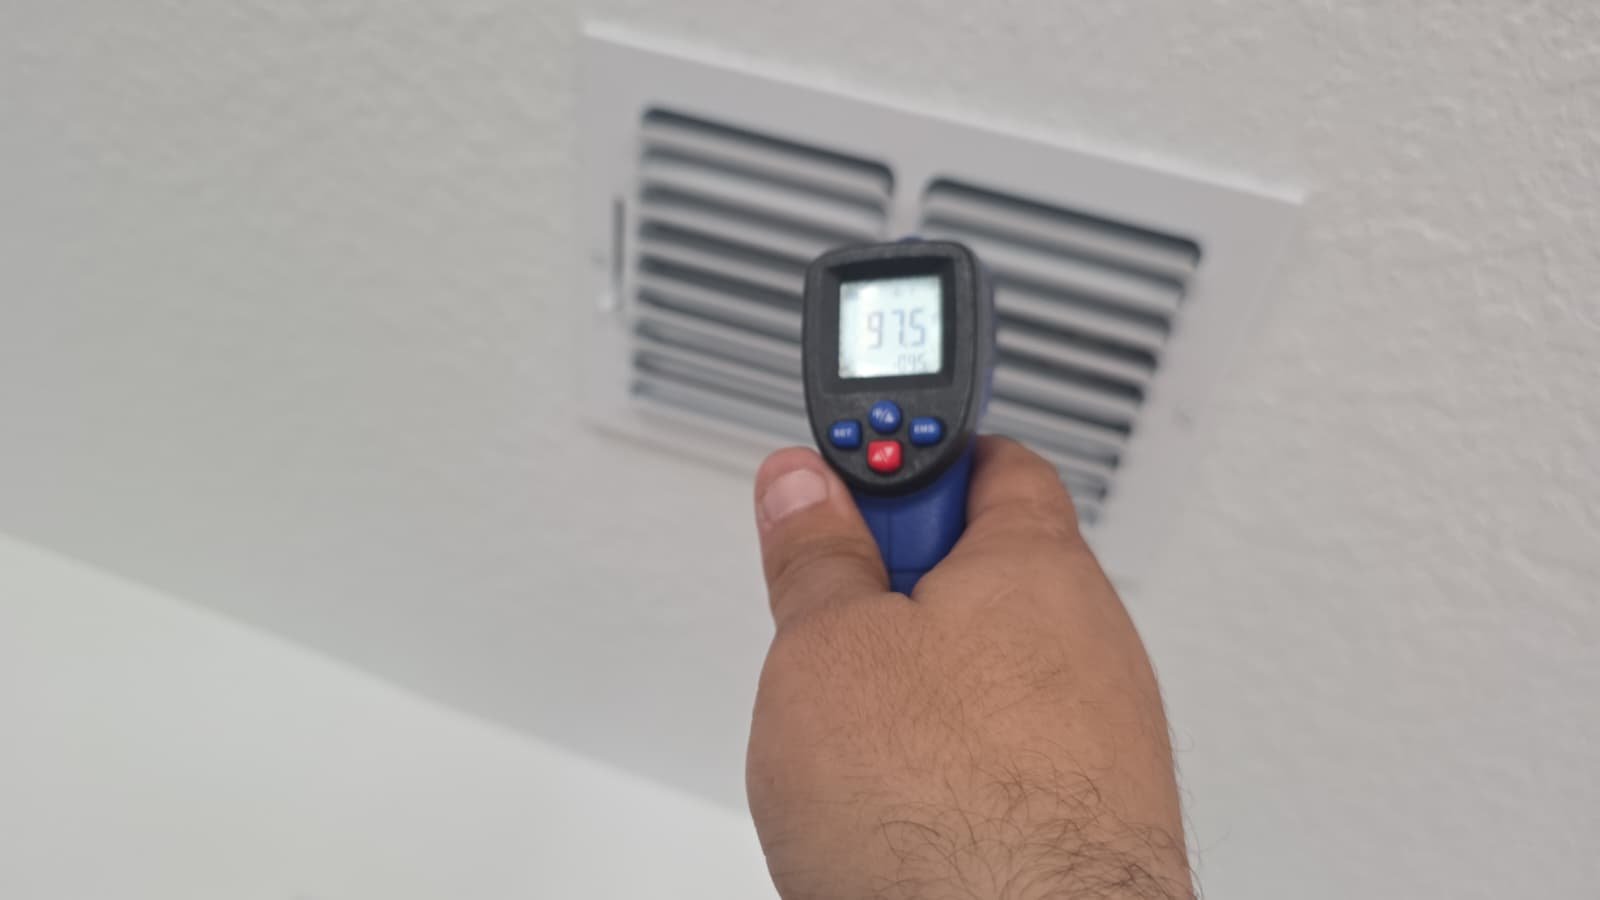
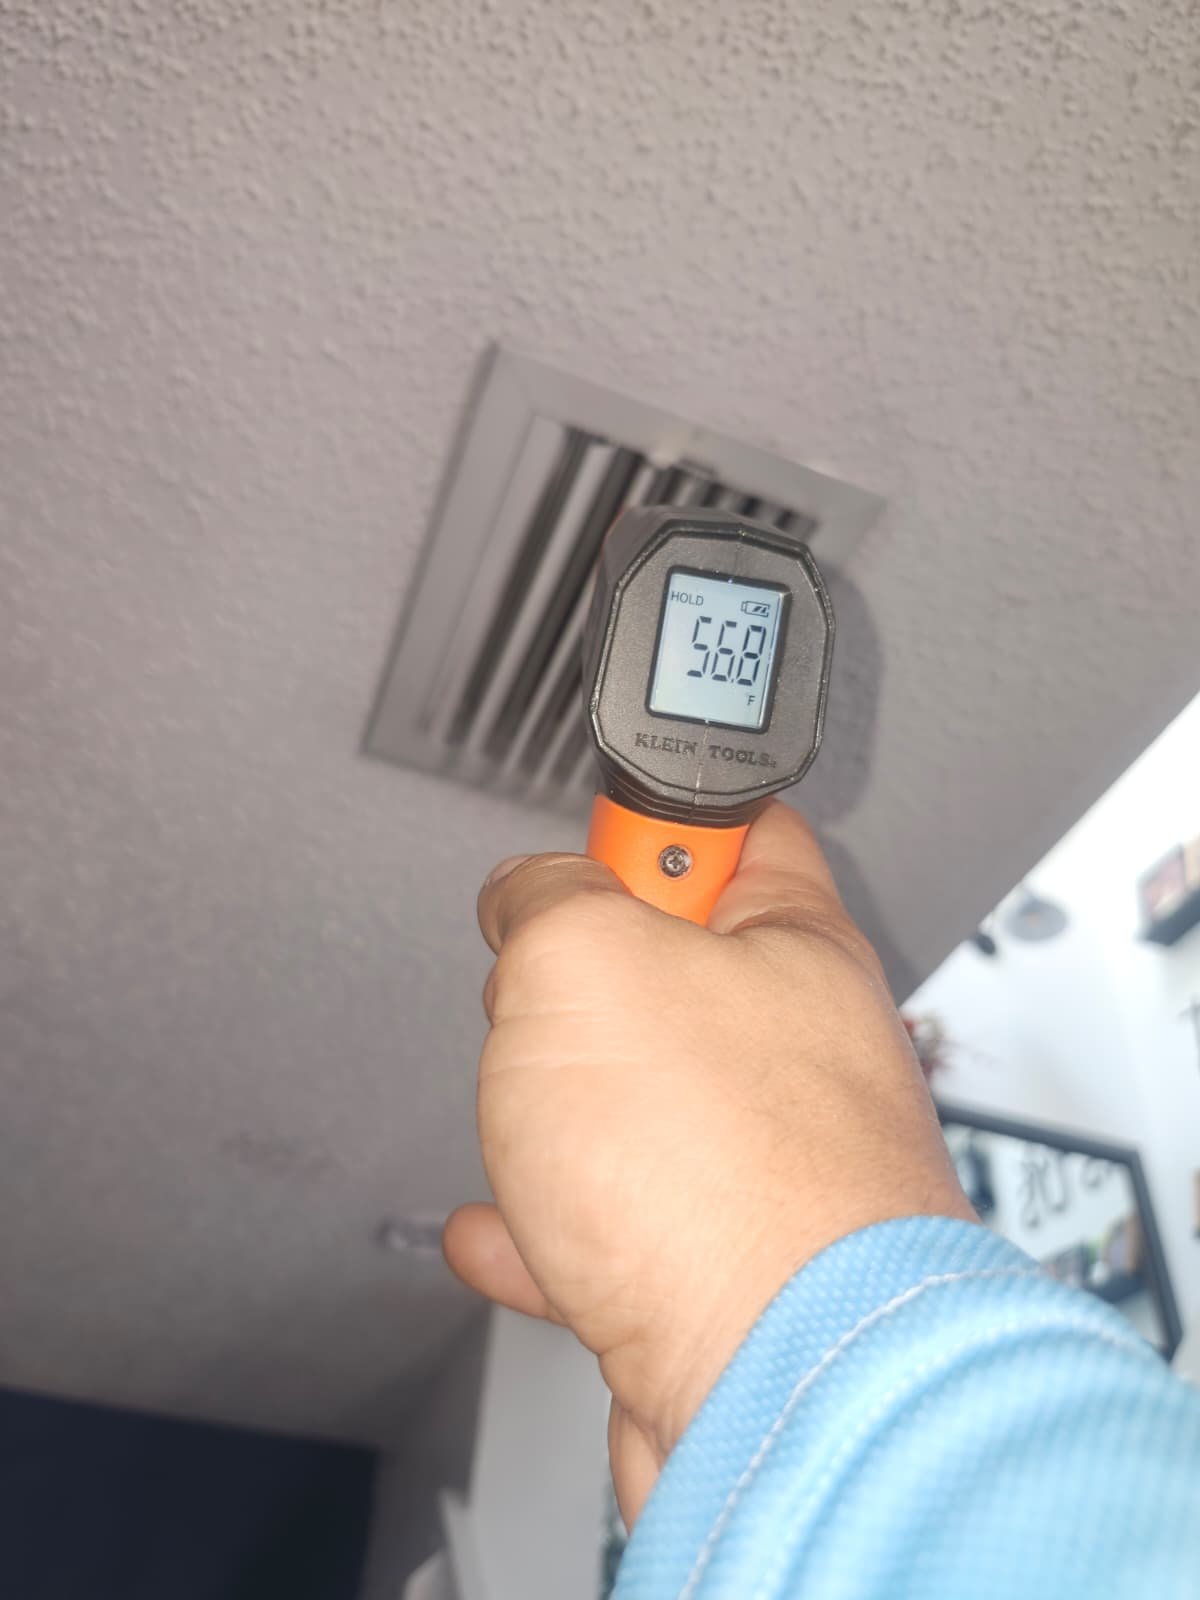
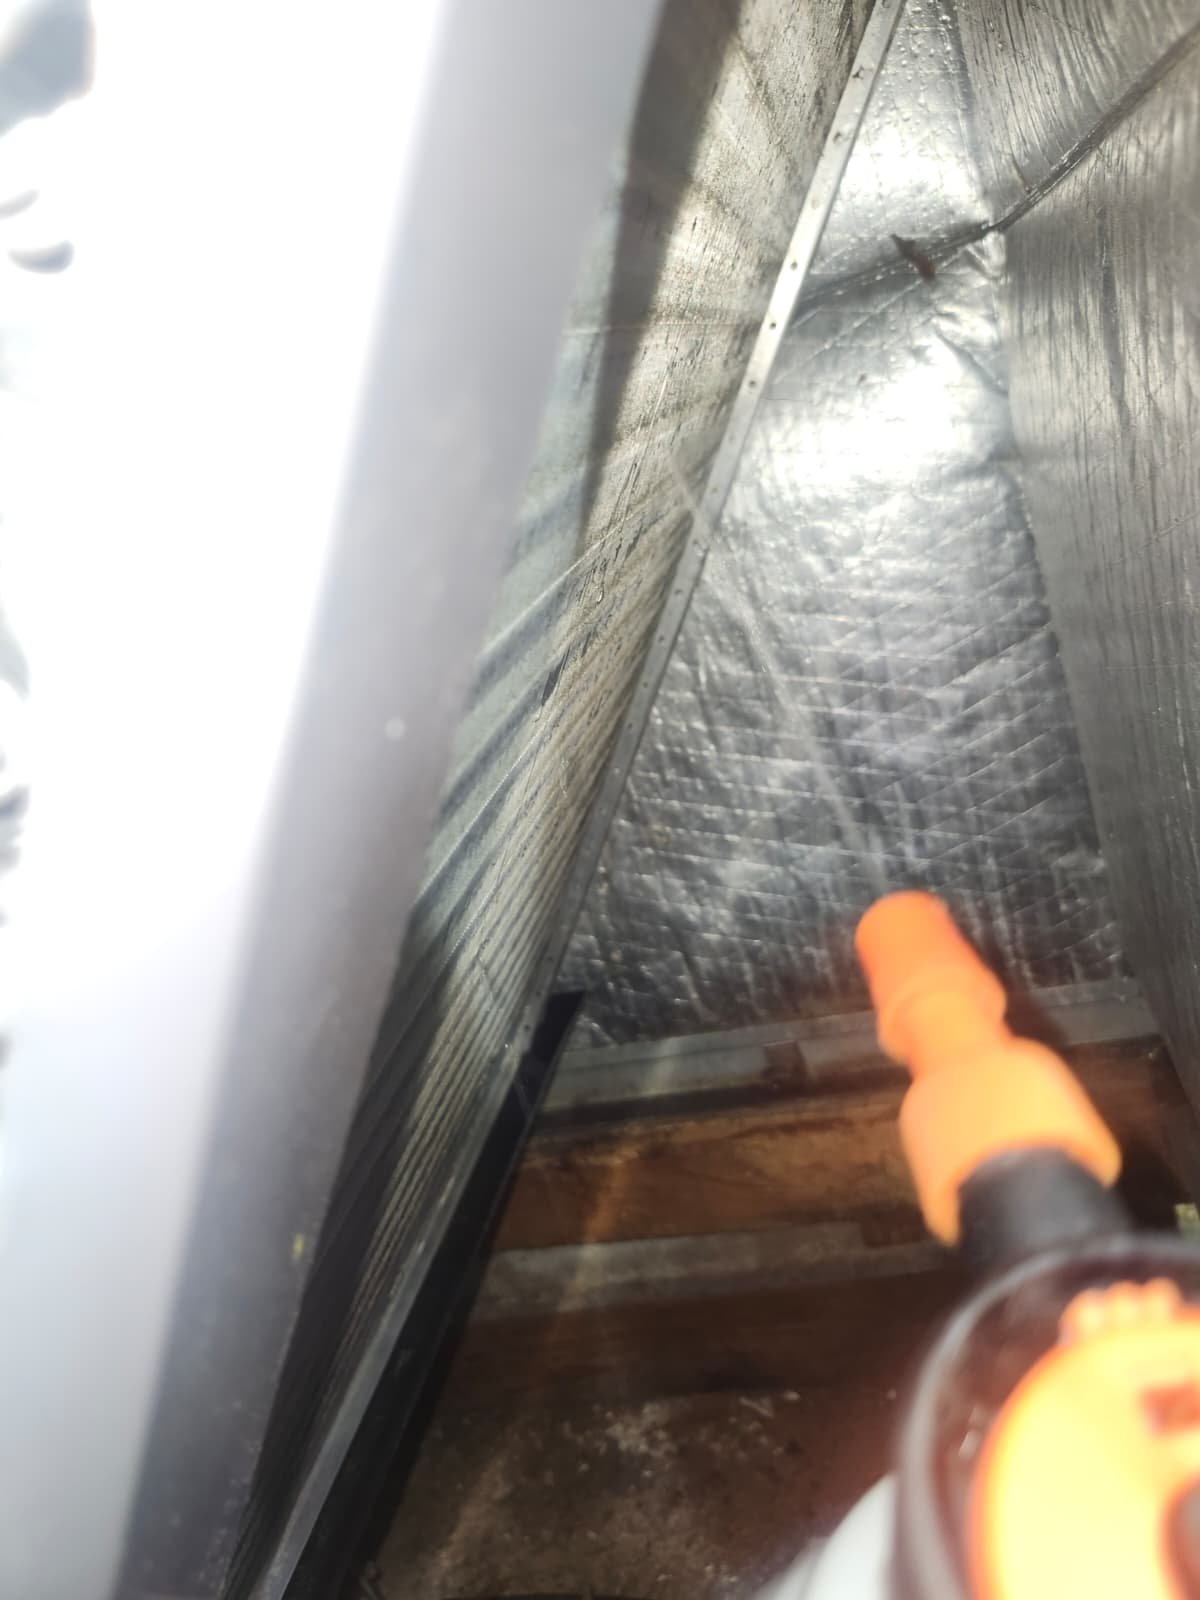
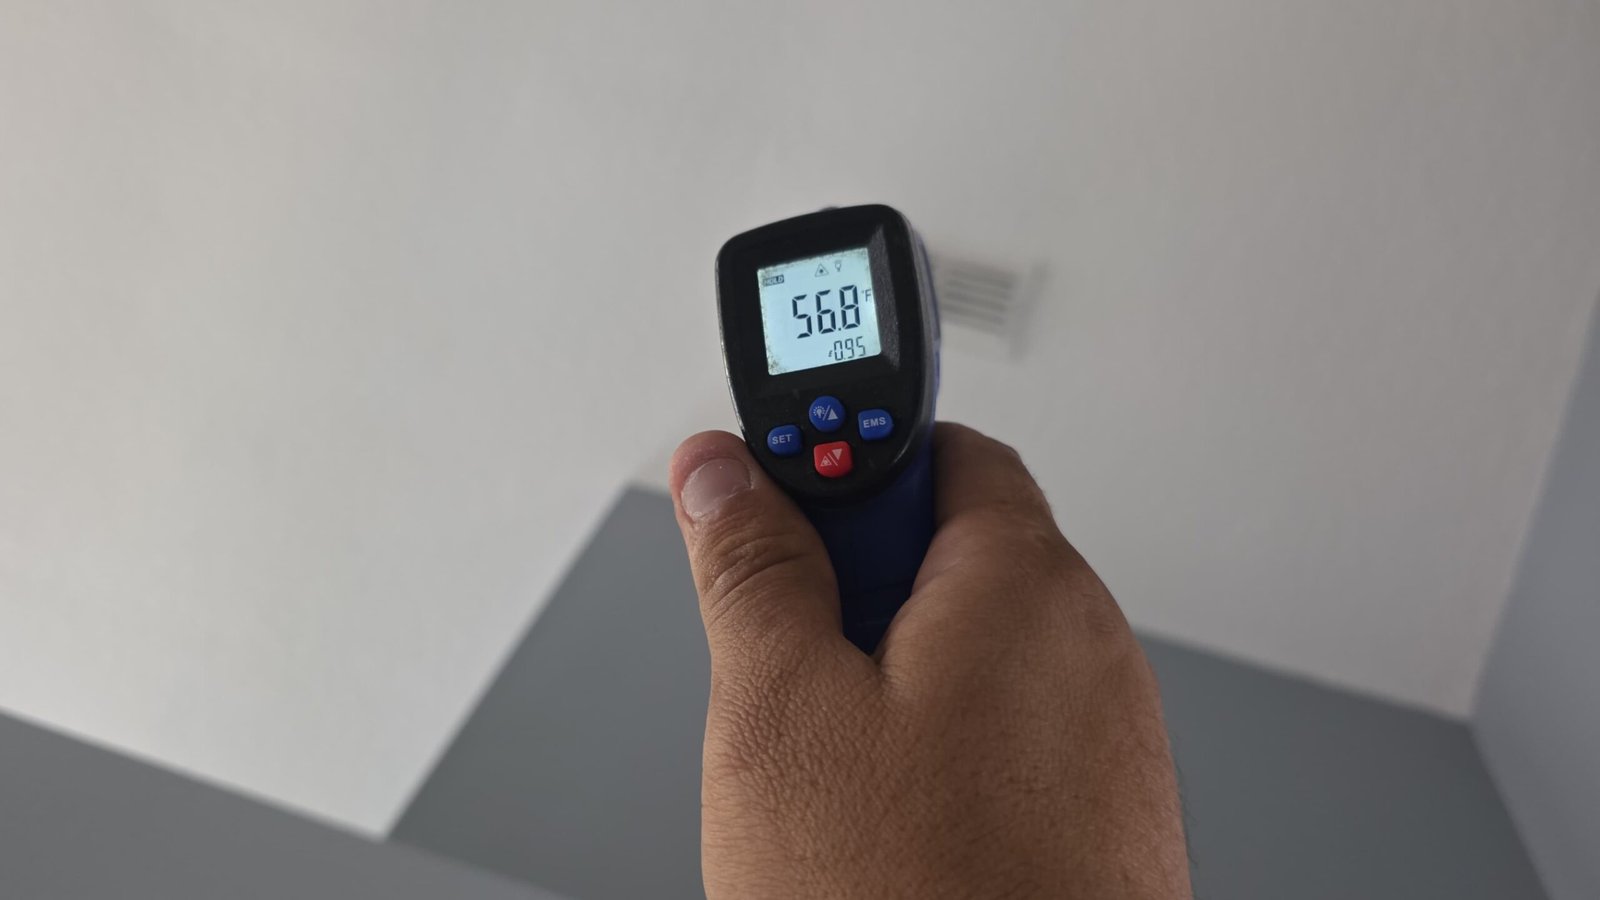
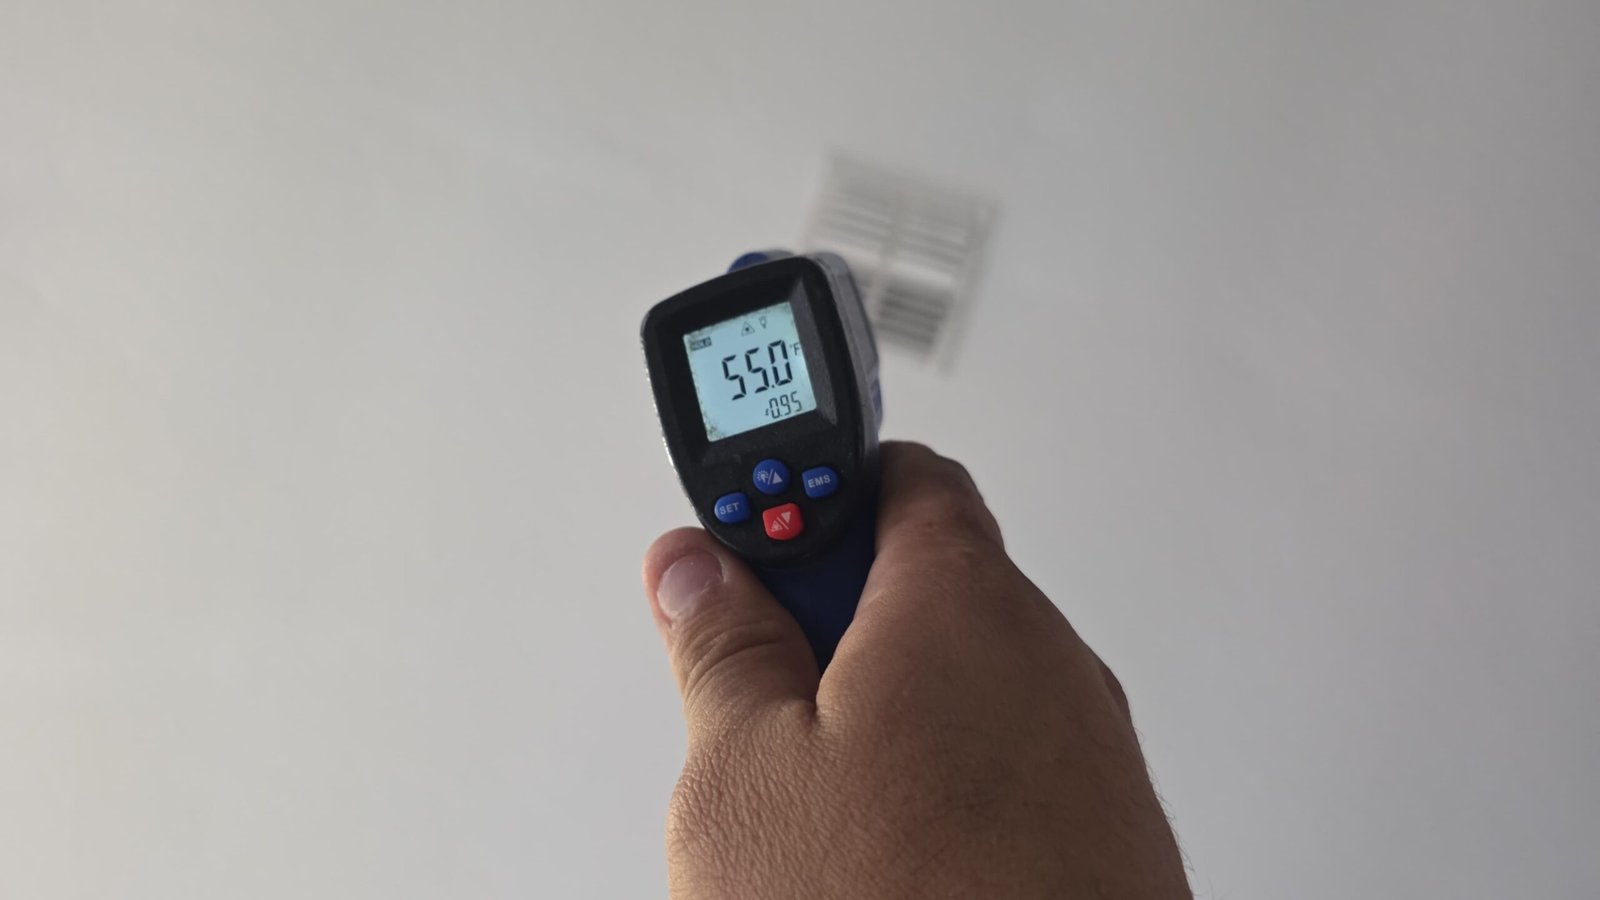
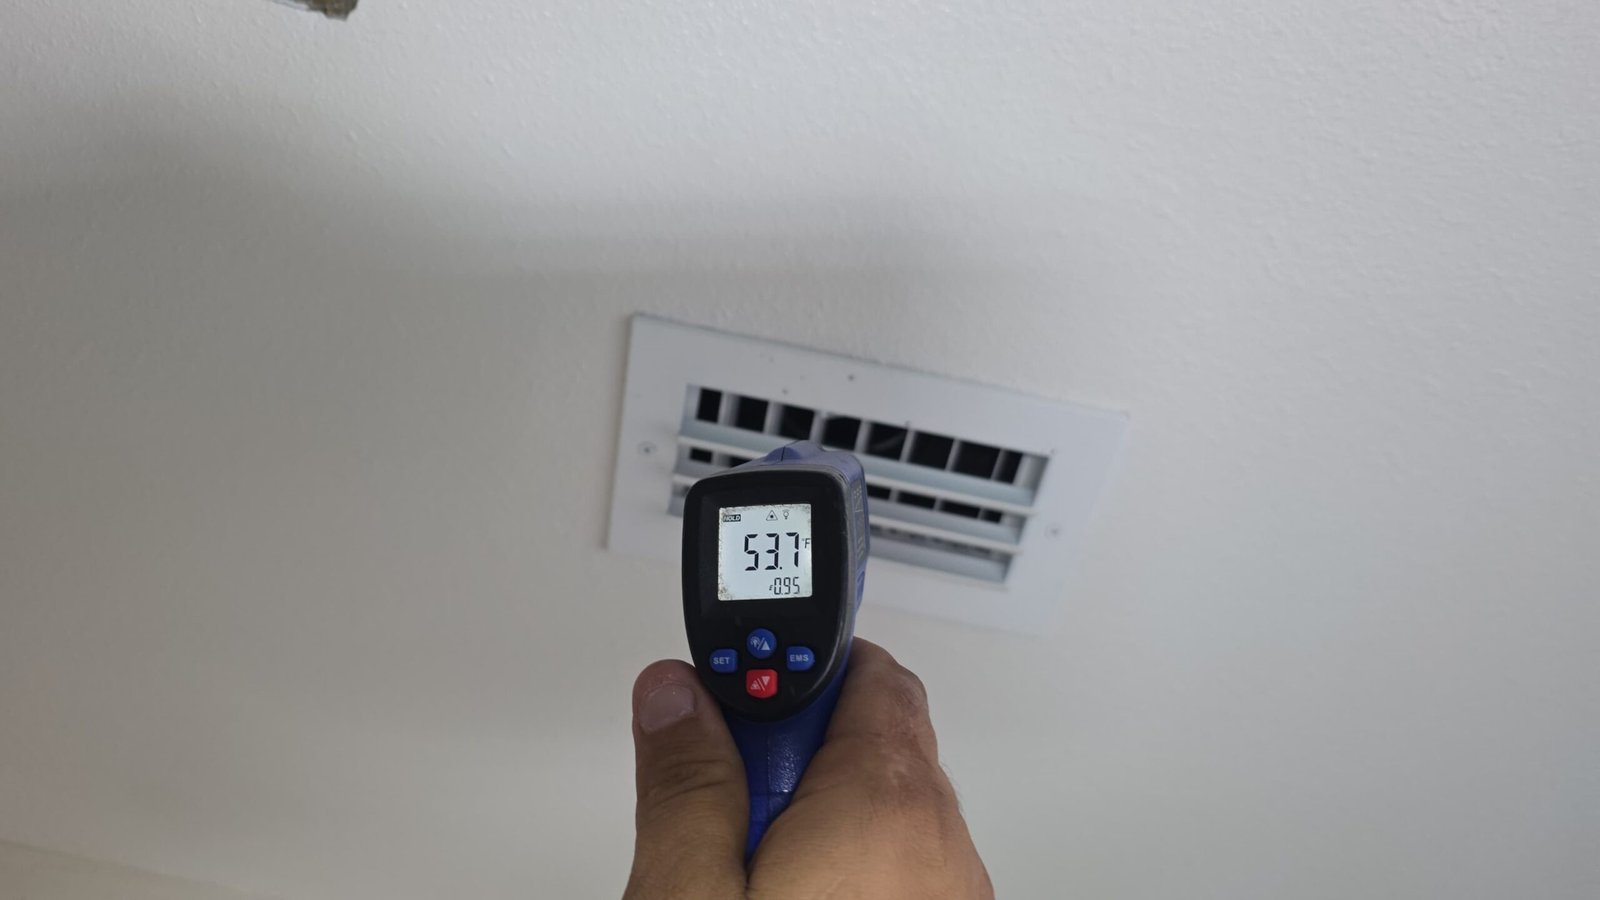
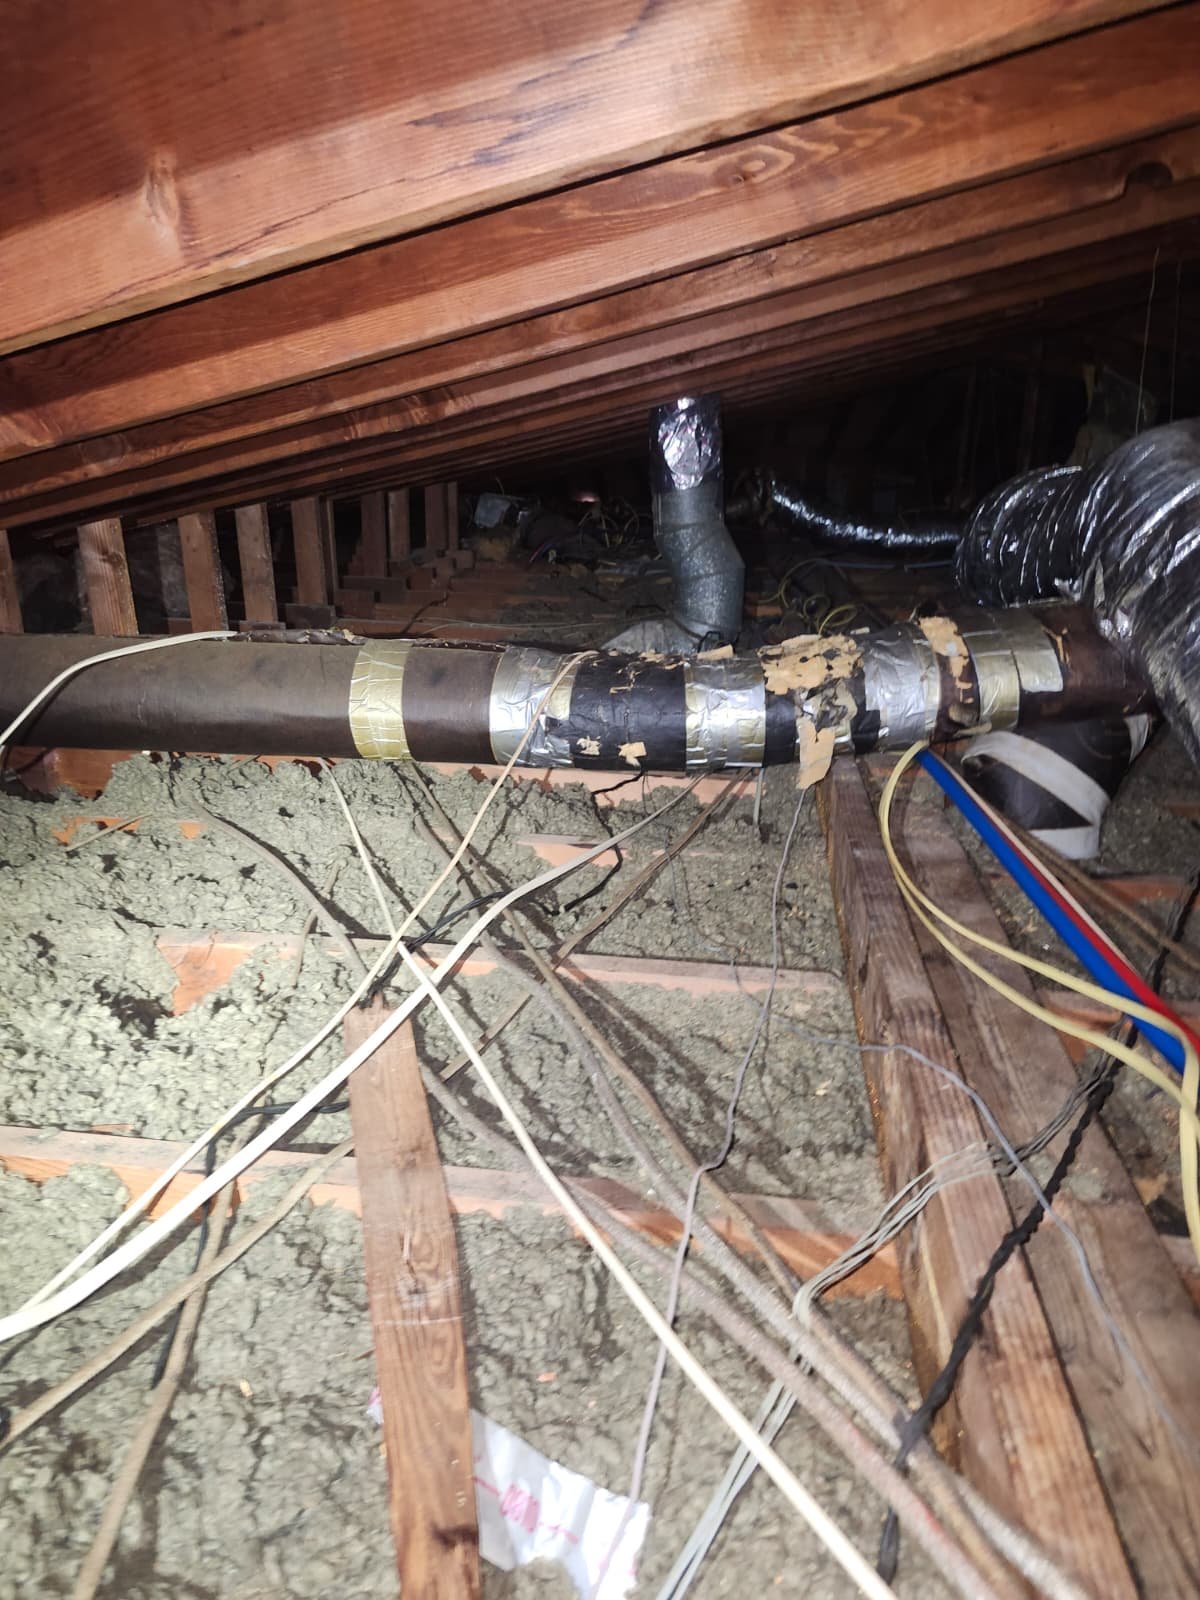
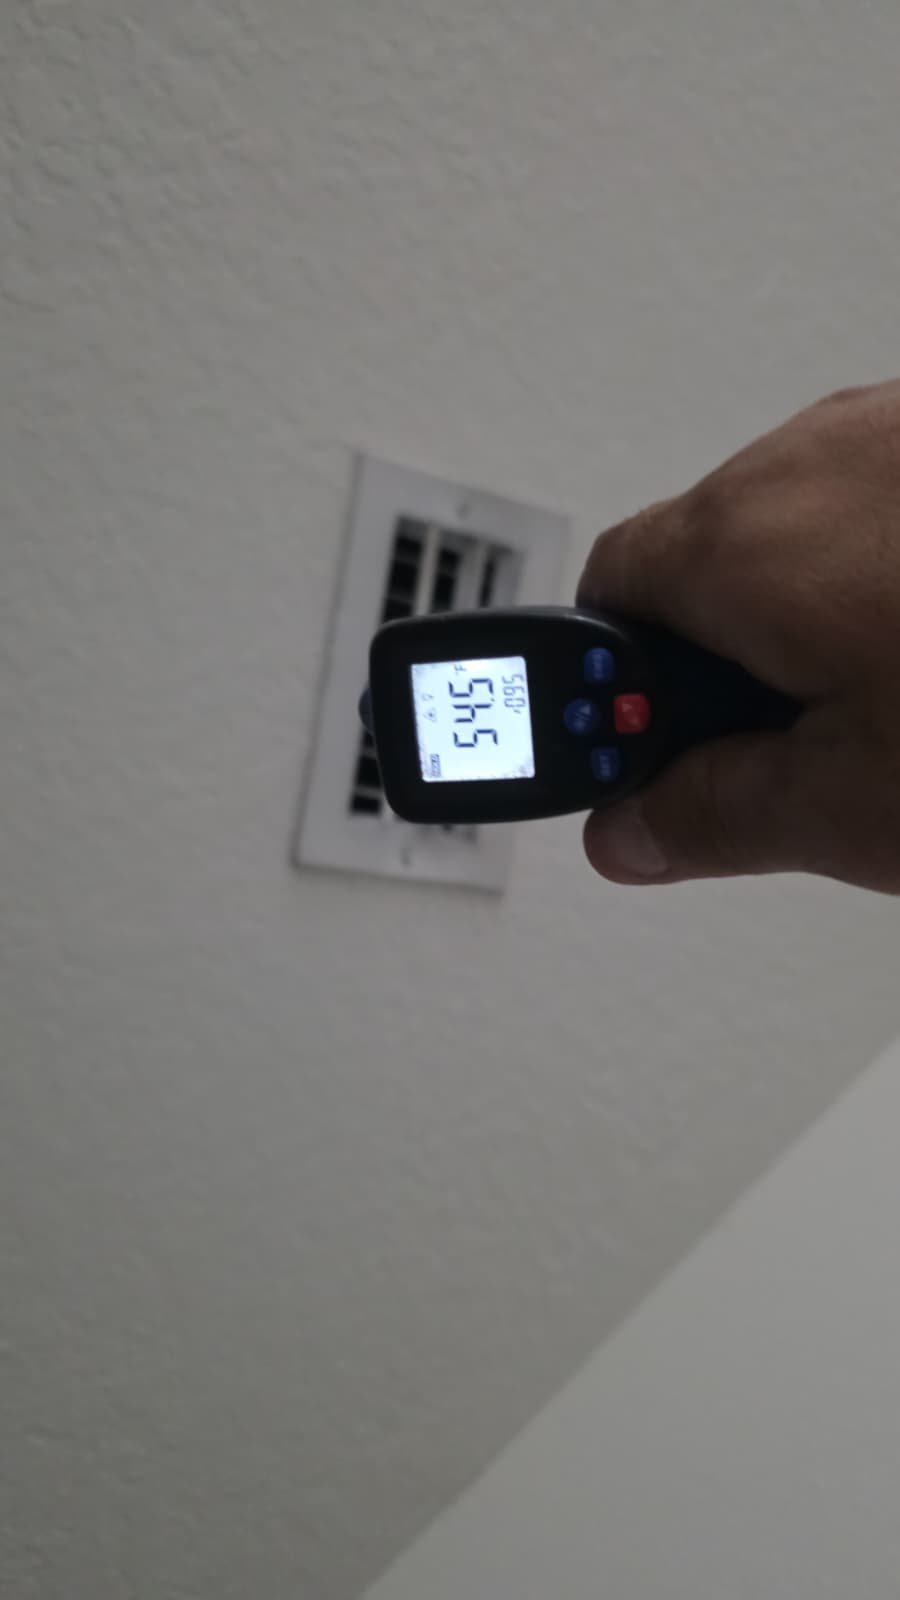
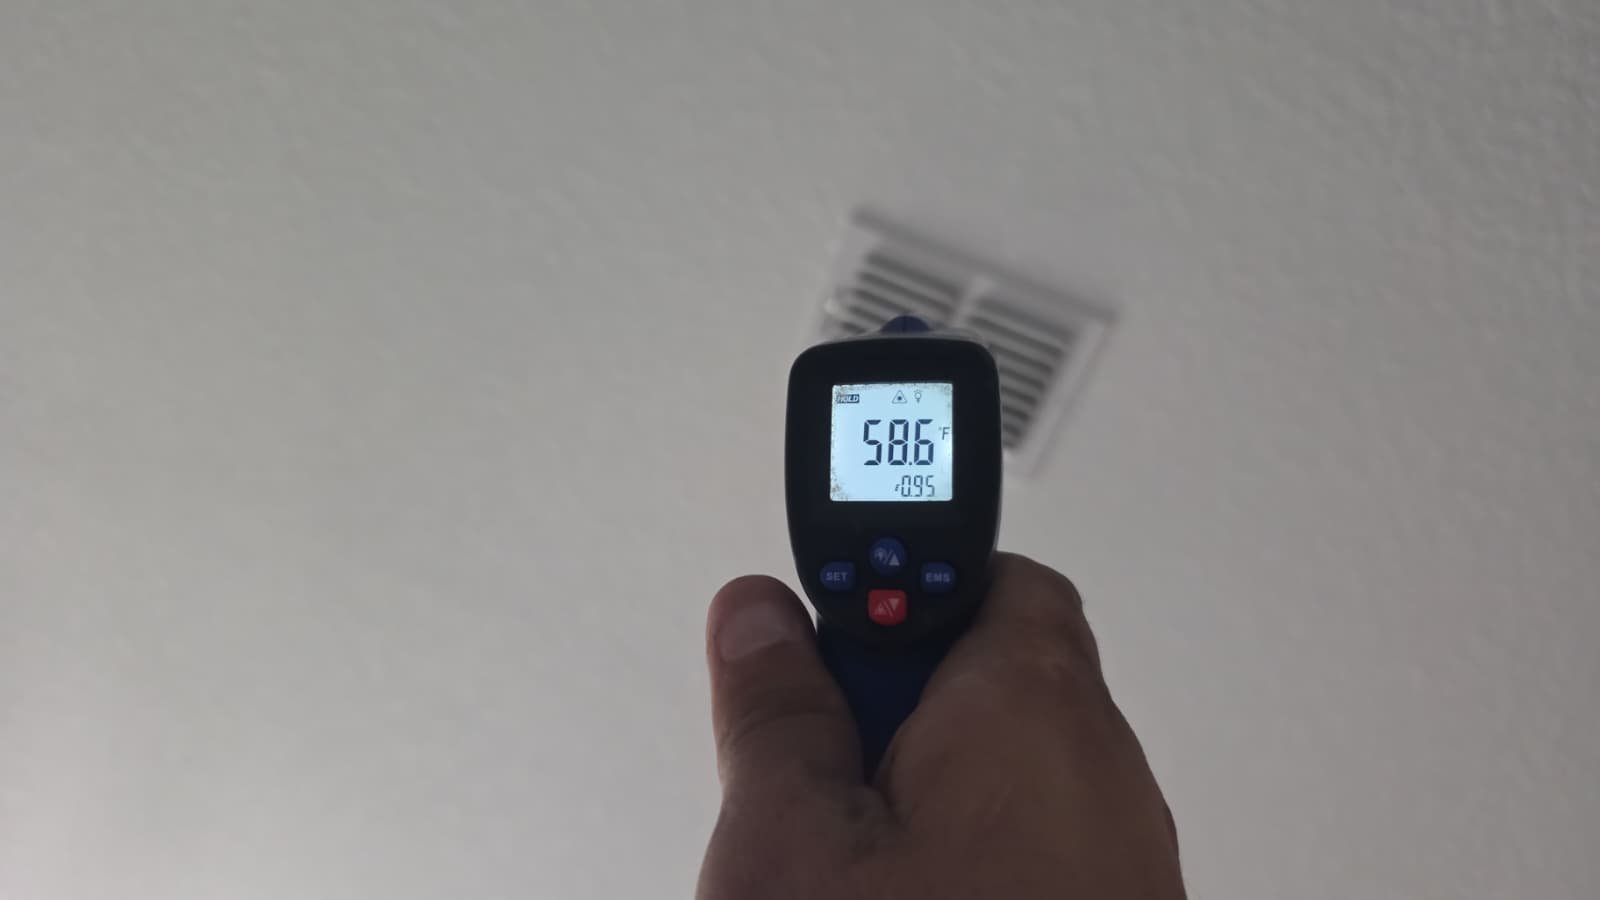
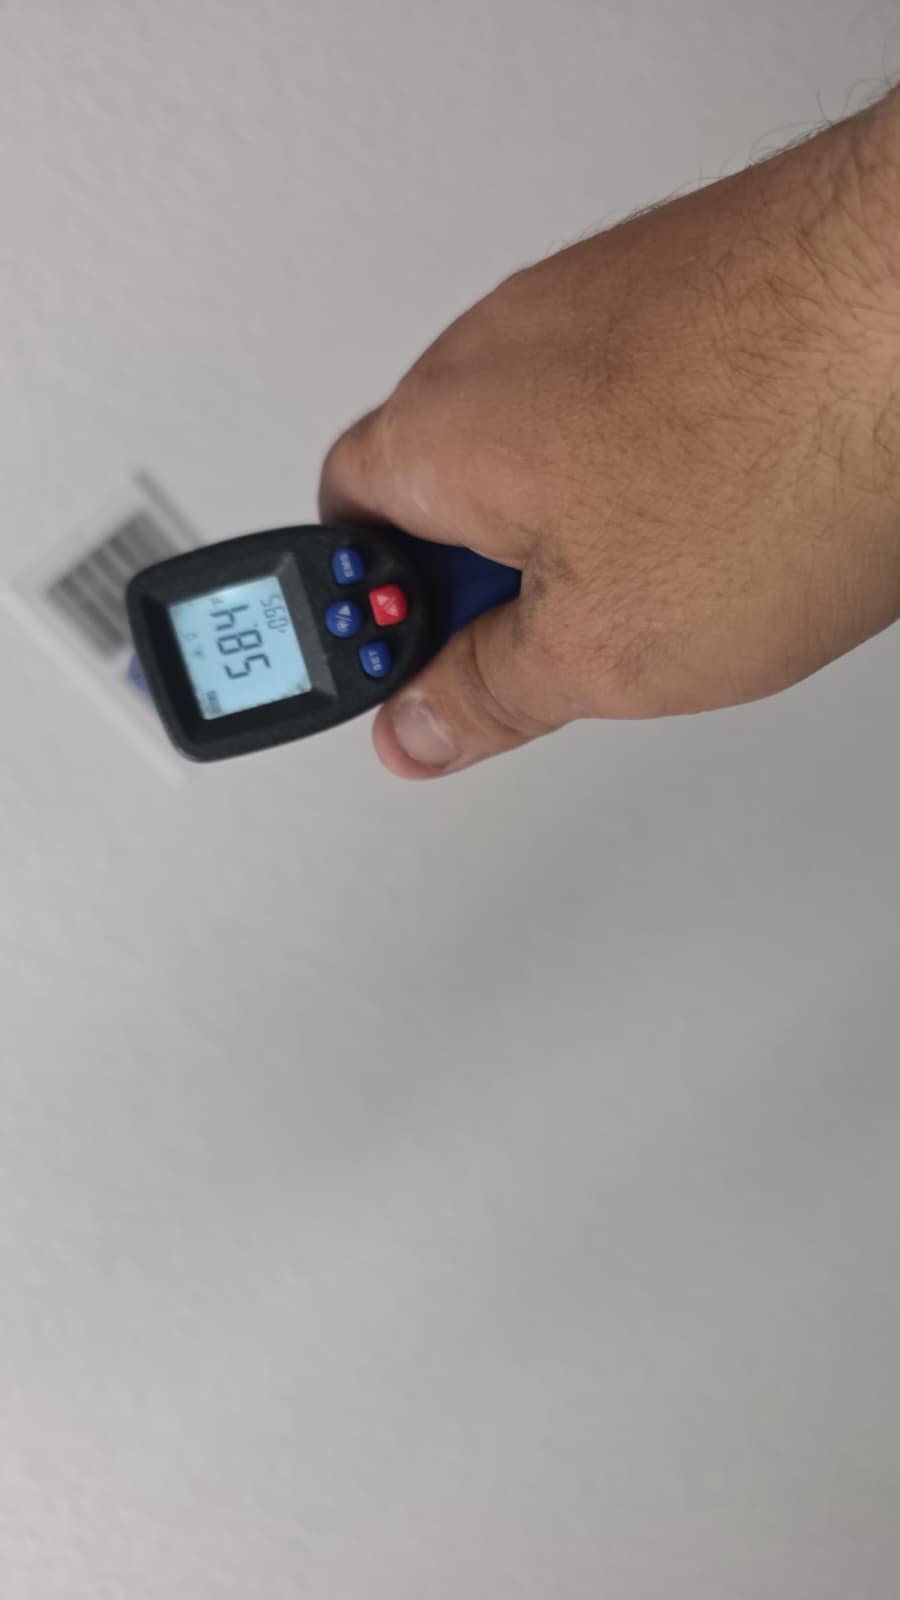
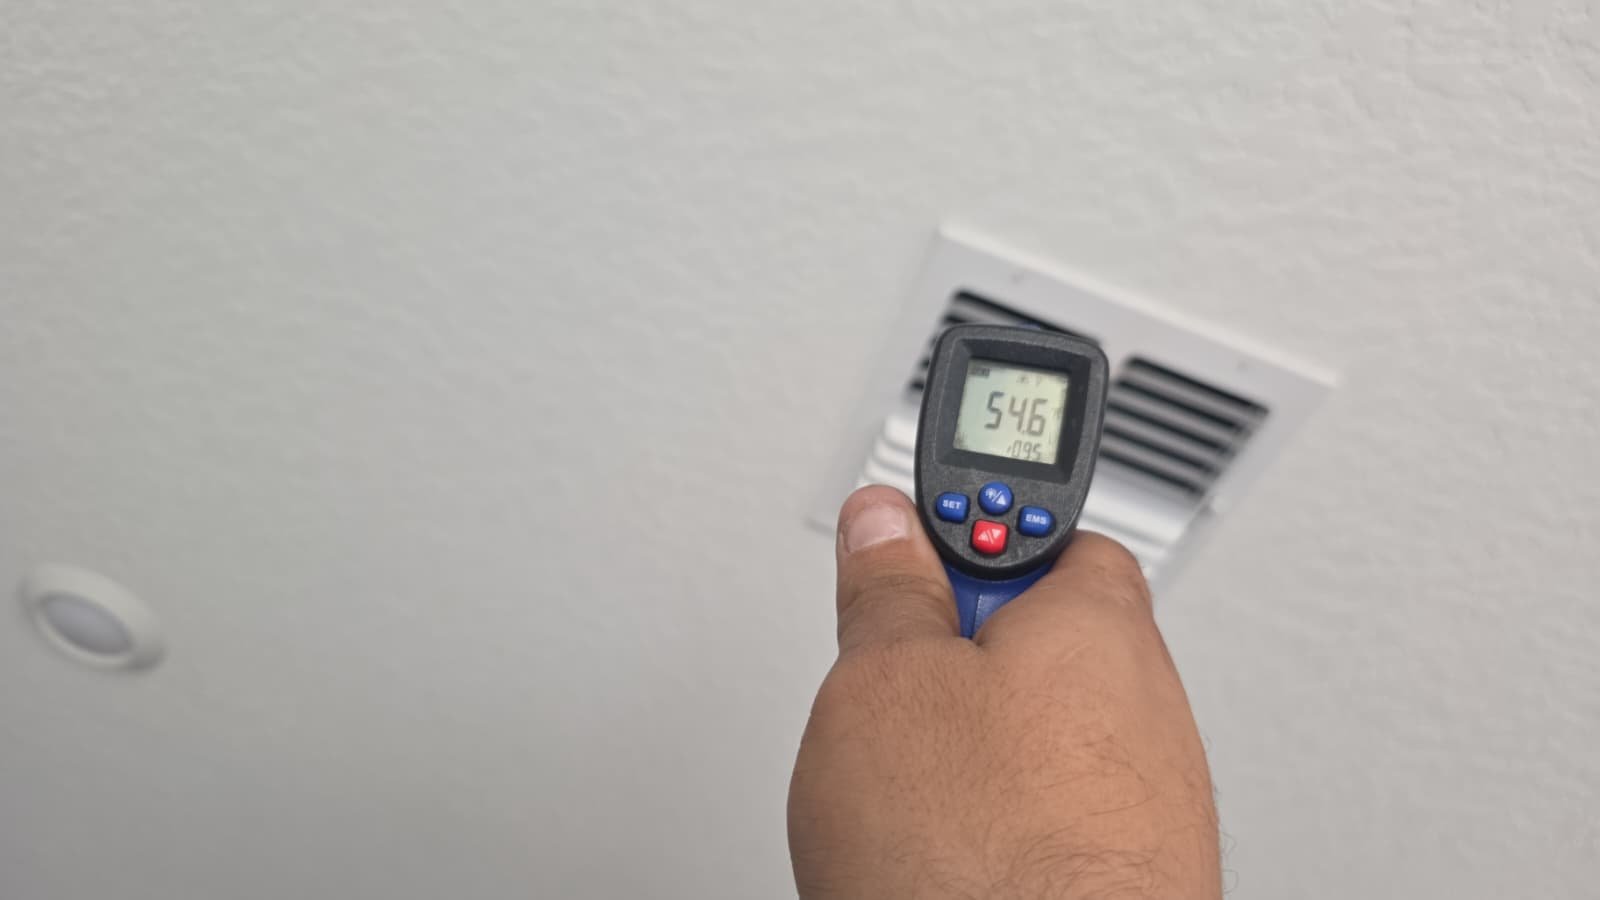
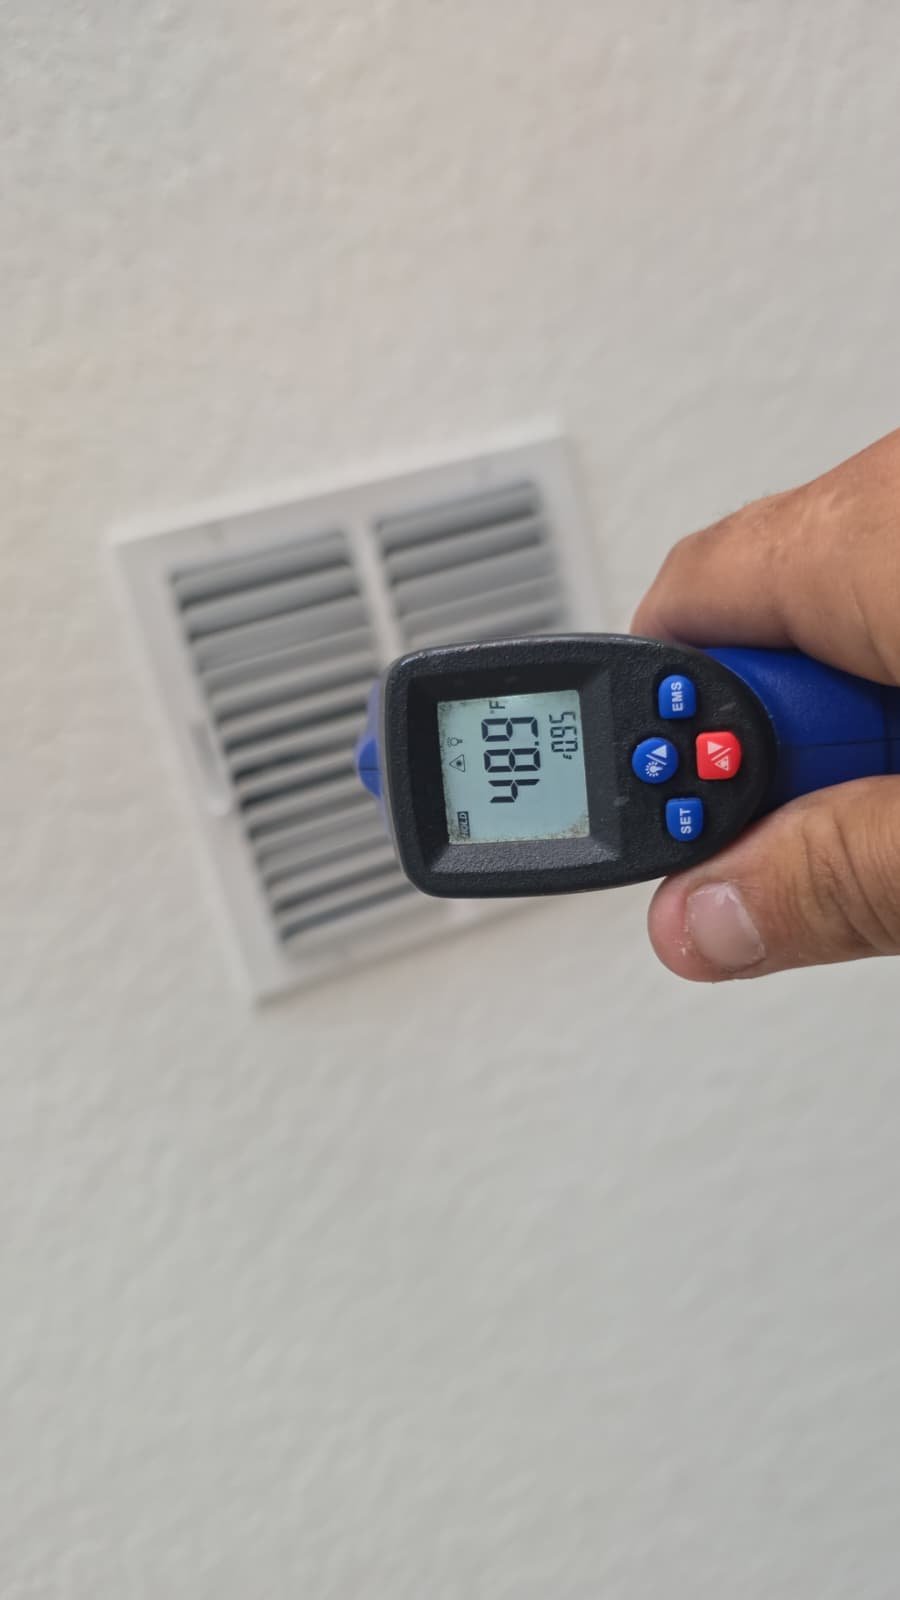
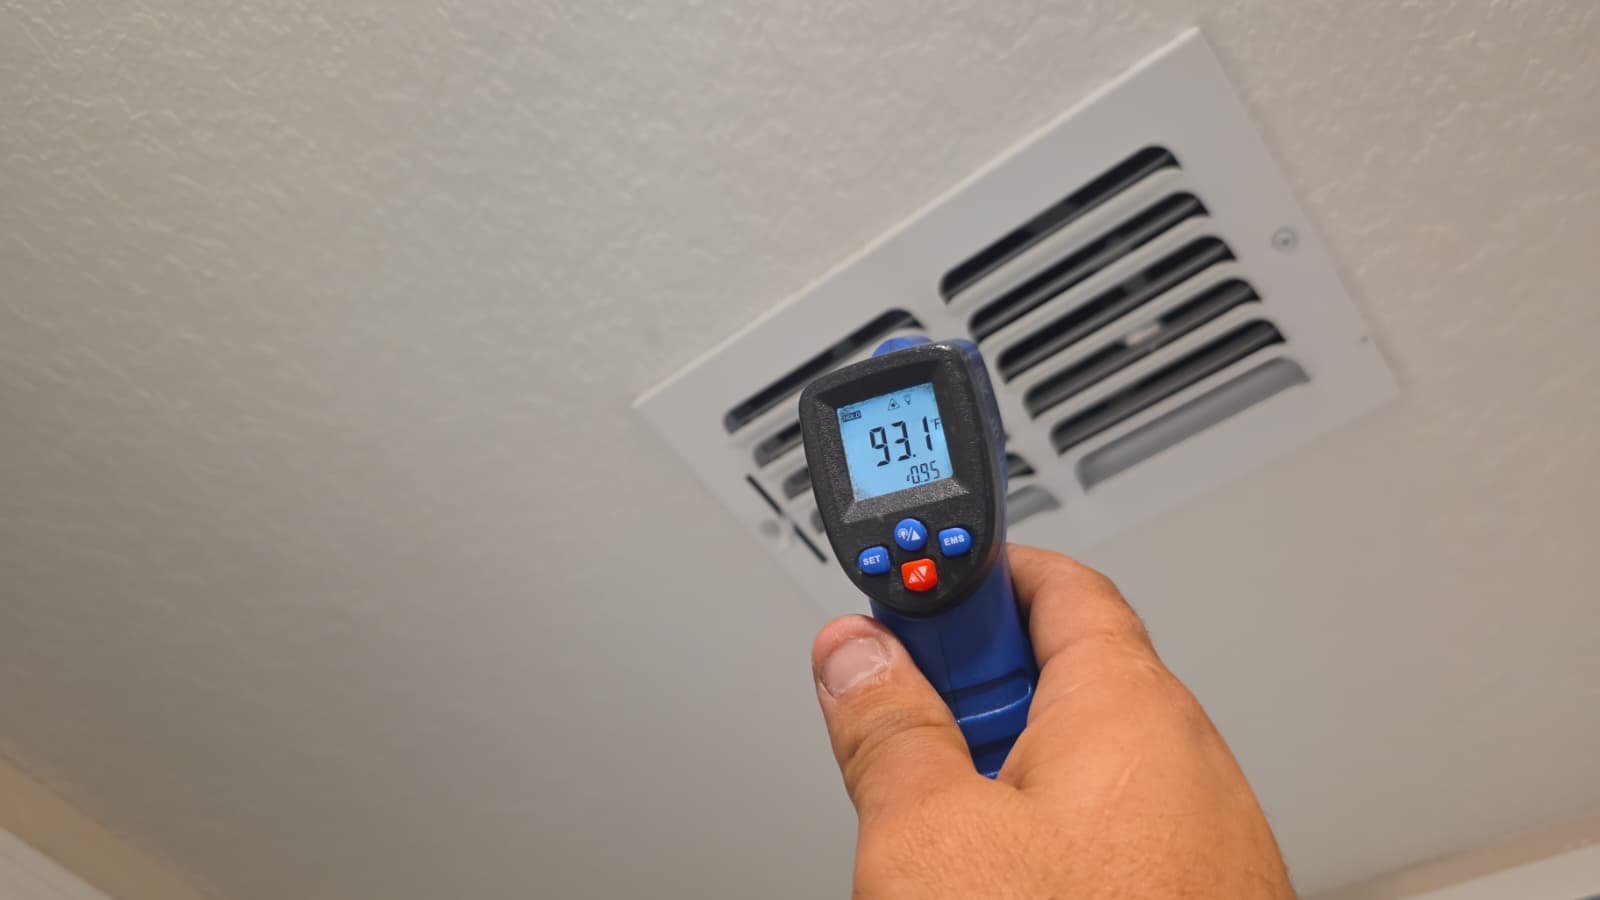
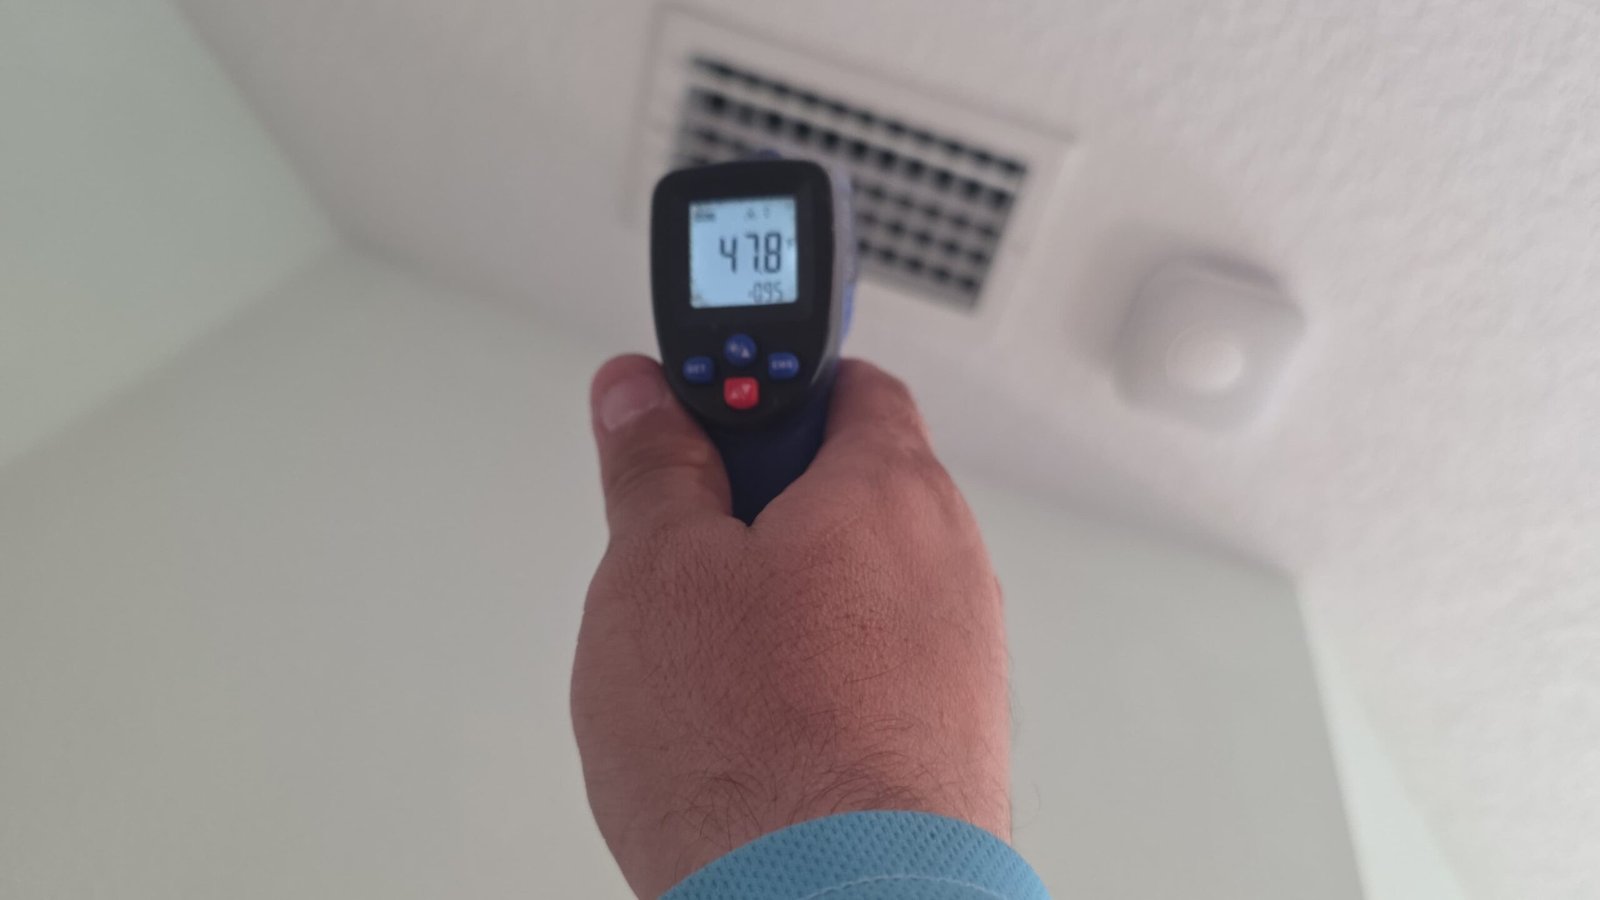
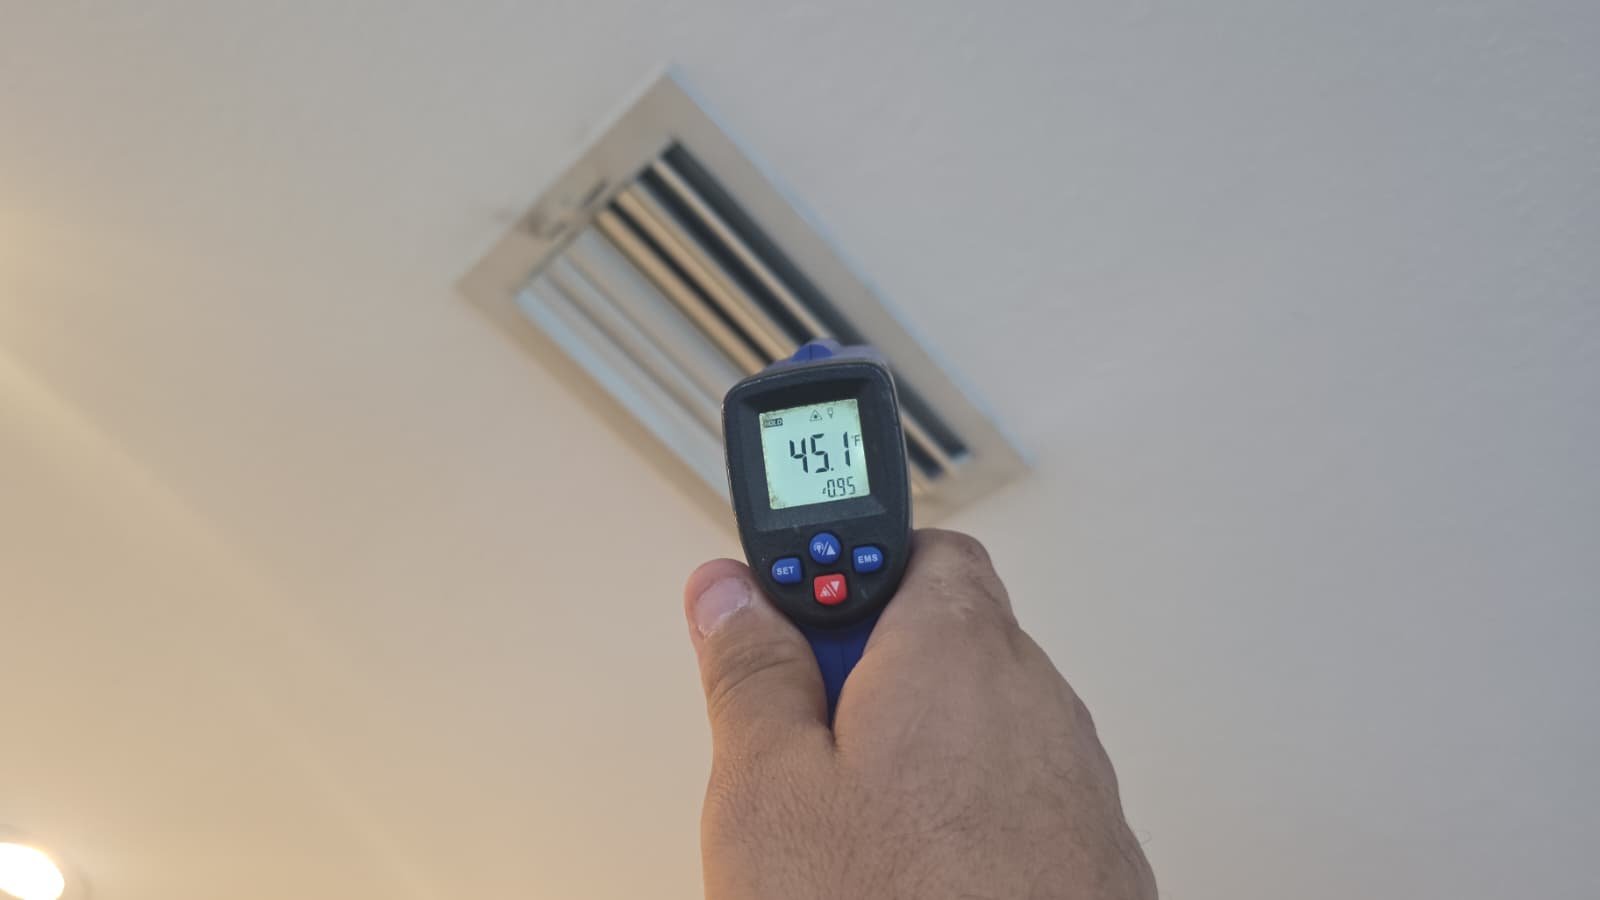
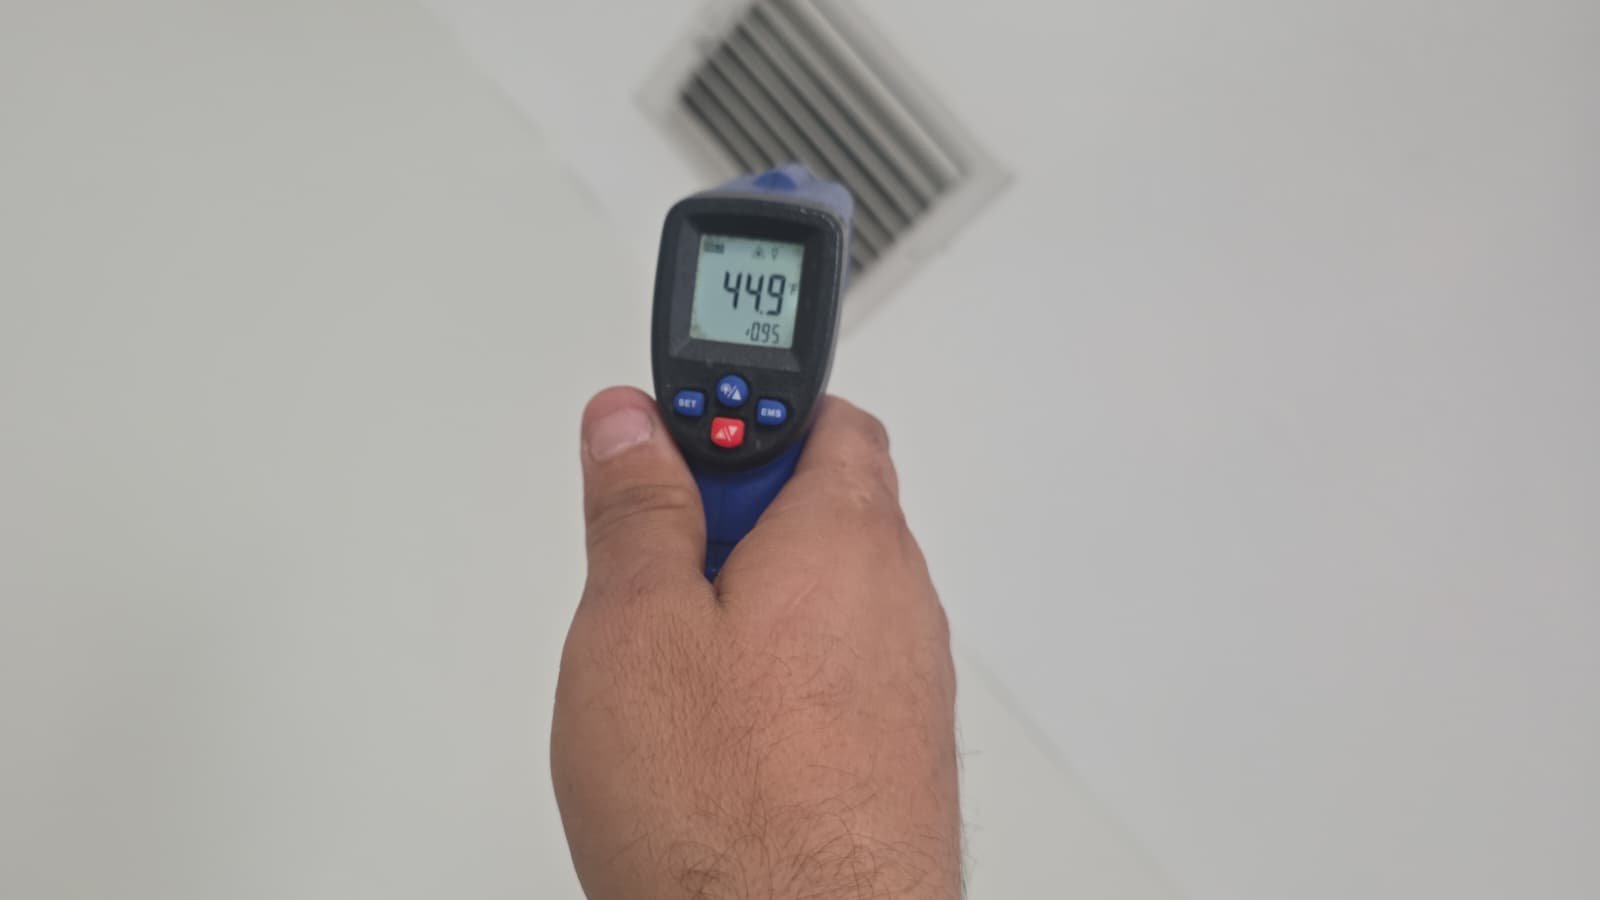
  • Checking supply and return airflow for obvious restrictions
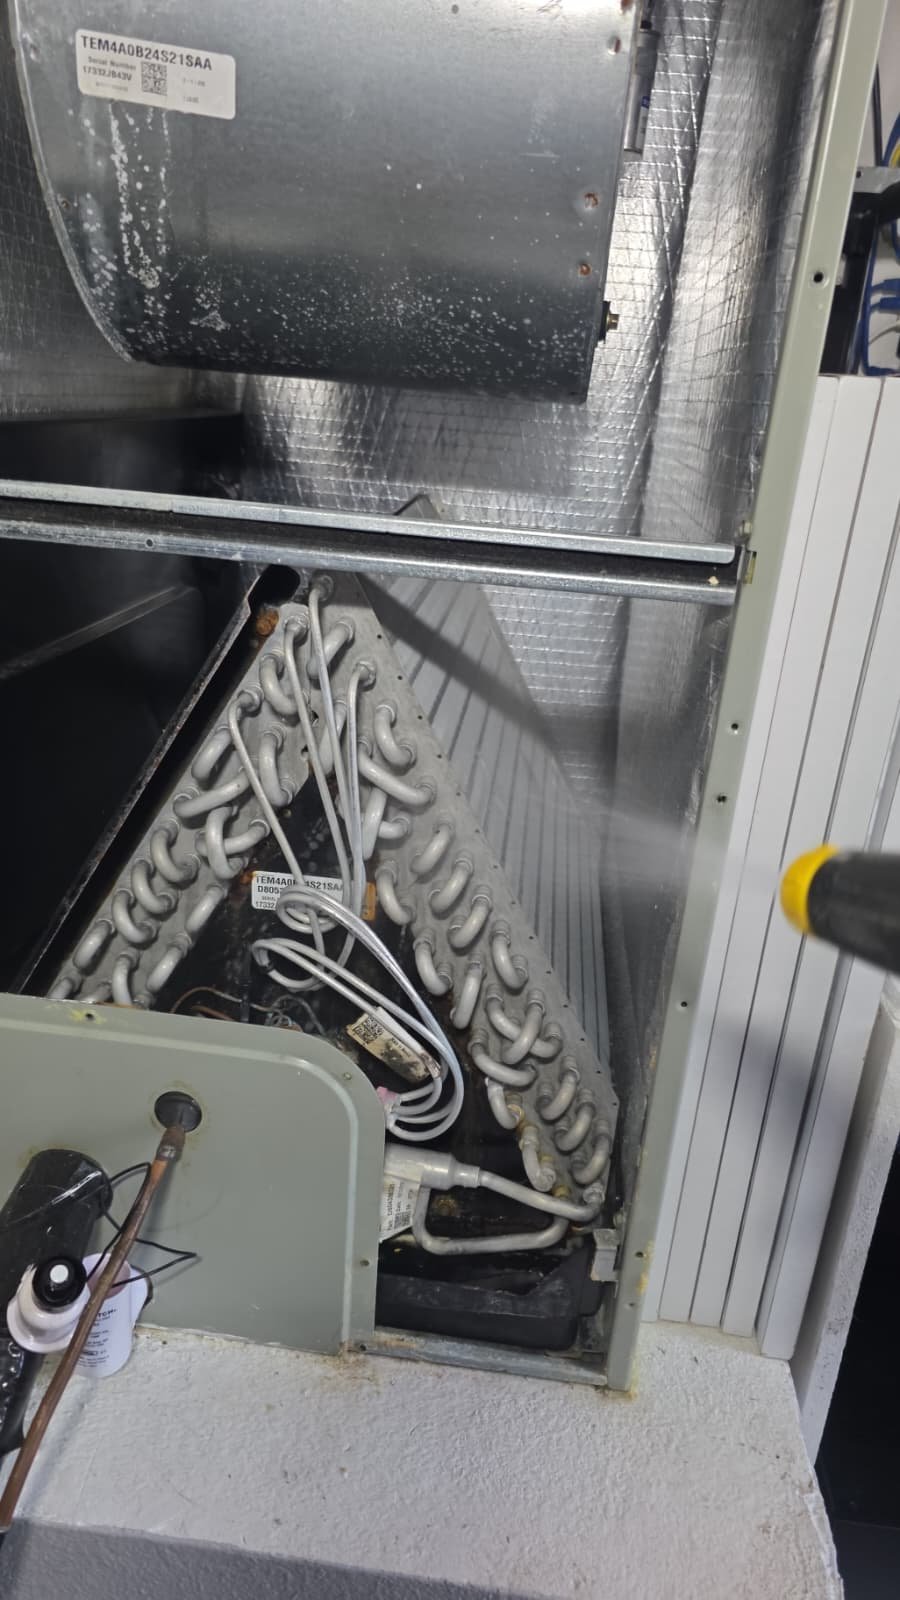
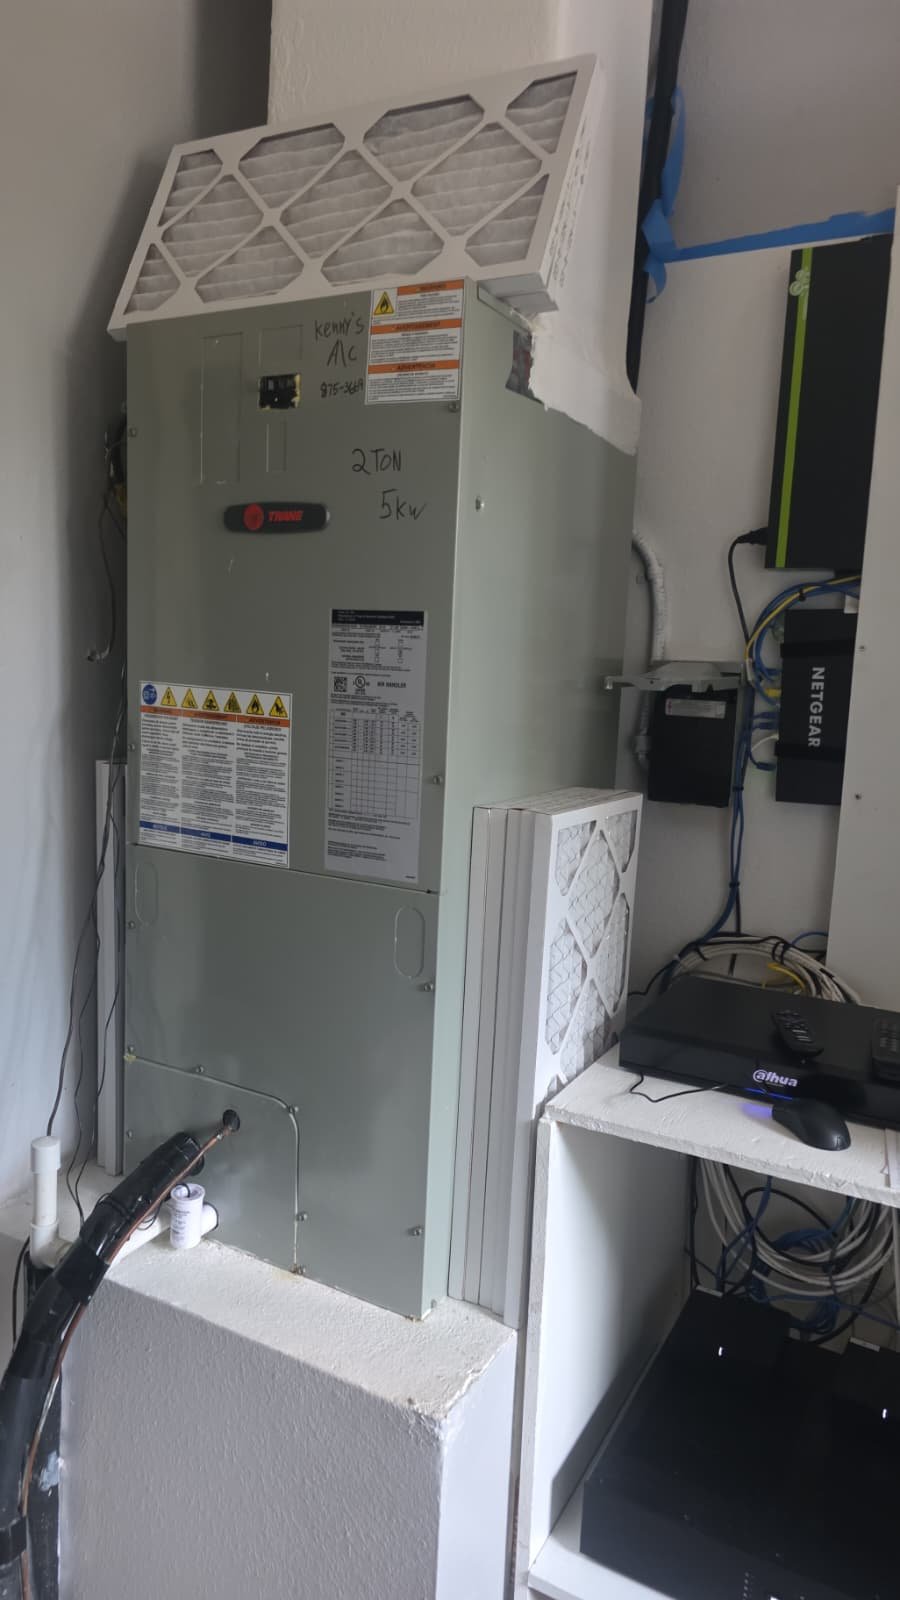
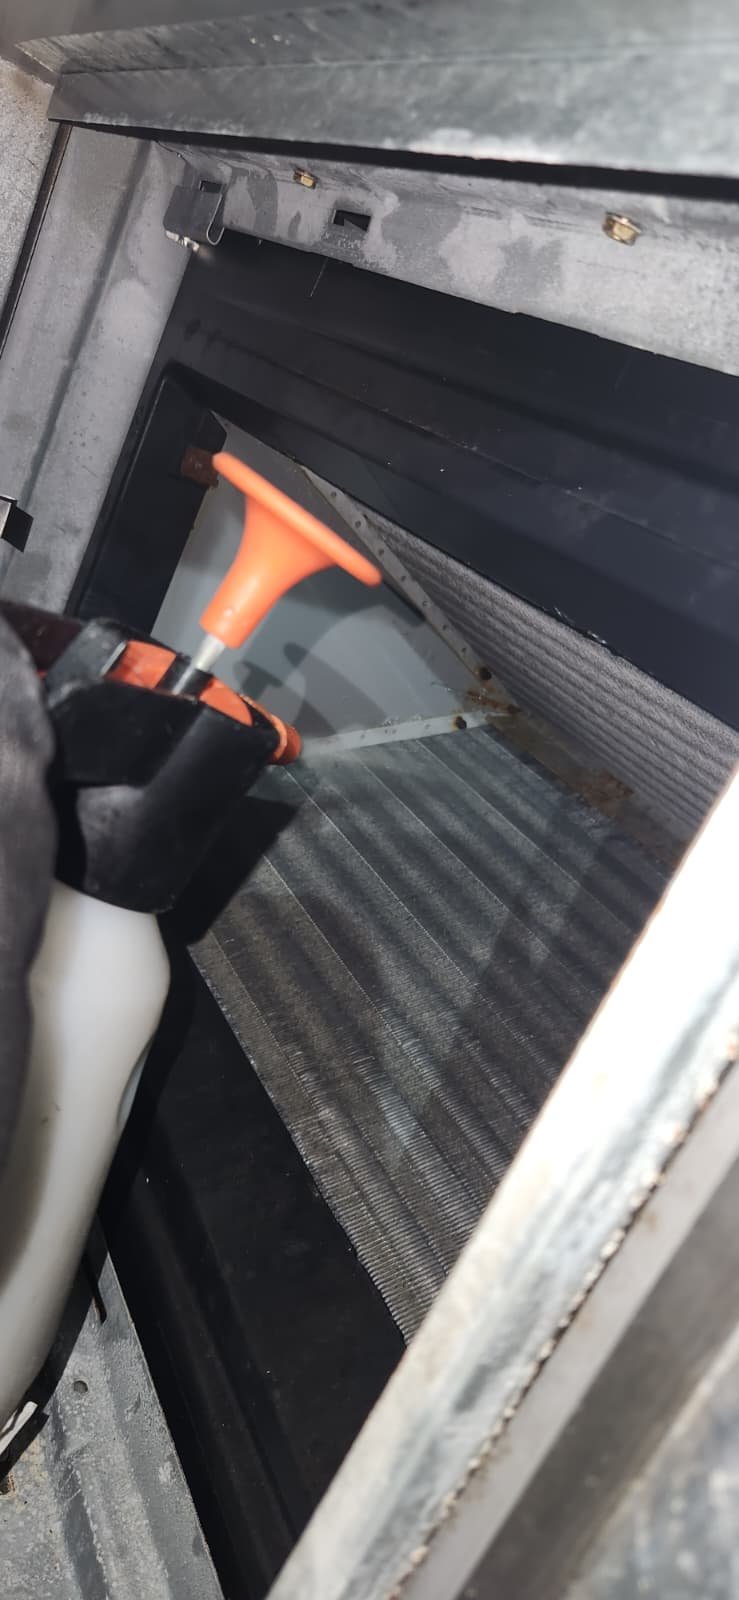
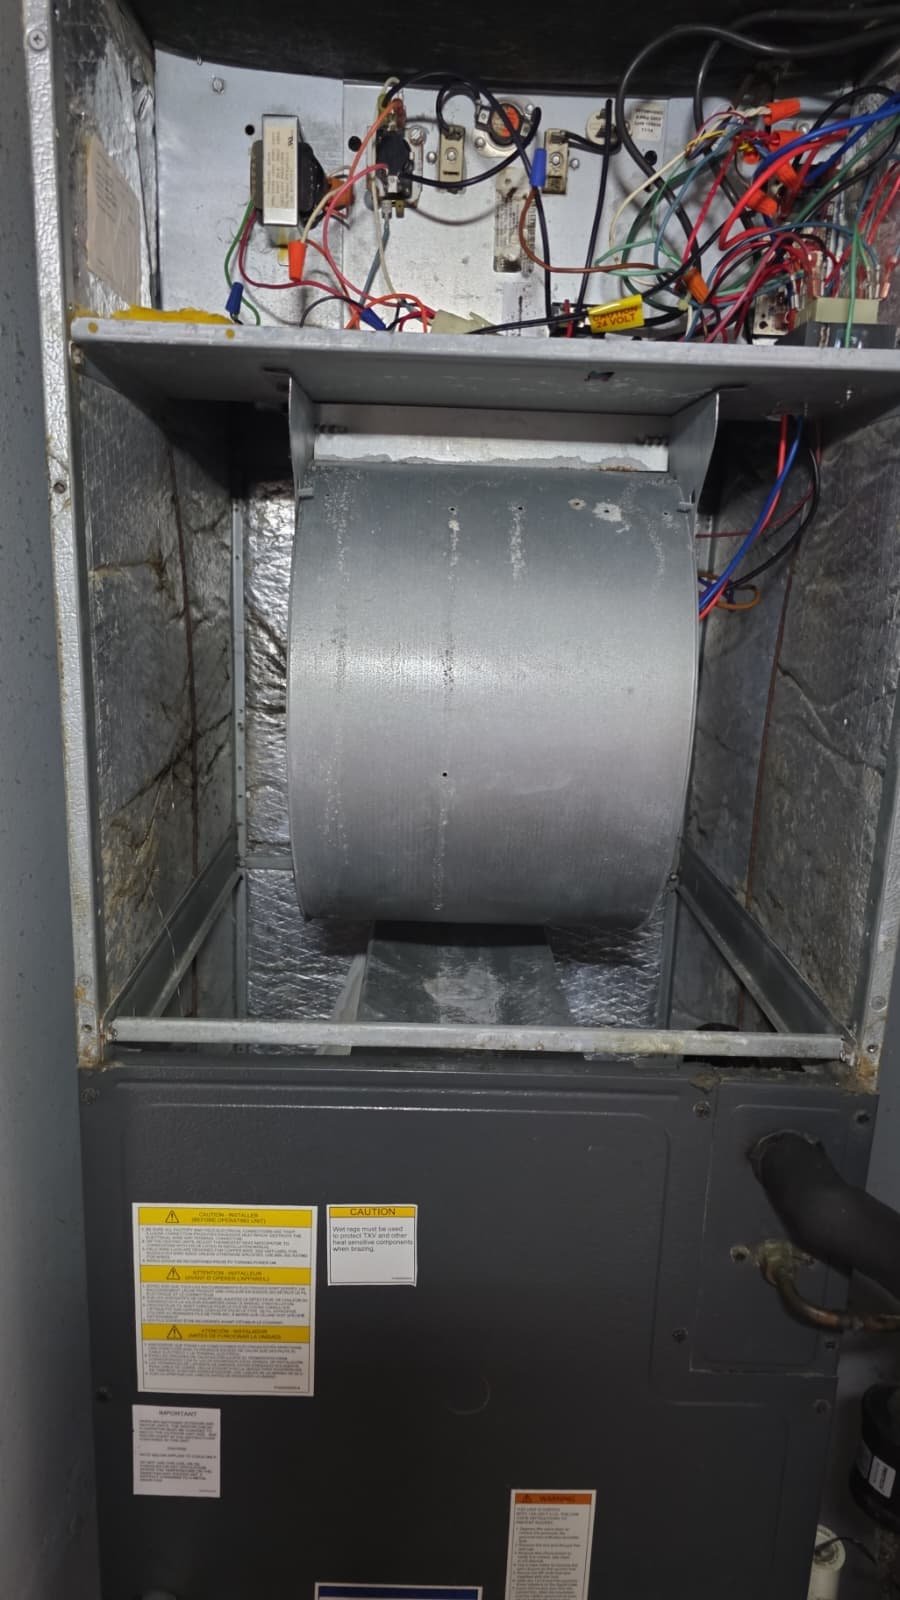
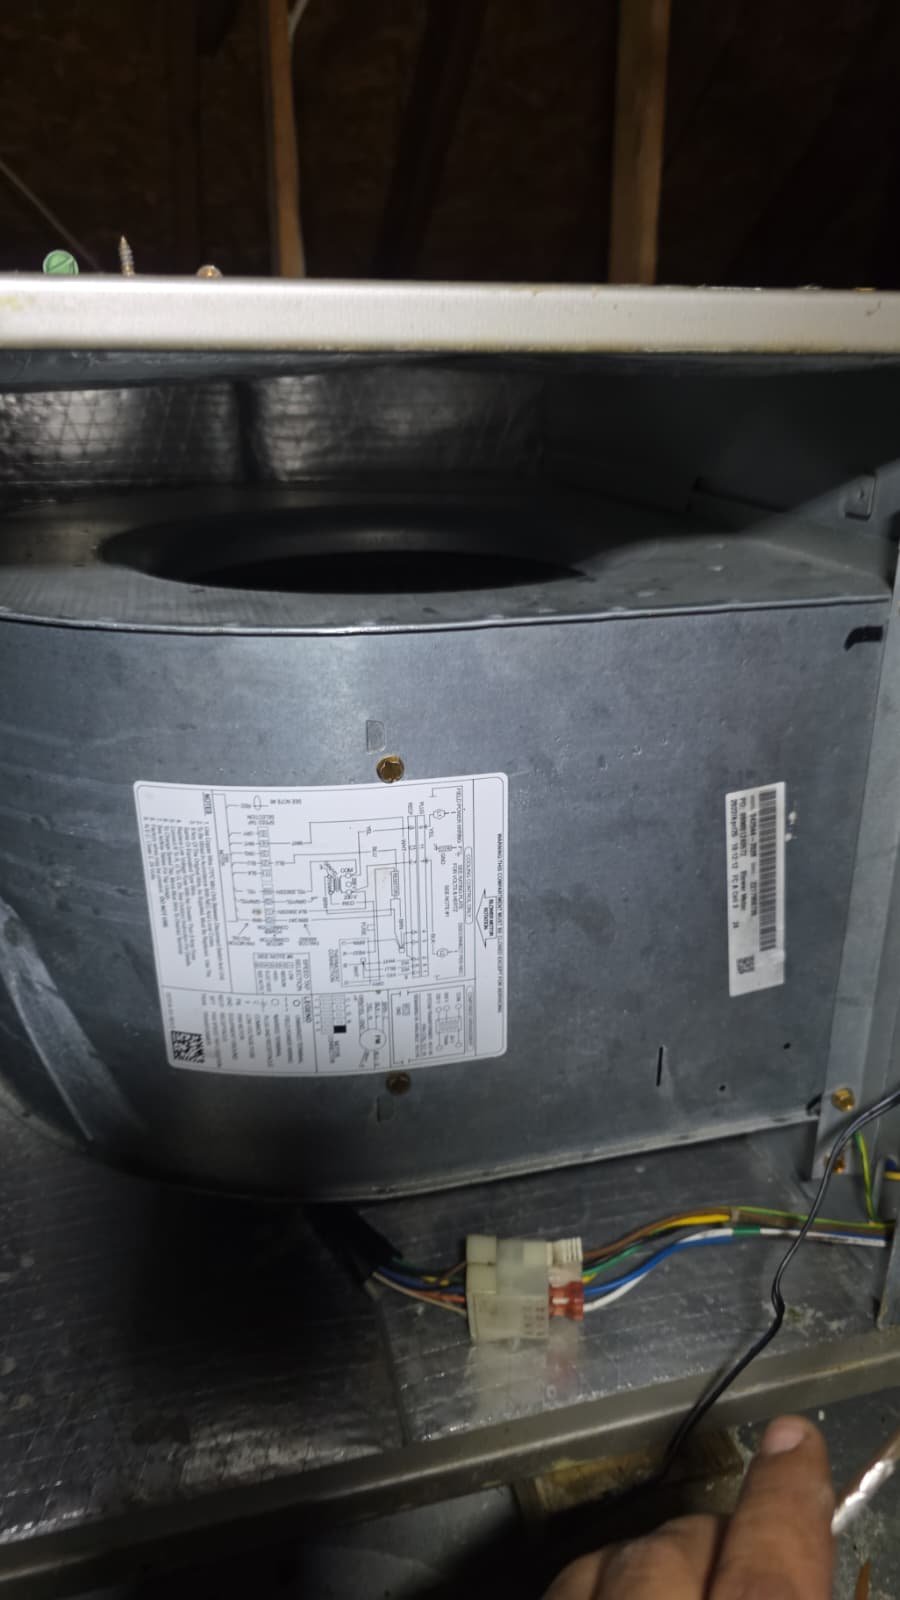
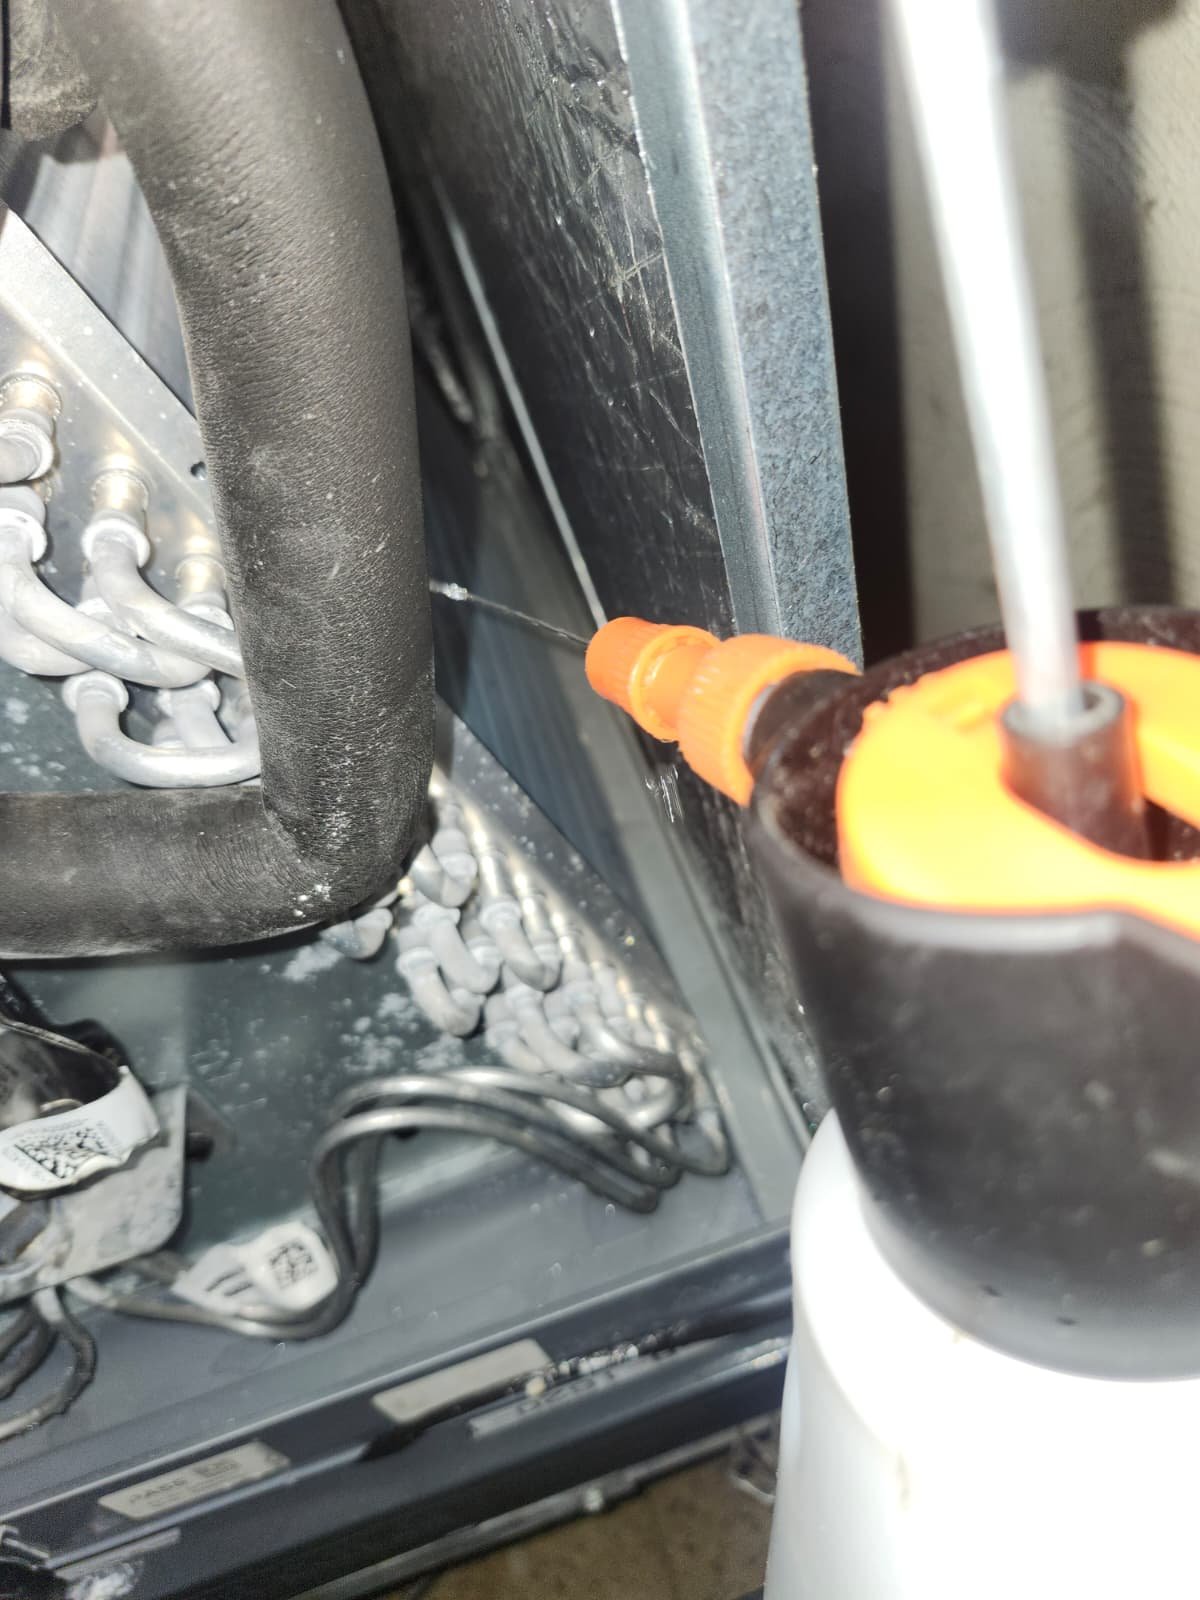
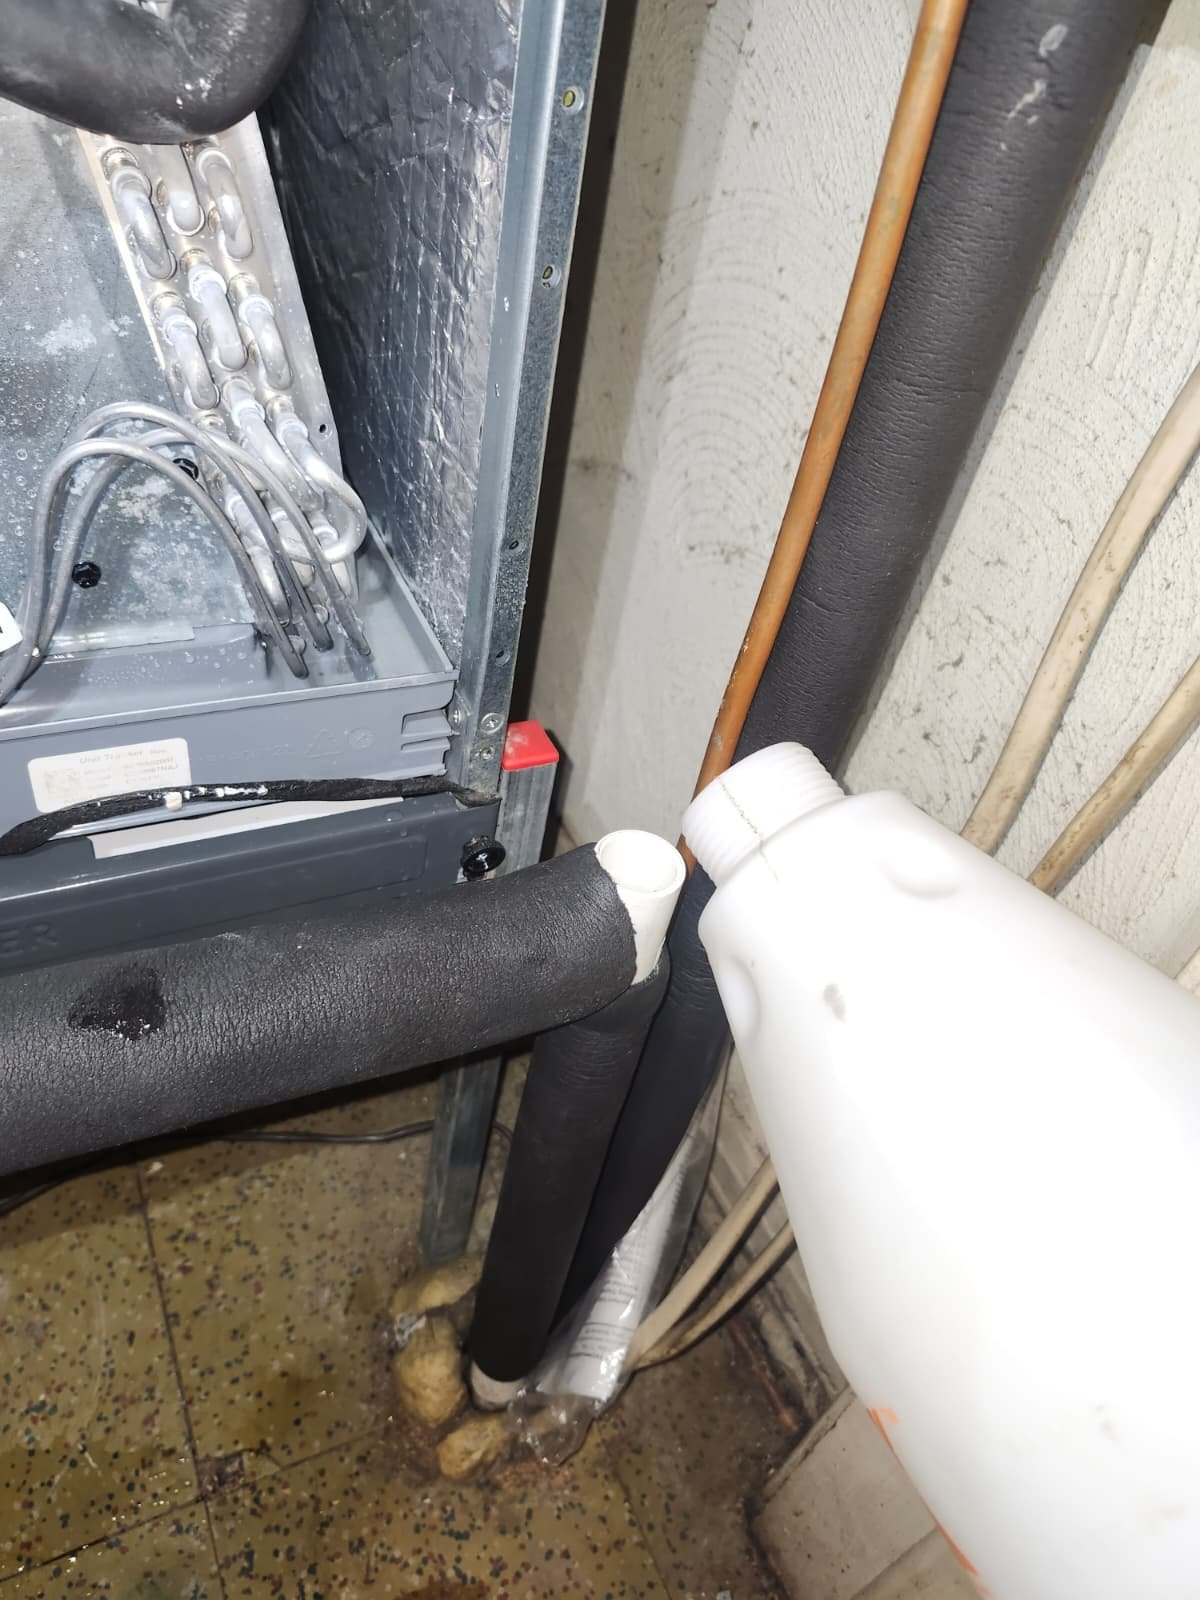
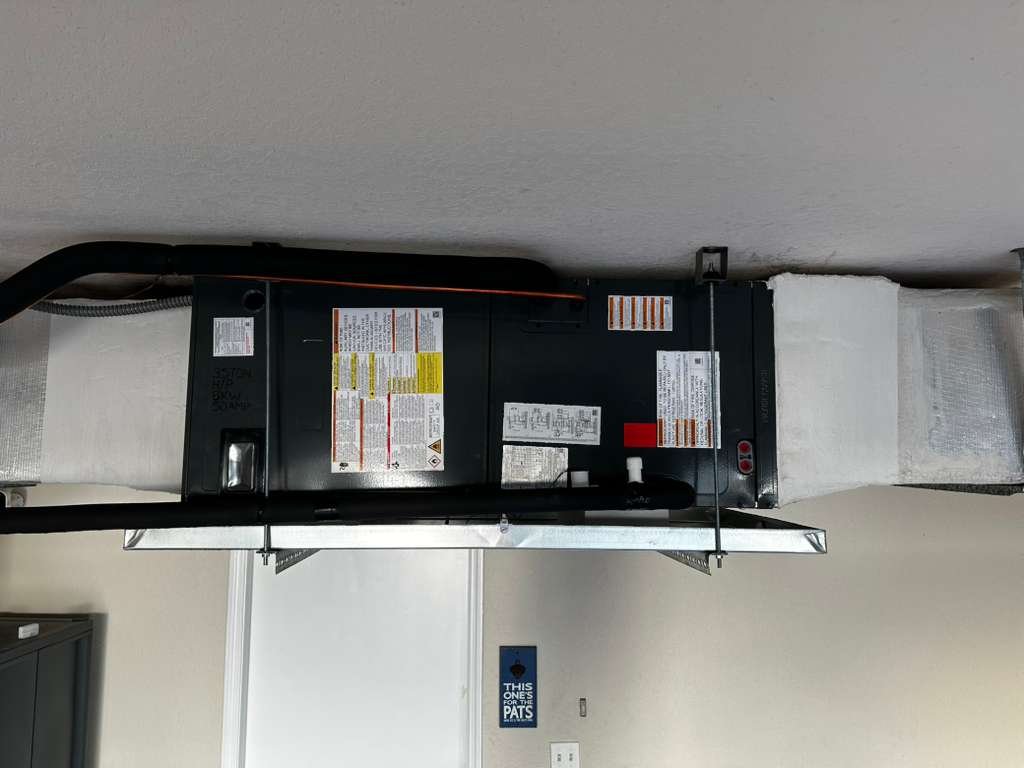
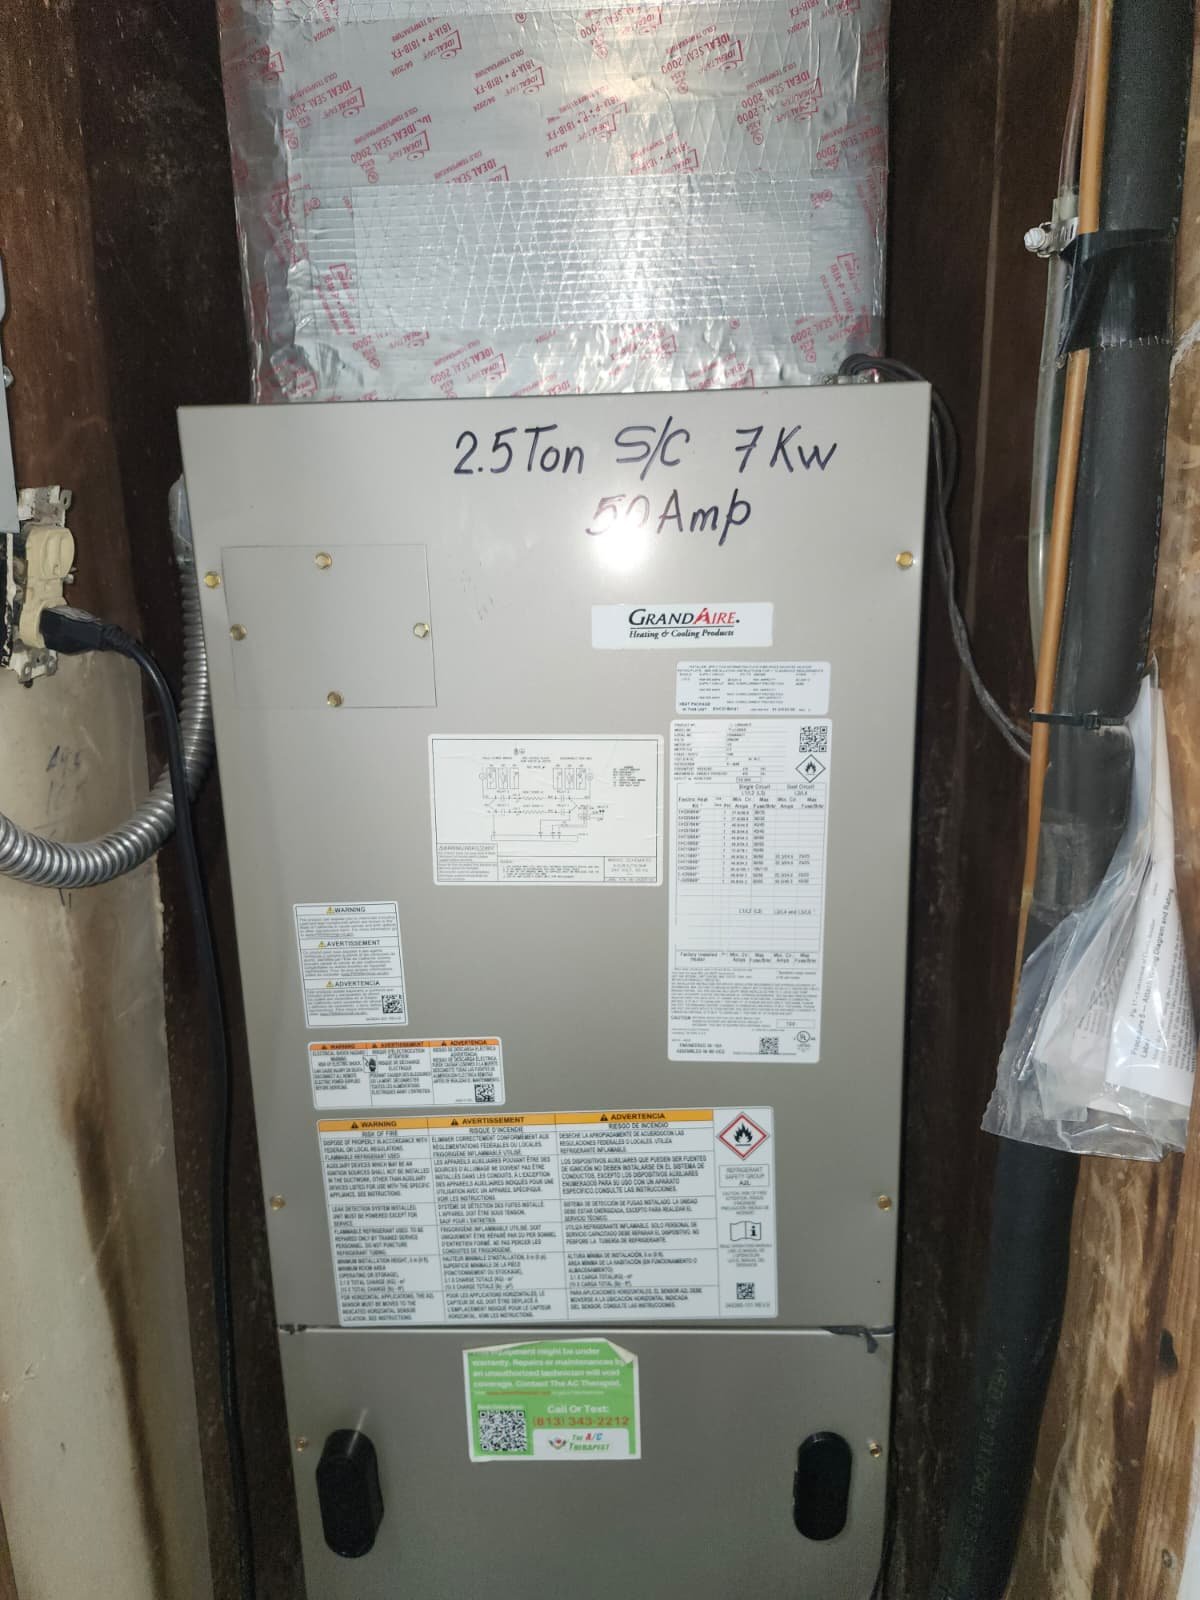
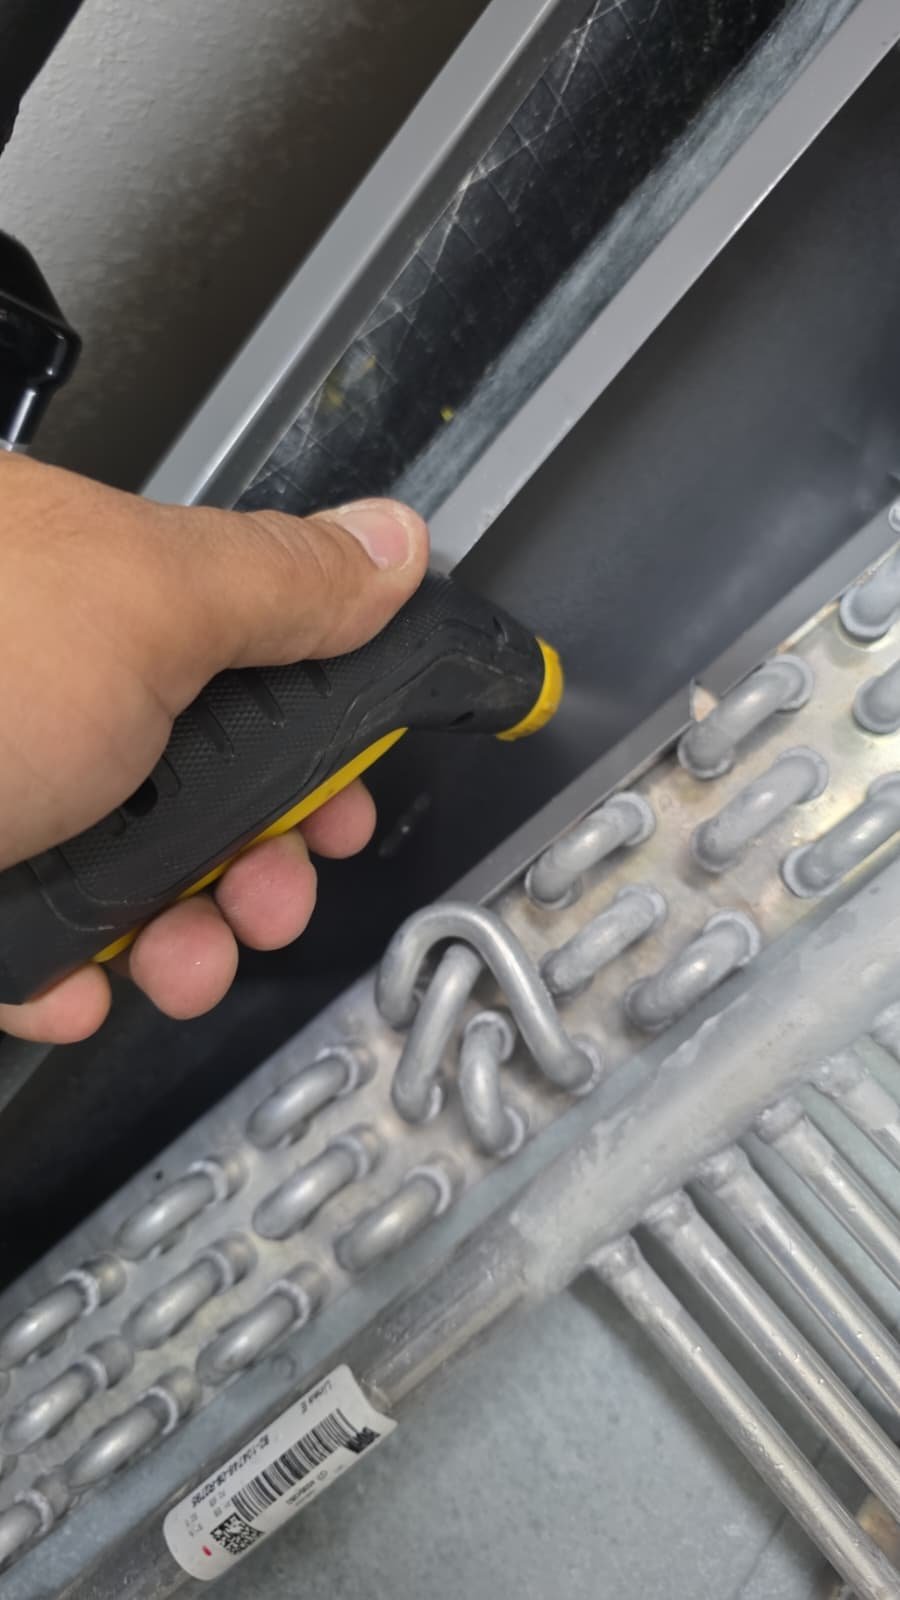
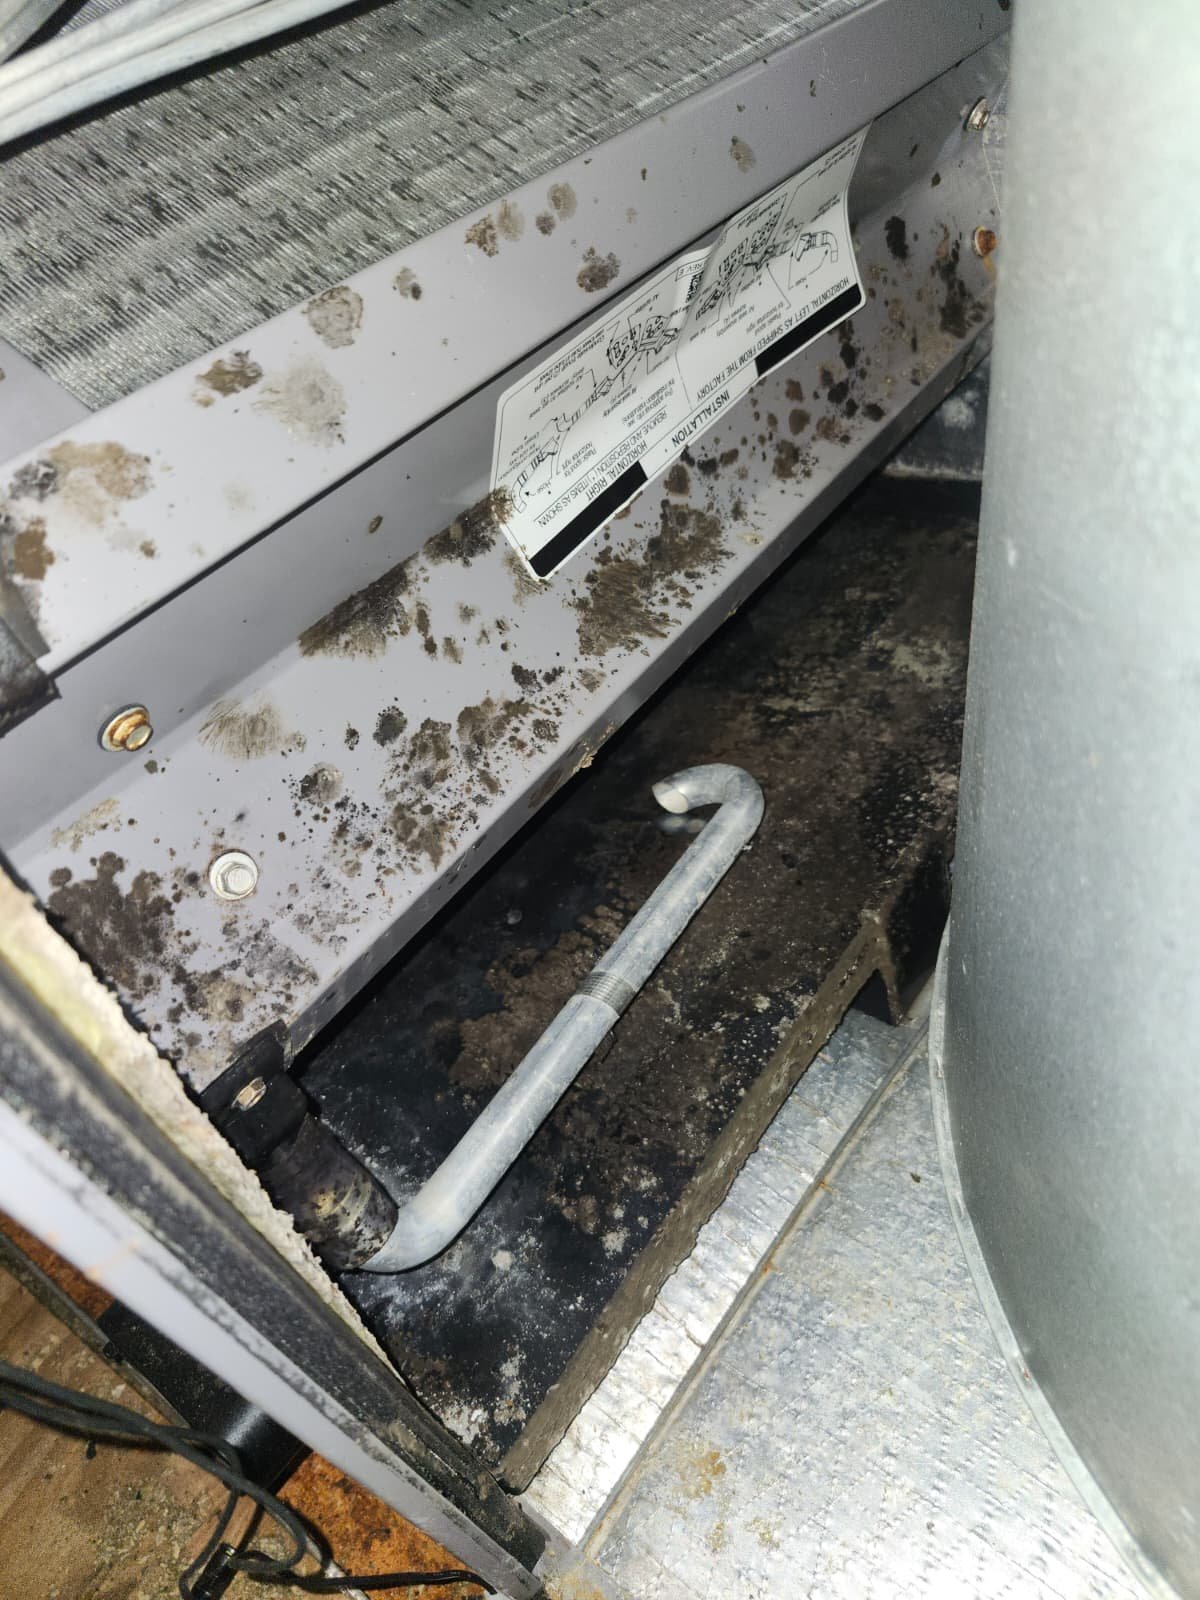
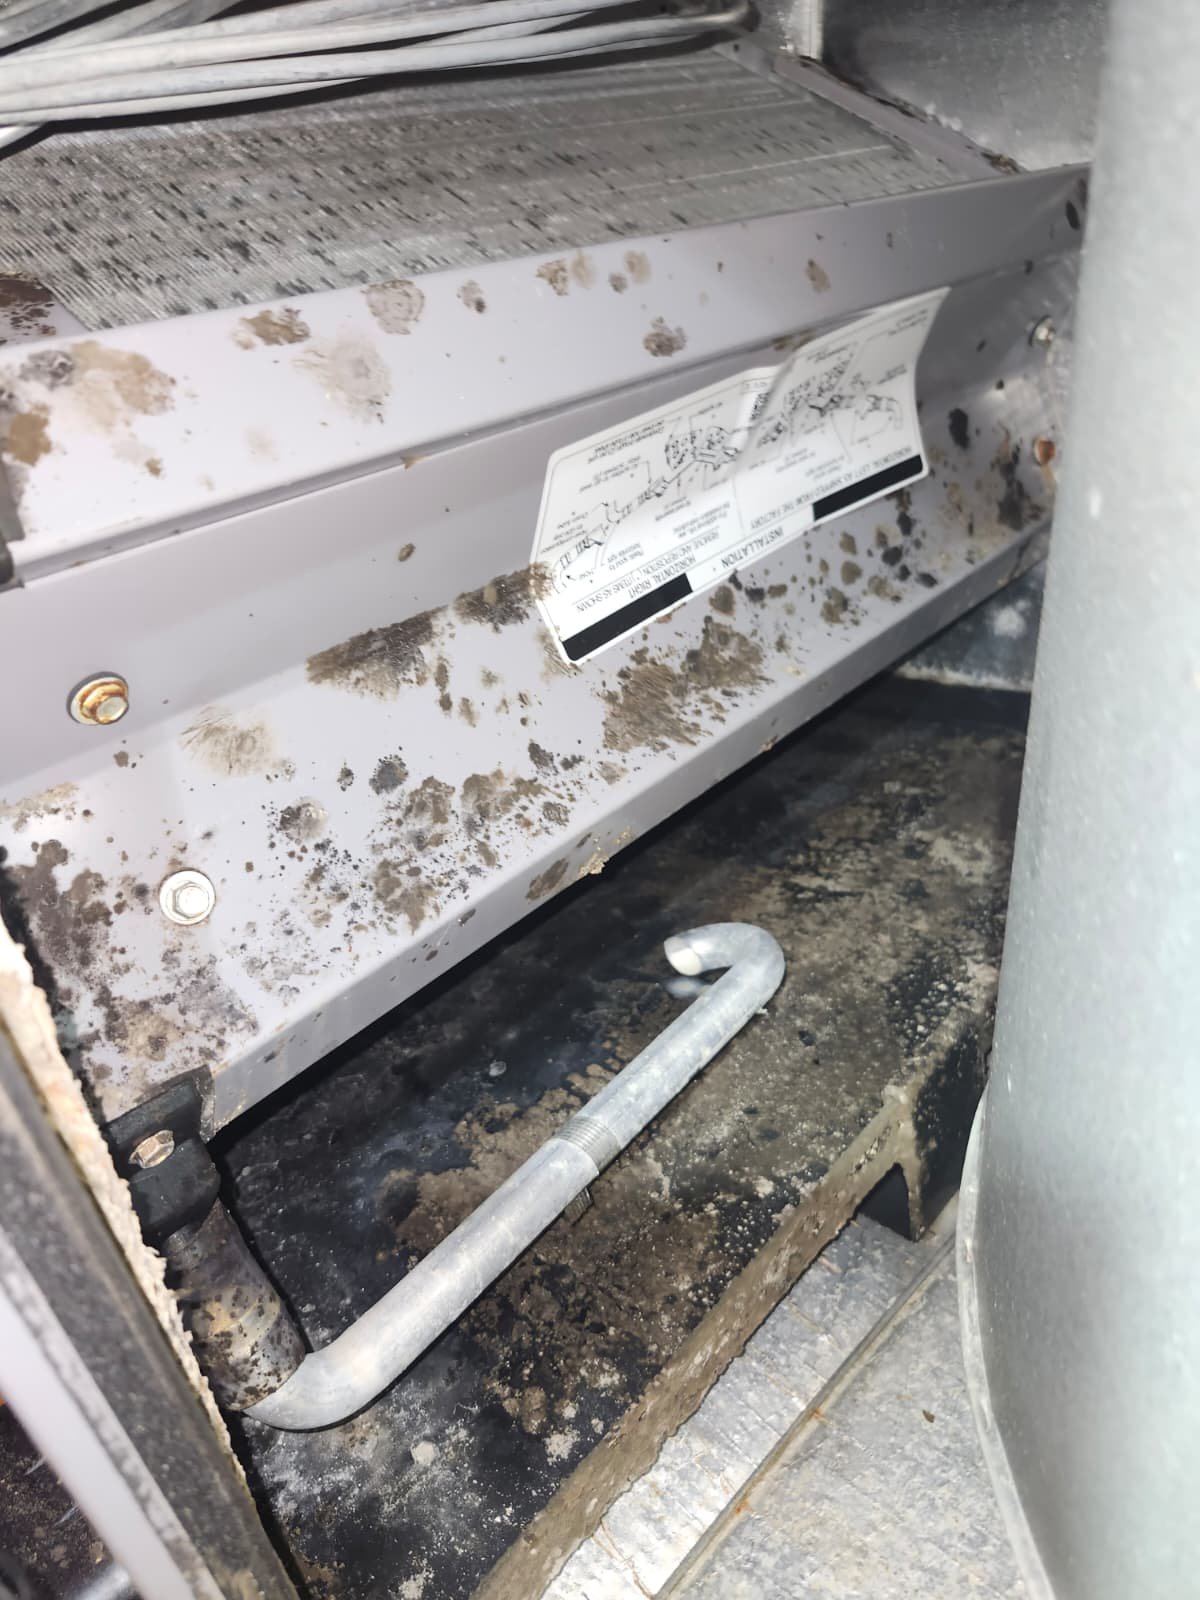
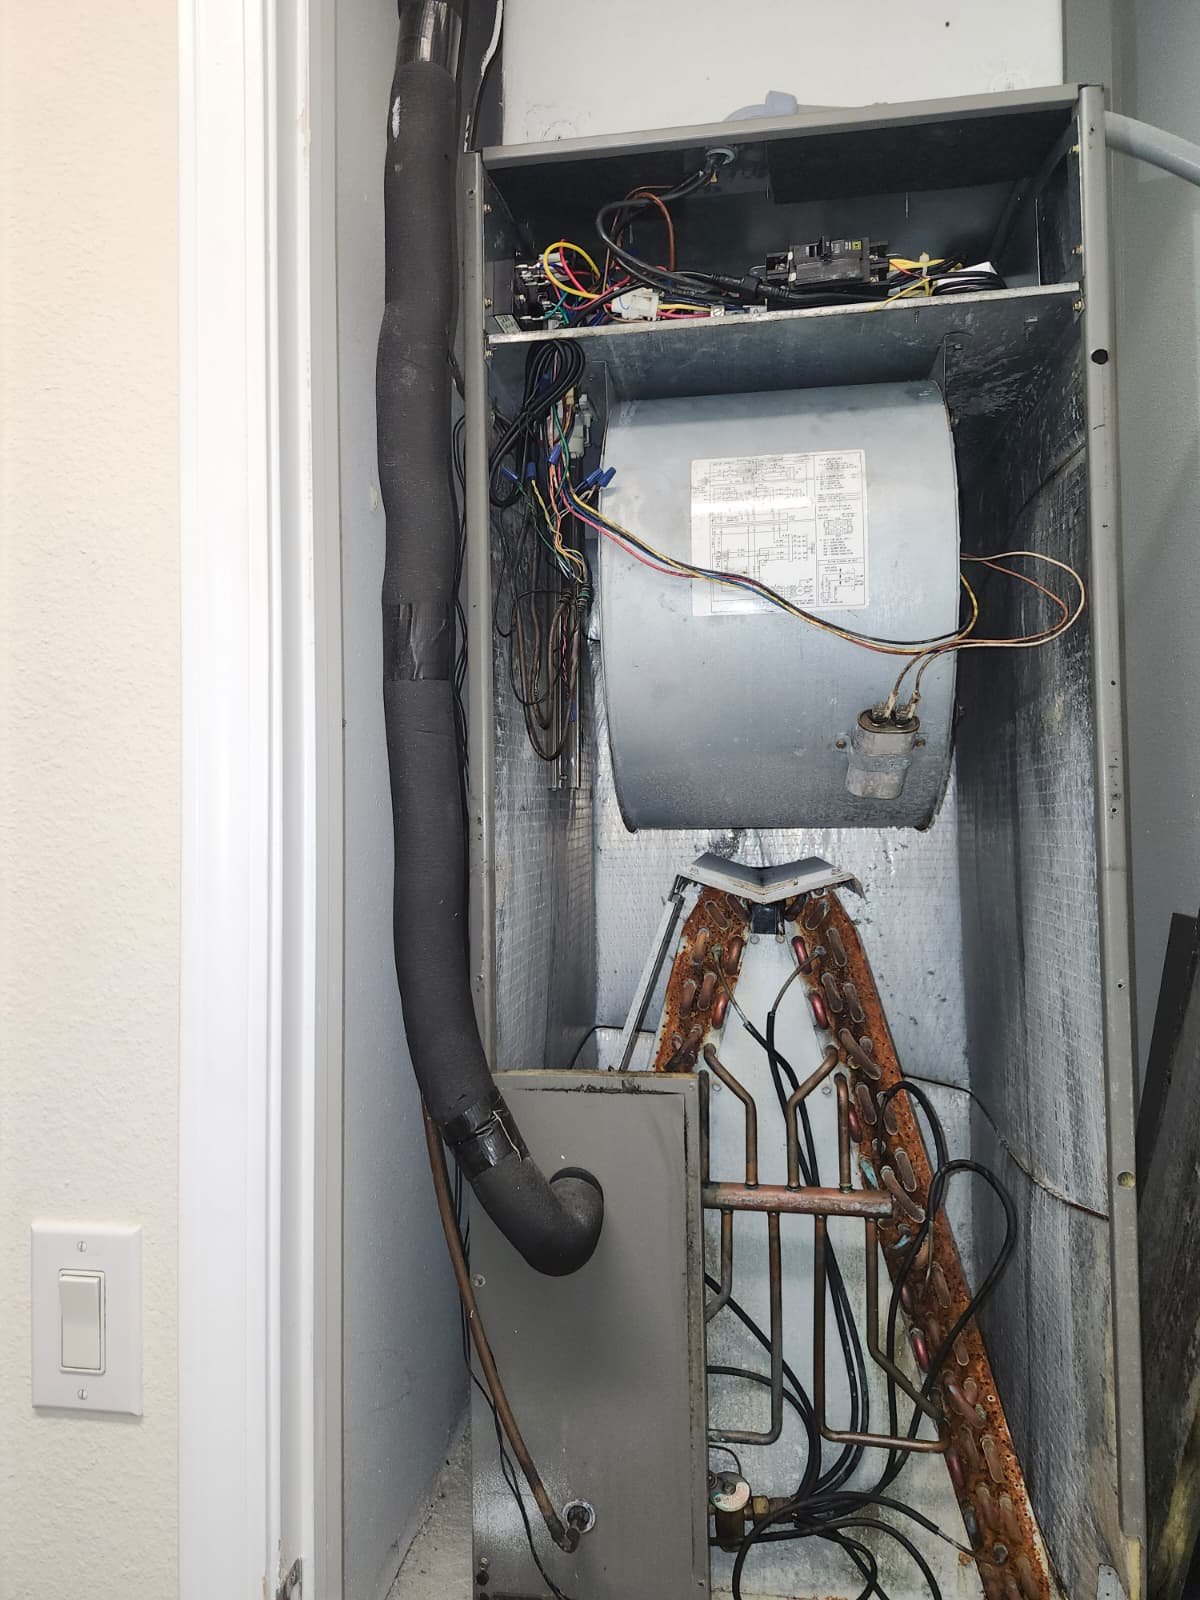
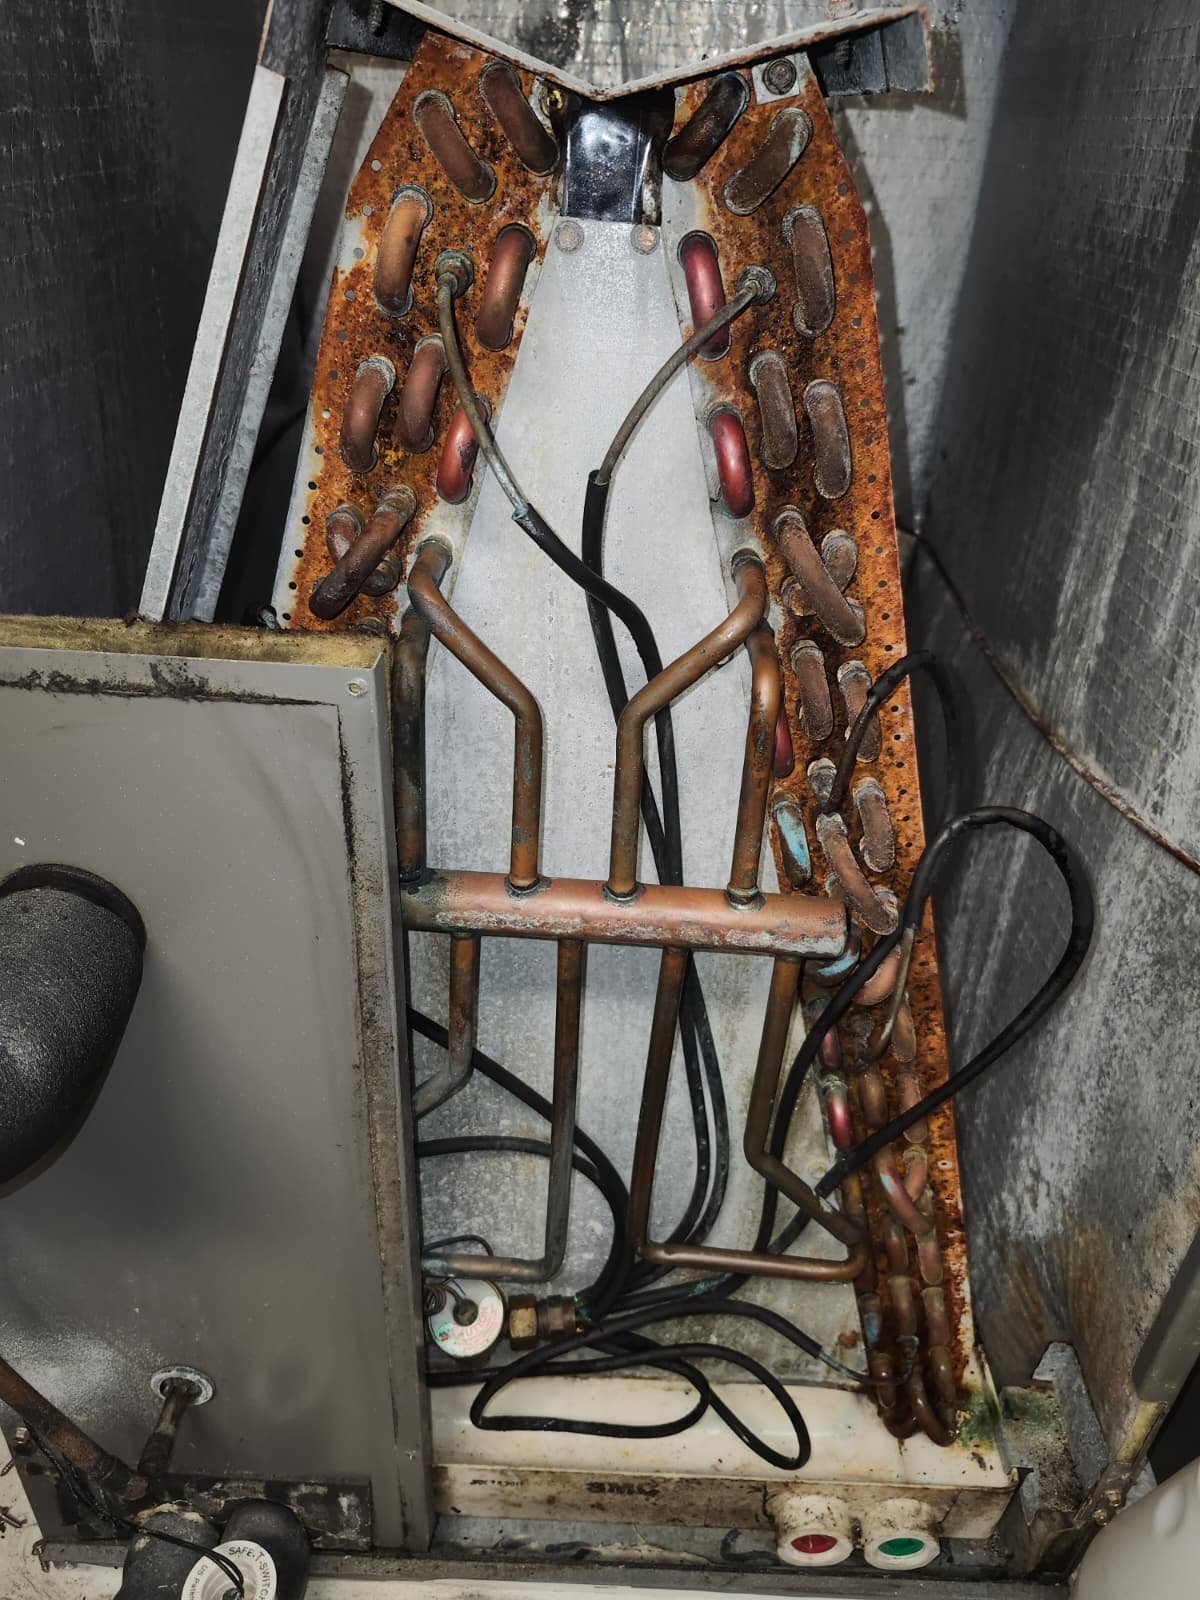
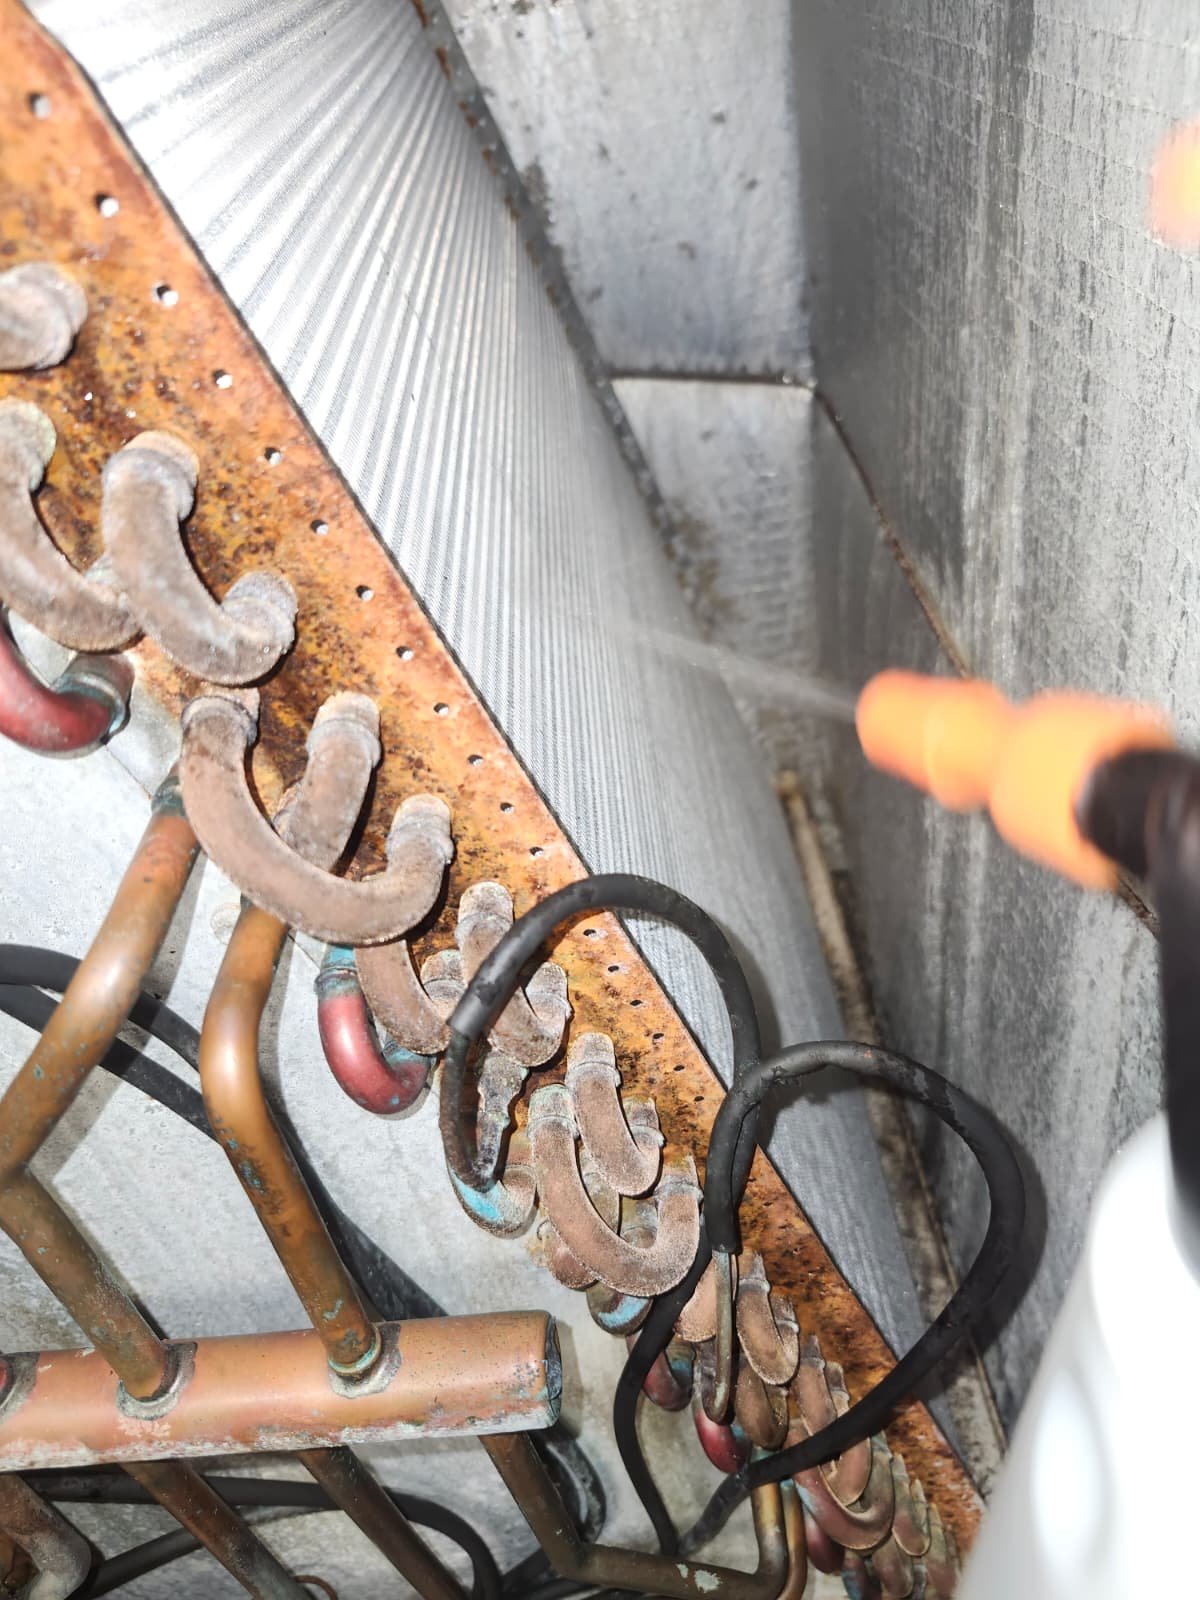
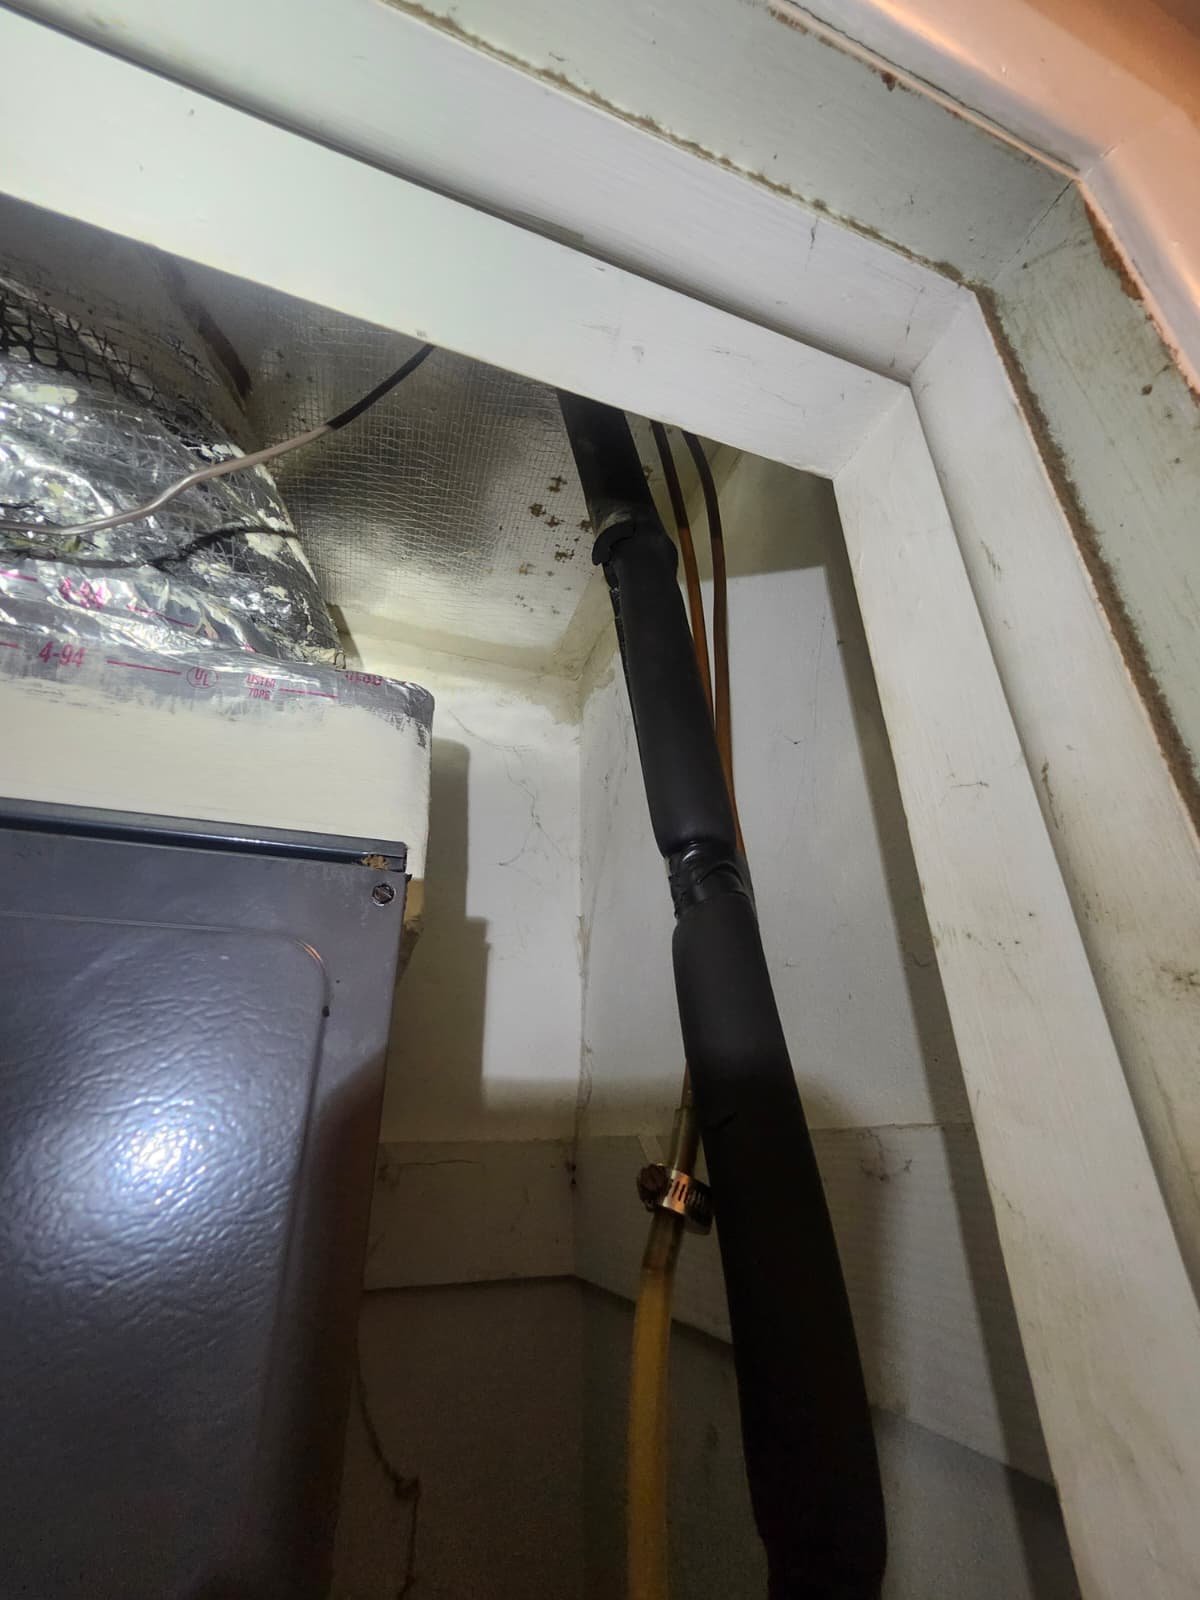
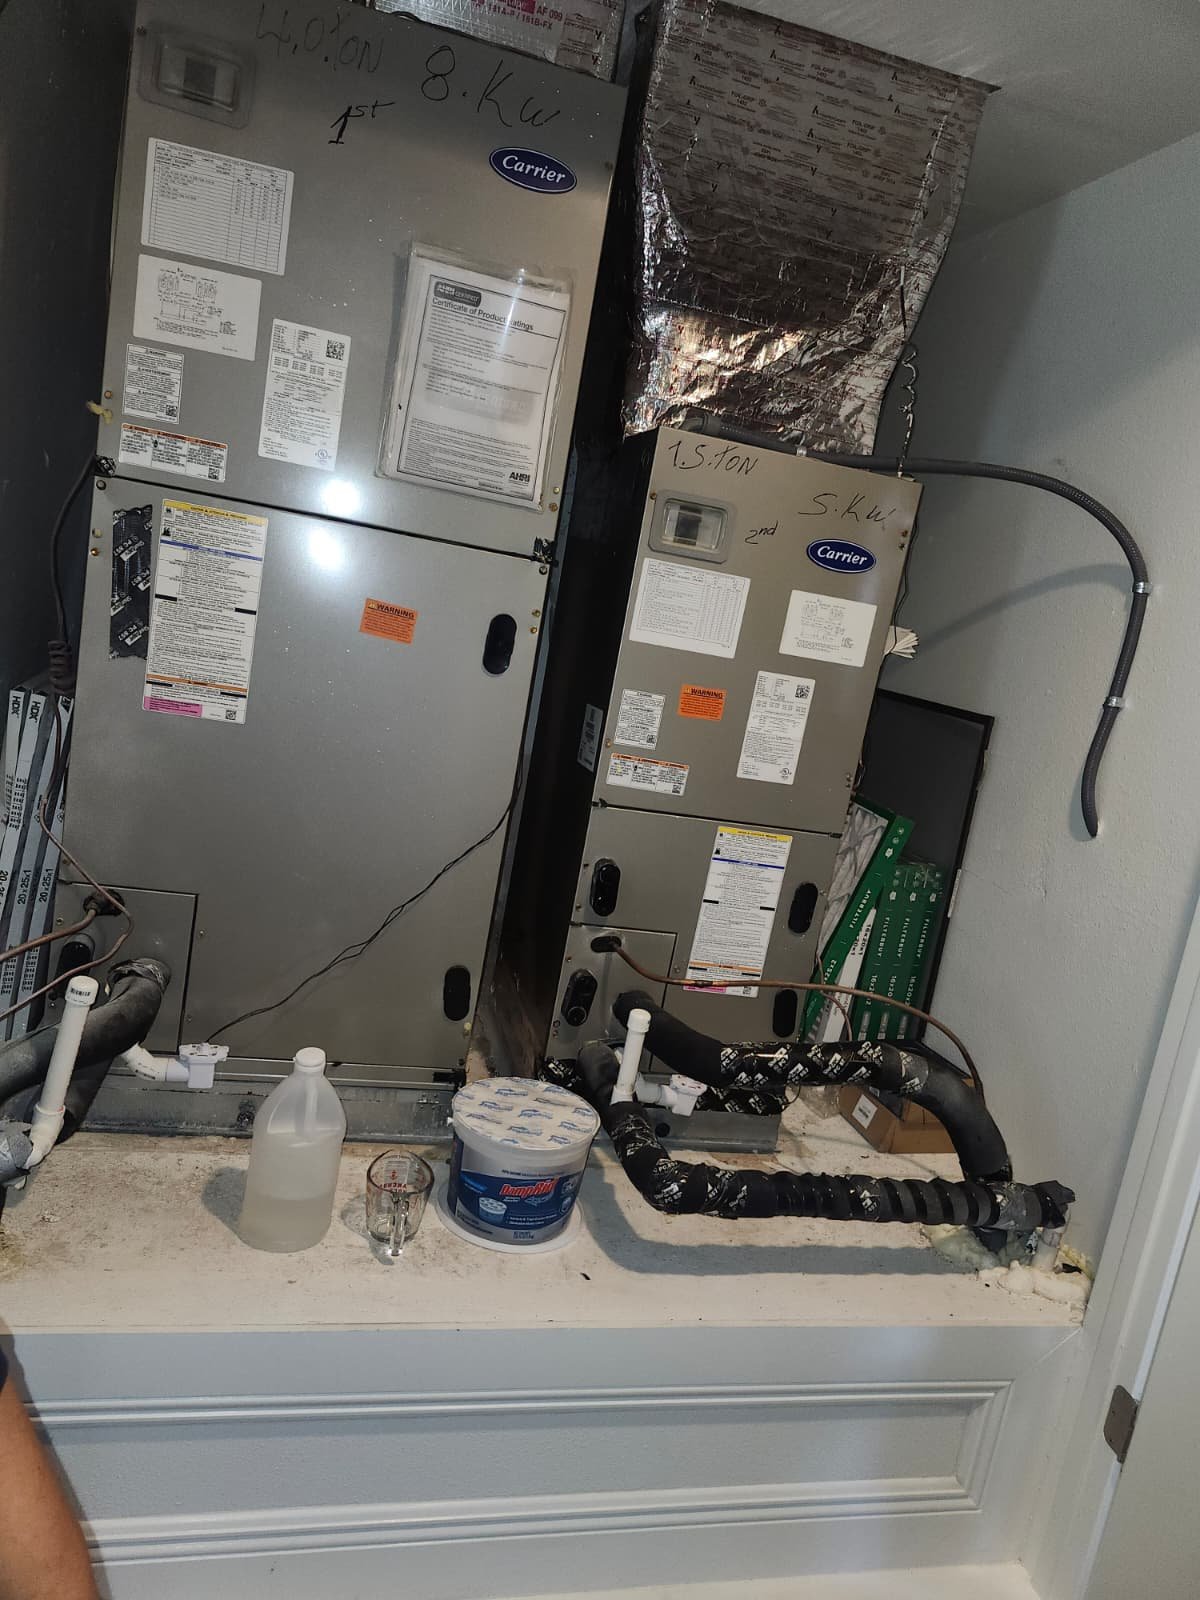
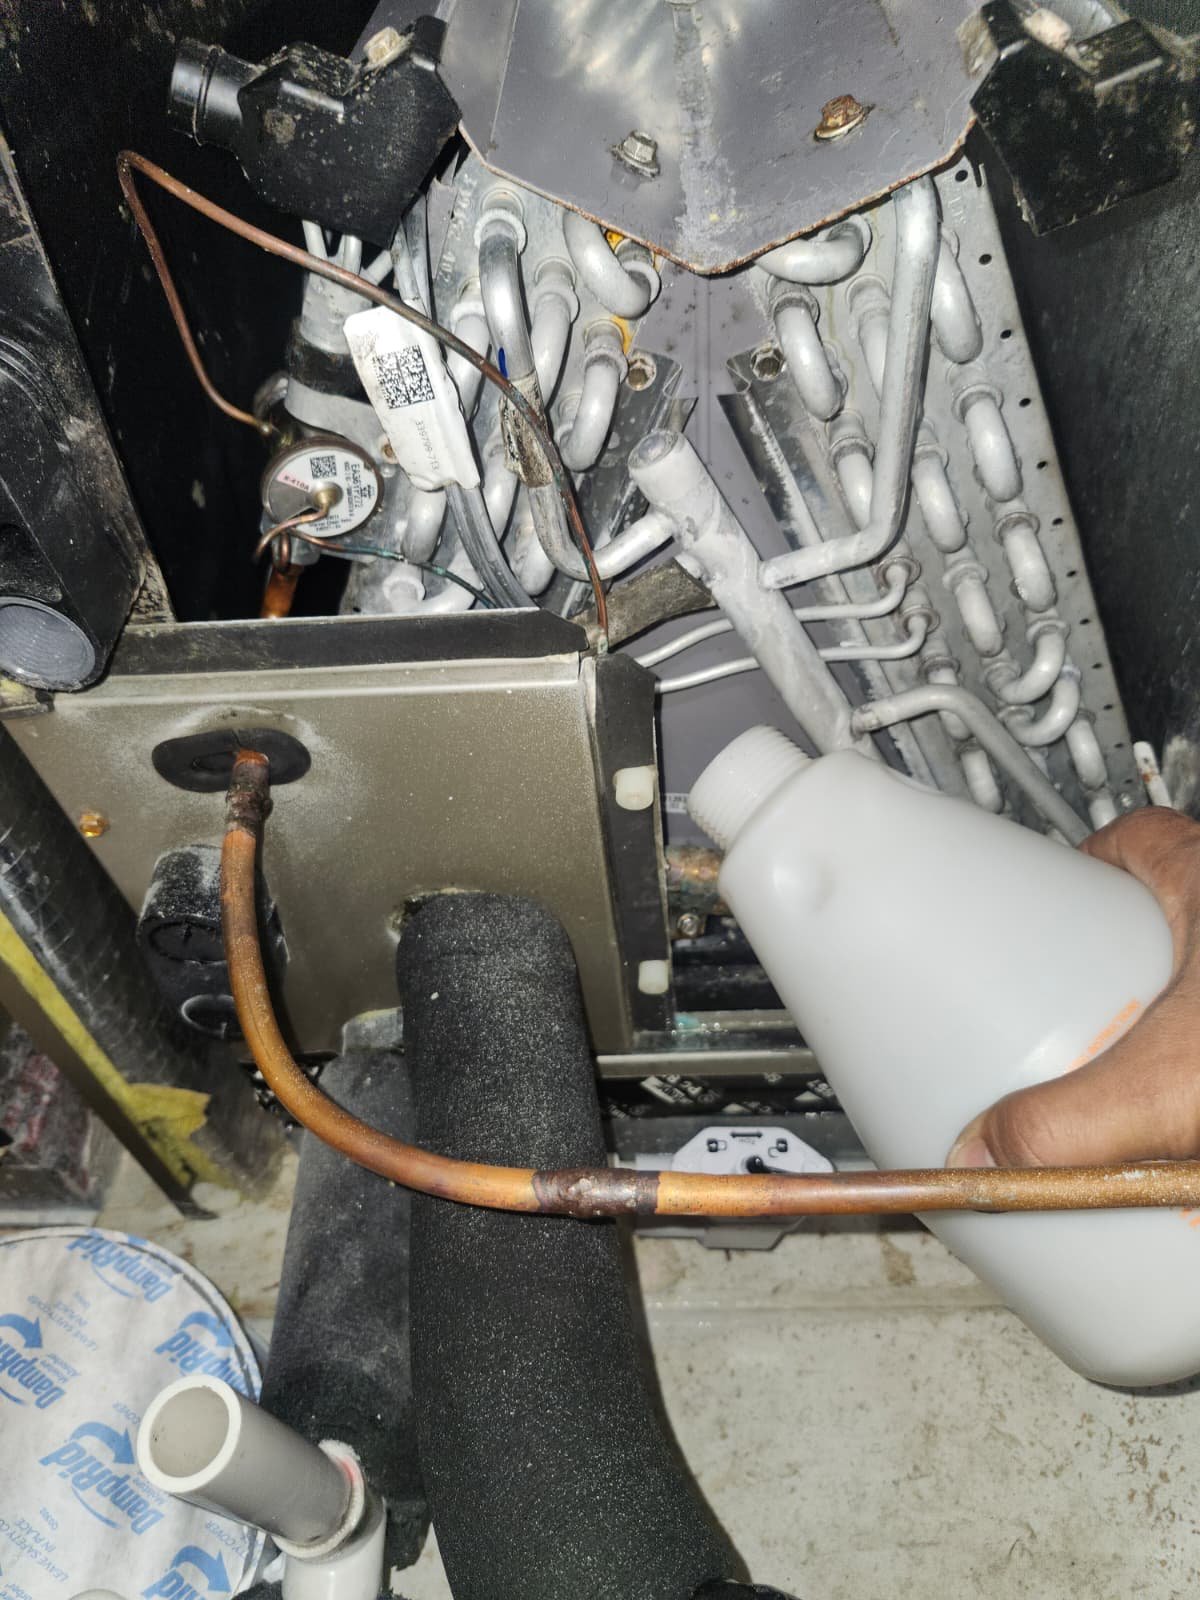
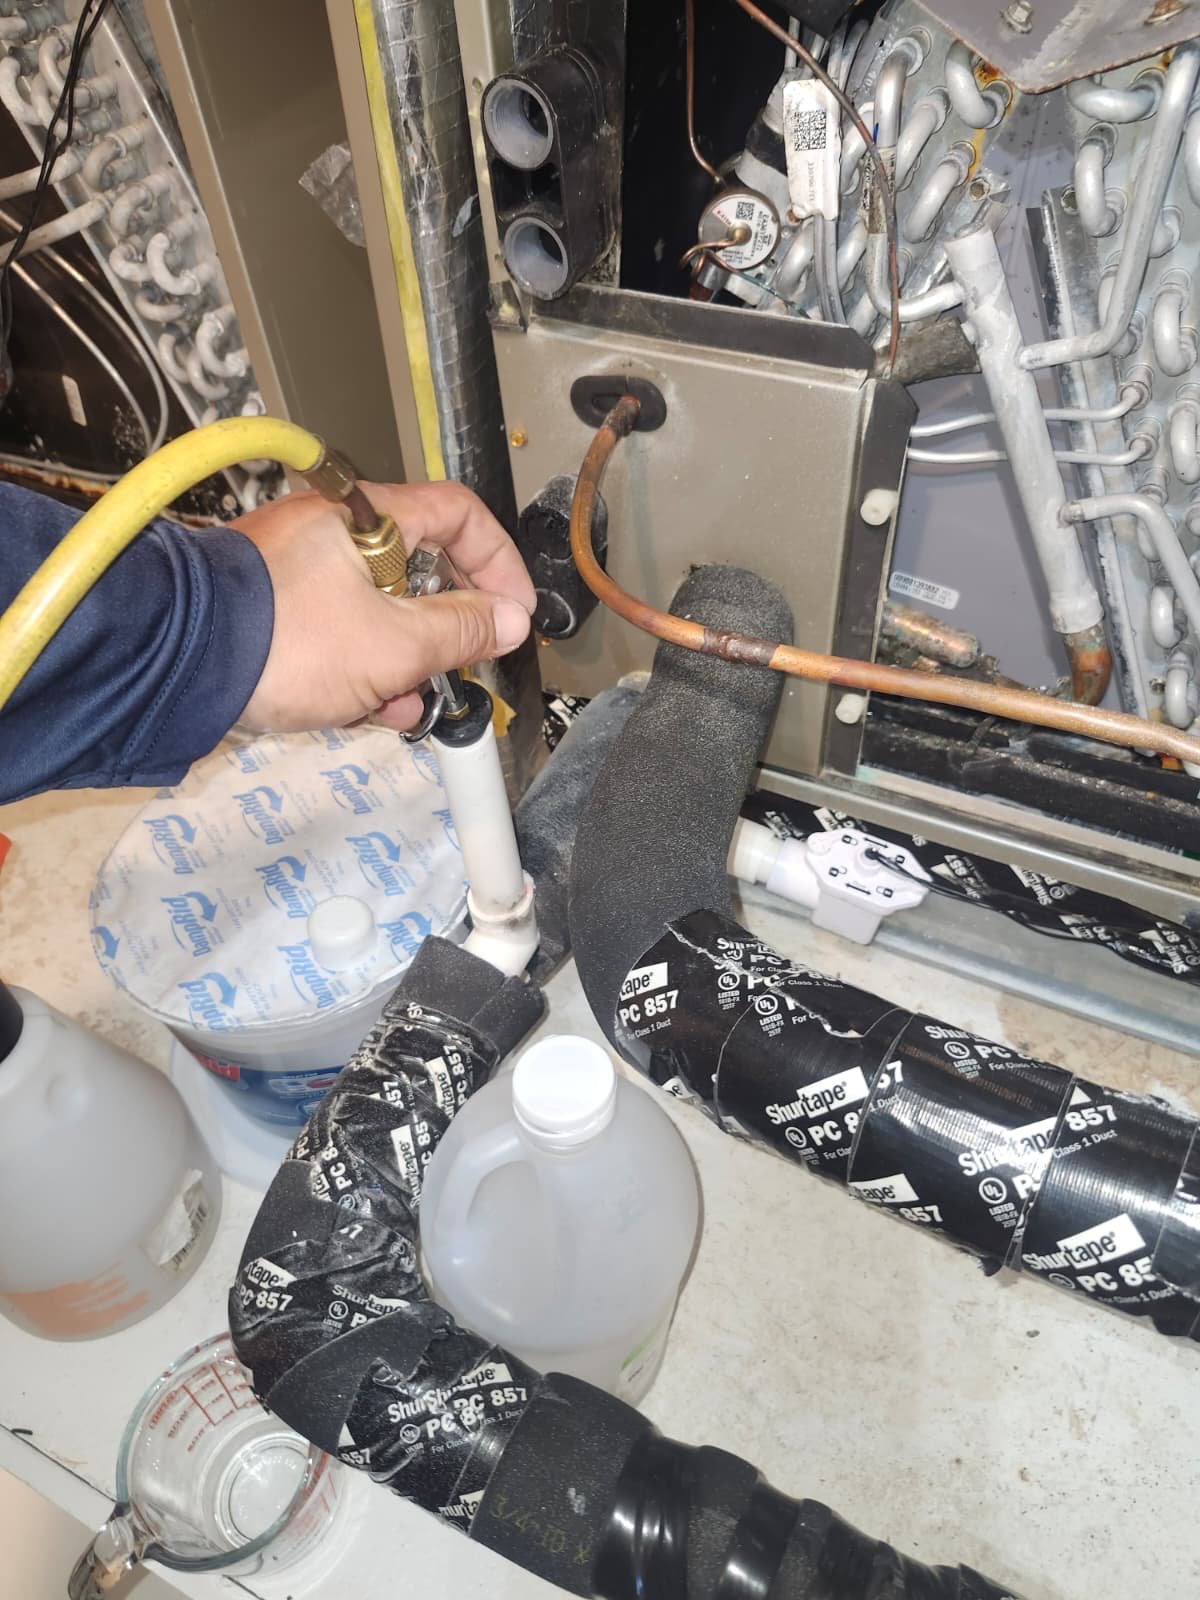
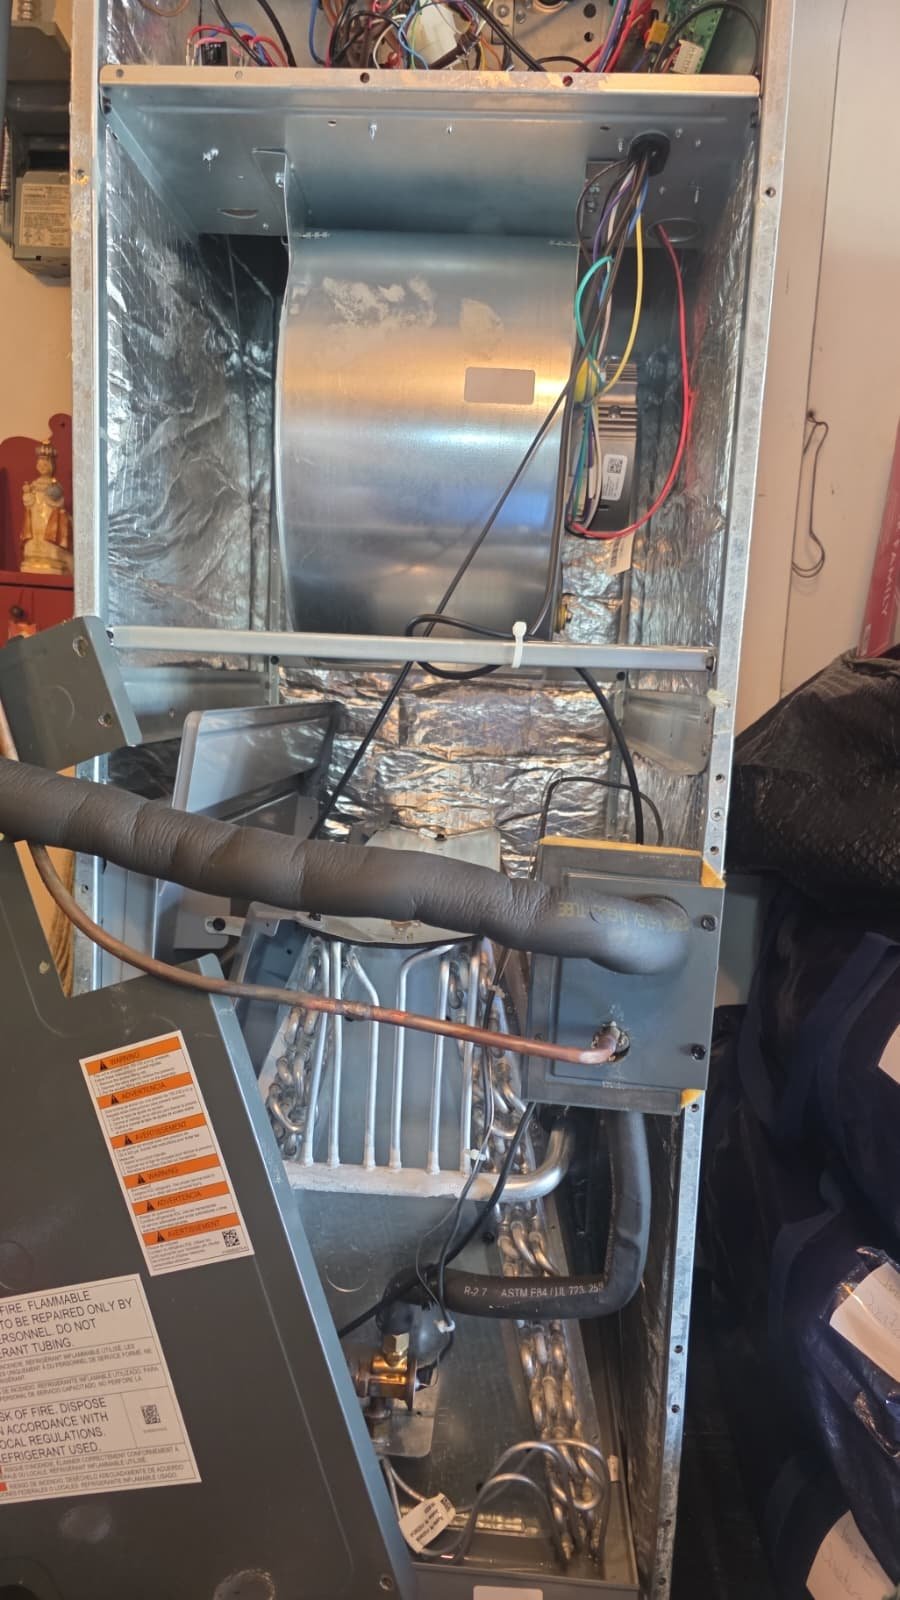
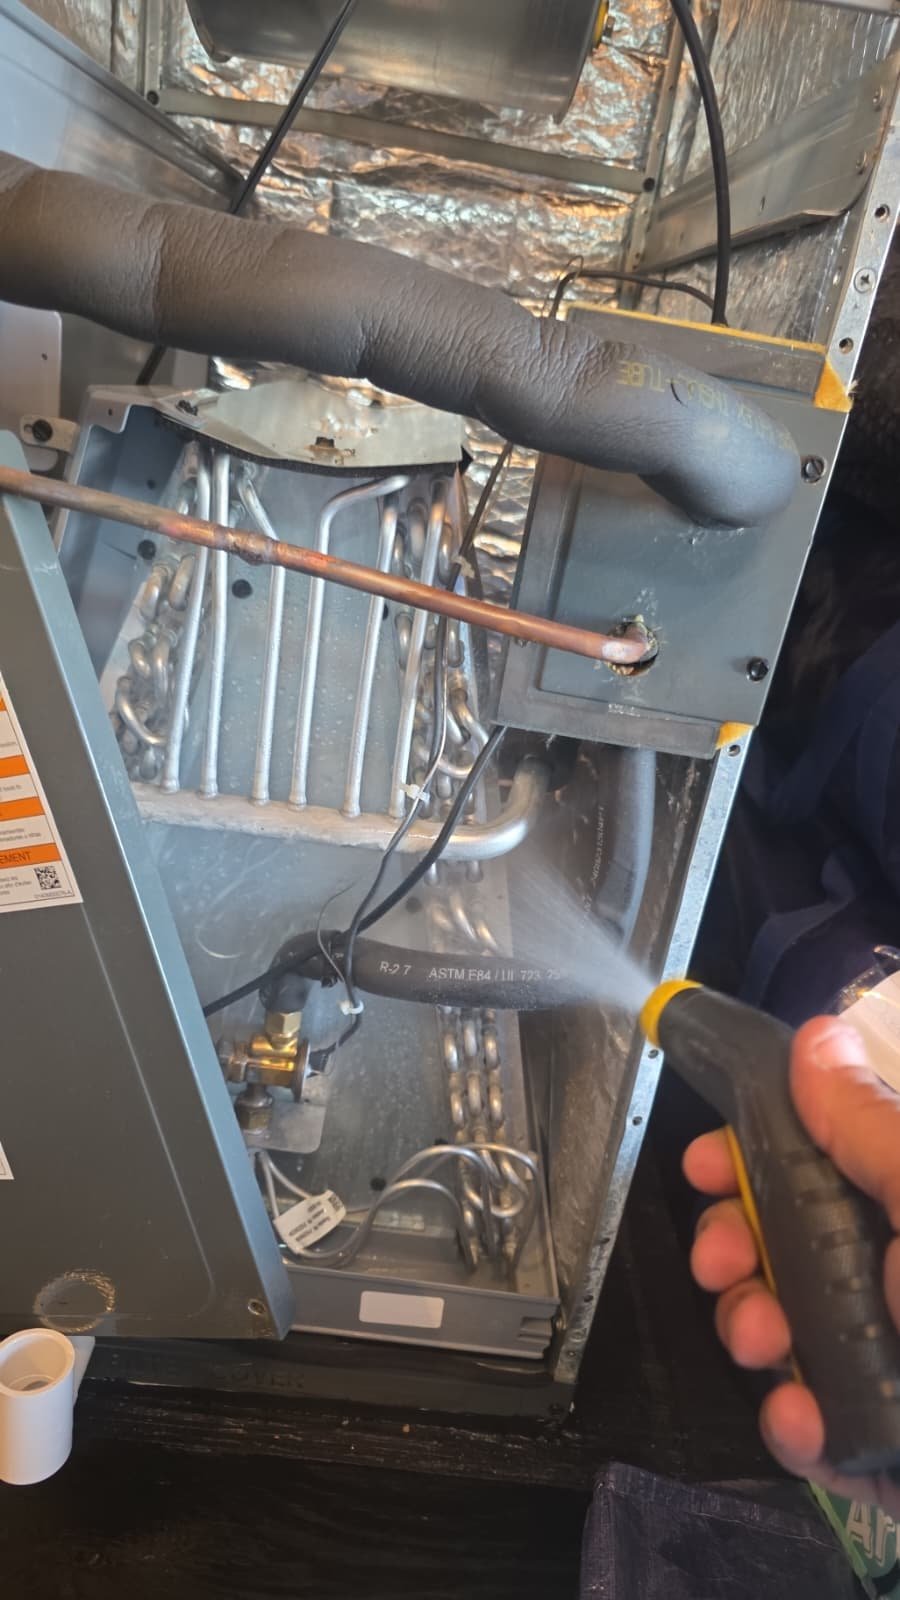
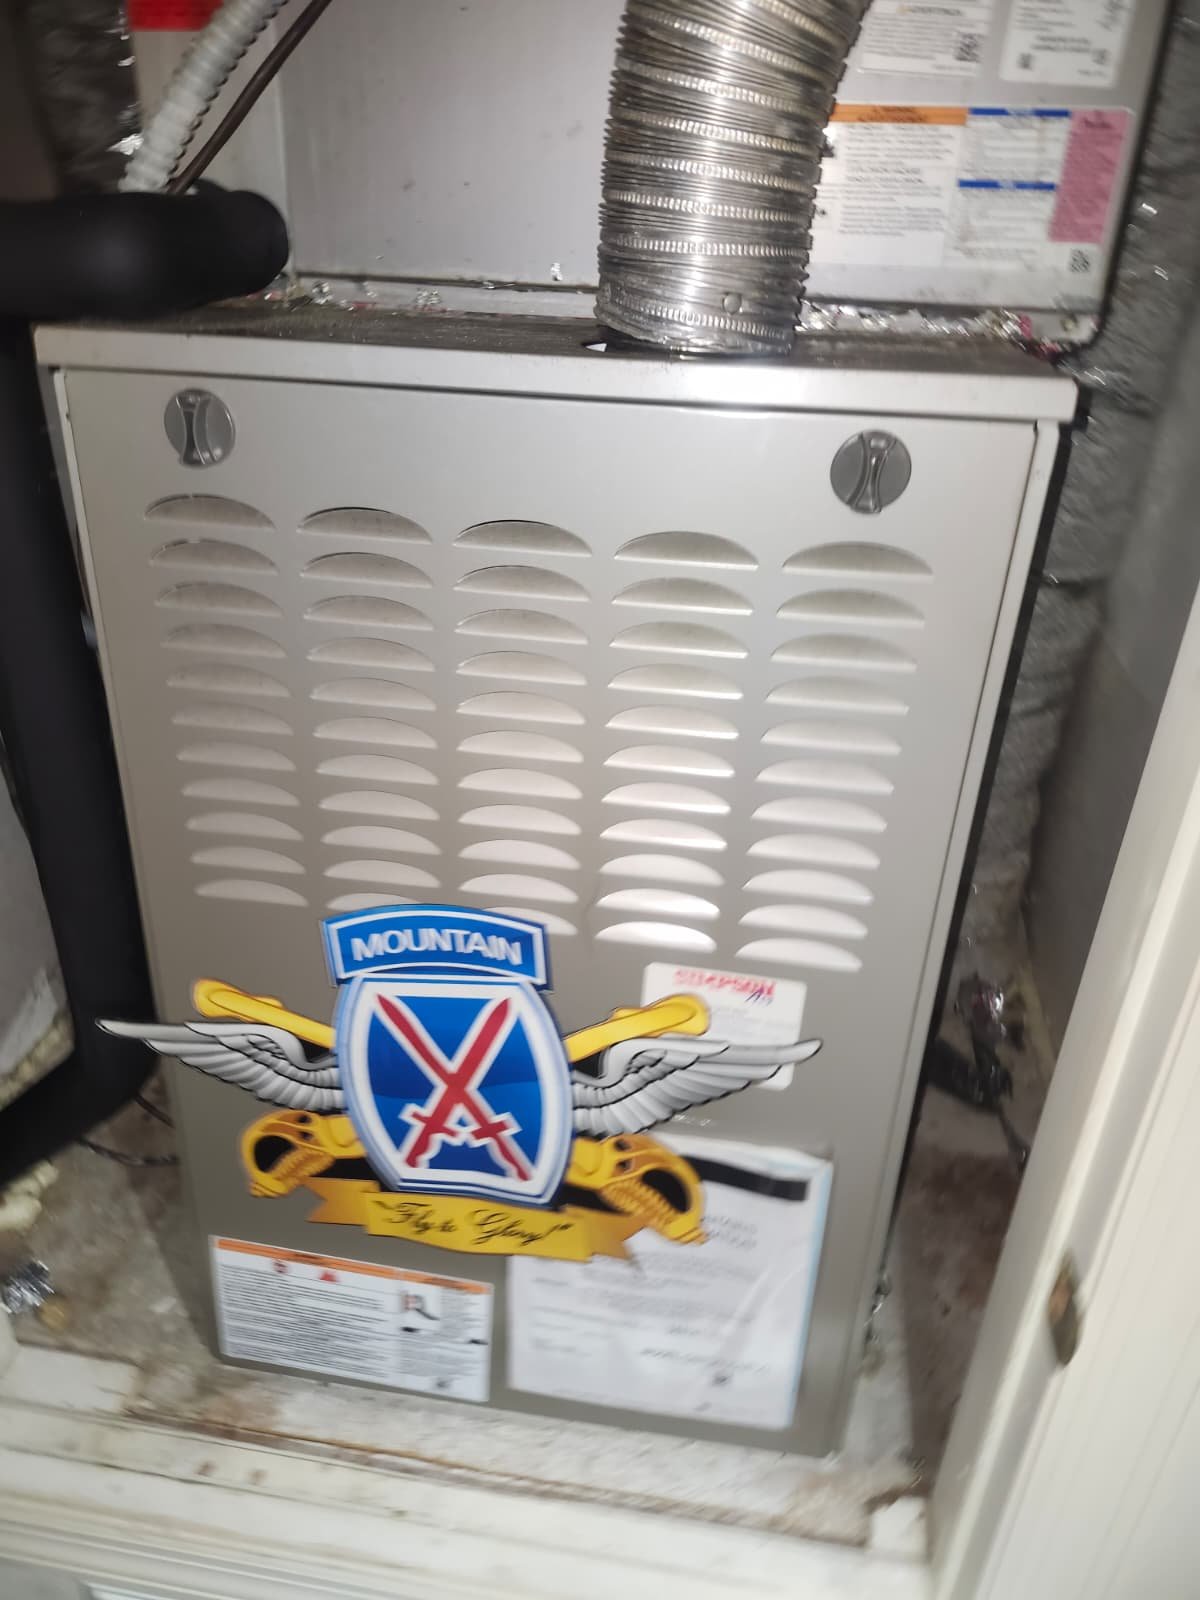
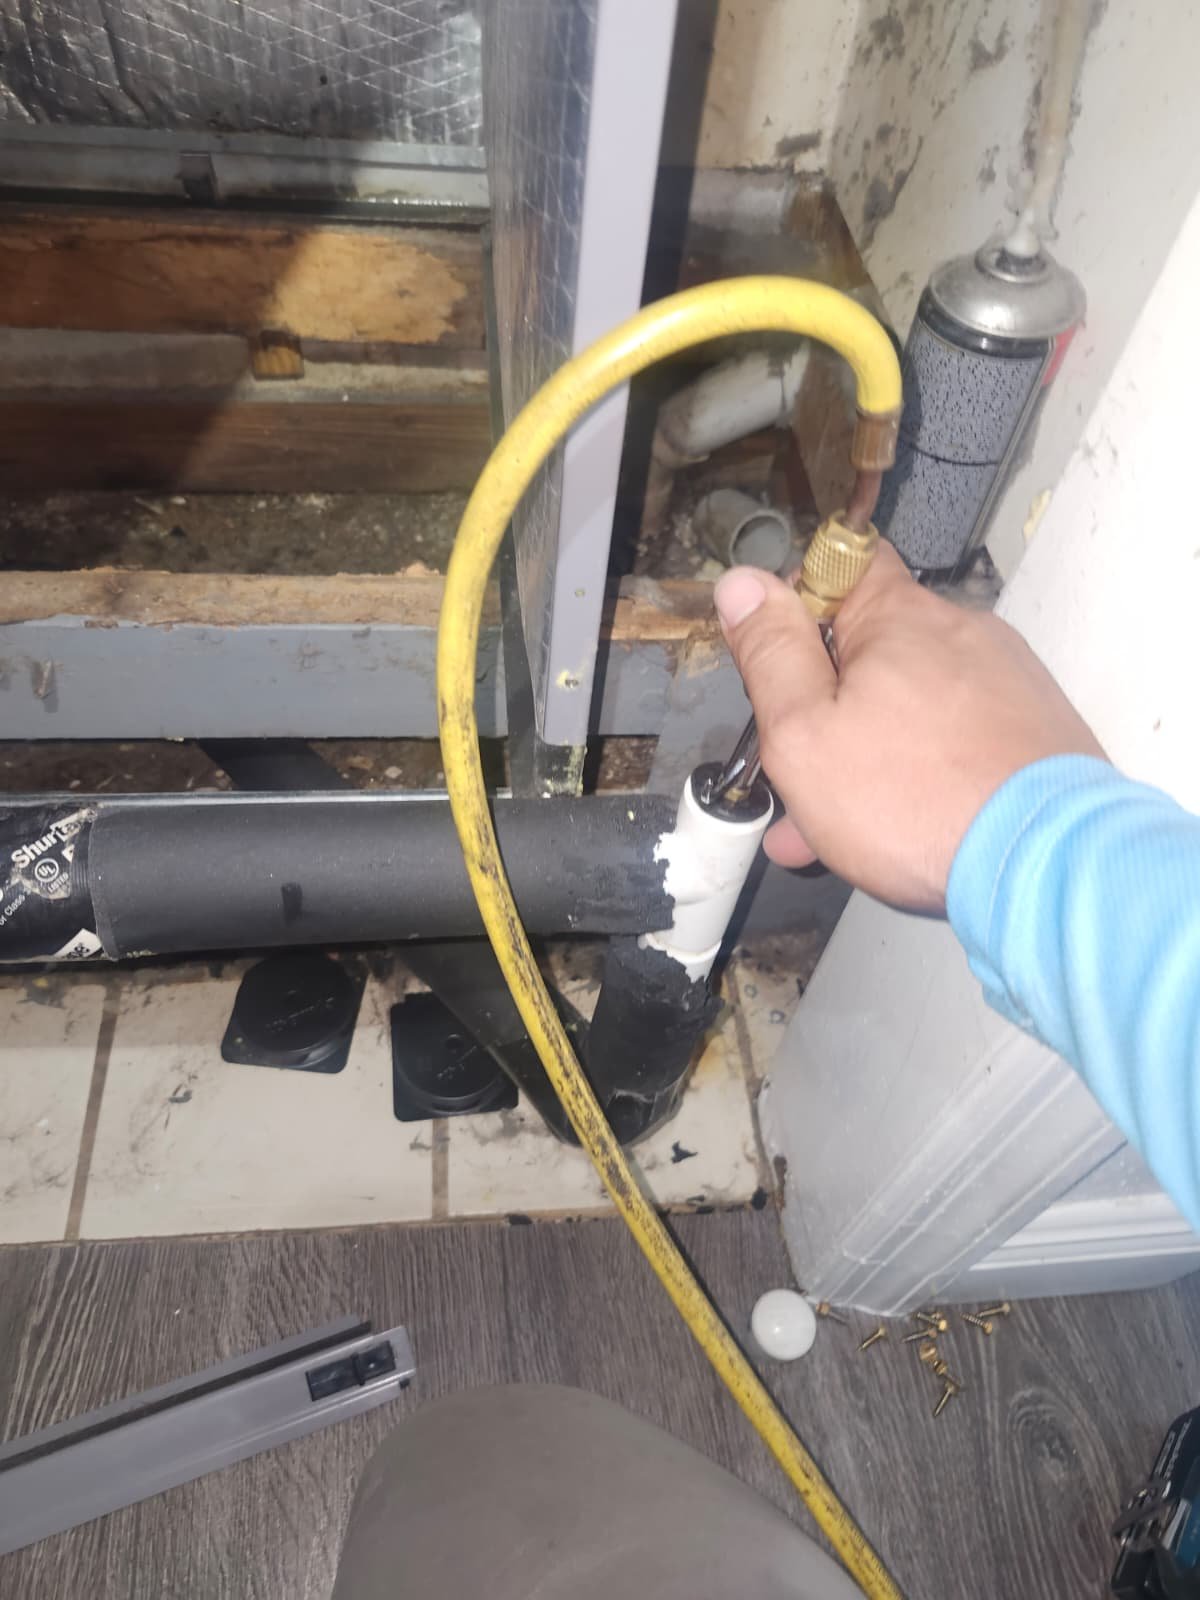
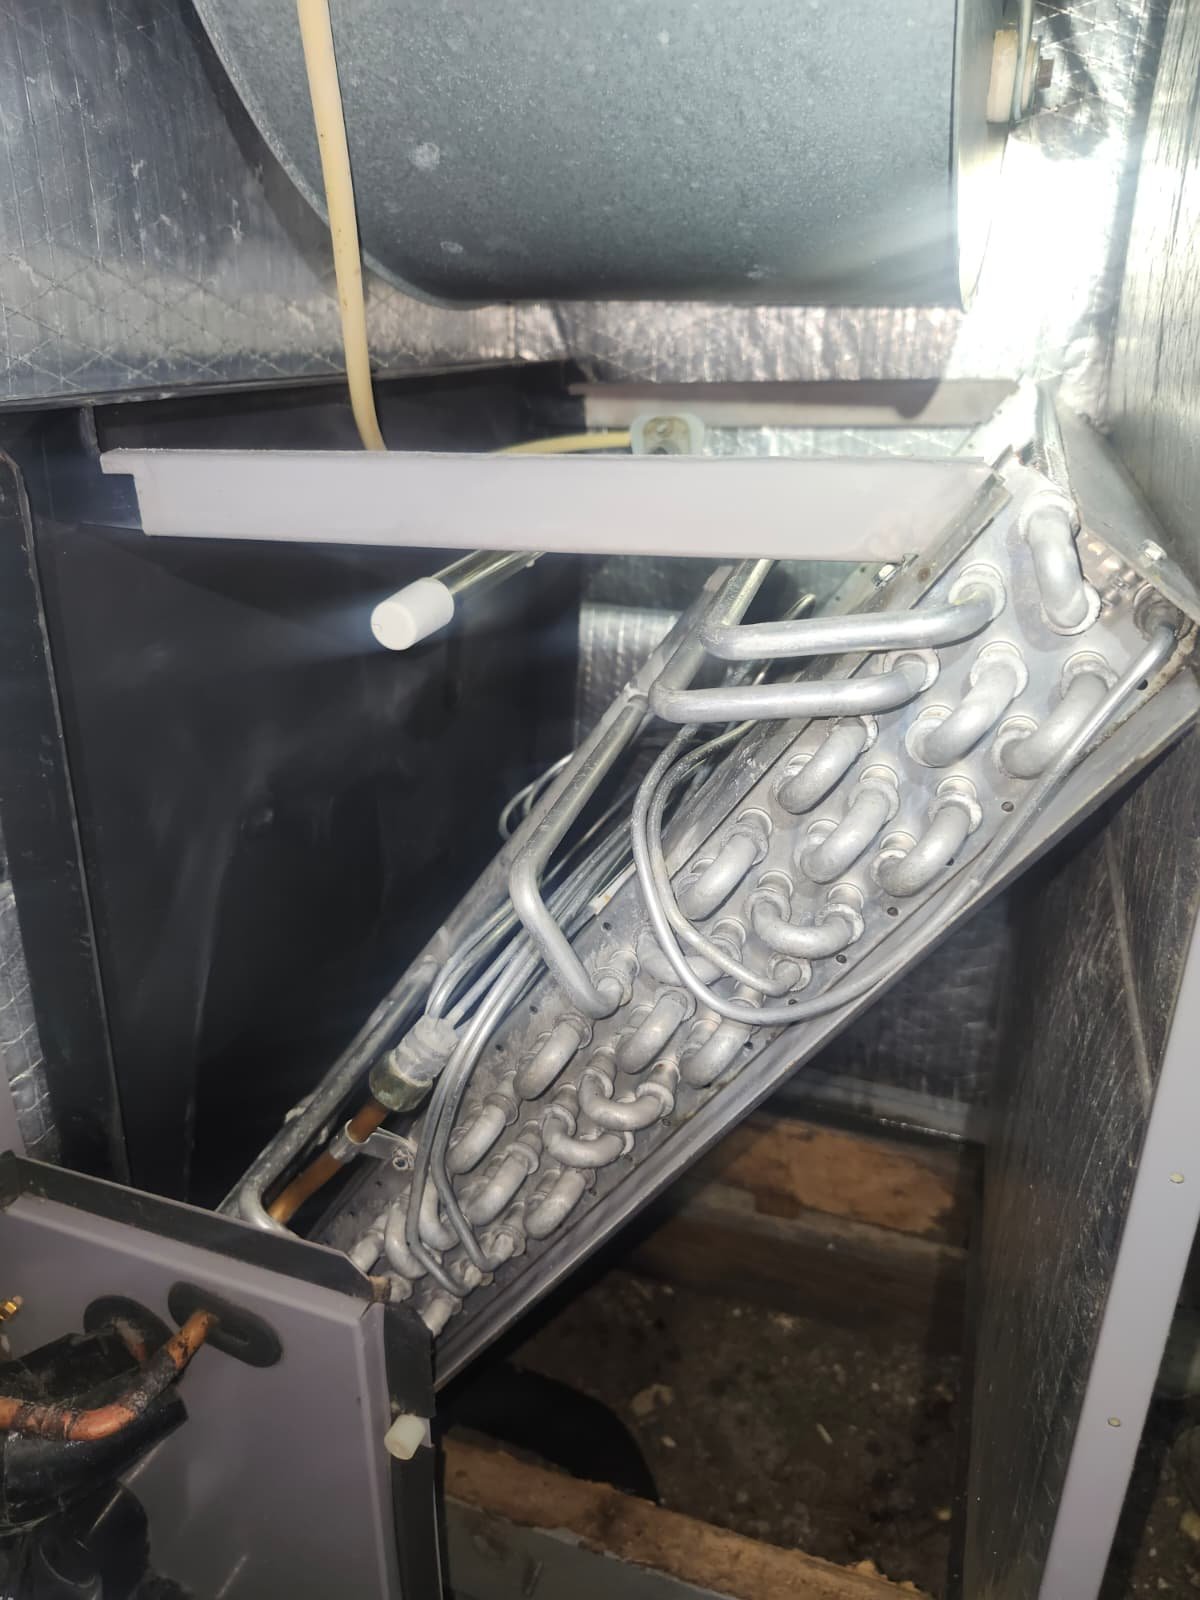
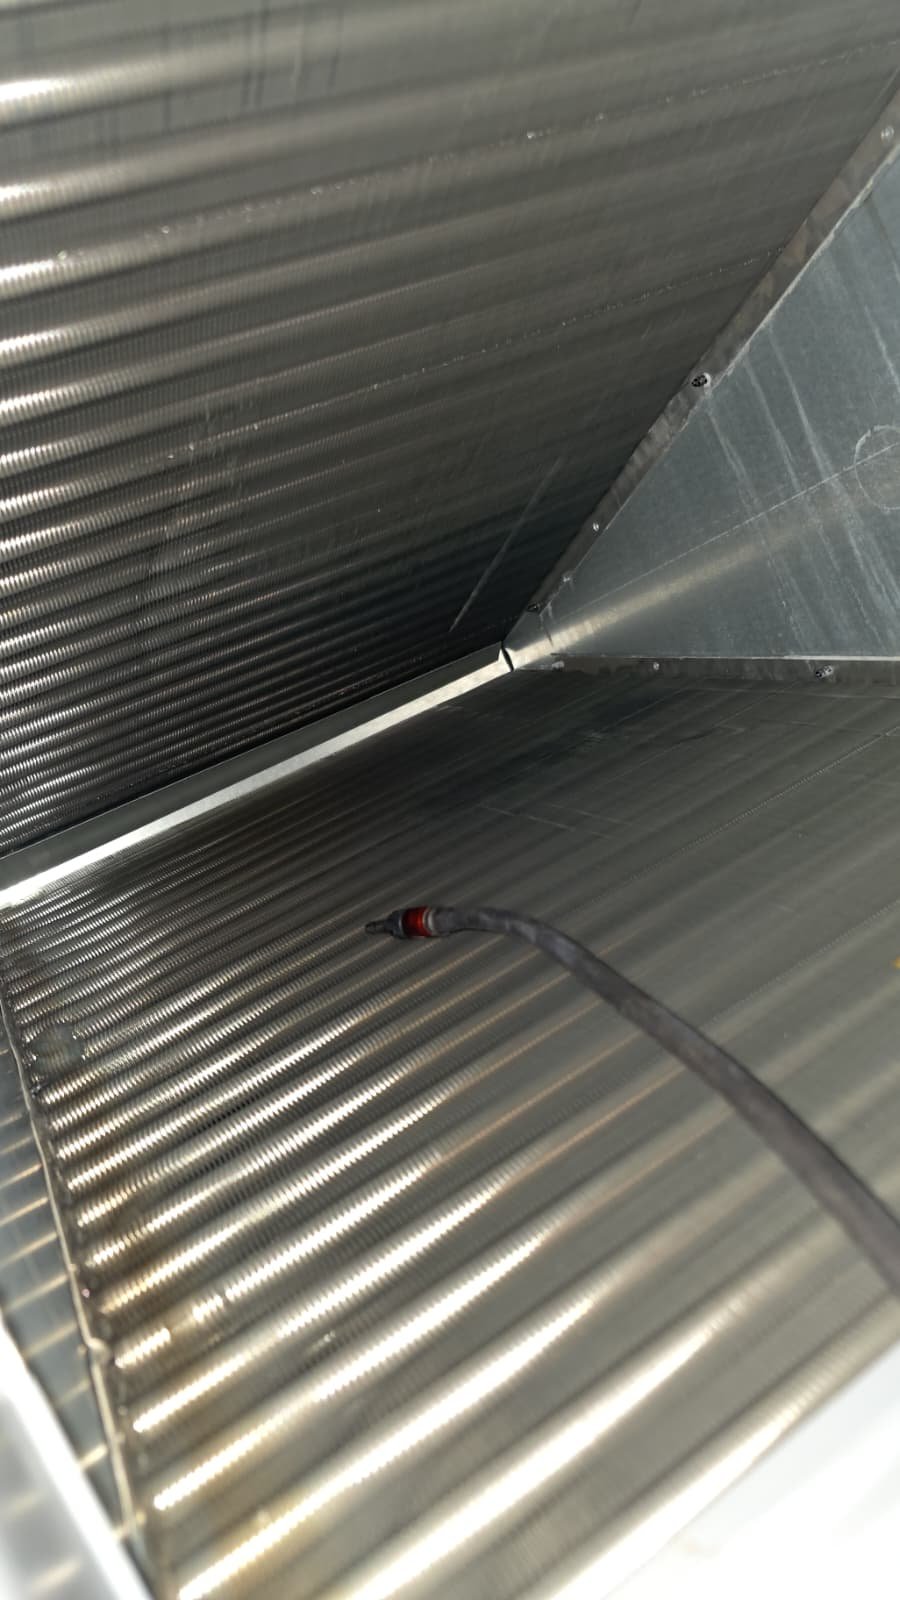
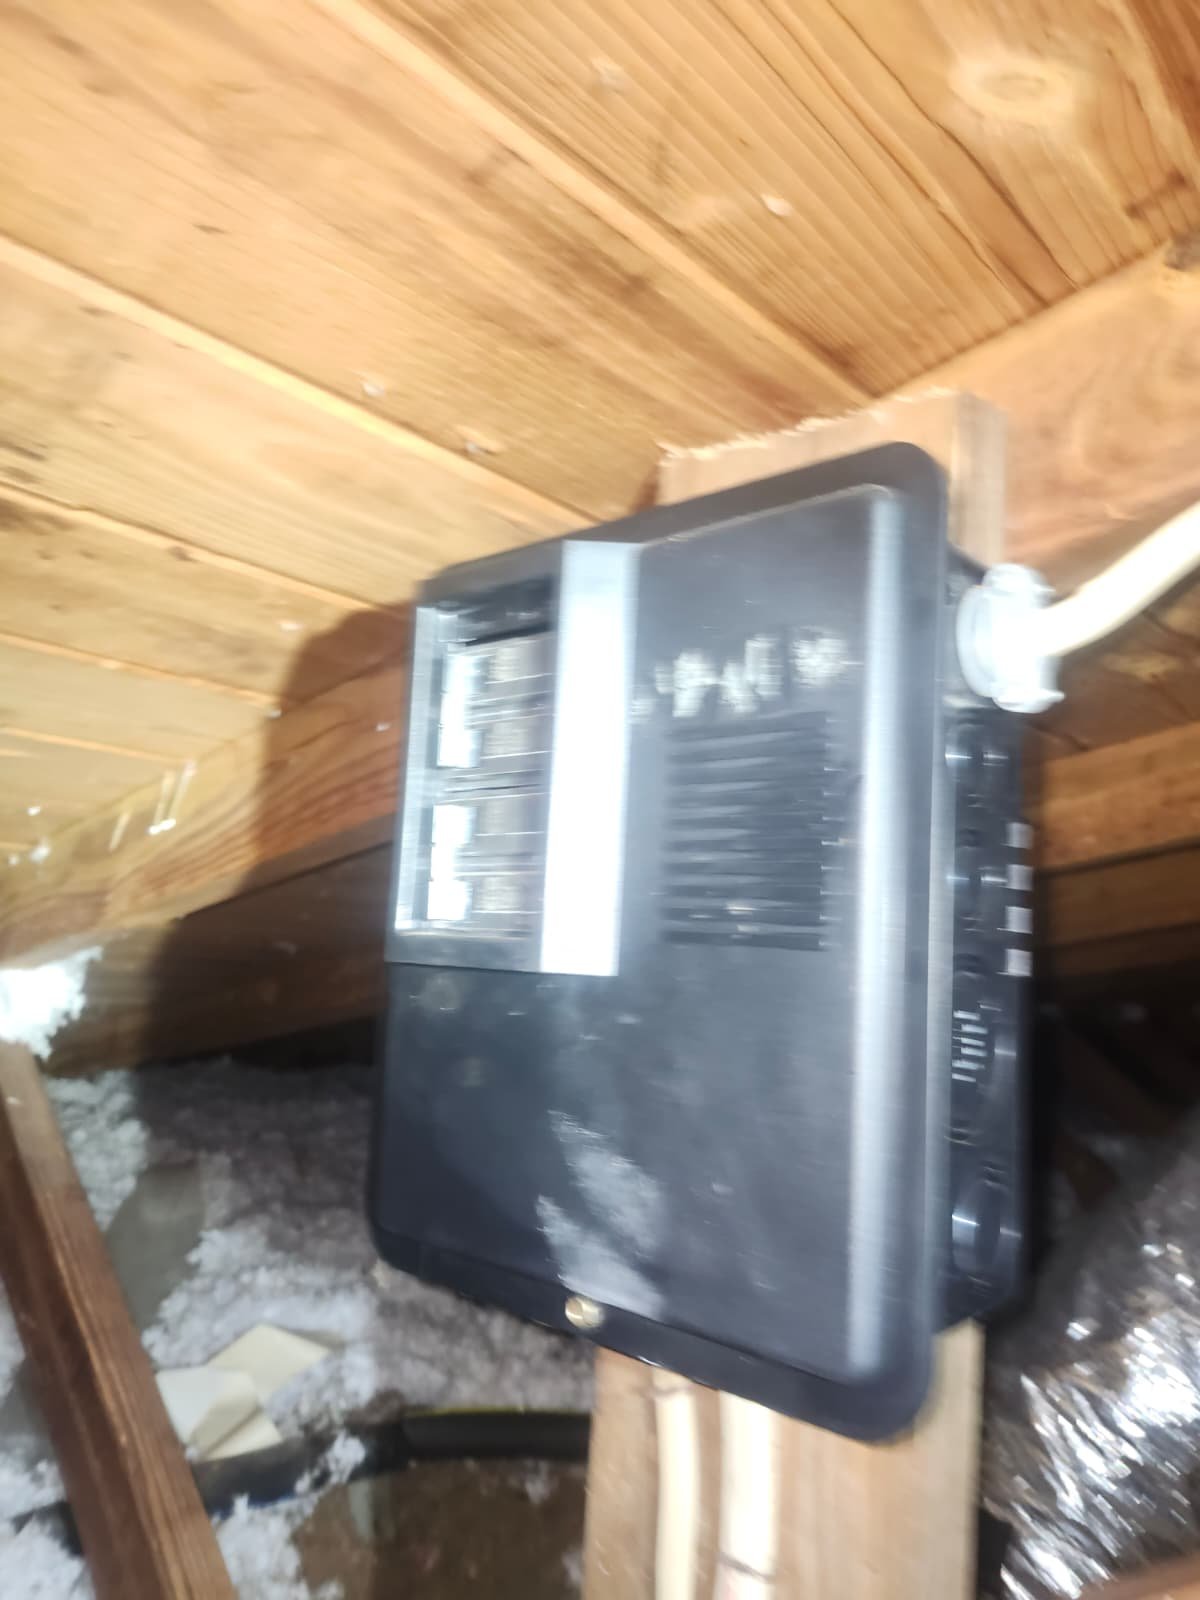
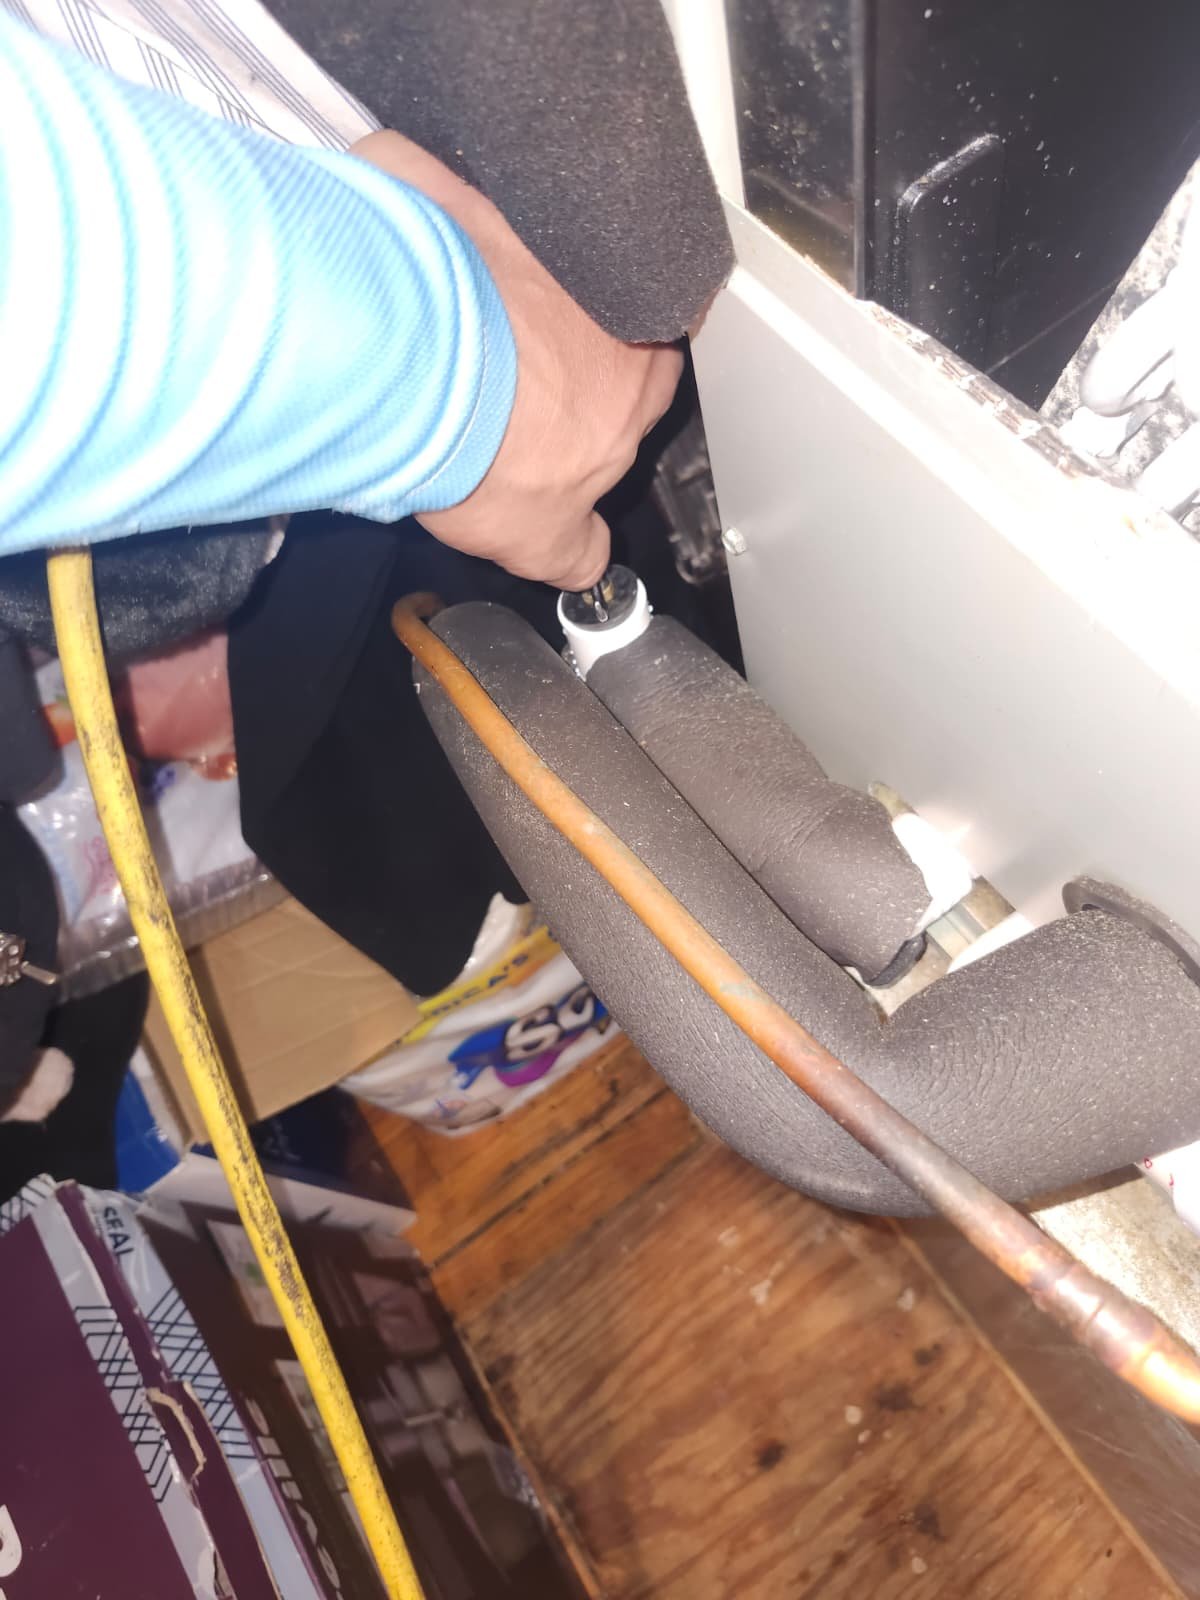
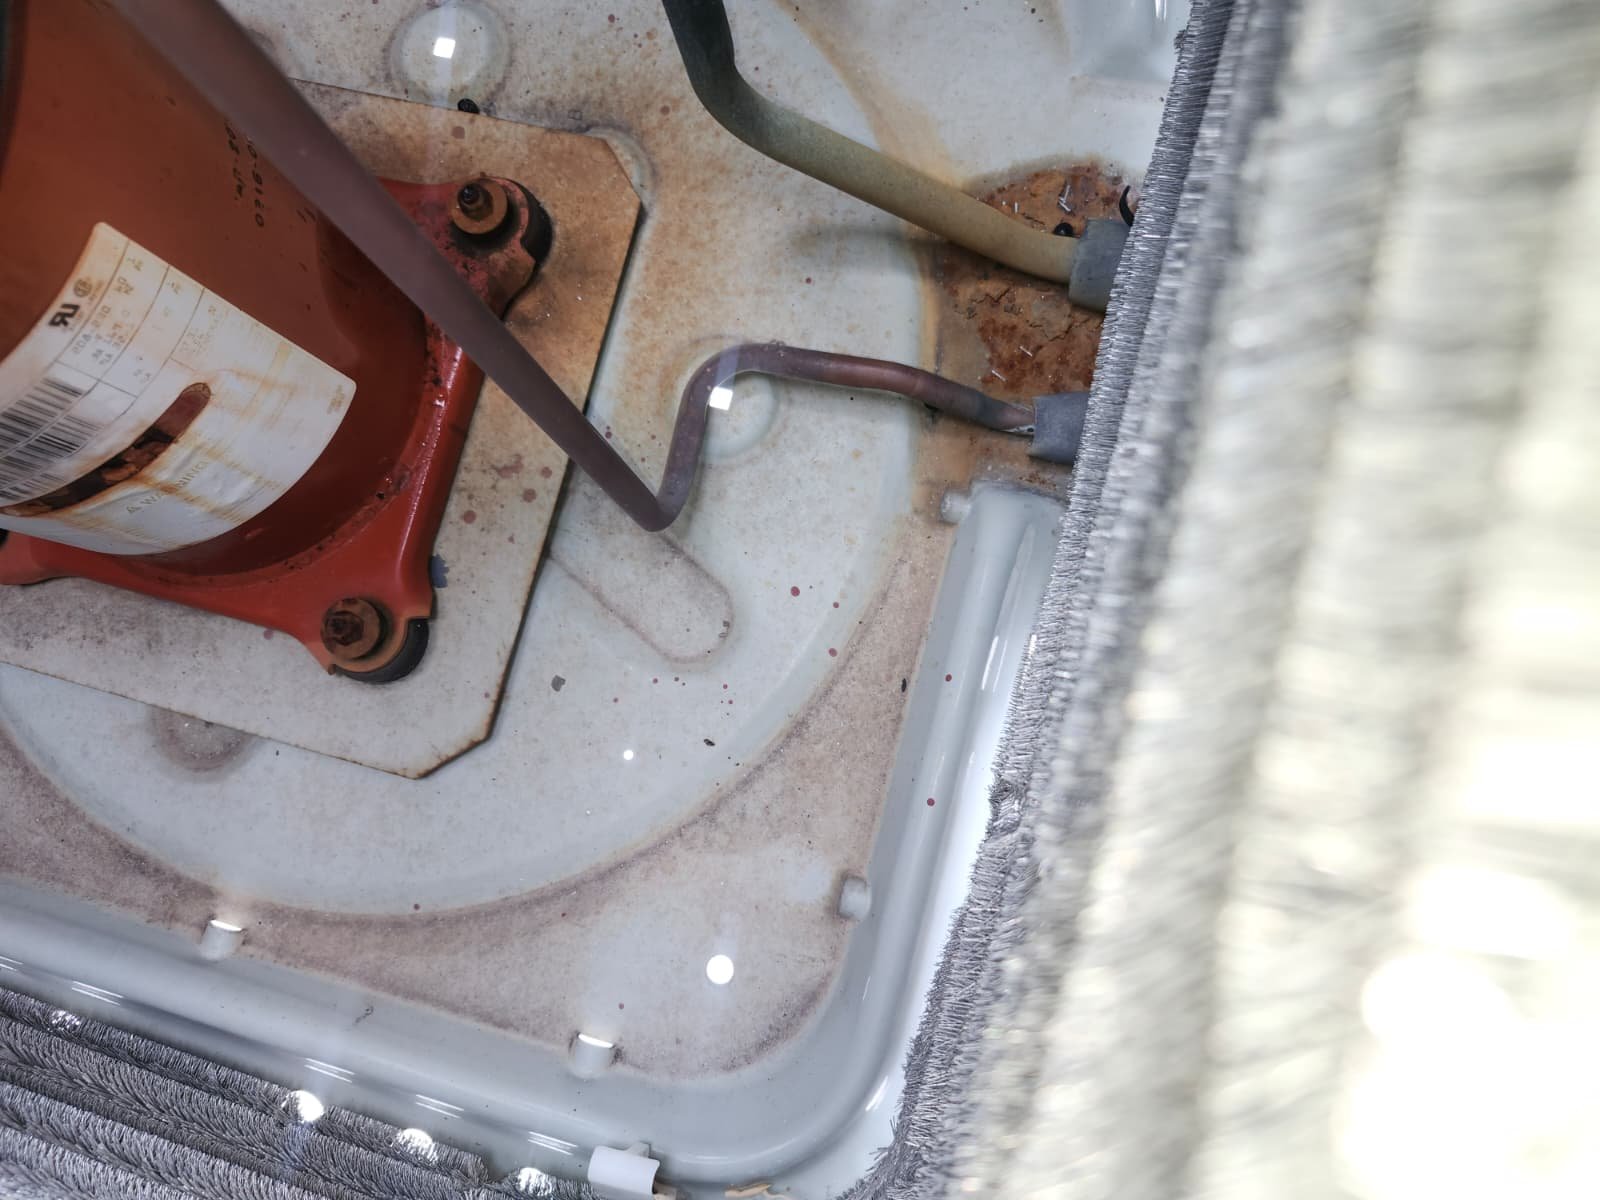
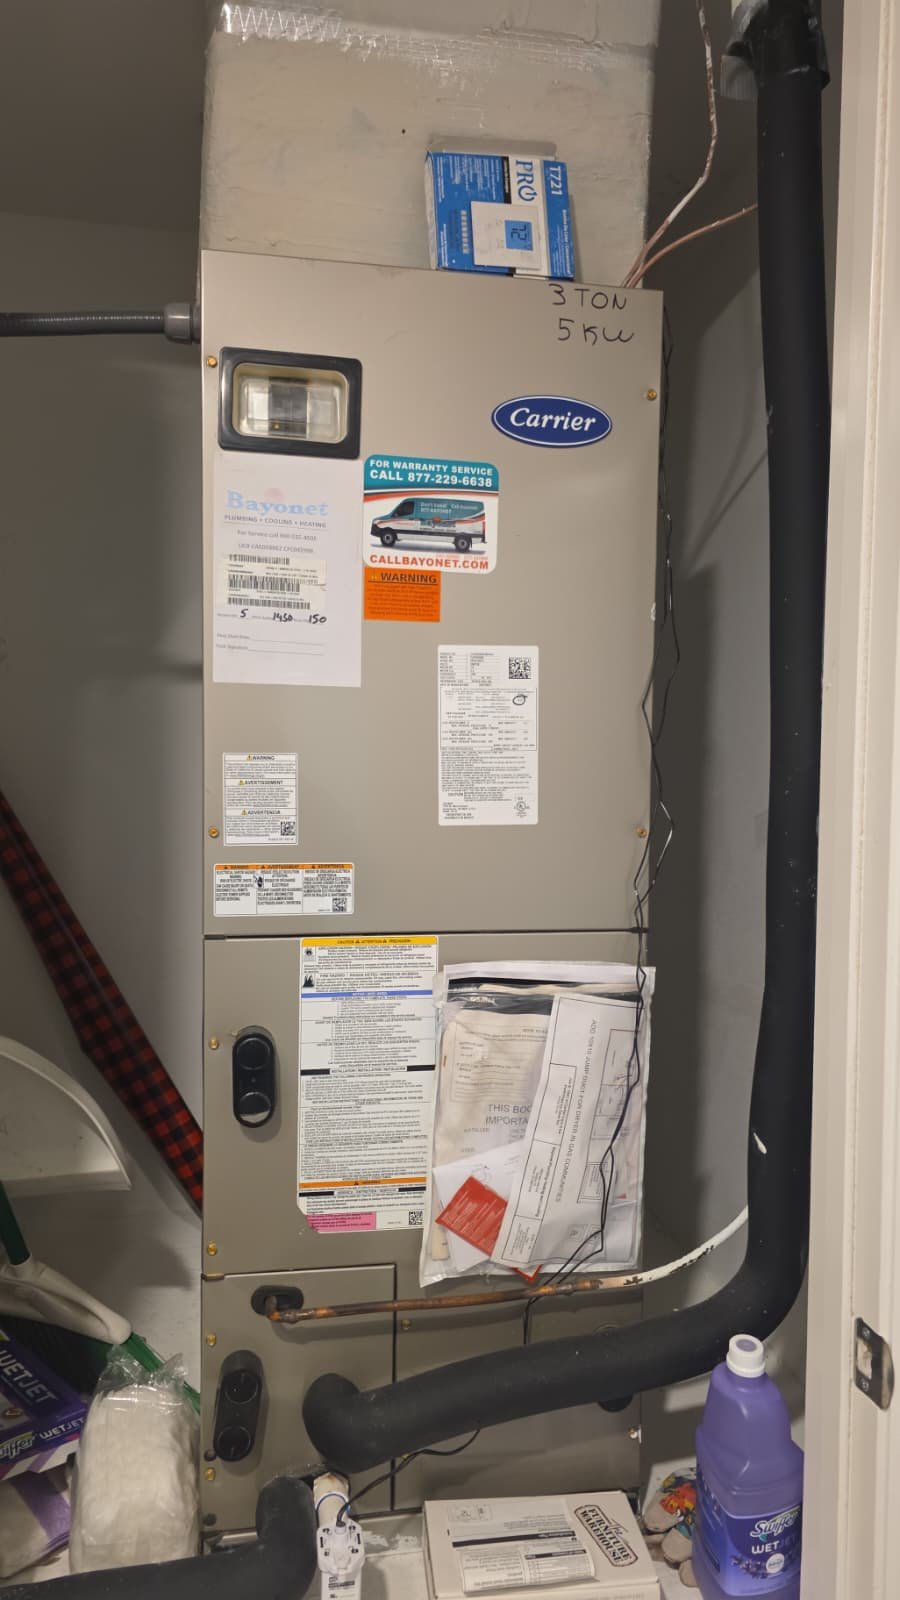
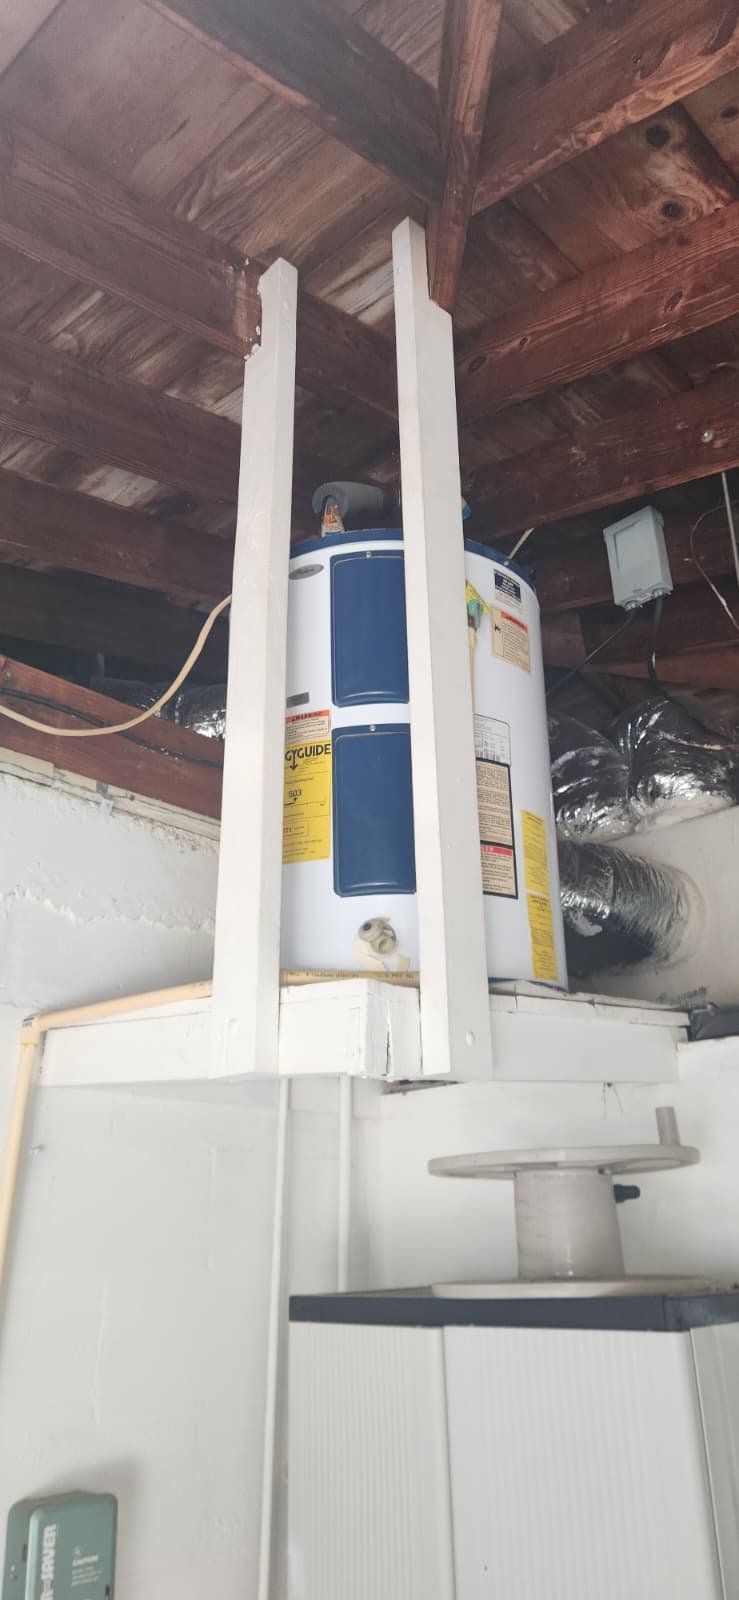
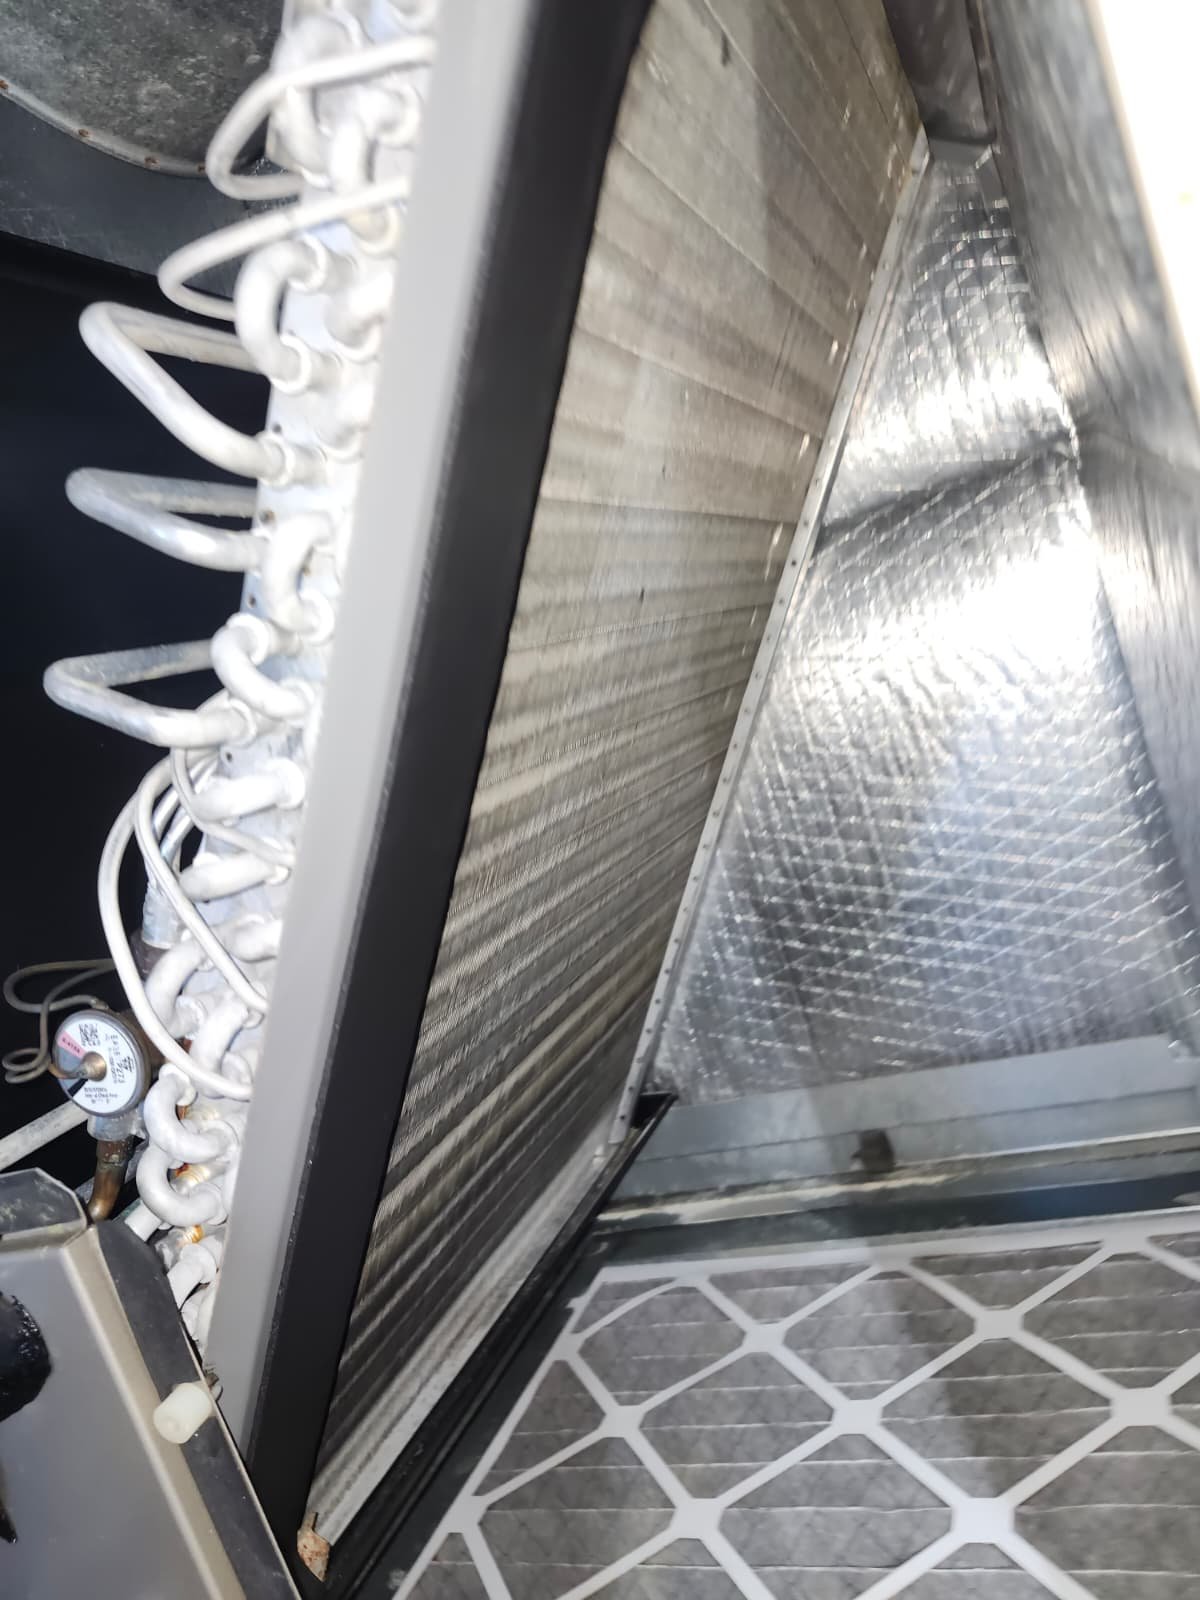
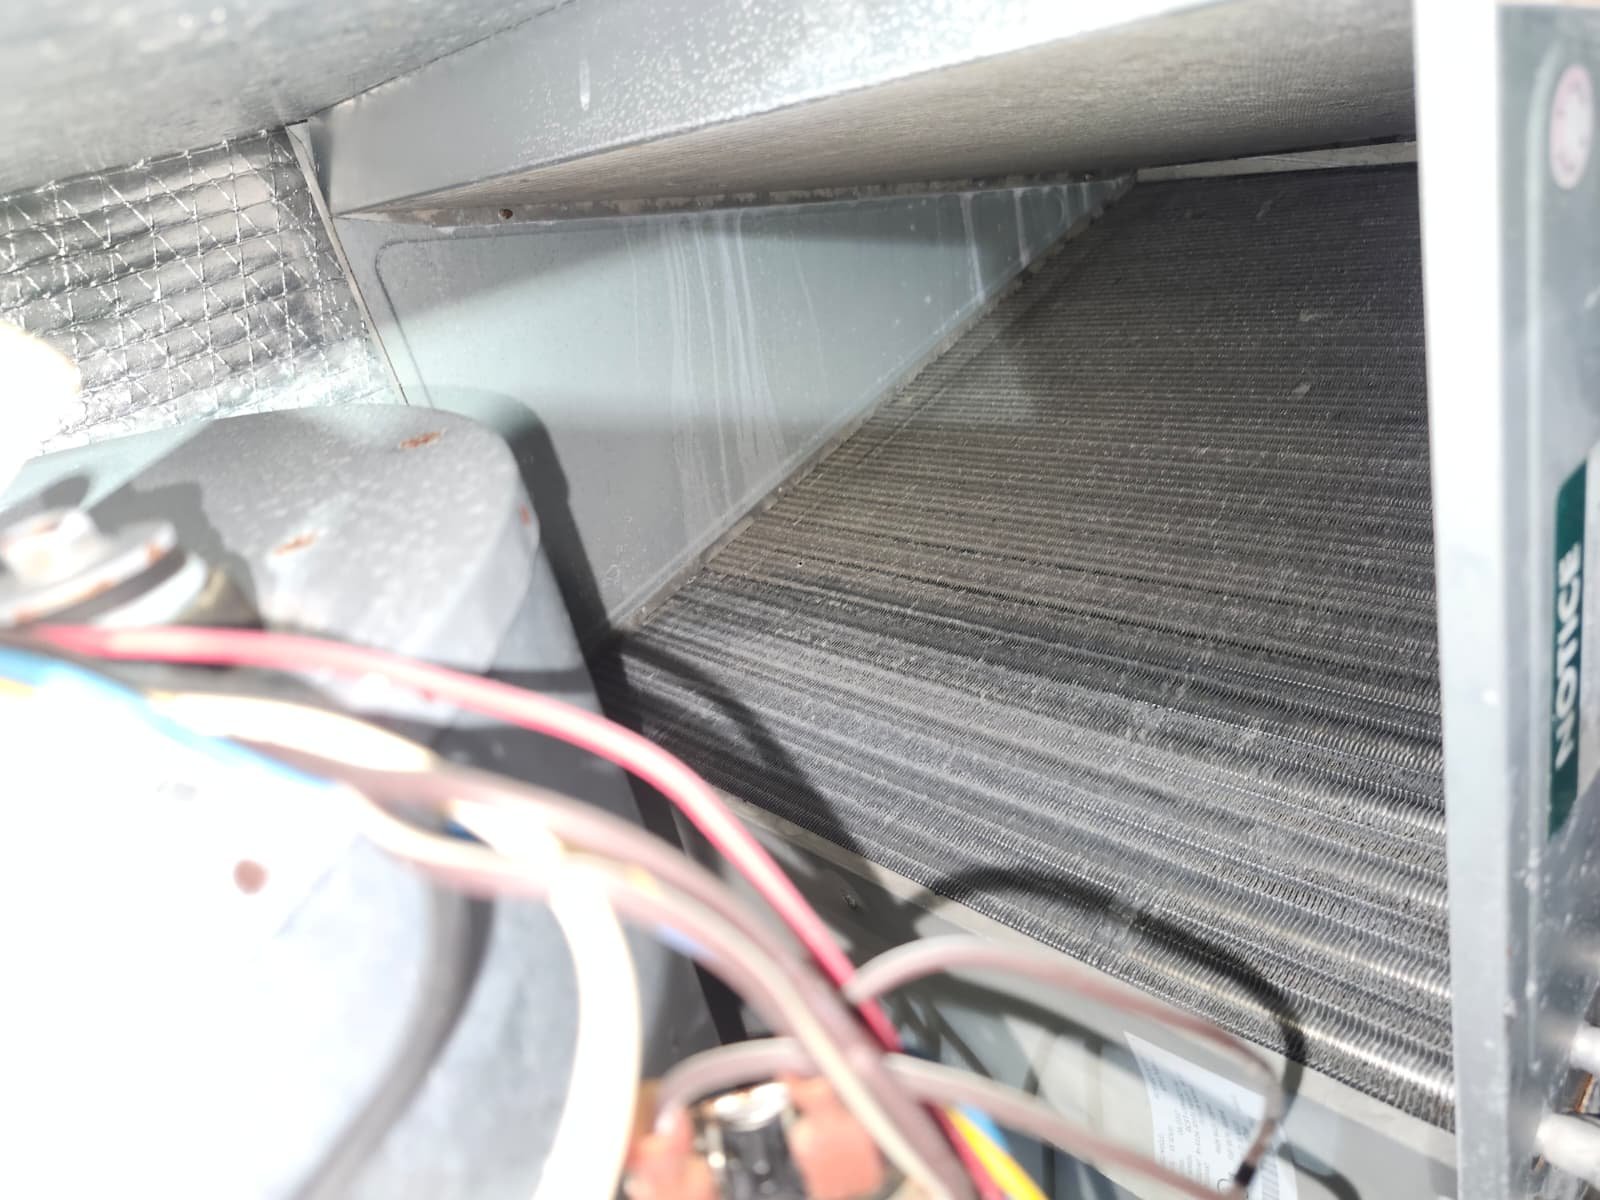
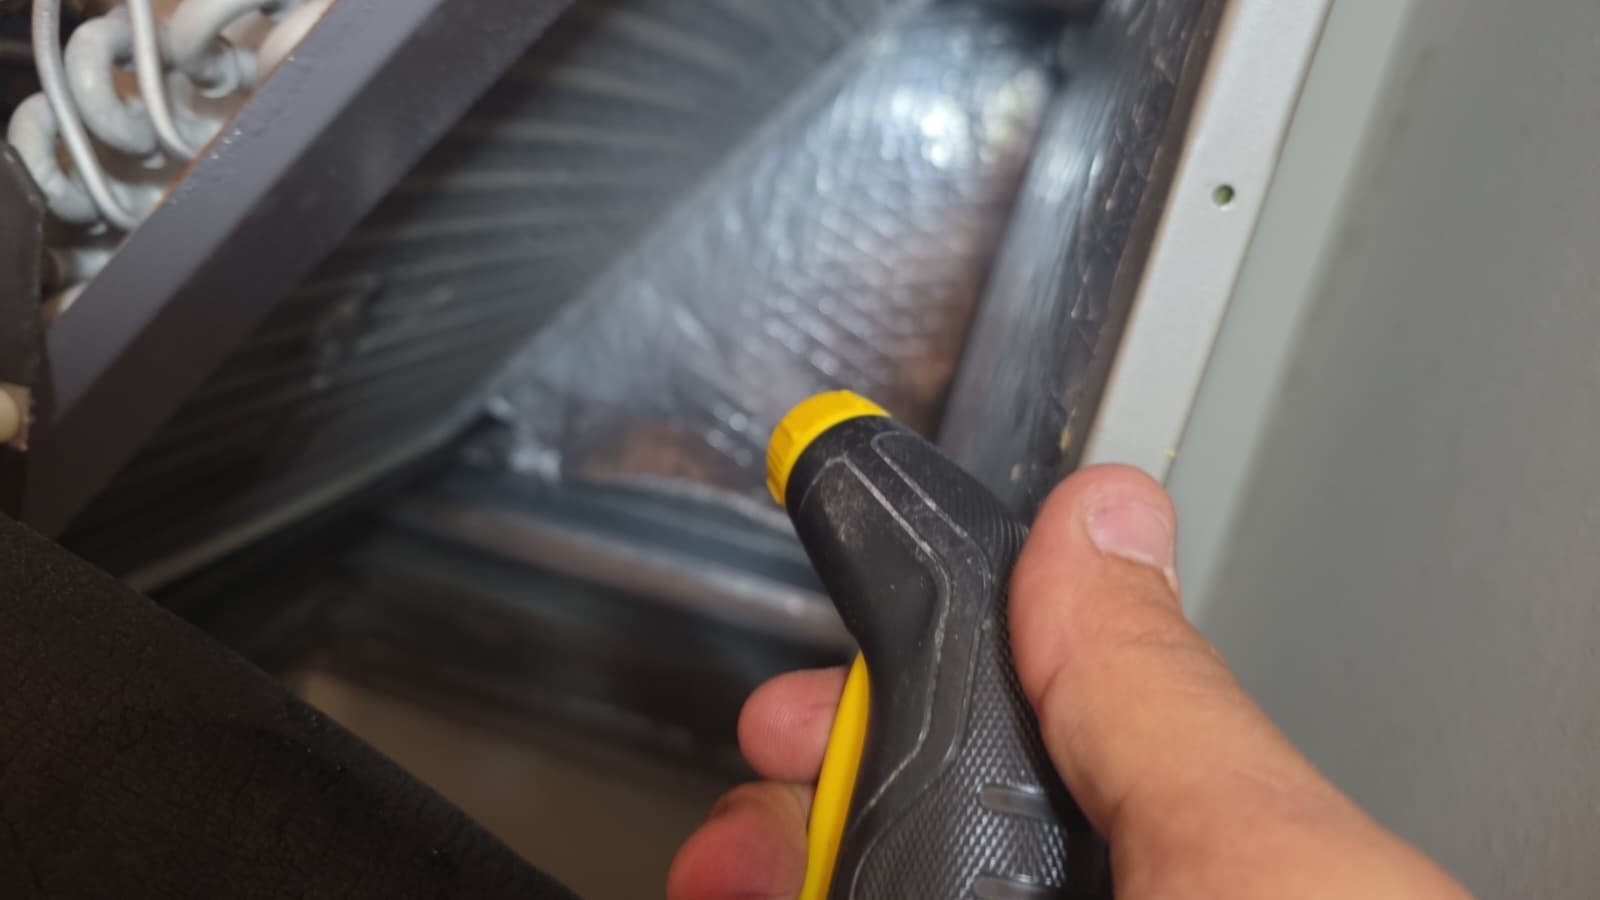
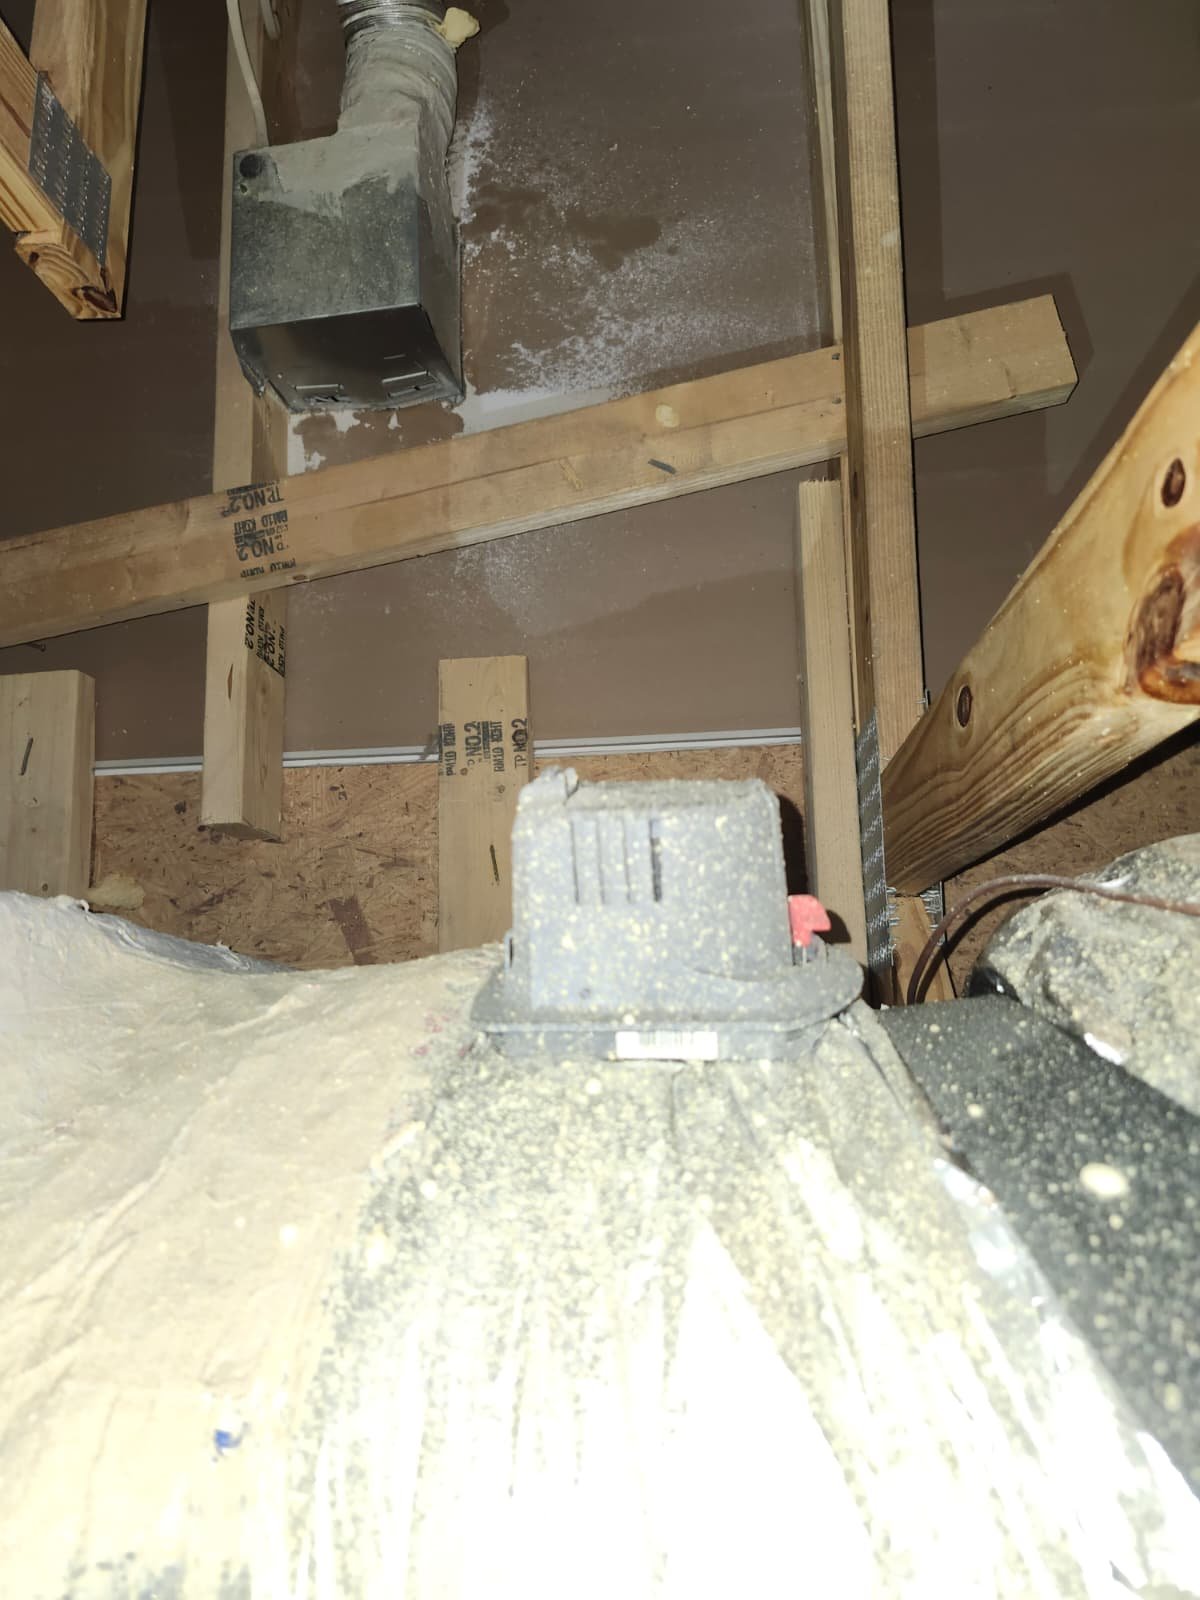
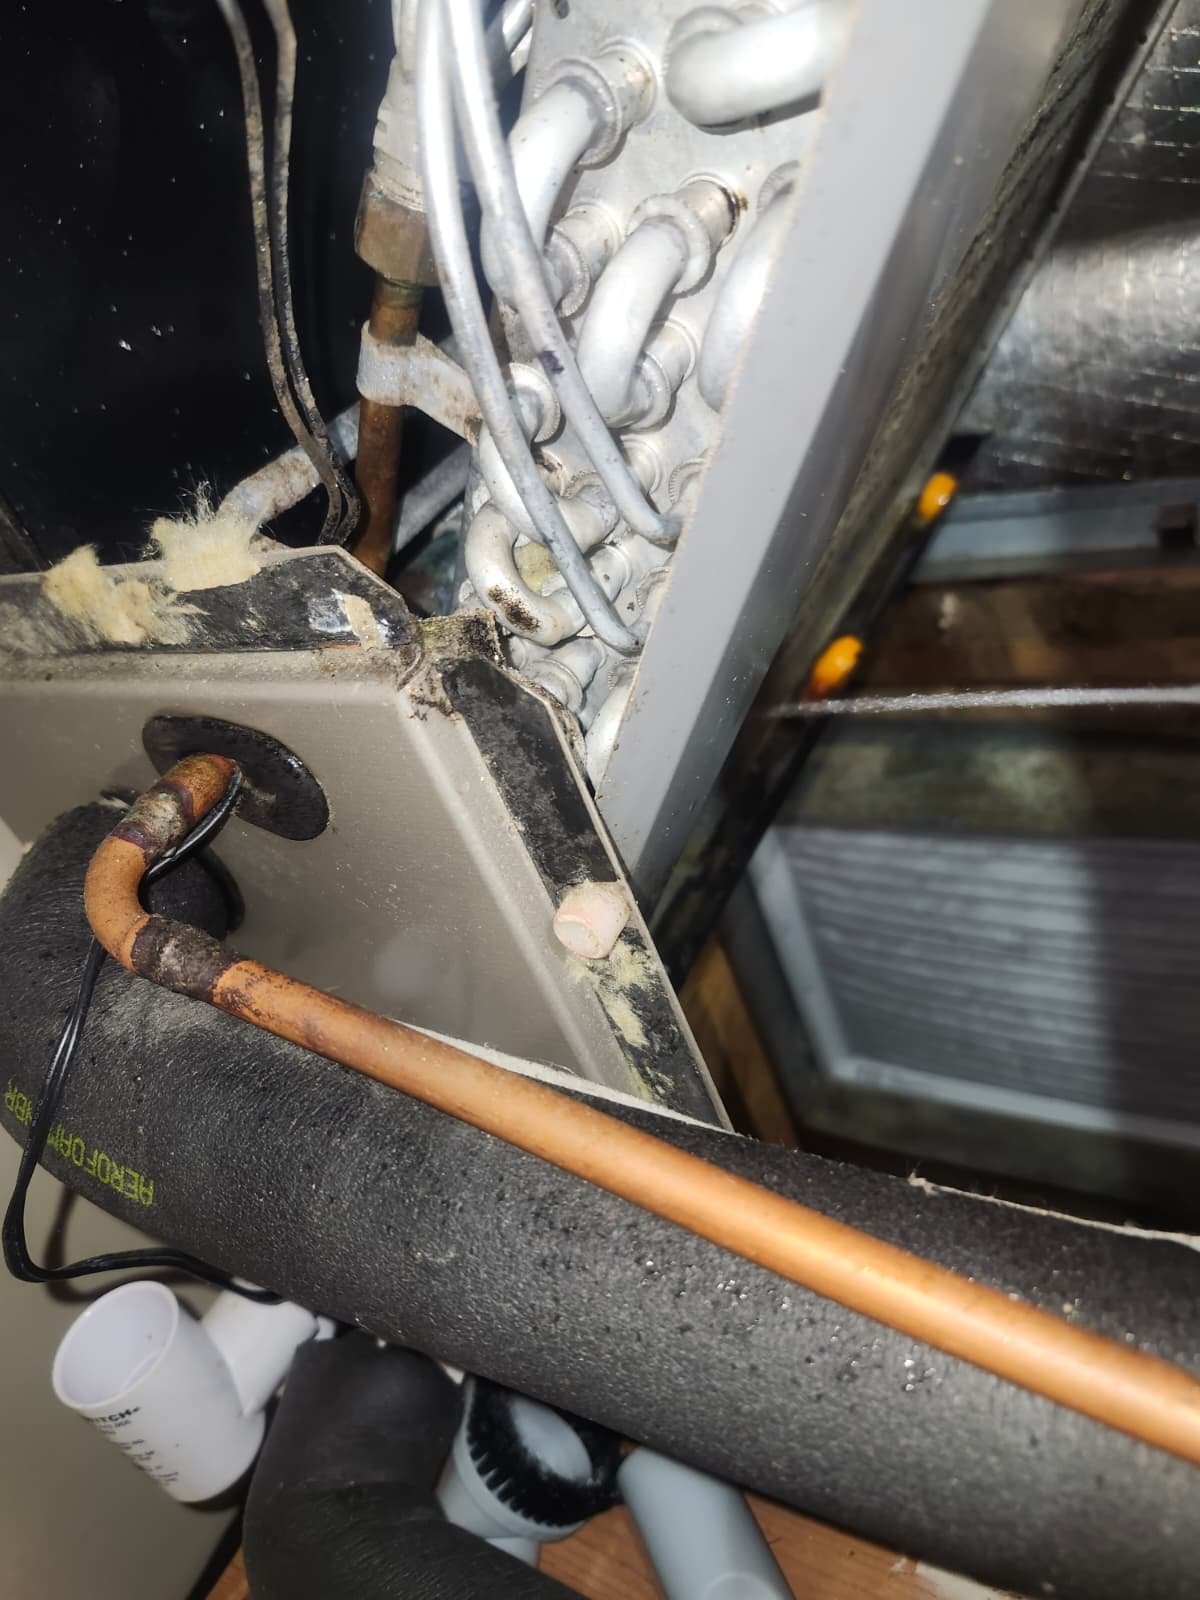
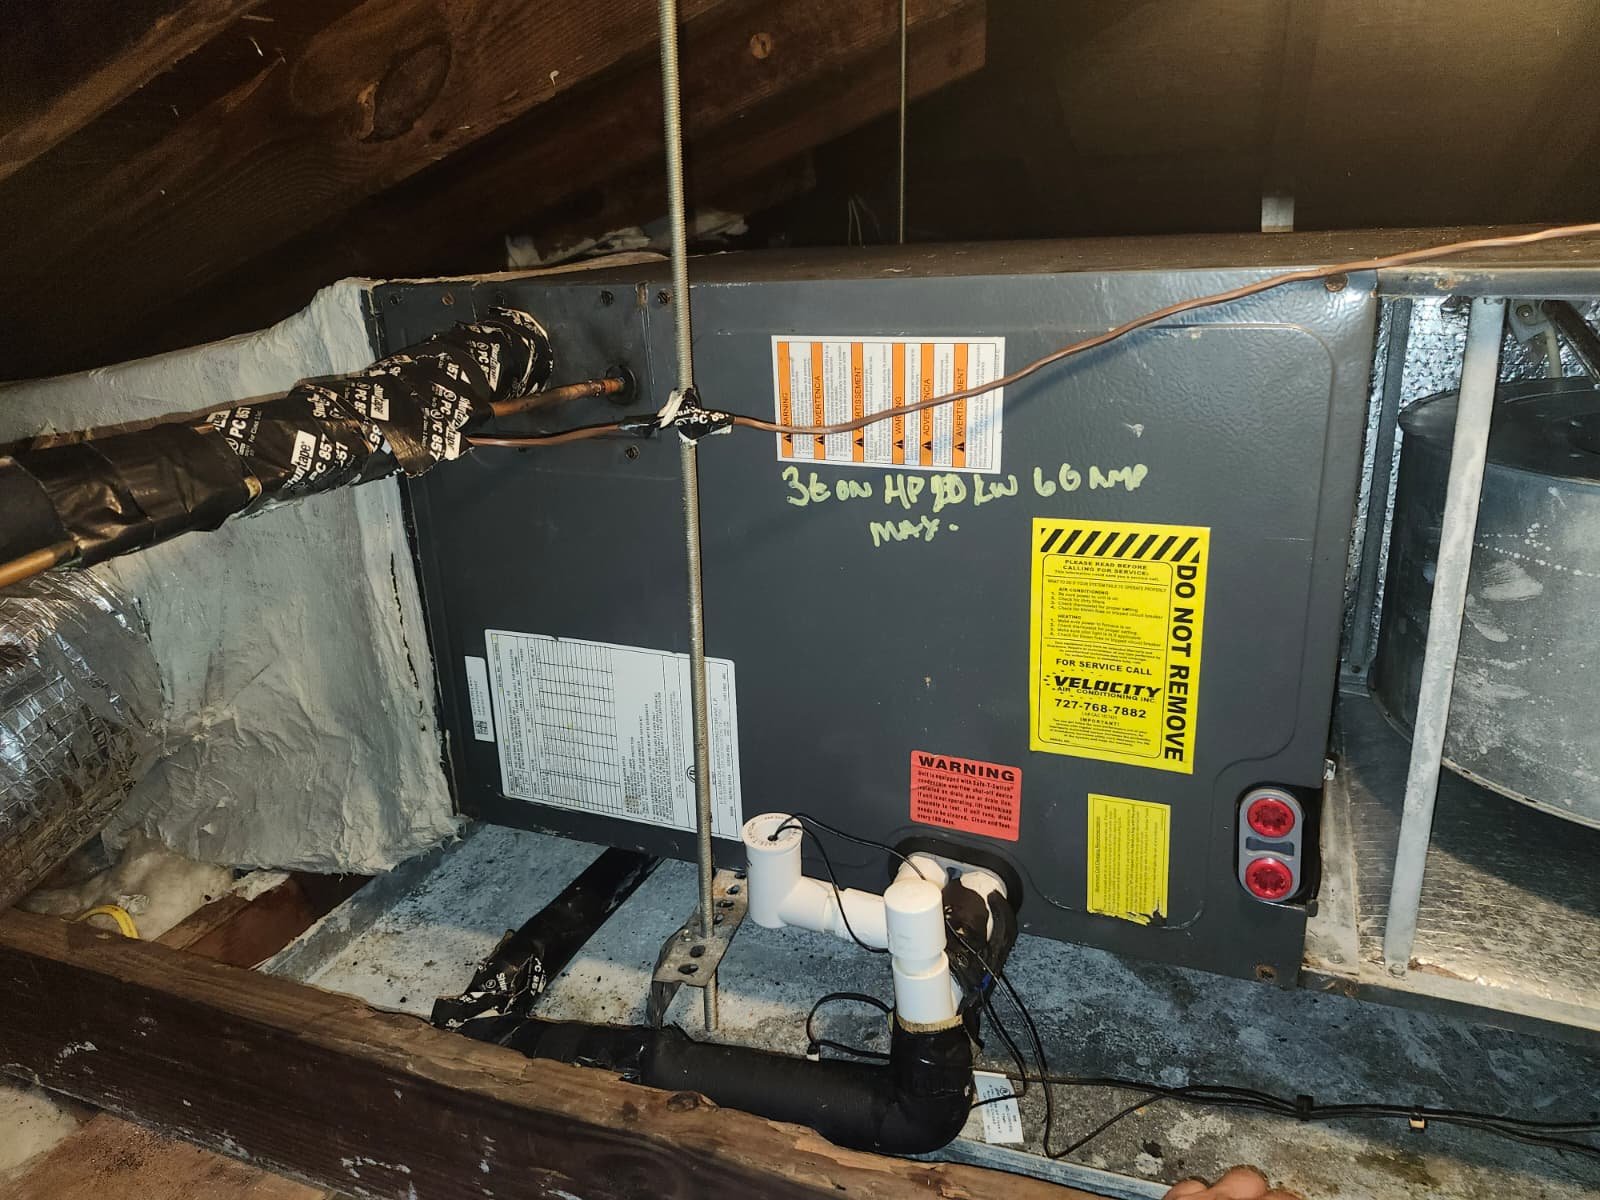
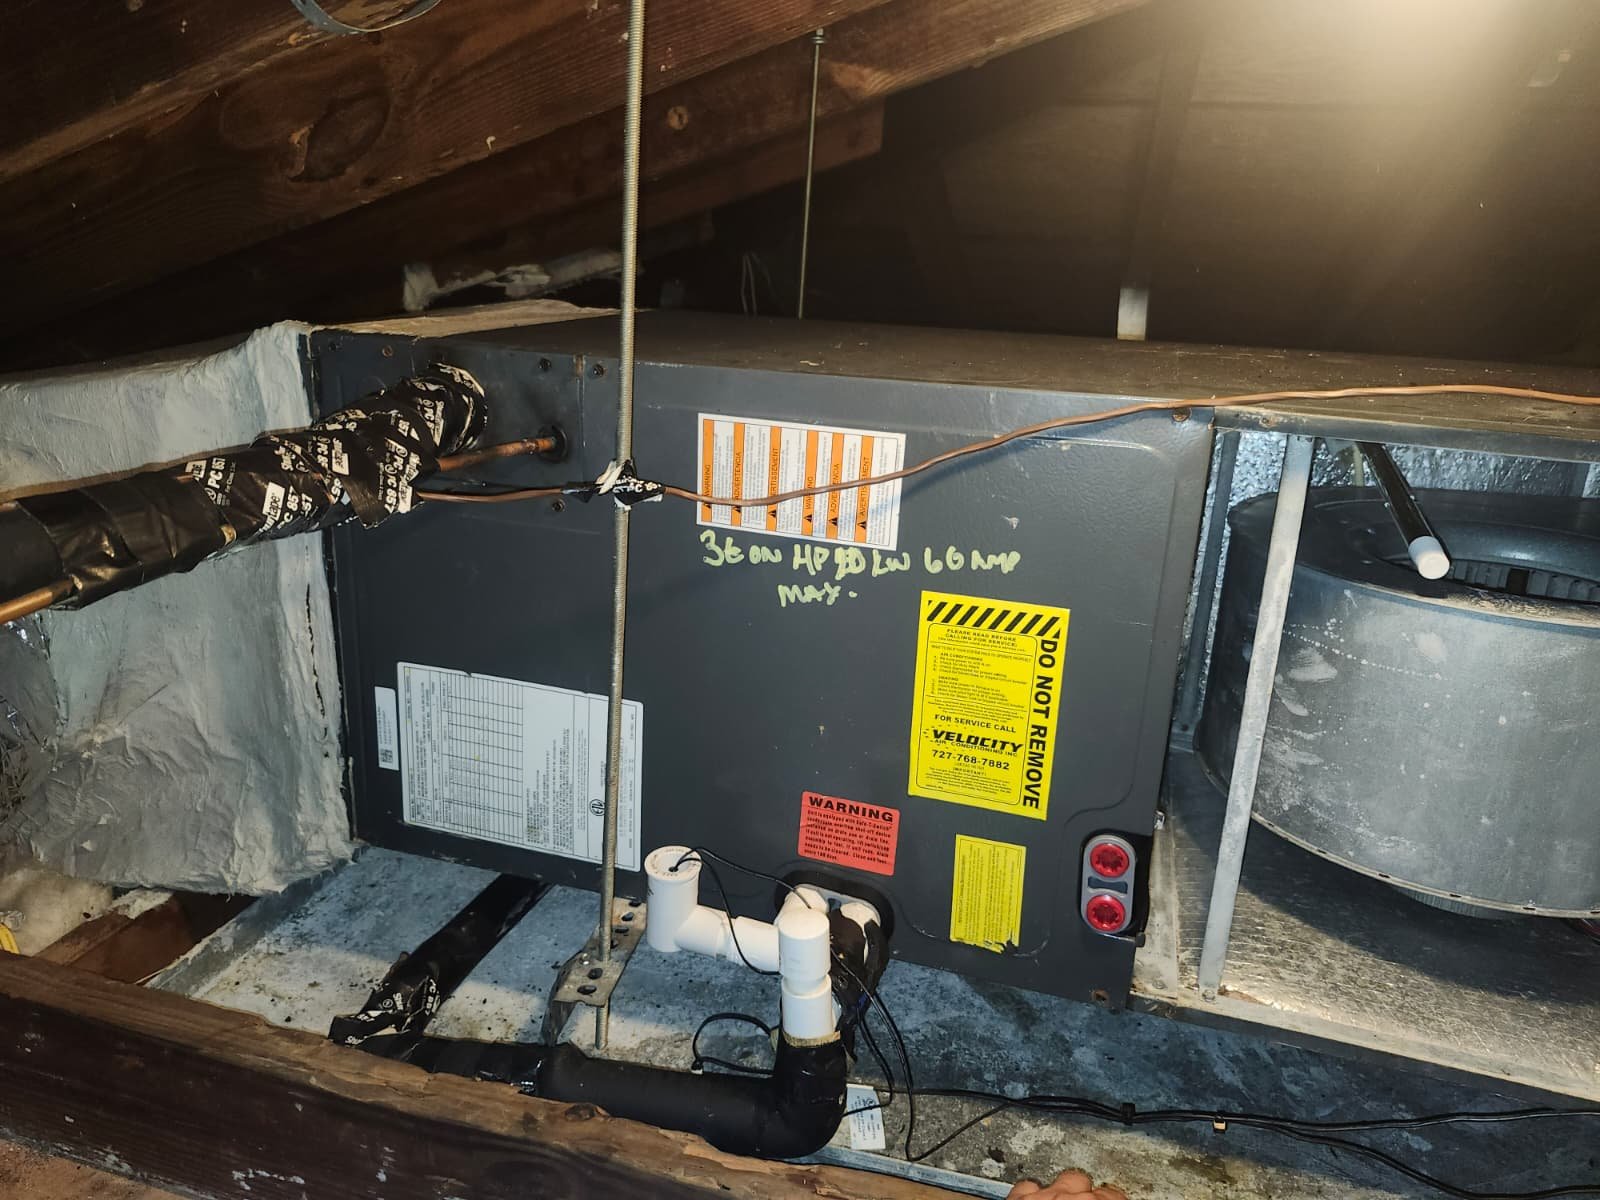
  • Inspecting the indoor air handler and the previously replaced coil and TXV
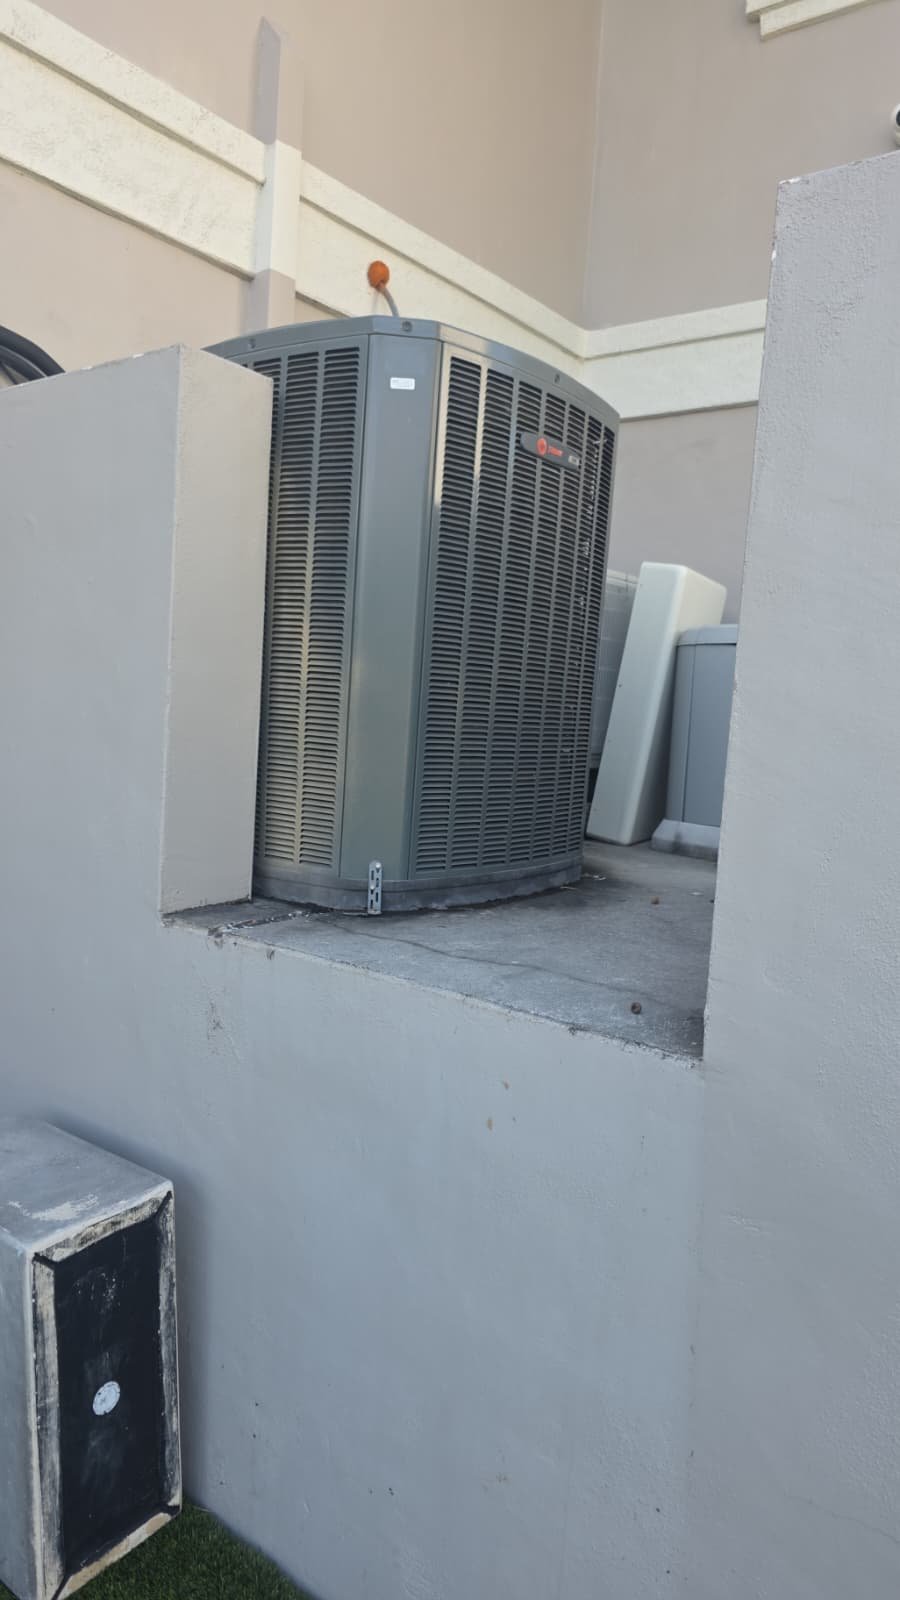
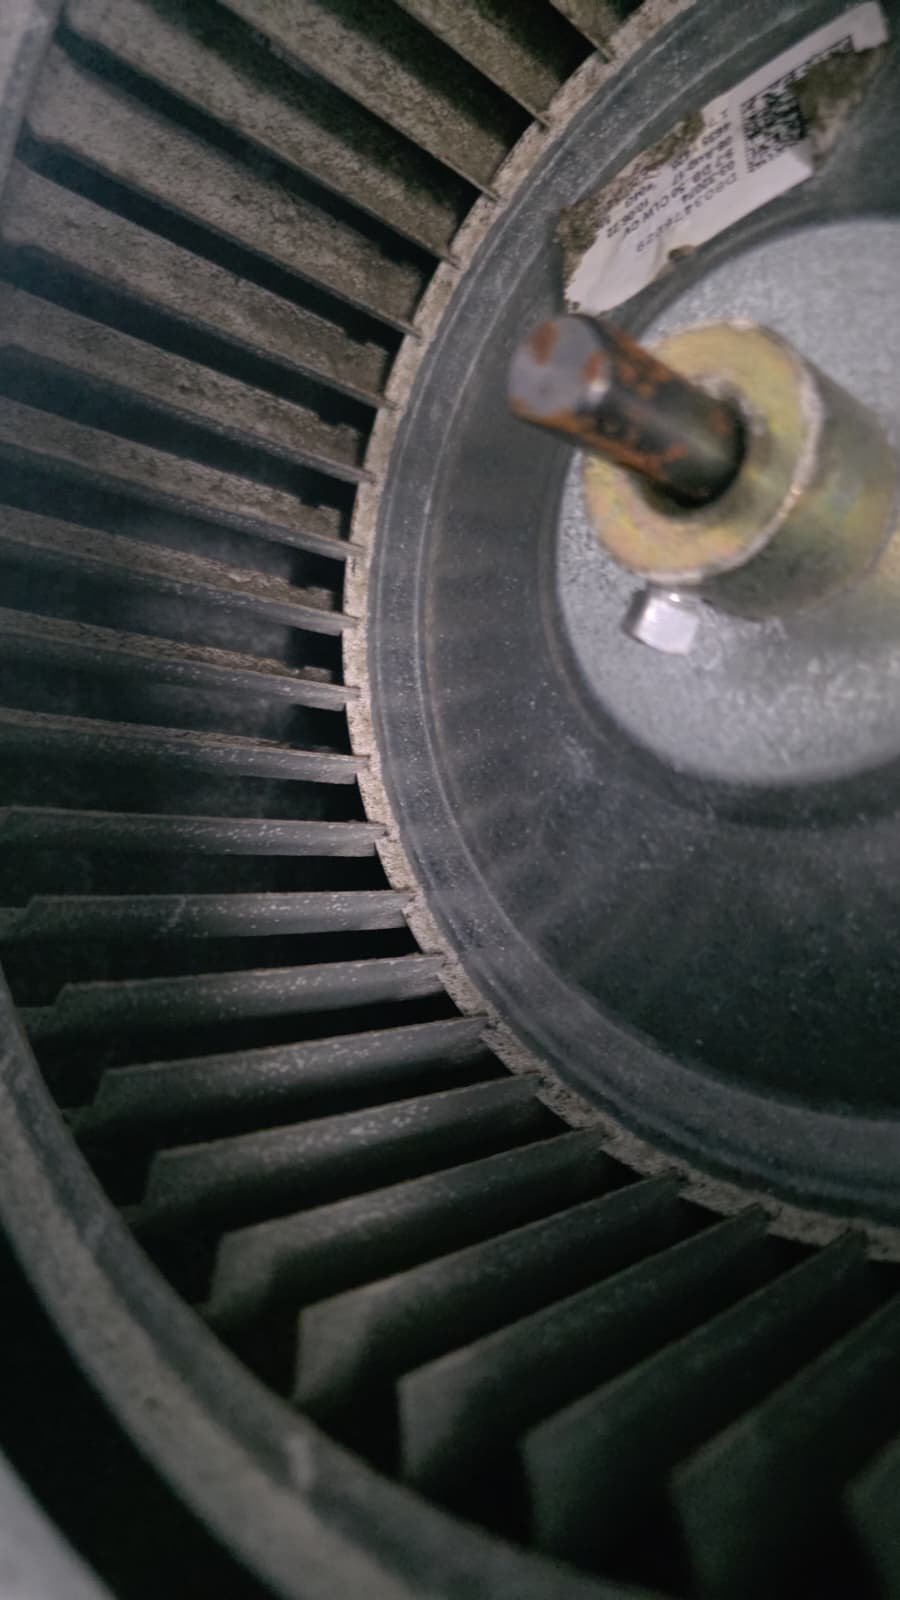
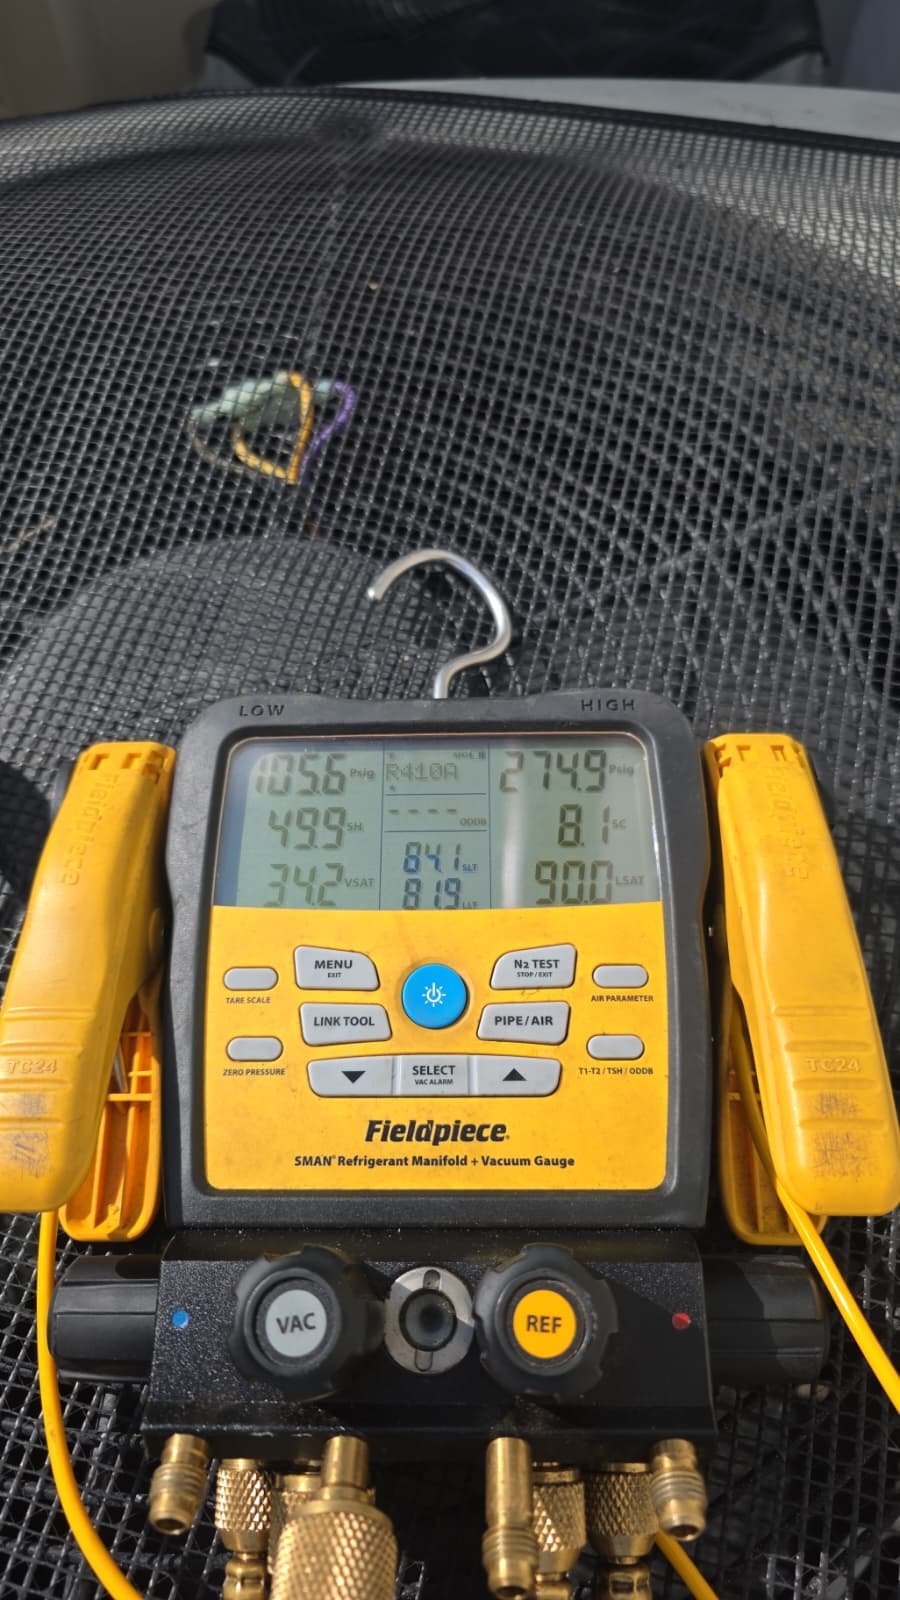
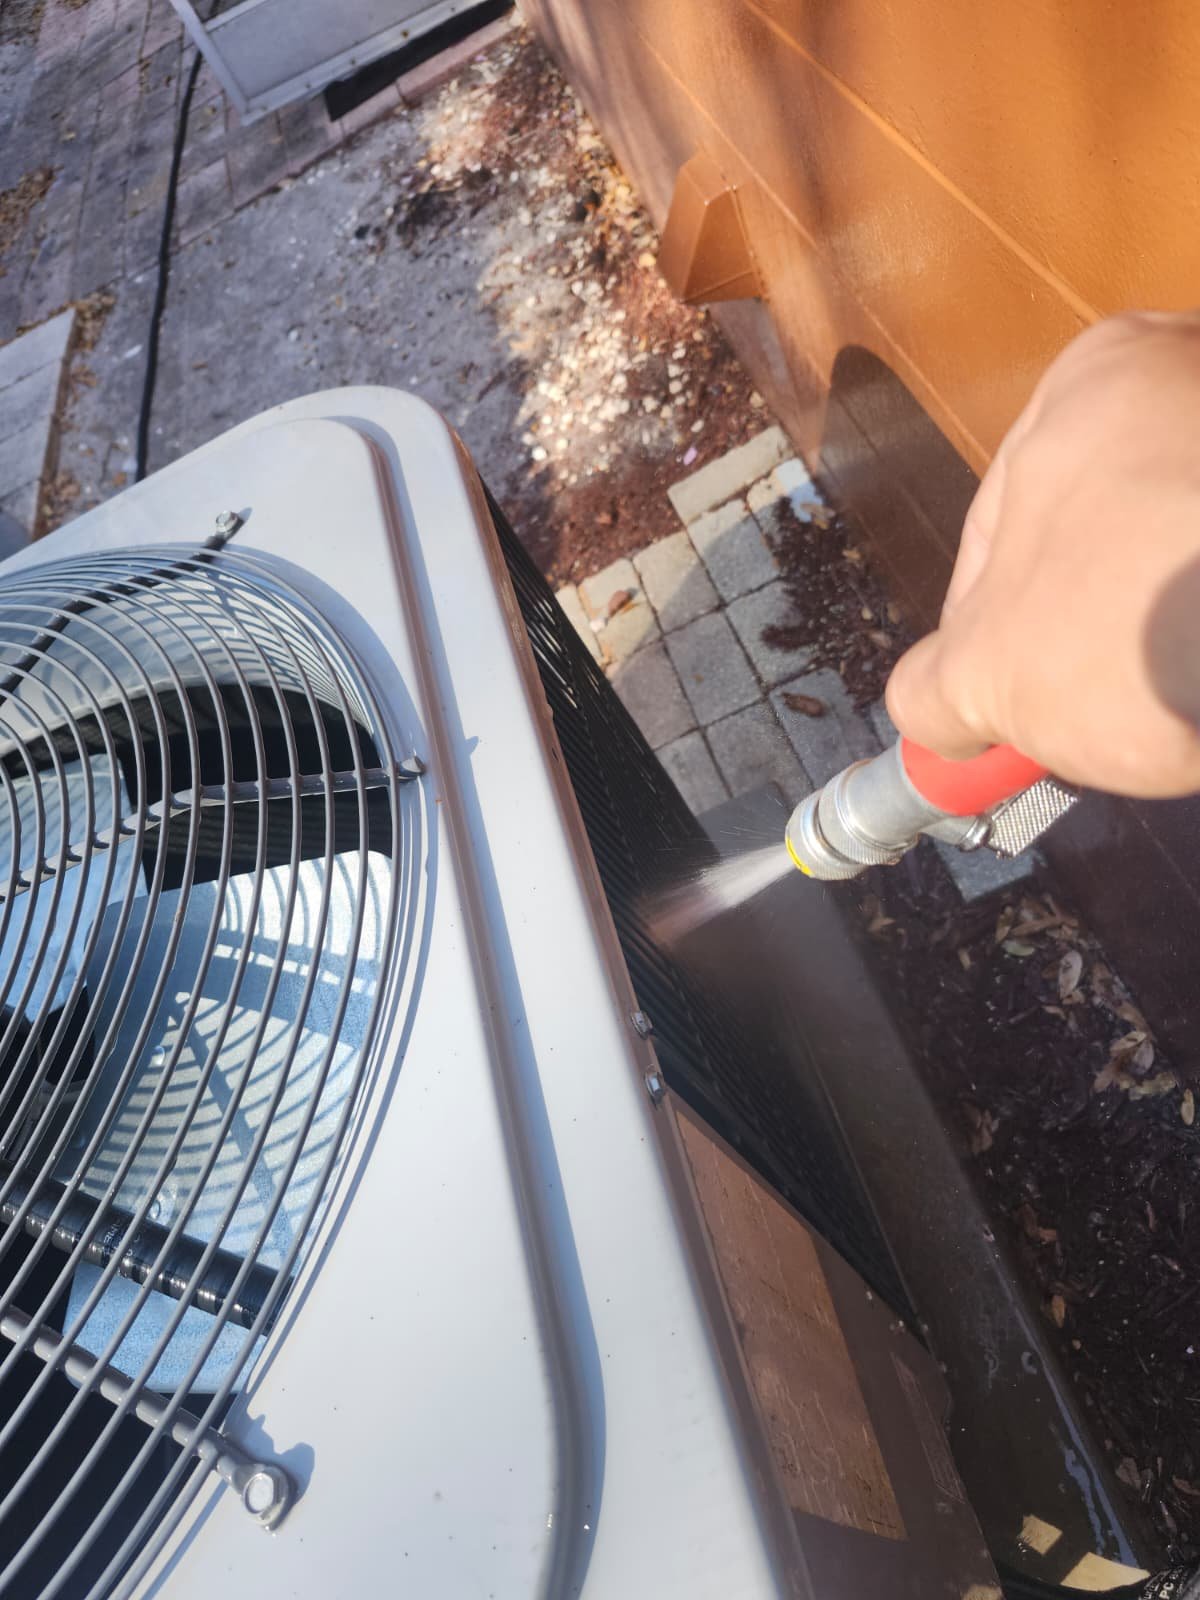
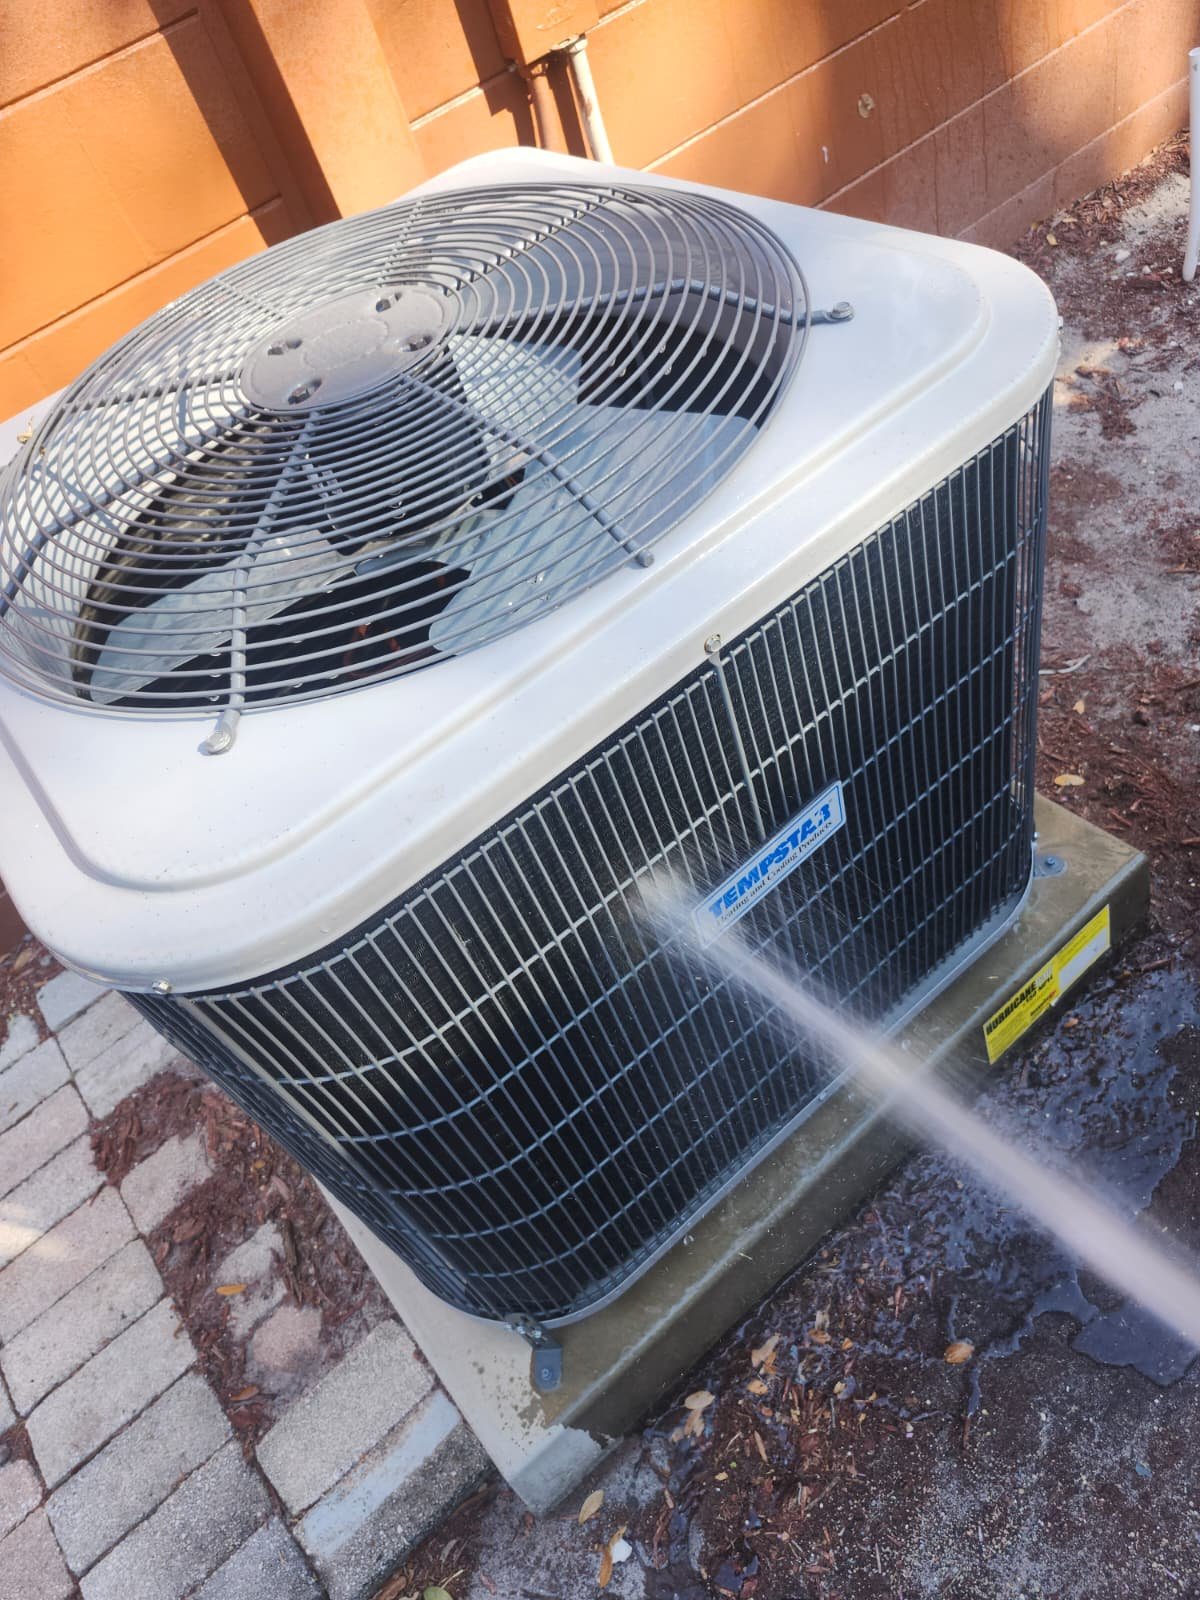
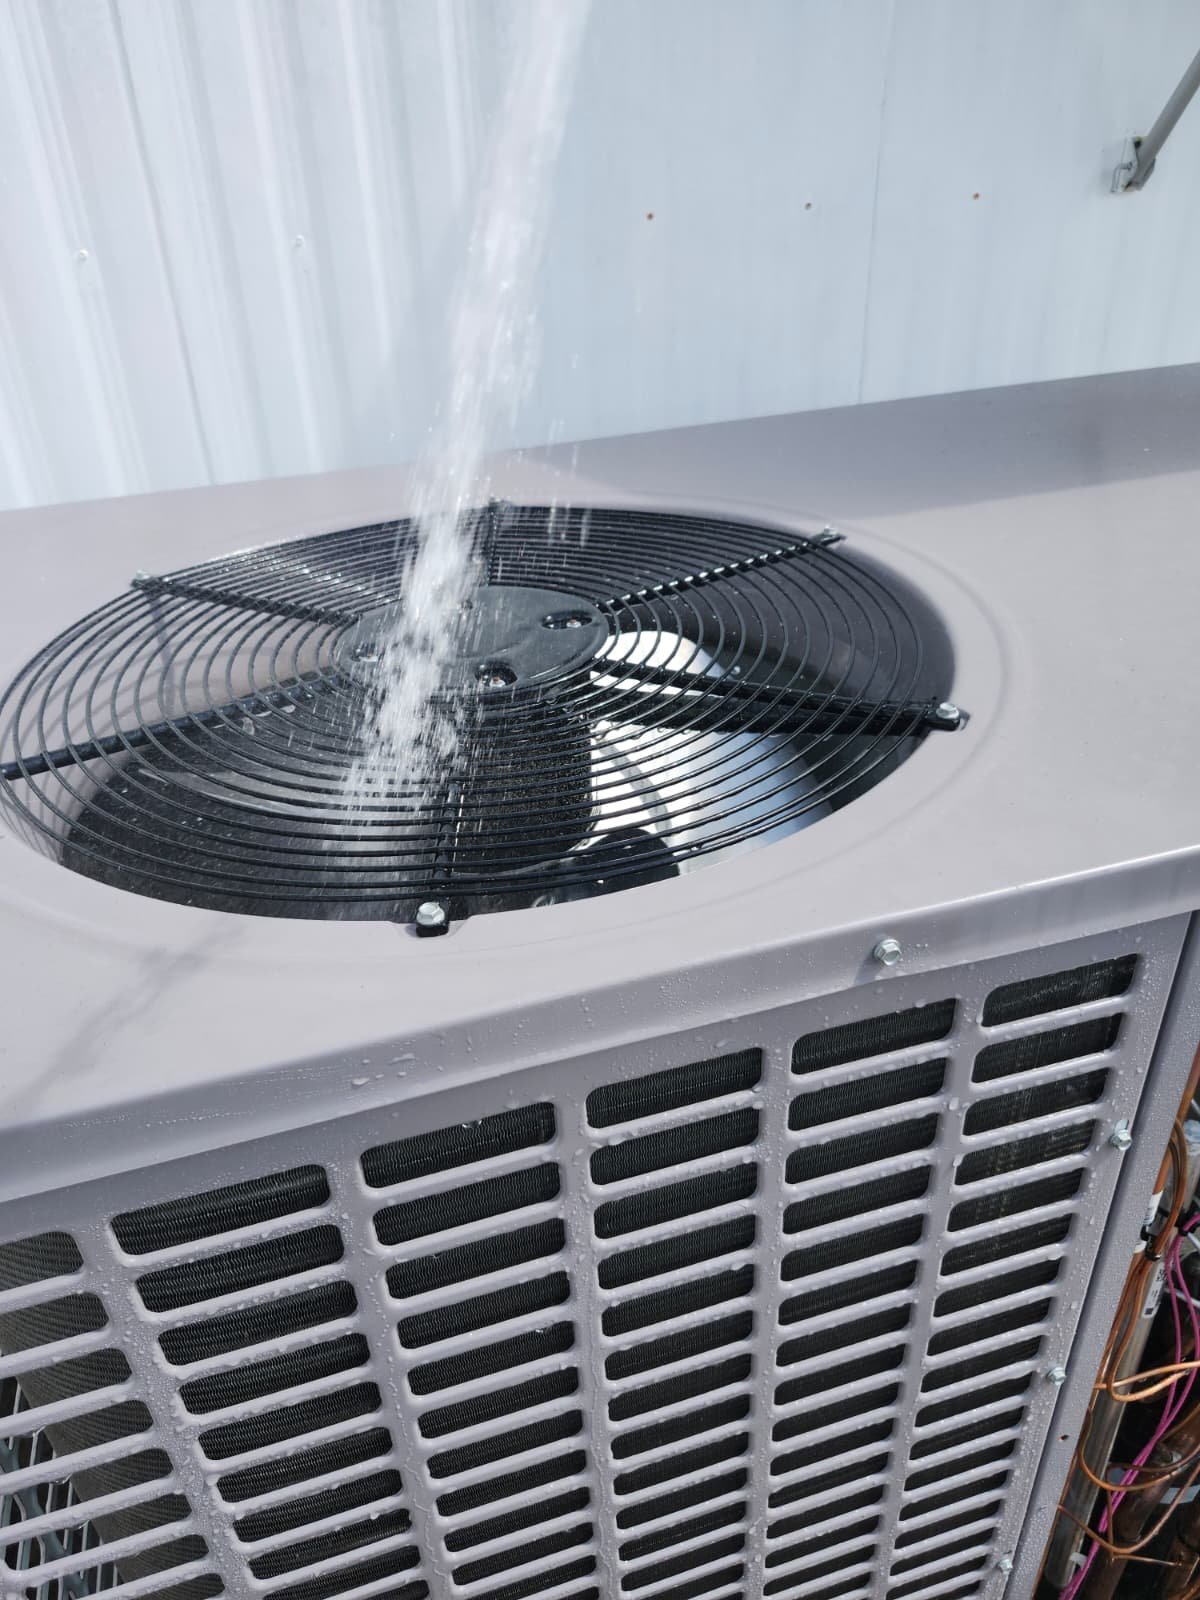
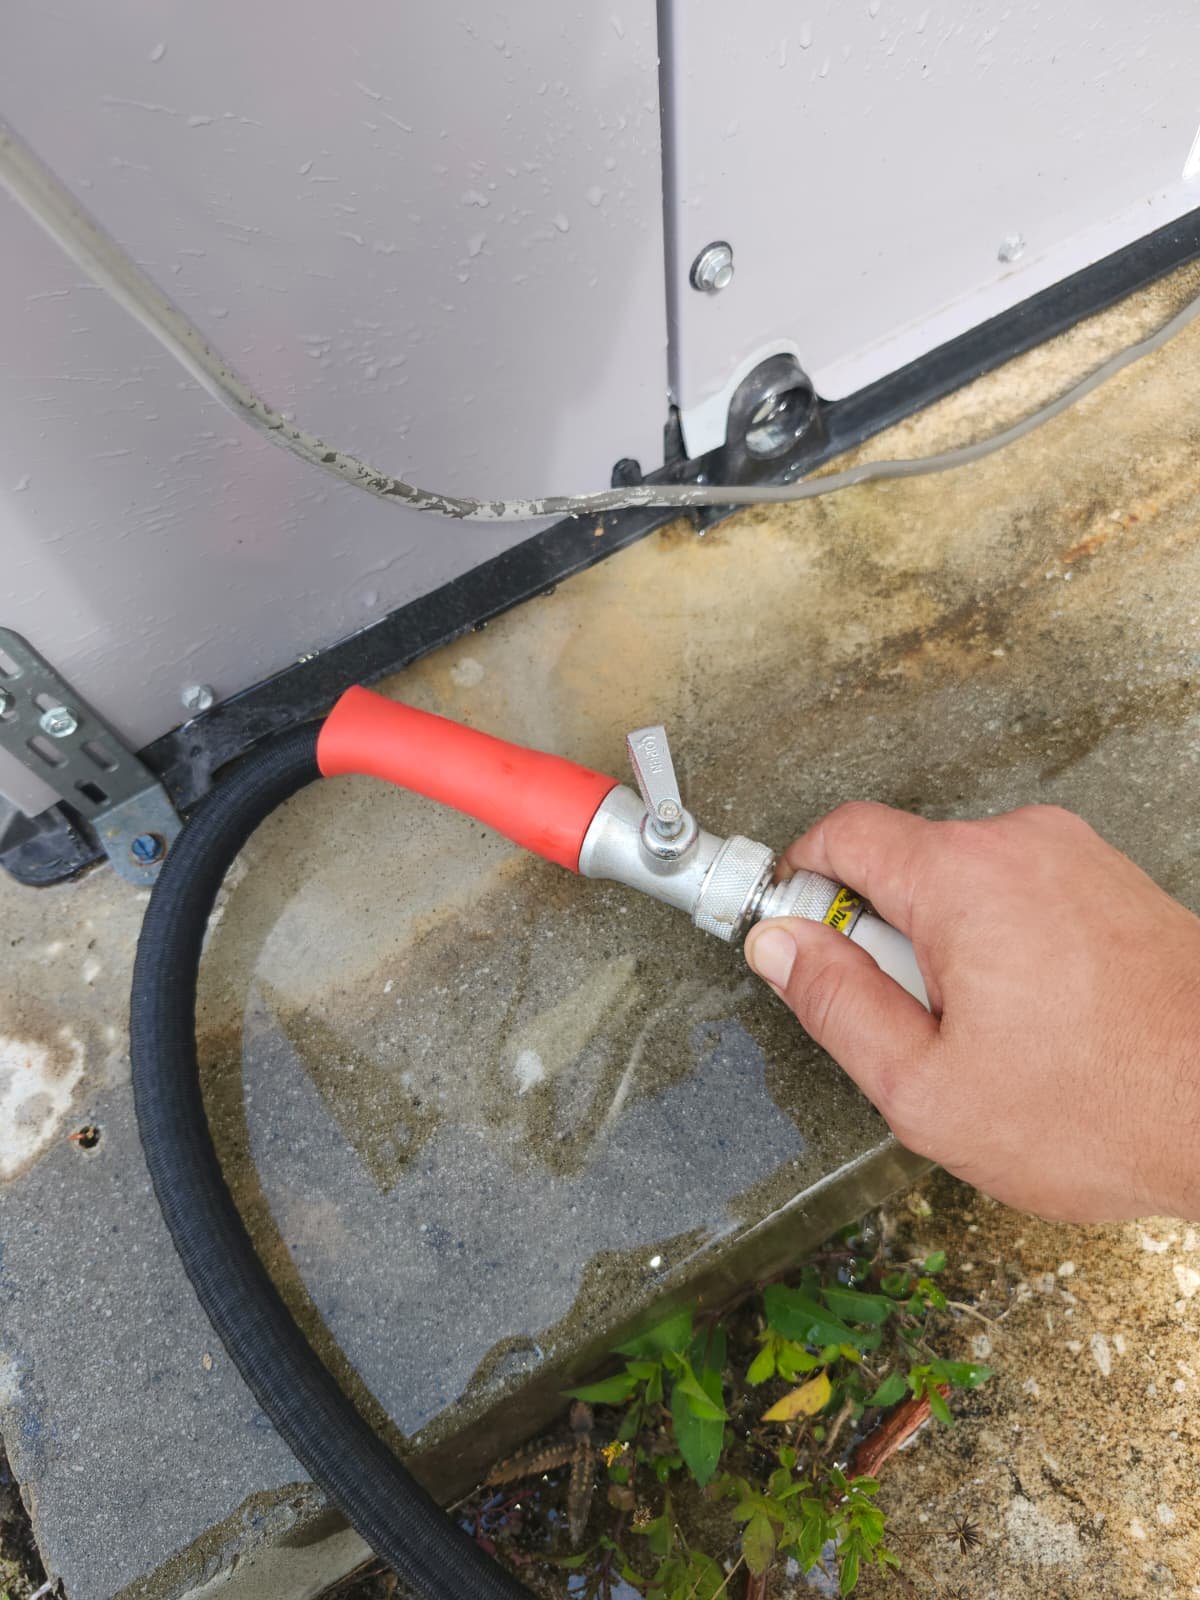
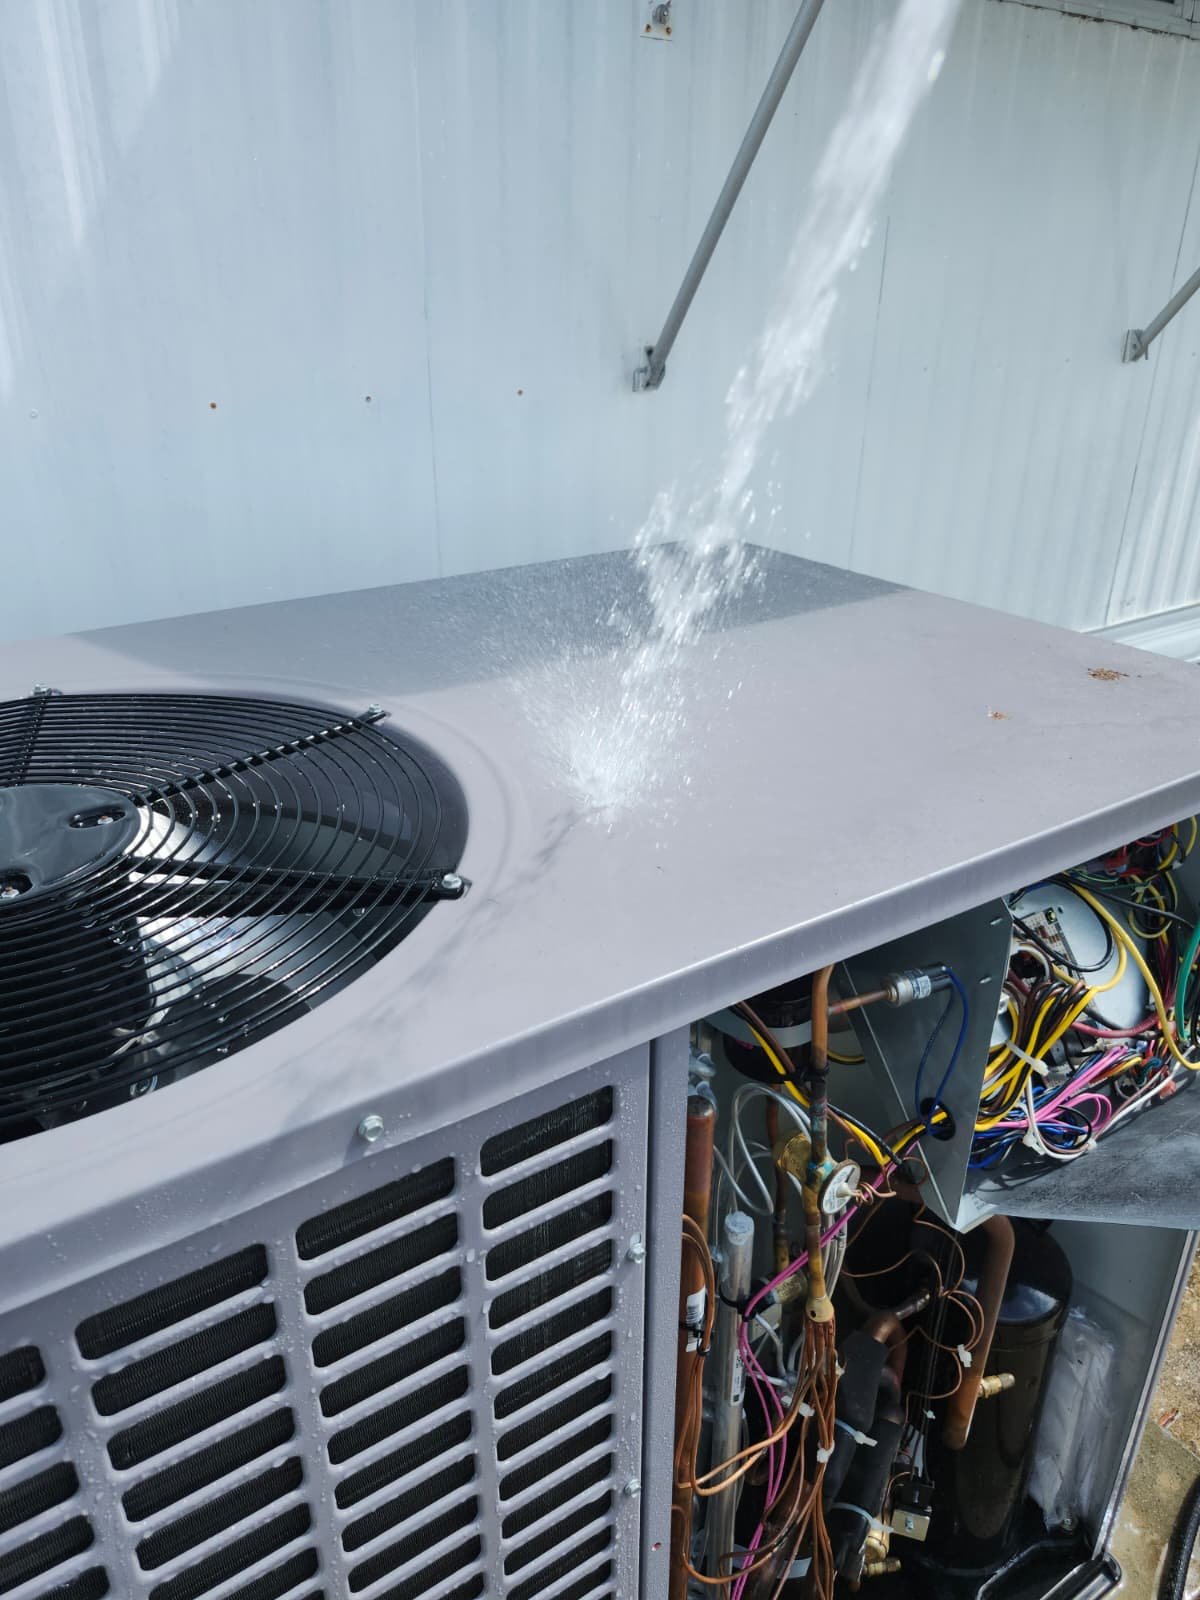
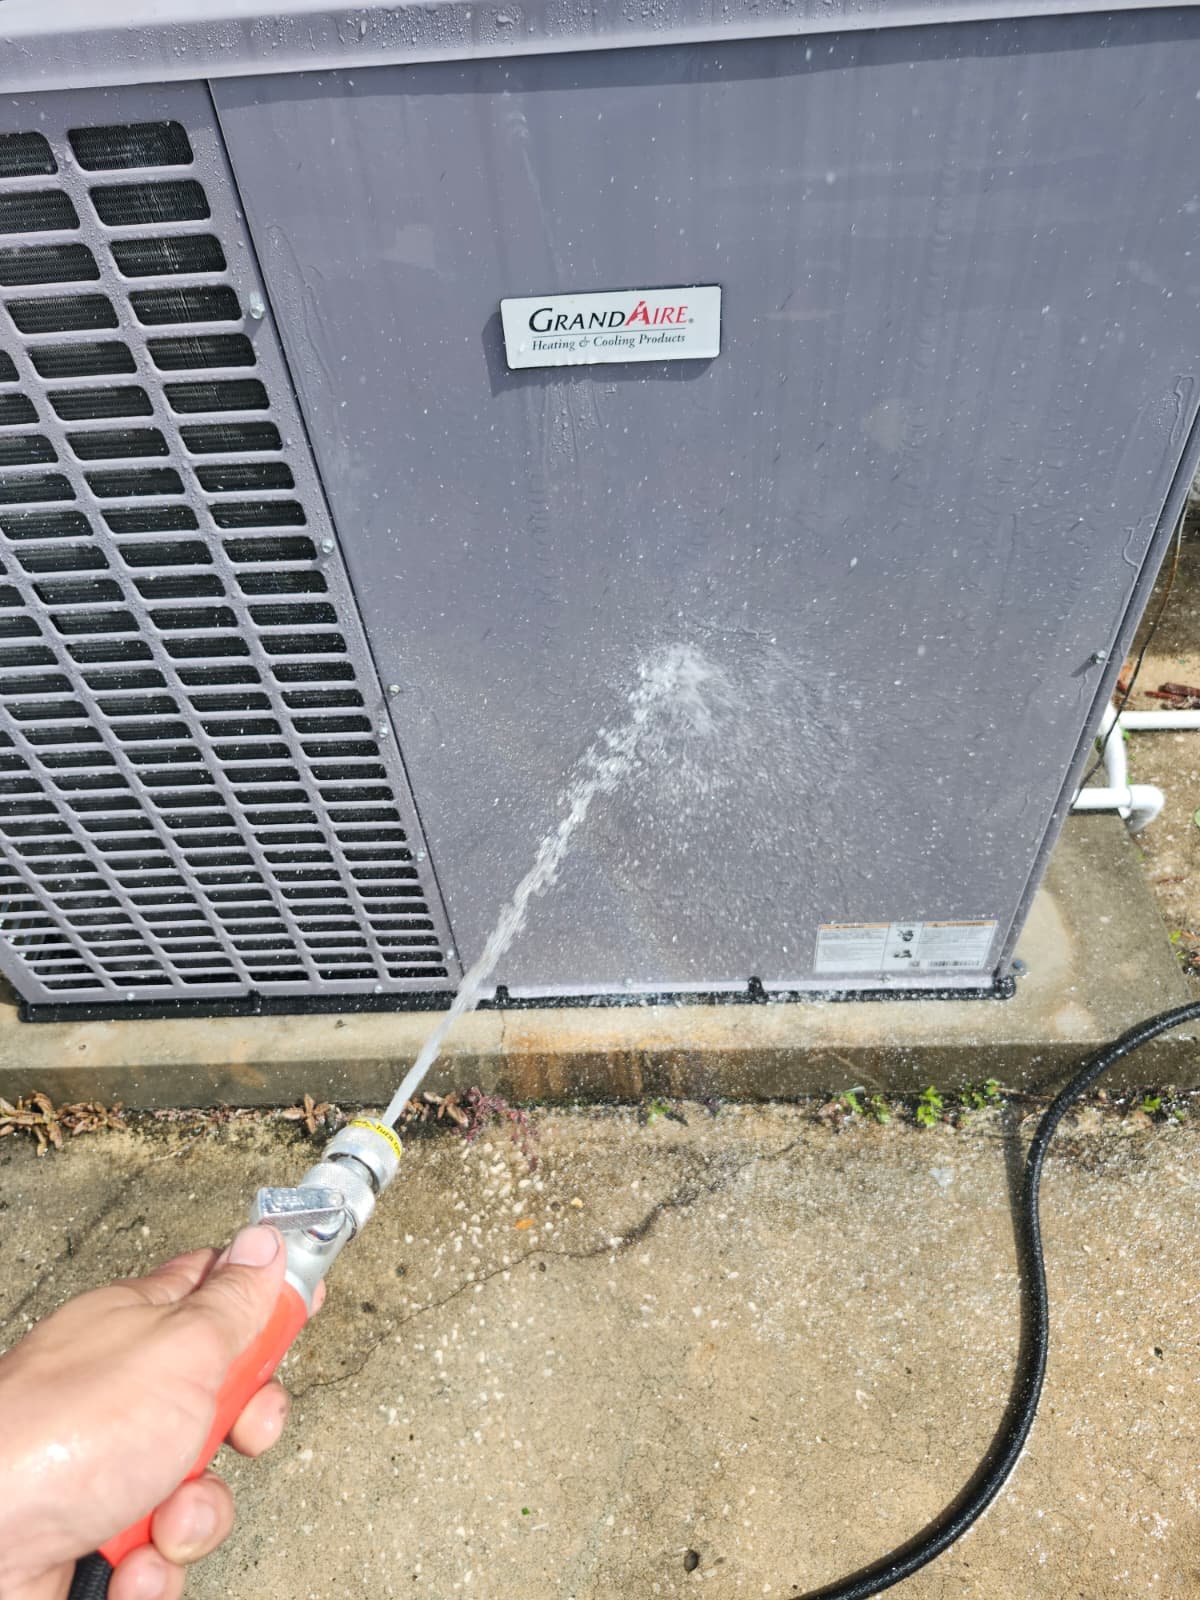
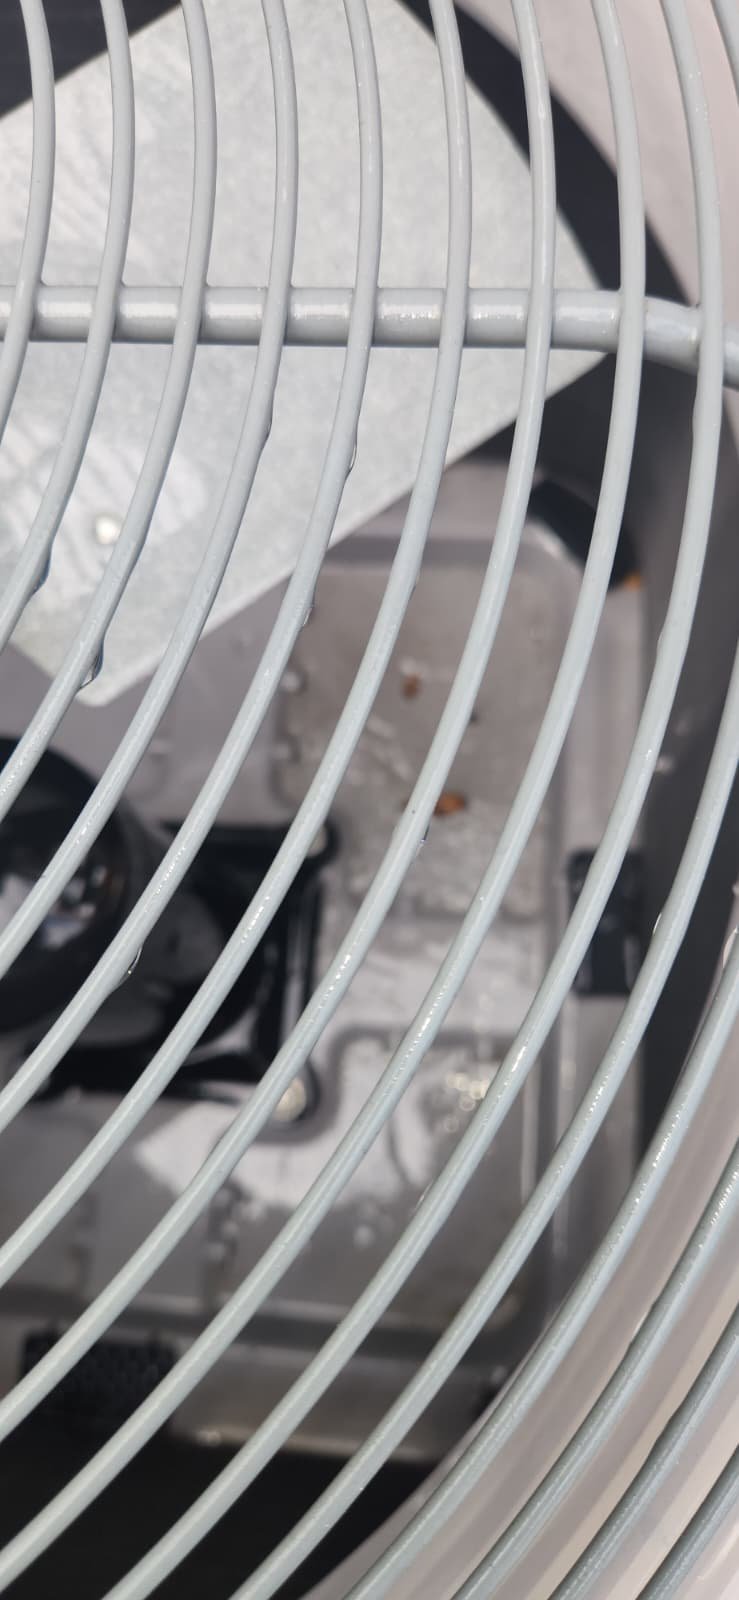
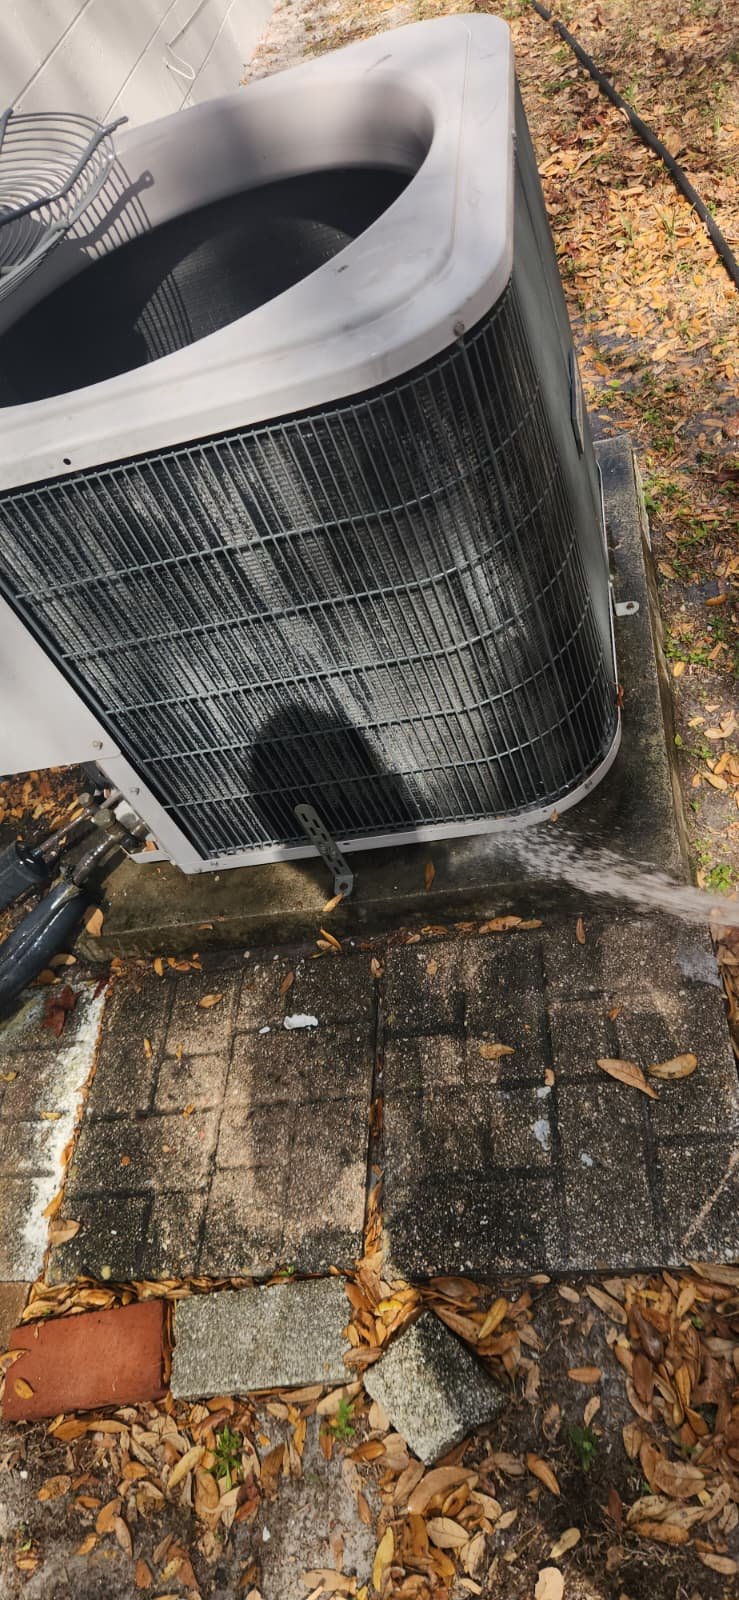
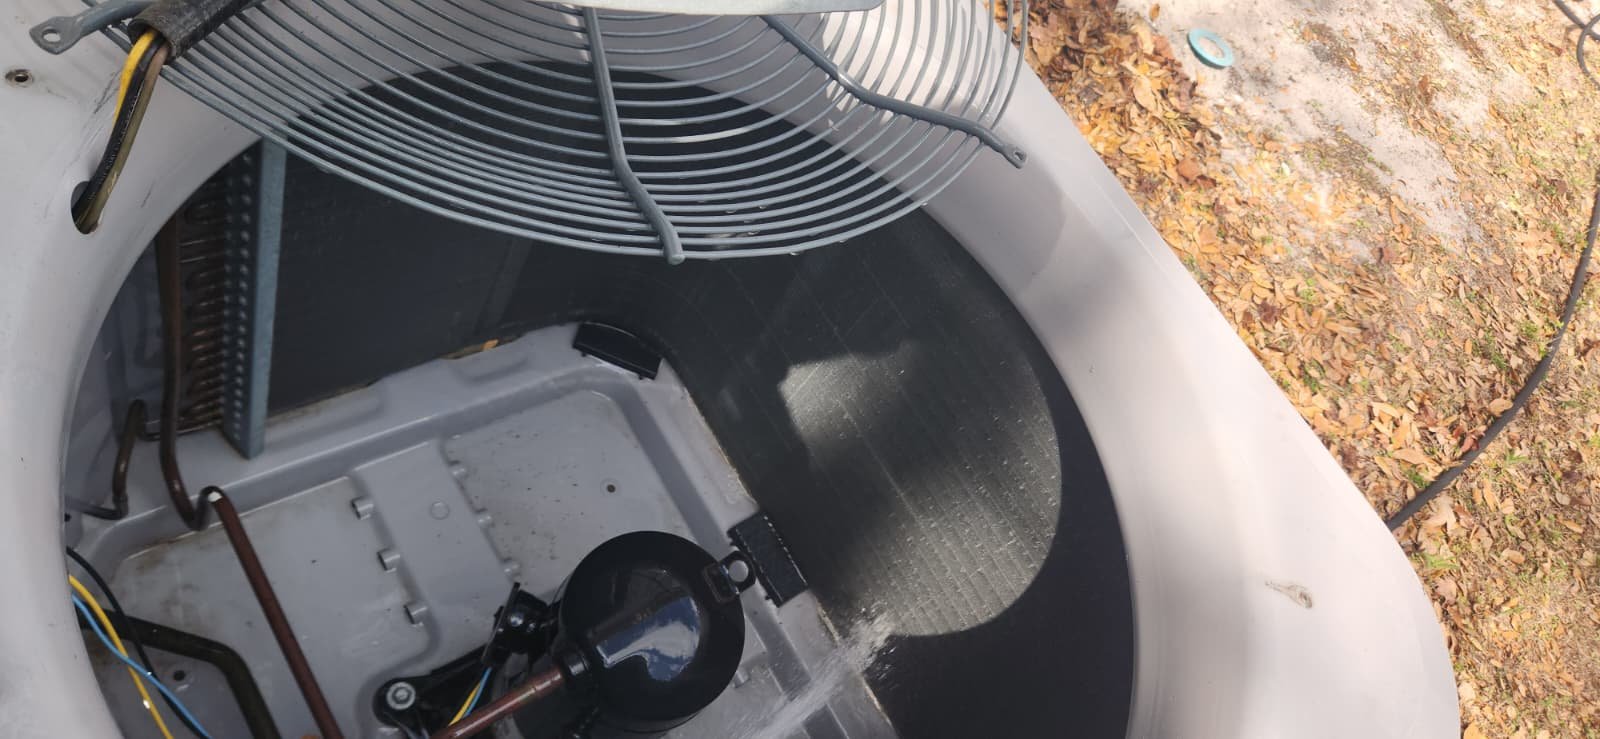
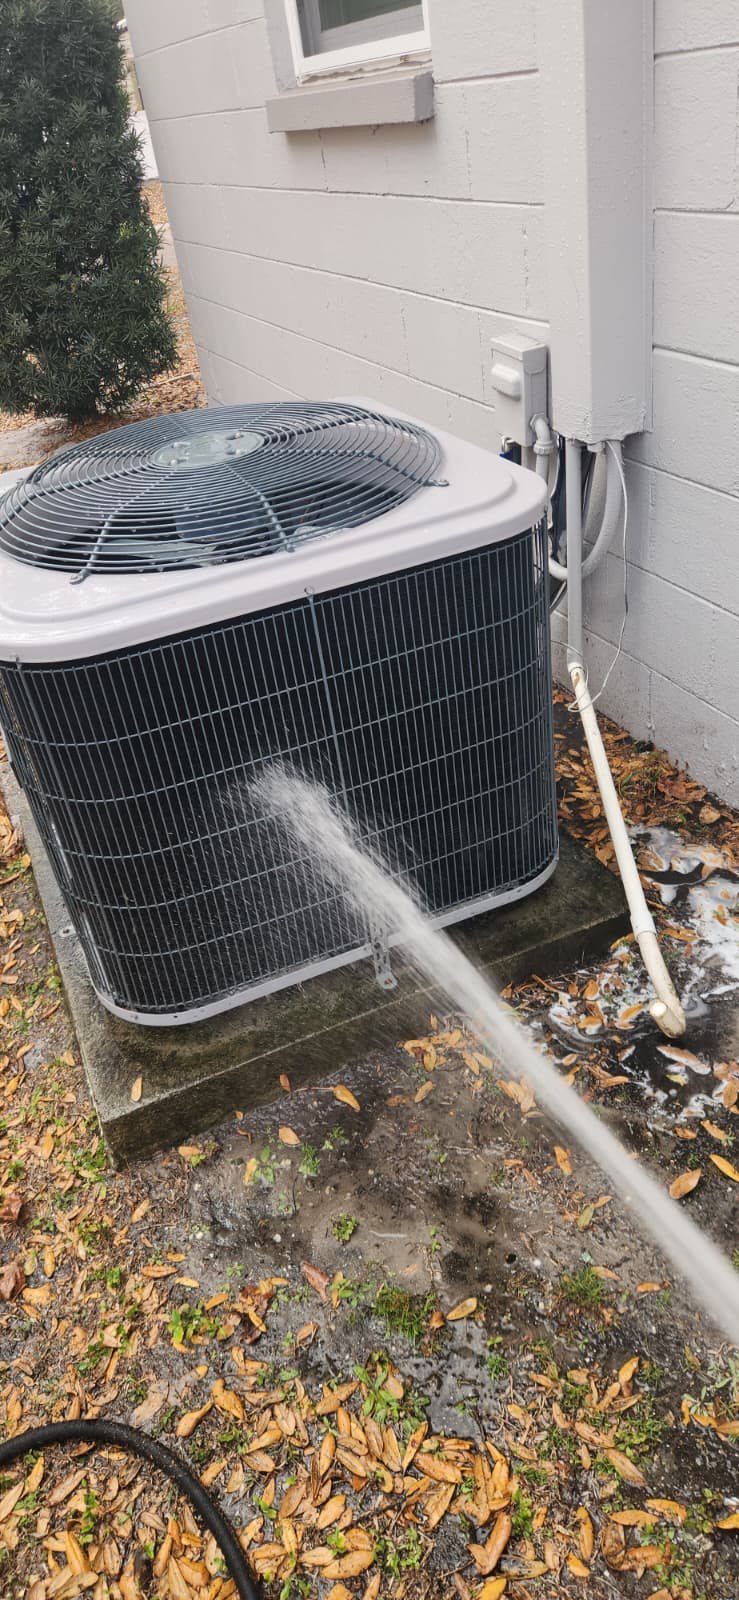
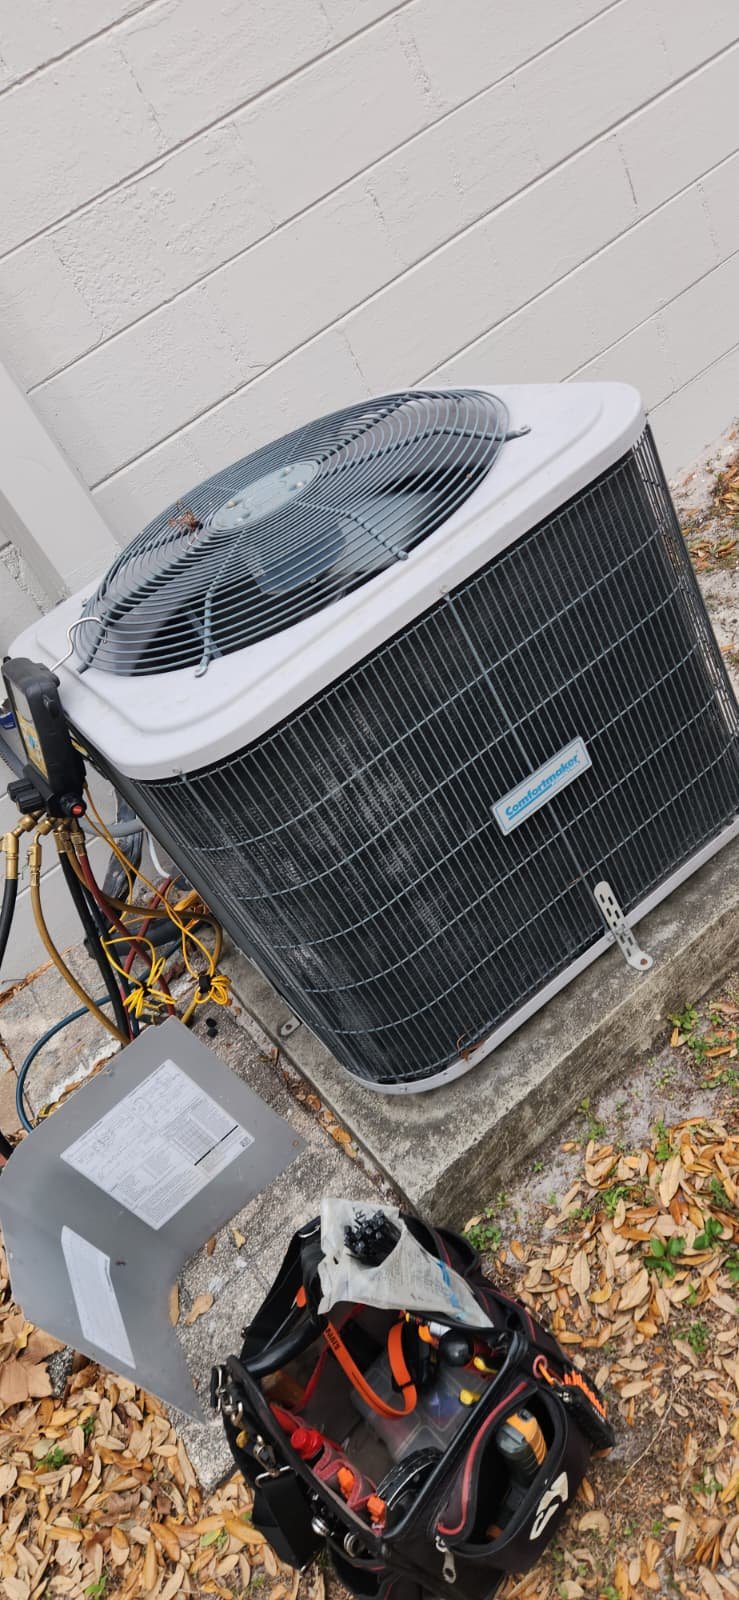
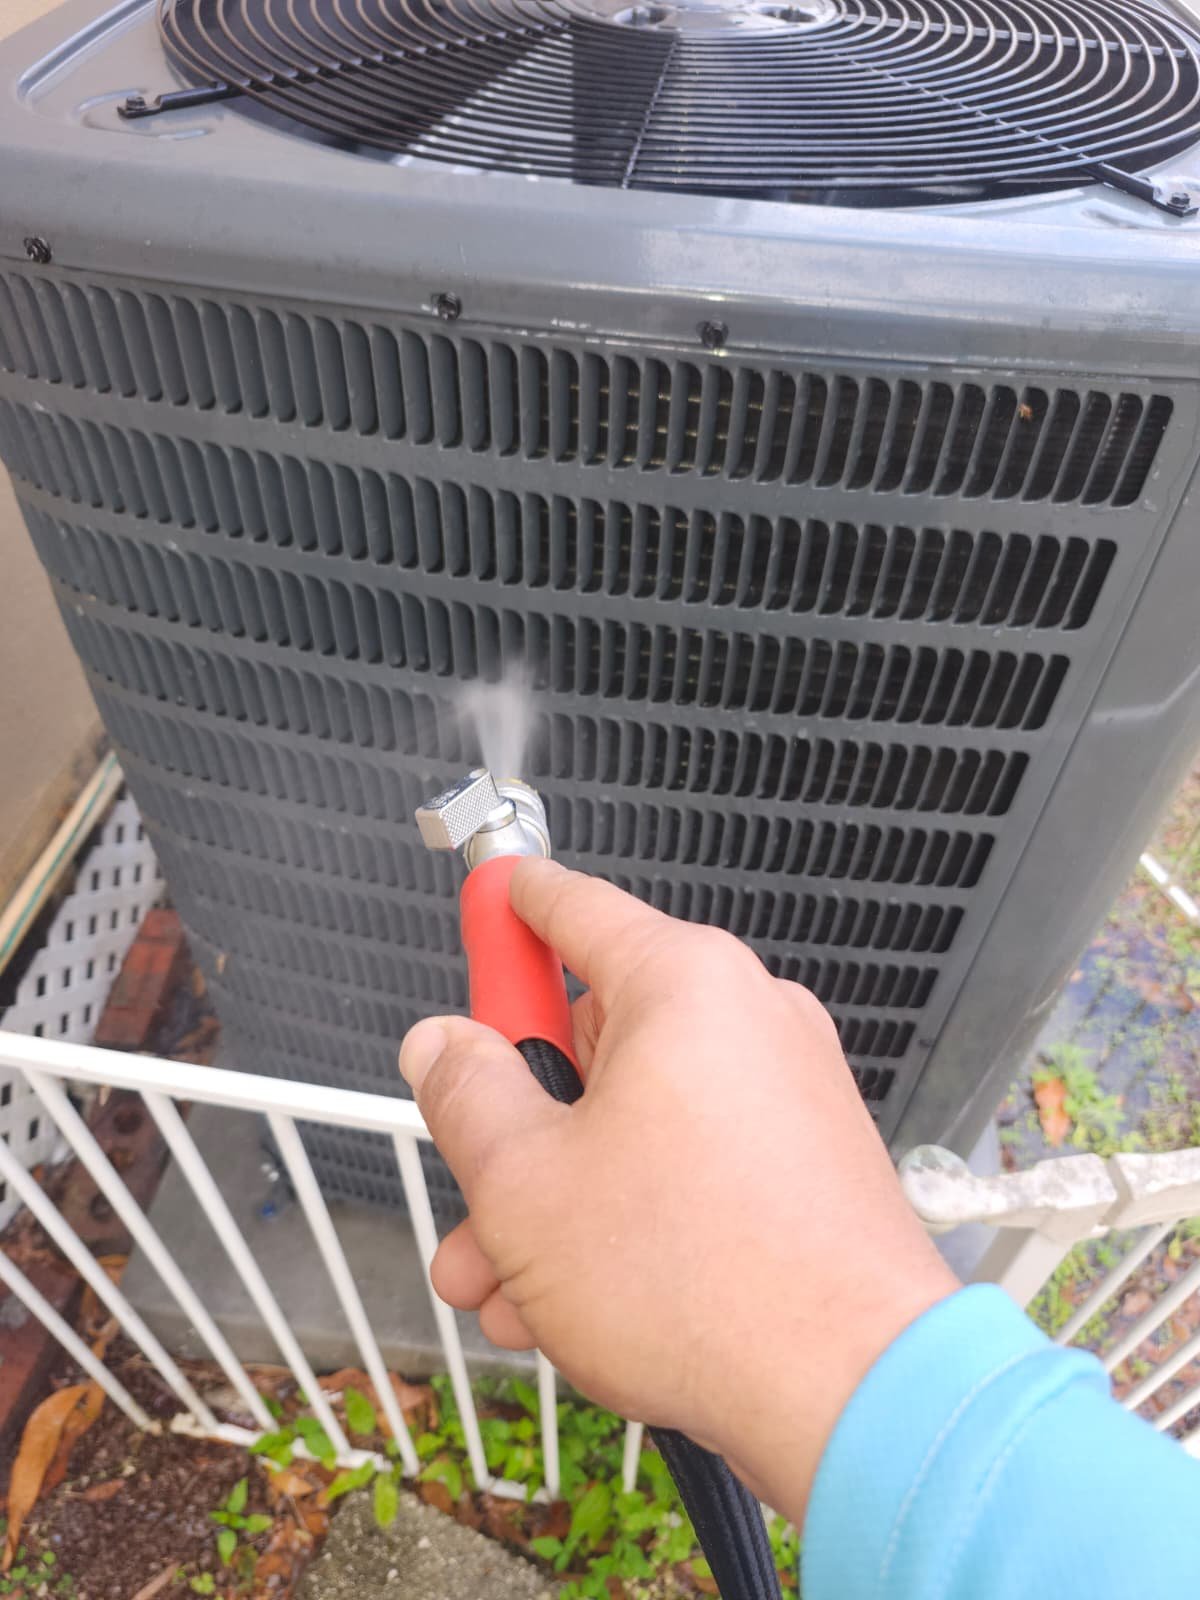
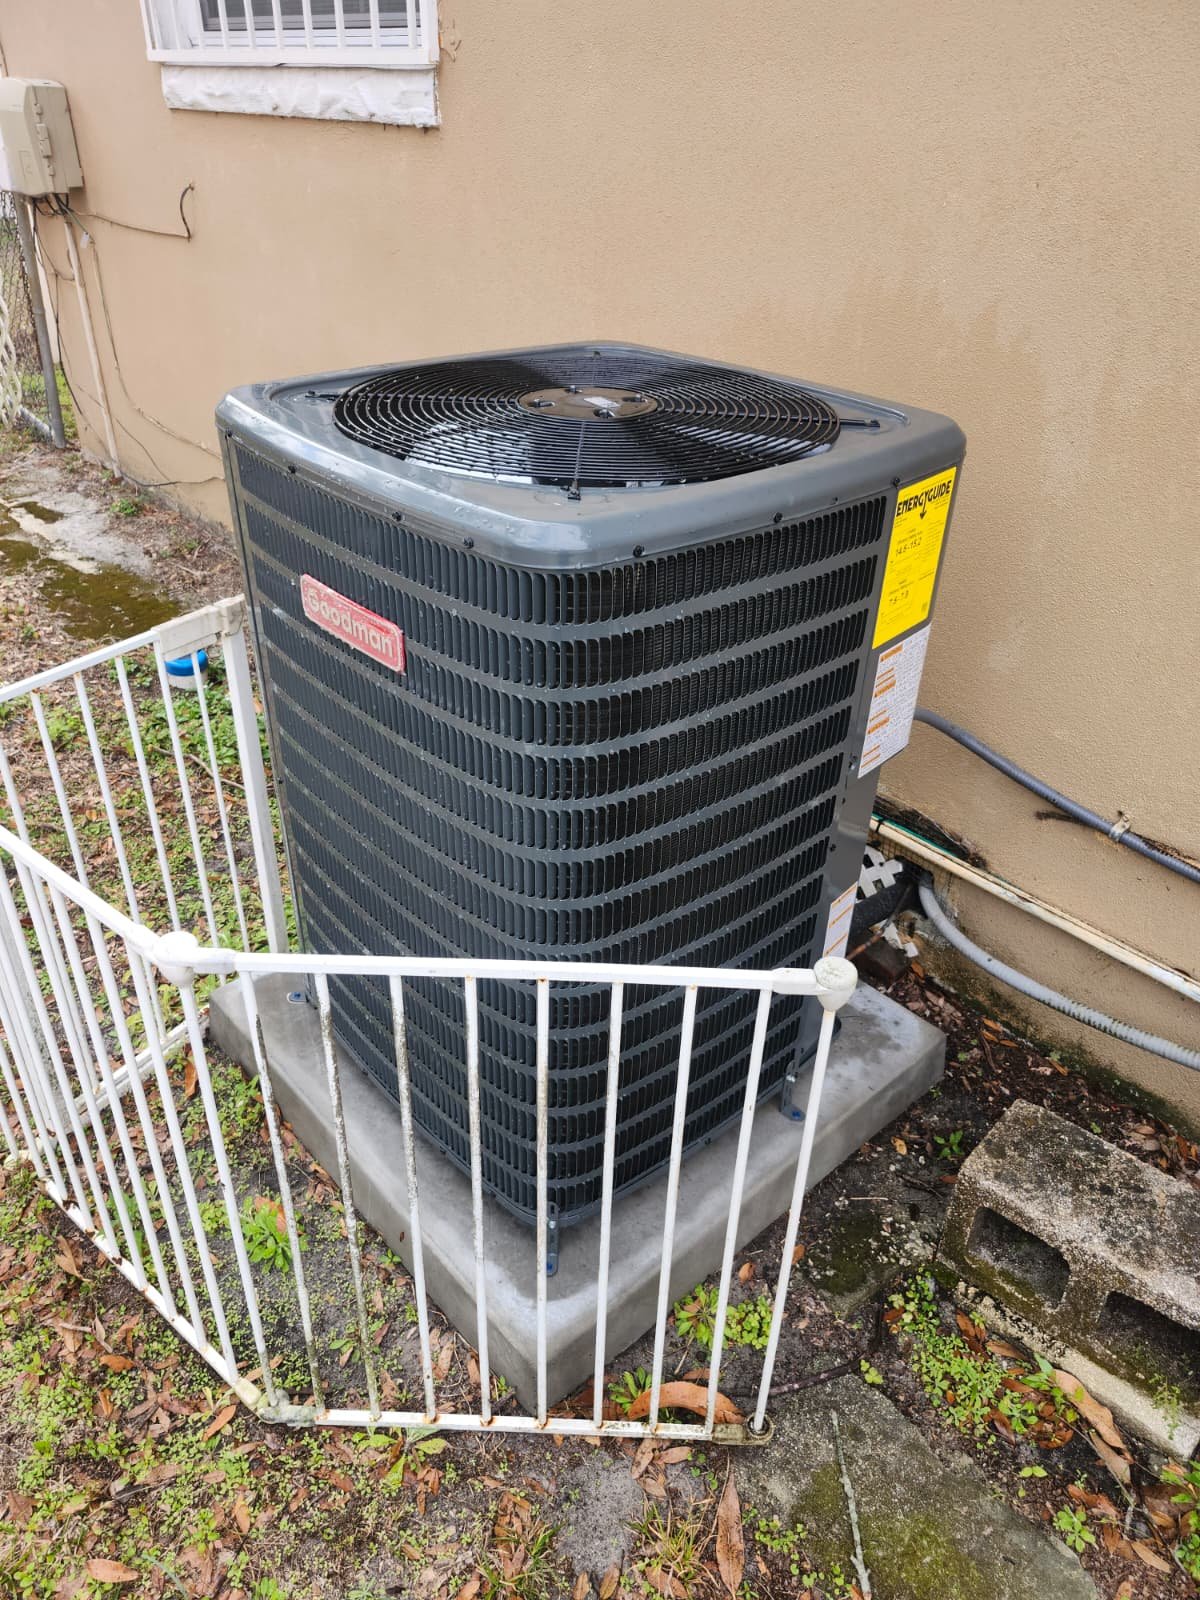
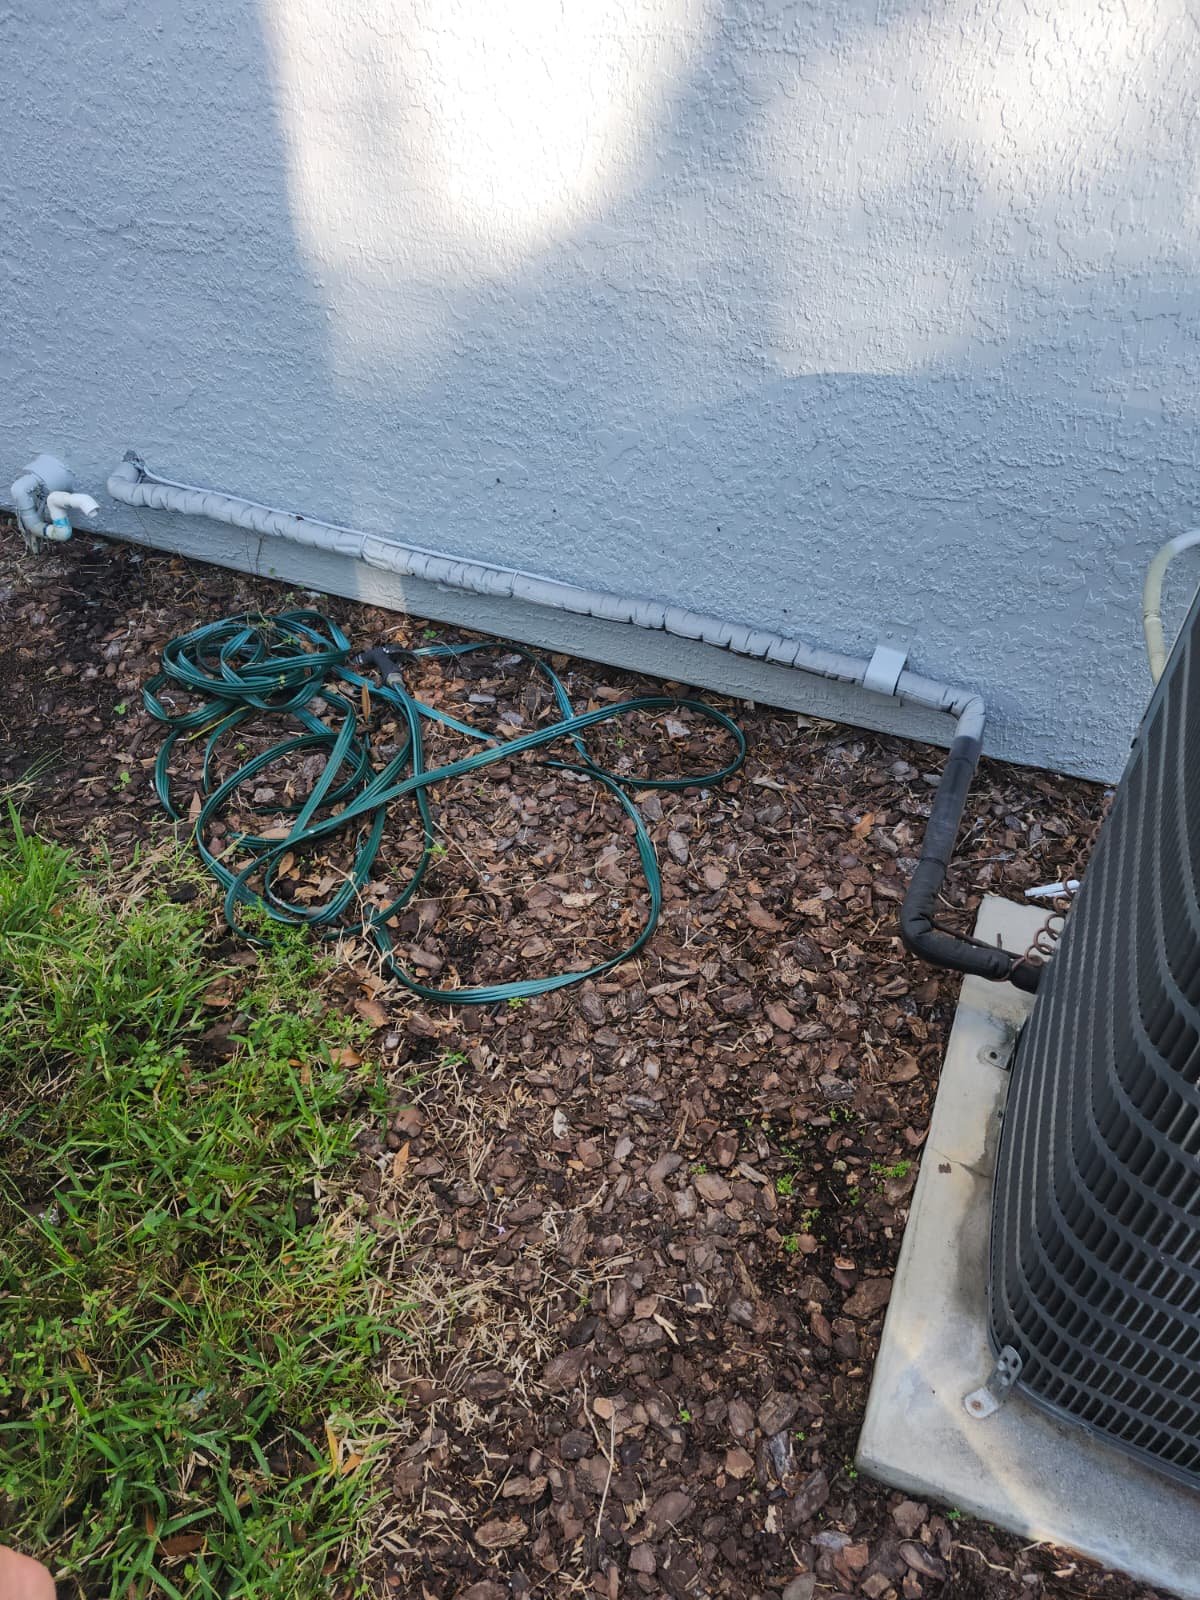
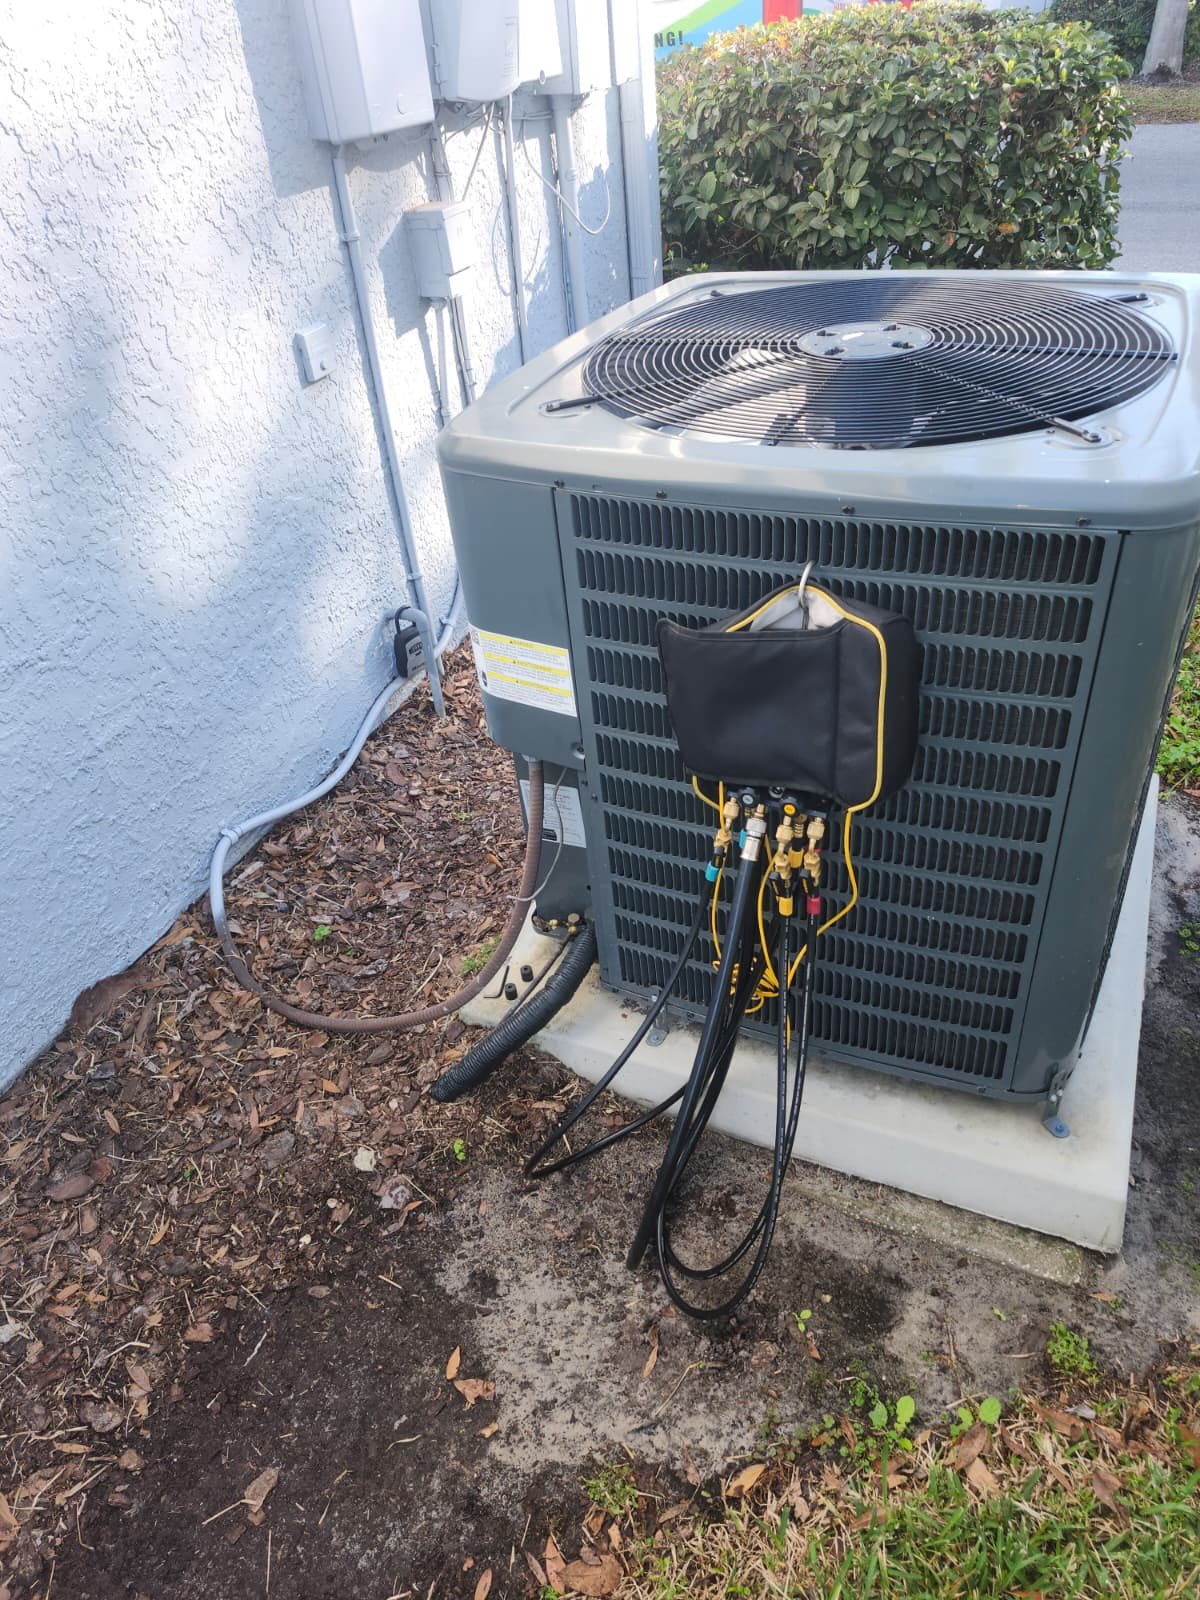
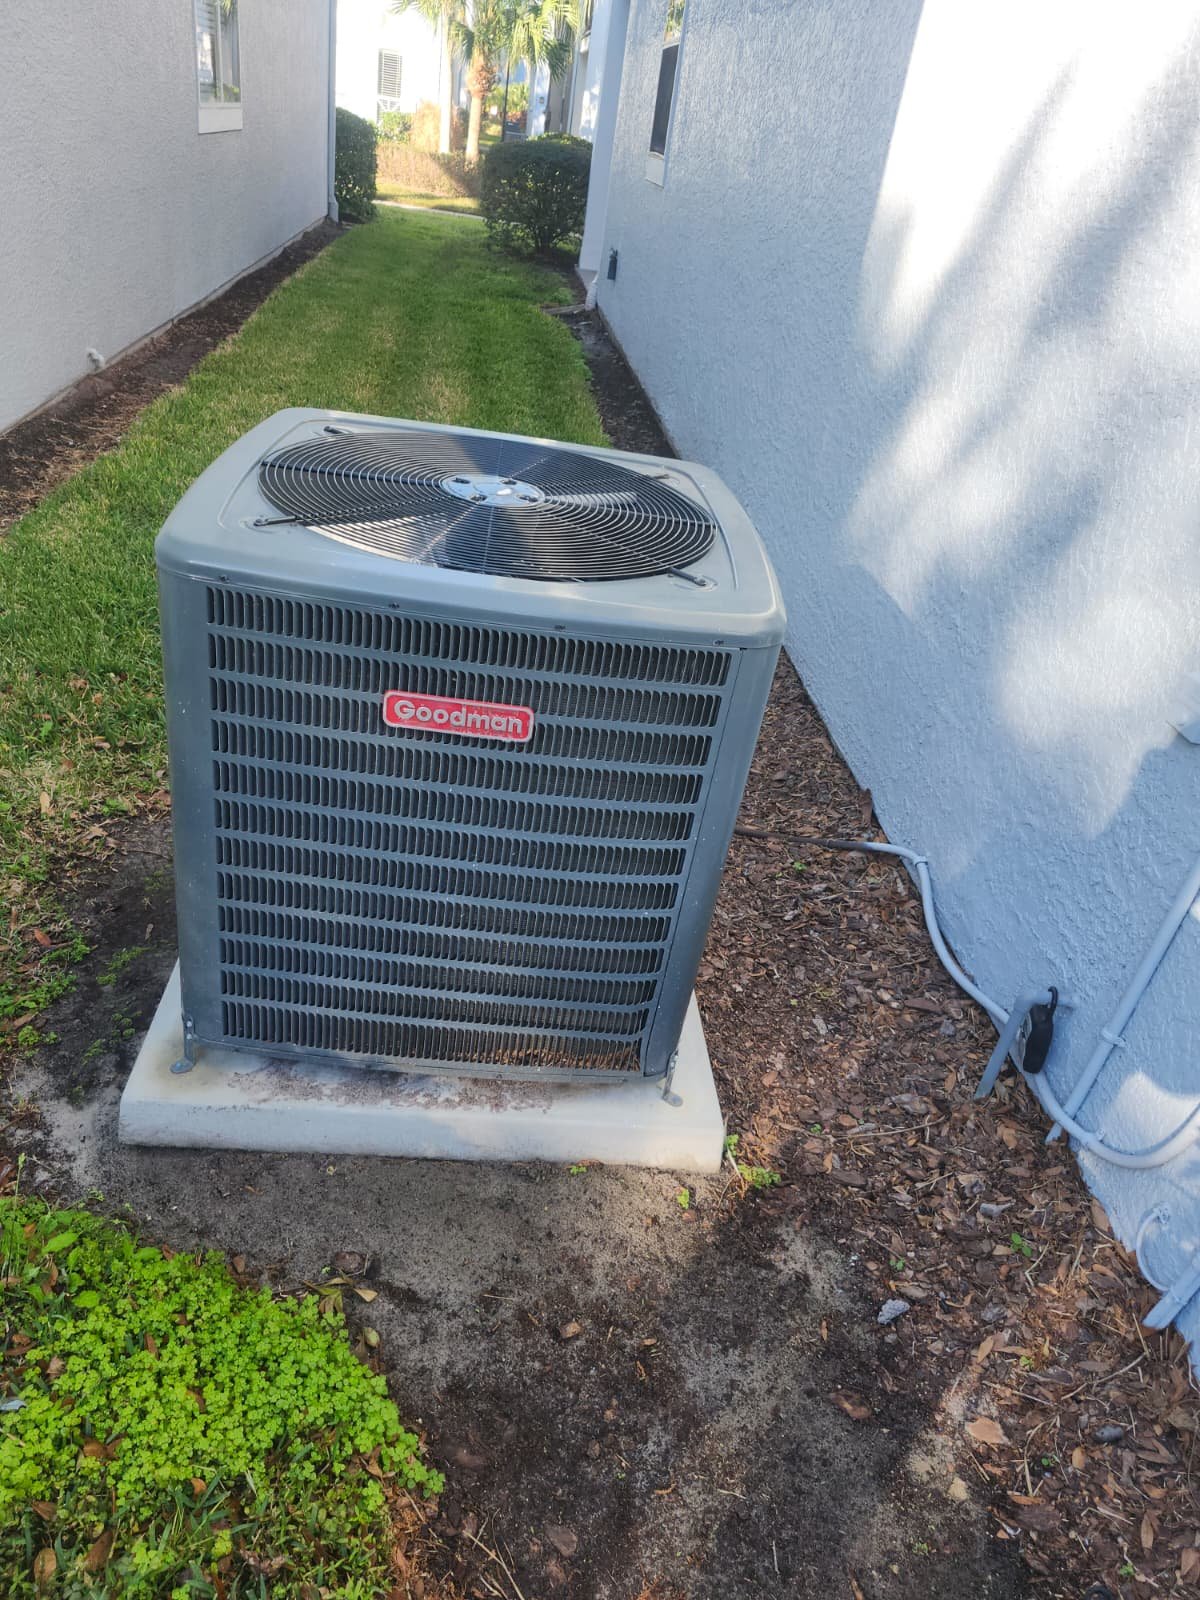
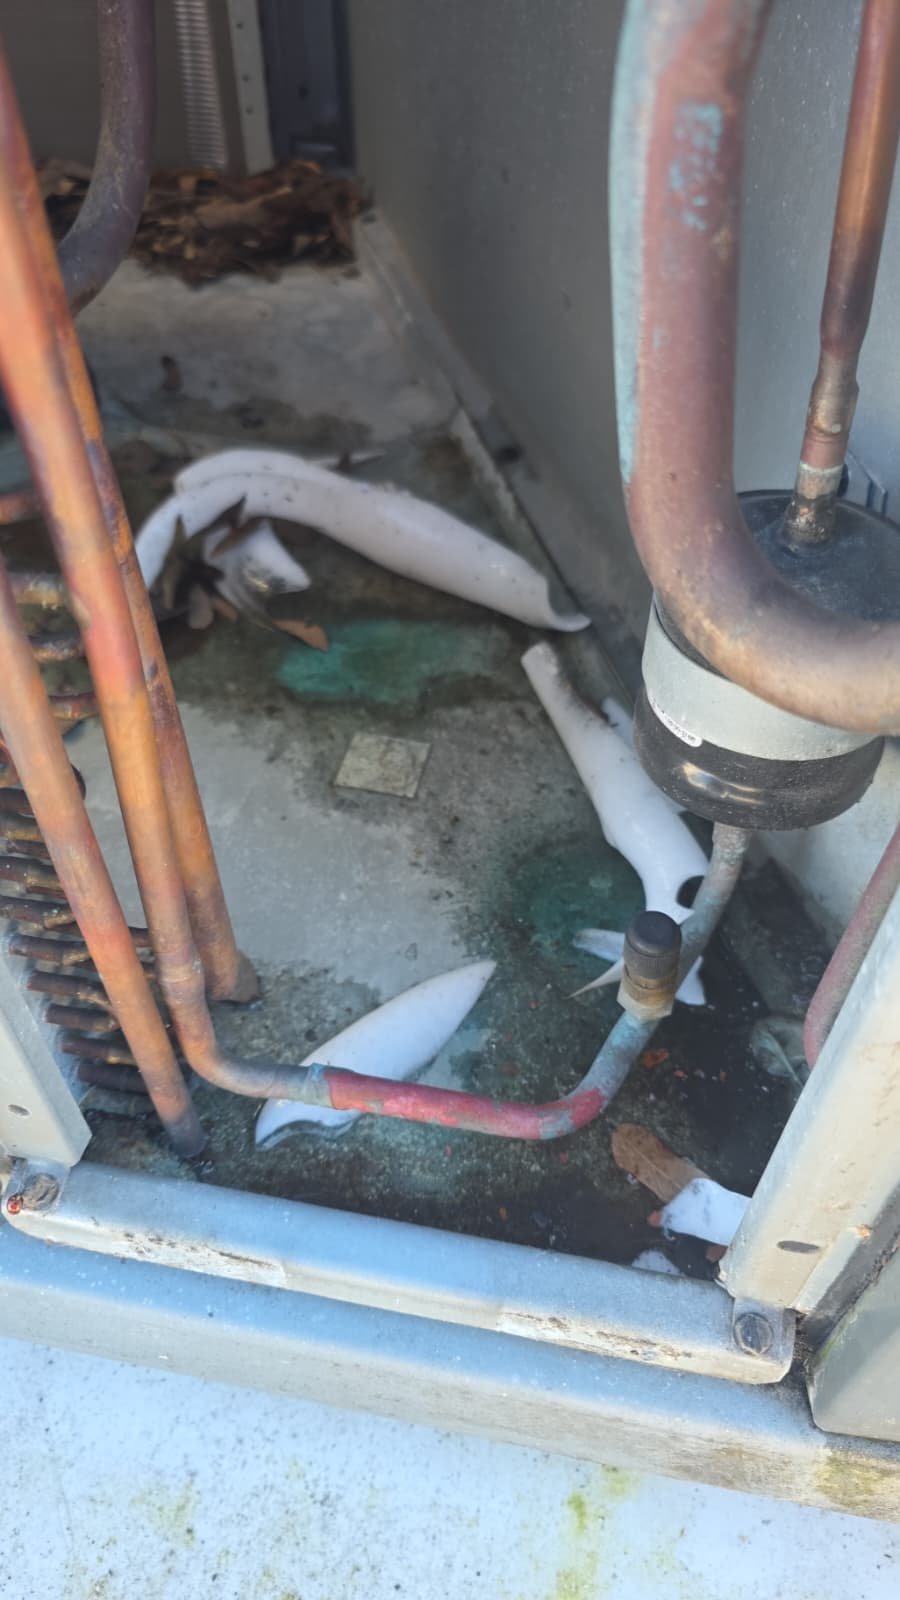
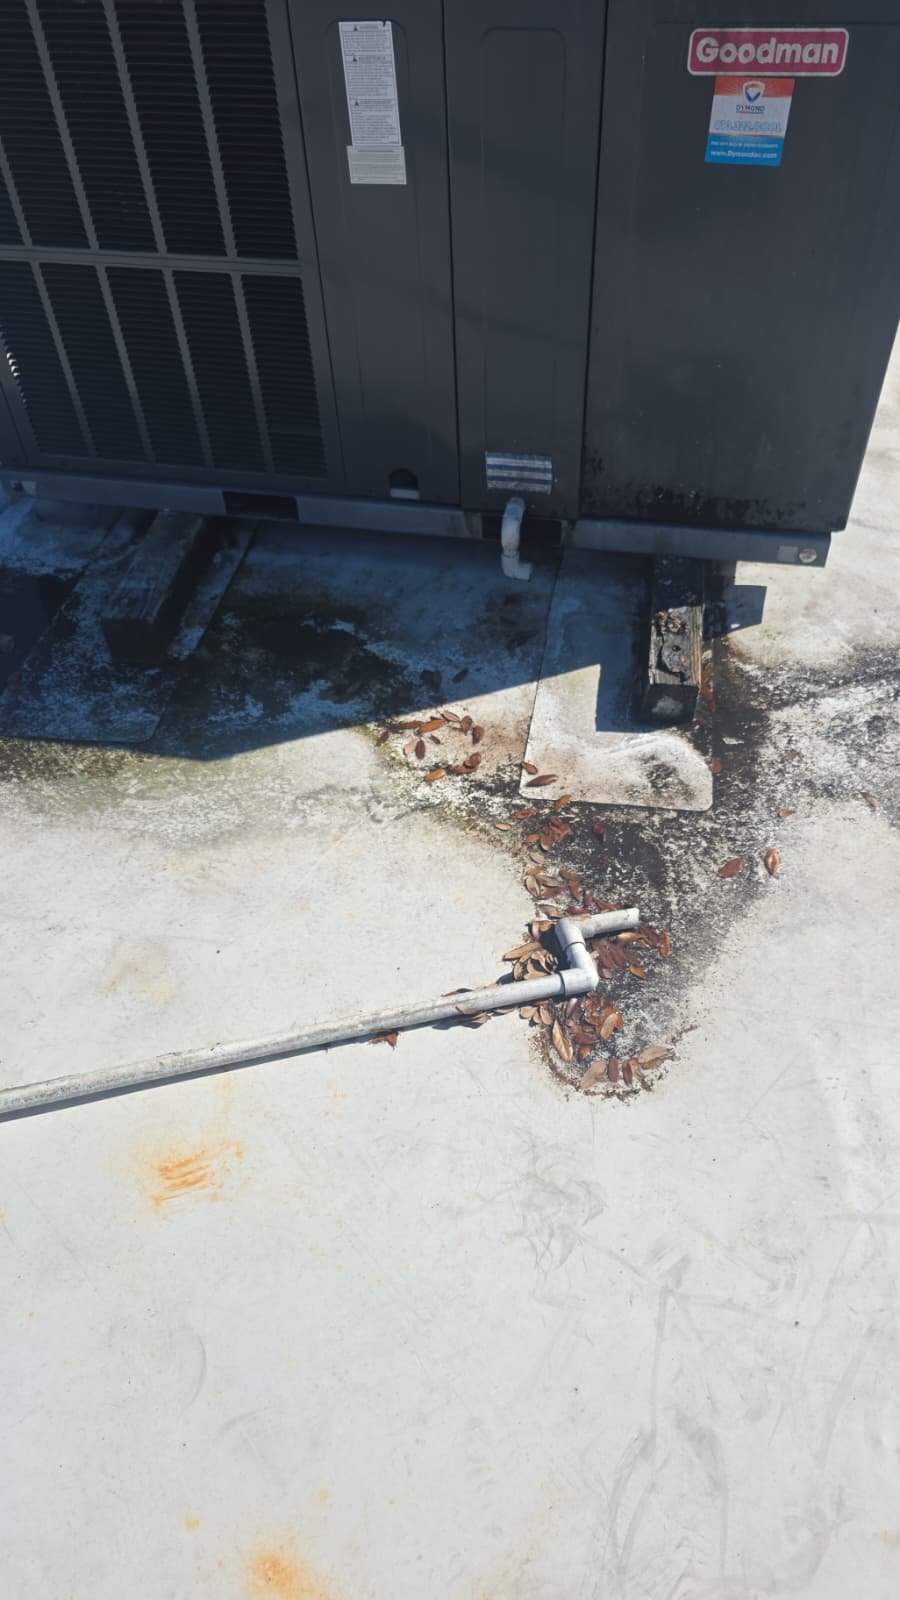
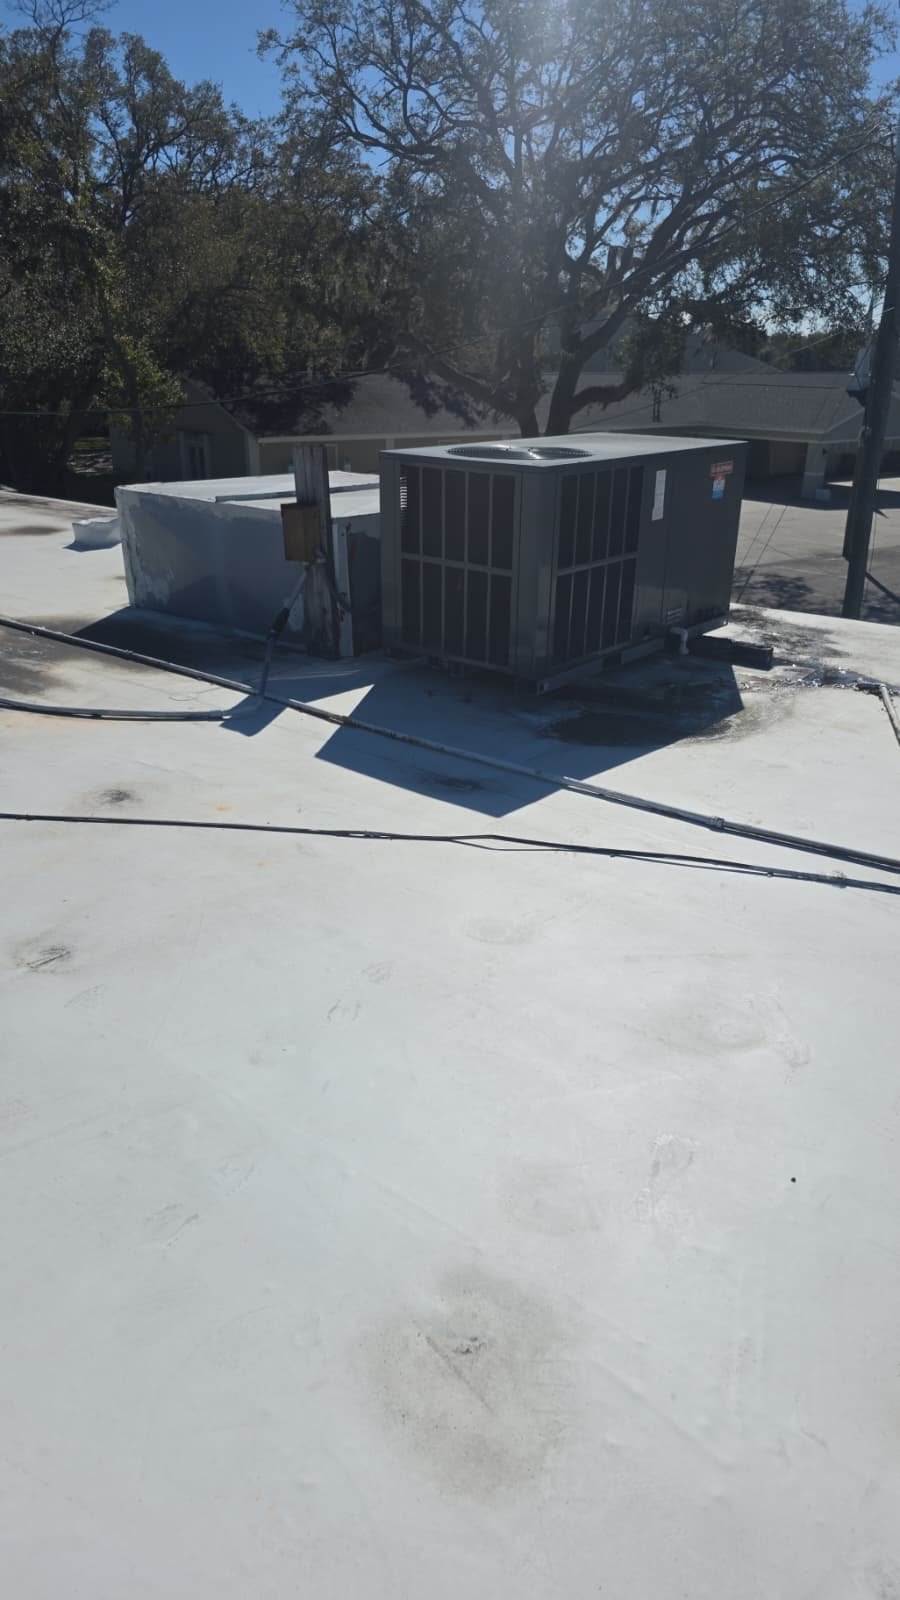
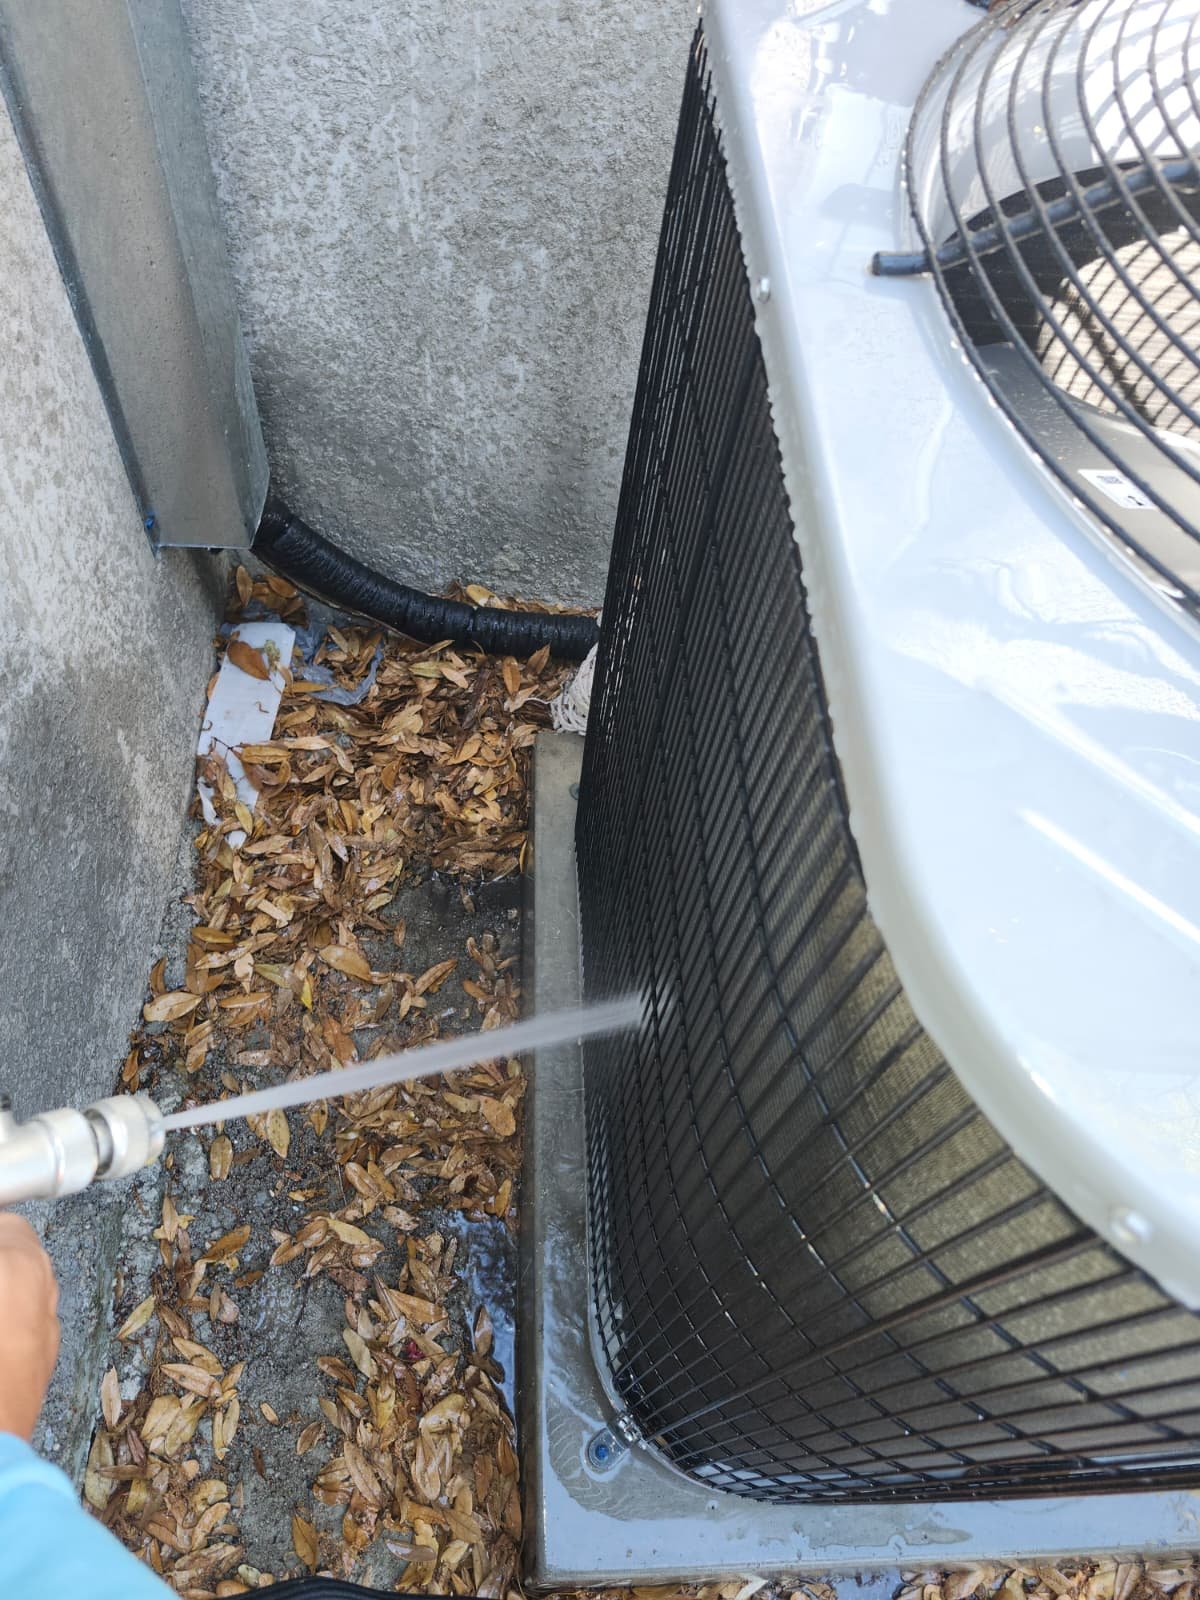
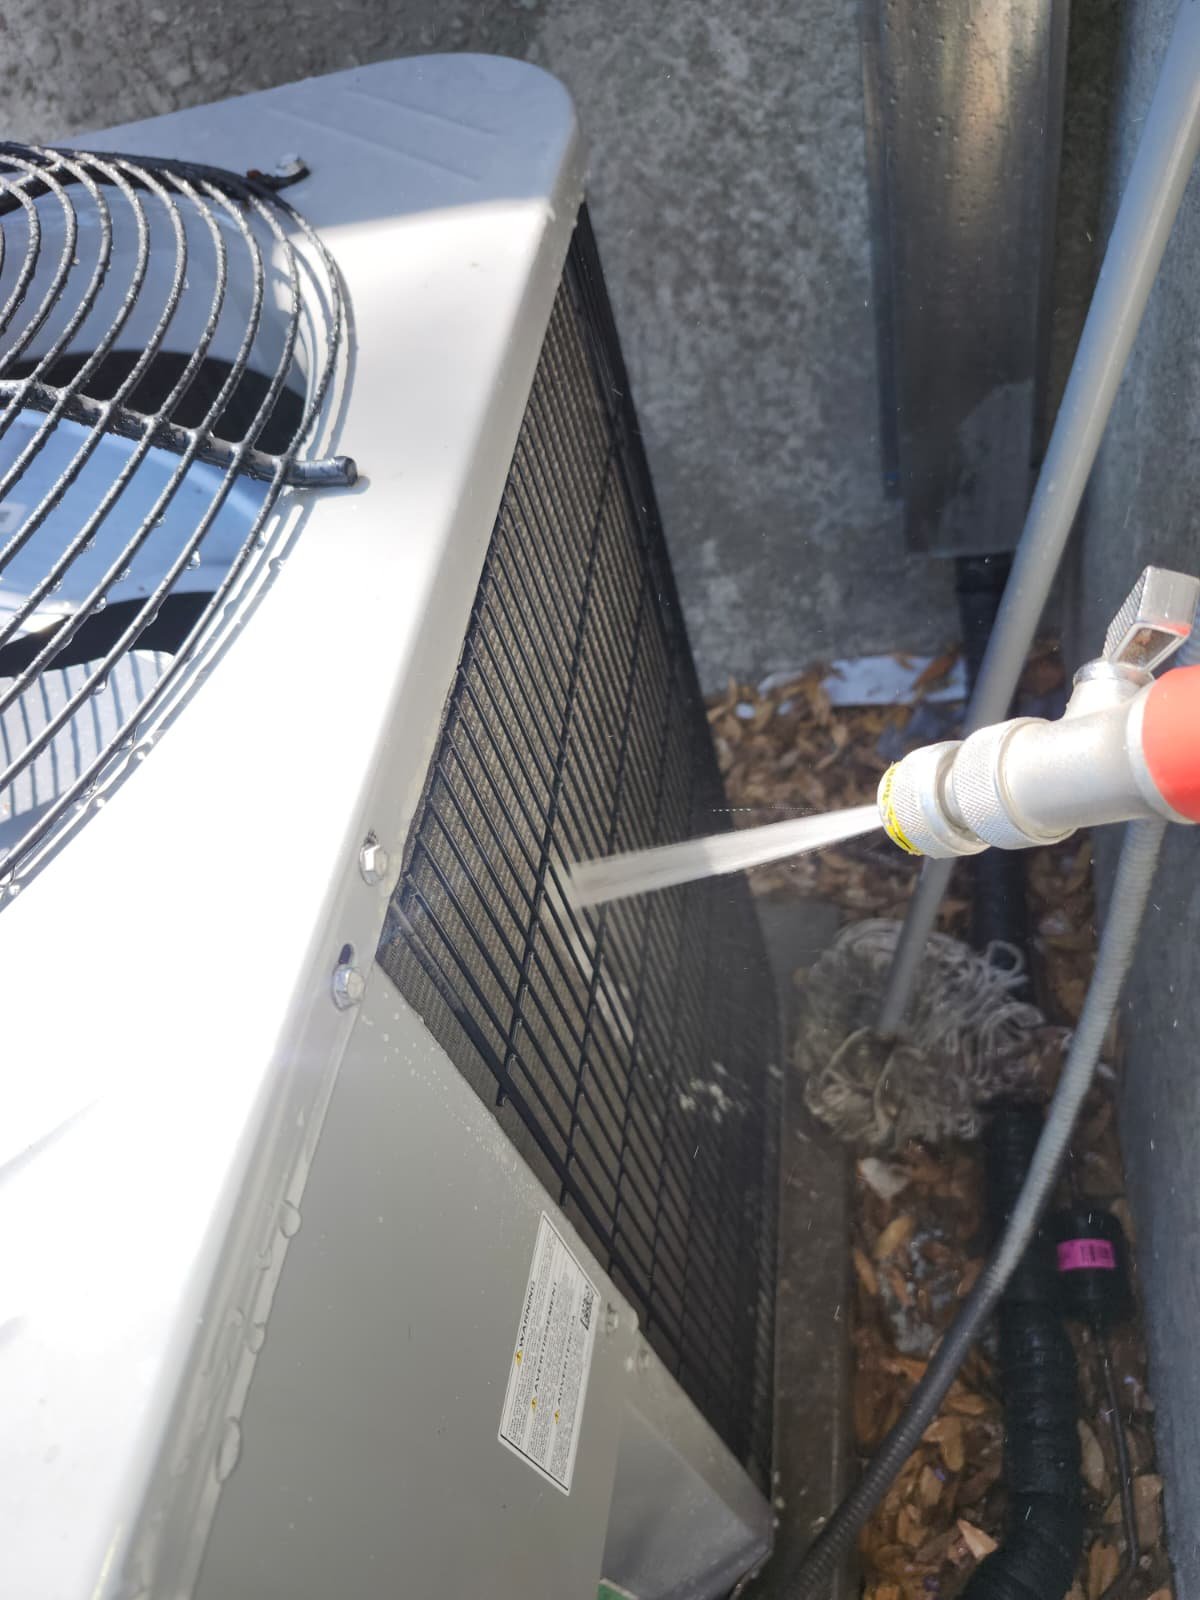
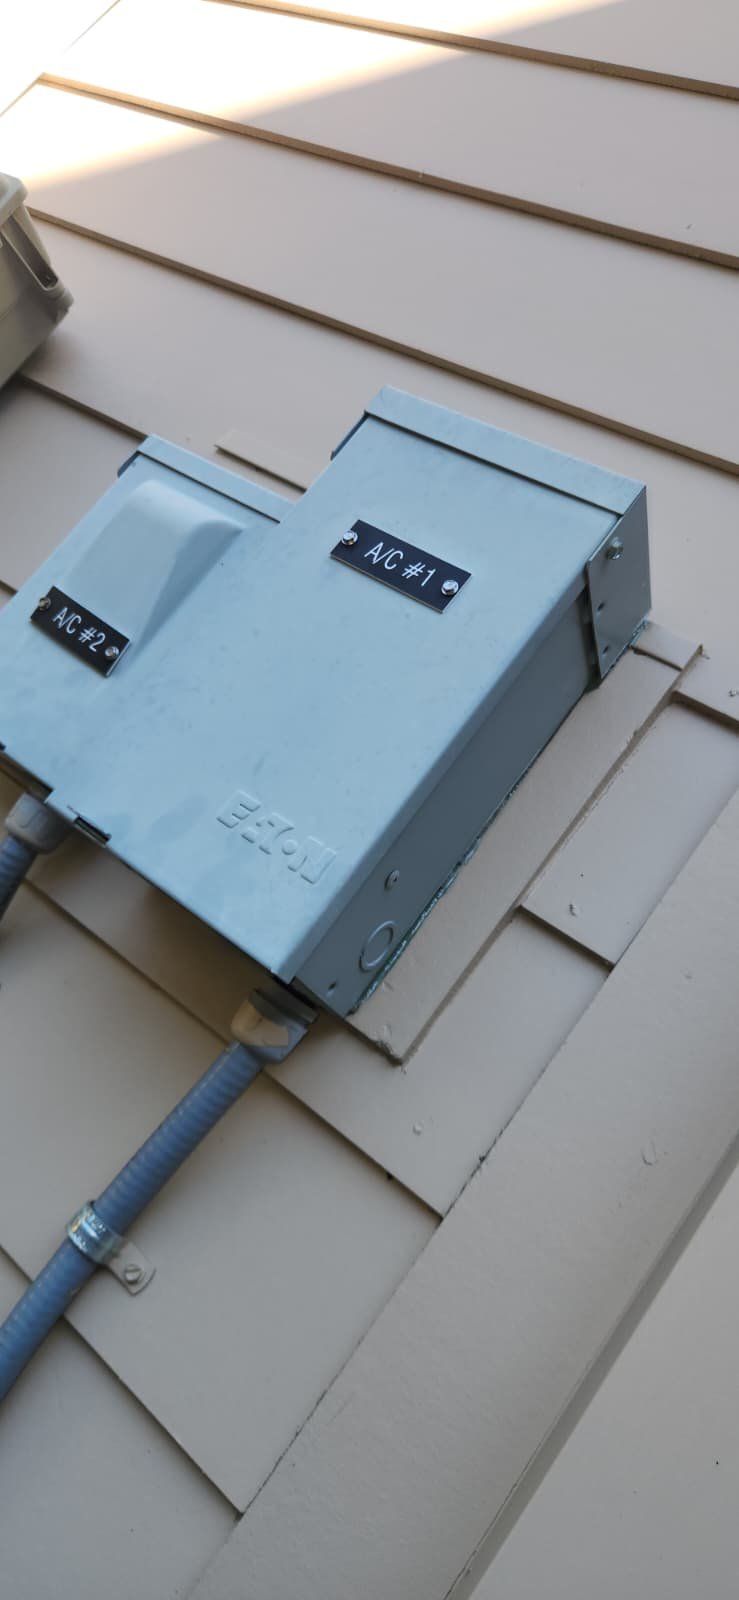
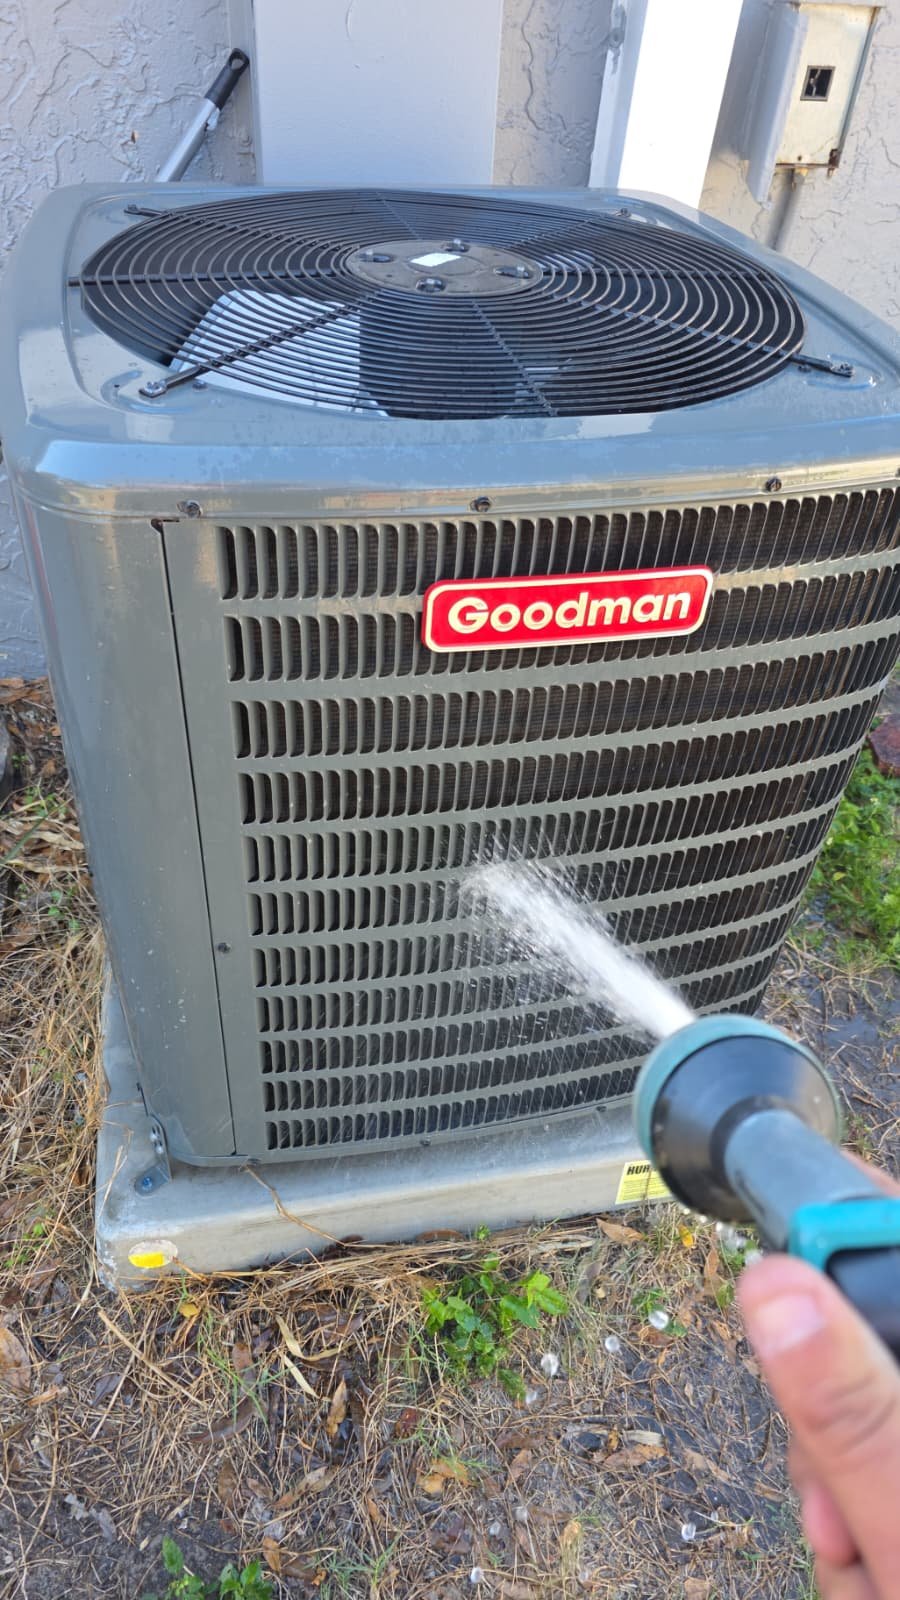
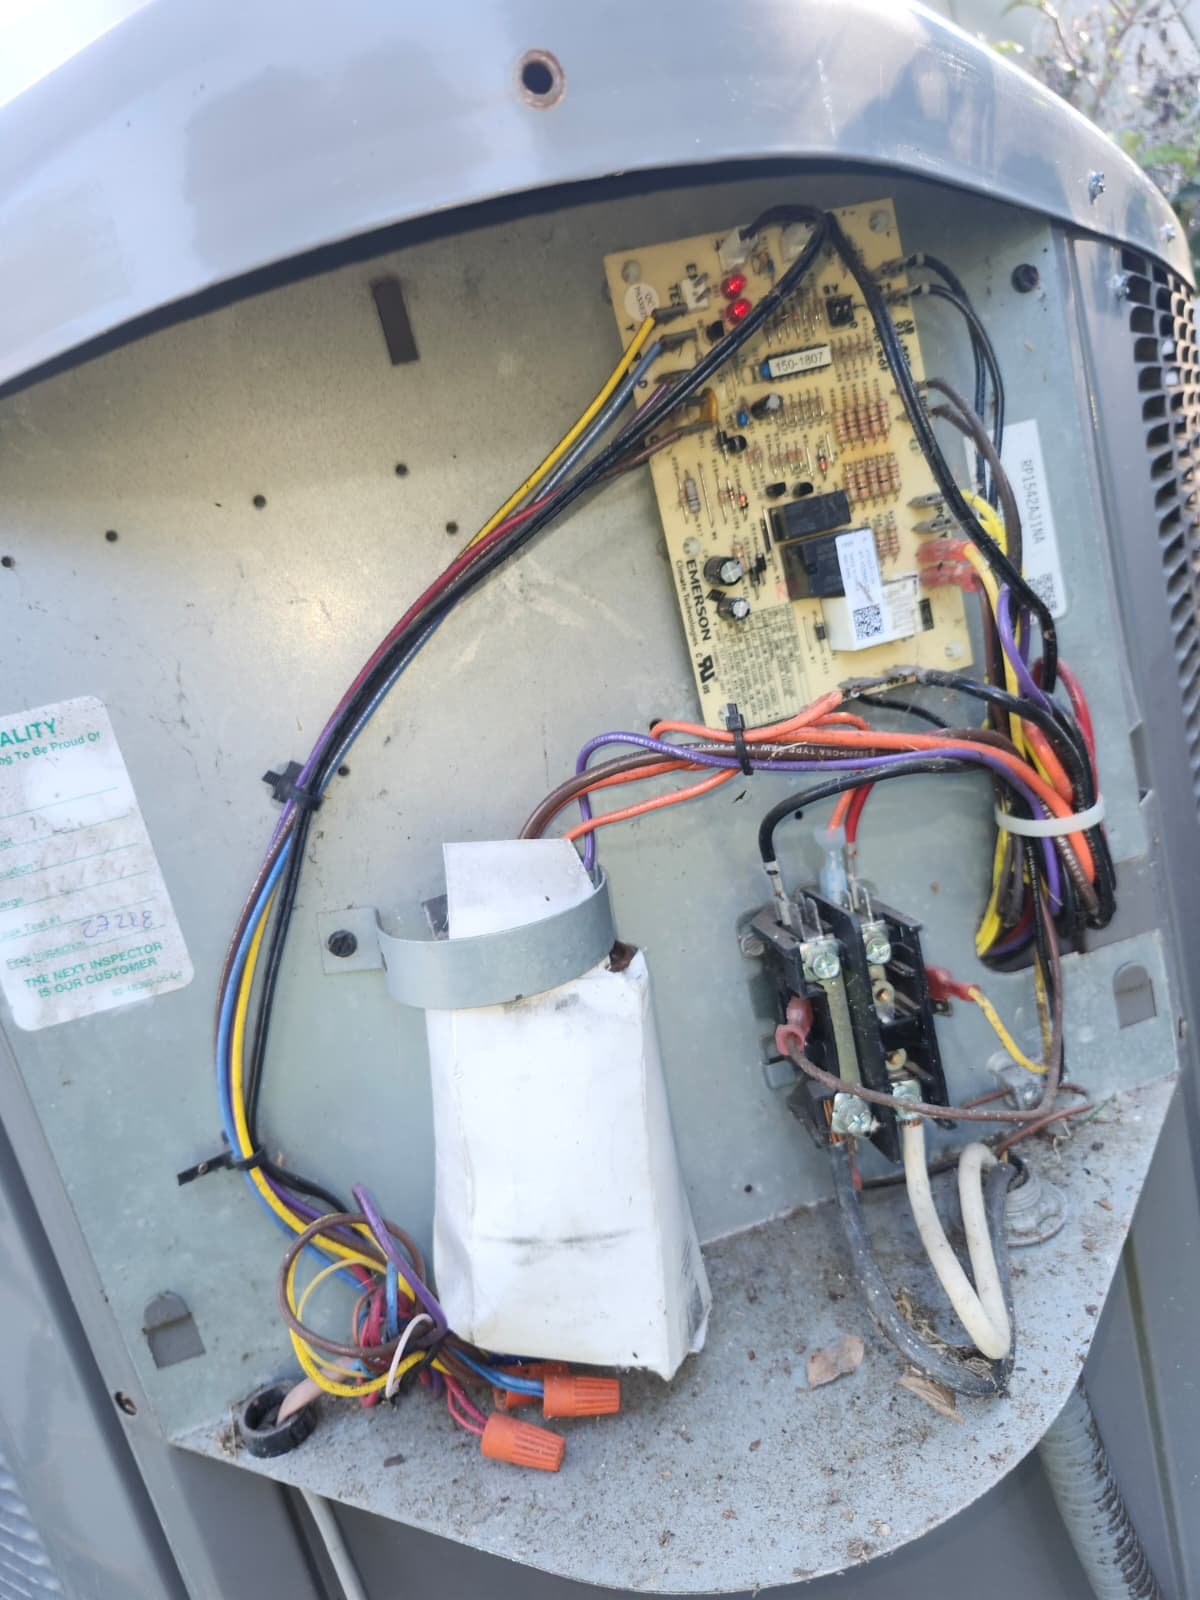
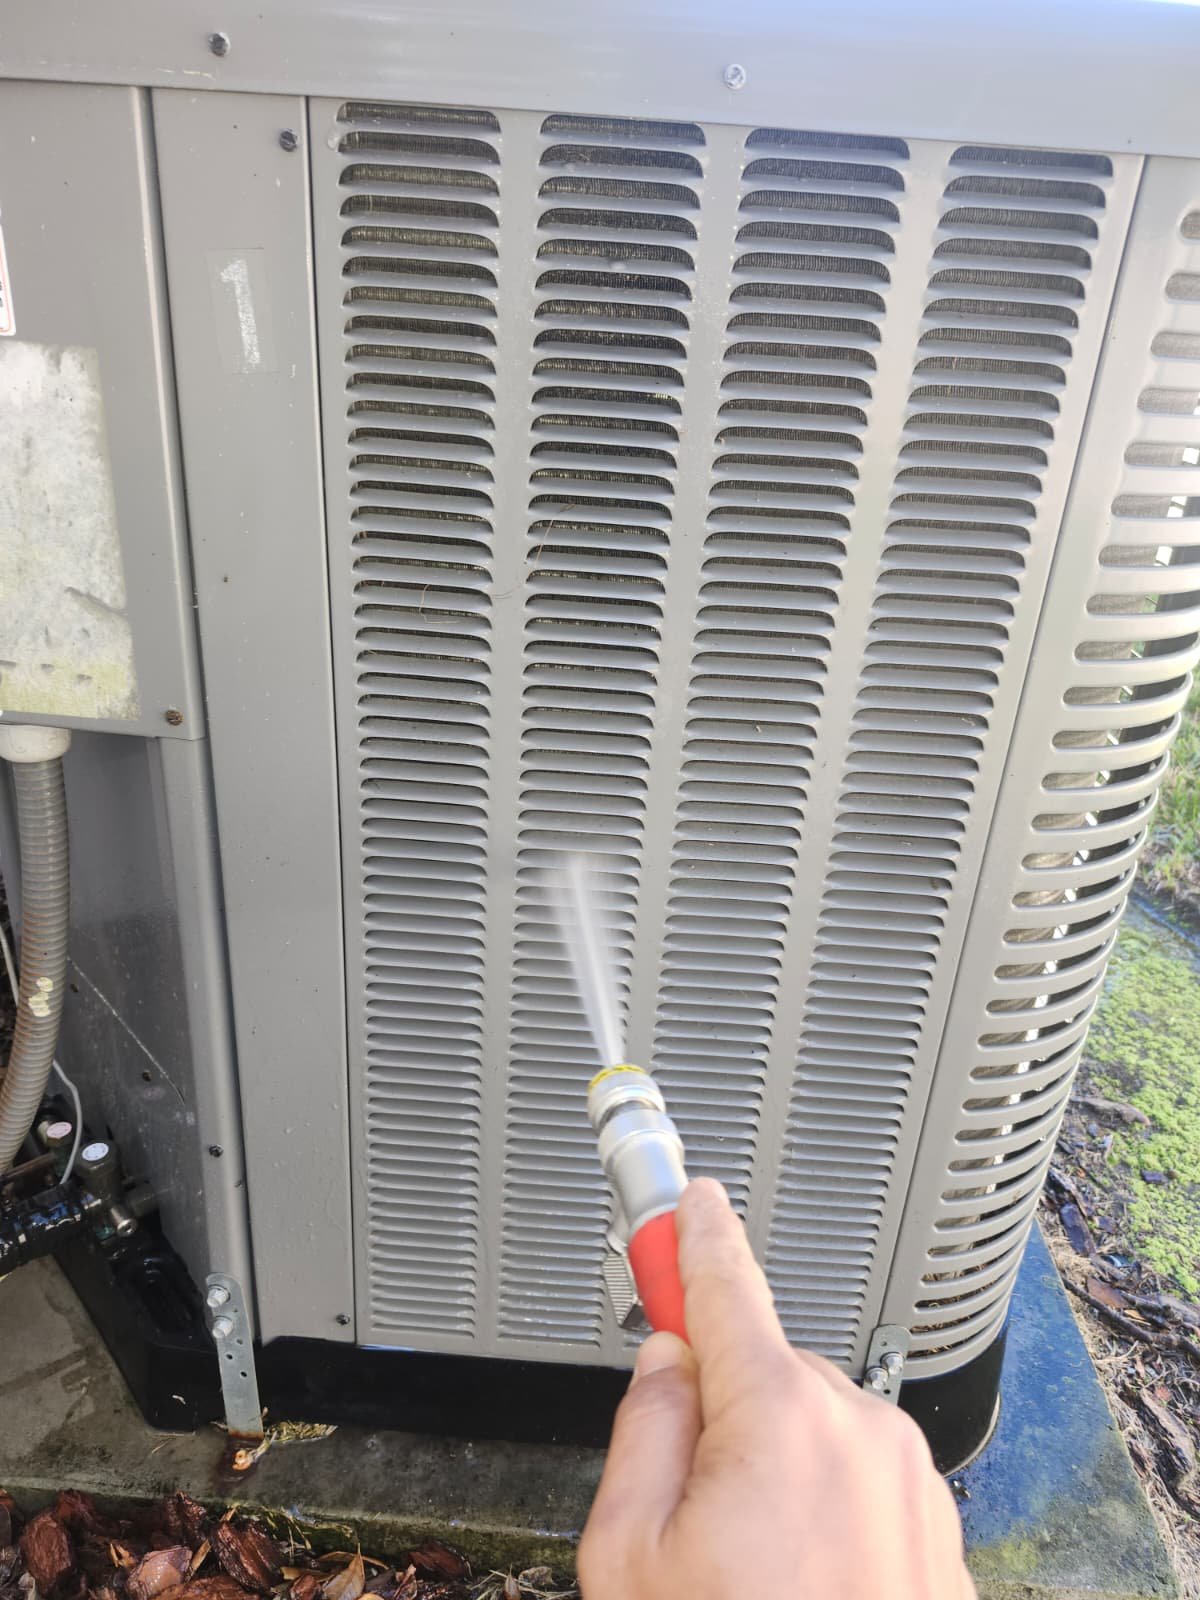
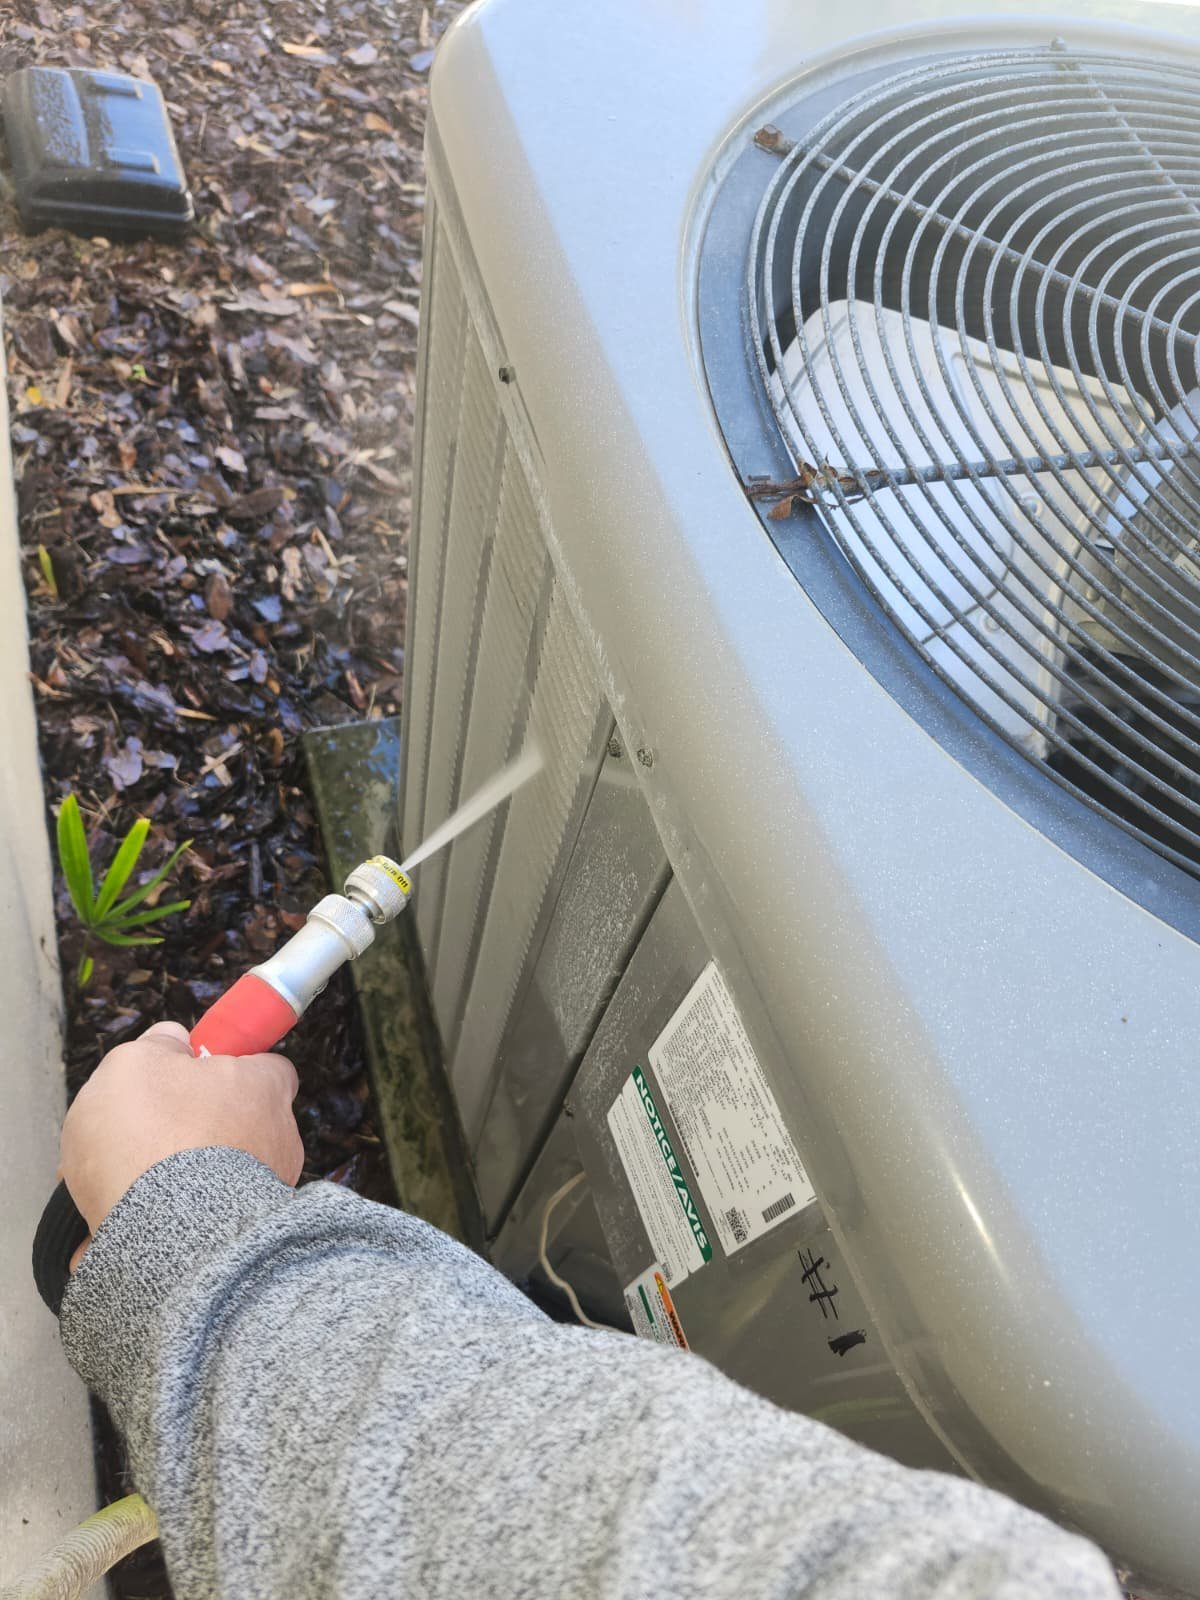
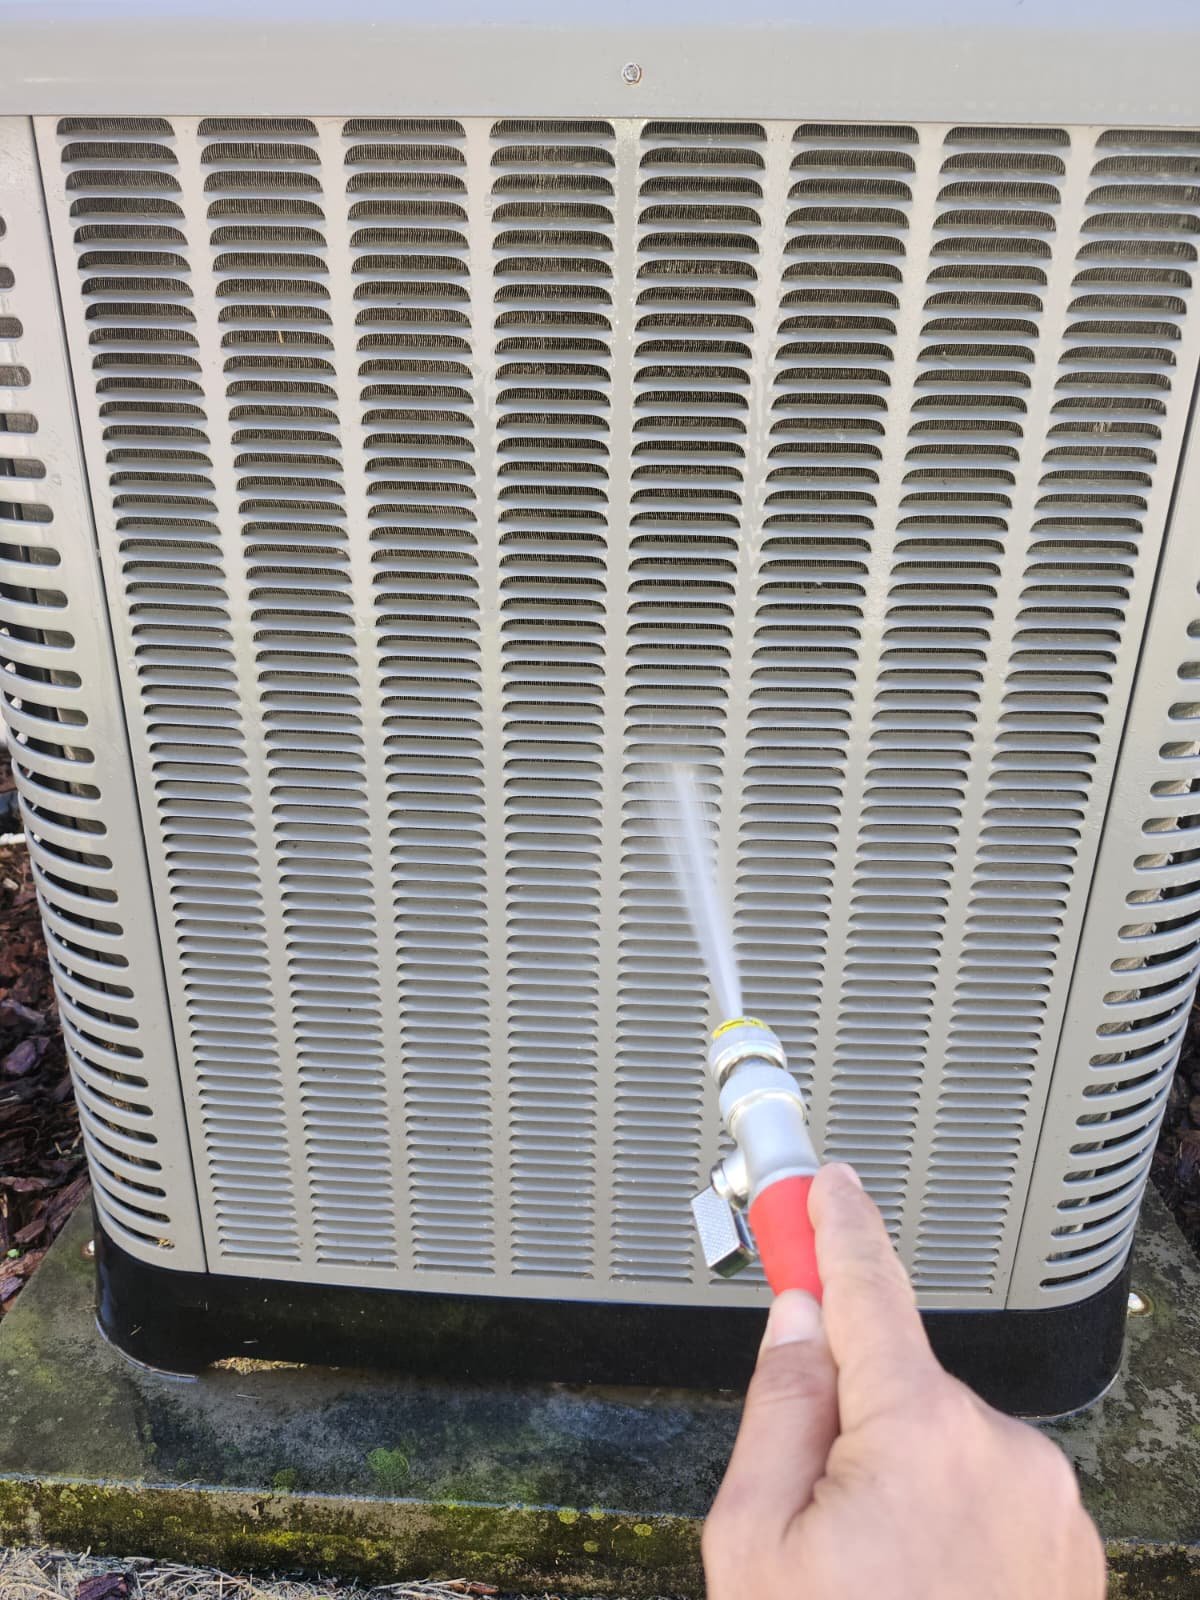
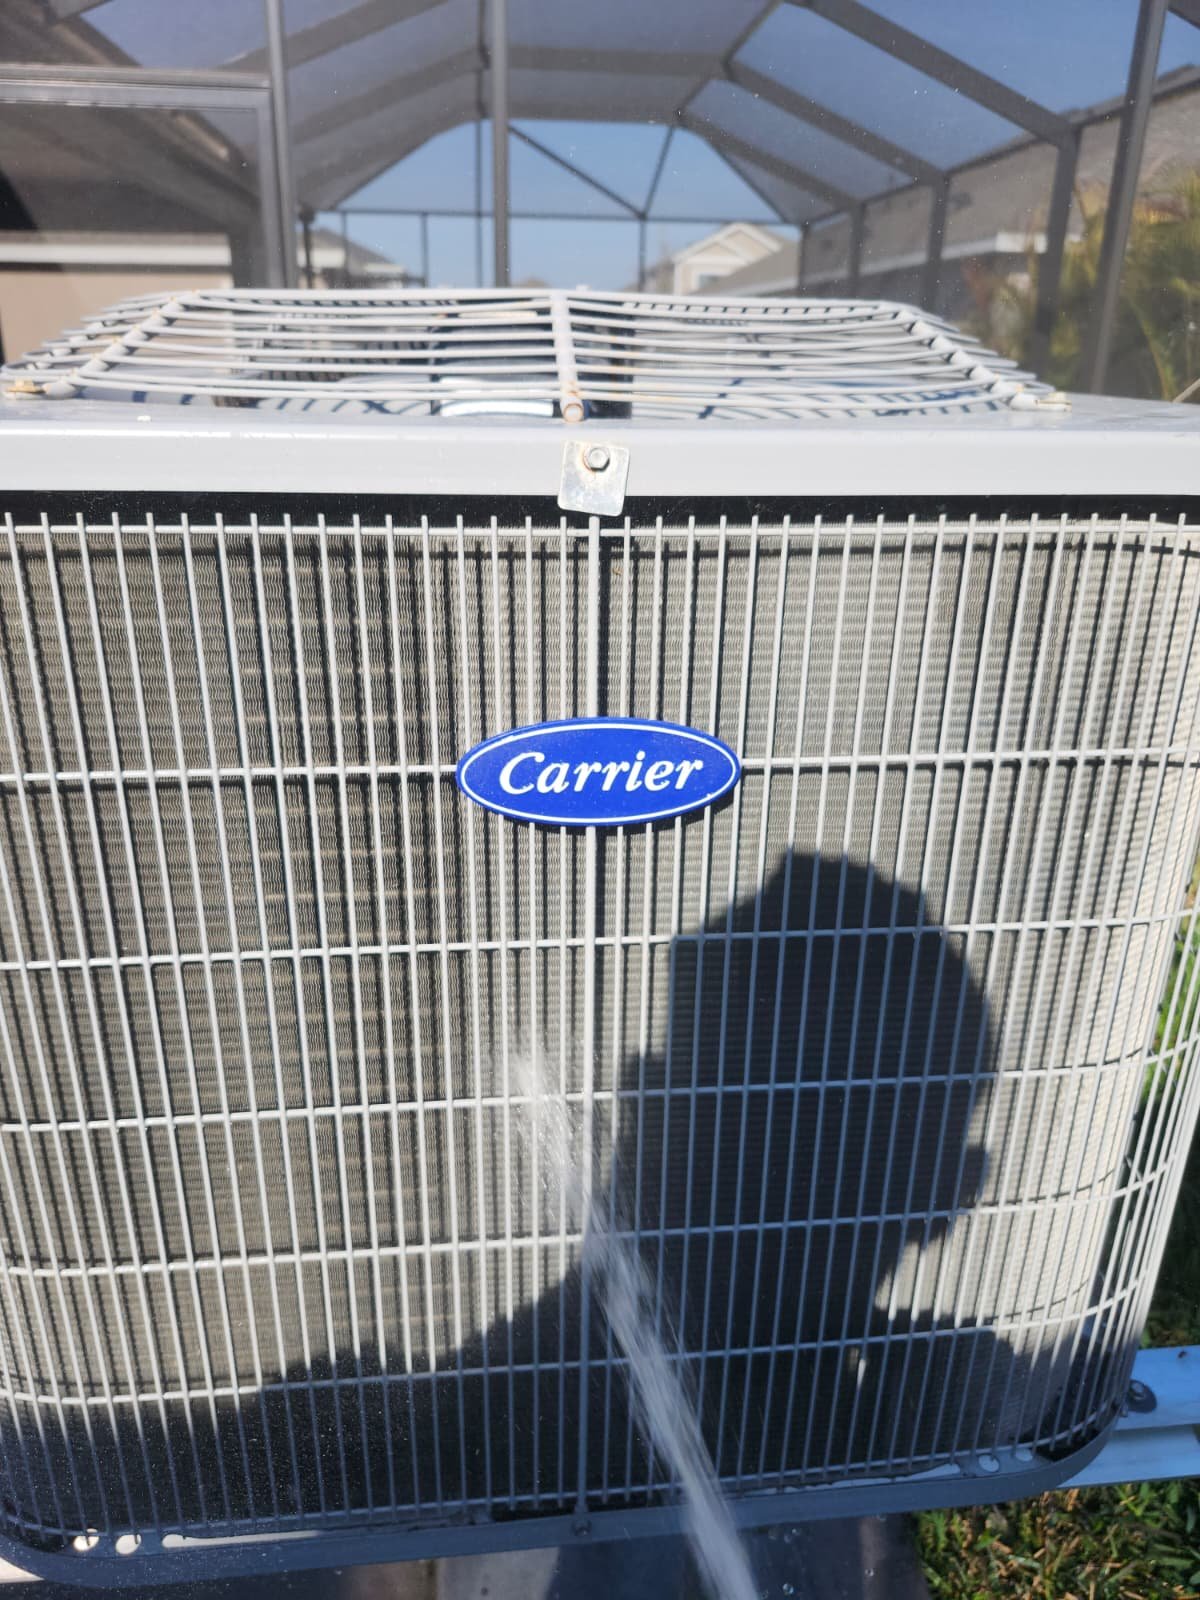
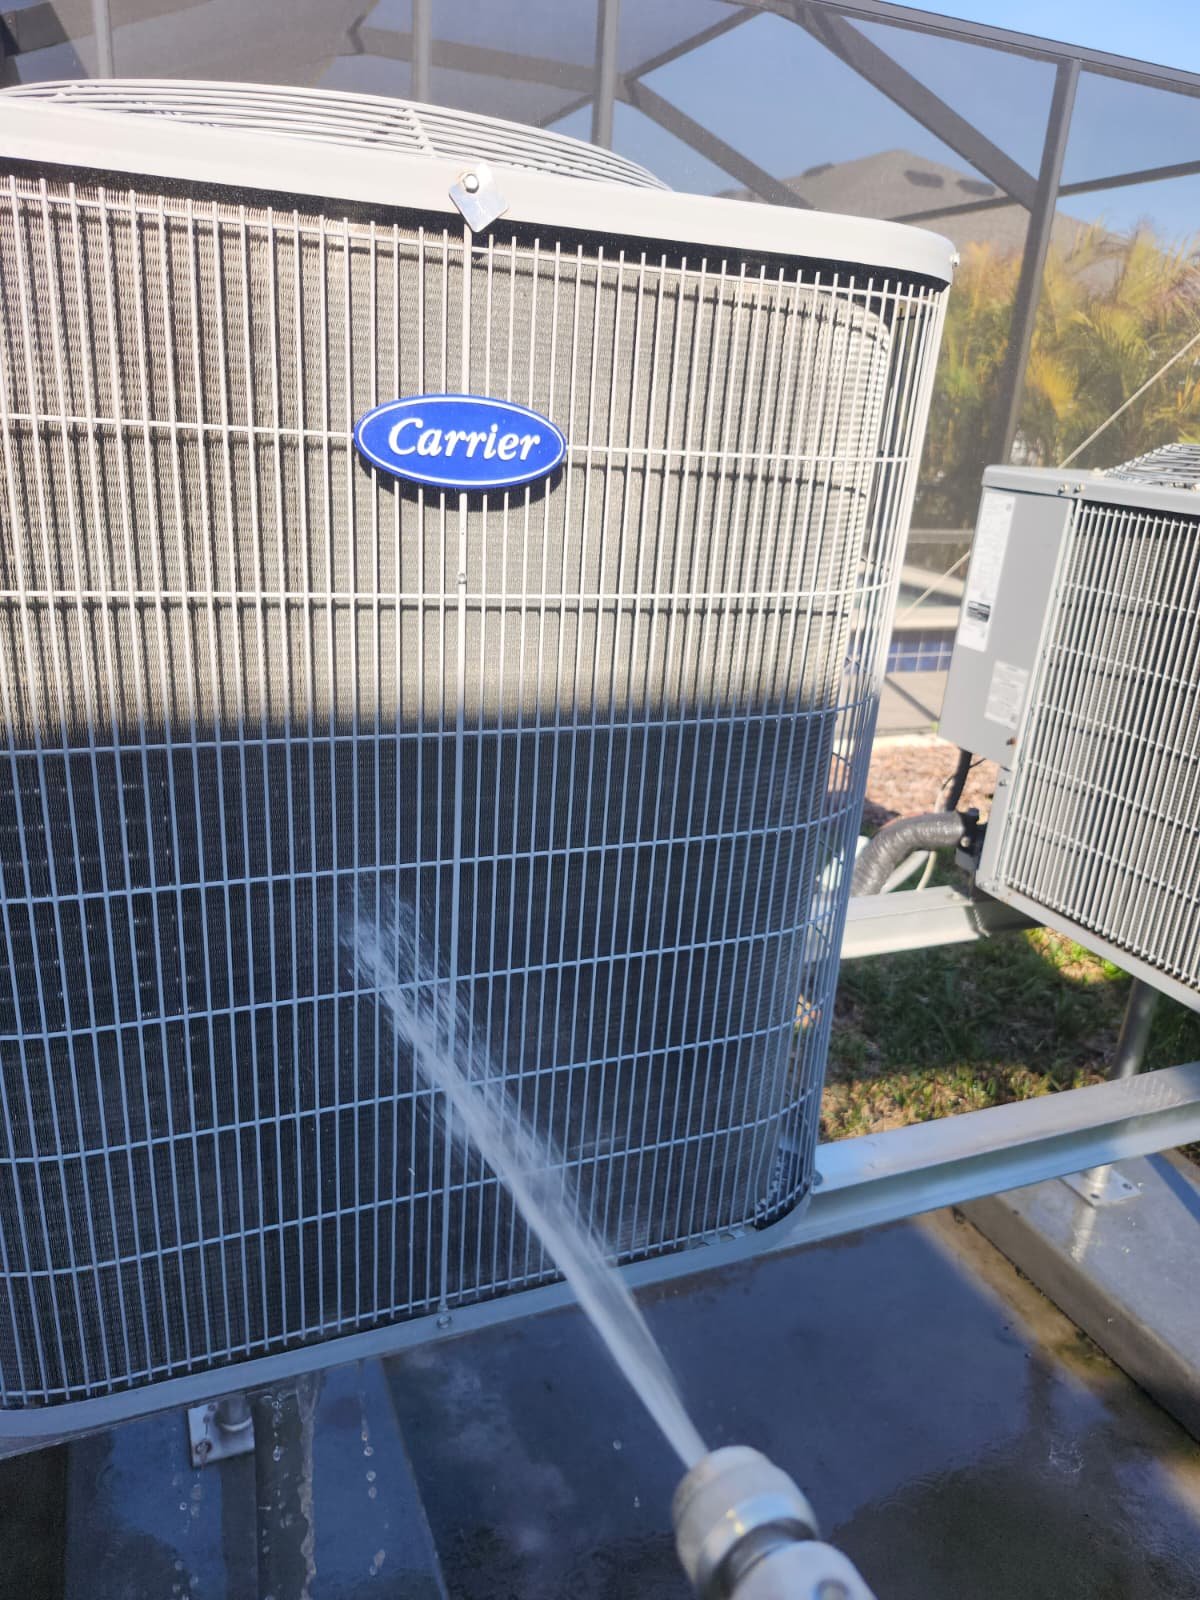
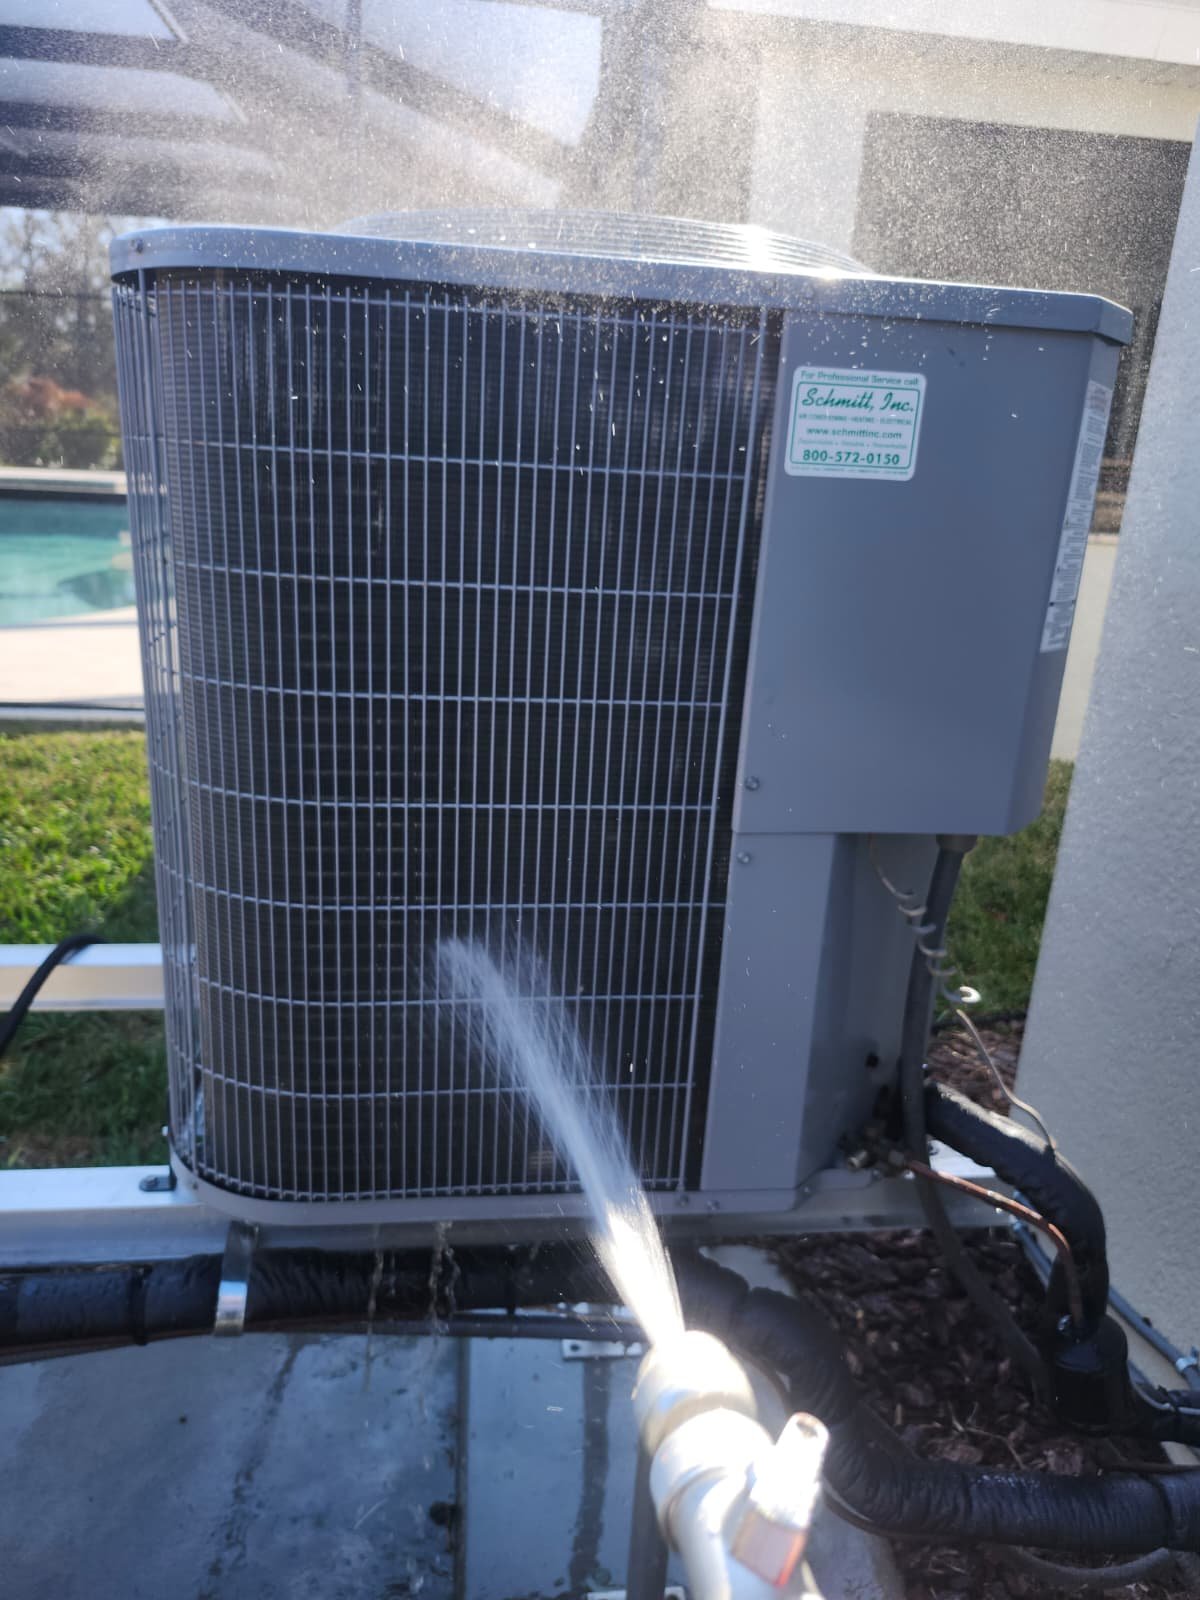
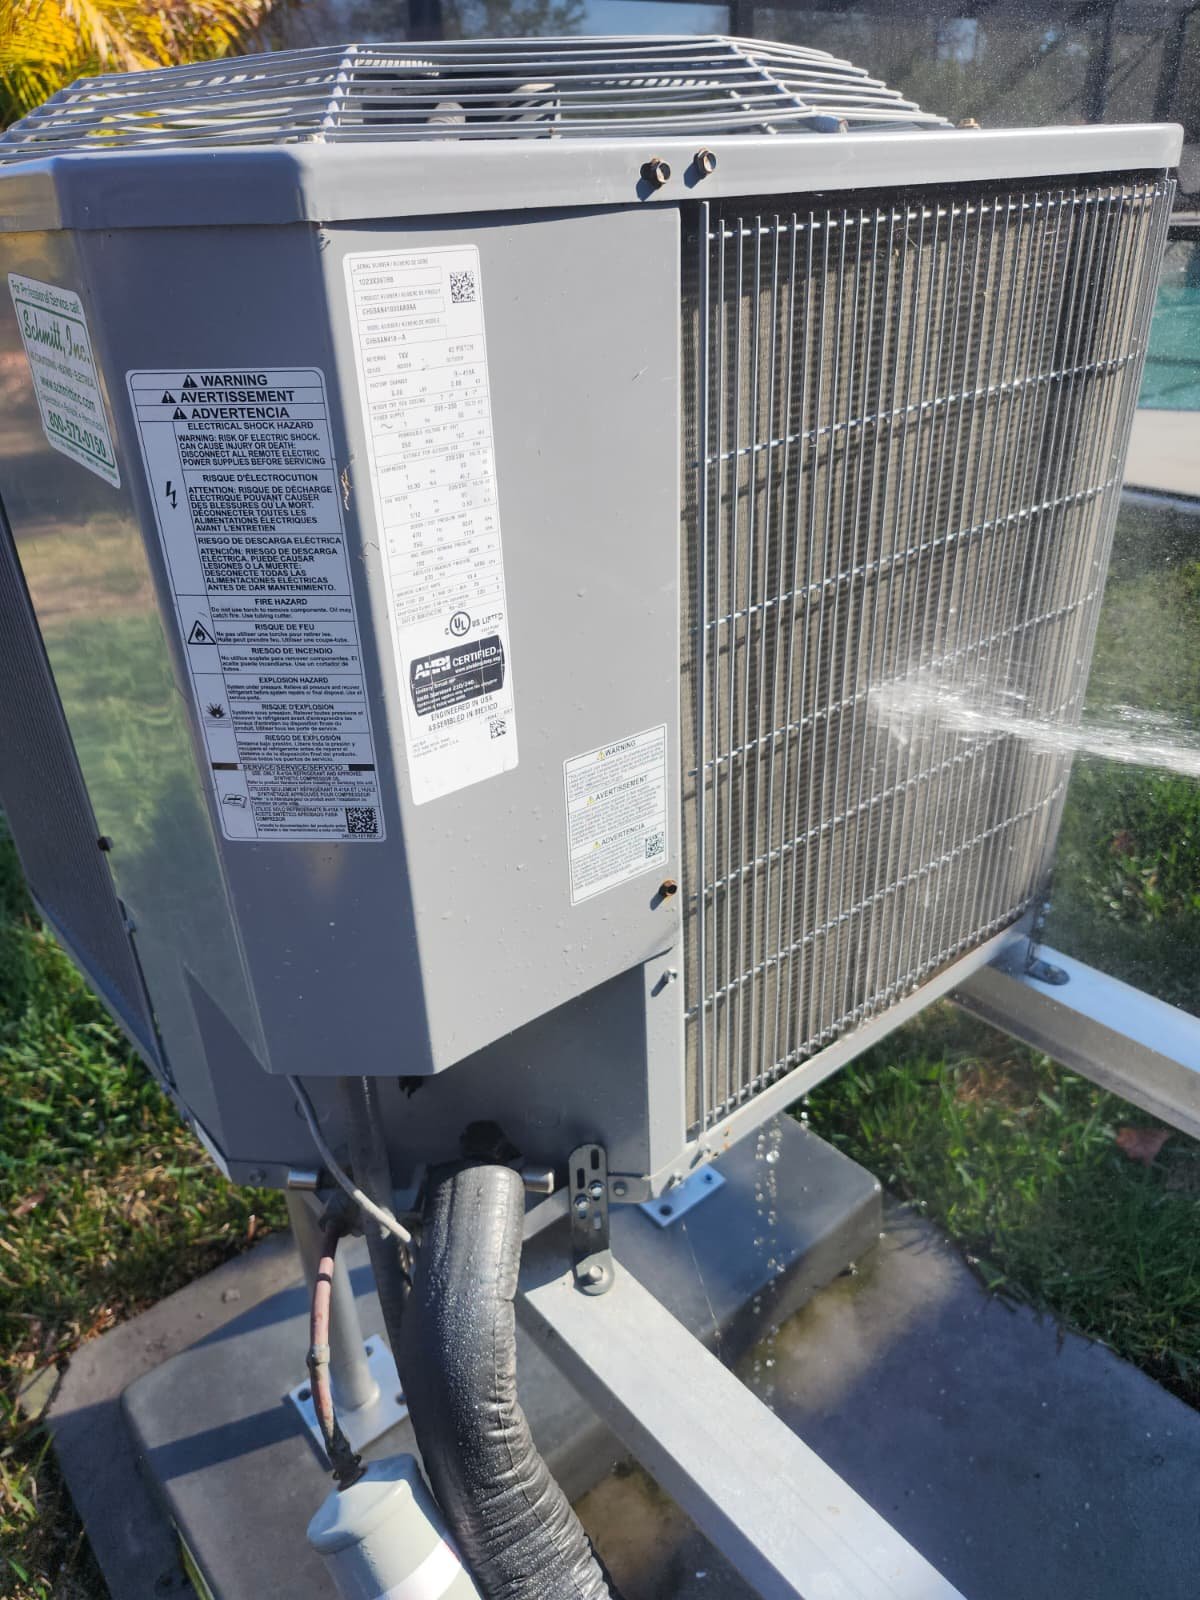
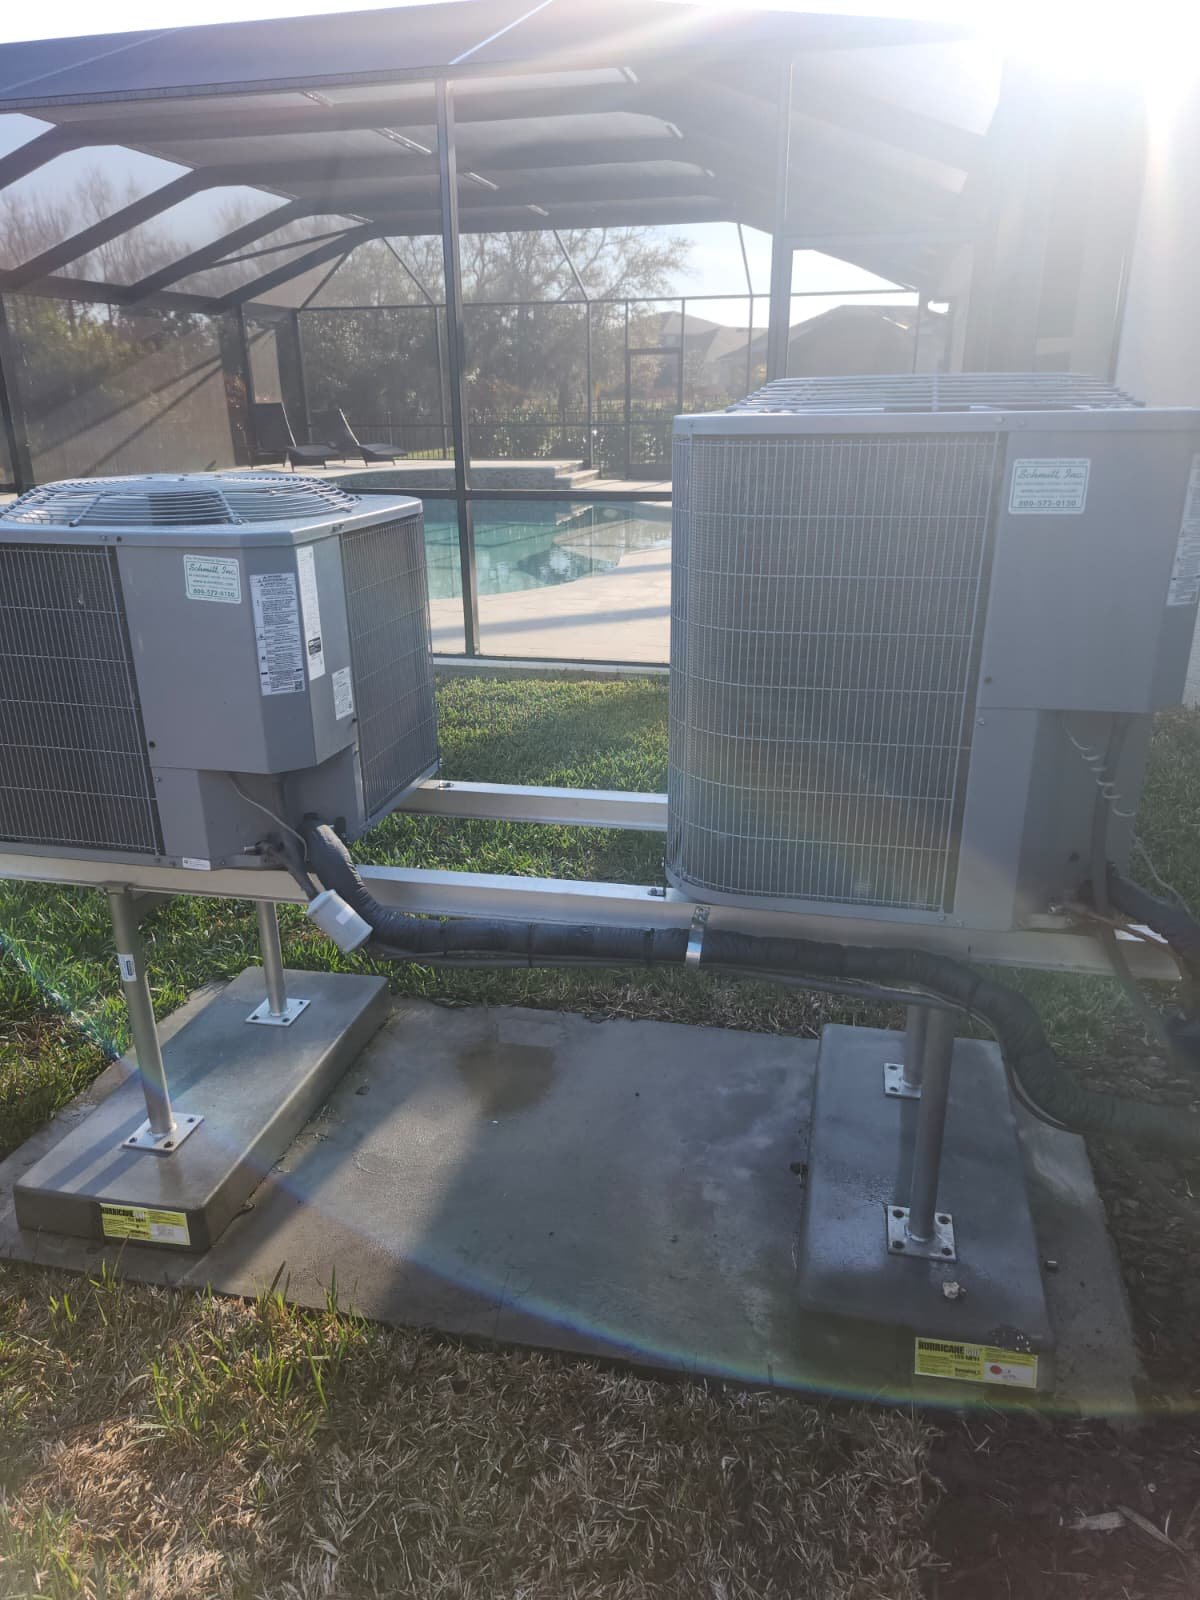
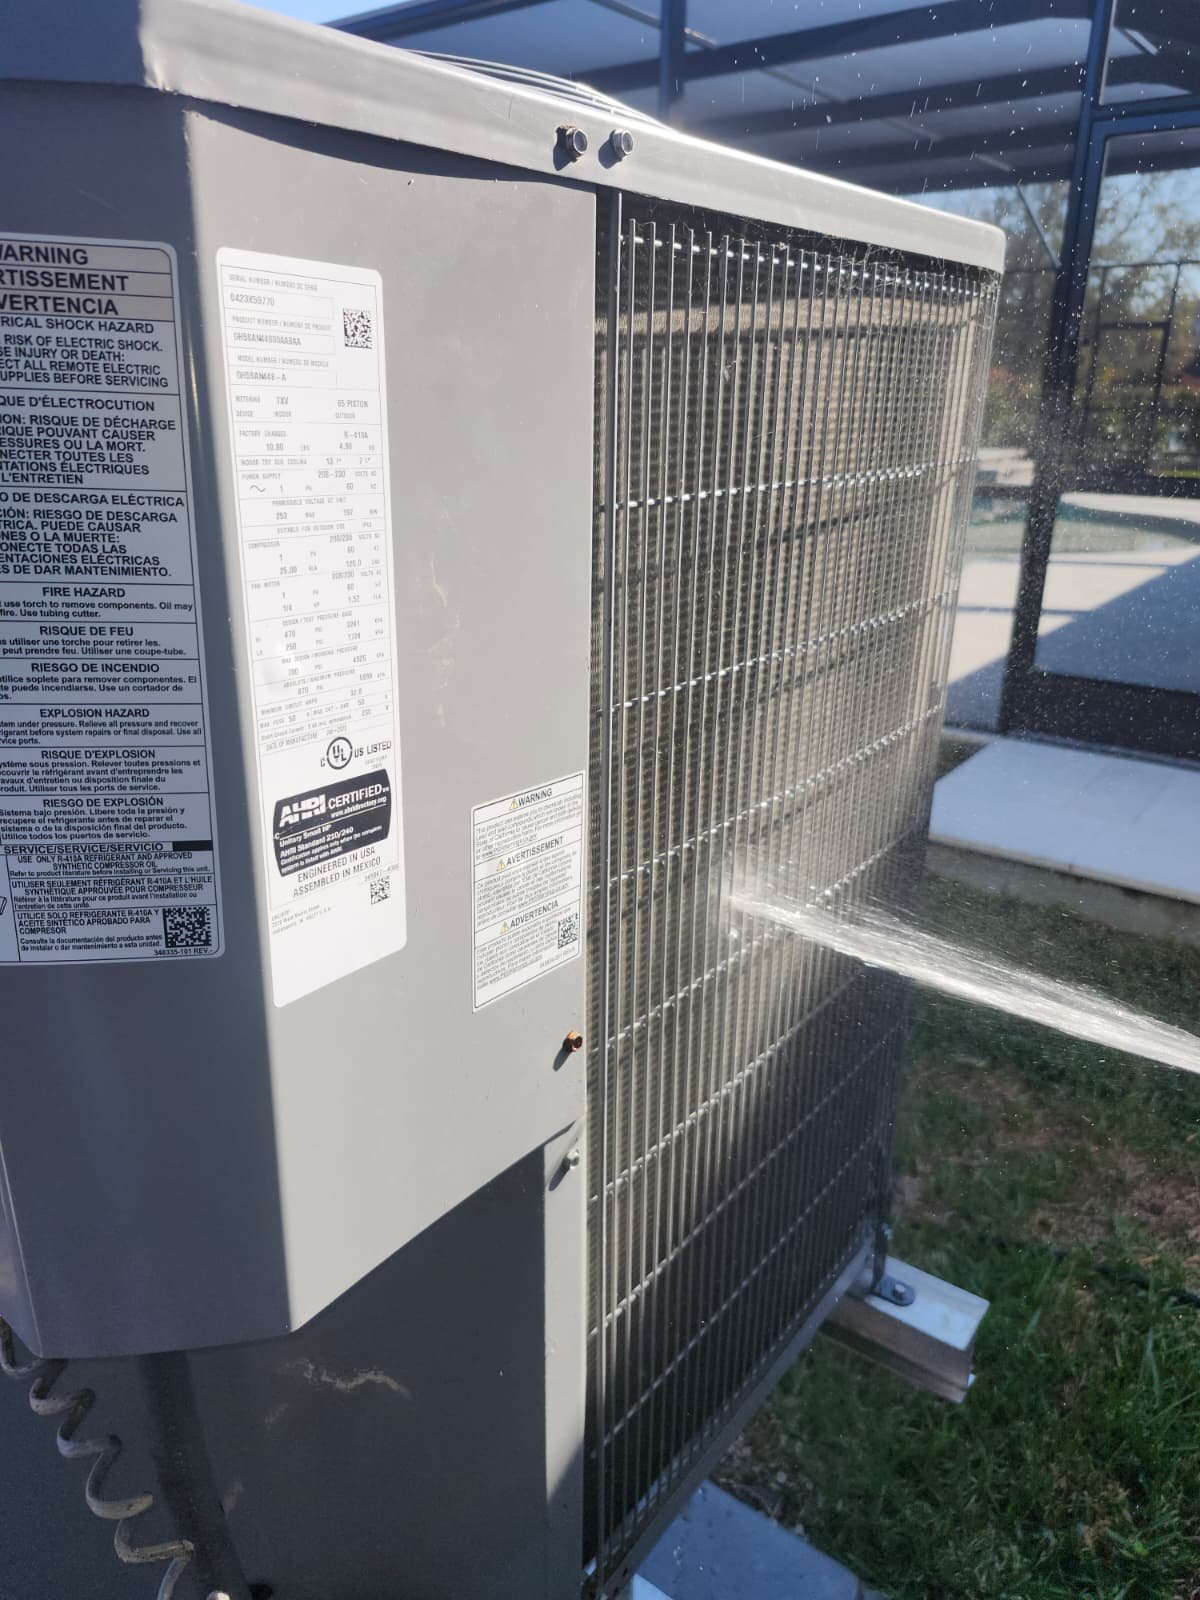
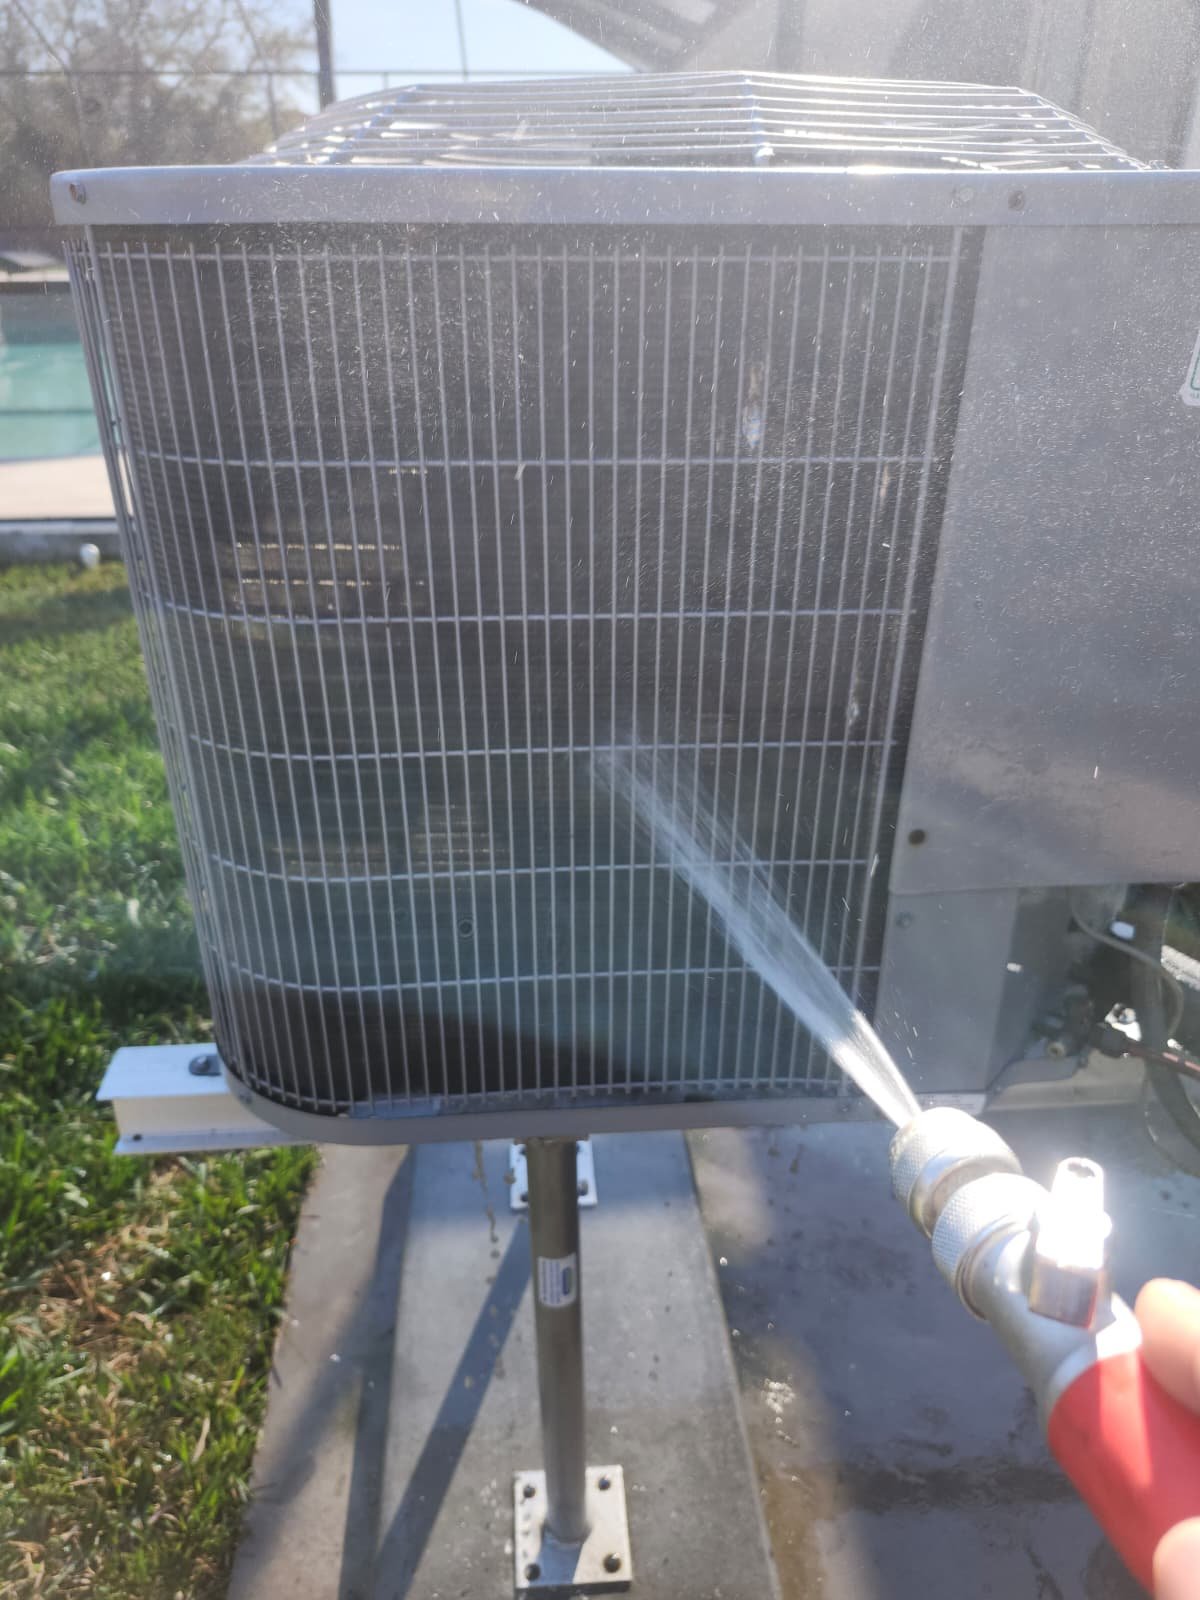
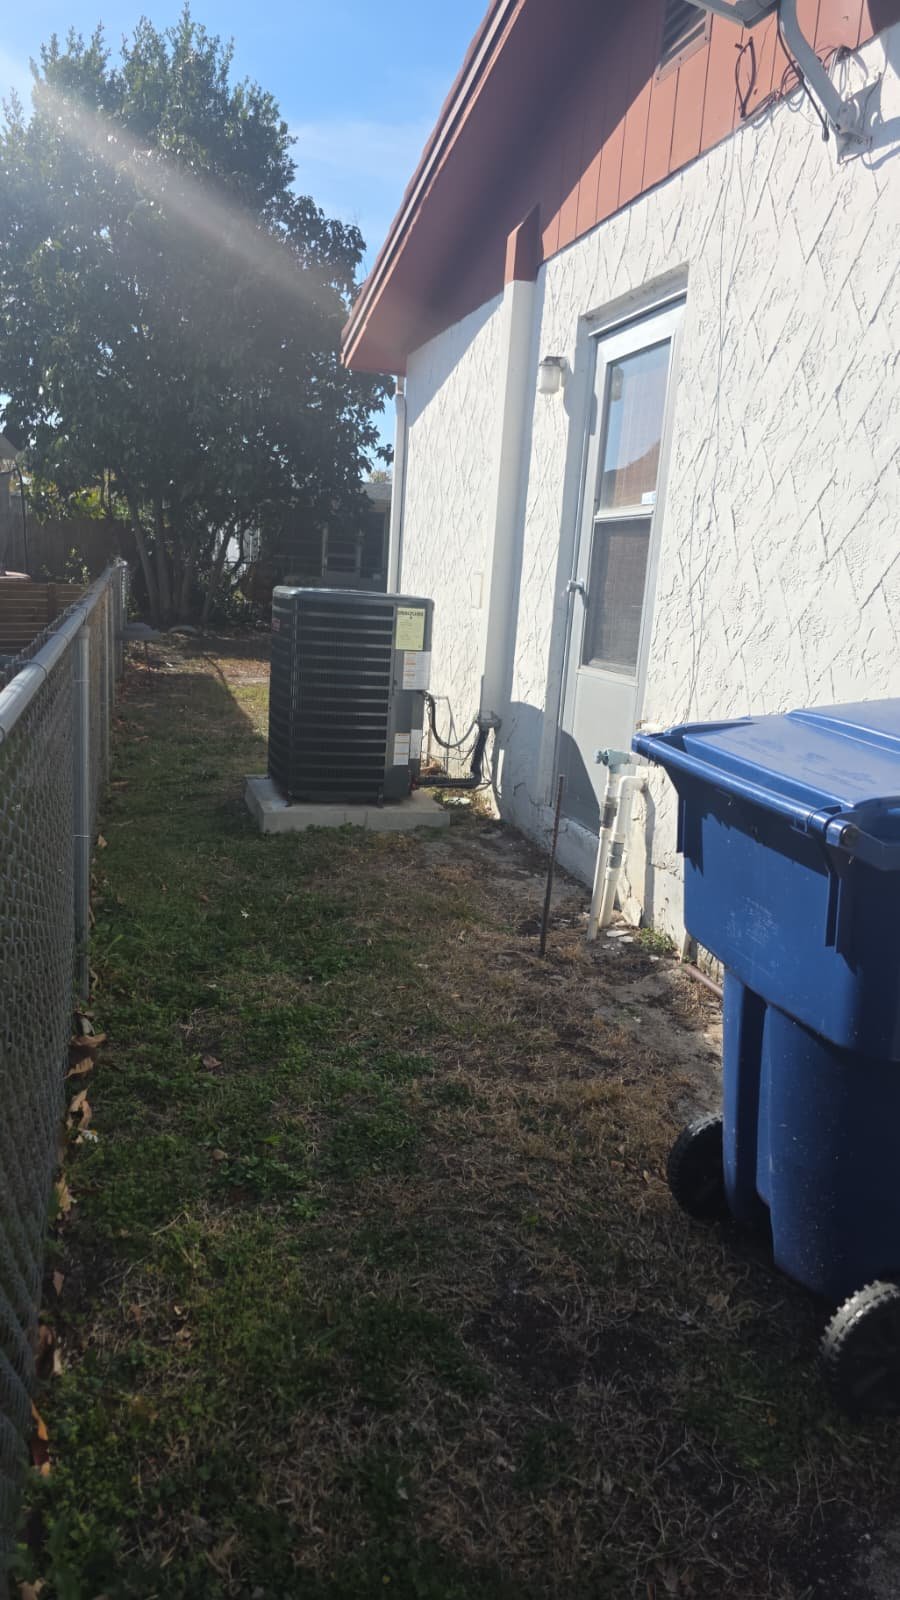
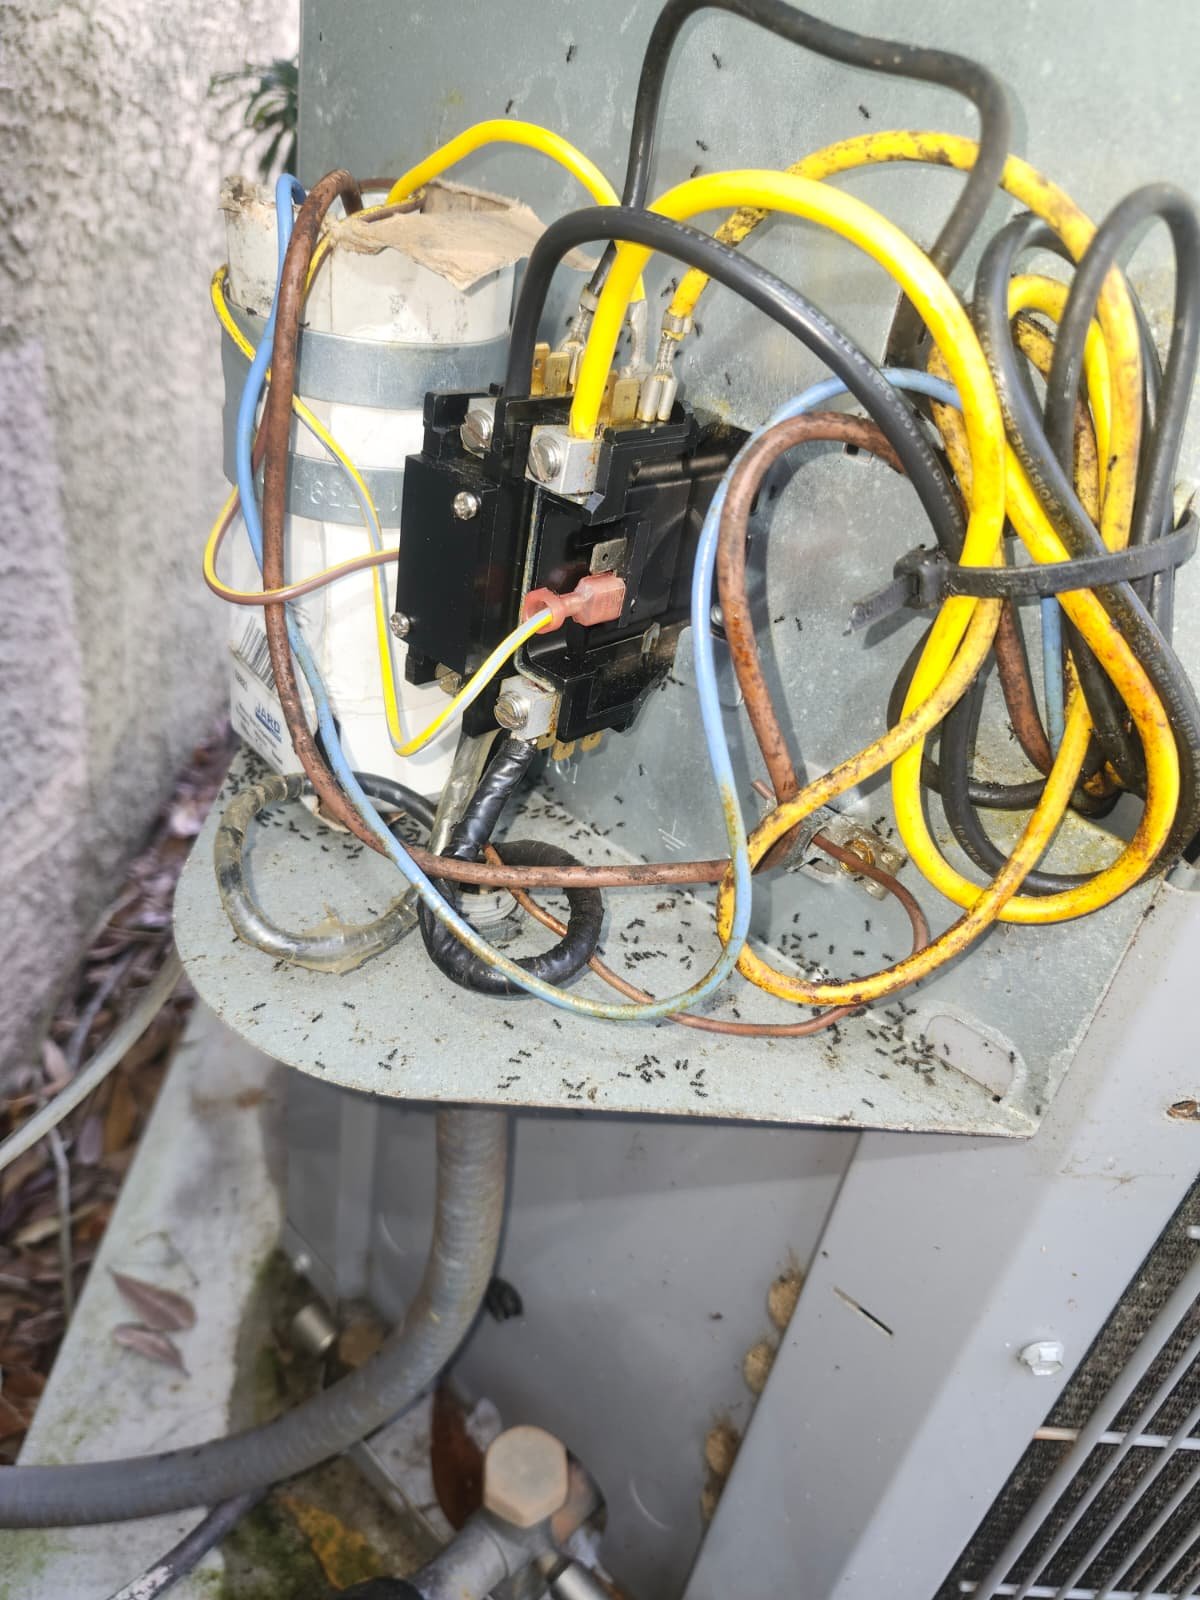
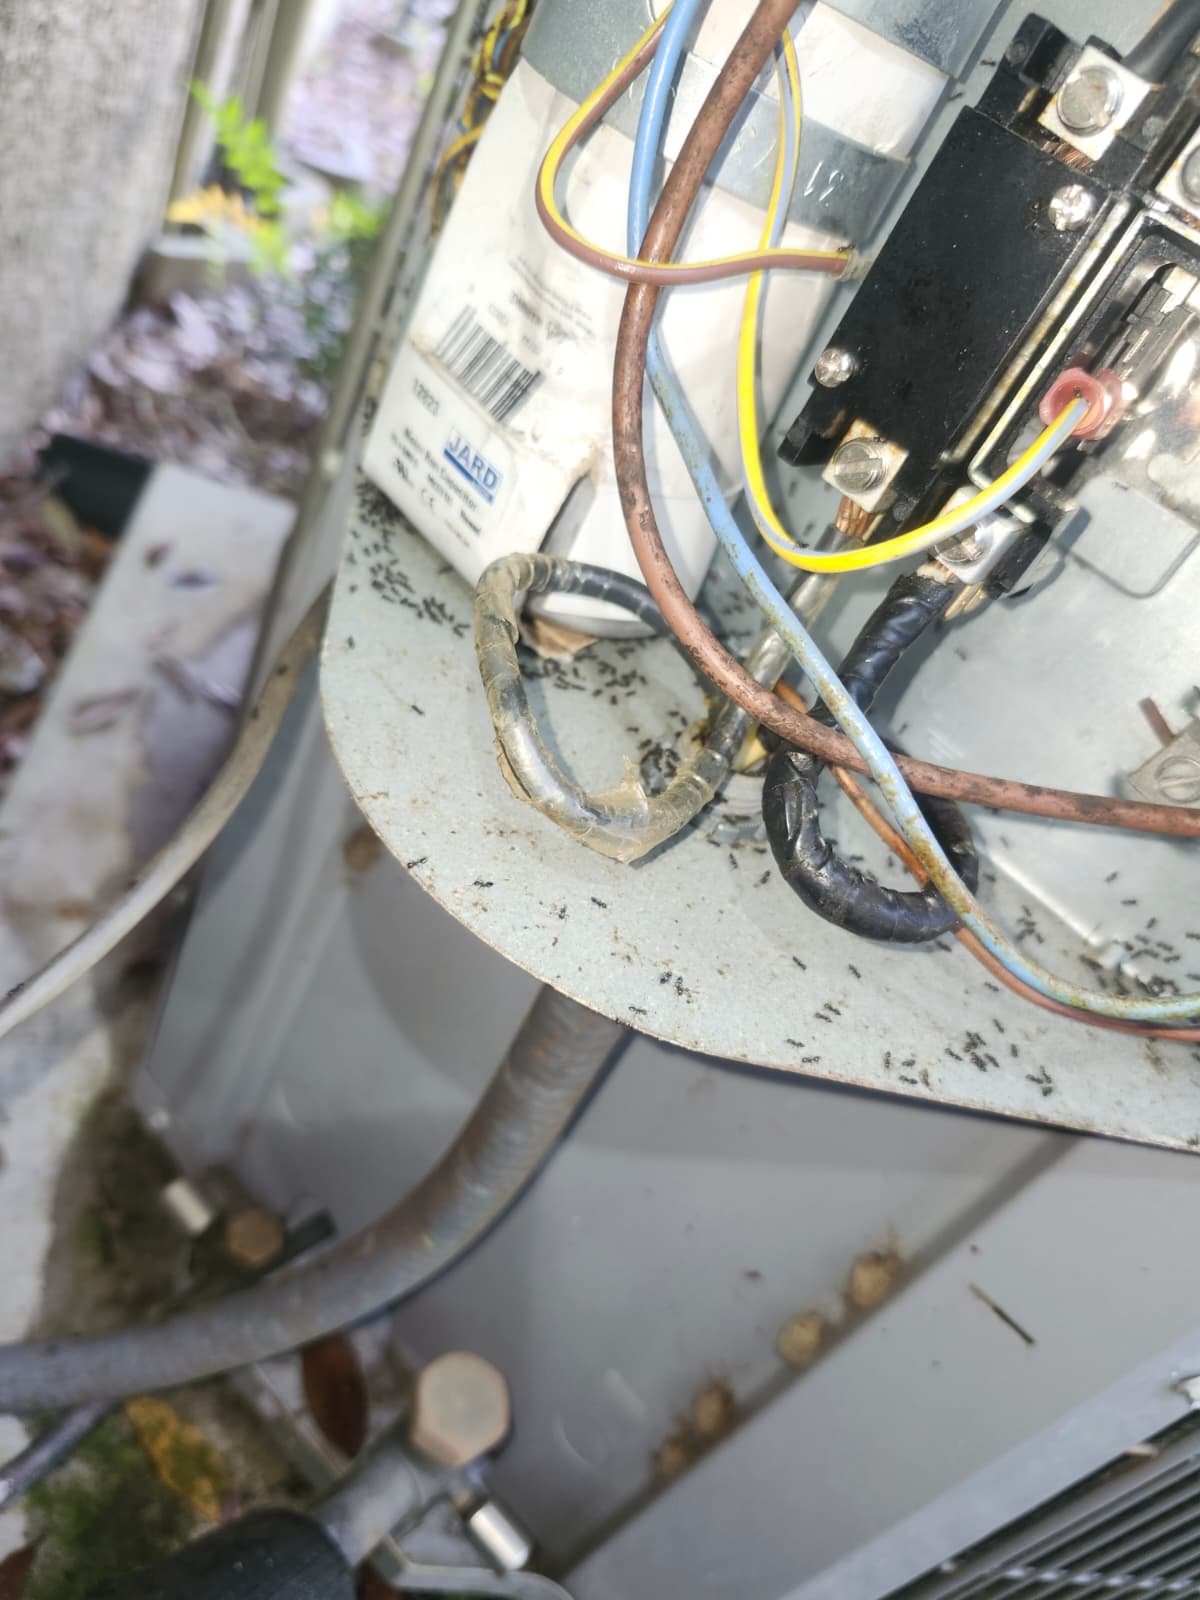
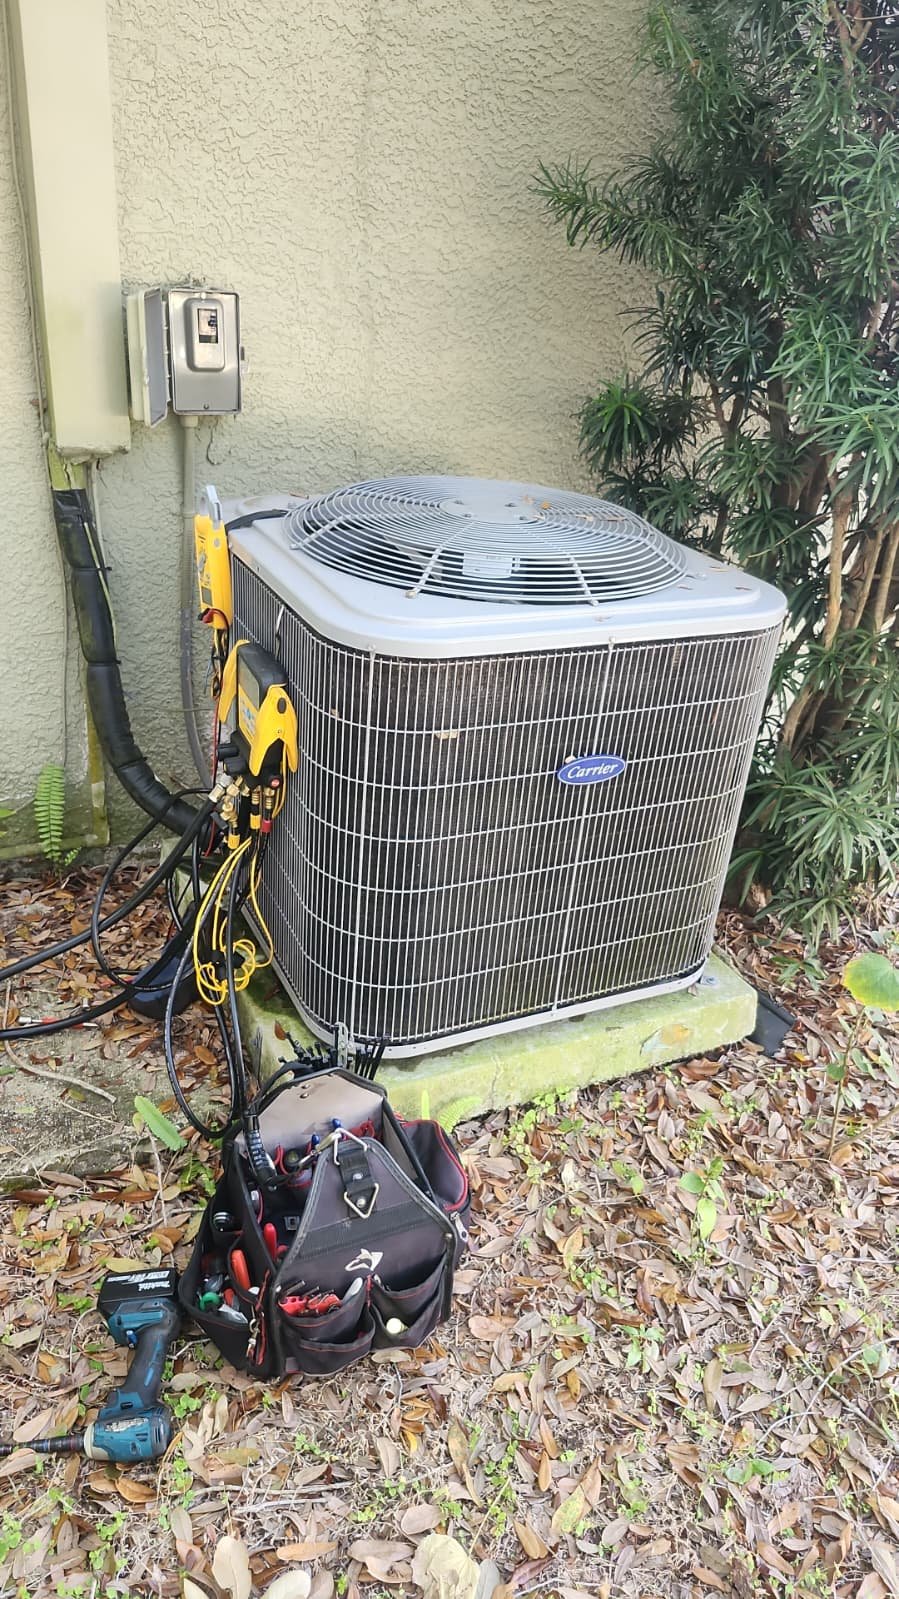
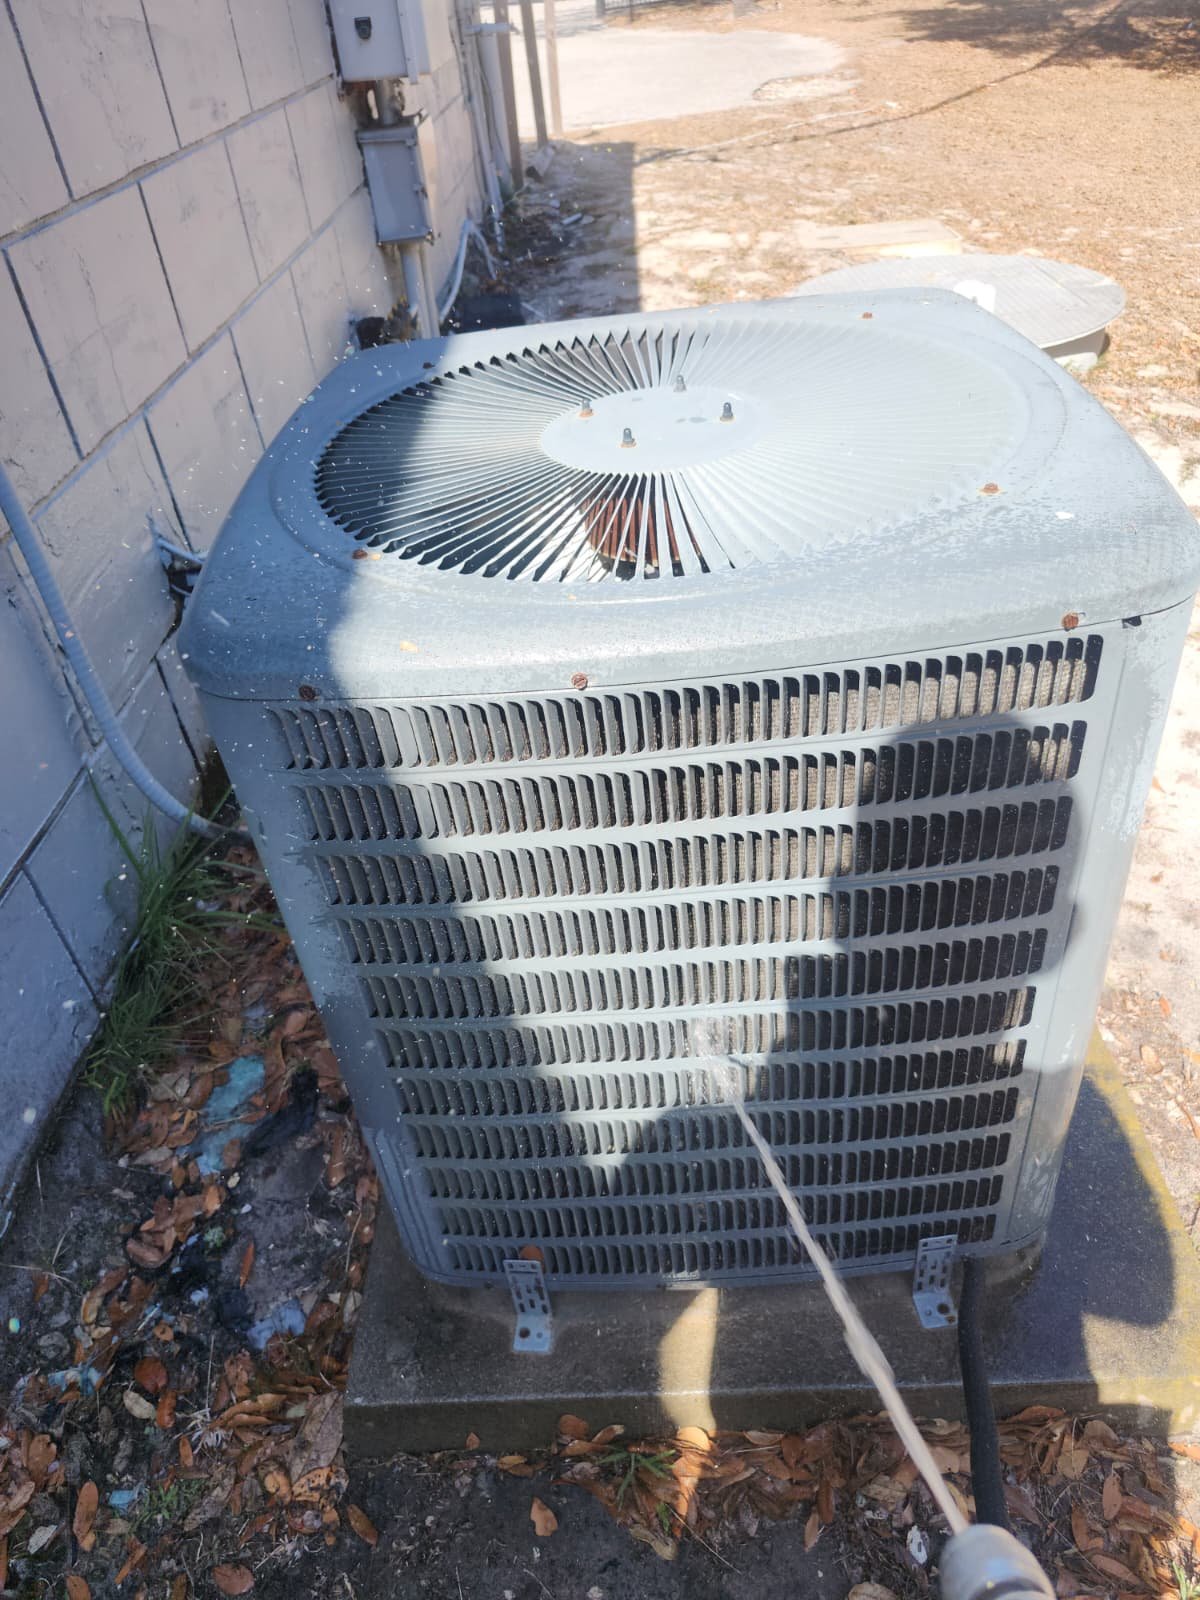
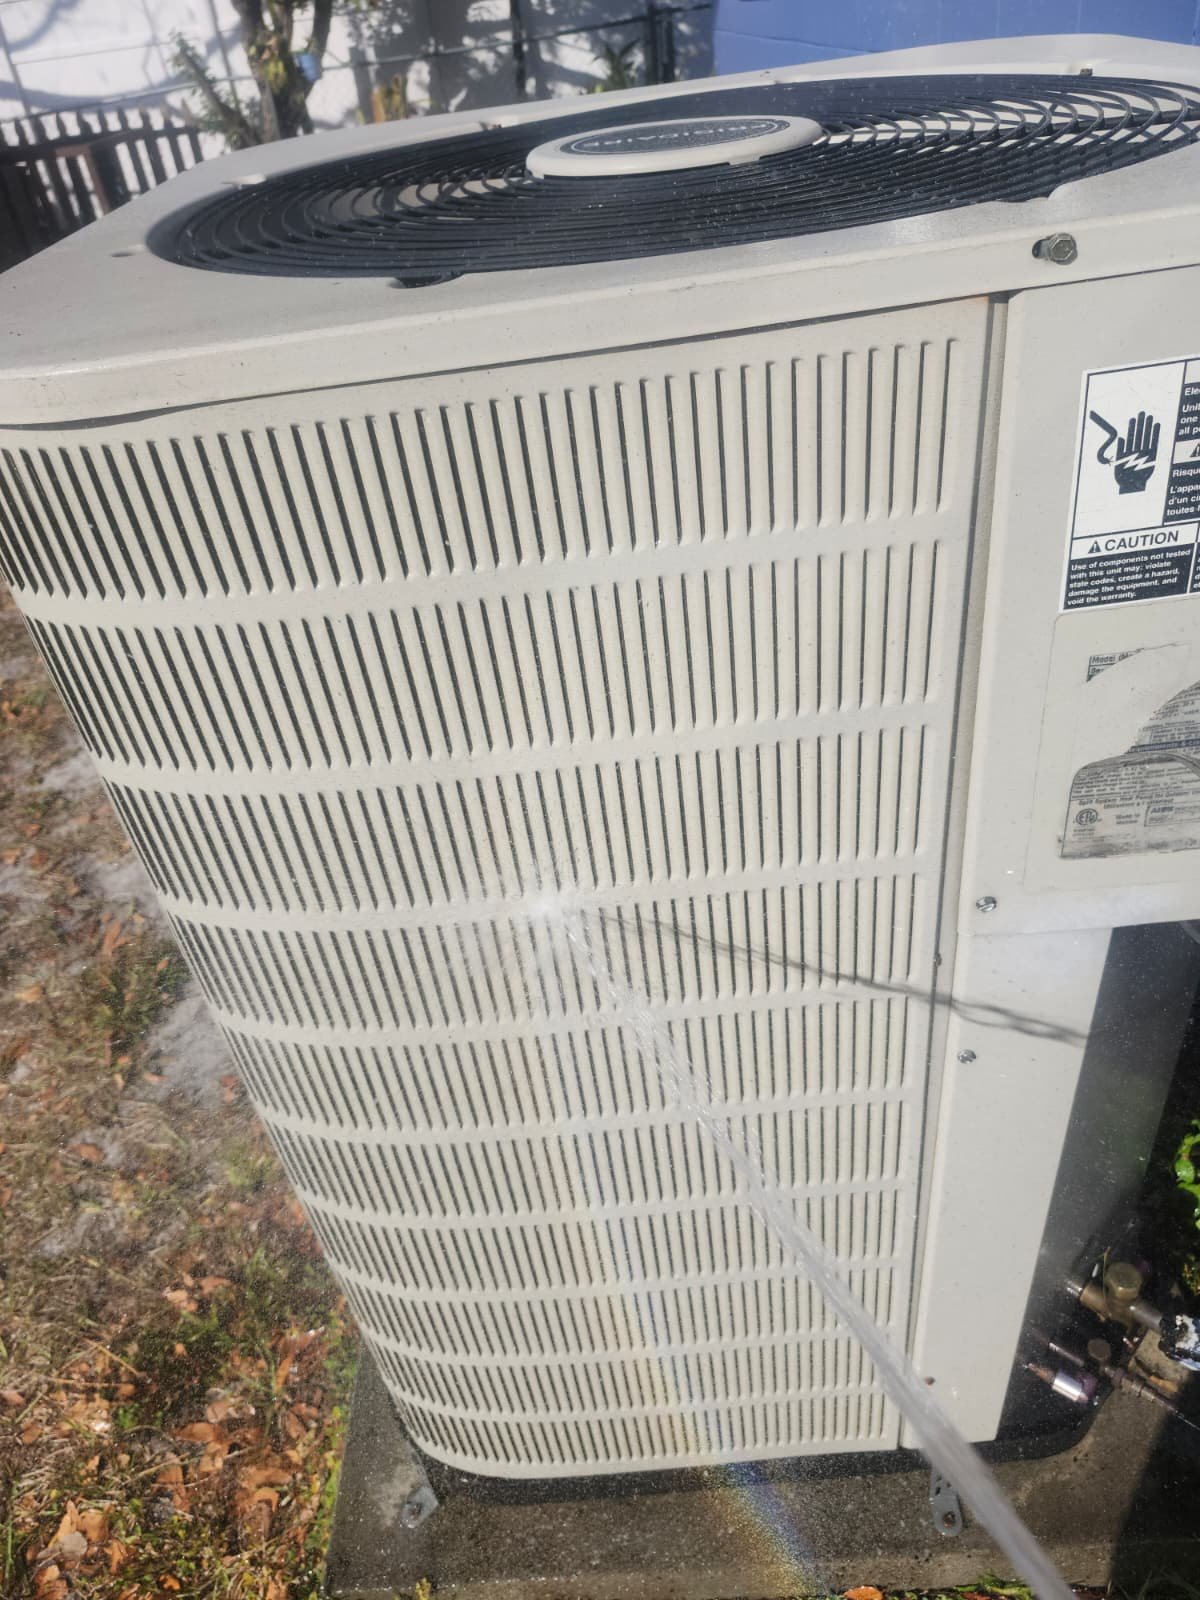
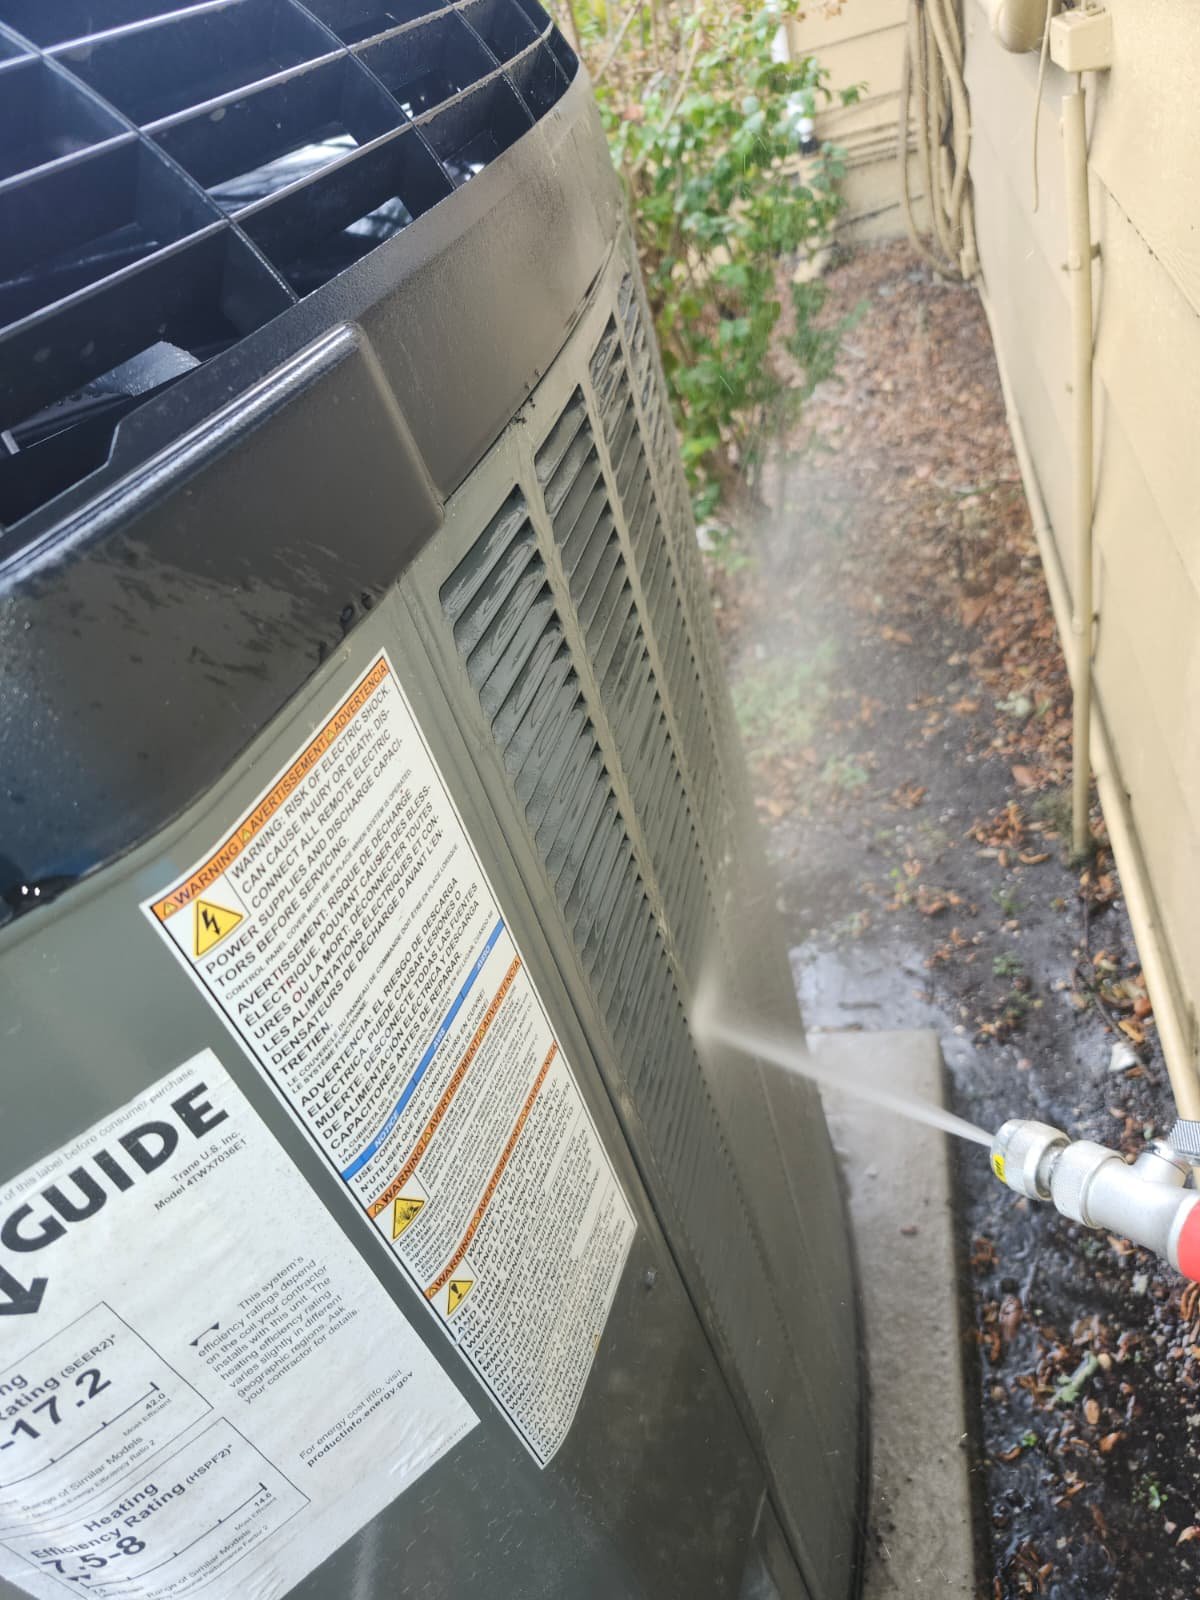
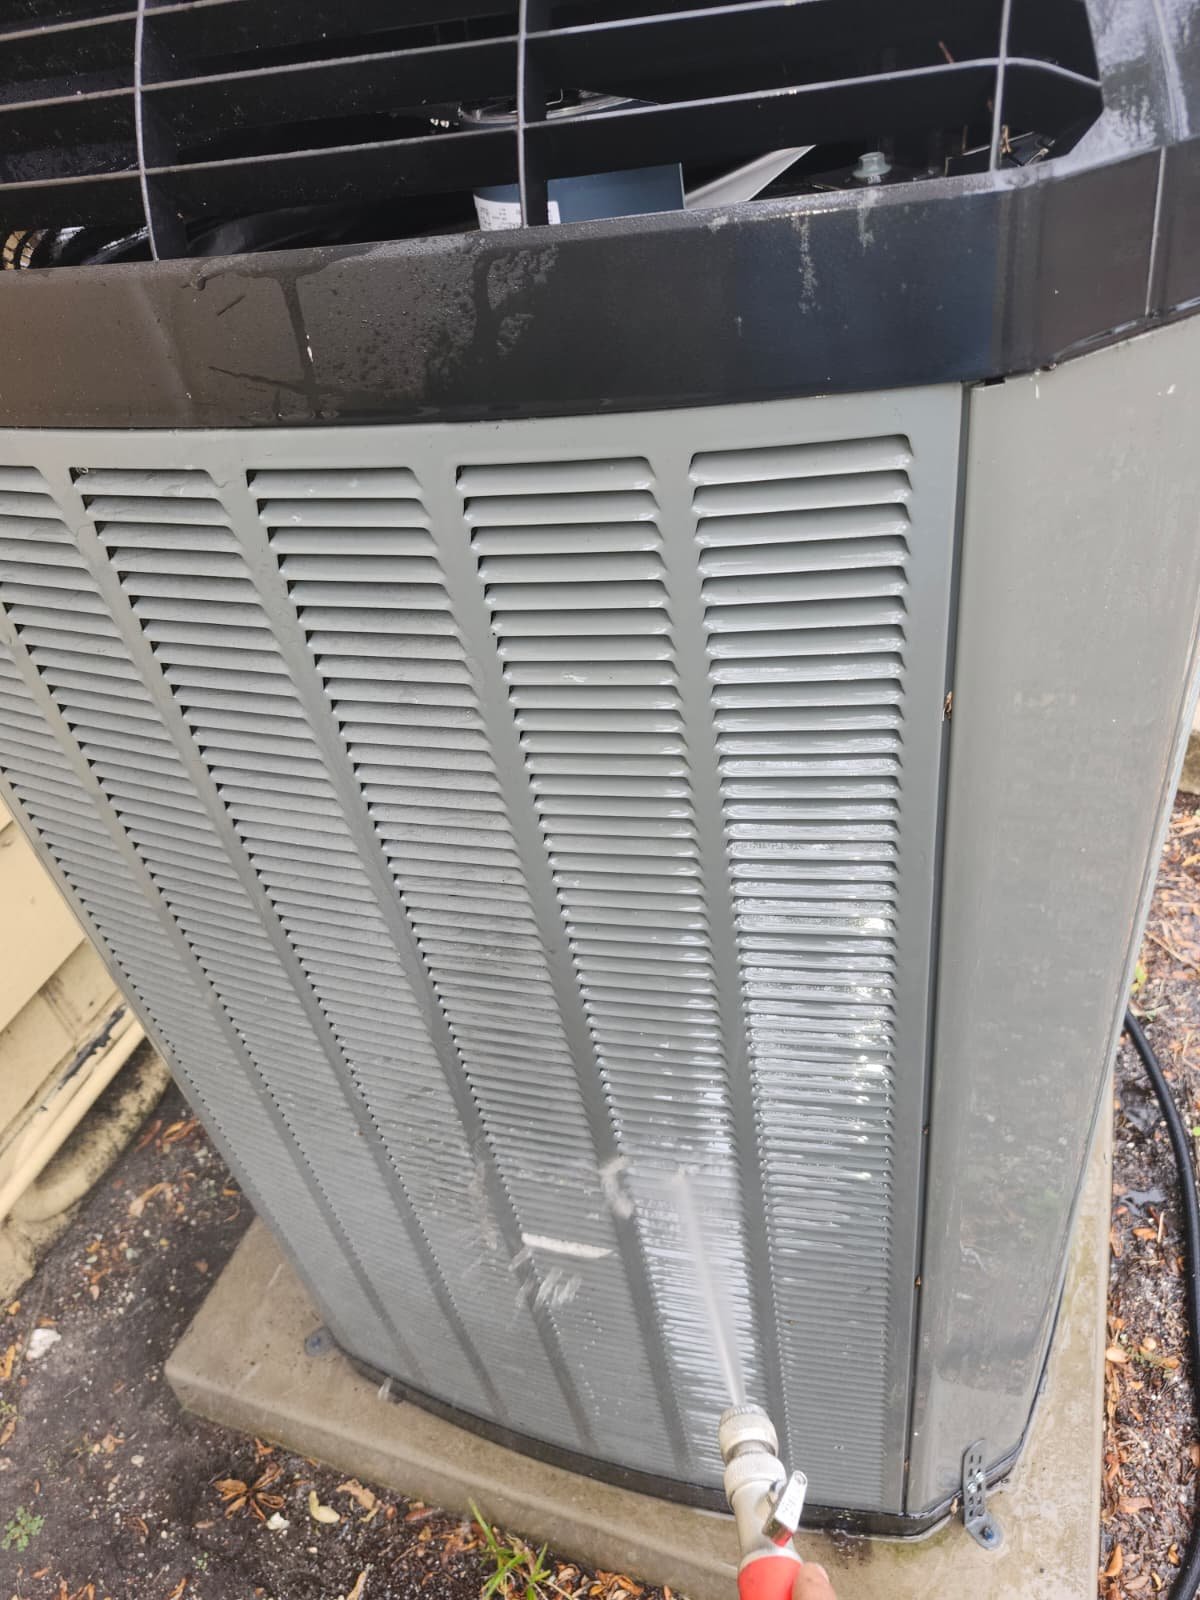
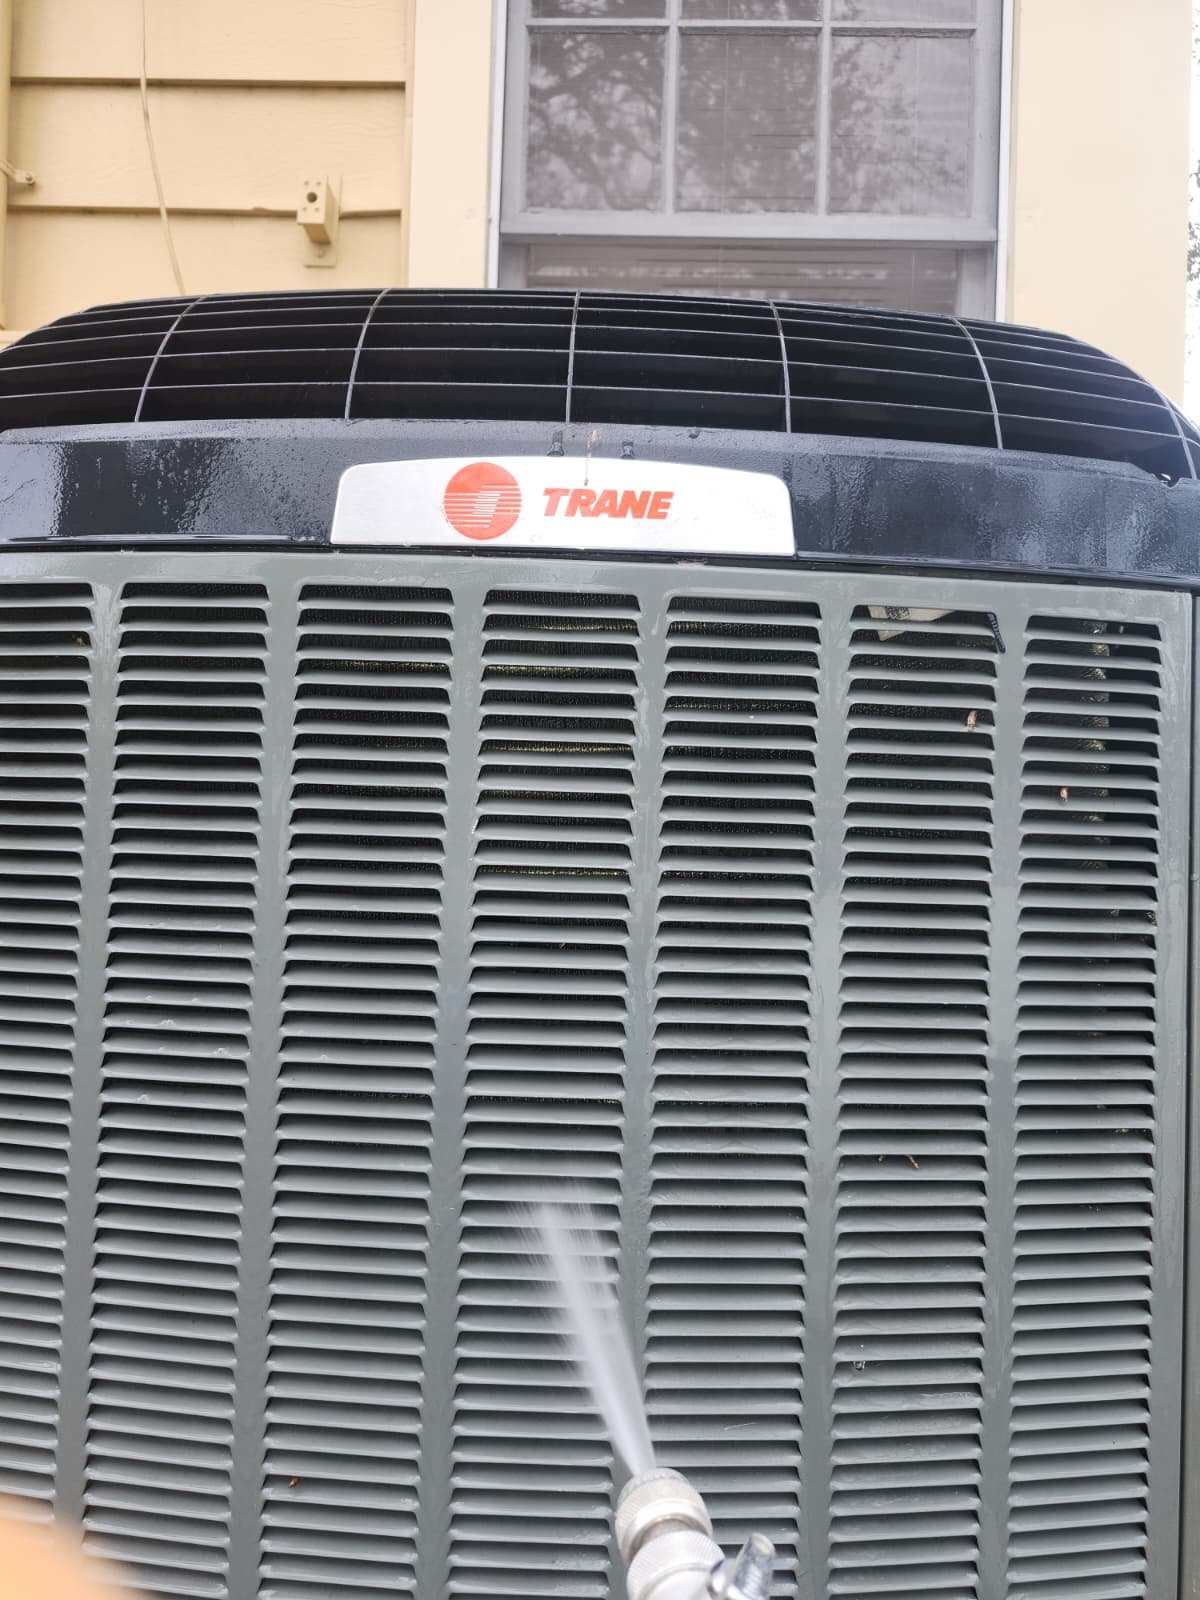
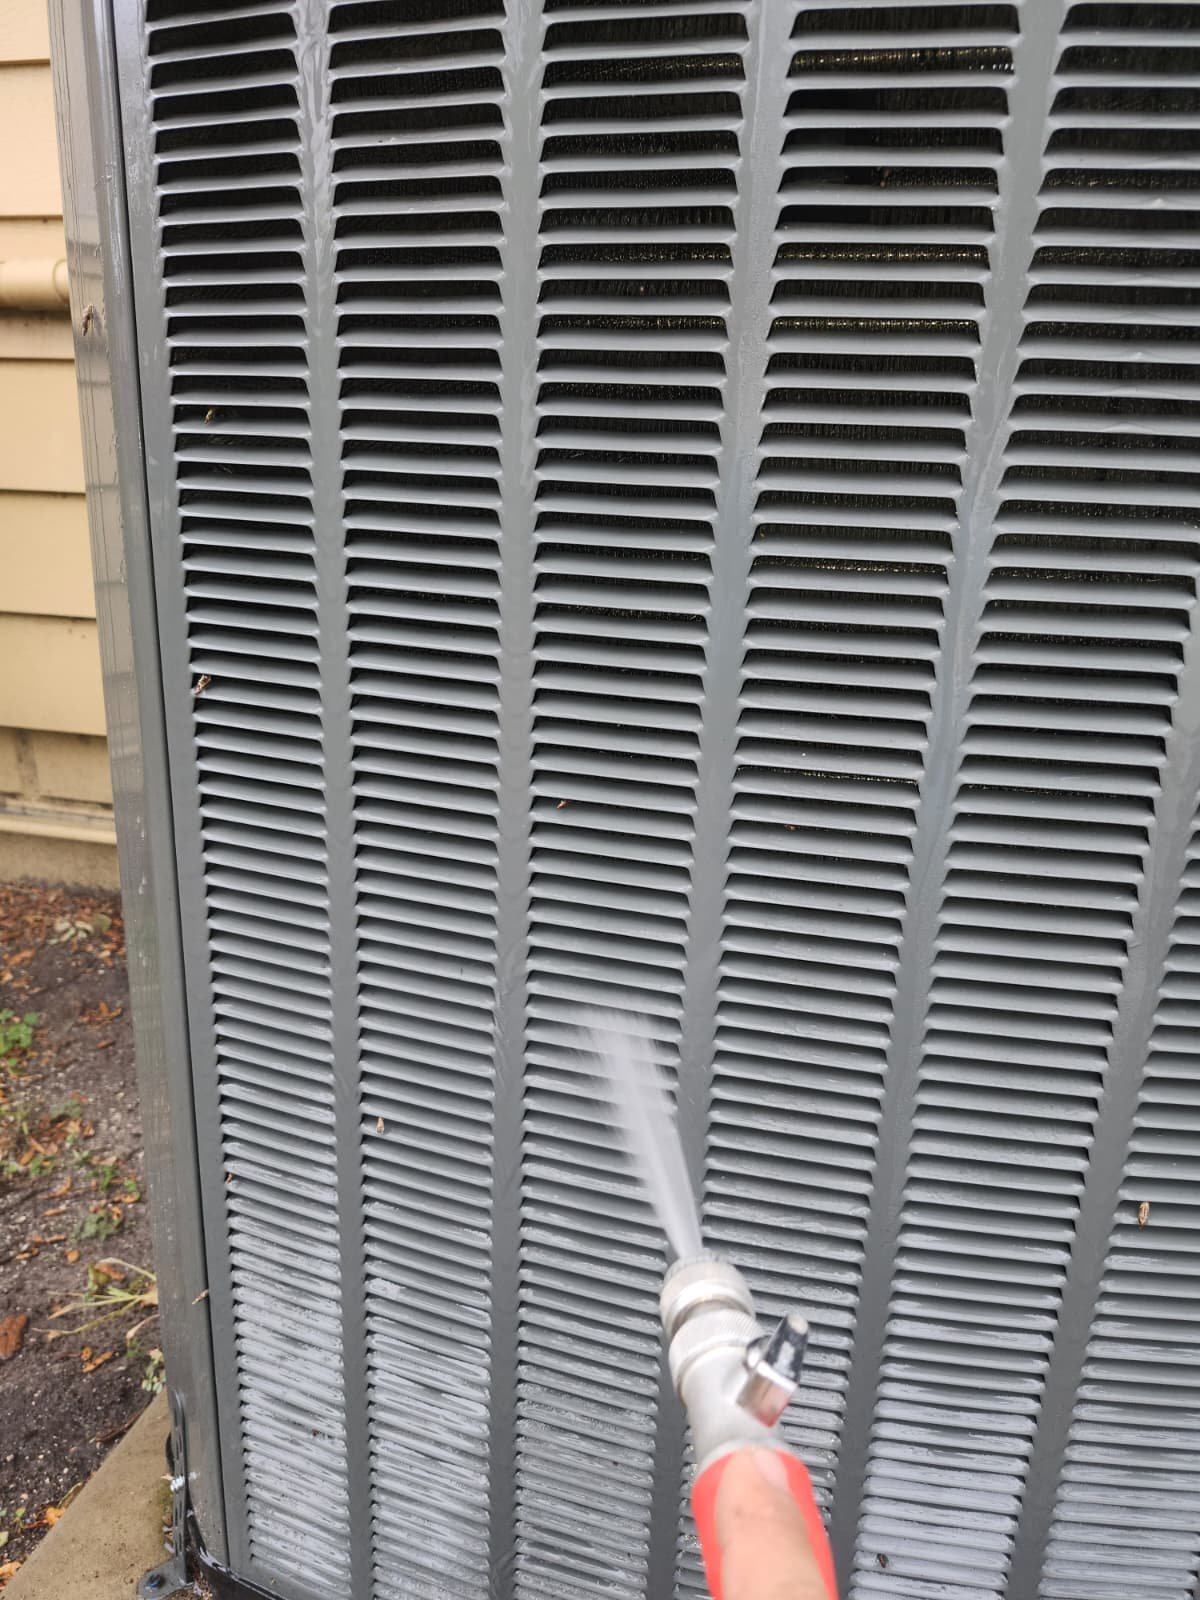
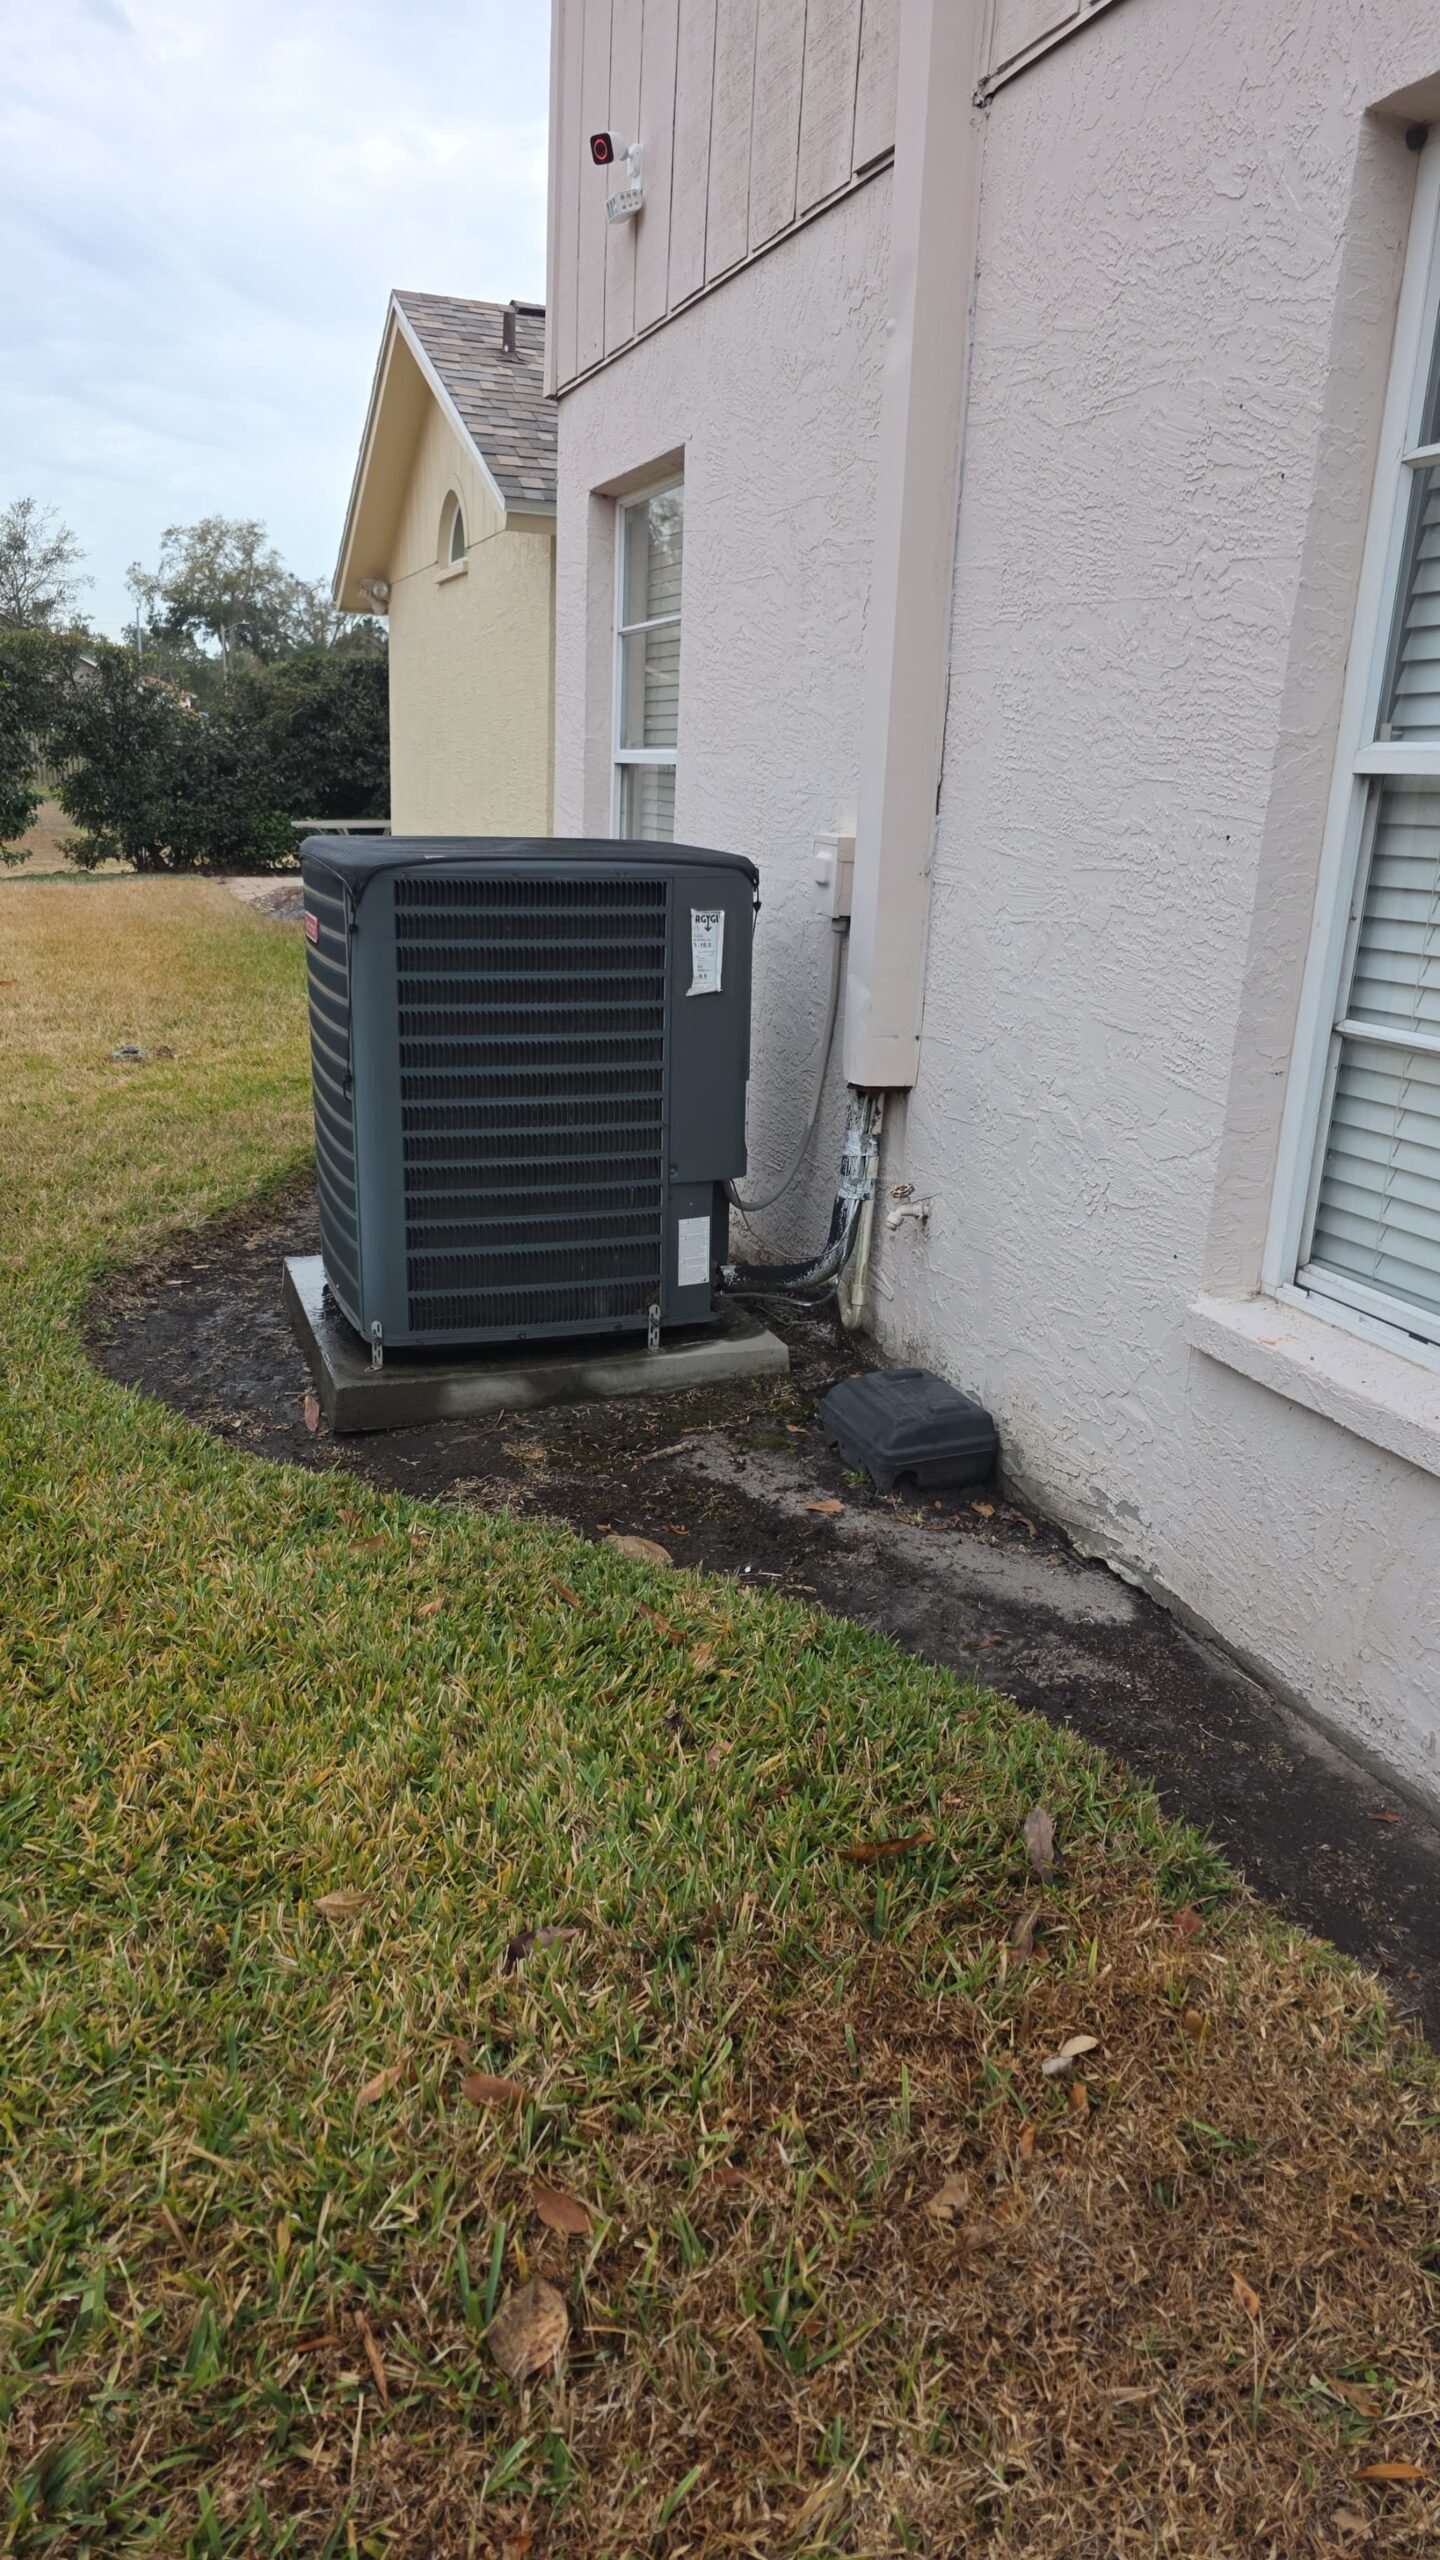
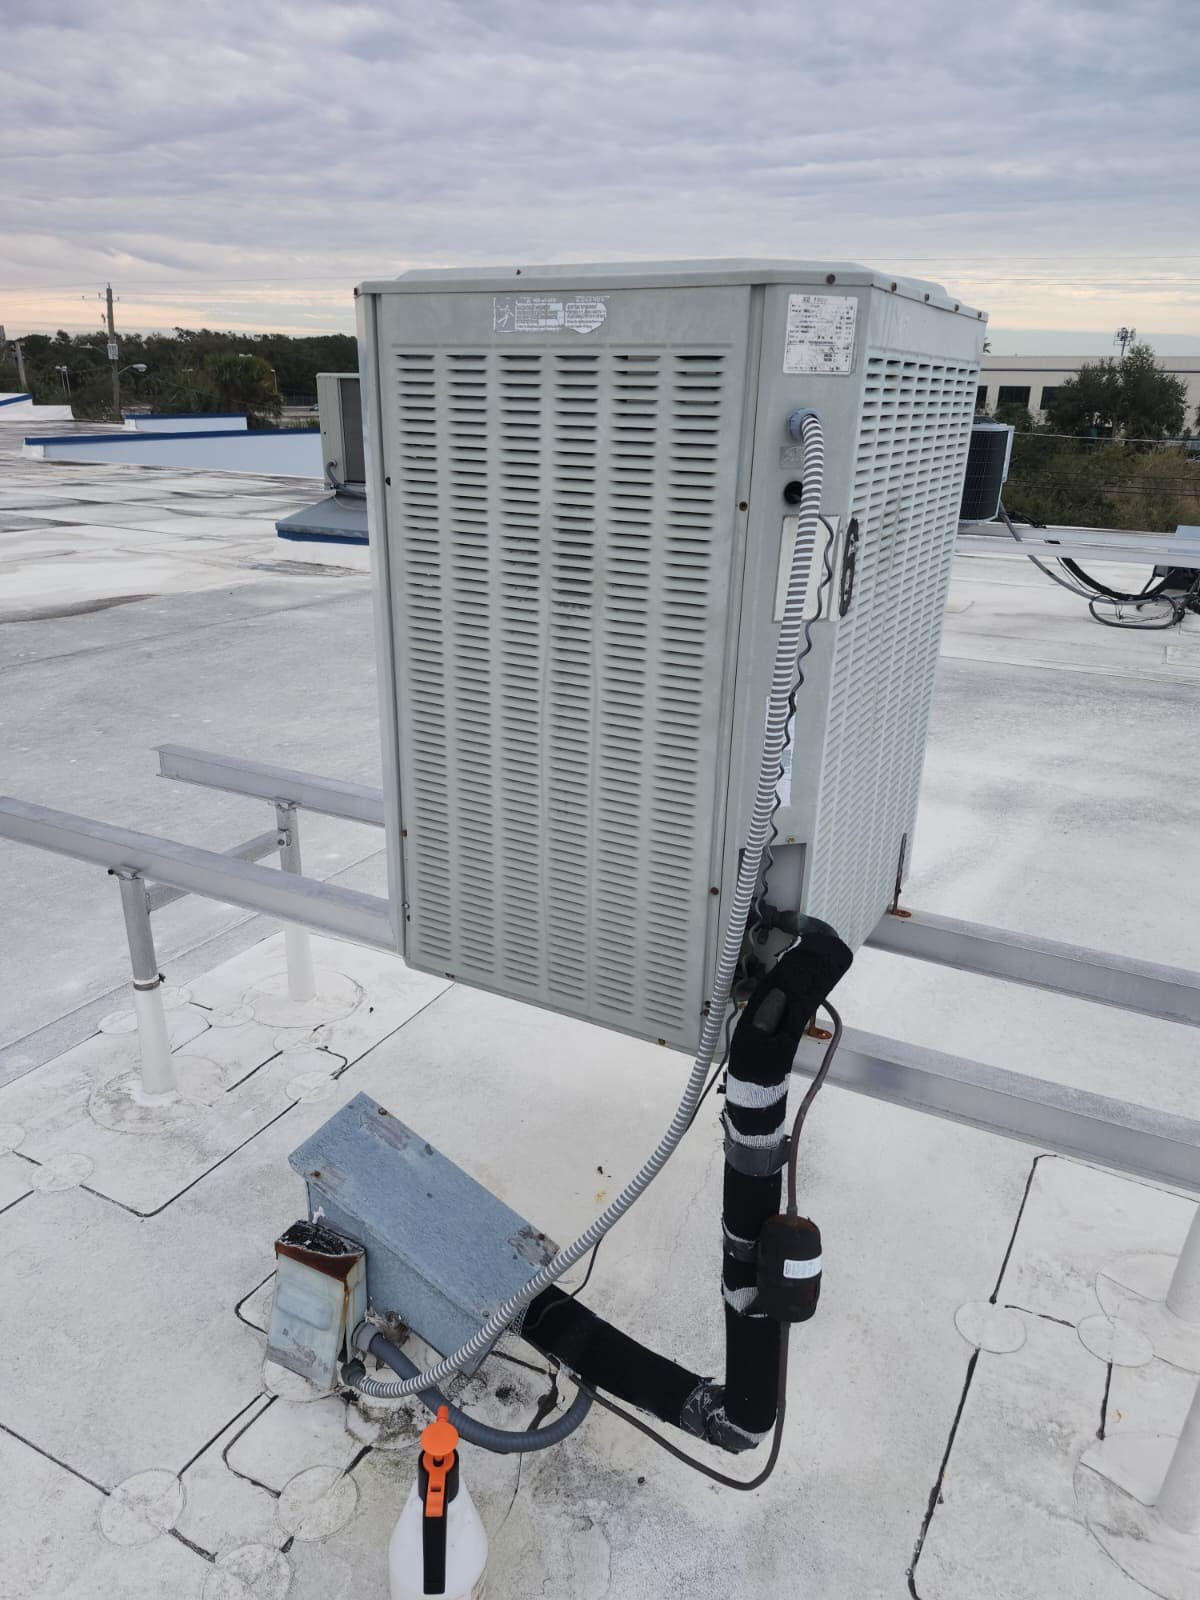
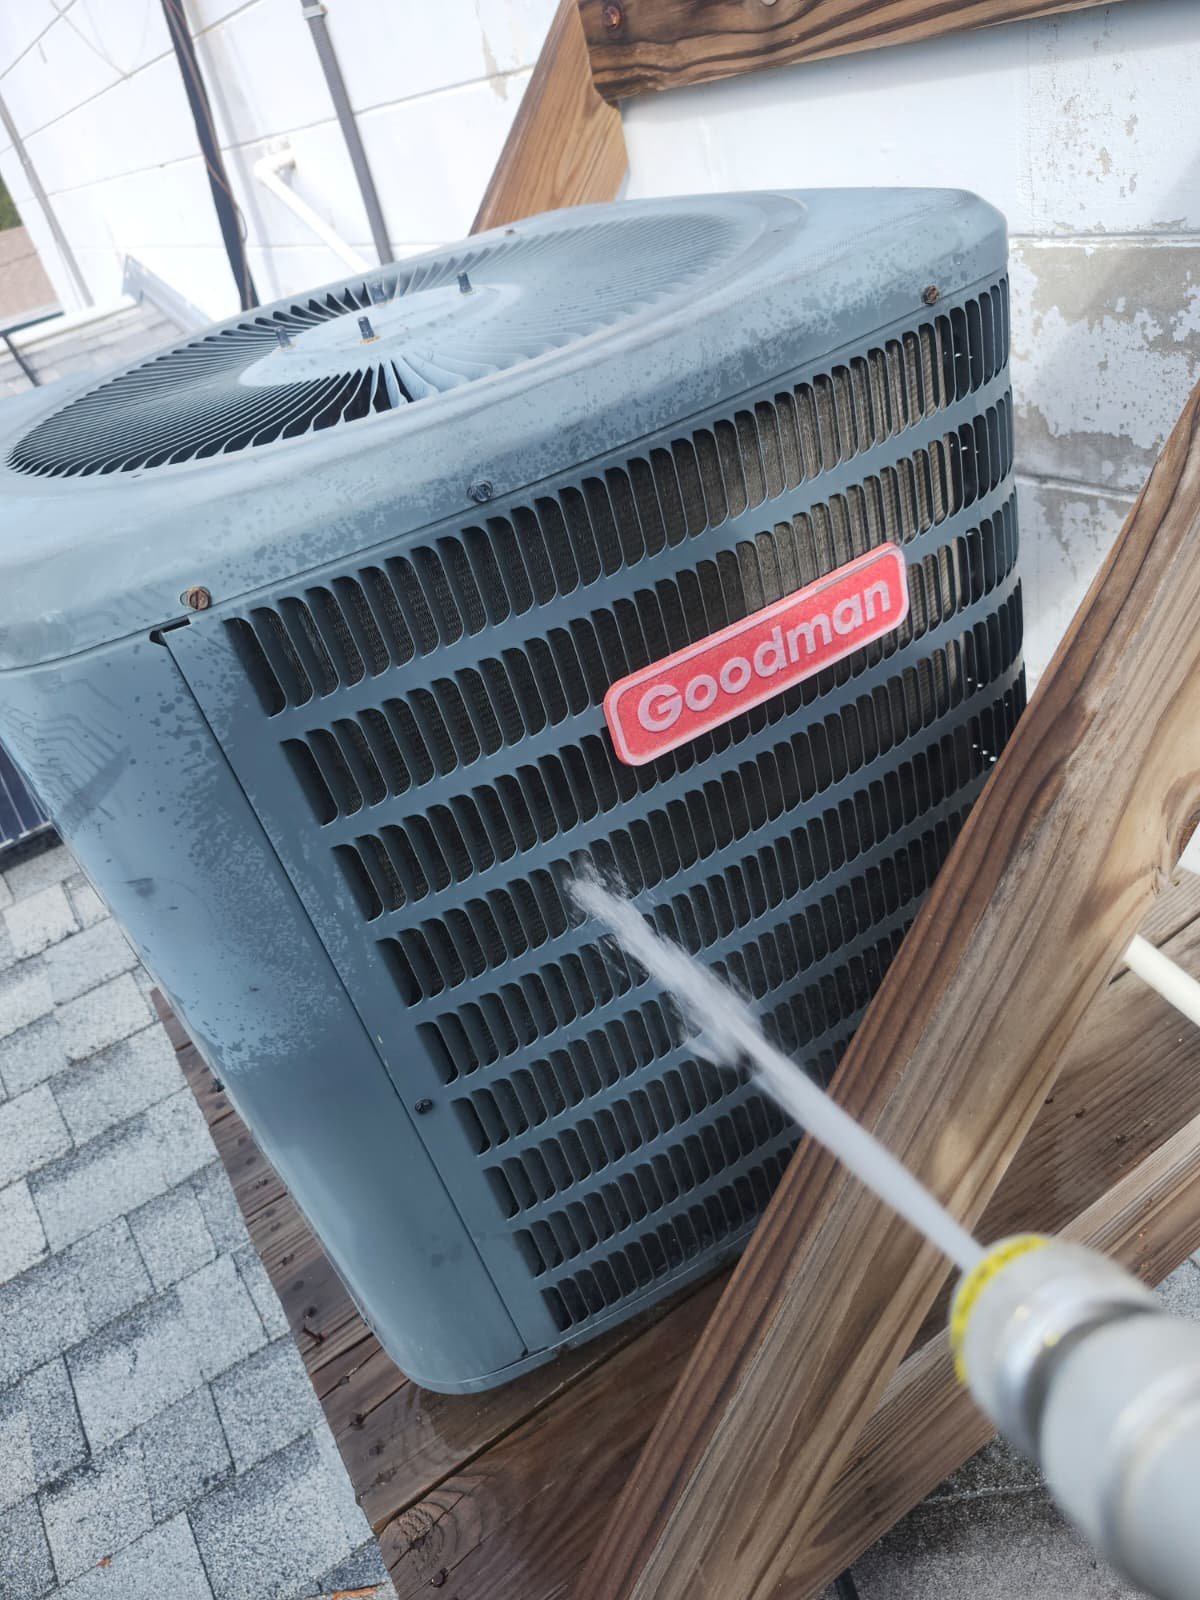
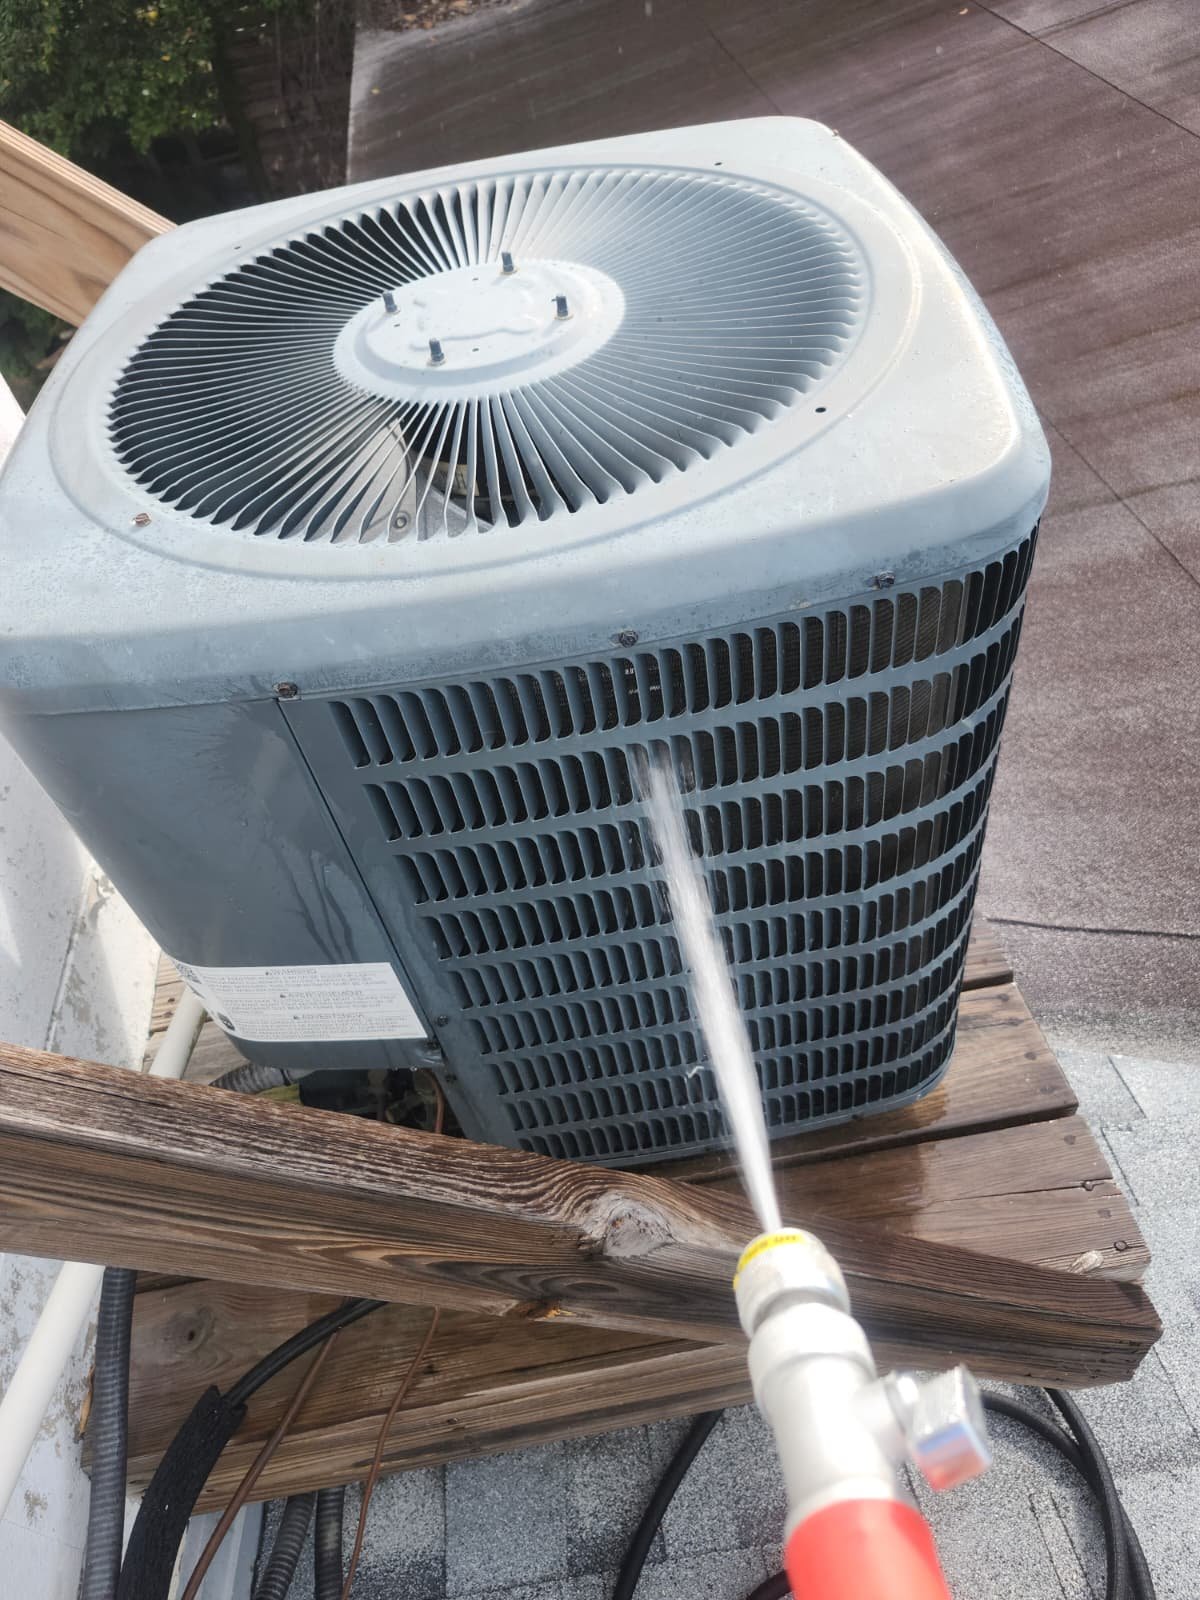
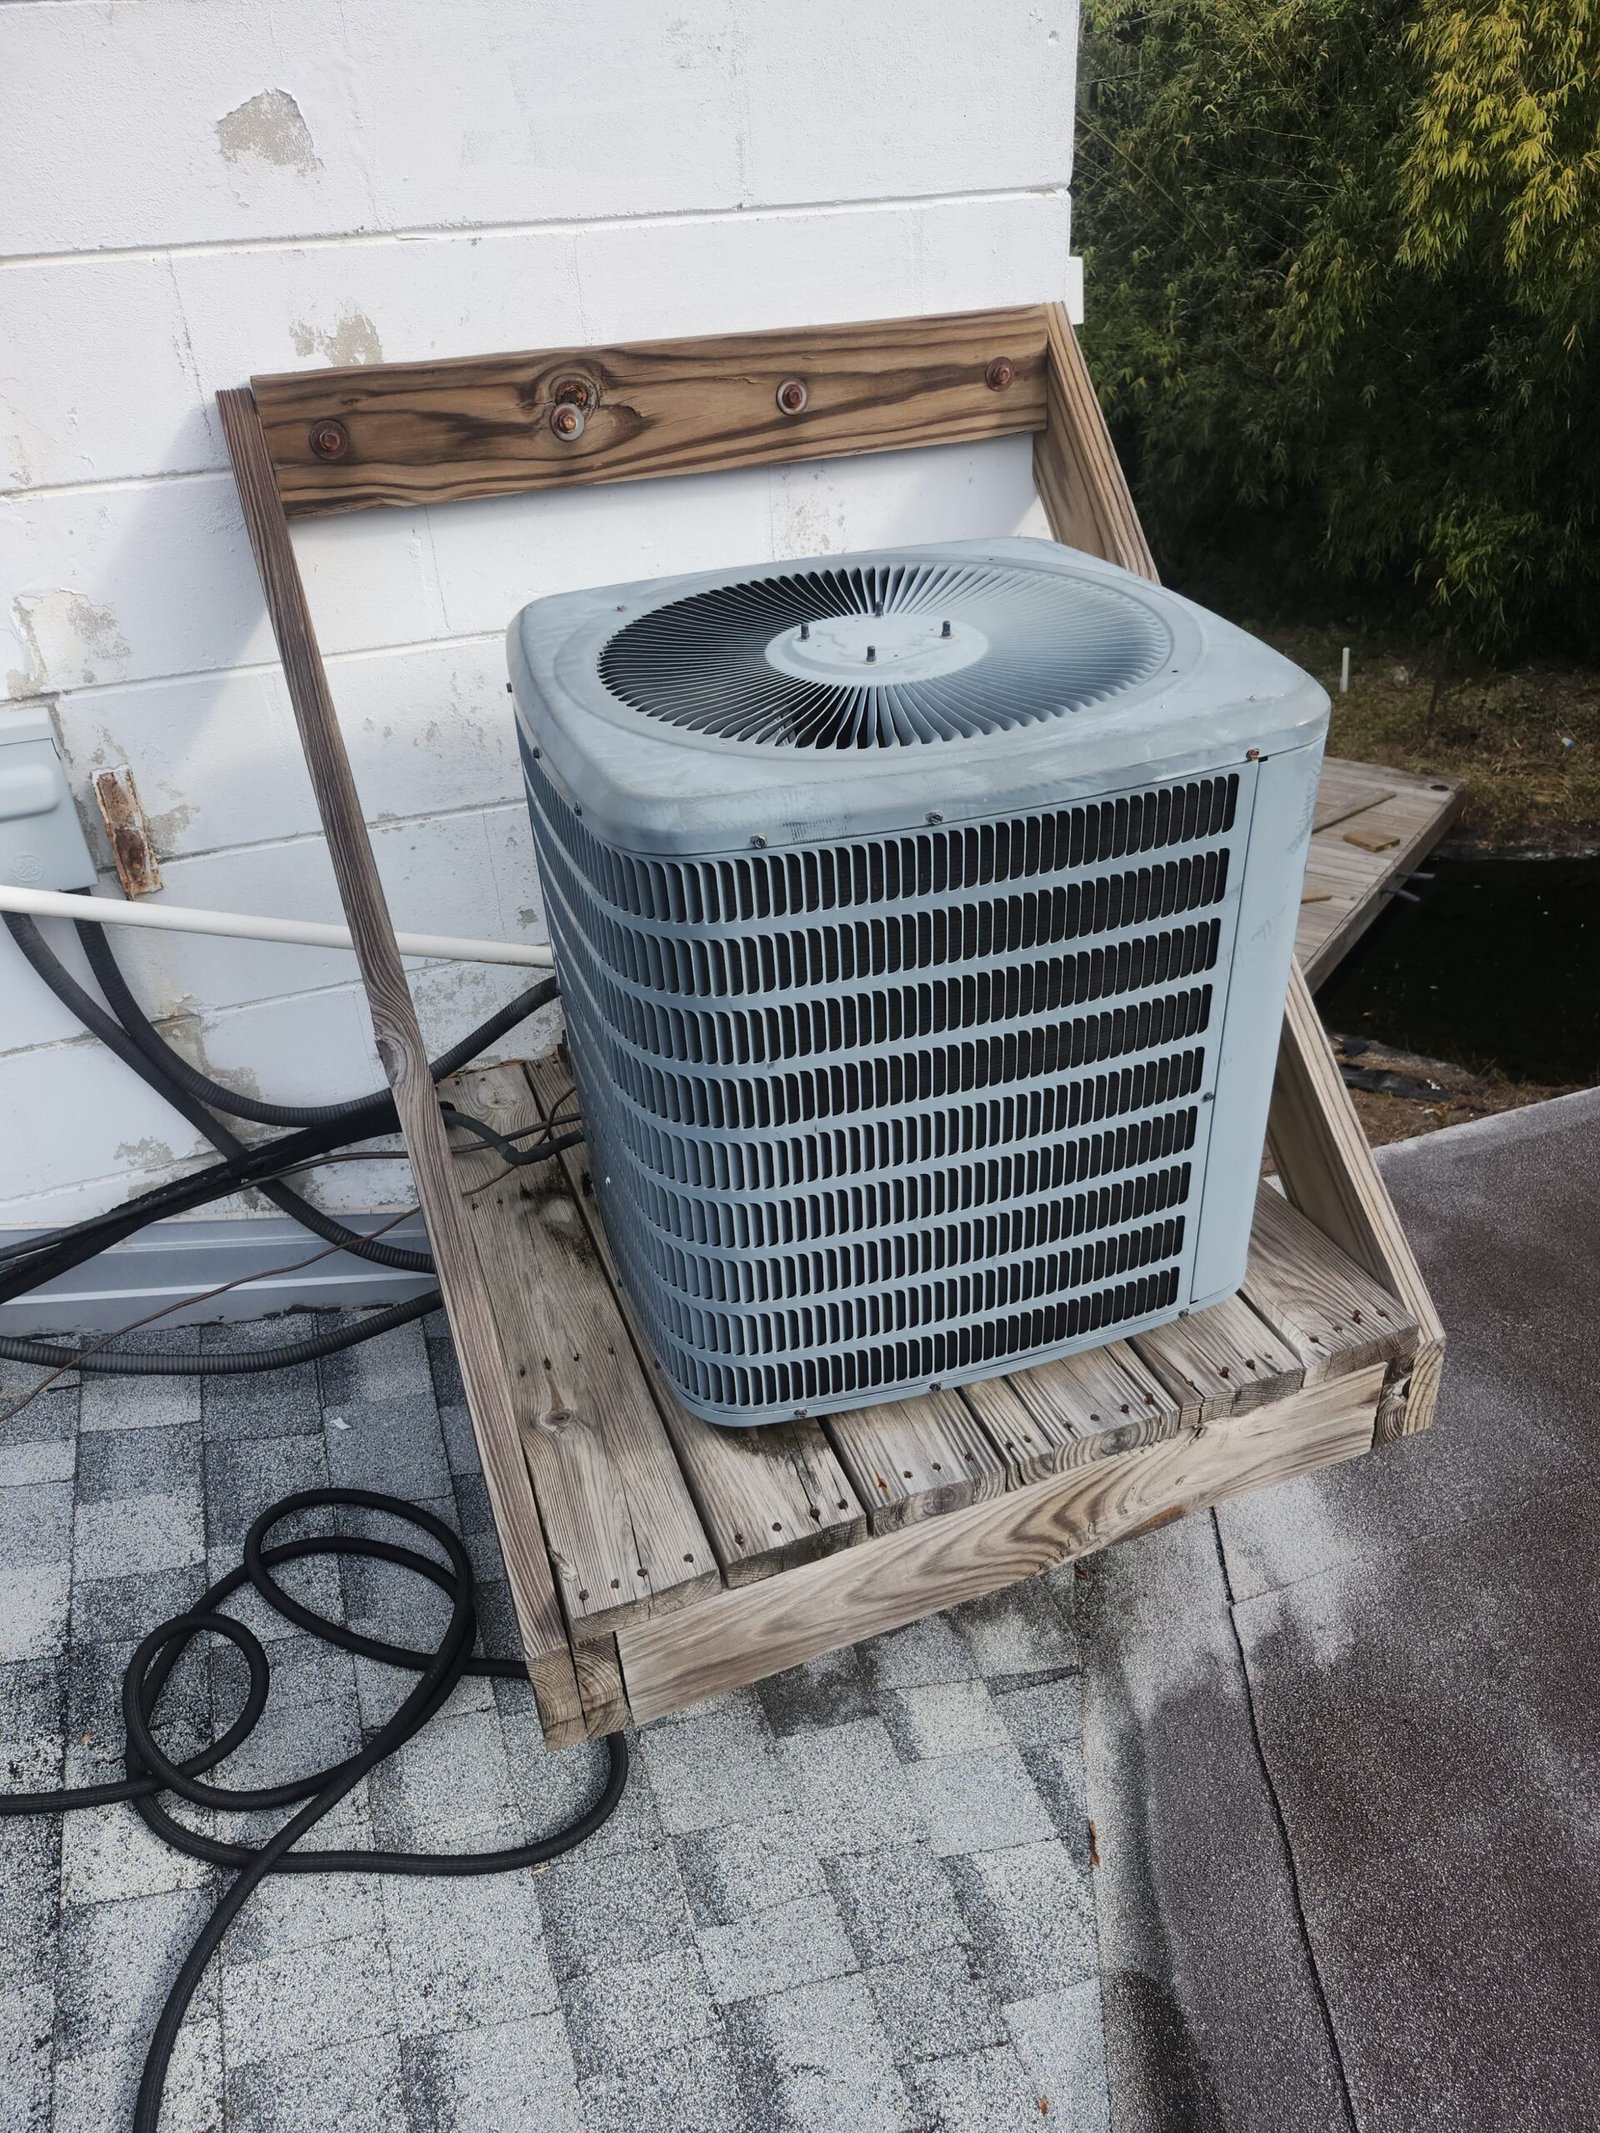
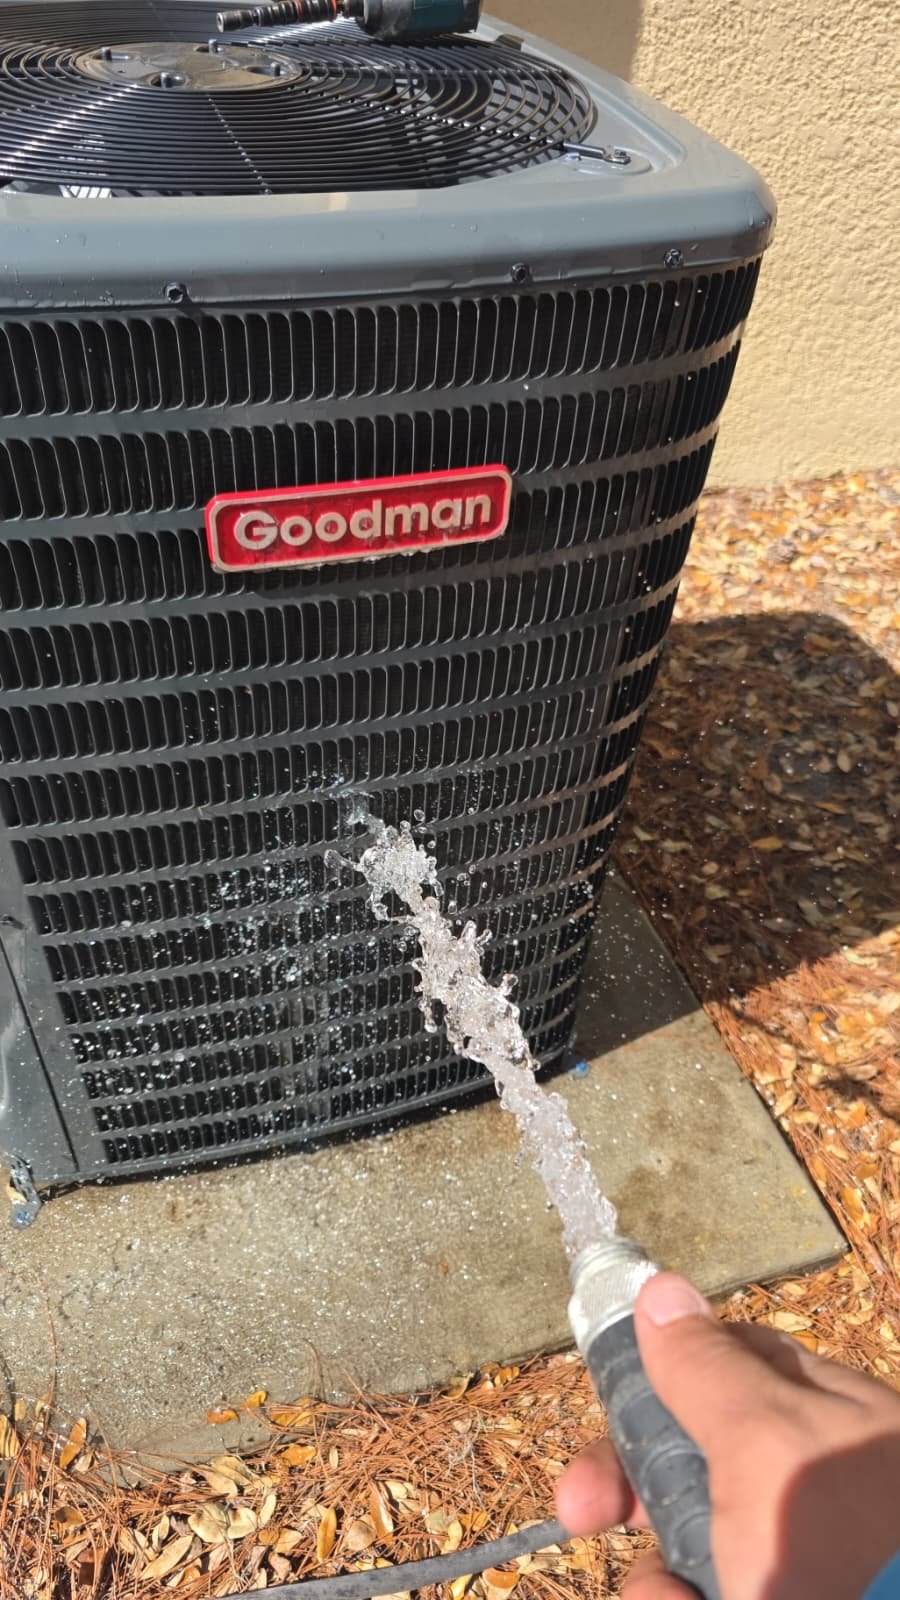
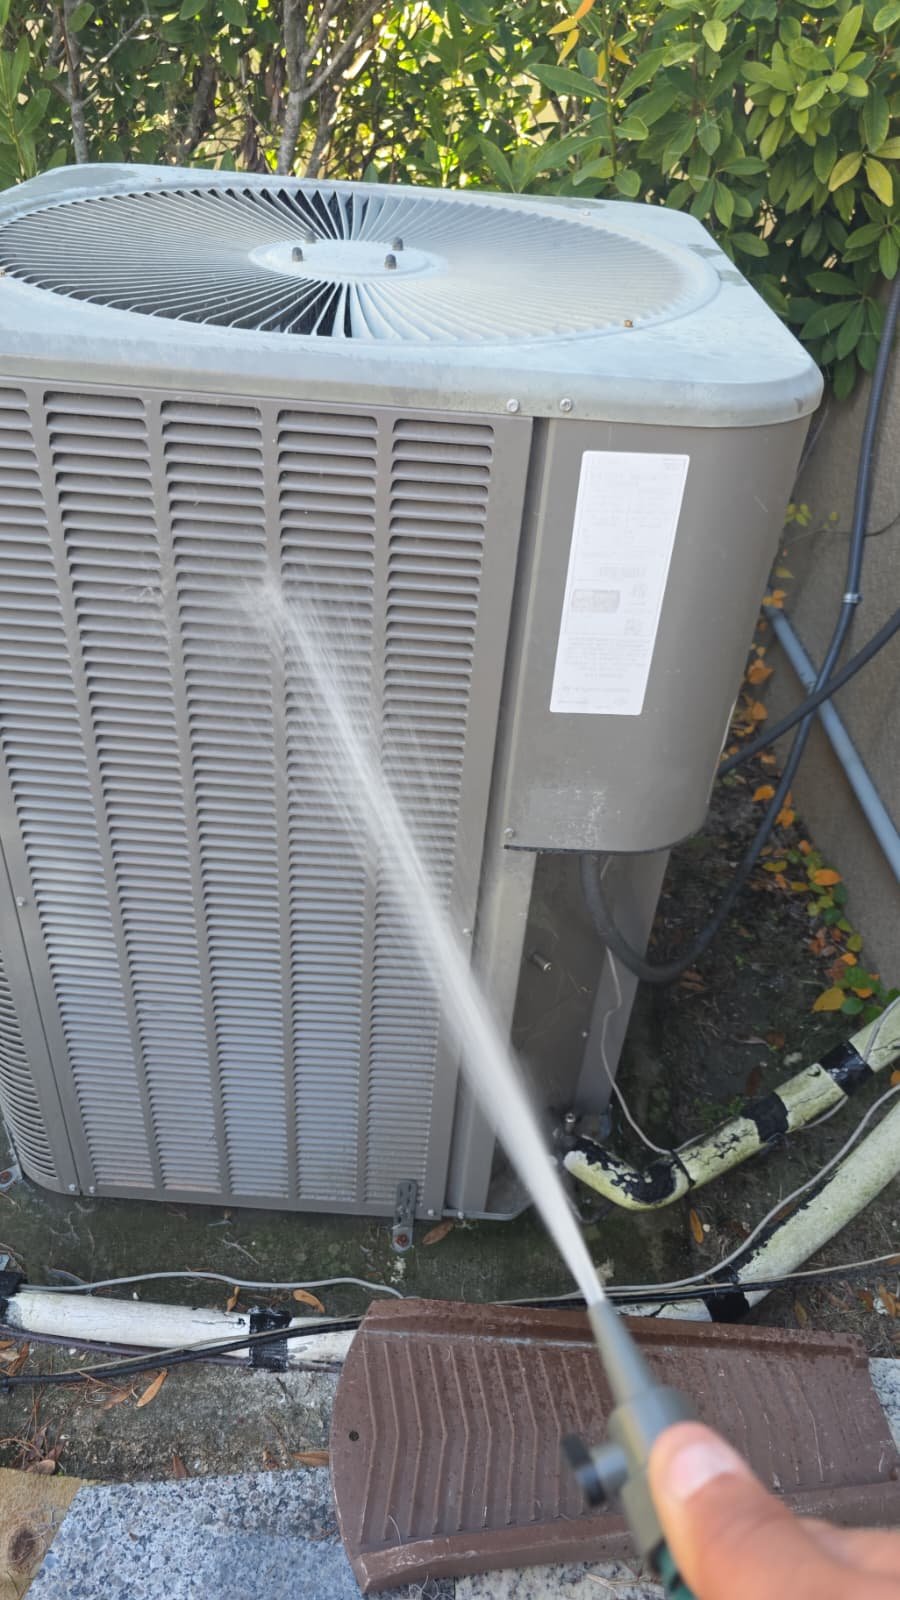
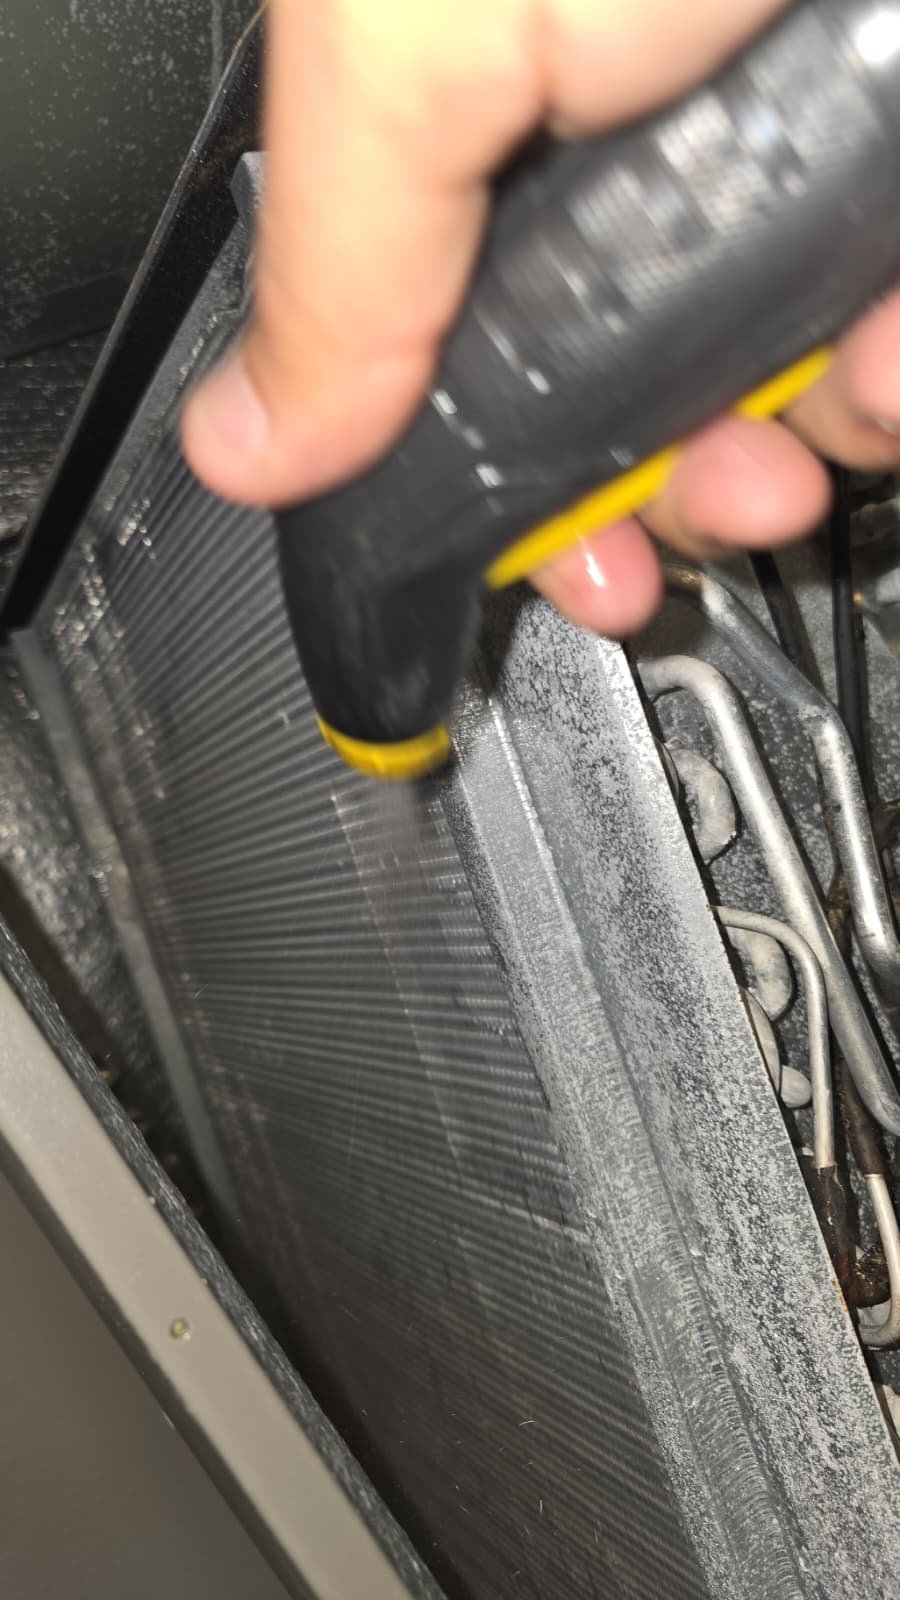
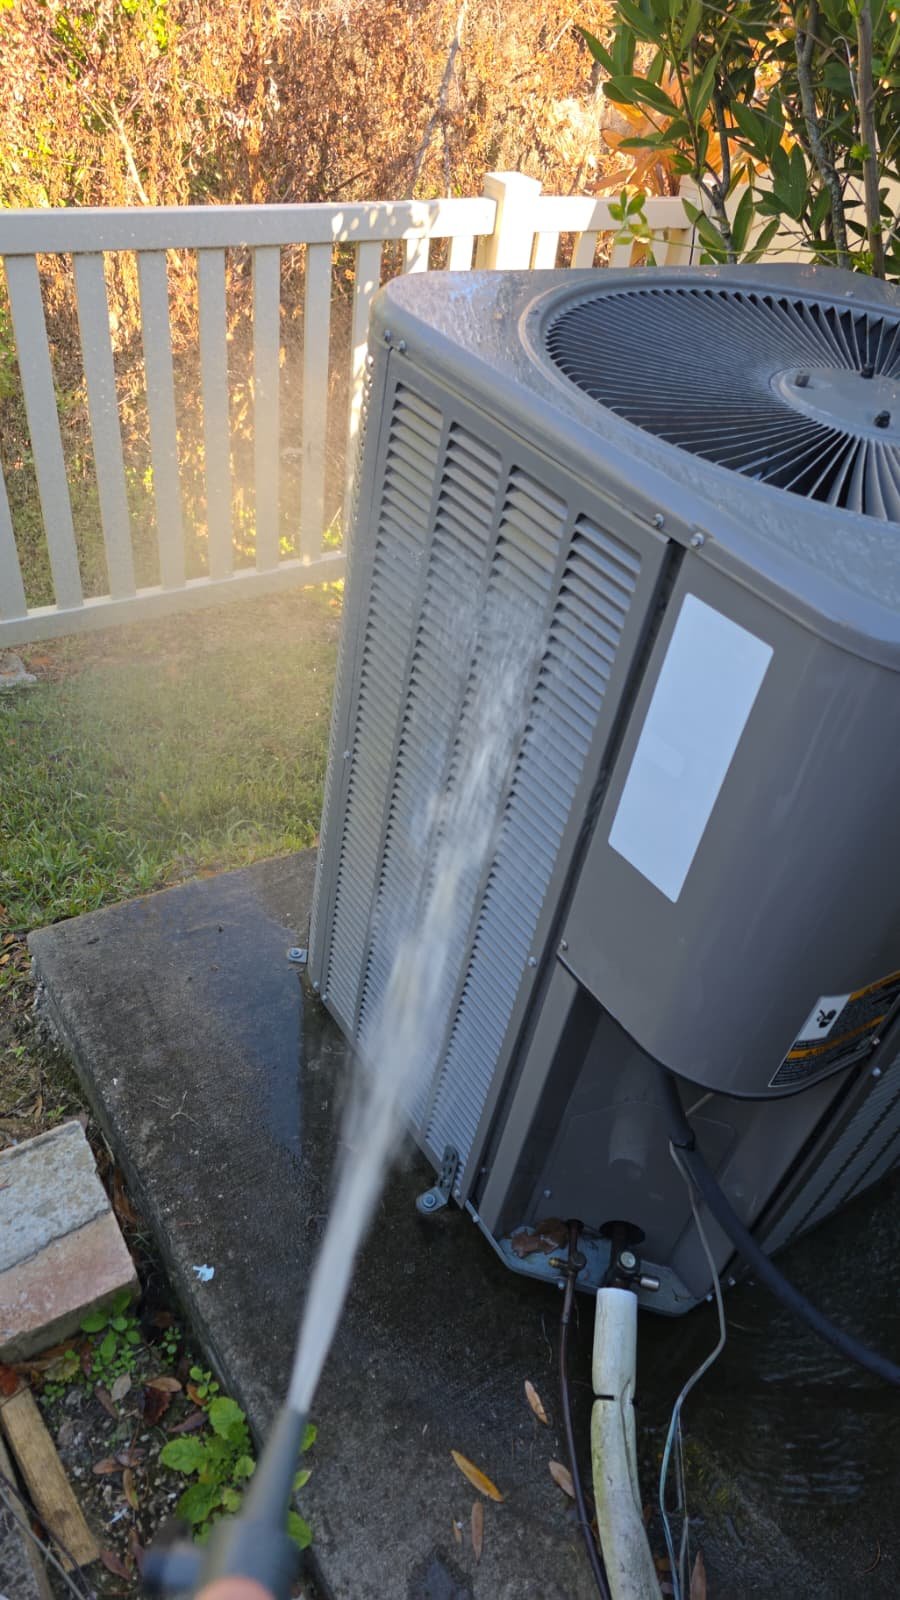
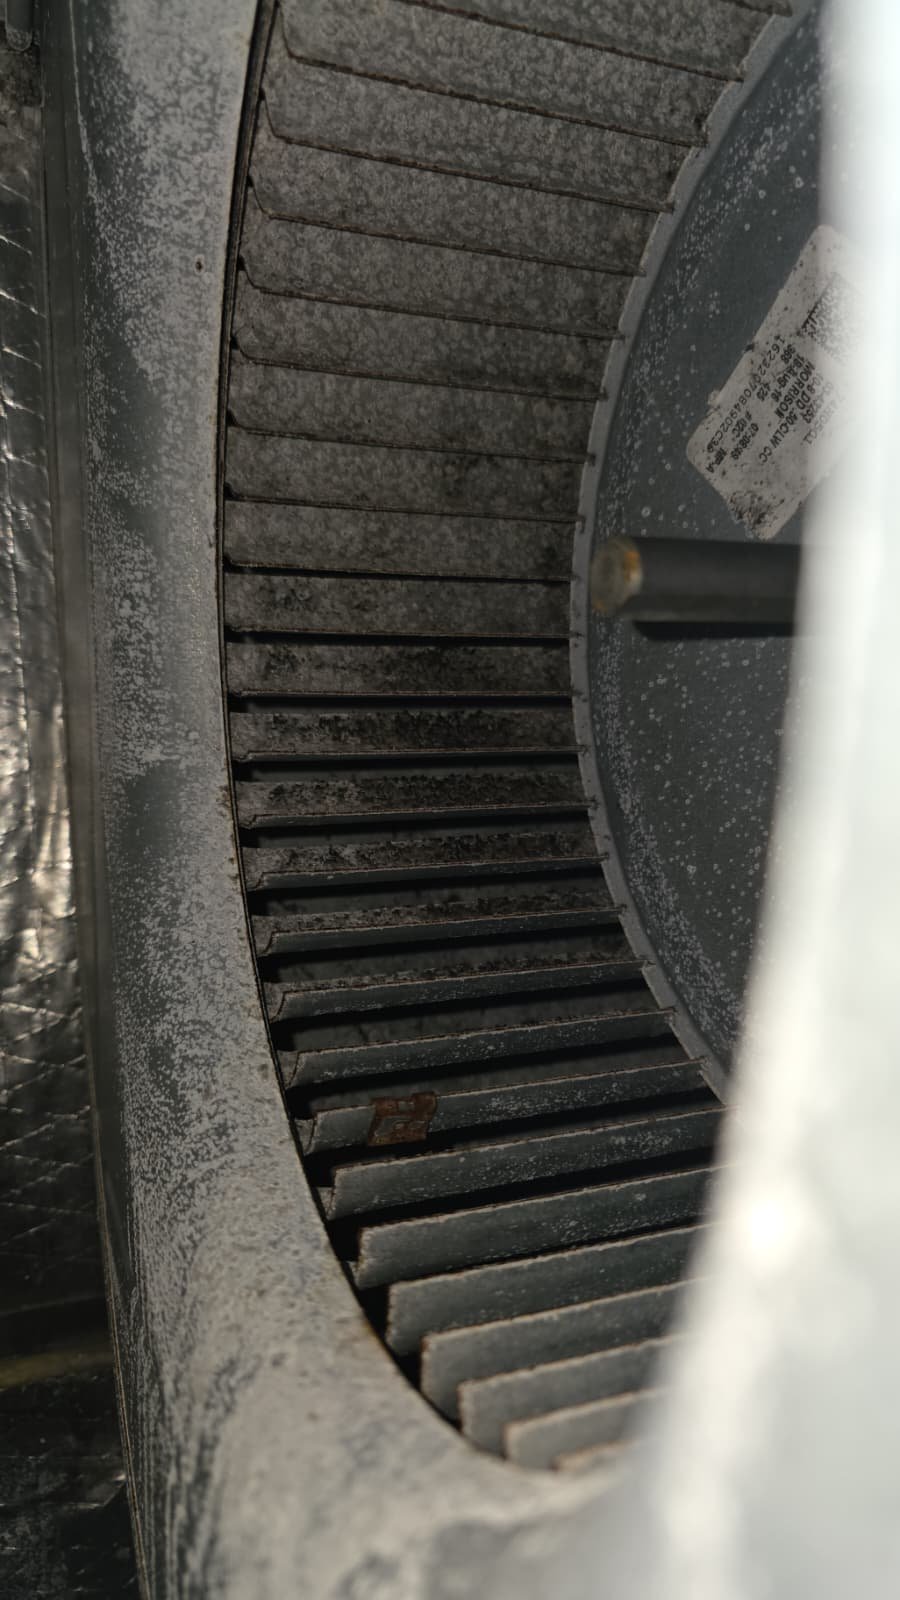
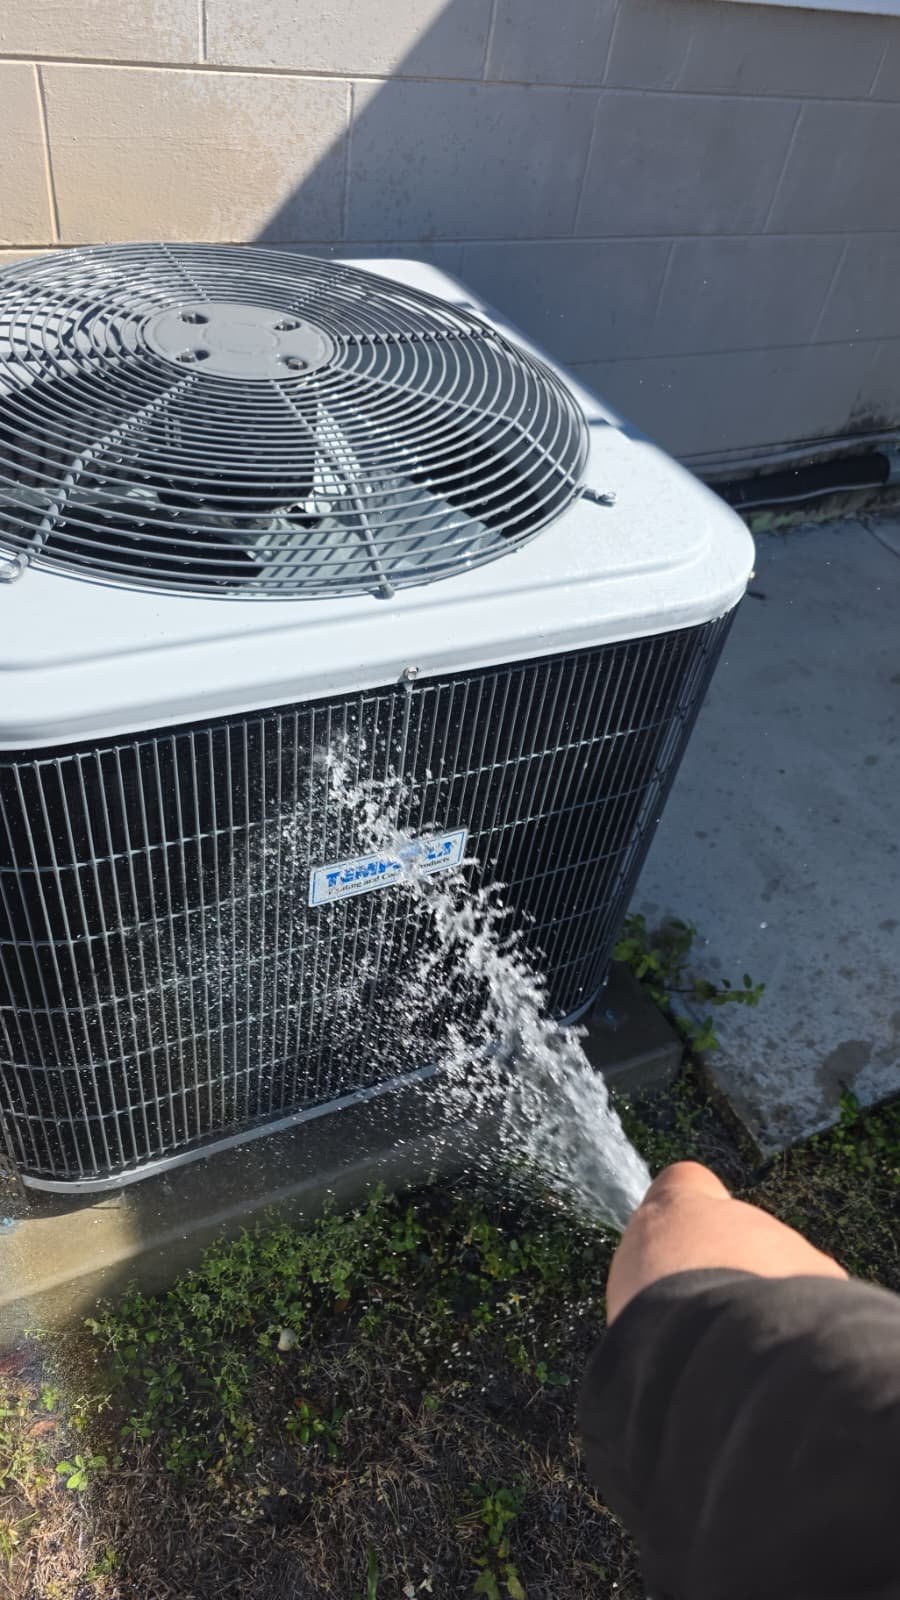
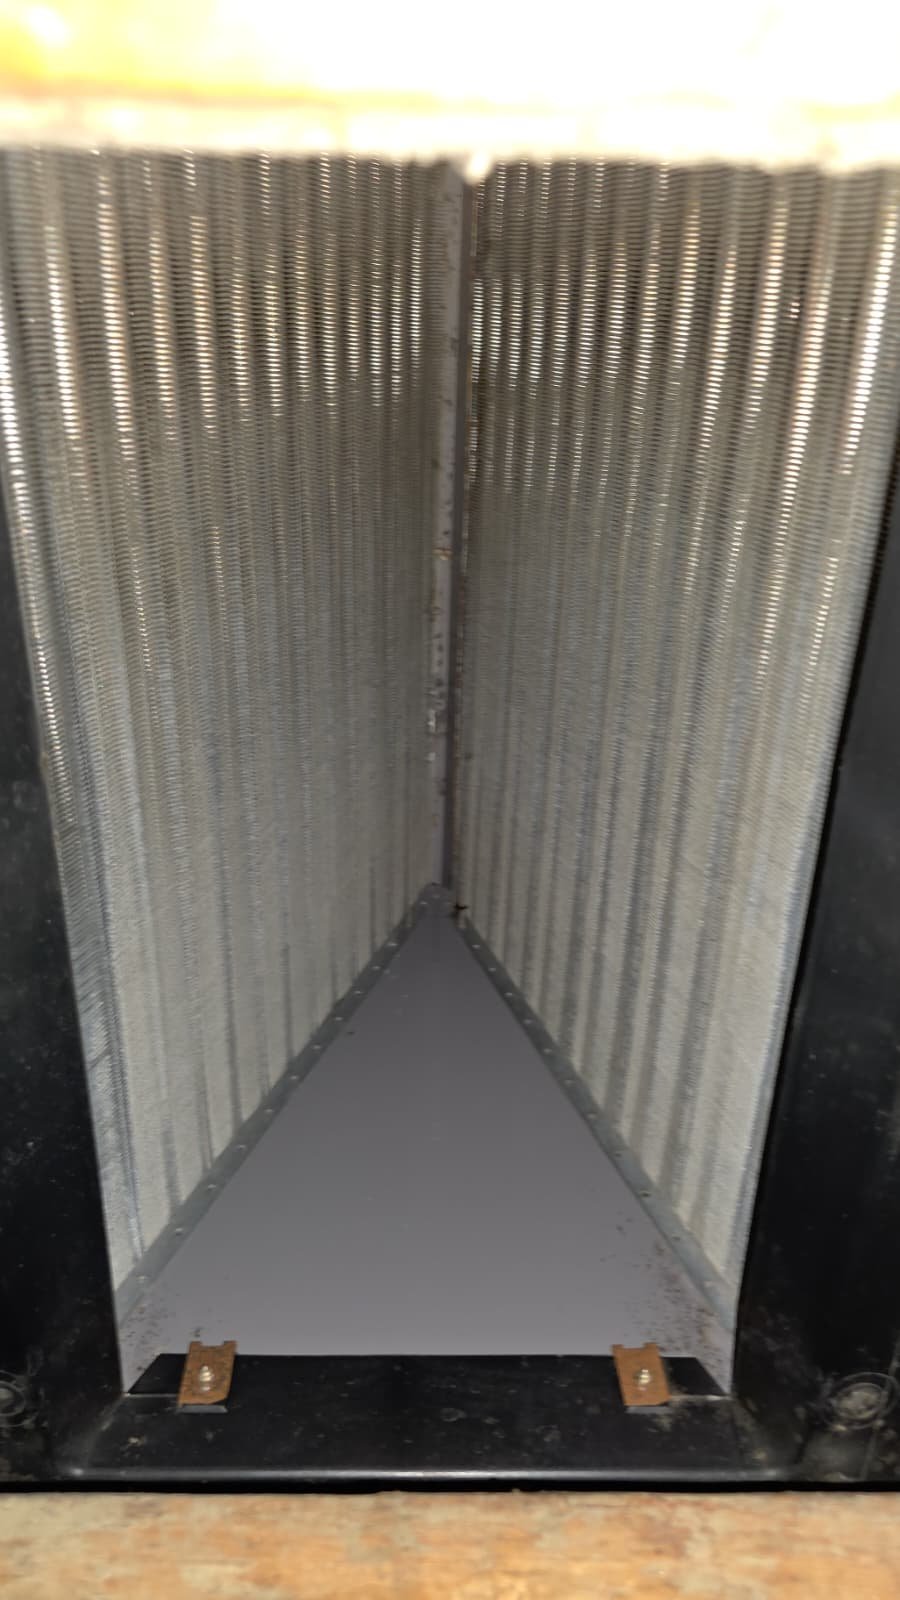
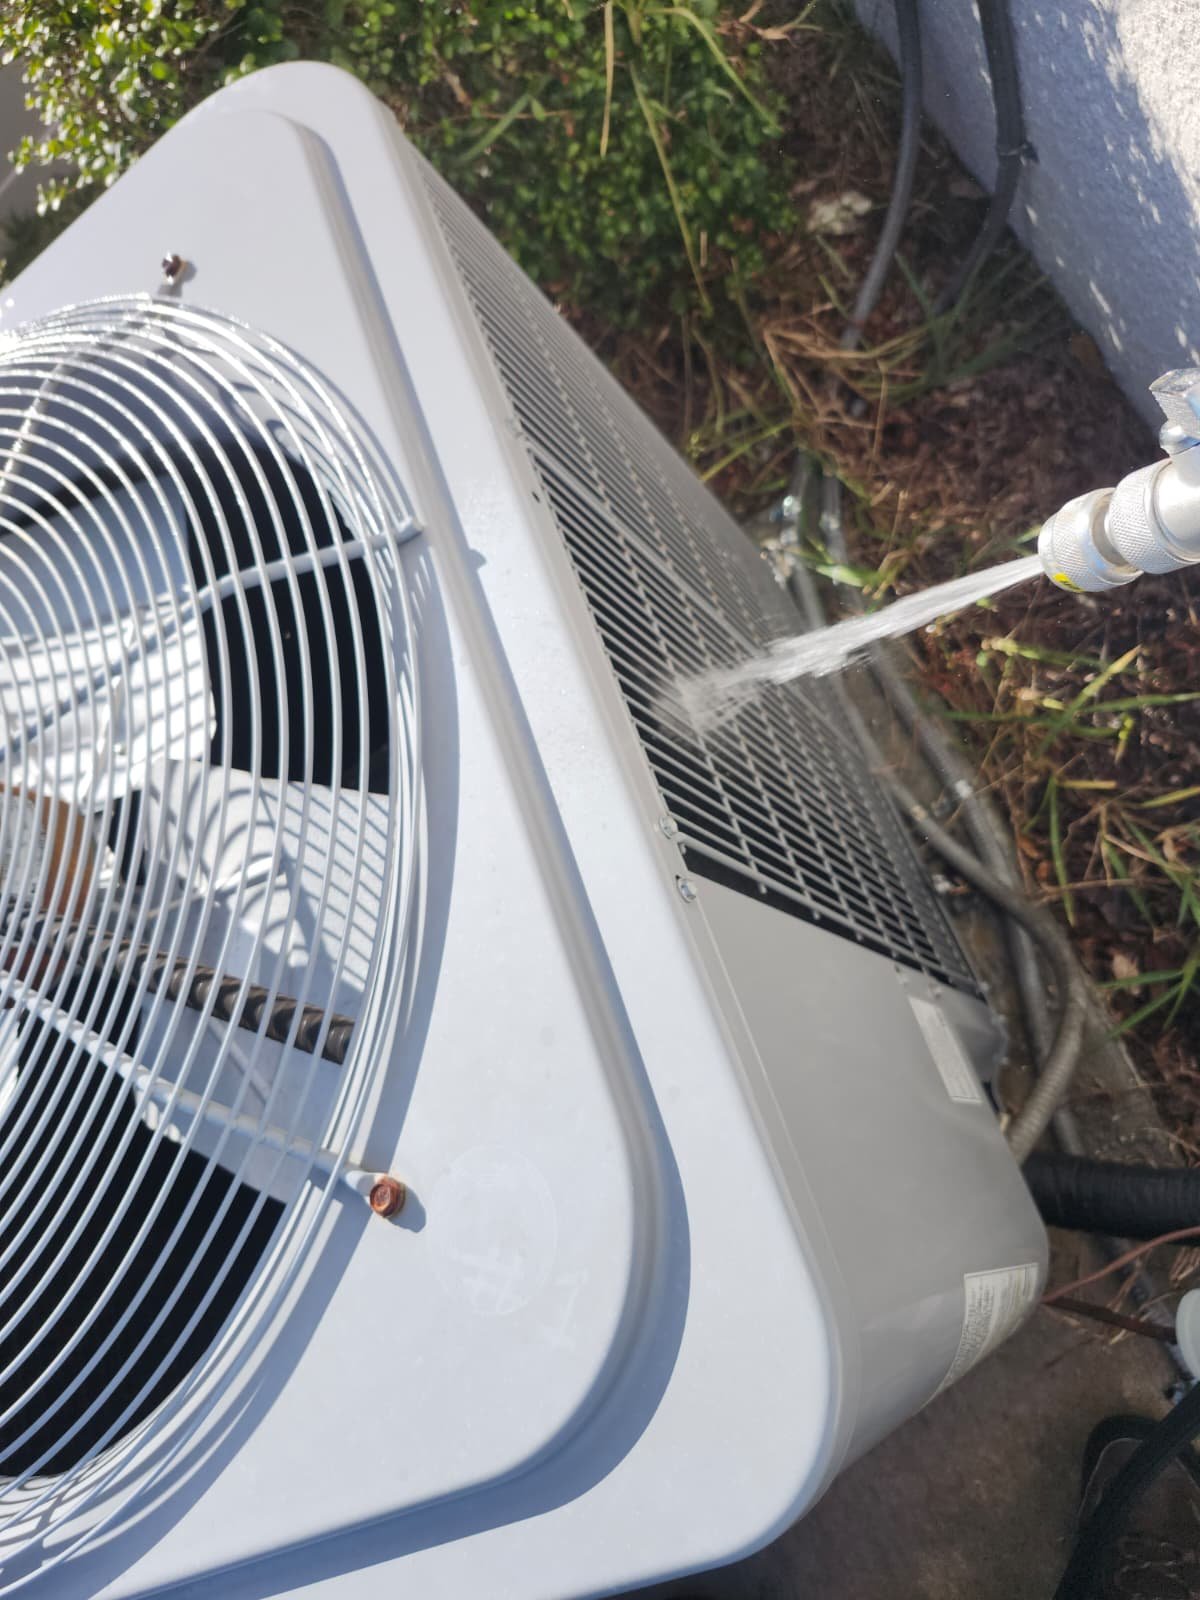
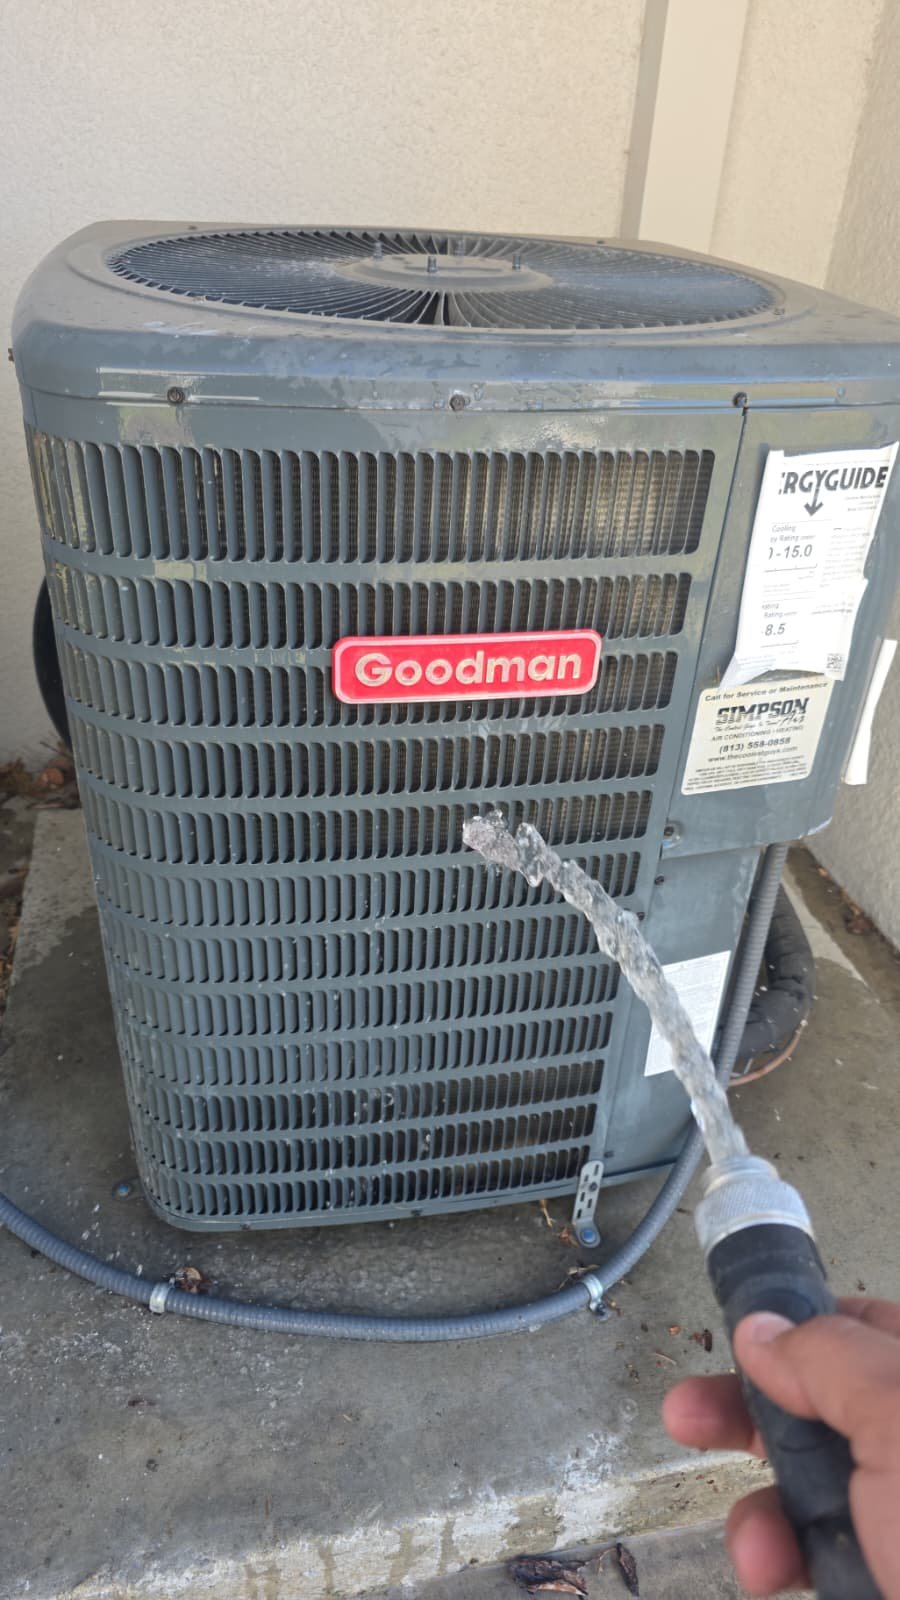
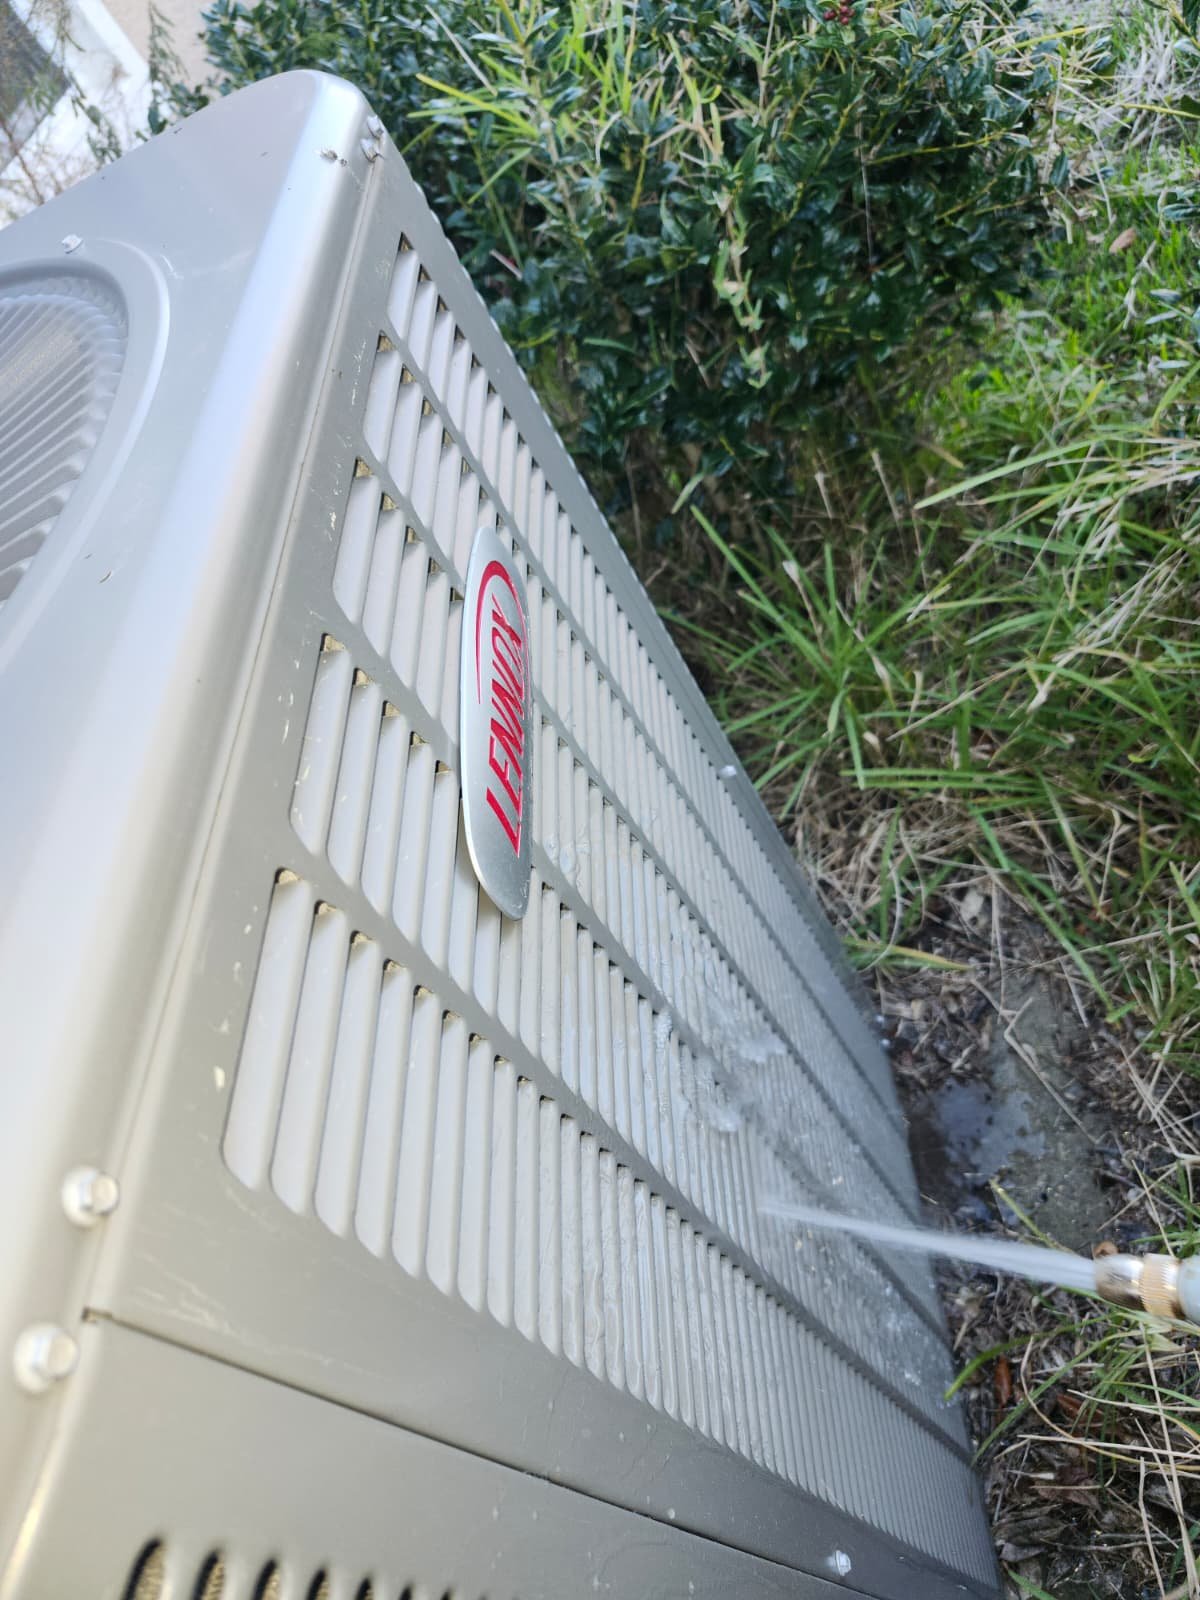
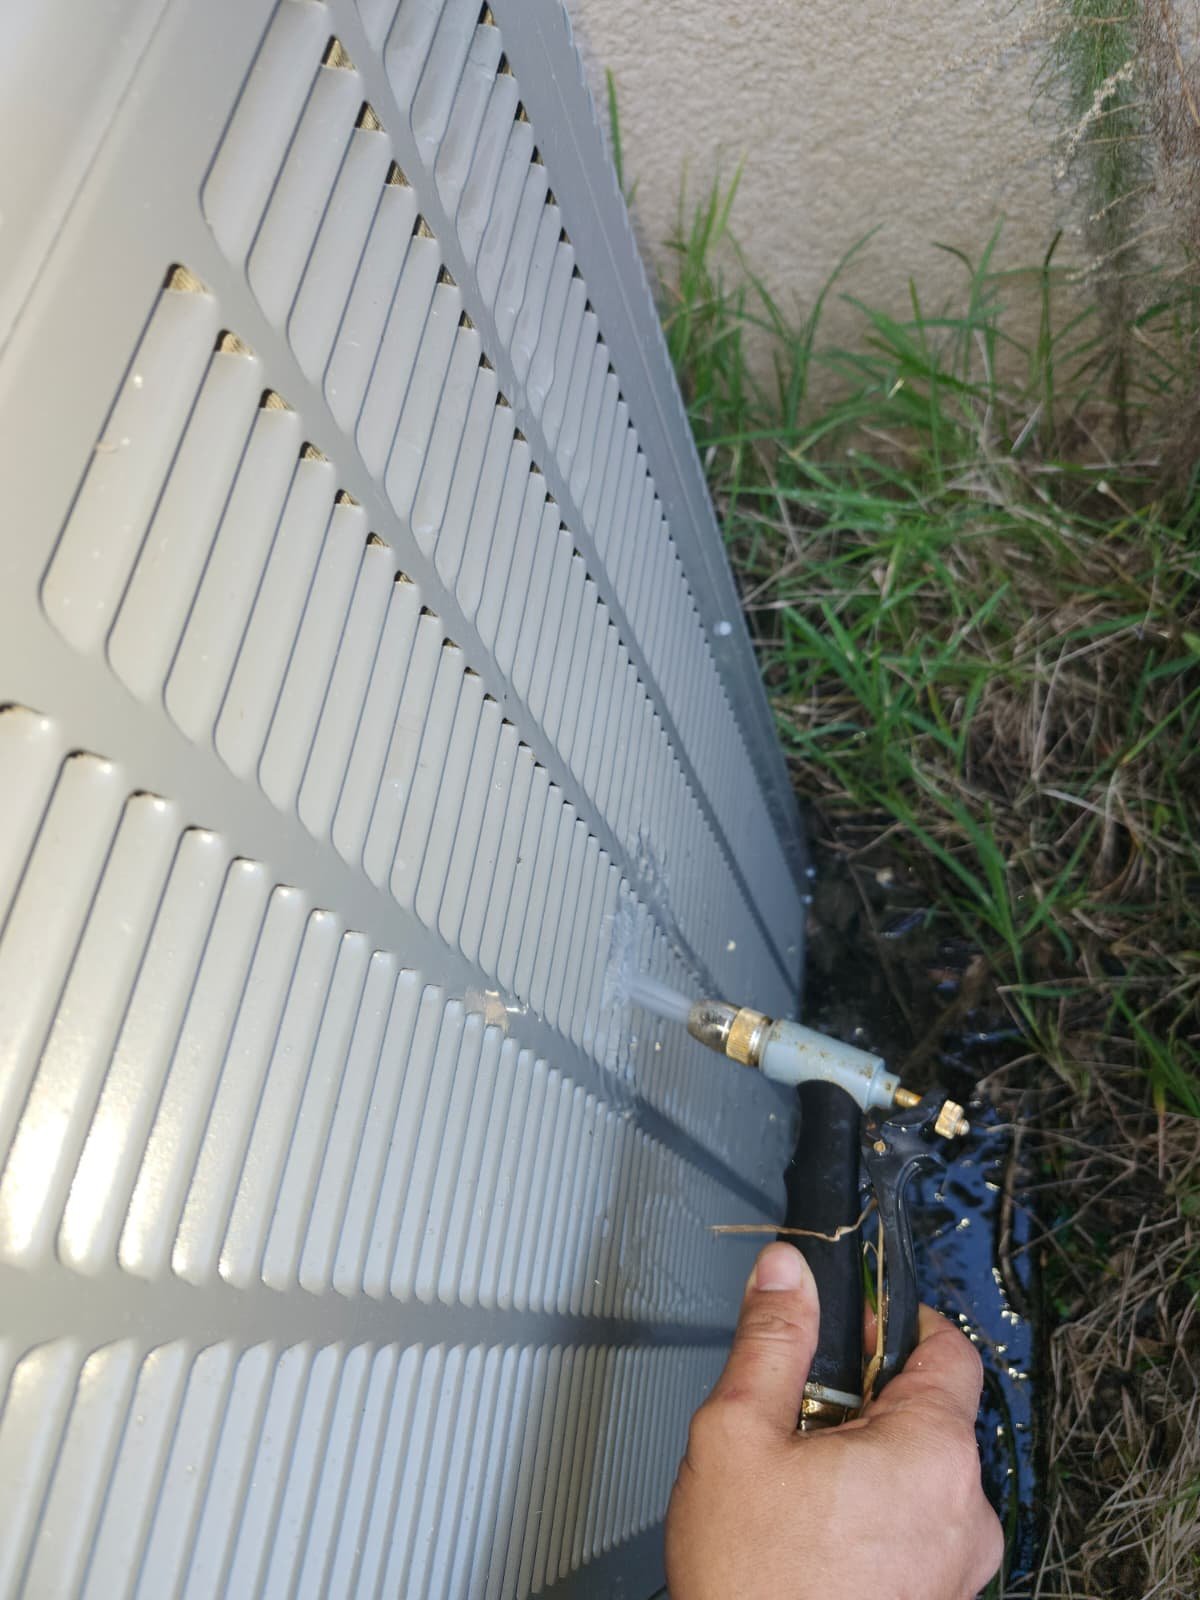
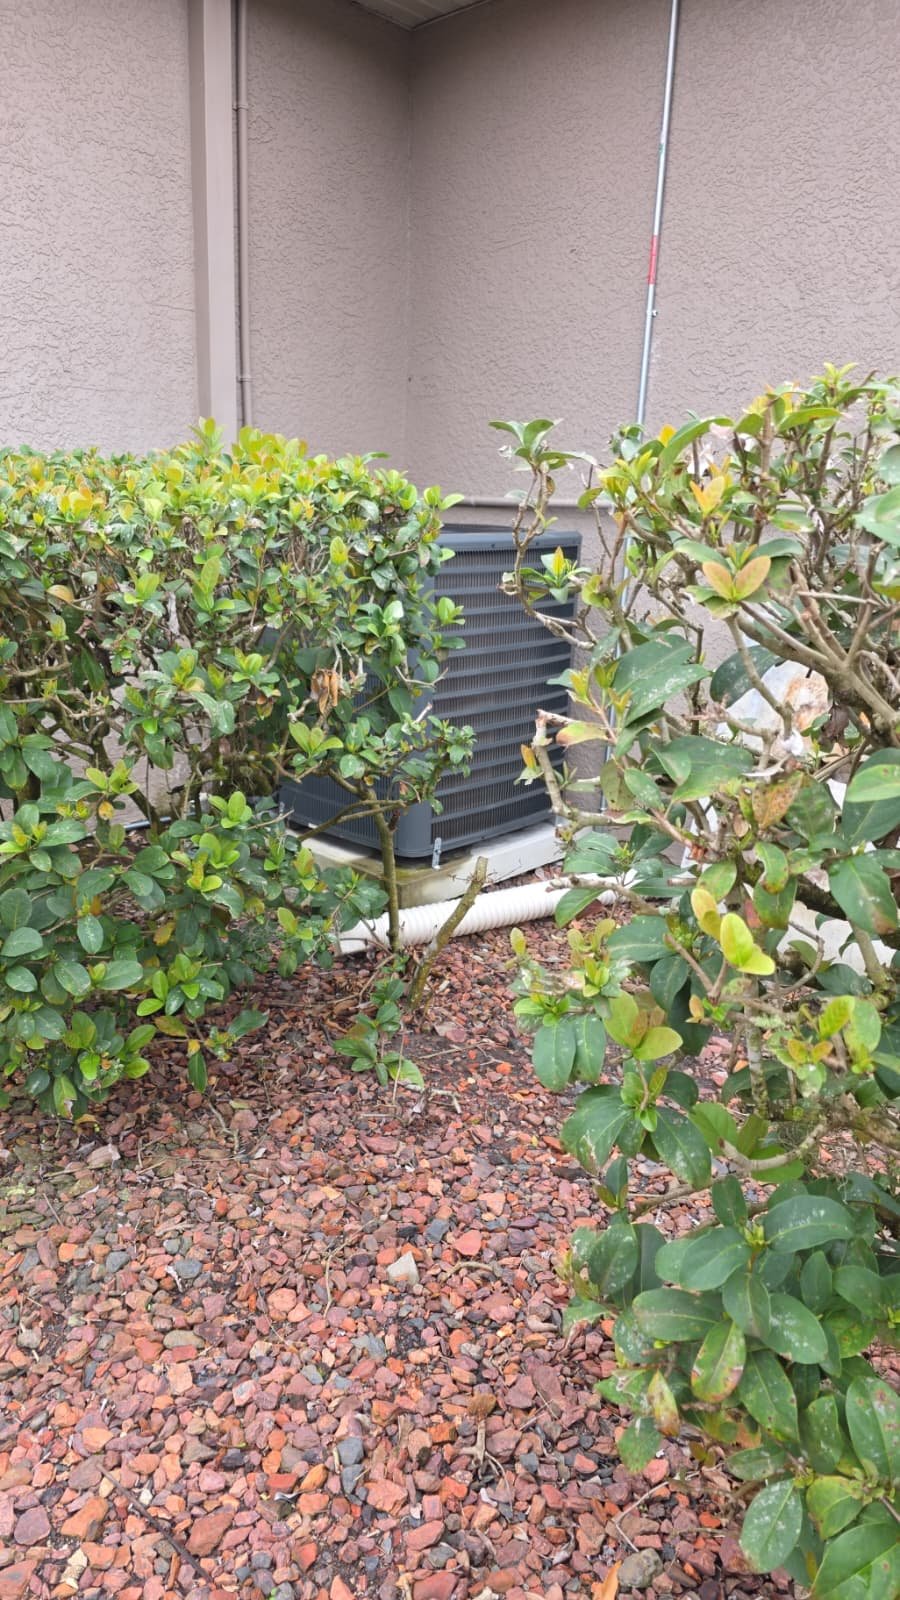
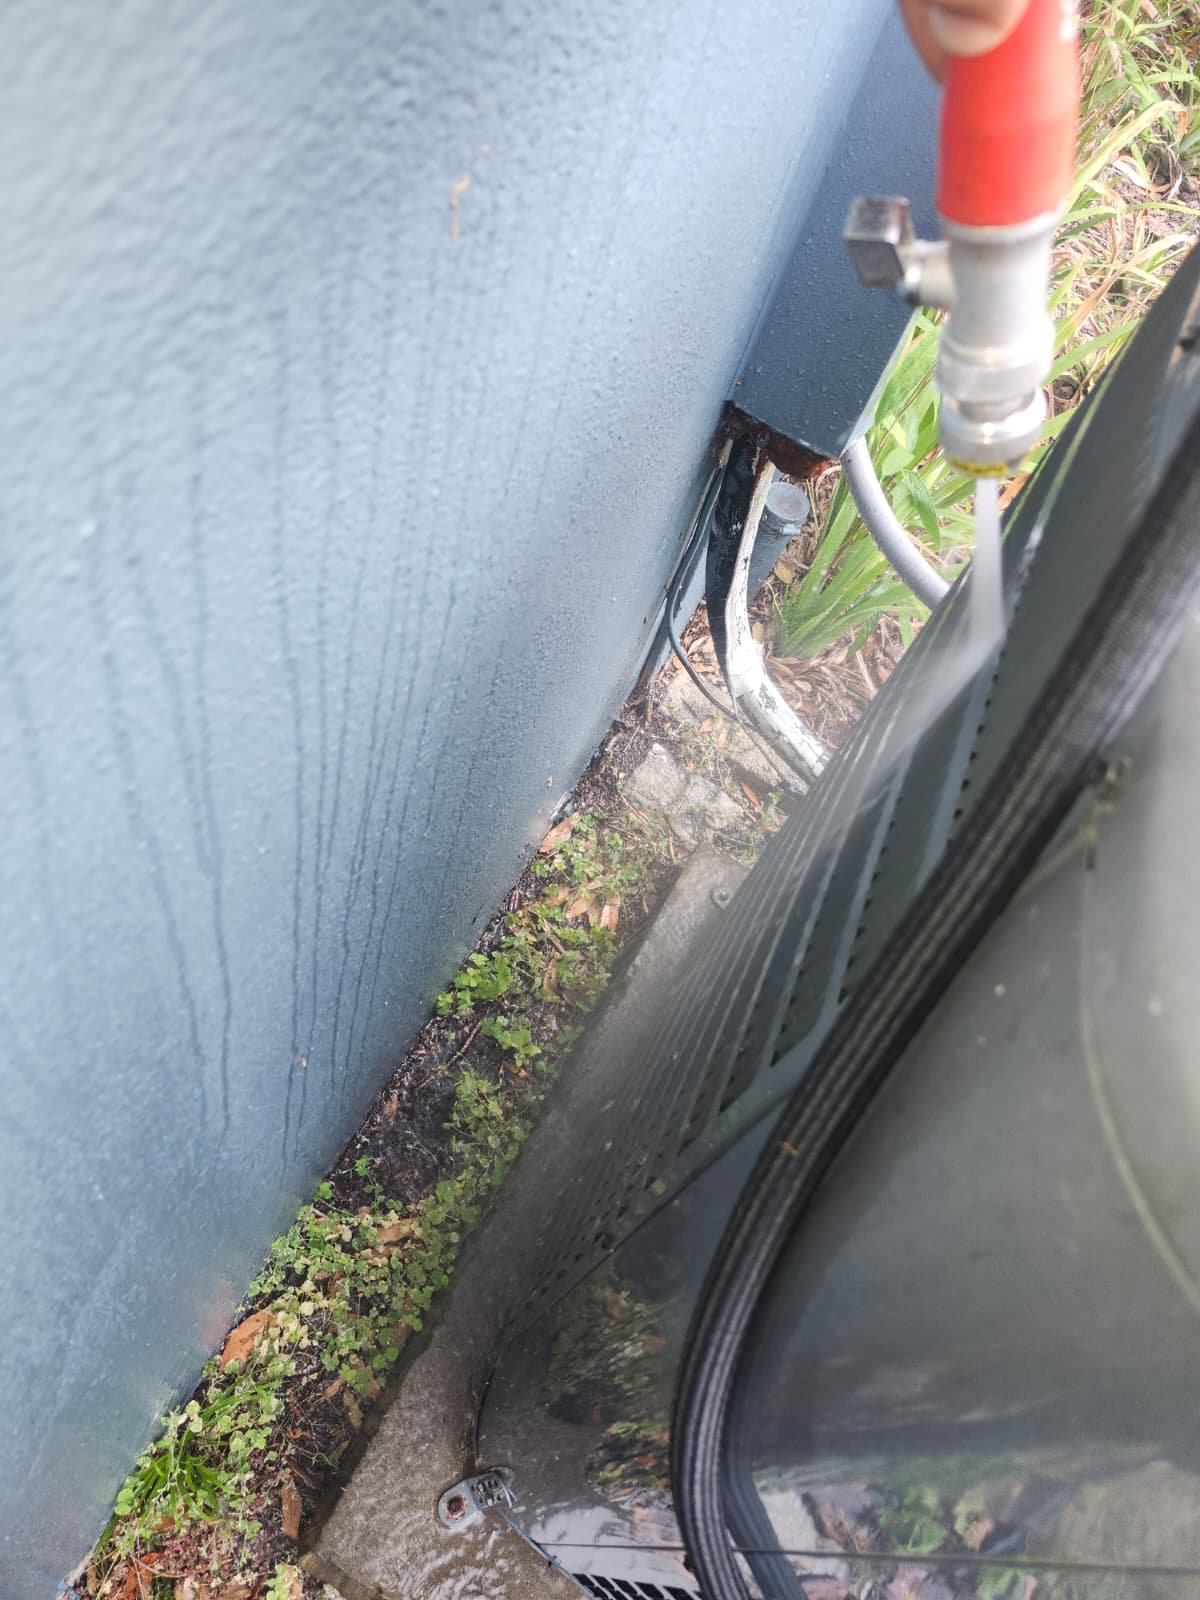
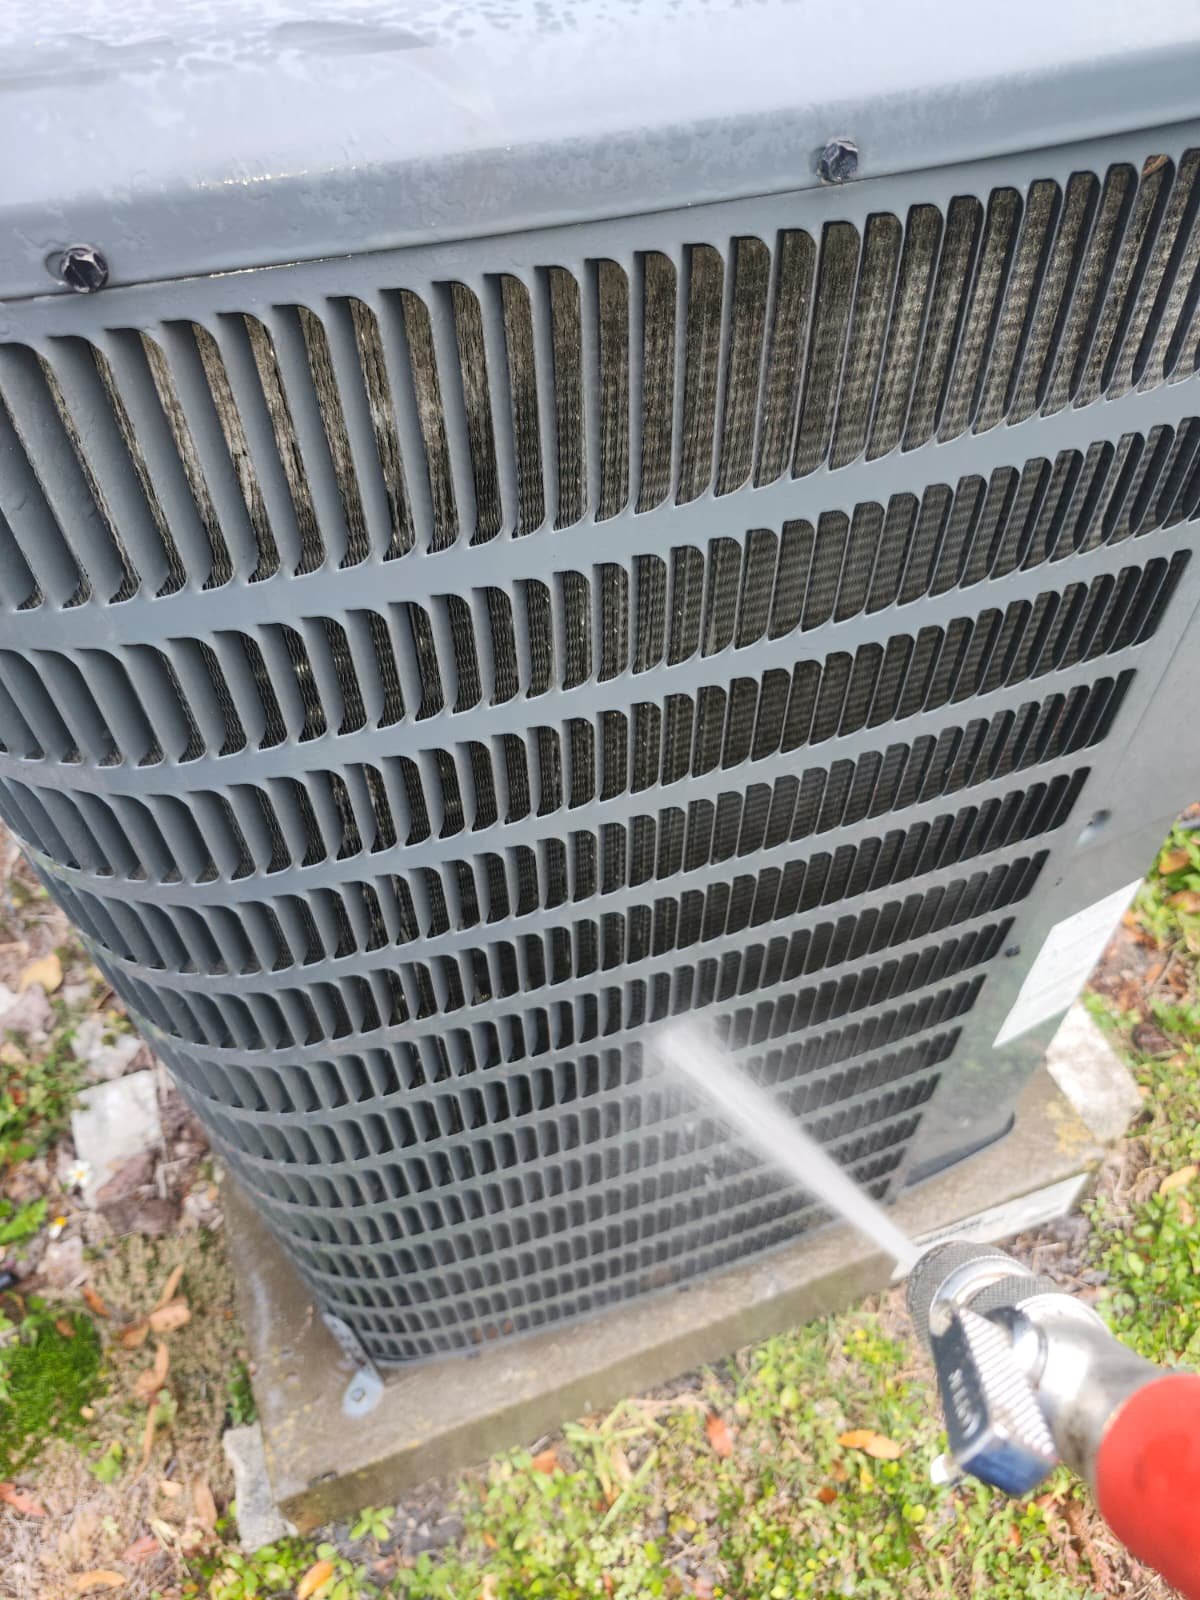
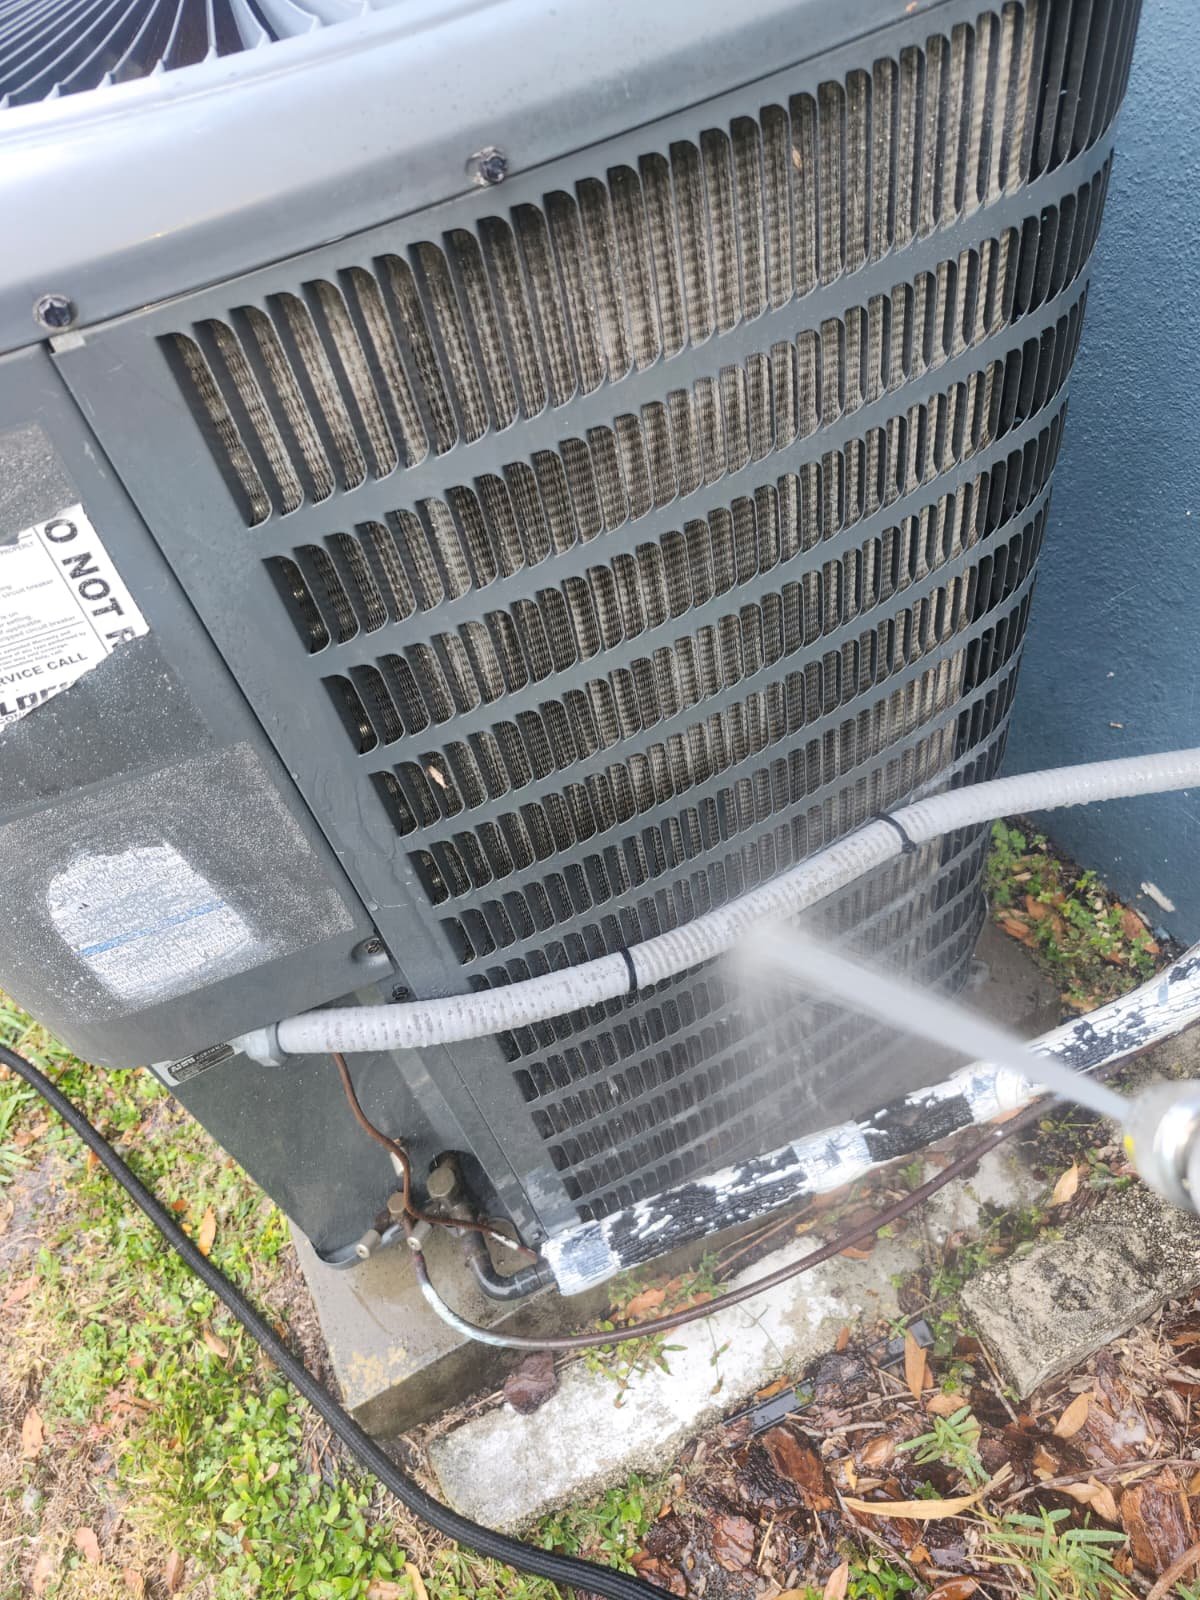
  • Looking over the outdoor condenser for cleanliness, damage, or signs of overheating

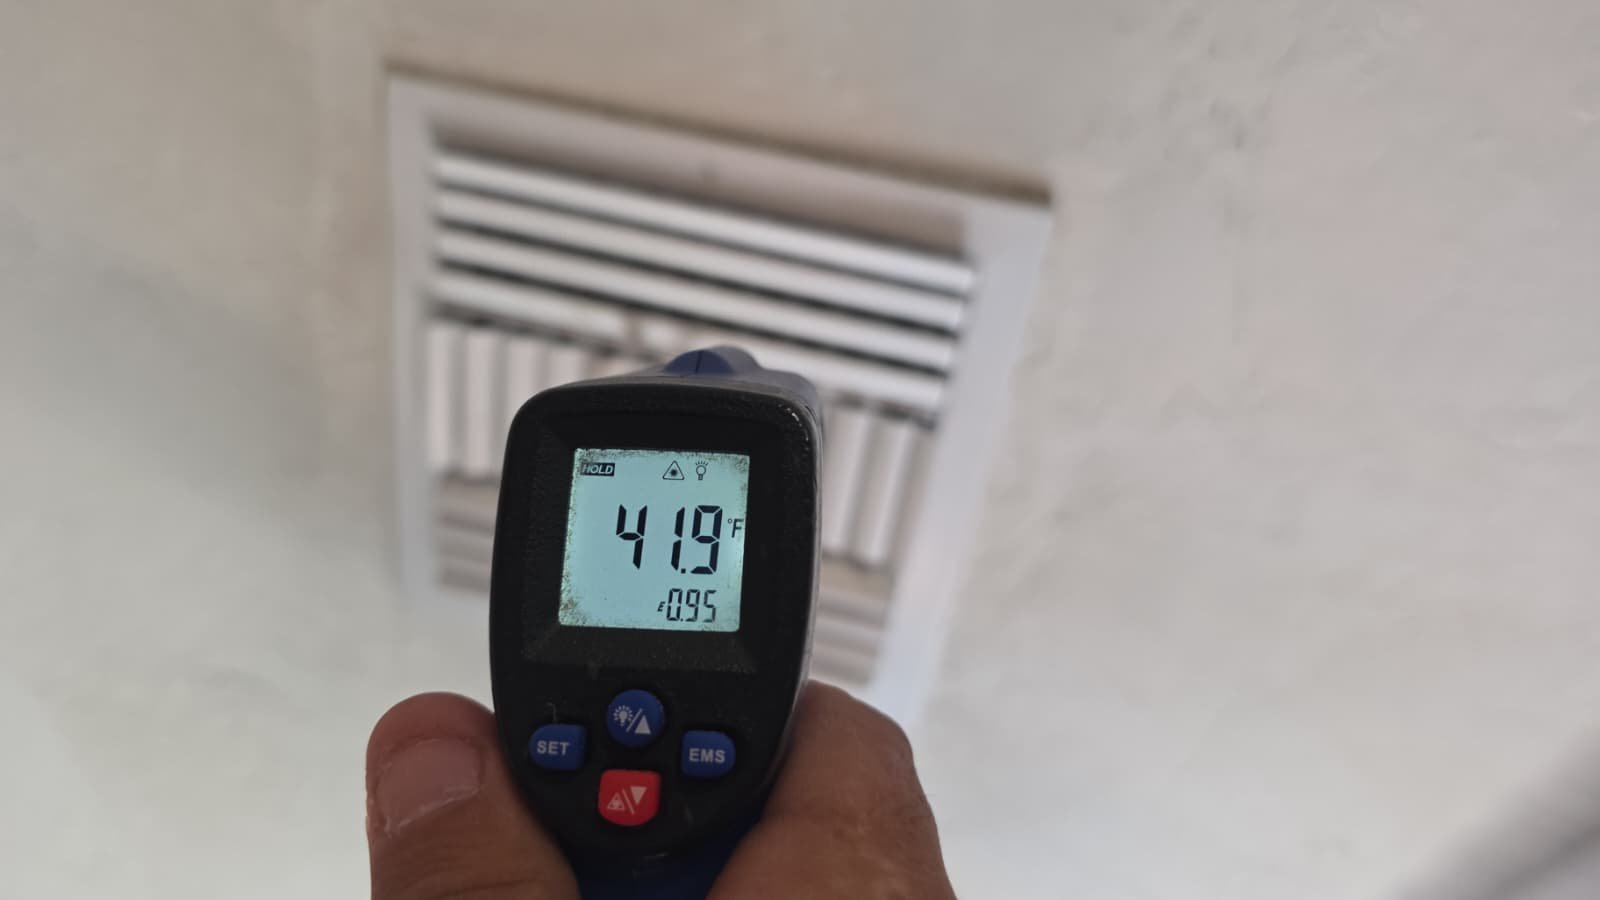
Everything appeared structurally sound. The system was running, cooling, and airflow felt normal in the home.

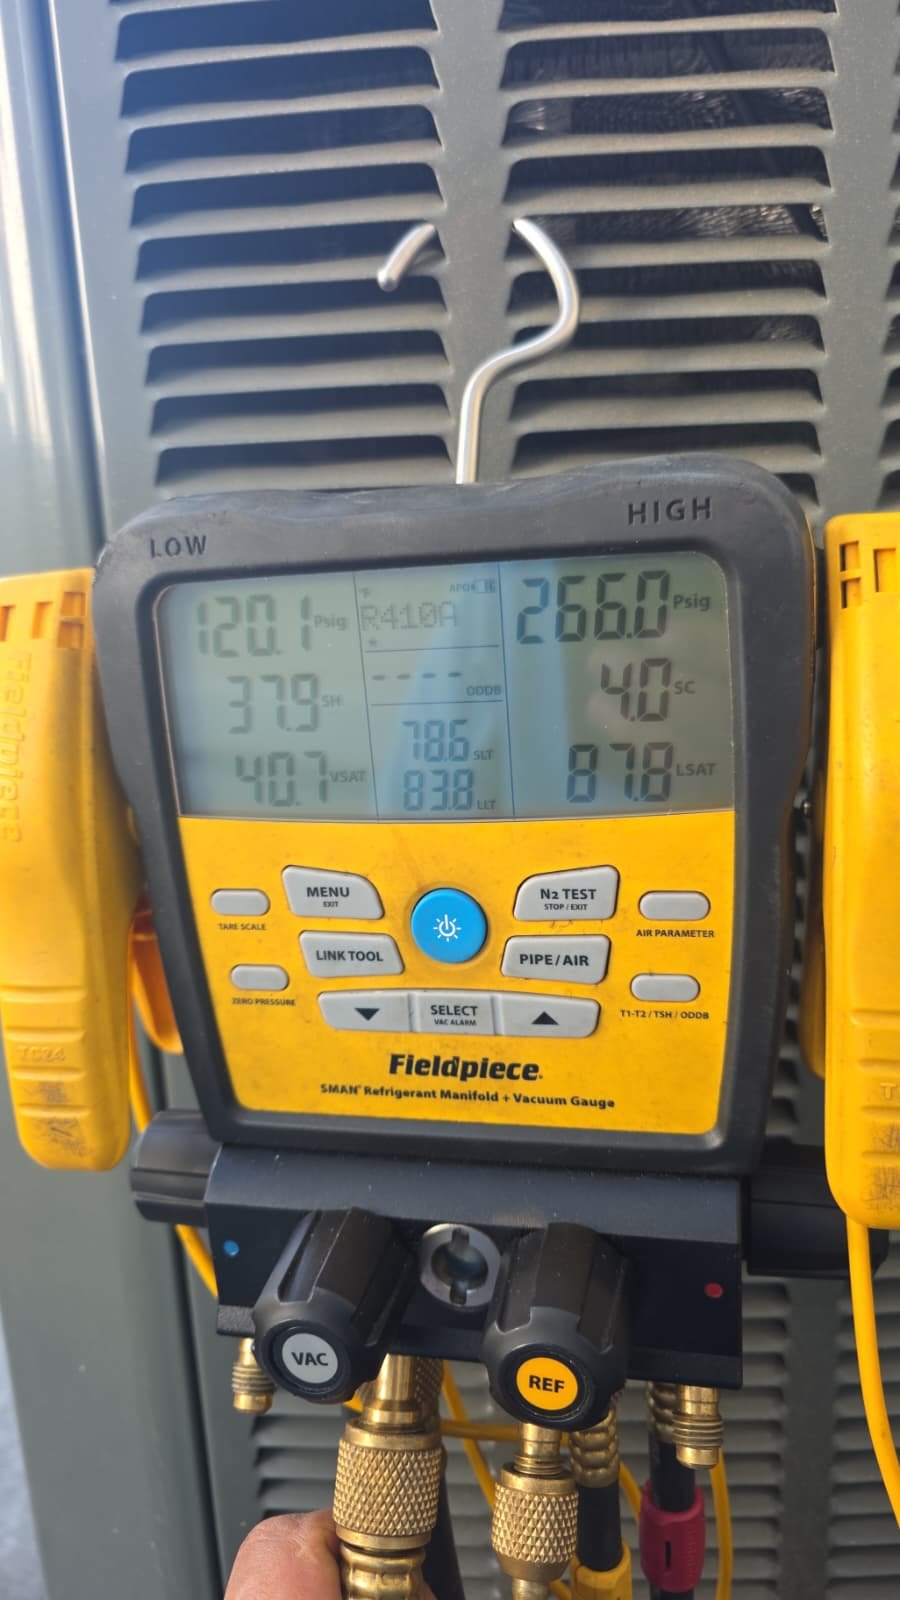
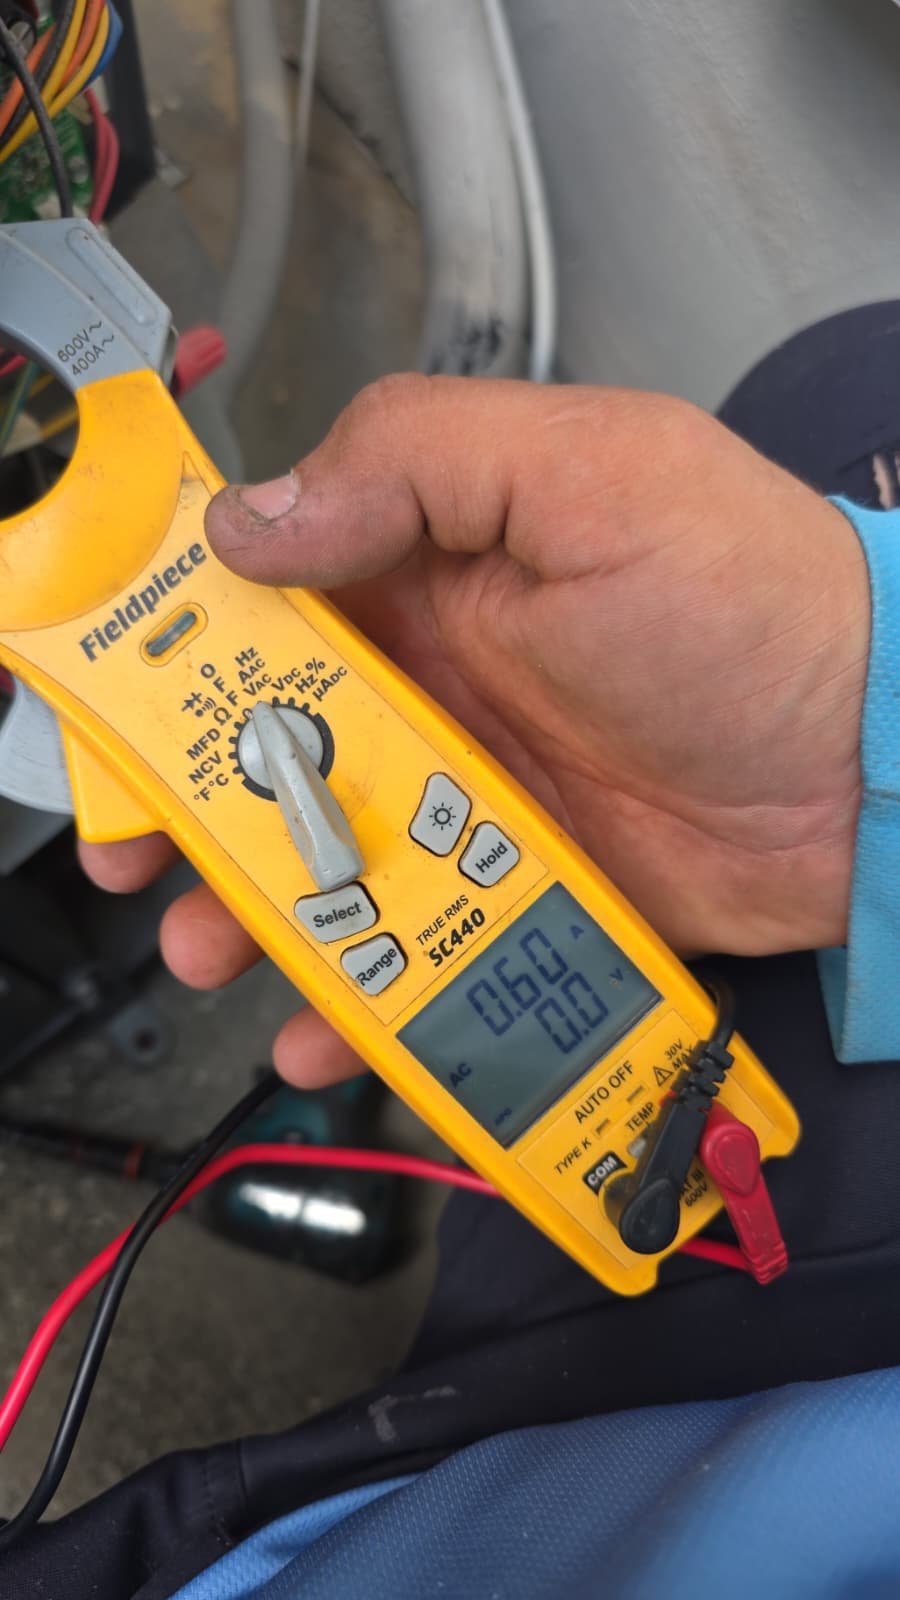
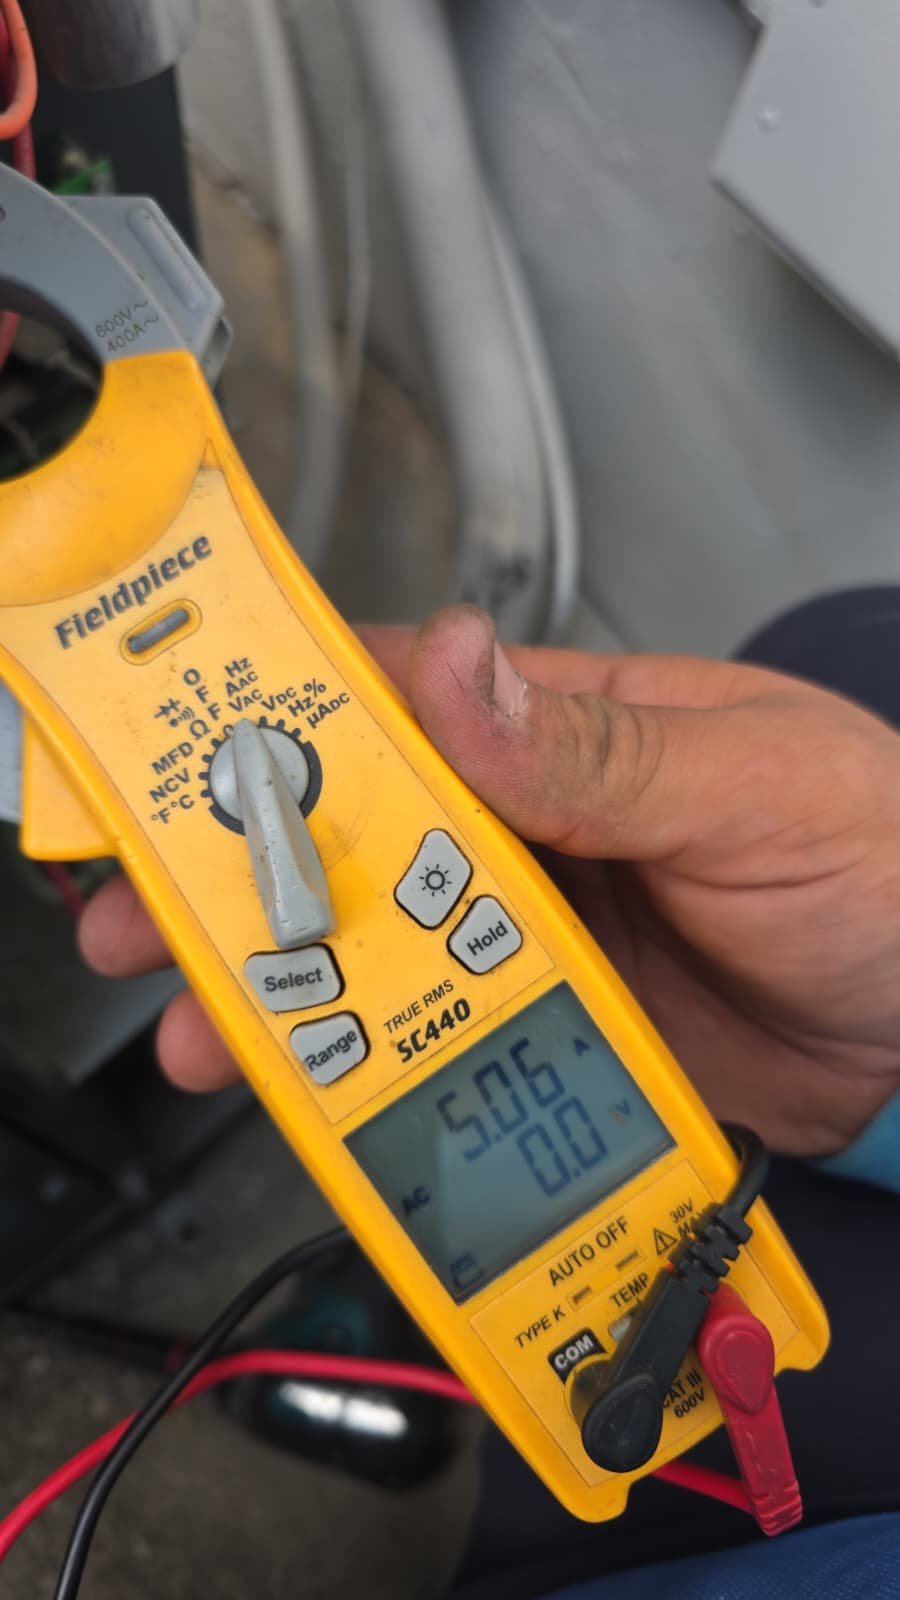
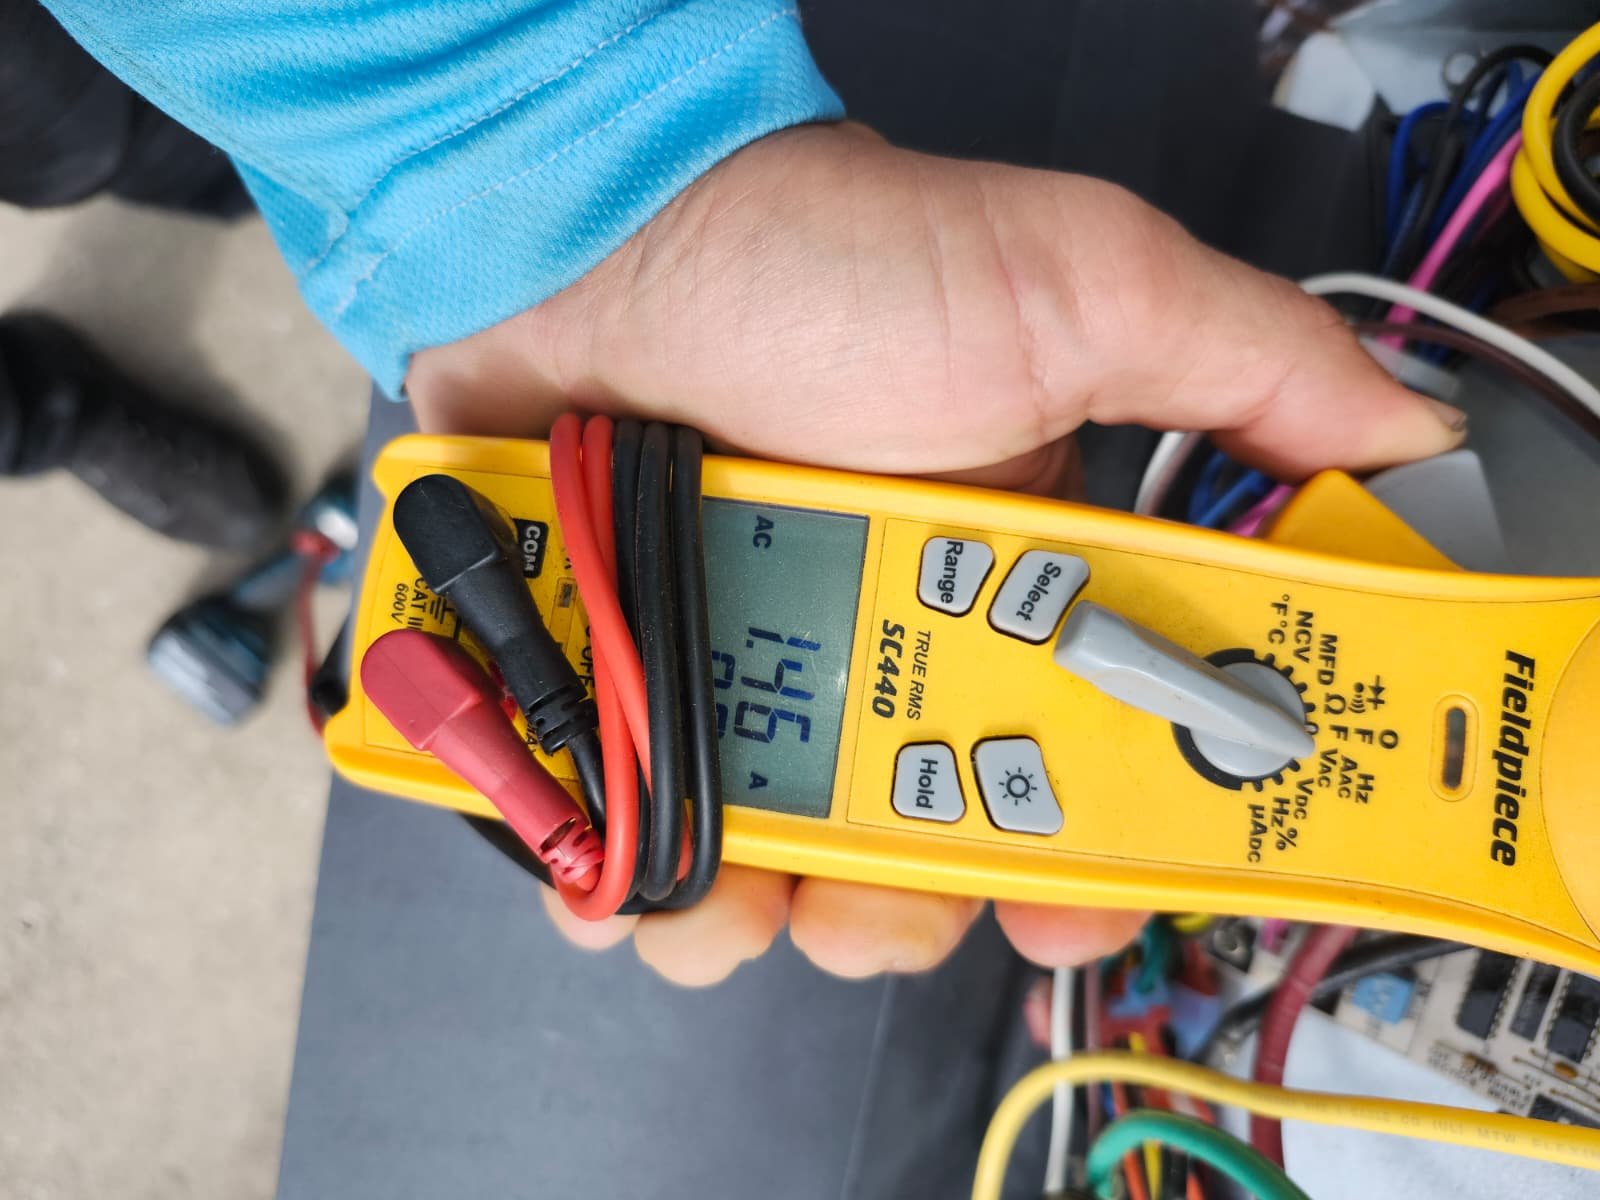
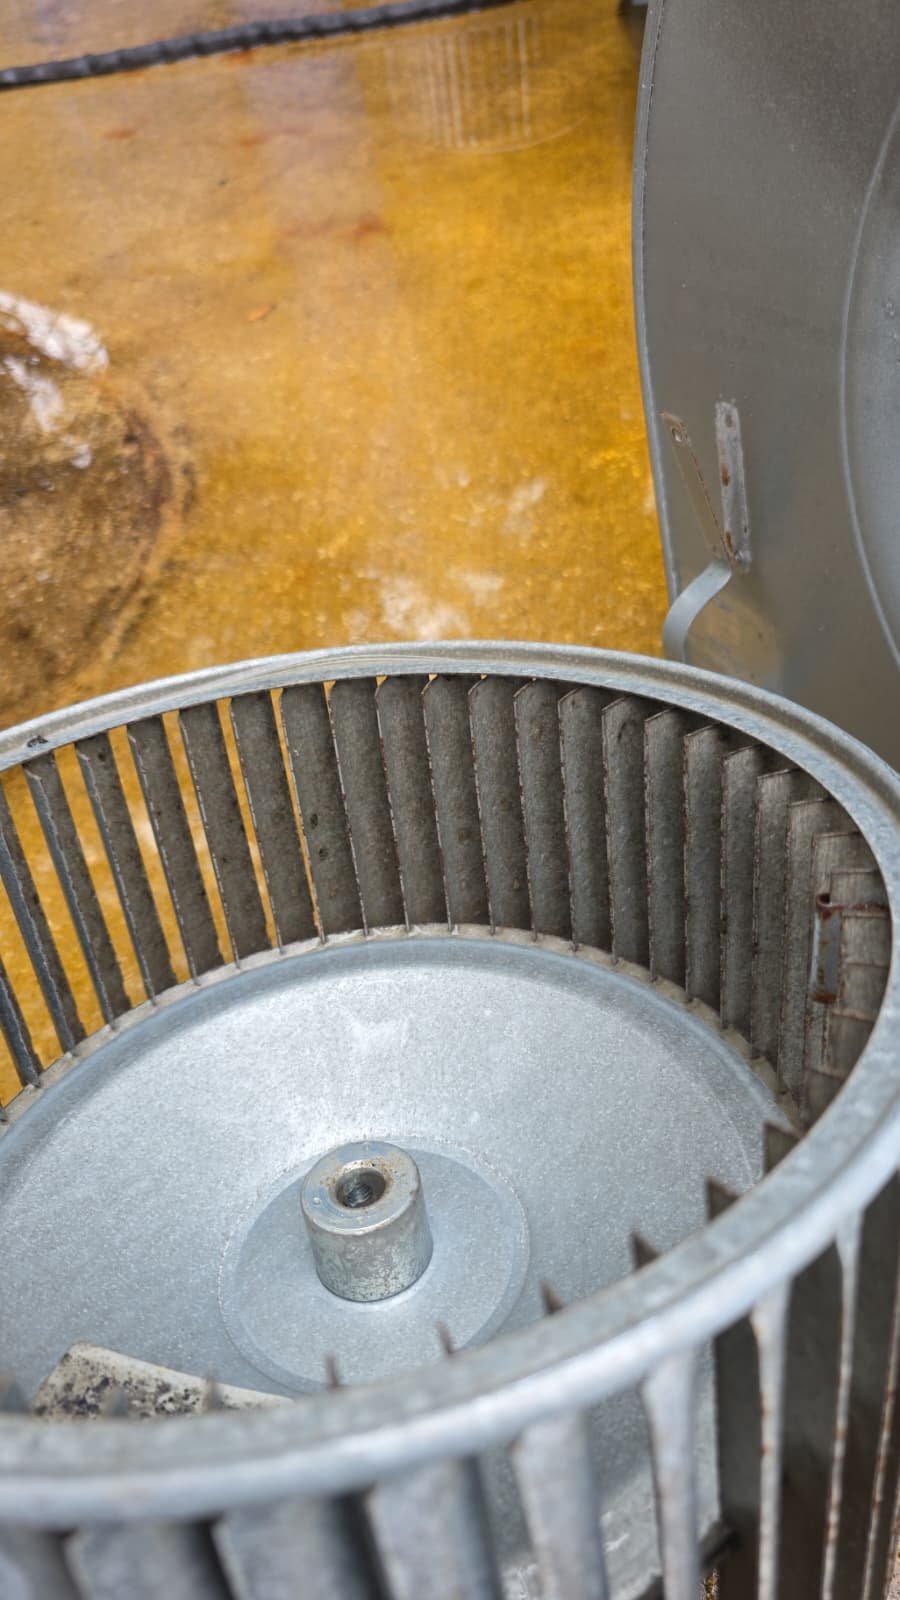
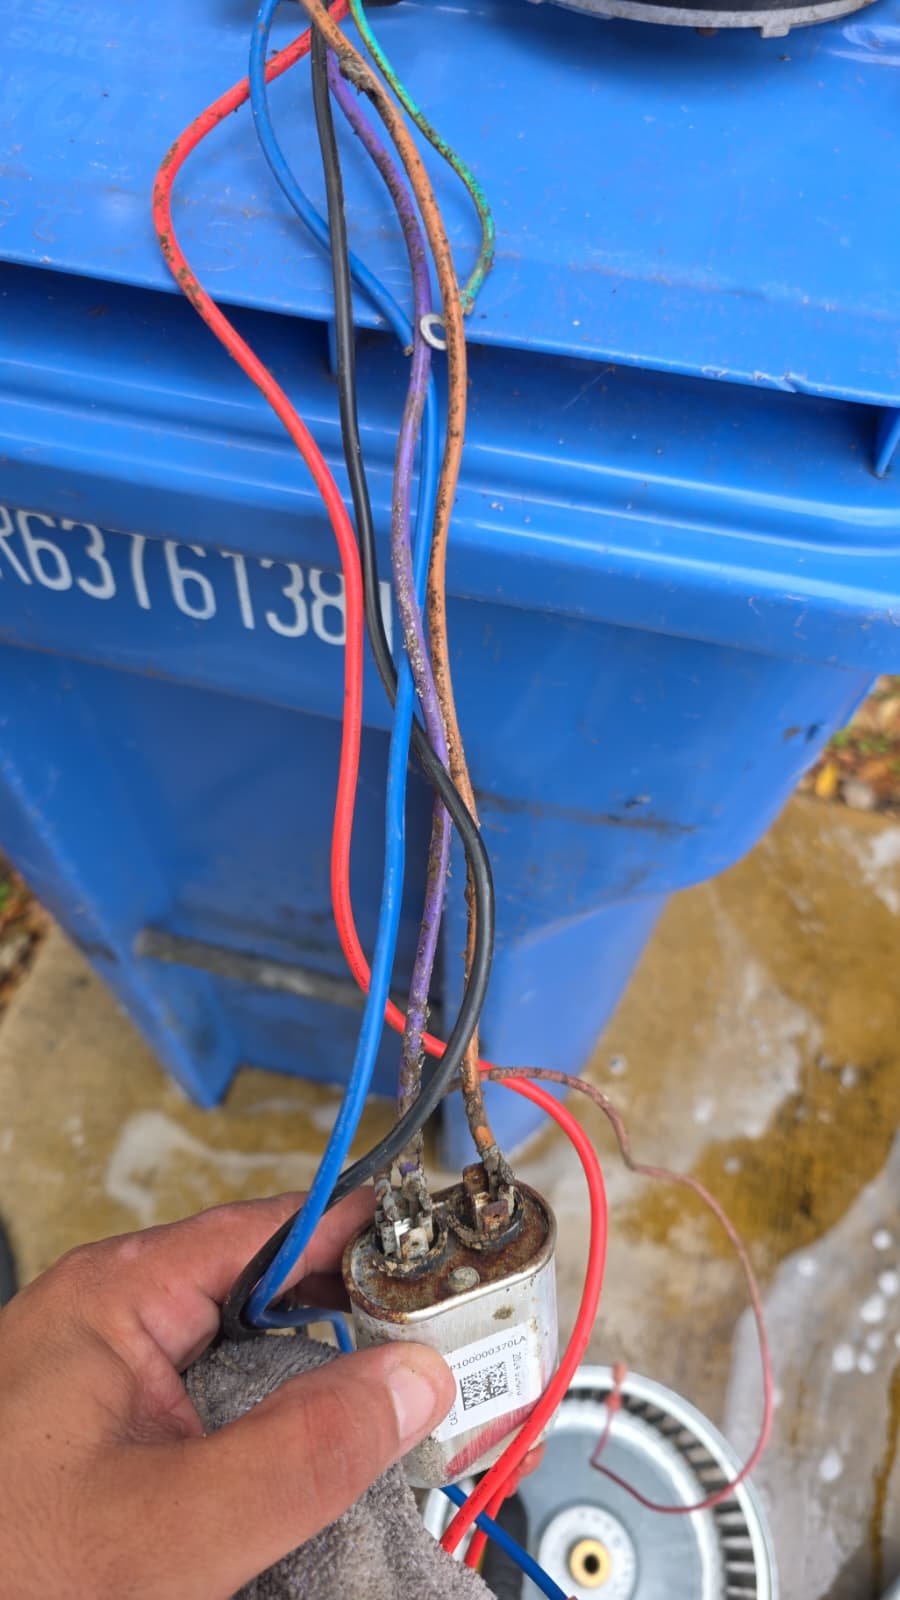
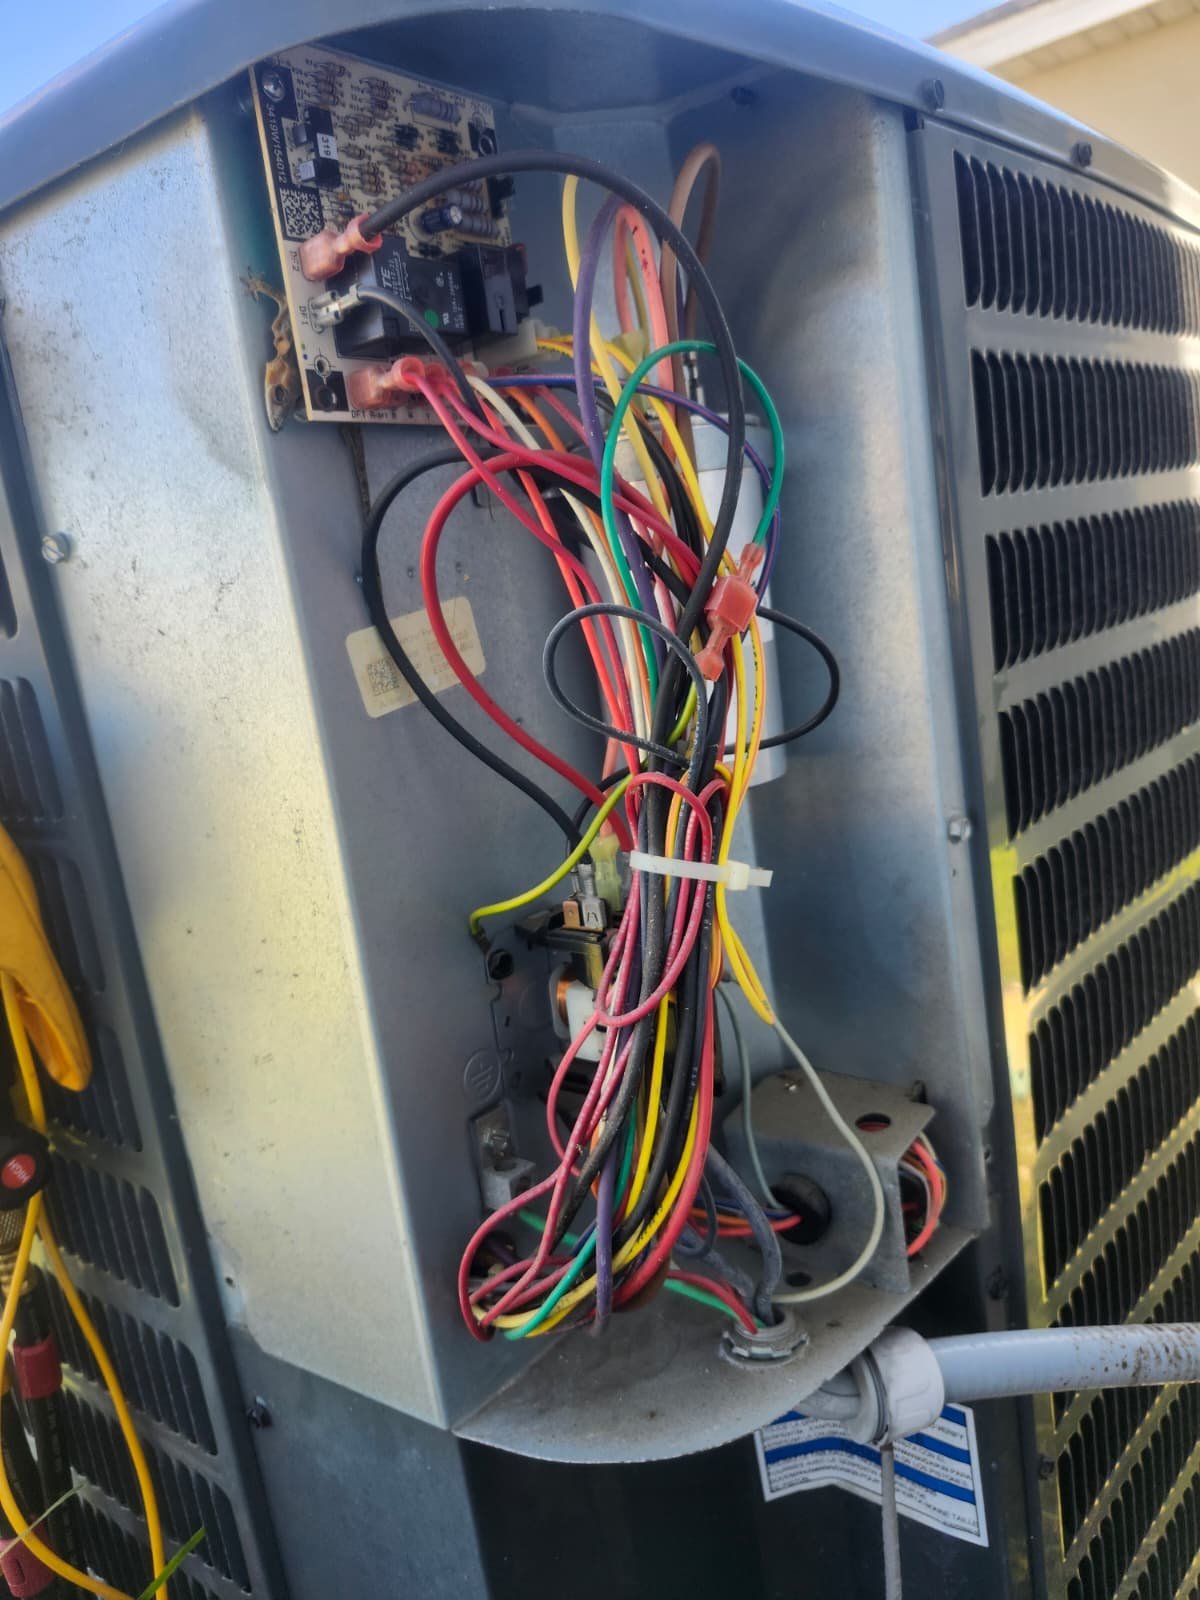
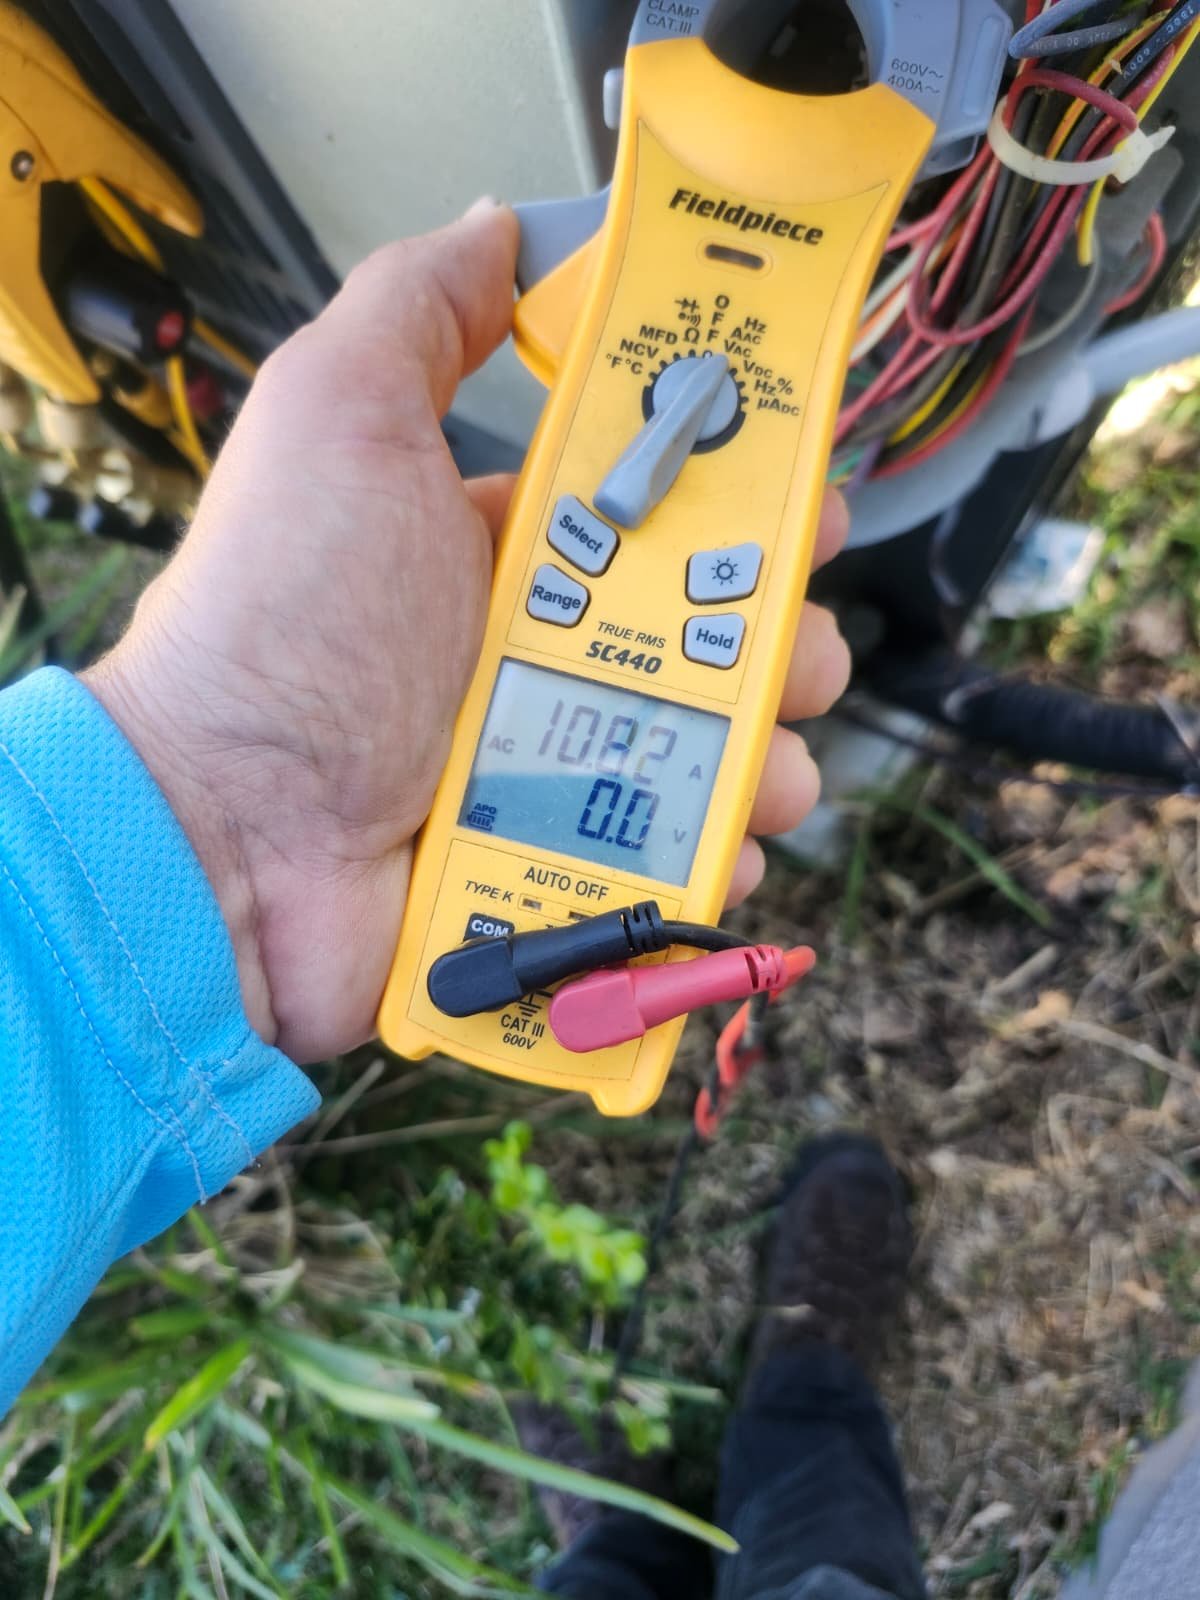
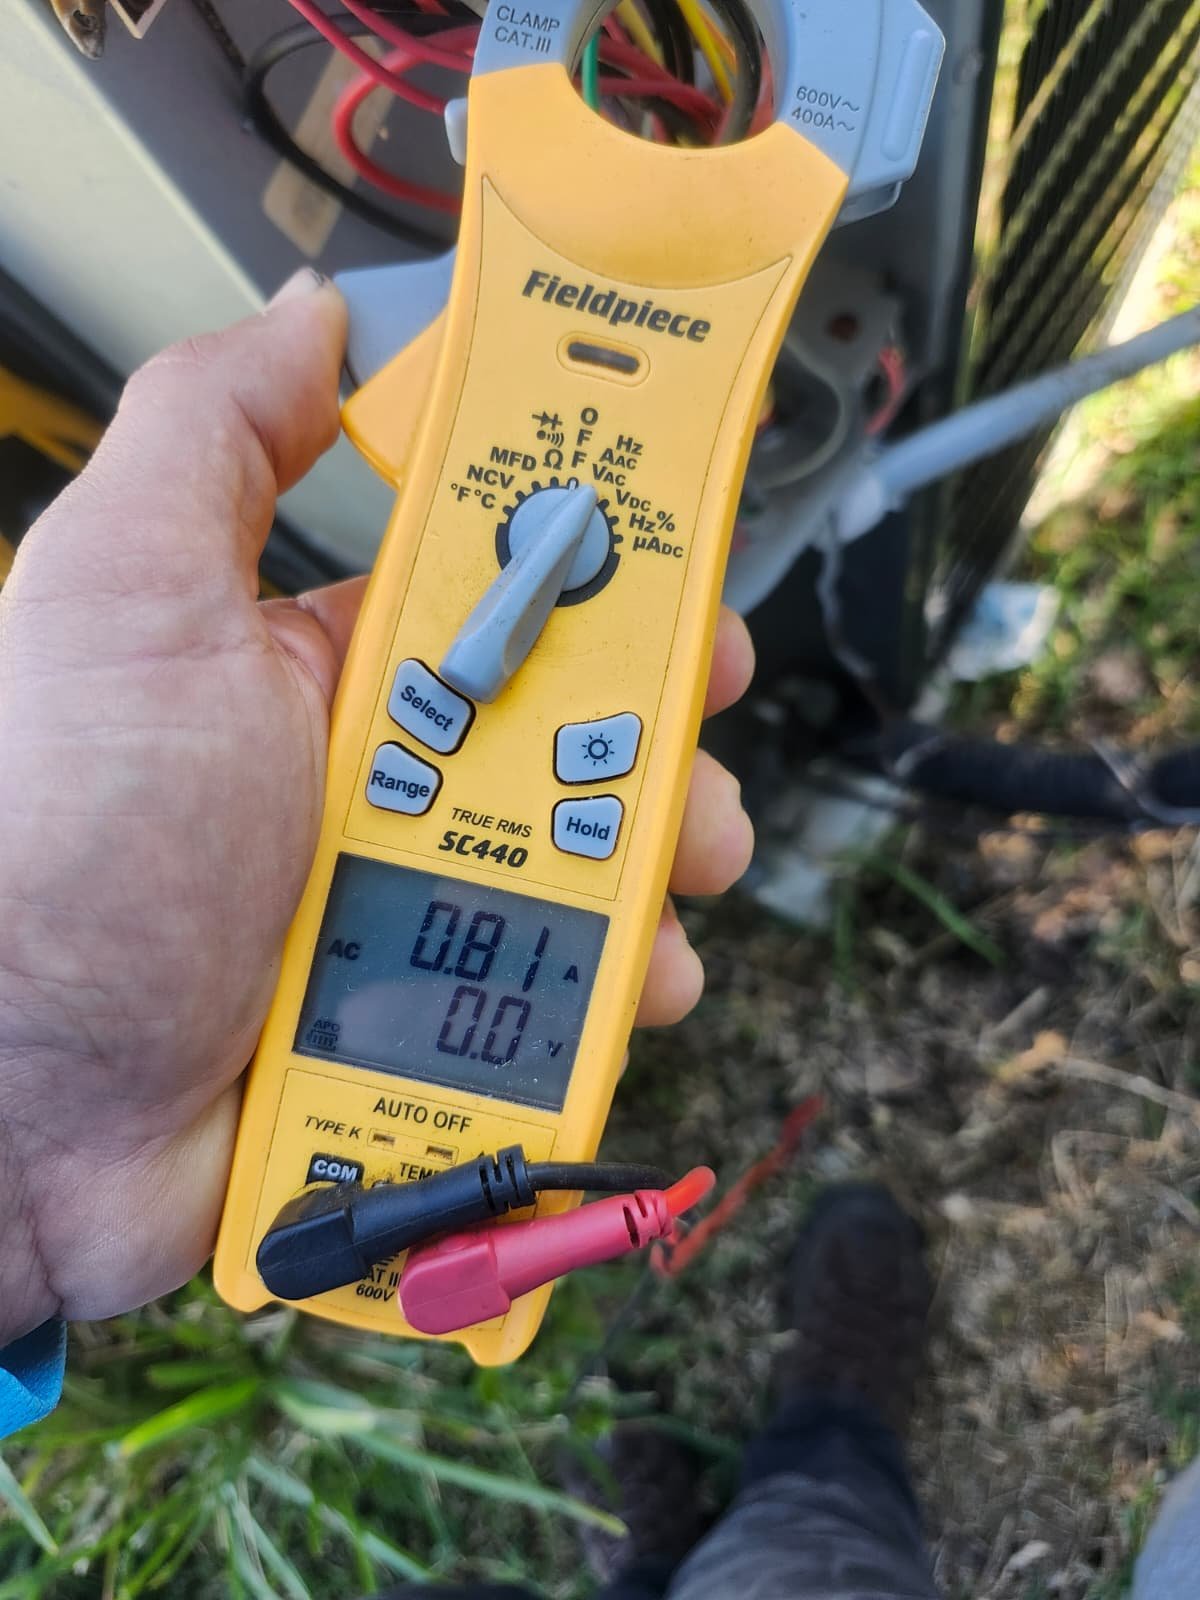
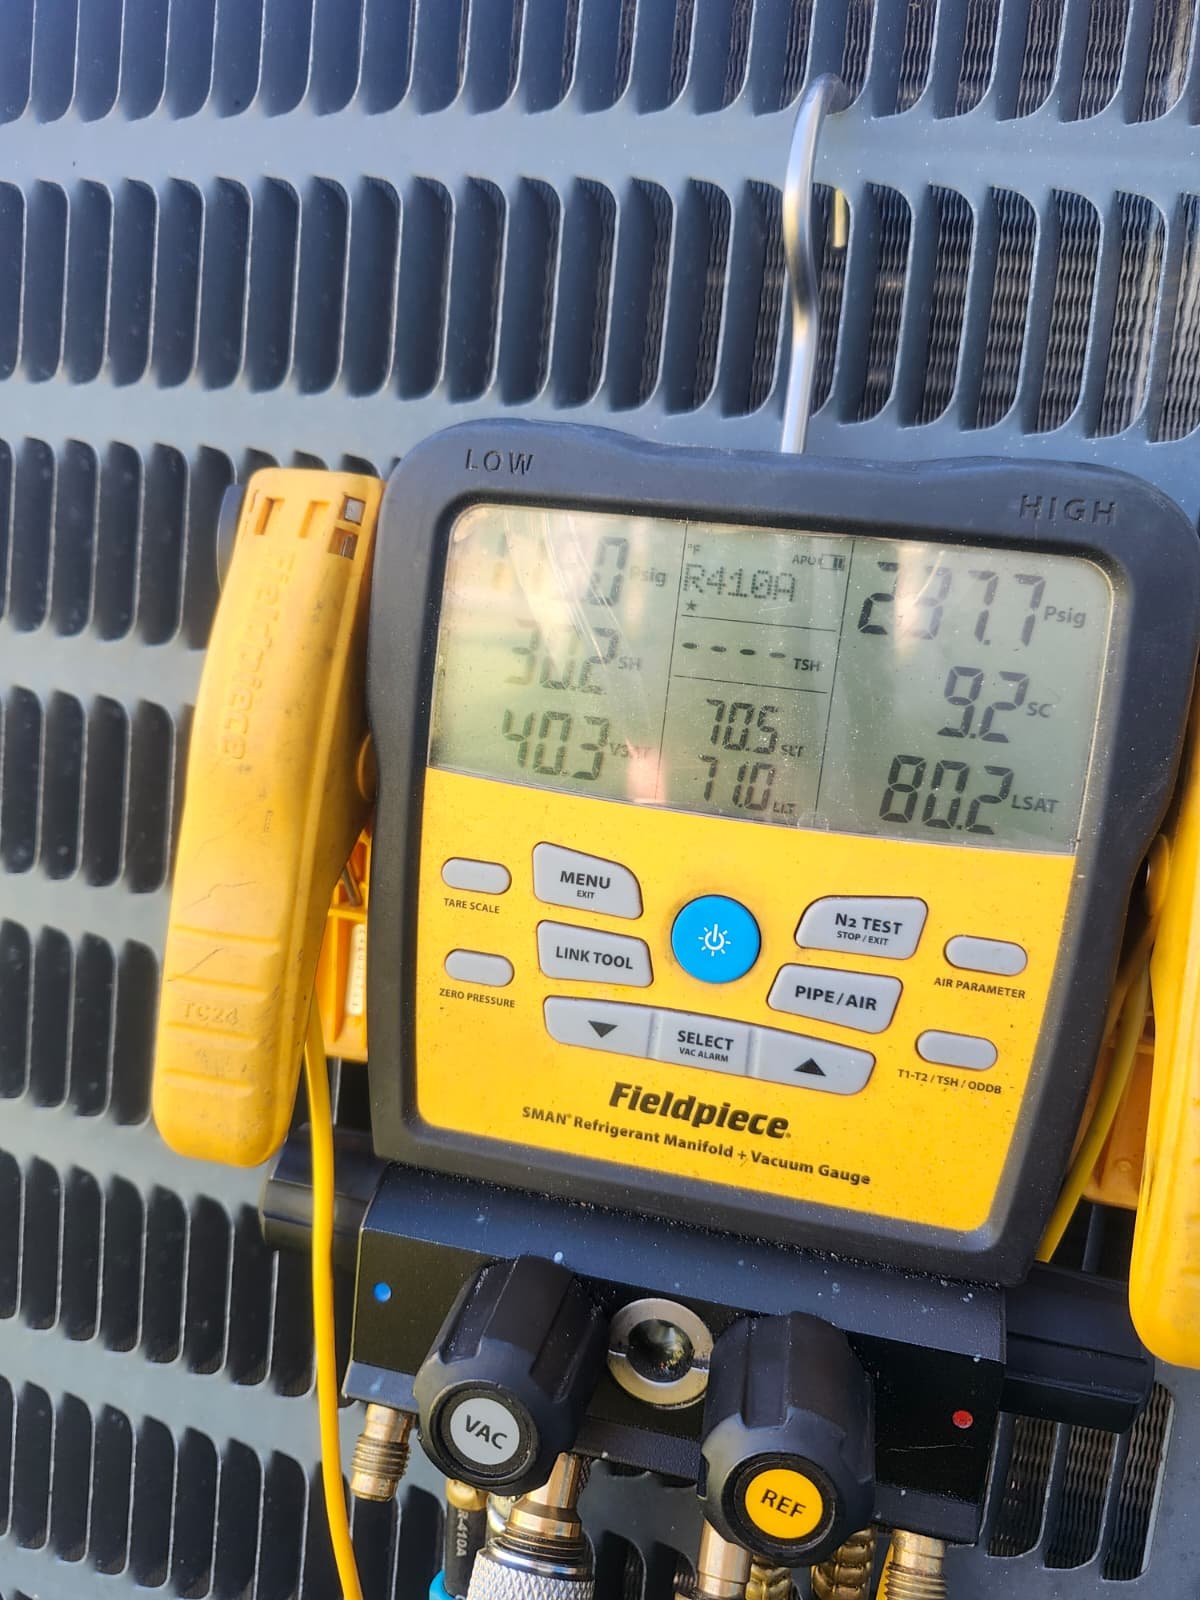
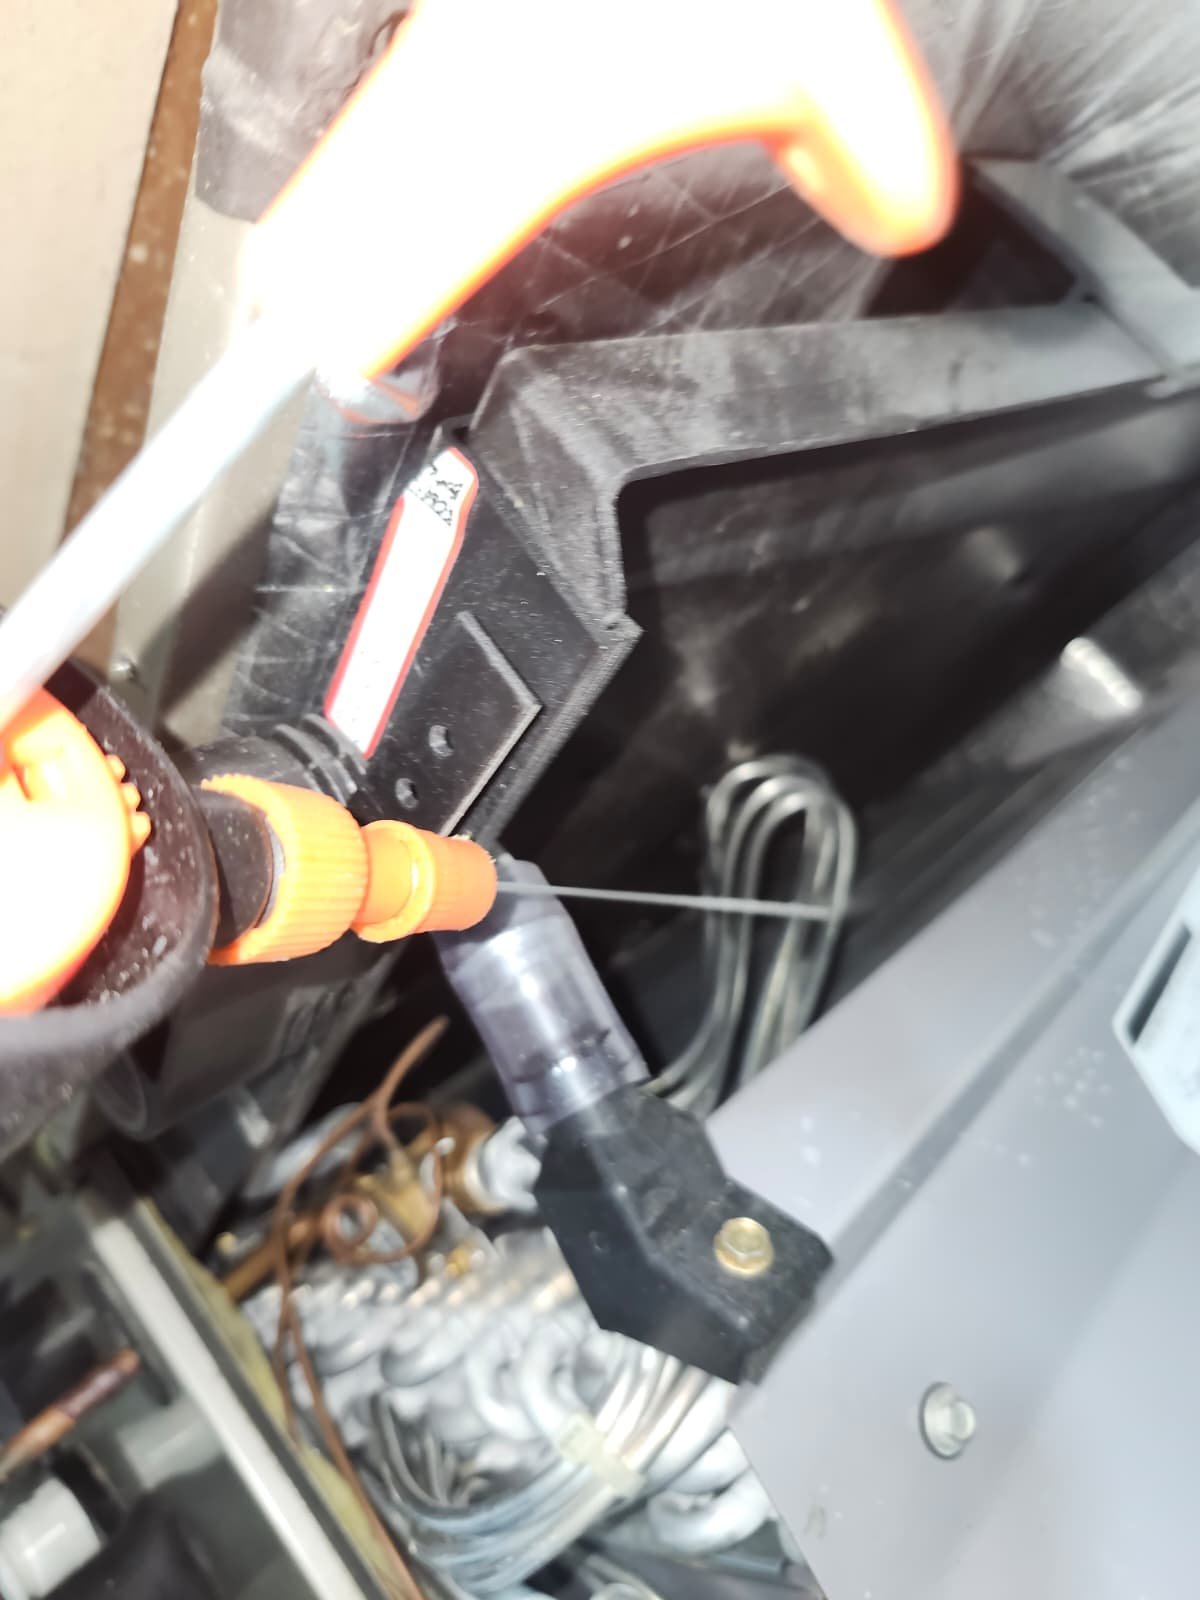
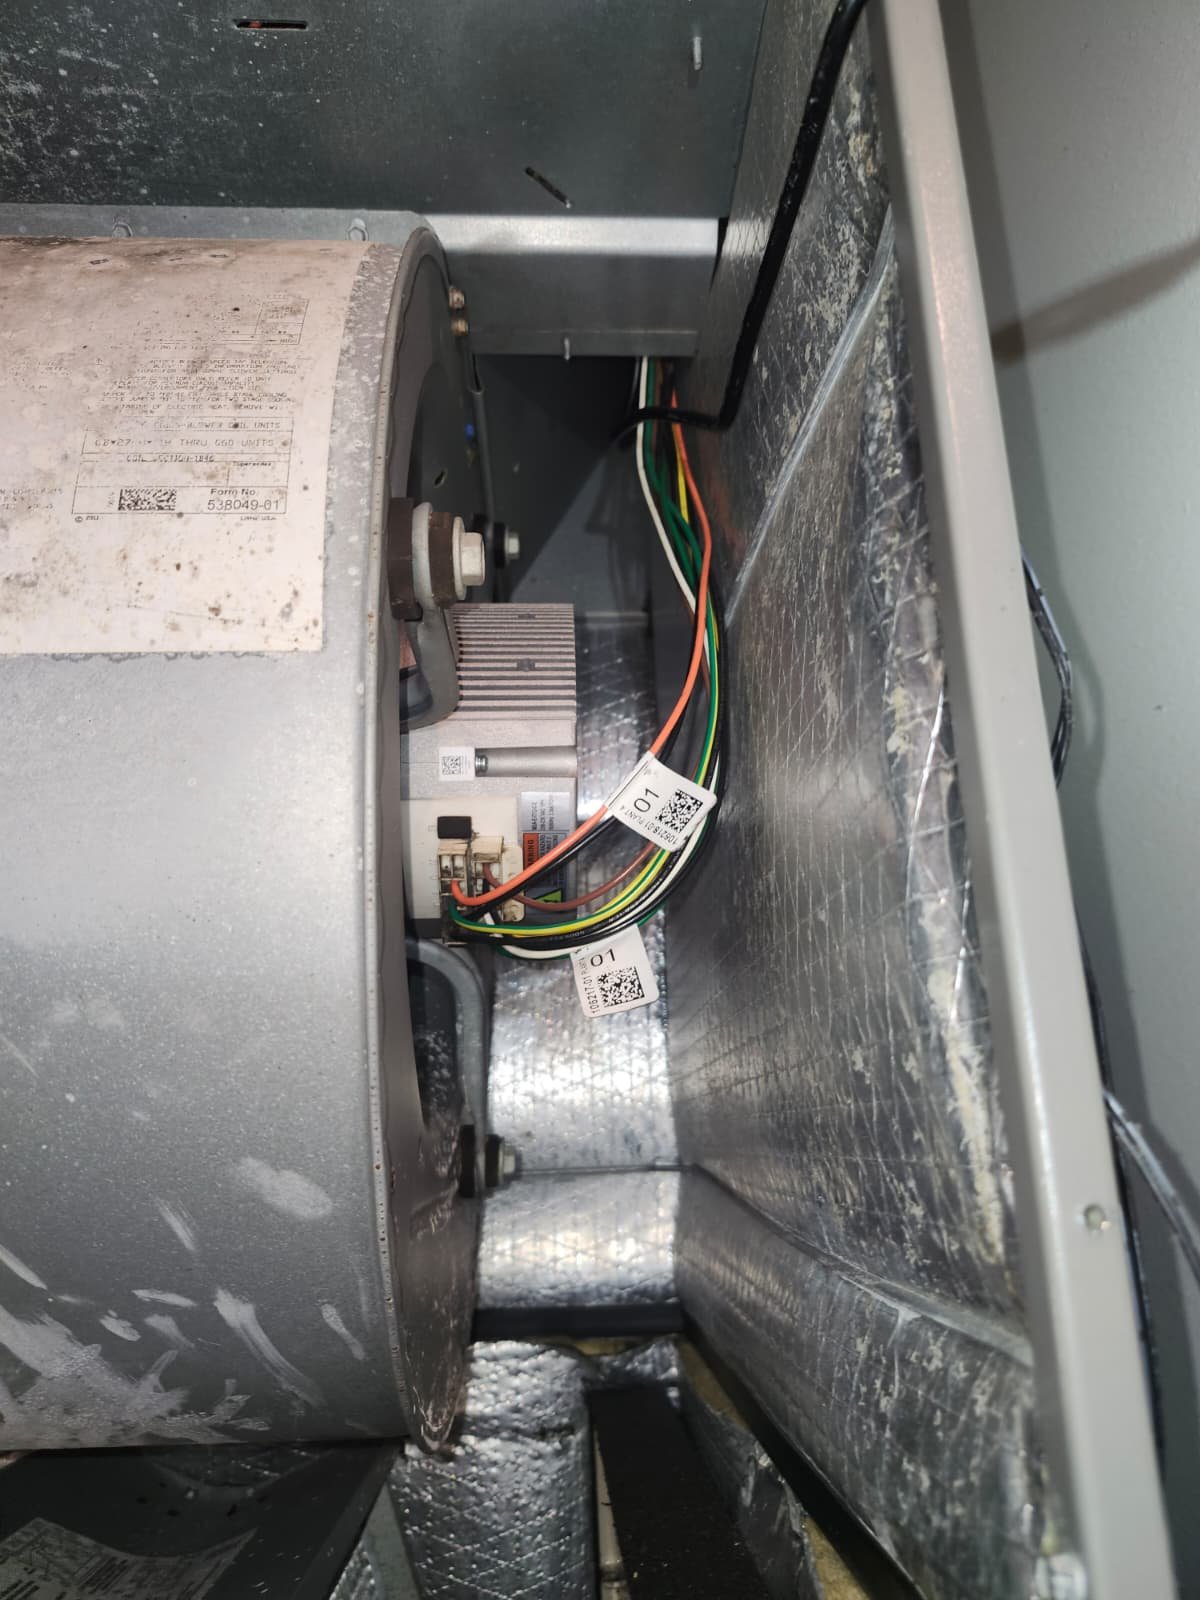
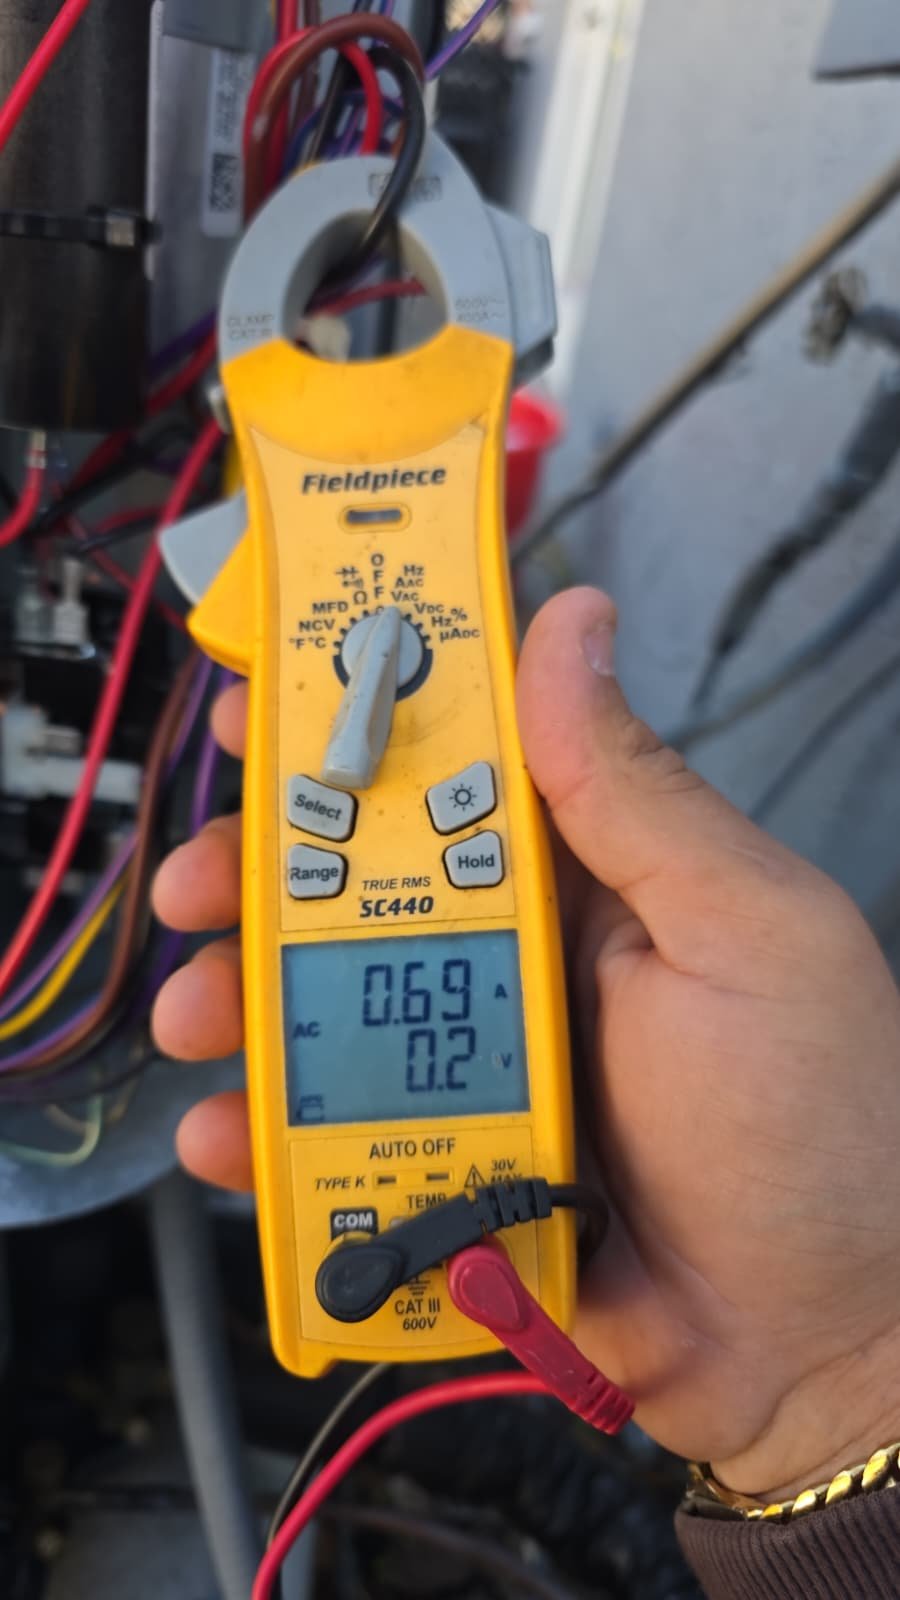
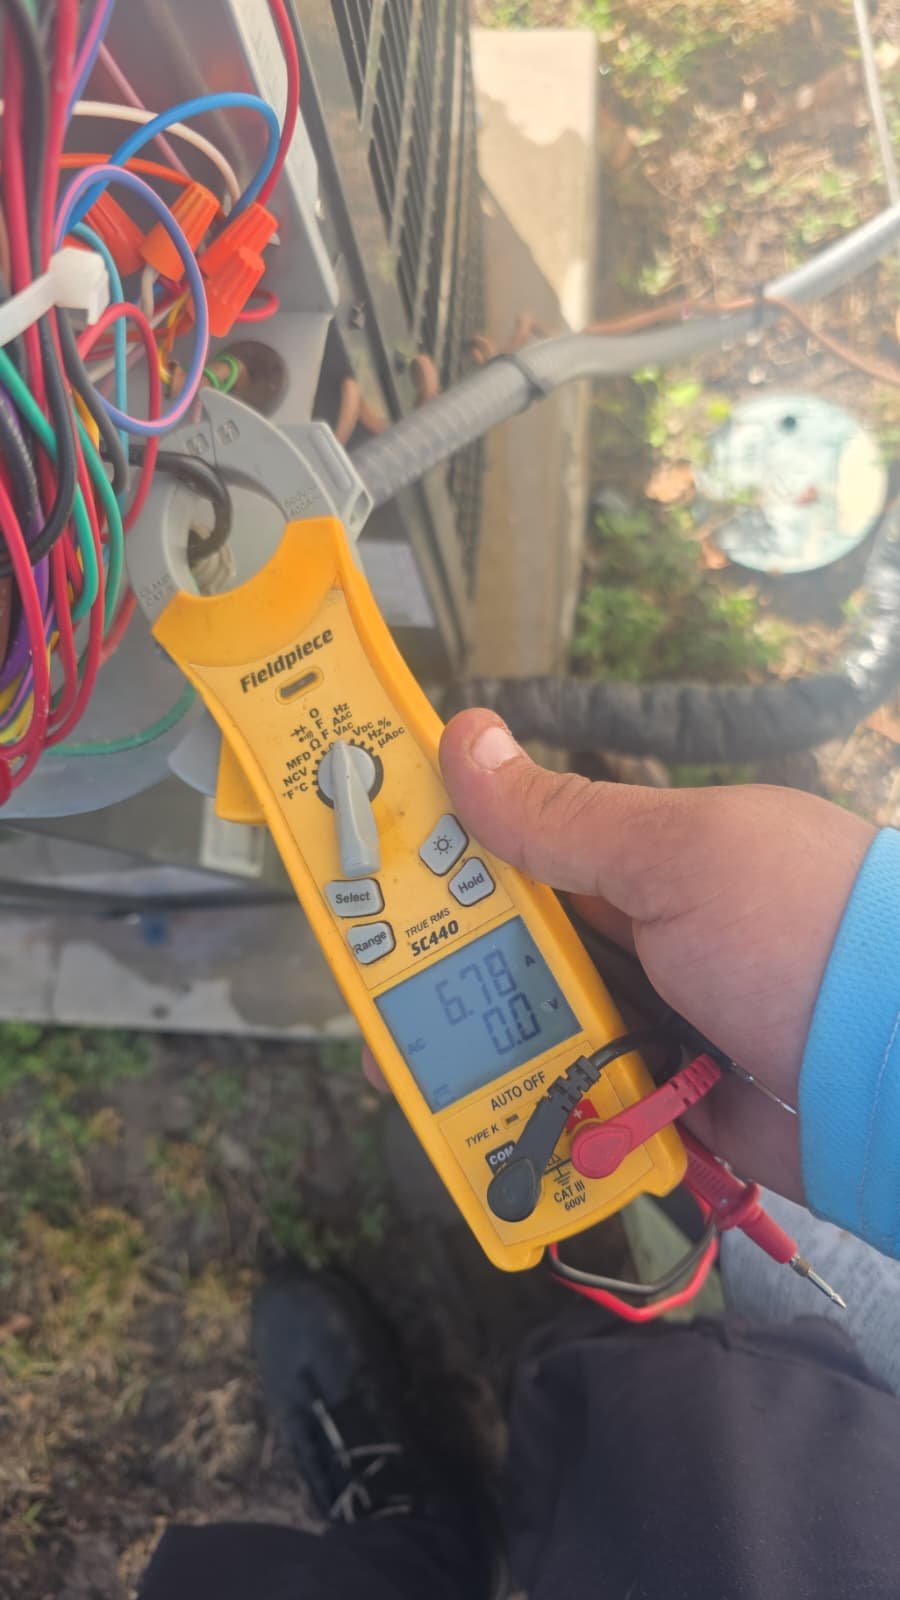
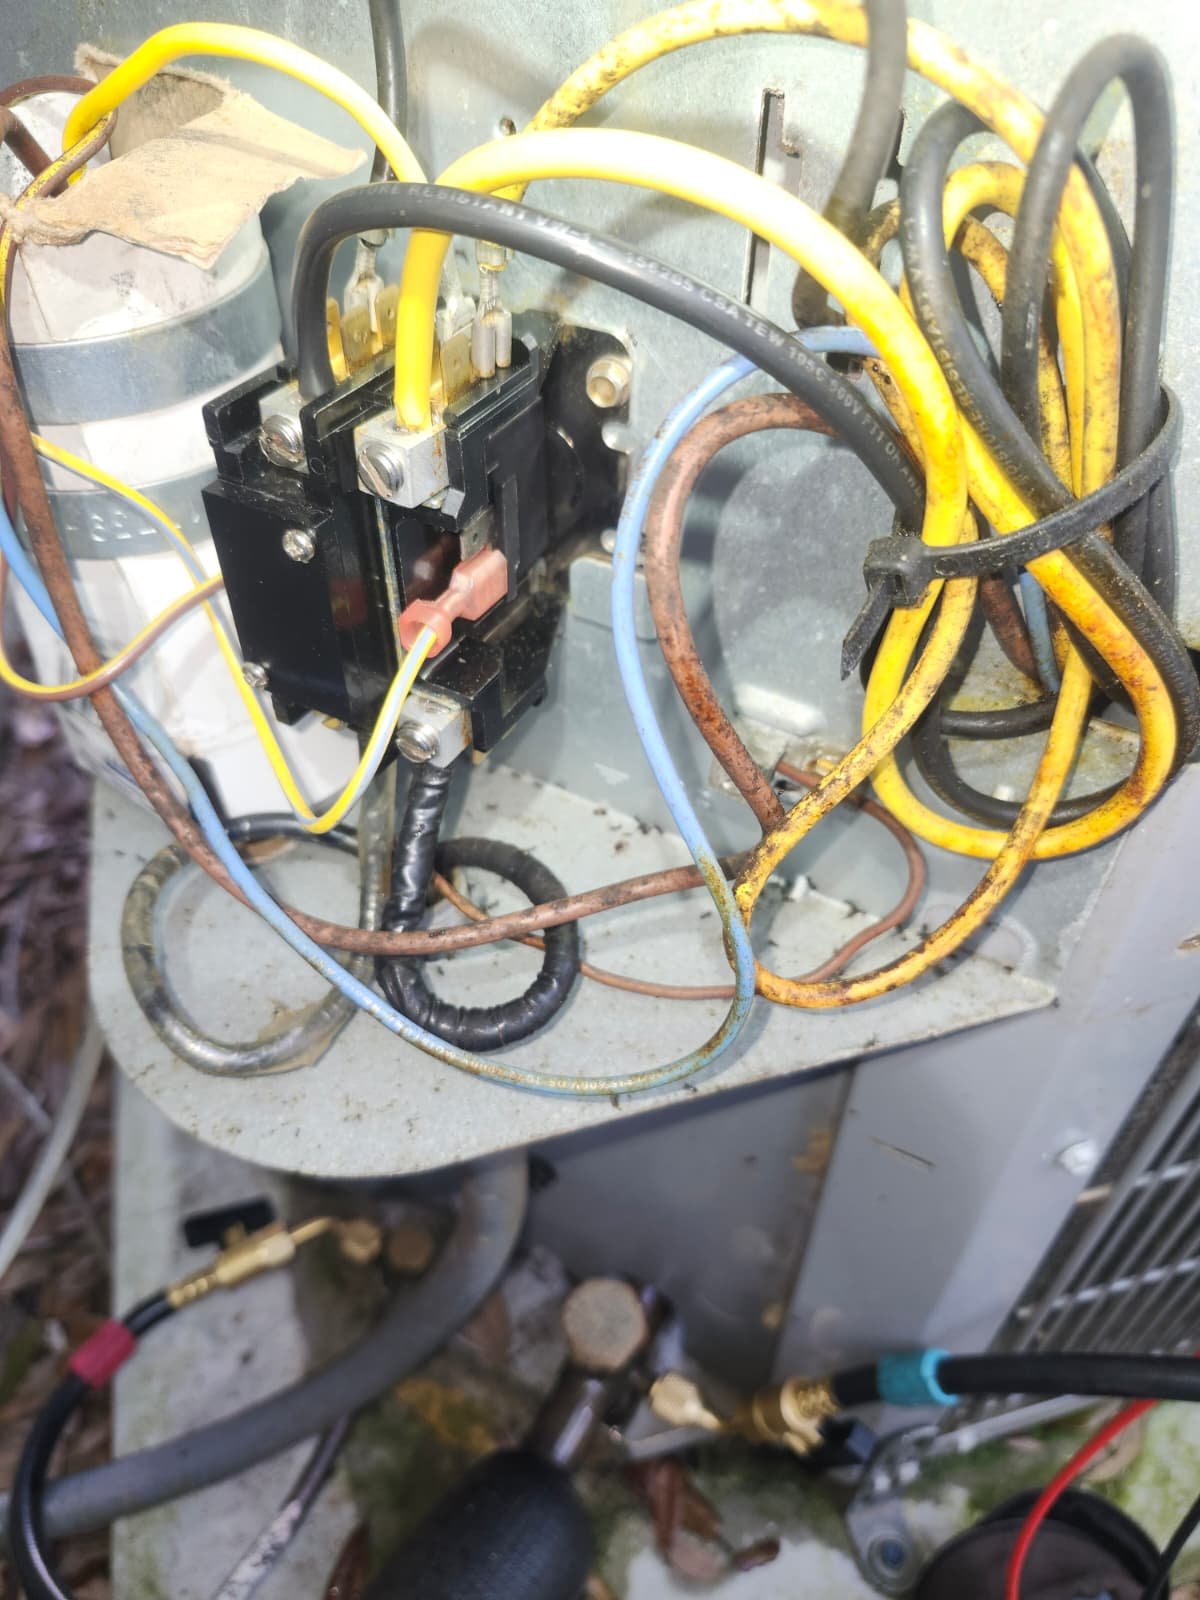
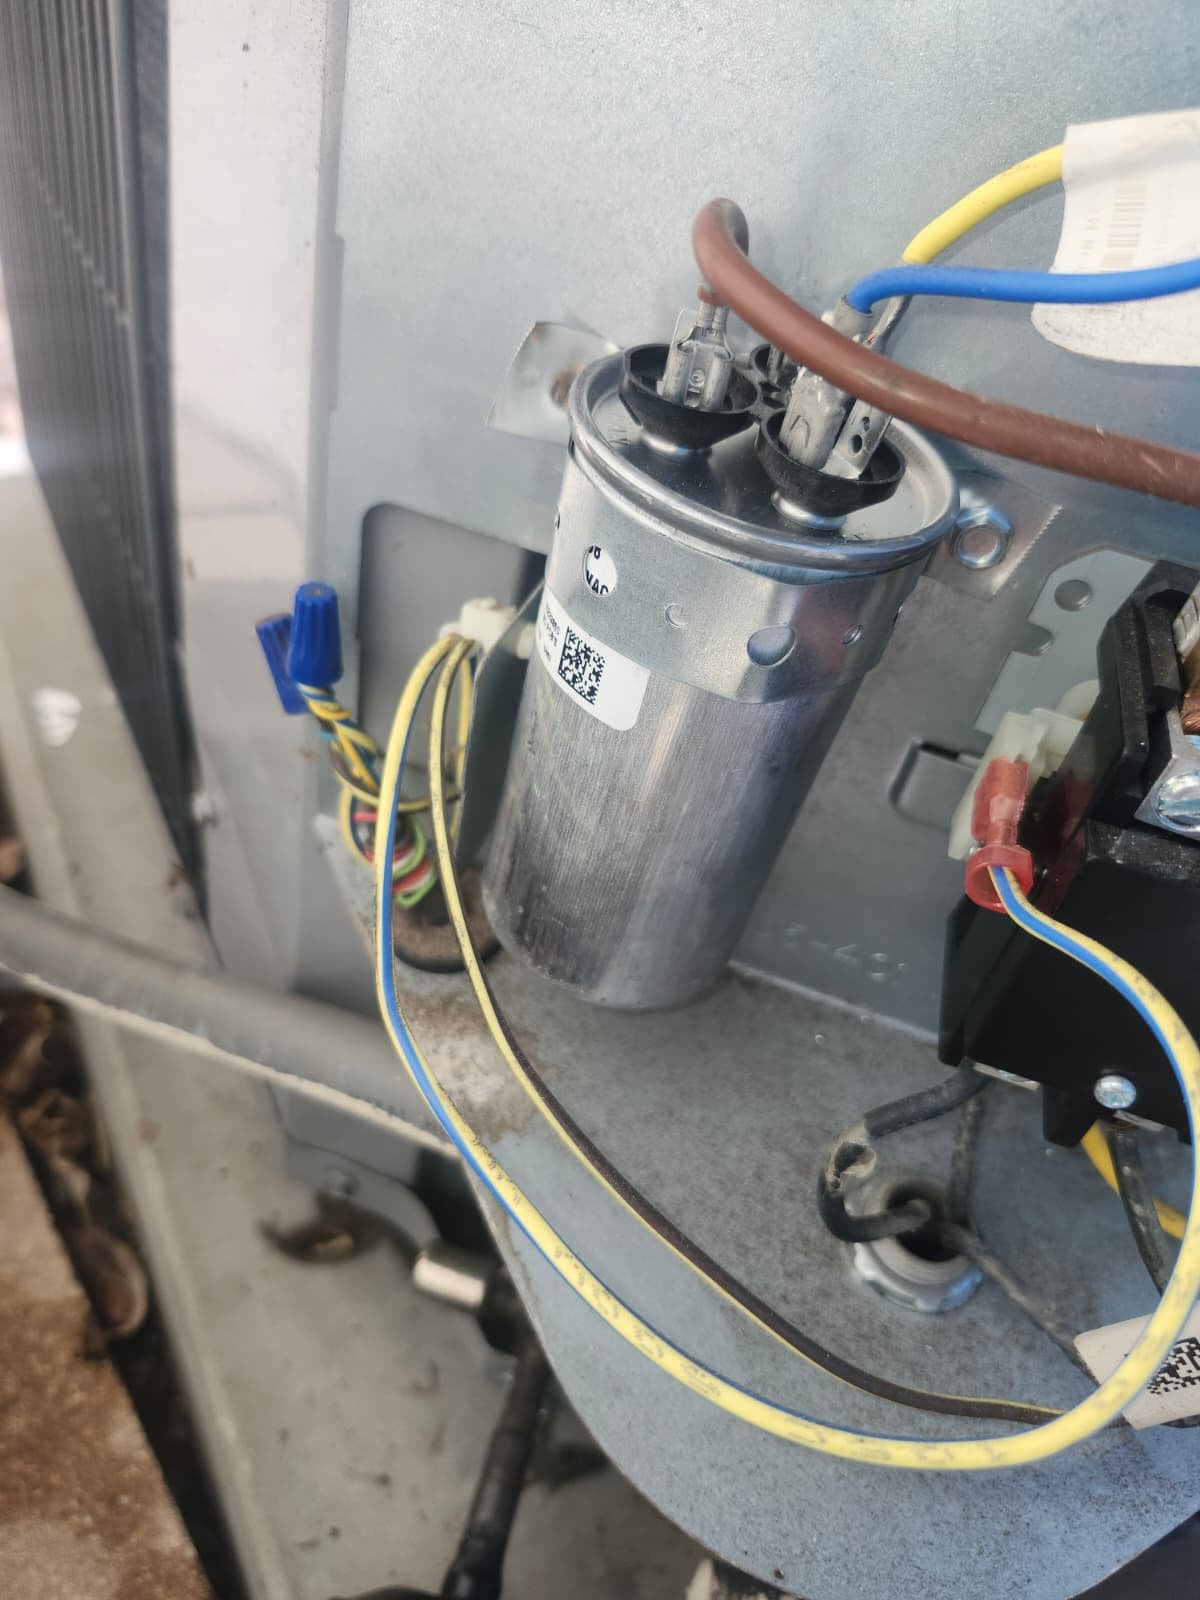
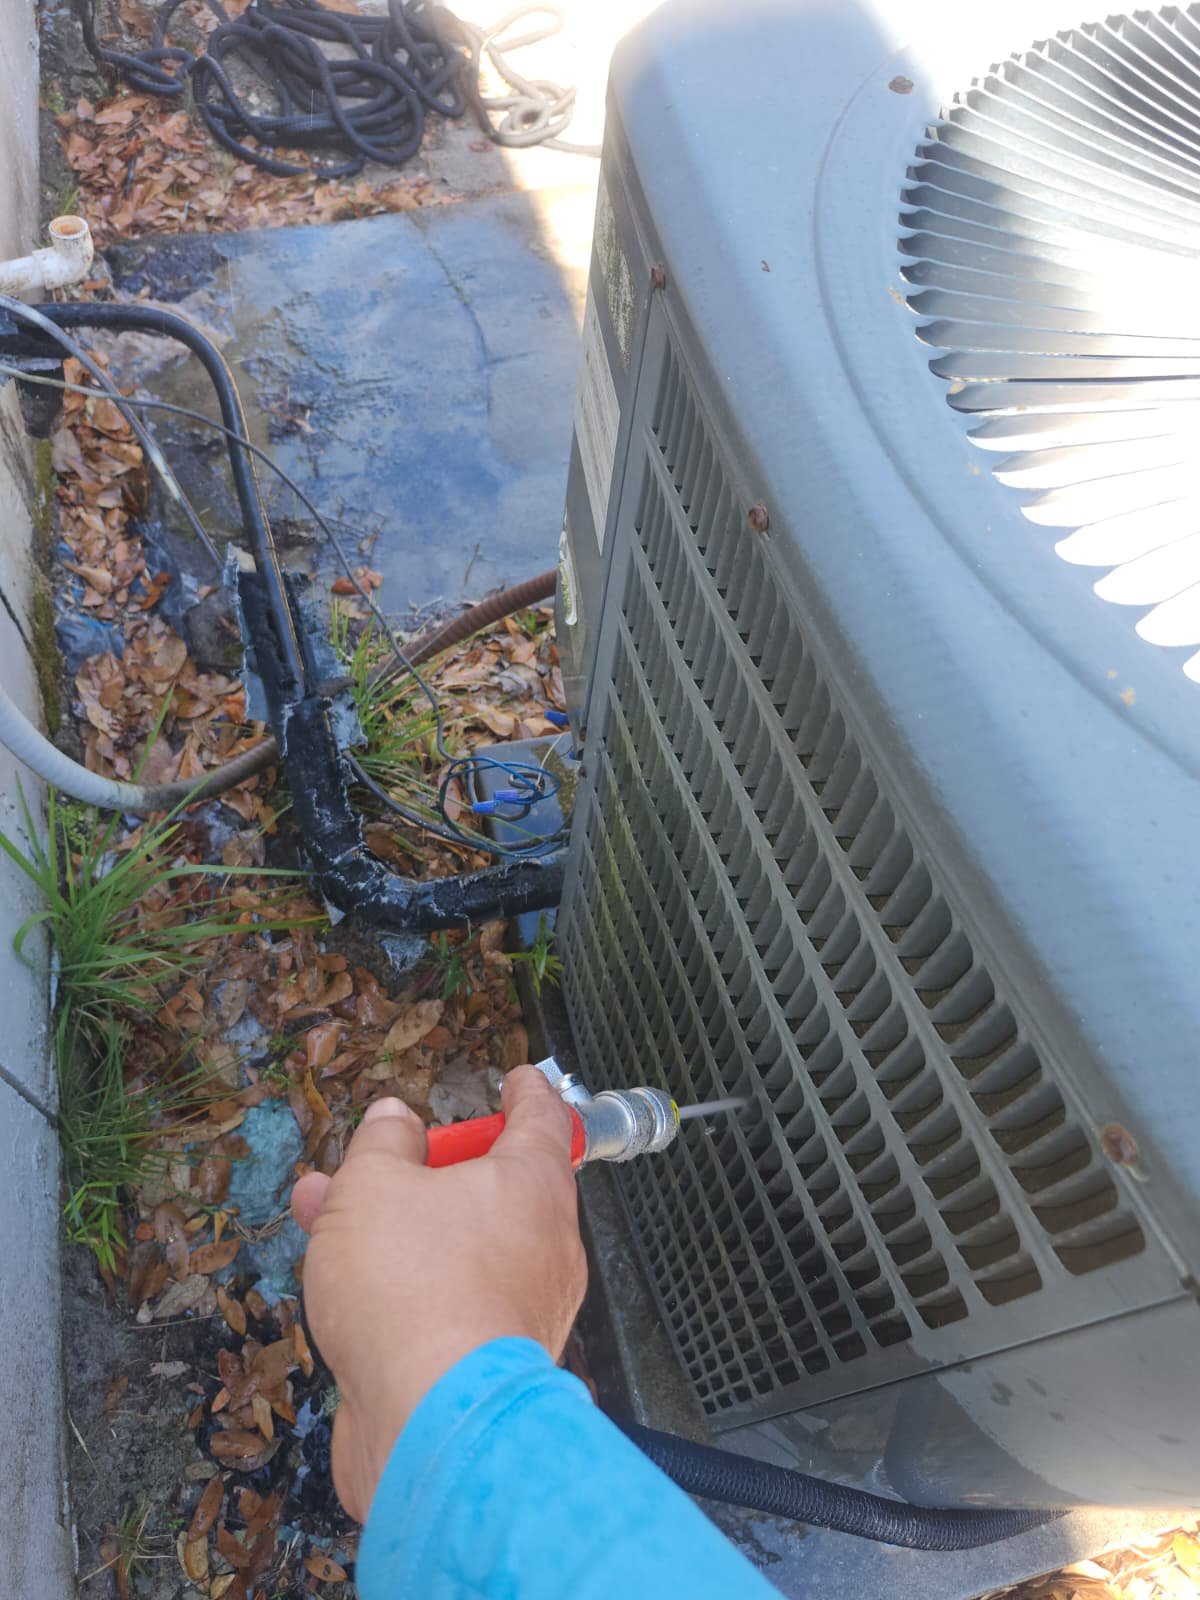
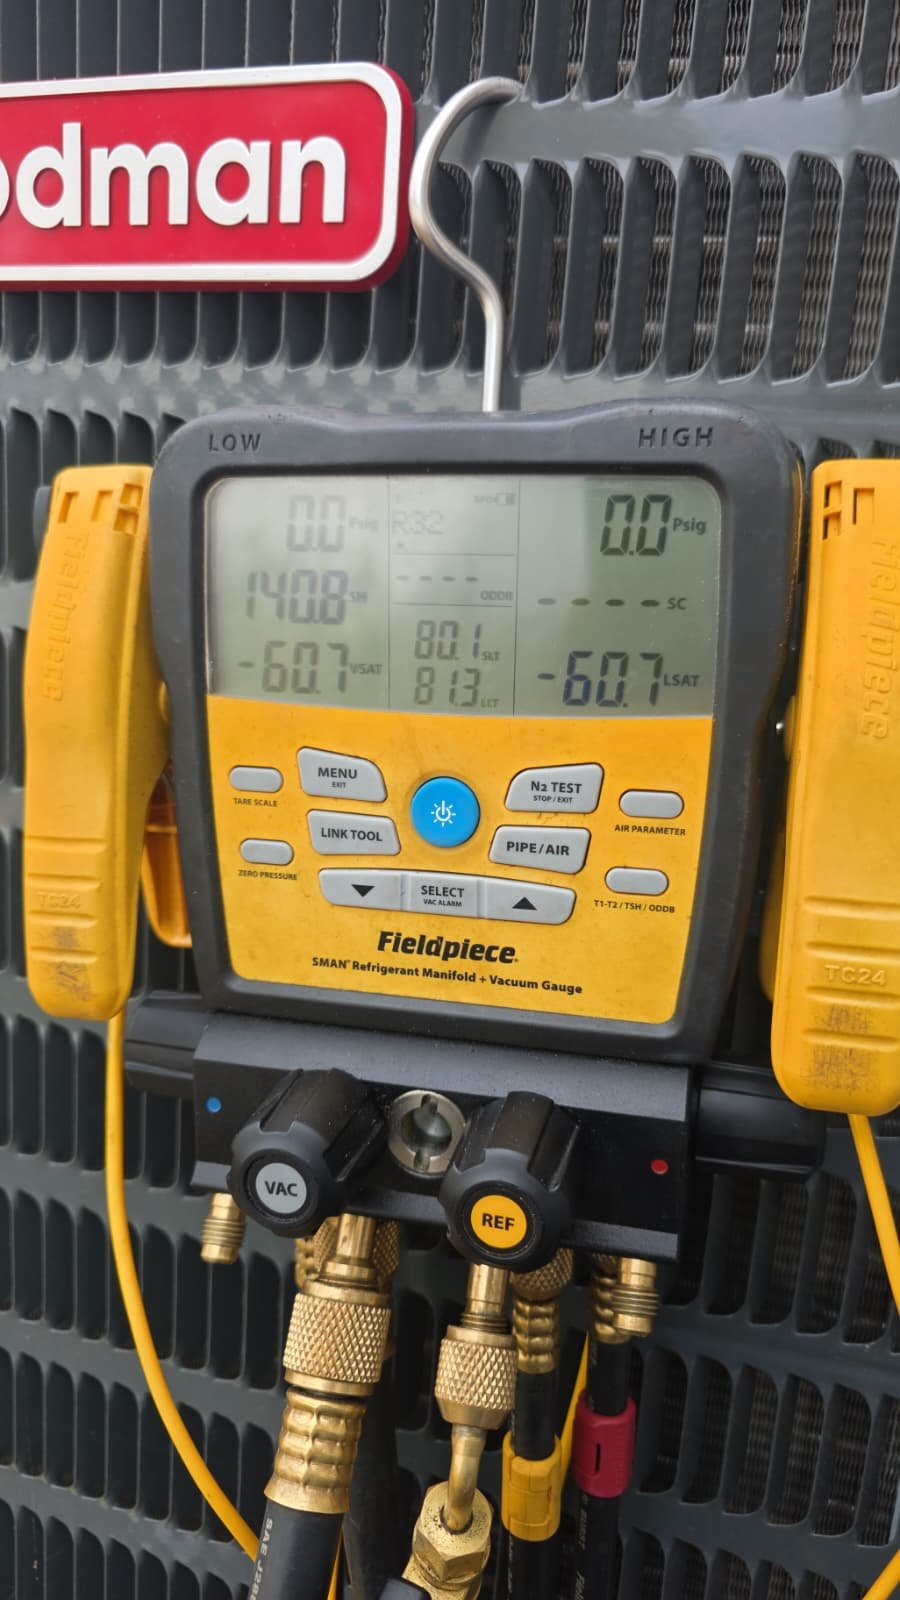
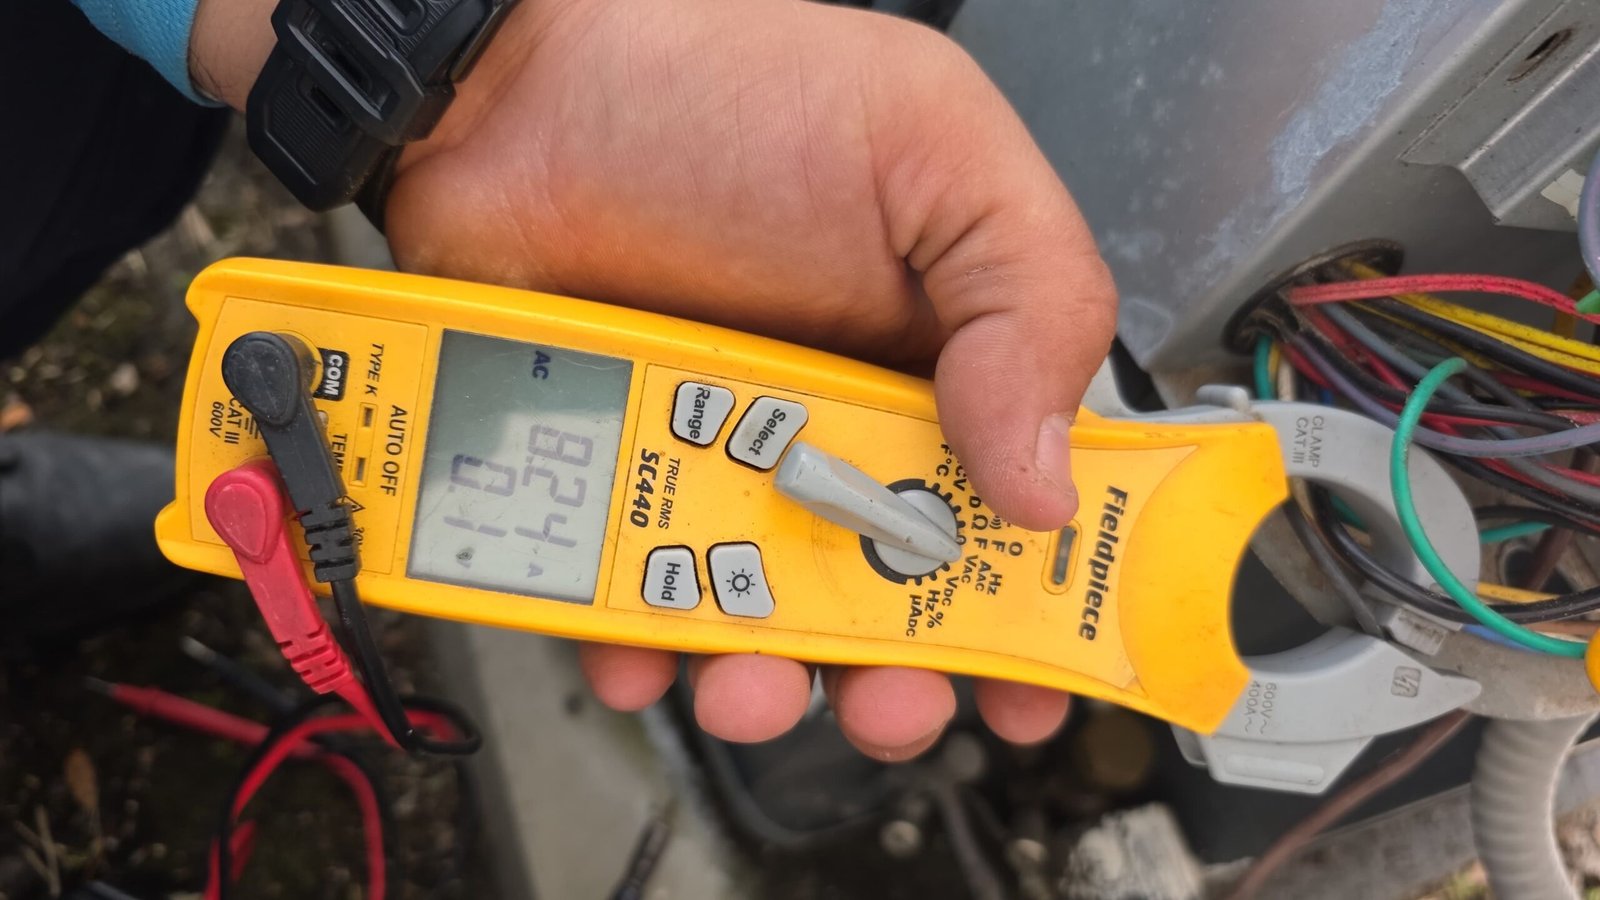
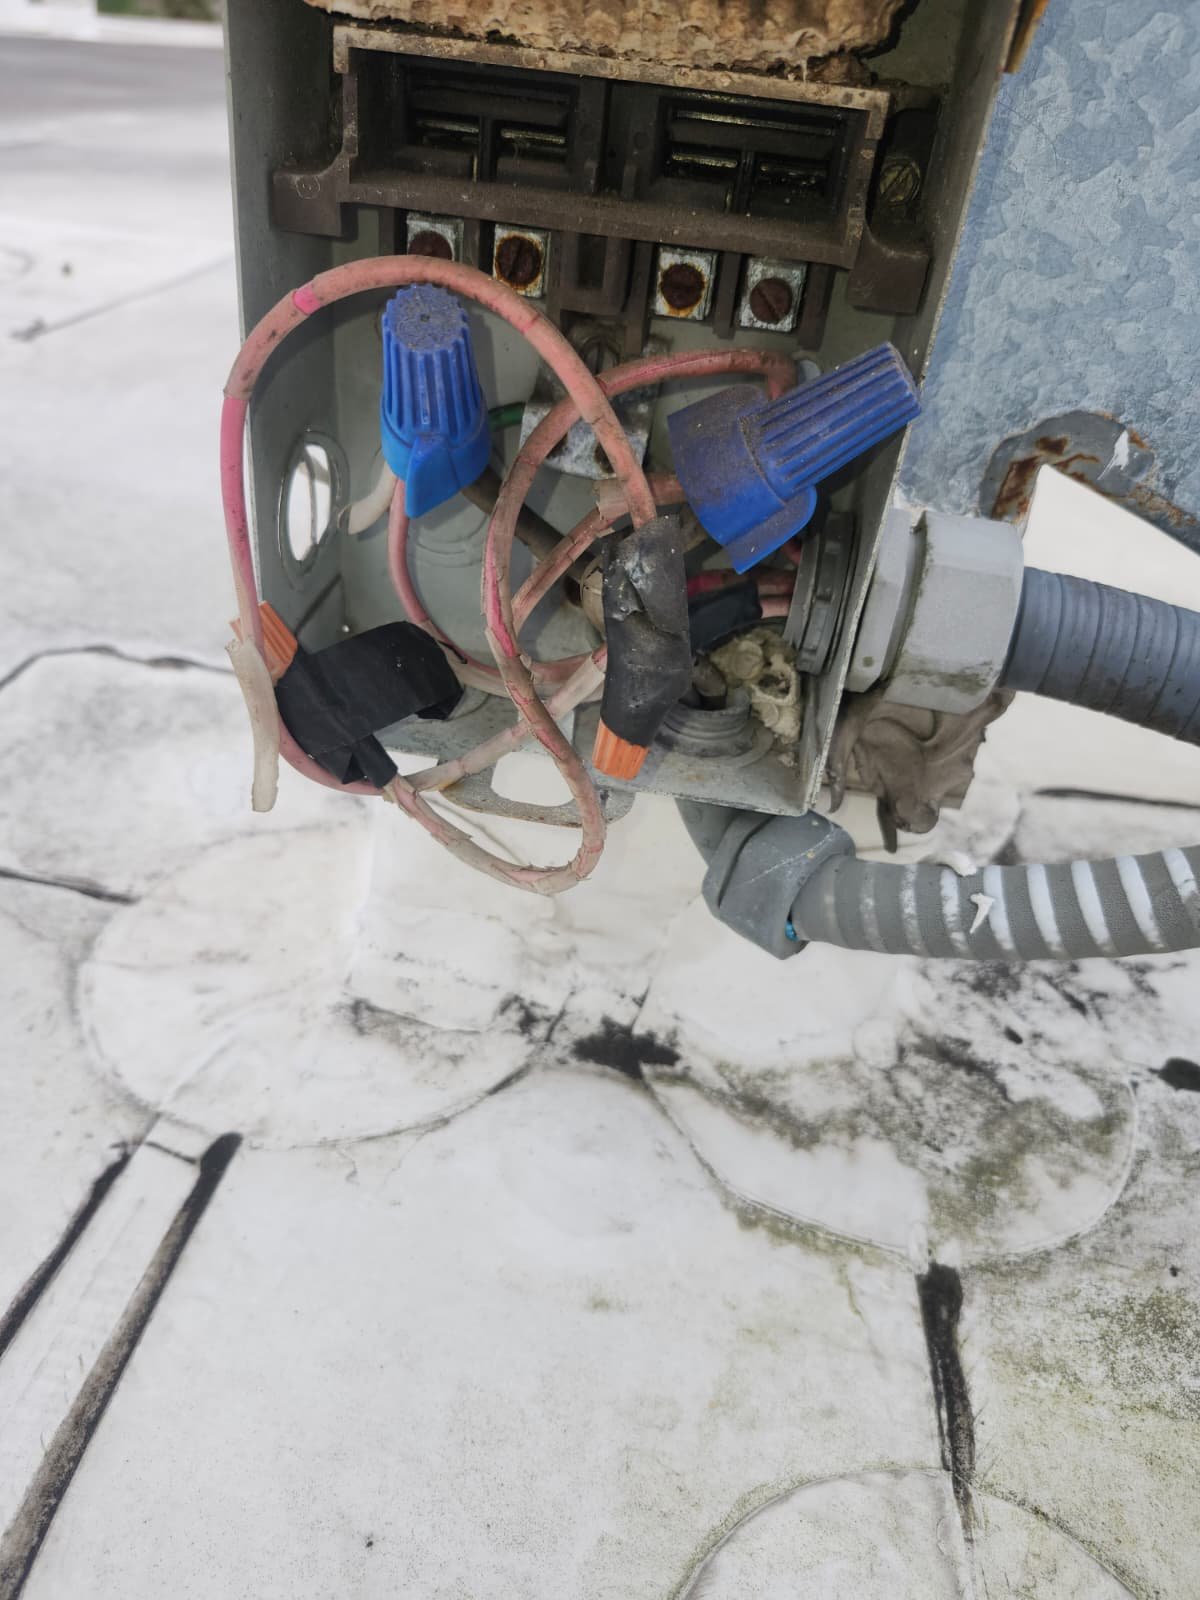
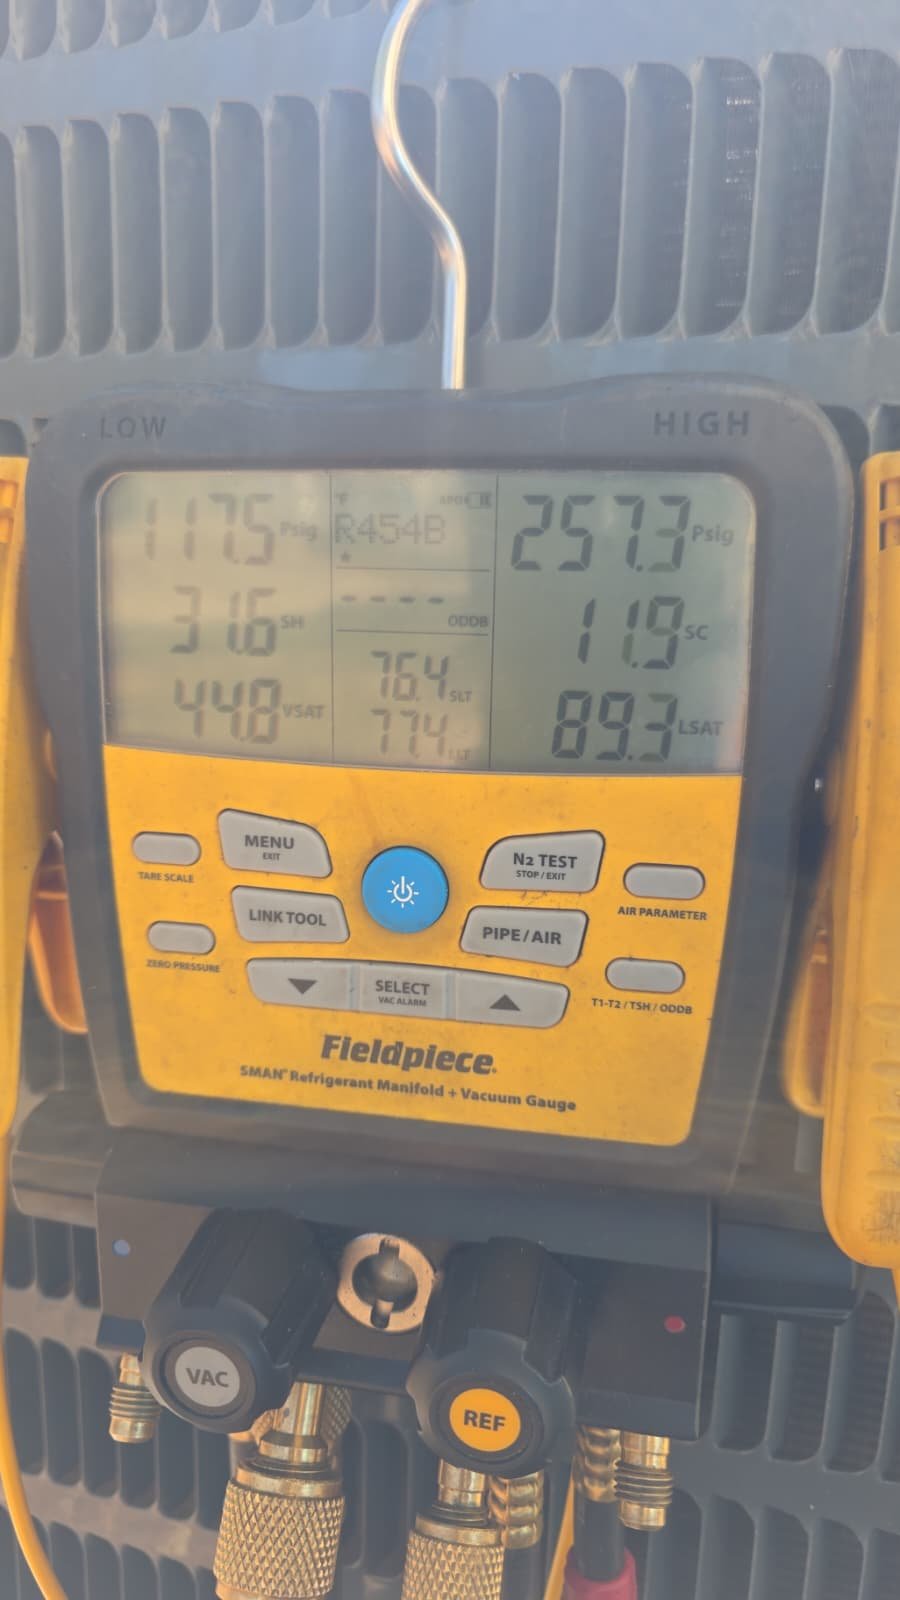
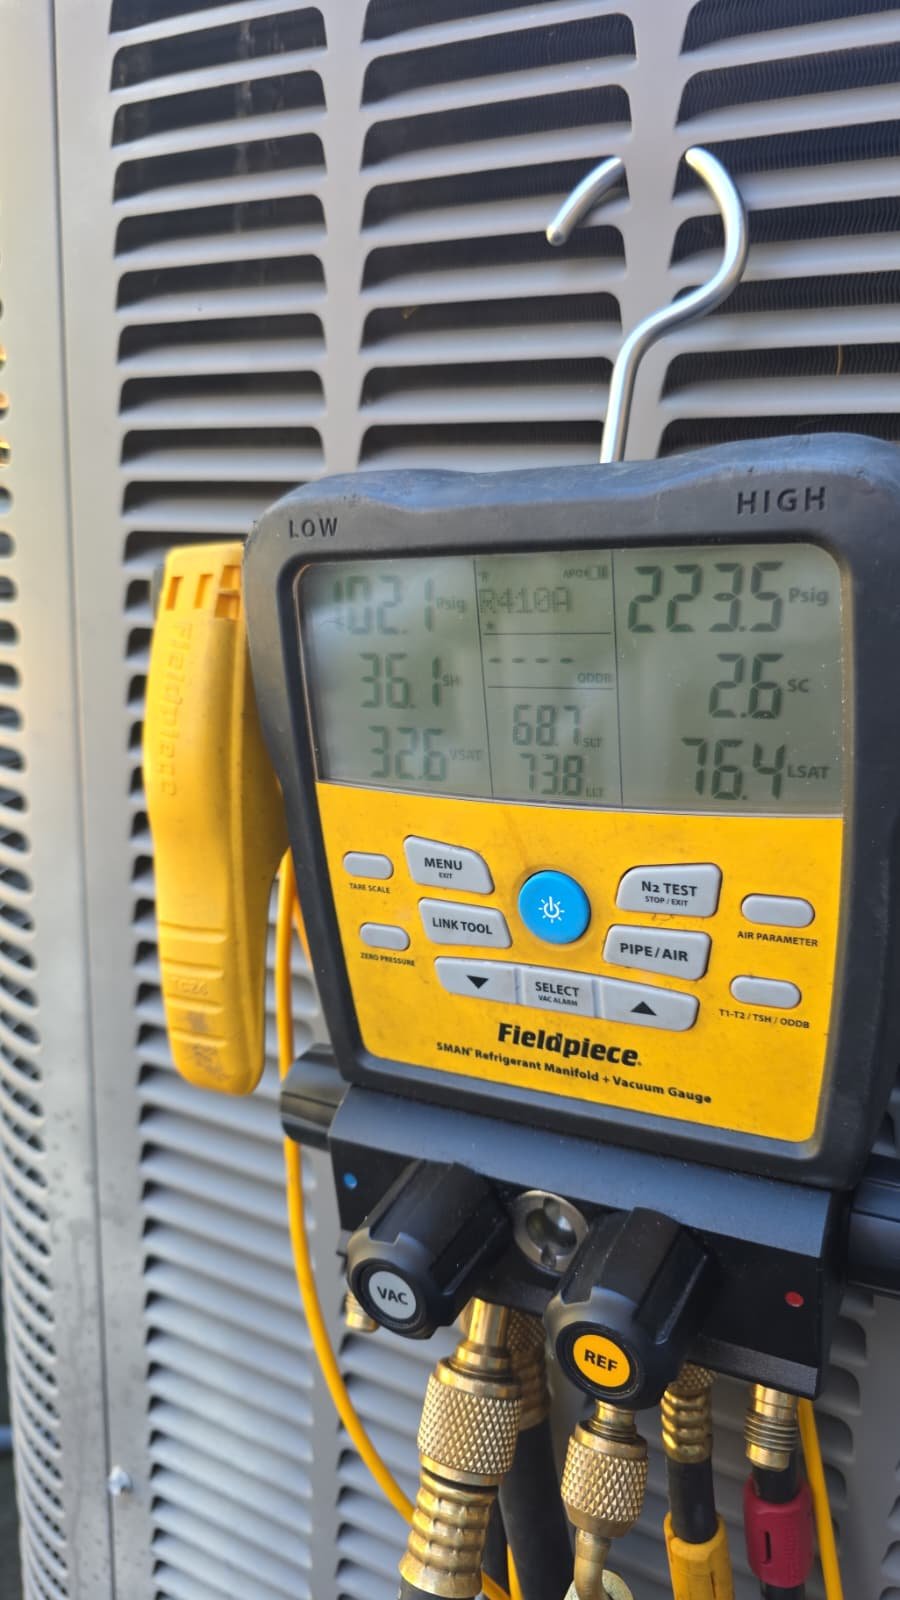
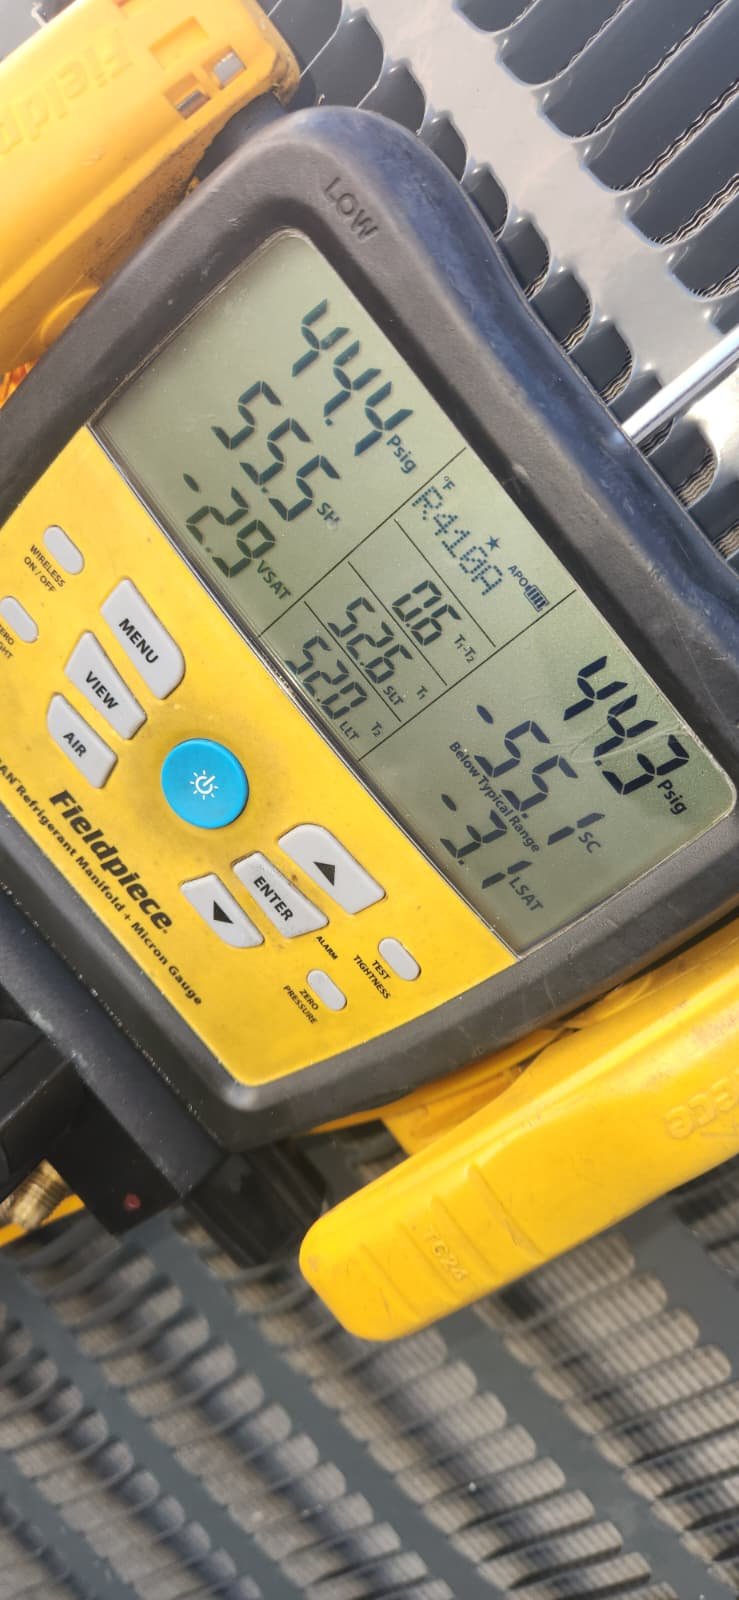
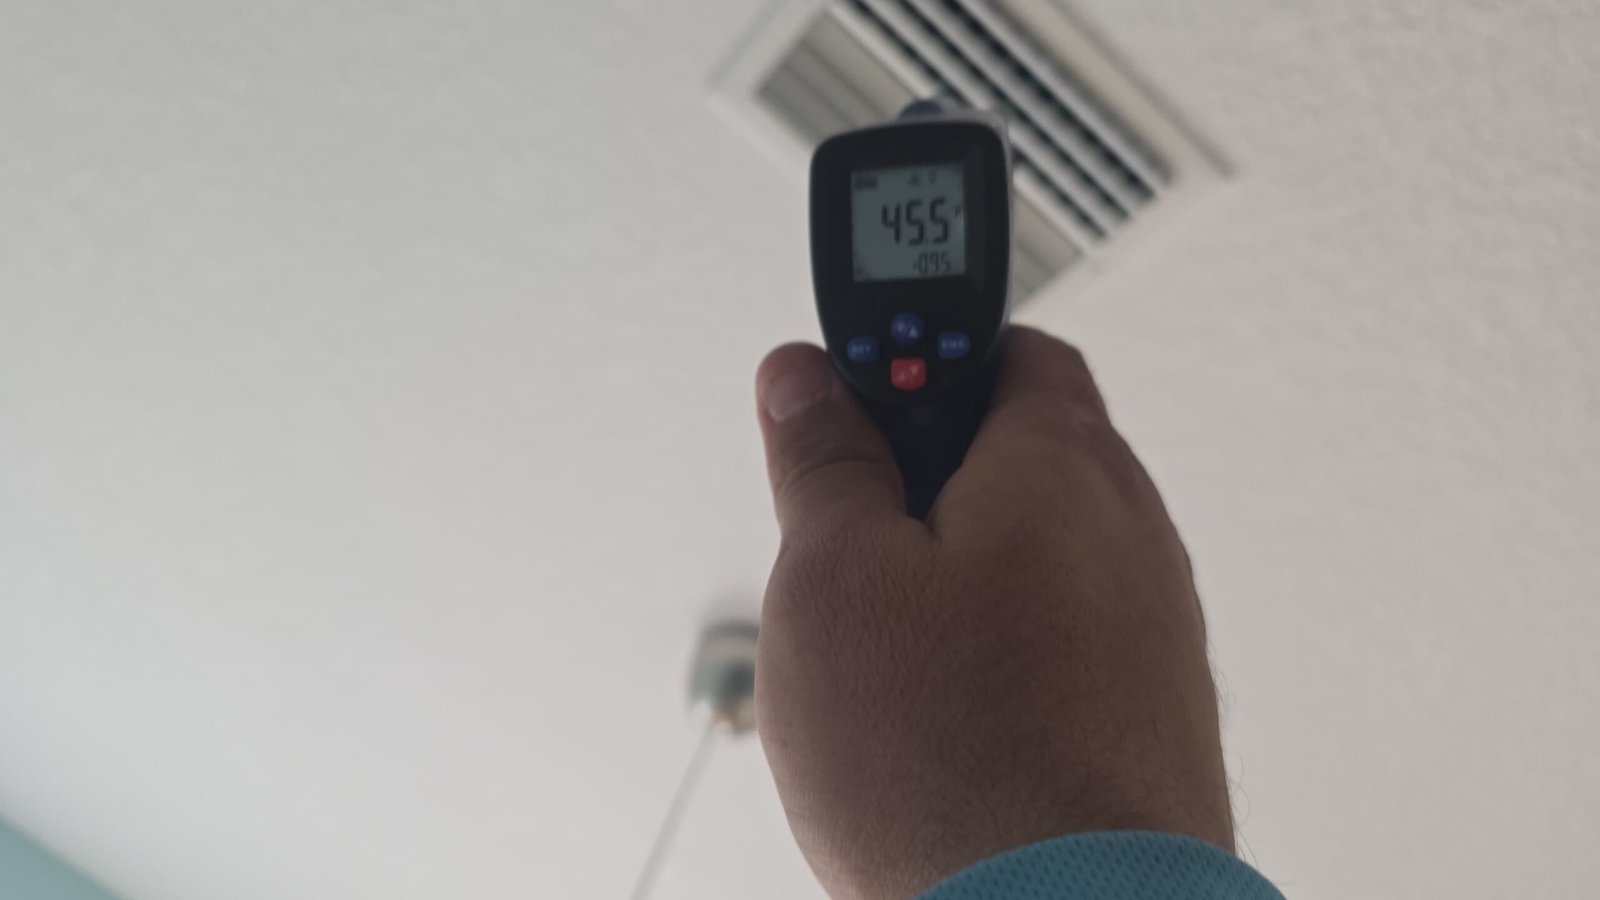
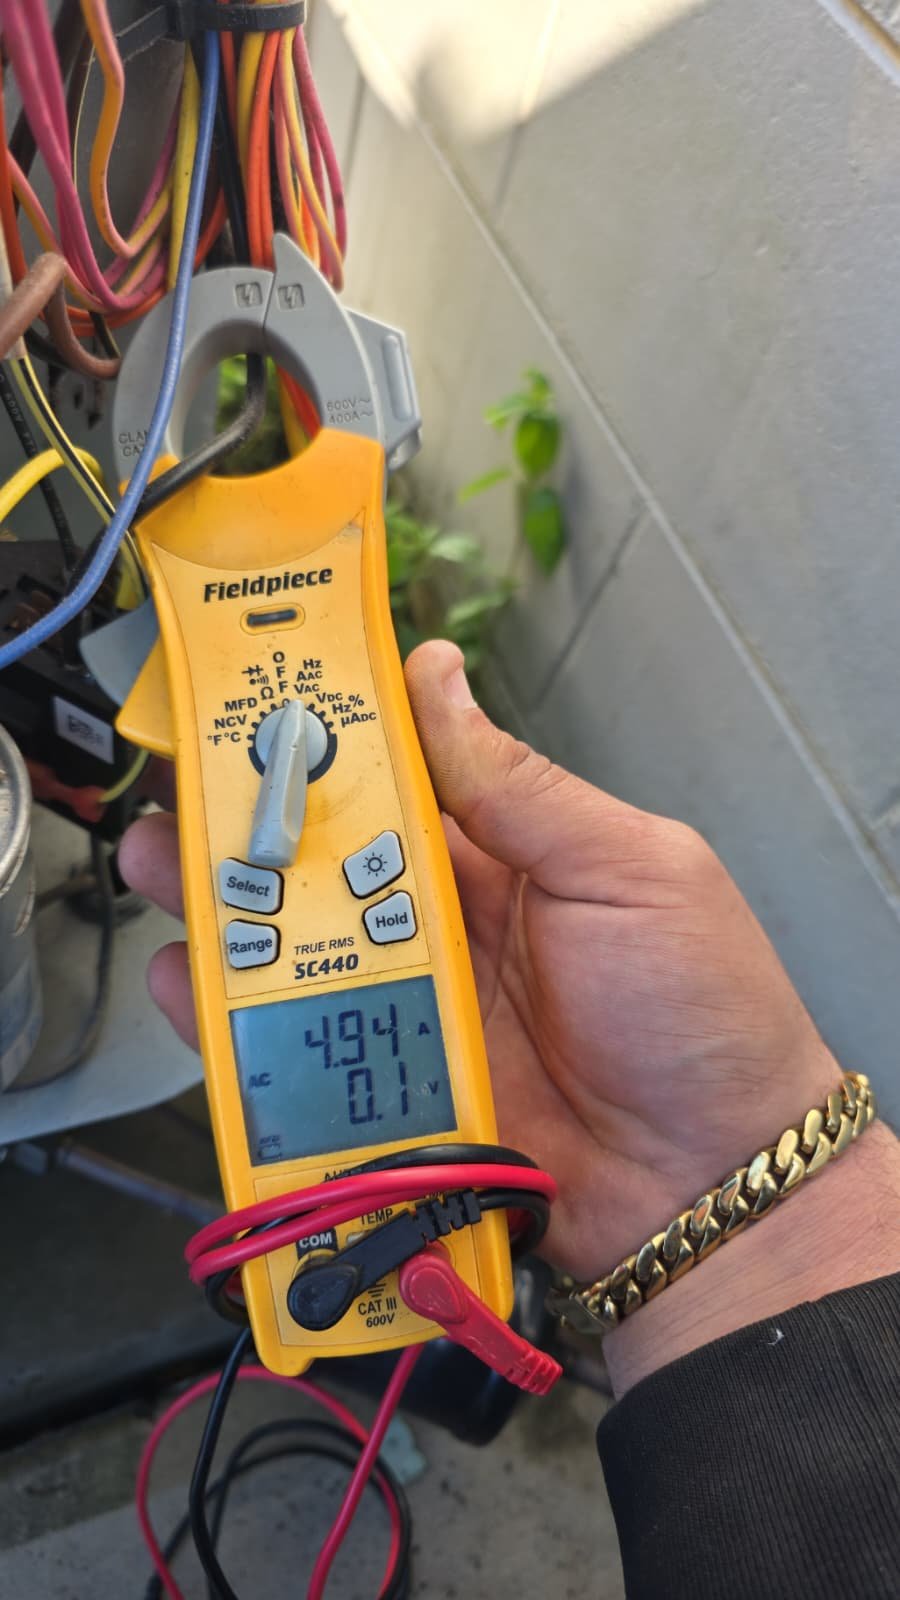
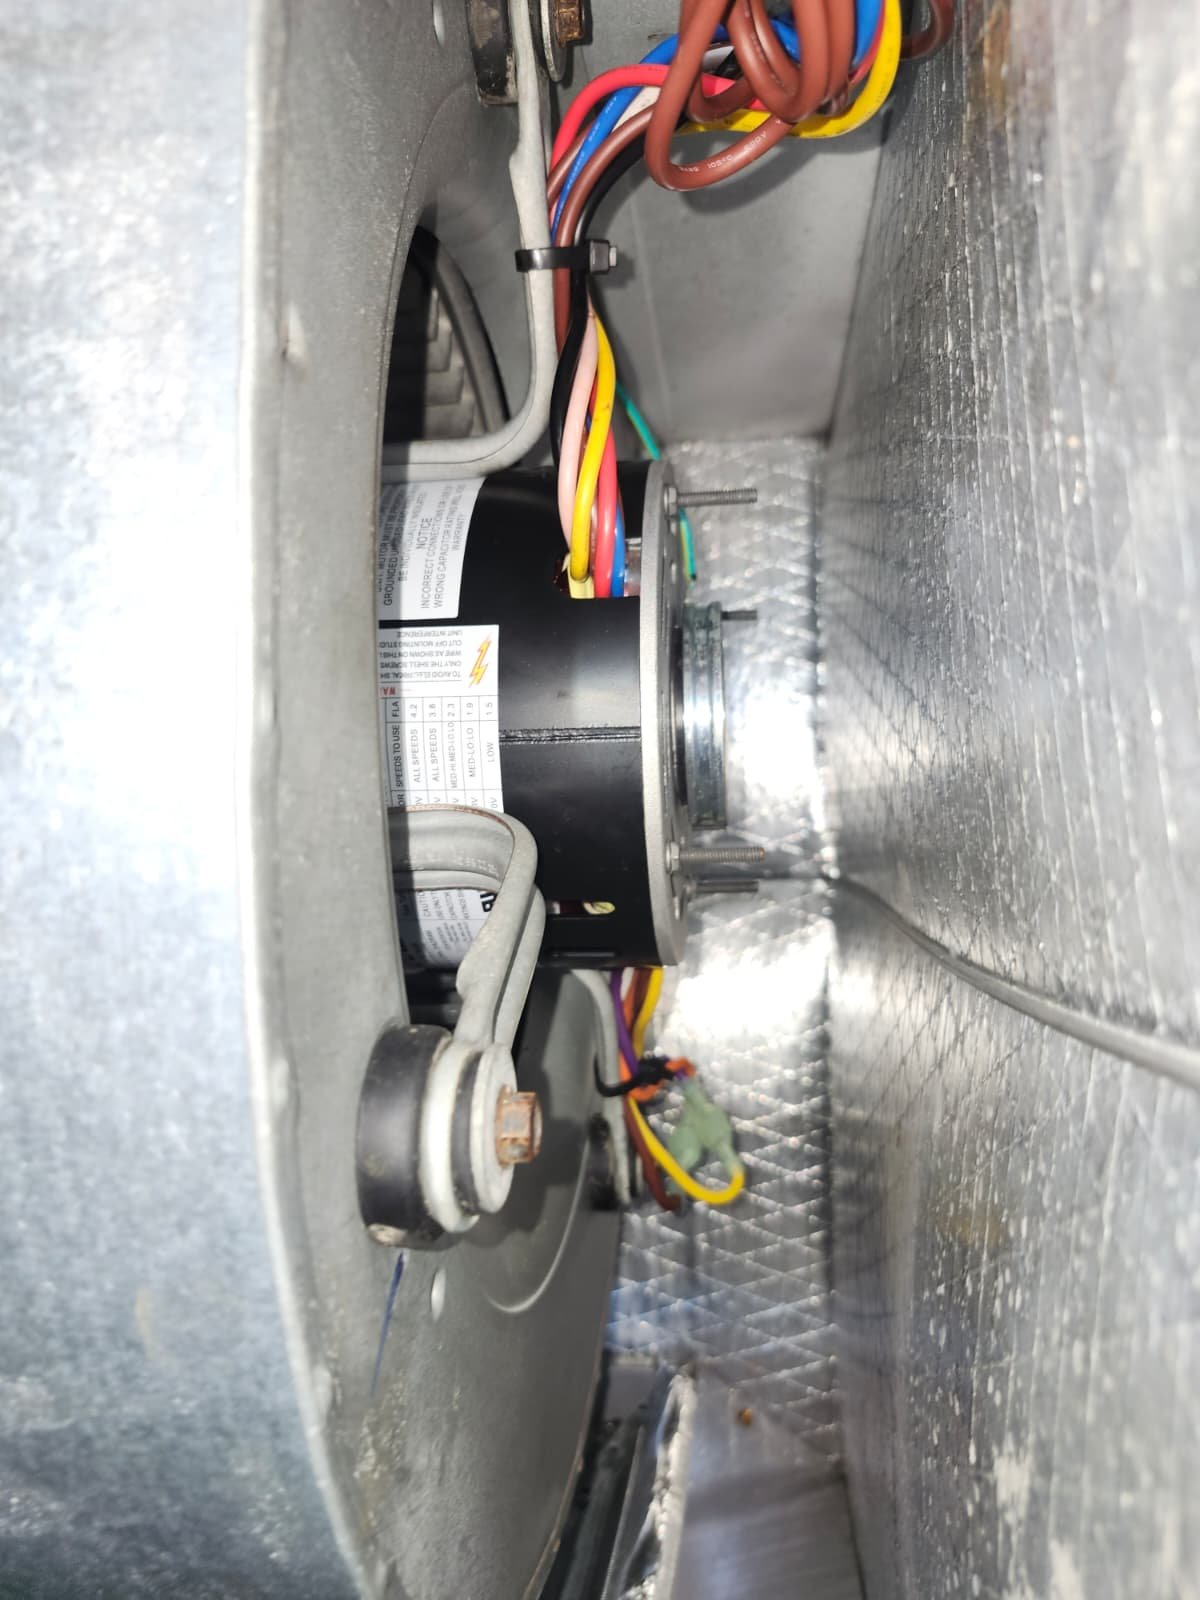
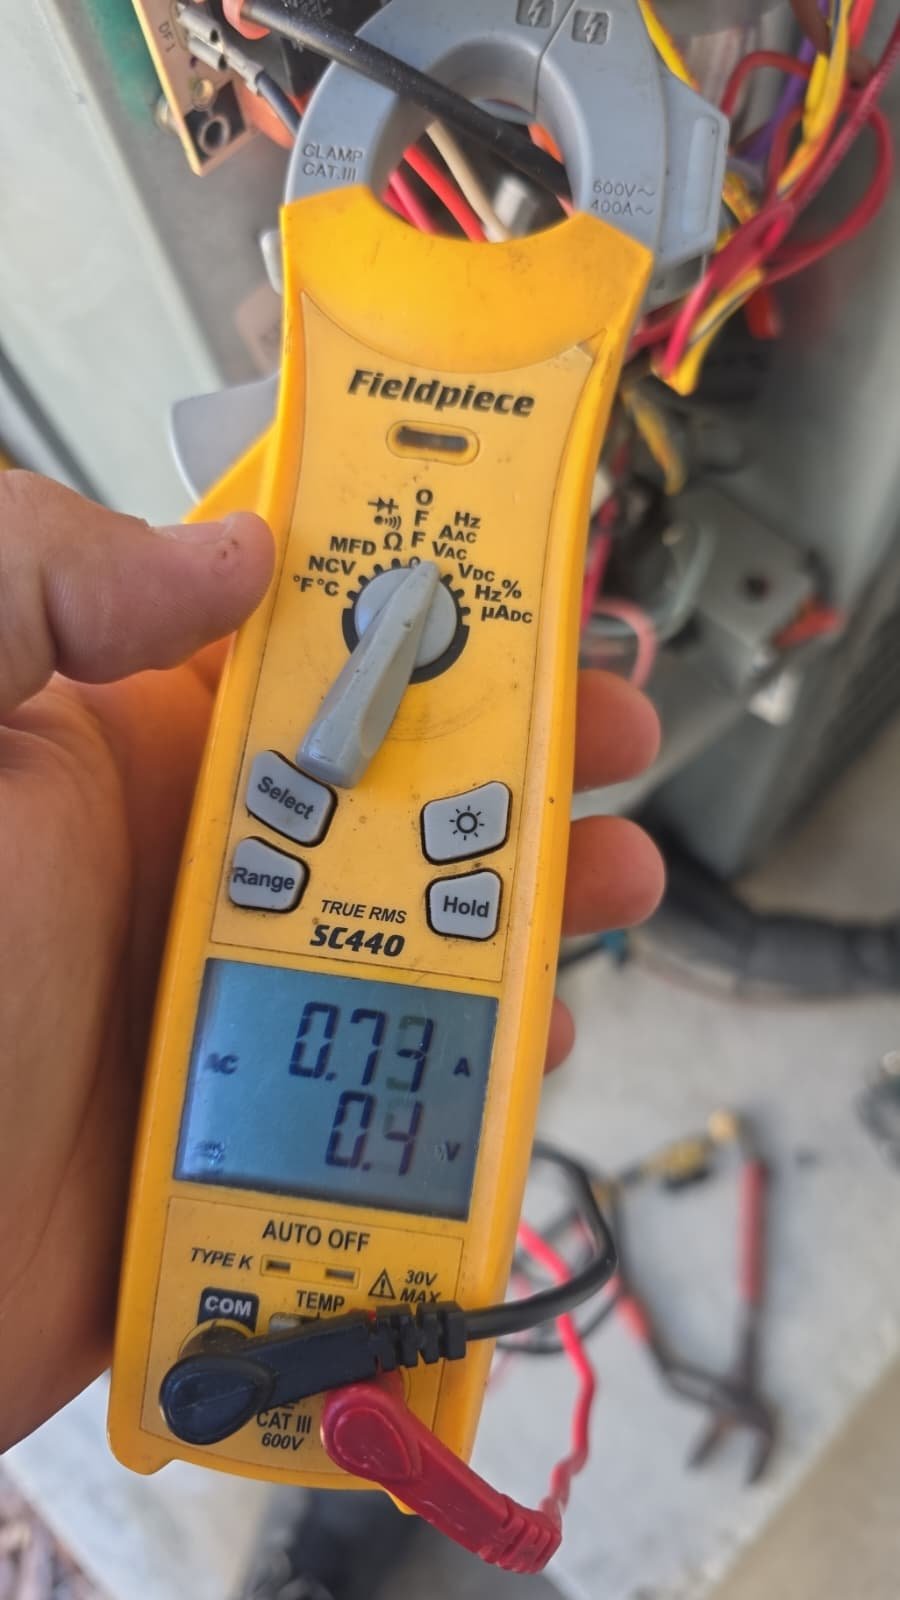
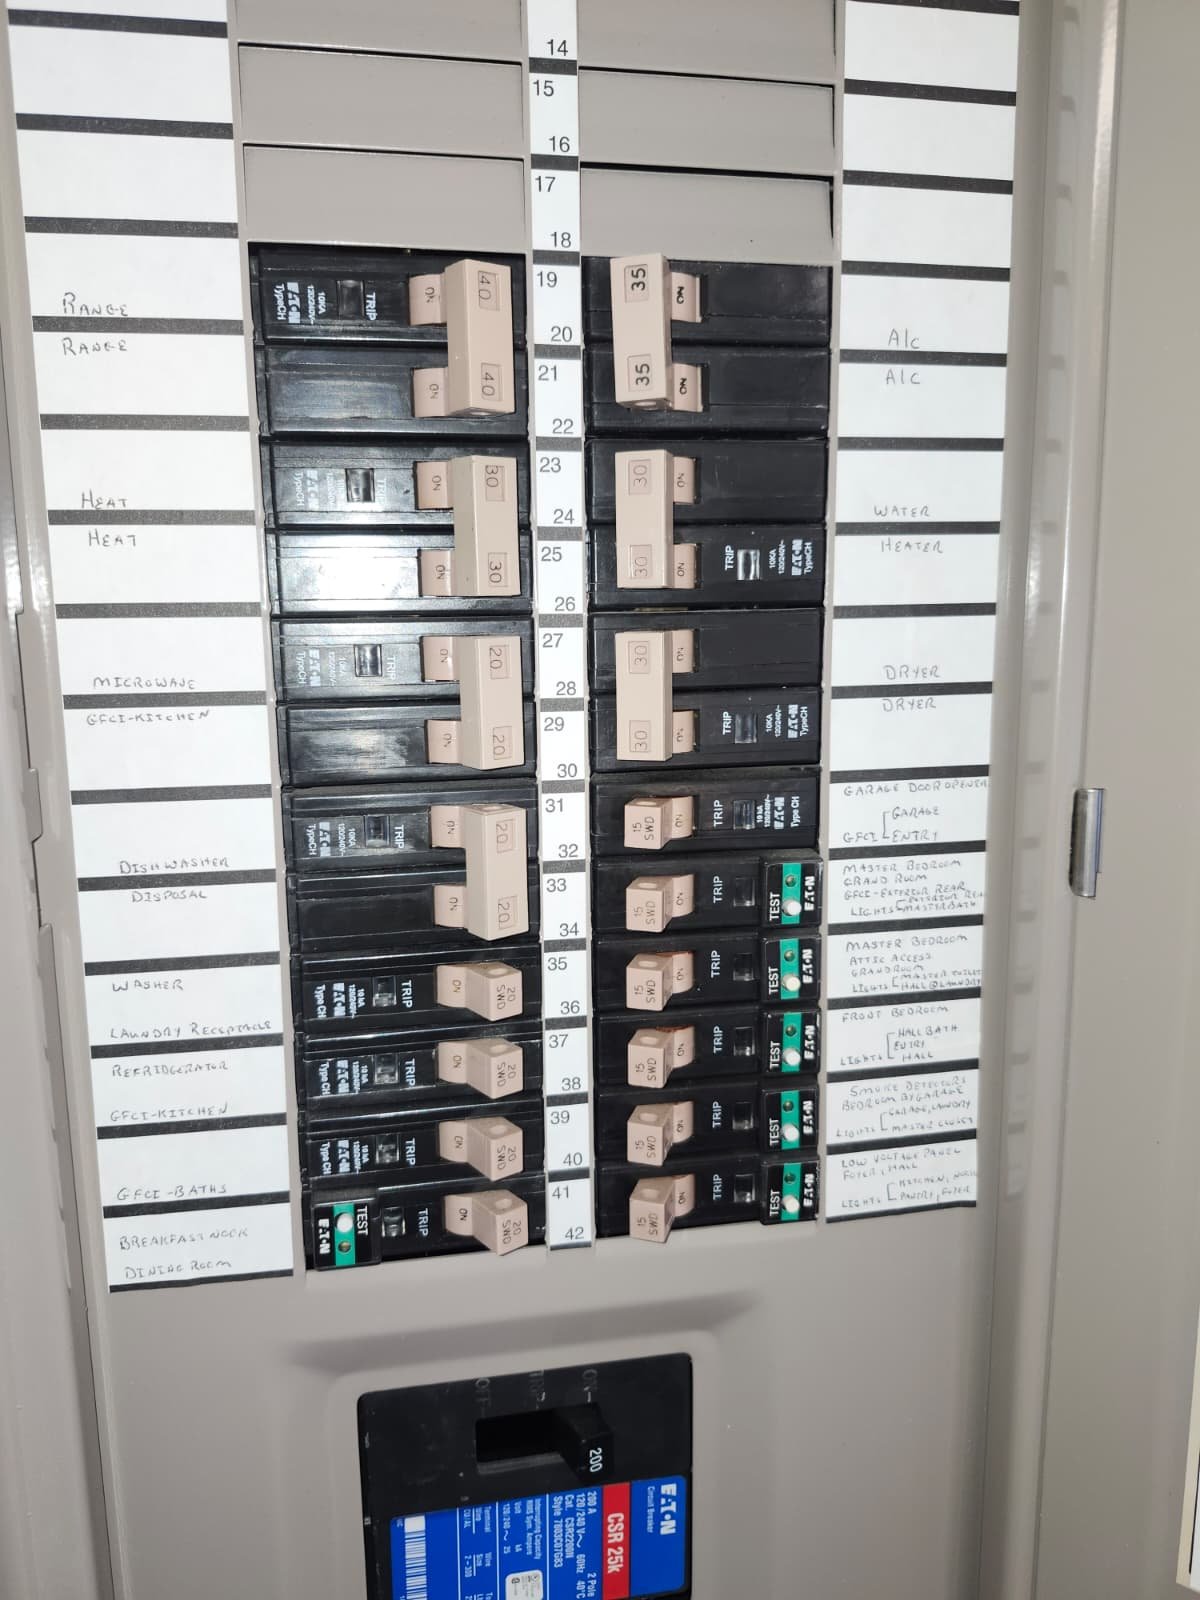
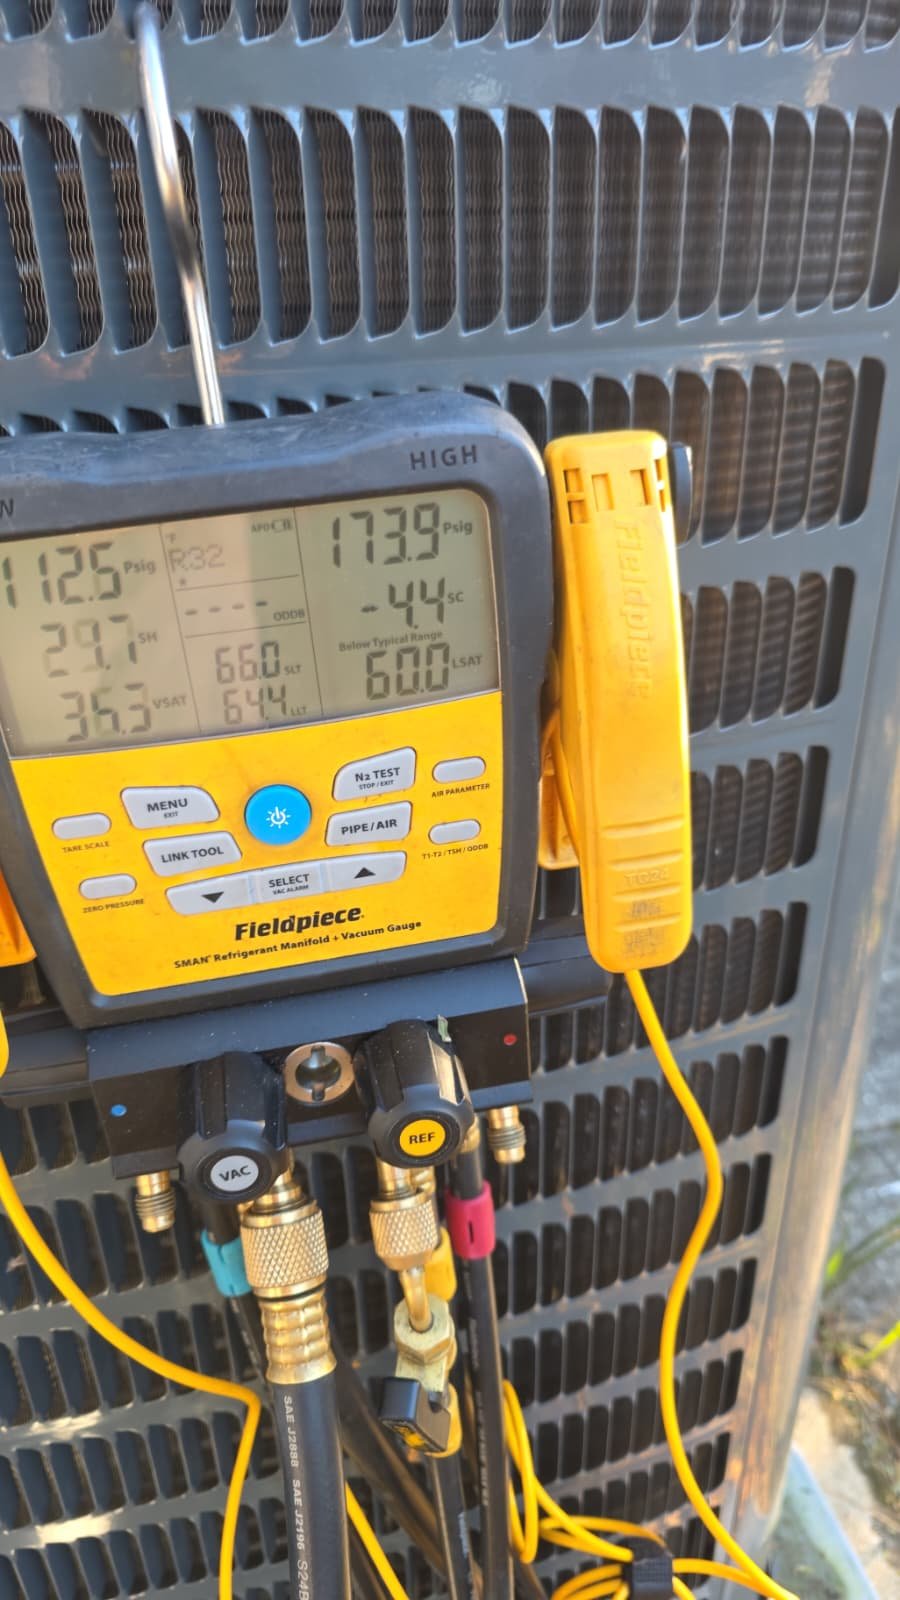
2. Electrical and Motor Health

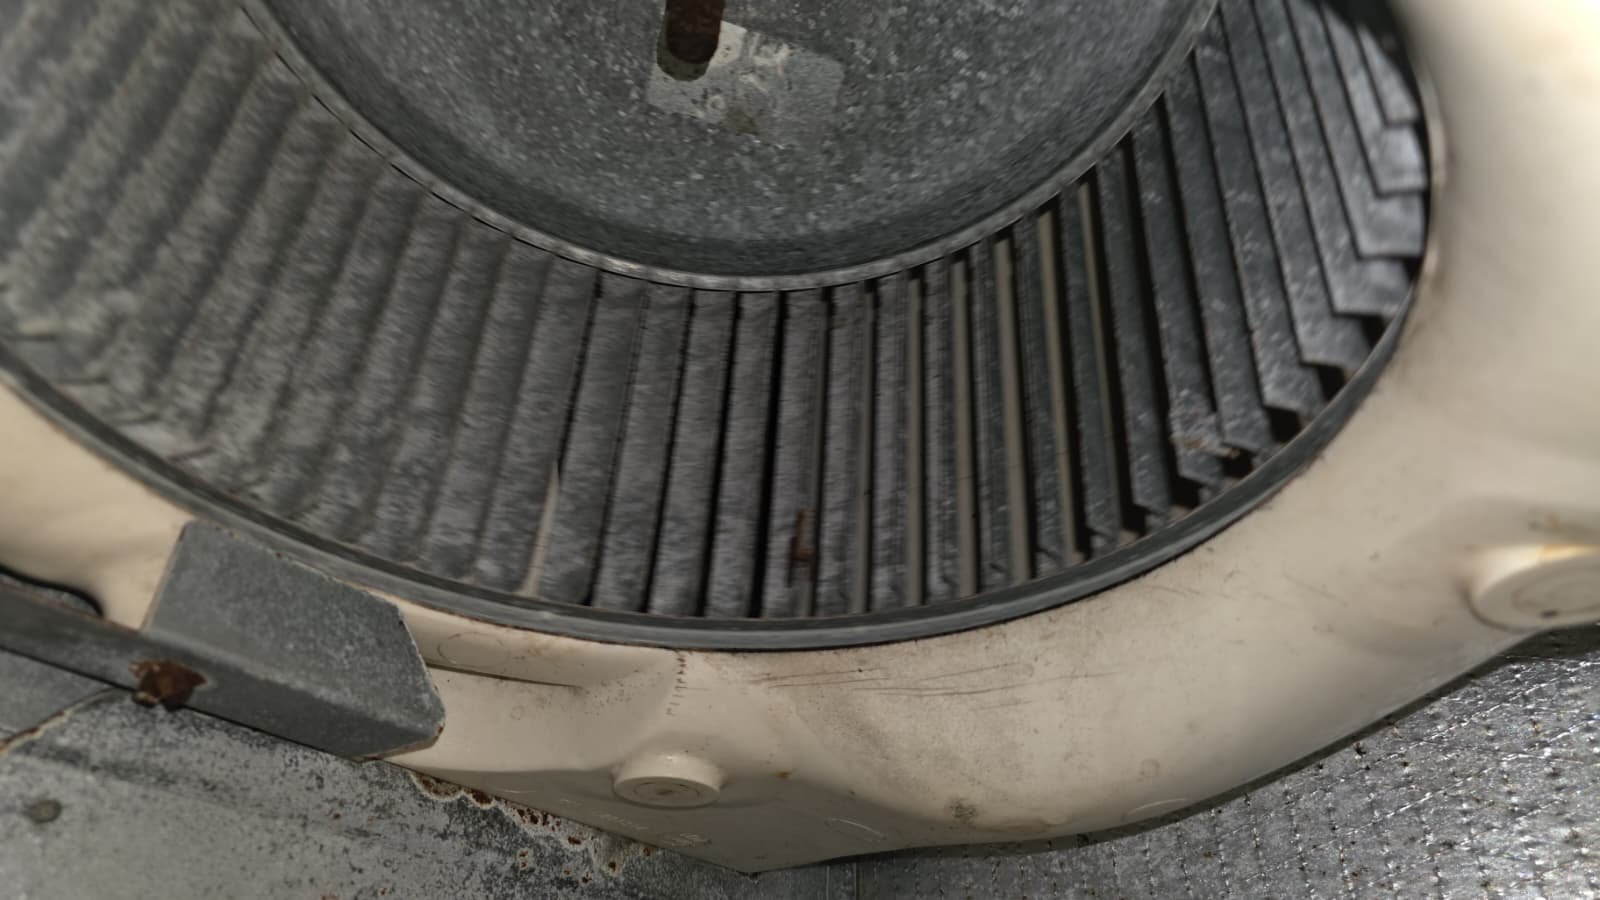
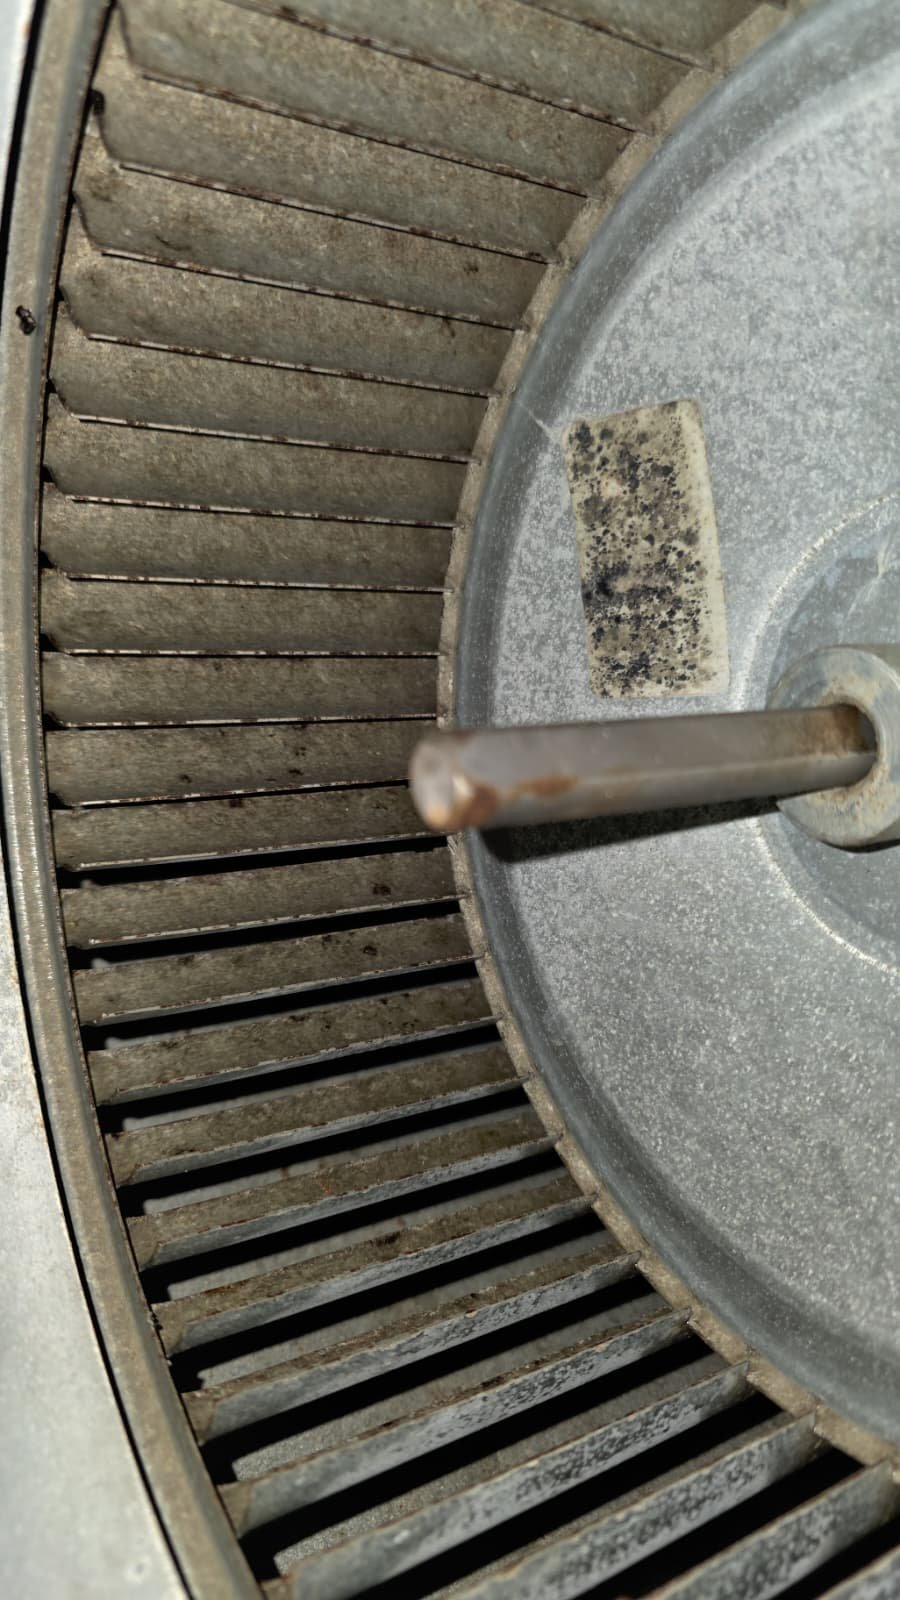
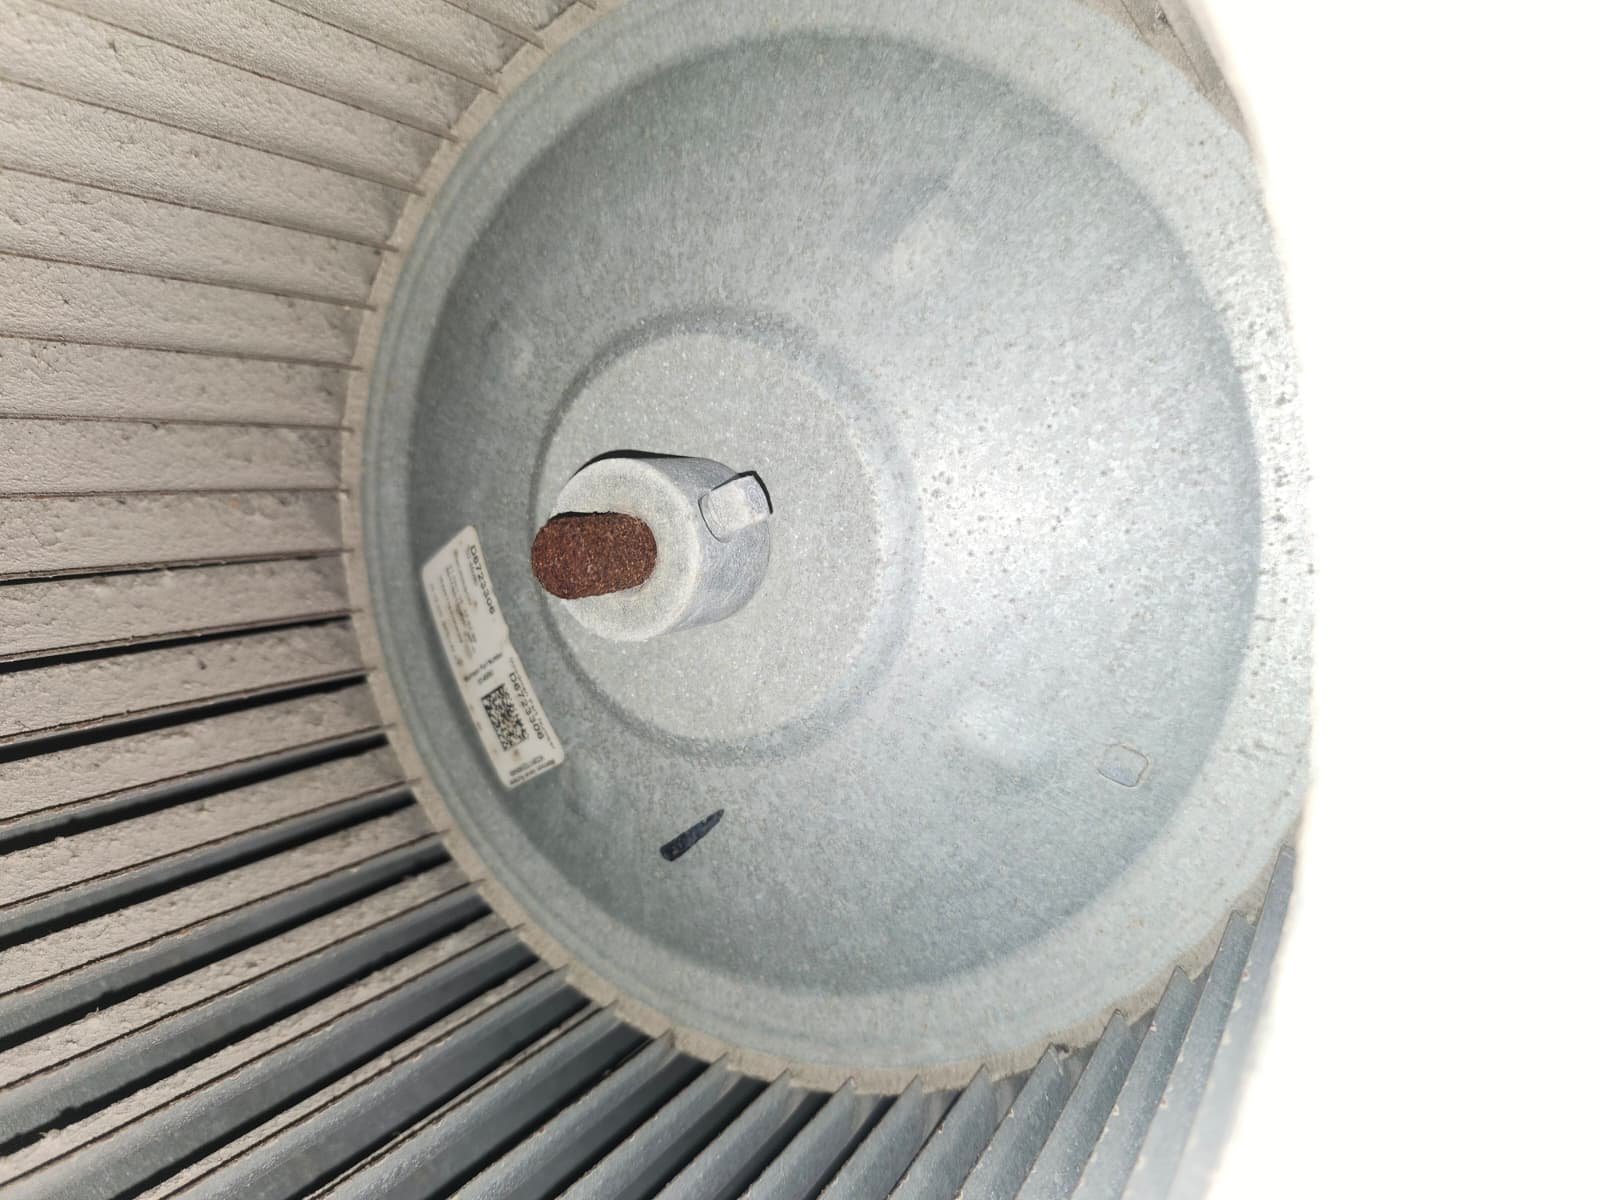
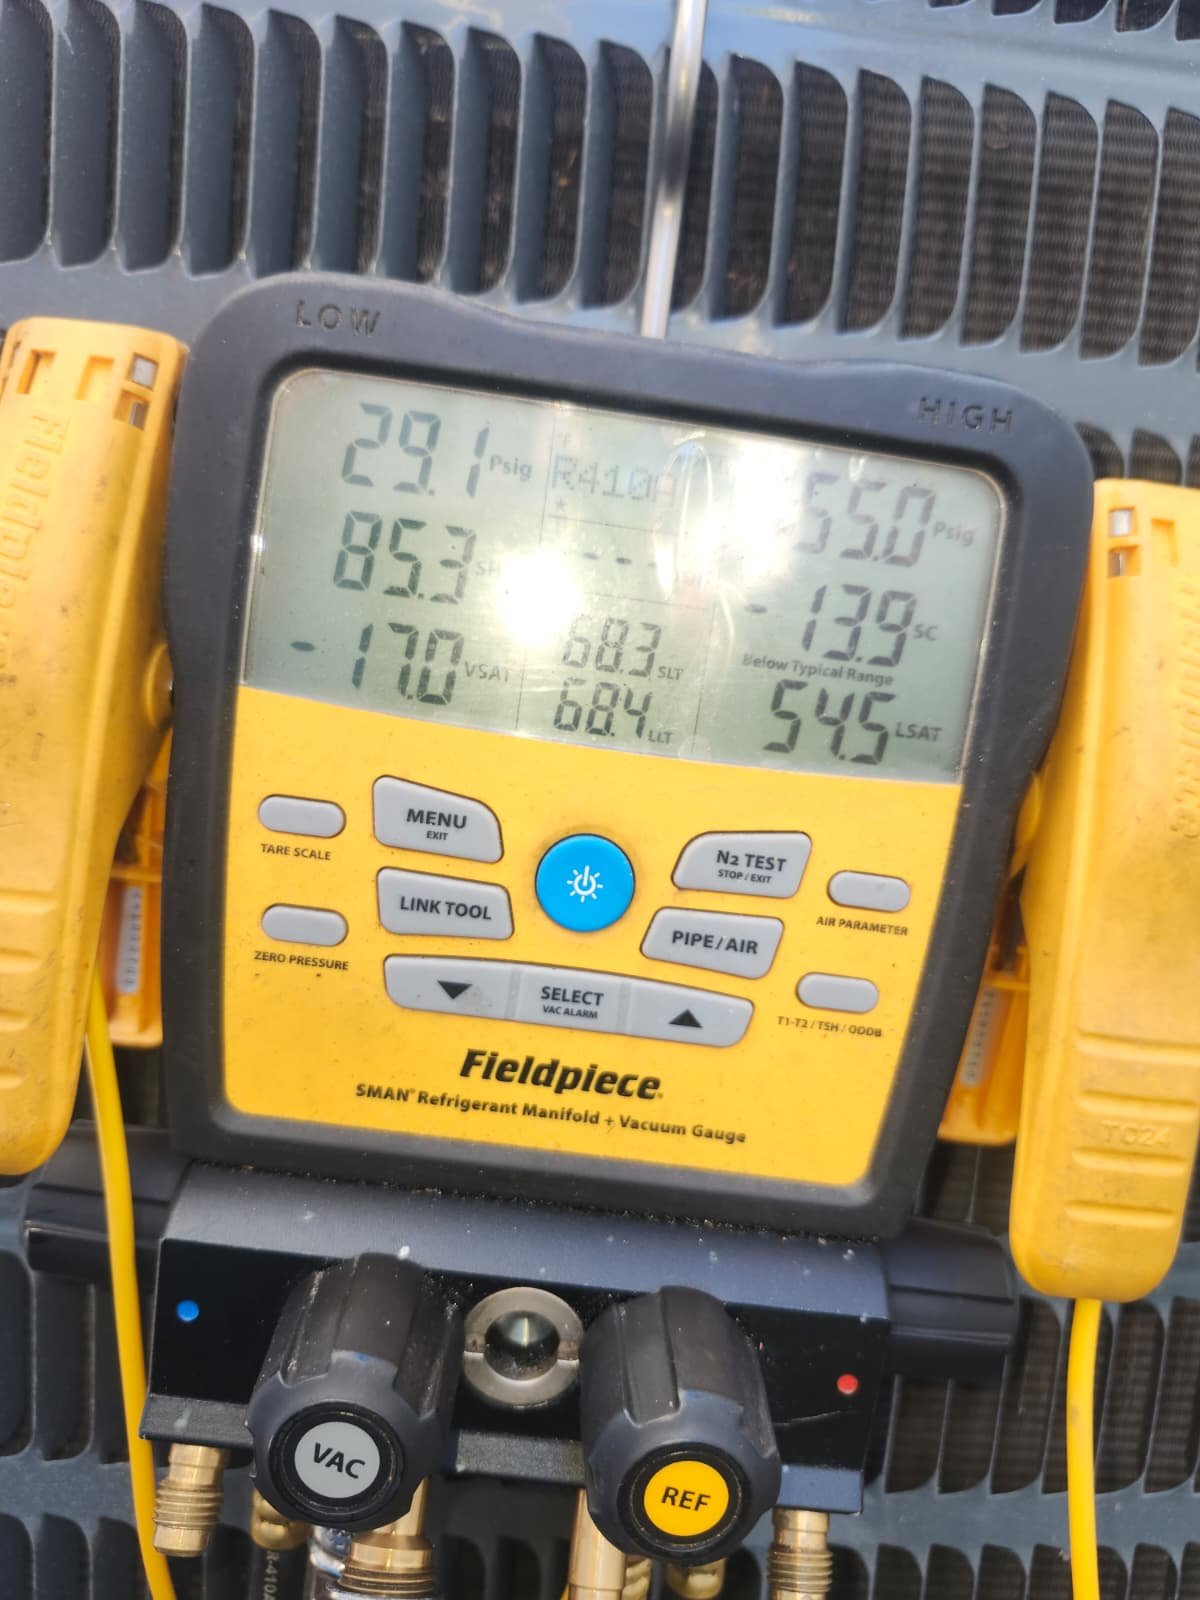
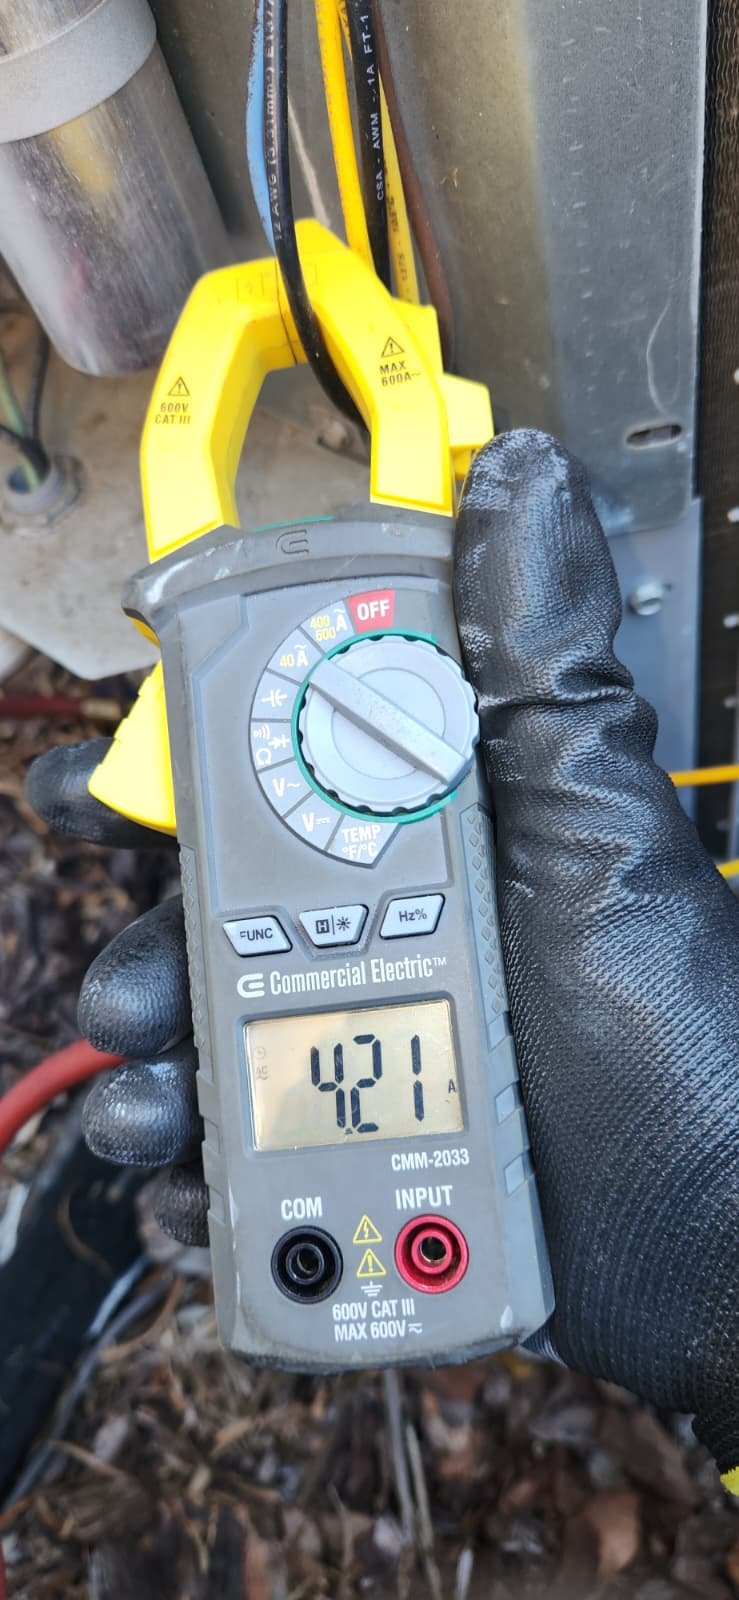
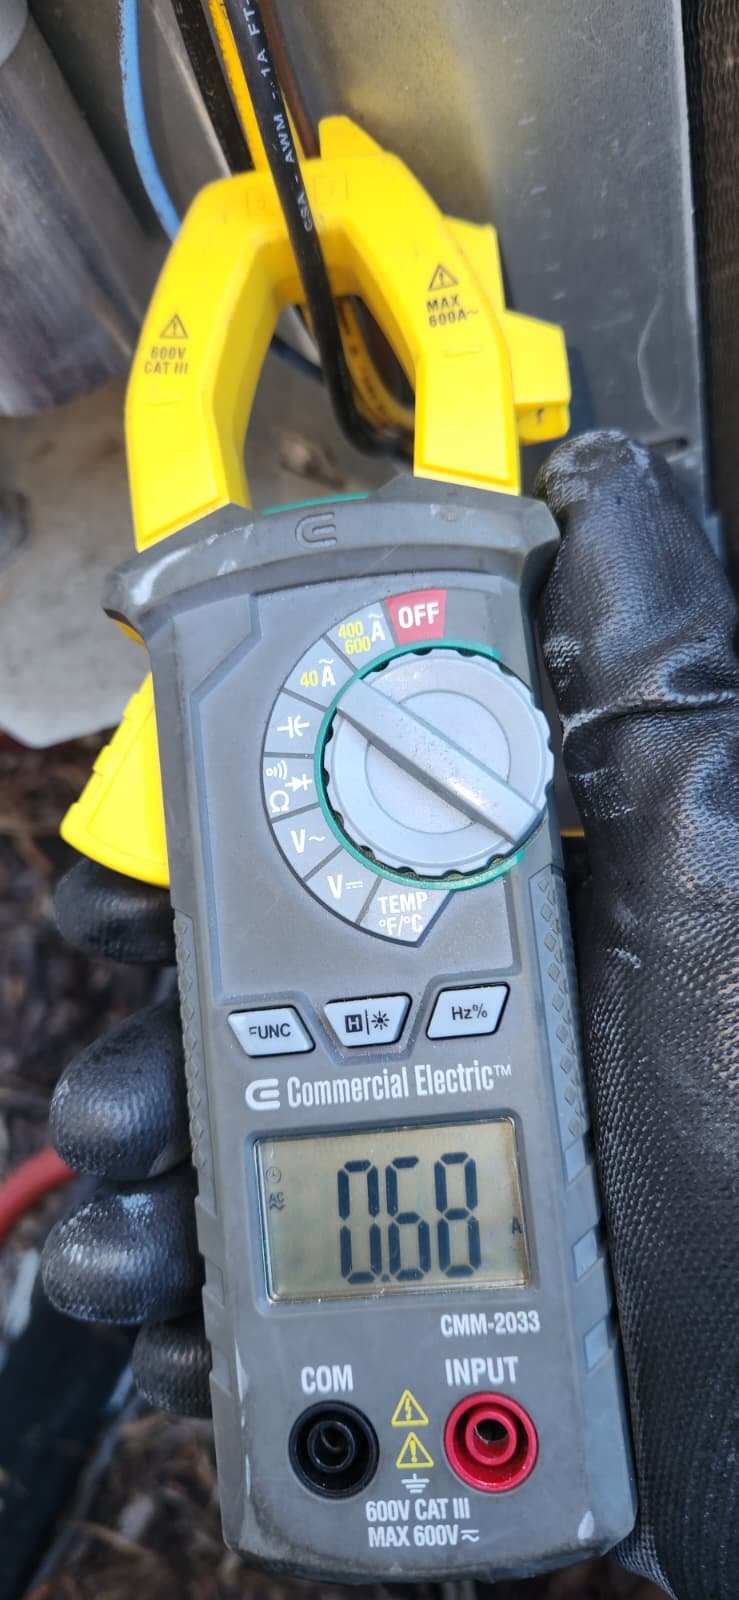
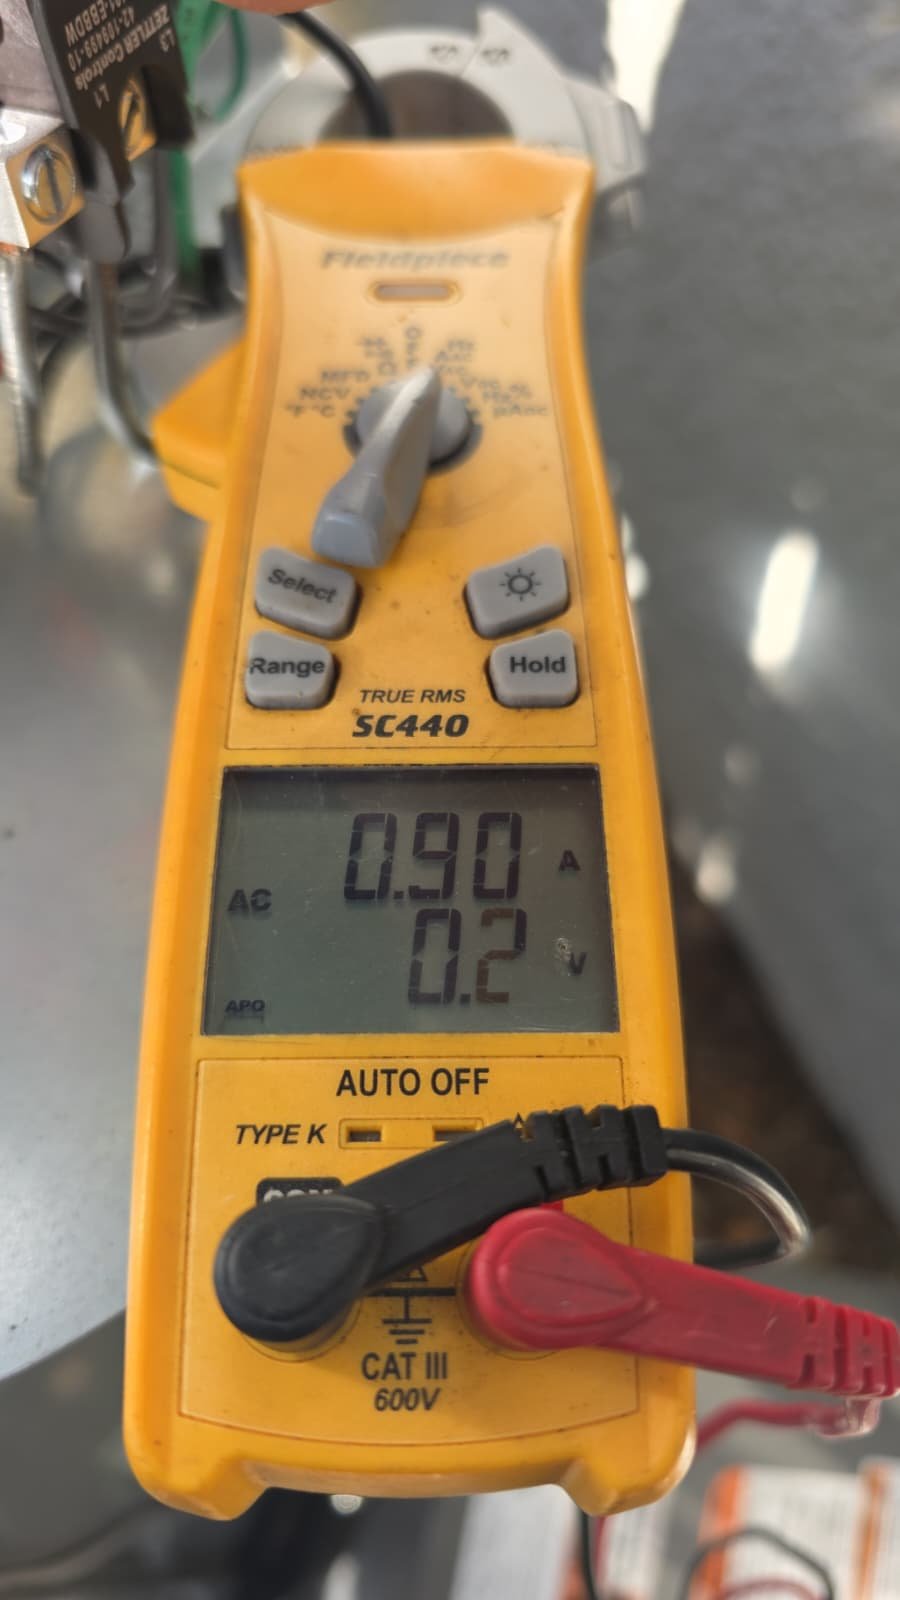
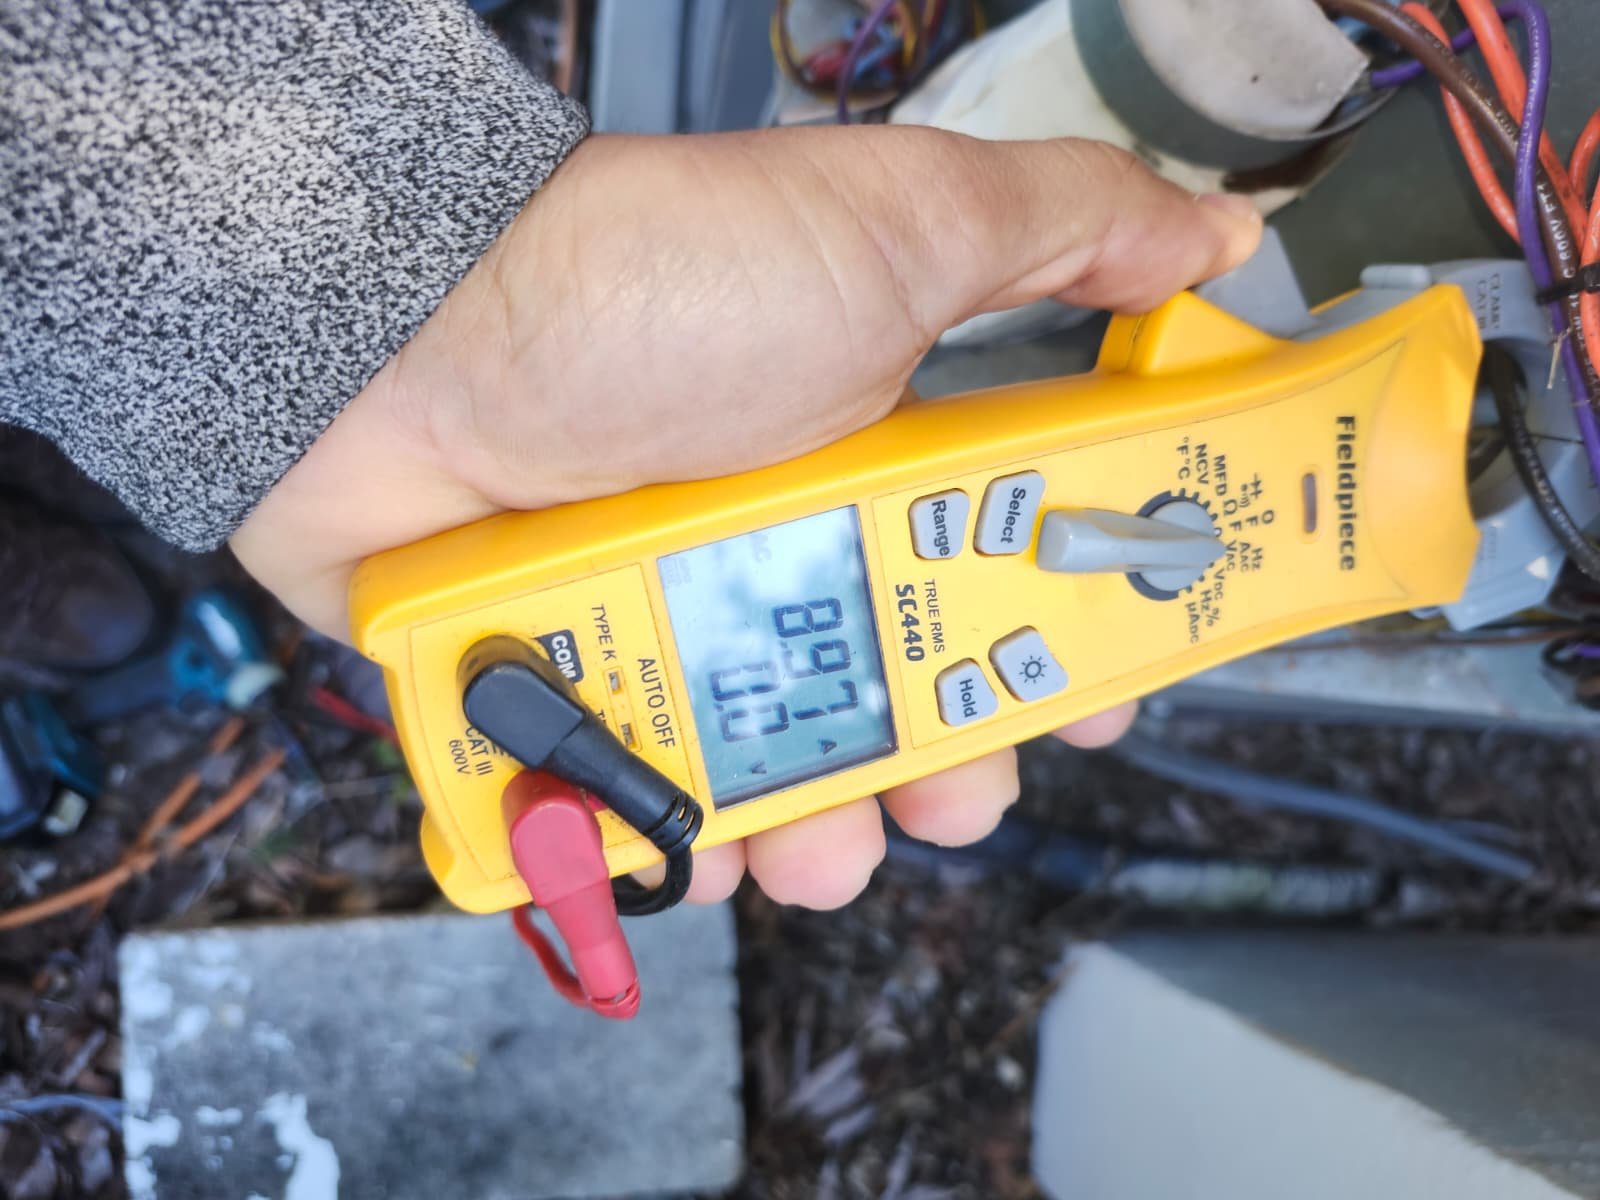
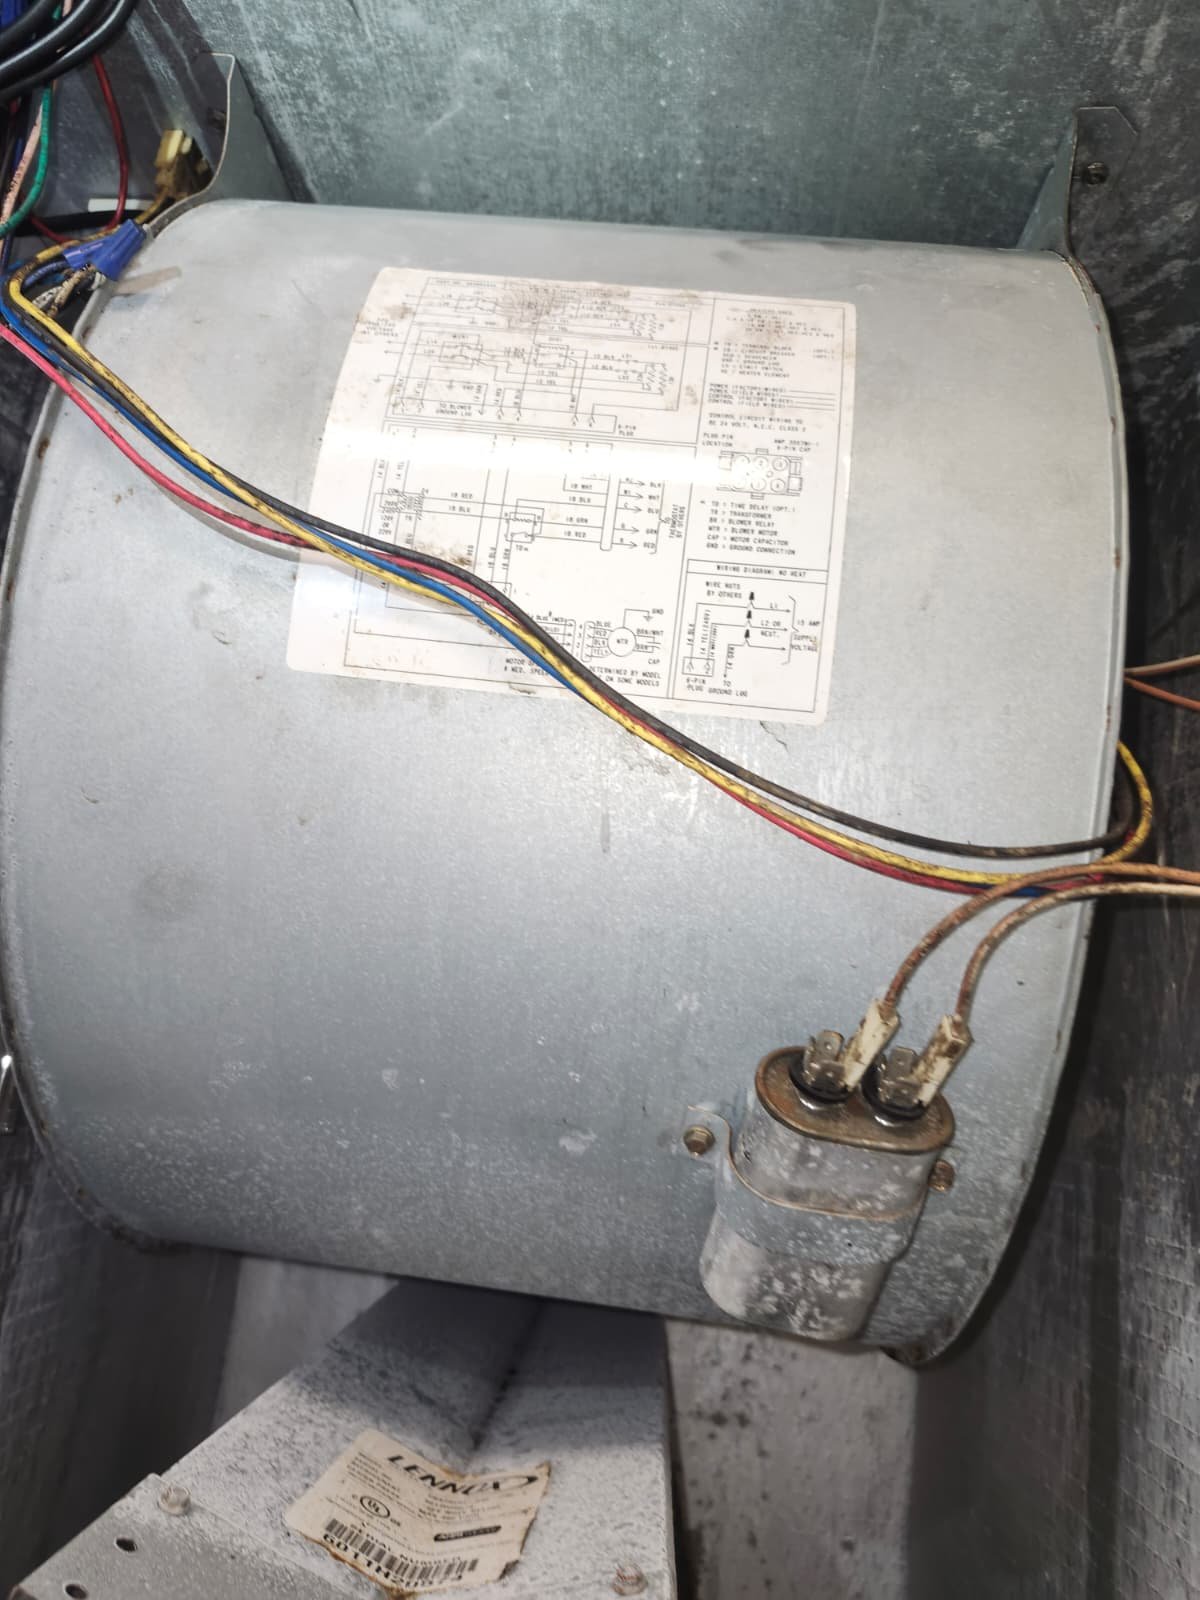
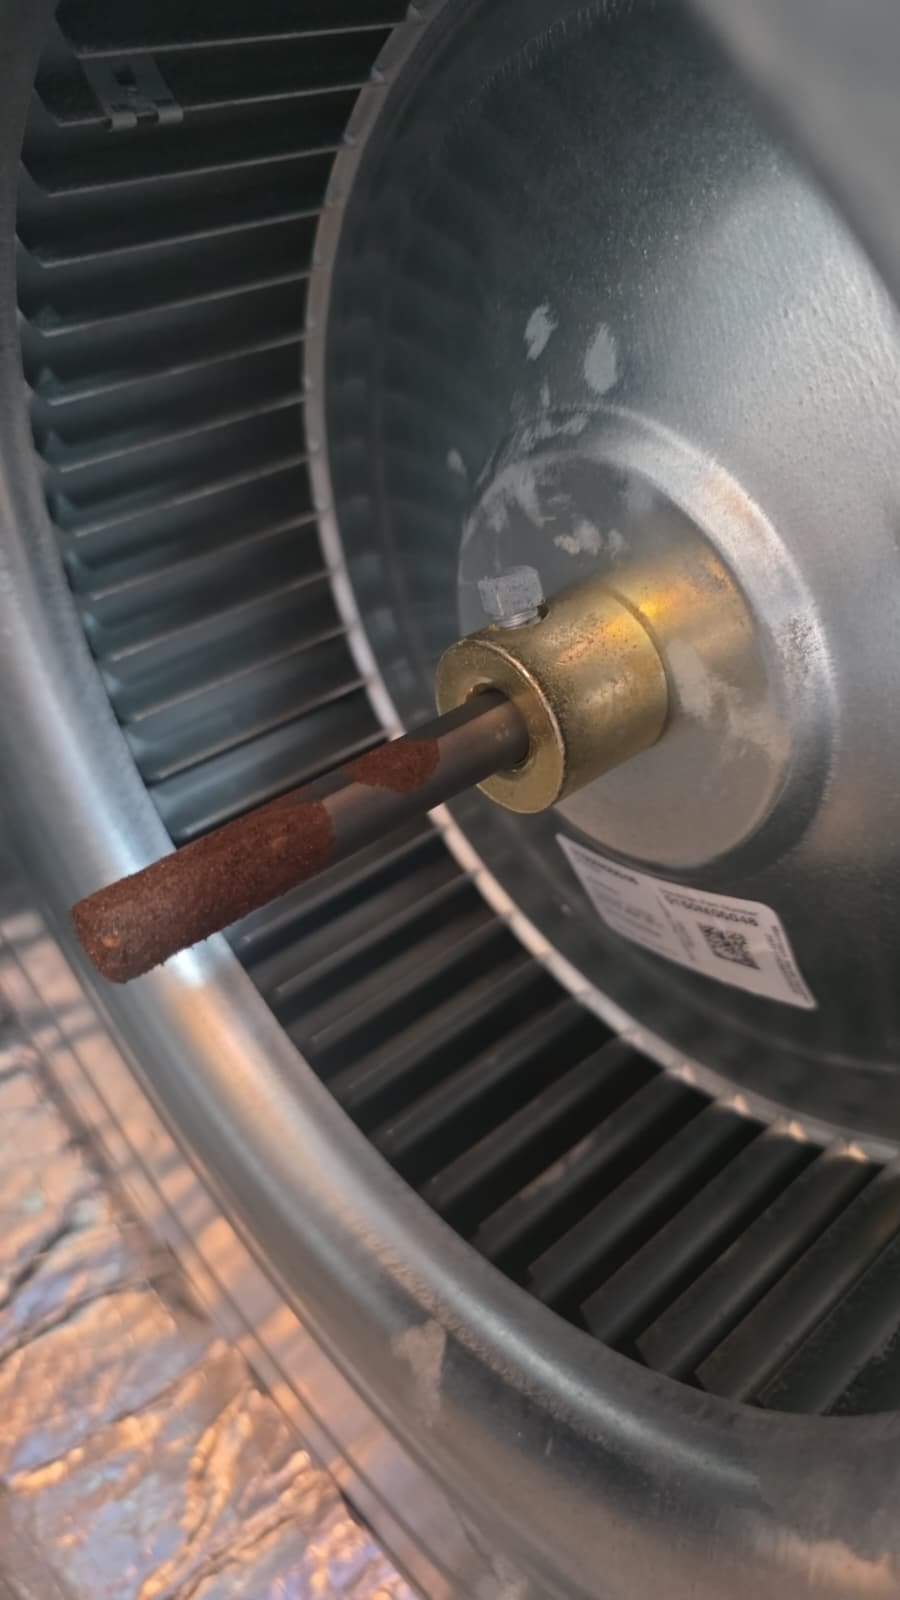
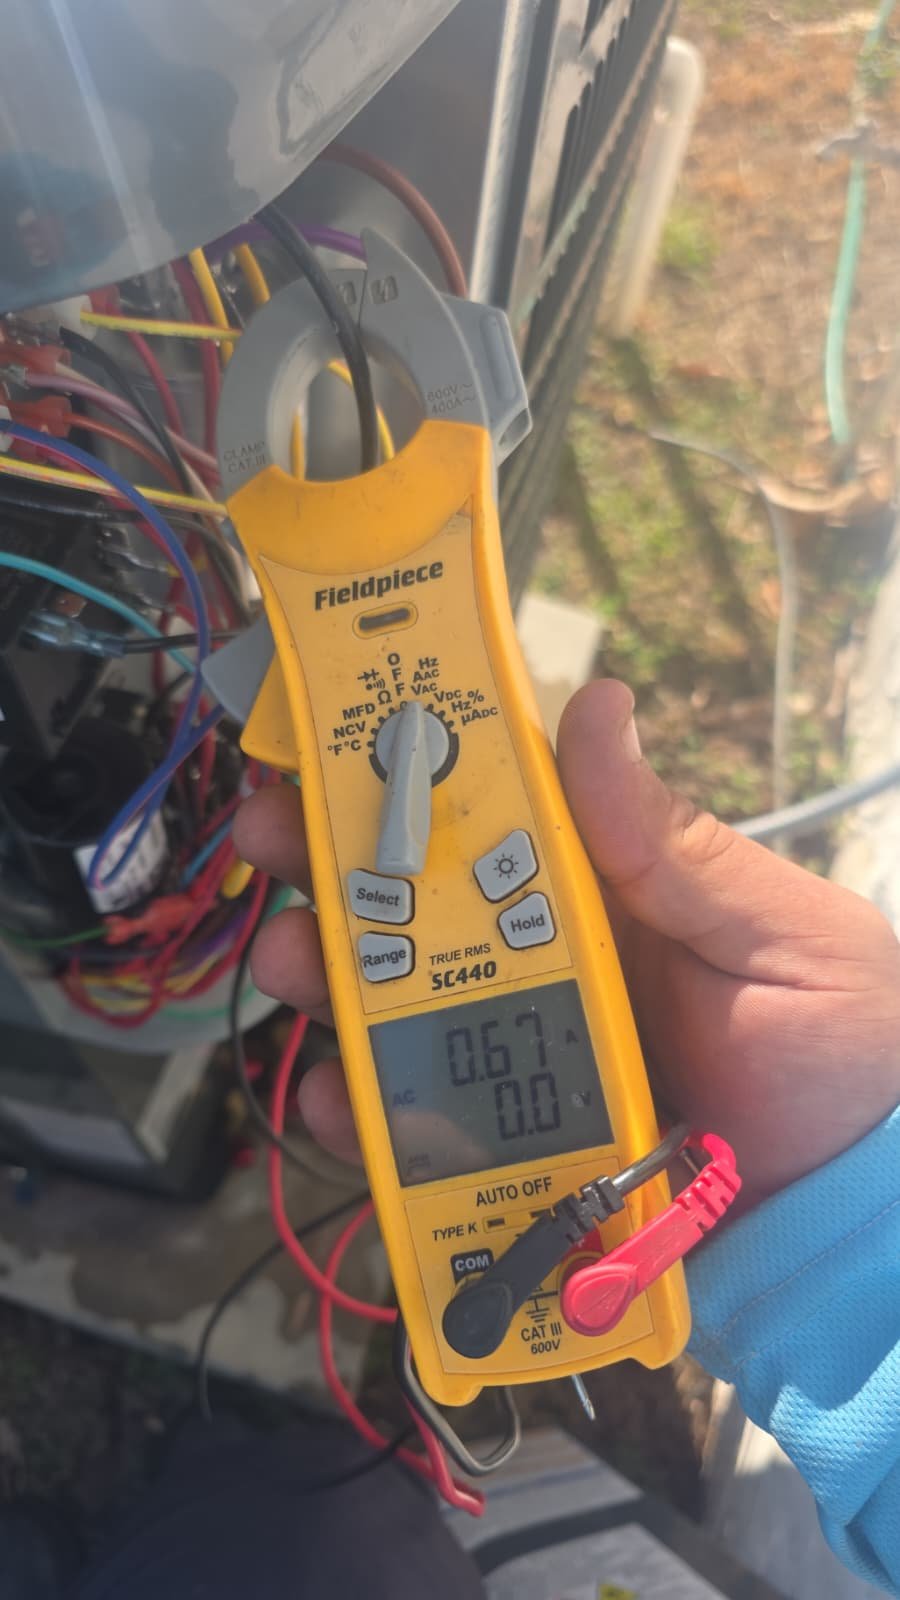
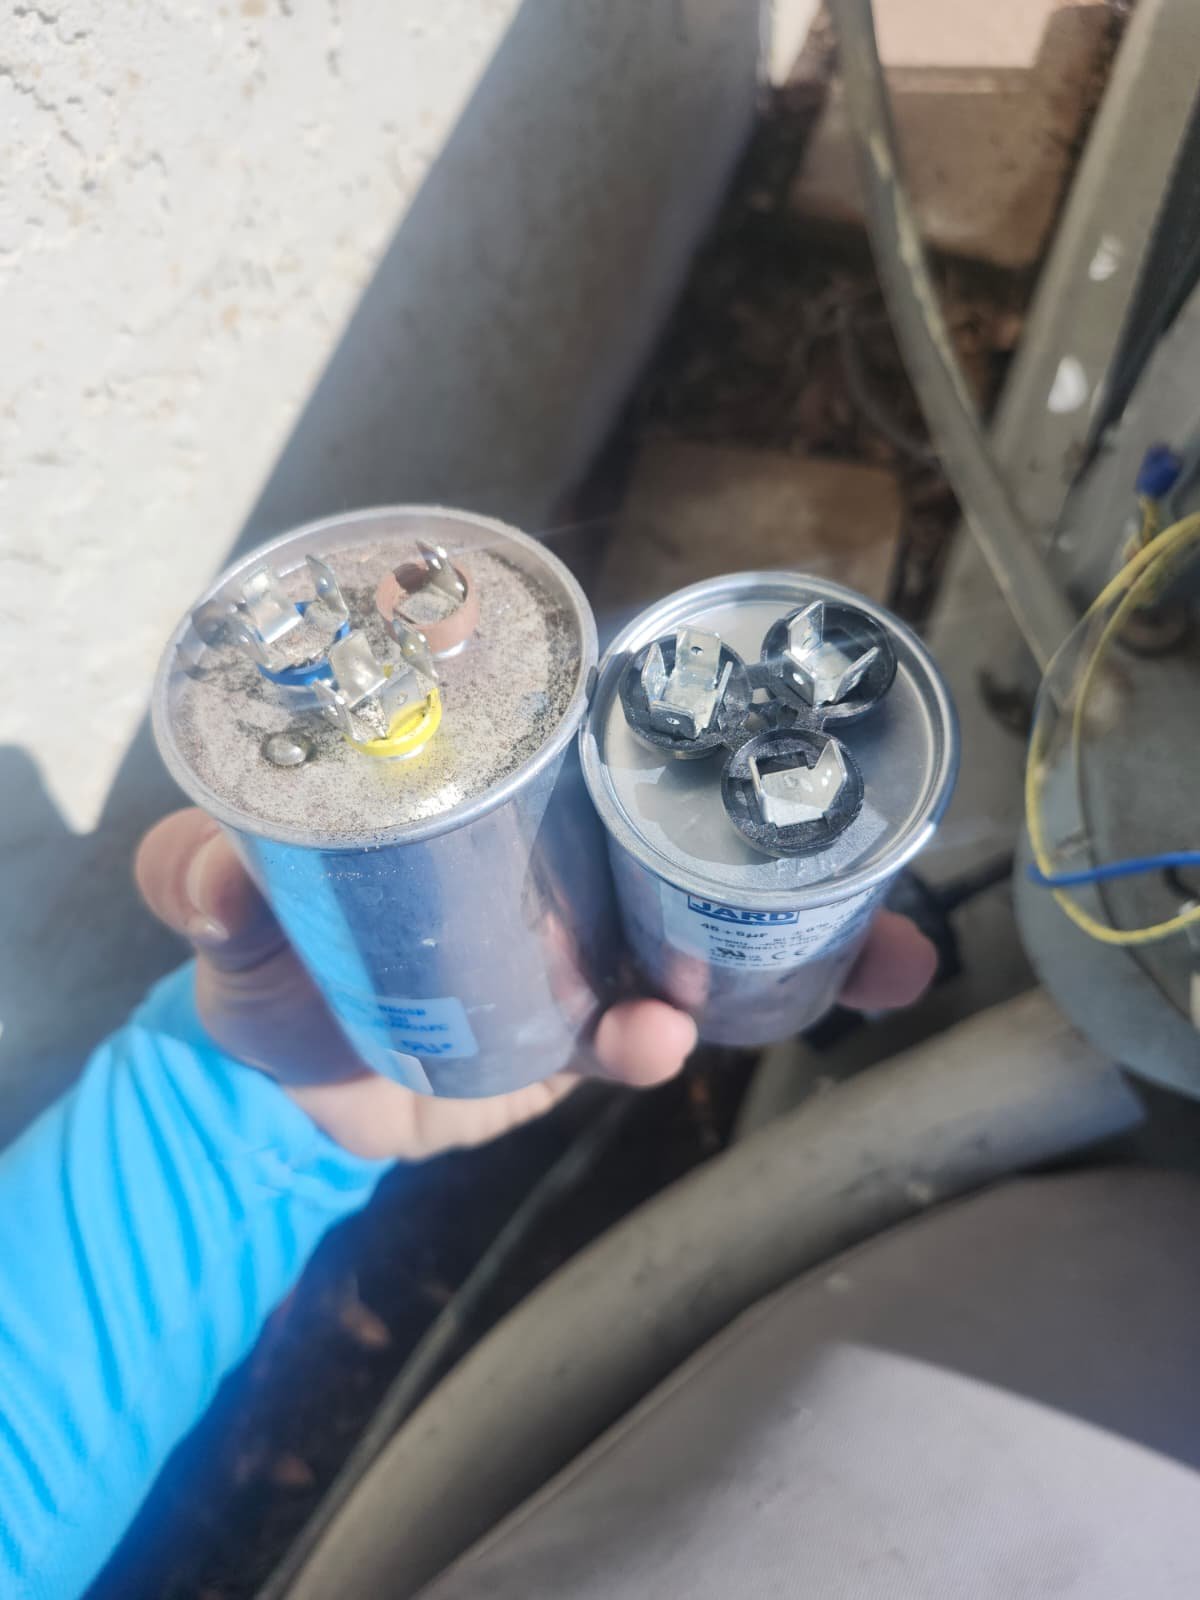
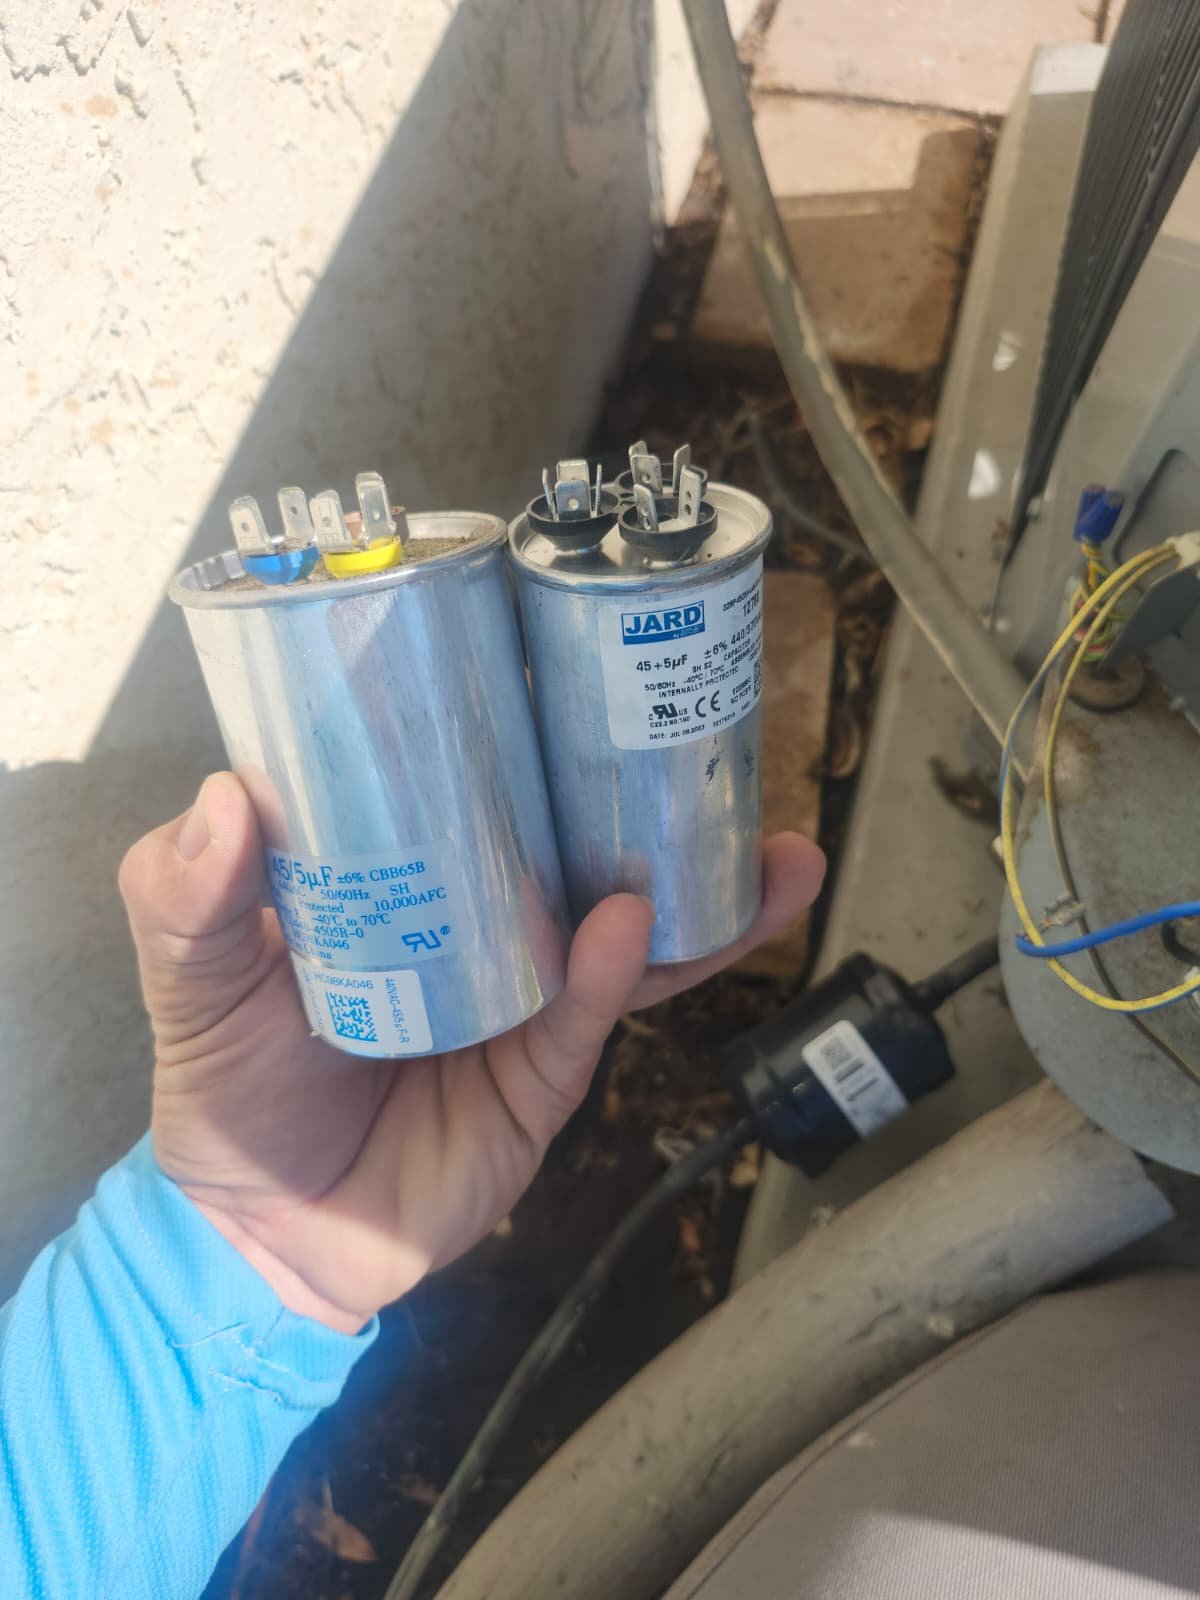
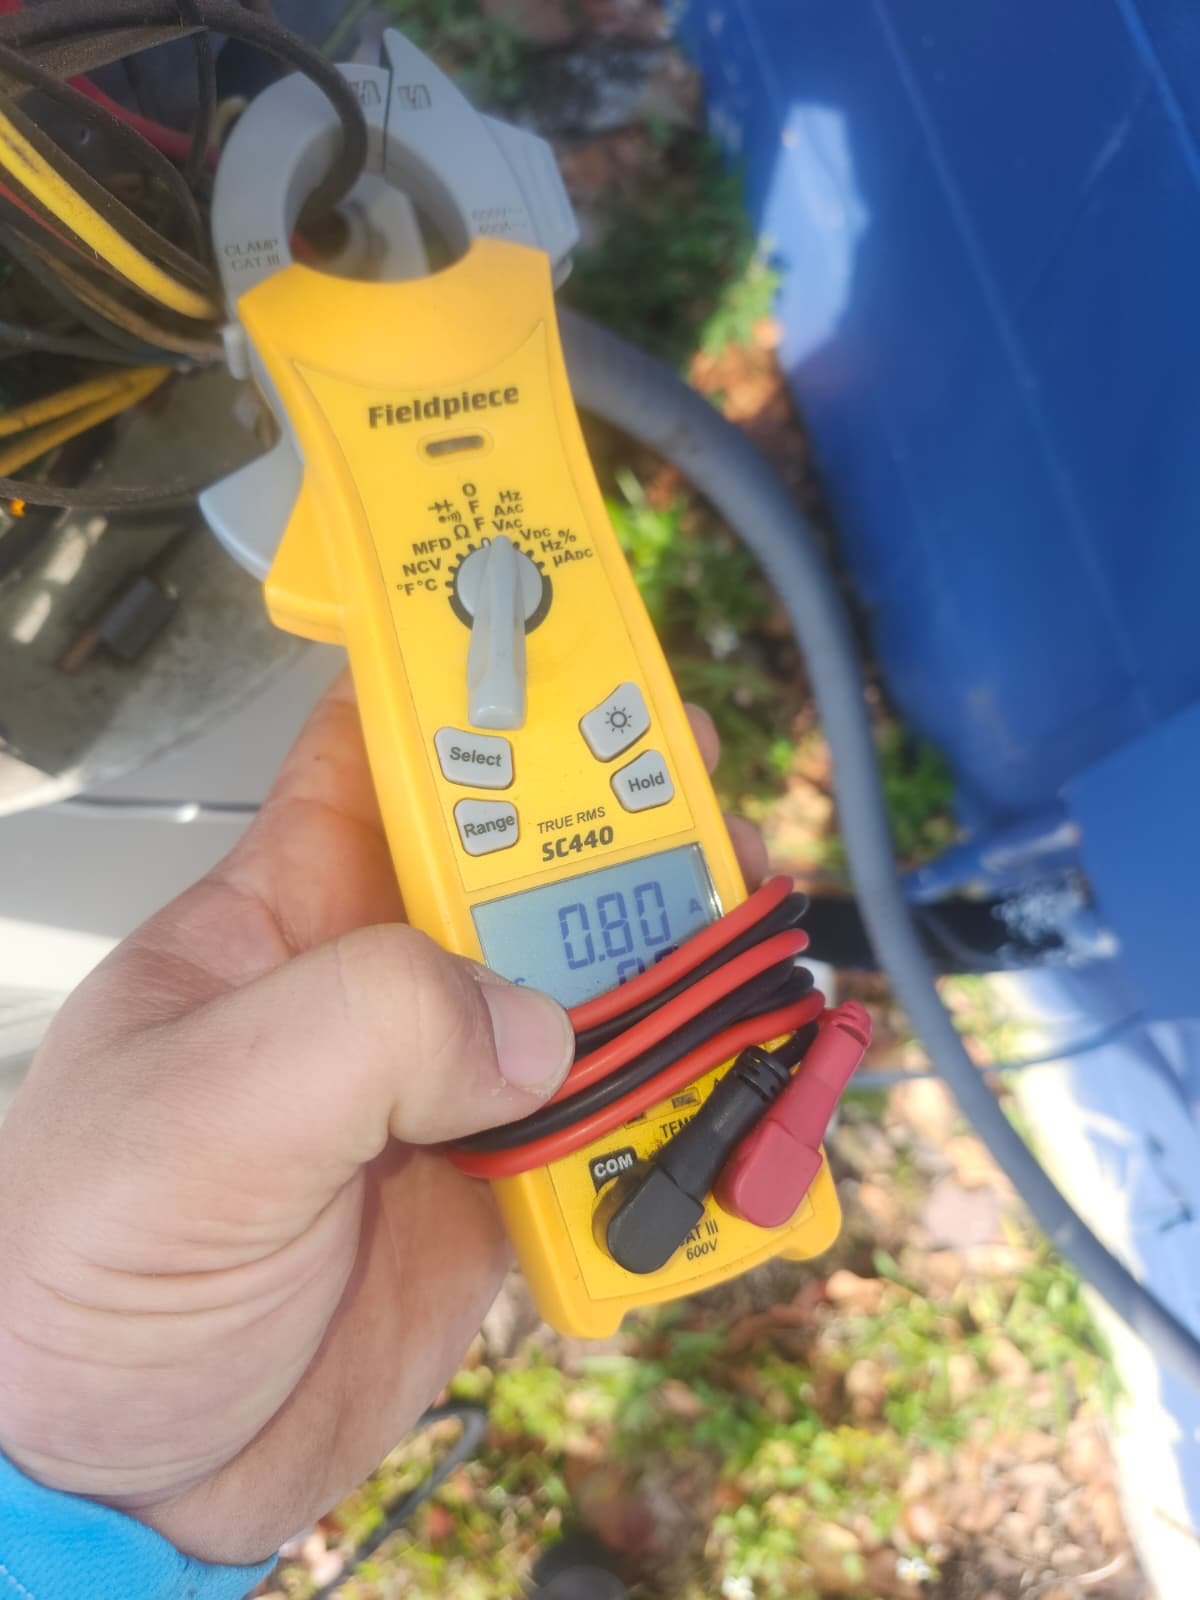
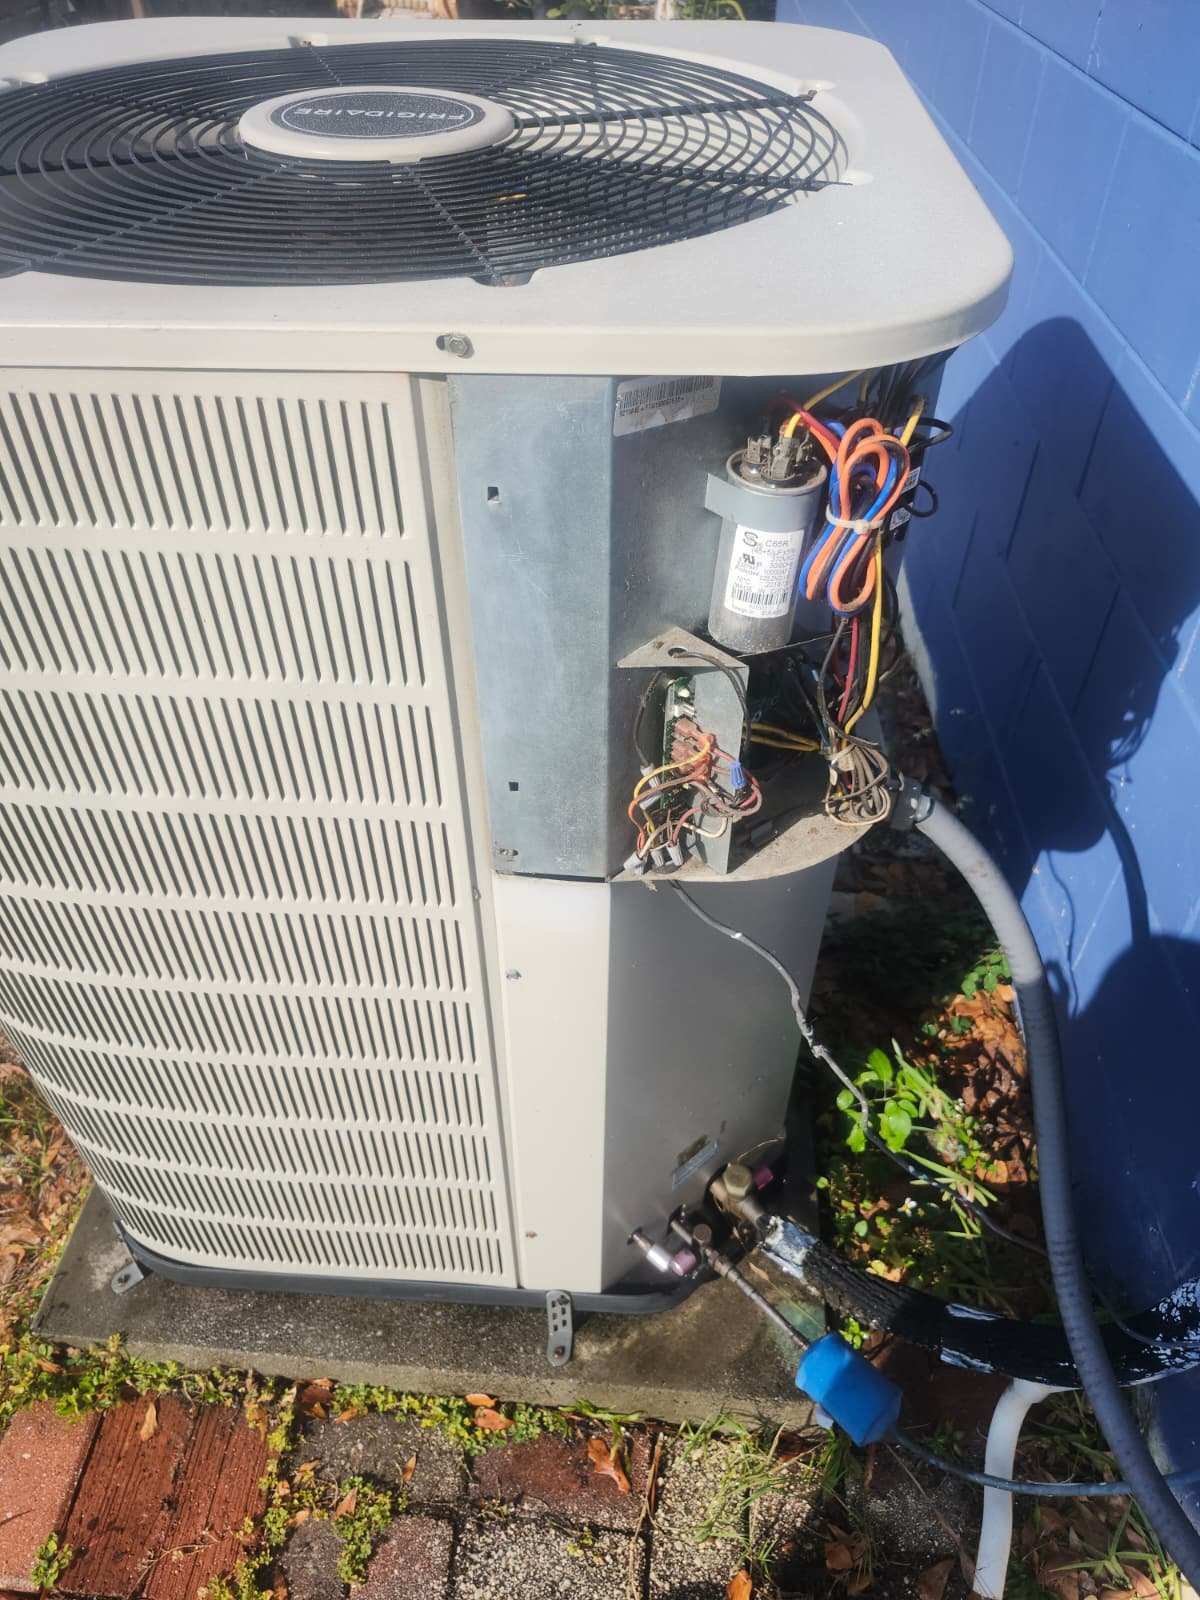
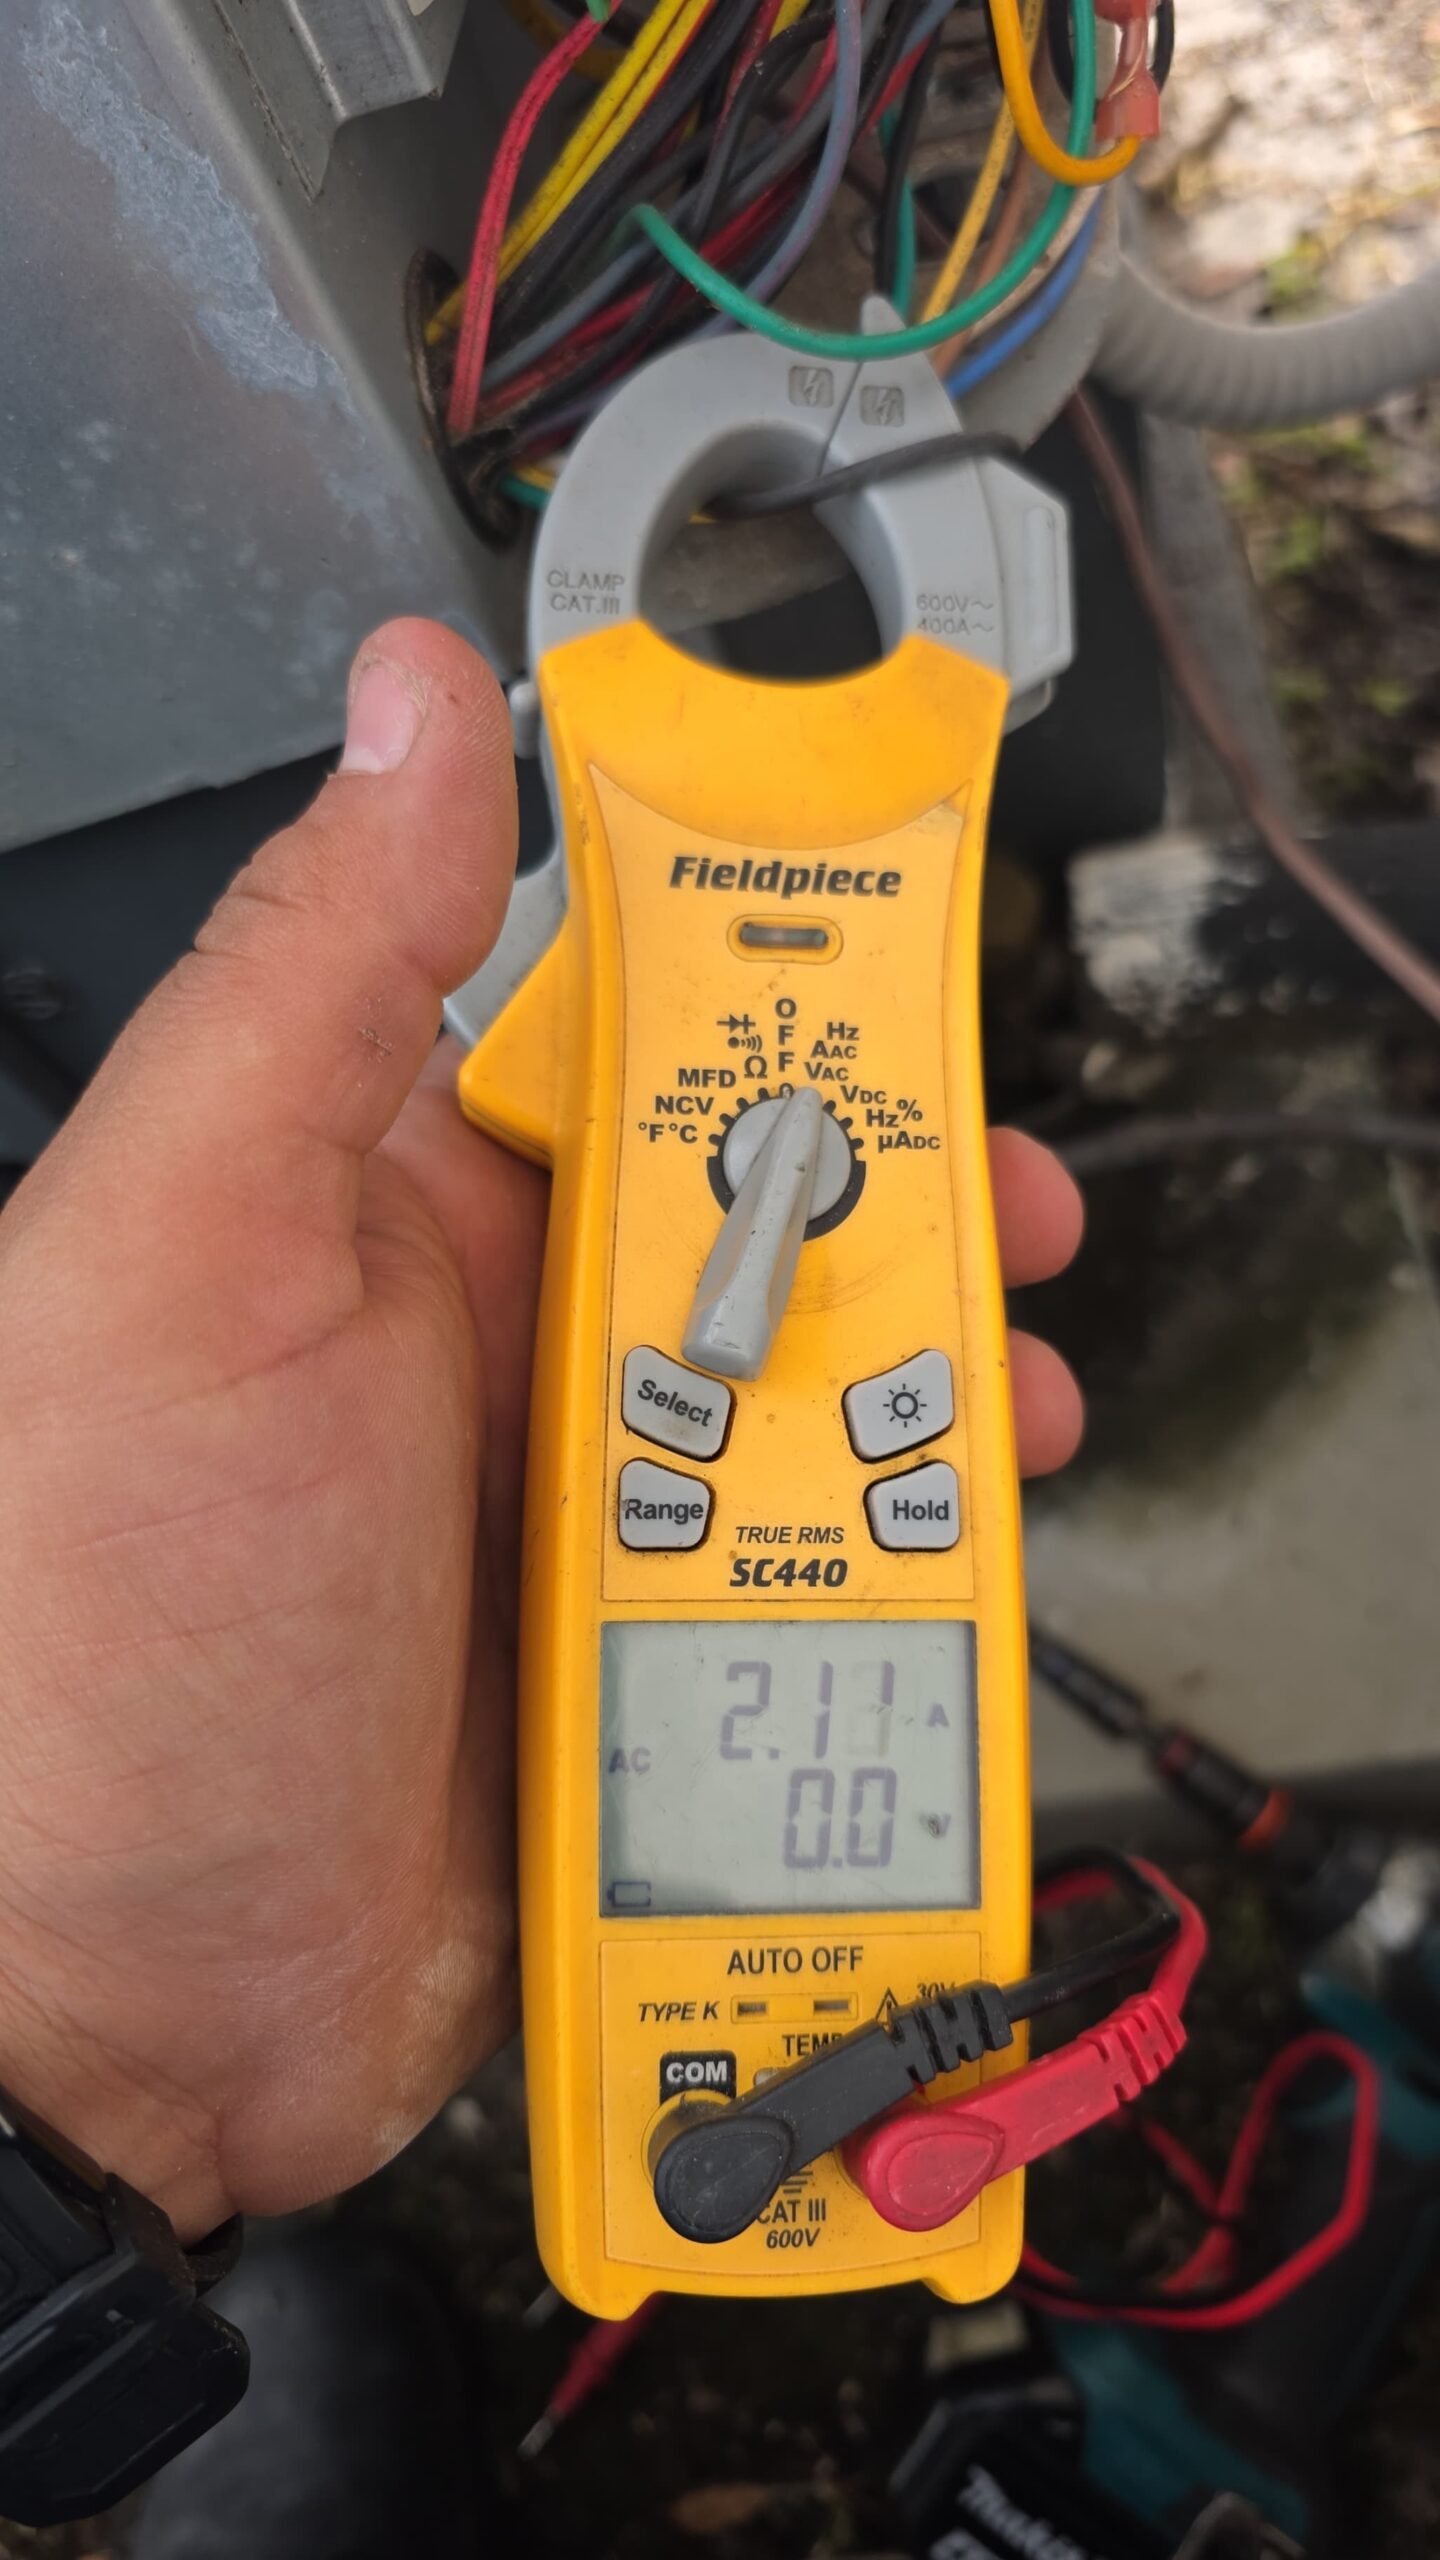
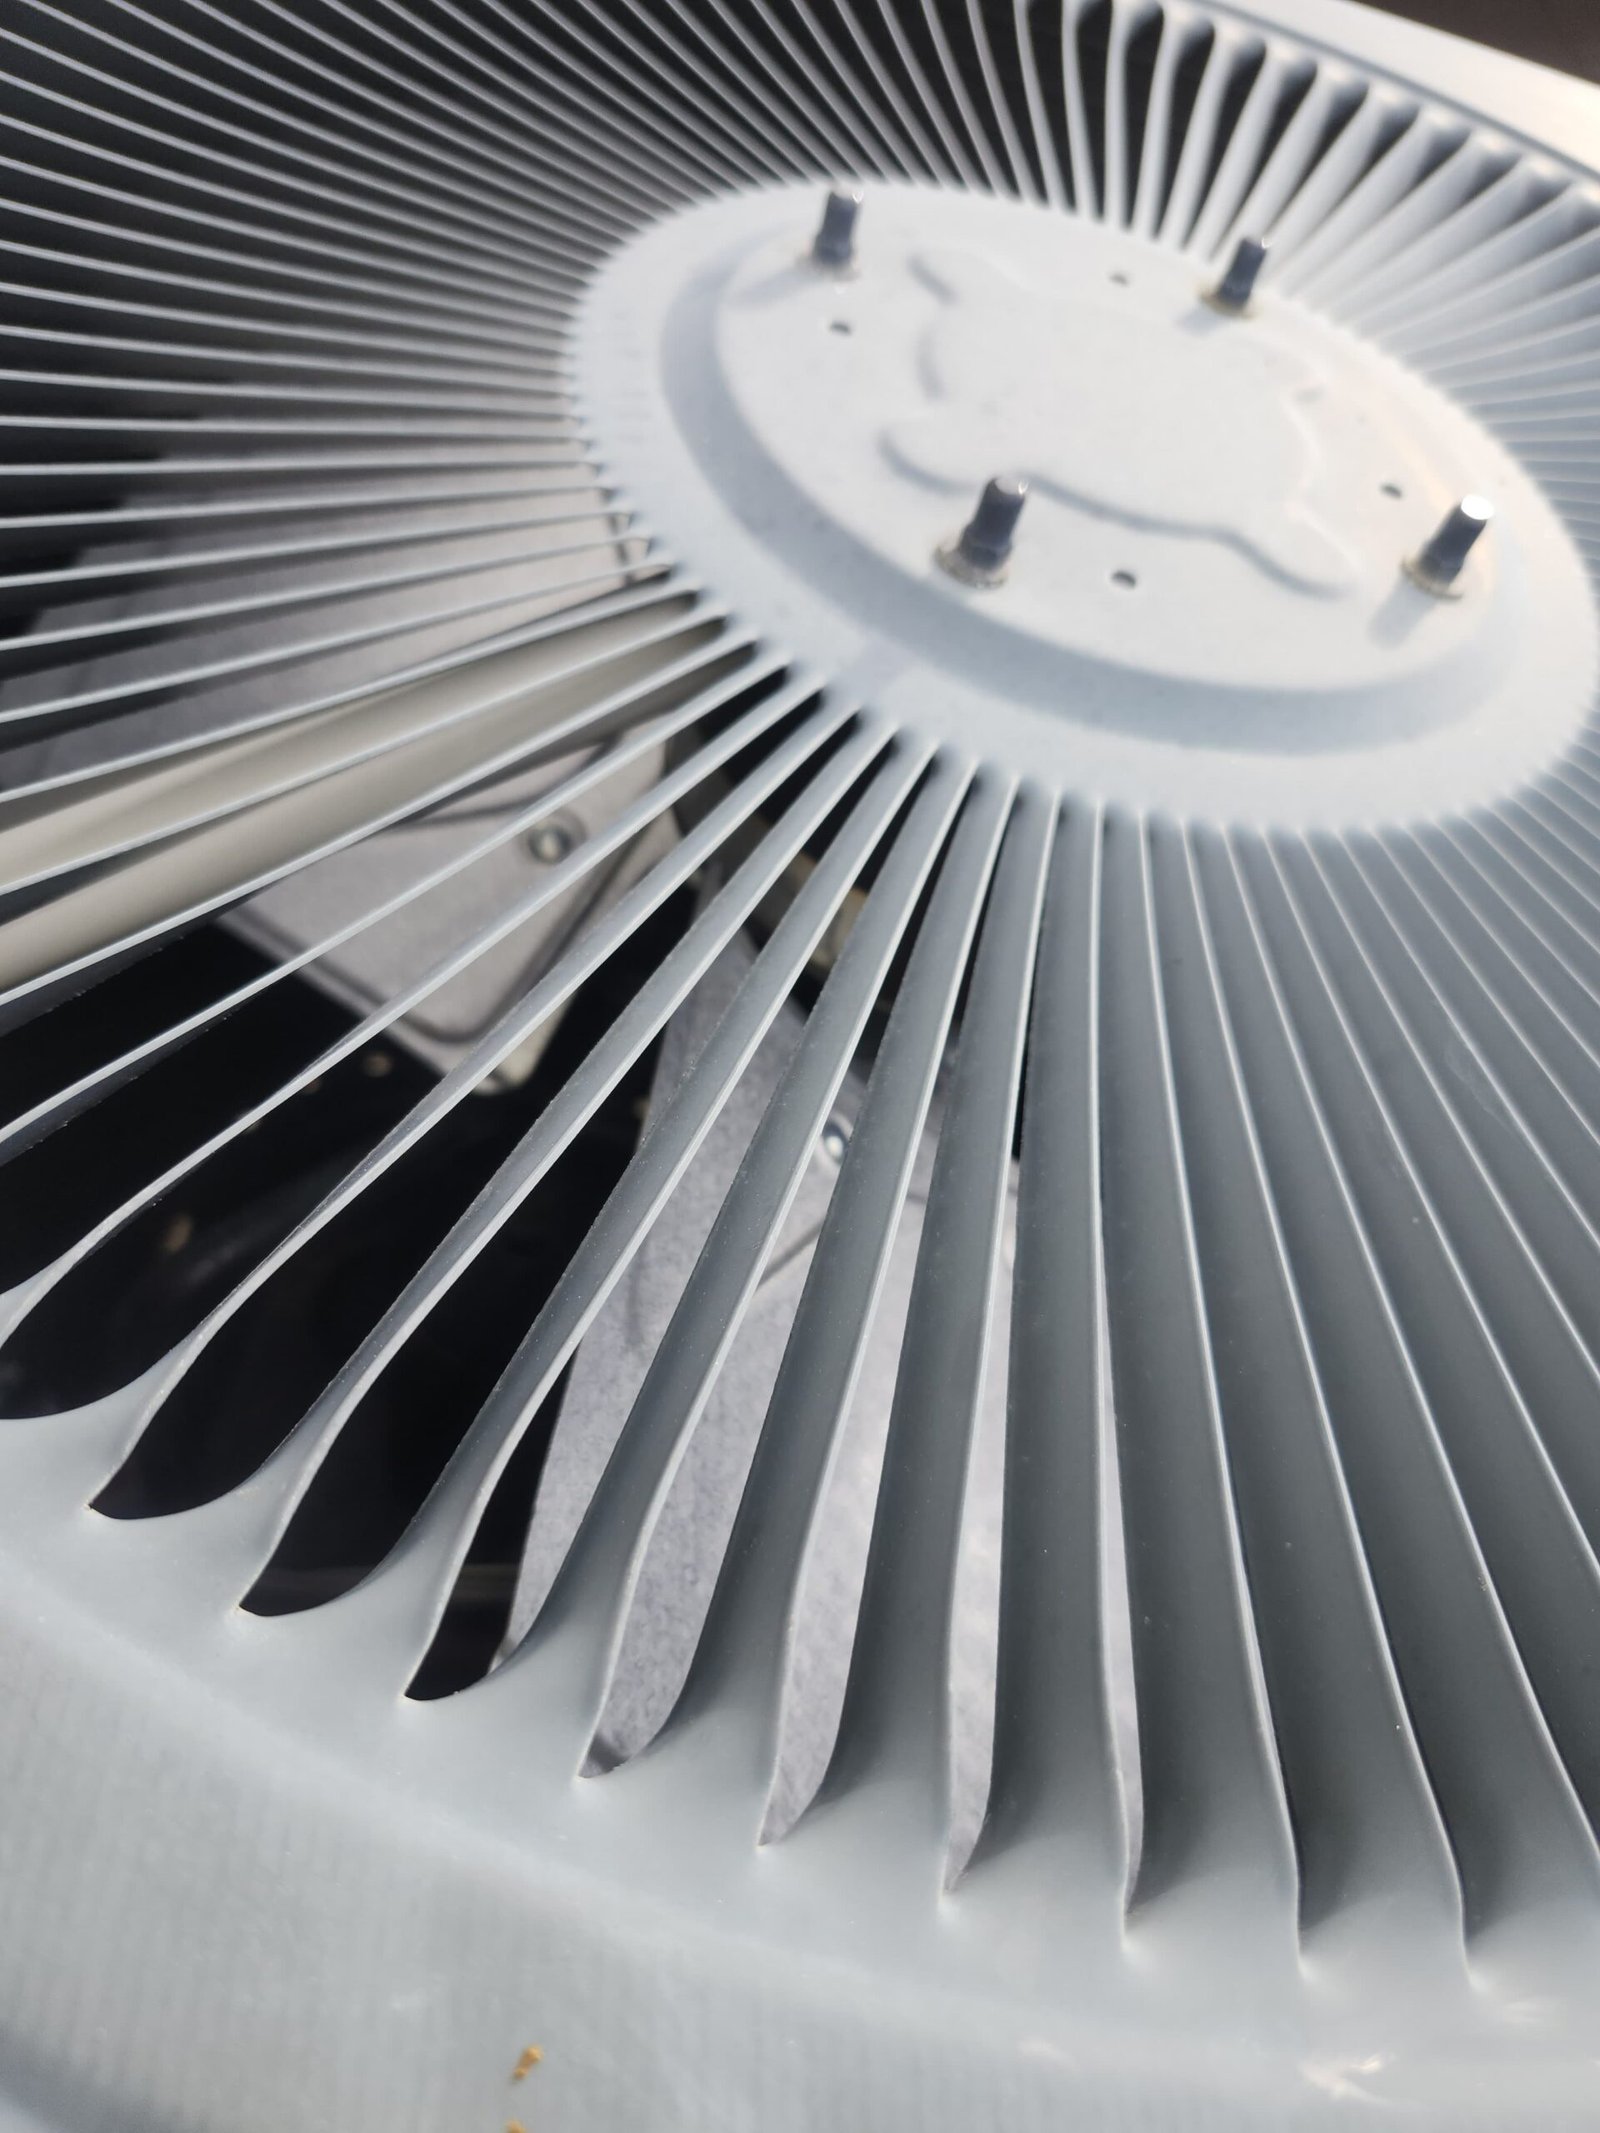
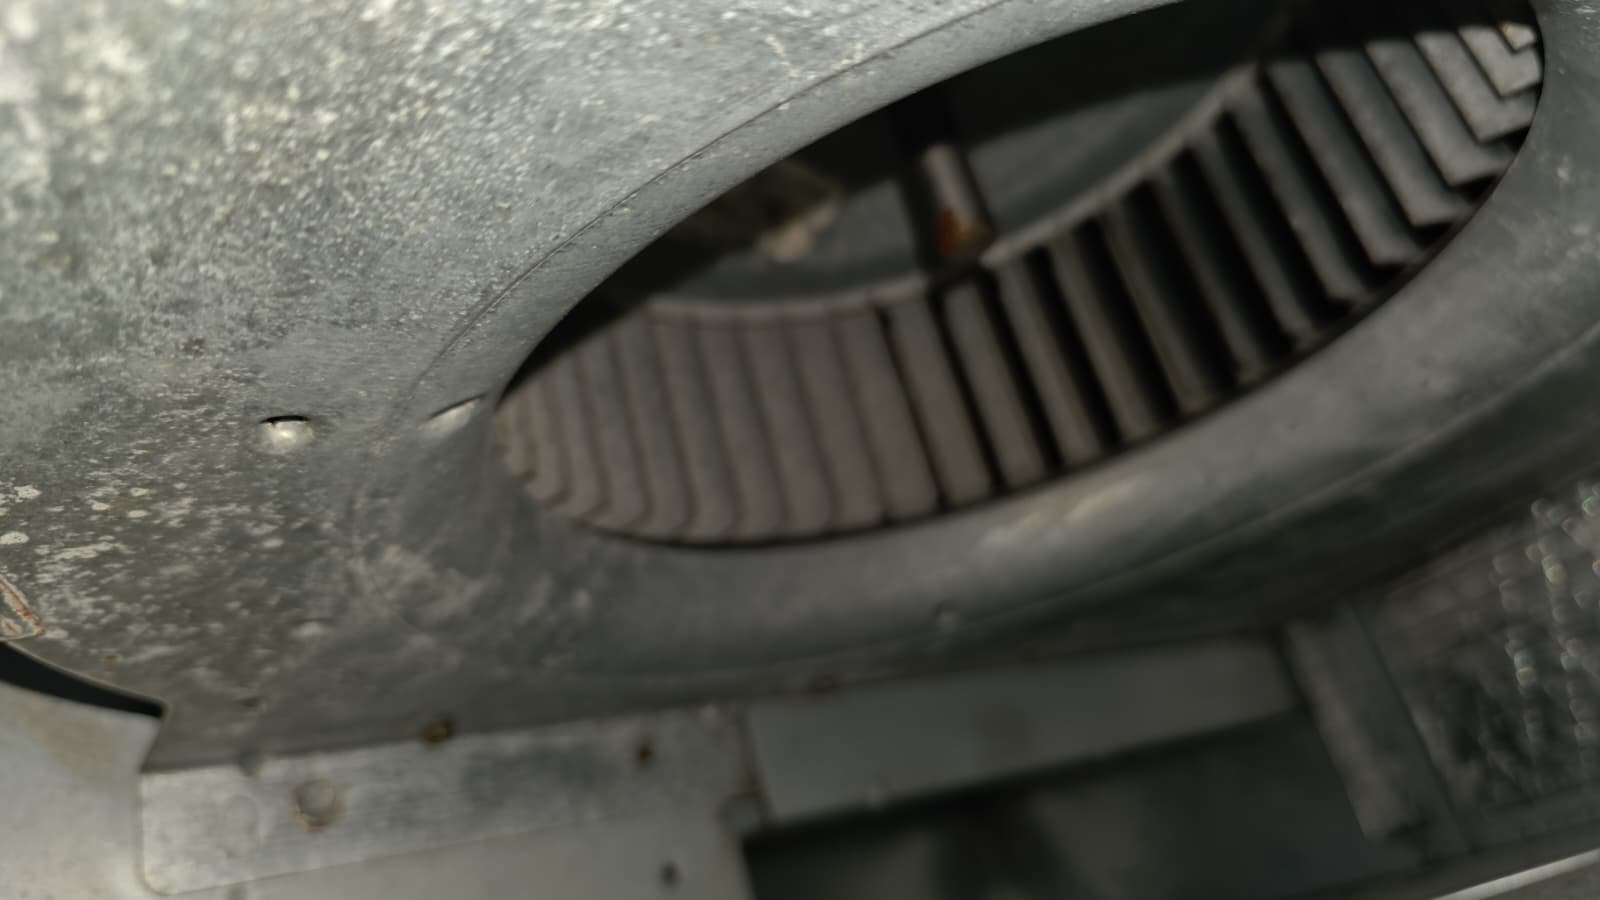
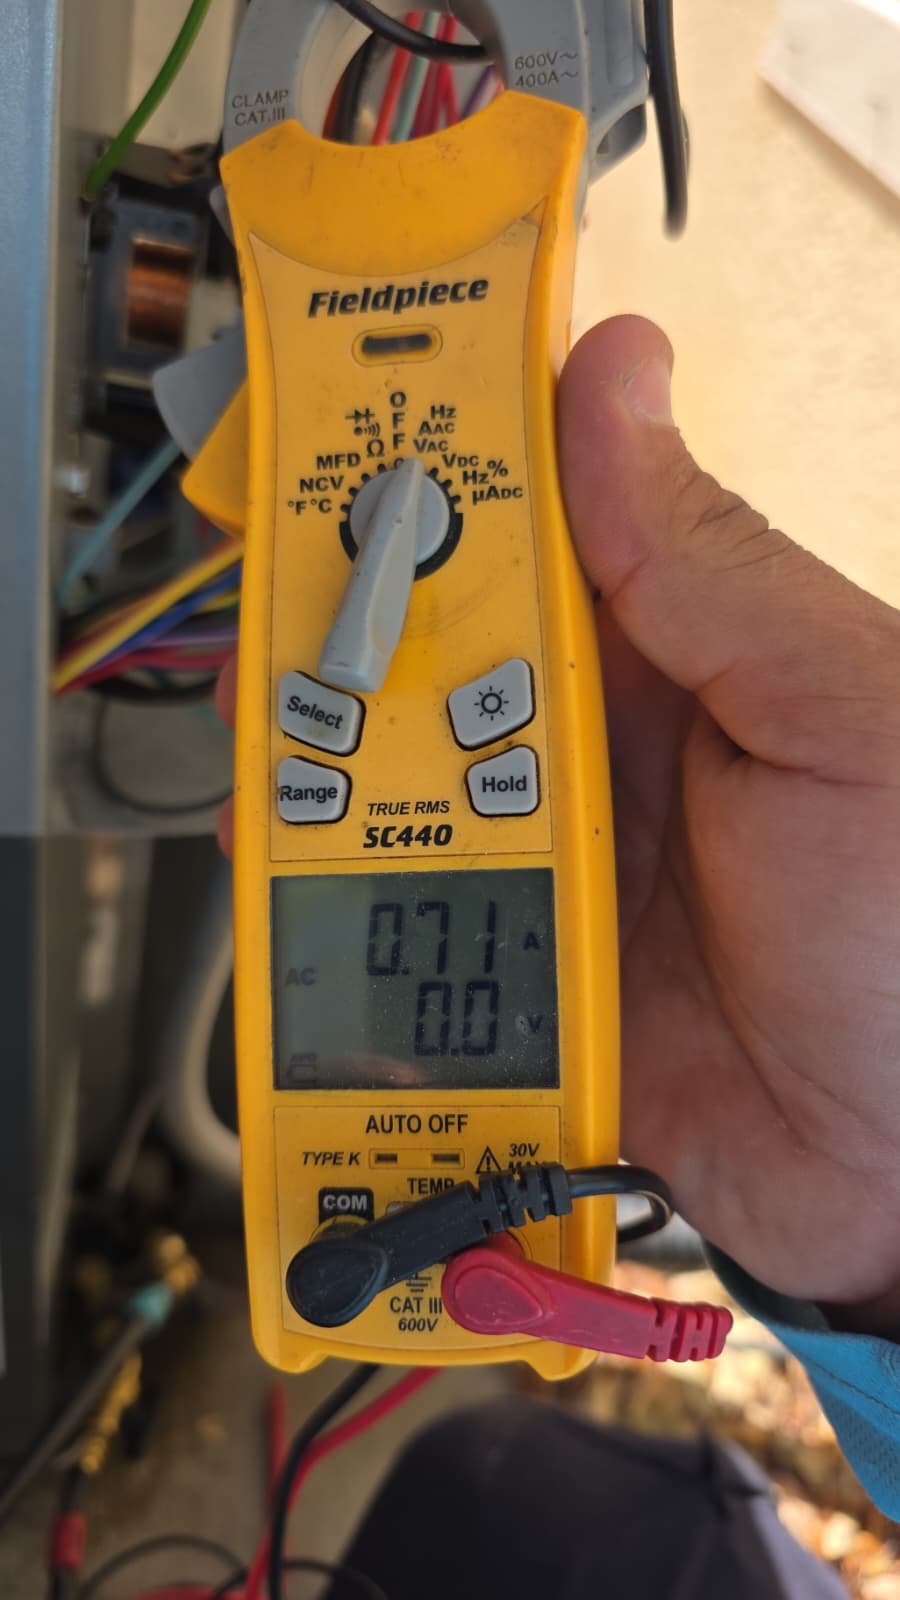
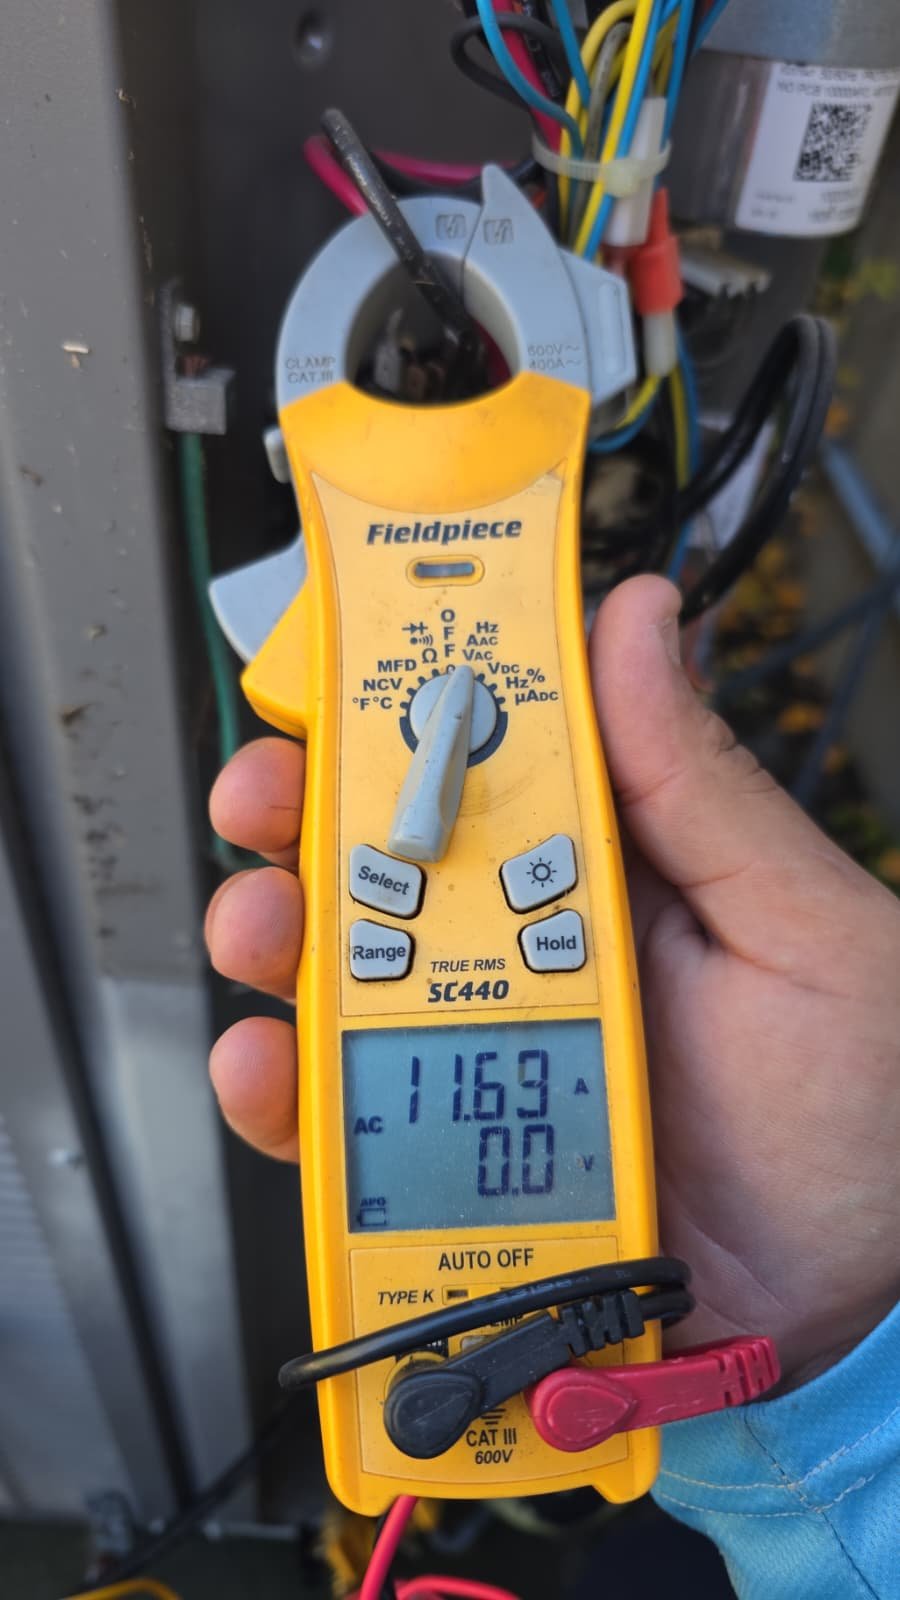
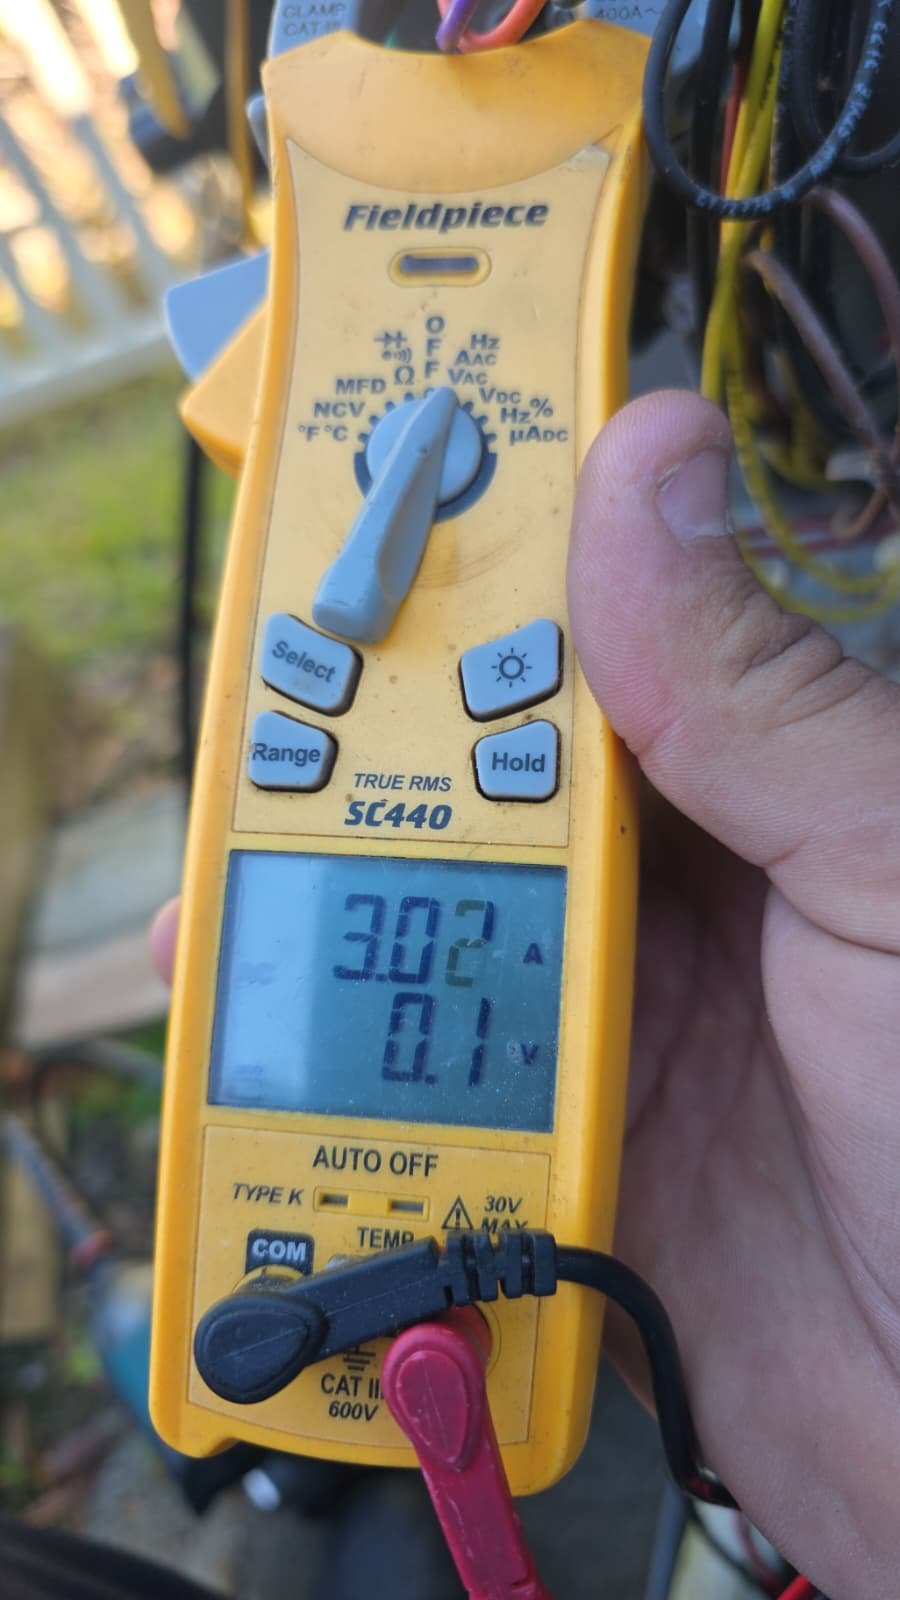
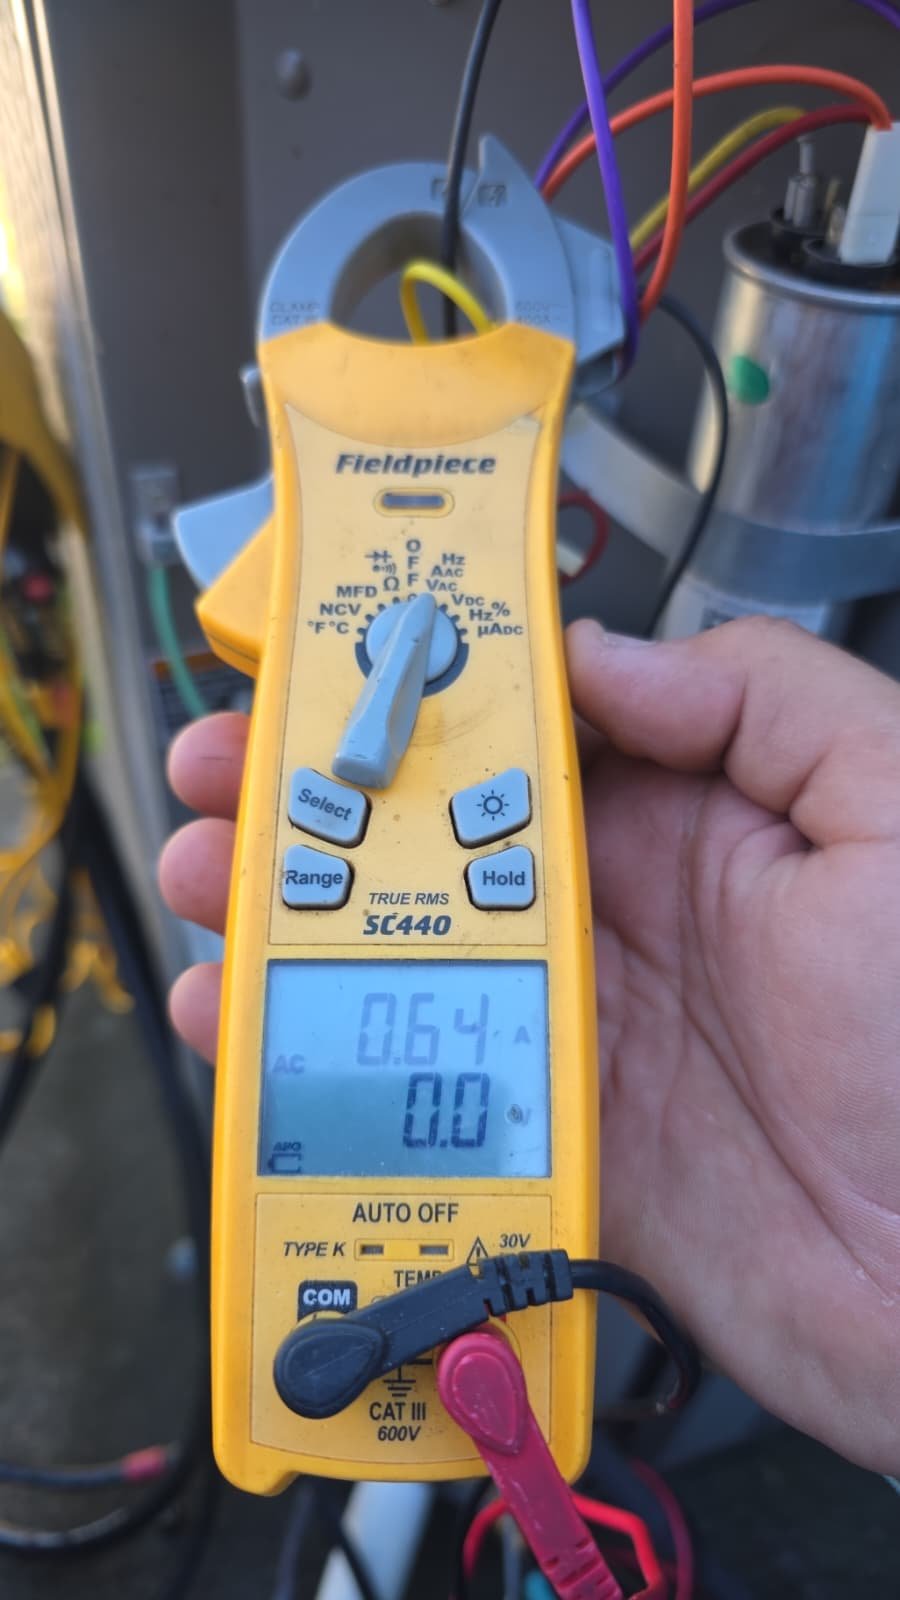
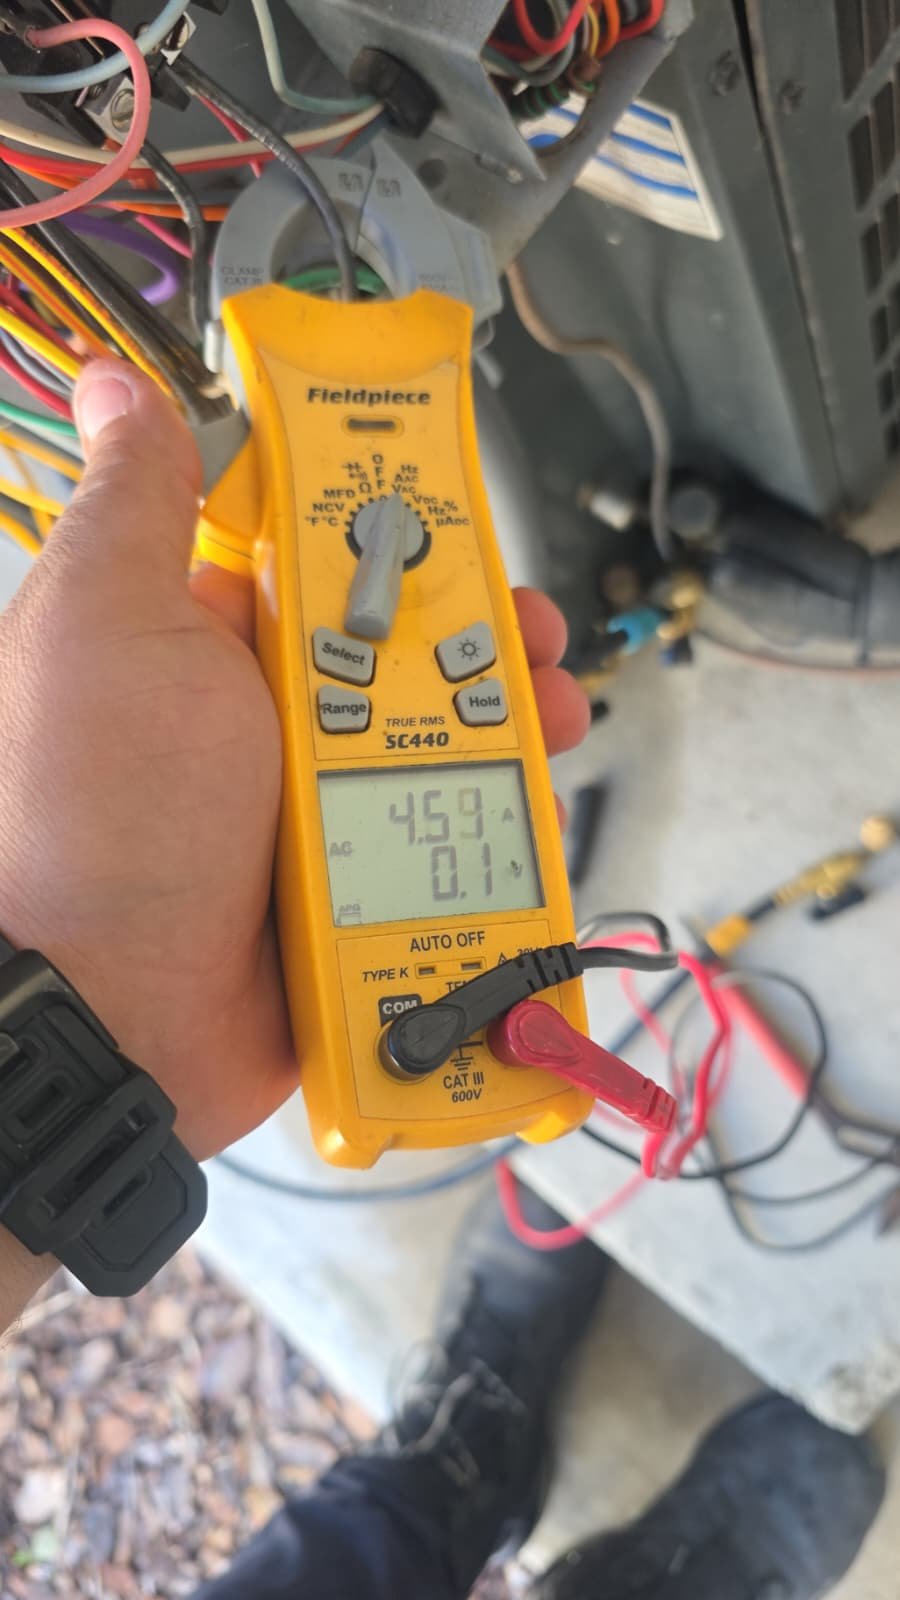
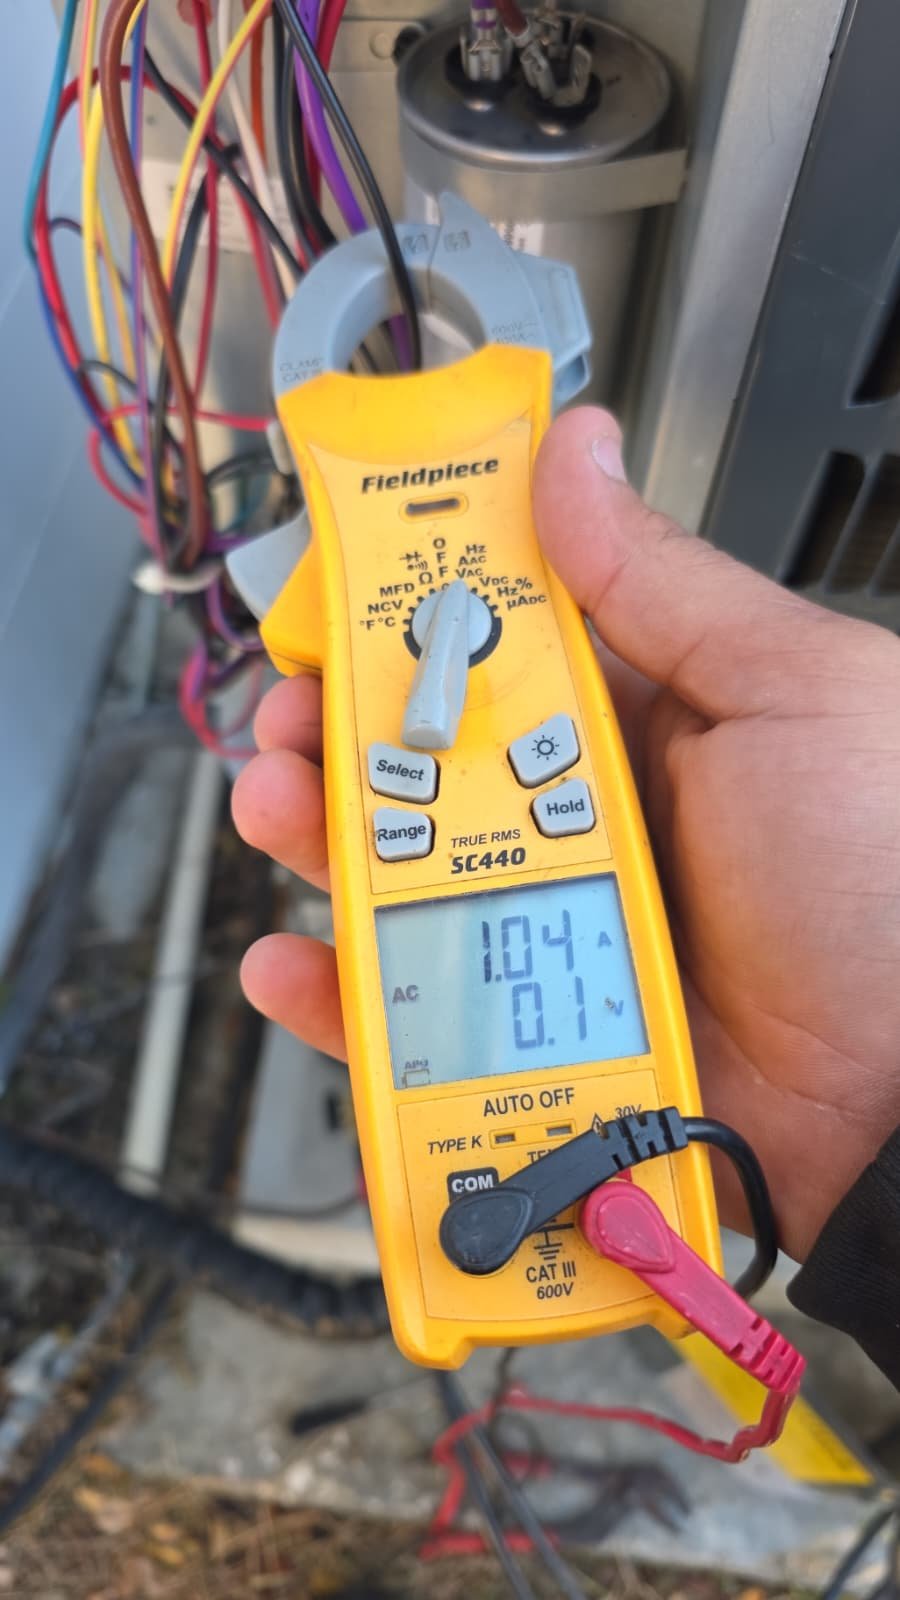
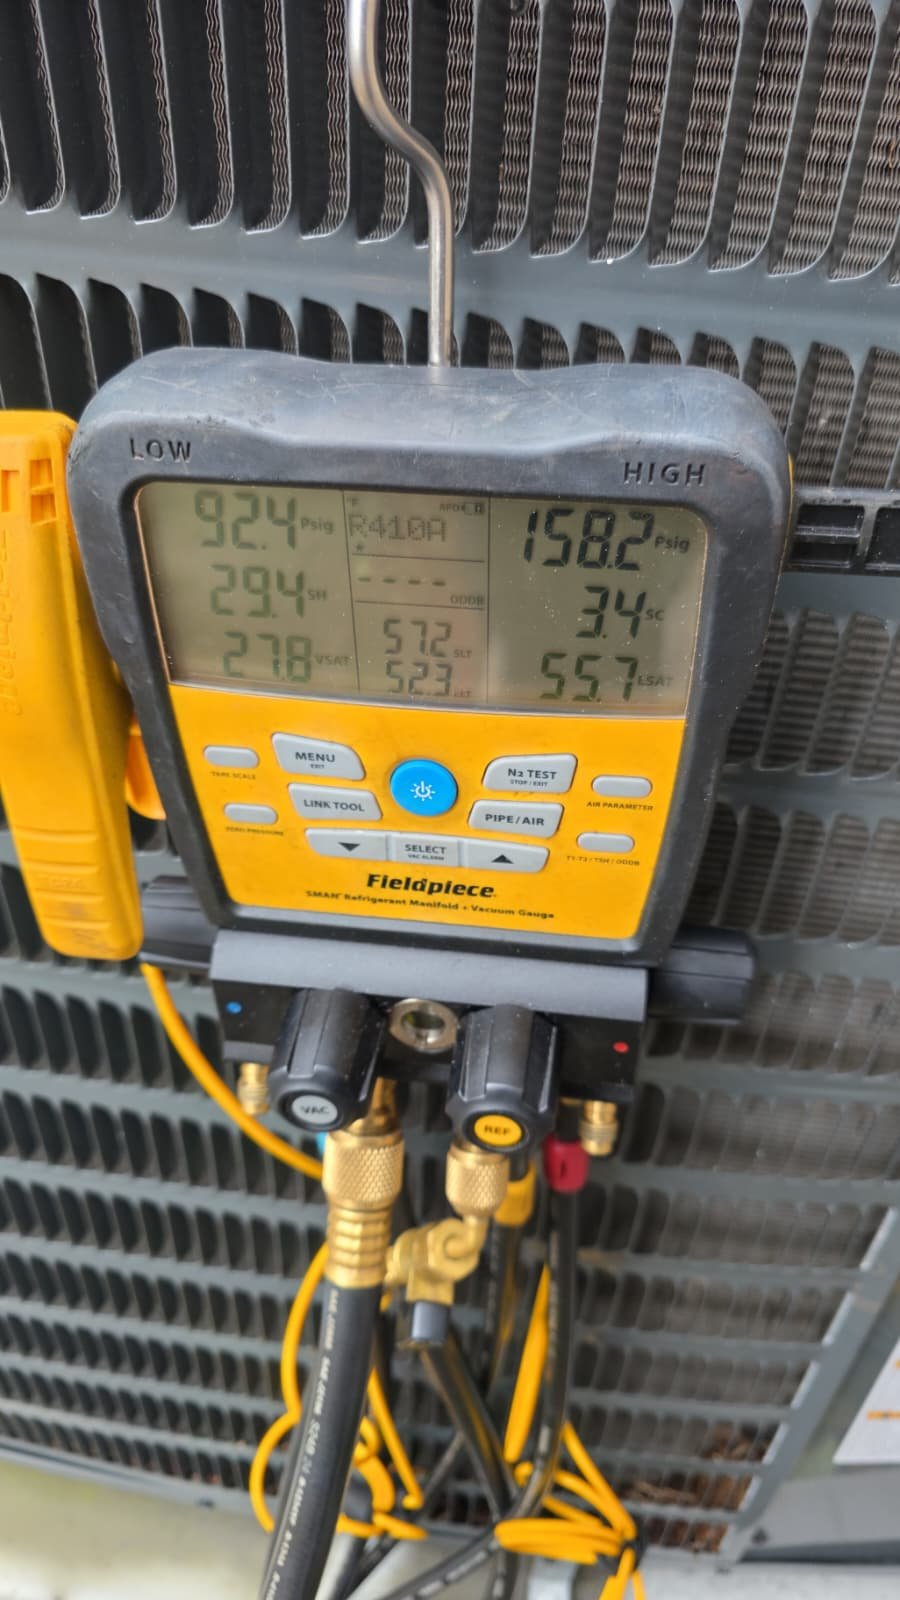
Next, we focused on the outdoor condenser fan motor. On older systems, fan motors are a common point of failure, and in Florida’s heat, they work extremely hard. We re-checked the fan motor’s electrical consumption and found that its draw was still higher than typical for a healthy motor.

We are careful not to guess on exact lifespans, but fan motors that consistently draw high current are generally closer to failure than to the beginning of their life. That’s why we document it and communicate clearly with the homeowner.

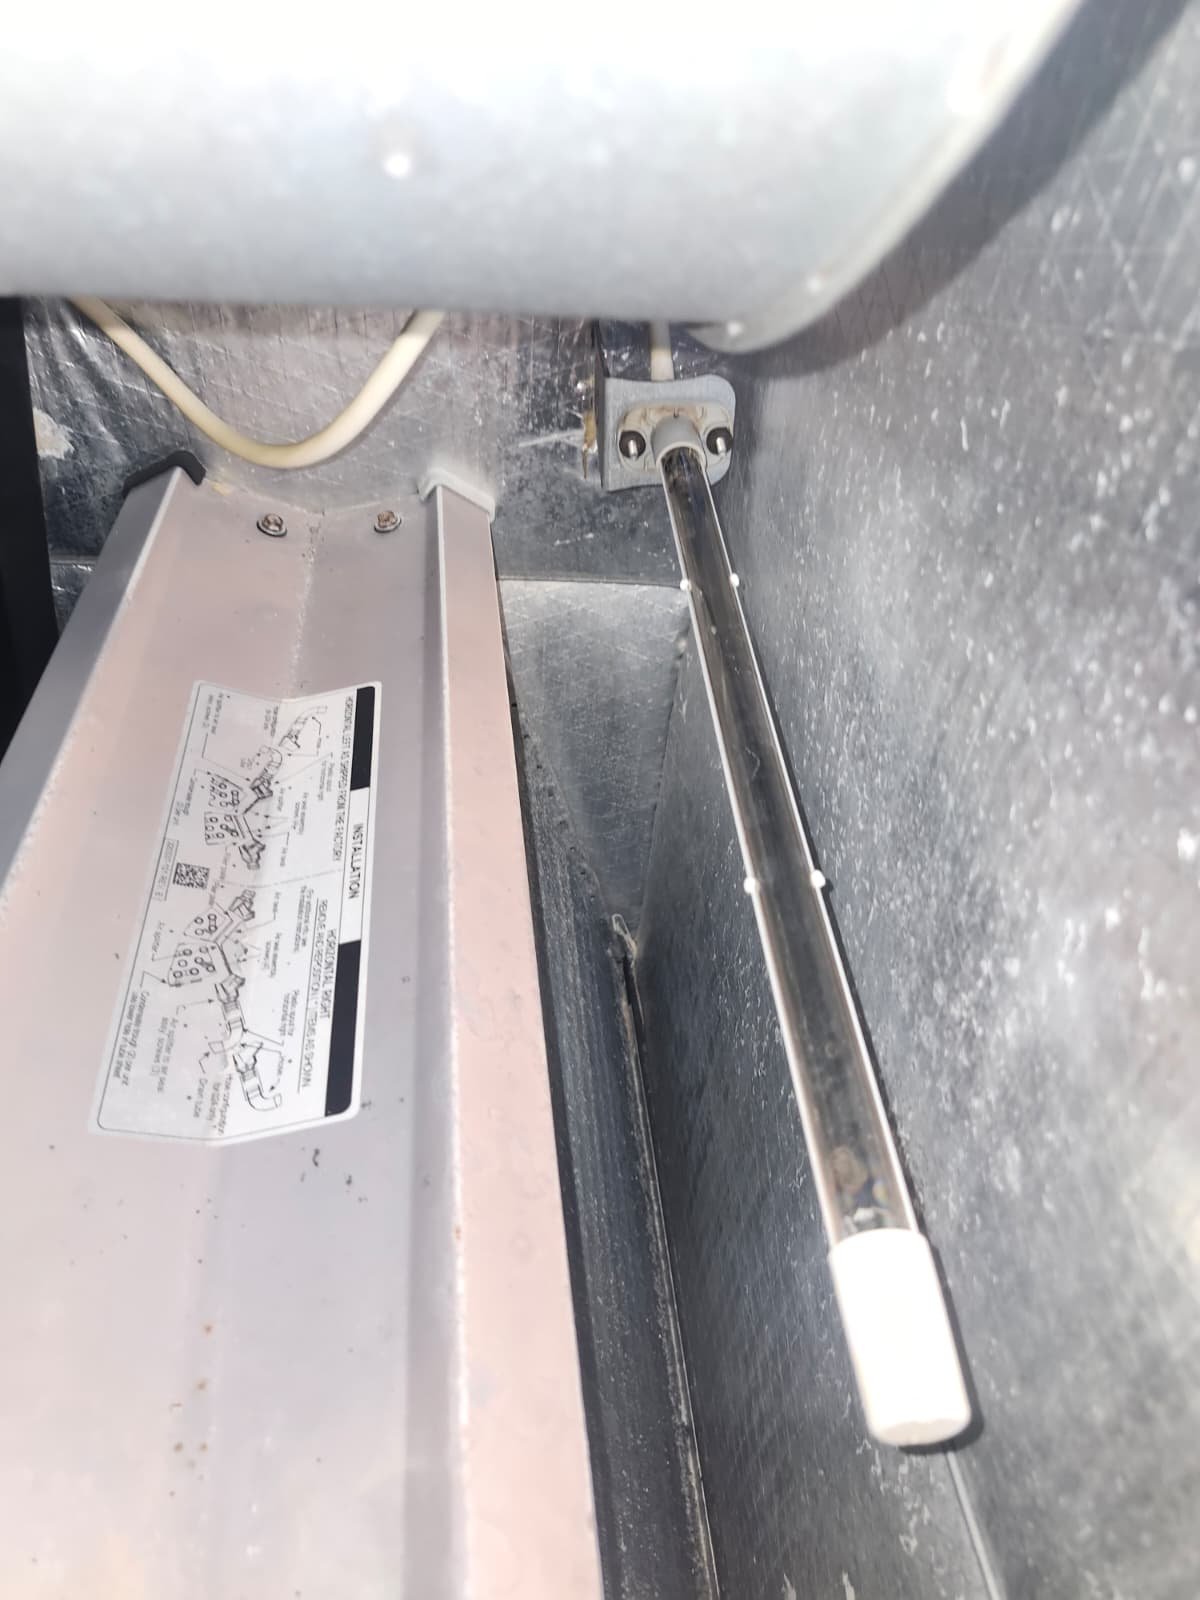
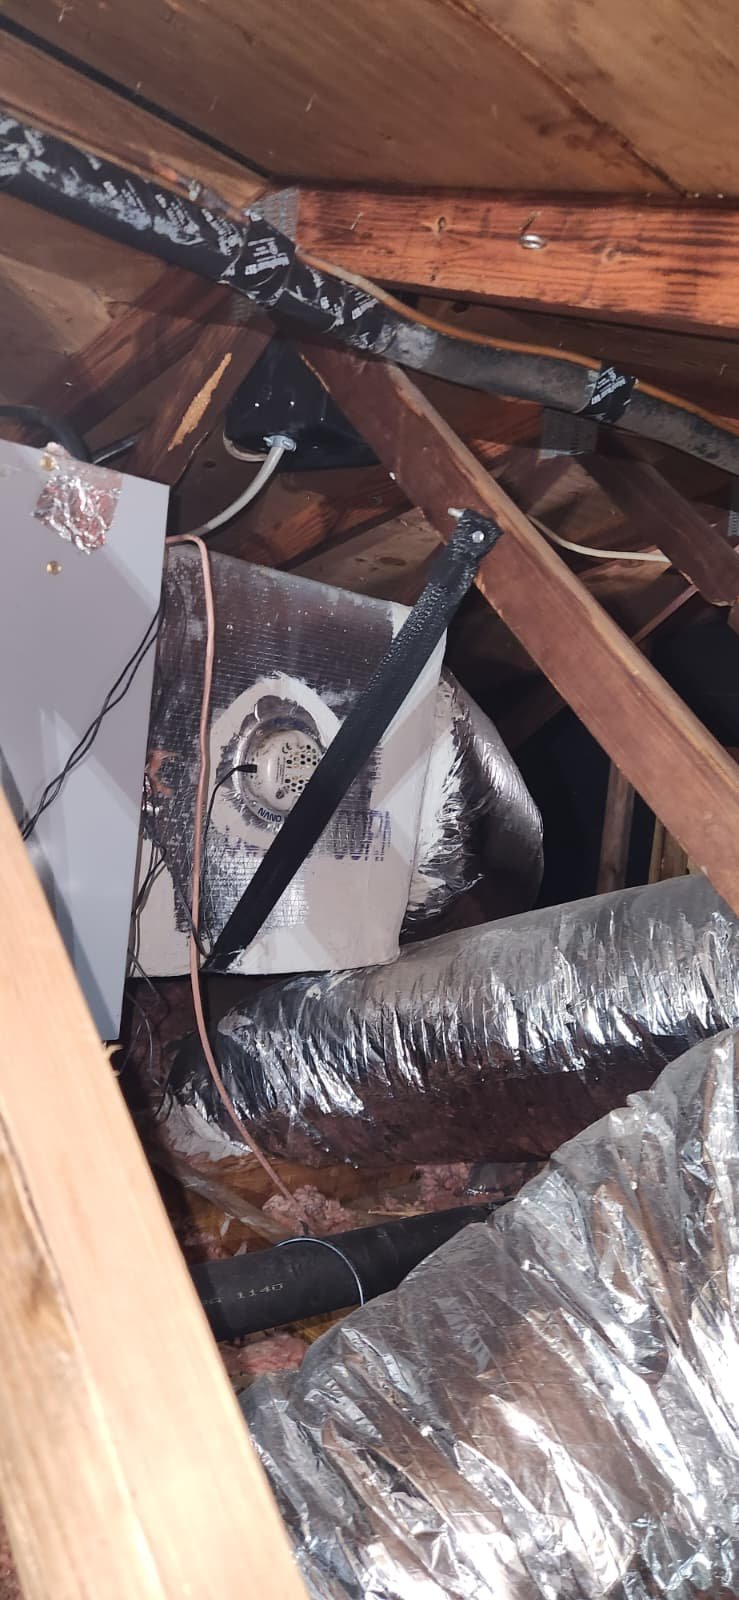
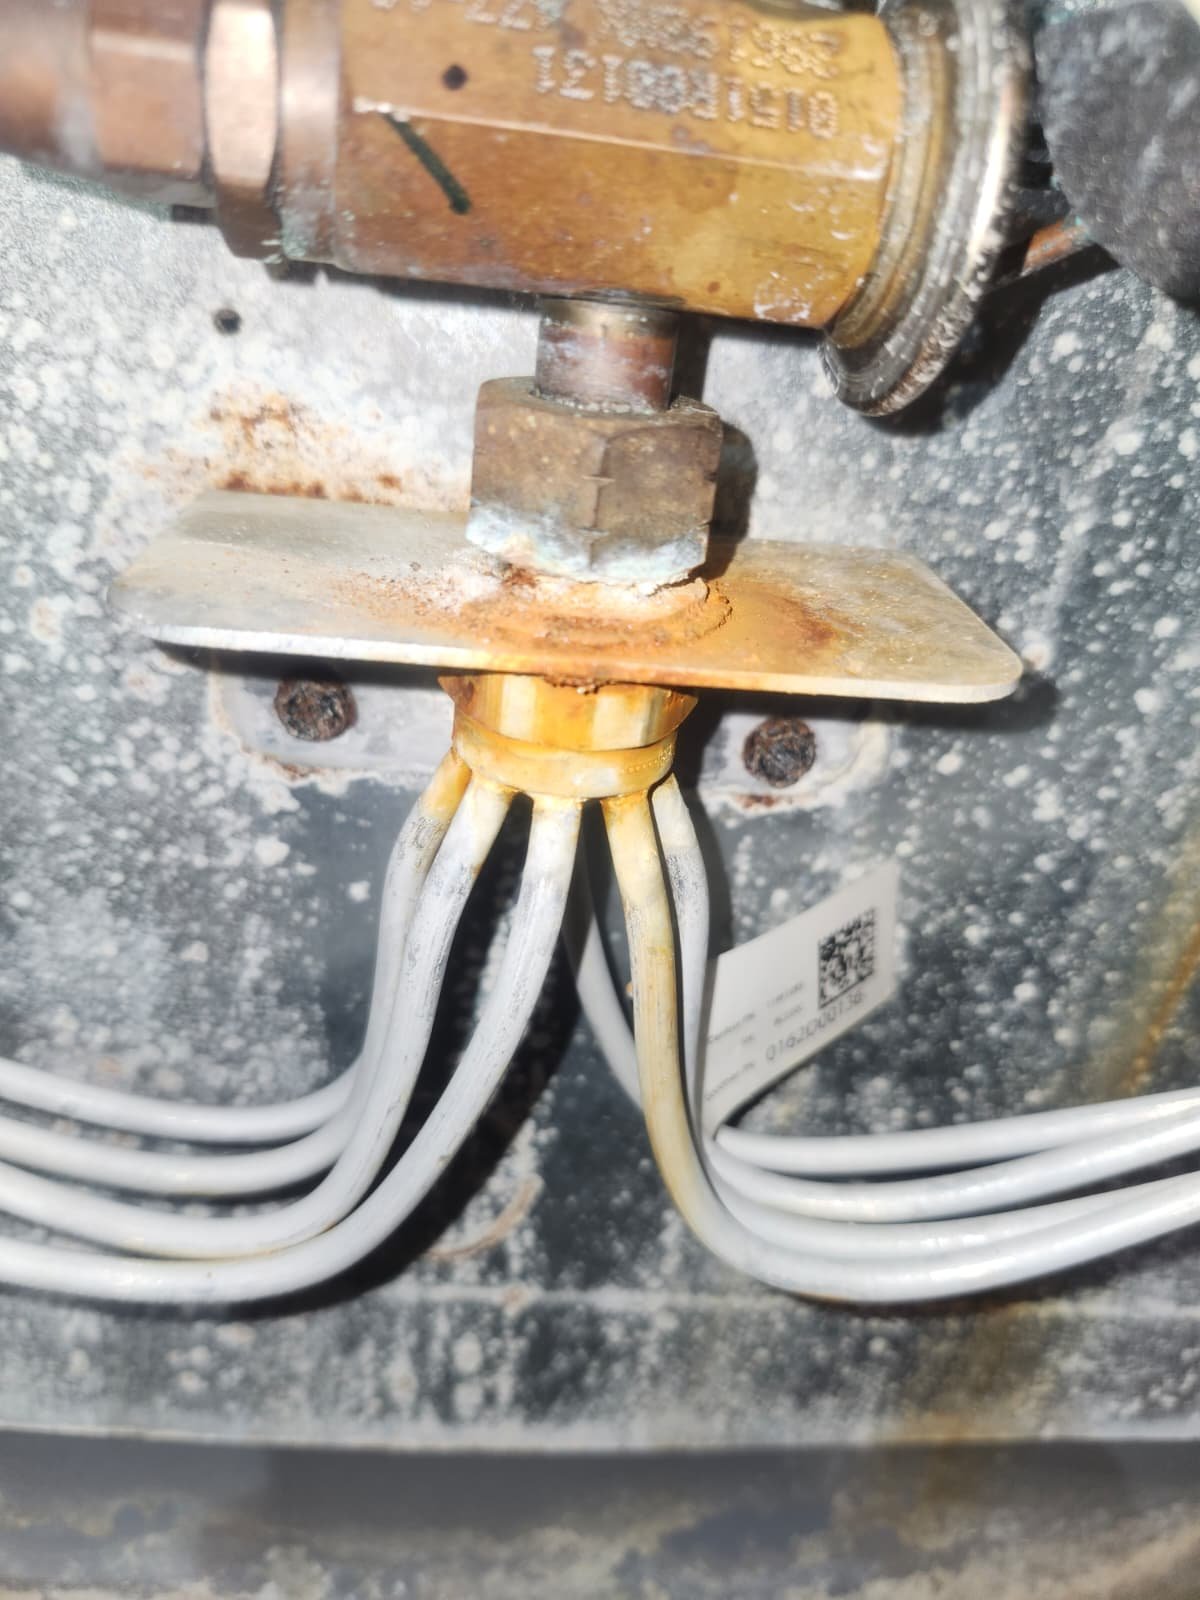
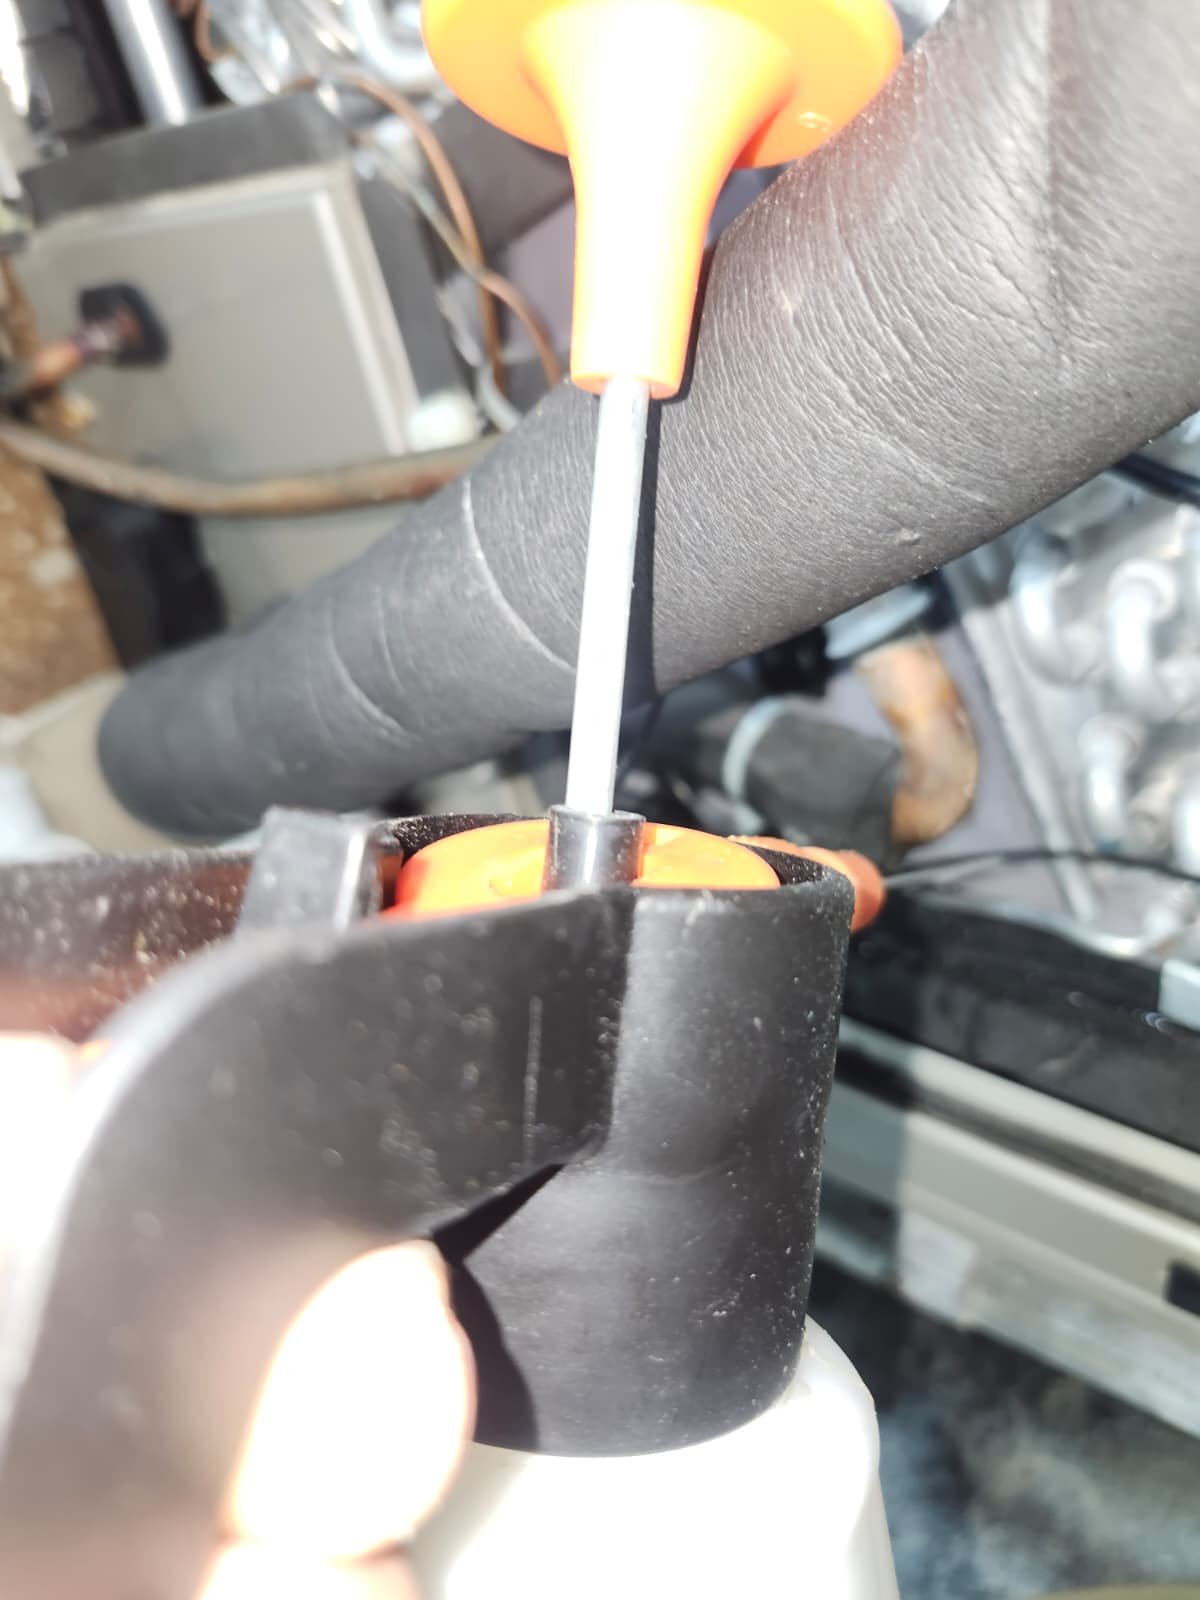
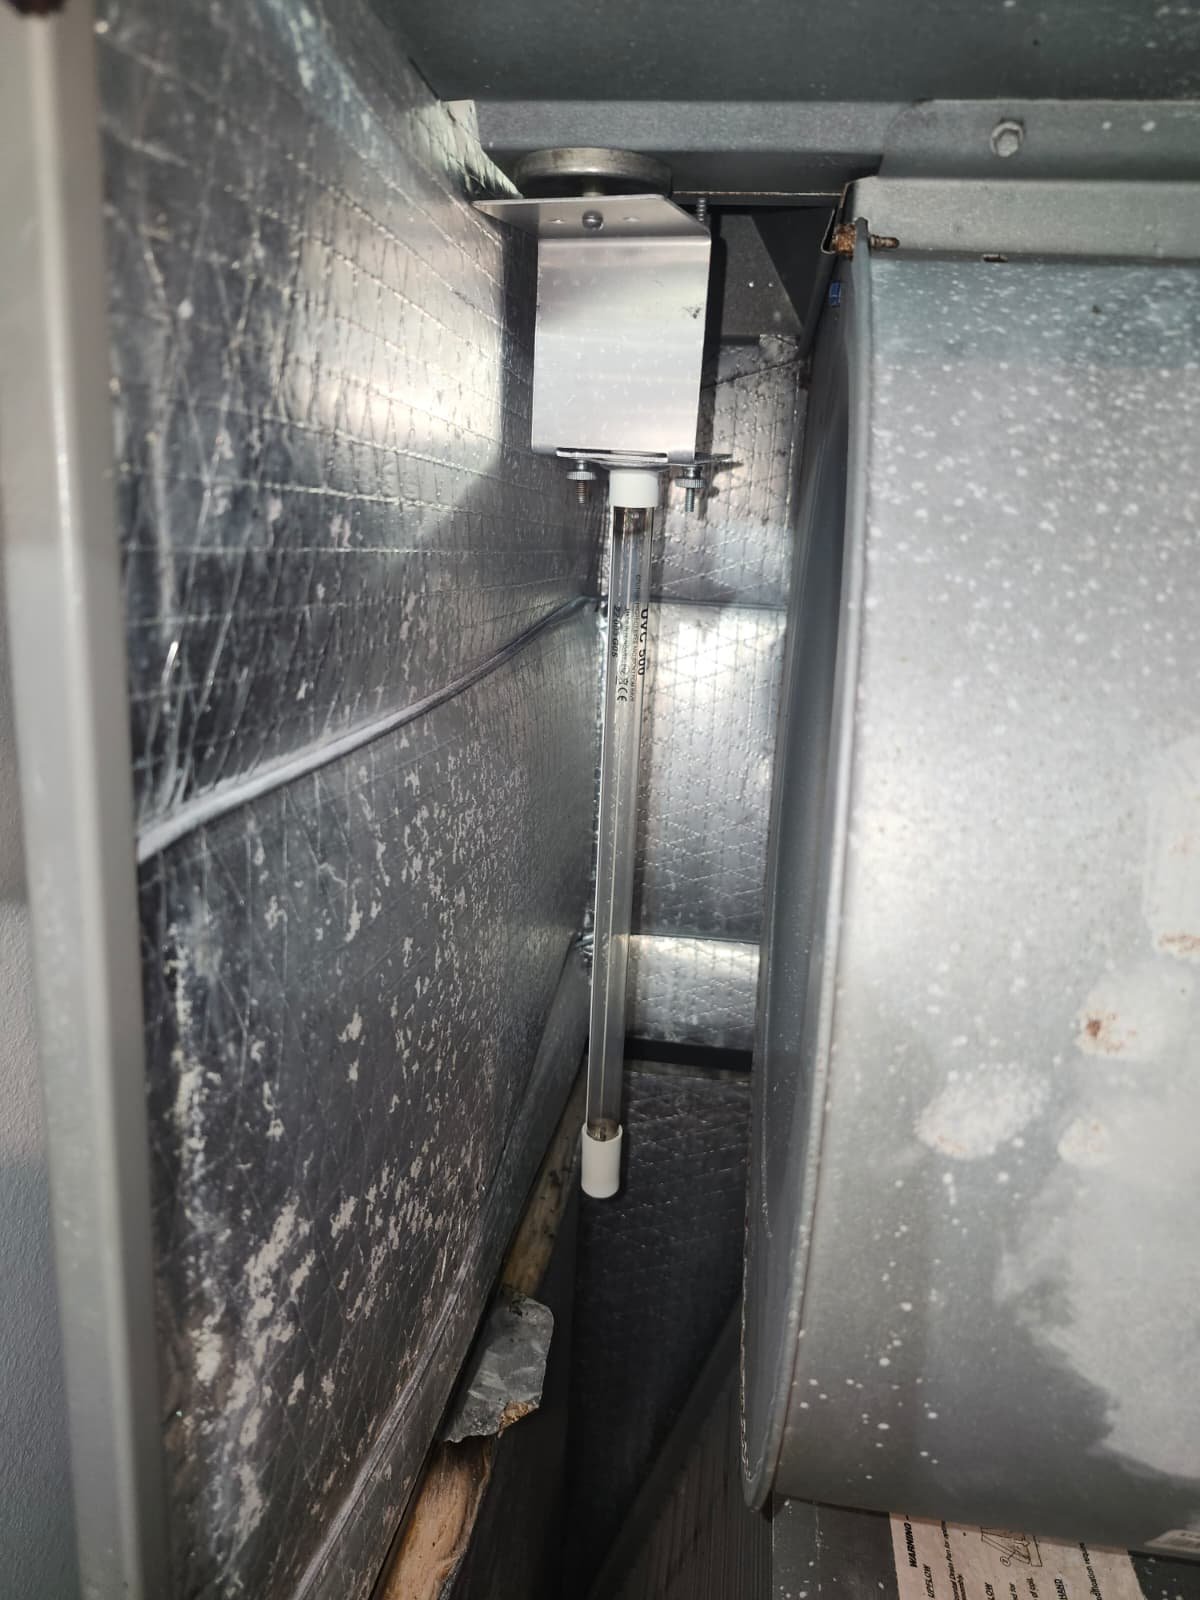
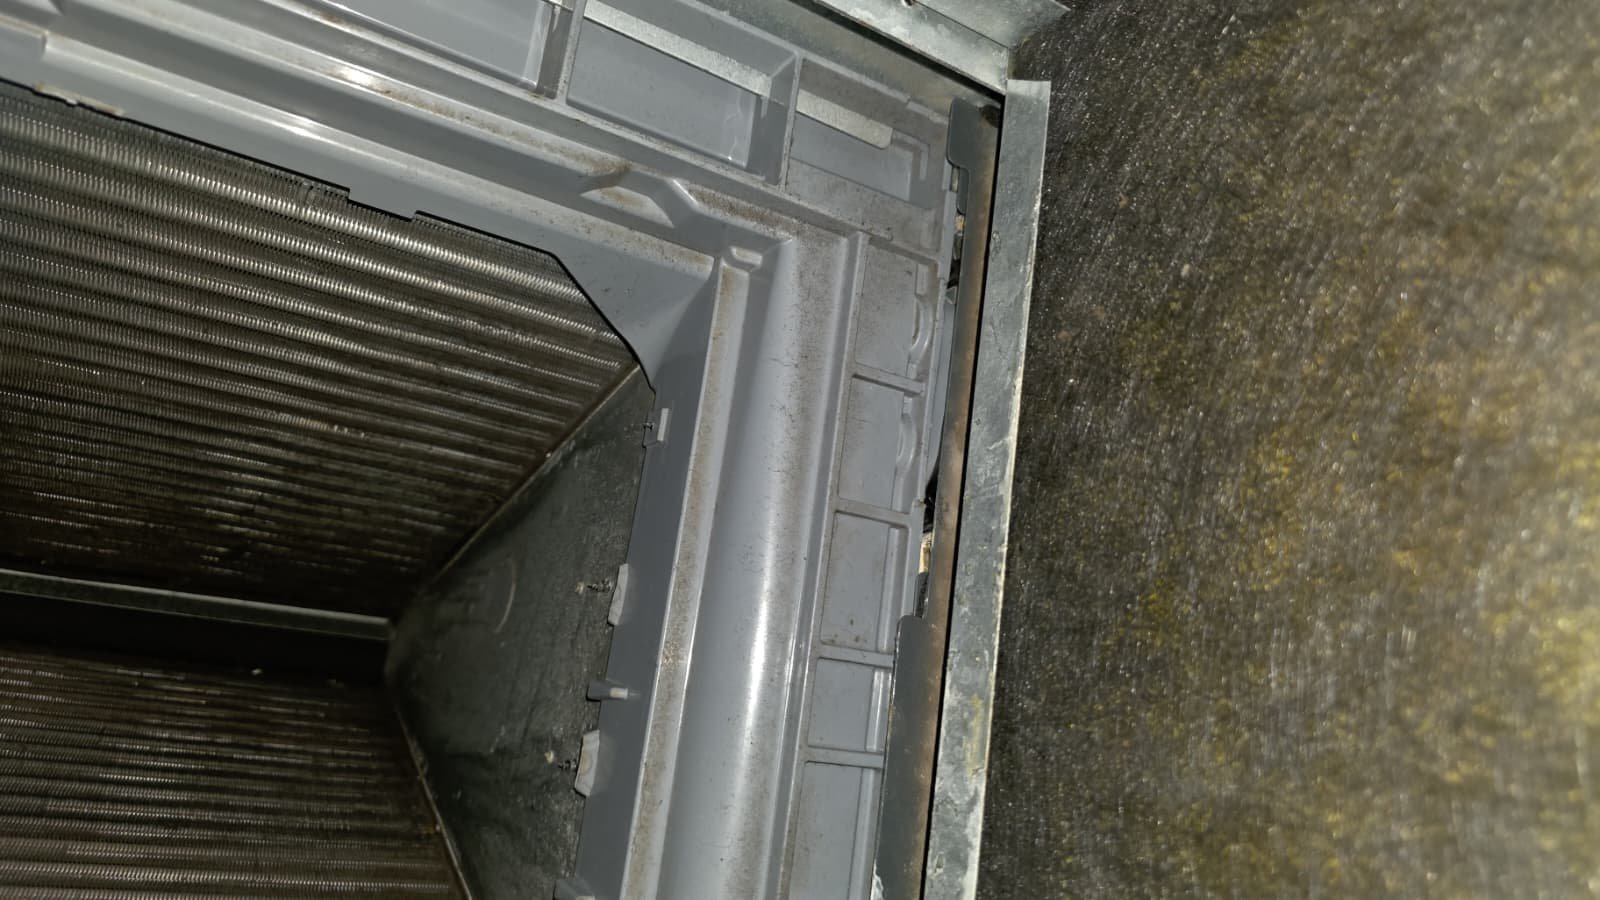
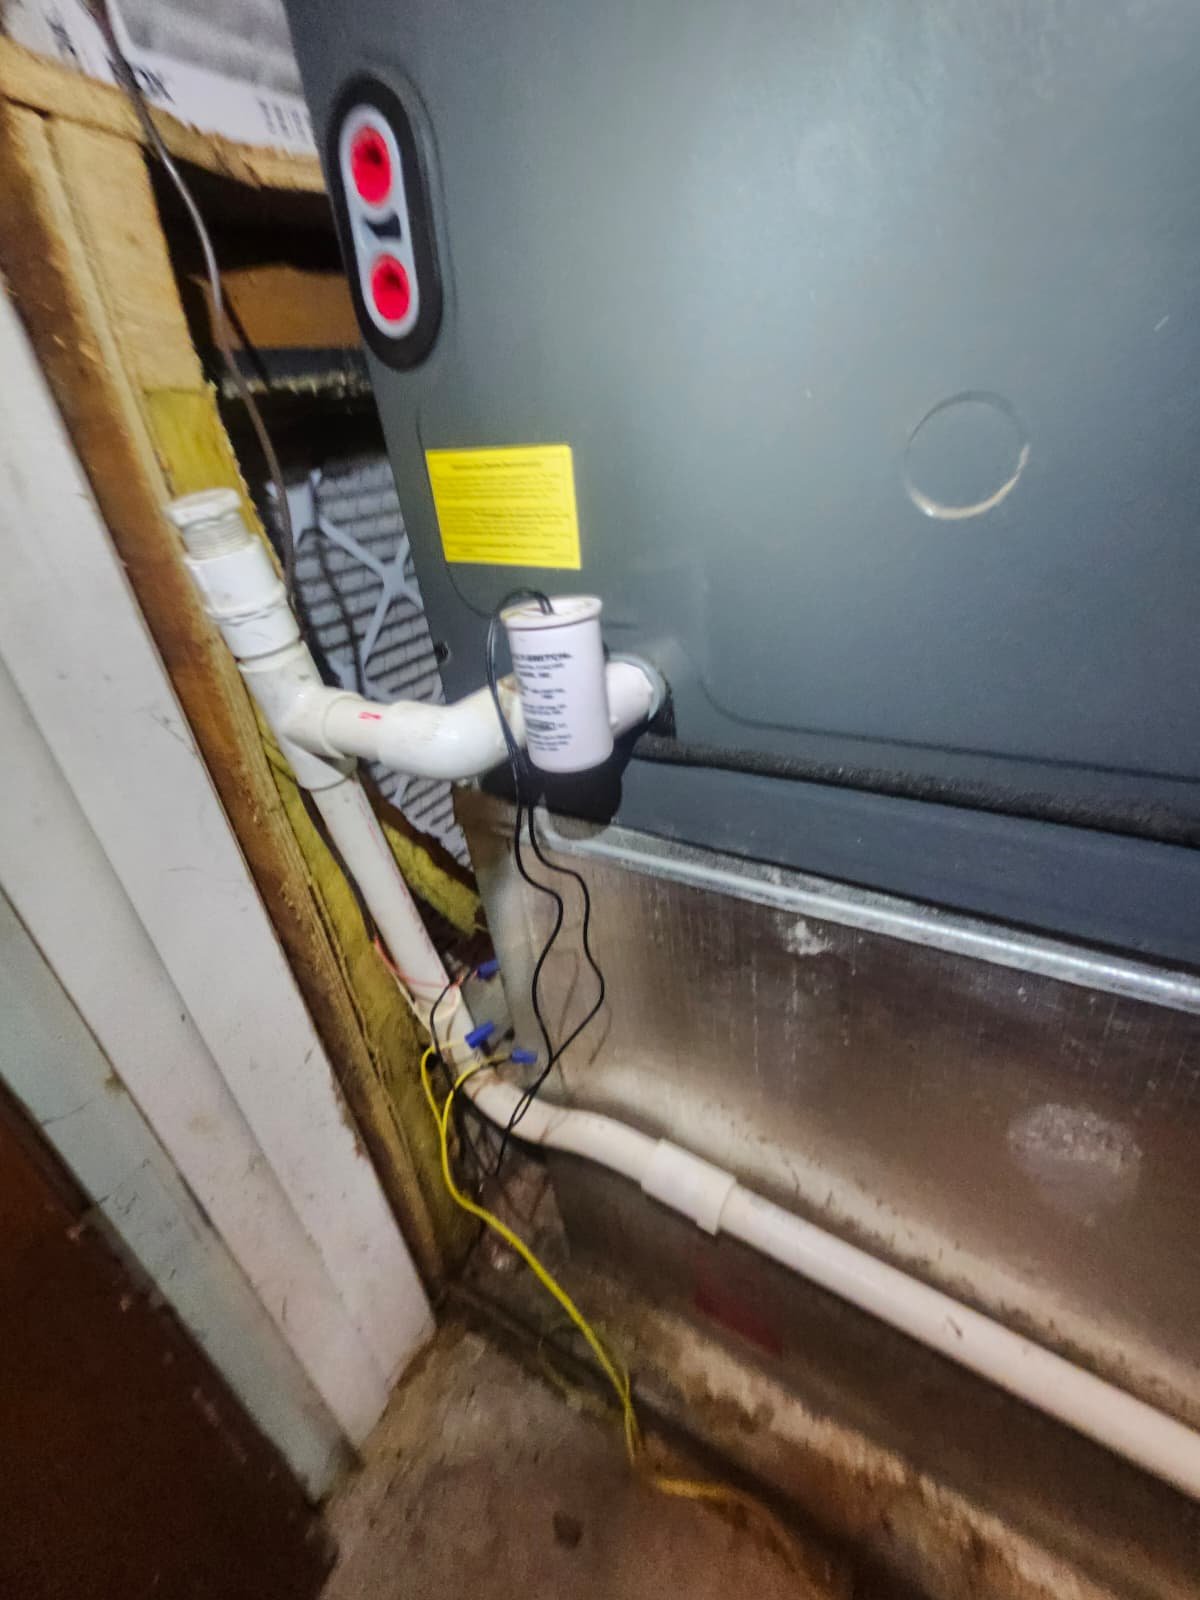
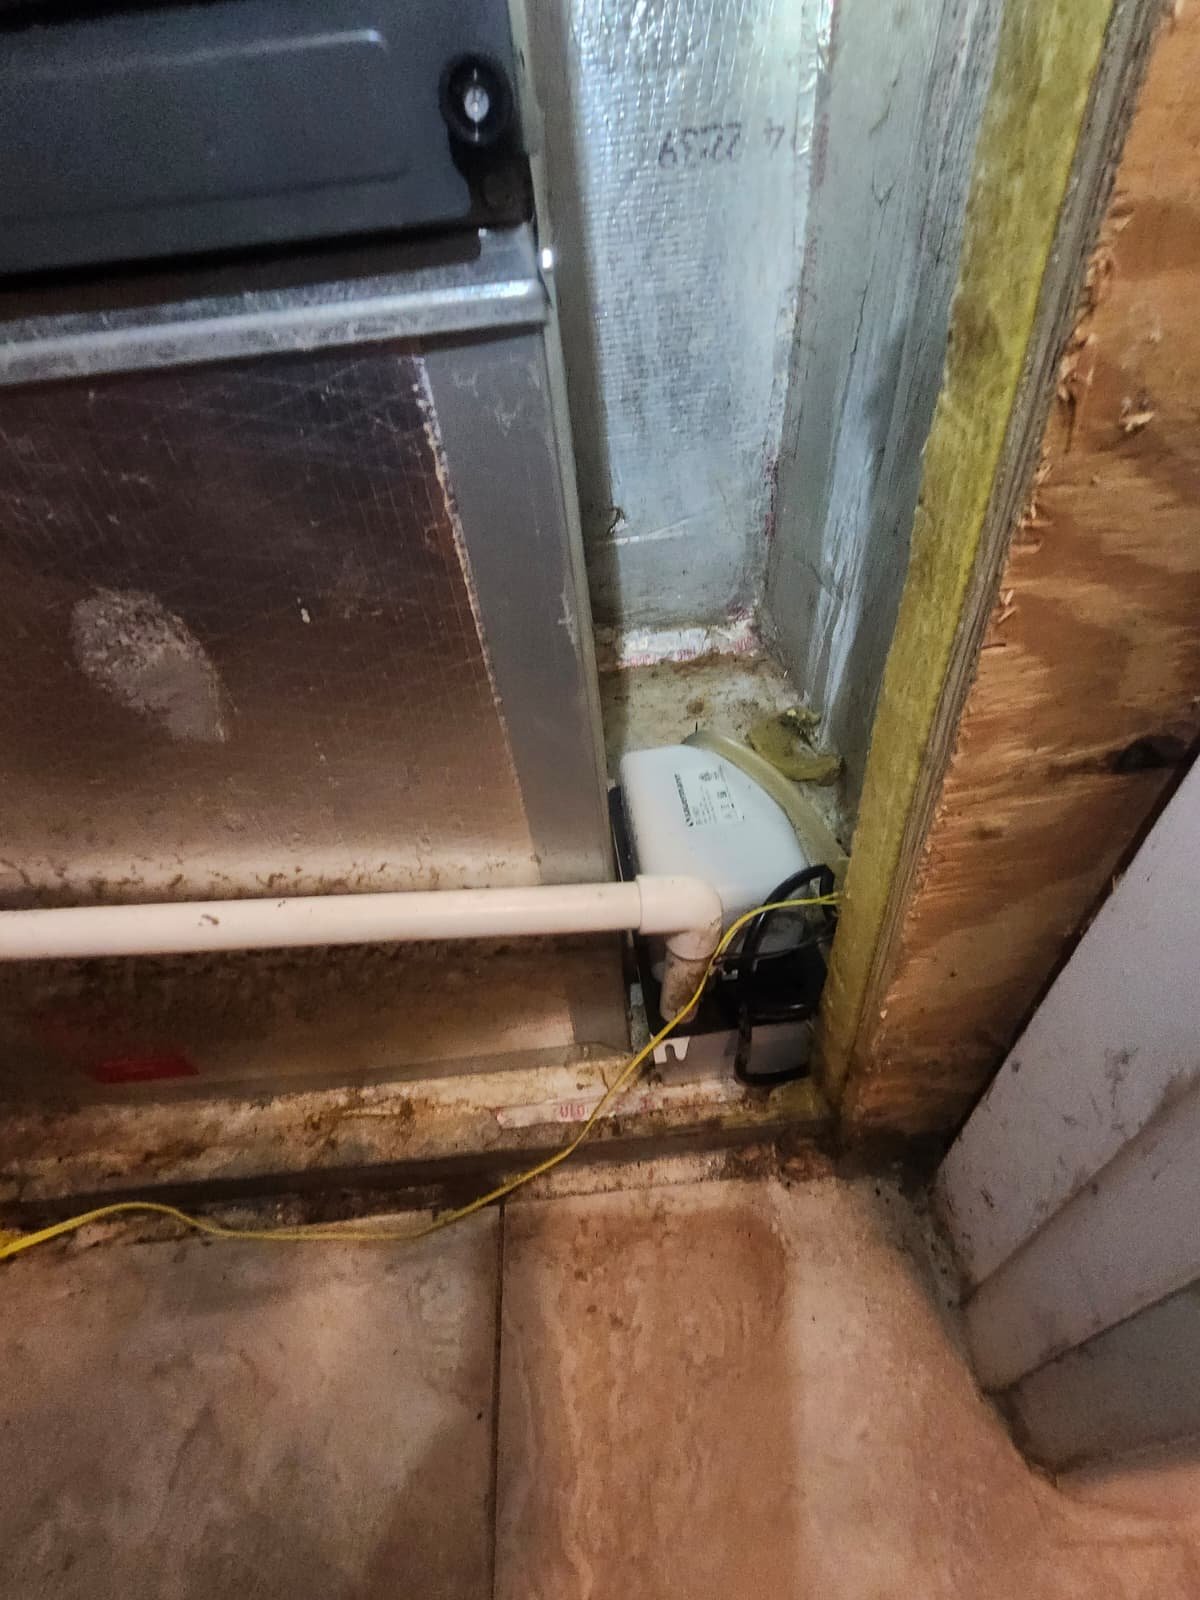
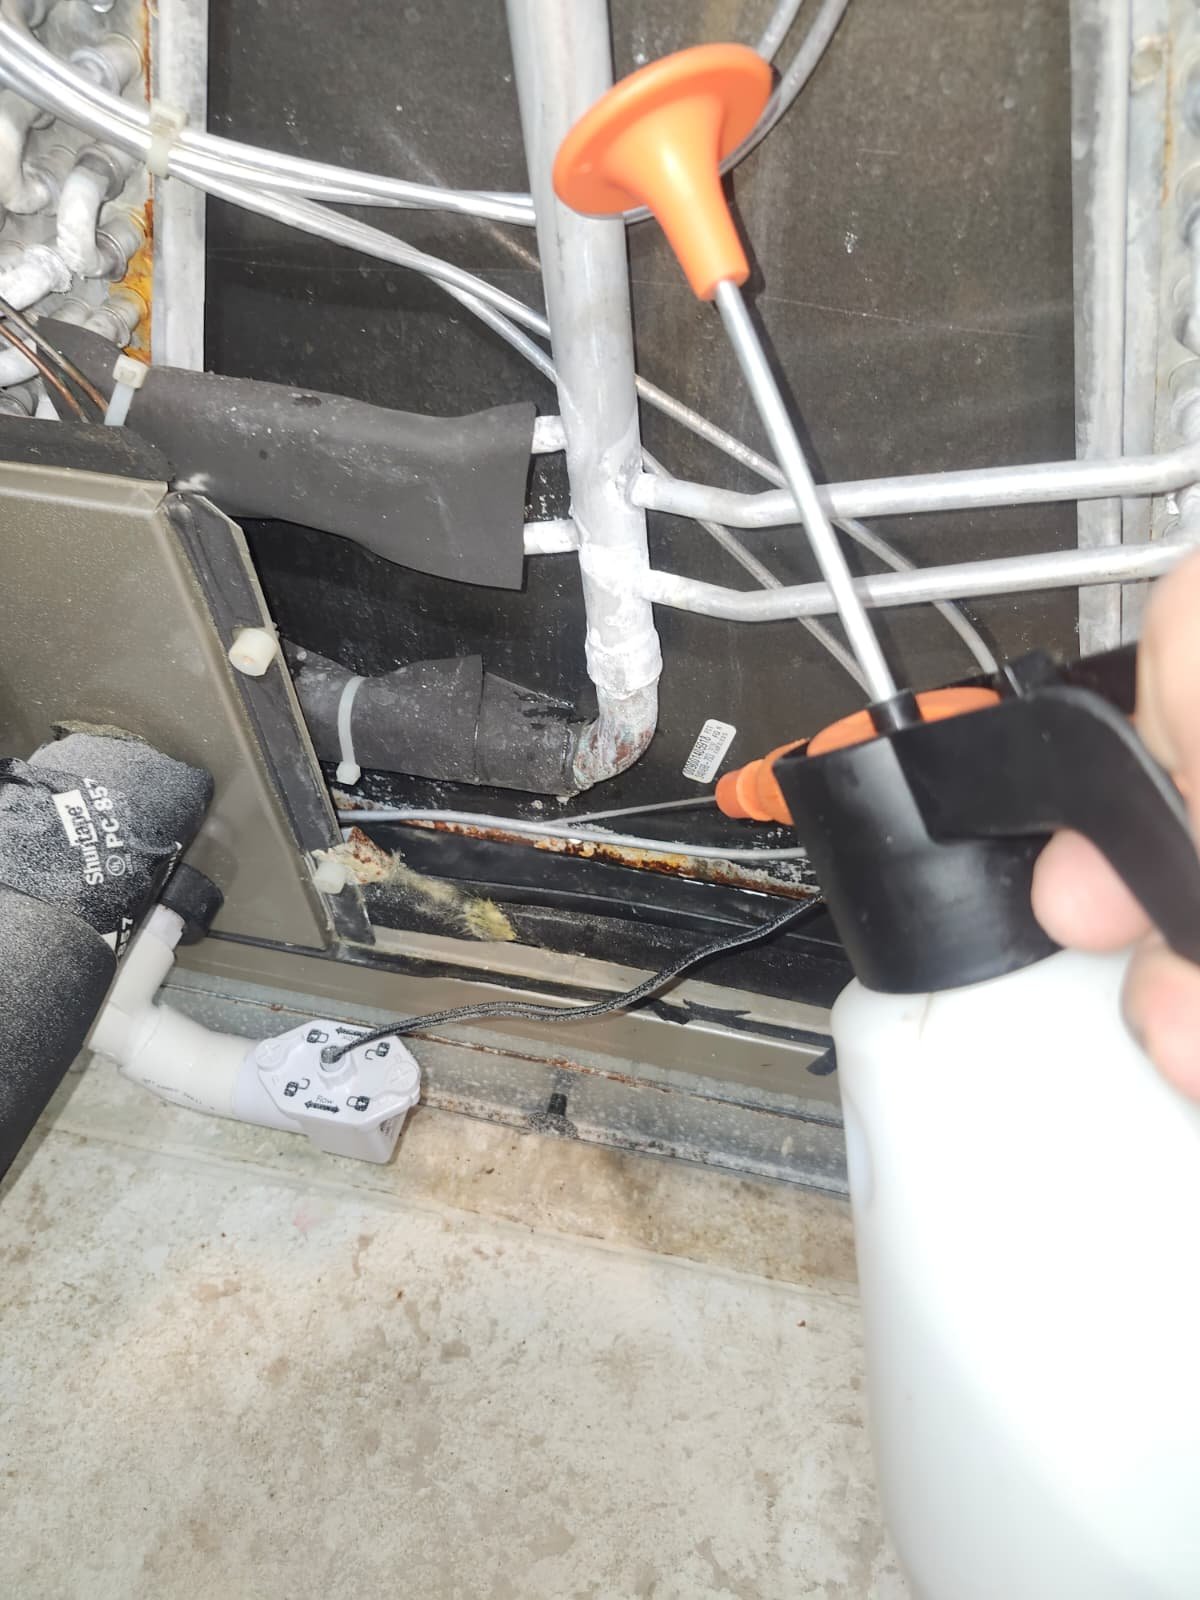
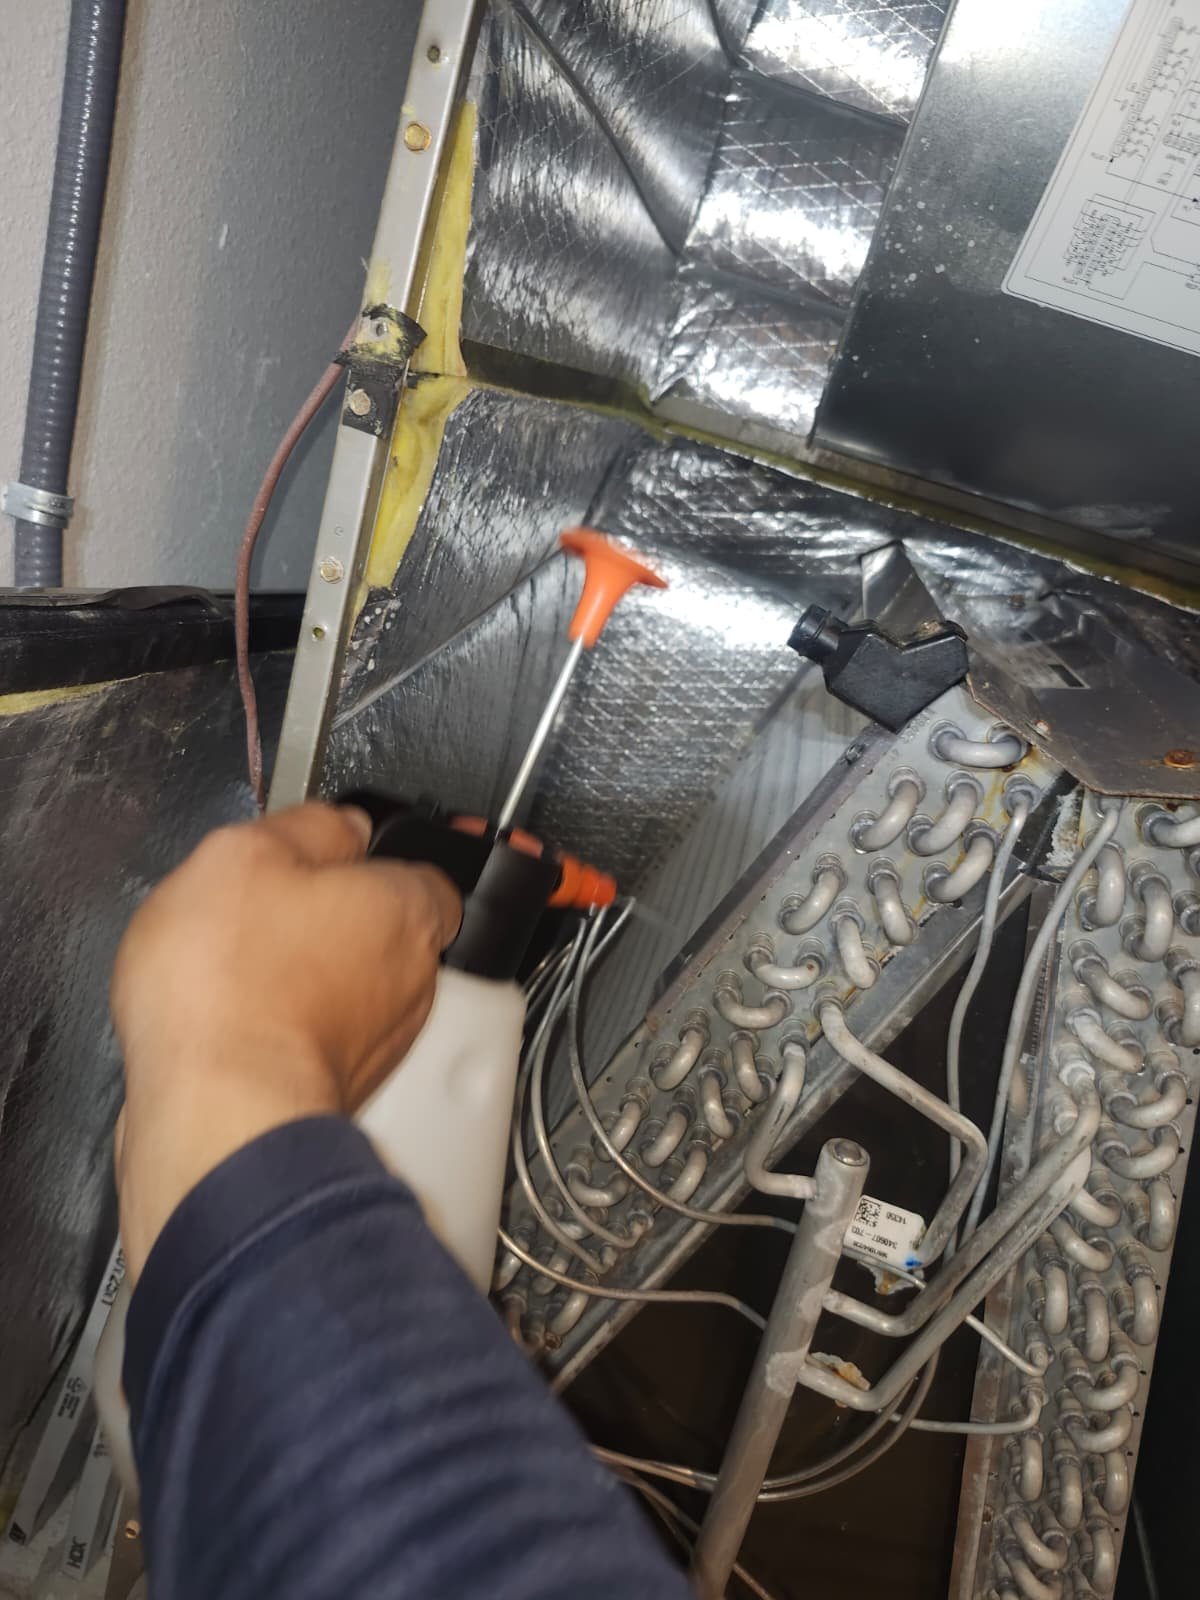
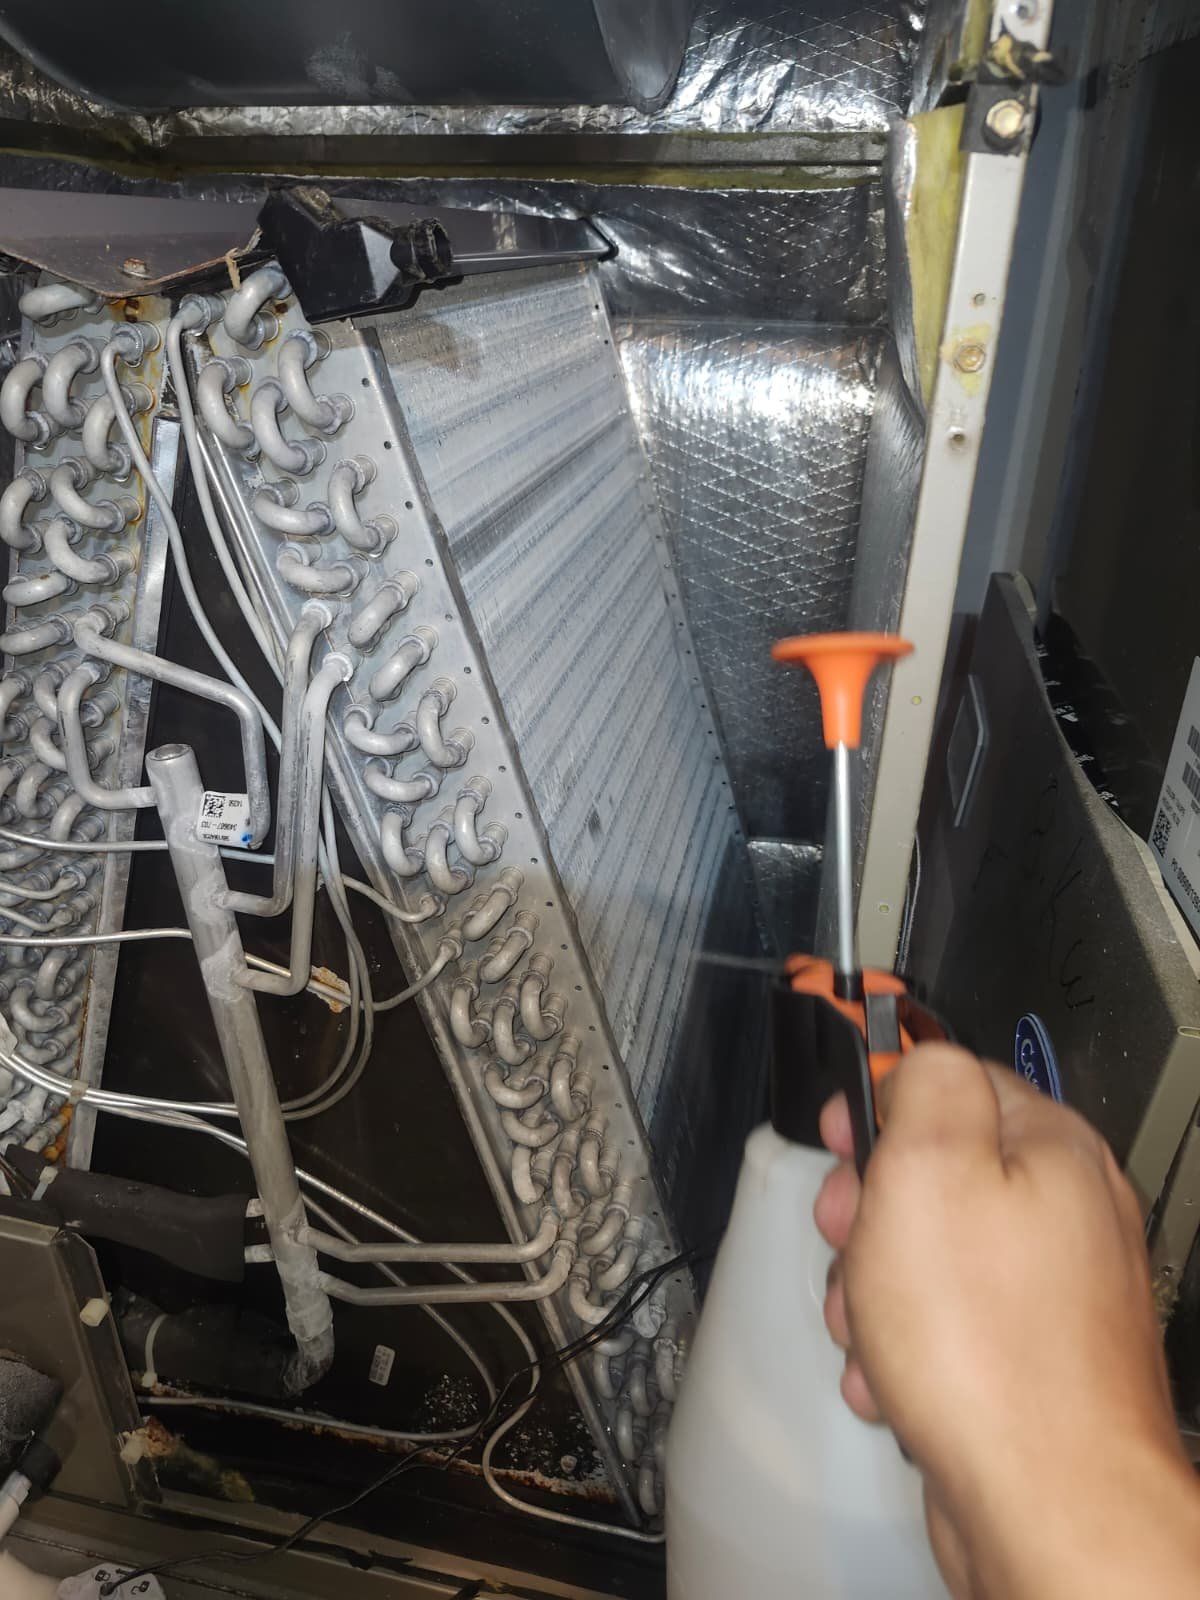
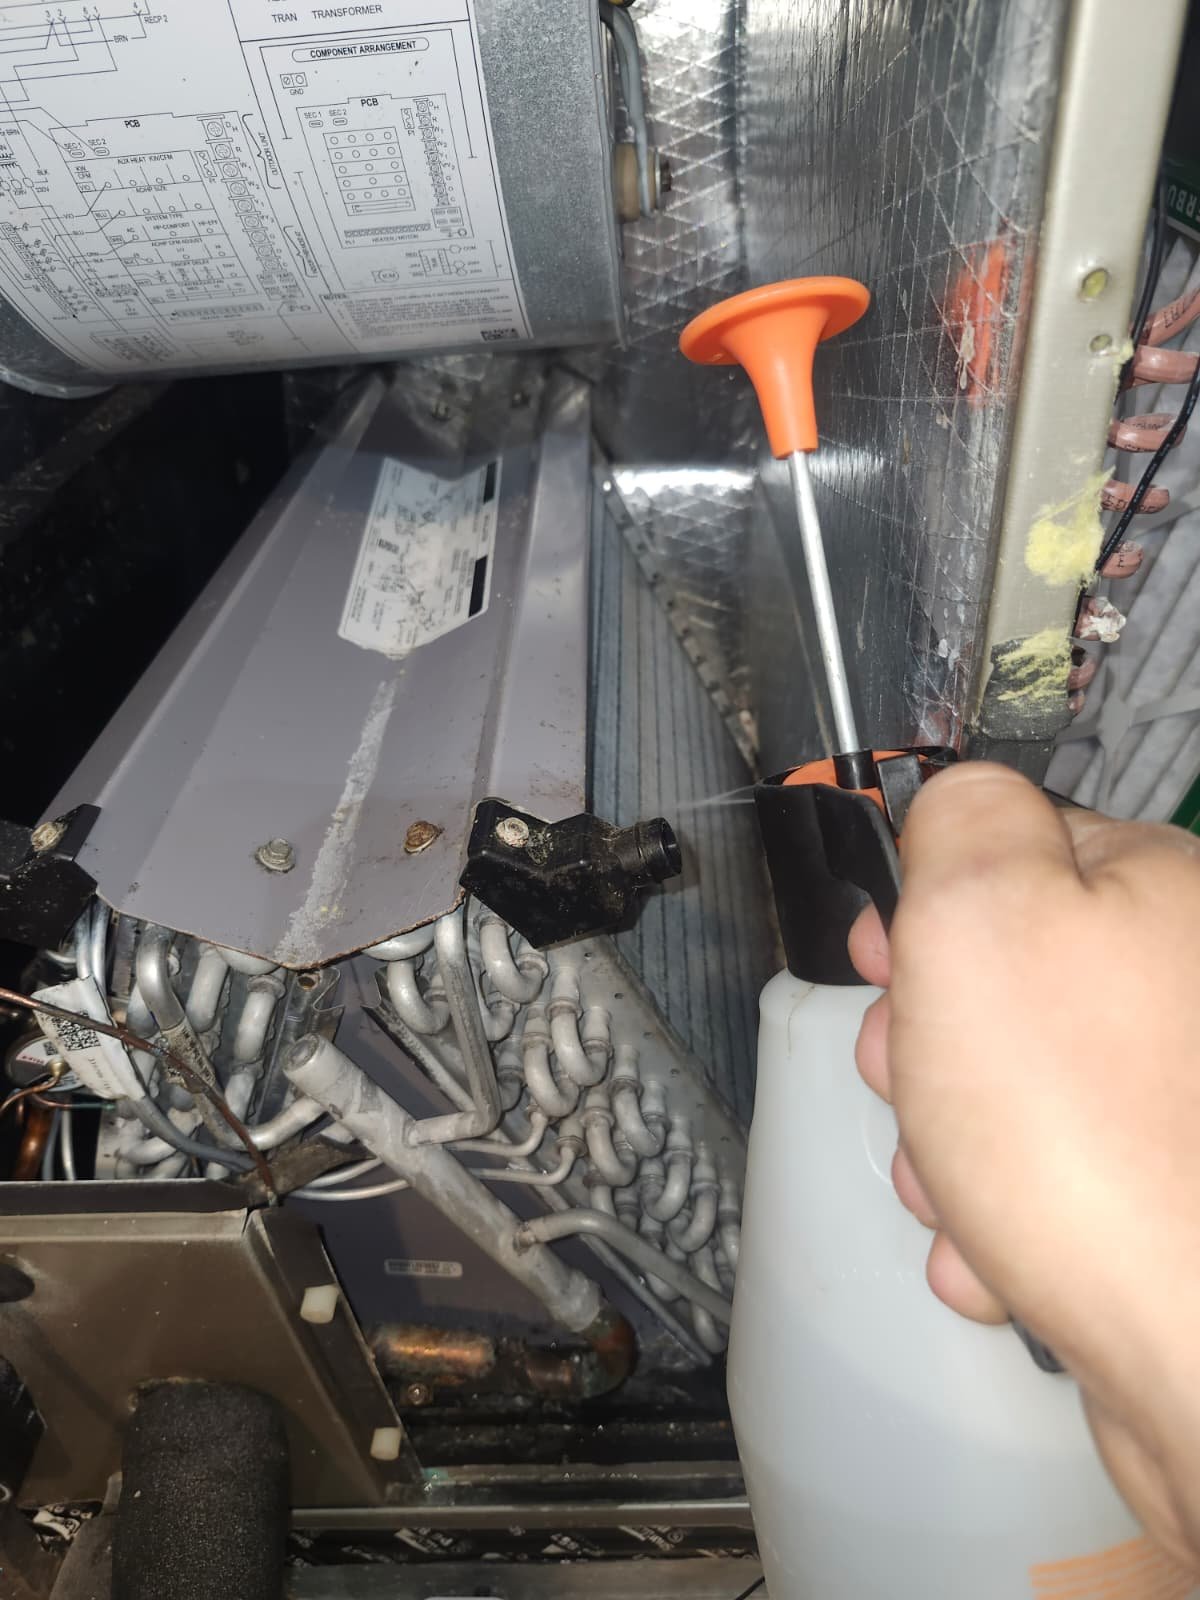
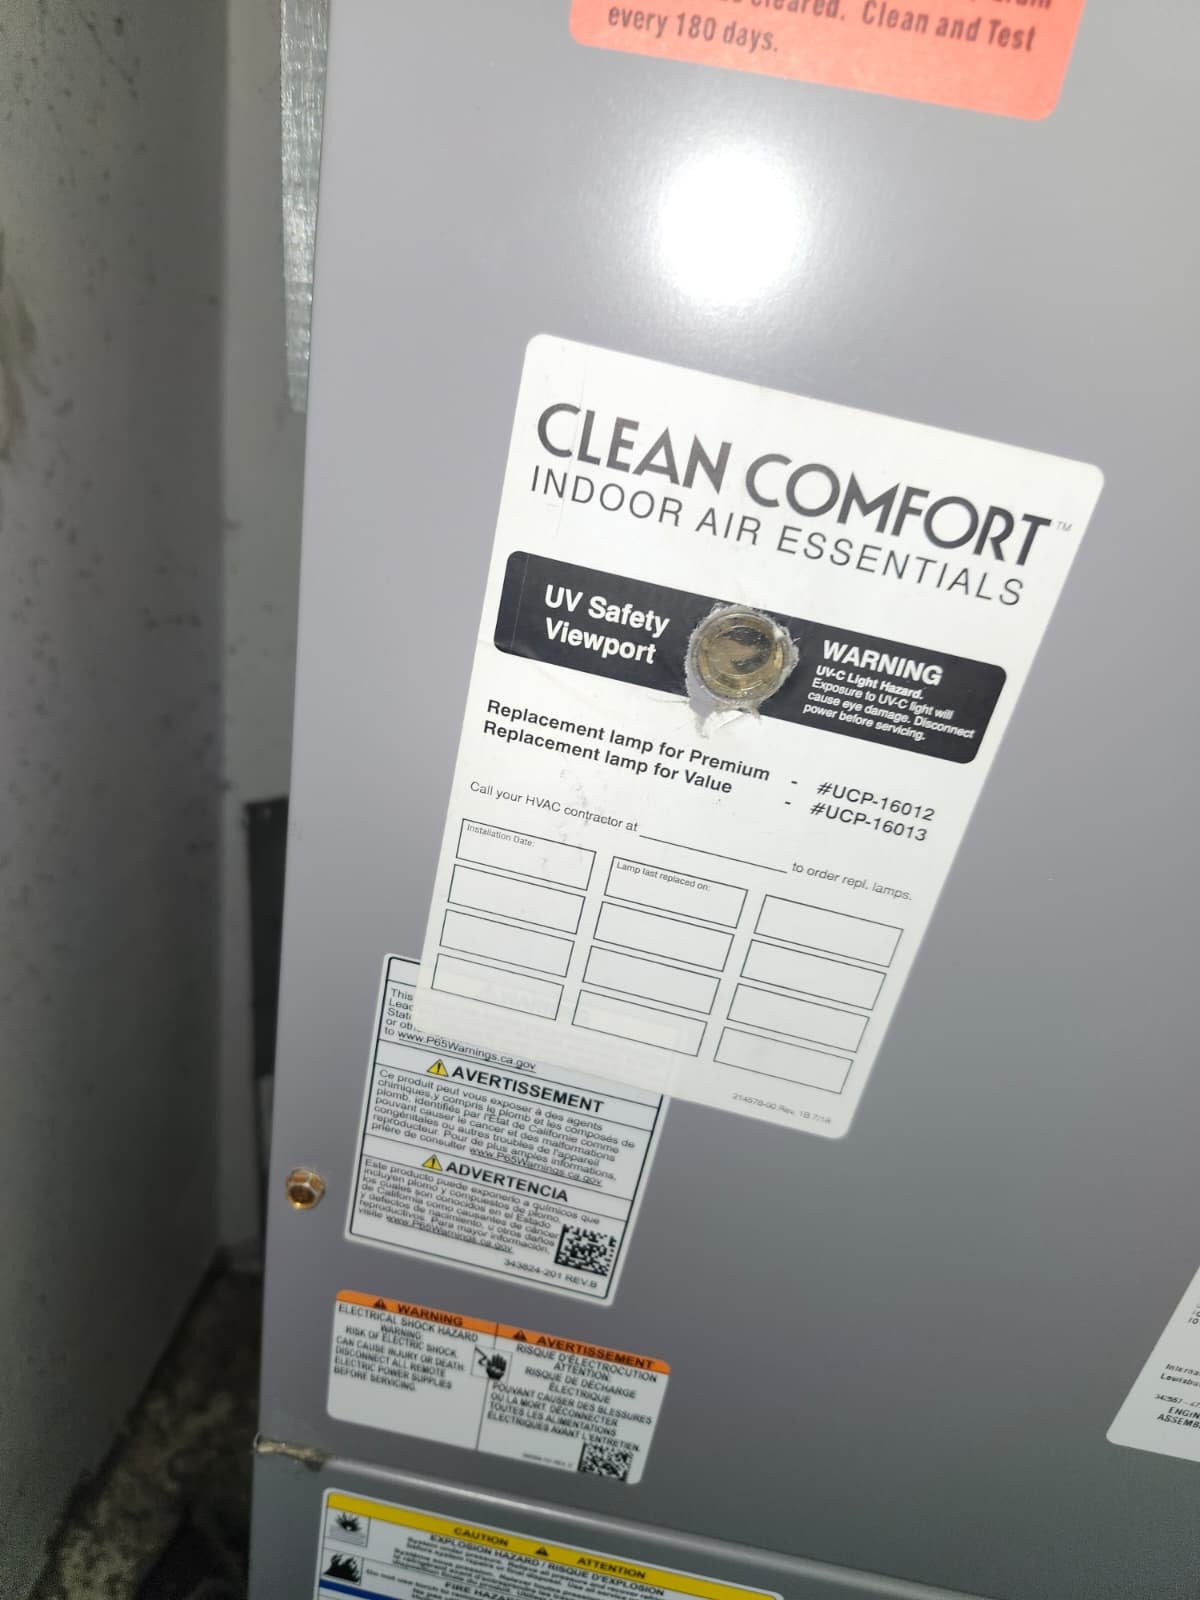
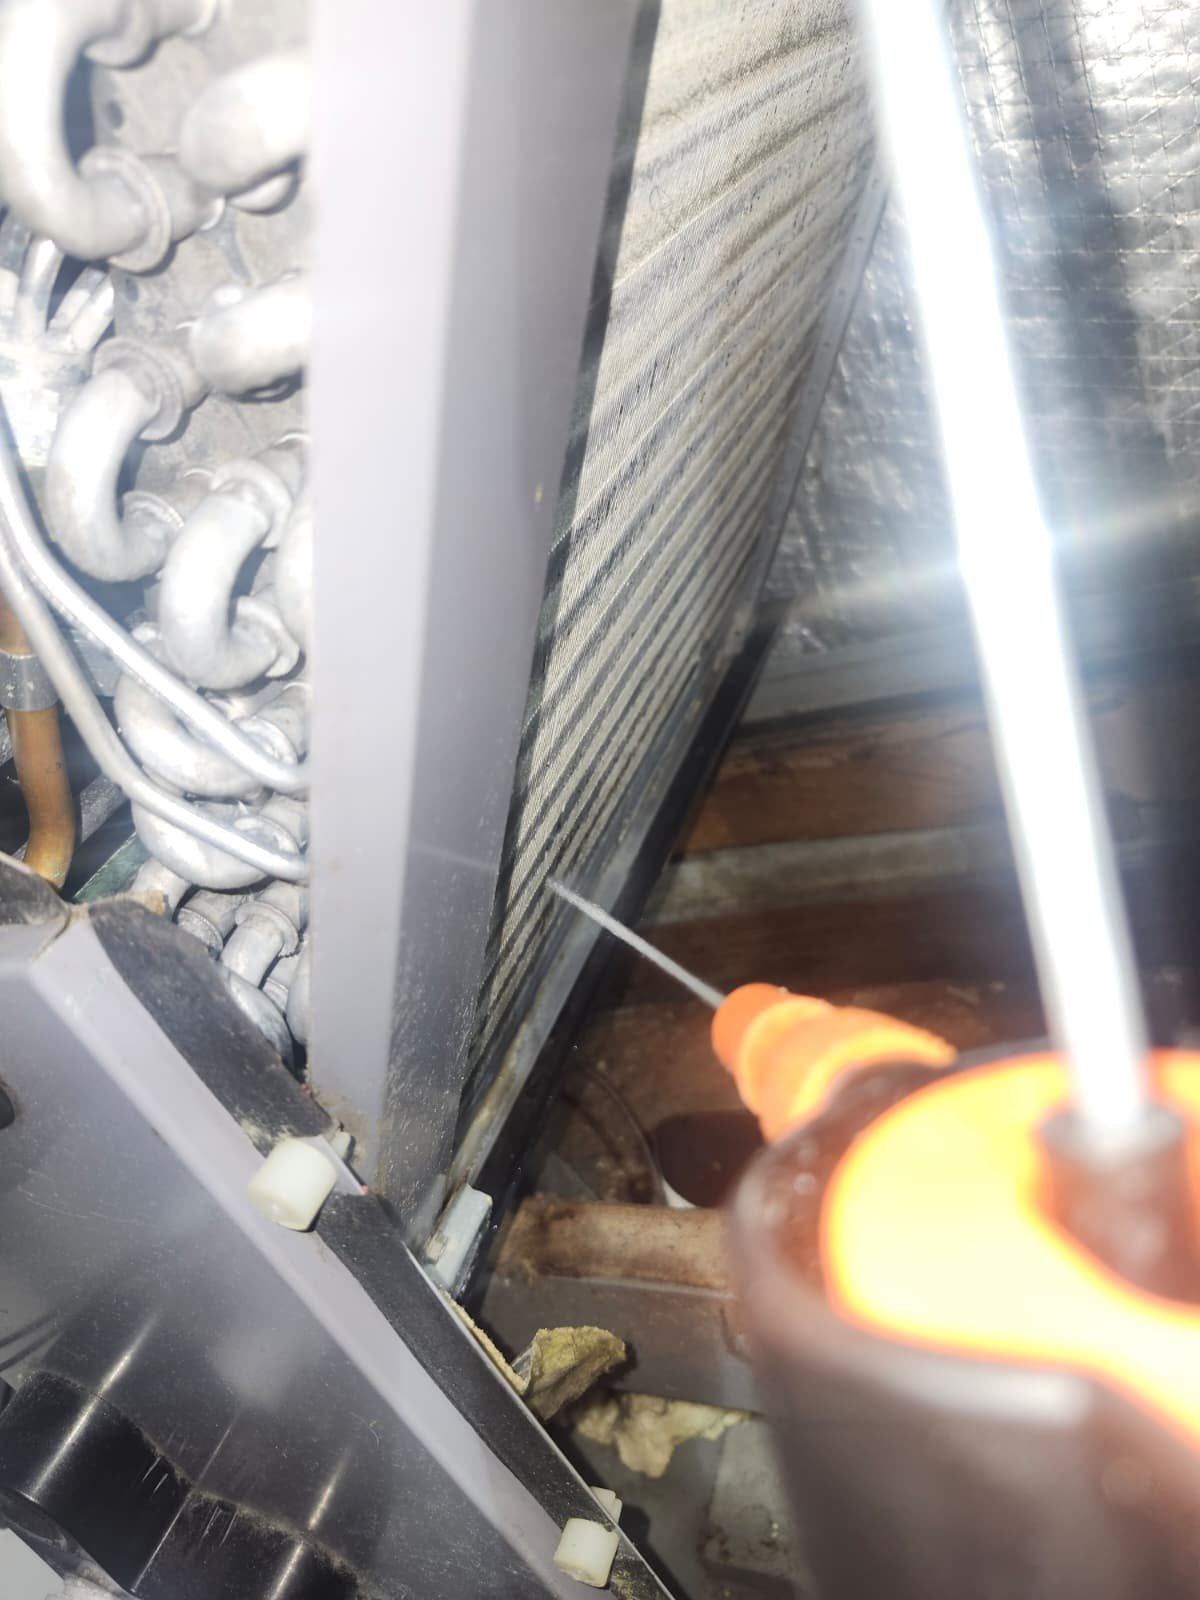
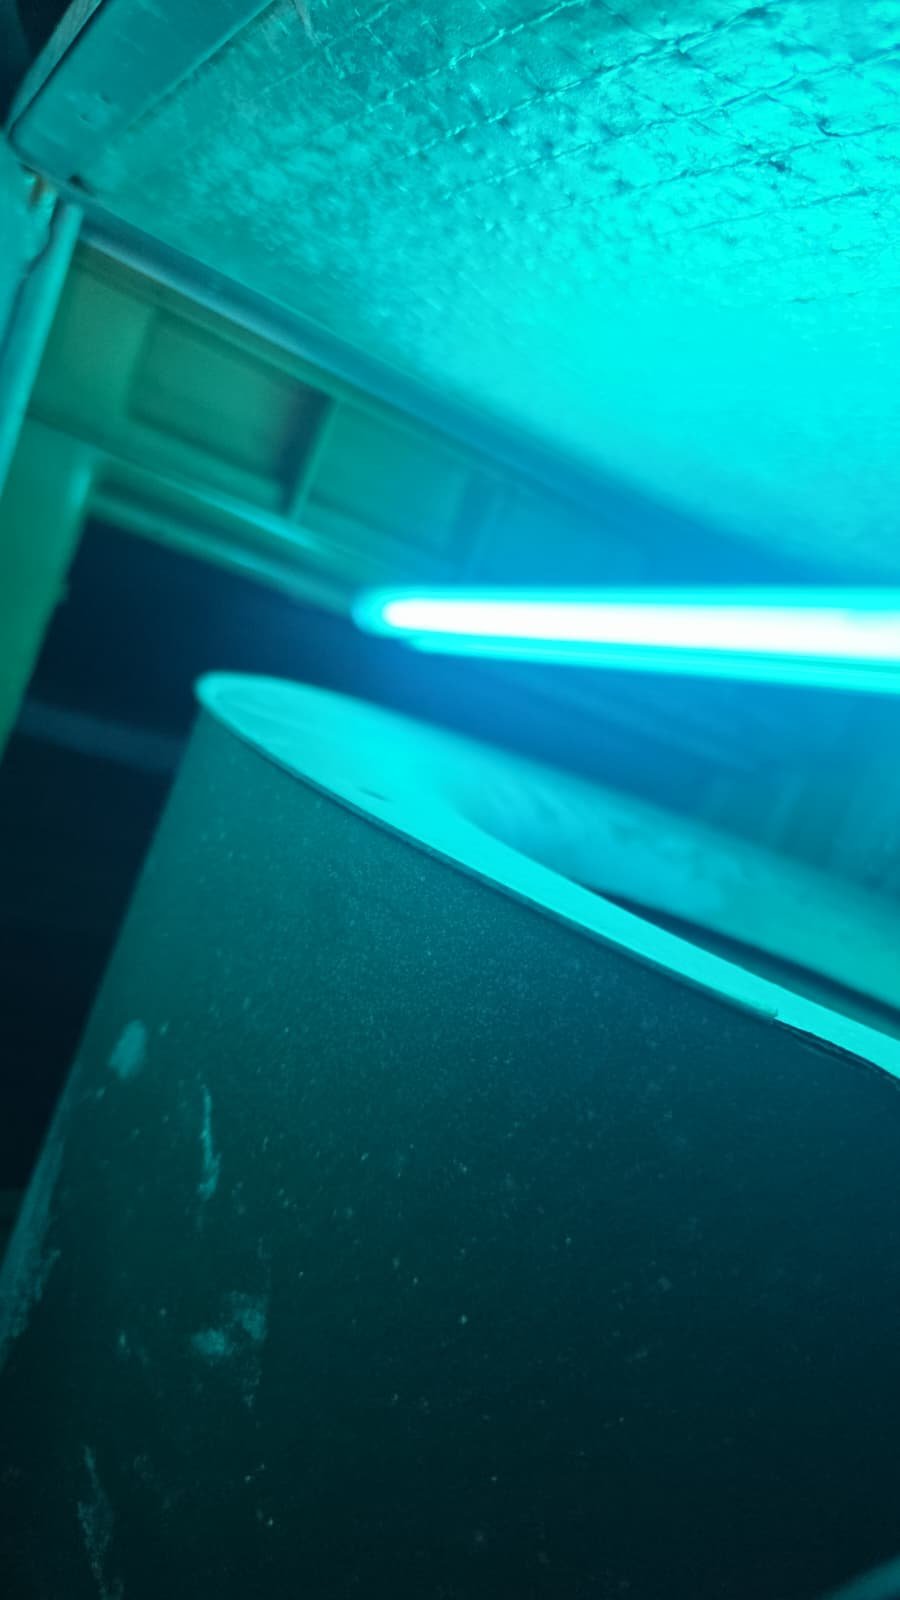
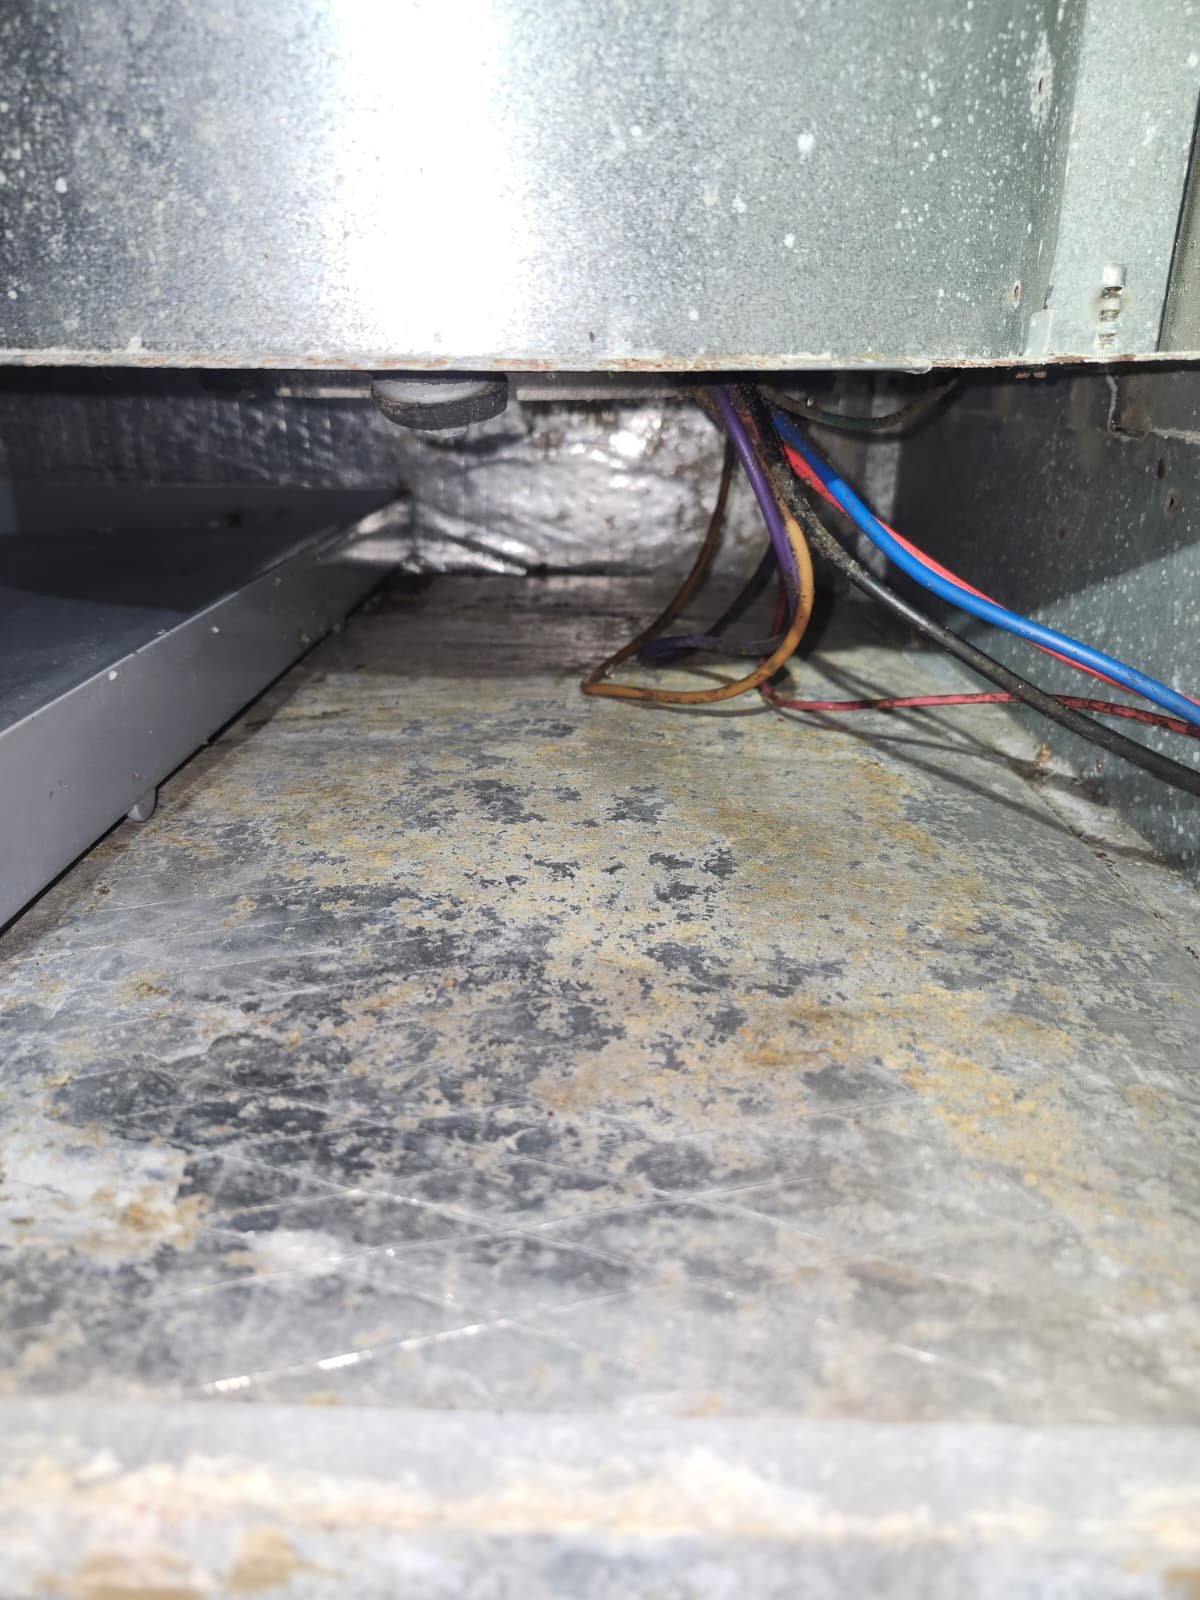
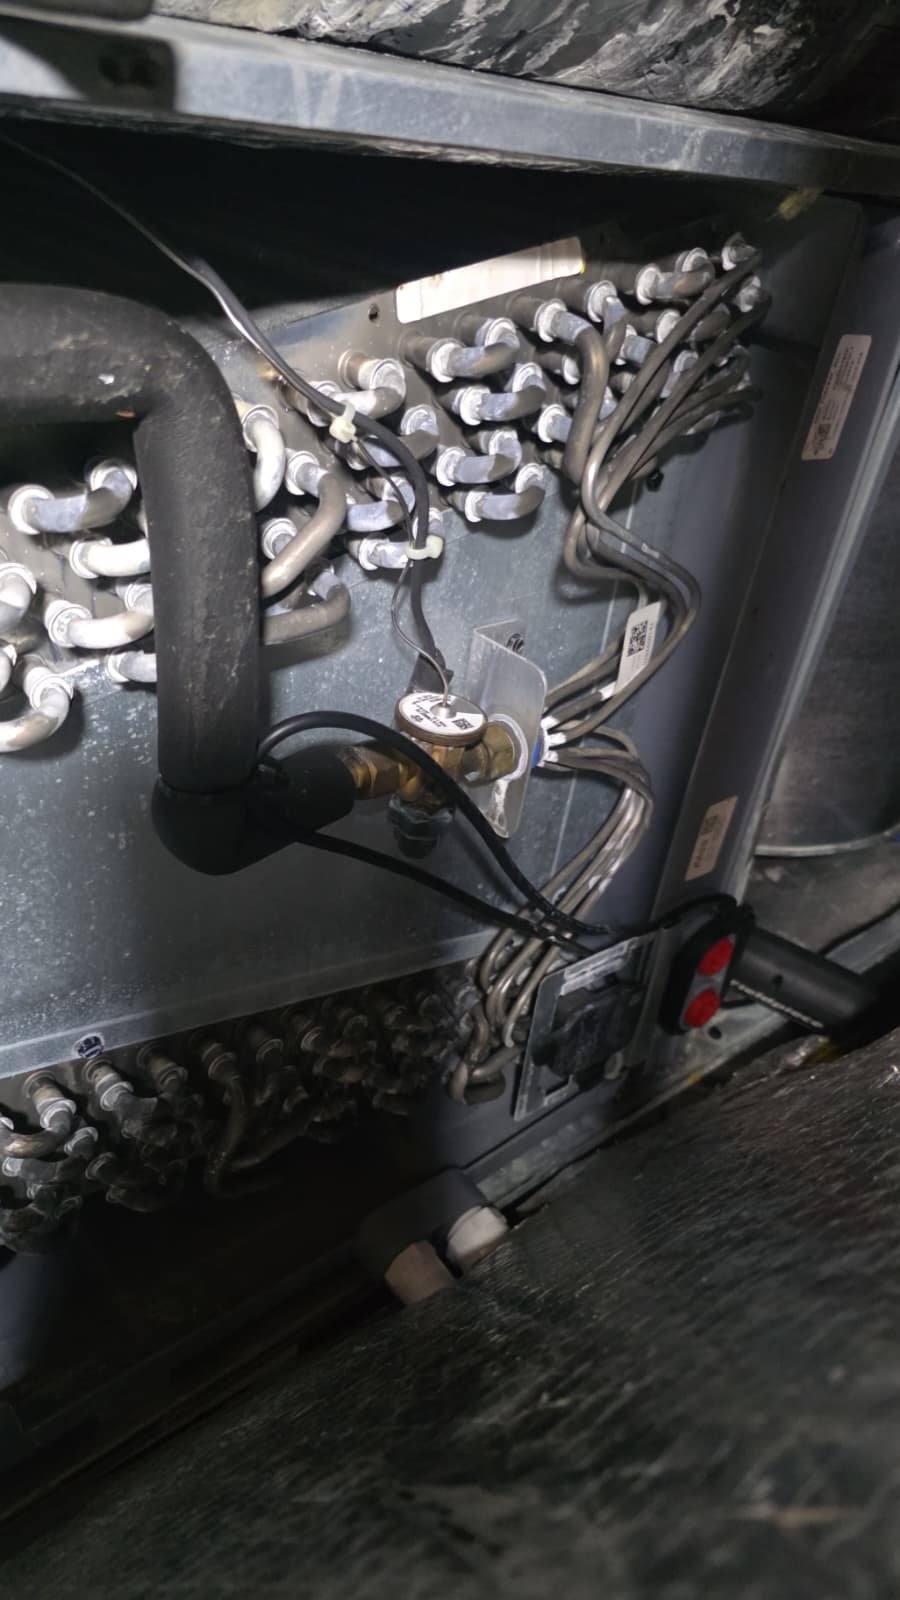
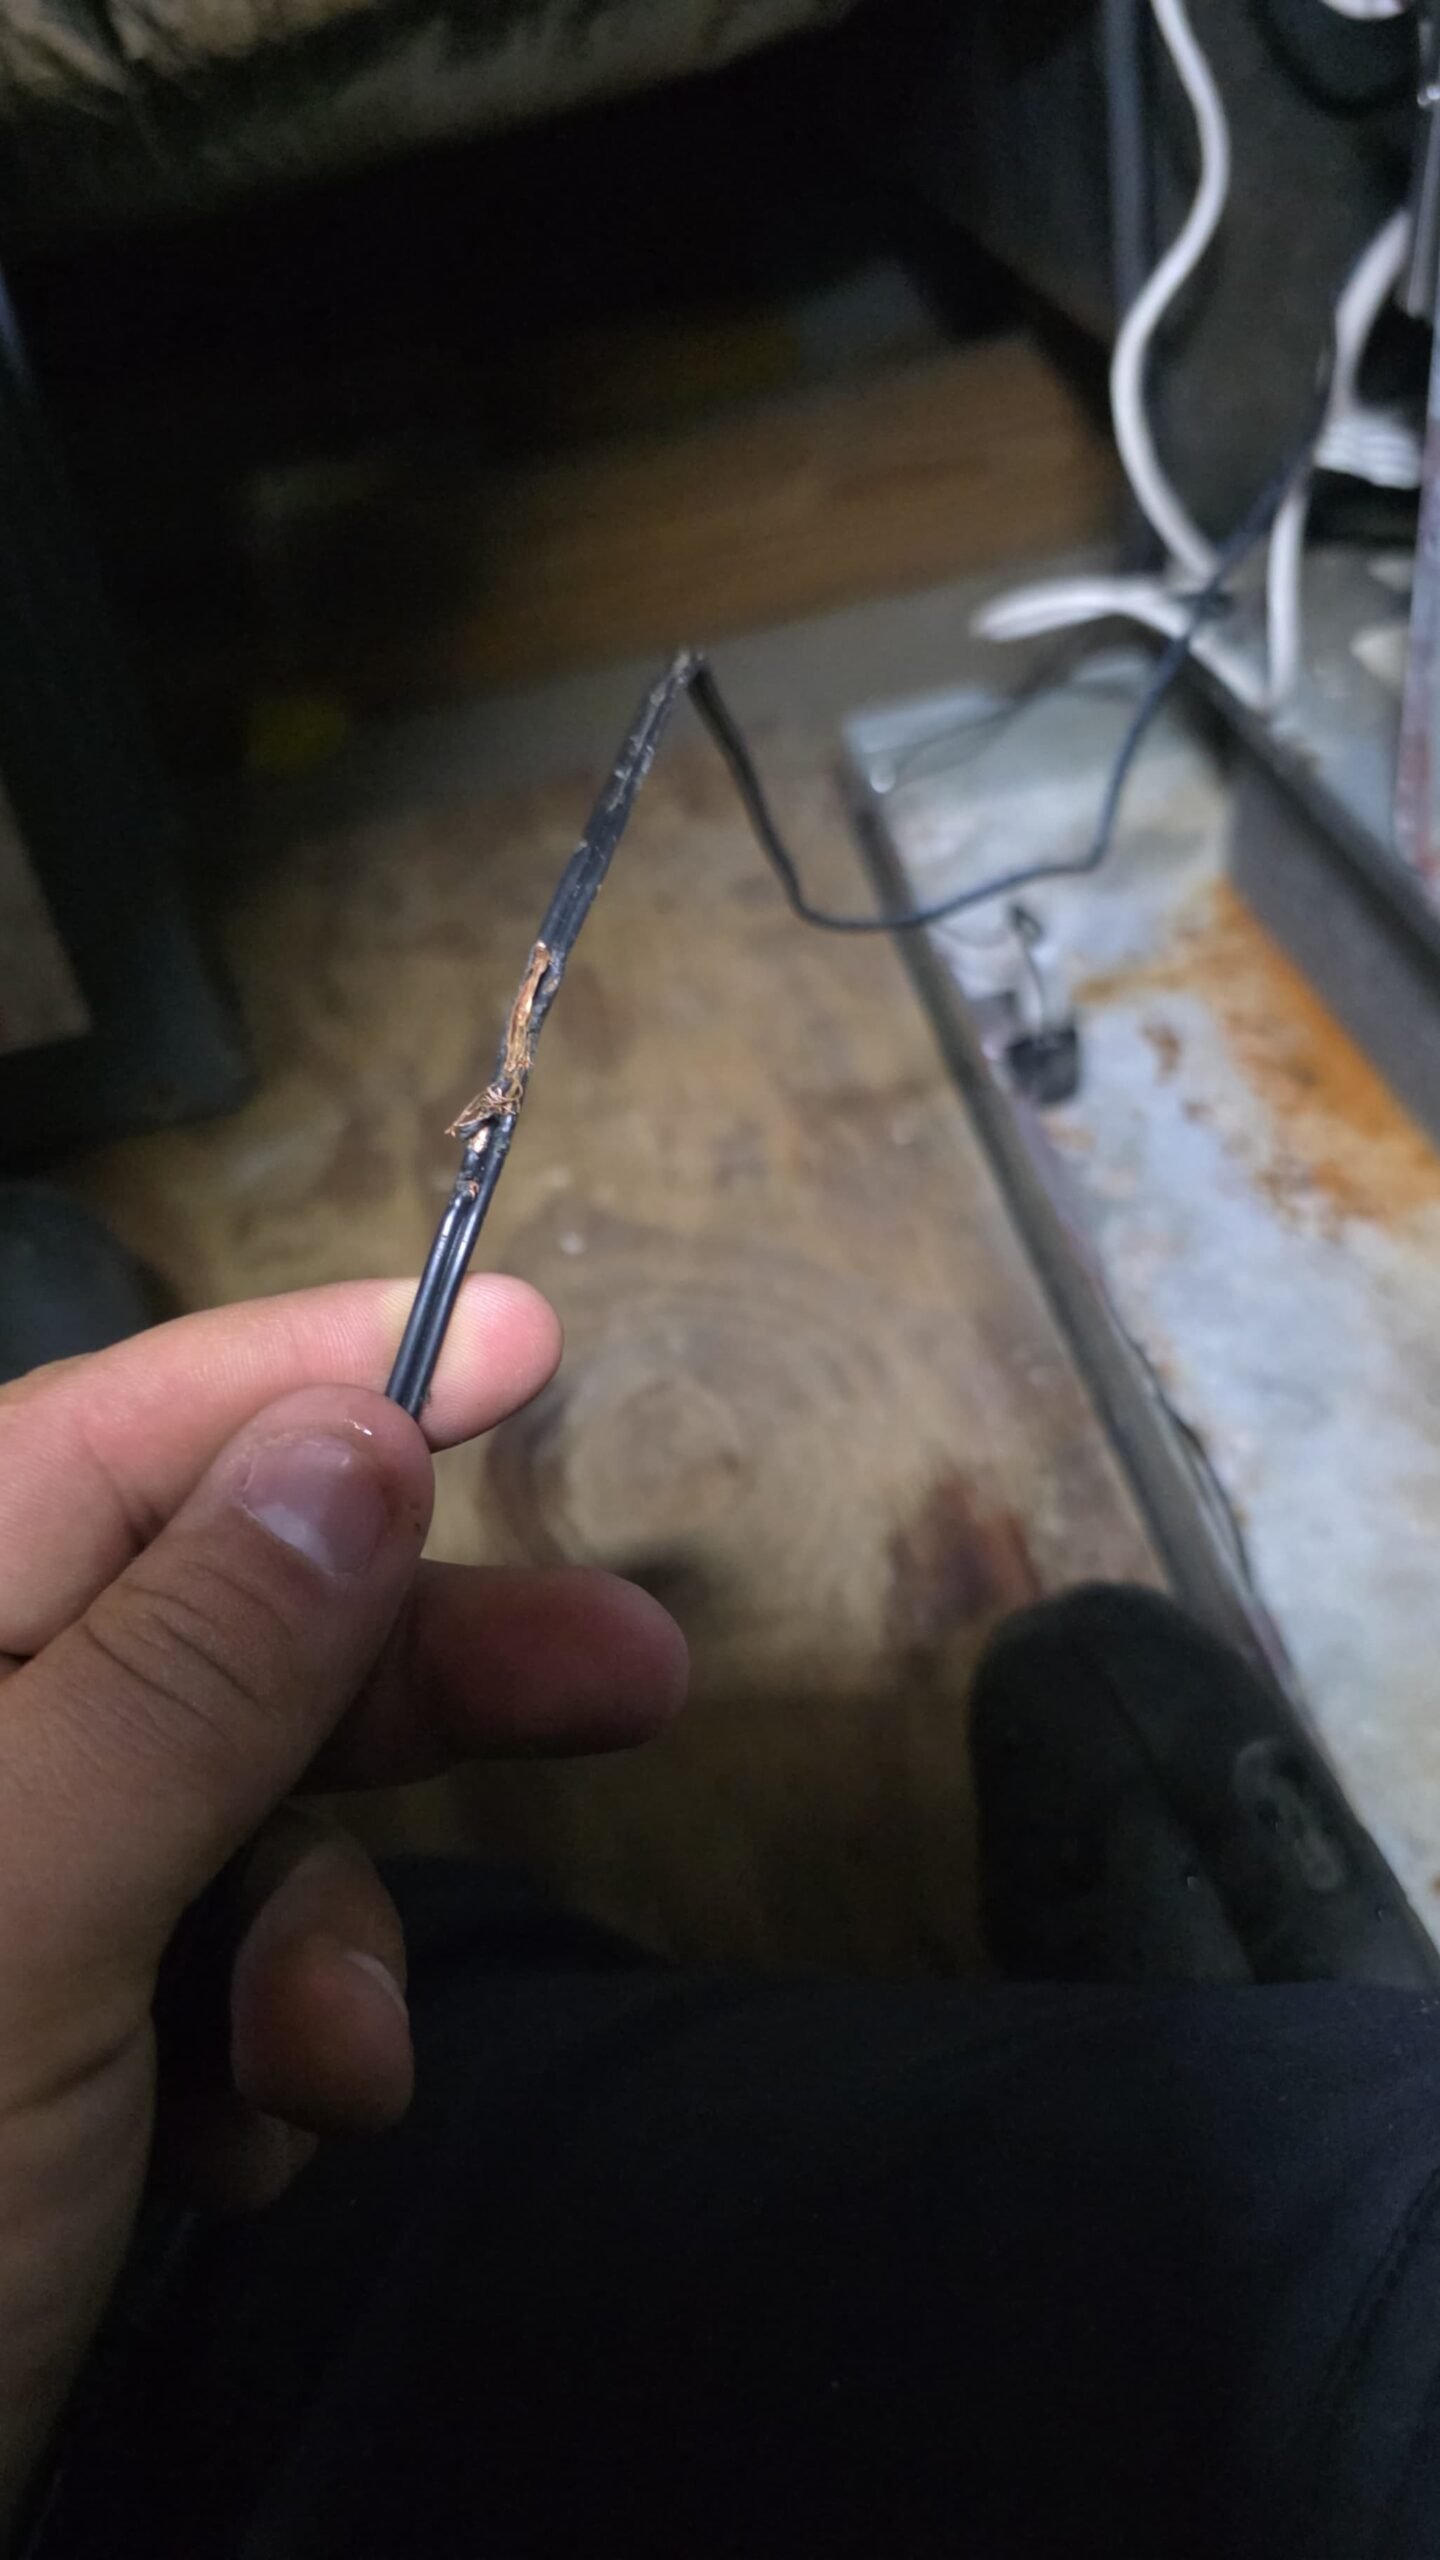
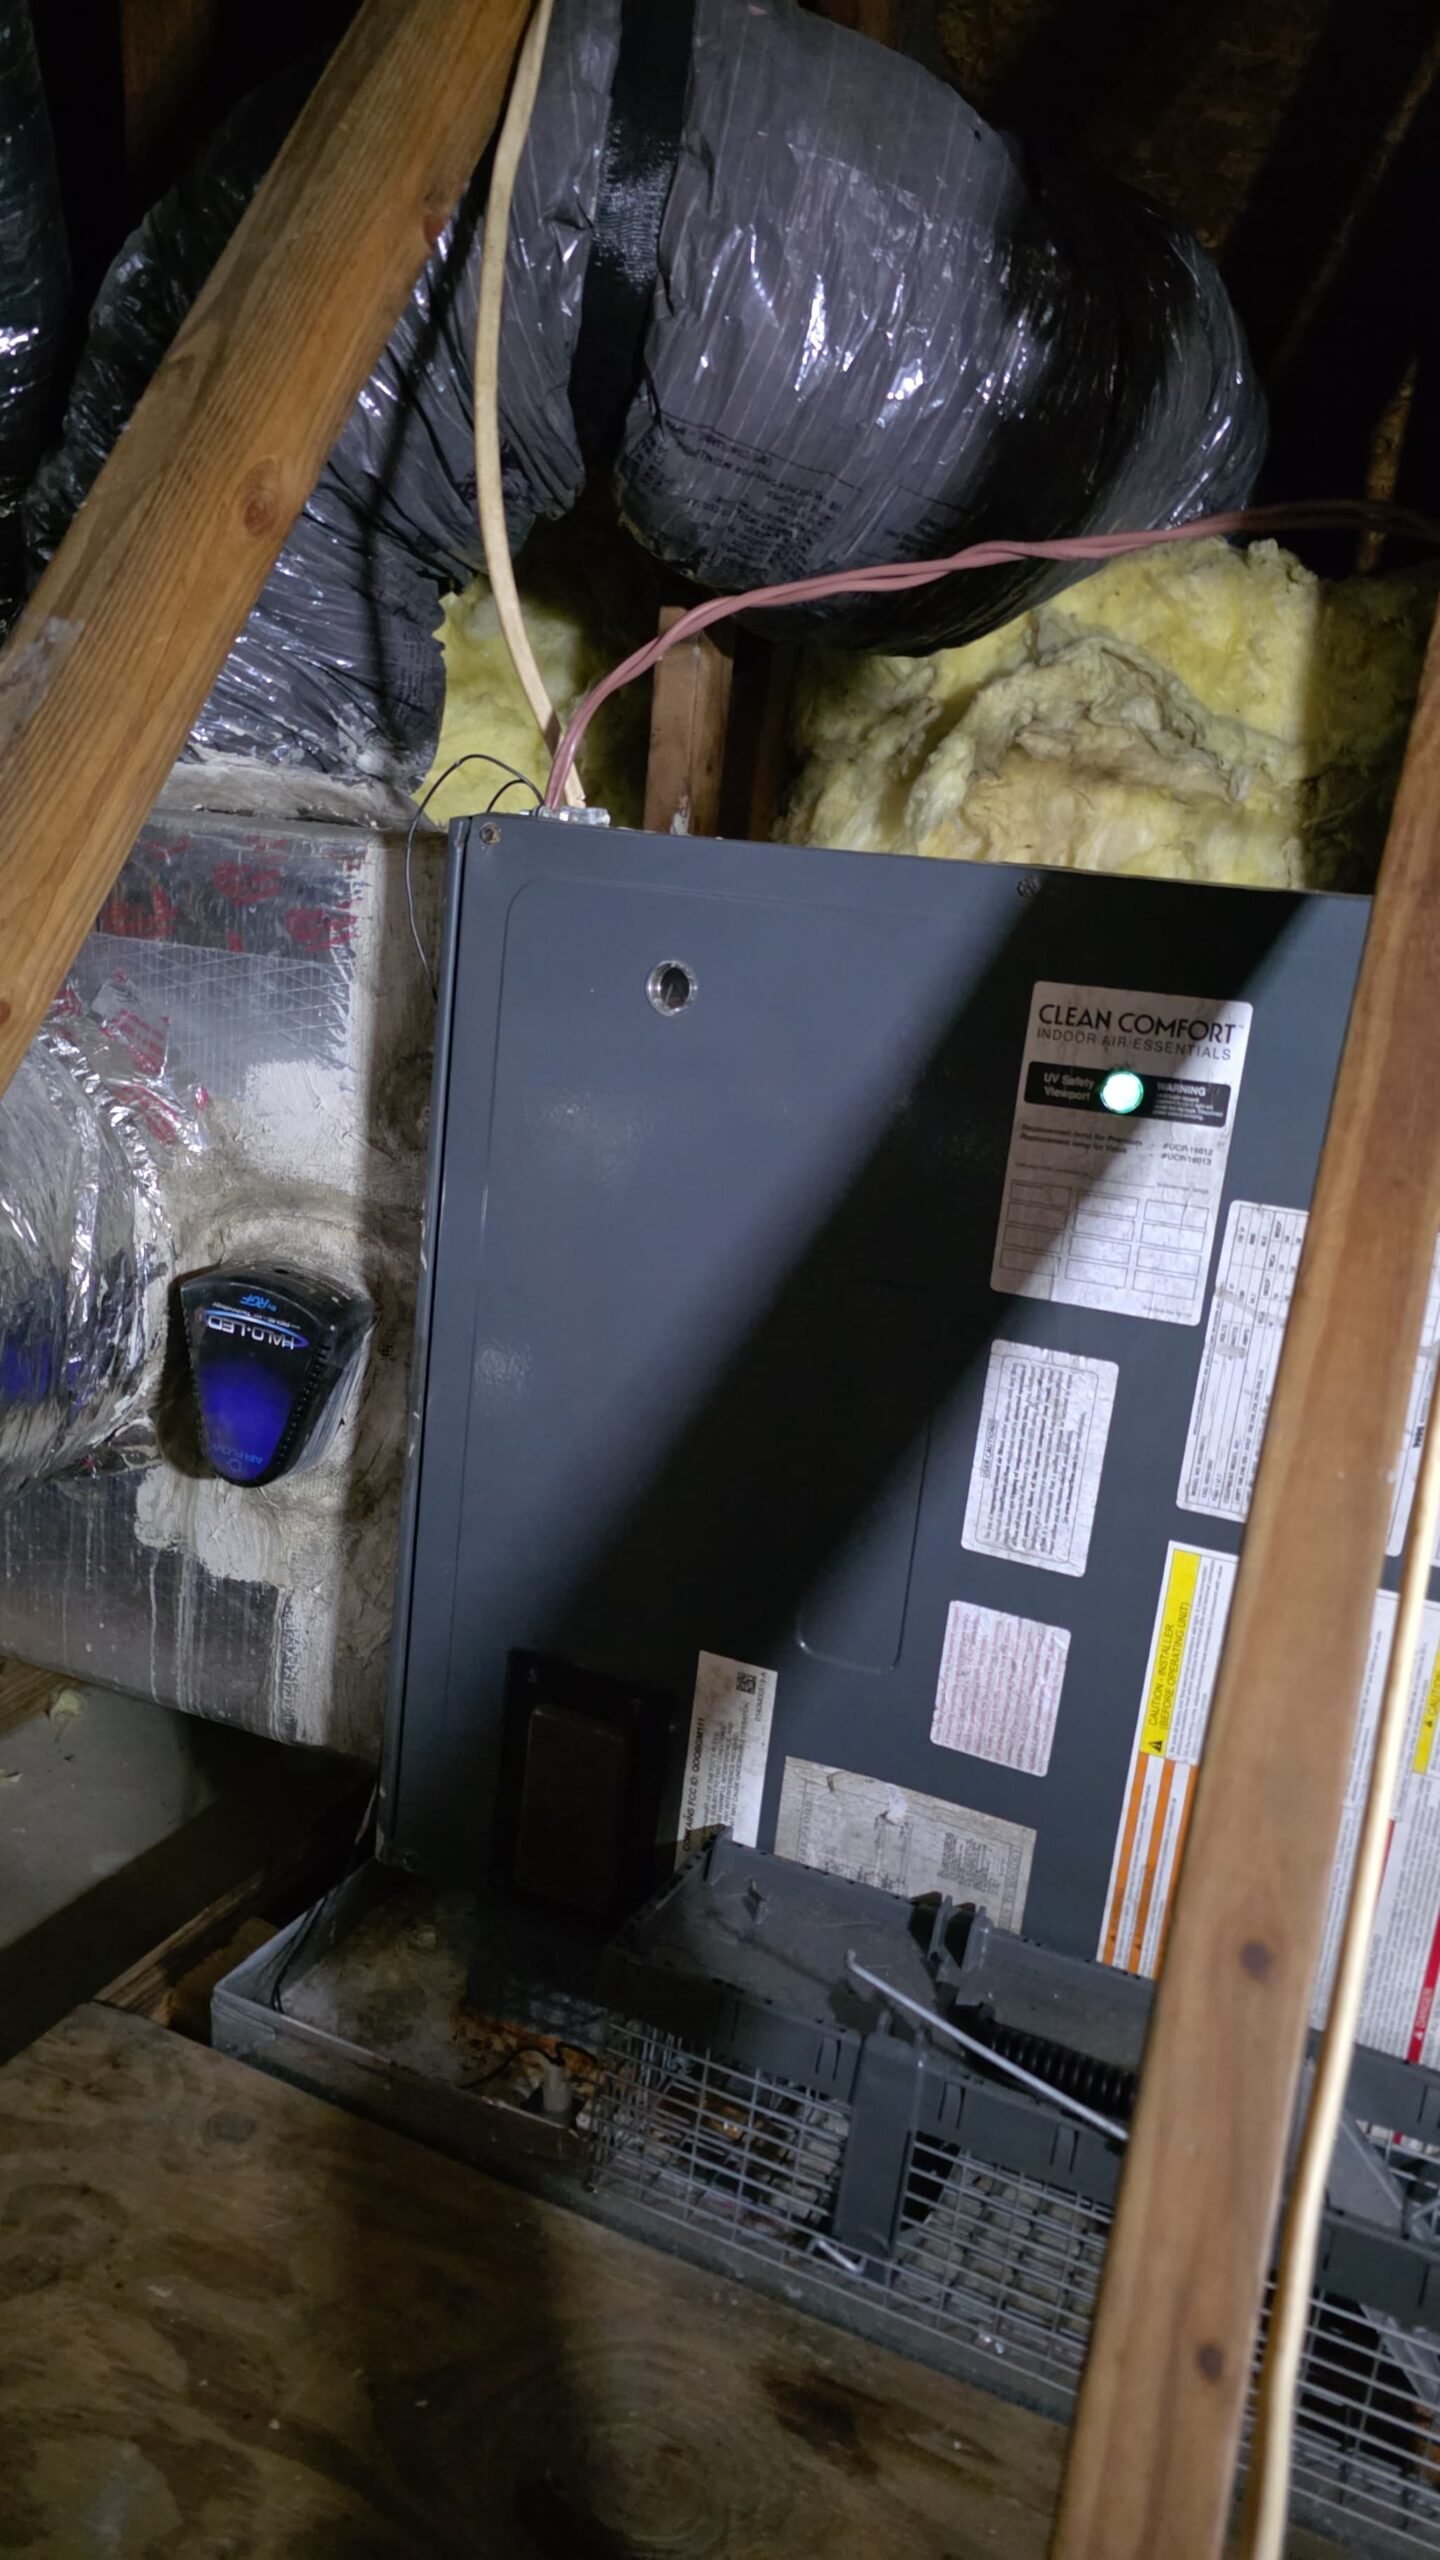
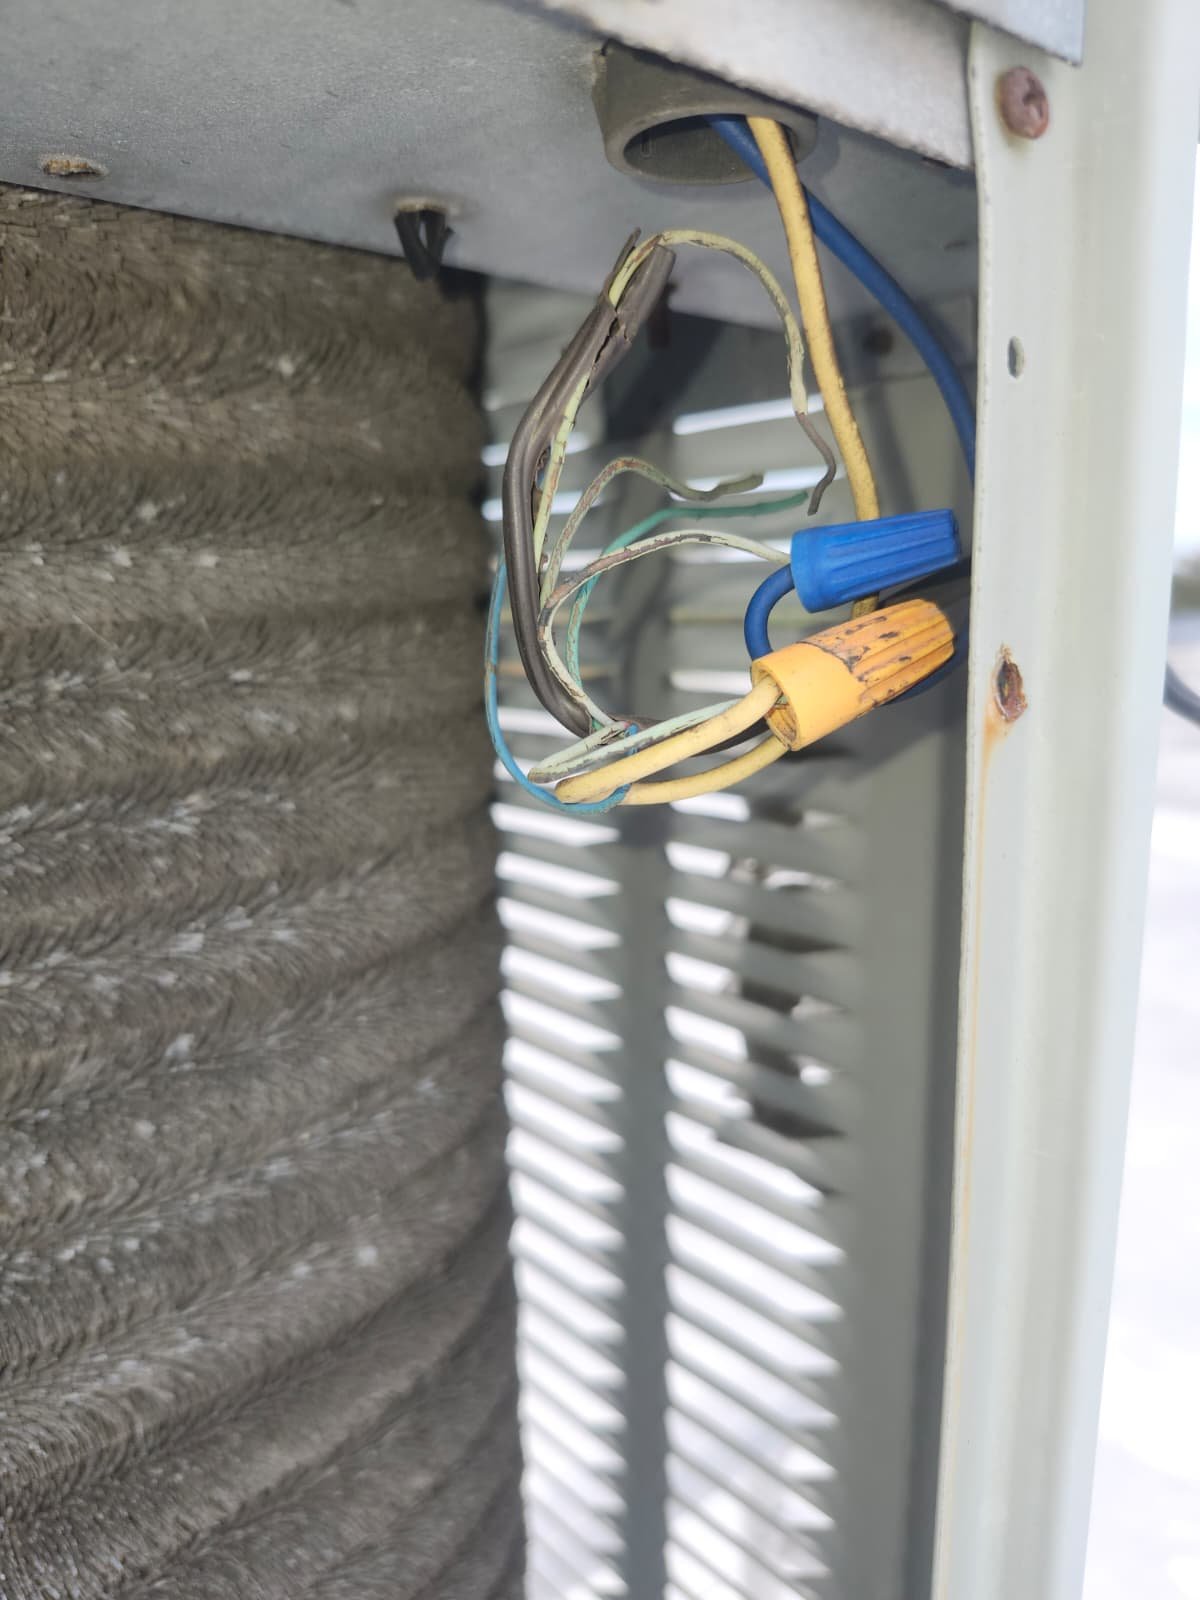
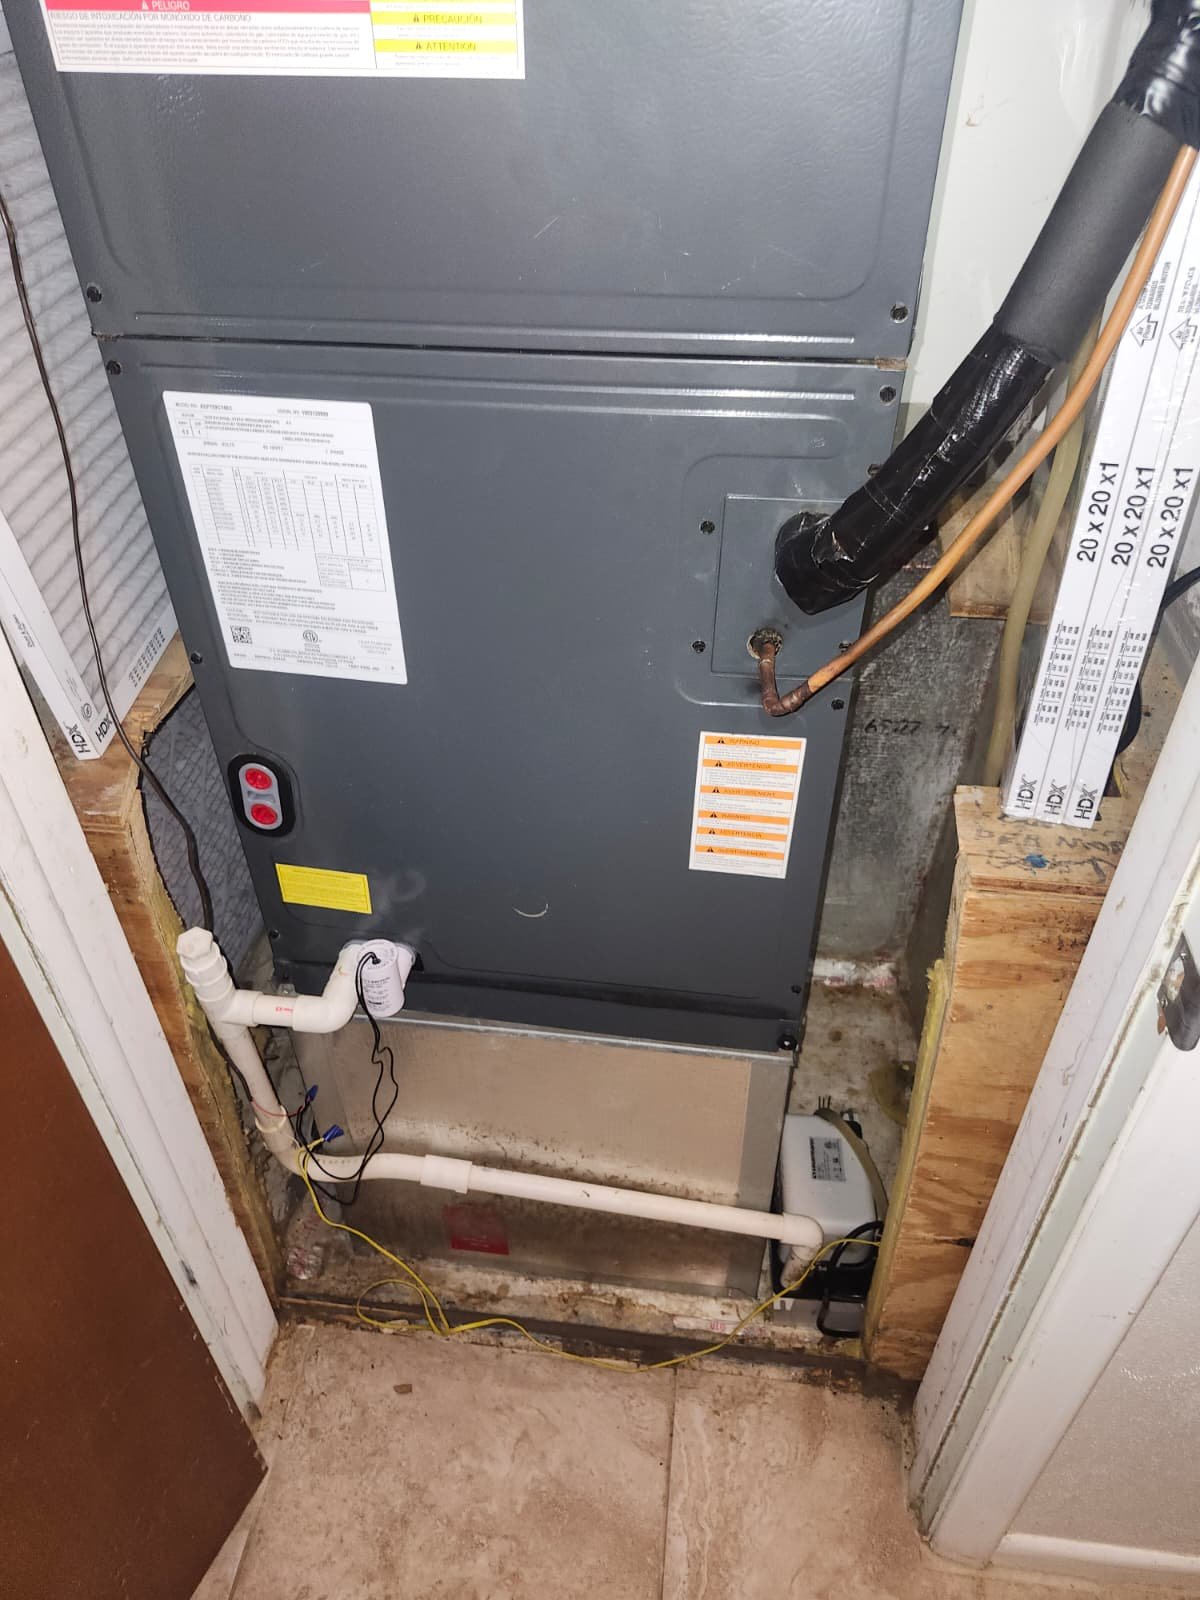
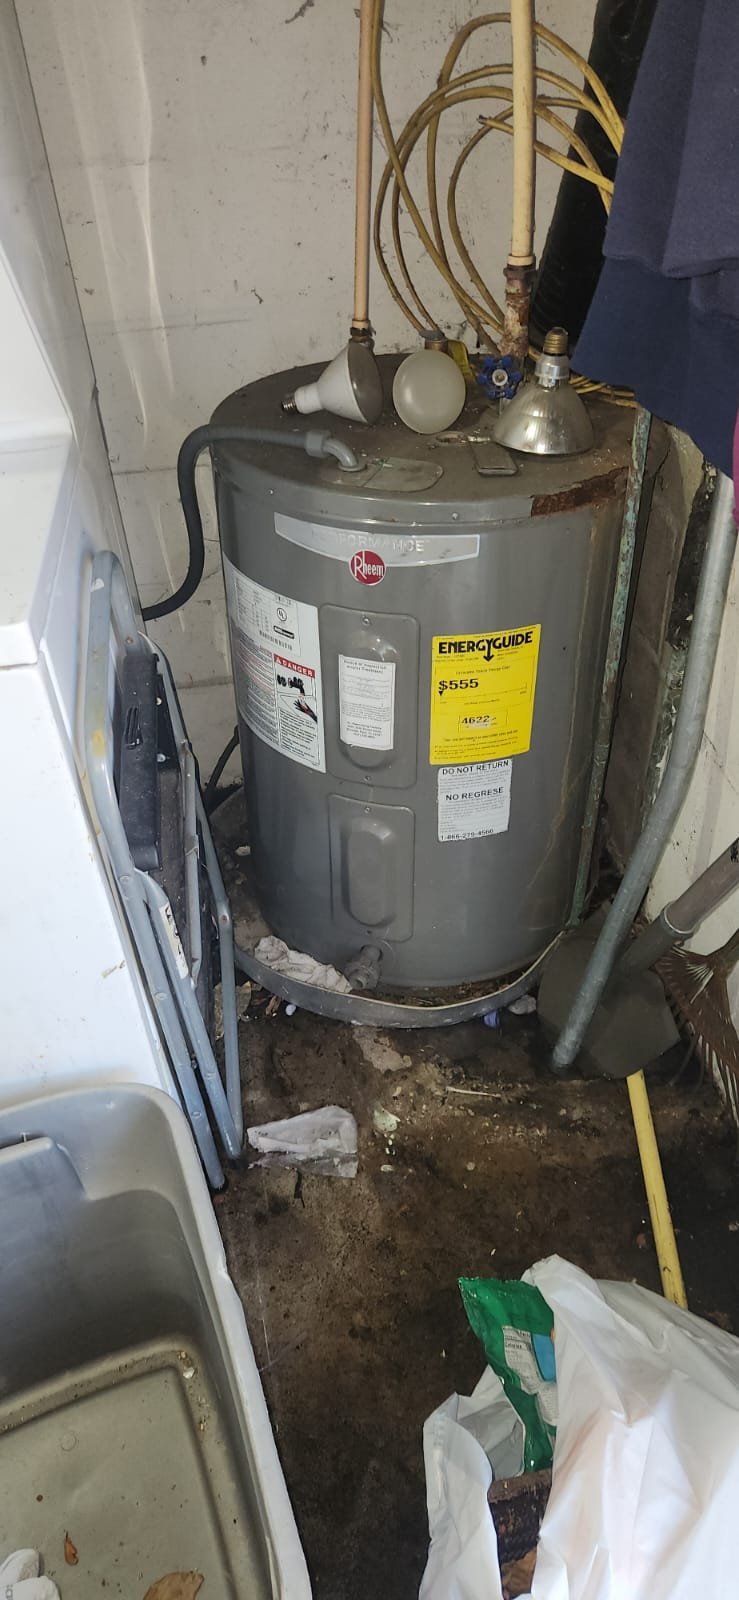
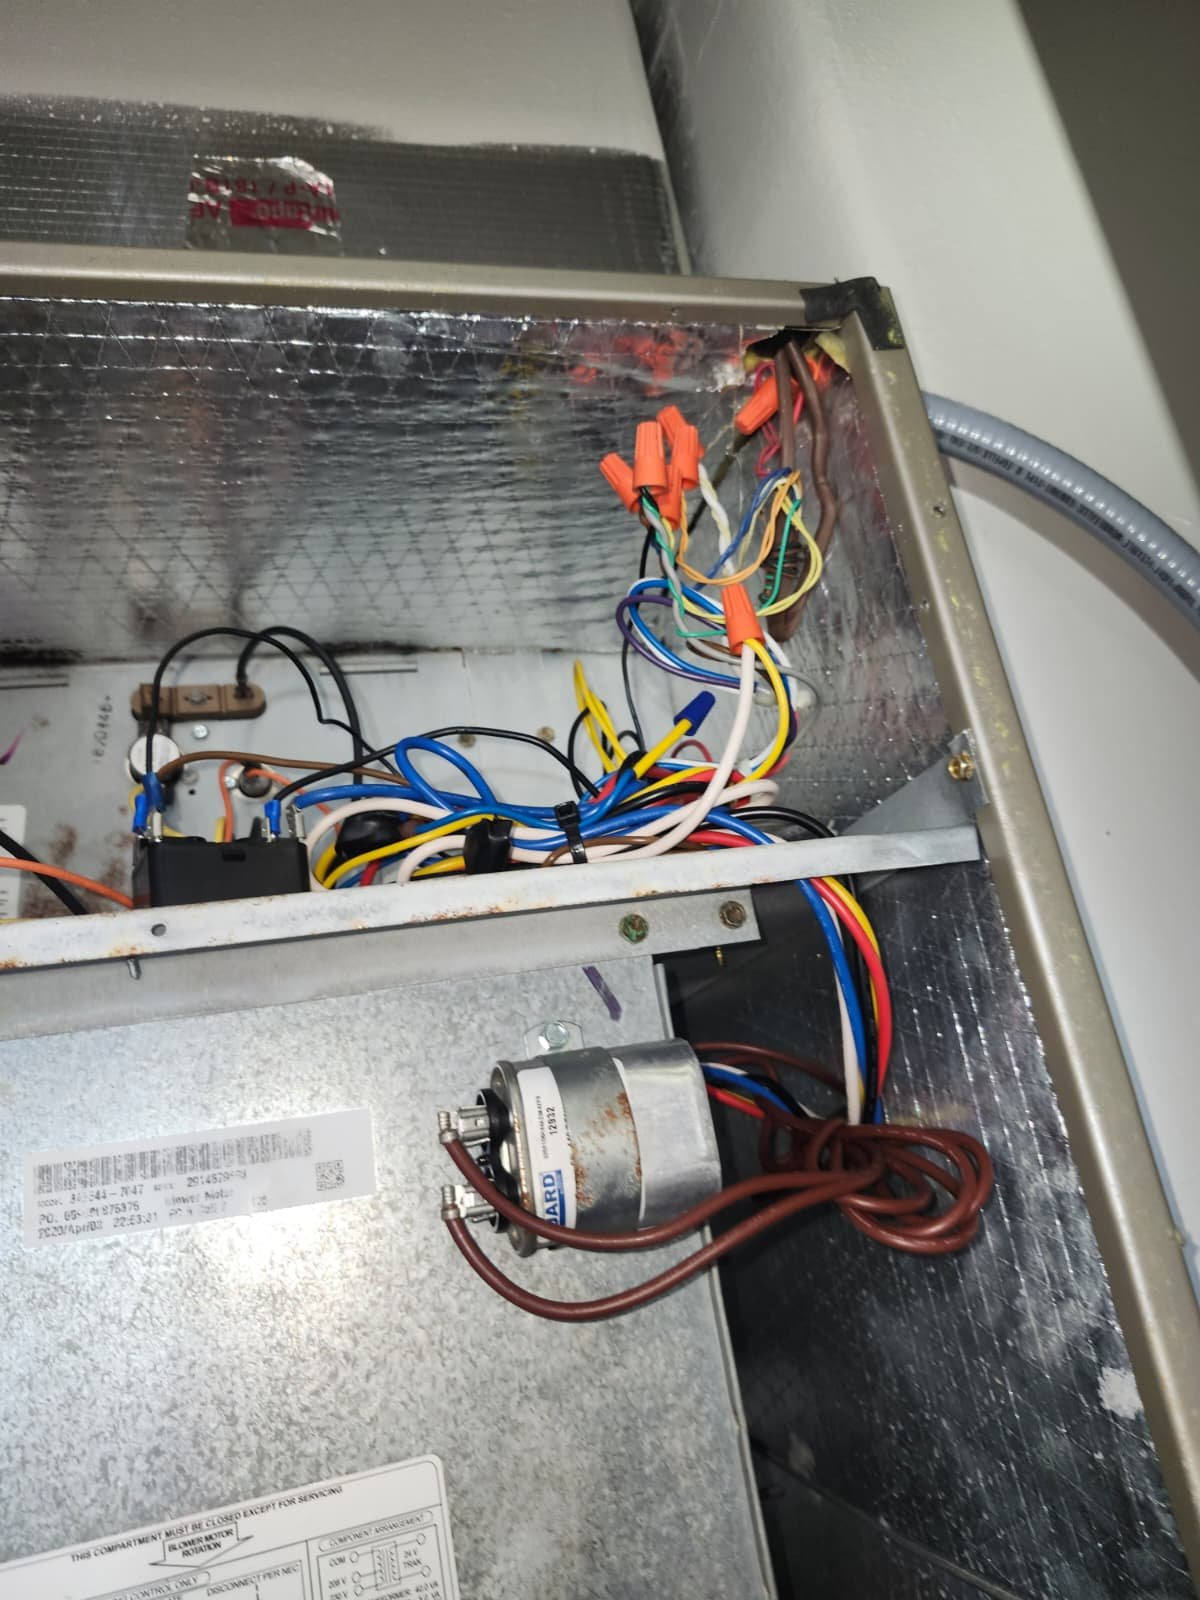
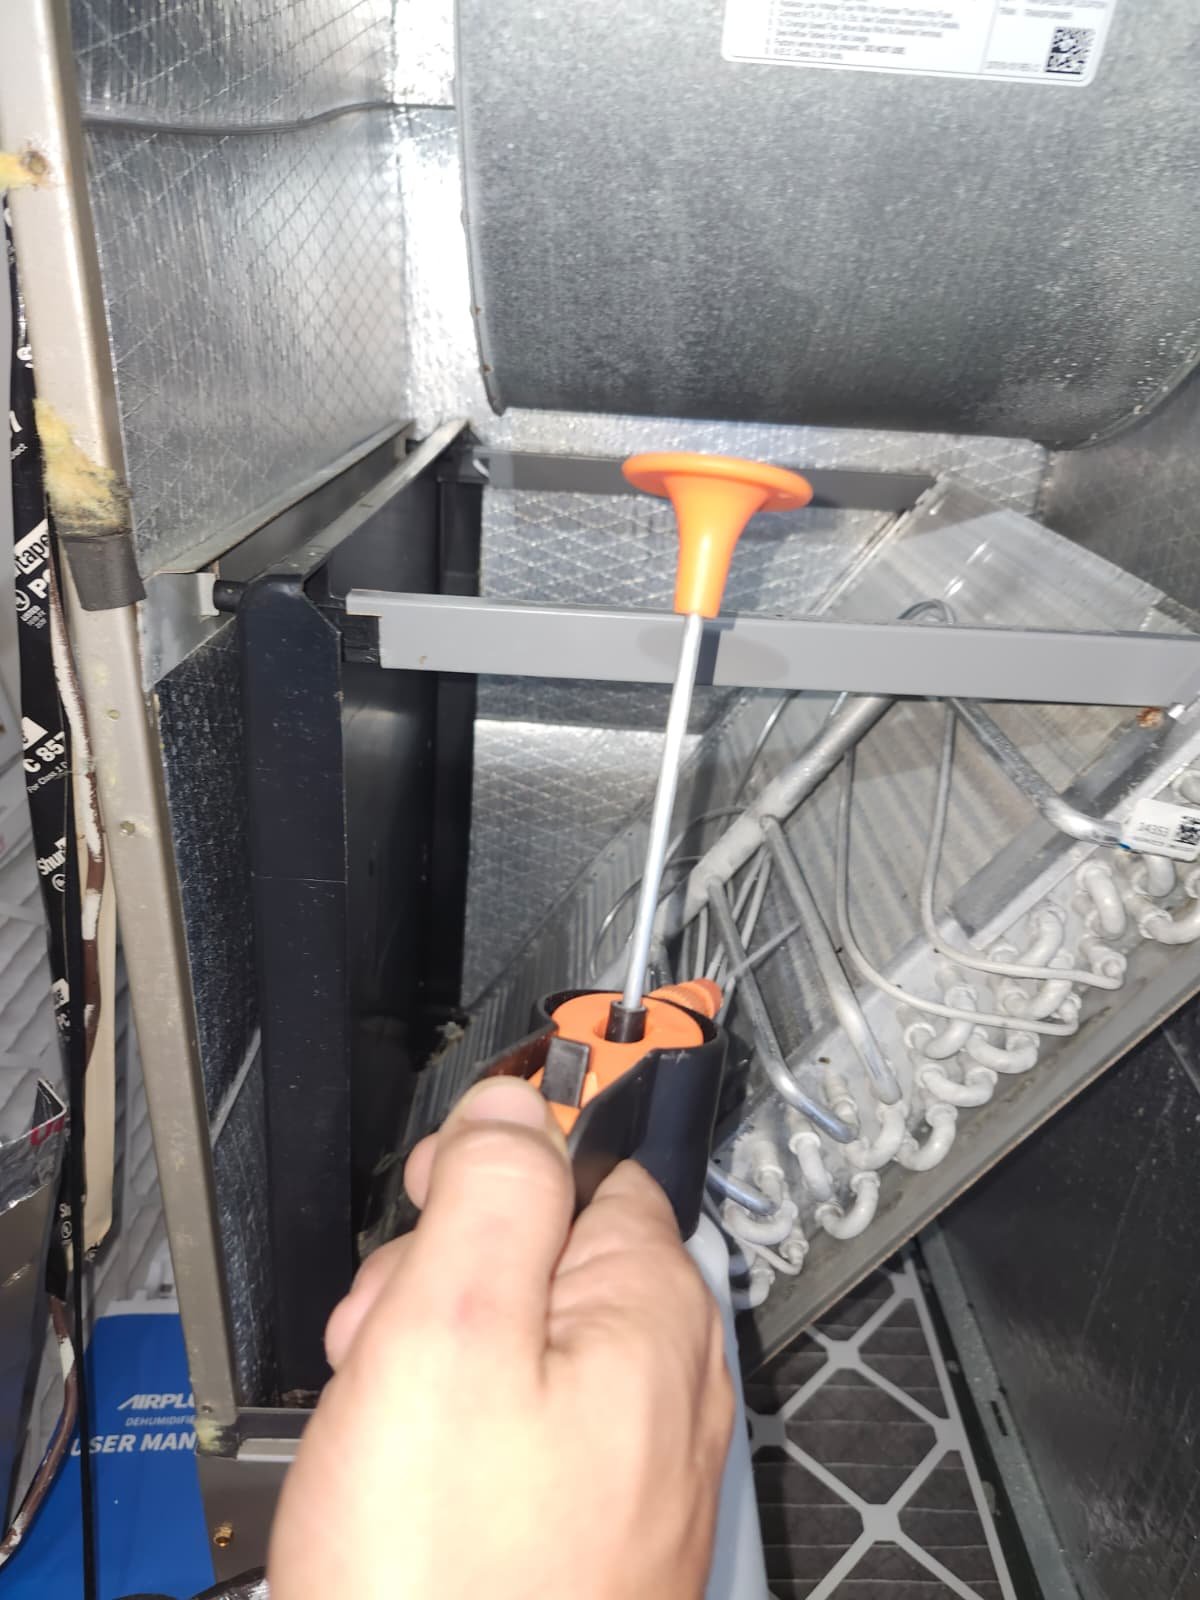
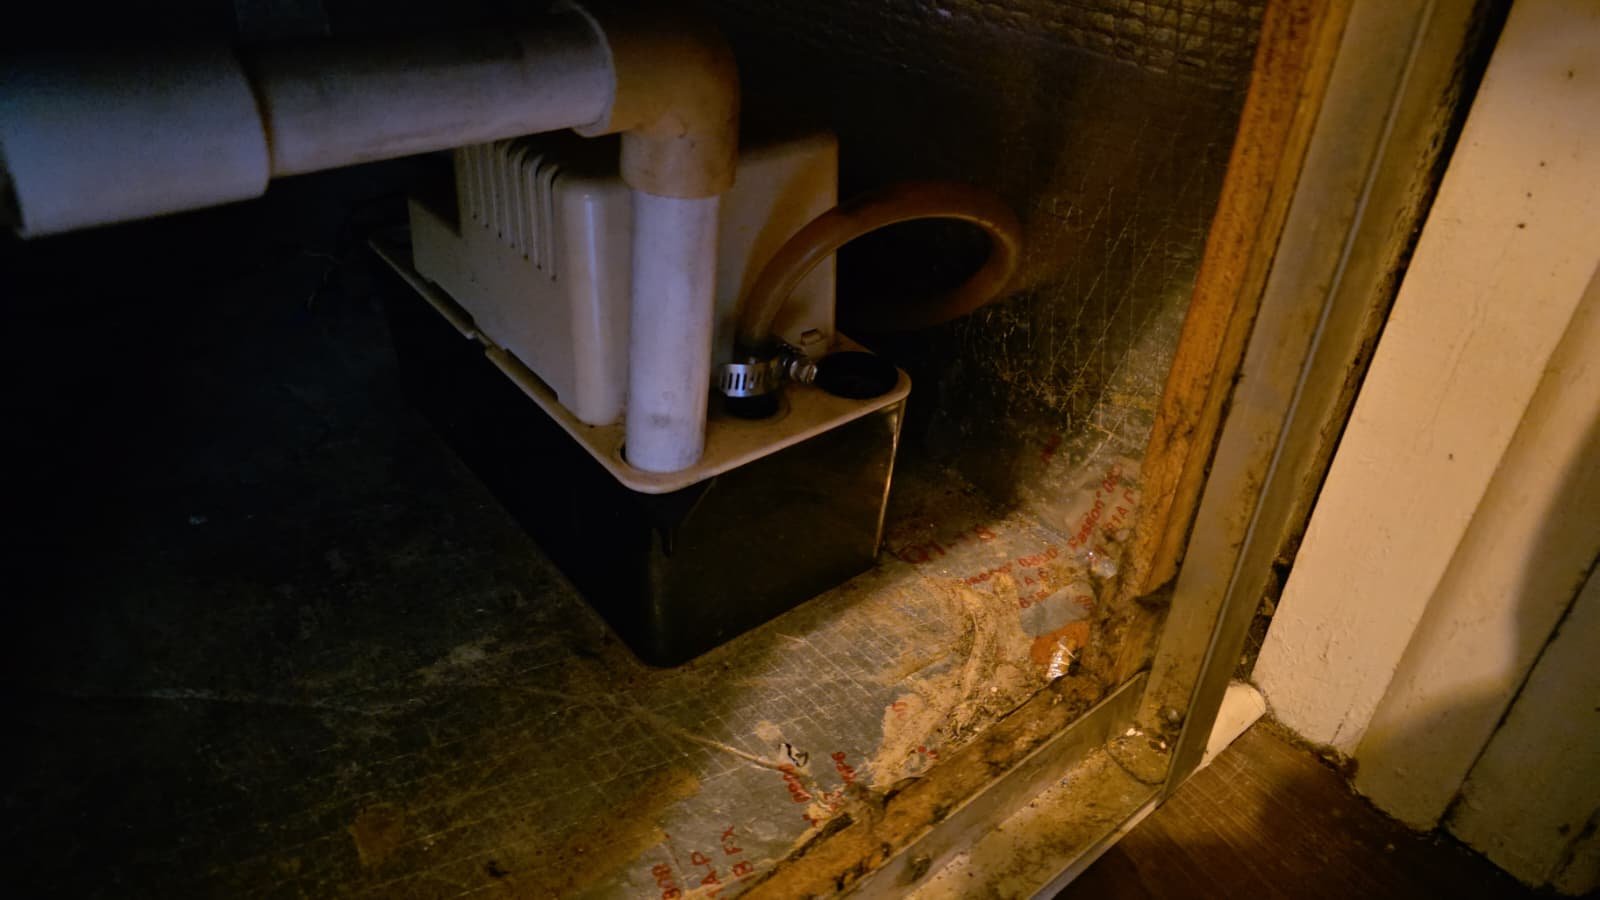
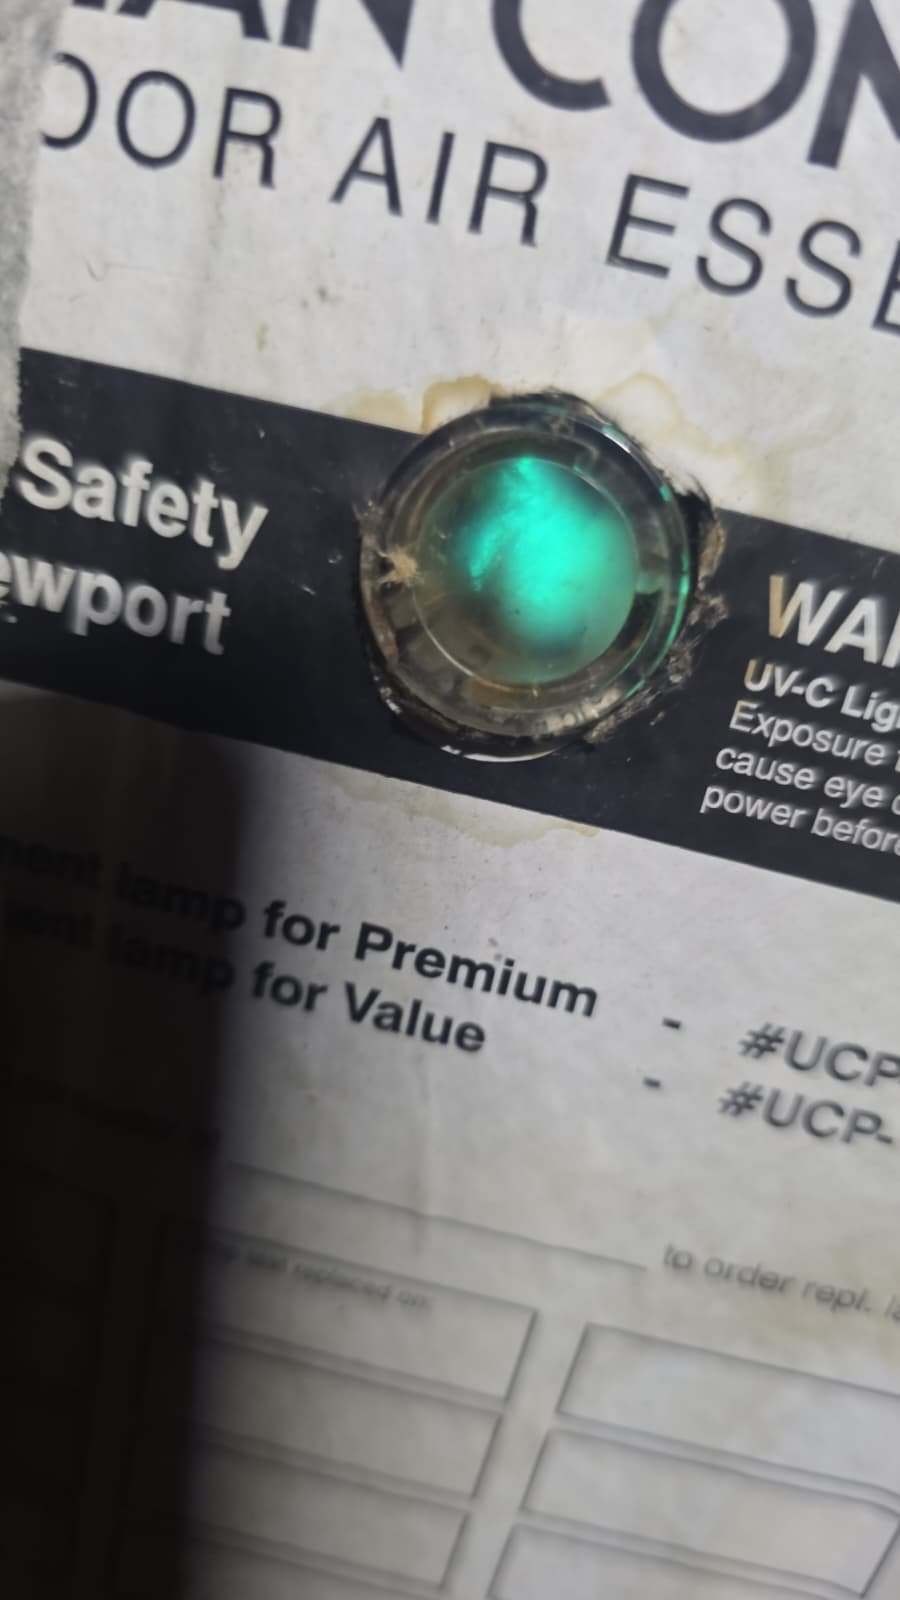
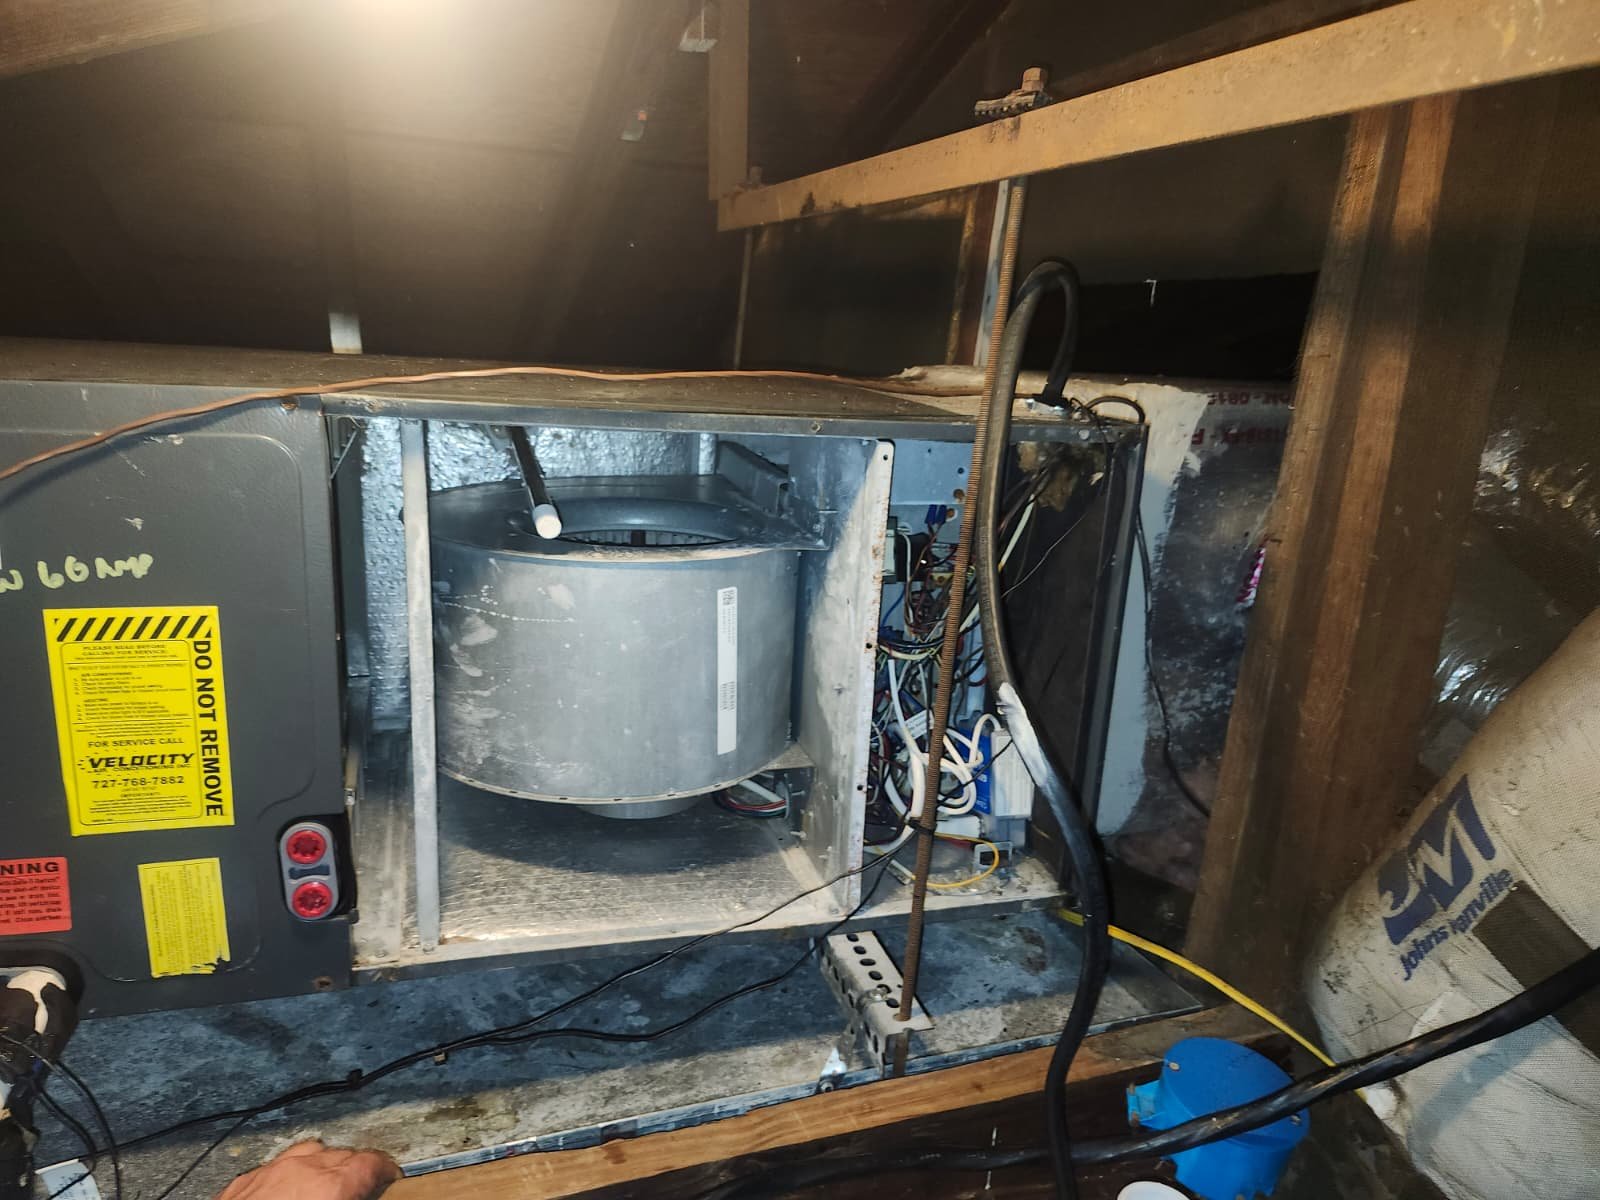
3. UV Light Inside the Air Handler

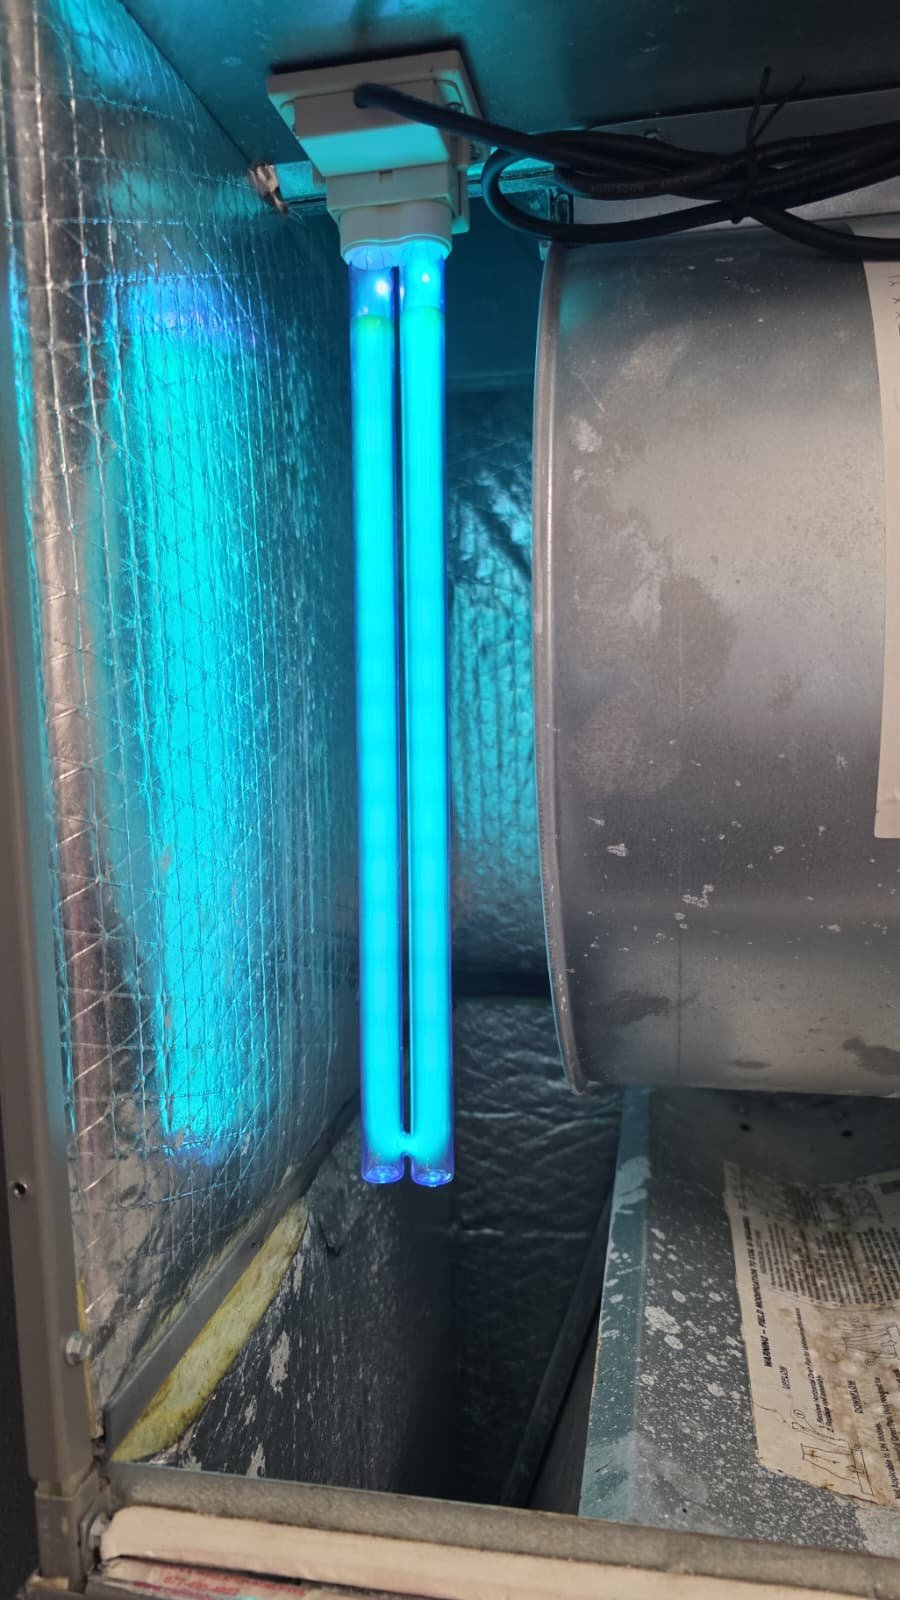
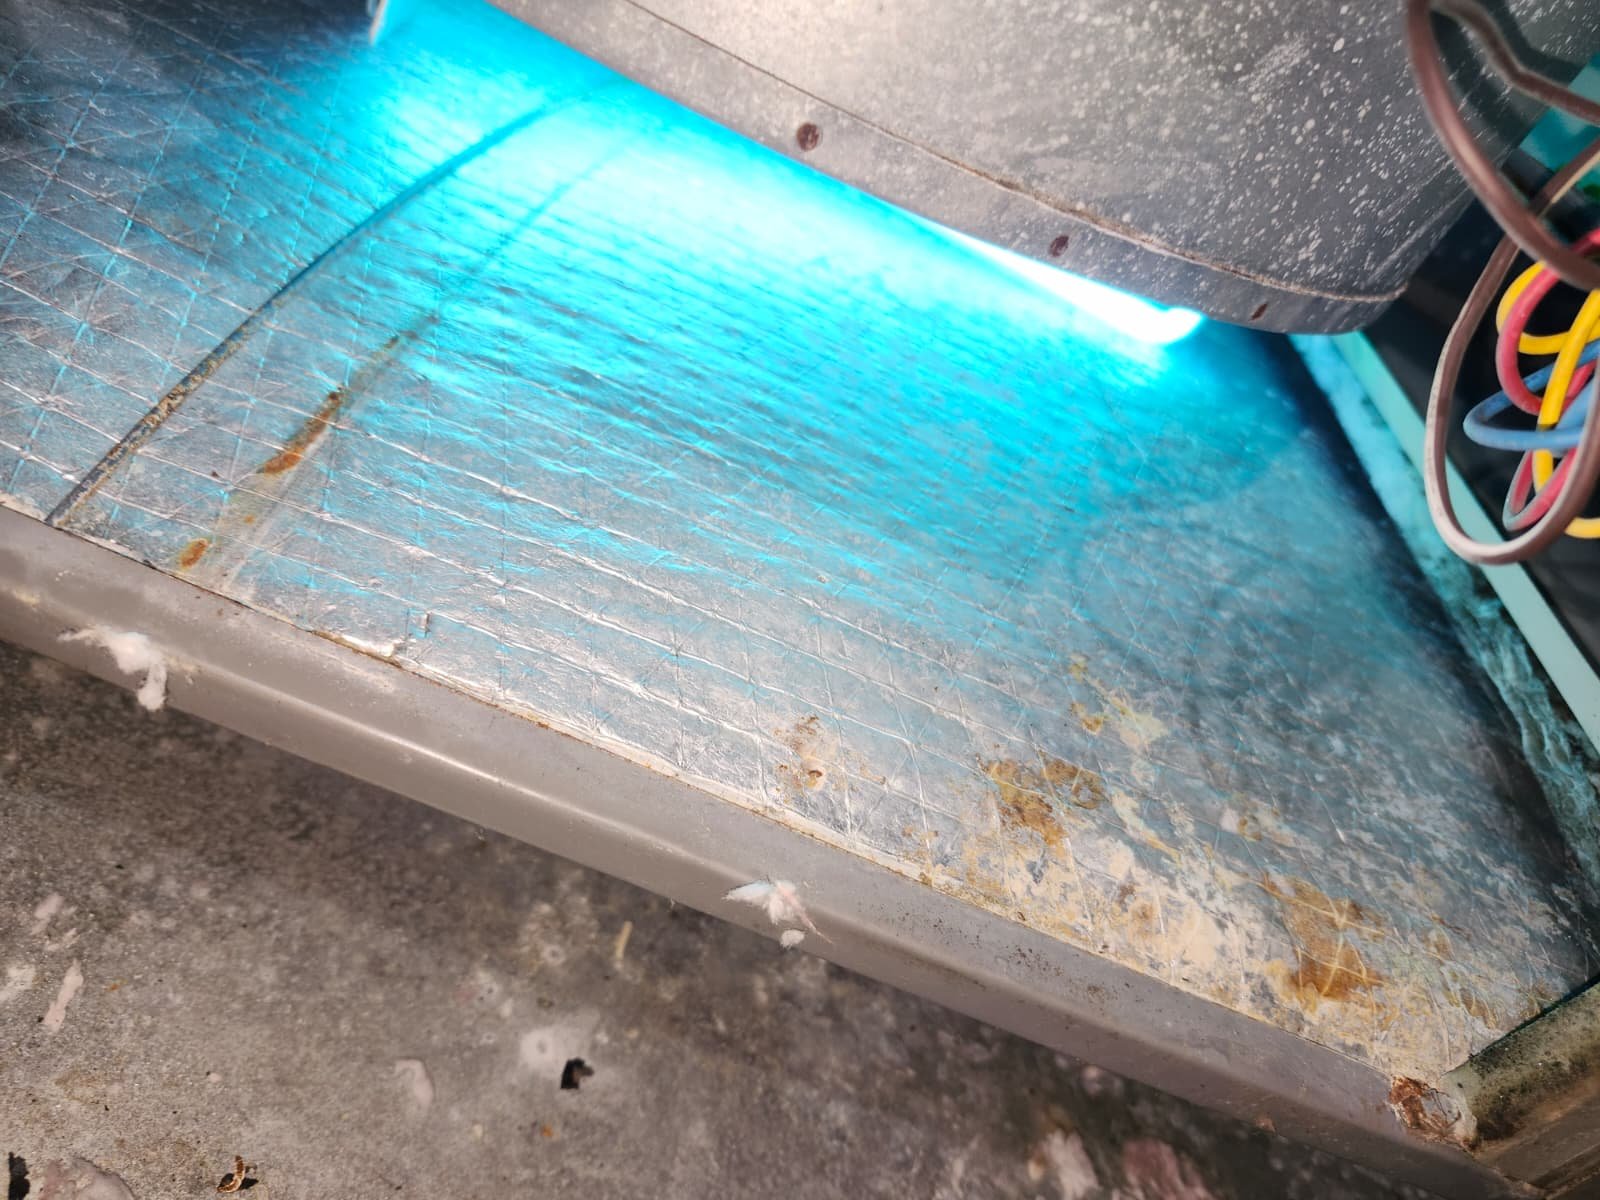
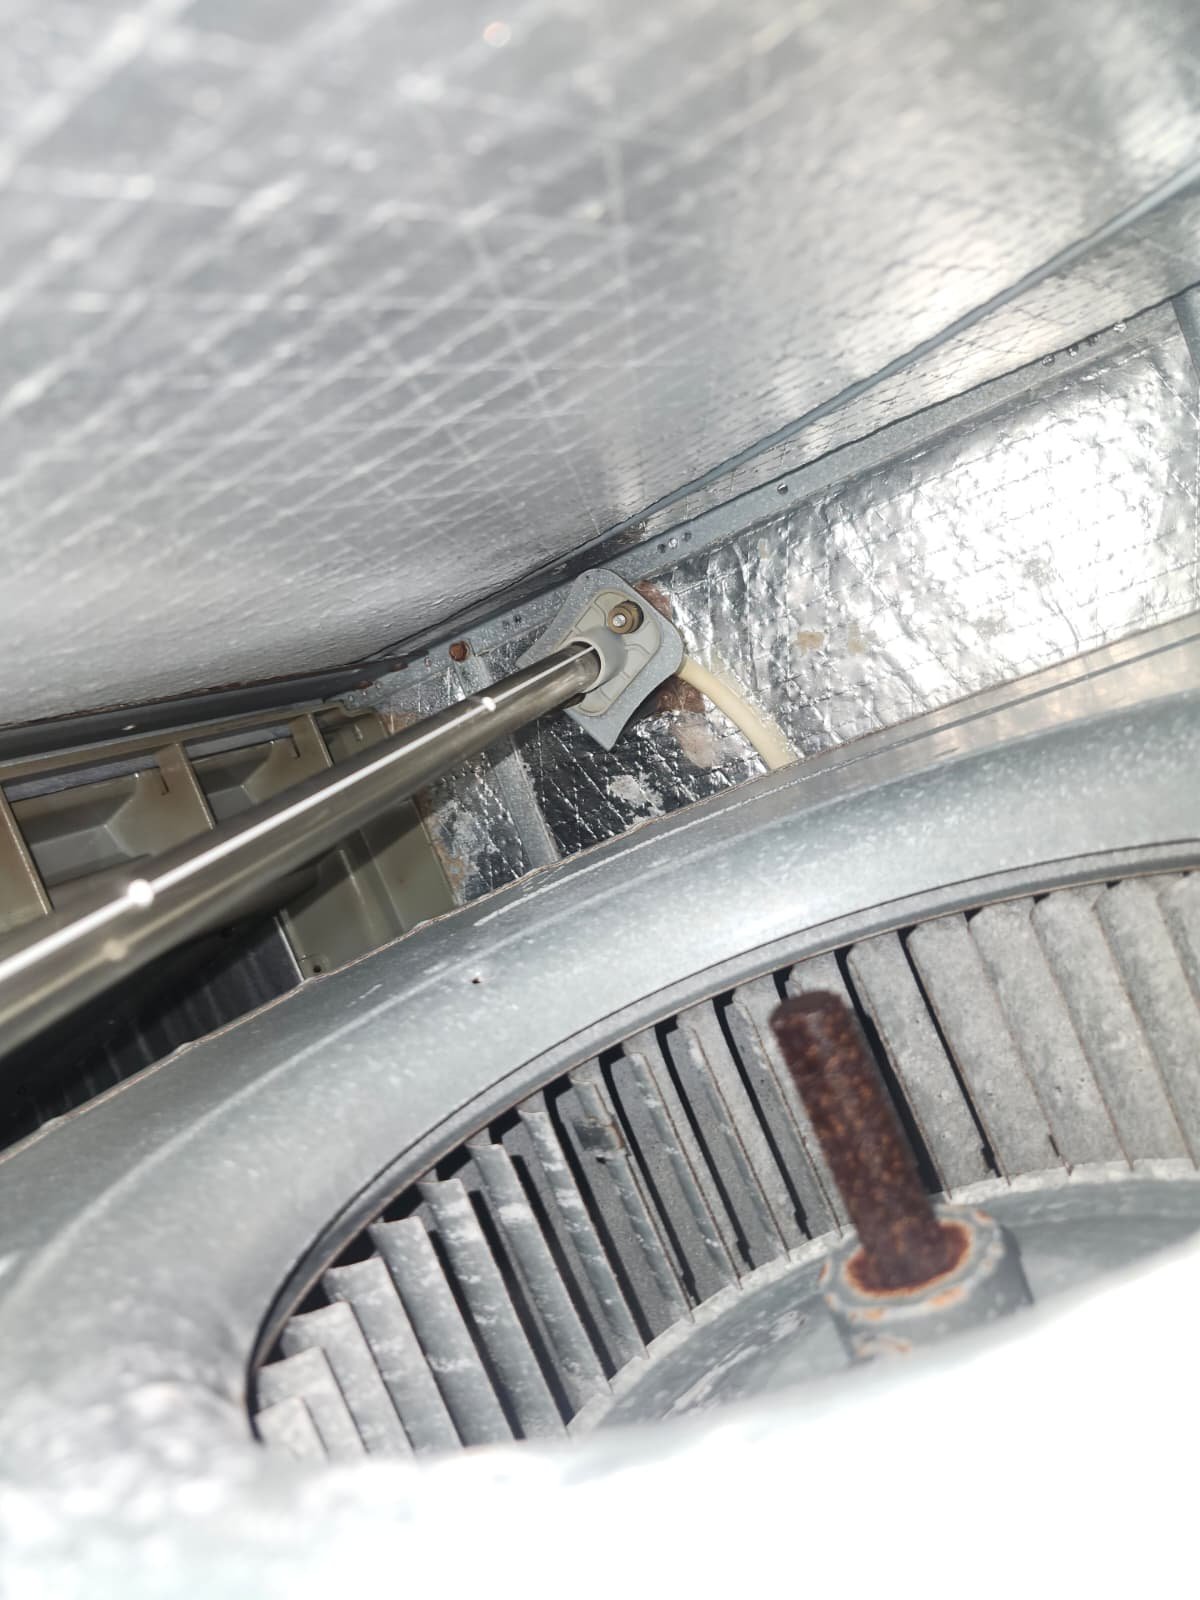
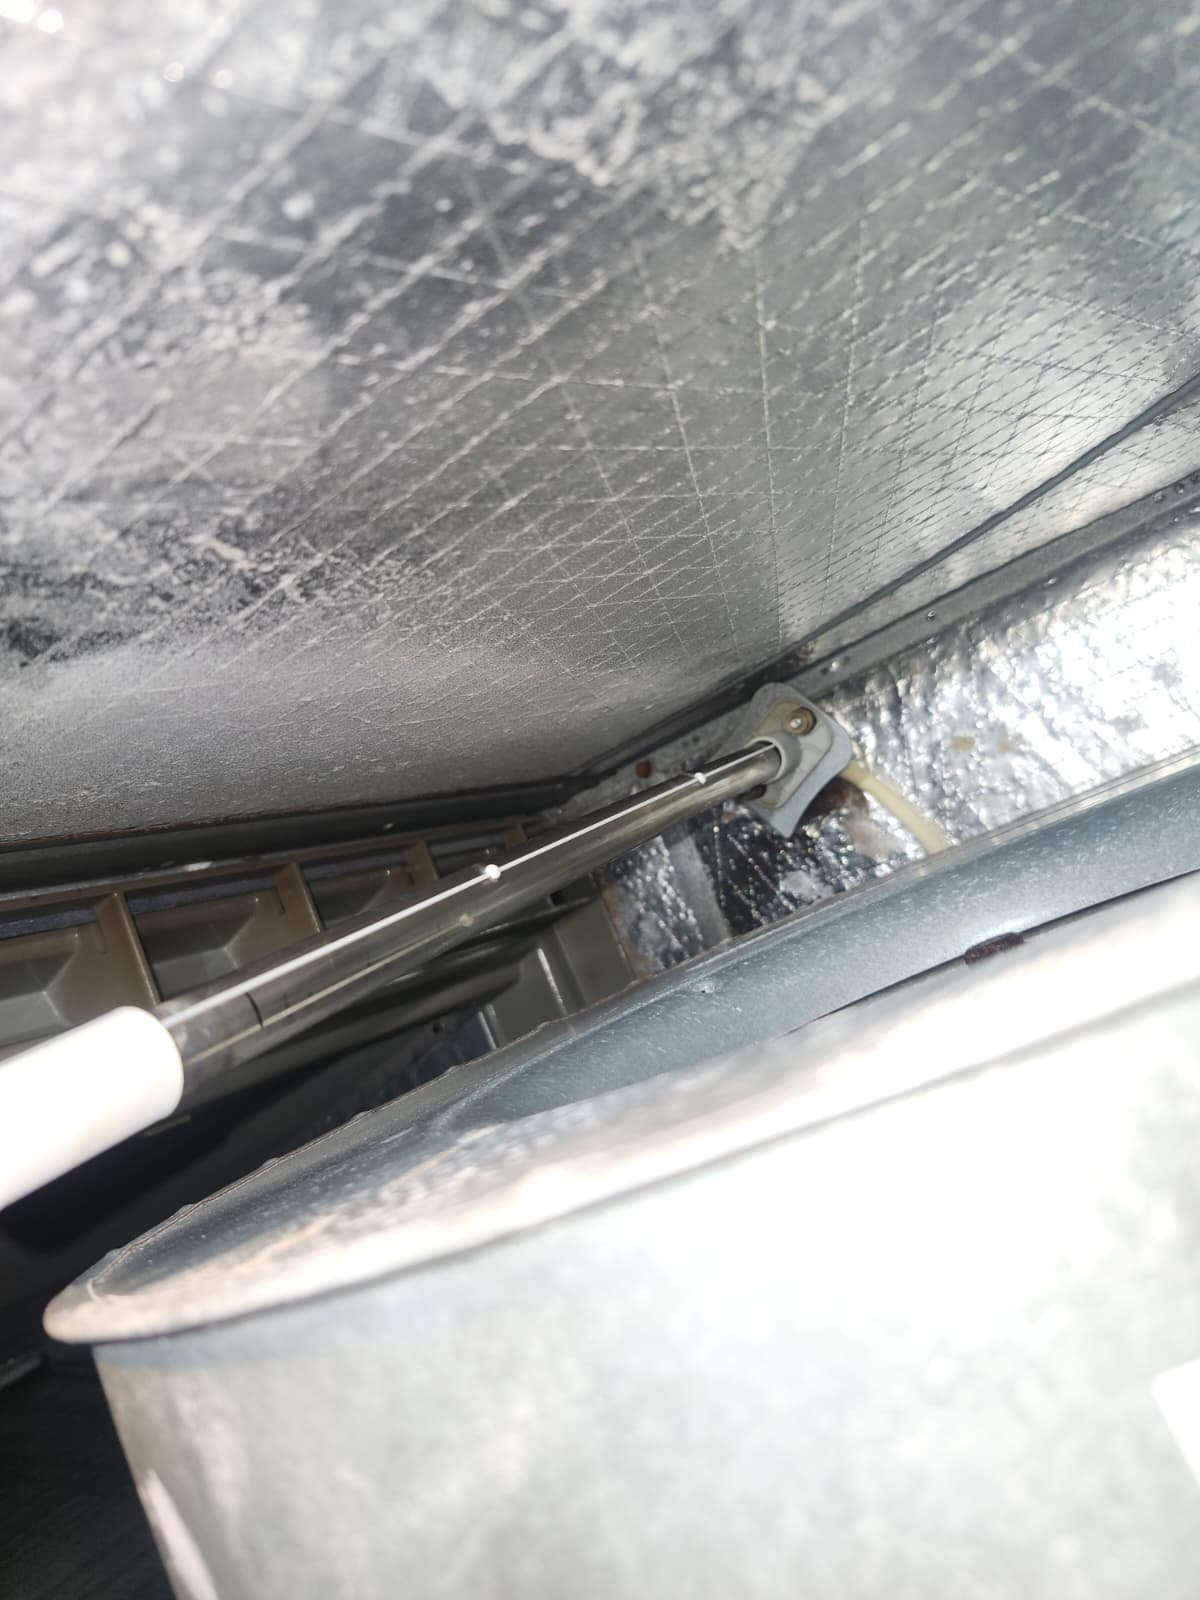
The air handler in this Clearwater home is equipped with a UV light, designed to improve indoor air quality by targeting microbial growth on interior surfaces near the coil. During the inspection, we checked the UV system and found that the light had stopped working.

UV bulbs do have a limited lifespan, and over time they lose effectiveness even before they go completely dark. In this case, the light was no longer operating at all, so it was not providing any benefit to the system or the air in the home.

4. Maintenance Plan Tune-Up Tasks

As part of the Premium Home Therapy Plan, we also completed a full tune-up checklist, including tasks such as:

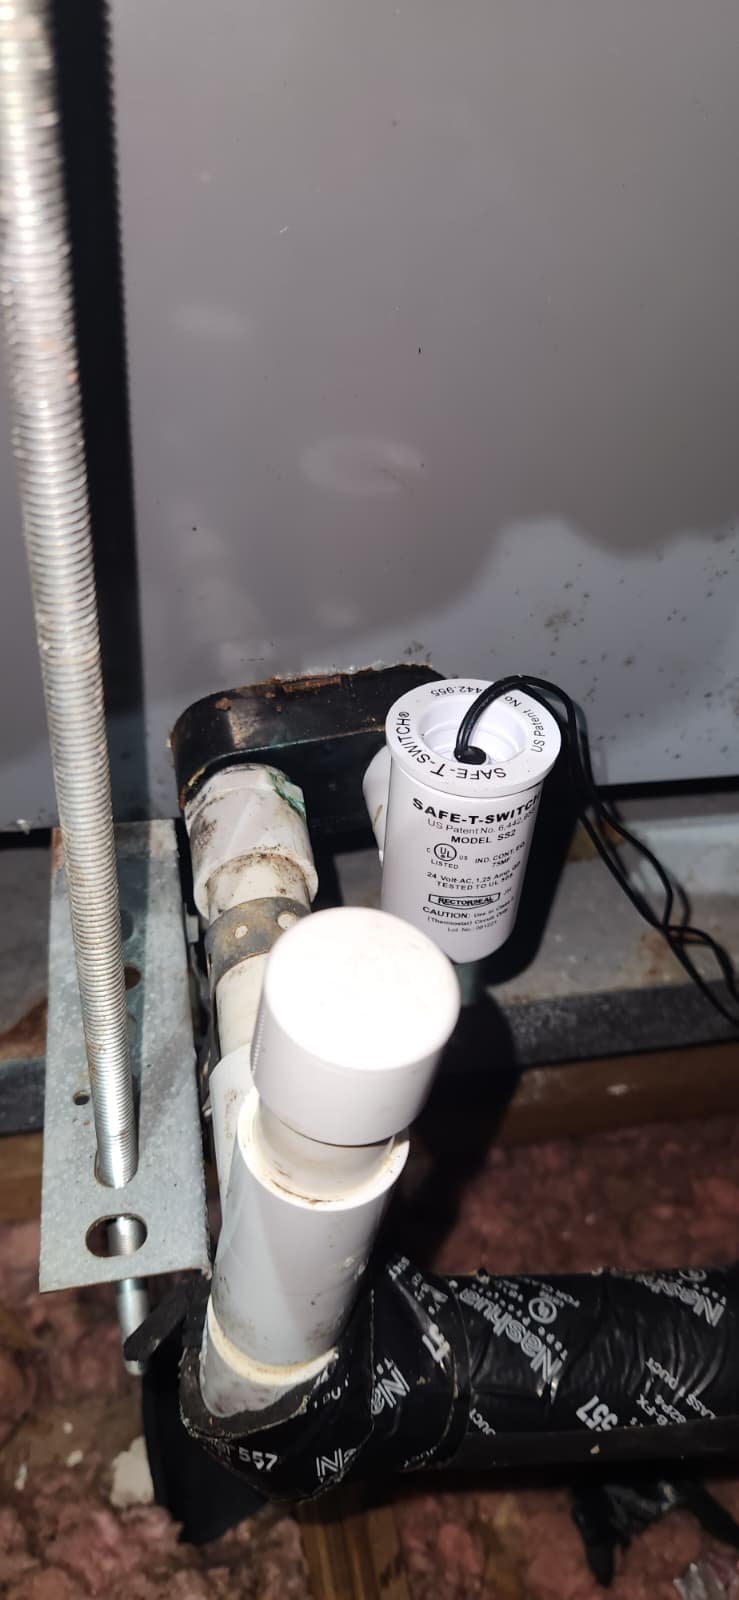
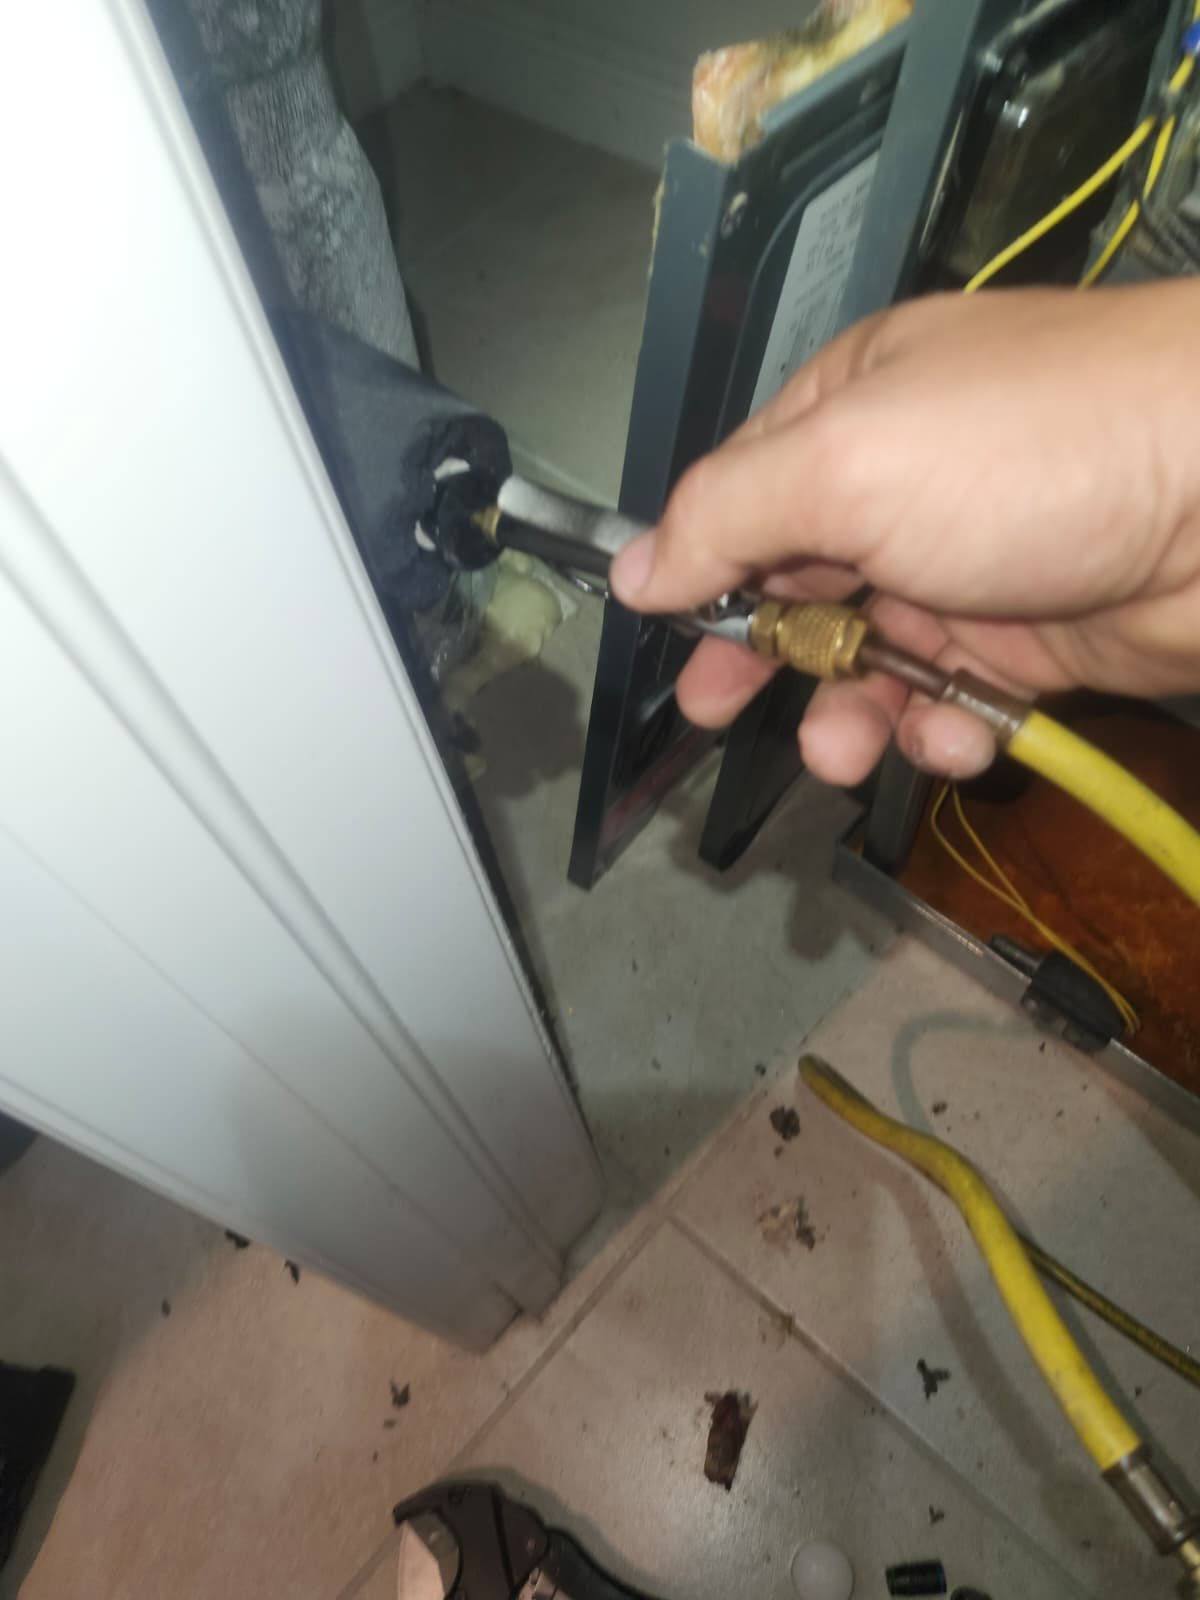
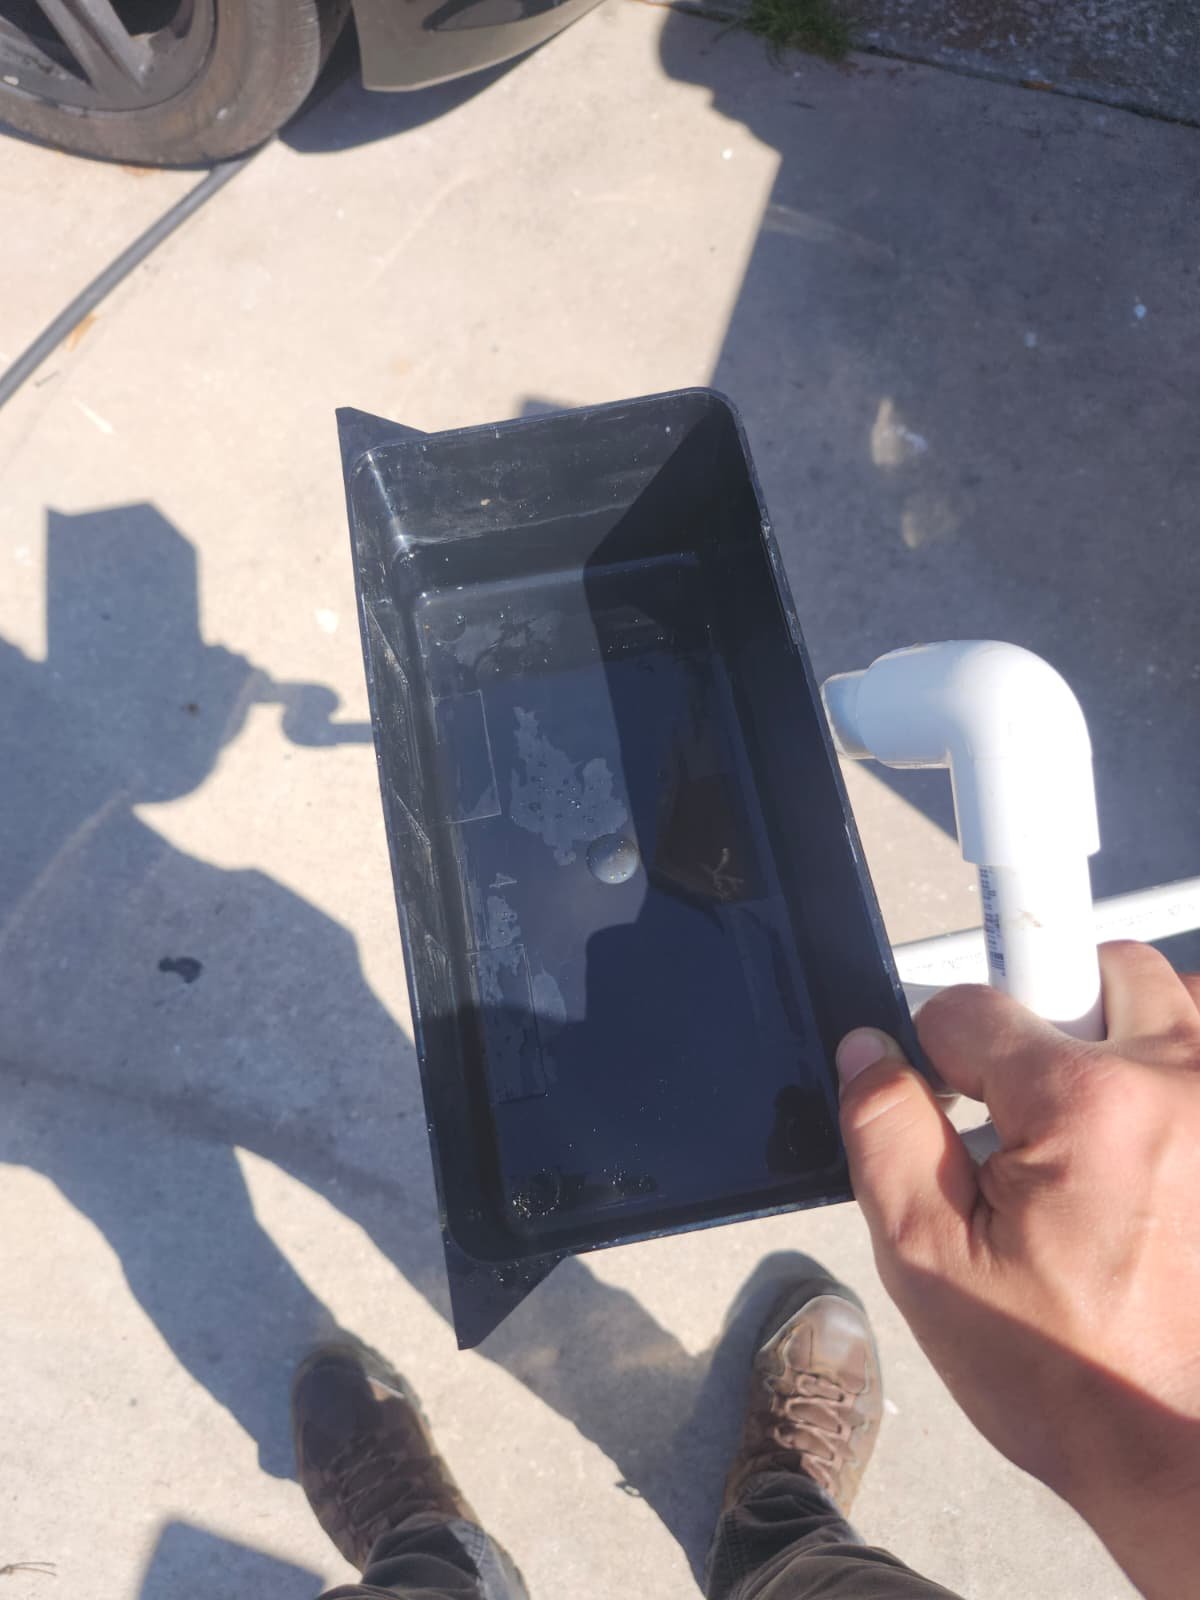
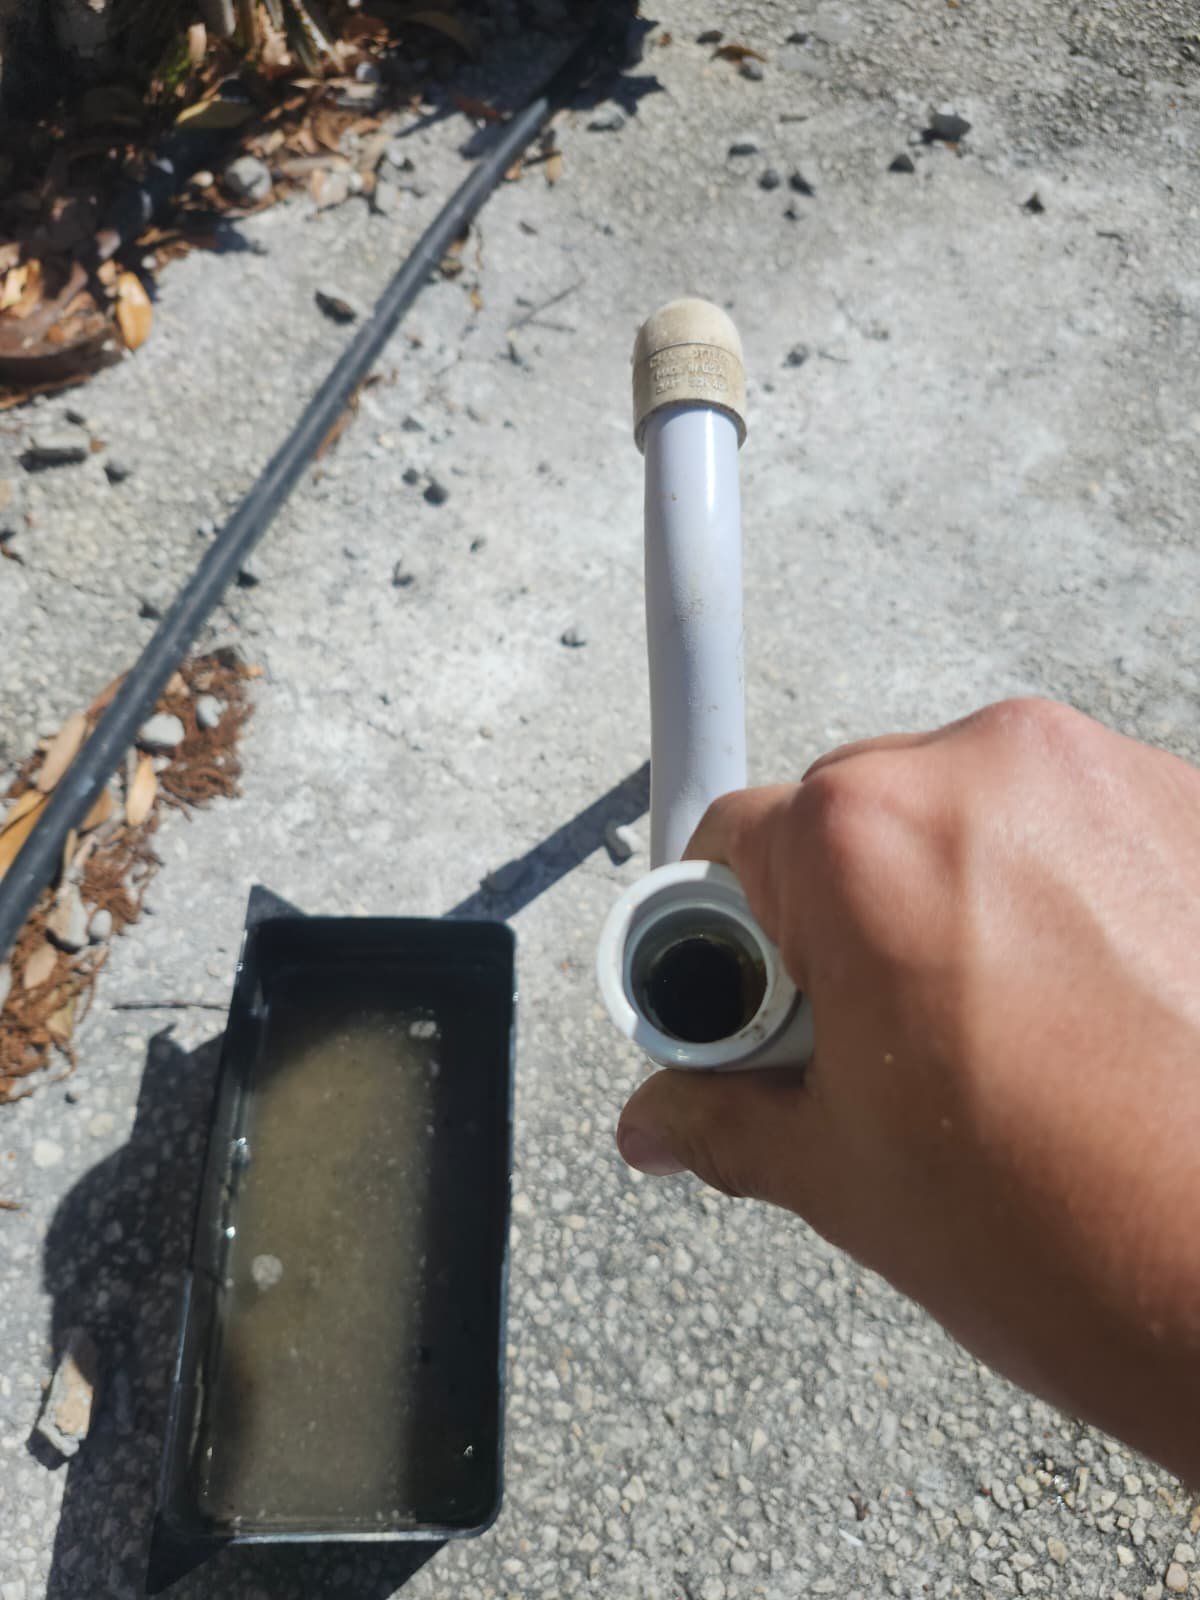
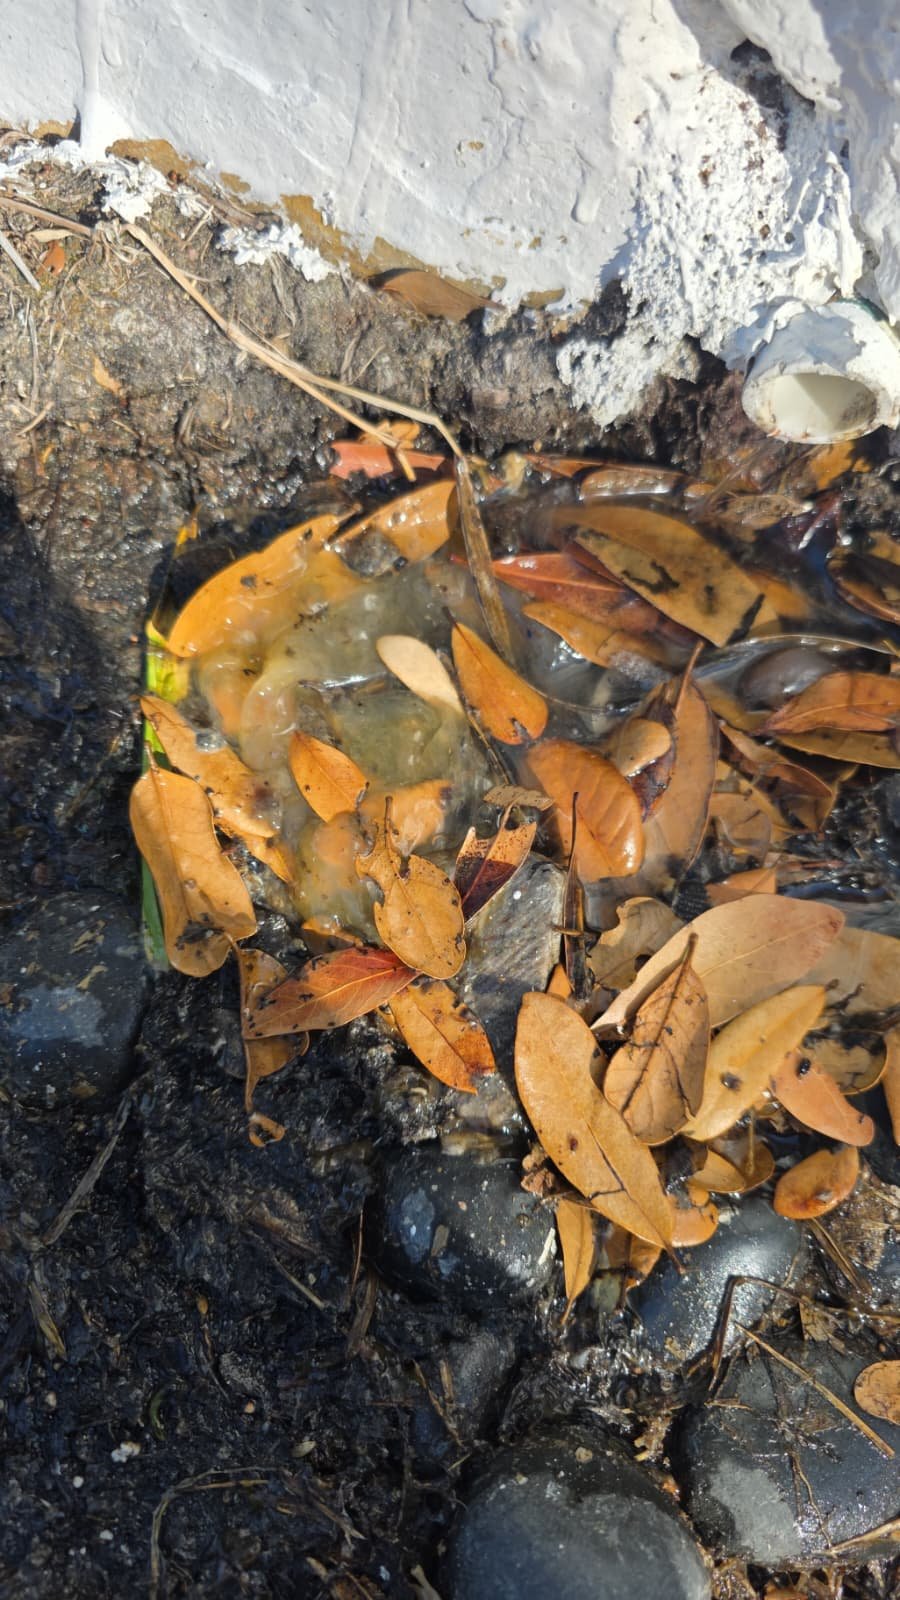
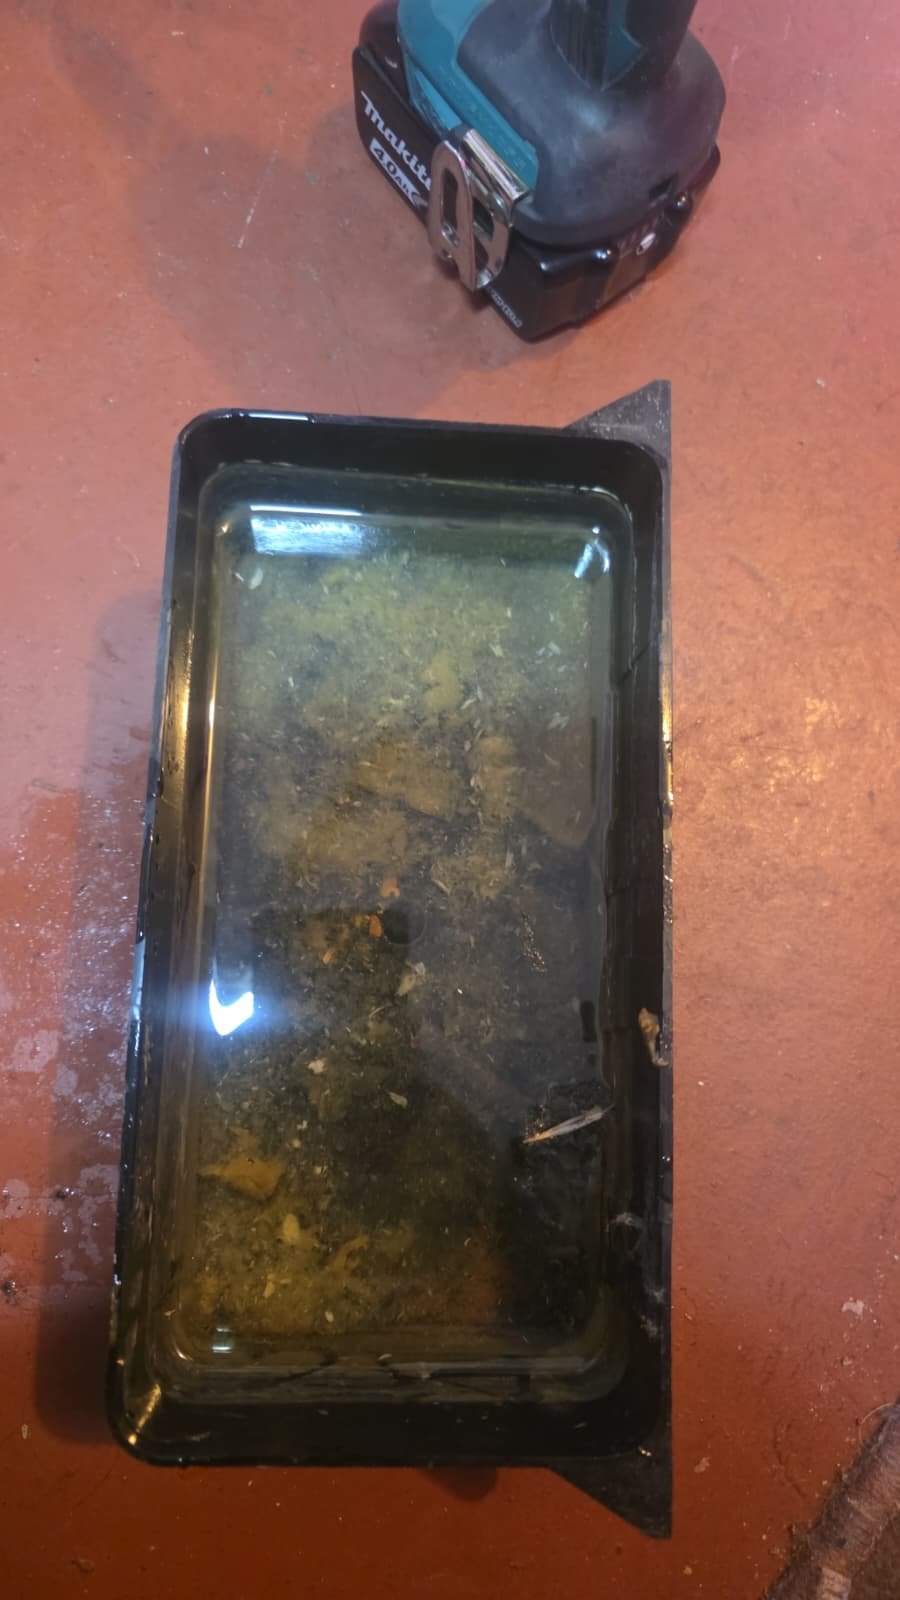
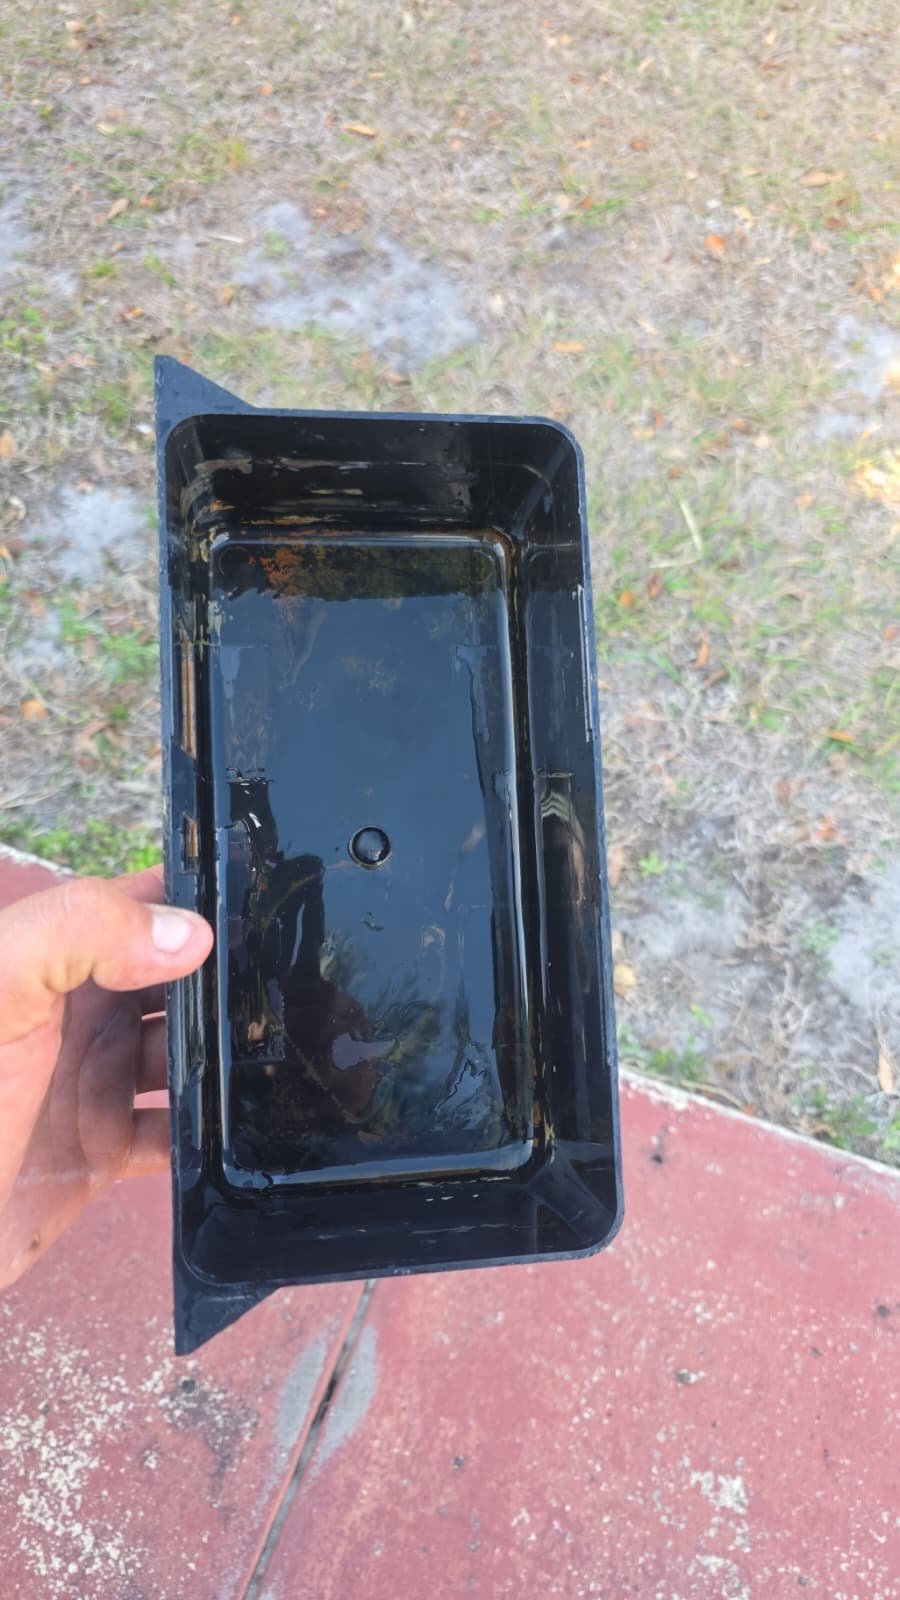
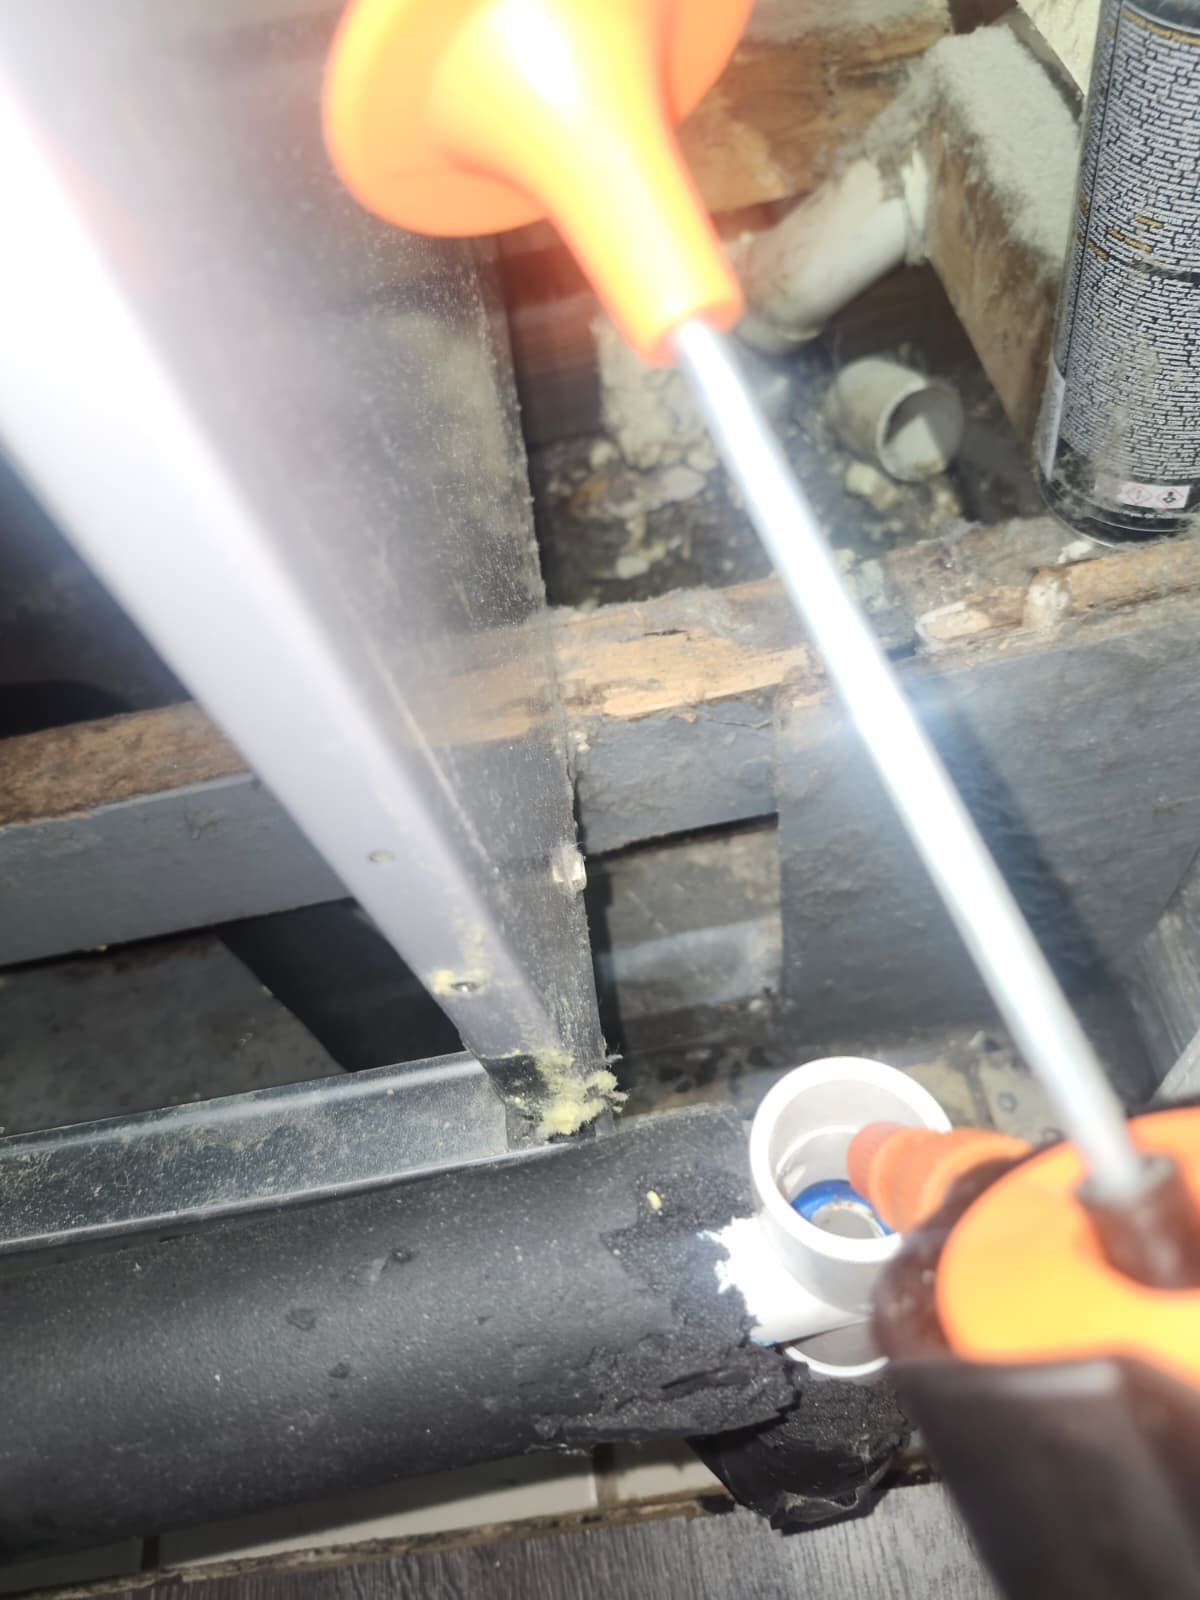
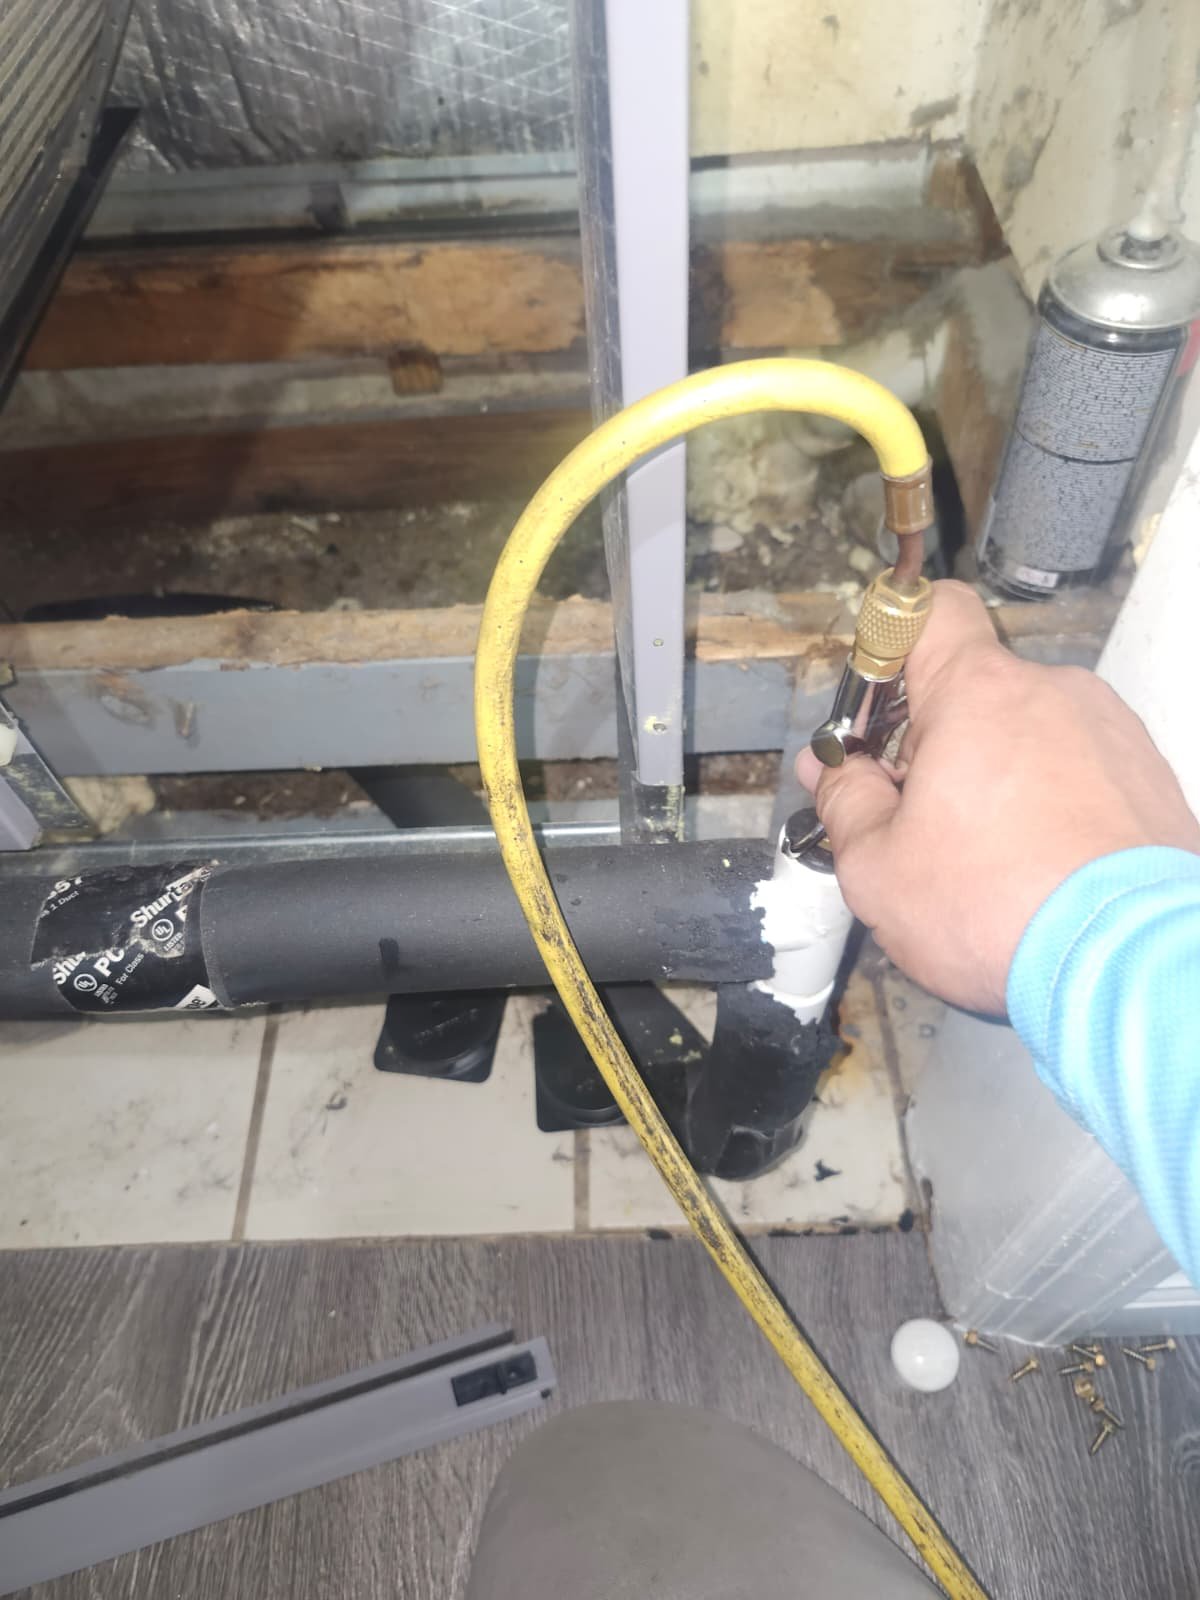
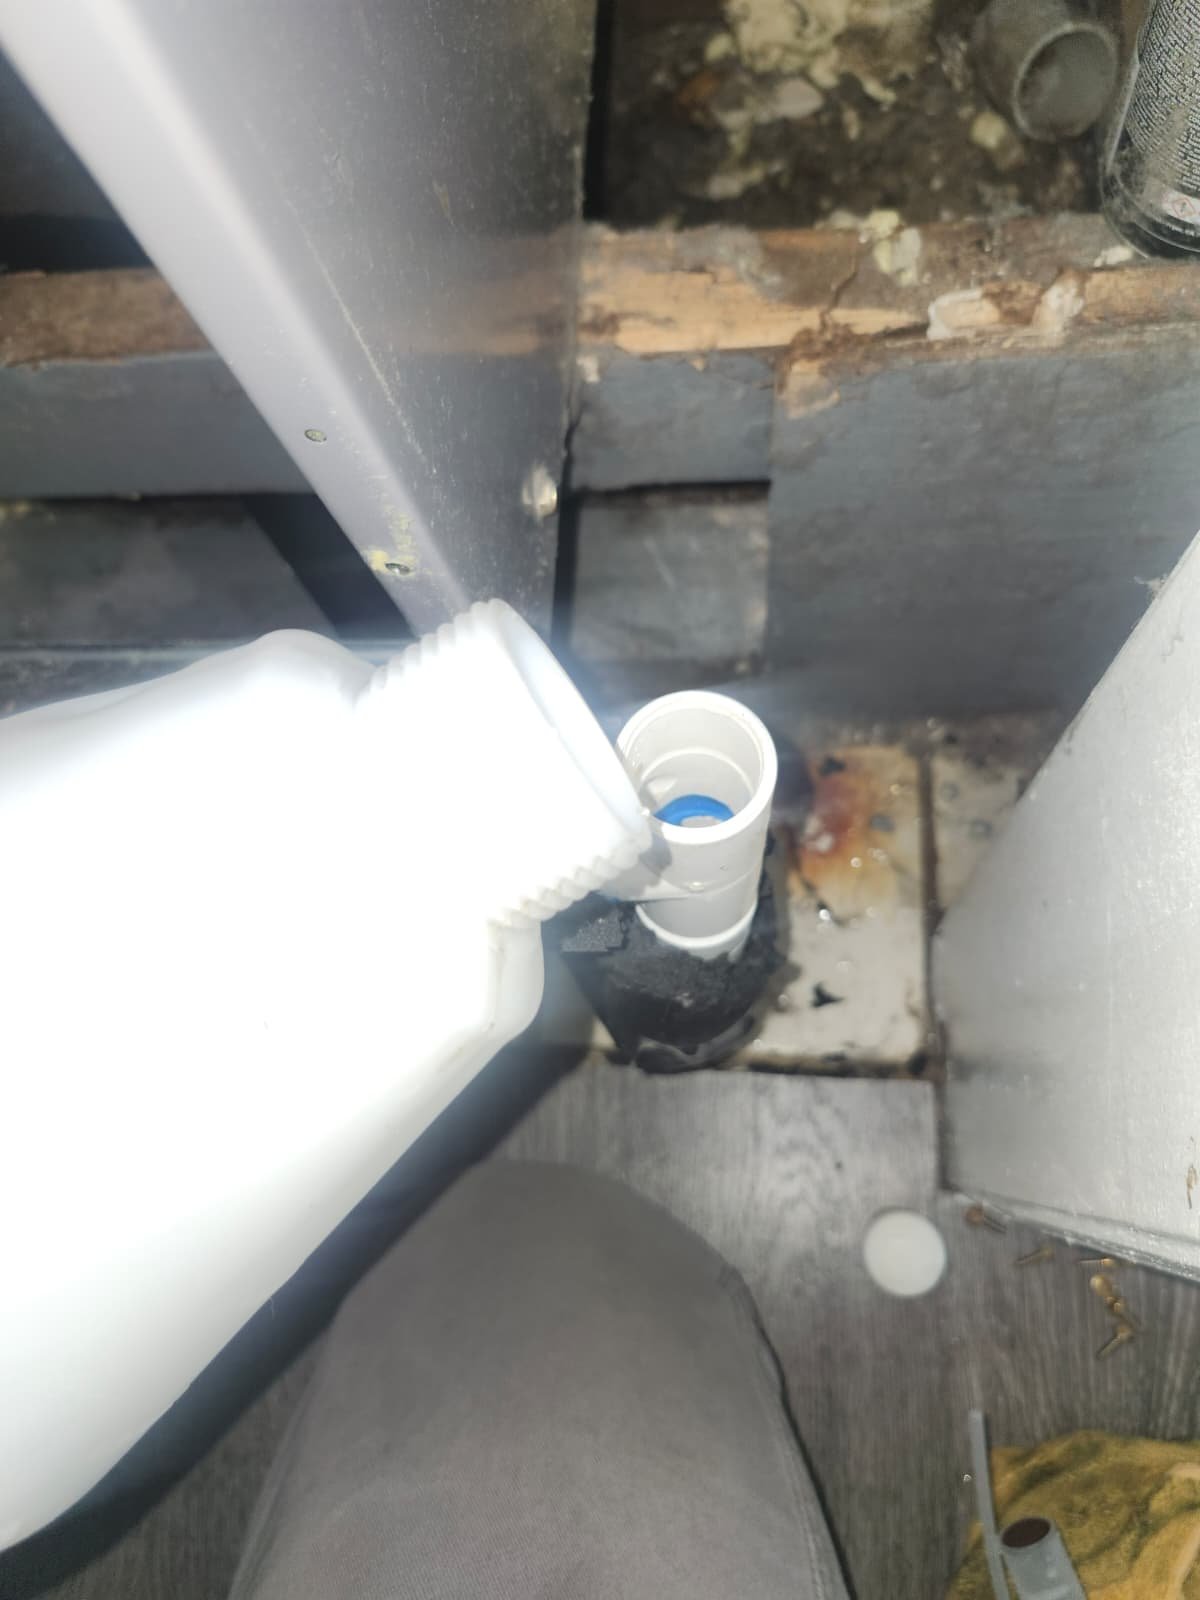
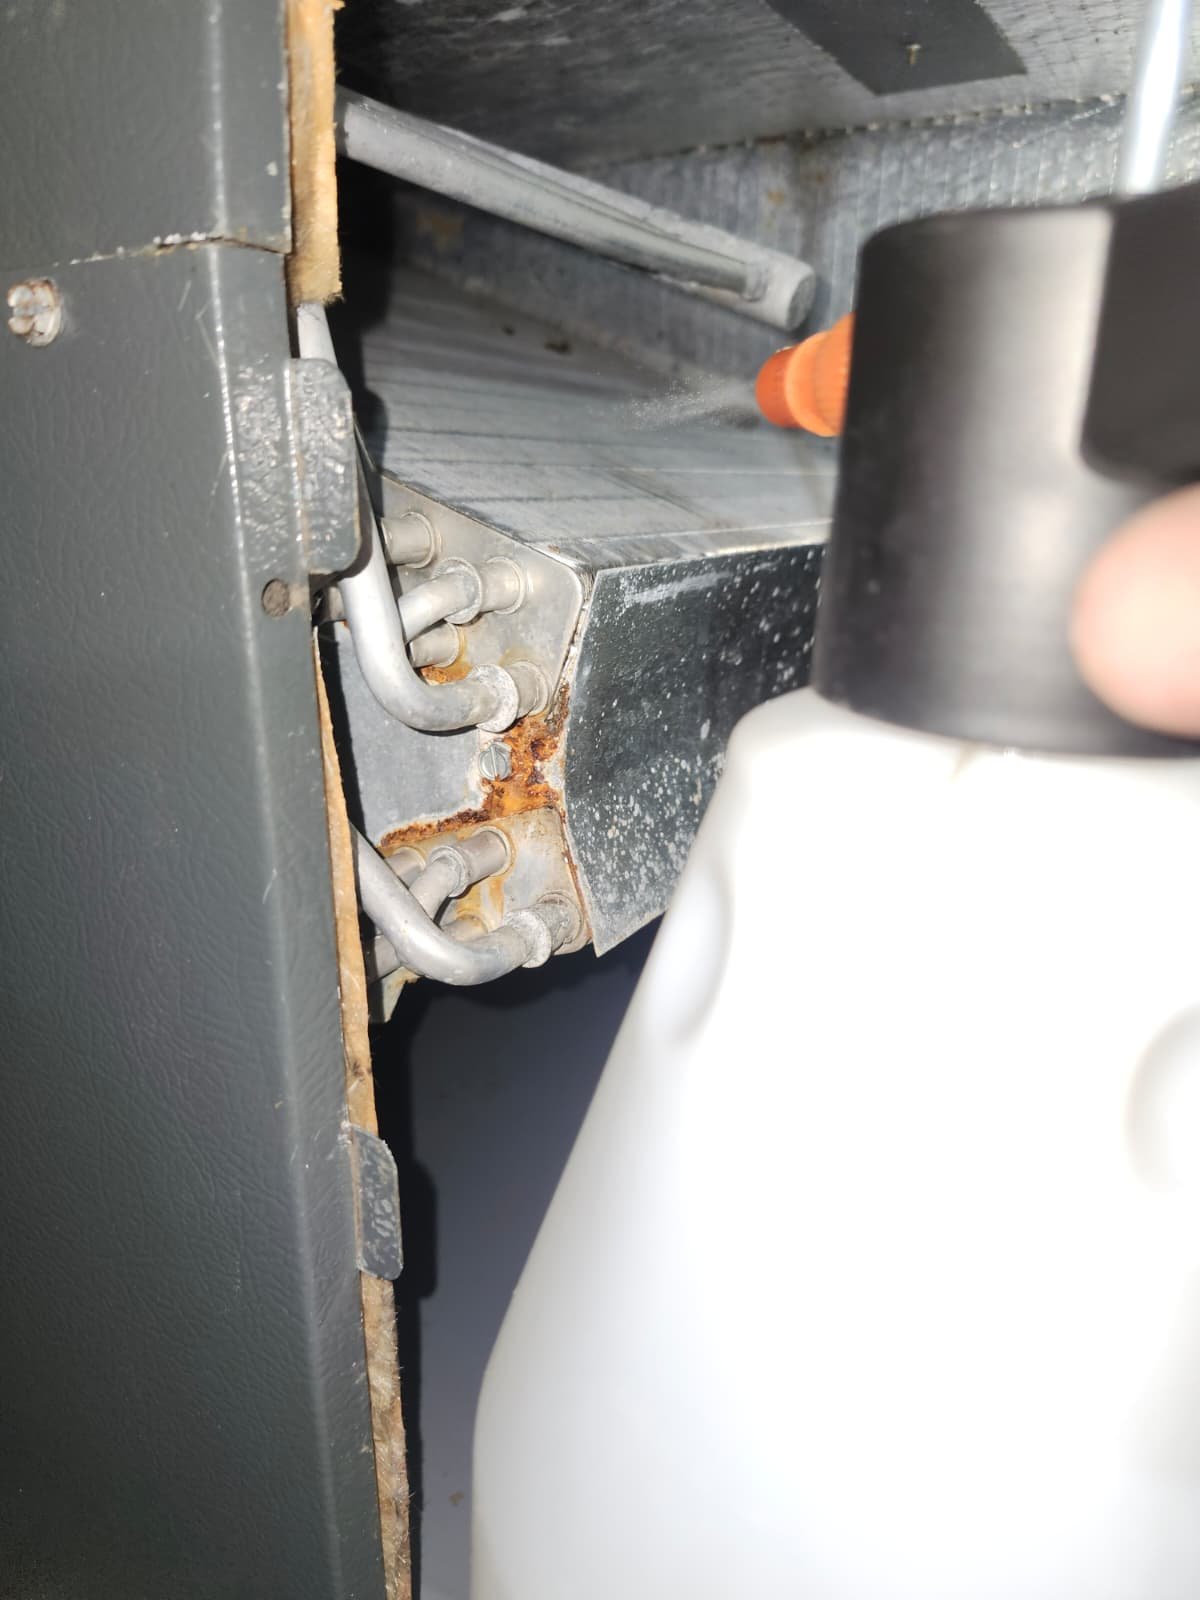
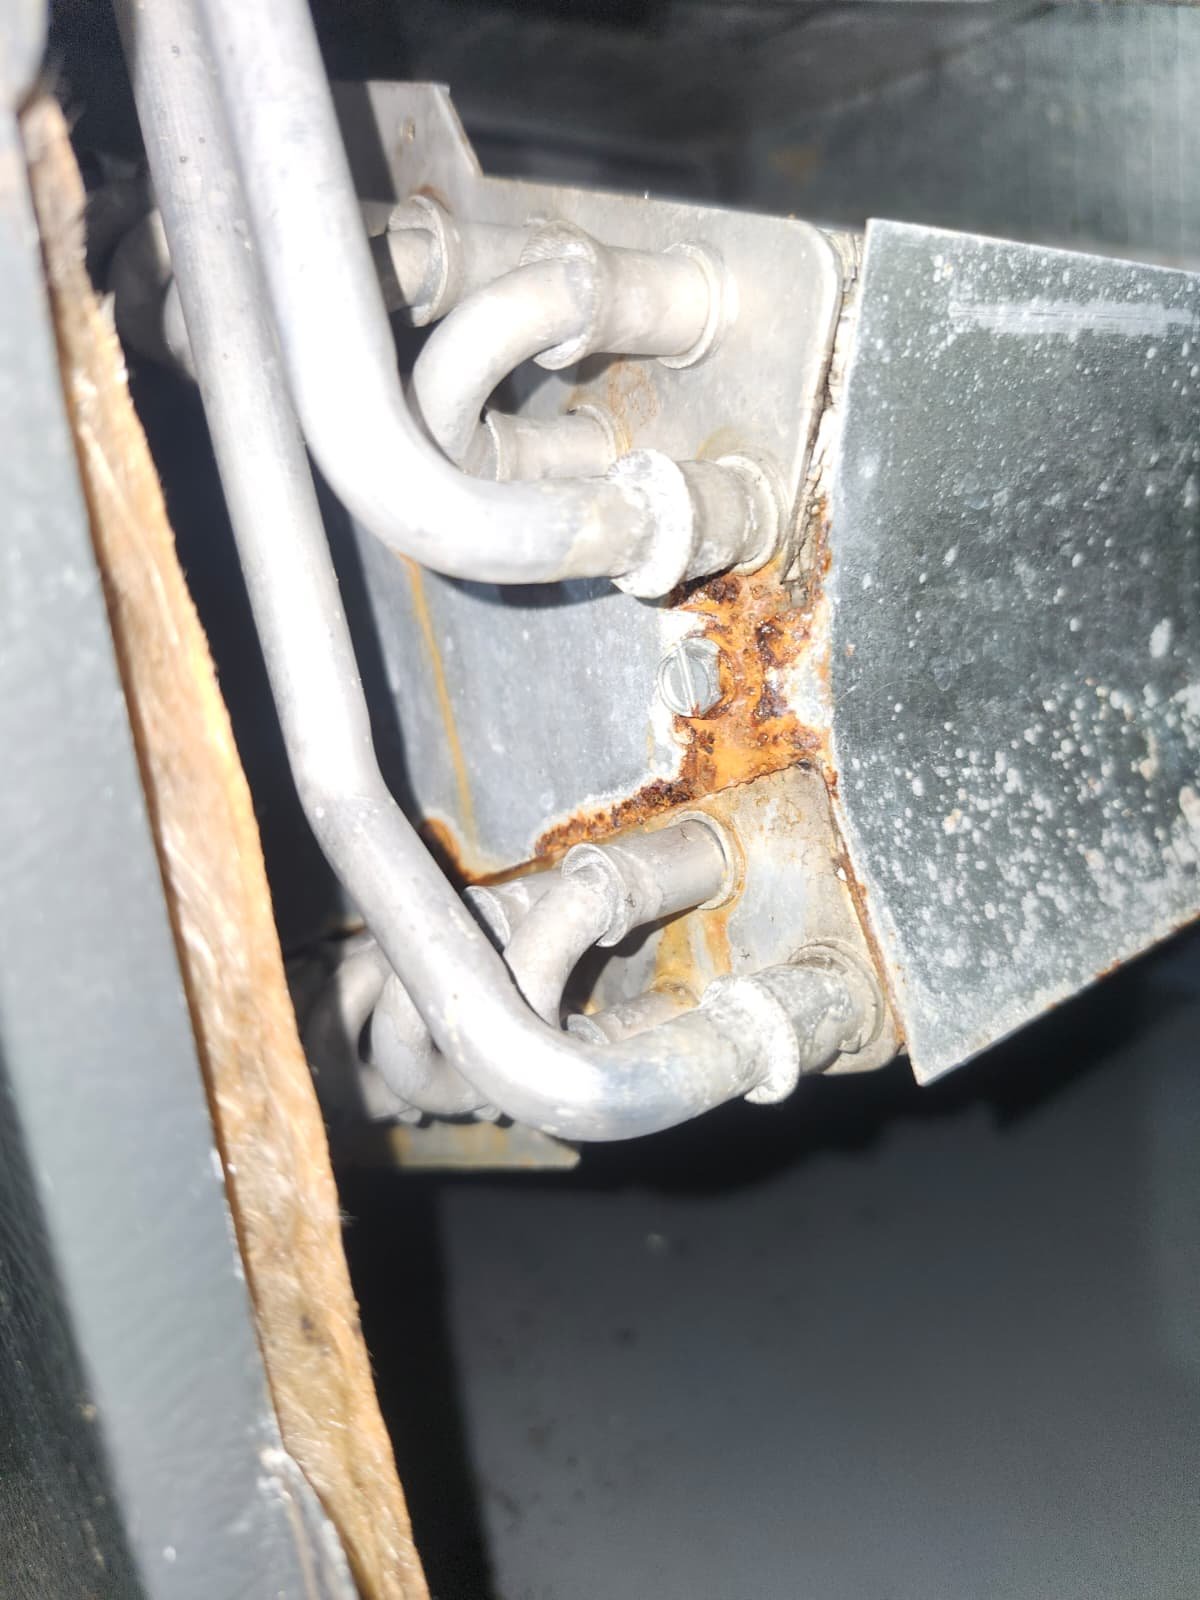
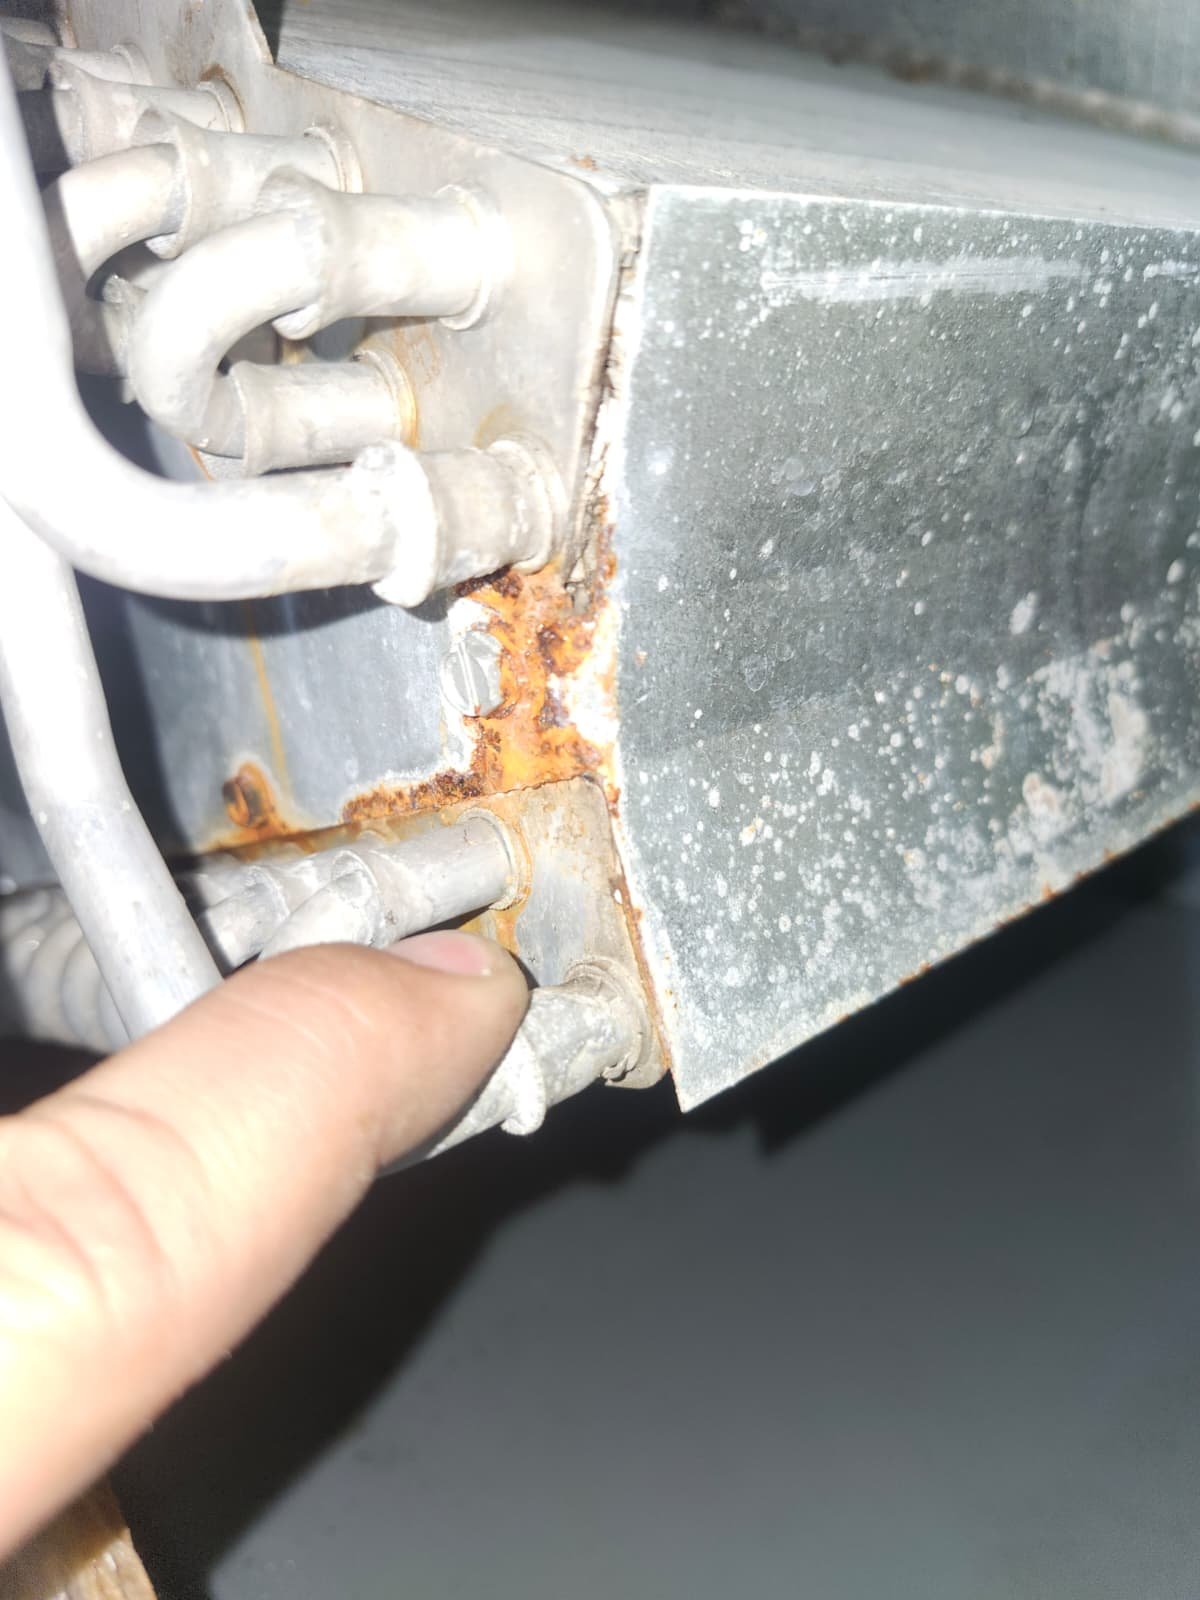
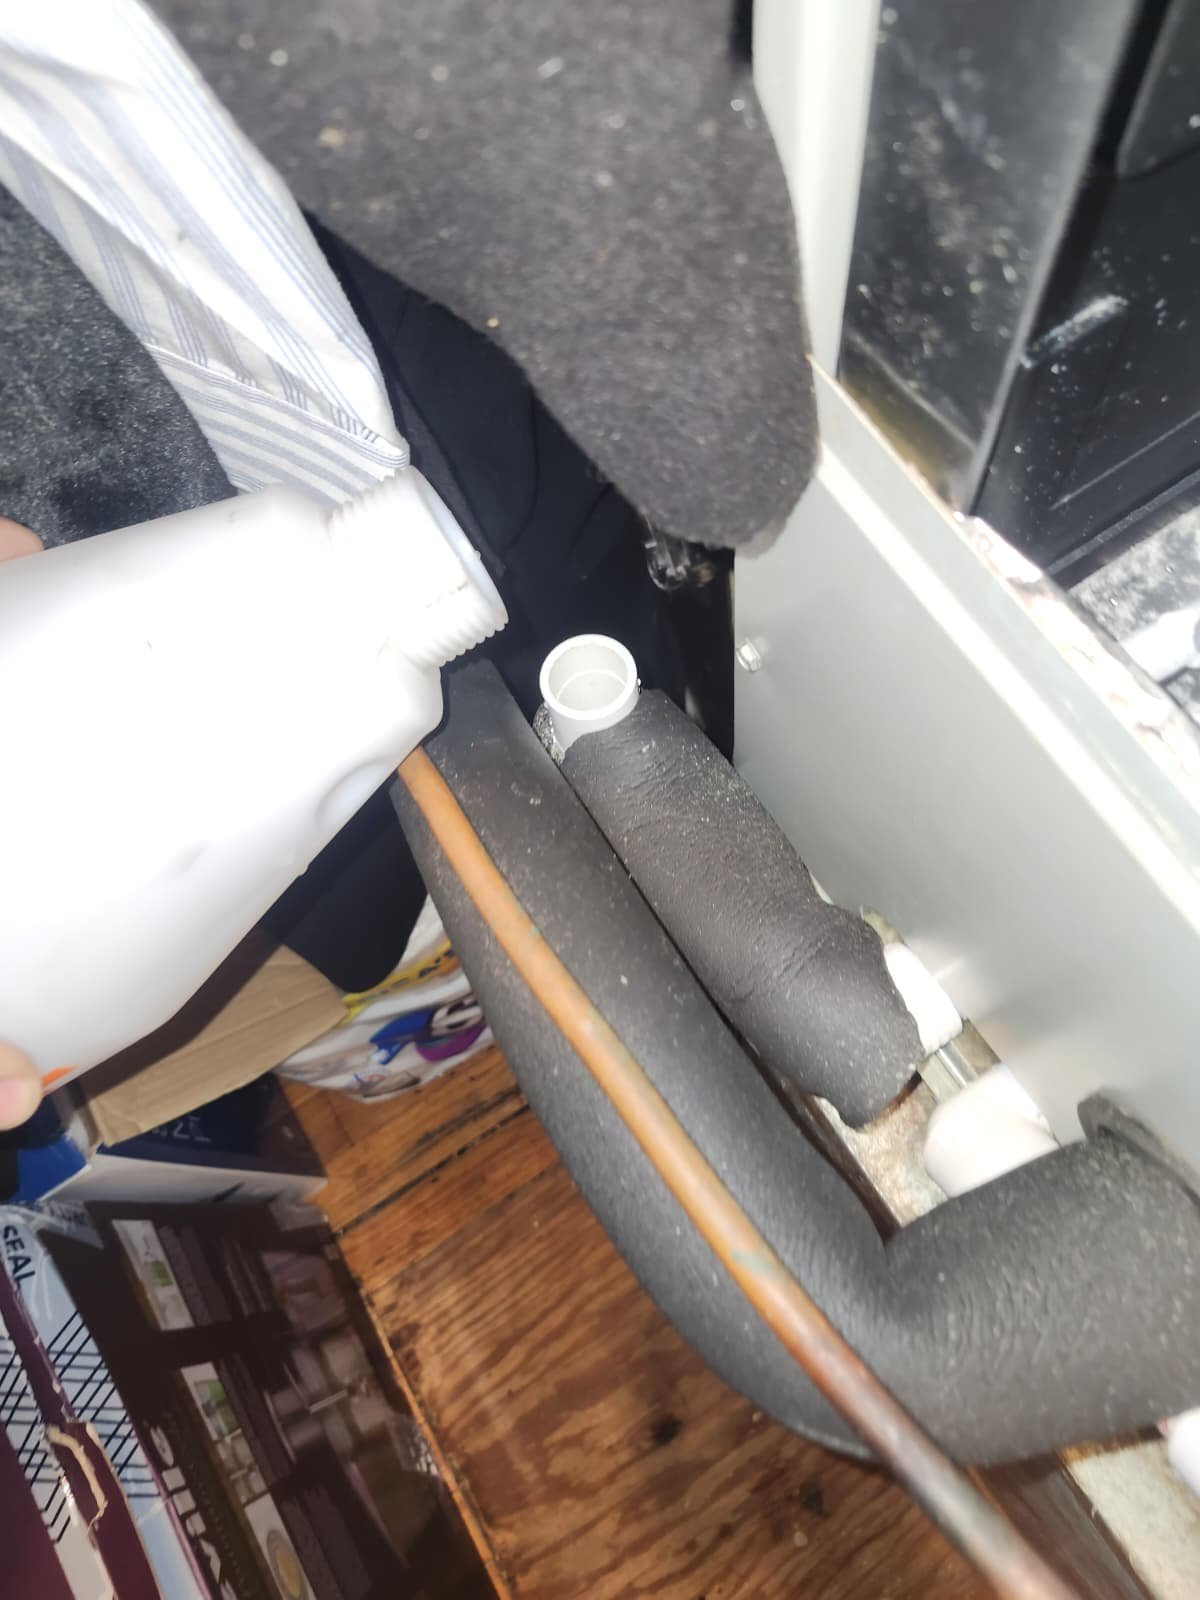
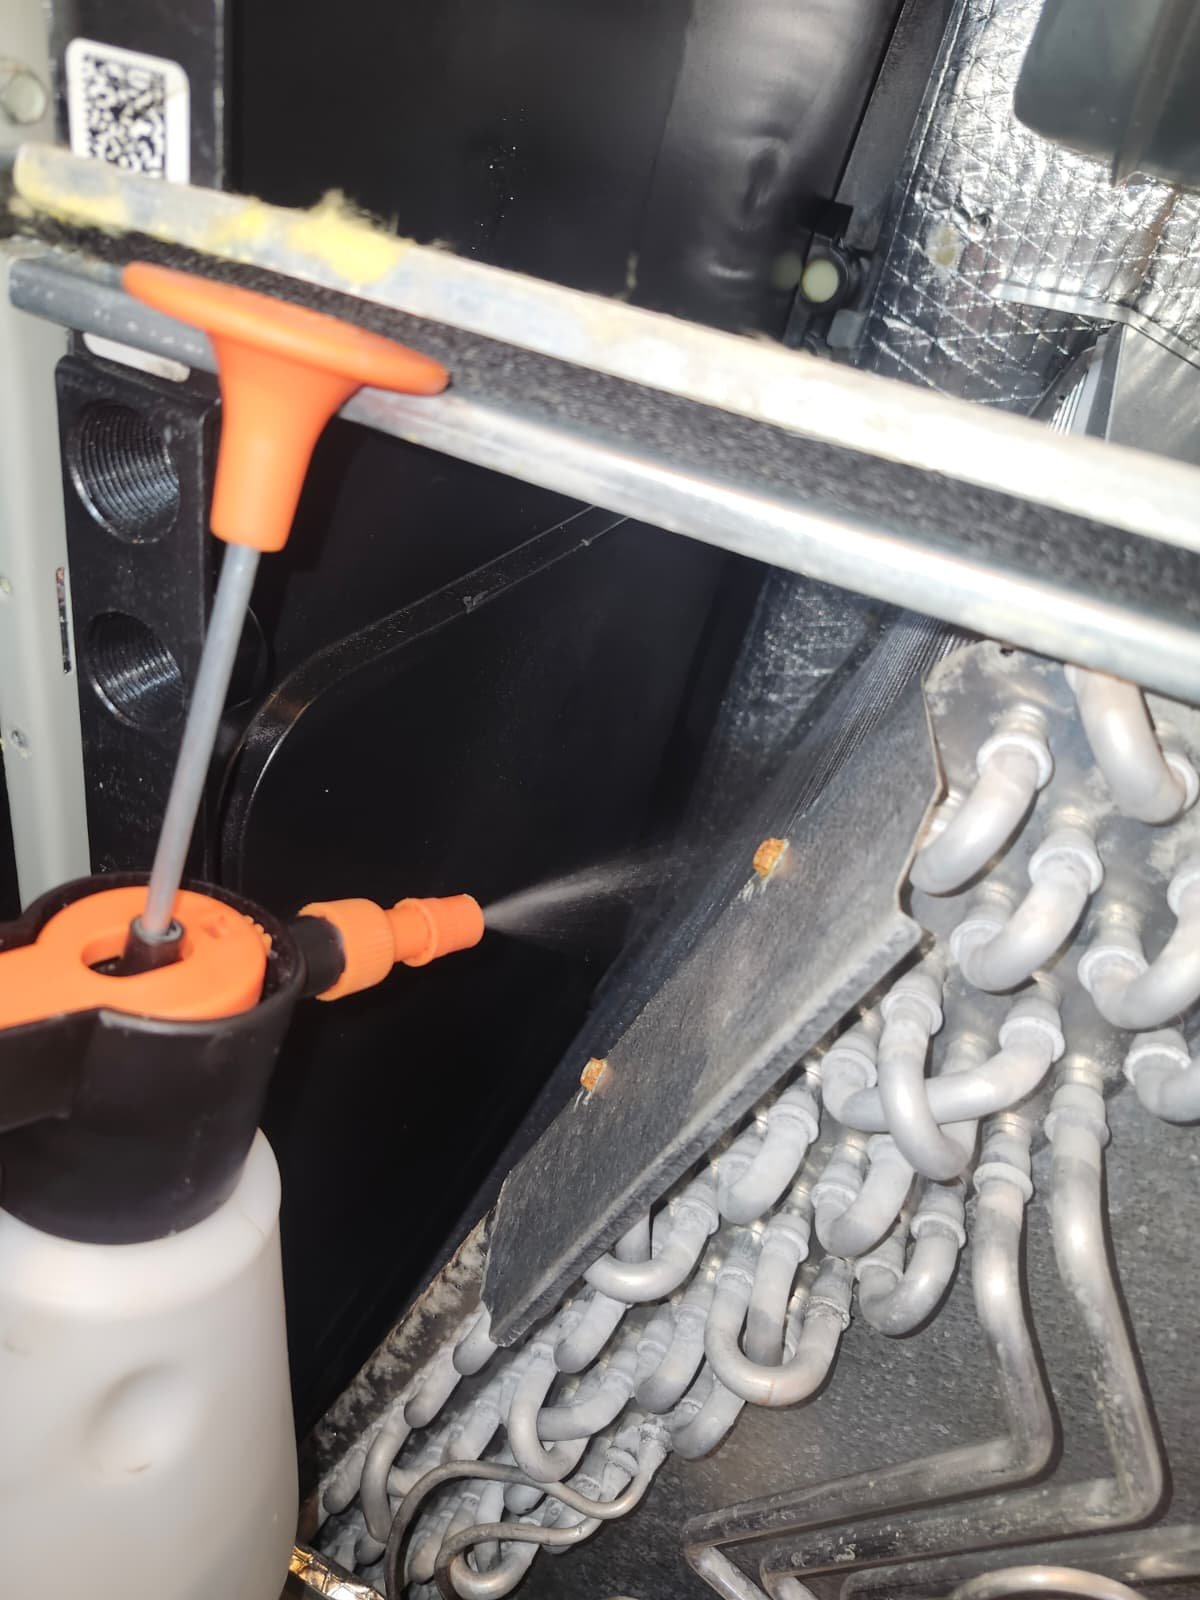
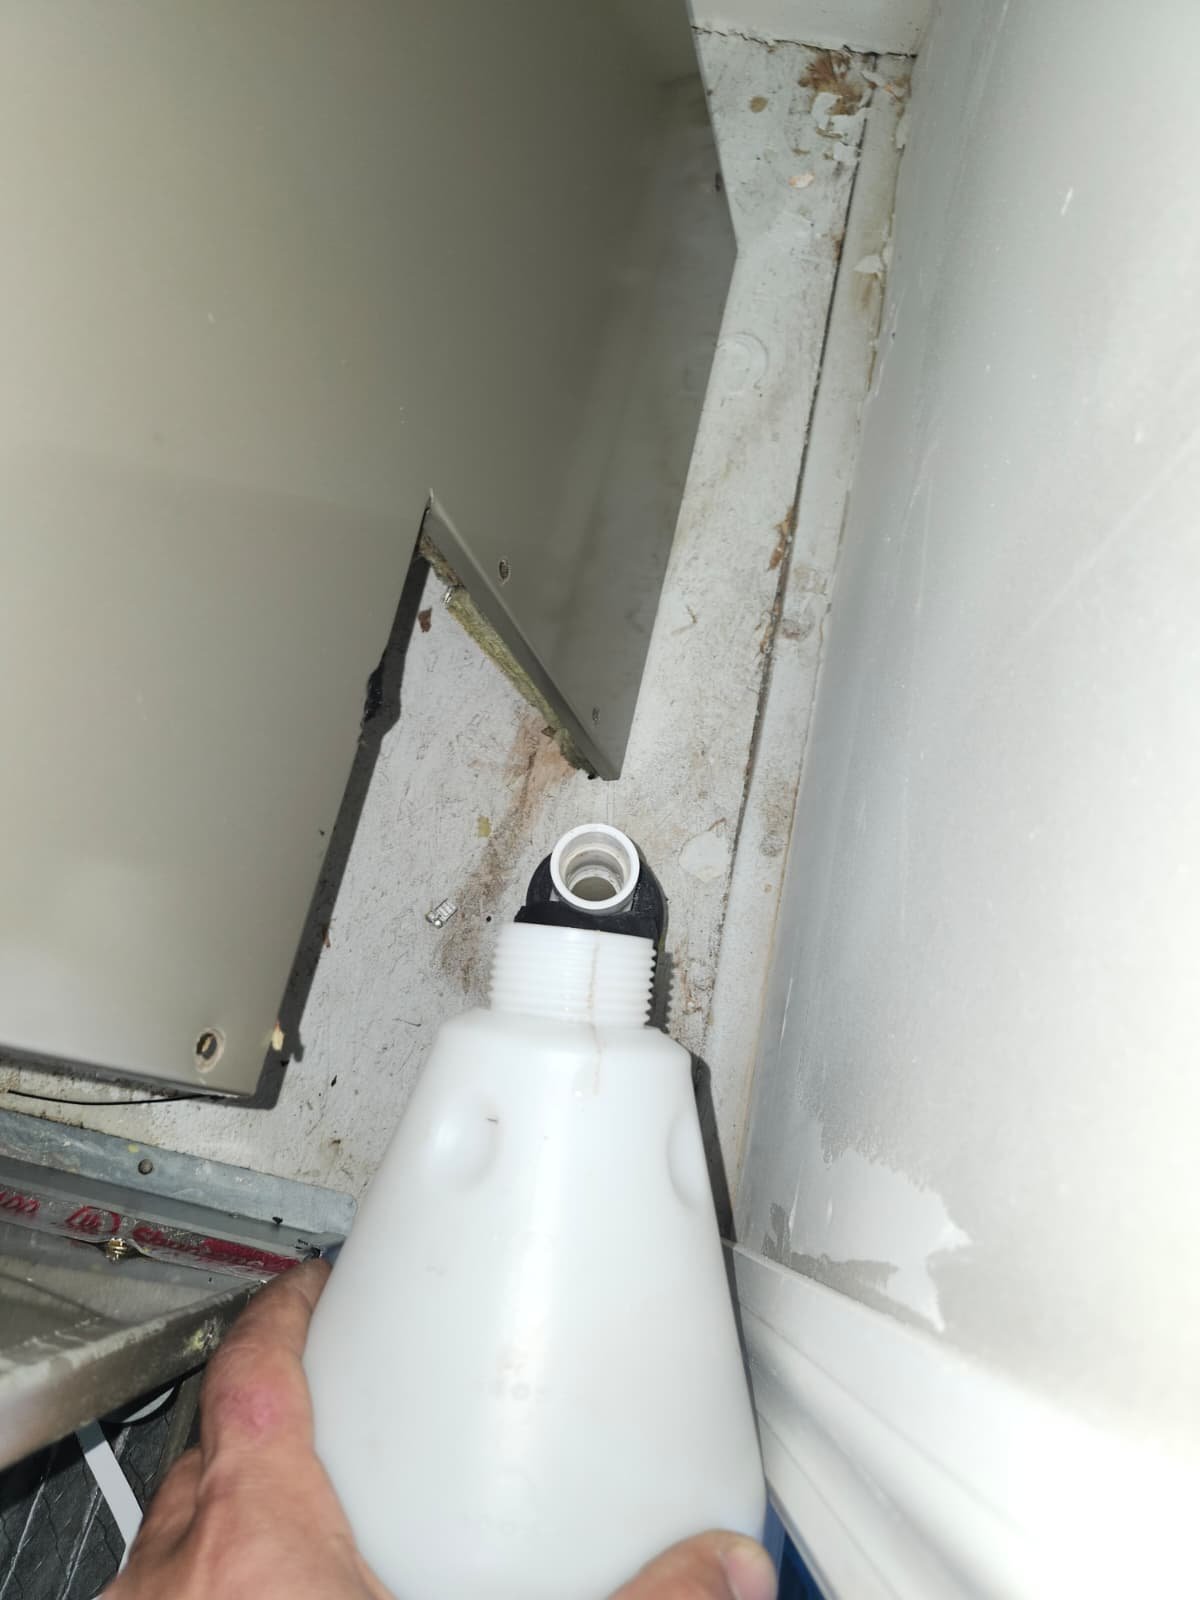
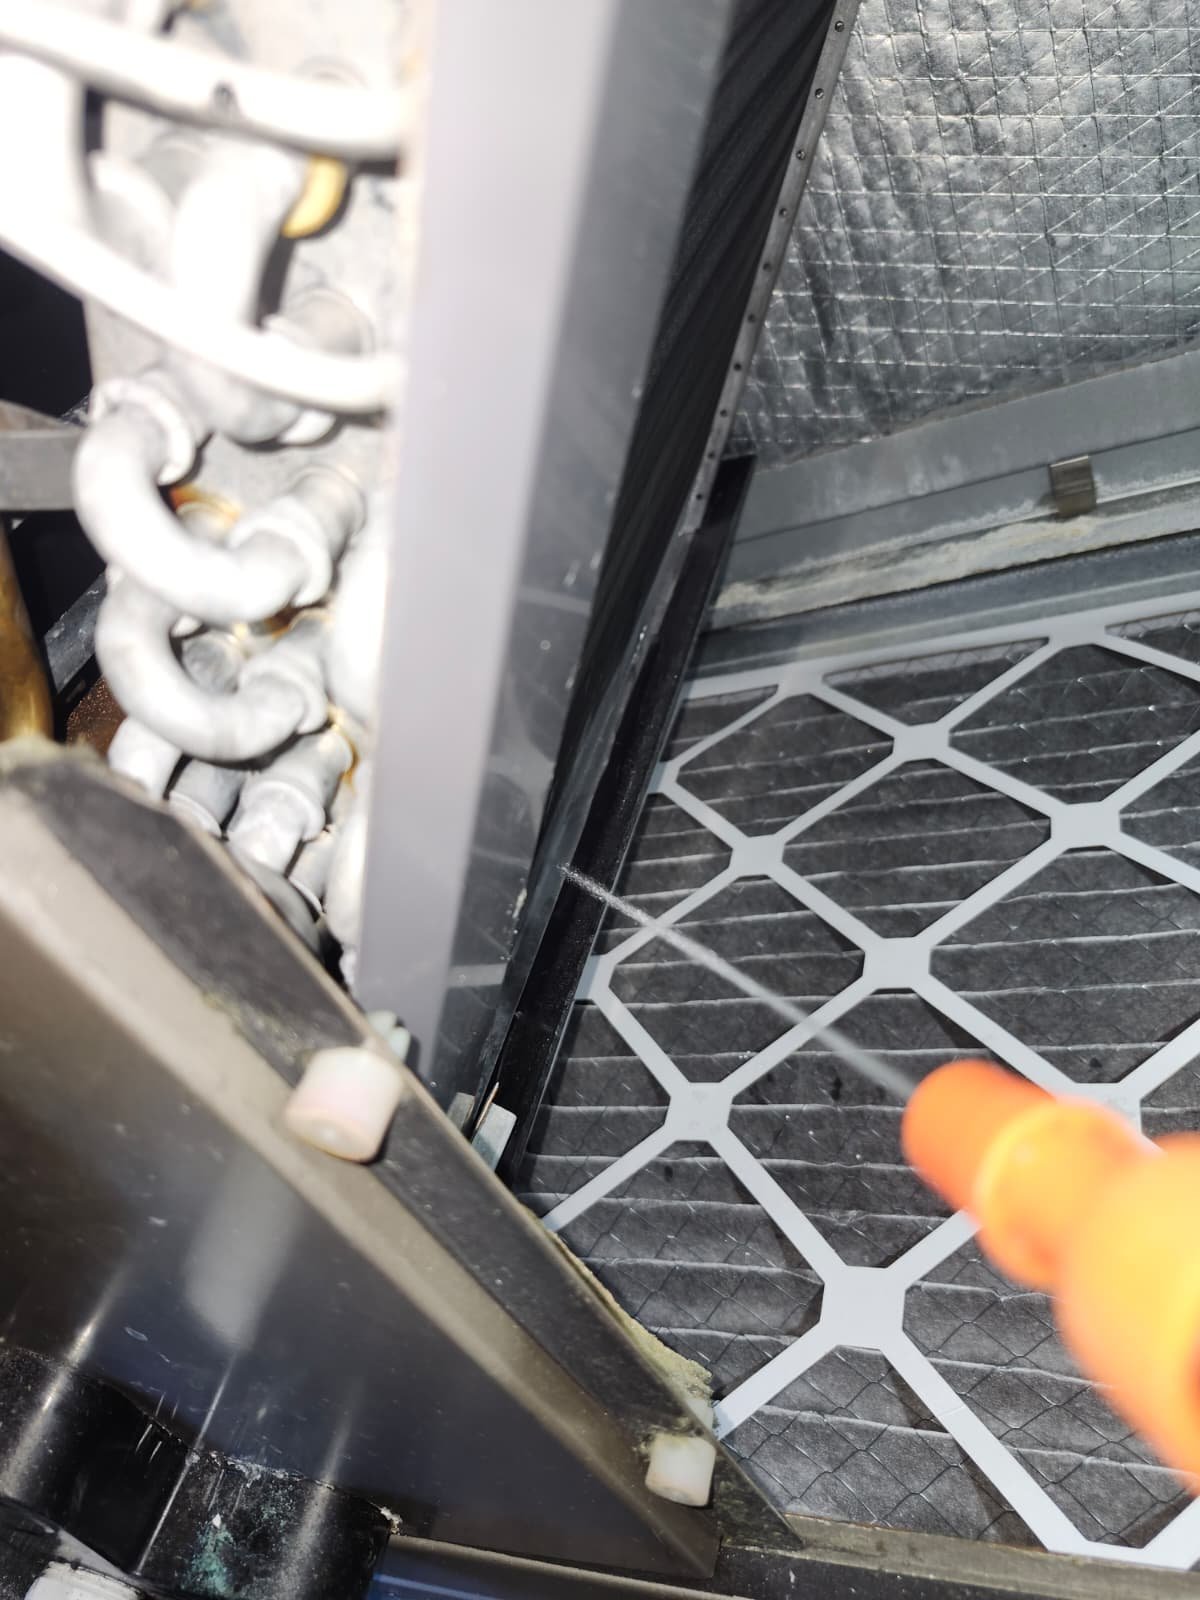
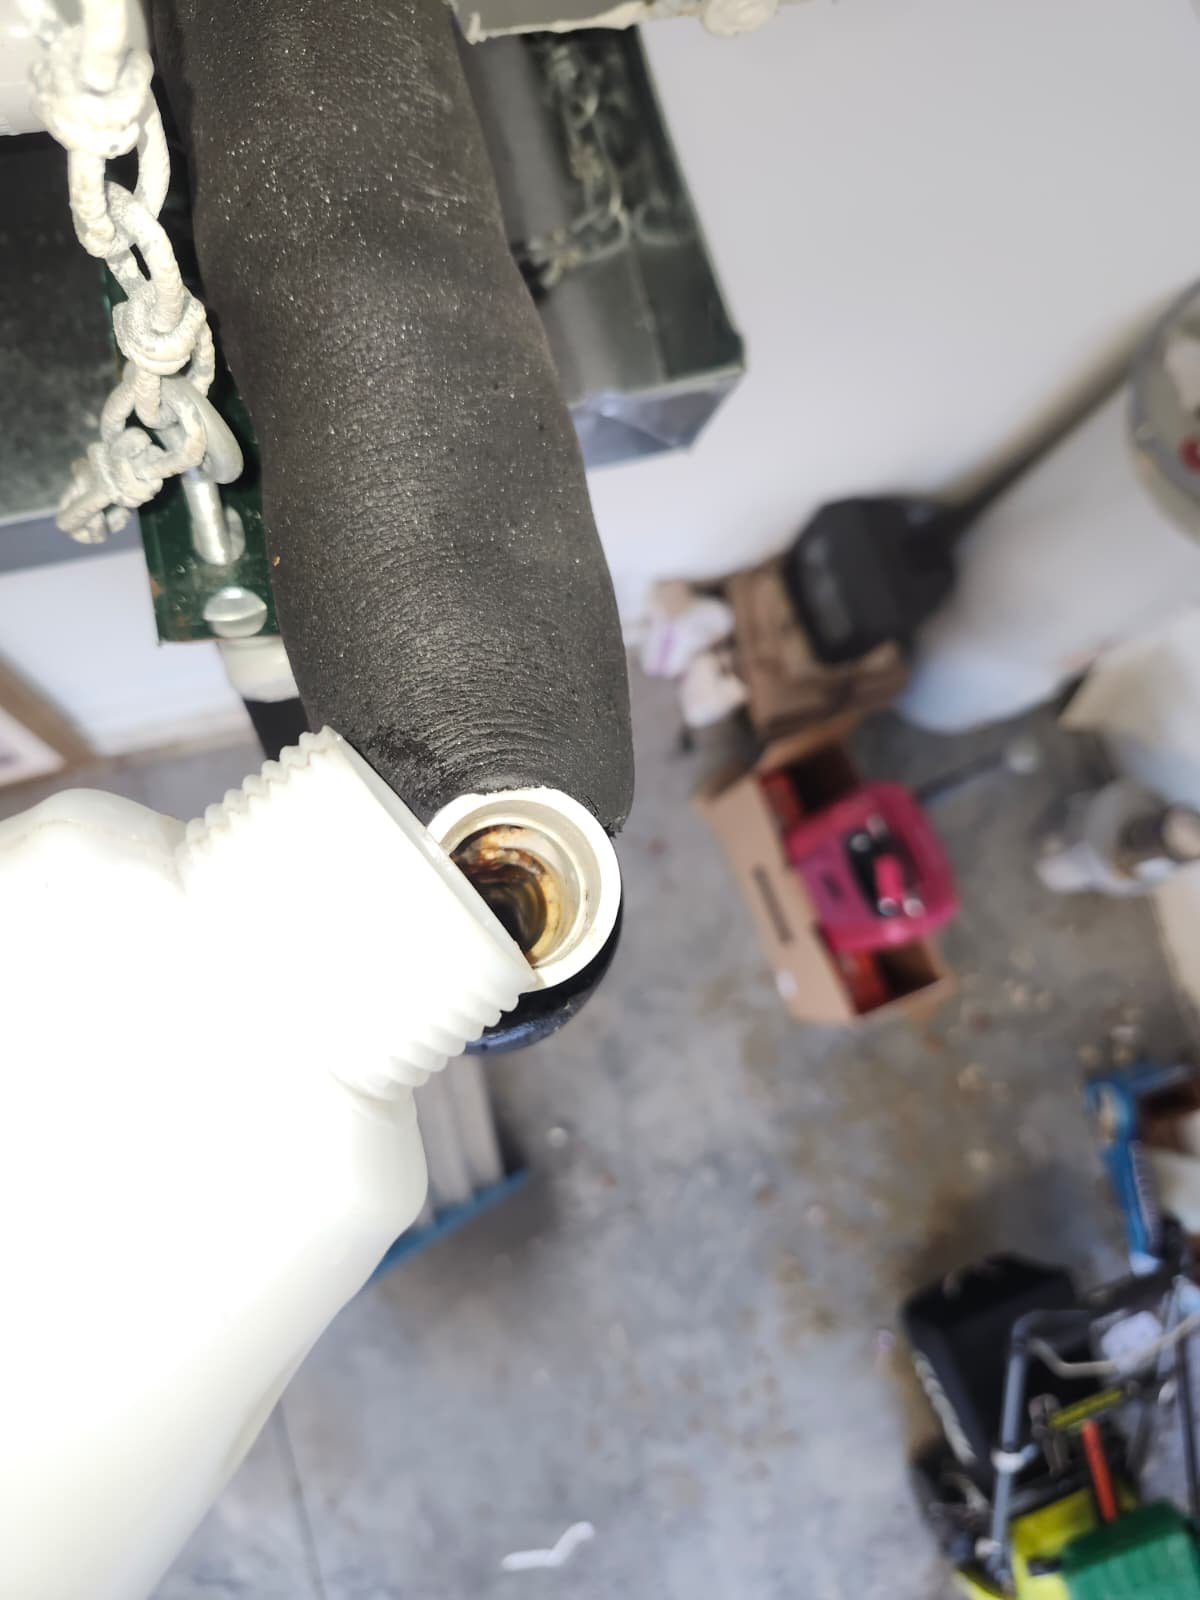
  • Inspecting the indoor coil and drain area for visible issues
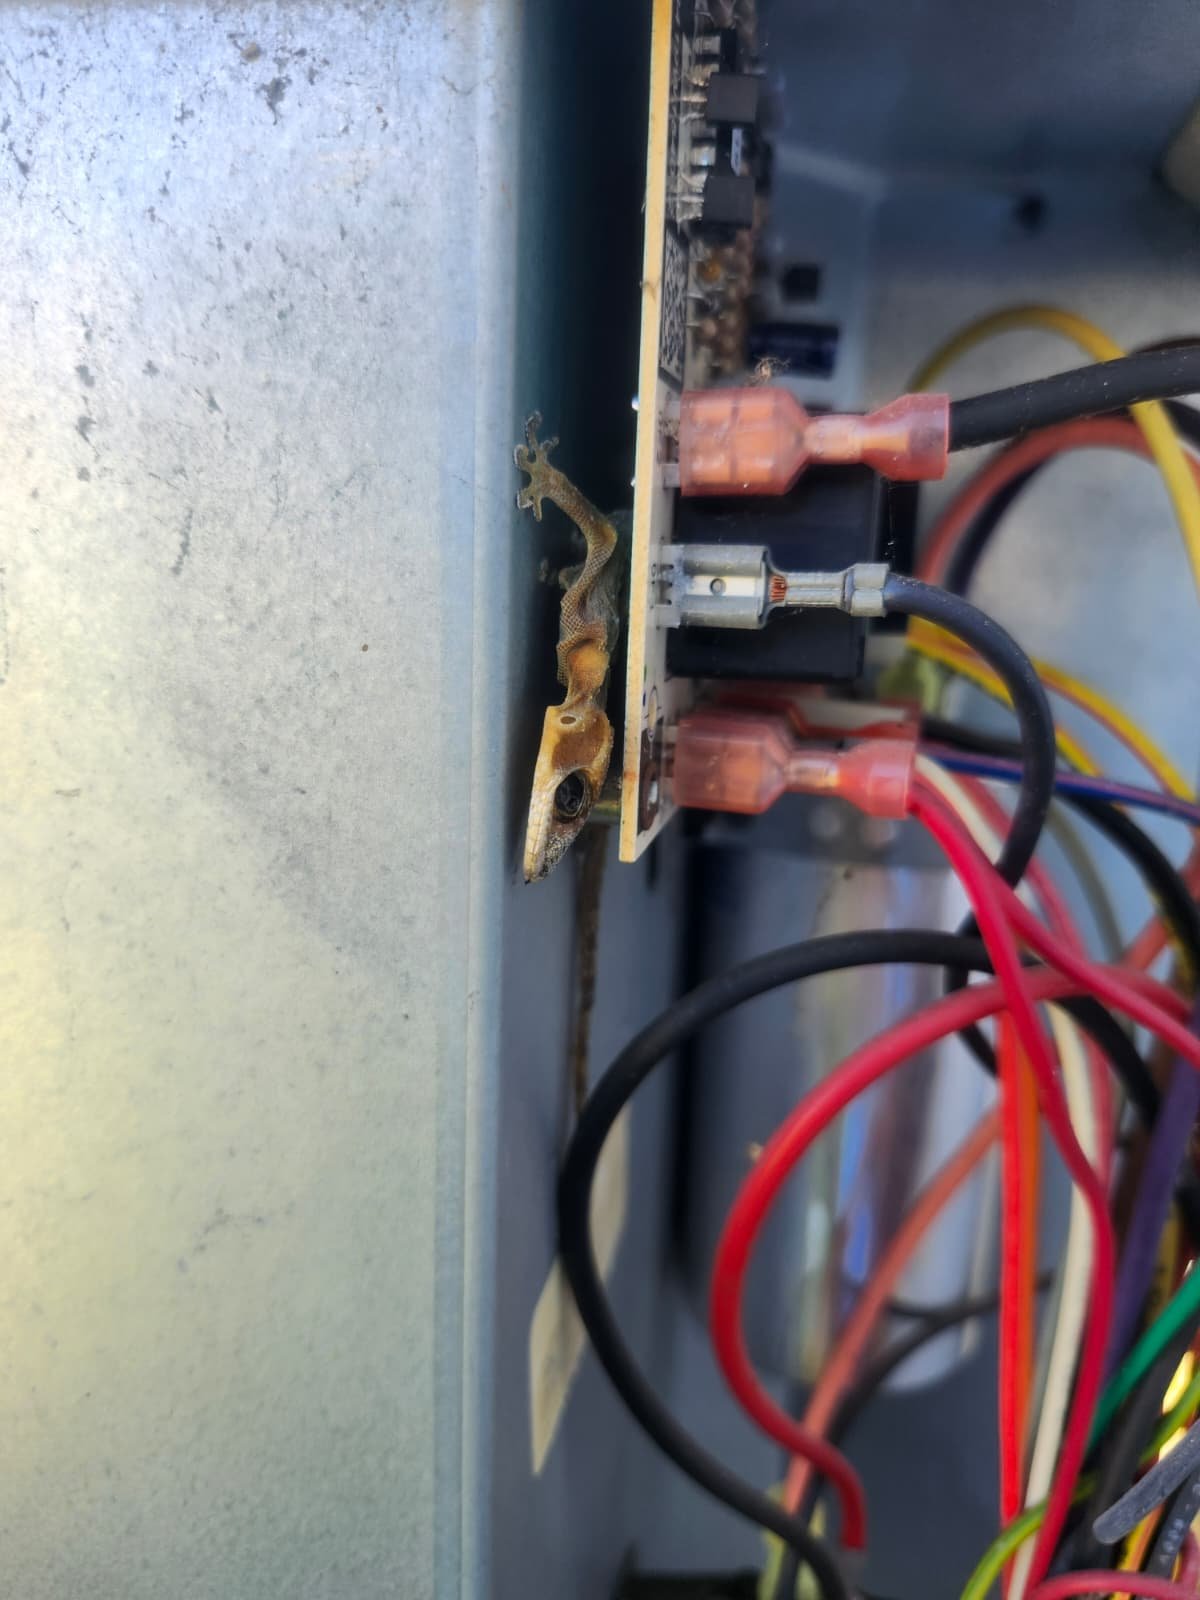
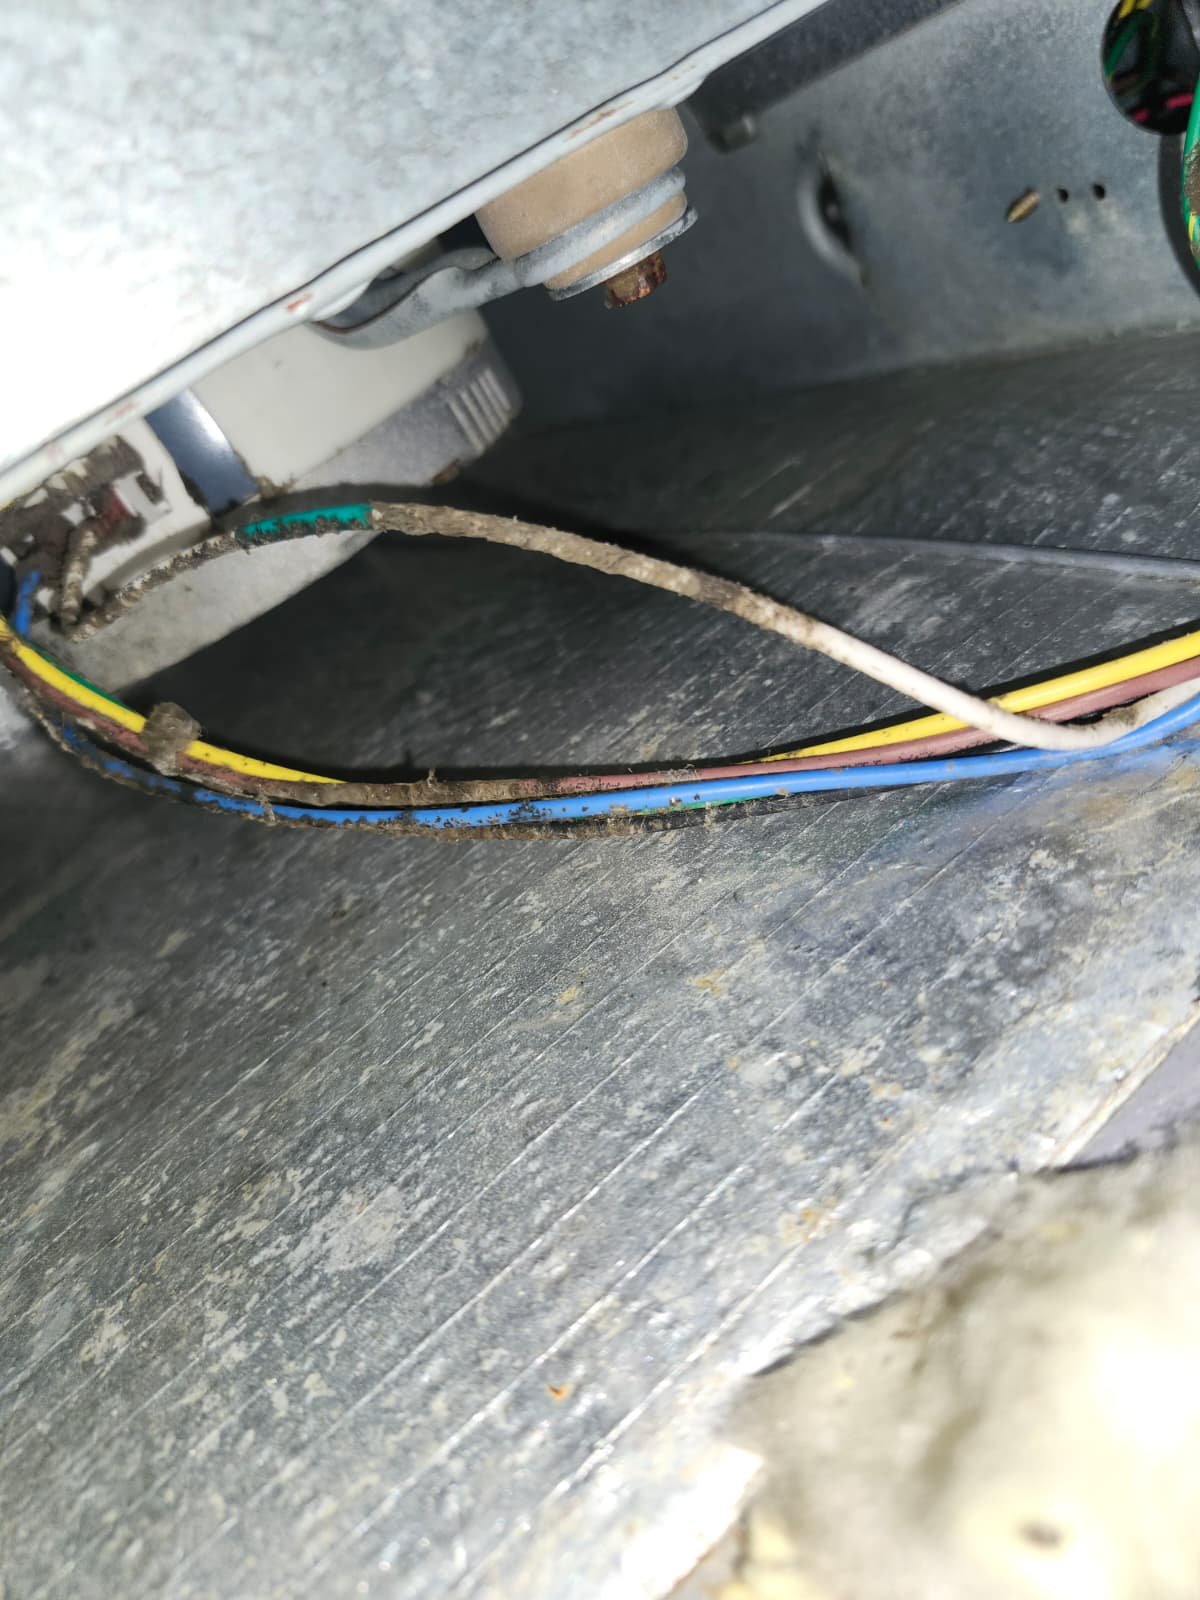
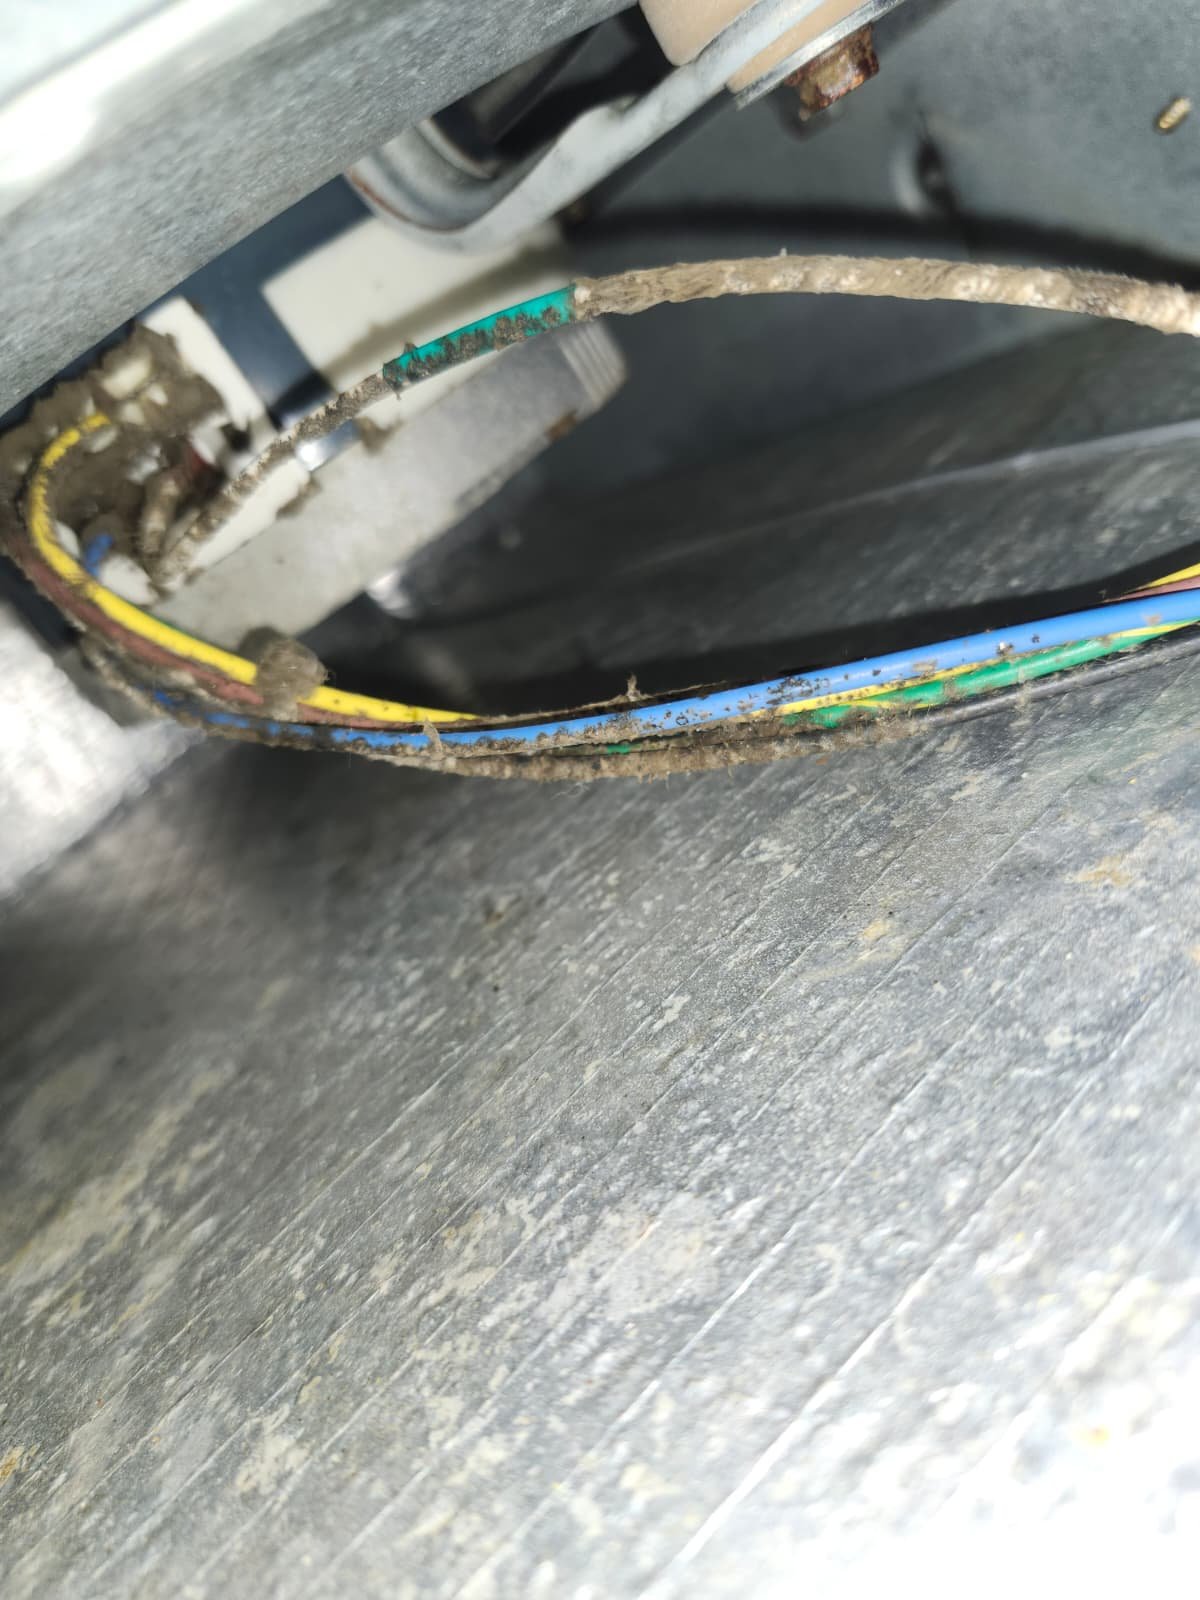
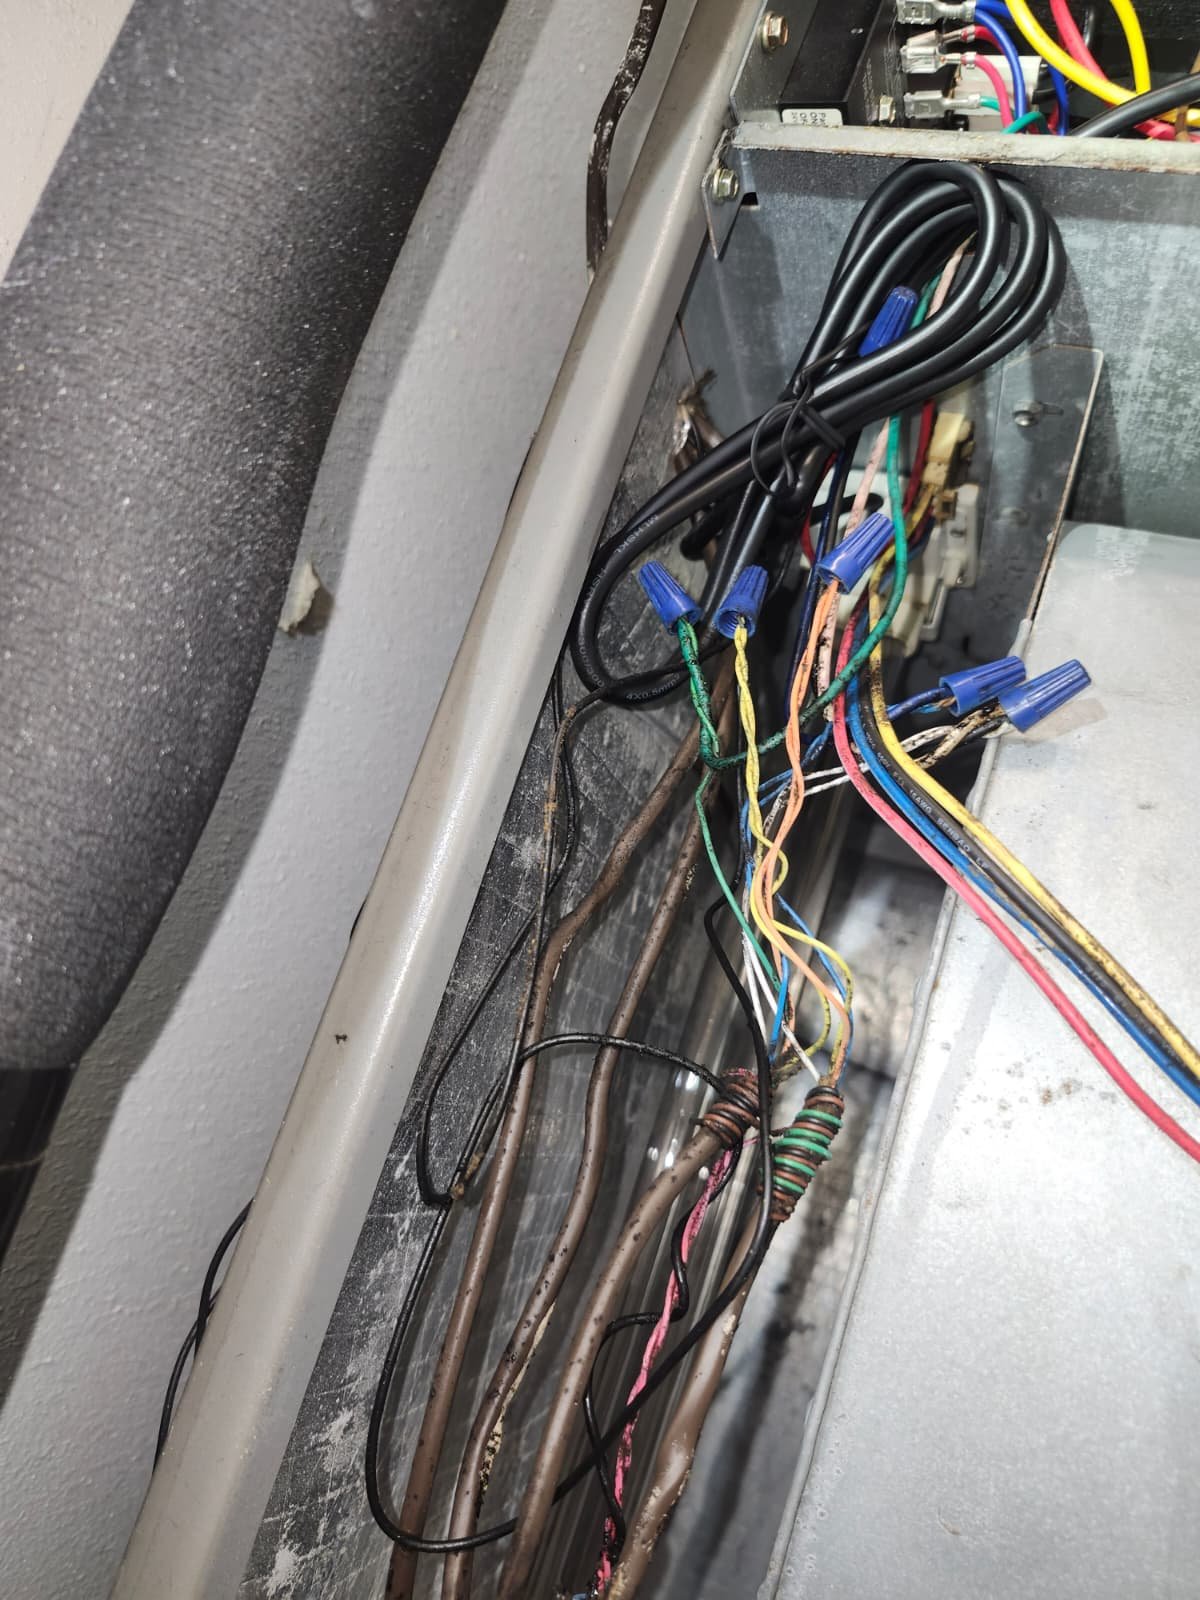
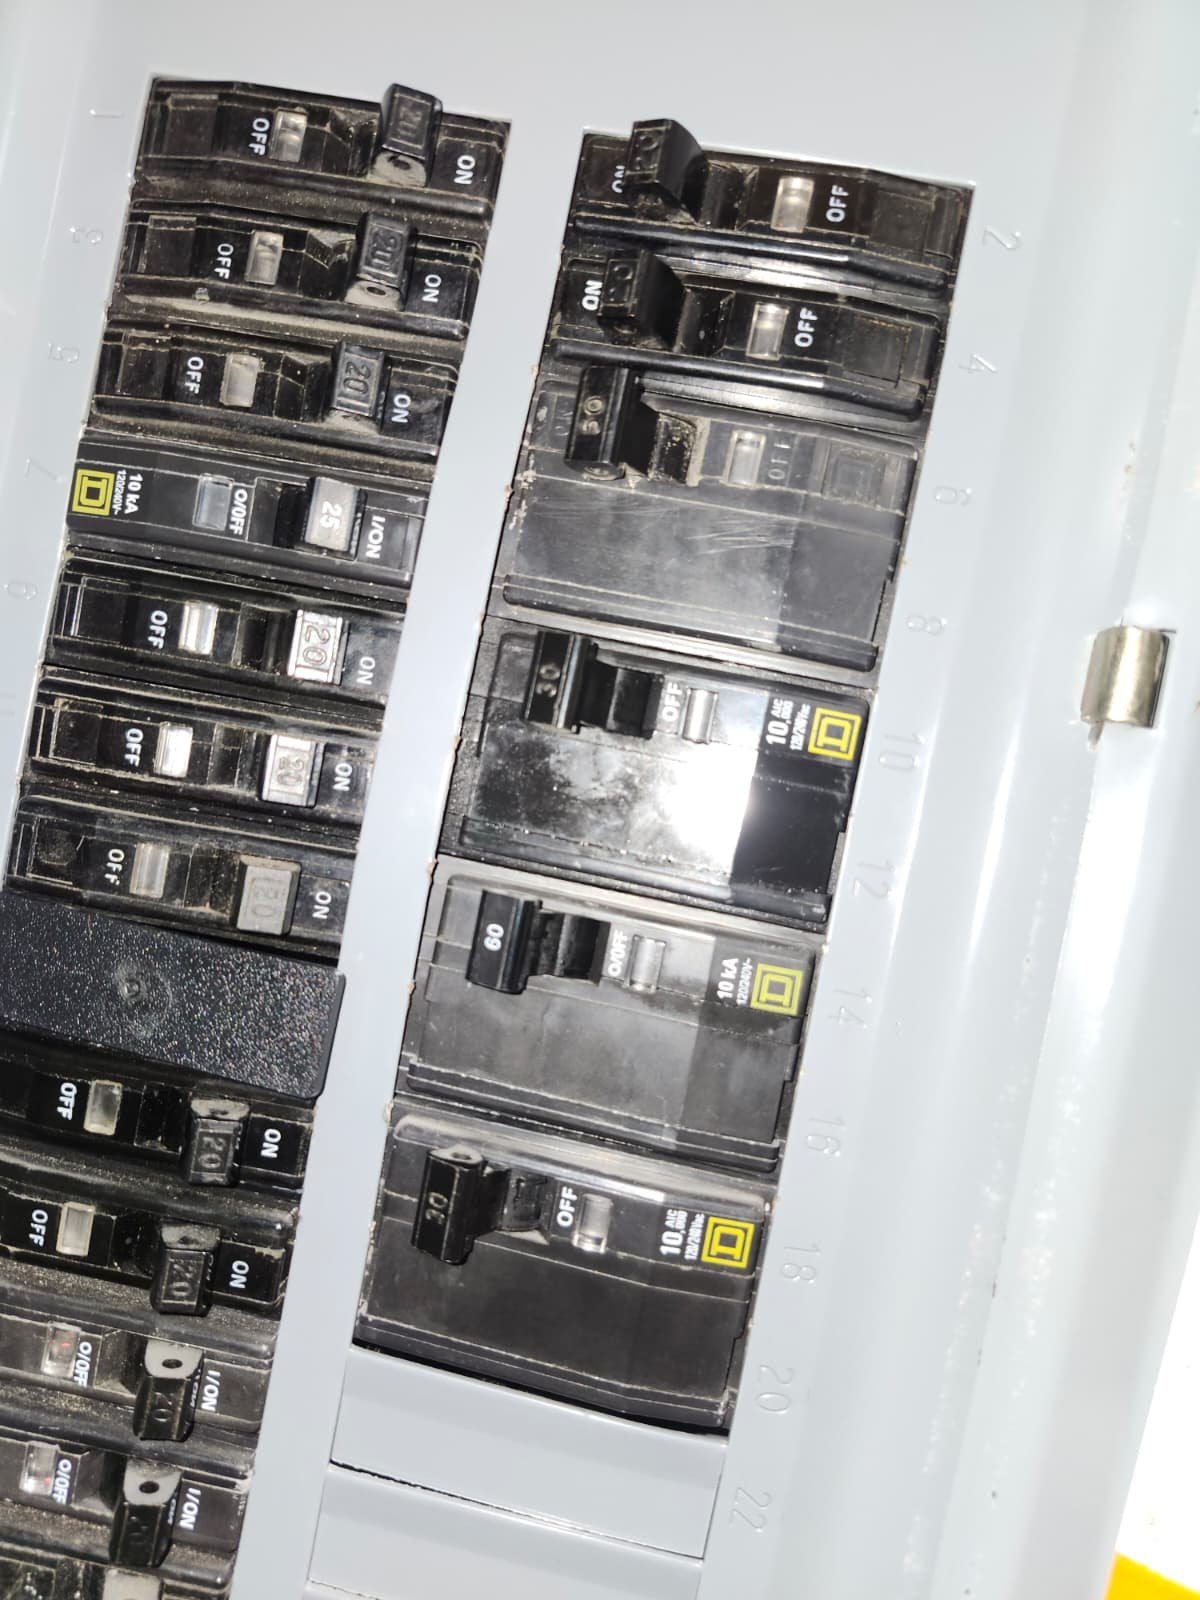
  • Checking accessible electrical connections for signs of overheating or looseness
  • Confirming that airflow and basic system operation were in a normal range
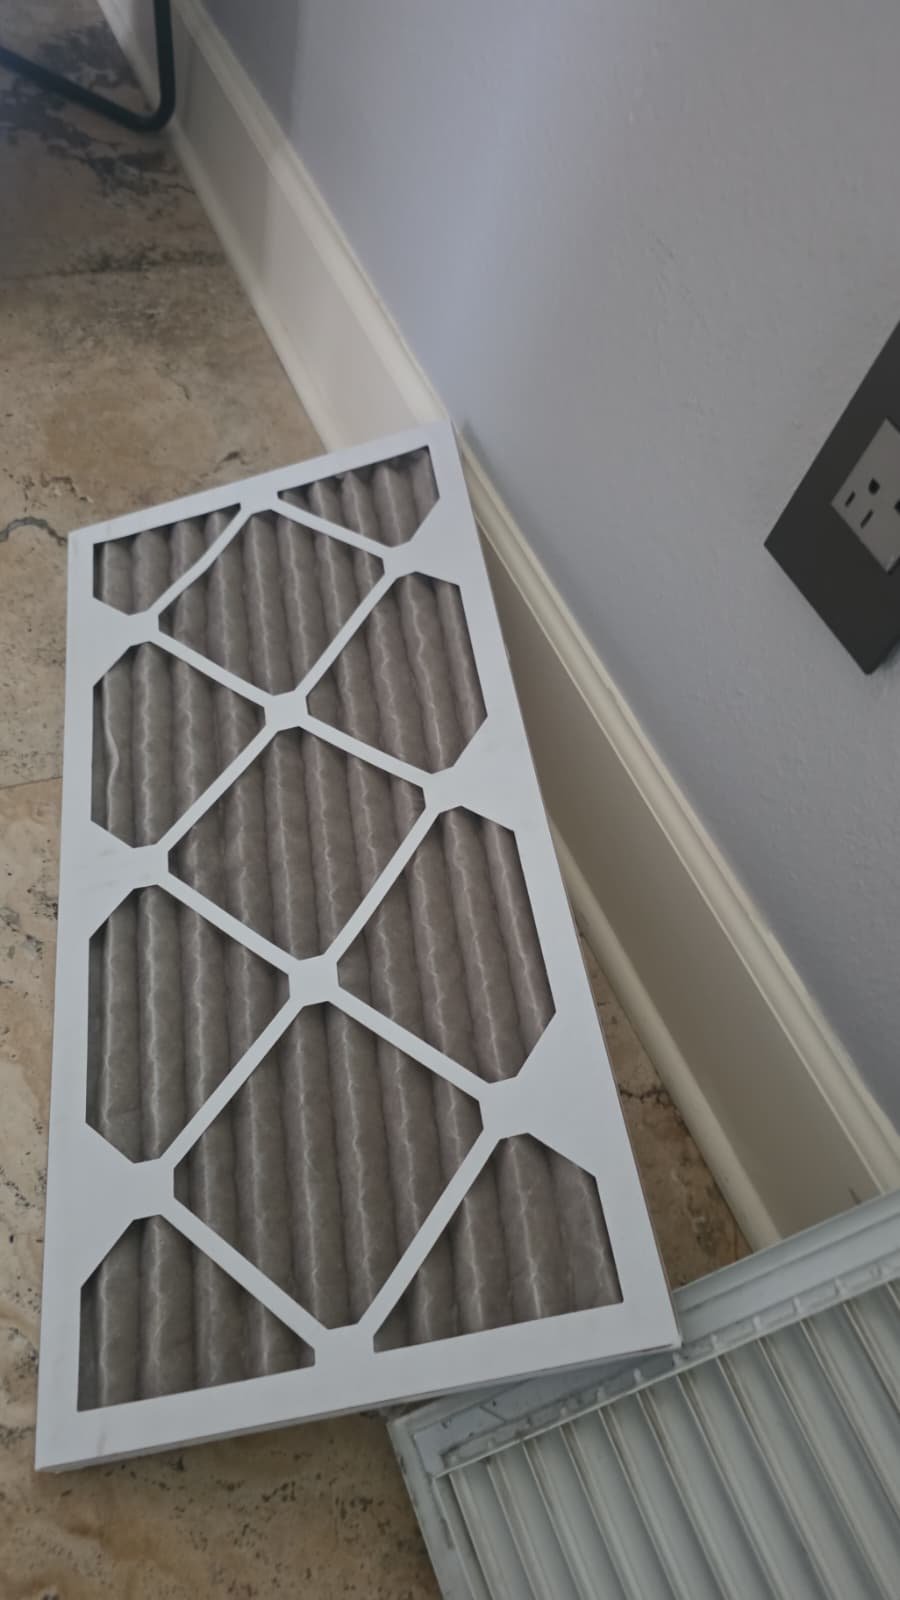
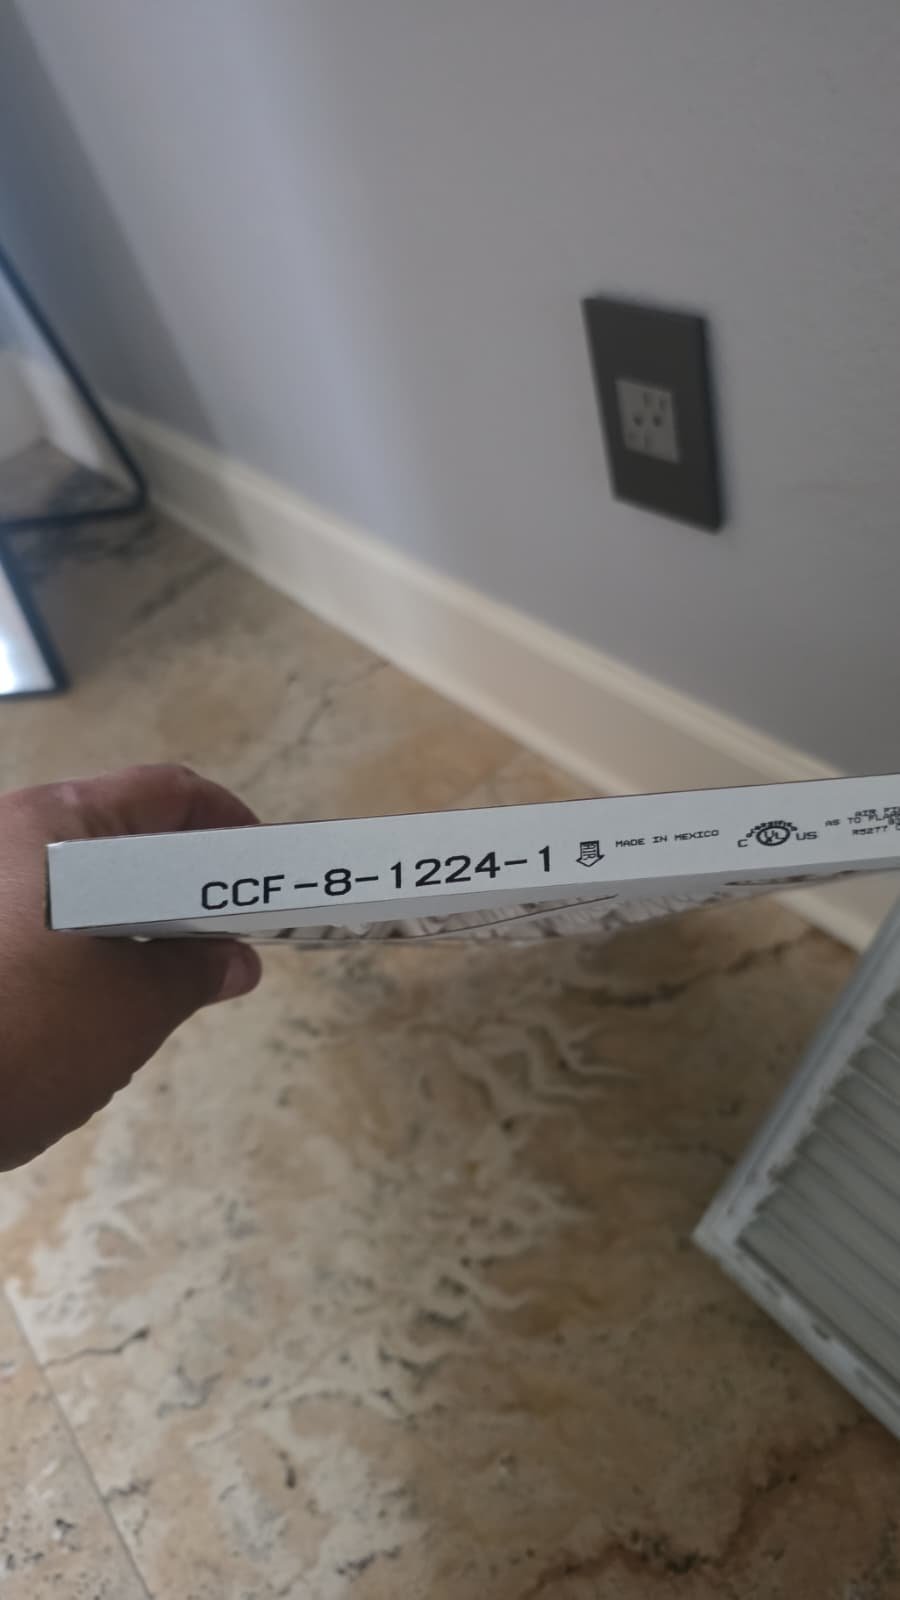
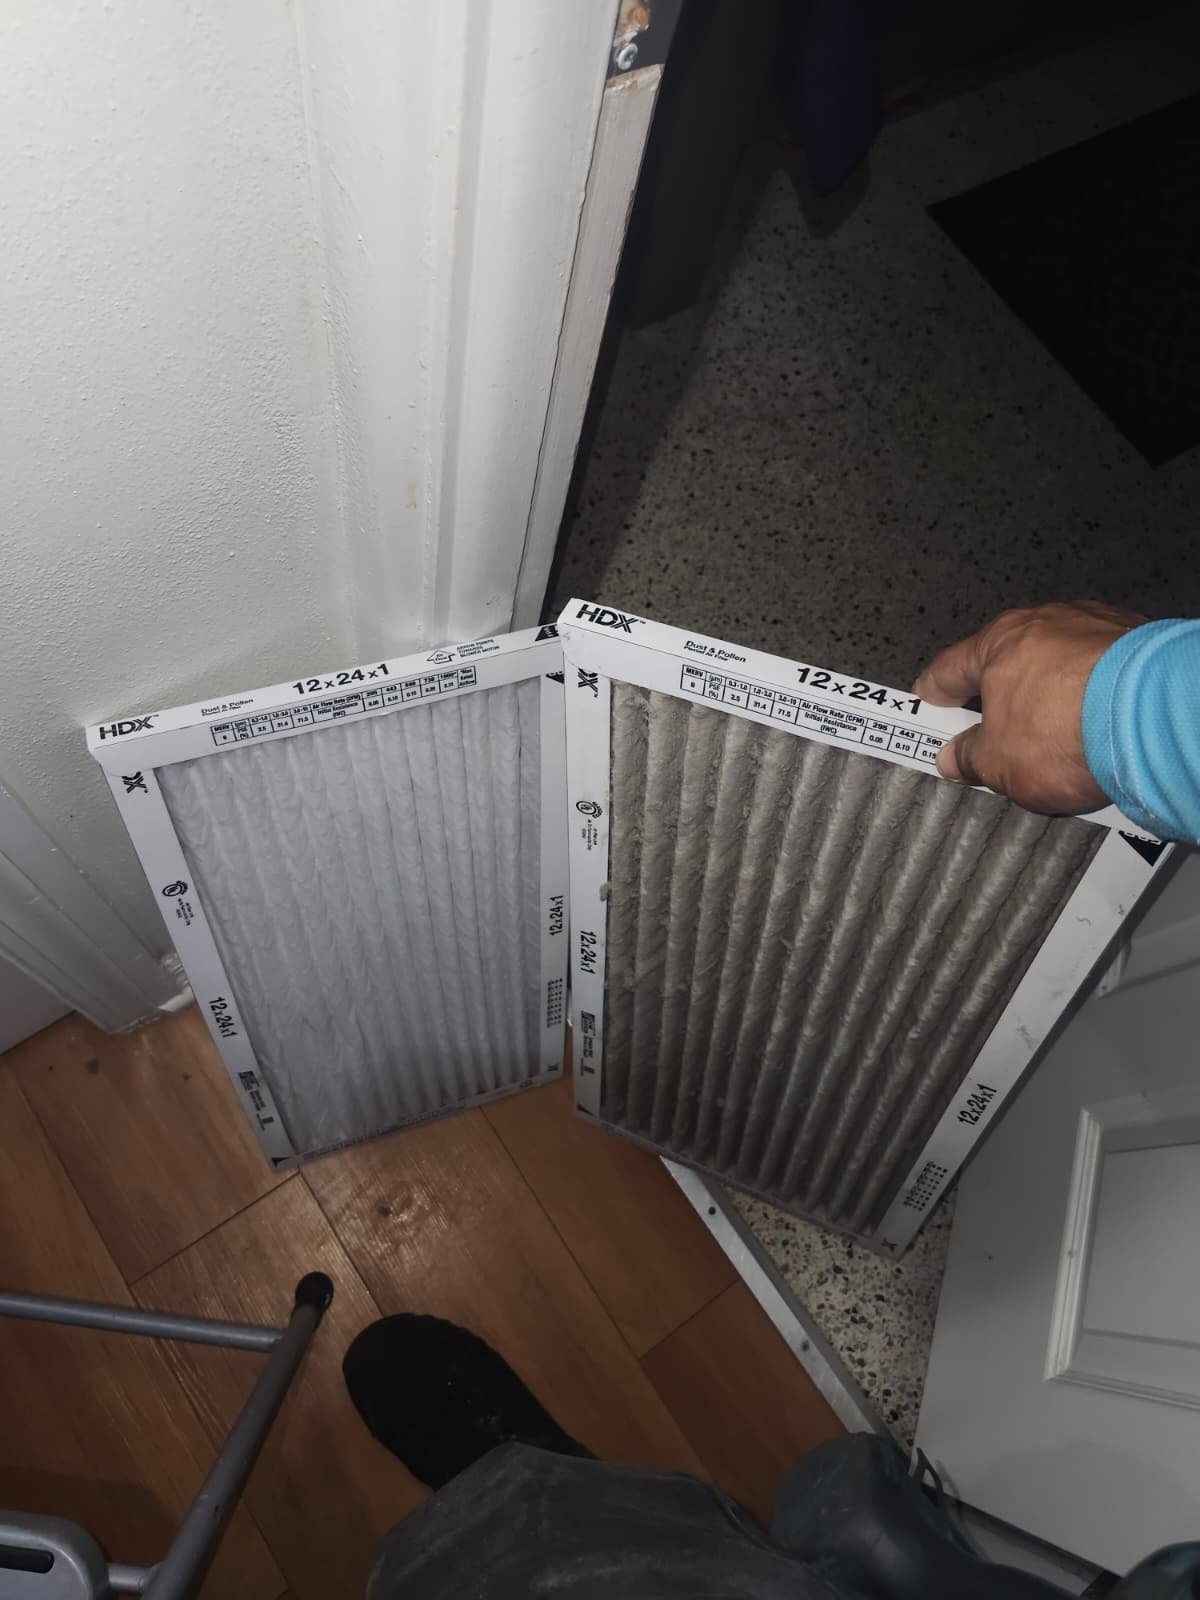
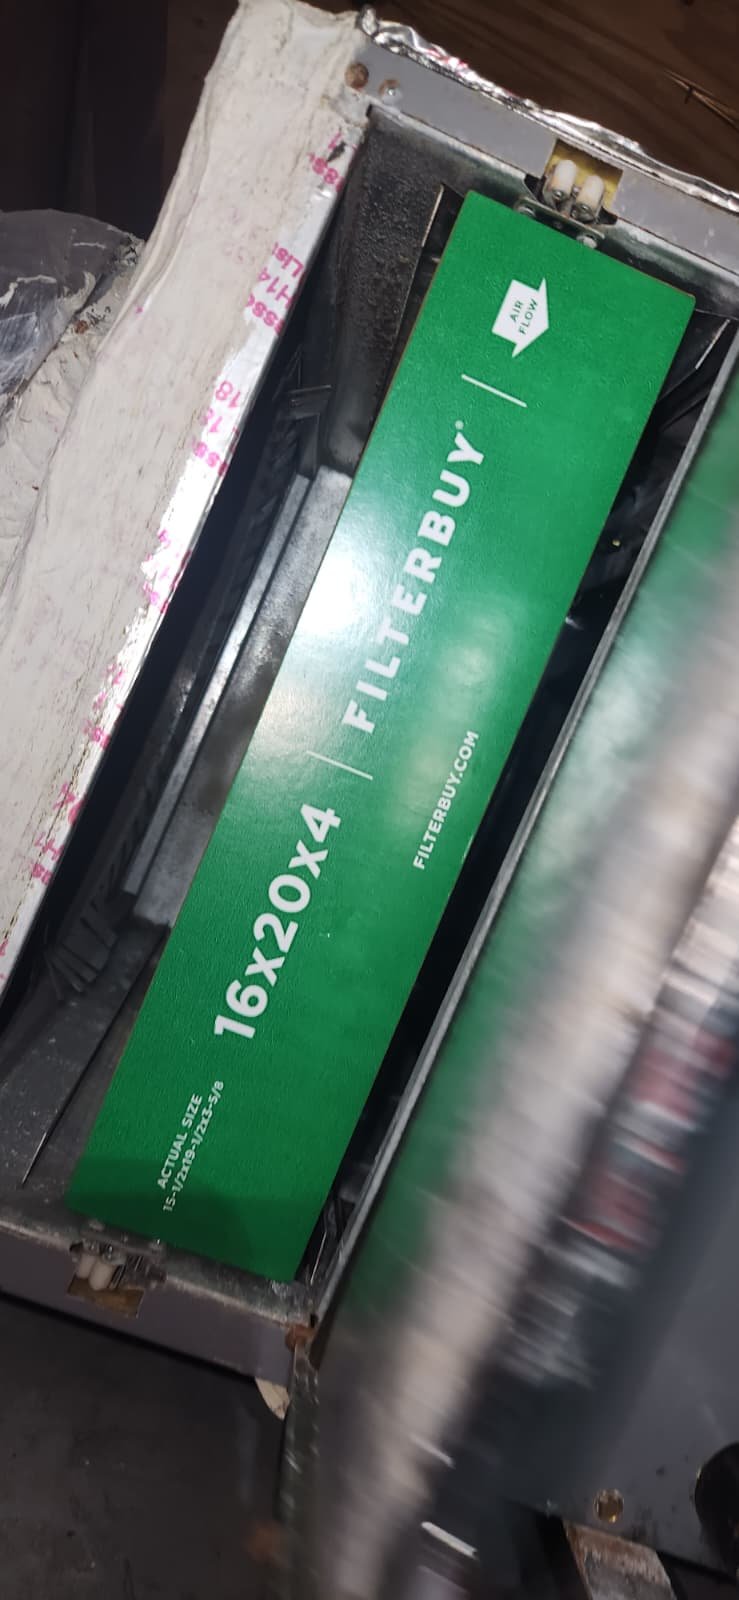
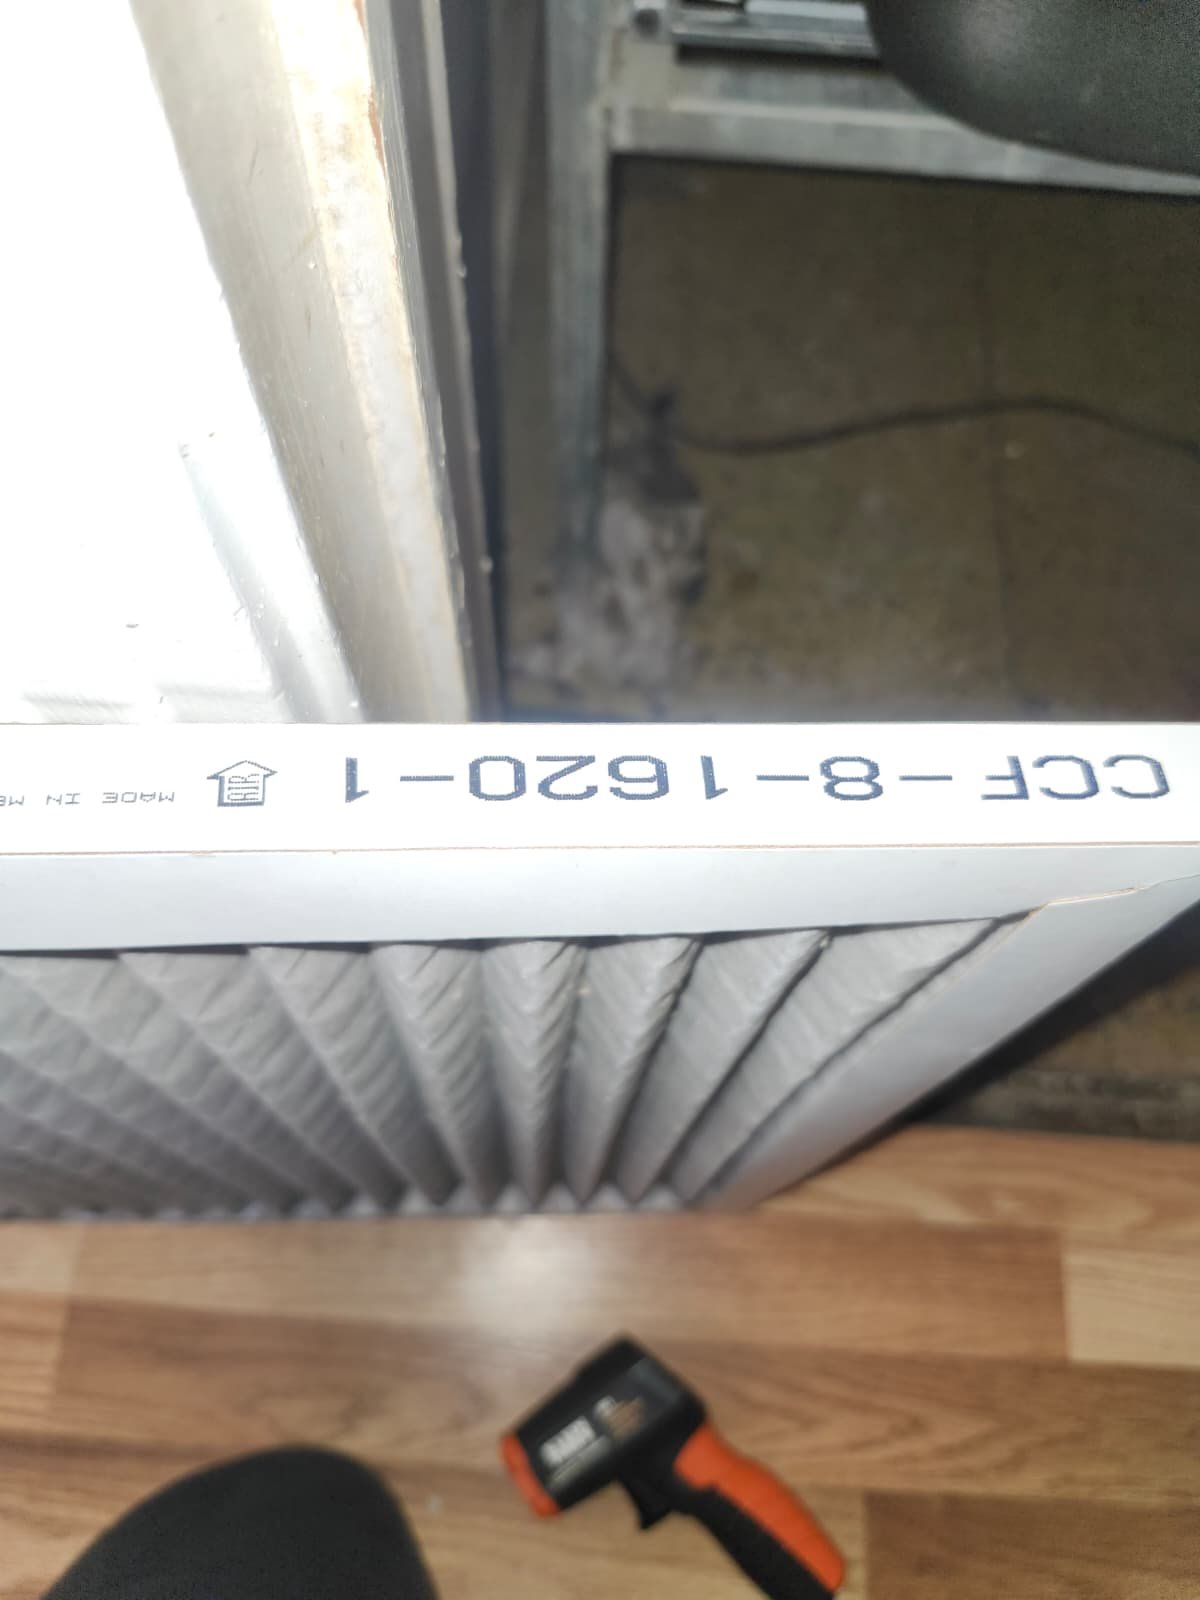
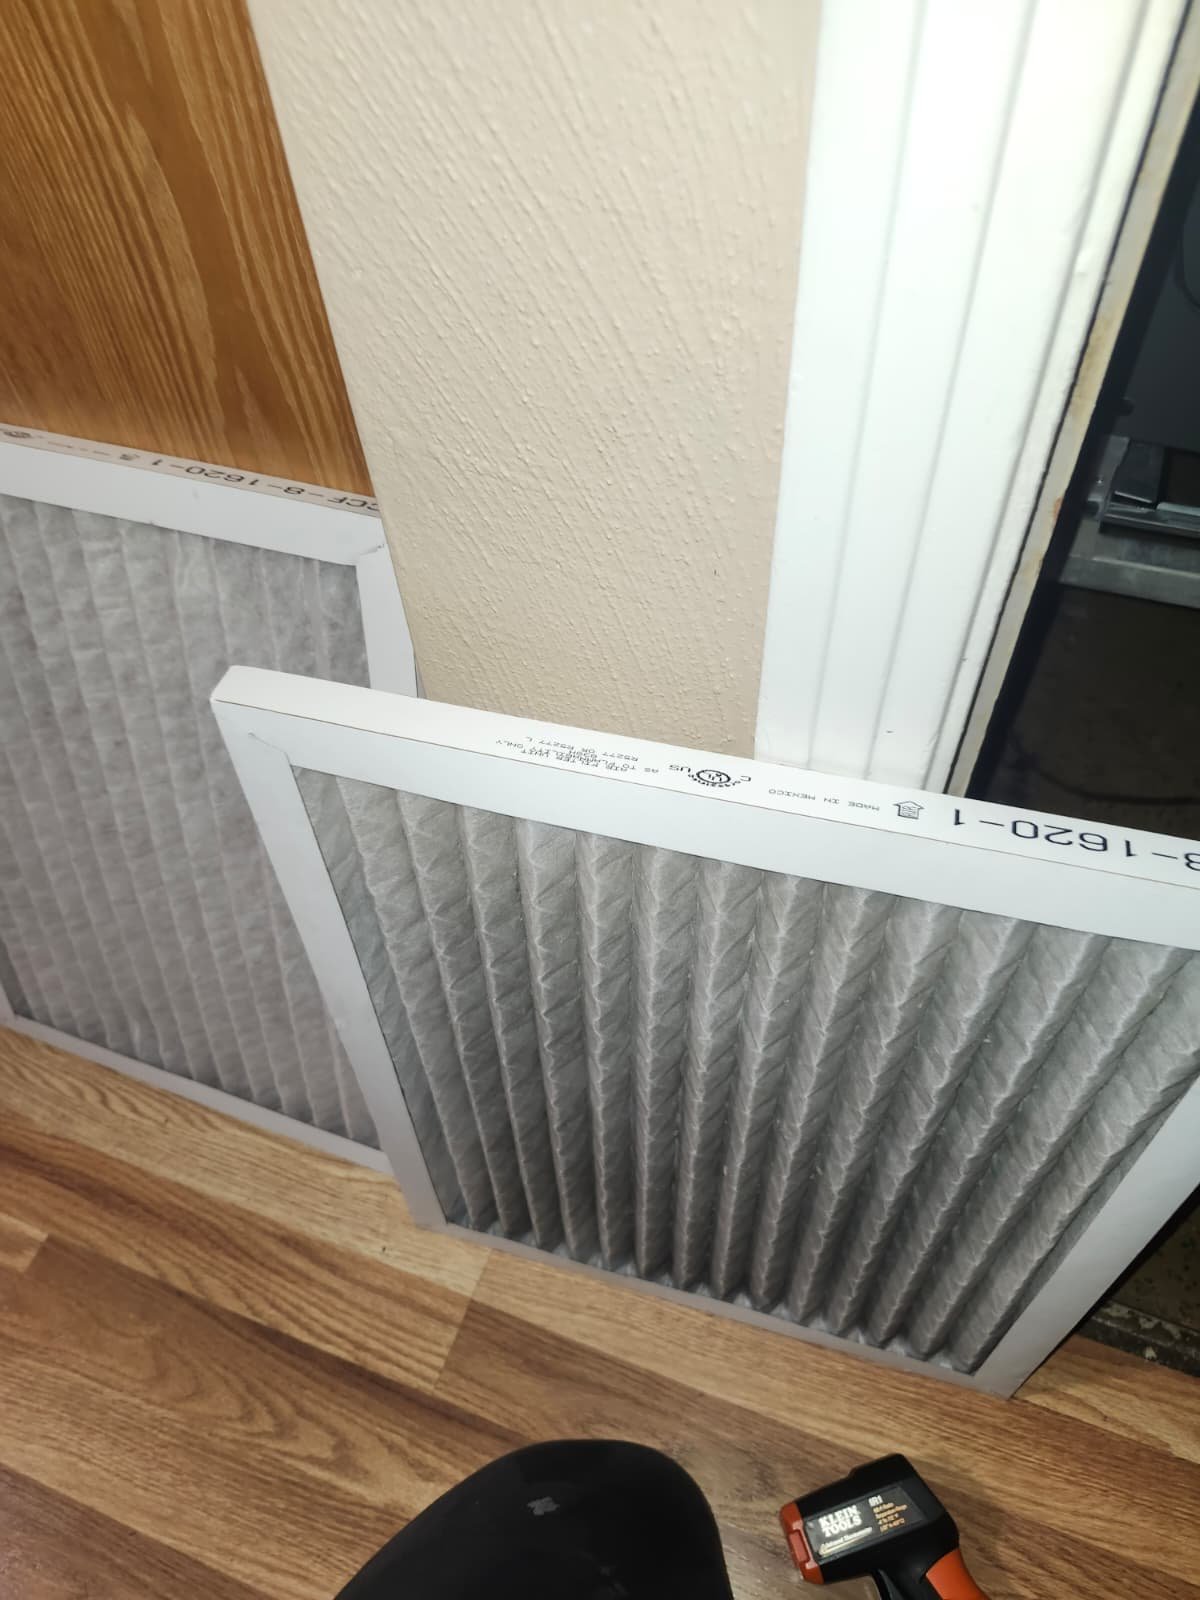
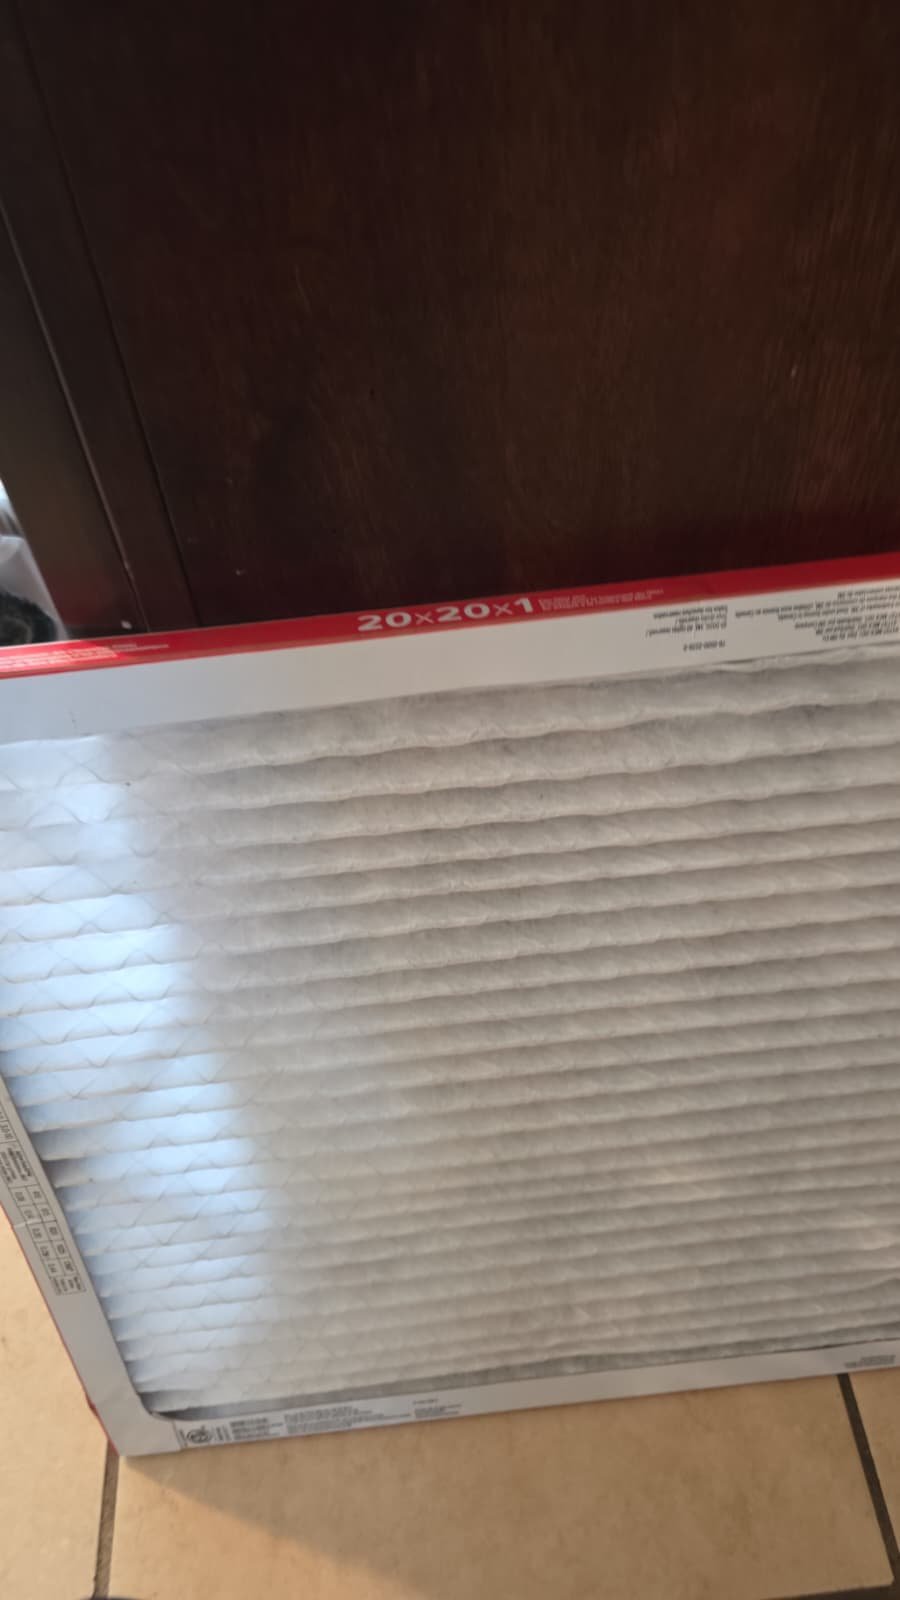
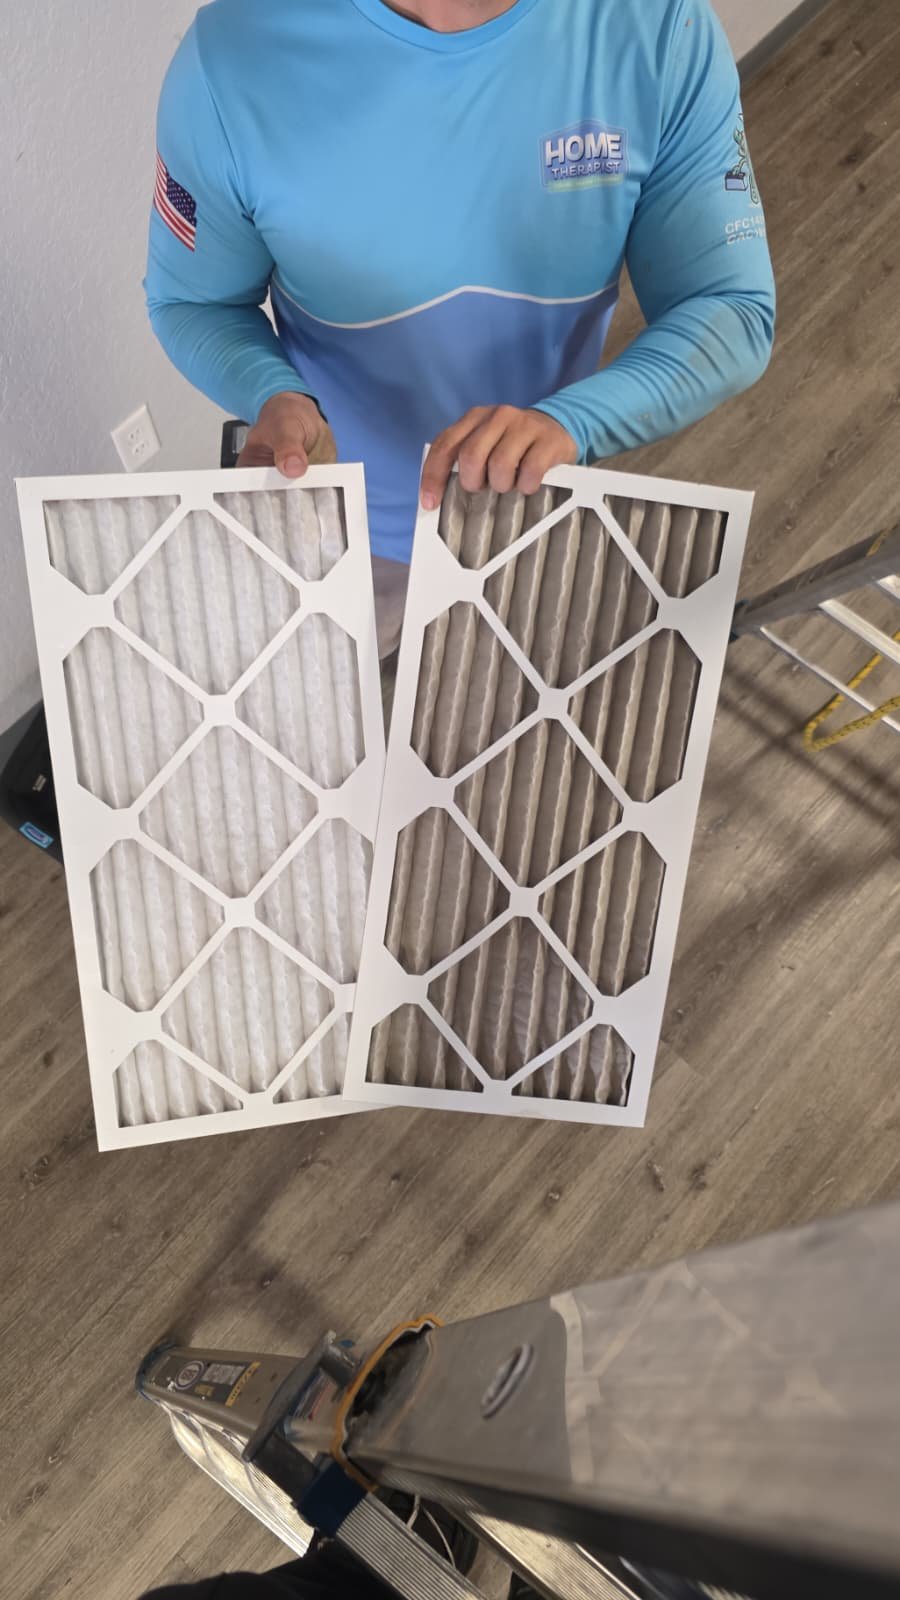
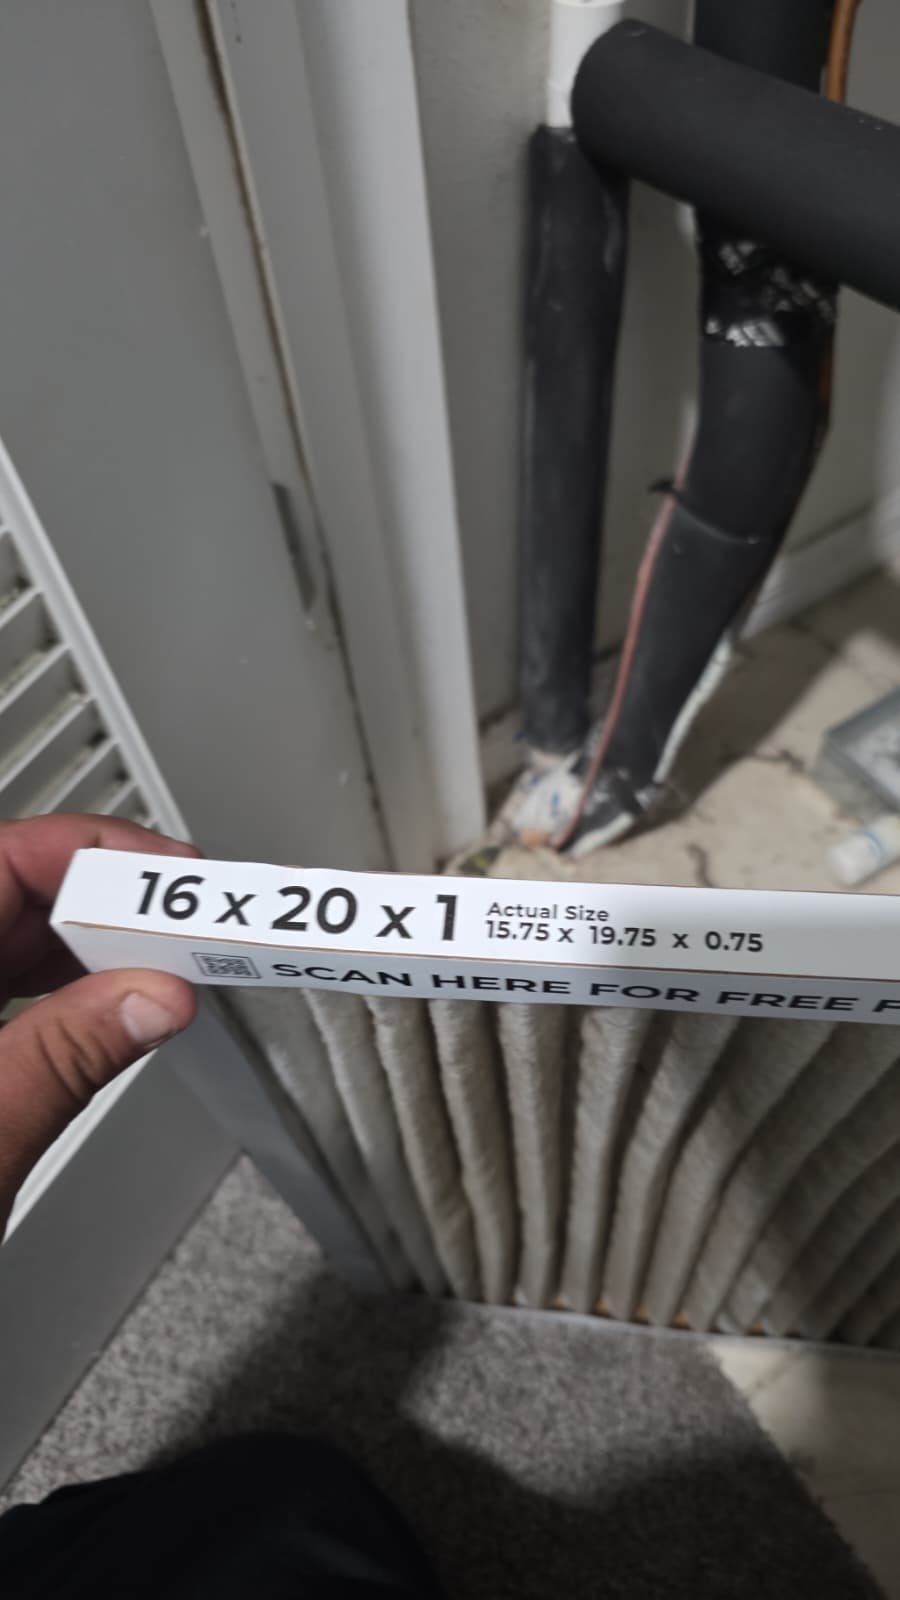
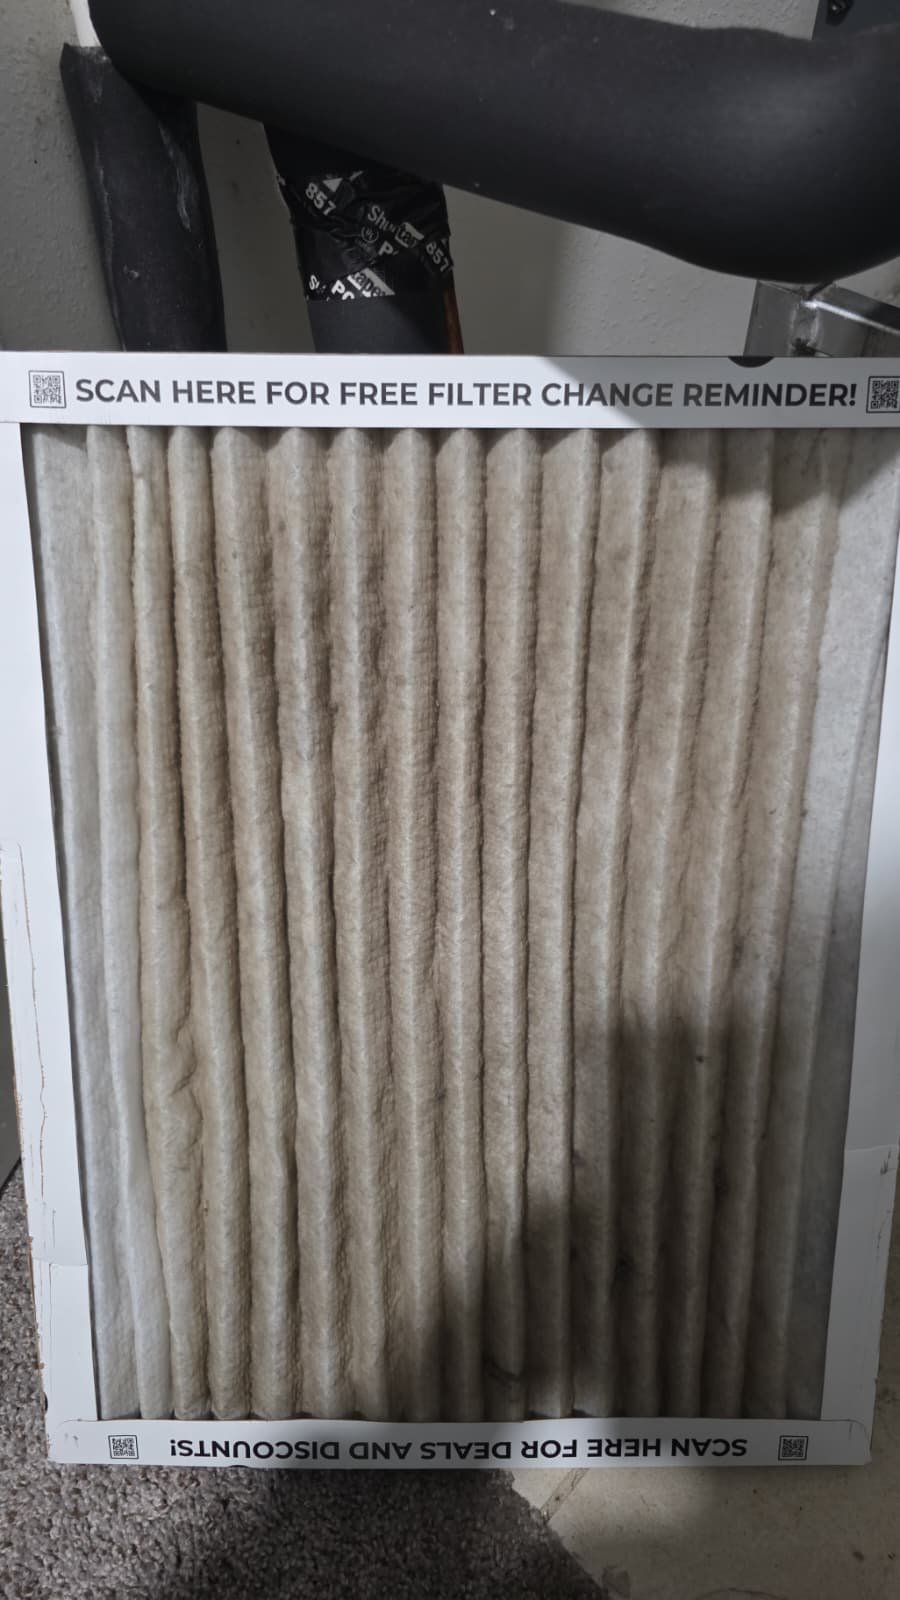
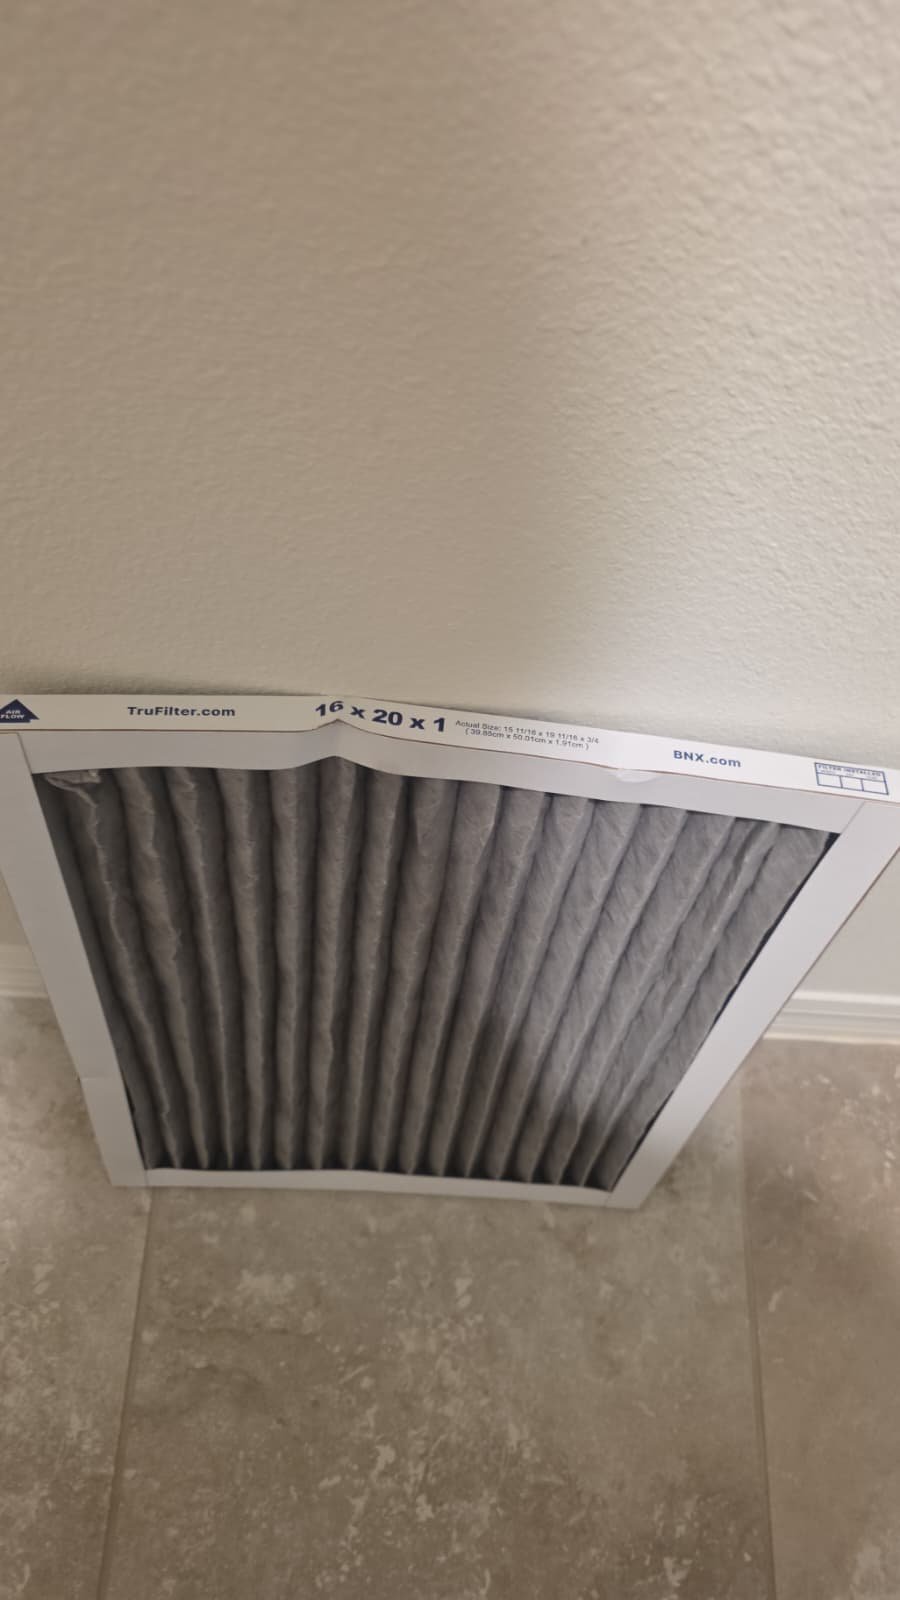
  • Reviewing the filter situation and discussing replacement options if needed

When appropriate, we also talk with homeowners about services like air filter installation and replacement and air duct cleaning, especially in homes where dust, allergies, or indoor air quality are a concern.

Repair or Service Process

On this particular visit in Clearwater, our focus was maintenance, documentation, and planning. We did not replace any major components during the appointment, because the homeowner wanted time to consider options. Here’s what we did step by step and why it matters.

1. Completed the Full Tune-Up

We carried out the full maintenance process included in the Premium Home Therapy Plan. Even when we know there are bigger decisions ahead, a proper tune-up helps:

  • Reduce strain on aging components
  • Improve comfort and consistency throughout the home
  • Catch early warning signs before they become emergencies

For Clearwater homeowners, this kind of routine HVAC service is especially valuable because systems run most of the year in our climate.

2. Documented the Condenser Fan Motor Concern

We verified again that the condenser fan motor’s electrical consumption was elevated. Rather than wait for a surprise breakdown, we explained to the homeowner that the motor is likely nearing the end of its useful life.

Instead of pushing an immediate replacement, we:

  • Documented the condition clearly
  • Explained what symptoms to watch for (unusual sounds, fan not starting, system tripping breakers, or warm air)
  • Discussed what a proactive fan motor replacement would involve and the potential costs

This allows the homeowner to balance budget, timing, and comfort, and to decide whether to wait or act proactively.

3. Identified and Explained the UV Light Failure

We confirmed that the UV light in the air handler was no longer operating. We explained what that means in practical terms: the system will still cool the home, but the added air quality protection the UV system is supposed to provide is no longer in effect.

We then provided a clear estimate for replacing the UV light assembly or bulb (depending on the exact setup), so the homeowner knows the cost and can decide whether to restore that feature now or at a future visit.

4. Discussed Replacement vs. Continued Repair

Because the system in this Clearwater, FL 33756 home is 8 years old and out of manufacturer’s warranty, we also had an honest conversation about long-term planning. We provided:

  • An estimate for replacing the entire system
  • Estimates for addressing individual issues, such as the UV light and potential future components

We did not pressure the homeowner to make a decision on the spot. Instead, our goal was to give a clear picture of the system’s current condition and the options, so they can decide what makes the most sense for their home and budget.

For homeowners who are starting to think ahead about new equipment, we often also talk about our HVAC services in Clearwater and what a properly sized, professionally installed system can do for efficiency and comfort.

Why This Approach Works

Even though we didn’t replace parts during this visit, the work we did is what keeps many Clearwater homeowners from facing sudden, stressful breakdowns.

1. Catching Failing Motors Before They Quit

Condenser fan motors are critical to the refrigeration cycle. They move air across the outdoor coil so the system can release heat. When a fan motor is drawing more power than it should, it’s often working harder than normal and running hotter internally.

If left completely unchecked, a failing fan motor can eventually stop running, which may lead to:

  • Loss of cooling
  • Overheating of other components
  • Potential nuisance breaker trips or safety shutdowns

By identifying the issue early and informing the homeowner, we help them prepare and avoid being caught off guard in the middle of a hot Clearwater afternoon.

2. Keeping Indoor Air Quality Tools Working

The UV light in the air handler plays a supporting role in indoor air quality. It doesn’t replace filters or cleaning, but it helps keep surfaces near the coil cleaner and can reduce certain types of microbial growth in that area.

When the UV light fails, the system can still run, but that added layer of protection isn’t there. Some homeowners, especially those with allergies or sensitivities, appreciate having the UV system working alongside proper filtration and, when appropriate, services like professional air filter setup or duct cleaning.

3. Honest Planning for Aging, Out-of-Warranty Systems

Once a system is out of warranty, every major component repair becomes a financial decision. Our job as your local Tampa Bay HVAC team is to give you enough information to make that decision comfortably.

In this Clearwater home, the coil and TXV have already been replaced, the condenser fan motor is trending in the wrong direction, and the UV light has failed. Rather than simply waiting for each part to break one by one, we laid out both repair and replacement paths so the homeowner can choose what’s best for them.

Pro Tips for Homeowners in Clearwater

For homeowners in Clearwater and across Tampa Bay, a few practical habits can go a long way toward extending the life of your HVAC system and protecting your comfort.

  • Stay consistent with maintenance. Our climate puts long hours on your system. Routine tune-ups, like the Premium Home Therapy Plan visit in this case, help catch issues early and keep efficiency up.
  • Don’t ignore unusual fan sounds. If your outdoor unit starts making grinding, squealing, or rattling noises, or the fan doesn’t always start smooth, call for service before it stops completely.
  • Check and change filters regularly. In humid, dusty Florida environments, filters can clog faster than expected. A clean filter helps airflow, efficiency, and comfort. If you’re unsure what type of filter is best for your home, we can help design a proper setup.
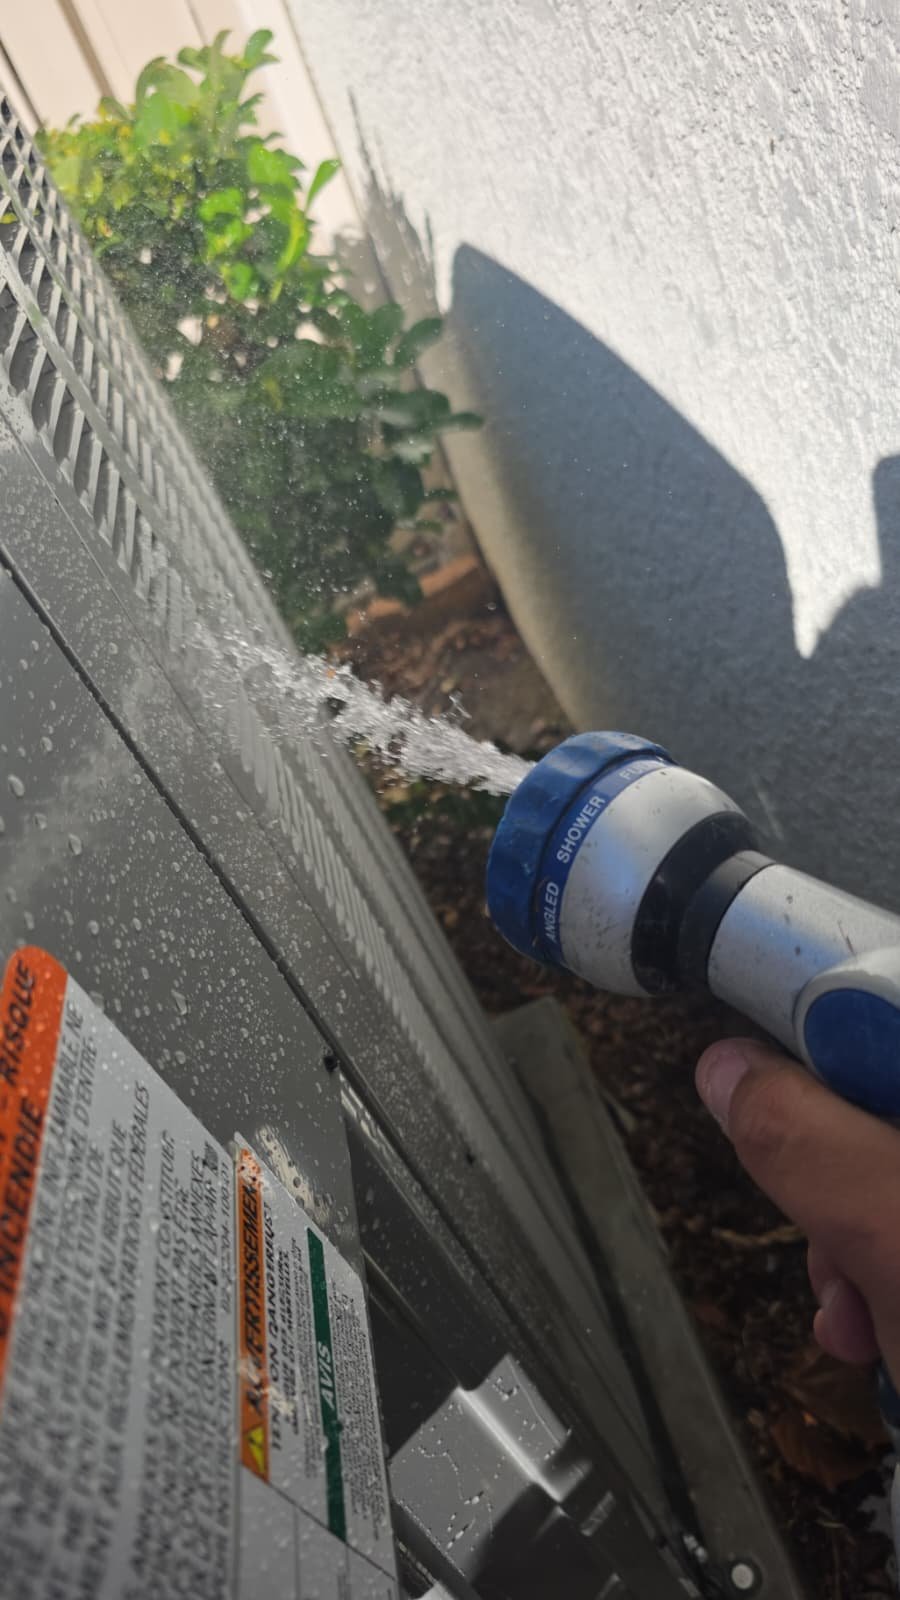
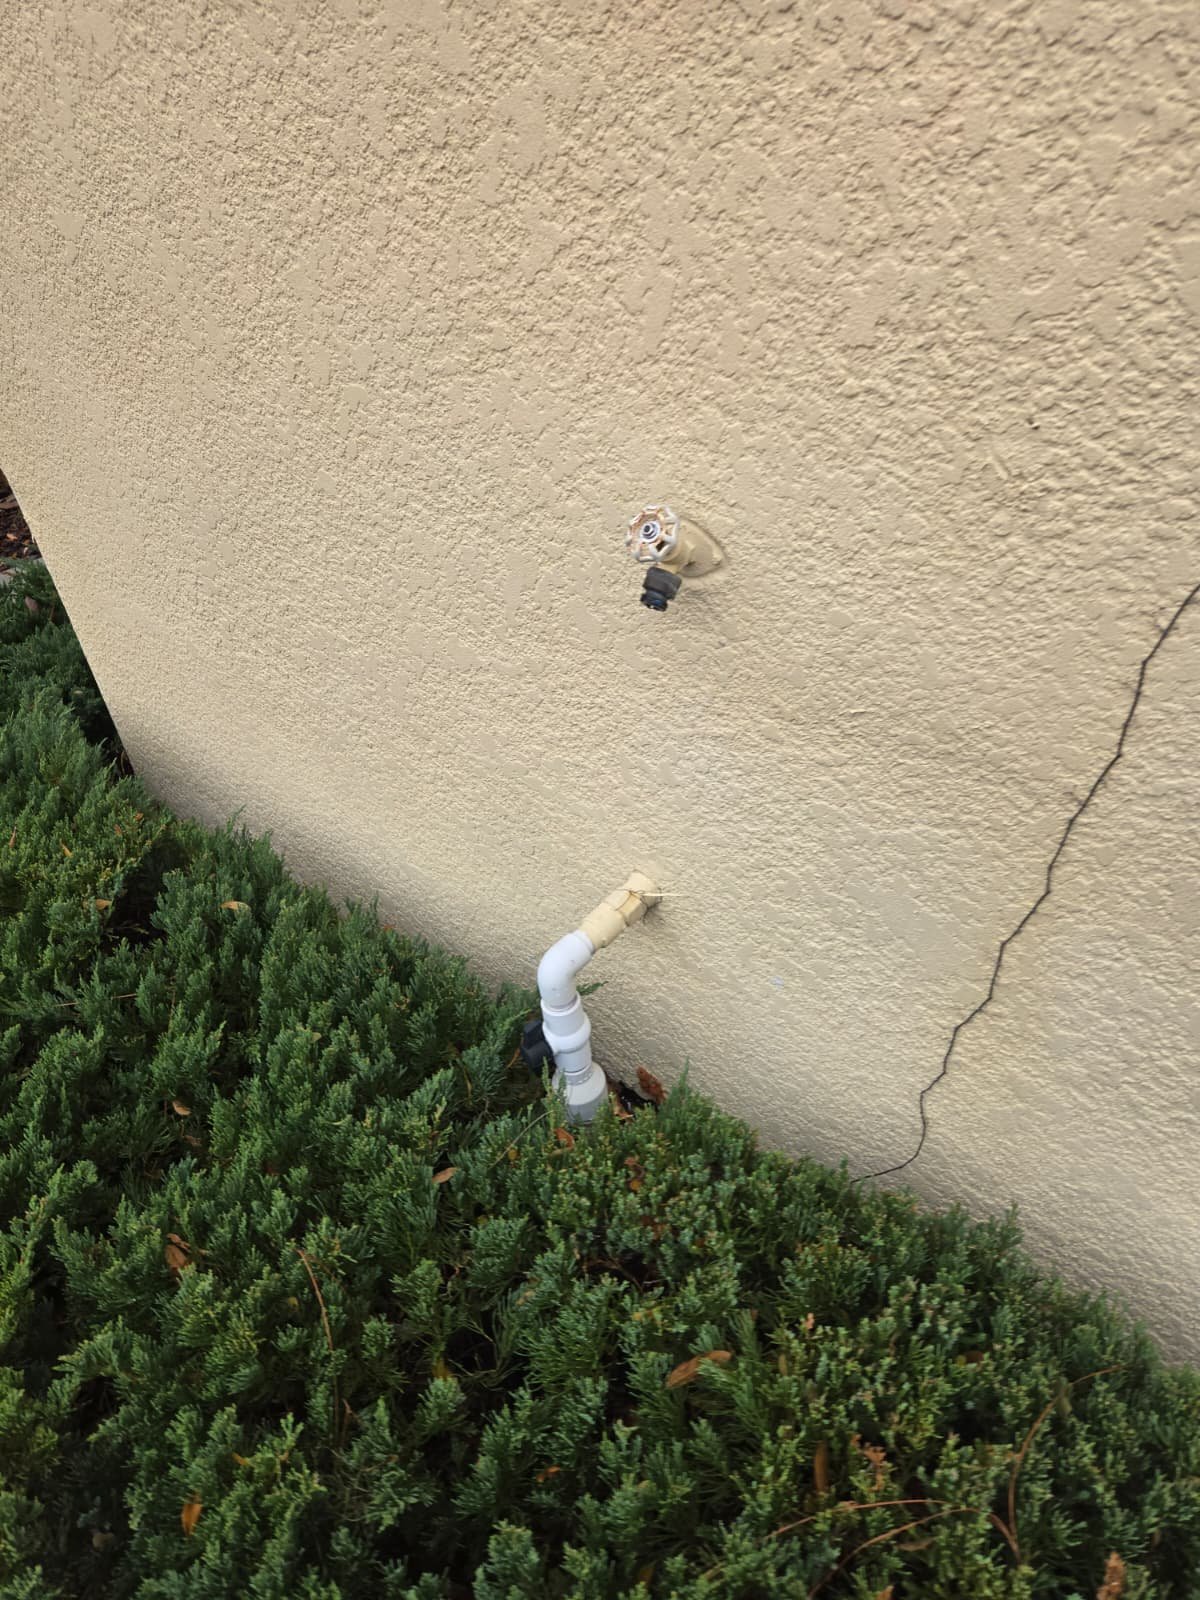
  • Keep the outdoor unit clear. Make sure there’s space around your outdoor condenser—no plants crowding it, and no debris blocking the coil. Good airflow around the unit is essential for heat removal.
  • Ask about air quality add-ons. If you or someone in your home has allergies or respiratory issues, UV lights, duct cleaning, and filtration upgrades can help. The key is to install and maintain them correctly so you actually get the benefit.
  • Plan ahead as your system ages. Around the 8–12 year mark, especially when warranties are gone and repairs start adding up, it’s wise to at least explore replacement options so you’re ready when the time comes.

FAQ: Clearwater HVAC Maintenance Visit

Does a failing condenser fan motor mean I have to replace the whole A/C system?

Not necessarily. A condenser fan motor can usually be replaced on its own. The decision to repair or replace the entire system in Clearwater depends on age, warranty status, previous repair history, and your budget and comfort goals. In this case, we provided both repair and replacement options so the homeowner could choose.

Why is my out-of-warranty system a bigger concern?

Once the manufacturer’s warranty has expired or doesn’t transfer to a new owner, you’re responsible for the full cost of parts and labor on major repairs. That doesn’t mean you must replace the system immediately, but it does mean each repair should be weighed against the value of putting that money toward a newer, more efficient unit.

What does a Premium Home Therapy Plan visit include?

Our maintenance plan visits are structured tune-ups where we inspect critical components, check system operation, and look for early signs of wear, like the elevated fan motor consumption we found in this Clearwater, FL 33756 home. The exact checklist can vary by system, but the goal is always reliability, comfort, and safety.

Do I need my UV light working for the A/C to cool?

Your system will still cool without a working UV light. The UV system is an add-on that helps with cleanliness near the coil and supports indoor air quality. Many Clearwater homeowners choose to keep UV lights maintained and replaced on schedule when air quality is a priority in their home.

How often should components like fan motors be checked?

We recommend at least annual professional maintenance for HVAC systems in Tampa Bay. During those visits, we evaluate motors, electrical components, and other parts for signs of stress or early failure. That’s how we’re able to warn homeowners ahead of time, rather than only reacting to breakdowns.

Can you help with other comfort and air quality needs?

Yes. Beyond routine tune-ups and repairs, we help Clearwater homeowners with services like filter upgrades, duct cleaning, and full HVAC service in Clearwater. We tailor recommendations to your home, not a one-size-fits-all list.

Why Choose Home Therapist

When you invite us into your home in Clearwater, FL 33756, you’re trusting us with your comfort, safety, and investment. We take that seriously.

  • Licensed, professional technicians. Our team is trained, experienced, and familiar with the demands of Florida’s climate. We show up prepared, on time, and ready to work.
  • Transparent communication. We explain what we find in plain language, show you the options, and never pressure you into a decision. In this case, we left the homeowner with clear estimates and plenty of time to think.
  • Clean, respectful work. We treat your home like our own—protecting work areas, cleaning up after ourselves, and respecting your schedule.
  • Long-term reliability focus. We don’t just reset a breaker and call it a day. We look at the whole system and help you plan for the future, especially when your equipment is out of warranty.
  • Committed to Tampa Bay homeowners. We live and work here, so we understand how hard your HVAC system has to run to keep a Clearwater home comfortable year-round.

If you’d like to see what other homeowners say about us, you can visit our Facebook page or follow us on Instagram. For additional peace of mind, you can also review our standing with local and national organizations, including the Tampa Bay Chamber of Commerce and the Better Business Bureau.

Schedule HVAC Service in Clearwater, FL 33756

If you live in Clearwater, FL 33756 and your system is getting older, making unusual noises, or you just haven’t had a professional tune-up in a while, we’re here to help. Our team at Home Therapist Cooling, Heating, and Plumbing can inspect your system, explain what we find, and help you choose the right path—whether that’s a simple repair, a proactive component replacement, or planning for a full system upgrade.

Reach out today to schedule your maintenance visit or HVAC service in Clearwater. We’ll take the time to listen, inspect carefully, and leave you with a clear, confident understanding of your system’s condition.

Sewer Drain Unclogging and Camera Inspection in Tampa, FL 33615

When a main sewer line backs up in a home in Tampa, FL 33615, it doesn’t take long for everyday routines to grind to a halt. Toilets may gurgle or refuse to flush, drains slow down, and you’re left wondering if this is a minor clog or a bigger issue underground. For this homeowner in Tampa, we were called out to perform a sewer drain unclogging, reset a toilet if needed, and complete a sewer camera inspection so we could see exactly what was going on in the line and restore reliable drainage.

In this case, we used a professional drain snake to clear the blockage from an accessible cleanout, verified the condition of the toilet flange when resetting the toilet, and followed up with a video camera inspection to visually confirm the health of the sewer line. By the time we wrapped up, the home’s drainage was flowing again, and the homeowner knew what was happening in the pipe instead of guessing.

Case Recap

  • Location: Single-family home in Tampa, FL 33615
  • Services: Sewer drain unclogging, toilet resetting (as needed), and sewer camera inspection
  • Tools used: Professional drain snake through an exterior cleanout and a high-resolution sewer camera
  • Goals: Restore proper drainage, ensure the toilet was properly seated, and confirm the sewer line condition
  • Outcome: Clog cleared, toilet reset with attention to the flange, and camera inspection provided visual confirmation of the line’s status

Customer Problem

By the time we were called to this Tampa home, the homeowner was dealing with classic sewer line symptoms: slow or backed-up drains and concerns that the main line might be partially blocked. Anytime multiple fixtures act up at once—especially toilets and lower-level drains—it’s a strong sign the main sewer line needs attention rather than just a single sink or shower.

The homeowner also knew that if the blockage turned out to be near or under the toilet, we might need to remove and reset the toilet to resolve the issue properly. That’s why the service options included both sewer drain unclogging and a potential toilet reset. They wanted the peace of mind of knowing the problem was fully corrected, not just temporarily pushed down the line.

On top of that, they wanted answers—not just a quick fix. That’s where a sewer camera inspection comes in. Instead of guessing whether the blockage came from buildup, a foreign object, or an issue with the pipe itself, a camera inspection allows us to visually confirm what’s happening in the line. For a homeowner in Tampa, FL 33615, that kind of clarity can make a big difference when deciding on next steps and future maintenance.

Inspection and Diagnosis

When we arrive at a home for a sewer drain unclogging, our first job is to safely access the plumbing system and figure out the most effective way to clear the blockage without causing damage or creating a mess inside the house.

For this visit, the plan started with using a drain snake through an existing cleanout. A cleanout is an access point on the plumbing system—usually outside or in a utility area—that lets us work directly on the main sewer line without pulling fixtures apart. Running a snake through the cleanout allows us to mechanically break up or retrieve obstructions in the line.

Our diagnostic approach generally focuses on:

  • Location of the symptoms: Multiple fixtures backing up suggests a main line issue rather than an isolated bathroom or kitchen drain.
  • History of past clogs: Repeated clogs in the same area can point to buildup, root intrusion, or damaged sections of pipe.
  • Condition of the toilet and flange (if reset is needed): A damaged, low, or misaligned flange can contribute to leaks, rocking toilets, and recurring problems around that fixture.

Because this project also included a sewer camera inspection, we planned from the start to follow the mechanical clearing with a detailed visual survey of the line. The camera lets us see if the clog was just a one-time obstruction or if there is something more serious going on such as sags, cracks, or heavy deposits inside the pipe.

Repair and Service Process

Once we confirmed that accessing the line through the cleanout was the best approach, we walked the homeowner through the steps we’d be taking. Clear communication is especially important when dealing with sewer issues in a Tampa home—nobody wants surprises with plumbing.

1. Running the Drain Snake Through the Cleanout

We started by opening the cleanout and feeding in a professional-grade drain snake. This tool allows us to navigate the curves of the sewer line and either break up or remove the blockage causing the backup.

As we worked the snake through the line, we paid attention to how it moved and what we felt at the other end. That feedback tells us a lot about the nature of the blockage—whether it feels like softer buildup, a harder obstruction, or a sharp transition that might indicate a shift or break in the piping.

Once the line was cleared, we made sure the snake returned clean and that there were no signs we were catching on damaged pipe or sharp edges. Afterward, we closed up the cleanout and tested the home’s fixtures to verify that drainage had returned to normal.

2. Toilet Resetting and Flange Inspection (If Required)

As part of this service package, we were prepared to remove and reset the toilet if the problem pointed toward that specific fixture or if a better seal was needed. Removing a toilet is more than just lifting it off the floor—it’s an opportunity to inspect the flange carefully.

We always check for:

  • Cracks or breaks in the flange: These can lead to leaks around the base of the toilet.
  • Flange height: If the flange is too low, it can prevent a proper seal and cause wobbling or recurring leaks.
  • Overall stability: The toilet should sit firmly and evenly without rocking.

If we find a damaged or improper flange, we don’t guess or patch it. We provide an estimate for correct repair or replacement so the homeowner can make an informed decision. Once everything checks out, we reset the toilet, install a new wax ring or appropriate seal, and tighten it down evenly to prevent rocking or gaps.

3. Sewer Camera Inspection

With the clog cleared and the toilet addressed, the next step was to send a sewer camera down the line. This is where we can really give a homeowner in Tampa, FL 33615 clear information instead of speculation.

The camera inspection allows us to:

  • Pinpoint the trouble area: We can see where the clog occurred and note any irregularities in that section.
  • Confirm the cause: Whether the issue is buildup, foreign objects, or structural pipe problems, the camera shows it.
  • Check overall pipe condition: We can spot low spots, misaligned joints, or places where debris tends to collect.

In addition to diagnosing clogs, camera inspections can sometimes locate items that have been accidentally flushed, such as jewelry or other valuables. While recovery isn’t guaranteed, the camera gives us the best possible chance of finding and locating them.

After reviewing the footage, we explain our findings in plain language, show the homeowner the key points, and discuss any recommendations for future maintenance or repairs if we see areas of concern.

Why This Fix Works

Sewer systems in Tampa homes rely on gravity, proper slope, and unobstructed piping to move wastewater out to the city main or septic system. When something blocks that path—whether it’s a buildup of debris, flushed items that don’t belong in the line, or a defect in the pipe—water has nowhere to go and starts backing up into the home.

Running a drain snake through a cleanout directly addresses the obstruction by physically breaking it up or pulling it out of the pipe. This restores a clear pathway so wastewater can once again flow freely.

Resetting the toilet and confirming the condition of the flange helps ensure that the connection between the toilet and the drain system is watertight and properly aligned. A stable, well-sealed toilet reduces the risk of leaks, odors, and recurring issues at that fixture.

The sewer camera inspection ties everything together. Instead of assuming the problem was fully resolved, the camera lets us verify the condition of the line after clearing the clog. If the pipe is in good shape, the homeowner can feel confident. If we spot issues such as repeated buildup areas or pipe irregularities, we can discuss proactive steps to prevent future emergencies.

Pro Tips for Homeowners in Tampa

Homes in Tampa, FL 33615 deal with a combination of high humidity, heavy rains, and sometimes older plumbing systems. Here are some practical tips to help keep your drains and sewer line in good shape:

  • Be careful what goes down the toilet. Only human waste and toilet paper should be flushed. Wipes labeled as “flushable,” paper towels, feminine products, and other materials can create stubborn clogs in your sewer line.
  • Protect your kitchen drains. Grease, oils, and food scraps can solidify in pipes, especially over time. Let grease cool and throw it in the trash instead of pouring it down the sink.
  • Schedule periodic drain maintenance. If your home has a history of slow drains or backups, consider periodic professional cleaning or inspection before the rainy season to reduce the chance of surprise clogs.
  • Watch for early warning signs. Gurgling toilets, slow drains throughout the house, or odors near drains can all signal a developing sewer issue in your Tampa home. Addressing these early usually costs less and reduces stress.
  • Know where your cleanouts are. Being aware of your cleanout locations allows a plumber to respond faster and more efficiently when a clog does occur.
  • Consider a camera inspection after major clogs. If you’ve had more than one sewer backup, a camera inspection can be a smart investment to understand whether there is a deeper issue in the line.

FAQ: Sewer Drain and Camera Inspection in Tampa, FL 33615

Do you always have to remove the toilet to clear a sewer clog?

No. In many Tampa homes, we can access the main sewer line through an exterior or interior cleanout, like we did on this job. Removing the toilet is only necessary if access through the cleanout isn’t effective, if the problem is localized at the toilet, or if we need to correct issues with the toilet seal or flange.

What is the benefit of a sewer camera inspection after unclogging the line?

A sewer camera inspection allows us to visually verify the cause and location of the problem. Instead of just clearing the blockage and hoping for the best, we can see if the pipe is in good condition, if there are areas where debris tends to collect, or if there are signs of damage. This gives homeowners in Tampa, FL 33615 clearer information for long-term planning.

Will a drain snake damage my pipes?

When used by a trained, licensed plumber, a professional drain snake is designed to clear clogs without damaging properly installed piping. We advance the cable carefully, pay attention to resistance, and avoid forcing the tool in a way that could harm the line.

How do I know if I need a toilet reset versus a simple plunging?

A plunger can help with minor, localized clogs. But if your toilet rocks, leaks at the base, has recurring issues, or if we suspect problems with the flange or connection to the drain, a proper removal and reset is the safer and more reliable solution.

How often should Tampa homeowners consider a professional drain inspection?

There’s no one-size-fits-all schedule, but if you’ve experienced repeated clogs, have an older home, or notice slow drains throughout the house, a professional inspection—especially with a camera—can help catch problems early and prevent emergencies.

Related Services for Tampa Bay Homeowners

If you’re dealing with frequent clogs or want to stay ahead of plumbing issues, we offer several related services for Tampa Bay homeowners. Our dedicated drain line cleaning and flushing services can help clear buildup before it turns into a full blockage. For bigger-picture planning, our plumbing maintenance plans and options provide routine checkups tailored to your home.

If you’d like more background on common plumbing concerns, you can also read our article on common plumbing repair issues in nearby Carrollwood or our focused guide on key drain inspection tips every Tampa homeowner needs. These resources can help you understand when it’s time to call for help and what to expect from a professional visit.

Why Choose Home Therapist for Plumbing in Tampa

When you invite a plumbing company into your home in Tampa, FL 33615, you deserve more than just a quick fix. At Home Therapist Cooling, Heating, and Plumbing, our technicians are fully licensed, trained, and focused on doing the work the right way—safely, cleanly, and with long-term reliability in mind.

From the moment we arrive, we explain what we’re going to do, why we’re doing it, and what your options are. Whether it’s running a snake through a cleanout, resetting a toilet, or completing a sewer camera inspection, you’re never left guessing about the process or the pricing. We believe in transparent communication so you can make confident decisions about your home.

We also respect your space. Our team takes care to protect flooring where we work, minimize mess, and clean up thoroughly when the job is done. When we leave, the goal is for your home to feel comfortable, safe, and back to normal—with plumbing that you can rely on.

If you’d like to see more about how we serve Tampa Bay homeowners, you can connect with us on social media. Visit us on Facebook, follow along on Instagram, or watch helpful content on our YouTube channel. These are great ways to get to know our team and stay updated on tips and services.

For extra peace of mind, you can also check our standing with trusted organizations. We’re listed with the Better Business Bureau and are proud members of the Tampa Bay Chamber of Commerce. Our Google business listing also reflects feedback from local customers we’ve helped throughout the area.

Need Sewer Drain Help in Tampa, FL 33615?

If you’re noticing slow drains, repeated toilet backups, or signs that your main line might be struggling, don’t wait for a full sewer emergency. Our local Tampa Bay plumbing team is ready to help with sewer drain unclogging, toilet resetting, and sewer camera inspections for homes in Tampa, FL 33615.

We’ll walk you through the process, address the immediate problem, and give you clear information about the condition of your plumbing so you can plan ahead with confidence. When you’re ready, reach out to Home Therapist Cooling, Heating, and Plumbing to schedule service and get your home’s drains flowing the way they should.

AC System Repair and Air Handler Fuse Replacement in Tampa, FL 33615

When your AC suddenly stops working in the middle of a warm, humid day in Tampa, FL 33615, it’s more than just an inconvenience. For one homeowner in this area, the air conditioner simply wouldn’t turn back on. The issue turned out to be a burned fuse in the air handler, caused by a short in the thermostat wiring. After a careful diagnosis and a proper fuse replacement, we were able to get the system safely back up and running—and help the homeowner take advantage of their Elite Home Therapy Plan discount in the process.

Case Recap

  • Location: Single-family home in Tampa, FL 33615
  • Main issue: AC system not operating due to a blown air handler fuse
  • Cause: Thermostat cable shorted, burning out the existing fuse
  • Service performed: System repair with new air handler fuse and wiring correction
  • Outcome: Safe system operation restored and cooling back for the homeowner
  • Bonus: Repair completed with Elite Home Therapy Plan discount applied

Customer Problem: AC Suddenly Dead in a Tampa Home

In our Tampa Bay climate, most homeowners notice right away when their AC isn’t working. In this Tampa, FL 33615 home, the system had been running, but then stopped and would not restart. The thermostat screen and settings looked normal to the homeowner, but the indoor unit would not come on and there was no airflow from the vents.

From the homeowner’s perspective, it felt like the entire system just “died” without warning. No unusual noises, no long list of previous issues—just a sudden loss of cooling. Understandably, that raises questions like:

  • Is the system completely burned out?
  • Is this going to require a full replacement?
  • Is it safe to keep trying to reset the system?

Our job as local HVAC technicians serving Tampa, FL 33615 is to answer those questions calmly, explain what we’re seeing, and fix the issue in a way that protects both the equipment and the homeowner’s comfort.

Inspection and Diagnosis: Tracking Down a Burned Fuse

When we arrived, we started with a structured diagnostic approach. On an electrical issue like this, we don’t guess—we work through the system step by step.

Here’s what we focused on during the inspection:

  • Thermostat and low-voltage control circuit: Since the problem started after a thermostat wiring issue, we immediately paid attention to the low-voltage wiring that connects the thermostat to the air handler.
  • Air handler electrical protection: Modern air handlers typically have a low-voltage fuse to protect the control board and wiring. If there’s a short in the thermostat cable, that fuse is designed to blow.
  • Visual inspection for shorts or damage: We looked for signs of rubbed, pinched, or exposed thermostat wires that could have touched metal or each other.

During this inspection, we confirmed that the existing air handler fuse had burned out. The thermostat cables had shorted at some point, and when that happened, the protective fuse sacrificed itself to prevent more expensive damage to the control components.

This is actually a good thing: it tells us that the system did what it was supposed to do from a safety and protection standpoint.

Repair Process: Safe Air Handler Fuse Replacement and Wiring Correction

Once we identified the burned fuse and the shorted thermostat cable as the source of the problem, we walked the homeowner through the repair steps in plain language. We always want homeowners in Tampa, FL 33615 to understand what we’re doing and why.

1. Securing Power and Working Safely

Before touching any components, we made sure the system power was properly shut off. Even on “low-voltage” circuits, we treat every repair with full respect for electrical safety. This protects both the technician and the equipment.

2. Inspecting the Thermostat Wiring

Because the old fuse burned after the thermostat cables shorted, we inspected the cable runs and connection points carefully. Our goals were to:

  • Confirm the short was no longer present
  • Check that no wires were bare, pinched, or frayed
  • Ensure connections were secure at the air handler terminals

If a fuse is replaced without addressing a wiring issue, it can blow again immediately. That’s why this inspection step is so important for a lasting repair.

3. Installing the New Air Handler Fuse

With the wiring checked and corrected as needed, we installed a new fuse in the air handler. The fuse is essentially a safety valve for the low-voltage controls—it takes the hit in case of a short so more expensive components don’t have to.

We made sure the replacement fuse was properly seated and that the surrounding components were clean and in good condition. We do not list specific fuse ratings unless it’s part of the work order details; what matters is that the correct type and size for that system was used and installed properly.

4. Restoring Power and Testing Operation

After the new fuse was installed and the thermostat wiring verified, we restored power to the air handler and system. Then we:

  • Called for cooling from the thermostat
  • Confirmed that the indoor unit started normally
  • Verified that airflow was restored at the vents
  • Checked that the system cycled on and off as expected

We verified proper operation after the repair and made sure there were no obvious signs of recurring electrical issues.

5. Applying the Elite Home Therapy Plan Discount

This homeowner had access to an Elite Home Therapy Plan discount, which helped reduce the cost of the repair. Our maintenance and protection plans are designed to make it easier for Tampa Bay homeowners to keep their systems maintained and to soften the impact when unexpected issues come up.

If you’d like to see how these plans work, you can learn more about our Therapy maintenance plans and how they help with ongoing HVAC care in Tampa.

Why This Fuse Replacement Fix Works

In simple terms, your thermostat and air handler communicate over a low-voltage circuit. Think of it as the “conversation” line between the brain (thermostat) and the body (air handler and outdoor unit). When a thermostat cable shorts—because of damage, rubbing against metal, or miswiring—it sends more current through that circuit than it’s designed to handle.

The fuse in the air handler acts like a guardian. Instead of allowing that excess current to damage the control board or other components, the fuse burns out. Once it does its job, the circuit is open and the system can’t run until the underlying cause is addressed and the fuse is replaced.

By:

  • Identifying and addressing the thermostat wiring short, and
  • Replacing the burned fuse with the correct one,

we restored the control circuit and allowed the system to communicate and operate again. That’s why a relatively small component like a fuse can completely shut down your AC—and why replacing it correctly is such an effective repair.

Pro Tips for Homeowners in Tampa

For homeowners in Tampa, FL 33615 and the surrounding Tampa Bay area, electrical-related AC problems often show up during our hottest, most humid months when systems run almost nonstop. Here are a few practical ways to protect your system:

  • Don’t force the system if it won’t turn on. If your AC won’t start after you’ve checked your thermostat settings and breaker, avoid repeatedly resetting it. This can stress components further. Call for professional AC repair in Tampa instead.
  • Be gentle with thermostat upgrades. When changing or upgrading your thermostat, make sure the power is off and the wiring is handled carefully. If you’re unsure, our team can handle smart thermostat installations for you.
  • Schedule regular AC maintenance. Routine checks help catch loose wires, weak connections, and other small issues before they become shutdowns. Our AC maintenance services in Tampa are tailored for Florida’s demanding climate.
  • Keep the area around your air handler clear. Whether your air handler is in a closet, garage, or attic, avoid stacking items against the access panel or wiring. This reduces the chance of accidental damage to wiring or components.
  • Watch for subtle warning signs. Short cycling, thermostats that randomly reset, or systems that occasionally fail to start can all point to early electrical issues. Addressing these early can prevent blown fuses or control board damage.
  • Consider a maintenance plan. For many Tampa homeowners, a plan with priority service and discounts helps keep repairs manageable and systems healthier over the long term.

FAQ: AC Fuse and Thermostat Wiring Issues

Why did my AC stop working after a thermostat issue?

When thermostat wires short together or against metal, they can send too much current through the low-voltage circuit. Most modern air handlers use a protective fuse to prevent damage. If that fuse burns out, the system will stop operating until the cause is resolved and the fuse is replaced.

Is replacing an air handler fuse a big repair?

Replacing the fuse itself is usually a straightforward task for a trained technician. The more important part is diagnosing why it blew in the first place. In this Tampa, FL 33615 project, the root cause was a shorted thermostat cable. By addressing the wiring and then installing a new fuse, we restored operation safely.

Can I replace the AC fuse myself?

While some homeowners attempt DIY fuse replacement, we don’t recommend it. If the underlying issue—like a wiring short—isn’t corrected, the new fuse can blow again or additional damage can occur. A licensed technician will shut power off safely, inspect the wiring, and verify proper operation after the repair.

Will a blown AC fuse damage my system permanently?

The purpose of the fuse is to help prevent permanent damage. In many cases, like this job in Tampa, a blown fuse is a protective response rather than a sign that the entire system is ruined. That said, if the short or electrical problem is severe and not corrected promptly, other components could be affected. That’s why quick, professional diagnosis is important.

How does the Elite Home Therapy Plan help with repairs like this?

The Elite Home Therapy Plan is designed to make ongoing maintenance and many common repairs more affordable. In this case, the homeowner’s plan provided a discount on the system repair, helping reduce the cost of getting their cooling restored. Plans typically focus on regular maintenance and member benefits rather than emergency-only coverage.

What should I tell the technician when I call for help?

Share any details you noticed before the system stopped working: thermostat changes, flickering displays, breakers tripping, or any recent wiring or thermostat work. Letting us know you’re in Tampa, FL 33615 also helps us coordinate scheduling efficiently in your area.

Why Choose Home Therapist for AC Repairs in Tampa Bay

When something as simple—but critical—as a fuse takes down your whole AC system, you want a team that treats the repair with the same care as a major project. That’s how we approach every visit.

Home Therapist Cooling, Heating, and Plumbing is a licensed, professional HVAC and plumbing company serving Tampa Bay homeowners, including those in Tampa, FL 33615. Our technicians focus on:

  • Clear communication: We explain what failed, why it failed, and what we’re doing to correct it—in plain language, not technical jargon.
  • Clean, respectful work: We treat your home like it’s our own, keeping work areas neat and minimizing disruption while we repair your system.
  • Long-term reliability: We don’t just swap parts; we look for root causes so you’re less likely to face the same issue again.
  • Honest recommendations: We’ll tell you when a repair is sufficient and when it might be time to consider upgrades or additional protection, without pressure.

If you’d like to see more about how we care for our neighbors, you can connect with us on social media and review platforms:

For added peace of mind, you can also verify our reputation and standing with trusted organizations:

Need AC System Repair in Tampa, FL 33615?

If your AC has suddenly stopped working, your thermostat seems fine, but the system won’t start, you may be dealing with the same kind of issue this homeowner faced—a protective fuse doing its job after a wiring short. The good news is that problems like this are often repairable when handled promptly and correctly.

Our local Tampa Bay technicians are ready to help homeowners in Tampa, FL 33615 with responsive, professional AC service—from fuse replacements and thermostat wiring issues to full emergency AC repairs and routine maintenance visits. If you’d like ongoing protection and repair savings, you can also explore our Therapy maintenance plans designed for Tampa Bay homes.

When you’re ready, reach out to schedule service. We’ll take a calm, thorough look at your system, explain exactly what we find, and get your home comfortable again.

HVAC Maintenance Visit Under Elite Home Therapy Plan in Tampa, FL 33615

For homeowners in Tampa, FL 33615, staying comfortable through our long, humid summers means keeping your air conditioning system in top shape. On this visit, we came out for a scheduled Elite Home Therapy Plan maintenance appointment (Visit #5 in the plan) to make sure the home’s HVAC system was clean, efficient, and ready for everyday use. The system was running fine when we arrived, and our job was to keep it that way with a thorough tune-up and filter care.

In this article, we’ll walk through what the homeowner was looking for, what we inspected, the steps we took during this Elite Home Therapy Plan visit, and how regular HVAC maintenance helps Tampa Bay homes stay comfortable and protected from surprise breakdowns.

Case Recap

  • Location: Single-family home in Tampa, FL 33615
  • Service: Scheduled HVAC maintenance under our Elite Home Therapy Plan (Visit #5)
  • System status on arrival: Cooling properly with no active complaints
  • Key task: Full maintenance check and filter service for multiple return vents
  • Outcome: System confirmed clean, operating as expected, and ready for continued daily use
  • Added value: Ongoing documentation and care under our membership plan for long-term reliability

Customer Problem

This homeowner in Tampa, FL 33615 is enrolled in our Elite Home Therapy Plan, which means we visit regularly to keep their HVAC system inspected, cleaned, and tuned up. On this particular Visit #5, there wasn’t a problem in the emergency sense—no hot house, no strange noises, and no leaks. Instead, the main concern was staying ahead of issues before they start.

In Tampa’s climate, air conditioners work almost year-round. That constant use can lead to:

  • Dirty filters and reduced airflow
  • Coils that slowly build up dust and debris
  • Condensate drain issues from algae and humidity
  • Extra strain on motors, capacitors, and other electrical components

The homeowner’s goal, and the purpose of the Elite Home Therapy Plan visit, was simple: keep the system clean, efficient, and reliable so it’s ready for the next hot stretch without surprise breakdowns or rising energy bills.

This particular home uses multiple return filters in common residential sizes, including 12x24x1 and 18x30x1. With several filters in the home, it’s easy for a busy family to lose track of replacement schedules. By having us come out under their plan, the homeowner knows those filters are being checked and changed on time, and the rest of the system is getting professional attention at the same visit.

Inspection and Diagnosis

Even when there’s no active issue, we still treat every maintenance visit in Tampa, FL 33615 like a full health check for the system. On this Elite Home Therapy Plan appointment, our technician walked through a structured inspection to confirm everything was operating as it should.

Our inspection process typically includes:

  • Filter and return inspection: Checking all return grills, confirming correct filter sizes (in this home, 12x24x1 and 18x30x1), and checking condition and fit.
  • Indoor unit check: Inspecting the evaporator coil area, blower compartment, and electrical connections for signs of dust buildup, corrosion, or wear.
  • Outdoor unit check: Looking over the condenser coil, fan, cabinet, and wiring for debris, damage, or anything that could restrict airflow.
  • Condensate and drainage: Visually checking the condensate line and drain pan area to help ensure proper drainage and no obvious blockages.
  • Thermostat and controls: Confirming the thermostat is responding correctly and that the system is cycling as expected.

Because this visit was part of a planned maintenance program and not a repair call, there was no specific malfunction to “diagnose” in the traditional sense. Instead, our focus was on confirming that:

  • Airflow was not being restricted by dirty filters
  • The system looked clean and in good condition
  • No obvious signs of developing issues (like burnt wiring or heavy corrosion) were present
  • The unit started, ran, and shut off normally when commanded by the thermostat

After going through these checks, we confirmed that the system was working fine and that this maintenance visit was truly preventative—exactly what you want from an HVAC maintenance plan in Tampa, FL 33615.

Repair or Service Process

Even when nothing is broken, there’s still important work to be done during a maintenance visit. On this Elite Home Therapy Plan appointment in Tampa, FL 33615, our technician followed a step-by-step service process aimed at keeping the system clean and running smoothly.

1. Filter Service for Multiple Returns

This home has multiple return vents using filters in sizes such as 12x24x1 and 18x30x1. We:

  • Located each return grill and removed the existing filters
  • Checked for dust accumulation along the returns and around the filter tracks
  • Installed fresh filters of the correct sizes, making sure they were oriented and seated properly

Proper filter sizing and installation matter a lot. A filter that’s too small, or installed loosely, will allow unfiltered air to bypass the media and carry dust straight into your system. During this visit we made sure the filters were the right fit and that the returns were ready for high-use cooling days.

2. Indoor Unit Checkup

Next, we moved to the indoor air handler. During a typical Elite Home Therapy Plan visit, our indoor checks include:

  • Inspecting the blower area for dirt buildup or visible obstructions
  • Looking over wiring and electrical connections for visible signs of wear
  • Checking the evaporator coil area for visible dirt or restricted airflow

On this visit, we did not find anything out of the ordinary. We confirmed that nothing obvious was restricting airflow, and that the indoor components looked consistent with a system that is maintained regularly.

3. Outdoor Condenser Inspection

Tampa’s outdoor units deal with heat, rain, and yard debris almost all year. We visually inspected the outdoor condenser to make sure:

  • The coil fins were generally clear of heavy debris
  • The fan area was free from leaves, branches, or obstructions
  • There were no visible signs of damage to the cabinet or wiring

Everything appeared in good shape, which is what we want to see on a scheduled maintenance visit.

4. Drainage and Condensate Check

Florida humidity puts a lot of condensation through your air conditioner. As part of this visit, we checked the condensate drain area to help ensure that water was able to exit properly and that there were no obvious clogs or standing water at the time of service.

While we do not list specific measurements or flow rates here, we verified that, at the time of the visit, there were no noticeable drainage concerns.

5. Operational Check and Thermostat Confirmation

Finally, we cycled the system at the thermostat to verify that it started, ran, and shut off as expected. We listened for unusual noises and paid attention to how the system responded.

Our technician confirmed that the system’s operation was normal for this home in Tampa, FL 33615. After the maintenance tasks were completed, the AC was cooling properly and ready for continued use.

For homeowners who want to know more about what’s typically included in regular tune-ups, our air conditioning maintenance in Tampa and AC tune-up services pages go into further detail about what we look at and why.

Why This Fix Works

In this case, the “fix” wasn’t about replacing a broken part—it was about protecting the system with preventive care. Here’s why this type of maintenance visit under the Elite Home Therapy Plan makes a real difference for homes in Tampa, FL 33615:

Airflow Protection

Filters in sizes like 12x24x1 and 18x30x1 are the first line of defense against dust and debris entering your HVAC system. When they’re dirty, several problems can follow:

  • Reduced airflow across the coil, making your system work harder
  • Longer run times to cool the home
  • Higher energy bills and added wear on motors

By confirming the correct filter sizes and keeping them clean and properly seated, we help maintain steady airflow and reduce unnecessary strain on the system.

Clean Heat Transfer Surfaces

Even moderate dust buildup on coils and in the blower compartment can interfere with heat transfer and airflow. Regular inspection and cleaning as needed keeps these components closer to factory condition, which supports efficient operation and more consistent comfort.

Electrical and Component Health

Spotting early signs of wear—like discolored wiring or unusual vibration—can prevent a small issue from turning into a major breakdown. During an Elite Home Therapy Plan visit, we’re not just looking at whether the system is running today; we’re watching for anything that might cause a failure down the road.

Drainage in a Humid Climate

In Tampa’s humidity, proper condensate drainage is critical. If drains clog and water backs up, it can lead to water damage or safety-switch shutdowns. Checking the drain area and pan during routine maintenance is a simple step that helps avoid those surprises.

Altogether, this kind of scheduled maintenance visit keeps the system operating smoothly, supports energy efficiency, and reduces the likelihood of mid-season failures—exactly what our Elite Home Therapy Plan is designed to do for homeowners in Tampa, FL 33615.

Pro Tips for Homeowners in Tampa

Based on what we see every day across Tampa Bay, here are a few practical tips to help keep your HVAC system in good shape between professional visits:

  • Stay on top of filter changes. If your home uses several filters (like 12x24x1 and 18x30x1), set reminders in your phone or on a calendar. In our Florida humidity and dust, many homes benefit from checking filters monthly.
  • Keep returns and supply vents clear. Avoid blocking vents with furniture or closing too many registers. Restricted airflow can create the same kind of stress as a dirty filter.
  • Give your outdoor unit breathing room. Keep plants, mulch, and stored items at least a couple of feet away from the sides of the condenser so it can move air freely.
  • Watch for subtle changes. If you notice longer run times, uneven temperatures, or new noises, don’t wait. Addressing changes early can keep a small concern from becoming a breakdown.
  • Use your maintenance plan. If you’re on a plan like our Elite Home Therapy Plan, make sure you schedule your visits. Consistent, documented care is one of the best ways to extend equipment life in Tampa’s climate.
  • Learn the basics of your system. You don’t have to be a technician, but knowing where your filters are, how to set your thermostat properly, and what normal operation sounds like will help you catch issues early.

If you’d like a deeper dive into what regular care looks like, our HVAC maintenance guide for homeowners and our Therapy Maintenance Plans page provide more detail on how planned maintenance works for Tampa Bay homes.

FAQ: Elite Home Therapy Plan Maintenance Visits

What is the Elite Home Therapy Plan?

The Elite Home Therapy Plan is our ongoing maintenance program for homeowners in Tampa and the surrounding Tampa Bay area. It includes scheduled visits—like this Visit #5 in Tampa, FL 33615—where we inspect, clean, and tune your HVAC system to help keep it running reliably and efficiently. The goal is to prevent problems instead of just reacting to emergencies.

Why schedule maintenance if my AC is already working fine?

That’s actually the best time to schedule maintenance. When your system in Tampa, FL 33615 is running normally, we can catch early signs of wear, keep filters and coils clean, and verify proper operation. This helps reduce the chance of breakdowns during the hottest days, when you rely on your AC the most.

How often should I change my HVAC filters in Tampa?

Filter frequency depends on your home, number of occupants, pets, and filter type, but in Florida’s climate many homes benefit from checking filters monthly. Homes with multiple return filters, like this one using 12x24x1 and 18x30x1 filters, should pay special attention so none are forgotten. During our maintenance visits, we make sure all of them are addressed.

What do you check during a maintenance visit?

On a typical visit under our Elite Home Therapy Plan, we inspect filters, indoor and outdoor units, basic electrical connections, and condensate drainage, and we verify proper system operation. If we see anything that needs attention beyond standard maintenance, we explain it clearly and discuss options before proceeding.

Is this different from an AC repair visit?

Yes. A repair visit focuses on fixing a specific problem—like no cooling, leaks, or unusual noises. A maintenance visit, like this one in Tampa, FL 33615, is scheduled ahead of time to keep your system in good shape and reduce the chances of those emergency calls. Both are important, but maintenance is what helps you avoid surprises.

Can I set up a maintenance plan if I live elsewhere in Tampa Bay?

Absolutely. We offer maintenance and AC maintenance services across Tampa and the broader Tampa Bay area. Our team can walk you through the Elite Home Therapy Plan and help you decide what’s best for your home.

Why Choose Home Therapist

When you invite someone into your home in Tampa, FL 33615, you deserve a team that treats your space with care and respects your time. That’s how we approach every Elite Home Therapy Plan visit.

Here’s what you can expect from Home Therapist Cooling, Heating, and Plumbing:

  • Licensed, professional technicians: Our team is trained to work safely and correctly on your HVAC and plumbing systems, following industry best practices on every visit.
  • Transparent communication: We explain what we’re doing in plain language, share what we find, and answer any questions you may have before we move forward.
  • Clean, respectful work: We treat your home like it’s our own—taking care around furnishings, minimizing mess, and cleaning up our work area before we leave.
  • Long-term reliability focus: Maintenance plans like the Elite Home Therapy Plan are built around extending equipment life, preserving efficiency, and reducing surprise breakdowns—not quick, one-time fixes.
  • Commitment to Tampa Bay homeowners: We live and work here too, and we’re proud to support our neighbors with dependable HVAC and plumbing service throughout the Tampa Bay area.

If you’d like to get a feel for who we are and how we work, you can connect with us on social media and see what we’re doing around the community. Visit our Facebook page, check out photos and updates on Instagram, or follow along on our TikTok channel.

For added peace of mind, you can also review our profiles on trusted directories and local organizations, including our BBB profile, our Tampa Bay Chamber of Commerce listing, and our Google Business Profile.

Closing: Ready to Protect Your Comfort in Tampa, FL 33615?

If you live in Tampa, FL 33615 and want your AC to keep performing reliably through our hot, humid seasons, a structured maintenance plan can make a big difference. This Elite Home Therapy Plan Visit #5 is a great example of how regular checkups, filter care, and system inspections help keep everything running smoothly—without waiting for something to break.

Whether you’re interested in a one-time tune-up or a full maintenance plan, our local Tampa Bay technicians are here to help. Explore our Therapy Maintenance Plans or schedule AC maintenance in Tampa today, and let us keep your home comfortable, efficient, and ready for whatever the Florida weather brings.

AC Maintenance and Fuse Replacement in Tampa, FL 33615

On a recent visit to a home in Tampa, FL 33615, we were scheduled for a routine maintenance visit under our Elite Home Therapy Plan. What started as a standard checkup turned into a simple but important repair: replacing a failed fuse to keep the air conditioning system running safely and reliably. In our Tampa Bay climate, where AC systems work almost year-round, visits like this are a key part of preventing breakdowns and keeping homes comfortable.

Case Recap

  • Location: Residential home in Tampa, FL 33615
  • Service type: Elite Home Therapy Plan maintenance visit
  • Main finding: Blown/failed fuse in the system electrical circuit
  • Work performed: Full maintenance checklist completed and fuse replaced
  • Outcome: System restored to normal operation and verified for safe performance
  • Homeowner benefit: Improved reliability, protection against future nuisance failures, and peace of mind heading into Florida heat and humidity

Customer Problem

This visit in Tampa, FL 33615 was scheduled as part of our Elite Home Therapy Plan, so the homeowner wasn’t calling for an emergency breakdown. They simply wanted to stay on top of their regular HVAC maintenance and make sure their system was ready for the ongoing Florida heat.

Even when everything seems to be working, it’s common for small issues to develop behind the scenes. In this case, during our maintenance checks we found a problem the homeowner hadn’t yet noticed: a failed fuse in the system’s electrical protection circuit. Left unaddressed, this kind of issue can lead to:

  • Intermittent system operation or surprise shutdowns
  • Unnecessary strain on electrical components
  • Hot, uncomfortable rooms while waiting for service

Because this visit was part of a scheduled maintenance plan, we were able to catch and fix the fuse issue before it turned into an inconvenient no-cooling call.

Inspection and Diagnosis

When we perform an Elite Home Therapy Plan maintenance for homeowners in Tampa, we follow a structured process. Even if the system appears to be cooling, we never assume everything is fine without checking.

On this visit, our inspection included:

  • Visual inspection of the indoor and outdoor units for signs of damage, overheating, corrosion, or loose wiring.
  • Electrical safety checks on disconnects, panels, and accessible wiring connections.
  • Thermostat and control checks to confirm proper communication with the system.
  • Airflow and filter checks to make sure the system can breathe properly.

While going through these steps, we identified a blown fuse in the system’s protection circuit. The fuse had done its job by opening the circuit when an electrical condition exceeded what it was designed to handle. That prevented further damage, but it also meant the system was relying on a weakened or failed component.

Before replacing any part, we always confirm that there isn’t an underlying issue that will immediately cause the new component to fail. So we:

  • Inspected nearby wiring and connections for overheating or damage
  • Checked for obvious shorts or loose wires in the affected area
  • Verified that the system wasn’t drawing power in an obviously abnormal way during startup

With no additional faults detected and the rest of the system looking healthy, we proceeded with replacing the fuse.

Repair and Service Process

Once we confirmed that the fuse was the only failed component and that it was safe to proceed, we moved step-by-step through the repair and remaining maintenance work.

1. Power Off and Safety Precautions

Before touching any electrical components, we safely shut off power to the unit at the appropriate disconnect and/or breaker. Electrical safety is non-negotiable—for our team and for your home. We also verified that there was no live power at the fuse location before continuing.

2. Removing the Failed Fuse

With power safely off, we removed the failed fuse from its holder. A fuse is designed to sacrifice itself to protect more expensive components, so when it fails, it often points to an event the homeowner never noticed, such as a brief power surge or momentary fault.

3. Installing the New Fuse

We installed a new fuse of the appropriate type and rating for this system. Matching the correct fuse type is important—too small and it may blow unnecessarily, too large and it can fail to protect the equipment properly. After installation, we double-checked the connections for a secure, clean fit.

4. Restoring Power and Testing Operation

Next, we restored power and carefully monitored the system as it started up. We listened for unusual noises, watched for any abnormal behavior, and confirmed that the system cycled on and off as expected. We verified proper operation after the repair.

5. Completing the Full Maintenance Checklist

Because this was part of our Elite Home Therapy Plan, fuse replacement was only one piece of the visit. We also completed the rest of our maintenance tasks, which typically include:

  • Checking and cleaning accessible components as needed
  • Confirming normal airflow at the supply and return
  • Inspecting the condensate drainage path to reduce the risk of clogs and leaks
  • Reviewing thermostat settings and basic system controls with the homeowner if requested

By the end of the visit, the system in this Tampa, FL 33615 home was back to running as expected, with electrical protection restored and routine maintenance up to date.

Why This Fix Works

Modern air conditioning systems depend on a combination of electrical controls, safety devices, and mechanical components all working together. Fuses are a simple but critical layer of protection in that system.

Here’s why replacing the fuse solved the issue and improved reliability:

  • Protection of major components: The fuse acts as a first line of defense for more expensive parts like compressors, control boards, and motors. When a problem occurs, it opens the circuit before those parts are severely damaged.
  • Stable, predictable operation: A healthy fuse ensures that the system receives power the way it was designed. Once the failed fuse was replaced and the system tested, the AC could start, run, and shut off normally.
  • Reduced risk of nuisance outages: A weakened or partially failed fuse can lead to intermittent problems. Replacing it during a maintenance visit helps avoid surprise breakdowns during the hottest days.

Paired with a full maintenance checklist, this simple repair supports safer, more reliable cooling for homeowners in Tampa and the surrounding Tampa Bay area.

Pro Tips for Homeowners in Tampa

For homeowners in Tampa, FL 33615 and nearby areas, your AC system works hard almost all year. Here are some practical, no-nonsense tips to help it last longer and run more reliably:

  • Stay consistent with maintenance. Florida humidity and long cooling seasons make regular service even more important. An annual or biannual maintenance plan, like our Elite Home Therapy Plan or the options described in our HVAC maintenance guide for homeowners, can catch small issues before they escalate.
  • Change filters on schedule. Clogged filters restrict airflow, strain the system, and can contribute to electrical and mechanical stress. Follow the manufacturer’s schedule or ask us to recommend a filter routine based on your home and lifestyle.
  • Protect your system from power issues. In the Tampa Bay area, storms and brief outages are common. Consider whole-home or dedicated surge protection and keep an eye out after storms if your system behaves differently.
  • Watch for early warning signs. If you notice your system tripping breakers, cycling off unexpectedly, or failing to keep up with the temperature, it’s worth scheduling a checkup before it turns into a full breakdown. Articles like our HVAC maintenance checklist can help you know what to look for.
  • Plan ahead before peak season. Scheduling maintenance in the milder months gives you better appointment flexibility and helps ensure your system is ready for the heaviest summer load. Our guide on how often to service your AC in Florida explains ideal timing.
  • Use your thermostat wisely. Large temperature swings force your system to work harder. In our Tampa climate, keeping a steady, reasonable setpoint and using programmable features can reduce wear and help avoid stress on electrical components.

FAQ: AC Maintenance and Fuse Replacement in Tampa, FL 33615

Do I still need maintenance if my AC seems to be working fine?

Yes. In this Tampa, FL 33615 home, the visit started as routine maintenance with no obvious complaint, yet we still found a failed fuse that needed replacement. Many issues develop quietly over time. Regular maintenance helps catch these problems early so you don’t find out about them during a heat wave when the system suddenly stops.

What does a fuse do in my air conditioning system?

A fuse is a safety device designed to protect your AC from electrical damage. When current exceeds what the system safely allows, the fuse opens the circuit and stops power flow. It’s much cheaper and safer to replace a fuse than to replace a compressor or control board. Once we replace the fuse and verify that nothing else is wrong, your system can safely run again.

How can I tell if my AC has a blown fuse?

From the homeowner side, a blown fuse usually looks like a system that won’t run at all or shuts off unexpectedly. However, the same symptoms can come from other issues like thermostat problems or tripped breakers. That’s why we don’t recommend guessing. A licensed technician can safely test the components, confirm whether a fuse has failed, and check for any underlying causes.

How often should I schedule AC maintenance in Tampa?

Most Tampa Bay homes benefit from at least one full AC maintenance visit per year, and many homeowners choose twice per year due to our long cooling season and high humidity. Our Elite Home Therapy Plan is designed around that reality. For more detail, you can review our article on how often you should service your AC in Florida.

What exactly is included in the Elite Home Therapy Plan?

The Elite Home Therapy Plan is our comprehensive maintenance program that includes scheduled system checkups, cleaning and inspection of key components, and priority attention if issues arise. Each visit follows a structured process, similar to the one we performed at this Tampa, FL 33615 home, and we always test the system to ensure it’s running as expected before we leave. You can learn more or request details through our AC maintenance plan inquiry page.

What should I do if my AC stops working between maintenance visits?

If your system shuts down or will not start, first check your thermostat settings and your main electrical panel for a tripped breaker. If everything looks normal and the system still doesn’t run, it’s time to schedule service. Our article on what to do when AC repairs are needed can help you understand next steps, and our team can diagnose whether the issue is a fuse, a control problem, or something more involved.

Why Choose Home Therapist for AC Maintenance in Tampa

When you invite someone into your home in Tampa, FL 33615, you want a team that treats your space and your time with respect. That’s how we approach every visit at Home Therapist Cooling, Heating, and Plumbing.

  • Licensed, professional technicians: Our technicians are trained, licensed, and experienced with Florida’s specific HVAC demands. We handle everything from simple fuse replacements to full system care.
  • Transparent communication: We explain what we found, what we’re recommending, and why—in plain language. If we replace a component like a fuse, we’ll tell you what it does and what we checked before installing it.
  • Clean and respectful work: We treat your home as if it were our own, working neatly, cleaning up after ourselves, and minimizing disruption.
  • Long-term reliability focus: Through options like the Elite Home Therapy Plan, our goal is to keep your system reliable over the long term, not just get it running for today.
  • Committed to Tampa Bay homeowners: We live and work in the same communities we serve, and we back our reputation with strong local partnerships and reviews.

If you’d like to see more about how we work with homeowners in the Tampa Bay area, you can visit us on social media:

We’re also proud to be listed with respected local and national organizations:

Schedule AC Maintenance in Tampa, FL 33615

If you live in or near Tampa, FL 33615 and want the same level of care this homeowner received, our team at Home Therapist Cooling, Heating, and Plumbing is ready to help. Whether you’re interested in our Elite Home Therapy Plan or simply need a one-time maintenance visit, we’ll inspect your system, address any issues like failed fuses, and verify that everything is running as it should.

Reach out today to schedule your AC maintenance or ask about ongoing plan options. We’ll keep the process straightforward, respect your home, and focus on delivering safe, dependable comfort for you and your family in Tampa and across the Tampa Bay area.

AC Maintenance and Air Duct Inspection in Pinellas Park, FL 33781

During a recent Premium Therapy Plan visit for a homeowner in Pinellas Park, FL 33781, we were called out for routine AC maintenance. What started as a standard checkup turned into a helpful look at the home’s indoor air quality. The system itself was running well, but we discovered a UV light that was no longer effective and ductwork with a heavy buildup of dust. The homeowners were noticing fast-clogging filters and dust collecting on furniture and equipment, so our findings lined up exactly with what they were experiencing.

Case Recap

  • Location: Single-family home in Pinellas Park, FL 33781
  • Service: Scheduled maintenance visit under our Premium Therapy Plan
  • System condition: Operating correctly at the time of inspection
  • Findings: Ineffective UV light and heavily dust-contaminated ductwork
  • Symptoms: Filters getting dirty quickly and visible dust around the home
  • Recommendation: Professional duct cleaning and indoor air quality improvements

Customer Problem

When we arrived for this maintenance appointment in Pinellas Park, the visit was booked as part of the homeowner’s Premium Therapy Plan. There wasn’t a breakdown or emergency cooling issue. Instead, the main concern the family shared was about air quality inside the home.

The homeowner’s wife mentioned that the air filter seemed to get dirty very quickly. Even after replacing it, they noticed dust building up again around vents, on electronics, and on furniture in a short amount of time. That kind of recurring dust can be frustrating and can make the home feel less clean, even when you’re staying on top of housekeeping.

They also knew there was a UV light installed in the system for air quality, but they weren’t sure if it was still doing anything. Over time, these lights can lose effectiveness, and when that happens the home doesn’t get the same air-cleaning benefits they originally paid for. Between the fast-clogging filters, the visible dust, and questions about the UV light, they wanted a clear answer about what was going on with their HVAC system.

Our goal during this visit was to give this Pinellas Park homeowner straightforward answers: confirm the system was working correctly, dig into the root cause of the dust issues, and recommend the most practical next steps.

Inspection and Diagnosis

Even though this was a routine maintenance visit, we approached it the same way we do any comfort concern in the Tampa Bay area: start with the basics, then work deeper into the system if needed.

Checking Overall System Operation

First, we verified that the air conditioning system itself was operating as expected. That includes confirming that:

  • The system was cycling on and off normally.
  • Airflow from the supply registers felt consistent throughout the home.
  • There were no obvious signs of strain, unusual noises, or strong odors from the equipment.

Based on this initial check, the cooling system in this Pinellas Park home was performing well at the time of our visit. That helped us narrow the focus to air quality, dust, and filtration rather than a mechanical failure.

Inspecting the UV Light

Next, we turned our attention to the UV light installed within the system. UV lights are often used as part of an indoor air quality strategy to help treat the air as it passes through the HVAC equipment. Over time, however, the effectiveness of these lights naturally declines.

During our inspection, we confirmed that the UV light in this system was no longer effective. That means it was not contributing to cleaning or conditioning the air the way it was originally intended. When a UV light stops working properly, homeowners can start to notice more dust and potentially more airborne contaminants circulating through their living spaces.

Evaluating Filtration and Dust

The homeowner’s concern about heavily soiled filters was an important clue. A filter that gets dirty too quickly can signal several possible issues, including:

  • High dust load inside the ductwork.
  • Air leaks that draw unfiltered dust into the return side of the system.
  • Usage patterns or activities in the home that increase airborne particles.

Because they were also seeing dust on furniture and equipment, we wanted to look past the filter and see what was happening inside the duct system.

Inspecting the Ductwork

We performed a visual inspection of the accessible ductwork. In this Pinellas Park, FL 33781 home, we found that the ducts were quite dirty. Dust and debris have a tendency to settle and build up inside ducts over time, especially in Florida where systems run heavily for much of the year.

The condition of the ducts matched the symptoms: if ductwork is lined with dust, every time the system turns on, a portion of that buildup can be carried into the living spaces and pushed out through supply registers. That makes it very hard to keep surfaces clean and puts extra load on the filter, causing it to clog faster.

Putting all of this together—the ineffective UV light, dirty ductwork, and fast-clogging filters—we had a clear explanation for the family’s dust issues.

Repair and Service Process

Because this visit was part of a scheduled Premium Therapy Plan appointment, we focused on two main areas during the service: routine maintenance and a detailed air quality assessment. Here’s how we walked through it.

1. Performing the Scheduled Maintenance

First, we carried out the core maintenance tasks for the system. While every visit is tailored to the condition of the equipment, a typical maintenance check in the Tampa Bay area includes:

  • Inspecting the indoor and outdoor units for visible issues or wear.
  • Checking the filter and noting how quickly it appears to be loading with dust.
  • Confirming airflow feels consistent from room to room.
  • Listening for unusual noises and looking for any obvious signs of leaks or blockages.

By the end of this portion of the visit, we had confirmed that the air conditioner itself was functioning well. That gave the homeowner peace of mind that there wasn’t a hidden AC failure behind their dust problem.

2. Assessing the UV Light Condition

Next, we evaluated the system’s UV light. We verified that it was no longer effective and explained this clearly to the homeowner. Rather than simply stating that it had “gone bad,” we walked them through what a functioning UV system is supposed to do and what happens when it stops working.

We discussed that a non-functioning UV light alone doesn’t stop the air from moving or cooling, but it does reduce the home’s air-cleaning capability. Combined with dirty ducts, the result is more dust and particles making their way into the living spaces.

3. Documenting Dirty Ducts

We then inspected and documented the duct condition. Where accessible, we visually checked inside the ductwork and confirmed that there was a substantial amount of dust buildup. We took the time to explain our findings to the homeowners so they understood that the dust on their furniture was not just a housekeeping issue—it was linked directly to the condition of the air distribution system.

4. Recommending Duct Cleaning

Based on the inspection results, we recommended a professional duct cleaning for this home in Pinellas Park, FL 33781. A thorough cleaning helps remove the accumulated dust and debris inside the ductwork, which can:

  • Reduce the amount of dust circulating through the living spaces.
  • Help filters last closer to their normal service life.
  • Support better overall indoor air quality.

We also discussed that, after duct cleaning, maintaining clean filters and keeping the system serviced regularly would be important to prevent the ducts from returning to their current condition over time.

5. Reviewing Next Steps and Answering Questions

Before we left, we reviewed everything we found and the steps we recommended. Our focus was on giving the homeowners clear, realistic expectations—no pressure, just straightforward guidance. We confirmed that the AC system was functioning well, explained why they were seeing so much dust, and outlined how a combination of duct cleaning and proper filtration could make a noticeable difference in their home.

Why This Fix Works

For homeowners in Pinellas Park and across Tampa Bay, dust issues are often a combination of Florida’s climate and how much the AC system runs. Understanding why duct cleaning and proper filtration help makes it easier to see why we made these recommendations.

How Dirty Ducts Affect Your Home

Ducts act like the lungs of your home’s HVAC system. Every time the system turns on, it pulls air in through the return, conditions it, and pushes it back out through the supply registers. If the inside of those ducts is lined with dust and debris, that material can be picked up and carried into your living spaces.

That leads to:

  • More frequent dusting, especially on flat surfaces and electronics.
  • Filters that load up quickly and may need replacement more often.
  • A general feeling that the air is “stale” or not as clean as it should be.

Cleaning the ducts removes the built-up dust and helps break that cycle. When you combine that with a good filter and a properly functioning system, the air moving through the home stays cleaner for longer.

The Role of the UV Light

A UV light in an HVAC system is meant to supplement filtration and duct cleanliness. While the exact performance depends on the specific system, the general idea is that it helps treat particles and contaminants as air moves through critical parts of the unit.

When a UV light stops being effective, it no longer contributes to that process. The system might still cool just fine, but some of the air-cleaning support is gone. In a home where the ducts are already dusty, that missing support makes the dust problem more noticeable.

That’s why, in this Pinellas Park, FL 33781 home, the combination of duct cleaning, maintaining proper filtration, and evaluating indoor air quality options is such a practical approach. It addresses the root causes instead of just swapping filters more often.

Pro Tips for Homeowners in Pinellas Park

Homes in Pinellas Park and the greater Tampa Bay area run their AC systems for much of the year, so dust and air quality issues are common. Here are some practical steps you can take to keep your system and ducts cleaner for longer:

1. Check Your Filter Monthly

Even if your filter is rated for several months, get in the habit of visually checking it every 30 days. If it looks heavily loaded with dust earlier than expected, that can be an early sign of duct or air quality issues. If you ever notice rapid filter clogging, it’s worth having a professional take a closer look at your system.

2. Keep Supply and Return Vents Clear

Avoid placing furniture or large items directly in front of vents and returns. Blocked airflow can cause dust to settle in odd places and put extra strain on the system. In a humid climate like Pinellas Park, you want air to move freely so your system can distribute cool, dry air throughout the home.

3. Watch for Unusual Dust Patterns

If you notice heavy dust around certain vents or in particular rooms, mention it during your next maintenance visit. That kind of pattern can help us identify areas where ducts may be more heavily loaded or where airflow might not be balanced correctly.

4. Schedule Regular Professional Maintenance

Routine maintenance visits give us a chance to catch issues like ineffective UV lights, dirty ducts, or airflow restrictions before they turn into bigger problems. For many homeowners in Pinellas Park, a maintenance plan helps ensure the system is checked consistently and thoroughly.

5. Consider Professional Duct Cleaning When It’s Truly Needed

Duct cleaning is not something that has to be done every year in every home, but when we see significant dust buildup—like we did in this Pinellas Park, FL 33781 home—it can make a real difference in comfort and cleanliness. The key is to base the decision on an actual inspection rather than guessing.

FAQ: AC Maintenance and Dust Issues

Why are my filters getting dirty so quickly?

When filters in a Pinellas Park home clog faster than expected, it’s often a sign that there is a high dust load in the system. Dirty ductwork, an ineffective UV light, or other air quality issues can all contribute. In this case, we found heavily dust-contaminated ducts that helped explain the rapidly dirty filters.

Does a non-working UV light affect cooling performance?

An ineffective UV light typically does not stop the system from cooling your home. However, it does mean you’re missing part of the air-cleaning support that the light was installed to provide. Over time, that can contribute to more dust and particles circulating throughout your living spaces.

How do I know if my ducts need to be cleaned?

The most reliable way to know is through a professional inspection. Signs that may prompt an inspection include fast-clogging filters, visible dust around vents, or dust that returns quickly even after cleaning. In this Pinellas Park, FL 33781 case, our visual inspection confirmed that the ducts were quite dirty, and we recommended cleaning based on what we saw.

Will duct cleaning stop dust in my home completely?

No solution can eliminate dust entirely, but cleaning heavily contaminated ductwork can significantly reduce the amount of dust blowing out of your vents. When duct cleaning is paired with proper filtration and regular maintenance, most homeowners notice that dusting becomes easier and filters last closer to their normal replacement interval.

Is routine AC maintenance still needed if everything seems to be working?

Yes. Even when the system appears to be working fine, routine maintenance is what allows us to catch issues like ineffective UV lights, dirty ducts, or minor wear before they affect comfort. For homeowners in Pinellas Park and across Tampa Bay, regular checkups help keep systems reliable and air quality more consistent.

Related Services for Cleaner Air

If you’re dealing with dust, air quality concerns, or frequently clogged filters, there are several services that can help beyond basic maintenance. We often pair duct inspections and cleaning with other solutions to support cleaner, healthier air in Tampa Bay homes. To learn more about duct cleaning options, visit our air duct cleaning service page.

Clogged lint and dust in your dryer vent can also affect air quality and safety, especially in our humid Florida climate. Many homeowners choose to bundle services with professional dryer vent cleaning for a more complete whole-home solution.

When filtration is part of the issue, we can also review your current filter type and installation and discuss options on our air filter installation and repair page. If you’d like to know more about who we are and how we work, you can read our story on the About Us page.

Why Choose Home Therapist for AC and Duct Care in Tampa Bay

When we visit a home in Pinellas Park, FL 33781 or anywhere in Tampa Bay, we treat it with the same care we’d want for our own families. That means focusing on clear communication, clean workmanship, and long-term reliability—not quick, one-time fixes.

Our technicians are fully licensed professionals who work with both HVAC and plumbing systems across the region. On visits like this Premium Therapy Plan appointment, our goal is to do more than just “check a box.” We take the time to explain what we’re seeing, why it matters, and what your realistic options are moving forward.

We also place a big emphasis on respect for your home. That includes protecting work areas, cleaning up after ourselves, and making sure you’re comfortable with everything we’ve done before we leave. Whether we’re recommending duct cleaning, checking a UV light, or simply confirming that your system is running well, we want you to feel confident that your home is in good hands.

If you’d like to see how we interact with our community and the kind of work we do day to day, you can connect with us on social media. We share updates, tips, and behind-the-scenes looks at our team on Facebook, Instagram, and YouTube.

For homeowners who value trust and accountability, we’re also proud to maintain strong profiles with reputable organizations. You can review our standing with the Better Business Bureau and see our listing with the Tampa Bay Chamber of Commerce. These platforms reflect our ongoing commitment to honest, reliable service for Tampa Bay homeowners.

Need AC Maintenance or Duct Inspection in Pinellas Park, FL 33781?

If you’re in Pinellas Park, FL 33781 and you’ve noticed fast-clogging filters, more dust than usual, or just want to make sure your AC system is operating the way it should, our team at Home Therapist is here to help. We can perform a thorough maintenance visit, inspect your ducts, and give you clear, no-pressure recommendations based on what we actually find in your home.

Whether you join a maintenance plan like our Premium Therapy Plan or just need a one-time evaluation, we’ll walk you through the results in plain language and focus on long-term comfort, safety, and reliability. When you’re ready to schedule service in Pinellas Park or the surrounding Tampa Bay area, reach out and let us know how we can help bring your home’s comfort and air quality back where you want it.

Hose Bib and Main Shutoff Valve Repair in Seffner, FL 33584

When a hose bib or main shutoff valve starts leaking or seizing up, it can quickly turn from a small annoyance into a real headache. At a recent visit to a home in Seffner, FL 33584, our plumbing team was called out to address issues with an exterior hose bib (garden faucet) and a failing shutoff valve that controlled the water supply. Our goal was simple: restore safe, reliable water control for the homeowner and make sure their plumbing system was ready for everyday use.

In this case, we replaced a worn hose bib and a problematic shutoff/ball valve with new, properly sized, code-compliant fixtures. By the time we were done, the home in Seffner had secure shutoff control, a drip‑free garden faucet, and peace of mind that they could safely turn the water off if a future plumbing issue ever came up.

Case Recap

  • Location: Single-family home in Seffner, FL 33584
  • Services performed: Hose bib (garden faucet) replacement and shutoff/ball valve replacement
  • Primary concerns: Leaks and unreliable shutoff control at the water supply
  • Solution: Remove failing fixtures and install new, high‑quality hose bib and shutoff valve
  • Outcome: Secure water control, improved reliability, and reduced risk of future water damage

Customer Problem

From the homeowner’s perspective, the problem started as “just a leak.” The exterior hose bib near the yard was dripping, and it was getting harder to close it completely. Over time, a small drip like this can waste a lot of water and stain concrete or siding. In Florida’s warm climate, homeowners in places like Seffner often use their hose bibs frequently for gardening, washing cars, or cleaning patios, so a worn faucet becomes a daily frustration.

On top of that, the shutoff or ball valve controlling part of the home’s water supply was no longer operating smoothly. A shutoff valve is something most people don’t think about until they really need it—during a leak, a repair, or a storm-related emergency. When that valve sticks, leaks, or fails, it becomes much harder to protect the home from water damage.

The homeowner wanted:

  • A hose bib that didn’t drip and could be fully turned off
  • A dependable shutoff valve that would operate smoothly when needed
  • Work completed cleanly and professionally, with clear communication about any limitations

That’s where we came in—providing local plumbing repair for a Seffner, FL homeowner who needed reliable water control and a straightforward explanation of the work being done.

Inspection and Diagnosis

When we arrived at the home in Seffner, FL 33584, we started with a visual and functional inspection of both the hose bib and the shutoff/ball valve. We never rush this step. Proper diagnosis is what keeps a “quick fix” from turning into a repeat call or a bigger problem later.

Here’s what we focused on during the inspection:

  • Hose bib condition: We checked for active drips, corrosion, worn packing, and any signs of past repairs or makeshift fixes (like over-tightened handles or temporary caps).
  • Connection point: We looked at how the hose bib tied into the home’s plumbing, checking the fitting, wall penetration, and nearby piping for signs of stress or prior leaks.
  • Shutoff/ball valve operation: We slowly exercised the valve to see if it would fully open and close, watching for leaks at the stem, body, and any threaded connections.
  • Water control risk: We evaluated how easily the homeowner could isolate the water in an emergency. If you can’t quickly shut off water, even a small leak can become a big issue.

Based on that inspection, replacement was clearly the best option. The hose bib showed signs of wear that would make simple packing adjustments or minor repairs unreliable. The shutoff/ball valve was no longer operating the way a critical control point should. Reusing those components would have meant leaving the homeowner with lingering risk.

Repair and Service Process

Once we reviewed the plan with the homeowner and answered their questions, we moved ahead with the replacement of the hose bib and the shutoff/ball valve. Even on a relatively small plumbing repair like this, we follow a careful, step-by-step process to protect the home and ensure long‑term reliability.

1. Safely Turning Off and Relieving Water Pressure

The first step was to safely shut off the water supply feeding the area where we were working. We made sure the line was fully depressurized before disassembling any components. This prevents unexpected bursts of water and keeps the work area under control.

2. Removing the Old Hose Bib

We then removed the existing hose bib from the exterior of the home. Depending on how the original plumbing was installed, hose bib replacement in Seffner and other Tampa Bay homes can range from straightforward to more complex. In some situations, accessing the piping behind a wall or block surface may require opening a small section for proper repair or replacement. When that’s the case, we’re always clear that we handle the plumbing work itself but do not perform concrete or wall patching after the fact.

In this project, we focused on carefully disconnecting the old hose bib, protecting surrounding finishes as much as reasonably possible, and preparing the connection for a new, secure installation.

3. Installing the New Hose Bib

Next, we installed a new hose bib, making sure it was properly aligned and firmly connected to the home’s piping. Our priorities with any new garden faucet are:

  • Solid, leak‑free threaded or soldered connections (depending on pipe type)
  • Correct orientation for easy hose use and drainage
  • A tight, smooth-operating handle that fully shuts off water flow

Once installed, we gently turned the water back on to this section and checked for any seeping, dripping, or weeping around the new connection.

4. Replacing the Shutoff/Ball Valve

With the hose bib in good shape, we moved to the shutoff/ball valve replacement. A shutoff valve may control the whole home, a branch line, or equipment such as a water heater. Regardless of location, the steps are similar:

  • Confirm water is off and lines are depressurized
  • Carefully remove the old shutoff valve without stressing adjacent piping
  • Prepare pipe ends or fittings for a clean, secure connection to the new valve
  • Install the new ball valve in the correct orientation, with accessible handle positioning

We then slowly restored water flow and checked for leaks, while cycling the new valve open and closed to confirm smooth operation. A properly installed ball valve should move with firm but manageable resistance and stop cleanly at full open or full closed.

5. Final Testing and Cleanup

Once the new hose bib and shutoff valve were installed, we performed a final check of all our work:

  • Visually confirmed no leaks at joints, threads, or valve stems
  • Operated the hose bib through a few open/close cycles while monitoring for drips
  • Tested the shutoff/ball valve to ensure full shutoff and full flow positions were working as intended

We also cleaned up our work area, collected any old material, and walked the homeowner through what we had done. Our goal on every plumbing repair in the Tampa Bay area is to leave your home as tidy as we found it—or better.

Why This Fix Works

Both the hose bib and the shutoff/ball valve are control points in your plumbing system. When they work properly, they give you reliable control over where water flows and when. When they fail, you lose that control and increase the risk of wasted water or property damage.

Here’s why the replacements we installed in Seffner, FL 33584 made such a difference:

  • Fresh, reliable sealing surfaces: New valves and hose bibs have clean internal surfaces and fresh seats that create a proper seal, preventing the persistent drips that worn-out fixtures often have.
  • Improved shutoff capability: A new ball valve gives the homeowner quick, reliable shutoff in an emergency. That’s critical if a pipe bursts or a fixture fails, especially in a single‑story Florida home where water can spread quickly.
  • Reduced wear and tear: Worn components often require over‑tightening to stop leaks, which only accelerates failure. New fixtures operate correctly under normal hand pressure.
  • Better long‑term reliability: Proper installation techniques—correct fittings, adequate support, and careful soldering or threading—help ensure these components will serve the home for years.

By replacing instead of repeatedly patching, we gave this Seffner homeowner a more dependable plumbing setup and reduced the chances of surprise problems down the road.

Pro Tips for Homeowners in Seffner

If you live in Seffner or anywhere in the Tampa Bay area, our plumbing team recommends a few simple habits to keep your hose bibs and shutoff valves working well:

  • Exercise your shutoff valves once or twice a year. Gently turn them fully off and back on. This keeps internal components from seizing up, especially in Florida’s humid climate.
  • Check hose bibs seasonally for drips. After turning them off, watch for a minute to see if any slow dripping continues. Catching a small leak early is much easier than dealing with long‑term water damage.
  • Avoid over‑tightening handles. If you need to crank a hose bib handle very hard to stop water, something inside is worn. Over‑tightening can damage the faucet and lead to a full replacement sooner.
  • Disconnect hoses when not in use for long periods. Constant pressure on a connected hose can stress both the hose bib and the hose itself, especially under Florida’s sun and heat.
  • Know where your main shutoff is and keep it accessible. In an emergency, you should be able to reach and operate your valve quickly. If it’s buried, rusted, or blocked, consider having it evaluated and possibly upgraded.
  • Schedule periodic plumbing checkups. A quick look at visible piping, hose bibs, and shutoff valves during general plumbing maintenance can prevent many surprises.

Related Services for Tampa Bay Homeowners

Hose bib and shutoff valve work often goes hand in hand with other plumbing needs. For homeowners in Seffner, FL 33584 and across Hillsborough County, we frequently combine these repairs with services like:

When we’re already on site at your Seffner home, we’re happy to look over related plumbing concerns and help you prioritize what should be addressed first.

FAQ: Hose Bib and Shutoff Valve Issues

How do I know if my hose bib needs to be replaced instead of repaired?

If your hose bib continues to drip even after you’ve tightened it reasonably, or if you see corrosion, cracks, or water leaking from around the body rather than the spout, replacement is usually the better long‑term option. For homeowners in Seffner, a quick inspection from a licensed plumber can confirm whether a simple adjustment is enough or if a new faucet makes more sense.

Is replacing a shutoff or ball valve really necessary?

A shutoff or ball valve is your main control point in a plumbing emergency. If it won’t fully shut off, is very difficult to turn, or leaks around the stem or body, relying on it can be risky. In the Seffner, FL 33584 project described here, replacement was the safest choice to make sure the homeowner could stop water flow quickly if needed.

Will you need to open walls or concrete to replace my hose bib?

It depends on how your home was originally plumbed. In some cases, we can access the connection from the outside; in others, reaching the piping may require opening a small section of wall or block. When that’s a possibility, we always explain it ahead of time and clarify that we handle the plumbing work but do not patch concrete or wall finishes afterward.

How long does a hose bib or shutoff valve replacement usually take?

Most straightforward replacements can be completed in a single visit, often within a few hours, depending on access and how your existing plumbing is configured. During that time, water to the affected area (or sometimes the whole home) will be shut off, and we restore service as soon as it’s safe to do so.

Can you check the rest of my plumbing while you’re there?

Yes. When we visit a home in Seffner, we’re happy to take a quick look at other visible plumbing fixtures and shutoff points if you’d like. If we see anything concerning, we’ll explain it clearly, offer options, and let you decide how you want to move forward.

Do you offer ongoing plumbing maintenance plans?

We do offer plumbing service and maintenance options for Tampa Bay homeowners. These visits can include checking shutoff valves, inspecting visible piping, and flushing water heaters, depending on the plan. You can learn more about our plumbing maintenance plans and options on our website.

Why Choose Home Therapist for Plumbing in Seffner

When you invite someone into your home to work on your plumbing, you want more than just a quick fix. You want a licensed, professional team that treats your home with respect and explains the work in clear, straightforward language. That’s how we approach every hose bib repair, shutoff valve replacement, and plumbing service call in Seffner and across the Tampa Bay area.

Here’s what you can expect from Home Therapist Cooling, Heating, and Plumbing:

  • Licensed and professional technicians: Our plumbers are trained, experienced, and focused on doing the job correctly—not just quickly.
  • Transparent communication: We explain what we find, what your options are, and what it will cost before we start. No pressure, no surprises.
  • Clean and respectful work: We protect your home as we work, clean up when we’re done, and handle your property with care.
  • Long‑term reliability: We aim to fix the root cause, not just the symptom, so you can count on your plumbing system when you need it.
  • Commitment to Tampa Bay homeowners: We live and work here, and we take pride in serving communities like Seffner, FL 33584 with honest, reliable service.

If you’d like to see more of what we do around Tampa Bay, you can find us on Facebook, follow our updates on Instagram, or check out our videos on YouTube.

For added peace of mind, you can also review our standing with trusted organizations. Home Therapist Cooling, Heating, and Plumbing is listed with the Better Business Bureau and the Tampa Bay Chamber of Commerce, and you can find us on Google Maps to see where we’re located and read customer feedback.

Need Hose Bib or Shutoff Valve Help in Seffner, FL 33584?

If you’re seeing drips from a garden faucet, struggling with a stiff or leaking shutoff valve, or just want the peace of mind that comes from having reliable water control, our team is here to help. We provide prompt, professional plumbing service for homeowners in Seffner, FL 33584 and throughout the Tampa Bay area.

Reach out to schedule a visit, and we’ll walk you through your options, replace what needs to be replaced, and make sure your plumbing system is ready for everyday life—and the unexpected moments, too.

When you’re ready, contact Home Therapist Cooling, Heating, and Plumbing for trusted local plumbing repair in Seffner. We’ll treat your home like our own and leave you with a system you can depend on.

Shower Valve and Faucet Repair in Tampa, FL 33647

When a shower or tub faucet will not stop running, it is more than just an annoyance. It wastes water, drives up utility bills, and can cause wear on your plumbing system. At an apartment community in Tampa, FL 33647, we were called out to look at a tub and shower combo where the water simply would not shut off, even when the handle was fully closed.

In this visit, our Home Therapist plumbing team inspected the shower valve, identified why the leak would not stop, and laid out a clear repair plan. Because this home is part of a larger multi-unit building, we also had to consider how shutting off the water would affect the other residents. In the end, we confirmed that the shower valve needs full replacement, recommended addressing an aging main shutoff and water heater, and coordinated next steps with the property manager and HOA so the work can be done safely and with minimal disruption.

Case Recap

  • Location: Multi-unit building in Tampa, FL 33647.
  • Complaint: Tub and shower faucet running nonstop, water would not fully shut off.
  • Findings: Shower valve is damaged beyond a simple cartridge change; full valve replacement is required.
  • Additional concern: Main shutoff for the building and an aging water heater need attention.
  • Challenge: Repair requires shutting off water to approximately 16 apartments and opening sheetrock to access the valve.
  • Outcome: Work and pricing approved in principle; repair scheduled pending HOA approval and building-wide water shutoff window.

Customer Problem

The tenant in this Tampa, FL 33647 apartment reached out because water from the tub and shower faucet would not stop running. Even with the handle turned all the way to the off position, there was a constant flow of water in the tub. That is usually a clear sign that something inside the shower valve has failed.

From the tenant’s perspective, the concerns were straightforward:

  • Continuous water flow they could not control.
  • Worry about wasting water and possible impact on the water bill.
  • Uncertainty about whether there was a hidden leak behind the wall.
  • Questions about how long they would be without water during repairs.

The property management team approved us to inspect the issue and move forward with repairs as needed, including replacing the shower valve and a bathroom faucet in the same unit. Because this is a multi-story building, the tenant also asked us to call when we arrived since it’s easy to miss a knock from inside the apartment.

Inspection and Diagnosis

On arrival, we started by confirming the symptoms. Water at the tub spout was running non-stop, and the handle movement was not giving us the resistance or control we expect from a healthy valve. That pointed us straight to the internal workings of the shower valve.

Here’s what we focused on during the diagnosis:

  • Testing the handle and trim: We checked whether the issue was with the handle or external components. In this case, the problem clearly originated inside the valve body.
  • Evaluating the cartridge vs. the full valve: Sometimes, replacing just the cartridge is enough. Here, based on the condition and the way water continued to flow, we determined the valve itself was damaged and a cartridge alone would not fix it.
  • Access considerations: We assessed how to reach the valve. The way the plumbing was installed means we will need to open sheetrock behind the shower to safely remove and replace the valve.
  • Building plumbing layout: We traced where shutoffs are located and confirmed that turning off water for this repair would also impact roughly 16 apartments.

In addition, we noted that the main shutoff and the water heater serving this unit and/or building are aging and should be addressed. During our discussion with the property manager, we recommended replacing the main shutoff and the water heater as part of a broader update, since shutting down the system once to do multiple repairs often makes more sense than doing several separate shutdowns.

Because the water to the entire section of the building needs to be turned off for at least a couple of hours, the property manager is coordinating with the HOA to schedule an appropriate time. Until that approval is in place, we cannot safely proceed with the physical repair work.

Repair and Service Plan

For homeowners and property managers in Tampa, FL 33647, shower valve and faucet repairs in multi-unit buildings require a bit more planning than in a single-family home. Here is the step-by-step plan we laid out for this project once the HOA gives the green light:

1. Coordinate Building-Wide Water Shutoff

To replace the shower valve and shutoff components safely, we must fully shut off the water supply serving the affected stack of apartments. We communicated to the property manager that residents should expect at least a couple of hours without water while we:

  • Shut off the building or section main.
  • Drain down the lines enough to work safely.
  • Complete the valve and shutoff replacements.

2. Access the Shower Valve Through Sheetrock

The current plumbing configuration requires us to cut an access opening in the sheetrock behind the tub and shower combo in order to remove the old valve. We’re always careful, clean, and precise with these cuts, but it is important to be transparent: our plumbing team does not restore sheetrock or tile after the repair. That finish work is typically handled by a handyman, drywall contractor, or the property’s maintenance team.

3. Remove the Damaged Shower Valve

Once access is open and water is safely off, we will remove the existing shower valve. At this stage we:

  • Cut or disconnect the supply lines from the old valve.
  • Inspect the surrounding piping for signs of corrosion or damage.
  • Confirm that there are no hidden leaks or weak spots around the valve area.

Sometimes additional issues only become visible after the old valve is out. If we find anything that would affect safety or long-term reliability, we review it with the property manager before moving forward.

4. Install the New Shower Valve

After removing the old valve, we will install the new shower valve assembly. The estimate for this project includes labor for the valve replacement. The property management team has already selected compatible fixture options, and we confirmed availability so there are no surprises.

As part of the installation, we will:

  • Securely connect the hot and cold supply lines to the new valve body.
  • Set the valve at the correct depth so trim, plate, and handle fit properly.
  • Verify that the tub spout and showerhead connections are aligned and sealed.

If the customer provides a new shower trim kit (head, plate, and handle), we are happy to install those during the visit. If not, and if the existing trim is still in good condition, we can typically reuse it to keep costs down.

5. Replace the Bathroom Faucet

In addition to the shower valve, this job also includes replacing a bathroom faucet. Our plan is to:

  • Shut off and disconnect the existing faucet and supply lines.
  • Clean the sink surface to remove old sealant and buildup.
  • Install the new faucet and reconnect the supply lines.
  • Check for any drips or seepage at connections and under the sink.

Like the shower valve work, this portion of the job is billed as labor only, with fixture selection coordinated with the property management team.

6. Address the Main Shutoff and Aging Water Heater

During our evaluation at this Tampa, FL 33647 property, we also recommended replacing the main shutoff valve and the aging water heater that serves this section of the building. When a main shutoff is old or unreliable, it can make future repairs more difficult and less predictable. Combining these upgrades with the shower valve project while the water is already off is often the most efficient approach.

We clearly explained these options to the property manager and included them in the estimate, so everyone understands the full scope and impact before work begins.

7. Turn Water Back On and Test

Once the shower valve, faucet, and any agreed-upon shutoff or water heater work are complete, we will slowly restore water to the building. At that point we:

  • Bleed air from the lines.
  • Test the new shower valve in both tub and shower modes.
  • Verify the faucet operates smoothly with no leaks.
  • Check surrounding areas for any signs of moisture.

We do not leave until we have verified proper operation and confirmed there are no active leaks.

Why This Fix Works

A shower valve is the heart of a tub and shower system. It blends hot and cold water, controls flow, and directs water either to the tub spout or the shower head. When internal components wear out or the valve body itself fails, the result can be exactly what we saw in this Tampa, FL 33647 home: water that simply will not shut off.

Replacing only the cartridge can be a good solution when the valve body is still in solid condition. But when the internal surfaces or structure of the valve are damaged, a new cartridge has nothing good to seal against. The water keeps finding a path through, and the leak continues.

By installing a new, properly sized valve, we restore:

  • Control: The handle now has full range of motion with clear on/off positions.
  • Sealing: Fresh internal surfaces and seals stop the unwanted flow.
  • Safety and comfort: Modern valves are designed for more consistent temperature control and reliable operation.

Pairing this with a sound main shutoff and a reliable water heater helps ensure the whole system behind the walls is ready to support daily use for years to come.

If you are curious about how we approach similar work for Tampa Bay residents, we go into more detail in our shower installation and repair overview and our guide on permit requirements for shower projects in Tampa Bay.

Pro Tips for Homeowners in Tampa

Whether you live in a condo, apartment, or single-family home in Tampa, FL 33647, here are a few practical plumbing tips from our team:

  • Act early on nonstop water flow. If your tub spout or shower head will not fully shut off, do not wait. The extra water use adds up quickly, and early intervention can sometimes keep the repair simpler.
  • Know where your shutoff is. In a house, learn where your main shutoff valve is located. In a condo or apartment, ask the management or HOA how water is controlled for your unit. Knowing this in advance makes emergencies far less stressful.
  • Keep Florida humidity in mind. In our Tampa Bay climate, hidden moisture behind walls can lead to musty odors or mold over time. Report any recurring dampness or staining around showers and tubs as soon as you notice it.
  • Plan ahead in multi-unit buildings. If you are on a board or managing property in Tampa, budget for valve, shutoff, and water heater replacements before they fail. Coordinated projects often save both time and disruption for residents.
  • Use licensed professionals for valve work. Shower valves, shutoffs, and water heaters tie into critical parts of your plumbing system. Proper installation and testing help protect you from leaks and water damage.
  • Consider periodic whole-home inspections. A scheduled plumbing inspection can catch aging shutoffs, supply lines, and valves before they cause urgent issues. We outline what we look for in our article on whole house plumbing inspections.

FAQ: Shower Valve and Faucet Repairs in Tampa, FL 33647

Do you always have to replace the whole shower valve when it leaks?

No, not always. In some cases, replacing just the cartridge can solve the issue. In this Tampa, FL 33647 apartment, the valve body itself was damaged enough that a cartridge alone would not restore proper shutoff. We always inspect first and then explain whether a cartridge or full valve replacement is the better long-term fix.

Why did the water for multiple apartments need to be shut off?

In many multi-unit buildings, several apartments share common water risers and main shutoff points. To safely replace a shower valve and main shutoff valve in this building, we had to turn off water feeding that entire section. That is why we coordinated with the property manager and HOA so residents would have advance notice.

Will you repair the sheetrock after opening the wall?

Our plumbing team handles the careful cutting and access needed to reach the shower valve. However, we do not perform sheetrock or tile repair. After the plumbing work is complete and tested, the property manager or homeowner usually arranges for a drywall or tile professional to close and finish the wall.

How long will my water be off during a shower valve replacement?

The exact time can vary, especially if additional issues are discovered once the valve is opened up. For a planned project like this one in Tampa, FL 33647, we typically ask residents to expect at least a couple of hours of downtime so we can shut off the water, complete the work safely, and thoroughly test the system when water is turned back on.

Can you install the trim (shower head, plate, and handle) that I provide?

Yes. If you supply compatible trim for your shower valve, we are happy to install it while we are replacing the valve. If the existing trim is in good shape and you prefer to keep it, we can usually reuse it as long as it works properly with the new valve.

What if you find additional plumbing problems once the wall is open?

If we discover additional issues—such as deteriorated piping or a failing shutoff—once we open the wall, we pause and communicate. We review our findings with the homeowner or property manager, explain the options, and get clear approval before proceeding. Our goal is to leave the system safe, reliable, and working as expected.

Why Choose Home Therapist for Plumbing Work in Tampa Bay

When you are dealing with nonstop water at a tub or shower, you want a plumbing team that treats your home with the same care we would give our own. At Home Therapist Cooling, Heating, and Plumbing, we bring licensed, professional technicians to every job in Tampa, FL 33647 and the greater Tampa Bay area.

Here is what you can expect from us:

  • Licensed and experienced plumbers: Our technicians handle everything from simple faucet swaps to full shower valve replacements and building-level shutoff projects.
  • Transparent communication: We explain what we find in plain language, outline your options, and review pricing before work begins—just as we did with the shower valve and main shutoff recommendations on this project.
  • Clean, respectful work: We protect surrounding areas, work neatly, and clean up our workspace before we leave. When walls must be opened, we make controlled, careful cuts and explain the next steps for drywall or tile repair.
  • Long-term reliability: We look beyond the immediate leak to the overall health of your plumbing system—main shutoffs, water heaters, and other components that can affect your comfort and safety.
  • Commitment to Tampa Bay homeowners: We live and work here too, and we’re proud to support our neighbors with reliable plumbing and HVAC service.

If you would like to see more of what we do and how we serve our community, you can follow us on Pinterest or connect with us on Reddit. You can also find us listed on HomeGuide and review our standing with trusted organizations such as the Better Business Bureau and the Tampa Bay Chamber of Commerce.

For more real-world plumbing stories from around our area, you can also read about common plumbing repairs we see in nearby Carrollwood and how we handle scheduled plumbing services for bathroom issues.

Need Shower or Faucet Help in Tampa, FL 33647?

If you are dealing with a nonstop tub or shower leak, a hard-to-turn handle, or an older valve that just does not feel right, our team is here to help. We regularly handle shower valve replacements, faucet swaps, and shutoff updates for homeowners and property managers throughout Tampa, FL 33647 and the wider Tampa Bay area.

We will inspect your system, explain exactly what is going on, and give you a clear, honest plan—whether it is a simple cartridge change or a full valve replacement with building-wide coordination like this project. When you are ready to schedule plumbing service in Tampa, just reach out to Home Therapist Cooling, Heating, and Plumbing. We will take it from there so you can get back to a comfortable, worry-free home.

Air Conditioner Maintenance Tune-Up in Palm Harbor, FL 34684

On a recent visit to a homeowner in Palm Harbor, FL 34684, we were out for a routine air conditioner maintenance tune-up as part of their Premium Therapy Plan. This particular system is a package unit that we installed about a year ago, and our goal was simple: make sure everything is still running at 100% and catch any small issues before they turn into big problems.

The good news for this Palm Harbor homeowner is that their system is in excellent shape. The tune-up went smoothly, the filter was clean, and all components were operating the way they should. The only recommendation we made was a proactive one: adding a UV light inside the system to help prevent future organic growth and keep indoor air cleaner over time.

Below, we’ll walk through what we did during this visit, what we look for during a tune-up on a package unit, and why adding UV protection can be a smart step for homeowners in our humid Tampa Bay climate.

Case Recap: AC Tune-Up in Palm Harbor, FL 34684

  • Location: Single-family home in Palm Harbor, FL 34684
  • Service: Scheduled maintenance visit under our Premium Therapy Plan
  • System type: Package HVAC unit installed by our team about one year ago
  • Findings: System running at 100%, filter clean, no operational issues detected
  • Work performed: Full air conditioning tune-up and safety check
  • Recommendation: Add a UV light inside the system to help prevent organic growth

Customer Problem: Staying Ahead of Issues, Not Chasing Breakdowns

In this case, the homeowner in Palm Harbor wasn’t calling us because something was wrong. They’re enrolled in our Premium Therapy Plan and this was their scheduled visit #5. Their main concern was staying on top of maintenance so they don’t have to deal with surprise breakdowns during the peak Florida heat.

Like many homeowners in Palm Harbor, they know how hard our climate can be on HVAC equipment. High humidity, long cooling seasons, and salty air in some areas all add up to extra wear and tear. This package unit had been running for a full year since installation, and they wanted reassurance that everything still looked as good inside as it did on day one.

They also had a broader question: what else can they do to protect their system and indoor air over the long term, beyond basic filter changes and annual maintenance? That’s where our recommendation for a UV light came in.

Inspection and Diagnosis: What We Checked on This Package Unit

Even when everything seems to be running fine, we treat each tune-up as an opportunity to inspect the system from top to bottom. For this package unit in Palm Harbor, FL 34684, we worked through a structured maintenance checklist focused on performance, safety, and cleanliness.

During a typical tune-up like this, we’ll:

  • Visually inspect the entire package unit cabinet and panels for signs of damage or corrosion
  • Check electrical connections and components for secure wiring and any visible wear
  • Inspect the indoor coil area and blower compartment for dust buildup or organic growth
  • Confirm that the air filter is correctly sized, installed, and clean
  • Look at overall airflow through the system to ensure nothing is obstructed
  • Verify that the condensate drainage path appears clear and properly sloped

Because this system is relatively new and professionally installed, we expected it to be in good shape—and that’s exactly what we found. The filter was clean, the unit was operating normally, and there were no signs of abnormal wear. We completed the tune-up and confirmed that the system was running as expected when we were finished.

For homeowners who want to better understand what goes into a maintenance visit, we also have a helpful HVAC maintenance checklist guide for homeowners that outlines typical steps in more detail.

Repair or Service Process: How We Completed This Tune-Up

Even when there are no active problems, a thorough tune-up is still a hands-on process. For this Palm Harbor service visit, our technician followed a step-by-step approach to keep the system reliable and efficient.

Here’s how that process generally looks on a package unit:

1. System Start-Up and Basic Operation Check

We begin by running the system in cooling mode from the thermostat, listening for any unusual noises and checking that the system cycles on and off as expected. This gives us a baseline for how the unit is operating before we touch anything inside.

2. Visual Inspection and Safety Review

Next, we open the access panels and visually inspect the major components. On a maintenance visit like this, we’re looking for early signs of issues—things like discoloration on wiring, loose harnesses, rust or corrosion starting on metal parts, or signs of past moisture issues. Even if the system is running well today, spotting these early helps us prevent bigger problems later.

3. Filter and Airflow Check

We confirmed that the filter in this Palm Harbor home was clean and properly installed. A clean filter is one of the simplest ways to protect your system, because restricted airflow forces the unit to work harder and can shorten its lifespan. With good airflow, your package unit can cool more efficiently and maintain better comfort throughout the home.

4. Cleaning and Tune-Up Tasks

From there, we work through tune-up tasks such as cleaning accessible areas that can collect dust, checking moving parts for smooth operation, and confirming that the indoor side of the system is free from signs of organic growth. While this homeowner’s system looked excellent, we still take the time to address any small issues we find—because those are the ones that turn into bigger headaches if they’re ignored.

5. Discussion of Preventive Options: UV Light Recommendation

After confirming that the unit was running at 100% and that the filter and components were in healthy condition, we talked with the homeowner about long-term air quality and system cleanliness. In humid areas like Palm Harbor, organic growth can eventually develop on surfaces inside the air handler and coil area. Even when everything is sealed and maintained correctly, humidity and constant cooling can create a favorable environment.

Based on what we saw and the homeowner’s interest in staying ahead of problems, we recommended installing a UV light inside the system. The goal isn’t to fix a current issue—it’s to reduce the chances of organic growth taking hold in the future. We explained how the UV light would be mounted, what it’s designed to do, and how it supports a cleaner system over the long term.

If you’d like to dig deeper into how UV systems fit into AC setups, we’ve written more on this topic in our article about adding UV light for air conditioner installations in Tampa Bay.

6. Final Verification

Once all checks and tune-up steps were complete, we closed the system back up and ran it again to verify proper operation. For this Palm Harbor, FL 34684 home, the system continued to run smoothly, with normal airflow and no signs of strain.

Why This Fix (and Maintenance) Works for Palm Harbor Homes

Even though this visit didn’t involve a repair, the work we did still has a direct impact on comfort, safety, and reliability for this Palm Harbor homeowner. Regular maintenance and smart upgrades like UV lighting work together to protect both your equipment and your indoor air.

Here’s why that matters, especially in Palm Harbor and the greater Tampa Bay area:

Protecting Airflow and Efficiency

A clean filter and well-maintained blower help your system move air the way it was designed to. When air can’t move freely, your unit has to run longer to cool the same space, which can increase wear and raise energy bills. Maintenance visits let us spot early airflow restrictions—like dirty filters, duct issues, or debris around the outdoor section of a package unit—before they cause comfort problems.

Reducing Organic Growth Risks

Florida’s humidity is one of the biggest challenges for HVAC systems. Moisture, cooled metal surfaces, and dark interior spaces can create ideal conditions for organic growth on coils and interior components. Over time, that growth can restrict airflow, impact heat transfer, and contribute to musty odors.

A UV light, when properly installed inside the system, is designed to expose those surfaces to ultraviolet energy that can help limit the growth of certain microorganisms on the surfaces the light reaches. It’s not a replacement for regular cleaning or filter changes, but it can be an extra layer of protection to keep your system cleaner between visits.

For homeowners who are particularly focused on air quality, we can also talk about related services like air duct cleaning or upgraded air filtration options when appropriate.

Supporting Indoor Air Quality

Good indoor air quality is about more than just temperature. A well-maintained system with proper filtration, clean ductwork, and preventive measures like UV lighting can reduce the amount of dust and certain airborne contaminants that circulate through your home. If you’re interested in how your HVAC system and air quality work together, we cover this in more detail in our article on the role of HVAC in indoor air quality.

Pro Tips for Homeowners in Palm Harbor

Whether you’re in Palm Harbor, FL 34684 or elsewhere in Tampa Bay, a few consistent habits can go a long way toward keeping your air conditioner running smoothly:

  • Check your filter monthly during peak cooling season. Even if your filter doesn’t need to be replaced every month, taking a quick look can help you catch issues early. Heavy use, pets, or nearby construction can all load up a filter faster than expected.
  • Keep the area around your package unit clear. Make sure there’s no lawn debris, storage items, or landscaping crowding the unit. Good airflow around the equipment is just as important as airflow through your ducts.
  • Set your thermostat and leave some buffer. In Florida’s heat, constantly changing the thermostat can cause the system to work harder. Choose a comfortable setting and let the system do its job, especially during the hottest hours of the afternoon.
  • Schedule professional maintenance at least once a year. Maintenance plans like our Premium Therapy Plan are built to make this easy. Regular tune-ups help keep warranties valid and catch small concerns before they affect comfort.
  • Ask about air quality add-ons if you’re sensitive to dust or humidity. Options like UV lights, upgraded filters, or duct inspections can often be added to an existing system without a full replacement, especially in homes around Palm Harbor where humidity is a year-round concern.
  • Watch for subtle changes in comfort or noise. If you notice the system running longer than usual, certain rooms staying warmer, or new noises, it’s worth having a technician take a look—even if the system is still cooling.

FAQ: AC Maintenance and UV Lights for Palm Harbor Homeowners

How often should I schedule AC maintenance in Palm Harbor, FL 34684?

Most homeowners in Palm Harbor are well-served by at least one professional maintenance visit per year for their cooling system. Because our area relies on air conditioning for much of the year, many customers choose a maintenance plan that spaces visits out during the year to keep things consistently checked and cleaned.

My system is only a year old—do I really need a tune-up?

Yes. Even newer systems benefit from regular maintenance. Components settle in, filters load up, and outdoor conditions can take a toll. A yearly tune-up helps protect your investment, maintain efficiency, and can support manufacturer warranty requirements, especially for homes in the Tampa Bay climate.

What exactly does a UV light do inside my AC system?

A UV light is installed inside the air handler or coil area where it can shine on interior surfaces. Its purpose is to help limit the growth of certain microorganisms on those surfaces over time. It’s a preventive measure that works alongside proper filtration and regular cleaning, not a replacement for them.

Will a UV light fix existing odors or dust issues?

A UV light is designed for surface protection inside the system, not for removing all odors or dust in the home. If you’re dealing with strong odors, visible dust, or suspected duct issues, we may recommend a combination of solutions, such as duct inspection, filter upgrades, or cleaning, in addition to UV lighting if it makes sense.

Is a maintenance plan really different from just calling when something breaks?

A maintenance plan is focused on prevention and consistency. Instead of waiting for a breakdown during a busy summer weekend, your system gets regular attention so we can catch small concerns early. That was the case with this Palm Harbor homeowner—their system is running at 100%, and the visit was about keeping it that way and planning ahead with options like UV lighting.

Does regular maintenance help with indoor air quality?

Yes, it can. Keeping filters clean, ensuring proper drainage, checking for organic growth, and keeping components clean all help your system circulate cleaner air. When paired with the right filter and, in some cases, UV lighting, maintenance becomes a key part of an overall air quality strategy in your home.

Why Choose Home Therapist for HVAC Service in Palm Harbor

When you invite us into your home in Palm Harbor, FL 34684, you’re getting more than a quick filter check. Our team is made up of licensed, professional technicians who treat your system like it’s in our own home. We take the time to explain what we see, why we’re recommending certain steps, and what can wait versus what needs attention now.

Here’s what you can expect from Home Therapist:

  • Licensed and qualified technicians who understand both older systems and newer package units like the one in this case.
  • Transparent communication—we walk you through what we found, what looks good, and where you have options, such as adding a UV light.
  • Clean and respectful work practices, including careful handling of panels, tools, and any areas we access inside or outside your home.
  • A focus on long-term reliability rather than quick, temporary fixes. Our goal is to help you avoid surprise breakdowns and keep your AC running smoothly, season after season.
  • Commitment to Tampa Bay homeowners, including Palm Harbor, through responsive service and honest recommendations.

If you’d like to see more of what we do day to day, you can connect with us on social media. We share tips, behind-the-scenes looks, and helpful updates for Tampa Bay homeowners on Facebook, Instagram, and TikTok.

For added peace of mind, you can also check out our standing with trusted organizations. We’re listed with the Better Business Bureau, included in the Tampa Bay Chamber of Commerce, and verified on Google Maps so you can easily see reviews and location details.

Need AC Maintenance in Palm Harbor, FL 34684?

If it’s been a while since your last tune-up—or if you’ve recently had a new system installed and want to keep it running like new—we’re here to help. Our local technicians regularly serve homeowners in Palm Harbor, FL 34684 and across Tampa Bay with scheduled maintenance, honest recommendations, and a focus on long-term comfort.

Whether you’re interested in a one-time AC tune-up, a maintenance plan like our Premium Therapy Plan, or exploring options like UV light installation to help protect against organic growth, we’ll walk you through your choices in clear, straightforward terms.

When you’re ready, reach out to Home Therapist to schedule your next HVAC maintenance visit in Palm Harbor. We’ll make sure your system is checked thoroughly, operating as it should, and set up for the long Florida cooling season ahead.

AC Maintenance and UV Light Replacement in St. Petersburg, FL 33703

During a recent scheduled AC maintenance visit for a homeowner in St. Petersburg, FL 33703, we were out to perform a routine Therapy Plan checkup. What started as a standard visit quickly turned into an important catch: the UV light that helps protect the home’s air quality was not working, and the attic insulation level was lower than ideal. We addressed the UV light issue right away and documented the insulation concern so the homeowner can plan improvements on their own timeline.

Case Recap

  • Location: Single-family home in St. Petersburg, FL 33703
  • Service: Scheduled Therapy Plan AC maintenance visit
  • Main findings: Non-operational UV light and low attic insulation
  • Solution: Provided estimate and replaced the failed UV light
  • Outcome: AC system operating properly with UV protection restored; insulation issue noted for future upgrade
  • Plan status: Ongoing Premium Therapy Plan for regular HVAC maintenance and system checks

Customer Problem

This visit in St. Petersburg was part of a Premium Therapy Plan, specifically Visit #4, so the homeowner wasn’t calling in for an emergency. Their main priority was staying on top of preventative maintenance and keeping the system running reliably, especially with the heat and humidity we see across Tampa Bay.

Because this homeowner values consistency, they prefer to work with the same technician whenever possible and to keep their appointment date firm. That’s something we take seriously. Familiarity helps us notice changes in the system from one visit to the next, which is exactly how we spotted the issues this time around.

On the surface, the AC seemed to be doing its job. The home was cooling, there were no obvious leaks, and there weren’t any major comfort complaints. But the point of scheduled HVAC service in St. Petersburg, FL 33703 is to catch the small problems before they grow. That’s where the detailed inspection came in.

Inspection and Diagnosis

On a Therapy Plan visit like this, we follow a consistent process so nothing gets missed. For this St. Petersburg home, our technician walked through a structured maintenance checklist, including:

  • Visual inspection of indoor and outdoor equipment
  • Checking filters and airflow paths
  • Inspecting the UV light system that protects indoor air quality
  • Reviewing drain lines and general cleanliness
  • Spot-checking attic conditions around the ductwork and insulation

During the air quality portion of the visit, we checked the UV light that is designed to help treat the air as it passes through the system. This involves confirming that the light is receiving power and that the lamp is actually turning on during operation. In this case, the UV light was not working at all.

When a UV light fails, many homeowners don’t notice it right away because the AC can still cool the home. There’s no loud noise or obvious shutdown. That’s why it’s easy for this kind of issue to go unseen without regular maintenance.

While in the attic, we also evaluated the insulation level. We’re not guessing or doing a full energy audit during a routine visit, but we do look for clear signs that insulation is low or uneven, especially around ductwork. In this St. Petersburg home, the attic insulation level was noticeably lower than what we typically like to see for maintaining consistent comfort and efficiency in Florida’s climate.

Aside from these findings, the rest of the system checked out well. That’s the balance we like to see during AC maintenance for homeowners in St. Petersburg – use the visit to fix what needs attention now and to flag what should be planned for later.

Repair and Service Process

Once we confirmed the UV light was not operating, the next step was to review options with the homeowner. We don’t move forward with any repair without a clear explanation and approval.

Here’s how we handled the service:

1. Explaining the UV Light Issue

We walked the homeowner through what the UV light does and what happens when it fails. In simple terms, the UV system is there to help treat the air as it circulates, supporting a cleaner indoor environment. When the lamp stops working, that layer of protection is no longer active, even though the AC may continue to cool.

We explained that:

  • The UV lamp had reached the end of its useful life and was no longer lighting.
  • The rest of the system was functioning, but without UV treatment.
  • Replacing the lamp restores the intended air quality benefits.

2. Providing an Estimate

Before touching anything, we prepared a clear estimate for the UV light replacement. As with all of our services in the St. Petersburg and greater Tampa Bay area, we aim to be transparent about pricing, parts, and what’s included.

The homeowner approved the estimate, and we proceeded with the replacement during the same visit so they didn’t have to schedule another appointment.

3. Replacing the UV Light

Once we had approval, we safely removed the non-functioning UV component and installed the new one according to manufacturer guidelines and our internal safety practices. That includes careful handling of electrical connections and ensuring the lamp is positioned correctly so it can do its job without creating any safety concerns for people in the home.

After installation, we:

  • Confirmed that the UV light was energizing properly.
  • Verified that any service panels or access points were securely reinstalled.
  • Checked the surrounding area for cleanliness and left the workspace tidy.

4. Documenting the Low Attic Insulation

Because insulation affects comfort and efficiency, we made sure to clearly explain what we observed in the attic. We didn’t rush the homeowner into an immediate decision. Instead, we:

  • Described how low insulation can make the AC work harder, especially in Florida’s heat and humidity.
  • Noted that the system is currently operating, but improvements could help lower energy strain.
  • Recommended considering an attic insulation upgrade when it makes sense for their budget.

For homeowners in St. Petersburg who want to dig deeper into indoor air quality and related solutions, we often share resources like our indoor air quality services page or our dedicated UV light installation service overview to help them understand the options.

5. Final Check and System Verification

After the UV light replacement and the full maintenance inspection, we performed a final check to ensure the system was operating as expected. We verified proper operation after repairs and confirmed there were no new issues introduced during the work.

The visit wrapped up with a summary of what we did, what we found, and what the homeowner should keep in mind going forward, including the future attic insulation upgrade.

Why This Fix Works

The key fixes and findings on this job in St. Petersburg, FL 33703 revolved around two main principles: indoor air quality and energy efficiency.

UV Light and Indoor Air Quality

UV lights are installed as part of many HVAC systems to help treat the air as it moves through the equipment. While the exact benefits depend on the specific product and setup, the general idea is simple: a functioning UV lamp provides an additional layer of defense inside the system itself. When it fails, that protection disappears.

By replacing the failed UV component, we restored that extra layer of air treatment. It doesn’t replace filtration or regular cleaning, but it works together with them as part of a complete indoor air quality strategy. This is especially helpful in Florida homes where the system runs heavily and humidity can be a constant challenge.

Attic Insulation and System Strain

Low attic insulation doesn’t usually cause an immediate breakdown, but it does make your AC work harder than it needs to. In a climate like St. Petersburg and the rest of Tampa Bay, that extra strain can:

  • Increase energy usage and monthly utility costs
  • Make it harder to keep certain rooms comfortable
  • Shorten the overall lifespan of HVAC equipment over time

By flagging the low insulation now, we helped the homeowner plan a future improvement that can support comfort and reduce stress on the system. For those who are ready to move forward with upgrades, our blown-in insulation services explain how proper attic insulation supports the AC’s work instead of fighting against it.

Pro Tips for Homeowners in St. Petersburg

If you’re a homeowner in St. Petersburg or anywhere in the Tampa Bay area, here are a few practical tips based on what we found on this visit:

  • Stay consistent with maintenance. Regular AC maintenance in St. Petersburg, FL 33703 is one of the best ways to catch hidden issues like a failed UV light or insulation problems before they impact comfort or reliability. A plan like our Therapy Maintenance Plans keeps those visits on schedule.
  • Ask about your air quality add-ons. If your system has a UV light, air purifier, or other indoor air quality accessory, make sure your technician checks it during every maintenance visit and explains how it’s performing.
  • Have your attic looked at occasionally. You don’t need a full inspection every time, but it’s smart to have a pro glance at insulation and duct conditions during routine AC maintenance, especially in older homes around St. Petersburg.
  • Don’t ignore “small” changes. A room that’s a bit warmer, a light musty smell, or a slow increase in energy bills can all be early hints that something in your HVAC or insulation setup needs attention.
  • Plan upgrades instead of rushing. Not every issue requires an immediate fix. Like this homeowner, you can address urgent items (like a non-working UV light) now and plan for larger improvements, such as insulation upgrades, when the timing is right.
  • Use maintenance visits to ask questions. Your scheduled service is a great time to ask your technician about air quality, efficiency, and comfort concerns. The more we know about how your home feels day to day, the better we can tailor our recommendations.

FAQ: UV Lights, Maintenance Plans, and Insulation for St. Petersburg Homes

How do I know if my HVAC UV light is working?

Most homeowners can’t easily tell just by looking at their AC. The system will usually still cool even if the UV light has failed. That’s why we check the UV component during maintenance visits and confirm whether it’s operating properly. If you have a UV light installed, it’s a good idea to ask your technician to review its status at each visit.

Is it urgent to replace a failed UV light?

When a UV light stops working, your AC can generally keep cooling, so it’s not the same as a total system breakdown. However, you do lose the air-quality benefits you originally invested in. For homeowners who chose UV protection for health, cleanliness, or peace of mind, we recommend replacing it promptly so the system is providing the full level of treatment you’re expecting.

What does a Premium Therapy Plan visit include?

While exact steps can vary by system, a typical Therapy Plan visit in the St. Petersburg and Tampa Bay area includes a thorough inspection of your cooling equipment, basic cleaning, checking filters and airflow, verifying drainage, and reviewing any accessories like UV lights or air purifiers. The goal is to keep your system reliable, efficient, and as trouble-free as possible. For more details, our AC maintenance service page explains what we focus on during a standard tune-up.

Why is low attic insulation a concern for my AC?

Low attic insulation makes it easier for heat to move into your home, which means your AC has to run longer to maintain the same temperature. Over time, that extra run time can increase energy costs and add wear and tear to the equipment. In a warm, humid area like St. Petersburg, improving attic insulation can be a meaningful step toward better comfort and lower system strain.

Can I schedule the same technician for future visits?

Whenever possible, we do our best to keep the same technician assigned to repeat visits, especially for Therapy Plan customers. That familiarity helps us track changes in your system and makes the whole process more comfortable for you. While schedule changes sometimes happen, our team will always communicate clearly and work with you to keep things as consistent as we can.

Will you pressure me to upgrade insulation or equipment on the spot?

No. Our job is to clearly explain what we see, what it means for your comfort and system, and what your options are. If we find something like low attic insulation, we’ll document it and discuss it with you, but any upgrade or replacement is scheduled on your terms. We focus on transparency and long-term reliability, not high-pressure sales.

Why Choose Home Therapist for HVAC Service in St. Petersburg

When you welcome us into your home in St. Petersburg, FL 33703, you’re trusting us with your comfort, safety, and equipment. We take that seriously on every visit.

Here are a few reasons homeowners across Tampa Bay choose Home Therapist for their AC maintenance, UV light, and insulation-related needs:

  • Licensed, professional technicians. Our team is trained, experienced, and equipped to handle everything from routine maintenance to more complex indoor air quality setups.
  • Transparent communication. We explain what we find, what it means, and what it costs before we move forward. No hidden surprises.
  • Clean and respectful work. We treat your home as if it were our own—protecting work areas, cleaning up after ourselves, and respecting your time and schedule.
  • Long-term reliability focus. We’re not just fixing today’s complaint; we’re looking out for how your system will perform through the next St. Petersburg summer and beyond.
  • Commitment to Tampa Bay homeowners. We live and work in the same communities we serve, and we stand behind our work in the greater Tampa Bay area.

If you’d like to get a feel for who we are and how we work, you can connect with us on social media and see what other homeowners are saying:

  • Follow us on Facebook for updates and homeowner tips.
  • See behind-the-scenes and project highlights on Instagram.
  • Watch educational clips and walk-throughs on our YouTube channel.

For added peace of mind, you can also review our standing and reputation with local and national organizations:

Need AC Maintenance or UV Light Service in St. Petersburg, FL 33703?

If it’s been a while since your last tune-up, or if you’re not sure whether your UV light, filters, or insulation are doing their job, we’re here to help. Our local Tampa Bay technicians serve homeowners throughout St. Petersburg, FL 33703 and surrounding areas with calm, thorough, and professional care.

Whether you’re interested in a one-time AC tune-up, a Premium Therapy Plan, or you’d like to explore options like UV light installation and attic insulation improvements, we’ll walk you through everything step by step. You can learn more about our maintenance options on our AC tune-up services page or reach out directly through our contact form to get scheduled.

When you’re ready, Home Therapist Cooling, Heating, and Plumbing is here to keep your home comfortable, efficient, and well cared for—visit by visit.

Tankless Water Heater Inspection and Plumbing Check in St. Petersburg, FL 33703

During a recent visit to a home in St. Petersburg, FL 33703, our team was called out for a routine plumbing inspection and to evaluate the condition of the home’s tankless water heater. Even when everything seems to be working well, these checkups are important for catching small issues early and protecting your system from future problems.

In this case, the plumbing system overall was in good shape with no active leaks or pressure issues. The main concern we uncovered was with the tankless water heater: it did not have isolation valves installed, which meant we could not safely perform a maintenance flush (descaling). That’s a key part of keeping a tankless unit efficient and reliable, especially here in Florida where mineral buildup is common.

Below, we’ll walk through what the homeowner in St. Petersburg needed, what we checked, why isolation valves matter, and how we recommended correcting the issue to keep their hot water system running smoothly for the long term.

Case Recap

  • Location: Residential home in St. Petersburg, FL 33703
  • Service: Routine plumbing inspection and tankless water heater evaluation
  • Findings: Overall plumbing in good working condition; no leaks, pressure issues, or obvious code concerns
  • Limitation: Unable to perform tankless water heater descaling due to missing isolation valves
  • Recommendations: Install a tankless water heater isolation valve kit and schedule a full descaling after installation
  • Outcome: Homeowner informed of options to protect efficiency, performance, and system lifespan

Customer Problem: Routine Checkup With a Hidden Limitation

The homeowner contacted us as part of a scheduled visit under their Premium Therapy Plan, asking us to perform a routine plumbing inspection and look over their tankless water heater. They weren’t reporting any major problems—no obvious leaks, no loss of hot water, and no noticeable changes in water pressure.

Even when everything feels fine, homeowners in St. Petersburg and across Tampa Bay benefit from these routine inspections. Florida’s water quality, humidity, and year-round demand on plumbing and hot water systems put steady stress on equipment. Catching issues early is much easier—and less expensive—than dealing with emergencies down the road.

On this visit, the homeowner’s main expectations were:

  • Confirm the plumbing system was in good working condition
  • Ensure the tankless water heater was operating properly
  • Get professional guidance on any maintenance that might be needed now or in the near future

They did exactly what we recommend for homeowners in St. Petersburg, FL 33703: call for preventive service before there’s a breakdown.

Inspection and Diagnosis: What We Checked and Why

Our plumbing technician performed a full visual and functional inspection of the home’s plumbing system and tankless water heater. Even during a routine visit, we approach the inspection the same way we would if there were an active problem—methodical and thorough.

For the general plumbing system, we focused on:

  • Visible piping and connections: Looking for corrosion, signs of prior leaks, or weak spots that could fail later.
  • Fixtures and drains: Checking sinks, toilets, and other fixtures for slow draining, drips, or unusual noises.
  • Water pressure behavior: Making sure pressure appears normal at multiple fixtures (no sudden drops or surges).
  • Signs of hidden moisture: Inspecting under sinks and around key plumbing areas for staining, dampness, or musty odors.

For the tankless water heater, we:

  • Confirmed that the unit was powering on and delivering hot water as expected.
  • Checked for visible leaks around the unit and its piping connections.
  • Looked at the piping configuration to determine whether a maintenance flush (descaling) could be performed.

The good news for this homeowner in St. Petersburg was that the plumbing system overall looked solid. At the time of our visit, we found no active leaks, no obvious pressure issues, and no visible code concerns. However, the tankless water heater setup lacked one critical component: isolation valves.

Because isolation valves were not installed, we could not safely complete the descaling process. Without these valves, flushing a tankless water heater requires disrupting the water supply for the whole home and creates a higher risk of introducing air or debris into the system. That’s not something we’re willing to do when there’s a safer, proper way to handle maintenance.

Repair or Service Process: What We Recommended and Why

Since the plumbing system itself was functioning well, our focus shifted to the tankless water heater and how to set it up for correct, ongoing maintenance. We walked the homeowner through two key recommendations.

1. Install a Tankless Water Heater Isolation Valve Kit

The first step we recommended was adding a dedicated isolation valve kit to the tankless water heater. These valves are installed on the hot and cold water lines going into the unit and often include service ports specifically designed for flushing.

Adding isolation valves allows us to:

  • Shut off water flow just to the heater, not the whole house
  • Connect flushing hoses directly to the unit in a controlled way
  • Perform maintenance safely, cleanly, and efficiently

We explained that once the valves are installed, future maintenance becomes simpler, faster, and less disruptive for the homeowner. It also ensures we can follow best practices every time we service the tankless system.

2. Schedule a Full Descaling (Flush) After Valve Installation

The second recommendation was to schedule a complete descaling service after the isolation valves are in place. Over time, tankless water heaters can build up mineral deposits from the water supply. Even if the homeowner isn’t seeing a performance issue yet, those deposits can quietly accumulate inside the heat exchanger and piping.

During a proper descaling visit, we:

  • Turn off the water supply to the heater using the isolation valves
  • Connect hoses to the service ports and circulate cleaning solution through the unit
  • Rinse the system thoroughly once scale has been loosened and removed
  • Restore normal operation and verify that the heater is working as expected

Because we couldn’t safely perform this process during the initial visit in St. Petersburg, FL 33703, the logical and safe path was to address the missing isolation valves first, then return for the descaling.

Why This Fix Works: Protecting Efficiency and Lifespan

Tankless water heaters are a great fit for Florida homes, including those in St. Petersburg, because they provide continuous hot water and can be highly efficient. But they rely on relatively small internal passages and a high-performance heat exchanger. When mineral scale builds up inside these narrow pathways, several problems can follow over time:

  • Reduced efficiency: Scale acts like insulation on the heat exchanger, making it harder for the heater to transfer heat into the water. That can mean longer run times and higher energy use.
  • Restricted water flow: Buildup inside the unit can narrow the water passages, leading to reduced hot water flow or inconsistent temperature.
  • Increased wear: The harder the heater has to work to do the same job, the more stress it places on internal components.

Regular descaling removes this buildup and restores more normal water contact with the heat exchanger, which helps the system deliver stable hot water and operate more efficiently. Isolation valves are what make that maintenance practical:

  • They create a controlled loop for flushing solution.
  • They allow the rest of the home’s plumbing system to stay isolated and protected during maintenance.
  • They reduce the time and disruption required for each service visit.

For this homeowner in St. Petersburg, the combination of adding isolation valves and scheduling routine descaling is a long-term reliability strategy. It’s not about fixing a crisis—it’s about preventing one.

Pro Tips for Homeowners in St. Petersburg

Living in St. Petersburg and the greater Tampa Bay area means your plumbing and hot water systems work hard year-round. Here are a few practical tips to help keep your tankless water heater and plumbing in good shape:

  • Ask if your tankless heater has isolation valves. If you’re not sure, a quick visual check or a visit from a licensed plumber can confirm it. If they’re missing, consider having them installed so you can schedule proper descaling.
  • Stay ahead of mineral buildup. Florida water can be mineral-heavy in many neighborhoods. Even if your hot water seems fine today, regular maintenance helps keep internal components cleaner and more efficient.
  • Watch for subtle signs of change. Longer wait times for hot water, fluctuating water temperature, or reduced flow at hot fixtures can all be early signals that your tankless heater or plumbing needs attention.
  • Schedule routine plumbing inspections. A periodic whole-home plumbing check—similar to what we performed in St. Petersburg, FL 33703—can catch small issues like slow leaks or aging shutoff valves before they become emergencies.
  • Consider overall water quality solutions. If you notice frequent scale on fixtures, cloudy glasses, or spotting on shower doors, you may benefit from a water treatment or filtration system. Our team can review options to help protect both your plumbing and your appliances.
  • Know where your main water shutoff is. In case of an emergency, being able to quickly shut off water to the home can minimize damage while you wait for a plumber to arrive.

FAQ: Tankless Water Heaters and Plumbing Maintenance in St. Petersburg

Why couldn’t you descale the tankless water heater during this visit?

We were unable to descale the tankless water heater because it did not have isolation valves installed. Without those valves, there’s no safe, controlled way to circulate cleaning solution through just the heater without affecting the rest of the home’s plumbing. Installing a proper isolation valve kit is the first step toward safe, effective maintenance.

Is it a problem if my tankless water heater doesn’t have isolation valves?

The heater can still operate without isolation valves, but it’s much harder to maintain correctly. Over time, mineral buildup can reduce efficiency and flow. Isolation valves make it possible to perform regular descaling, which helps protect the unit’s performance and lifespan, especially in areas like St. Petersburg where mineral content can be a concern.

How often should I have my tankless water heater serviced?

The ideal frequency depends on your water quality and usage. Many manufacturers recommend annual maintenance in areas with moderate to hard water. Even if everything seems to be working, having a licensed professional inspect and, when needed, descale the unit on a consistent schedule is a smart move for homeowners in St. Petersburg, FL 33703.

What did you check during the plumbing inspection?

During this visit, we performed a full plumbing inspection, including checking for active leaks, looking at visible piping and connections, assessing fixture performance, and watching for signs of pressure problems or visible code concerns. At the time of our inspection, the system appeared to be in good working order.

Can I descale a tankless water heater myself once isolation valves are installed?

Some homeowners attempt DIY descaling, but we recommend using a licensed professional. A technician can ensure the process is done correctly, safely, and thoroughly, and can also inspect the unit for any developing issues. That way, you’re not just flushing the system—you’re getting a full health check for your heater.

Is this type of maintenance covered under service plans?

Maintenance needs can vary by plan and equipment. Under programs like our Premium Therapy Plan, we focus on regular inspections and proactive recommendations. If you’re in St. Petersburg or the surrounding Tampa Bay area, our team can review your specific plan details and outline what’s included for your plumbing and tankless water heater.

Helpful Resources for Tampa Bay Homeowners

If you’d like to learn more about plumbing maintenance and related services, we cover many of these topics in detail on our website. For example, our whole-home repiping services page explains how we handle aging or failing piping systems, and our water filtration installation services page discusses options for improving water quality and reducing mineral-related issues.

We also share practical advice for avoiding common plumbing issues in our blog, including articles like drain inspection tips for Tampa homeowners and information on how membership and maintenance plans support reliable plumbing services in the Tampa area.

Why Choose Home Therapist for Plumbing and Tankless Water Heater Service

When you invite us into your home in St. Petersburg, you’re not just getting a quick in-and-out visit. Our goal is to understand the full picture of your plumbing system, explain what we see in clear terms, and help you make decisions that protect your home for the long run.

Here’s what you can expect when you work with Home Therapist Cooling, Heating, and Plumbing:

  • Licensed and professional technicians: Our plumbers are trained, licensed, and experienced with both traditional plumbing systems and modern equipment like tankless water heaters.
  • Transparent communication: We walk you through our findings, explain why we recommend certain options, and answer your questions in plain language—no pressure, no scare tactics.
  • Clean and respectful work: We treat your home carefully, work neatly, and clean up after ourselves so you’re left with comfort, not a mess.
  • Long-term reliability focus: We don’t just fix what’s urgent today. We look for ways to prevent future issues and extend the life of your plumbing and hot water systems.
  • Commitment to Tampa Bay homeowners: We’re local, and we understand the specific plumbing challenges that come with living in the Tampa Bay area—from mineral buildup to high usage and storm seasons.

If you’d like to get to know us better, you can connect with our team and see more of our work on social media. Visit us on Facebook, follow along on Instagram, or check out educational videos and project highlights on our YouTube channel.

For added peace of mind, you can also see what others in the community say about us on trusted platforms. Our Google business listing and our profile on Yelp are great places to read real experiences from Tampa Bay homeowners we’ve helped.

Need Plumbing or Tankless Water Heater Help in St. Petersburg, FL 33703?

If you live in St. Petersburg, FL 33703 and aren’t sure when your tankless water heater was last inspected or descaled, or if you simply want a professional set of eyes on your plumbing system, we’re here to help. Whether it’s confirming that everything is in good shape, adding isolation valves for safer maintenance, or addressing a specific concern, our local Tampa Bay technicians are ready to support you.

Reach out to Home Therapist Cooling, Heating, and Plumbing to schedule your next plumbing inspection or tankless water heater service. We’ll take the time to explain what we find, outline your options clearly, and help you keep your home’s plumbing running smoothly and reliably.

UV Air Treatment Installation in St. Petersburg, FL 33703

When the UV light in an HVAC system fails, most homeowners in St. Petersburg, FL 33703 don’t notice right away. There’s no loud noise or obvious leak—just a slow decline in air quality and a higher chance of mold trying to take hold inside the air handler. On this visit, we were called out to a home in St. Petersburg to look at a broken UV air treatment system and give an estimate to replace it. Once the homeowner approved the work over the phone, we installed a new UV light and set her up with a maintenance plan to keep everything in good shape going forward.

In this walkthrough, we’ll explain what we found, how we diagnosed the issue, what we installed, and why a properly working UV air treatment system matters for indoor air quality in a humid place like St. Petersburg, FL 33703.

Case Recap

  • Service location: Single-family home in St. Petersburg, FL 33703
  • Initial concern: Existing HVAC UV light was broken and not operating
  • Requested service: Estimate to replace the current UV air treatment system
  • Solution: New UV air treatment light installed at the air handler
  • Added value: Premium maintenance plan set up for ongoing system care
  • Outcome: UV system restored, air handler protected, and homeowner has a plan for routine checkups

Customer Problem: A Broken UV Light and Concerns About Air Quality

The homeowner in St. Petersburg reached out because her existing UV light air treatment system had stopped working. She knew the UV system was supposed to help keep the inside of the air handler cleaner and was concerned that, without it, mold and other organic growth could develop over time.

In our area, with our heat and humidity, that concern is very understandable. The air handler stays moist as it pulls humidity out of the air. When you combine moisture, darkness, and warm temperatures, you create a perfect environment for mold growth. A UV light doesn’t solve every air quality issue, but it is a strong layer of protection inside the unit when it’s working correctly.

Her main questions were straightforward:

  • Is the current UV light really broken, or is it just a bulb issue?
  • What are the options for replacement?
  • How quickly can the new UV light be installed?

She asked us to come out, inspect the system, and provide an honest estimate to replace the broken UV air treatment setup. Once we reviewed the options with her over the phone, she approved moving forward with the new installation.

Inspection and Diagnosis: Confirming the UV System Failure

When we arrive at a home in St. Petersburg, FL 33703 for an air quality or UV light concern, we don’t jump straight to replacement. We start with a short but careful inspection to confirm what’s actually going on.

For this visit, our inspection focused on three main areas:

  • Visual check of the UV assembly: We look at the UV housing, mounting location, and wiring at the air handler to ensure nothing is physically damaged or out of place.
  • Power and safety checks: We verify that the UV system is receiving power and that there are no obvious electrical issues at the connection point.
  • UV bulb and component condition: We check whether the bulb has failed, looks darkened, or shows clear signs of end-of-life.

In this case, the UV system was indeed not operating. The homeowner’s description matched what we found: the current UV light was broken and no longer providing any treatment inside the air handler. Based on the condition of the components and the homeowner’s goals, we recommended replacing the existing unit with a new UV air treatment system designed to run continuously alongside the air handler.

We explained the replacement option, benefits, and expectations clearly over the phone. Once she approved the estimate, we proceeded with the installation.

Repair and Service Process: Installing the New UV Air Treatment System

Our goal with any UV air treatment installation in St. Petersburg, FL 33703 is to keep the work neat, safe, and effective long-term. Here’s how we handled this project from start to finish.

1. Preparing the Work Area

First, we made sure the work area around the air handler was clean and accessible. That includes:

  • Protecting nearby surfaces where necessary
  • Clearing any items stored around the unit so we can work safely
  • Verifying we can access the coil and plenum area without forcing or bending panels

Being careful at this stage helps us avoid damage to the equipment and keeps the home tidy while we work.

2. Removing the Old UV Components

Next, we disconnected the existing UV light components. This typically involves:

  • Safely disconnecting power to the UV device
  • Removing the failed bulb and associated hardware
  • Inspecting the mounting location for any signs of heat damage or wear

Even though the old light was no longer functioning, we still remove it carefully so there are no loose wires, gaps, or leftover parts that could cause issues down the road.

3. Installing the New UV Air Treatment System

With the old unit out of the way, we installed the new UV light assembly. We position these lights so they can shine directly on key components inside the air handler—most importantly, the evaporator coil and nearby surfaces where moisture can linger.

During installation we focus on:

  • Proper mounting: Securing the UV housing so it stays stable over time and doesn’t stress the air handler cabinet.
  • Correct alignment: Ensuring the UV light is aimed where it can be most effective inside the unit.
  • Safe penetration points: Only using approved locations in the cabinet for installing the UV assembly.

4. Electrical Connection and Safety Checks

Once the physical installation is complete, we connect the UV light to its power source following manufacturer and safety guidelines. That includes:

  • Making tight, secure electrical connections
  • Routing wiring neatly so it’s protected and doesn’t rub against sharp edges
  • Confirming that safety covers and panels are reinstalled correctly

We then restore power and confirm that the UV light is operating as intended. We do not rely on guesswork—we visually verify that the system is on and appears to be working properly.

5. Final Operation Check and Cleanup

After installation, we perform a final check of the air handler to make sure everything is closed up and running as expected. We confirm that the unit starts and runs normally and that the UV device is functioning.

Just as important, we clean up the work area, remove any old parts and debris, and leave the space as tidy as we found it—or better. Respecting the home is a big part of how we work throughout St. Petersburg and the rest of Tampa Bay.

6. Enrolling in a Premium Maintenance Plan

In addition to replacing the broken UV system, the homeowner also chose a premium maintenance plan. While we won’t go into every detail of the plan here, the idea is simple: regular checkups help keep the entire HVAC system, including accessories like the UV light, running reliably.

For homeowners in St. Petersburg, FL 33703, a plan like this helps ensure that bulbs are replaced at appropriate intervals, components are inspected, and small issues are caught before they become bigger, more expensive problems.

Why This UV Air Treatment Fix Works

UV air treatment systems are designed to shine ultraviolet light on surfaces inside the air handler—especially the evaporator coil and nearby areas that stay damp during cooling. In our climate, that moisture can lead to mold and organic buildup if it’s left unchecked.

Here’s why replacing the broken UV light made sense for this home in St. Petersburg:

  • Direct exposure: Mold and microorganisms that are in the line-of-sight of the UV bulb are exposed to ultraviolet energy, which disrupts their ability to grow and reproduce.
  • Continuous operation: UV systems are typically designed to run 24/7, providing constant treatment in the space around the coil.
  • Cleaner coil surfaces: When the coil and nearby components stay cleaner, it supports more efficient heat transfer and helps the system work the way it was intended.

It’s important to be clear: a UV light is one piece of the indoor air quality puzzle. It doesn’t replace the need for clean filters or proper ductwork, and it doesn’t fix unrelated HVAC issues. But when combined with good filtration and routine maintenance, a working UV system is a strong line of defense against organic growth inside your equipment.

For this St. Petersburg homeowner, restoring the UV system and adding a maintenance plan provided exactly what she wanted: better protection inside the air handler and a clear path for keeping it that way.

Pro Tips for Homeowners in St. Petersburg

Living in St. Petersburg and the wider Tampa Bay area means dealing with heat, humidity, and long cooling seasons. Here are a few practical tips to get the most out of your UV air treatment system and your HVAC equipment overall:

  • 1. Keep up with filter changes. Even with a UV light, your system still depends on a clean filter. Regular filter changes help keep dust from collecting on the coil and improve airflow. If you’re unsure what type of filter is best, we can help you choose and even handle air filter installation and replacement services.
  • 2. Don’t ignore musty odors. If you notice persistent musty smells from your vents, don’t wait months to have it checked. It doesn’t always mean mold, but it’s worth a look—especially in our humid St. Petersburg climate.
  • 3. Consider duct and vent cleaning when needed. UV lights treat surfaces they can “see” inside the air handler. They don’t reach into your ductwork. If you haven’t had your ducts or dryer vent looked at in a while, services like professional air duct cleaning and dryer vent cleaning can support better airflow and safety.
  • 4. Ask about UV bulb life. UV bulbs don’t last forever. Even if they still “look” like they’re on, their effectiveness drops over time. During routine visits, we can let you know when it’s time to replace the bulb so you’re not relying on a light that’s past its useful life.
  • 5. Schedule routine HVAC maintenance. With Florida systems running much of the year, having a recurring maintenance plan—like the one this St. Petersburg homeowner chose—is one of the best ways to keep everything, including your UV system, in solid working order.
  • 6. Keep the area around your air handler clear. Whether it’s in a closet, garage, or attic, try to keep boxes and stored items away from the air handler. That gives us room to work and helps maintain proper airflow around the equipment.

FAQ: UV Air Treatment Systems in St. Petersburg, FL 33703

How do I know if my HVAC UV light is working?

Most UV systems have an indicator or a safe viewing port that lets a technician confirm operation. During a service visit, we visually verify that the light is on and appears to be operating normally. If you suspect it has failed—especially if it has been in place for several years—it’s a good idea to have it inspected.

Do I still need good air filters if I have a UV light?

Yes. UV lights and filters do different jobs. The UV light focuses on organic growth on surfaces inside the air handler, while the filter captures dust and particles in the air. For homeowners in St. Petersburg, using both together is the best approach for protecting your equipment and improving indoor air quality.

Will a UV light fix odors in my home?

A properly installed UV system can help reduce certain musty odors that come from organic growth inside the air handler. However, not all odors start there. That’s why we look at the whole HVAC system—including ducts, filters, and sometimes even the home’s layout—before promising any odor-related improvements.

How long does it take to replace a broken UV light?

For most homes in St. Petersburg, FL 33703, replacing a broken UV air treatment system is a relatively quick visit once the equipment is on-site and approved. The actual work typically takes about the length of a standard HVAC service appointment, depending on access and the specific setup of your air handler.

Is a maintenance plan really necessary for a UV system?

While you can replace a UV light without a maintenance plan, having regular HVAC checkups makes it much easier to keep track of bulb life, system cleanliness, and overall performance. For this homeowner, enrolling in a premium plan added peace of mind and helped ensure the new UV system will be inspected routinely.

Can a UV light replace duct cleaning?

No. A UV light treats surfaces inside the air handler where it shines; it does not clean or disinfect your entire duct system. If there are concerns about dust, debris, or buildup inside the ductwork, we may recommend separate services such as duct cleaning in addition to UV treatment and proper filtration.

Why Choose Home Therapist for UV Air Treatment in Tampa Bay

When you invite a technician into your home in St. Petersburg or anywhere in Tampa Bay, you’re trusting us with your comfort and your equipment. We take that seriously.

Here’s what you can expect from Home Therapist when you need a UV light replacement or any HVAC service:

  • Licensed, professional technicians: Our team is trained on both standard HVAC systems and accessories like UV air treatment devices, so we can recommend and install solutions that make sense for your home.
  • Transparent communication: We explain what we find, what’s broken, and what your realistic options are before we move forward. In this St. Petersburg job, the homeowner approved the UV replacement over the phone after we walked through the estimate clearly.
  • Clean, respectful work: We treat your home like it’s our own—laying out a clean work area, removing old parts, and cleaning up before we leave.
  • Focus on long-term reliability: We don’t just swap parts and walk away. We look at how your equipment, UV system, filtration, and maintenance all work together to keep your system reliable for the long haul.
  • Commitment to Tampa Bay homeowners: We’re a local company serving St. Petersburg, Tampa, and surrounding communities, and we stand behind our work on every visit.

If you’d like to get a feel for who we are and how we work, you can connect with us on our Facebook page, follow us on Instagram, or watch our videos on our YouTube channel.

For added peace of mind, you can also review our standing with local organizations. Our company is listed with the Tampa Bay Chamber of Commerce and maintains a profile with the Better Business Bureau, reflecting our commitment to professionalism and accountability in the community.

Need UV Air Treatment Service in St. Petersburg, FL 33703?

If your current UV light is broken, you’re noticing musty odors, or you simply want to add extra protection inside your air handler, we’re here to help. Our local Tampa Bay technicians regularly serve homeowners in St. Petersburg, FL 33703, and we can walk you through whether a UV air treatment system or other indoor air quality solutions make sense for your home.

Whether you’re ready to replace a failed UV system, explore a maintenance plan, or just have questions about your HVAC equipment, reach out to Home Therapist. We’ll take the time to listen, explain your options in plain English, and leave your home as clean and comfortable as we found it.

When you’re ready, schedule your UV air treatment service in St. Petersburg, FL 33703 and let our team help keep your air handler cleaner and your system running the way it should.

Blower Wheel Cleaning and Indoor Air Quality Service in Lutz, FL 33558

When the blower wheel inside your air handler gets dirty, your air conditioner has to work harder and your home never feels quite as comfortable as it should. For a homeowner in Lutz, FL 33558, we came back out to finish a blower wheel cleaning so their system could move air properly again, improve indoor air quality, and run more efficiently in our hot, humid Florida climate.

In this visit, we completed the cleaning work, verified that everything was running smoothly, and talked through simple steps—like regular filter changes and installing a UV light—to help keep the system cleaner for the long term.

Case Recap

  • Location: Single-family home in Lutz, FL 33558
  • Service: Finish blower wheel cleaning in the air handler
  • Concern: Dust and buildup on the blower reducing airflow and comfort
  • Solution: Complete blower wheel cleaning and confirm proper operation
  • Prevention: Recommended frequent filter changes and a UV light for organic growth control
  • Outcome: Quieter, smoother airflow and a cleaner, more efficient system for the homeowner

Customer Problem

Like many homeowners in Lutz, the customer was dealing with a system that wasn’t moving air as well as it should. Over time, dust and debris had collected on the blower wheel—the part of the air handler that actually pushes air through the ductwork and into each room.

When the blower wheel gets dirty, several things can start to happen:

  • Airflow drops, so rooms feel warmer or more humid even when the thermostat is set correctly.
  • The system may run longer cycles to keep up, which can raise energy bills.
  • Dust can recirculate through the home, affecting indoor air quality.

This visit to the Lutz, FL 33558 home was specifically to finish the blower wheel cleaning that had been planned. The goal was simple: get the blower clean, protect the equipment, and help the homeowner enjoy more consistent comfort.

Inspection and Diagnosis

Before we got back to work on the blower, we performed a quick visual inspection and basic checks to make sure nothing had changed since the original visit and that the system was safe to service.

Here’s what we focused on during the inspection in this Lutz, FL 33558 home:

  • Air handler condition: Checking for any visible moisture, rust, or signs of leaks around the cabinet.
  • Blower wheel access: Confirming we had proper access and that the wheel and housing were ready to be fully cleaned.
  • Filter condition: Looking at the air filter to get a sense of how much dust was getting into the system and how often it might be getting changed.
  • Overall airflow: Listening to the system running and feeling the supply vents to compare airflow before and after cleaning.

The main issue in this case was the dirty blower wheel. Nothing in the visit suggested additional mechanical failures; the priority was to complete the cleaning correctly and then talk with the homeowner about prevention options like better filtration and UV light for organic growth control.

Blower Wheel Cleaning: Step-by-Step

Blower wheel cleaning is one of those behind-the-scenes tasks that make a big difference in day-to-day comfort. It’s not flashy, but it’s important. Here’s how we approached it for this Lutz, FL 33558 homeowner.

1. Safely Shutting Down the System

We started by turning off power to the air handler at the appropriate disconnect and thermostat. Working on any moving electrical component requires a safe, powered-down system. This protects the equipment and our technicians, and it prevents accidental damage to internal components.

2. Opening the Air Handler and Accessing the Blower

Once the system was safe, we removed the access panels to reach the blower assembly. On many systems, the blower wheel sits inside a metal housing, mounted with the motor. Access can be tight, so we take our time to avoid bending fins, pulling wires, or stressing other parts of the system.

3. Cleaning the Blower Wheel and Housing

With the blower assembly exposed, we focused on carefully removing dust and buildup from the blower wheel blades and the surrounding housing. The goal is not just to make it look clean, but to restore the intended shape and surface of the blades so air can move smoothly.

During this cleaning process we:

  • Addressed visible dust and debris on the blower wheel blades.
  • Took care not to bend or damage the wheel fins.
  • Cleaned accumulated dust inside the blower housing area where accessible.

Because the primary objective of this visit was to finish a blower wheel cleaning that had already been started, we focused on the remaining sections of the wheel and housing to ensure it was fully cleaned, not just partially improved.

4. Reassembly and Visual Checks

After cleaning, we reassembled the blower assembly and reinstalled all access panels. Before restoring power, we performed a final visual check to make sure everything was secure, wiring was in place, and there were no tools or debris left inside the cabinet.

5. Testing System Operation

With the system put back together, we restored power and ran the air conditioner to confirm proper operation. We listened for unusual noises, checked that the blower was running smoothly, and verified that airflow at the vents felt more consistent.

While we don’t list specific measurements here, we always verify that the system is operating as expected after any internal cleaning or maintenance work.

Why This Fix Works

The blower wheel is essentially the “lungs” of your HVAC system. Its job is to pull air across the evaporator coil and push that conditioned air through your ductwork into every room.

In our hot and humid Florida climate—especially in communities like Lutz, FL 33558—systems run for long hours. That means more air passing through the blower and more opportunity for dust and debris to collect on the blades.

When the blower wheel gets dirty:

  • The blades can’t grab and move air as effectively.
  • Airflow drops, which can impact comfort and humidity control.
  • The motor may work harder, which can affect longevity.

By cleaning the blower wheel and housing, we restore more normal airflow through the system. That helps the air conditioner cool more evenly, improves circulation across the coil, and supports better filtration and indoor air quality overall.

It’s not a “cosmetic” cleaning—it’s a performance and comfort improvement.

Filter Changes and UV Light: Preventing Future Buildup

During this visit in Lutz, we didn’t just finish the blower cleaning and leave. We also talked with the homeowner about how to keep the system cleaner going forward. Two key recommendations were:

1. Change Filters Regularly

Dirty filters are one of the main reasons blower wheels get coated with dust. When filters aren’t changed often enough, dust and debris pass through and start collecting on internal components.

We recommended that this Lutz, FL 33558 homeowner keep up with frequent filter changes to help prevent:

  • Excess dust settling on the blower wheel.
  • Build-up on the evaporator coil.
  • Unnecessary strain on the blower motor and system.

For more details on filtration options and professional help with filter-related issues, homeowners can learn more on our air filter installation and repair page.

2. Consider Installing a UV Light

We also recommended installing a UV light in the air handler to help reduce organic growth on internal surfaces. UV lights are often placed near the evaporator coil, where moisture and darkness can create conditions for microbial growth.

While a UV light doesn’t replace filter changes or regular cleaning, it can be a helpful add-on to:

  • Discourage organic growth on the coil and nearby components.
  • Support cleaner indoor air.
  • Help keep internal components cleaner between maintenance visits.

If you’re interested in learning more about how UV lights fit into a whole-home plan, we’ve shared additional insights in our blog resources, including posts like our article on planning for UV light installation and guidance on scheduling UV light installation alongside other services.

Pro Tips for Homeowners in Lutz

For homeowners in Lutz, FL 33558 and surrounding Tampa Bay communities, here are some practical ways to help keep your blower and air handler cleaner, longer:

  • Stay on a filter schedule: Set a reminder on your phone or calendar to check your filter monthly, especially during peak cooling season. Replace it as soon as you see noticeable dust buildup.
  • Keep returns clear: Avoid blocking return air grilles with furniture, curtains, or clutter. Restricted return airflow makes the blower work harder and can worsen dust issues.
  • Consider duct and vent cleaning when appropriate: If you haven’t had your ducts looked at in a long time and you’re seeing dust around vents, it may be time to consider professional help like our air duct cleaning services.
  • Watch for changes in airflow or noise: If certain rooms suddenly feel warmer, or you hear the blower struggling or sounding louder than usual, it may be a sign that dust buildup or another issue is starting.
  • Schedule routine maintenance: Regular checkups help catch dust buildup and minor issues before they turn into bigger problems. Our team provides HVAC service throughout Hillsborough County; you can learn more on our Hillsborough County service page.
  • Ask about indoor air quality upgrades: In our humid Florida climate, products like UV lights and enhanced filtration can be worth considering, especially if anyone in the home has allergies or respiratory sensitivities.

FAQ: Blower Cleaning and Indoor Air Quality

How do I know if my blower wheel needs cleaning?

Common signs include reduced airflow at your vents, rooms that don’t cool as evenly as they used to, and longer run times for your air conditioner. A technician can confirm the condition of the blower wheel by inspecting the air handler interior.

Is blower wheel cleaning something I can do myself?

We don’t recommend homeowners in Lutz try to clean the blower wheel on their own. Access can be tight, wiring is present, and the wheel is easy to damage if handled incorrectly. A licensed technician has the tools and experience to perform a thorough, safe cleaning.

How often should blower wheels be cleaned in Florida?

The right interval depends on how much your system runs, how often filters are changed, and the general dust level in your home. Instead of setting a fixed schedule, we suggest having the system inspected regularly; we’ll let you know when cleaning is truly needed.

Will a UV light replace filter changes?

No. A UV light is designed to help with organic growth on internal surfaces; it doesn’t catch dust the way a filter does. You still need to change your filters regularly, even if you have a UV light installed in your air handler.

What can I do between professional visits to keep my system cleaner?

Change filters on time, keep vents and returns unblocked, and pay attention to any changes in airflow, noise, or comfort. If something feels off, it’s better to have a professional take a look sooner rather than later.

Why Choose Home Therapist for HVAC Service in Lutz

When you invite our team into your home in Lutz, FL 33558, you’re trusting us with your comfort and your equipment. We take that seriously.

Here’s what you can expect from Home Therapist on every visit:

  • Licensed, professional technicians: Our team is trained to handle blower cleanings, maintenance, repairs, and full system work with care and attention to detail.
  • Transparent communication: We explain what we find in plain language, walk you through your options, and answer questions honestly. No pressure, no surprises.
  • Clean, respectful work: We treat your home like our own—using care around your belongings and leaving the work area tidy.
  • Long-term reliability focus: We’re not just there to “patch it up for today.” We aim for solutions that support long-term comfort, efficiency, and system health.
  • Commitment to Tampa Bay homeowners: We live and work in the same communities we serve, including Lutz, Tampa, and the greater Tampa Bay area.

If you’d like to get a feel for who we are and how we work, you can connect with us and see updates from our team on Facebook and Instagram, or even follow along on TikTok.

For additional peace of mind, you can also review our profiles on trusted platforms like Yelp, BuildZoom, and HomeGuide.

Need Blower Cleaning or HVAC Service in Lutz, FL 33558?

If your system isn’t moving air like it used to, or you’re concerned about dust and indoor air quality, we’re here to help. Whether you need blower wheel cleaning, filter guidance, or want to explore UV light options, our Home Therapist team is ready to serve homeowners in Lutz, FL 33558 and across the Tampa Bay area.

Reach out to schedule a visit, and we’ll work with you to get your system cleaned up, running smoothly, and keeping your home comfortable again.

AC Tune-Up, Duct Repair, and Attic Insulation Recommendations in Tampa, FL 33610

During a recent Elite Therapy Plan visit to a home in Tampa, FL 33610, we came out for a routine AC tune-up on a system we had installed about six months earlier. The goal was simple: make sure the unit was running smoothly before the next stretch of Florida heat. While the equipment itself checked out in good shape, our attic inspection uncovered two important issues—low insulation levels and damage to a couple of ducts, likely tied to a past rodent problem.

In this walkthrough, we’ll explain what we found, why it matters for comfort and energy bills, and how addressing attic insulation and duct damage can help homeowners in Tampa, FL 33610 get the most out of their air conditioning system.

Case Recap

  • Location: Single-family home in Tampa, FL 33610
  • Service: Elite Therapy Plan AC tune-up visit #4
  • System condition: Newer system (around six months old) in good working order
  • Findings: Low attic insulation and two damaged ducts, likely from prior rodent activity
  • Work completed: Full AC maintenance and tune-up, system cleaned and checked
  • Recommendations: Replace the two damaged ducts and add attic insulation to improve efficiency and comfort

Customer Problem: Keeping a New System Running Efficiently

This homeowner in Tampa, FL 33610 is enrolled in our Elite Therapy Plan, which means we come out on a regular schedule to maintain their system. On this visit, the concern wasn’t a breakdown; it was preventive care.

Because the system was installed relatively recently, the homeowner wanted to be sure everything was still running like new and that there were no hidden issues that could shorten the life of the equipment or cause energy bills to creep up. With Florida’s heat and humidity, even a small issue in the attic or ductwork can make a newer system work harder than it should.

They’d also dealt with rodent activity in the past, so they were understandably concerned about any damage that might have been left behind in the attic where the ductwork runs.

Inspection and Diagnosis

On every AC tune-up in Tampa, we follow a structured process. For this visit in Tampa, FL 33610, our technician started at the air handler and outdoor unit, then moved into the attic to inspect the ductwork and insulation.

Here’s what we focused on and why:

  • System operation: We checked overall start-up, run cycle, and shut-down to make sure the equipment responded properly to thermostat calls.
  • Airflow paths: We inspected filters, supply and return vents, and accessible duct runs to look for restrictions, leaks, or damage.
  • Attic and duct condition: Because of the homeowner’s prior rodent issues, we paid special attention to duct insulation, any visible tears, and signs of previous activity.
  • Insulation levels: We visually checked insulation coverage in the attic to see whether the depth and distribution were adequate for efficient HVAC performance.

The equipment itself was in good condition for its age. We did not find any mechanical failures or obvious component problems during this visit. The important findings were in the attic:

  • Low attic insulation: The insulation coverage was clearly lower than ideal, leaving parts of the attic under-insulated. That means more heat entering the home from the attic, especially in our Tampa climate.
  • Two damaged ducts: We discovered two duct runs with visible damage. Based on what we saw and the homeowner’s history with rodents, the damage was consistent with previous rodent activity, even though the ductwork itself is not very old.

We documented the condition, walked the homeowner through what we found, and explained how these attic and duct issues affect their comfort and their power bill, even when the AC unit itself is in good shape.

Repair and Service Process During This Visit

Because this visit was scheduled as an Elite Therapy Plan tune-up, our main scope for the day was full system maintenance. We completed all of the standard steps we perform on AC maintenance in Tampa homes and then added a detailed attic evaluation.

Here’s how we approached the work:

1. Full AC Tune-Up

We completed a thorough maintenance service on the six-month-old system, including:

  • Checking and cleaning key components for proper operation
  • Inspecting the indoor unit, outdoor unit, and accessible electrical connections
  • Reviewing airflow at the registers to confirm even distribution
  • Verifying the system cycled on and off correctly with the thermostat

We also updated our notes on the correct filter sizing for this system so that future visits are streamlined and the homeowner always has the right filter information when they need it.

2. Attic and Ductwork Inspection

Next, we moved into the attic to focus on the parts of the system most homeowners never see:

  • Duct visual inspection: We followed the duct runs, checking for crushed sections, loose connections, and any rips or tears.
  • Damage identification: We found two ducts with clear damage. While air was still moving, these sections were compromised and likely losing conditioned air into the attic space.
  • Insulation review: We evaluated the coverage and consistency of the attic insulation and found it was lower than we’d like to see for an efficient system.

We took time to show the homeowner photos and explain what we were seeing so they didn’t have to guess about conditions in the attic.

3. Clear Recommendations for the Homeowner

Because the tune-up portion was successfully completed and the equipment was operating properly, the remaining work we recommended was focused on the building envelope and ductwork:

  • Replace the two damaged duct sections: Swapping out those damaged ducts will help reduce air loss into the attic, improve comfort in the rooms they serve, and ease the load on the system.
  • Add attic insulation: Increasing attic insulation will help the home hold cool air longer, reduce heat gain from the attic, and support lower energy usage over time.

We explained that while the system is new and currently performing well, addressing these two issues will protect their investment and help keep monthly bills more predictable—especially in a Tampa, FL 33610 summer.

Before leaving, we rechecked system operation after the maintenance steps and confirmed that the AC was running as expected for the day’s conditions.

Why This Fix Works: Airflow, Insulation, and Efficiency

Even with a brand-new AC system, your comfort in Tampa, FL 33610 depends heavily on where that conditioned air goes and how well your home holds onto it. Two big factors are duct condition and attic insulation.

Damaged ducts allow cooled air to escape into the attic before it reaches your living spaces. That means:

  • Some rooms may feel warmer or less comfortable
  • The thermostat may run the system longer to reach the set temperature
  • The equipment sees more run time and wear than necessary

By replacing damaged duct sections, we restore a sealed path for air to travel, which supports balanced temperatures and reduces wasted energy.

Low attic insulation works against your AC by allowing heat from the attic to seep into the home. With Florida’s sun and humidity, attic temperatures can climb significantly, and without enough insulation, that heat transfers down into the living areas. The AC then has to work harder to pull that heat back out.

Adding insulation improves the thermal barrier between the attic and the living space. The result is:

  • More stable indoor temperatures room-to-room
  • Reduced run time for the AC system
  • Better long-term efficiency and comfort

Combined with consistent professional maintenance—like the Elite Therapy Plan tune-up we completed—these upgrades help ensure the system we installed continues delivering the comfort and reliability the homeowner expects.

Pro Tips for Homeowners in Tampa

For homeowners in Tampa, FL 33610 and across the Tampa Bay area, the combination of heat, humidity, and long cooling seasons means your attic and ducts matter just as much as your AC unit. Here are a few practical tips:

  • Have your attic checked every few years. Insulation can settle, shift, or get disturbed over time. A quick attic inspection during your maintenance plan visit can catch issues early.
  • Pay attention to room-to-room comfort. If certain rooms stay warmer, it may not be the AC itself—it could be ducts, insulation, or airflow balance. Mention those rooms when your technician visits.
  • Address rodent activity promptly. After a rodent problem, have the ductwork inspected. Chewed or torn ducts are a common hidden issue that quietly raises energy bills.
  • Change filters on schedule. In Tampa’s climate, filters often need more frequent changes. Clean filters protect your system and help maintain strong airflow.
  • Consider a maintenance plan. A structured plan keeps tune-ups on the calendar, so your system gets checked before peak season instead of after a problem shows up.
  • Ask for photos of attic findings. If you’re not comfortable going into the attic, request pictures so you can see duct and insulation conditions for yourself.

FAQ: AC Maintenance, Duct Damage, and Insulation in Tampa, FL 33610

Do I really need a tune-up if my AC is only six months old?

Yes. In Tampa, systems work hard almost year-round. A tune-up on a newer system helps confirm the installation is holding up well under real-world conditions, catches early issues like duct or insulation problems, and protects your warranty and long-term performance.

Can low attic insulation really affect my energy bill?

It can. When your attic isn’t insulated properly, heat from the attic flows into your living space. Your AC has to run longer to pull that heat back out. In a hot and humid area like Tampa, FL 33610, improving attic insulation can make a noticeable difference in comfort and operating costs.

How serious is duct damage from rodents?

Even small tears or holes in ducts can leak a significant amount of conditioned air into the attic. That air never reaches your rooms, so you lose comfort and efficiency. If you’ve had rodent issues in the past, it’s a good idea to have your ductwork inspected and any damaged sections replaced.

My system seems to run fine—why worry about ducts and insulation?

Your thermostat and equipment only tell part of the story. The system can run and cool, but if ducts are leaking or the attic is under-insulated, you’re paying more for that cooling than you should, and some rooms may never feel quite right. Fixing these hidden issues lets your AC do its job more effectively.

What happens during an Elite Therapy Plan visit?

During an Elite Therapy Plan visit, we perform a full tune-up: checking system operation, cleaning key components, reviewing airflow, and looking over accessible ducts and attic conditions. The visit we completed in Tampa, FL 33610 is a good example—no major equipment failures, but important attic and duct findings that will help the homeowner plan smart upgrades.

How do I know if it’s time to replace my ducts or upgrade my insulation?

The best starting point is a professional inspection. We look for visible damage, age-related wear, and insulation coverage. From there, we’ll explain what’s urgent, what’s recommended, and what can be planned for later, so you can make decisions that fit your budget and comfort goals.

Why Tampa Bay Homeowners Choose Home Therapist

At Home Therapist Cooling, Heating, and Plumbing, we treat every visit—whether it’s a simple tune-up or a larger project—as an opportunity to protect your comfort and your home. For homeowners in Tampa, FL 33610 and throughout Tampa Bay, that means:

  • Licensed, professional technicians: Our team is trained, licensed, and experienced with Florida homes, attics, and climate challenges.
  • Transparent communication: We show you what we find, explain your options in plain language, and never pressure you into a decision.
  • Clean, respectful work: We treat your home with care—shoe covers, tidy workspaces, and clear cleanup before we leave.
  • Long-term reliability focus: We don’t just fix the symptom; we look for underlying issues like duct leaks and low insulation that can affect your system over time.
  • Commitment to Tampa Bay homeowners: We live and work here too, and we design our services around the real conditions our neighbors face every summer.

If you’d like to see what other local homeowners say about working with us, you can check out our social channels and community profiles:

For added peace of mind, you can also review our listings with trusted organizations:

Need AC Maintenance or Duct Help in Tampa, FL 33610?

If you’re in Tampa, FL 33610 and it’s been a while since your last tune-up—or if you suspect duct damage or poor attic insulation—our local technicians are here to help. We can perform a thorough HVAC maintenance and inspection, document what we find, and give you clear recommendations so you can choose what’s right for your home.

Whether you need a routine AC tune-up, help planning duct repairs, or guidance on improving attic insulation, Home Therapist Cooling, Heating, and Plumbing is ready to keep your home comfortable and efficient through every Tampa Bay season.

Reach out today to schedule your visit, and let us take care of the details so you can enjoy a cooler, more comfortable home.

Heat Pump Installation and Copper Line Replacement in Tampa, FL 33624

When a homeowner in Tampa, FL 33624 reached out about replacing an older system, they weren’t just looking for a new air conditioner. They needed a reliable, efficient heat pump setup, safe electrical updates, and new copper lines to support the investment. Our goal was to make sure their new 3.5-ton Daikin heat pump, installed horizontally in the attic, would run safely, efficiently, and comfortably for many years in our Tampa Bay climate.

On projects like this in Tampa, FL 33624, it’s not enough to simply “swap out” equipment. The copper lines, electrical breakers, thermostat wiring, drain protection, and even the concrete pad under the outdoor unit all need to work together as a system. In this case, we also had an outdoor condenser that was in good condition but had lost refrigerant due to a leak at the existing indoor unit, so we needed to recover that unit carefully and set the new system up the right way.

In this article, we’ll walk you through what the homeowner was dealing with, how we planned the installation, what we did step by step, and why each part of the work matters for comfort, safety, and long-term reliability in a Florida home.

Case Recap

  • Location: Single-family home in Tampa, FL 33624
  • Service: 3.5-ton horizontal Daikin heat pump installation with copper line replacement
  • Scope: New copper lines and insulation, updated electrical breakers, new low-voltage cable, careful removal and handling of outdoor condenser
  • Extras: Secondary drain pan with float switch, UV-protected insulation, hurricane-ready concrete pad setup, programmable thermostat
  • Outcome: Efficient, properly wired system with strong warranty protection and a clean, safe installation

Customer Problem

The homeowner’s existing system had multiple issues that made a simple repair a poor long-term choice. The newer outdoor condenser was in decent shape, but there had been a refrigerant leak at the indoor unit. By the time we arrived, that outdoor condenser no longer had refrigerant, and the indoor equipment and existing copper tubing were suspect.

They were concerned about:

  • Ongoing refrigerant leaks and wasted money on repeated recharge visits
  • Potential electrical issues with aging breakers and wiring
  • Whether the attic installation could be done safely and securely
  • Getting the right size and efficiency for Tampa’s heat and humidity

During our planning conversations, our team noted (in Spanish) that a mechanical lift would be required to safely raise and position the new horizontal air handler in the attic space. The unit’s weight and location made it unsafe to try to handle with ladders alone. We also discussed the need to:

  • Run brand-new copper lines between the air handler and condenser
  • Install new electrical wiring and verify or replace breakers as needed
  • Add a new low-voltage control cable between the indoor and outdoor units

The homeowner wanted these items clearly addressed up front, along with strong warranty coverage and a clean, professional installation. That’s where the new Daikin heat pump system came in.

Inspection and Diagnosis

Before we ever bring in new equipment, we take time to understand the existing setup. For this Tampa, FL 33624 home, we focused on a few key areas.

1. Existing Indoor and Outdoor Units

We verified the condition of the existing outdoor condenser, which was reported as being in good shape structurally but empty of refrigerant due to an interior leak. We confirmed that the leak source was tied to the indoor side of the system and that reusing old copper lines would be a risk for future leaks and contamination.

2. Copper Line Set and Insulation

The existing copper line set between the air handler and condenser was not suitable for a long-term, warranty-backed installation. Old tubing can contain moisture, acid, or debris from previous failures, and the insulation often breaks down in Florida’s sun and heat. To protect the new Daikin equipment and refrigerant, we planned for a complete replacement of the copper lines with new insulation.

3. Electrical Panel, Breakers, and Wiring

We reviewed the existing electrical configuration to confirm that dedicated circuits, wiring, and breakers matched the new system’s requirements. The notes for this project included specific breaker sizes for the condenser and air handler, and we planned to verify and replace breakers as needed during installation.

4. Thermostat and Low-Voltage Wiring

The homeowner also requested a review of the thermostat cable and low-voltage wiring between the air handler and the outdoor unit. For modern heat pump controls and safety circuits, a clean, properly sized low-voltage cable is essential. We included new low-voltage wiring between the indoor and outdoor units in the scope of work.

5. Concrete Pad and Outdoor Placement

The existing concrete pad outside was reported as being in good condition but slightly out of level. For a quiet, long-lasting heat pump installation in Tampa, vibration control and proper drainage matter, so we planned to reuse the pad but level it and secure the condenser with a hurricane-rated tie-down kit.

6. Attic Access and Safety

Because this is a 3.5-ton horizontal air handler going in the attic, we evaluated access, platform support, and the safest way to lift the unit. Our team determined that a lift would be required to position the equipment without putting technicians or the home at risk.

Repair and Installation Process

Once we had a clear plan, we scheduled the heat pump installation for this Tampa, FL 33624 homeowner and moved step by step through the process.

1. Safely Removing the Existing Equipment

We began by disconnecting the existing indoor unit and carefully handling the outdoor condenser. The homeowner noted that the condenser itself was in good condition, so we took extra care to avoid damage during removal and repositioning. Any remaining refrigerant or oil was handled in line with environmental and safety standards.

2. Running New Copper Lines and Insulation

Next, we installed brand-new copper lines from the air handler to the condenser, up to the agreed distance. This included:

  • Proper sizing of the suction and liquid lines for a 3.5-ton Daikin heat pump
  • Routing the lines to minimize sharp bends and potential rub points
  • Applying UV-protected insulation to shield the tubing from Florida sun and weather

We also flushed and sanitized the system piping and drain line to give the new R32 refrigerant and components a clean start.

3. Electrical and Breaker Updates

With the mechanical work in progress, we turned our attention to the electrical side. That included:

  • Verifying breaker sizes and circuits for the air handler and condenser
  • Replacing breakers as needed to match the equipment specifications
  • Running new electrical wiring where required to ensure safe, code-compliant operation

All electrical connections were tightened, labeled, and inspected for proper grounding and protection.

4. New Low-Voltage and Thermostat Wiring

We installed a new low-voltage cable between the air handler and outdoor unit, as well as a thermostat cable suited for the homeowner’s new programmable thermostat. Clean control wiring reduces nuisance issues like intermittent shutdowns or communication problems, especially with heat pumps that switch between heating and cooling modes.

5. Setting the Air Handler with a Lift

To safely position the horizontal air handler in the attic, we used a lift instead of trying to maneuver the equipment by hand on ladders. This protects the equipment, the home’s structure, and our team. Once in place, the air handler was secured, connected to the ductwork, and checked for proper pitch on the drain connections.

6. Drain Protection and Safety Accessories

We installed a secondary drain pan with a float switch beneath the air handler. In a Florida attic, this is an important layer of protection: if the primary drain line ever backs up, the float switch will shut the system down before water can overflow and damage ceilings.

We also included heat shields on the return and supply connections where needed, and locking condenser valve caps outside to protect the refrigerant circuit from tampering.

7. Outdoor Pad, Leveling, and Tie-Downs

Outside, we reused the homeowner’s concrete pad after leveling it properly. The Daikin condenser was set on the pad and secured with a hurricane-rated tie-down kit designed for high wind speeds. This kind of hurricane-ready installation is especially important for homeowners in and around Tampa, FL 33624.

8. System Startup, Testing, and Clean-Up

After pulling a deep vacuum on the new refrigerant lines and confirming they held, we charged the system according to manufacturer guidelines for the Daikin 3.5-ton heat pump with R32 refrigerant. We then:

  • Tested cooling and heating modes
  • Confirmed thermostat operation and settings
  • Verified airflow and drain function
  • Checked that breakers and wiring operated as expected under load

Before leaving, we cleaned the work areas, removed old materials, and walked the homeowner through thermostat use, basic filter maintenance, and warranty documentation.

Why This Fix Works

This project wasn’t just about installing a new piece of equipment—it was about rebuilding the entire support system so the heat pump can do its job properly.

Fresh Copper Lines and Refrigerant Circuit

By replacing the old copper lines and insulating them correctly, we gave the Daikin system a clean, properly sized refrigerant pathway. This helps maintain the right pressures and temperatures in both heating and cooling modes and reduces the risk of repeat leaks or contamination from old tubing.

Proper Electrical Support

Updated breakers and wiring ensure the system has the power it needs without tripping or overheating. Correctly sized breakers protect the equipment and wiring while still allowing the compressor and blower to start and run smoothly.

Drain and Safety Controls

The secondary drain pan with a float switch, along with locked service valves and solid low-voltage connections, all work together to protect the home and the system. If something goes wrong—like a clogged drain—the safety devices step in to shut down the unit before damage occurs.

Efficient Equipment Matched to the Home

The 3.5-ton Daikin heat pump with supplemental 5 kW heat and 15.2 SEER2 efficiency gives the homeowner balanced performance for Tampa’s hot summers and mild winters. Paired with a programmable thermostat, the system can maintain comfort while helping control energy costs.

Pro Tips for Homeowners in Tampa

If you’re in Tampa, FL 33624 or anywhere in Tampa Bay and you’re planning a heat pump or AC replacement, here are some practical tips:

  • Ask about the line set, not just the unit. In many older homes, reusing old copper lines can limit efficiency or lead to future leaks. It’s worth asking if new lines and insulation are recommended for your project.
  • Confirm breaker and wiring checks. Your new system is only as reliable as the power feeding it. Make sure your installer checks and, if needed, updates breakers and wiring to match the new equipment.
  • Protect your attic with a float switch. For attic air handlers, a secondary drain pan with a float switch is one of the best defenses against ceiling damage in our humid Florida climate.
  • Use your programmable thermostat. Take a few minutes to set schedules that match your routine. It can help lower energy use while keeping your Tampa home comfortable when you’re actually there.
  • Stay on top of maintenance. Change or clean filters regularly and schedule routine checkups. Plans like our Therapy Maintenance Plans are designed to keep systems in good shape and help protect your investment.
  • Plan for Florida storms. Ask about hurricane-rated pad and tie-down options, especially if your outdoor unit is exposed. It’s an extra layer of protection for your home and your HVAC system.

FAQs About Heat Pump Installation and Copper Line Replacement

Why did you replace the copper lines instead of reusing the old ones?

Because the previous system had a refrigerant leak at the indoor unit, the existing copper lines could have been contaminated or weakened. For a new Daikin 3.5-ton heat pump, fresh copper lines with new insulation help protect the equipment, reduce the risk of future leaks, and support proper refrigerant flow and efficiency.

Is a lift really necessary for attic air handler installations?

In many Tampa homes with a larger horizontal air handler, yes. These units are heavy and often need to be positioned in tight attic spaces. Using a lift allows us to move and place the air handler safely without risking damage to the home, the equipment, or our technicians.

What’s the benefit of the secondary drain pan and float switch?

In Florida’s humidity, drain lines can clog over time. A secondary drain pan sits underneath the air handler, and the float switch in that pan will shut the system down if water starts to collect. That prevents ceiling leaks and water damage, which is especially important when the unit is above living space.

How does the 1-year labor warranty from Home Therapist work?

Our 1-year labor warranty starts on the date of installation and covers the workmanship involved in setting up your new system for the full term provided. It does not cover routine maintenance issues like dirty filters or clogged drains, consumable components not covered by the manufacturer, or damage from storms, flooding, or electrical surges. Any work performed by another provider can void this warranty. We’re always happy to explain details for your specific setup.

What’s included with the Daikin system’s manufacturer warranty?

This project’s Daikin equipment included strong warranty protection, such as long-term parts coverage and unit replacement coverage on select systems, depending on model and application. Exact terms can vary, especially for commercial settings, so we always review the manufacturer’s current warranty documents with homeowners in Tampa, FL 33624 before finalizing an installation.

Will this new system help with my energy bills?

The Daikin 3.5-ton heat pump installed here operates at 15.2 SEER2 and uses modern refrigerant technology. Combined with proper installation, sealed refrigerant lines, and a programmable thermostat, that efficiency rating can help reduce monthly energy use compared to many older systems, especially during long Tampa summers.

Why Choose Home Therapist for Heat Pump Installation in Tampa Bay

When you invite our team into your home, you’re trusting us with your comfort, safety, and investment. We don’t take that lightly.

Licensed, Professional Technicians
Our installers are trained and licensed to handle HVAC and electrical work, from breaker updates to refrigerant line replacement. For projects like this 3.5-ton heat pump installation in Tampa, FL 33624, that expertise is what keeps your system running reliably year after year.

Transparent Communication
From the first call, we explain what we’re doing and why—whether it’s the need for a lift, the reason for new copper, or how warranty coverage applies. If we see something unexpected during the job, we talk it through with you before moving forward.

Clean, Respectful Work
We treat your home the way we’d want ours treated. That means protecting surfaces, managing debris, and leaving the workspace cleaner than we found it. After the installation, we take time to walk you through the new system rather than just rushing out the door.

Long-Term Reliability Focus
We don’t cut corners on things like line sets, drain protection, or electrical work. Those details are exactly what keep systems in Tampa Bay running smoothly through heavy summer use. We also offer ongoing care through our AC maintenance services in Tampa and seasonal AC tune-ups to keep your system performing well.

Rooted in the Tampa Bay Community
As a local HVAC and plumbing company serving Tampa Bay homeowners, we’re proud of our reputation. You can see real stories and updates from our team on social media, including Facebook and Instagram, and explore more about our services and projects on our website, including AC installation in Tampa and heat pump replacement in Tampa.

For added peace of mind, you can also find us on trusted local and national platforms such as the Better Business Bureau and the Tampa Bay Chamber of Commerce.

Ready for a Professional Heat Pump Installation in Tampa, FL 33624?

If your current system is leaking refrigerant, struggling to keep up, or you’re simply ready for a more efficient upgrade, our local Tampa Bay team is here to help. We handle everything—from equipment selection and copper line replacement to breakers, thermostat wiring, and hurricane-ready outdoor setups—so your new system starts off on solid footing.

Homeowners in Tampa, FL 33624 can schedule a visit, request a quote, or learn more about our installation process by visiting our contact page or exploring our dedicated AC installation services in Tampa. We’ll take the time to understand your home, explain your options clearly, and deliver an installation that prioritizes comfort, safety, and long-term reliability.

Shower Valve Leak Repair in Wesley Chapel, FL 33545

When a shower that has always worked fine suddenly starts leaking, it can be frustrating and worrying. That was the situation for a homeowner in Wesley Chapel, FL 33545 who called us after noticing water constantly dripping from the shower head. They were understandably concerned that a recent cartridge replacement might not have been installed correctly. Our job as local plumbing professionals is to sort out exactly what is going on, explain it clearly, and recommend the right long-term fix.

In this case, we traced the leak back to a damaged shower valve inside the wall, not an incorrect cartridge installation. Below, we will walk through how we diagnosed the problem, why the valve was the real issue, and what we recommended to restore a reliable, drip‑free shower for this Wesley Chapel homeowner.

Case Recap: Shower Leak in Wesley Chapel, FL 33545

  • Location: Residential home in Wesley Chapel, FL 33545
  • Problem: Persistent leak from the shower head that had never occurred before
  • Customer concern: Suspected the cartridge from a prior visit was not installed correctly
  • Diagnosis: Internal damage to the shower valve body, not the cartridge itself
  • Solution: Provide an estimate to replace the faulty valve and prevent ongoing leakage
  • Outcome: Clear explanation, options reviewed with the homeowner, and a plan for a permanent repair

Customer Problem: New Leak From the Shower Head

When we arrived at the home in Wesley Chapel, the homeowner explained the situation in their own words. In Spanish, they told us:

“Customer dice que tiene un leak que viene del shower head, nunca habia tenido ese leak, piensa que no colocamos bien el cartridge.”

Translated and summarized, they were saying: there was now a leak coming from the shower head, it had never leaked before, and they were worried the cartridge we had installed previously might not have been put in correctly.

From a homeowner’s perspective, this makes perfect sense. A new symptom shows up after work is done, so it is natural to wonder if the two are related. Our responsibility as licensed plumbers serving Wesley Chapel and the greater Tampa Bay area is to:

  • Listen carefully to the concern
  • Re‑check any work we did before
  • Inspect the rest of the system to see if something else has changed or failed

The main symptom here was simple but important: even when the shower was turned off, water continued to drip from the shower head. Over time, that kind of leak can waste water, increase utility bills, stain fixtures, and cause frustration every time someone walks into the bathroom.

Inspection and Diagnosis: Looking Beyond the Cartridge

On any shower leak call in Wesley Chapel, we follow a careful, step‑by‑step process. We do not assume the cause based on the first guess; instead, we verify.

Here is how we approached this visit:

1. Visual check at the shower trim and cartridge

We started by removing the trim and accessing the shower cartridge. Our first goal was to inspect the cartridge area for obvious issues such as:

  • Cartridge not fully seated or misaligned
  • Damaged O‑rings or seals
  • Visible cracks or deformities on the cartridge itself
  • Signs of mineral buildup or debris preventing a tight seal

We verified that the cartridge was properly installed and that there were no obvious installation errors causing the leak.

2. Functional testing of the shower controls

Next, we turned the water on and off several times, watching closely how the valve and shower head responded. A properly working shower valve should shut off water flow completely when switched to the “off” position. In this case, even with the handle in the off position, water continued to seep through to the shower head.

3. Inspecting the valve body itself

Once we ruled out our installation and the cartridge seating, we focused on the valve body. The shower valve is the internal control unit behind the wall that directs hot and cold water and shuts it off when you are done. If the internal surfaces or sealing points inside that valve become damaged, the valve can let water bypass even when the handle is off.

Our notes from the visit reflect this conclusion clearly:

“La valvula esta danada se manda estimado para cambiarla.”
Translation: The valve is damaged; we will send an estimate to change it.

In other words, the problem was not a loose cartridge. The valve itself had internal damage that prevented it from sealing completely.

Repair Plan: Replacing the Damaged Shower Valve

With the diagnosis confirmed, we walked the homeowner through the findings and the recommended solution. For a shower valve that is internally damaged, the reliable fix is to replace the valve, not just keep changing cartridges.

1. Explaining the findings to the homeowner

We believe in clear, transparent communication. We explained, in both English and Spanish as needed, that:

  • The cartridge was correctly installed.
  • The leak was caused by internal damage inside the shower valve body.
  • A new cartridge alone would not correct a worn or damaged valve.

For homeowners in Wesley Chapel, FL 33545, this step is important. You deserve to understand why we recommend a specific repair, not just be told what it will cost.

2. Preparing the estimate for valve replacement

Because a valve replacement is more involved than a simple cartridge swap, we prepared a detailed estimate. A typical shower valve replacement can include:

  • Shutting off the water supply safely
  • Opening the wall (either from the shower side or an access panel, if available)
  • Removing the old faulty valve
  • Installing and securing the new valve to code
  • Reconnecting hot and cold water lines
  • Pressure testing for leaks
  • Reinstalling trim and handle and checking operation

We sent the estimate so the homeowner could review the scope and make an informed decision about moving forward.

3. Focus on long‑term reliability

Whenever we recommend a valve replacement for a Wesley Chapel homeowner, our goal is long‑term reliability, not a temporary patch. A properly installed new valve, rated for your plumbing system and water conditions, helps ensure:

  • No constant dripping from the shower head
  • Smoother control of temperature and pressure
  • Reduced risk of hidden water damage inside the wall

Once approved, our team completes the replacement, tests the shower thoroughly, and makes sure everything is functioning as expected before we consider the job done.

Why This Fix Works: How Shower Valves Control Leaks

To understand why a damaged valve causes leaks, it helps to know, in simple terms, how a shower valve works.

Inside the valve body are internal passages and sealing surfaces that control how hot and cold water mix and where that mixed water goes. When you turn the handle to the “off” position, the valve is supposed to block water from flowing to the shower head. A cartridge and internal seals do most of this work.

However, if the internal metal or plastic surfaces inside the valve are worn, cracked, or warped, water can still sneak past those seals even when the handle is off. You end up with a persistent drip or small stream at the shower head. In those cases:

  • Installing a new cartridge may reduce the leak but usually will not eliminate it entirely.
  • The real fix is to replace the entire valve body, restoring a clean, solid sealing surface.

For our neighbors in Wesley Chapel and the rest of Tampa Bay, this kind of permanent repair is especially important. Our local water conditions and mineral content can be tough on plumbing components over time. A fresh, properly installed valve helps your system handle that wear and tear much more reliably.

Pro Tips for Homeowners in Wesley Chapel

If you live in Wesley Chapel, FL 33545 or nearby Tampa Bay communities, here are some practical tips to help prevent or catch shower valve problems early:

1. Don’t ignore small drips

A slow drip from the shower head might not seem urgent, but it usually means the internal seals or valve surfaces are not closing properly. Addressing it early can prevent bigger issues and higher water bills.

2. Pay attention after any plumbing work

After any cartridge replacement or shower repair, keep an eye on the fixture for a few days. If you notice new leaks, temperature swings, or difficulty turning the handle, call us back. We stand behind our work and will re‑evaluate the system just as we did for this Wesley Chapel homeowner.

3. Consider a periodic plumbing checkup

Your shower valve is just one part of your plumbing system. Regular checkups can catch hidden issues before they become emergencies. Our team offers ongoing plumbing maintenance plan options tailored to Tampa Bay homes.

4. Watch for changes in water pressure or temperature

If you notice that your shower pressure is dropping, surging, or the temperature is hard to control, that can be a sign the valve is beginning to fail or that there is another restriction in the system. Getting it checked sooner rather than later helps protect your plumbing and your comfort.

5. Be mindful of moisture around walls and trim

A leaking shower valve can sometimes cause moisture behind the wall. If you see bubbling paint, soft drywall, or staining near the shower, schedule a visit promptly so we can inspect the area and prevent further damage.

FAQs About Shower Leaks and Valve Repairs

Is a leaking shower head always caused by the cartridge?

No. A worn or damaged cartridge is one possible cause, but as we saw in this Wesley Chapel, FL 33545 home, the leak can also come from internal damage to the valve body itself. That is why we always inspect both the cartridge and the valve before recommending a repair.

How do you know if the valve is damaged and not just the cartridge?

We remove and inspect the cartridge, check for proper seating, and test the valve with the water turned on and off. If the cartridge and seals appear correct but water still bypasses in the off position, it often points to internal wear or damage in the valve body, which cannot be reliably fixed with a cartridge alone.

Will I need to open the wall to replace my shower valve?

In many cases, yes. To replace the valve, we typically need access behind the shower trim or from an access panel if one exists on the opposite side of the wall. During an on‑site visit, we will explain exactly how we plan to reach the valve and what it means for your specific bathroom layout.

Can I keep using the shower if it is just a slow drip?

Most homeowners can still use the shower with a slow drip, but it is not ideal. The drip wastes water, can worsen over time, and may indicate developing damage inside the valve. We recommend having it looked at so you can plan a proper repair instead of waiting for a bigger problem.

Do you offer other plumbing services in the Wesley Chapel area?

Yes. In addition to shower valve repairs, we handle a wide range of plumbing services for Wesley Chapel and Tampa Bay homeowners, including drain cleaning for common home drain issues, drain line cleaning and flushing, and broader plumbing maintenance options to keep your system running smoothly.

Why Tampa Bay Homeowners Choose Home Therapist

When you invite a plumbing company into your home in Wesley Chapel, FL 33545, you are trusting them not only to fix the problem but also to respect your space and your time. At Home Therapist Cooling, Heating, and Plumbing, we take that responsibility seriously.

Here is what you can expect from our team:

  • Licensed and professional technicians: Our plumbers are trained, experienced, and licensed to work on shower valves, drain systems, and full plumbing layouts throughout Tampa Bay.
  • Transparent communication: We explain what we find, why it matters, and what your options are—just like we did for this homeowner concerned about a possible cartridge issue.
  • Clean and respectful work: We protect your home, clean up after ourselves, and treat your bathroom and living spaces with the same care we would want in our own homes.
  • Long‑term reliability focus: Our goal is not a band‑aid fix. When we recommend a valve replacement or any plumbing repair, it is because we believe it will give you safer, more reliable performance over time.
  • Commitment to Tampa Bay homeowners: We live and work in this community, so we understand the plumbing challenges specific to the Wesley Chapel and broader Tampa Bay area—from local water conditions to heavy seasonal use.

If you would like to see more of how we work and hear from other local homeowners, you can connect with us on social media and through trusted review and business platforms:

Need Shower Valve or Leak Repair in Wesley Chapel, FL 33545?

If you are noticing a new leak from your shower head, difficulty turning the handle, or changes in water control, it is time to have a licensed professional take a look. Our Home Therapist team regularly handles shower valve issues and other plumbing repairs for homeowners in Wesley Chapel, FL 33545 and across the Tampa Bay area.

We will inspect your system, explain exactly what we find, and give you clear options—whether it is a simple cartridge issue or a full valve replacement. Our goal is to restore your comfort, protect your home, and give you peace of mind every time you turn on the shower.

To schedule plumbing service in Wesley Chapel, you can visit our website at Home Therapist Cooling, Heating, and Plumbing or reach out through any of our listed contact options. We are here to help you get a reliable, leak‑free shower again—calmly, professionally, and on your schedule.

AC Tune-Up and Evaporator Coil Cleaning in Tampa, FL 33613

When an air conditioner in Tampa, FL 33613 is only blowing warm air, the space heats up fast and the air can start to feel heavy, dusty, and uncomfortable. That was the situation at this commercial property when we arrived. Our team was called to find out why the AC system wasn’t cooling properly and to get it back into reliable shape.

After a full inspection, we found a severely dirty evaporator coil with signs of previous freezing, the system running with no air filters in place, and slightly low refrigerant pressures that we needed to keep an eye on. We performed an in-depth evaporator coil cleaning, vacuumed the system, checked for leaks after soldering as needed, and completed a full tune-up to improve comfort, air quality, and efficiency for this property in Tampa.

Case Recap

  • Location: Commercial property in Tampa, FL 33613
  • Complaint: AC blowing warm air, space heating up quickly, air feeling dusty and heavy
  • Findings: Extremely dirty evaporator coil, evidence of coil freezing, system running without filters
  • Service: Evaporator coil removed and cleaned, system vacuumed, soldering with leak search, full AC tune-up
  • Outcome: Cleaner air, improved airflow and cooling, system operating more efficiently with recommendations for monitoring pressures and installing filters

Customer Problem

The person we met on site in Tampa was responsible for coordinating maintenance for the building, even though he isn’t the actual owner. He explained that the AC system wasn’t working correctly, the space was getting hot very quickly, and the air felt loaded with dust and generally uncomfortable. For a commercial space in the Tampa Bay heat, that’s a serious issue for both comfort and productivity.

He mentioned a few key concerns:

  • The AC wasn’t keeping up with the heat; rooms warmed up shortly after the system cycled off.
  • The air felt “charged” and dusty, not fresh or clean.
  • He didn’t know the exact age of the system but believed there was only one unit serving the space.

On top of that, the system was accessible but had been running without proper filters in place. The system uses two filters (21×21 size), but they weren’t installed at the time of our visit. Running an air handler without filters allows dust and debris to go straight into the coil, blower, and ductwork, which often leads to the kind of dirty coil issues we found here.

For a commercial or residential property in Tampa, FL 33613, these symptoms are classic signs that the AC needs more than a quick reset—it needs a thorough cleaning and professional tune-up from local HVAC technicians who understand our climate.

Inspection and Diagnosis

We started with a full evaluation of the system to understand why it was only blowing warm air and why the air quality felt so poor. Our diagnostic approach is always methodical so we don’t miss anything important.

Here’s what we focused on during our inspection:

  • Visual inspection of the air handler and evaporator coil: We quickly noticed the evaporator coil was extremely dirty. This kind of buildup usually comes from long-term operation without proper filtration or without regular maintenance.
  • Signs of past freezing: We saw evidence that the coil had frozen at some point in the past (for example, water staining and patterns of residue). A coil that freezes and thaws repeatedly can create inconsistent cooling and long-term performance issues.
  • Air filters: The system was running with no filters installed. The client confirmed he had been operating it this way and that he planned to purchase two 21×21 filters. We emphasized how important it is to have those installed.
  • Refrigerant pressures: We checked system pressures and noted they were a bit on the low side, but we also took into account that the outdoor temperature was lower at the time of testing. Without a clean coil and stable conditions, you can’t draw firm conclusions about refrigerant charge.

Because the evaporator coil was so dirty, we could not accurately evaluate refrigerant pressures or overall efficiency right away. A clogged coil changes airflow and heat transfer so much that any readings you get can be misleading. That’s why our recommendation was to perform a complete evaporator coil cleaning first. Only after restoring normal airflow through a clean coil can we properly judge how the system is functioning.

We explained this clearly to the client in Tampa, making sure he understood that jumping straight to refrigerant adjustments or major parts replacement without cleaning the coil would be guesswork—and that’s not how we operate.

Repair and Service Process

With approval to move forward, we got to work on a thorough cleaning and tune-up to restore the system’s performance.

1. Disconnecting and Removing the Evaporator Coil

The first step was to safely disconnect the air handler (AH) coil and remove it so we could clean it outside. This involves carefully opening the system, managing brazed connections where necessary, and protecting the surrounding area from any mess.

Removing the coil allows for a deeper, more even cleaning than you can get from an in-place surface rinse. For a system in Tampa, FL 33613 with heavy buildup, this step is essential to restore proper heat transfer and airflow.

2. Deep Cleaning the Evaporator Coil

Once outside, we performed a full cleaning of the evaporator coil. In a standard tune-up, this includes an acid wash and sanitizing process designed to:

  • Remove dirt, dust, and debris from the coil fins
  • Wash away biological growth and buildup
  • Help improve indoor air quality and system efficiency

On a coil this dirty, a proper cleaning can make the difference between a system that struggles to cool and one that runs smoothly and efficiently. It also helps the air feel less “heavy” and dusty inside.

3. Vacuuming the System

With the coil removed and cleaned, we vacuumed the system to remove loose debris and any contaminants that had collected inside the air handler compartment. This step supports cleaner airflow and reduces the chances of recirculating dust through the building.

4. Soldering and Leak Search

After cleaning, we reinstalled the evaporator coil and completed any necessary soldering to reconnect the refrigerant lines. Whenever we perform this type of work, we conduct a leak search afterward to confirm the integrity of the connections.

We do not guess about refrigerant leaks. We use appropriate methods to check for leaks at the joints we’ve opened or worked near, so the system can operate reliably after we’re done.

5. Full System Tune-Up Tasks

Along with the coil work, we completed a full AC tune-up, which typically includes:

  • Acid wash and sanitize the evaporator coil
  • Acid wash and sanitize the condenser coil
  • Flush and sanitize the system’s drain line (with a 60-day guarantee on the drain line cleaning)
  • Inspect refrigerant levels and pressures (with the understanding that readings are more meaningful once coils and airflow are correct)
  • Check and adjust the thermostat
  • Tighten wiring, contacts, capacitors, and relays
  • Tighten the outdoor disconnect and condenser fan motor assembly
  • Inspect the compressor at startup

If the customer provides filters, filter replacement is included; otherwise, we can supply them at an additional cost depending on size and quantity. In this case, we reminded the client to purchase two 21×21 filters and install them promptly. Running without filters was a major factor in how dirty the coil became.

6. Final Check and System Monitoring Recommendations

After reassembly, cleaning, and tune-up, we started the system and observed operation. The air was noticeably cleaner and the system was cooling better. We noted that pressures were still a bit on the low side, but given the outdoor temperature at the time, that can be within normal variation.

To stay transparent, we documented in our report that pressures were slightly low and advised the client to keep an eye on performance. At this point, there was no clear indication of a serious problem, but we want Tampa property owners to know what we see so they can plan ahead if anything changes.

We also encouraged them to schedule regular AC maintenance in Tampa so the system doesn’t end up in the same condition again.

Why This Fix Works

Air conditioners rely on three main things to cool properly: good airflow, clean heat transfer surfaces, and a sealed refrigerant circuit that’s operating within normal ranges. In this Tampa, FL 33613 project, the biggest problem was airflow and heat transfer at the evaporator coil.

Here’s what was happening:

  • Dirty coil = restricted airflow: Dust and debris packed into the coil fins make it harder for air to pass through. Less air means less cooling and longer run times.
  • Poor heat transfer: When the copper and aluminum surfaces of the coil are coated in grime, the refrigerant inside can’t absorb heat from the air efficiently. That leads to warmer supply air and may contribute to coil freezing under the right conditions.
  • No filters = rapid buildup: With no filters installed, airborne dust went straight into the coil. In a humid climate like Tampa Bay, that combination creates a sticky layer that’s tough to remove without a professional cleaning.

By removing, thoroughly cleaning, and reinstalling the coil, then performing a full tune-up, we restored more normal airflow and improved heat transfer. That allows the refrigerant to do its job more effectively, the compressor to run under healthier conditions, and the indoor air to feel cleaner and more comfortable.

We always verify proper operation after repairs and cleaning. While we do not speculate on exact measurements without stable conditions, we make sure the system is running as expected before we leave and we communicate clearly about anything that should be monitored over time.

If you’d like to understand more about how this ties into long-term care for your system, our team has also put together helpful resources on AC tune-up services in Tampa and a broader air conditioning maintenance guide for Tampa Bay homeowners.

Pro Tips for Homeowners in Tampa

Whether you’re managing a commercial property or a home in Tampa, FL 33613, a few simple habits can go a long way toward preventing the kind of issues we found in this system.

  • Always run your AC with filters in place. Make sure your filters fit properly and match the required size. Running without filters will quickly clog your evaporator coil and can lead to expensive cleanings or repairs.
  • Change filters more often in Florida. With our high humidity and long cooling season, most systems need filter changes more often than the standard “every 3 months” guideline. Check them monthly and replace as needed.
  • Schedule annual AC tune-ups. An annual tune-up by local Tampa Bay technicians helps catch dirty coils, weak electrical connections, and drain line clogs before they cause breakdowns. You can learn more about tune-ups and options in our AC tune-up services page.
  • Watch for early signs of trouble. Warm air from the vents, uneven cooling, unusual noises, or repeatedly “heavy” or dusty air are all signals that your system needs attention. Early service usually costs less than emergency repairs.
  • Keep outdoor units clear. Make sure your outdoor condenser has room to breathe—no overgrown plants, stacked items, or blocked airflow. Clear space helps your system handle Tampa’s heat more efficiently.
  • Don’t ignore drainage. Clogged drain lines are common in Florida’s humidity. Regular flushing and cleaning keep water from backing up and protect your home or building from water damage.

FAQ: AC Tune-Up and Coil Cleaning in Tampa, FL 33613

Why was my AC only blowing warm air?

In this case, the main cause was an extremely dirty evaporator coil combined with the system running without filters. The buildup on the coil restricted airflow and reduced the system’s ability to remove heat from the air, so the supply air felt warm and the space heated up quickly.

Do I really need to clean the evaporator coil, or is a basic tune-up enough?

When the evaporator coil is lightly dirty, a standard in-place cleaning during a tune-up may be enough. But when it’s heavily clogged, as we saw in this Tampa property, removing the coil and performing a deep cleaning is the only way to restore proper airflow and efficiency. Without that, any further diagnostics or adjustments can be misleading.

Is it safe to run my AC without filters for a short time?

We don’t recommend running your AC without filters at all. Even a short period without filtration can allow dust and debris to collect on the coil and blower. Over time, this leads to restricted airflow, poor air quality, and more frequent service needs. Always have the correct-size filters installed before running your system.

Why did you mention refrigerant pressures being a little low but not add more refrigerant right away?

Refrigerant pressures depend on several factors, including outdoor temperature and system load. With a previously dirty coil and cooler outdoor conditions, the readings we saw could still fall within a normal range for the circumstances. We noted that pressures were a bit low and recommended monitoring performance rather than rushing into changes without clear evidence that refrigerant was the issue.

How often should I schedule an AC tune-up in Tampa?

For most systems in the Tampa Bay area, we recommend at least one professional AC tune-up per year. Many property owners schedule service before the peak cooling months so the system is ready for our long, hot season. Additional visits may be helpful if the system runs heavily or serves a commercial space.

Can Home Therapist help if my AC stops cooling suddenly?

Yes. If your system in Tampa, FL 33613 suddenly stops cooling or blows warm air, we offer emergency AC repair services in Tampa. We’ll inspect the system, explain what we find in clear terms, and recommend the most appropriate next steps.

Why Choose Home Therapist for AC Service in Tampa

When you invite our team into your home or commercial property in the Tampa Bay area, you’re trusting us with your comfort and safety. We take that responsibility seriously.

Here’s what you can expect when you work with Home Therapist Cooling, Heating, and Plumbing:

  • Licensed, professional technicians: Our techs are trained, licensed, and experienced with real-world systems throughout Tampa, FL 33613 and the surrounding communities.
  • Transparent communication: We explain what we find in plain English (or Spanish when needed), outline your options, and document important details like we did with the slightly low pressures on this project.
  • Clean, respectful work: We treat your property as if it were our own—protecting surfaces, managing debris, and cleaning up after ourselves.
  • Focus on long-term reliability: Instead of quick band-aid fixes, we look at the whole system. That’s why we recommended a full coil cleaning and tune-up before making any assumptions about refrigerant issues.
  • Commitment to Tampa Bay homeowners and property managers: We live and work in this community and understand what Florida heat and humidity do to HVAC systems.

If you’d like to see more of our work and stay connected, you can find us on social media:

And if you’re looking for additional reassurance, you can check out our profiles with trusted organizations:

Need AC Help in Tampa, FL 33613?

If your AC system in Tampa, FL 33613 is blowing warm air, running without filters, or just doesn’t feel like it’s keeping up, we’re here to help. Whether you need a deep evaporator coil cleaning, a full tune-up, or urgent repairs, our team will inspect your system carefully and walk you through your options.

Schedule your AC service with Home Therapist Cooling, Heating, and Plumbing today, and let our local Tampa Bay technicians get your comfort back on track.

Full A/C System Tune Up in Riverview, FL 33579

When a homeowner in Riverview, FL 33579 reached out for a full system A/C tune-up, their goal was simple: keep the home comfortable, avoid surprise breakdowns, and keep power bills under control during our long Florida cooling season. A proper tune-up is one of the best ways to keep your air conditioner running smoothly, especially in the heat and humidity we see around Riverview.

In this visit, we completed a full air conditioning tune-up: cleaning coils, flushing the drain line, checking refrigerant levels, tightening electrical connections, and verifying overall system operation. By the end of the appointment, the system was running more efficiently, and the homeowner had a clear understanding of the unit’s condition and any future recommendations.

Case Recap: A/C Tune-Up in Riverview, FL 33579

  • Performed a complete A/C system tune-up for a well-kept residential unit.
  • Acid washed and sanitized both evaporator and condenser coils.
  • Flushed and sanitized the condensate drain line with a short-term guarantee on drain performance.
  • Checked refrigerant levels, thermostat operation, and major electrical components.
  • Tightened wiring, fan components, and outdoor disconnect for safety and reliability.
  • Verified proper system startup and overall cooling performance before leaving.

Customer Problem: Staying Comfortable and Avoiding Breakdowns

Homeowners in Riverview, FL rely heavily on their A/C systems for most of the year. In this case, the homeowner’s system was still cooling, but they wanted to stay ahead of problems instead of waiting for a breakdown on a hot afternoon.

Some common concerns we often hear in Riverview include:

  • Rising electric bills even when thermostat settings haven’t changed.
  • Uneven cooling or rooms that feel warmer than others.
  • Worry about mold or musty smells from the system due to Florida humidity.
  • Fear of emergency repairs or full system replacement during peak summer.

The homeowner here wanted a thorough tune-up that would help keep the system efficient, catch any small issues early, and get professional confirmation that everything was operating as it should. This visit was a preventative step rather than a reaction to a failure, which is exactly how a tune-up is meant to be used.

Inspection and Diagnosis: What We Looked At

During a full system tune-up like this in Riverview, FL 33579, we treat the visit as a full checkup on the A/C system. Even though the unit was generally well kept, we still go through our full inspection process to make sure nothing is overlooked.

Key areas we inspected included:

  • Evaporator coil: We checked for dirt, biological growth, and restriction that can reduce airflow and efficiency.
  • Condenser coil (outdoor unit): We looked for buildup from dust, grass clippings, and outdoor debris that can trap heat.
  • Condensate drain line: We verified drainage and checked for any signs of buildup that could lead to clogs.
  • Refrigerant levels and pressures: We inspected the system’s refrigerant condition to ensure it appeared to be operating within normal ranges for proper cooling.
  • Thermostat: We confirmed that the thermostat was responding, calling for cooling correctly, and cycling the system as expected.
  • Electrical components: We inspected wiring, contacts, capacitors, relays, and the outdoor disconnect for tightness and visible issues.
  • Fan motors and blades: We checked the condenser fan motor and blades for secure mounting and smooth operation.
  • Compressor startup: We monitored the compressor on startup to ensure it engaged properly without unusual behavior.

We also took into account the general condition of the system. This particular tune-up is designed for units that are reasonably well maintained. If we found the system extremely dirty or neglected, we would have discussed a more in-depth cleaning service before proceeding, and only with the homeowner’s approval.

Repair and Service Process: Step-by-Step Tune-Up

Once we completed the initial inspection, we moved into the detailed tune-up steps. Each part of the process is meant to improve efficiency, protect components, and reduce the risk of leaks or failures—especially important in the hot, humid climate of Riverview, FL.

1. Acid Wash and Sanitize the Evaporator Coil

The evaporator coil is located inside the home, usually in the air handler. Over time, dust, dander, and moisture can build up on the coil surface. We performed an acid wash and sanitation of the evaporator coil to remove buildup and organic material.

This matters because a dirty evaporator coil:

  • Reduces airflow and cooling capacity.
  • Can cause the coil to freeze up under certain conditions.
  • Can contribute to musty or unpleasant odors.

After cleaning, we confirmed that the coil was clear and that airflow across the coil was unobstructed.

2. Acid Wash and Sanitize the Condenser Coil

Outside, we performed an acid wash and sanitation on the condenser coil. This is the part of the system that releases heat from your home into the outdoor air. In Riverview yards, coils often collect grass clippings, dust, and other debris.

Cleaning the condenser coil helps the system:

  • Reject heat more efficiently.
  • Run with less strain on the compressor.
  • Use less electricity for the same amount of cooling.

3. Flush and Sanitize the Condensate Drain Line

We then flushed and sanitized the system’s drain line. This line carries away the moisture that your A/C removes from the air. In Florida’s humidity, this line is constantly in use and can easily develop algae, slime, and buildup.

During the tune-up we:

  • Cleared existing buildup from the drain line.
  • Sanitized the line to help slow down new growth.
  • Verified proper drainage from the evaporator coil pan.

This service came with a short-term guarantee on the drain line, giving the homeowner peace of mind that a backed-up drain is much less likely in the near future.

4. Inspect Refrigerant Levels and Pressures

We inspected the system’s refrigerant levels and operating pressures. While we did not publish or quote specific readings, we verified that the system appeared to be operating as expected for normal cooling. If refrigerant-related issues are suspected, we always discuss any next steps and options clearly with the homeowner.

5. Check and Adjust the Thermostat

We checked the thermostat for proper operation and made any needed adjustments. This includes verifying that:

  • The thermostat is reading the room temperature reasonably.
  • The system responds correctly when changing temperature settings.
  • The cooling cycles start and stop as expected.

6. Tighten Wiring, Contacts, Capacitors, and Relays

Loose electrical connections are a common cause of intermittent problems and equipment damage. As part of the tune-up, we tightened wiring connections at key points, as well as contacts, capacitors, and relays. We also inspected for signs of wear or overheating.

This step helps reduce the chance of nuisance shutdowns or premature failure of electrical components—something no homeowner in Riverview wants during a summer heat wave.

7. Tighten the Outdoor Disconnect and Fan Components

We inspected and tightened the outdoor disconnect (the safety shutoff near the condenser) and made sure the condenser fan motor and blades were secure. A loose disconnect or fan assembly can create safety concerns or mechanical noise over time.

8. Inspect Compressor at Startup

Finally, we monitored the compressor during startup. We listened for unusual noises and watched for signs that the unit was struggling to start. In this case, the compressor started and ran as expected.

9. Filter Replacement and Final Recommendations

Filter replacement is included in this type of visit when the homeowner provides the filters, or we can supply them at an additional cost depending on size and quantity. A clean filter is one of the simplest and most effective ways to keep an A/C system healthy.

At the end of the tune-up, we provided the homeowner with a clear recommendation summary. If we see anything that may need attention in the future, we outline it, explain why, and leave the decision up to the homeowner—no pressure.

Why This Fix Works: The Principles Behind a Tune-Up

A full A/C tune-up like this one in Riverview, FL 33579 works because it addresses the main stress points in a cooling system: airflow, heat transfer, drainage, and electrical reliability.

Here’s how each part helps:

  • Airflow: Clean coils and a clean filter allow air to move freely. Good airflow helps the system cool more effectively and reduces strain on the blower motor.
  • Heat transfer: The evaporator coil absorbs heat from inside, and the condenser coil releases it outside. Cleaning these coils improves heat transfer, so the system doesn’t have to run as long to achieve the same indoor temperature.
  • Drainage: A clear condensate line prevents water from backing up into the air handler or overflowing. This helps avoid water damage, mold concerns, and system shutdowns caused by safety switches.
  • Electrical control: Tightening wiring and inspecting capacitors, relays, and contacts reduces the risk of arcing, overheating, and sudden electrical failures.
  • System coordination: A properly functioning thermostat and healthy compressor startup ensure that each cooling cycle begins and ends the way it should.

All of this adds up to a system that runs more efficiently, more reliably, and with less risk of unexpected breakdowns—exactly what most homeowners in Riverview are looking for.

Pro Tips for Homeowners in Riverview

If you live in Riverview, FL 33579 or nearby areas in Hillsborough County, here are some practical tips to keep your A/C running smoothly between professional tune-ups:

  • Change filters regularly: In our hot, humid climate, filters often need to be changed more frequently, especially if you have pets or allergies. A clean filter protects your evaporator coil and improves indoor air quality.
  • Keep the outdoor unit clear: Trim back plants, remove leaves, and avoid stacking items around the condenser. You want at least a couple of feet of clear space around it for good airflow.
  • Watch for drain line issues: If you notice water near your air handler or from the drain line outside, call for service promptly. Drain problems are common in Florida due to algae and humidity.
  • Use reasonable thermostat settings: Setting the thermostat extremely low can overwork the system without providing much extra comfort. Moderate settings and programmable schedules can help manage your power bill.
  • Schedule annual tune-ups: Having a professional tune-up at least once a year—especially before peak summer—can catch small issues early and keep your system performing as it should.
  • Consider air quality services: If you’re concerned about dust or allergies, services such as air duct cleaning or upgraded air filtration can be helpful additions.

FAQ: A/C Tune-Ups for Riverview, FL 33579 Homeowners

How often should I get an A/C tune-up in Riverview?

For most homes in Riverview, an annual A/C tune-up is a smart schedule. Our long cooling season puts a lot of hours on your system. Having it checked once a year helps keep it efficient and reduces the risk of mid-summer breakdowns.

What’s included in a full system tune-up like this?

This type of tune-up typically includes coil cleaning, drain line flush and sanitation, checking refrigerant levels, tightening electrical connections, inspecting fan motors and blades, verifying thermostat operation, and confirming the compressor starts and runs as expected. Filter replacement is also included when filters are provided or purchased.

Will a tune-up fix every problem with my A/C?

A tune-up is focused on cleaning, inspection, and preventative maintenance. If we find worn or failing parts during the visit, we’ll explain what we see and offer repair options. Some issues may require separate repairs or additional services beyond the tune-up itself.

Can a tune-up lower my electric bill?

While every home and system is different, a clean, well-maintained A/C system generally runs more efficiently than a neglected one. By improving airflow, cleaning coils, and ensuring the system is operating properly, a tune-up can help reduce wasted energy.

What if my system is very dirty or in poor condition?

The tune-up described here is designed for well-kept systems. If we arrive and find that the unit is heavily soiled or in poor shape, we’ll pause and discuss more in-depth cleaning or repair options, along with costs, before proceeding. We don’t move forward with extra work without your approval.

Is it worth tuning up an older A/C system?

Even older systems can benefit from maintenance. A tune-up can help you get the most life and performance out of your existing equipment, and it also gives you clearer information about its condition so you can plan ahead if replacement is on the horizon.

Why Choose Home Therapist for A/C Tune-Ups in Riverview

When you invite someone into your home in Riverview, FL 33579, you want to know they’ll treat your home and your time with respect. At Home Therapist Cooling, Heating, and Plumbing, that’s how we approach every visit.

Here’s what you can expect from our team:

  • Licensed, professional technicians: Our technicians are trained, licensed, and experienced with Florida homes and systems. We follow industry best practices on every job.
  • Transparent communication: We explain what we’re doing, what we find, and what your options are—clearly and without pressure. You stay in control of every decision.
  • Clean, respectful work: We treat your home as if it were our own. That means careful work, cleanup when we’re finished, and respect for your space and schedule.
  • Long-term reliability focus: Our goal isn’t just to get through today’s visit. We want your system to run reliably season after season, with fewer surprises.
  • Commitment to Tampa Bay homeowners: We’re local to the Tampa Bay area and proud to serve Riverview and surrounding communities throughout Hillsborough County.

If you’d like to get a feel for who we are, you can connect with us on social media and see what local homeowners are saying:

We’re also listed with trusted local and national organizations, so you can verify our reputation and standing:

Ready to Schedule Your A/C Tune-Up in Riverview, FL 33579?

If you’re in Riverview, FL 33579 and want your A/C system checked, cleaned, and tuned by a local Tampa Bay team, we’re here to help. A professional tune-up can help lower your electric bill, extend the life of your system, and reduce the chances of an inconvenient breakdown when you need cooling the most.

Whether you’re due for routine maintenance, interested in services like dryer vent cleaning, or want to learn more about our HVAC and plumbing services across Hillsborough County, you can count on Home Therapist to provide clear, honest guidance and careful work.

Reach out today to schedule your full system A/C tune-up and keep your Riverview home comfortable and reliable all year long.

Bathroom Sink P-Trap and PVC Drain Repair in Riverview, FL 33578

When a bathroom sink isn’t draining right, it usually starts as a small annoyance and slowly turns into a daily frustration. For a homeowner in Riverview, FL 33578, that frustration came from an improperly installed bathroom sink drain and P-trap assembly that just didn’t look or feel right. The fittings were crowded, misaligned, and pulling apart inside the cabinet, raising concerns about leaks and long-term reliability.

Our Home Therapist plumbing team was called out to evaluate the situation, explain what was going on in plain terms, and put together a clean, code-conscious solution. In this case, that meant correcting the P-trap configuration, adjusting the PVC drain line, and securing everything so the sink would drain properly and stay leak-free.

In this walkthrough, we’ll recap what we found in this Riverview bathroom, how we diagnosed the problem, the repairs we made, and what homeowners in Riverview, FL 33578 can watch for in their own sink cabinets.

Case Recap: Bathroom Sink Drain Repair in Riverview

  • Location: Bathroom sink in a home in Riverview, FL 33578
  • Main issue: Improper P-trap configuration and misaligned PVC drain line inside the cabinet
  • Risks: Potential leaks, poor drainage, and stress on fittings due to offset and lack of support
  • Solution: Reconfigure drain layout, install a properly aligned P-trap, and extend/realign PVC piping
  • Special consideration: Keep an unused dishwasher branch connection accessible for future use
  • Outcome: Secure, correctly pitched, and supported drain system with restored reliable drainage

Customer Problem: Cluttered, Misaligned Bathroom Sink Drain

From the homeowner’s perspective, the first red flag was visual: opening the bathroom cabinet and seeing a tangle of PVC fittings that didn’t look like a typical bathroom sink drain. The P-trap area had multiple connections, extra fittings, and visible misalignment where the horizontal pipe disappeared into the wall.

Over time, that misalignment had started to show itself in a few ways:

  • The drain line appeared to be pulling away from proper alignment inside the cabinet.
  • The P-trap assembly didn’t sit straight or look securely supported.
  • There were unused branch connections on the tailpiece that didn’t serve any current purpose.

The homeowner in Riverview was concerned about two main things: hidden leaks that could damage the cabinet and whether the strange configuration could cause clogs or drainage issues down the line. They wanted a clean, professional setup that would work reliably and look like it was installed correctly from the start.

Inspection and Diagnosis: What We Looked For

Whenever we’re called out for a plumbing repair in the Tampa Bay area – whether it’s a bathroom sink in Riverview, FL 33578 or a larger job like whole-home repiping in Tampa – we start with a methodical inspection. In this bathroom, we focused on three key areas.

1. P-Trap Configuration

The P-trap is the curved section of pipe under your sink that holds water and blocks sewer gases from coming back into your home. On this sink, we observed:

  • An overly complicated assembly with excessive fittings.
  • Improper alignment between the sink tailpiece, trap, and wall drain.
  • Signs that the trap could be under stress due to the offset wall connection.

An overly complex P-trap setup often means more joints that can loosen, more spots for debris to collect, and more chances for misalignment.

2. Horizontal Drain Line and Wall Connection

The horizontal PVC pipe that carries water from the P-trap into the wall was slightly offset and not properly supported. That kind of offset can lead to:

  • Improper slope (too flat or back-pitched).
  • Mechanical stress on joints where the line tries to “pull away” from straight alignment.
  • Higher risk of leaks at the wall connection.

We visually confirmed that the line showed signs of being pulled out of ideal position, which can worsen over time as the pipe is bumped or the cabinet is used for storage.

3. Extra Branch Connections and Future Use

We also noted an unused branch connection on the tailpiece, intended for a dishwasher hookup. The homeowner didn’t yet have the dishwasher connected, but they wanted to keep that option open for the future.

Our job was to streamline the drain configuration while:

  • Maintaining proper access for the future dishwasher connection.
  • Ensuring the P-trap and horizontal line were correctly aligned and supported.
  • Improving drainage performance and reducing the chance of leaks.

Repair Process: How We Fixed the Bathroom Sink Drain

Once we had a clear picture of the problem, we walked the homeowner through the options and explained what would give them the most reliable long-term result. For a straightforward bathroom sink plumbing repair like this in Riverview, our focus is always on simplicity, code-conscious layout, and durability.

Step 1: Remove the Problematic P-Trap Assembly

The first step was to remove the existing P-trap assembly that had too many fittings and poor alignment. Taking it out allowed us to start fresh with a clean layout instead of trying to “patch” something that was fundamentally flawed.

With the old trap removed, we could see more clearly how the sink drain, cabinet space, and wall connection lined up – and where we needed to make adjustments.

Step 2: Cut and Extend the Existing PVC Drain Line

The horizontal PVC drain inside the cabinet was offset and under strain. To correct this, we:

  • Carefully cut the existing PVC drain line at the appropriate location.
  • Installed an extension piece to bring the connection into better alignment.
  • Reconfigured the layout so both necessary connections could be joined effectively.

This extension allowed us to line up the new P-trap properly without forcing the pipes into awkward angles. Proper alignment reduces stress on joints and helps maintain consistent slope for better drainage.

Step 3: Configure and Install a Properly Aligned P-Trap

With the drain line extended and aligned, we installed a new P-trap assembly sized and oriented correctly for this sink. The goal was a single, clean P-trap serving the sink, rather than a cluttered, multi-piece setup.

We made sure that:

  • The trap inlet lined up smoothly with the sink tailpiece.
  • The outlet connected naturally to the adjusted horizontal line.
  • The overall assembly sat plumb and level, without twisting or binding.

Step 4: Preserve the Dishwasher Connection for Future Use

The homeowner still needed the dishwasher branch connection available for a future hookup. We maintained that connection point in the layout, leaving it capped and accessible so a future dishwasher installer can easily tie in without reworking the entire drain.

This type of planning is similar to how we approach larger plumbing projects, like plumbing repairs in nearby Brandon or service calls across Hillsborough County – we’re always thinking about future access and serviceability.

Step 5: Secure, Support, and Test the Drain Assembly

Finally, we made sure the entire assembly was properly supported and secured. Unsupported pipes can sag over time, changing the slope and putting extra strain on joints.

Once everything was in place, we:

  • Ran water through the sink and observed the drainage.
  • Checked all joints and connections for any signs of leakage.
  • Verified that the water seal in the P-trap was holding properly.

We confirmed normal drainage and no leaks before wrapping up, and we walked the homeowner through what we’d done so they knew exactly how their bathroom sink in Riverview, FL 33578 had been improved.

Why This Fix Works: The Plumbing Principles Behind It

Bathroom sink drains may look simple, but they rely on a few important plumbing principles to work correctly and safely.

Proper Alignment and Slope

Drain pipes rely on gravity. If the horizontal section from your P-trap to the wall is misaligned or lacks proper slope, water can slow down, sit in the pipe, or even flow backward in spots. Over time, that can lead to buildup, odors, or gurgling sounds.

By cutting and extending the PVC line, then realigning it, we created a smooth, properly sloped path for wastewater to leave the sink.

Correct P-Trap Configuration

The P-trap’s job is to hold a small amount of water that seals off sewer gases. When a trap is assembled with too many pieces, odd angles, or poor alignment, you risk:

  • Leaks at joints under stress.
  • Improper sealing if water doesn’t settle evenly.
  • More areas where clogs can start.

A clean, correctly sized and aligned P-trap is more dependable and easier to service down the road.

Stress-Free Joints and Secure Support

Every glued or compression joint in a PVC drain has a limit to how much twisting and bending it can tolerate. When pipes are forced into position, the joint is constantly fighting that stress, which makes leaks more likely.

By physically moving and extending the piping to match where it wants to be, then properly supporting it, we removed that strain and gave the system a much better chance of staying tight over the long term.

Pro Tips for Homeowners in Riverview, FL

For homeowners in Riverview, FL 33578 and across the Tampa Bay area, the combination of humidity, frequent bathroom use, and storage inside sink cabinets means your plumbing deserves a quick check now and then. Here are some simple, practical tips:

1. Open Your Sink Cabinets Once in a While

Every month or two, open the bathroom cabinets and visually inspect under the sinks. Look for:

  • Water spots or swelling on the cabinet base.
  • Rust on metal parts or staining on PVC.
  • Pipes that look crooked, pulled, or heavily tilted.

2. Be Gentle With Storage

Heavy bottles and baskets can bump into the P-trap and drain lines. Try to keep bulky items away from the pipes, and avoid using the plumbing as a “shelf” or hanger. A little care here can prevent joints from loosening over time.

3. Take Odors and Gurgling Seriously

If you notice sewer-like odors or frequent gurgling in a bathroom sink, it may be a sign of trap issues, venting problems, or partial blockages. Early attention can often prevent bigger repairs later.

4. Don’t Ignore Slow Drainage

In our warm, humid Florida climate, hair and soap buildup can worsen quickly. If a sink starts draining slowly, addressing it sooner is better. Sometimes it’s a simple clean-out; other times, a misaligned or poorly pitched drain may be contributing.

5. Plan Ahead for Future Appliances

If you know you’ll be adding a dishwasher, new vanity, or other fixtures, it’s worth having a professional plumber look at your existing drains. Proper planning – similar to how we handle water filtration installations in Tampa – can save you from duplicated work later.

FAQ: Bathroom Sink Drain and P-Trap Repairs

Why was my existing P-trap setup a problem?

In this Riverview home, the P-trap was assembled with too many fittings and poor alignment. That created unnecessary stress on the joints and made leaks and drainage issues more likely. A simpler, properly aligned trap is both safer and more reliable.

Is it normal for the drain pipe to look crooked where it enters the wall?

A slight angle can sometimes be present, but the pipe should not appear pulled, sagging, or visibly strained. In this case, the offset was enough to affect alignment and support, so we corrected it with a new extension and better layout.

Do I always need two P-traps if I have multiple connections?

Not necessarily. Many bathroom sinks only need a single properly configured P-trap. The right approach depends on how the fixtures are plumbed together. In this Riverview, FL 33578 project, we configured the system so a single properly aligned P-trap served the sink while preserving a branch for a future dishwasher connection.

How do I know if my bathroom sink drain needs professional repair?

Signs include recurring slow drainage, visible leaks, strong odors, or pipes that look heavily tilted, patched together, or obviously out of alignment. If you’re not sure what you’re looking at under the sink, it’s safer to have a licensed plumber inspect it.

Will you repair cabinets, drywall, or other finishes if plumbing access is needed?

Our focus is on the plumbing itself. As a rule, we do not repair sheetrock, stucco, concrete, or similar finishes after a plumbing repair. If access is needed through walls or surfaces, we’ll explain that clearly so you can plan for any follow-up cosmetic work.

Why Tampa Bay Homeowners Choose Home Therapist

Whether we’re handling a bathroom sink drain repair in Riverview, FL 33578 or a larger plumbing project elsewhere in Tampa Bay, our approach is the same: respectful service, clear communication, and work that’s built to last.

Here’s what you can expect from our team:

  • Licensed, professional technicians: Our plumbers are trained, licensed, and experienced with both simple and complex drain configurations.
  • Transparent communication: We explain what we see, what we recommend, and why – in clear, everyday language.
  • Clean and respectful work: We treat your home like it’s our own, keeping the work area as tidy as possible and minimizing disruption.
  • Long-term reliability focus: We’re not just trying to “get it to work today.” We aim for solid, durable solutions that hold up over time.
  • Commitment to Tampa Bay homeowners: From Riverview to broader Hillsborough County and beyond, we’re proud to be a trusted local HVAC and plumbing partner.

If you’d like to see more of how we work and connect with us online, you can find Home Therapist on social media and local platforms:

For added peace of mind, you can also view our standing with trusted organizations:

Need Bathroom Sink Drain Help in Riverview, FL 33578?

If you open your bathroom cabinet and see a maze of pipes, or you’re noticing slow drainage, odors, or signs of leaks, it’s worth having a professional take a look. A simple, well-executed repair now can prevent cabinet damage and plumbing headaches later.

Home Therapist Cooling, Heating, and Plumbing is here to help homeowners in Riverview, FL 33578 and across Tampa Bay with dependable, no-drama plumbing service. Whether you need a straightforward sink drain repair, help with a persistent leak, or larger plumbing work similar to our repiping services in Tampa, we’ll walk you through every step and make sure you’re comfortable with the plan.

When you’re ready, reach out to schedule an appointment, and we’ll send a licensed technician to carefully inspect your system, explain your options, and get your bathroom sink draining the way it should.

Dishwasher Leak Sensor Replacement and Premium Home Therapy Plan Visit in Tampa, FL 33619

On a recent Premium Home Therapy Plan visit for a homeowner in Tampa, FL 33619, we were called out for a routine checkup on a one-year-old system that our team had installed. During our inspection, we found that the internal leak detection sensor in the dishwasher had failed. While everything else in the home was working well, that faulty sensor could have created real headaches if it went unnoticed.

Because the equipment was still under warranty, we replaced the leak detection sensor, tested the dishwasher thoroughly, and confirmed that it is now operating exactly as it should. The rest of the home’s comfort systems also checked out, so the homeowner was left with peace of mind and a fully protected kitchen.

Case Recap

  • Location: Homeowner in Tampa, FL 33619
  • Visit type: Premium Home Therapy Plan maintenance visit
  • Age of equipment: Approximately one year since installation by our team
  • Primary issue found: Faulty internal leak detection sensor in the dishwasher
  • Work performed: Sensor replacement under warranty and full operational check
  • Result: Dishwasher and home systems operating normally, with no active leaks or alarms

Customer Problem

This visit started like many of our plan appointments in Tampa. The homeowner in Tampa, FL 33619 has a relatively new system and is enrolled in our Premium Home Therapy Plan to keep everything running smoothly year-round. There wasn’t a major emergency happening that day, but in Florida’s climate, even a small water issue can turn into a bigger problem if it’s not caught early.

During the visit, the homeowner mentioned wanting to make sure that all appliances connected to water were in good shape. With a busy household and a newer kitchen, they wanted reassurance that there were no hidden leaks, especially around the dishwasher. A hidden leak under or behind a dishwasher can damage cabinets, flooring, and baseboards long before it shows up on the surface.

Our goal for this Premium Home Therapy Plan appointment in Tampa was simple: verify that the home’s plumbing and related systems were operating correctly, look for any early warning signs, and address anything we found on the spot.

Inspection and Diagnosis

Because this home’s equipment was only about a year old and installed by our team, we already had a good understanding of the layout and components. Even when everything seems new, we treat each visit as a fresh inspection—especially in humid Tampa Bay homes, where small issues can develop quickly.

For this particular visit, we focused on:

  • Checking overall plumbing-related fixtures for any visible leaks or moisture
  • Inspecting the dishwasher area for signs of water damage or staining
  • Verifying that safety and leak detection devices were installed and active
  • Confirming that the dishwasher cycled and drained properly

During our checks around the dishwasher, we identified that the internal leak detection sensor was not functioning correctly. These sensors are designed to detect water where it shouldn’t be—typically in the base pan of the dishwasher or in surrounding areas—and then either shut the unit down or signal an alert.

In this case, the sensor itself had failed, not the dishwasher’s plumbing connections. That’s an important distinction. The dishwasher was still able to run, but the safety backup that watches for hidden leaks was not reliable. On a one-year-old system, that’s exactly the kind of thing a maintenance visit should catch.

Once we confirmed the sensor issue, we reviewed the installation history, verified warranty coverage, and prepared to replace the component as a covered repair.

Repair and Service Process

Because the rest of the system was in good shape, our main corrective task during this Premium Home Therapy Plan visit in Tampa, FL 33619 was focused on that internal leak detection sensor. We approached it step by step, keeping the homeowner’s kitchen clean and disruption to a minimum.

Here’s how we handled it:

1. Safely accessing the dishwasher and work area
We carefully moved and protected nearby finishes to avoid scuffs, scratched cabinets, or damage to flooring. A clean work area is just as important to us as the technical repair. We ensured power to the unit was handled properly before working on any internal components.

2. Confirming the sensor fault
Before replacing anything, we double-checked that the sensor was indeed the issue and not a loose connection or misreading. Once we were confident that the sensor itself had failed, we proceeded with the replacement.

3. Removing the faulty leak detection sensor
We removed the original sensor, making sure not to disturb any plumbing connections or surrounding wiring. Our focus here is to correct the problem without creating a new one—especially in tight spaces like under a dishwasher.

4. Installing the new internal leak detection sensor
We installed a new sensor that matched the system requirements and was fully covered under the existing warranty. The sensor was secured in the proper position so it could accurately detect any future water presence where it doesn’t belong.

5. Reassembling and securing the dishwasher
Once the new sensor was in place, we reassembled any access panels and confirmed that the dishwasher was level and properly supported, then restored power to the appliance.

6. Testing the dishwasher and sensor operation
After the repair, we ran the dishwasher through a test cycle to confirm normal fill, wash, and drain operation. We also verified that the new leak detection sensor was reading properly and that there were no visible leaks around the unit. While we do not share specific readings unless needed, we always make sure the appliance is operating as expected before we leave.

7. Reviewing findings with the homeowner
Before wrapping up, we walked the homeowner through what we found, what we replaced under warranty, and what we checked during the visit. We also answered questions about how the sensor works and what signs to watch for in the future.

By the end of the appointment, the dishwasher was fully operational, the leak safety feature was restored, and the homeowner had reassurance that their one-year-old installation was in excellent shape.

Why This Fix Works

Leak detection sensors in dishwashers are all about early warning and damage prevention. In a warm, humid area like Tampa, even a small amount of unnoticed water can quickly turn into damaged cabinets, swelling wood, or musty odors.

Here’s the basic principle behind this repair:

  • The dishwasher is designed to keep water contained inside the tub and drain line during each cycle.
  • An internal sensor monitors areas where water should never be, such as the base pan or underbody of the appliance.
  • If water reaches that area, the sensor sends a signal that can stop the cycle or indicate a leak.
  • When the sensor fails, the dishwasher might still run, but you lose that safety layer.

By replacing the faulty sensor, we restored that extra line of defense. The dishwasher can now help protect the home by responding if a future leak ever develops. Combined with regular maintenance, this significantly reduces the risk of hidden water damage around the kitchen.

For homeowners in Tampa, FL 33619 and across the Tampa Bay area, this kind of repair is a good example of why ongoing maintenance is valuable. It’s not just about fixing what’s obviously broken—it’s about keeping all the safety and protection features working in the background.

Pro Tips for Homeowners in Tampa

Based on what we see on service calls and maintenance visits throughout Tampa, here are a few practical tips to help protect your home from dishwasher and plumbing issues:

1. Check around your dishwasher regularly
Every few weeks, take a quick look under the sink, along the toe-kick, and around the sides of the dishwasher for any signs of moisture, swelling, or discoloration. Early signs are often subtle, especially in humid Florida homes.

2. Listen for new or unusual noises
If your dishwasher suddenly starts sounding louder, grinding, or straining, it may be working harder than it should. While this doesn’t always point to a leak, it is a good reason to have a professional take a look before a small issue grows.

3. Don’t ignore musty or damp smells
In Tampa’s humidity, musty odors can show up quickly, but if you notice a persistent damp smell near the dishwasher or cabinets, it may be a sign of a slow leak. Addressing it early is almost always less expensive than waiting.

4. Run your dishwasher on full but not overloaded loads
Running small loads constantly can add unnecessary wear, while overloading can block spray arms and cause poor draining. Aim for a full, balanced load to keep things running smoothly.

5. Consider a maintenance plan for whole-home coverage
A structured maintenance plan ensures that a professional keeps an eye on your plumbing and comfort systems at least once or twice a year. Our Therapy Maintenance Plans are designed exactly for this—catching developing issues before they become emergencies.

6. Act quickly if you see pooling water
If you ever see water pooling near the base of your dishwasher or under the sink, shut off water to the area if you can do so safely, avoid running the appliance, and schedule a visit. Our leak detection services in Tampa can help track down the source before it spreads.

FAQ: Dishwasher Leak Sensors and Maintenance Visits

Is it normal for a dishwasher leak sensor to fail after only a year?

It isn’t common, but it can happen. Components vary, and sometimes a part fails earlier than expected. The good news for this homeowner in Tampa, FL 33619 is that the sensor was still under warranty, and we were able to replace it during a scheduled maintenance visit—with no major damage or disruption.

How do I know if my dishwasher has a leak detection sensor?

Many newer dishwashers include some form of leak detection, either built into the unit or as an added feature. If you’re not sure, you can check your user manual or ask us during your next service visit. During our maintenance visits, we’ll let you know what protection your system has and whether it’s functioning correctly.

What are the benefits of a Premium Home Therapy Plan visit?

Our Premium Home Therapy Plan visits in the Tampa area are designed to keep both HVAC and plumbing-related systems in top shape. We look for early signs of wear, test safety components like leak detection, and confirm proper operation. Catching a faulty sensor early, like we did on this visit, is exactly the type of value these plans are meant to provide.

Will you tell me if a repair is covered under warranty?

Yes. When we arrive, we review the age of your equipment, installation details, and any applicable warranties. If a part is covered, we let you know up front. In this case, the dishwasher leak detection sensor replacement was fully covered, and we explained that clearly to the homeowner before completing the work.

What should I do if my dishwasher stops mid-cycle or shows a leak error?

If your dishwasher shuts itself down or shows a warning related to water or leaks, avoid forcing it to restart. Turn off the water supply to the appliance if you can do so safely, and schedule a service visit. We can inspect for leaks, test the sensor, and confirm whether it’s a true water issue or a sensor fault.

Why Choose Home Therapist for Your Tampa Home

When you invite us into your home in Tampa, FL 33619, you’re trusting us with your comfort, safety, and property. We take that seriously on every visit—whether it’s a major plumbing repair or a simple warranty sensor replacement.

Here’s what you can expect from our team:

  • Licensed and professional technicians – Our team is trained, licensed, and experienced with both HVAC and plumbing systems, including leak detection and appliance-related issues.
  • Transparent communication – We explain what we find in plain language, outline your options, and let you know when something is covered under warranty before work is done.
  • Clean and respectful work practices – We protect your home, clean up our work areas, and treat your kitchen and living spaces as carefully as we would our own.
  • Focus on long-term reliability – Our goal isn’t just to get you through today—it’s to keep your systems running smoothly for years with smart maintenance and solid repairs.
  • Commitment to Tampa Bay homeowners – We’re local, we understand Tampa’s climate and housing styles, and we build long-term relationships with the families we serve.

If you’d like to see what other homeowners are saying about us, you can check out our community on Facebook or follow us on Instagram and TikTok for helpful tips and real-world project highlights.

We’re also proud to be recognized and listed with trusted organizations. You can find us on the Better Business Bureau, the Tampa Bay Chamber of Commerce, and through our Google business listing.

Need Help with Plumbing or Leak Detection in Tampa, FL 33619?

If you’re in Tampa, FL 33619 and you’ve noticed moisture around your dishwasher, are concerned about hidden leaks, or simply want the peace of mind that comes with regular checkups, our team is here to help. From targeted leak detection in Tampa to broader plumbing services and structured maintenance plans, we can tailor our visit to what your home truly needs.

Whether your equipment is brand new or has been in place for years, a well-planned visit with a licensed professional can make a big difference. If you’re ready to schedule service in Tampa, FL 33619, reach out today and let Home Therapist Cooling, Heating, and Plumbing take care of the details—so you can enjoy a comfortable, worry-free home.

AC Service and Troubleshooting in Tampa, FL 33603

When your air conditioner starts acting up in the middle of a Tampa summer, it doesn’t take long for the house to feel uncomfortable. A homeowner in Tampa, FL 33603 reached out to us because their system wasn’t keeping up the way it used to. Our job on this visit was to carefully inspect the AC system, track down the cause of the problem, and get everything running reliably again.

In this walkthrough, we’ll explain how we approached this AC service call in Tampa, what we look for during a diagnostic visit, and how we help homeowners understand their options so they can feel confident about their system going forward.

Case Recap

For readers in a hurry, here’s a quick summary of this AC visit in Tampa, FL 33603:

  • Homeowner in Tampa reported poor cooling performance and inconsistent comfort.
  • We performed a full system inspection: outdoor unit, indoor air handler, thermostat, and airflow.
  • We identified issues affecting airflow and overall system efficiency.
  • We made targeted corrections, cleaned key components, and verified proper operation.
  • We reviewed maintenance recommendations specific to Tampa’s heat and humidity.
  • The system was cooling more consistently by the end of the visit, with a plan to keep it that way.

Customer Problem

On this Tampa service call, the homeowner’s main concern was comfort. They noticed that some rooms felt warmer than others and that the system seemed to run longer than usual to reach the set temperature. In a hot, humid area like Tampa, FL 33603, that usually means the AC is working harder than it should.

From our conversation with the homeowner, here were the key symptoms they described:

  • The thermostat was set to a normal temperature, but the home still felt muggy or slightly warm.
  • They heard the system running for long stretches without much improvement in comfort.
  • Certain areas of the home were noticeably less comfortable than others.

They wanted to know two things: what was actually going on with the system, and whether they were at risk of a breakdown if nothing was done. Our goal as licensed Tampa Bay HVAC technicians is to give clear, honest answers and leave the system better than we found it—never to push unnecessary work.

Inspection and Diagnosis

Any time we’re called for AC service in Tampa, we start with a structured inspection. That way we’re not guessing—we’re checking each part of the system that can affect cooling, airflow, and reliability.

On this Tampa, FL 33603 visit, we walked through the following checks:

Thermostat and Basic Operation

We began at the thermostat to make sure it was set correctly and communicating with the system. If the thermostat isn’t calling for cooling properly, the rest of the system can’t do its job, no matter how healthy the equipment is.

Indoor Air Handler and Filter Area

Next, we inspected the indoor unit and return area. In our climate, clogged filters and restricted returns are very common causes of poor cooling. They reduce airflow across the coil, which can lead to longer run times, uneven temperatures, and extra strain on the equipment.

We looked for:

  • Filter condition and fit.
  • Visible dust and debris around the return.
  • Any signs of drainage or moisture issues near the air handler.

Outdoor Condenser Unit

We then moved outside to the condenser. Because Tampa homes are exposed to salt air, yard debris, and heavy rains, the outdoor unit often takes a beating. Restricted condenser coils and poor airflow outside can cause the system to run hot and lose efficiency.

Our inspection included:

  • Condition and cleanliness of the condenser coil.
  • Clearances around the unit for proper airflow.
  • General condition of accessible electrical components and connections.

Airflow and Room-to-Room Comfort

Since the homeowner mentioned inconsistent comfort, we also checked airflow at several supply vents. While we don’t quote specific numbers unless they’re documented in the job file, we make sure there’s not an obvious airflow imbalance that could be caused by closed vents, blocked registers, or ductwork issues.

By following this systematic approach, we were able to narrow the problem down to airflow restrictions and general system strain rather than a single catastrophic component failure. That’s good news for the homeowner—addressing these issues early helps avoid larger breakdowns later.

Repair or Service Process

Once we’d identified what was affecting performance, we moved into corrective work. On a service call like this in Tampa, FL 33603, the goal is to restore proper airflow, improve efficiency where we can, and make sure everything is operating safely.

1. Addressing Airflow Restrictions

We started with the simplest but most critical piece: airflow through the return and filter area. If the filter was dirty or improperly sized, that alone could explain why the system was struggling.

Steps we typically take during this portion of the visit include:

  • Inspecting and, if needed, replacing the air filter with an appropriate type and size the homeowner is comfortable maintaining.
  • Checking that return grills and supply vents are open and not blocked by furniture, rugs, or other items.
  • Visually confirming that air is moving freely into and out of the unit.

Restoring proper airflow helps the system cool more evenly and reduces unnecessary strain on the equipment.

2. Cleaning and Clearing the Outdoor Unit

Next, we focused on the outdoor condenser. In Tampa, grass clippings, leaves, and dirt commonly get pulled into the coil. When that happens, heat can’t be released efficiently and the system has to work much harder to cool your home.

On this visit, we:

  • Cleared debris away from around the unit to improve airflow.
  • Cleaned accessible areas of the condenser coil to help it reject heat more effectively.
  • Visually checked the fan operation and general condition of the unit while it was running.

3. Verifying System Operation

After we addressed airflow and cleanliness, we ran the system through a full cooling cycle. We don’t leave until we’ve confirmed that the system is responding properly to the thermostat, starting and running smoothly, and providing consistent cooling.

On this Tampa AC service call, we:

  • Monitored the system as it cycled on and off.
  • Confirmed that airflow and comfort improved at the registers.
  • Verified that there were no immediate concerns with normal operation.

We then took time to explain to the homeowner what we found, what we did, and what to watch for going forward. Our goal is always to keep homeowners in Tampa Bay informed and comfortable, not in the dark.

Why This Fix Works

Most AC problems we see in Tampa, FL 33603 come down to a few basic principles: airflow, heat transfer, and control. You don’t need to be an HVAC expert to understand the basics.

Here’s what we addressed on this visit and why it matters:

  • Airflow: Your AC needs a steady, unobstructed flow of air across the indoor coil. A dirty filter or blocked return restricts that airflow, making the system run longer and harder to do the same job.
  • Heat Transfer: The outdoor unit’s job is to release heat from your home into the outside air. When the coil is dirty or airflow is blocked, heat can’t escape as easily, so the system’s cooling capacity drops.
  • Controls: The thermostat tells the system what to do. If everything else is healthy but the thermostat is mis-set or not working properly, comfort will still suffer.

By cleaning, clearing, and verifying these basic functions, we help the system move air the way it was designed to and get rid of heat efficiently. That translates into steadier temperatures, less humidity, and a more comfortable home in Tampa’s challenging climate.

When a system is regularly maintained through services like our AC maintenance in Tampa and seasonal AC tune-ups, these airflow and cleanliness issues are caught early—before they turn into major breakdowns.

Pro Tips for Homeowners in Tampa

Living in Tampa, FL 33603 means your air conditioner works almost year-round. Here are some practical, low-stress tips to keep your home more comfortable and your system running smoothly:

1. Stay Consistent With Filter Changes

In our humid Tampa climate, filters tend to load up faster. Check your filter at least once a month, especially during peak summer. Replace it as soon as you see significant dust buildup. A clean filter protects your system and improves comfort.

2. Keep Vents and Returns Clear

Make sure furniture, curtains, and rugs aren’t blocking supply vents or return grills. Restricted vents can starve certain rooms of cool air and make your AC work harder than necessary.

3. Give the Outdoor Unit Breathing Room

Keep at least a couple of feet of clearance around your outdoor condenser. Trim back bushes, move stored items away, and avoid piling mulch or leaves against the unit. Good airflow outside is just as important as inside.

4. Use Your Thermostat Wisely

In Tampa, it’s usually better to pick a comfortable temperature and let the system maintain it rather than constantly pushing the thermostat down. Large temperature swings can increase runtime without providing much extra comfort.

5. Consider Preventive Maintenance

Annual or seasonal maintenance helps catch small issues before they grow. Our Therapy maintenance plans are designed for Tampa Bay homeowners who want fewer surprises and steadier comfort from their AC and heating systems.

FAQ: AC Service in Tampa, FL 33603

How often should I schedule AC service in Tampa?

For homes in Tampa, we generally recommend at least one professional AC maintenance visit per year, ideally before peak summer. Many homeowners also like a second check in the fall to prepare for the next season, especially if the system runs hard all year.

What are the most common signs I need AC service?

Common warning signs include uneven temperatures from room to room, longer run times, unusual noises, higher energy bills, or the system cycling on and off more than usual. If you notice these in your Tampa, FL 33603 home, it’s a good time to schedule a visit.

Can a dirty filter really cause cooling problems?

Yes. A dirty or restrictive filter is one of the largest contributors to poor performance and breakdowns we see on service calls. It chokes off airflow, which increases strain on the system and can lead to comfort issues and premature wear.

Is it worth repairing an older AC, or should I replace it?

It depends on the condition of the system, the type of repairs needed, and how well it has been maintained. On a visit like this, we focus first on getting your current system running as reliably as possible. If we see signs that replacement may be more cost-effective, we’ll explain your options clearly and can also provide AC installation services in Tampa when the time is right.

What can I do between professional visits to help my system?

Replace filters regularly, keep vents and the outdoor unit clear, and pay attention to changes in comfort or noise. If something feels off, it’s usually better to have it checked sooner than later. Our AC repairs and maintenance overview page explains what’s typically included in a professional visit.

Why Choose Home Therapist for AC Service in Tampa

When you invite us into your Tampa, FL 33603 home, you’re trusting us with your comfort and your property. We take that seriously on every visit.

Here’s what you can expect from our team at Home Therapist Cooling, Heating, and Plumbing:

  • Licensed, professional technicians: Our techs are trained, experienced, and fully licensed to work on residential HVAC and plumbing systems in the Tampa Bay area.
  • Clear, honest communication: We explain what we’re seeing in plain language, walk you through your options, and never pressure you into work you don’t need.
  • Clean and respectful work: We treat your home like it’s our own—protecting work areas, cleaning up after ourselves, and being mindful of your time and space.
  • Focus on long-term reliability: Every recommendation we make is with an eye toward keeping your system reliable and efficient, not just getting through today’s visit.
  • Commitment to Tampa Bay homeowners: We live and work here too. Our reputation in the Tampa Bay community matters to us, and we work hard to earn your trust on every job.

If you’d like to get a feel for who we are and how we work, you can connect with us on social media and see more about our presence in the community:

  • Follow us on Pinterest for comfort and home care ideas.
  • Visit our Reddit profile to see how we engage with homeowners and answer common HVAC questions.

We’re also proud to be listed with respected organizations and directories that help Tampa Bay homeowners find trusted local service providers:

Need AC Service in Tampa, FL 33603?

If your home in Tampa, FL 33603 isn’t as cool or comfortable as it should be, we’re here to help. Whether you need a one-time AC checkup, ongoing maintenance, or you’re starting to think about replacement options, our team will walk you through everything step by step.

Schedule your visit with Home Therapist Cooling, Heating, and Plumbing today, and let our local Tampa Bay technicians take care of your AC system so you can get back to enjoying a comfortable, reliable home.

AC Maintenance and Water Heater Flush in Lithia, FL 33547

For a homeowner in Lithia, FL 33547, keeping the home comfortable and healthy meant taking care of both the air conditioning systems and the water heater. Our team at Home Therapist was called out to perform an $89 maintenance special on two AC systems and a tankless water heater. During the visit, we uncovered organic growth and heavy dirt buildup in the upstairs air handler and blower wheel, and we discussed several options to improve indoor air quality and protect the family’s health.

Case Recap

  • Location: Single-family home in Lithia, FL 33547
  • Services requested: AC tune-up for two systems and tankless water heater flush
  • Findings: Organic growth and dirty blower wheel in the second-floor air handler; first-floor system operating normally
  • Recommended: Air handler and blower wheel cleaning, duct sanitation, and UV light installation for long-term air quality
  • Outcome: Systems checked for proper operation, clear plan provided to restore and maintain clean, healthy airflow

Customer Problem: Keeping Two AC Systems and Hot Water Reliable

In many homes in Lithia and across the Tampa Bay area, it’s common to have one AC system for the downstairs and a second system dedicated to the upstairs. That was the setup in this home. The homeowner reached out to us because they wanted to take advantage of our $89 maintenance option for both air conditioning systems and their tankless water heater.

Their main goals were straightforward:

  • Make sure both AC systems were running efficiently before our long Florida cooling season.
  • Have the tankless water heater flushed to maintain reliable hot water and protect the unit.
  • Find out if there was anything that could be done to improve indoor air quality for their family.

There were no major comfort complaints yet, but the homeowner in Lithia, FL 33547 wanted to get ahead of potential issues. That’s exactly the right mindset for our climate, where heat, humidity, and year-round usage can wear equipment down faster.

Inspection and Diagnosis

We started with a full visual and functional inspection of both AC systems and the tankless water heater. Our process on this type of visit typically includes:

  • Checking overall system condition and cleanliness.
  • Inspecting the air handlers and blower sections.
  • Looking for signs of organic growth (mold/mildew) in damp areas.
  • Evaluating coils, drain pans, and accessible ductwork for buildup.
  • Verifying basic electrical connections and controls.
  • Running the systems to listen for abnormal noises or operation.

On the downstairs (System 1), everything appeared to be in good shape. No obvious signs of organic growth, no major dirt buildup, and no functional problems noted during the visit.

The upstairs system (System 2) told a different story. When we opened the air handler, we found:

  • Visible organic growth inside the air handler cabinet.
  • A blower wheel that was very dirty and also showing organic growth.

This is not unusual for second-floor systems in Florida. Warm air rises, the upstairs gets worked harder, and humidity can stay trapped in the air handler if it doesn’t get regular deep cleaning. Over time, this combination can lead to buildup and organic growth in the equipment that is constantly blowing air into the home.

On the tankless water heater side, the customer had requested a standard maintenance flush. During a flush, we’re focused on removing mineral and sediment buildup and checking the overall condition of the unit. If we encounter a unit that’s severely clogged and not allowing water to flow properly, additional work and time may be needed to clear it completely.

Repair and Service Process

After reviewing our findings with the homeowner in Lithia, FL 33547, we outlined a clear plan. Some items could be done as part of maintenance, and some were recommended as upgrades to protect indoor air quality and long-term system health.

1. AC Maintenance and Tune-Up Steps

For both AC systems, a thorough tune-up typically includes:

  • Cleaning accessible components to remove dust and debris.
  • Checking refrigerant levels and overall cooling performance.
  • Inspecting electrical wiring and key components for signs of wear.
  • Verifying thermostat operation and settings.
  • Checking filters (replacing if provided or requested by the homeowner).
  • Inspecting condensate drainage for proper flow.

These steps help the systems run more efficiently, reduce stress on components, and can lower the risk of unexpected breakdowns during peak heat. For homeowners who want a deeper look at our specials and what’s included, we cover that in detail on our AC maintenance and cleaning specials page.

2. Addressing the Organic Growth in the Upstairs Air Handler

The main concern for the upstairs system was the organic growth in the air handler and on the blower wheel. We explained that the air handler is essentially the “lungs” of the system, constantly pulling air in, conditioning it, and pushing it back out through the ducts. When that space is dirty:

  • Particles can circulate into the living spaces.
  • Airflow can be restricted, making the system work harder.
  • Musty odors and potential respiratory irritation can develop.

We recommended a detailed cleaning of the air handler interior and the blower wheel. This type of cleaning is more involved than a standard tune-up and is focused on removing buildup and organic growth from surfaces where air is constantly moving across.

3. Duct Sanitation

Because organic growth was present inside the air handler, we also recommended duct sanitation for the areas served by this system. Duct sanitation involves using appropriate products and methods to treat the interior of the ductwork, helping to reduce microbial contamination and improve air quality throughout the home.

For many homeowners in communities like Lithia and nearby Fish Hawk, duct sanitation is especially helpful when:

  • There’s visible growth in HVAC components.
  • Family members are sensitive to dust, allergens, or musty odors.
  • The home has had water intrusion or long periods of high humidity.

We’ve documented similar projects, such as our duct sanitation and UV light installation project in Fish Hawk, FL 33547, to help homeowners understand what to expect.

4. UV Light Installation Recommendation

To help prevent the problem from returning, we recommended installing a UV light within or near the air handler. UV lights designed for HVAC systems are placed where they can shine directly on damp surfaces inside the unit. Over time, this can help limit the growth of certain microorganisms on those surfaces.

We were very clear with the homeowner about what a UV light does and does not do. It is not a replacement for cleaning, and it is not a cure-all for every air quality concern. It is a preventive tool that works best after the air handler and blower have been properly cleaned and the basic maintenance is up to date.

5. Tankless Water Heater Flush

For the tankless water heater, the requested service was a standard flush and inspection. During this process, we:

  • Shut down the unit safely and isolate it from the plumbing system.
  • Use appropriate connections to circulate cleaning solution through the heat exchanger.
  • Flush out mineral and sediment buildup that can affect performance and efficiency.
  • Inspect for signs of rust, leaks, or loose connections.

If a water heater is so heavily clogged that water will not flow properly, additional labor and time are needed to break up and remove the excess sediment. In those cases, we explain the situation to the homeowner and discuss any additional cost before moving forward.

We also let homeowners know that regular water heater maintenance is an important part of protecting the system. For more context on how this fits into our plumbing services, you can review our article on annual water heater maintenance in Tampa.

Why This Fix Works

For homeowners in Lithia, FL 33547, the combination of AC tune-ups, air handler cleaning, duct sanitation, and water heater flushing addresses several important principles of home comfort and safety.

Airflow and Clean Surfaces

A clean blower wheel and air handler allow air to move freely through the system. When the blower is coated with dust and organic growth, airflow can be reduced, and particles are more likely to be picked up and carried into the home. Cleaning these components helps:

  • Restore proper airflow.
  • Reduce the amount of debris in circulated air.
  • Lower strain on the motor and components.

Humidity and Organic Growth

Our climate in the Tampa Bay area is warm and humid for much of the year. Inside an air handler, you often have cool, damp surfaces—exactly the environment where organic growth can take hold. Combining thorough cleaning with a properly installed UV light helps limit growth on key surfaces, especially after moisture has condensed there.

Duct Sanitation and Distribution

The duct system is the pathway that carries conditioned air throughout the home. If the equipment has had organic growth, treating the ducts helps ensure that contaminants are not simply sitting in the airways where air passes over them repeatedly. Duct sanitation, when done as part of a comprehensive cleaning plan, supports cleaner air at every supply register.

Water Heater Efficiency and Reliability

Flushing a tankless water heater removes mineral buildup that can insulate the heat transfer surfaces and restrict flow. Routine flushing helps:

  • Maintain consistent hot water delivery.
  • Reduce strain on the heat exchanger and internal components.
  • Extend the practical lifespan of the unit when combined with other proper care.

Pro Tips for Homeowners in Lithia

Based on what we found at this home in Lithia, FL 33547, here are some simple, practical tips we share with local homeowners:

  • Schedule regular AC tune-ups, especially for upstairs systems. Upper floors in Florida homes tend to run hotter and put more hours on their AC units. An annual tune-up helps catch buildup and minor issues before they become bigger problems.
  • Stay on top of filter changes. Dirty filters reduce airflow and can contribute to dirt accumulation inside the air handler. Check filters monthly, and replace them as needed—especially during peak cooling season.
  • Watch for musty or “dirty” smells when the AC runs. Persistent odors can be a sign of organic growth inside the system or ducts. If you notice this, it’s worth having the air handler and ductwork inspected.
  • Consider UV lights as a preventive add-on, not a cure-all. UV lights work best when installed after professional cleaning and paired with good filtration and humidity control.
  • Flush tankless or tank water heaters regularly. Our water in the Tampa Bay area can leave mineral deposits inside water heaters. Regular flushing helps maintain efficiency and hot water performance.
  • Ask for a clear report after every maintenance visit. A written or digital summary makes it easy to track what’s been done and what’s recommended so you can plan and budget for future work.

FAQ: AC and Water Heater Maintenance for Lithia Homeowners

How often should I have my AC systems serviced in Lithia, FL 33547?

For most homes in Lithia and the greater Tampa Bay area, we recommend at least one professional AC maintenance visit per year for each system. Upstairs systems that work harder may benefit from more frequent checkups, especially if you’ve had past issues with organic growth or heavy dirt buildup.

Is organic growth in my air handler dangerous?

Any time we see organic growth inside an air handler, we take it seriously because that’s where the air you breathe is being pulled and pushed through. It doesn’t automatically mean an emergency, but it does mean the system needs proper cleaning and, in many cases, additional measures like duct sanitation and UV lighting to reduce the chance of it returning.

Will a UV light fix air quality issues by itself?

No. A UV light is a helpful tool, but it works best as part of a full plan—cleaning the air handler and blower, maintaining good filtration, keeping humidity under control, and using duct sanitation where appropriate. We always start with cleaning and inspection before recommending UV lights.

What’s included in an $89 AC tune-up or water heater flush?

The goal of these specials is to provide a thorough maintenance visit at a predictable price. For AC systems, that means cleaning accessible components, checking refrigerant levels, inspecting wiring and components, verifying thermostat operation, and checking filters and drainage. For water heaters, it involves flushing sediment, testing safety devices, and inspecting for leaks or corrosion. If more intensive cleaning or repairs are needed, we explain those options and costs before moving forward.

What if you find more problems after replacing a part?

Sometimes a system can’t be fully tested until a failed part or major issue is corrected. In those cases, we let homeowners know that additional issues may only become visible after the primary repair is done. If that happens, we provide clear estimates for any follow-up work so there are no surprises.

Does my water heater really need regular flushing?

Yes. Over time, minerals and sediment naturally build up inside water heaters. Flushing helps maintain efficiency, protect the heat exchanger, and support consistent hot water. For more detail on how we handle this, you can read our overview of annual water heater maintenance in Tampa and how it fits into our plumbing services.

Why Choose Home Therapist for Your Lithia Home

When you invite us into your home in Lithia, FL 33547, you’re trusting us with your comfort, your equipment, and your indoor air quality. We take that seriously.

Our licensed technicians are trained to look at the whole system, not just a single part. We explain what we find in clear, simple terms and provide options so you can choose what makes sense for your budget and your priorities. That’s true whether we’re performing an $89 tune-up, a full air handler cleaning, duct sanitation, or a water heater flush.

We work cleanly and respectfully in your home—wearing shoe covers when appropriate, protecting work areas, and cleaning up after ourselves. Our focus is on long-term reliability, not quick, one-time fixes. Many homeowners first find us through our online presence and then stay with us because of the service they receive in person. You can see more of what we do and how we work on our social channels like Facebook, Instagram, and YouTube.

If you like to check credentials and community involvement, we encourage that. You can review our standing with the Better Business Bureau, see our listing with the Tampa Bay Chamber of Commerce, or confirm our local presence on Google Maps. We’re proud to serve homeowners throughout Tampa Bay with honest, reliable HVAC and plumbing care.

Need AC or Water Heater Service in Lithia, FL 33547?

If you’re in Lithia, FL 33547 and you’re due for an AC tune-up, noticing musty smells, or simply want peace of mind about your water heater, our team at Home Therapist is here to help. We’ll inspect your systems, explain what we see, and recommend only the services that make sense for your home.

Whether you’re interested in maintenance specials, air quality upgrades like duct sanitation and UV lights, or you just want a trustworthy local technician to look over your equipment, you can count on us. Reach out today to schedule your visit, and let us help keep your home comfortable, efficient, and healthy all year long.

For more background on our HVAC offerings, including repairs, installs, and maintenance options, you can also explore our overview of AC repair and maintenance services before you call. We look forward to serving you in Lithia and throughout the Tampa Bay area.

Plumbing Diagnosis and Water Heater Evaluation in Brandon, FL 33511

When a homeowner in Brandon, FL 33511 reached out to us for a plumbing diagnosis, their main concern was simple: they wanted clear answers and honest options. They also asked about a professional water heater flush to help keep hot water reliable without unexpected surprises.

As local plumbing and HVAC technicians serving Brandon and the greater Tampa Bay area, our job in a visit like this is to make things easier to understand. We walk the homeowner through what we're checking, what we find, and what their options are—including any interest in maintenance services like a water heater (WH) flush. We also set realistic expectations about warranties and the possibility of hidden issues that might only show up once work begins.

In this article, we'll walk you through how a plumbing diagnosis visit like this typically works in Brandon, from the first concern to our final recommendations, so you know what to expect if you ever need similar help in your own home.

Case Recap: Plumbing Diagnosis in Brandon, FL 33511

  • Location: Residential home in Brandon, FL 33511
  • Service requested: Plumbing diagnosis with interest in a water heater flush
  • Goal: Understand what’s going on, review repair or maintenance options, and get transparent pricing
  • Scheduling needs: Tight time windows in late afternoon and limited weekday availability
  • Outcome: Clear explanation of findings, options for repair and maintenance, and honest discussion of warranties and potential hidden issues

Customer Problem: Clear Answers and Convenient Scheduling

For many homeowners in Brandon, plumbing issues don't always show up at convenient times. In this case, the household had limited weekday availability and could only meet late in the afternoon or on Saturday mornings. They needed us to be firm on arrival time so someone could be home to let us in.

Along with the scheduling challenge, the homeowner wanted a professional opinion on their plumbing system and was specifically interested in a water heater flush at a clearly stated price. That tells us two things:

  • There may be existing concerns about hot water performance or reliability.
  • The homeowner is thinking ahead about maintenance, not just emergency repairs.

When we're called for a plumbing diagnosis in Brandon, the concerns are often similar:

  • Uncertain where a problem is coming from
  • Worried about the cost or whether a repair is really necessary
  • Hoping to avoid bigger issues with some preventative maintenance

Our role is to slow things down, listen carefully, and then give a straightforward explanation of what we see—in plain language.

Inspection and Diagnosis: What We Look For and Why

On a plumbing diagnosis visit for a homeowner in Brandon, FL 33511, we follow a structured process so nothing important is overlooked. Even when the appointment also involves a potential water heater flush, we always start with the basics:

Listening to the Homeowner

We begin by asking questions:

  • What symptoms have you noticed? (Noises, slow drains, inconsistent hot water, odors, visible leaks, etc.)
  • How long has it been happening?
  • Has any work been done on the plumbing or water heater recently?

This conversation helps us focus our inspection on the areas most likely to be involved, instead of just guessing.

Visual and Functional Checks

Next, we perform a visual and functional inspection of the relevant plumbing fixtures or systems. Depending on what the homeowner describes, that may include:

  • Checking under sinks and around toilets for signs of moisture or active leaks
  • Looking at exposed plumbing lines for corrosion, improper supports, or past repairs
  • Inspecting the water heater for visible rust, corrosion, leaks, or unsafe conditions
  • Listening for unusual sounds when water is running or when the water heater cycles

We don't guess at hidden problems or invent explanations. If we don't see evidence of an issue, we say that clearly. If something looks questionable, we explain why and what it might mean.

Focusing on the Water Heater

Because this Brandon homeowner also expressed interest in a water heater flush, part of the visit would typically include evaluating whether their system is a good candidate for that maintenance.

Without making assumptions about model numbers or readings, here are the general things we consider when evaluating a water heater for a flush:

  • Approximate age of the unit
  • Visible condition of the tank and connections
  • Signs of sediment buildup, like popping or rumbling noises
  • Any prior history of leaks or repairs

From there, we can explain whether a flush makes sense, or whether the unit may be closer to the end of its useful life. In some cases, we may also discuss options like repiping or upgrading older plumbing if we see widespread aging or corrosion, but we base those conversations on what we actually see in the home.

Repair or Service Process: How We Walk Homeowners Through Options

Once we've completed our inspection, we move into the part that matters most to homeowners in Brandon: clear options. Our reports and estimates are structured to answer five simple questions.

1) Why Were We Called?

We start by restating the problem in everyday language based on what the homeowner told us and what we confirmed during the visit. For example, we might say:

“You called us because you've noticed [symptom] and you want to prevent bigger issues, especially with your hot water system.”

This way, everyone is on the same page about the reason for the visit.

2) What Did We Find?

Next, we describe what we observed during the diagnosis. We avoid technical jargon unless we explain it. For instance:

  • If we see evidence of minor leaks, we'll point them out on the spot.
  • If the water heater shows signs of age or sediment buildup, we'll explain what that can mean for performance and reliability.
  • If everything looks normal, we'll say so—and that's just as important to know.

We don't assign blame or dramatize the situation. Our goal is simply to show you what we see and explain what it means for a typical home in Brandon, FL.

3) What Are the Options?

Once we've gone over the findings, we lay out the options. Depending on the situation, that may include:

For each option, we explain:

  • What the work includes
  • What it does not include
  • What kind of results you can reasonably expect

4) Why We Recommend Certain Estimates

We never push a homeowner toward the highest-price option. Instead, we recommend what makes the most sense given:

  • The current condition of the plumbing and water heater
  • The homeowner's budget and priorities
  • How long they plan to stay in the home

For example, if a water heater is in generally good condition but shows signs of sediment, we may recommend a flush and regular maintenance to extend its life. If the plumbing system is older and has recurring issues, we may talk about long-term solutions like repiping or filtration, and explain resources like our water filtration installation services that can protect fixtures and appliances from hard water or sediment.

5) Disclaimers, Warranties, and Hidden Issues

As part of every professional diagnosis, we're upfront about what we can and cannot guarantee. That includes:

  • Explaining any workmanship warranties that apply to the repair or maintenance we perform
  • Clarifying that pre-existing damage or hidden issues inside walls, underground, or inside equipment may not be visible at the time of diagnosis
  • Discussing the possibility that once we open up a wall, line, or water heater connection, additional issues could be revealed

We don't use this as a scare tactic. It's just honest information, so you understand why a straightforward repair can occasionally uncover something more involved. When that happens, we pause, explain what we've found, and go over updated options before proceeding.

Why This Approach Works for Brandon Homeowners

Plumbing systems in Brandon and across Tampa Bay work under some tough conditions: high humidity, heavy use of hot water for showers and laundry, and, in some cases, older piping in established neighborhoods. A structured diagnosis and clear reporting process helps homeowners make confident decisions.

Here's why this approach works well:

  • Focused inspection: By starting with the homeowner's main concerns, we spend time where it matters most.
  • Transparent reasoning: We explain why we recommend a repair, a water heater flush, or continued monitoring instead of leaving you guessing.
  • Realistic expectations: By discussing warranties and potential hidden issues upfront, there are fewer surprises later.
  • Long-term view: Instead of patching the same problem over and over, we can talk about bigger-picture solutions when it makes sense.

Even when the visit starts as a "free diagnosis," our goal is to give homeowners in Brandon, FL 33511 something more valuable: clarity. You should walk away understanding the condition of your plumbing, what can be done now, and what might come up down the road.

Pro Tips for Homeowners in Brandon, FL

Whether you're dealing with an active plumbing issue or just trying to stay ahead of problems, here are some practical tips tailored to homes in Brandon and the Tampa Bay area:

1) Don't Ignore Subtle Changes

Small signs like a faint drip sound, a musty odor under a sink, or slightly discolored water can be early warnings. In our humid Florida climate, even minor leaks can quickly lead to mold or cabinet damage. If something feels off, it's worth a professional look.

2) Consider Periodic Water Heater Maintenance

Sediment buildup is common in water heaters, especially in areas with minerals in the water supply. Over time, that buildup can reduce efficiency and put extra strain on the tank. Asking about a water heater flush—like this Brandon homeowner did—is a smart way to help prolong the life of the unit when it's in otherwise good condition.

3) Know Where Your Main Shutoff Is

Before an emergency happens, make sure you know how to turn off the main water supply to your home. This simple step can significantly reduce damage if a pipe bursts or a fixture suddenly fails. If you're not sure where it is, ask your technician during a diagnosis visit.

4) Watch for Recurring Problems

If the same toilet, sink, or section of pipe keeps giving you trouble, it might be a sign of a larger underlying issue. In some Brandon homes, repeated leaks or low pressure in certain areas can indicate aging lines that may eventually benefit from more permanent solutions rather than repeated spot repairs.

5) Plan Ahead for Older Systems

If your home has older plumbing or a water heater that's been in place for many years, use diagnosis visits and inspections to plan ahead. That might mean budgeting for a future replacement or exploring options similar to those we discuss in our plumbing service case studies. Planning ahead is usually less stressful and often more cost-effective than reacting to an emergency.

FAQ: Plumbing Diagnosis and Water Heater Evaluations in Brandon

What does a plumbing diagnosis typically include?

A plumbing diagnosis usually includes a conversation about your concerns, a visual and functional inspection of the affected fixtures or systems, and a clear explanation of what we see. From there, we provide options for repair or maintenance, such as a water heater flush when appropriate. If we don't find evidence of a problem, we'll tell you that as well.

Can you look at my water heater during a diagnosis visit?

Yes. If you're in Brandon, FL 33511 and you'd like us to evaluate your water heater during a diagnosis visit, let us know when you schedule. We can visually inspect the unit, listen for signs of sediment, and discuss whether a flush or other maintenance makes sense based on its condition.

Will a water heater flush fix all hot water issues?

Not always. A flush can help address issues related to sediment buildup and efficiency when the tank and its components are still in good condition. However, if the water heater is nearing the end of its life or has internal damage, a flush by itself may not resolve every issue. During the visit, we explain what a flush can realistically do for your specific situation before you decide.

What happens if you find more problems once you start a repair?

Sometimes, once we open up a wall, pipe, or connection, we discover additional issues that were not visible during the initial diagnosis. When that happens, we stop, show you what we found, and go over updated options and pricing. We don't proceed with extra work without your approval.

How soon can you schedule around tight time windows?

We understand that many Brandon homeowners can only be home for narrow windows in the late afternoon or on weekends. We do our best to accommodate firm time requests like 4:30–5:00 p.m. or Saturday mornings, and we confirm the schedule clearly so you know when to expect us.

Are your plumbing repairs covered by a warranty?

We provide workmanship warranties on the plumbing repairs and services we perform, and we explain those terms before we begin. However, warranties generally do not cover pre-existing damage, unrelated parts of the system, or new issues that develop later due to age, wear, or conditions beyond the scope of the repair. We'll always be clear about what is and is not covered.

Why Brandon Homeowners Choose Home Therapist

When you invite a technician into your home in Brandon, FL 33511, you're trusting them not just with your plumbing, but with your comfort and your time. At Home Therapist Cooling, Heating, and Plumbing, we take that seriously.

  • Licensed, professional technicians: Our team is trained and licensed to handle both plumbing and HVAC work throughout Tampa Bay, so we can look at your home as a whole system.
  • Transparent communication: We explain what we're doing, what we find, and why we recommend specific options—in plain language, without pressure.
  • Clean and respectful work: We treat your home the way we'd want ours treated: shoe covers when needed, clean work areas, and careful attention to details.
  • Long-term reliability focus: We don't just patch symptoms. When appropriate, we talk about long-term solutions like repiping, filtration, or planned replacement so you can reduce surprise breakdowns.
  • Committed to Tampa Bay homeowners: We live and work here too, and we're proud to serve Brandon, Tampa, and surrounding communities.

If you'd like to get a feel for who we are, you can see how we interact with homeowners and share tips on our social channels, including Facebook, Instagram, and TikTok.

For extra peace of mind, you can also review our standing with trusted local and national organizations, such as the Better Business Bureau, the Tampa Bay Chamber of Commerce, and our verified presence on Google Maps.

Need Plumbing Help in Brandon, FL 33511?

If you're noticing plumbing concerns or you're simply unsure about the condition of your water heater, we're here to help. A straightforward diagnosis visit can give you the clarity you need to decide on next steps—whether that's a small repair, a water heater flush, or a bigger-picture plan for your home.

Homeowners in Brandon, FL 33511 and the surrounding Tampa Bay area can count on us for calm, professional guidance, clear explanations, and respectful service from start to finish. When you're ready, schedule your plumbing diagnosis with Home Therapist Cooling, Heating, and Plumbing, and let us help you get your home back to feeling comfortable and reliable again.

AC Maintenance Tune-Up and Comfort Planning in Land O’ Lakes, FL 34638

When your home in Land O’ Lakes, FL 34638 doesn’t feel as comfortable as it should, even though the air conditioner is running, it can be frustrating. On this visit, we came out for a scheduled maintenance tune-up under our Premium Therapy Plan to check a 3-ton AC system serving a roughly 2,500 sq. ft. home. The system was generally operating, but the homeowner was noticing warm spots on the first floor, especially in the kitchen. During our visit, we completed a full maintenance, found a capacitor that was drifting out of its proper range, talked through system sizing for the future, and recommended duct cleaning to help overall comfort and efficiency.

Case Recap

  • Location: Single-family home in Land O’ Lakes, FL 34638
  • Service: Premium Therapy Plan AC maintenance tune-up (routine visit #4)
  • System: 3-ton central air conditioner serving approximately 2,500 sq. ft.
  • Concerns: First floor, especially the kitchen, feeling warmer than the rest of the home
  • Findings: Capacitor outside its normal range and a system that may be undersized for the home
  • Recommendations: Continue maintenance, consider duct cleaning, and plan for a slightly larger system at replacement time

Customer Problem: Warm First Floor and Uneven Comfort

When we arrived at this home in Land O’ Lakes, our homeowner explained that the second floor stayed reasonably comfortable, but the first floor – particularly the kitchen area – often felt warm and stuffy. This is a very common complaint in Florida homes, especially when we’re dealing with open floor plans, large windows, or heavy kitchen use during the hottest parts of the day.

In this case, the home is about 2,500 square feet with a single 3-ton system trying to keep everything cool in our hot, humid climate. The system is only about six years old, so it’s not at the end of its life, but it’s working hard. The homeowner enrolled in our maintenance program to stay ahead of breakdowns and keep the system running as efficiently as possible.

On this visit, our goals were:

  • Perform the scheduled Premium Therapy Plan tune-up
  • Investigate the comfort complaints on the first floor
  • Check critical components like the capacitor and airflow
  • Give the homeowner clear, honest recommendations for both short-term and long-term comfort

Inspection and Diagnosis

For homeowners in Land O’ Lakes, FL 34638, regular AC maintenance is one of the best ways to avoid surprise failures and comfort issues. On this Premium Therapy Plan visit, we followed a structured inspection process so nothing important gets overlooked.

Here’s how we approached the diagnostic side of this tune-up:

1. Visual and Safety Check

We started by inspecting the indoor and outdoor units for any obvious issues: signs of overheating, corrosion, loose wiring, or damage. We also made sure the equipment area was clear and safe to work around. Safety and cleanliness are always our first priority in any Tampa Bay home.

2. Electrical Components and Capacitor Check

Next, we focused on electrical components, especially the capacitor. The capacitor is a small part that helps the compressor and fan motors start up and run smoothly. When it drifts out of range, the system can:

  • Struggle to start
  • Run hotter than it should
  • Use more energy
  • Be more prone to nuisance breakdowns

On this visit, we found that the capacitor was outside of its ideal range. It hadn’t failed yet, but it was no longer performing the way a healthy capacitor should. This is exactly the type of issue that proactive maintenance is meant to catch before it turns into an emergency.

3. Airflow and Home Layout Considerations

With the homeowner’s complaint about the first floor being warm, we also looked at the bigger picture: the size of the home, the tonnage of the system, and how air is distributed. This home has approximately 2,500 square feet being cooled by a 3-ton unit. While every home is different, that’s a lot of space for a system of that size in our Land O’ Lakes and greater Tampa Bay climate.

We discussed how factors like:

  • Sun exposure on the first floor
  • Usage of the kitchen (cooking adds heat and humidity)
  • Duct layout and cleanliness
  • Single-system design serving multiple floors

can all contribute to uneven temperatures, even when the equipment itself is in decent shape.

4. System Age and Replacement Planning

Because the system is only about six years old, it’s not yet at the stage where we’d typically recommend full replacement strictly due to age. Instead, we talked through a plan: keep maintaining the current system, correct weak points like the capacitor, and when the time does come to replace the equipment, consider upsizing modestly to around 3.5 or 4 tons (based on professional load calculations at that time).

Repair and Service Process

Even though this visit was focused on routine maintenance, we treat it like a full health check for your AC system. For homeowners in Land O’ Lakes, FL 34638, that means leaving your system cleaner, safer, and better prepared for the next stretch of hot weather.

1. Premium Maintenance Tune-Up Tasks

As part of our Premium Therapy Plan, we performed a thorough tune-up that typically includes:

  • Cleaning accessible components to help improve efficiency
  • Checking electrical connections for tightness and wear
  • Inspecting the air filter (and changing it if part of the plan or requested)
  • Verifying the thermostat is operating correctly
  • Confirming proper system operation through a complete cooling cycle

These steps help not only with comfort but also with avoiding premature wear on major parts.

2. Addressing the Capacitor Issue

We identified that the capacitor was out of range and documented our findings for the homeowner. A capacitor in this condition is considered weak. It may still allow the system to run, but it can become a reliability risk. We explained what we found in plain language, including what could happen if it’s left as-is and the benefits of addressing it proactively.

Because we don’t guess at measurements or exaggerate issues, we simply laid out the condition, the options, and answered all questions. Our goal is always informed decisions, not pressure.

3. Comfort and Sizing Discussion

The homeowner shared that the first floor – especially the kitchen – tends to feel warmer than the rest of the home. Given the home’s size and the single 3-ton system, we explained how system capacity, duct design, and real-world usage work together to affect comfort. We talked about how:

  • Doors opening frequently on the first floor can let in a lot of Florida heat and humidity.
  • Cooking adds both heat and moisture right where comfort is already challenged.
  • Cool air naturally prefers to stay on lower levels, but duct balance and supply register location matter.

We answered questions and helped the homeowner understand that while the current system can be maintained and kept running, the layout and load on the home are pushing it near its limits during peak heat.

4. Duct Cleaning Recommendation

We also recommended a professional duct cleaning. Over time, dust and debris can restrict airflow and reduce efficiency. In a larger home that already challenges a 3-ton system, any extra restriction in the ductwork makes the system’s job even harder.

Cleaner ducts can contribute to:

  • More consistent airflow to all rooms
  • Better indoor air quality
  • Less strain on the blower motor and overall system

We provided estimates for the work and left everything in writing so the homeowner can review and decide on timing.

5. Final Operation Check

After completing our maintenance tasks and documenting our findings, we ran the system through a full cooling cycle. We verified that it was operating as expected at the time of service. The maintenance visit was successful, and the homeowner will review the options we provided and let us know how they’d like to proceed.

Why This Approach Works

For AC systems in Land O’ Lakes and across Tampa Bay, performance comes down to a few core principles: capacity, airflow, refrigeration, and electrical reliability. This visit touched all of them.

Electrical Health (Capacitor): A capacitor that’s out of range can compromise how smoothly the compressor and fan motors start and run. When we identify and address weak capacitors early, we help prevent hard-starting, reduce stress on the motors, and lower the risk of system shutdowns on the hottest days.

System Sizing and Home Load: A 3-ton system in a 2,500 sq. ft. home in Florida can be asked to do a lot, especially on high-humidity, high-heat days. While this doesn’t automatically mean the system is “wrong,” it does mean we need to be realistic about its limits. Planning ahead for a slightly larger system when replacement time comes helps avoid repeating the same comfort challenges.

Airflow and Duct Cleanliness: Even the best equipment can’t perform well if the air can’t move freely. Dust, debris, and buildup inside ducts can slightly reduce airflow to each room. In a home that already pushes the system’s capacity, even small restrictions can show up as warm spots, especially on the first floor and in the kitchen.

By combining routine maintenance with honest evaluation of system sizing and duct conditions, we help homeowners in Land O’ Lakes, FL 34638 get the most out of the equipment they have today while planning smarter for tomorrow.

Pro Tips for Homeowners in Land O’ Lakes

If you live in Land O’ Lakes or anywhere in the Tampa Bay area, here are some practical, no-pressure tips to help your AC system keep up with our climate:

  • Stay consistent with maintenance. Regular tune-ups, like our Therapy Maintenance Plans, help catch weak parts such as capacitors before they fail and keep efficiency up.
  • Watch your filters. In Florida’s dusty, humid environment, filters can clog sooner than expected. Check them monthly and change them as needed to maintain proper airflow.
  • Use ceiling fans wisely. Fans don’t lower the air temperature, but they make rooms feel cooler by moving air across your skin. This can make a warm first floor feel more comfortable without overworking the AC.
  • Be mindful of kitchen heat. When cooking during the hottest times of day, use exhaust fans when possible and keep doors closed to keep the extra heat from spreading throughout the home.
  • Consider duct cleaning and inspection. If you notice certain rooms always feeling warmer or cooler than others, a duct cleaning and airflow evaluation can be a smart next step.
  • Plan ahead for replacement. If your system is getting older or already working hard to keep up, talk to a licensed HVAC professional about realistic options. Resources like our AC installation services page can help you start thinking about the right size and setup for your next system.

FAQ: AC Maintenance and Comfort in Land O’ Lakes, FL 34638

Why does my first floor feel warmer than the rest of the house?

Several factors can make the first floor feel warmer, including sun exposure, doors opening frequently, cooking heat from the kitchen, and how the ductwork is laid out. In this Land O’ Lakes home, a single 3-ton system was serving about 2,500 sq. ft., which can push the limits of the equipment on very hot days. Evaluating duct cleanliness, airflow, and system capacity together gives the clearest picture.

What does it mean when a capacitor is “out of range”?

A capacitor has a specific performance range it’s designed to stay within. When it drifts outside that range, it’s considered weak. The system may still run, but the motors can be under more stress, and the risk of failure increases. Catching a weak capacitor during a tune-up allows you to address it before it causes a breakdown.

Do I need to replace my AC if it’s undersized?

Not necessarily. If your system is still in good condition, like the six-year-old unit in this Land O’ Lakes, FL 34638 home, you can usually keep maintaining it and making the most of what you have. In the meantime, we recommend planning for a properly sized replacement when the system naturally reaches the end of its life or repair costs begin to climb.

How often should I schedule AC maintenance in the Tampa Bay area?

For most Tampa Bay and Land O’ Lakes homeowners, a professional maintenance visit once a year is a good minimum, though some homes benefit from twice-yearly service. Our AC maintenance services and AC tune-up options are set up to keep your system clean, efficient, and reliable.

Will duct cleaning really help with hot and cold spots?

Duct cleaning is not a cure-all, but in many homes it does help by restoring more even airflow to all rooms and removing dust that can restrict air movement. In larger homes or homes where certain rooms always run warm, duct cleaning combined with a duct inspection is often a worthwhile step.

What’s the benefit of a maintenance plan versus one-time tune-ups?

Maintenance plans, like our Therapy Plans, keep you on a regular schedule so important visits don’t get missed during busy seasons. They also help spread out costs and often include added benefits or discounts. For homeowners in Land O’ Lakes, staying ahead of issues like weak capacitors and airflow problems can mean fewer surprises in the middle of summer.

Why Choose Home Therapist for Your AC Care

At Home Therapist Cooling, Heating, and Plumbing, we treat every visit in Land O’ Lakes, FL 34638 like we’re working in a neighbor’s home. That means:

  • Licensed, professional technicians who are trained to work safely and correctly on modern HVAC systems.
  • Transparent communication, so you always know what we found, what your options are, and what we recommend – without pressure.
  • Clean, respectful work habits, including careful use of drop cloths and attention to your home as if it were our own.
  • Long-term reliability focus, not just quick fixes. We’ll help you get the most out of your current system and plan wisely for future replacements.
  • Commitment to Tampa Bay homeowners backed by our reputation across multiple trusted platforms.

If you’d like to get a feel for who we are beyond a service visit, you can find us on social media and local directories:

  • Follow us on Facebook for updates and practical tips.
  • See more behind-the-scenes and project photos on Instagram.
  • Watch educational videos and homeowner guides on our YouTube channel.

We’re also proud to be listed with respected local and national organizations:

These profiles reflect the same values we bring into every home: professionalism, honesty, and a focus on lasting comfort.

Schedule Your AC Maintenance in Land O’ Lakes, FL 34638

If you’re noticing warm spots, rising energy bills, or just want peace of mind that your system is ready for the next heat wave, we’re here to help. Our team provides AC tune-ups, maintenance, and installation services for homeowners in Land O’ Lakes, FL 34638 and across the Tampa Bay area.

Whether you’re interested in a one-time tune-up, exploring our Therapy Maintenance Plans, or planning ahead for a future system upgrade with our AC installation services, we’ll walk you through your options in clear, straightforward terms.

When you’re ready, reach out to schedule a visit. We’ll take a careful look at your system, listen to your comfort concerns, and help you build a plan that fits your home and your goals.

HVAC Maintenance in Land O’ Lakes, FL 34637 Under a Premium Home Therapy Plan

For a homeowner in Land O’ Lakes, FL 34637, staying comfortable in the Florida heat means keeping the air conditioning system in top shape all year long. On this visit, we were out for a scheduled Premium Home Therapy Plan maintenance appointment, not because something was broken, but to make sure everything kept running smoothly. After a full inspection and cleaning, we confirmed the system was operating properly, with no current issues to worry about.

Case Recap

  • Location: Residential home in Land O’ Lakes, FL 34637
  • Service: Scheduled Premium Home Therapy Plan HVAC maintenance (Visit #3)
  • Both indoor and outdoor units inspected and cleaned
  • Drain line flushed and cleared to prevent future backups or leaks
  • Compressor, fan, and system pressures checked and found within normal ranges
  • System left running properly with no performance concerns at this time

Customer Problem: Staying Ahead of Issues, Not Waiting for a Breakdown

Unlike many calls we receive in Land O’ Lakes, this homeowner did not contact us because the AC stopped cooling or was making strange noises. Instead, they are enrolled in our Premium Home Therapy Plan and wanted to make sure their scheduled maintenance visit was completed on time.

In our climate, AC systems in Land O’ Lakes and across Tampa Bay run hard for much of the year. That constant run time creates wear on components, adds strain from heat and humidity, and increases the chance of problems like:

  • Clogged drain lines from algae growth
  • Dirty outdoor coils that restrict airflow
  • Fan or compressor issues from heavy use
  • Minor performance drops that slowly increase power bills

The homeowner’s goal was simple: keep the system reliable and efficient, reduce the risk of surprise breakdowns, and make sure everything was still operating as it should after a year of use since the last Premium Plan maintenance.

Because this visit was pre-planned under the maintenance plan, we had a firm arrival window that worked for the homeowner’s schedule. Our focus was to respect that time, complete a thorough inspection, and leave the system clean and operating correctly.

Inspection and Diagnosis: Verifying the Health of the System

When we arrive for a maintenance visit like this in Land O’ Lakes, FL, we approach it with the same care we bring to a repair call. The difference is that we are looking to confirm normal operation and catch anything early, rather than chasing an obvious failure.

On this Premium Home Therapy Plan visit, we:

  • Inspected the outdoor condenser unit for cleanliness, physical condition, and airflow
  • Checked the indoor unit and air handler for signs of wear, dirt buildup, or moisture problems
  • Verified that the compressor and fan were starting and running normally
  • Reviewed system pressures to ensure they were within an appropriate operating range
  • Visually checked wiring connections and components for any obvious concerns

The goal of these checks is to answer a few key questions:

  • Is the system operating as designed?
  • Is anything starting to show early signs of trouble?
  • Is airflow unrestricted and drainage moving as it should?
  • Is there anything that could affect comfort or efficiency in the near future?

On this particular visit, the answers were what every homeowner likes to hear: the compressor and fan were operating normally, system pressures were within a proper range for current conditions, and the overall performance of the system was good. We did not find any failing components or performance red flags during the inspection.

Repair or Service Process: What We Actually Did During This Visit

Even when everything is running well, a Premium Home Therapy Plan visit in Land O’ Lakes is hands-on. Preventive care is about cleaning, clearing, and verifying, not just looking around.

Here is how we approached the service step by step:

1. Cleaning the Outdoor Unit

The outdoor condenser sits out in the Florida weather year-round. Dirt, grass clippings, pollen, and debris can collect on the coil and restrict airflow. During this visit we:

  • Visually inspected the coil and cabinet
  • Cleaned the unit to remove normal buildup
  • Ensured there was adequate space around the unit for proper airflow

Keeping this coil clean helps the system reject heat more easily, which supports better cooling performance and can reduce strain on the compressor.

2. Cleaning the Indoor Unit

The indoor unit is responsible for moving air through the home and across the evaporator coil. Dust and dirt can accumulate on internal surfaces and affect both comfort and efficiency. As part of this visit, we cleaned the indoor components that are included under the plan and confirmed that the air moving through the system was not being restricted by normal buildup.

3. Flushing and Clearing the Drain Line

Condensation is a normal part of cooling in humid areas like Land O’ Lakes, FL 34637. That moisture needs a clear path to drain away. If algae, debris, or sludge build up in the drain line, it can block the flow of water and cause backups, overflows, or water damage around the air handler.

During this maintenance visit we:

  • Flushed the condensate drain line
  • Cleared any buildup to restore a clean path for drainage
  • Verified that water was moving out of the system as expected

This simple step can prevent one of the most common issues we see in Florida homes: water leaks from a clogged AC drain line.

4. Verifying System Operation

After cleaning and clearing, we always verify performance. On this Land O’ Lakes Premium Plan visit, we:

  • Watched the system start up and shut down normally
  • Confirmed the compressor and fan were operating smoothly
  • Checked system pressures and overall operation to ensure everything remained in a proper range

We left the home with the system running as expected and no active problems to report. The homeowner could relax knowing their equipment had been professionally inspected and serviced.

Why This Fix (and Maintenance) Works

Even though nothing was broken on this visit, the work we performed directly supports reliable cooling and long-term comfort. In our Tampa Bay service area, including Land O’ Lakes, FL 34637, AC systems are exposed to three big stress factors: heat, humidity, and heavy runtime.

The maintenance tasks performed on this visit help in several ways:

  • Cleaning the units helps maintain proper airflow and heat transfer. When coils and components are kept clean, the system doesn’t have to work as hard to move heat, which can support better comfort and efficiency.
  • Flushing the drain line keeps condensation moving out of the home. This reduces the risk of water damage, musty odors, and system shutoffs caused by safety devices responding to drain blockages.
  • Verifying normal operation allows us to spot early warning signs before they become breakdowns. Even when all readings are within normal ranges, having baseline observations helps us notice changes at future visits.

Routine maintenance doesn’t “fix” a single dramatic problem. Instead, it strengthens the entire system so that homeowners in Land O’ Lakes can depend on it through long stretches of hot, humid weather.

For homeowners who want more detail about our maintenance services, our dedicated AC maintenance services page explains how we approach tune-ups across the Tampa Bay area.

Pro Tips for Homeowners in Land O’ Lakes

Based on what we see every day in Land O’ Lakes and surrounding Tampa Bay communities, here are some practical tips to keep your HVAC system running smoothly between professional maintenance visits:

1. Change or Clean Your Filter Regularly

In our humid climate, your system often runs longer cycles, which means the filter loads up faster. Check your filter at least once a month during peak cooling season and replace or clean it as needed. A clean filter supports proper airflow and reduces strain on the system.

2. Keep the Outdoor Unit Clear

Make sure there are no shrubs, tall grass, or stored items crowding the outdoor unit. Aim for at least a couple of feet of clear space around the sides. This helps maintain strong airflow and supports efficient operation when temperatures in Land O’ Lakes climb.

3. Watch for Drain Line Warning Signs

If you notice water around your indoor unit, damp spots near the air handler, or the system shutting off unexpectedly, the drain line could be starting to clog. A regular maintenance plan that includes flushing the drain, like our Therapy Maintenance Plans, can help prevent these issues.

4. Use Your Thermostat Consistently

Frequent large temperature swings can make the system work harder than necessary. In Land O’ Lakes, FL 34637, it often works best to choose a comfortable temperature and let the system maintain it, rather than constantly adjusting up and down.

5. Schedule Preventive Maintenance, Not Just Repairs

Waiting until something breaks usually means more stress, more discomfort, and sometimes higher repair costs. Scheduling planned maintenance visits—like this Premium Home Therapy Plan appointment—helps keep your system ahead of problems. Our AC tune-up services are designed to do exactly that.

6. Plan Ahead for Replacement

If your system is older or has needed frequent repairs, it can be helpful to start planning for eventual replacement before an emergency hits. Our team can help you compare options through our AC installation services when the time comes.

FAQ: Premium HVAC Maintenance Visits in Land O’ Lakes

What is included in a Premium Home Therapy Plan visit?

A Premium Home Therapy Plan visit is a scheduled maintenance appointment where we inspect your HVAC system, clean key components, and perform tasks like flushing the drain line. The goal is to verify proper operation, address normal wear and buildup, and reduce the risk of future problems.

How often should I schedule maintenance in Land O’ Lakes, FL 34637?

In our area, most homeowners benefit from at least annual professional maintenance, and often twice a year if the system runs heavily. This particular visit took place about one year after the previous Premium Plan maintenance, which is a reasonable interval for many homes.

Do you only come out when something is wrong?

No. For homeowners on a maintenance plan, we schedule regular visits even when the system is working fine. In this Land O’ Lakes case, the system was operating properly, and the visit was focused entirely on preventive care and cleaning rather than fixing an active problem.

Will maintenance prevent all breakdowns?

No service can guarantee you will never have a breakdown, but regular maintenance significantly lowers the risk. It helps keep components cleaner, improves airflow and drainage, and lets us spot potential issues early, which is especially valuable in the demanding Florida climate.

Can you work with specific time windows?

Yes. We understand that homeowners in Land O’ Lakes have busy schedules. For maintenance plan visits, we do our best to honor firm time windows that work for you, while still allowing enough time on site to do a thorough job.

How do I know if my system is operating properly after a visit?

At the end of each maintenance visit, we confirm that the system is running as expected and share our findings with you. In this case, we verified that the compressor and fan were operating normally, system pressures were within a proper range, and overall performance was good.

Why Choose Home Therapist for HVAC Maintenance in Land O’ Lakes

When you invite us into your home in Land O’ Lakes, FL 34637, you are trusting us with your comfort and your equipment. We take that seriously, and we work to make every visit feel professional, respectful, and straightforward.

Here is what you can expect from our team:

  • Licensed and professional technicians who are trained to work safely, accurately, and with attention to detail.
  • Transparent communication before, during, and after the visit, so you know what we are doing and why.
  • Clean and respectful work habits, including protecting your home, cleaning up after ourselves, and treating your space as if it were our own.
  • Long-term reliability focus, not just quick fixes. Our Premium Home Therapy Plan and other maintenance plans are built to support the full life of your system.
  • Commitment to Tampa Bay homeowners across communities like Land O’ Lakes, Odessa, Lutz, and the greater Hillsborough and Pasco County areas.

If you would like to see more of how we work and hear from other homeowners, you can connect with us on social media:

For added peace of mind, you can also review our standing with trusted organizations:

Need HVAC Maintenance in Land O’ Lakes, FL 34637?

If you would like the same level of care this homeowner received, our team is ready to help. Whether you are interested in a Premium Home Therapy Plan visit, a one-time tune-up, or a system evaluation, we can tailor the visit to your needs and schedule.

Homeowners in Land O’ Lakes, FL 34637 can reach out to schedule maintenance, ask questions, or explore options for keeping their system running reliably through our Florida heat and humidity. We will arrive on time, walk you through our findings, and leave your home with the system operating as it should.

To get started, simply contact our team and ask about AC maintenance and Therapy Maintenance Plans for your Land O’ Lakes home. We are here to keep your comfort steady, season after season.

Blower Motor Replacement and AC Maintenance in Riverview, FL 33578

When the blower motor in your air conditioner or heat pump starts failing, comfort in your home can go downhill quickly. That was the situation for a homeowner in Riverview, FL 33578 who reached out to our team at Home Therapist Cooling, Heating, and Plumbing. Their system was struggling to move air properly, and they wanted a professional solution that would keep their home comfortable without surprises.

On this visit, we handled a blower motor replacement, managed the manufacturer warranty process for the part, and completed a thorough cooling and heating maintenance service. By the time we wrapped up, the system was running smoothly again, and the homeowner knew exactly what had been done and what to keep an eye on moving forward.

Case Recap

  • Location: Single-family home in Riverview, FL 33578
  • Primary service: Blower motor replacement (labor only)
  • Additional work: Cooling and heating system tune-up and inspection
  • Warranty: Manufacturer standard warranty part, processed with a warranty handling fee
  • Outcome: Restored airflow, verified operation, and clear recommendations for ongoing monitoring

Customer Problem

By the time we arrived, the homeowner was dealing with unreliable airflow and was concerned that their system might be on its last legs. A bad or failing blower motor can cause symptoms like weak airflow from the vents, hot and cold spots, or the system shutting off before the home reaches the thermostat setpoint.

The work order for this Riverview visit included:

  • Blower motor replacement (labor only, with a possible new capacitor if needed)
  • A warranty handling fee for the manufacturer-covered part
  • A complete cooling and heating maintenance service to make sure the rest of the system was in good shape

The homeowner’s main concerns were:

  • Restoring consistent airflow and comfort throughout the home
  • Making sure the warranty on their blower motor was handled correctly
  • Avoiding surprise breakdowns heading into the next season

They wanted a trustworthy local HVAC company serving Riverview, FL to not just swap parts, but also explain what was going on and what to plan for in the future. That’s exactly how we approach every call.

Inspection and Diagnosis

Even when a part is already scheduled for replacement, we still take the time to verify what’s happening with the system. On this visit in Riverview, we focused on the following areas:

  • Indoor blower assembly: We confirmed that the existing blower motor was not operating as it should and that replacement was the appropriate solution.
  • Capacitor condition (if applicable): Since many blower motors rely on a capacitor to start and run, we were prepared to replace the capacitor if it did not test within acceptable operating range.
  • System controls and thermostat communication: We checked that the thermostat was sending the proper signals and that the air handler responded as expected.
  • Outdoor condenser: After completing the indoor work, we also evaluated the outdoor condenser fan motor. We noted that its power consumption was a bit higher than we like to see and made sure the homeowner was informed so they could monitor it.

Once we confirmed that the blower motor replacement was the correct path, we moved forward with the repair and the scheduled maintenance service.

Repair and Service Process

Our goal with any blower motor replacement is to restore reliable airflow as efficiently and cleanly as possible, while respecting your home and your time. Here’s how we handled the job for this homeowner in Riverview, FL 33578.

1. Safe Shutdown and Preparation

We began by safely shutting down the HVAC system and disconnecting power to the air handler. This step protects both the equipment and anyone working on it. We also laid out protective coverings as needed to keep the work area clean and avoid tracking dust or debris through the home.

2. Removing the Failed Blower Motor

With the power off, we accessed the blower compartment inside the air handler. We carefully removed the existing blower motor assembly, taking care not to damage the blower wheel, wiring, or control board. This is a detailed process that requires patience and proper handling to avoid introducing new issues while fixing the original problem.

3. Installing the Replacement Motor from Our Service Vehicle

For this job, our technician installed a blower motor that was already stocked on the service van. Having the right replacement motor on-hand allowed us to get the system back online during the same visit, instead of leaving the home without proper heating or cooling while waiting on a part shipment.

Once the new motor was mounted and aligned, we:

  • Reconnected all wiring according to the system’s specifications
  • Checked for secure connections and proper support
  • Verified that the blower wheel spun freely without rubbing or wobbling

4. Capacitor Check and Replacement (If Needed)

The original work order included the option for a new capacitor if required. Many blower issues are related to weak or failing capacitors. When we evaluate a system in Riverview or anywhere in Tampa Bay, we always check this component so that a simple, low-cost part does not cause bigger problems later. If the capacitor does not perform as it should, replacement is a straightforward way to support the new motor’s lifespan.

5. Handling the Manufacturer Warranty

This particular blower motor was covered under the manufacturer’s standard warranty. To keep things simple for the homeowner, we charged only for the labor of the replacement and applied a warranty handling fee. This fee comes from the supplier of the HVAC brand and covers the processing and logistics involved in honoring the part warranty.

We arranged for the original motor to be returned to the supplier so the manufacturer could process the warranty claim. The homeowner didn’t have to chase paperwork or make extra calls—our office handled the details so they could focus on getting their comfort back.

6. System Tune-Up: Cooling and Heating Maintenance

Replacing the blower motor solved the immediate airflow concern, but we also wanted to make sure the rest of the system was ready for the demands of Florida’s climate. As part of the maintenance service, we performed a full tune-up that typically includes:

  • Cleaning critical components where accessible
  • Flushing and checking the system’s drainage to help prevent clogs and water leaks
  • Checking refrigerant levels to confirm the system is operating within expected range
  • Inspecting wiring and electrical components for signs of wear or overheating
  • Confirming thermostat operation and adjusting settings if requested
  • Replacing the air filter (using the homeowner’s filter or one we provide at an additional cost)

This type of tune-up is designed for reasonably well-kept units. If we ever find that a system in Riverview needs more intensive cleaning or repairs beyond a standard maintenance visit, we pause, explain what we’re seeing, and discuss options before moving forward.

7. Final Checks and Homeowner Briefing

After installing the new blower motor and completing the maintenance tasks, we restored power and ran the system through a full cycle. We listened for unusual noises, verified airflow at the vents, and confirmed that the thermostat and controls responded correctly.

We also performed a quick evaluation of the outdoor condenser fan motor. Its power usage was a bit higher than we prefer to see, so we made sure to explain this to the homeowner. At this point, it was still operating, but we recommended keeping an eye on it and being prepared to address it if symptoms like unusual noise, frequent cycling, or reduced cooling show up.

Before leaving, we walked the homeowner through what we did, what was covered under warranty, and what to monitor over the coming months. That level of clear communication is especially important for HVAC service in Riverview, FL, where air conditioning is a year-round priority.

Why This Fix Works

The blower motor is the heart of the air handler. Its job is to push conditioned air—either cooled or heated—through the ductwork and into the rooms of your home. When the motor fails or becomes weak, even a perfectly charged and clean system can’t keep you comfortable because the air simply doesn’t move.

By installing a properly functioning blower motor and verifying its support components (like the capacitor and wiring), we restored:

  • Consistent airflow: Air can now move evenly through the duct system.
  • Comfort across rooms: Fewer hot or cold spots, especially in rooms farthest from the air handler.
  • System efficiency: The equipment does not have to work as hard or run as long to reach the thermostat setpoint.

The follow-up check on the outdoor condenser fan motor also matters. The outdoor unit needs a healthy fan motor to move heat out of the system. Keeping an eye on that component helps prevent unexpected breakdowns during peak heat in Riverview, FL 33578.

Pro Tips for Homeowners in Riverview

Living in Riverview and the greater Tampa Bay area means your HVAC system sees heavy use almost all year. Here are some practical, non-alarmist tips to help protect your blower motor and the rest of your system:

  • Change your air filter regularly. In our humid, dusty climate, a dirty filter can quickly restrict airflow, forcing the blower motor to work harder and potentially shortening its life. Check your filter monthly and change it as needed.
  • Keep supply and return vents open and clear. Closing too many vents or blocking them with furniture can increase static pressure in the ductwork, putting extra strain on the blower.
  • Schedule seasonal maintenance. Regular AC maintenance in Tampa Bay and Riverview helps catch issues like weak capacitors, dirty coils, and failing motors before they cause comfort problems.
  • Pay attention to changes in noise or airflow. If your system suddenly gets louder, starts humming, or airflow drops noticeably, it’s worth a professional inspection before the situation worsens.
  • Protect your outdoor unit. Keep plants, leaves, and debris at least a couple of feet away from the outdoor condenser so it can breathe. Clear space helps both the compressor and the fan motor run more efficiently.
  • Consider a tune-up before peak season. Getting an AC tune-up before the hottest months arrive can reduce the chance of mid-summer breakdowns and may help lower your energy bills.

FAQ: Blower Motor Replacement and Maintenance in Riverview, FL

Do I always need a new blower motor when my AC isn’t blowing enough air?

Not always. Weak airflow can be caused by a clogged filter, dirty coils, blocked ducts, or electrical issues. In this Riverview, FL 33578 case, the blower motor itself needed replacement, but we still checked the rest of the system to rule out other causes. A proper diagnosis is key before replacing any major part.

What does a warranty handling fee cover?

The warranty handling fee is charged by the supplier of your HVAC brand to process the warranty for a covered part. While the part itself may be covered under the manufacturer’s standard warranty, labor and administrative handling typically are not. We make sure homeowners understand that they’re paying for our time and the logistics of getting the warranty honored, not for the part itself when it’s under coverage.

Can I run my system if the outdoor fan motor is drawing a little high?

If your condenser fan motor is using more power than expected but still running, your system may continue to operate for a while. However, it’s a sign that the motor could be heading toward failure. In this Riverview job, we advised the homeowner to monitor the system and contact us if they noticed any changes in performance or noise. Addressing the issue early often prevents a complete outage on a hot day.

What’s included in a typical AC tune-up from Home Therapist?

Our tune-up services usually include cleaning accessible components, flushing and checking drainage, verifying refrigerant levels, inspecting wiring and major components, checking thermostat operation, and replacing the air filter (either yours or one we provide at an additional cost). We focus on safety, efficiency, and reliability, and we always explain any recommended repairs before proceeding.

How often should homeowners in Riverview, FL schedule HVAC maintenance?

With the long cooling season in Riverview and the rest of Tampa Bay, once-a-year maintenance is a minimum, and many homeowners benefit from having their system checked twice a year—once before peak cooling season and once before the cooler months. Regular visits help extend equipment life and reduce the risk of unexpected breakdowns.

What if my system needs more than just a tune-up?

If we find that your system needs more intensive cleaning or repairs beyond a normal tune-up—for example, a heavily impacted coil or a failing major component—we stop, review the findings with you, and discuss your options. We never move forward with additional work without your approval.

Why Choose Home Therapist for HVAC Service in Riverview, FL 33578

When you invite us into your home, you deserve more than just a quick fix. You deserve licensed, experienced technicians who treat your equipment and your time with respect. That’s the standard we bring to every blower motor replacement, tune-up, and AC repair in Riverview and across Tampa Bay.

Here’s what sets Home Therapist Cooling, Heating, and Plumbing apart:

  • Licensed and professional technicians: Our team is trained to diagnose issues accurately, explain them clearly, and complete repairs to professional standards.
  • Transparent communication: We walk you through what we found, what we’re recommending, and why. No surprises, no pressure—just straightforward information.
  • Clean and respectful work: We protect your home, minimize disruption, and clean up our work areas before we leave.
  • Long-term reliability focus: We don’t just swap parts; we look at your system as a whole, aiming to prevent future breakdowns and keep your comfort consistent.
  • Commitment to Tampa Bay homeowners: We live and work in this community, and we’re proud to provide dependable HVAC and plumbing services throughout the region.

If you’d like to get a feel for how we work and how we treat our customers in Riverview and beyond, you can connect with us on social media and through trusted local directories:

  • Follow us on Facebook for service updates and homeowner tips.
  • See more of our day-to-day work on Instagram.
  • Watch helpful videos and walkthroughs on our YouTube channel.

For added peace of mind, you can also review our standing with trusted organizations:

Schedule Blower Motor Service or AC Maintenance in Riverview, FL 33578

If you’re noticing weak airflow, unusual noises, or inconsistent comfort in your home, it may be time to have your system checked by a professional. Our local Tampa Bay technicians are ready to help with blower motor replacement, AC repair, and routine AC maintenance for homeowners in Riverview, FL 33578.

Whether you’re dealing with a specific problem or simply want to schedule a tune-up like the one we performed on this visit, we’ll take the time to inspect your system carefully, explain our findings, and recommend the most sensible next steps. You can also explore our maintenance plan options if you prefer a more structured, long-term approach to caring for your HVAC equipment.

Reach out today to schedule service in Riverview, and let our team at Home Therapist Cooling, Heating, and Plumbing help keep your home comfortable, safe, and efficient all year long.

Sewer Drain Pipe Replacement and Trenching in Clearwater, FL 33765

When a homeowner in Clearwater, FL 33765 reached out to us, they were dealing with aging cast iron piping under their home and concerns about long-term reliability. Cast iron sewer lines in older Florida homes often reach the end of their life, leading to recurring clogs, slow drains, and the risk of leaks under the slab or in the yard.

For this project, our focus was on planning the replacement of existing cast iron sewer piping with new PVC, including digging a trench, setting the proper slope, and preparing for a full evaluation with a camera inspection. The goal was simple: restore dependable drainage and give the homeowner a clear picture of what it would take to bring the entire system up to modern standards.

In this article, we’ll walk through how we approached this sewer drain replacement estimate in Clearwater, what we recommended, and why it matters for long-term plumbing health in Tampa Bay homes.

Case Recap

  • Location: Single-family home in Clearwater, FL 33765
  • Primary concern: Aging cast iron sewer piping under the home
  • Service type: Sewer drain replacement with PVC and trench excavation
  • Key step: Camera inspection recommended to confirm remaining pipe materials and condition
  • Scope detail: Trench excavation, proper slope to city connection, and installation of a cleanout (where possible)
  • Outcome: Clear, transparent estimate outlining base costs, additional potential work, and what the homeowner can expect

Customer Problem: Aging Cast Iron Sewer Lines Under the Home

In many Clearwater neighborhoods, especially older homes, cast iron sewer piping was the standard for decades. Over time, Florida’s moisture, soil conditions, and everyday use can cause that cast iron to rust from the inside out. That leads to rough pipe walls, scaling, and eventually cracks, leaks, and blockages.

In this Clearwater, FL 33765 home, we observed cast iron pipes underneath the house. The homeowner was concerned about:

  • Recurring drain issues and the risk of future backups
  • Potential hidden damage under the home or in buried sections
  • Wanting a long-term solution instead of constant small repairs

Our initial observation showed cast iron piping in the accessible areas under the structure. However, we also know from experience that some additional buried or connecting sections may also be cast iron but not immediately visible. That’s why we were upfront about the need for further verification and the possibility of additional work if more cast iron was found once demolition and excavation began.

On top of that, the home needed a new sewage drain run in PVC, including excavation of a trench in the yard and a proper tie-in to the city connection. Our notes for this job specifically mentioned that we would need to excavate to connect to the buried iron pipe, which is very typical for sewer upgrades in Clearwater and the surrounding Tampa Bay area.

Inspection and Diagnosis: Understanding the True Scope

Any time we’re planning a sewer line replacement in Clearwater, we approach it methodically. For this estimate, the process and logic were as follows:

1. Visual assessment of existing piping
We started by noting the cast iron pipes visible underneath the home. This gave us a baseline understanding of the age and type of material in use and confirmed that at least part of the system was nearing the end of its practical life.

2. Identifying connection points and city tie-in
Next, we looked at how the home’s drain system likely tied into the city sewer connection. To install a new PVC line with proper slope, we needed to plan where the trench would start, how it would route across the property, and where it would connect to the existing system or to the municipal point.

3. Planning for a camera inspection
We recommended a camera inspection of the remaining piping once the initial cast iron sections were removed. The purpose of the camera inspection is to:

  • Confirm the material of any remaining sections (cast iron, PVC, or another type)
  • Check for cracks, offsets, root intrusion, or heavy corrosion
  • Make sure no problem areas are left behind after new PVC is installed

This step is especially valuable for homeowners in Clearwater, FL 33765, where mixed-material systems (part cast iron, part PVC) are common due to prior partial repairs over the years.

4. Clarifying base costs and potential add-ons
In the estimate, we clearly separated:

  • A base cost line item for pipe replacement
  • The cost of trenching, slope correction, and installing PVC drain
  • Additional potential costs if more cast iron was discovered during the work

This transparent breakdown helps homeowners understand what is included up front and what might change depending on what we find once the old pipe is exposed.

Repair and Service Process: How We Plan a Sewer Drain Replacement

Although this visit was focused on estimating and planning, we walked the homeowner through how the actual work would proceed if they moved forward. Here’s how we typically handle a sewer drain replacement with PVC in a home like this in Clearwater:

Step 1: Careful layout and marking
We start by mapping the path of the new sewer line from the home to the city connection. This includes marking where we’ll dig the trench and identifying any obstacles (landscaping, walkways, or other utilities). In Florida yards, we always keep safety in mind and work carefully around existing lines.

Step 2: Excavating the trench
As noted in the job details, excavation is required to reach the buried cast iron and create a path for the new PVC. We do our best to protect the grass and landscaping, but we’re also honest that some damage to grass can occur during digging, especially in tight spaces or when soil is saturated from Florida’s rainy seasons.

While we can’t guarantee the lawn will look untouched, we work neatly, keep the site as organized as possible, and backfill the trench properly when the work is complete.

Step 3: Removing accessible cast iron sections
Once the trench is opened and access is established, we remove the cast iron sections that are part of the project scope. During this process, if we uncover additional connected cast iron pipe that was not visible during the estimate, we notify the homeowner and discuss any necessary changes to scope or cost before proceeding.

Step 4: Laying new PVC sewer piping
With the trench open, we install the new PVC sewer line. The job description here was very specific: this line item covers only laying the pipe itself. Other tasks like digging the trench, cutting concrete, or additional accessory work are separate, so the homeowner isn’t surprised later on.

The most important part at this stage is establishing and checking the slope so that wastewater flows smoothly toward the city connection. In Clearwater and across Tampa Bay, proper slope is crucial for avoiding standing water in the line and preventing frequent clogs.

Step 5: Installing a cleanout (where possible)
We also plan for installing a cleanout in an accessible location. A cleanout is a vertical access point that allows us to run professional drain cleaning equipment or inspection cameras in the future without digging again. When it’s feasible to add one, it makes maintenance much easier and less disruptive for the homeowner.

Step 6: Testing and backfilling
Once the PVC line is installed, we test the line to help confirm proper flow and check for leaks at connections. After testing, we backfill the trench carefully to support the pipe and reduce settlement over time. Then the area is cleaned up so the homeowner is left with a neat jobsite, even if the grass may need a little time to recover.

From start to finish, our goal is to leave the homeowner in Clearwater, FL 33765 with a sewer system that is reliable, accessible for maintenance, and clearly documented.

Why This Fix Works: From Failing Cast Iron to Reliable PVC

Replacing old cast iron sewer lines with PVC is a tried-and-true approach that addresses several common problems at once.

Smoother interior walls
Cast iron ages by corroding and building up scale inside the pipe, which creates rough surfaces that catch debris. PVC has a smooth interior that allows wastewater to flow more easily, helping reduce the risk of recurring clogs.

Corrosion resistance
In Florida’s humid environment and corrosive soil conditions, cast iron can deteriorate faster than in other regions. PVC doesn’t rust or corrode the way metal does, which is a major advantage for long-term performance in Clearwater homes.

Consistent slope and alignment
When we install new PVC, we set the correct pitch from the home to the city connection. Proper slope ensures gravity does the work for you—keeping solids moving and minimizing standing water in the line.

Easier future maintenance
By adding a cleanout where possible and tying into modern materials, future inspections and cleaning are much simpler. That’s especially helpful if the homeowner ever needs professional drain cleaning services or additional camera inspections down the road.

Taken together, this approach turns an aging, vulnerable sewer system into one that is designed for long-term reliability and easier service for homeowners in Clearwater, FL 33765.

Pro Tips for Homeowners in Clearwater

Whether you’re already facing sewer line issues or just trying to stay ahead of problems, here are some practical tips for Clearwater and Tampa Bay homeowners:

1. Pay attention to early warning signs
Slow drains in multiple fixtures, gurgling toilets, or bad odors around drains can all be early indicators of sewer line trouble. Don’t wait until you have a full backup—schedule a visit with a local plumbing repair team in Clearwater to get it checked.

2. Consider a camera inspection for older homes
If your home was built decades ago and still has cast iron or unknown piping underground, a camera inspection can give you a clear picture of what’s happening inside your lines. This is especially helpful before big projects like repiping or major drain replacements.

3. Be mindful of what goes down the drain
In our warm Florida climate, grease and food waste can build up quickly. Avoid pouring cooking oil, fats, wipes, or hygiene products down your drains. These can cling to rough cast iron or even new PVC and cause blockages over time.

4. Protect your investment with maintenance
Once your sewer and drain system is in good shape, keeping it that way is much easier than dealing with emergencies. Our plumbing maintenance plans and options are designed to help Tampa Bay homeowners stay ahead of problems with periodic inspections and service.

5. Don’t ignore recurring clogs
If you’re calling for drain cleaning more than once a year for the same line, it’s worth exploring a more permanent solution. That might mean a focused repair or, in some cases, a larger project like whole-home repiping or targeted sewer replacement.

FAQ: Sewer Drain Replacement in Clearwater, FL 33765

Why do cast iron sewer pipes need to be replaced?

Over time, cast iron corrodes and scales on the inside, which narrows the pipe and makes clogs more likely. Eventually, cracks and leaks can form, especially in Florida’s moist soil. When we see advanced corrosion or repeated issues, replacement with PVC is often the most reliable long-term fix.

Why is a camera inspection recommended after removing some of the pipe?

A camera inspection lets us see the condition and material of the remaining piping that isn’t exposed. For this Clearwater project, it helps confirm whether any additional sections are still cast iron, if there are any cracks or offsets, and whether more replacement is needed to fully solve the problem.

Will my yard be damaged during trenching?

When we dig a trench for a new sewer line, we do our best to protect your grass and landscaping. However, some damage to the lawn is possible and sometimes unavoidable, especially if the trench runs through a grassy area. We work neatly and backfill the trench, but the grass may need some time and care to bounce back.

What does the base cost for pipe replacement include?

The base cost covers the fundamental work of replacing the water or sewer pipe itself. Other tasks—such as digging the trench, cutting concrete, or additional accessory work—are listed separately so you have a clear, transparent understanding of what each part of the project costs.

Is this kind of sewer work disruptive inside the home?

Most of the disruption is outside, where we excavate the trench and tie into the city connection or existing lines. Inside the home, we work to minimize disturbance. If interior access is required, we protect floors, clean up after ourselves, and keep you informed every step of the way.

How long does a PVC sewer line typically last?

While exact lifespans depend on installation quality, soil conditions, and usage, a properly installed PVC sewer line is designed for long-term service. Our focus is on correct slope, solid connections, and accessible cleanouts to support reliable operation for years to come.

Why Choose Home Therapist for Sewer and Drain Projects

When you’re considering sewer drain replacement in Clearwater, you want a team that treats your home with respect and communicates clearly. At Home Therapist Cooling, Heating, and Plumbing, we approach each project as if we were working on our own property.

Licensed, professional technicians
Our plumbers are trained, licensed professionals who understand the specific challenges of Tampa Bay plumbing systems—from aging cast iron to high groundwater and sandy soils. We don’t rush through estimates; we take the time to explain your options and our recommendations.

Transparent communication and clear estimates
For this Clearwater, FL 33765 project, we clearly outlined base costs, separate line items, and the possibility of additional work if more cast iron was found. That same transparency is what you can expect on every job.

Clean, respectful work
Sewer projects can be messy by nature, but our technicians work hard to keep your property as tidy as possible during and after the job. We protect surfaces, manage debris, and clean up before we leave.

Focus on long-term reliability
We don’t just fix today’s problem—we look at how to keep your plumbing system dependable for years. That may include recommendations for camera inspections, cleanouts, or future maintenance options.

If you’d like to get a feel for how we work and how we treat our customers, you can connect with us and see what Tampa Bay homeowners are saying:

  • Follow us on Facebook for updates, tips, and project highlights.
  • See more of our day-to-day work on Instagram.
  • Check out our presence on trusted platforms like Google Maps and Yelp.

We’re proud to be a local Tampa Bay company serving homeowners in Clearwater and the surrounding communities with honest, dependable plumbing and HVAC services.

Ready to Plan Your Sewer Line Project in Clearwater, FL 33765?

If you’re worried about aging cast iron pipes, recurring clogs, or slow drains in your Clearwater home, you don’t have to guess at what’s going on underground. Our team can provide a clear, detailed estimate—just like we did for this homeowner in Clearwater, FL 33765—so you understand your options before committing to any major work.

Whether you need targeted sewer line replacement, local HVAC and plumbing services in Clearwater, or help planning a larger plumbing project, we’re here to help. Reach out to Home Therapist Cooling, Heating, and Plumbing to schedule your visit, and let us walk you through the process with calm, straightforward guidance.

Your home’s comfort and plumbing reliability matter. We’ll help you get there, one careful step at a time.

Shower Arm Replacement in Brandon, FL 33510

When a shower starts leaking behind the wall, it can quickly go from a small annoyance to a costly water damage issue. A homeowner in Brandon, FL 33510 reached out to us after noticing water coming from their shower area. Our team at Home Therapist Cooling, Heating, and Plumbing came out to diagnose the problem and perform a shower arm replacement to stop the leak and protect their bathroom from further damage.

In Brandon’s humid Florida climate, any hidden moisture can linger in walls and ceilings, so addressing a shower leak promptly is especially important. In this case, the first and most logical step was to replace the shower arm and confirm whether the leak was coming from the threaded connection. Once we completed the work, we tested the shower and verified that everything was operating as expected.

Case Recap

  • Location: Residential home in Brandon, FL 33510
  • Main issue: Water leak around the shower head area
  • Service performed: Shower arm replacement (labor), with shower arm part cost addressed separately
  • Goal: Determine whether the leak was coming from the shower arm threads or from inside the wall
  • Outcome: Shower arm replaced, threaded connections sealed, and system tested for proper operation

Customer Problem: A Suspicious Leak at the Shower

The homeowner in Brandon started noticing water where it shouldn’t be whenever the shower was in use. Common signs include:

  • Drips or moisture around the shower arm where it comes out of the wall
  • Water spots, staining, or soft areas on the wall or ceiling near the shower
  • Needing to constantly wipe up water after a shower even when the curtain or door is closed properly

The concern was that the leak might be inside the wall, which can lead to long-term damage to framing, drywall, and potentially even mold growth if left unaddressed. However, one of the most common – and more straightforward – causes is a leak right at the threaded connection of the shower arm itself.

During our initial conversation, we explained that there are usually two main possibilities with this type of issue:

  • The leak is coming from the shower arm threads where it screws into the drop-ear elbow behind the wall.
  • The leak is coming from piping or fittings inside the wall, which would require opening the wall for in-depth repair.

Because you can’t reliably see what’s happening behind the wall without opening it up, the best, least invasive first step is usually to replace the shower arm and test. That’s exactly what we planned for this Brandon, FL 33510 plumbing visit.

Inspection and Diagnosis

When we arrived, we started with a visual inspection of the shower area and the surrounding walls and ceiling. For a shower leak, we typically look at:

  • The condition of the existing shower arm and shower head
  • The tightness and alignment of the shower arm where it exits the wall
  • Any visible signs of rust, mineral buildup, or cracking on the arm
  • Evidence of water staining or soft drywall near the shower

We also ask the homeowner questions such as how long the leak has been happening, whether it only occurs when the shower is running, and whether there have been any recent changes, like a new shower head installed. All of this helps narrow down the root cause.

Based on the symptoms and the description of the problem, we followed our standard diagnostic logic for this type of Brandon plumbing repair:

  1. Inspect the visible portion of the shower arm and head for obvious cracks or damage.
  2. Gently test for movement or looseness where the arm enters the wall.
  3. Plan to replace the shower arm as a first diagnostic and repair step, since the threaded connection is a frequent source of leaks.

We explained to the homeowner that if replacing and properly sealing the shower arm did not stop the leak, the next step would be to proceed with an in-wall repair. That second option usually requires opening drywall or tile to access the piping and fittings behind the wall. We also made clear that we do not patch or repair sheetrock or tile; a drywall or tile professional would handle those finishes afterward if any openings are needed.

Shower Arm Replacement: Step-by-Step Process

For this shower arm replacement in Brandon, FL 33510, the work was focused and precise. Here’s how we typically perform this service to protect your home and ensure a long-lasting repair:

1. Protecting the Work Area

Before we touch any plumbing, we take a moment to protect the surroundings. That includes:

  • Using drop cloths or towels to cover the tub or shower floor
  • Keeping tools organized and off finished surfaces
  • Wearing shoe covers when needed to keep your floors clean

We want homeowners in Brandon and across Tampa Bay to feel confident that we respect your home as much as the plumbing system we’re working on.

2. Removing the Old Shower Arm

Next, we carefully remove the existing shower head and arm. Using the right tools and technique is important here to avoid stressing the piping behind the wall. We support the arm and apply steady pressure to unscrew it from the threaded fitting (typically a drop-ear elbow) inside the wall.

During removal, we watch for any signs of excessive movement or instability at the wall opening, which could indicate a loose fitting or bracing inside the wall. If we see issues like that, we make note for the homeowner and explain whether additional work may be necessary.

3. Inspecting Threads and Connections

Once the old shower arm is removed, we inspect:

  • The male threads on the old arm for wear, corrosion, or cross-threading
  • The female threads of the fitting inside the wall for damage or debris
  • Any old tape or sealant left behind on the fitting

This inspection often confirms whether the leak was likely caused by a poor seal at the threads, a cracked arm, or another similar issue.

4. Preparing and Installing the New Shower Arm

Whether the homeowner provides the new shower arm or we supply it, we prepare the threads with a proper sealing method. Typically, that involves wrapping the threads with high-quality thread sealant tape, sometimes combined with an appropriate pipe joint compound, depending on the specific situation and material.

We then carefully screw the new shower arm into the wall fitting, ensuring it is snug but not over-tightened. Over-tightening can damage threads or stress fittings, which is exactly what we want to avoid for long-term reliability.

After the arm is set and oriented correctly, we reinstall the shower head (or install a new one if the homeowner is upgrading at the same time) and make sure everything is secure and properly aligned.

5. Testing for Leaks

With the new shower arm in place, we turn on the water and run the shower while checking carefully for any signs of leakage. We look both at the visible connection around the wall and, when accessible, any nearby areas where water might show up if a hidden leak persists.

Only after we verify that the connection stays dry and everything is operating as expected do we consider the repair complete. For our Brandon, FL 33510 homeowner, this test is a key reassurance that their shower is back to normal without unnecessary demolition.

Why This Fix Works for Many Shower Leaks

Many shower leaks at the wall are caused by issues at the shower arm connection. Over time, the sealant on the threads can fail, the arm can loosen, or corrosion and mineral deposits can compromise the joint. When water is under pressure, it takes the path of least resistance—and if that path is through a compromised thread connection, it will find its way into the wall cavity.

By replacing the shower arm and properly sealing the threads:

  • We restore a watertight connection where the arm meets the fitting inside the wall.
  • We eliminate cracks, damaged threads, or other defects on the old arm.
  • We can rule out a simple connection issue before moving to more invasive in-wall work.

This approach is not only practical, it’s also more budget-friendly for homeowners in Brandon and across Tampa Bay. If the leak stops after a proper shower arm replacement, you’ve avoided the cost and disruption of opening up the wall. If it doesn’t, we’ve still completed a necessary first step and can then plan the appropriate in-wall repair with accurate information.

Pro Tips for Homeowners in Brandon, FL

Because of our hot, humid Florida climate, bathrooms in Brandon and the greater Tampa Bay area are under extra moisture stress. Here are some practical tips to help protect your shower and plumbing:

  • Watch for early signs of moisture. If you see new stains, bubbling paint, or soft drywall near the shower, don’t ignore it. Addressing a small leak early is almost always less expensive than waiting.
  • Use your exhaust fan. Run your bathroom fan during and for at least 15–20 minutes after showers. Reducing humidity helps walls and ceilings dry out faster if minor moisture does occur.
  • Avoid over-tightening shower heads. When you install or adjust a shower head, don’t crank it down as hard as possible. Over-tightening can stress the arm and its connection inside the wall.
  • Check caulking and grout regularly. Even if your shower arm is sealed, failing caulk or grout around the tub or tile can let water seep behind surfaces. Inspect these areas every few months.
  • Schedule periodic plumbing checkups. Especially in older Brandon homes, a routine plumbing inspection can catch developing issues in showers, sinks, and other fixtures before they turn into major repairs.

If you’d like a more in-depth look at shower upgrades and related plumbing work in the Tampa Bay area, we also cover these topics on our shower service pages, such as our shower installation and repair services for Tampa Bay residents and a detailed guide on permit requirements for shower projects in Tampa Bay.

FAQ: Shower Arm Leaks and Repairs

How do I know if my shower leak is from the arm or inside the wall?

If water appears around the shower arm where it exits the wall or drips down from that area when the shower is running, the arm or its threads are strong suspects. However, you can’t always tell just by looking. That’s why we often start with a shower arm replacement in homes in Brandon, FL 33510—to rule out the simplest, most common source before considering in-wall repairs.

Do you need to open the wall to replace a shower arm?

No. Replacing a shower arm is typically a surface-level repair. We remove the old arm and install a new one through the existing opening. Only if the leak persists after a proper replacement do we discuss opening drywall or tile to access the plumbing inside the wall.

Can I provide my own shower arm and shower head?

Yes. Many homeowners prefer to choose their own fixture style and finish. We’re happy to install a shower arm and head you provide, or we can supply quality parts and include them on your invoice. Either way, we focus on a secure, properly sealed installation.

Will you also repair drywall or tile if the wall needs to be opened?

Our team focuses on plumbing repairs. If we do need to open any sheetrock, tile, or similar materials for an in-wall repair, we do not perform the patching or finishing work. We’ll explain exactly what was opened and recommend that you work with a drywall or tile professional to restore the wall’s appearance.

Is a leaking shower arm an emergency?

It may not feel like an emergency if water isn’t gushing, but any leak that’s getting into the wall should be taken seriously. In Brandon’s humid climate, moisture inside walls can linger and cause long-term damage. We recommend scheduling service as soon as you notice the problem so it can be addressed before it worsens.

Do you handle other plumbing repairs in the Brandon area?

Yes. In addition to shower repairs, we offer a full range of plumbing services for Tampa Bay homeowners, including plumbing repair throughout Hillsborough County and ongoing plumbing maintenance plan options. Our goal is to keep your whole home’s plumbing reliable and efficient.

Why Choose Home Therapist for Shower Repairs in Brandon

When you invite a plumber into your home in Brandon, FL 33510, you’re trusting them not just with your pipes, but with your comfort and peace of mind. Here’s what we focus on every time we step through the door:

  • Licensed, professional technicians. Our plumbers are trained, experienced, and licensed to work on showers, fixtures, and full plumbing systems throughout Tampa Bay.
  • Clear, transparent communication. We explain what we find, what your options are, and what each option means for your budget and your home—before we do the work.
  • Clean, respectful service. From protecting your bathroom surfaces to cleaning up when we’re done, we treat your Brandon home with care.
  • Long-term reliability, not quick band-aids. We aim for repairs that solve the problem at the source, so you’re not calling us back for the same issue a few months later.
  • Committed to Tampa Bay homeowners. We live and work in this community, and we stand behind the work we do in Brandon and surrounding areas.

If you’d like to get a feel for who we are beyond the toolbox, you can also connect with us on social media. We’re active on Facebook, share updates and project highlights on Instagram, and post helpful tips and behind-the-scenes content on TikTok.

For added peace of mind, you can also check out our listings and reviews on trusted platforms. We’re proud to be listed with the Better Business Bureau and the Tampa Bay Chamber of Commerce, and you can find our location and reviews on Google Maps as well.

Need Shower Arm Repair in Brandon, FL 33510?

If you’re seeing water around your shower arm, hearing drip sounds in the wall, or noticing new stains near your bathroom, it’s a good time to have a licensed plumber take a look. A straightforward shower arm replacement may be all that’s needed, and if it turns out you need a deeper in-wall repair, we’ll walk you through it step by step.

Homeowners in Brandon, FL 33510 can count on Home Therapist Cooling, Heating, and Plumbing for calm, professional, and thorough service. We’ll diagnose the problem, explain your options clearly, and complete the work with your comfort and home’s long-term health in mind.

If you’re ready to schedule plumbing service in Brandon or the surrounding Tampa Bay communities, reach out today and we’ll be glad to help you get your shower—and your bathroom walls—back to normal.

Dryer Duct Installation and Replacement in Clearwater, FL 33759

When a homeowner in Clearwater, FL 33759 reached out to us, their main concern was getting a safe, code-compliant dryer duct run to the outside. They wanted the duct hidden in the wall if possible, venting properly outdoors, without surprise damage or long-term leak risks. Our job was to install or replace the dryer duct run, explain exactly what was and wasn’t included, and make sure the home was left safe and ready for a properly vented dryer.

In this project, we installed the required ductwork for the dryer vent to the exterior, coordinated the route through the wall and ceiling spaces, and talked through important details about roof penetrations and drywall repairs. By the time we were done, the homeowner had a clean, direct path for their dryer exhaust and a clear understanding of what to expect next.

Case Recap

  • Location: Single-family home in Clearwater, FL 33759
  • Service: Dryer duct installation/replacement to safely vent the dryer outdoors
  • Scope: Labor to install up to 18 feet of duct, including exterior soffit/gable/roof vent as needed
  • Wall work: Cutting sheetrock to conceal the duct in the wall where possible (drywall repair handled by others)
  • Safety: Clear explanation of code considerations, roof responsibility, and what happens if hidden obstructions are found
  • Outcome: Completed dryer duct run with verified airflow path and a safer, more efficient setup for the homeowner

Customer Problem

Like many homeowners in Clearwater, the customer wanted their dryer to vent correctly to the outside and not into an attic space or a short, inefficient duct run that could trap lint. They were also interested in having the duct hidden inside the wall as much as possible for a clean, finished look in their laundry area.

The main concerns they shared with us were:

  • Making sure the dryer vent met current code requirements by exhausting to the exterior of the home.
  • Keeping the duct run as short and direct as possible to improve dryer performance and reduce lint buildup.
  • Hiding the duct inside the wall, which would require opening the sheetrock to route the pipe.
  • Understanding who would be responsible for any drywall repairs and for any roofing work if the only option was to vent through the roof.

We also made sure the homeowner understood one important limitation: if we cut into the wall and discover structural members, plumbing, electrical wires, or other obstacles that cannot be safely moved, we may not be able to run the duct fully inside the wall cavity. This was confirmed and documented before work began, so there were no surprises if we ran into hidden obstructions.

Inspection and Diagnosis

Before we start any dryer duct installation in Clearwater, FL 33759, we walk through the layout and look at the existing conditions. In this home, our inspection focused on:

  • The current dryer location and how much space we had behind and above the appliance.
  • The wall and ceiling cavities between the dryer and the exterior of the house.
  • Possible exterior termination points: soffit, gable end, or roof.
  • Any visible obstacles such as plumbing stacks, electrical lines, or framing that might interfere with an in-wall duct run.

We also evaluated how we could stay within the included duct length (up to 18 feet) while maintaining an efficient route. Longer, more twisted runs can reduce airflow and make the dryer work harder, so planning the path carefully is part of doing the job right.

During this phase, we explained to the homeowner:

  • That our goal is always to vent through the soffit or gable when possible, because those options often reduce roof risk.
  • That if the only safe and practical path is through the roof, they will need a licensed roofer to inspect and verify the roof penetration for watertightness.
  • That our responsibility covers the ductwork installation, not roofing warranties or drywall finishing.

With the route discussed and expectations set, we were ready to begin the installation.

Repair and Service Process

Dryer duct installation might seem straightforward, but doing it cleanly and safely in an existing house takes planning and care. Here’s how we handled this Clearwater project, step by step.

1. Planning the Duct Path

We started by mapping the most direct and code-appropriate path from the dryer to the outside. The priorities were:

  • Keeping the run within the included 18 feet when possible.
  • Reducing the number of turns and elbows to maintain strong airflow.
  • Finding a termination point at the soffit or gable before considering a roof penetration.

This planning step is crucial for performance and safety. A shorter, smoother run helps the dryer exhaust moist air and lint effectively, which supports both safety and energy efficiency.

2. Opening the Wall (Sheetrock Cutting)

Because the homeowner wanted the duct concealed inside the wall, we carefully marked and cut the necessary sections of sheetrock. We used controlled cuts to limit the opening to just what was required for the duct installation and to keep dust and debris contained as much as possible.

Before cutting, we confirmed with the homeowner that:

  • Our responsibility is limited to cutting and accessing the wall for the duct installation.
  • They would be responsible for hiring a drywall professional for patching, finishing, and painting after our work was complete.
  • If we discovered immovable or unsafe obstacles behind the wall, we might need to adjust the plan and could not guarantee a fully in-wall run.

3. Installing the Dryer Duct

With the wall open and the route confirmed, we installed the dryer duct from the appliance area toward the chosen exterior termination point. Our work included:

  • Running the duct within wall or ceiling cavities where possible.
  • Securing the duct to prevent sagging or disconnections over time.
  • Maintaining a smooth interior path to support good airflow.
  • Keeping total duct length within the included 18 feet, with transparent pricing if any additional length was needed.

We also made sure the connection point at the dryer end would be accessible enough for future maintenance and cleaning. A good installation not only works on day one, but stays serviceable over the life of the dryer.

4. Exterior Vent Termination

The exterior termination is where the dryer exhaust exits the home. Per the scope of this work, the soffit, gable, or roof vent was included as part of the installation. Our preference is always:

  • Soffit or gable vents when layout allows, because they often reduce roof-related risks.
  • Roof vent only if there is no practical alternative, and only after a clear conversation with the homeowner about responsibilities.

If a roof penetration is required, we install the vent as carefully as possible, but we are not roofers and cannot warranty roofing work. We clearly inform the homeowner that they must have a licensed roofer inspect our penetration afterward to ensure it is watertight and up to roofing standards. Any future roof leaks or roofing issues fall under the roofer’s responsibility, not ours.

5. Final Checks and Cleanup

Once the duct and vent were installed, we:

  • Verified that the duct had a continuous, unobstructed path from the dryer location to the exterior vent.
  • Confirmed that joints were properly secured and supported.
  • Cleaned up our work area, removing debris and leaving the home ready for the next trades (drywall and roofer, if needed).

We also reminded the homeowner to schedule their dryer connection and, when ready, consider periodic dryer vent cleaning. For ongoing safety and performance, a dedicated service like our dryer vent cleaning in Tampa Bay can help keep lint from building up inside the duct over time.

Why This Fix Works

Dryers work by pushing warm, moist air out through the vent. When the duct is properly sized, correctly routed, and vented outdoors, several good things happen:

  • The dryer can move air freely, so clothes dry faster and the appliance doesn’t have to run as long.
  • Lint has a clear path to leave the home, reducing buildup inside the duct that can become a fire hazard if ignored.
  • Moist air is exhausted outside instead of into the attic or home, helping protect framing, insulation, and indoor air quality.

In a humid area like Clearwater, FL 33759, properly exhausting moist air is especially important. A well-installed dryer duct supports both comfort and safety by managing heat, humidity, and lint the way the system was designed to.

By planning the run carefully, avoiding unnecessary bends, and terminating at a proper exterior vent, we set this homeowner up for reliable, efficient dryer operation for years to come.

Pro Tips for Homeowners in Clearwater

If you live in Clearwater or anywhere in the Tampa Bay area, here are some practical tips to keep your dryer venting system safe and efficient:

  • Check your exterior vent regularly. Make sure the flap opens freely when the dryer runs and that it isn’t blocked by lint, leaves, or nesting materials.
  • Clean the lint filter every load. This simple step reduces strain on the dryer and helps air move more easily through the duct.
  • Watch your dry times. If clothes suddenly start taking longer to dry, it could be a sign of restricted airflow in the vent line.
  • Schedule periodic vent cleaning. In Florida’s humid climate, lint can cling more easily inside ducts. Professional cleaning helps keep the line clear and reduces strain on the dryer. Our team handles this through our dedicated dryer vent cleaning service.
  • Be careful with flexible ducting behind the dryer. Avoid crushing or sharply bending the transition hose when you push the dryer back against the wall.
  • Address water staining or musty smells quickly. If you see signs of moisture near the vent route, have it checked. Proper venting should move moist air out of the home, not into walls or attic spaces.

FAQ: Dryer Duct Installation in Clearwater, FL 33759

Does this service include installing the dryer itself?

No. For this project and similar jobs, our work focuses on installing or replacing the dryer duct and exterior vent. The installation and setup of the appliance (dryer, range, or hood) are not included in this specific scope of work.

Is drywall repair included after you cut the sheetrock?

Drywall repair is not included. As part of running the dryer duct inside the wall, we may need to cut sheetrock to access wall or ceiling cavities. We perform those cuts carefully, but patching, finishing, and painting the drywall are the homeowner’s responsibility, typically handled by a drywall or painting professional.

What happens if you open the wall and find something in the way?

Before we start, we explain that if we cut into the wall and discover structural members, plumbing lines, electrical wiring, or other obstacles that cannot be moved safely, we may not be able to run the duct entirely inside the wall. In that case, we discuss alternative routes or partial in-wall runs with the homeowner so they can make an informed decision.

Are roof penetrations covered under your warranty?

No. While we can install a dryer vent through the roof when it’s the only practical option, we are not licensed roofers and cannot provide a roofing warranty. The homeowner must have a licensed roofer inspect and verify the roof penetration to ensure it is watertight. Any future roof-related issues should be handled by a roofing professional.

How long of a duct run is included in your pricing?

For this type of job, up to 18 feet of dryer duct is included in the standard labor scope. If more length is needed, we explain any additional cost per added section so the homeowner knows exactly what they are paying for before we proceed.

Do you offer related duct and vent services around Clearwater?

Yes. In addition to dryer duct installation, our Tampa Bay team provides services like air duct cleaning and full HVAC and plumbing service for homeowners in Clearwater and the surrounding communities.

Why Choose Home Therapist for Dryer Vent and Duct Work

When you invite someone into your home in Clearwater, FL 33759, you want technicians who treat your space with respect and communicate clearly. That’s how we approach every job.

  • Licensed and professional technicians: Our team is trained to handle venting, ductwork, HVAC, and plumbing with a focus on safety and code compliance.
  • Transparent communication: We explain what is included (like duct length and vent options) and what is not (such as drywall repair and roofing warranties) before work begins.
  • Clean and respectful work: We protect your home as we cut access openings and run ductwork, then clean up our work areas before we leave.
  • Long-term reliability: A properly routed, well-secured dryer duct supports safer, more efficient operation for years, not just on installation day.
  • Committed to Tampa Bay homeowners: We serve Clearwater and the broader Tampa Bay area with a focus on comfort, safety, and honest service.

If you’d like to get a better feel for who we are, you can connect with us on social media. Visit us on Facebook, follow our updates on Instagram, or check out our videos on TikTok.

Homeowners also often look for third-party assurance. You can review our standing with the Better Business Bureau, see our listing with the Tampa Bay Chamber of Commerce, or view our profile on BuildZoom for additional peace of mind.

Need Dryer Duct Installation in Clearwater, FL 33759?

If you’re planning a new laundry setup, replacing an old dryer, or simply want your dryer vent brought up to current standards, our team is here to help. We regularly handle dryer duct installations, reroutes, and related duct and vent services for homeowners in Clearwater, FL 33759 and across Tampa Bay.

We’ll walk you through your options for soffit, gable, or roof venting, explain any wall or ceiling access needed, and make sure you know exactly what to expect from start to finish. When we’re done, you’ll have a clean, properly routed exhaust path that helps your dryer run the way it was designed to.

To schedule service or discuss a dryer duct project in Clearwater, FL 33759, reach out to Home Therapist today. We’ll take the time to understand your home, explain your options clearly, and deliver work you can feel good about for the long term.

Premium AC Maintenance in Pinellas Park, FL 33781

For a homeowner in Pinellas Park, FL 33781, staying ahead of Florida heat and humidity starts with one simple habit: routine AC maintenance. On this visit, we came out for a scheduled Premium Home Therapy Plan service on a system that’s about a year old. Our goal was to give the system a full checkup, clean critical components, and confirm everything was running safely and efficiently so the family could stay comfortable without surprise breakdowns.

Case Recap

  • Location: Residential home in Pinellas Park, FL 33781
  • Service type: Premium Home Therapy Plan AC maintenance visit
  • System age: Approximately one year old
  • Full system inspection completed – indoor and outdoor units
  • Pressures, amperage, and UV light all operating within normal ranges
  • Both units cleaned and the condensate drain line flushed and cleared

Customer Problem

This visit wasn’t about a breakdown; it was about staying ahead of one. The homeowner in Pinellas Park is on our Premium Home Therapy Plan, which means we come out on a firm, scheduled date and time to perform routine maintenance so their AC doesn’t leave them stuck in the heat.

Because the system is only about a year old, there were no obvious complaints like warm air, strange noises, or high energy bills. Instead, their main priorities were:

  • Keeping the new system running like new for as long as possible
  • Making sure the equipment is clean and operating safely
  • Preventing clogs in the drain line that could cause water damage or leaks
  • Confirming their investment in a maintenance plan is truly protecting their home comfort

In Pinellas Park and across Tampa Bay, our air conditioners work hard almost year-round. Even a newer system can build up dirt, algae in the drain line, and general wear if it’s not inspected. That’s exactly what this Premium Plan visit was designed to address.

Inspection and Diagnosis

With any maintenance visit in Pinellas Park, FL 33781, we start by listening to the homeowner and then move into a structured inspection of the entire cooling system. On this job, we focused on:

  • Indoor air handler: Checking the blower motor, electrical connections, and general cleanliness.
  • Outdoor condenser: Inspecting the fan motor, compressor, coil condition, and cabinet.
  • Refrigerant circuit: Verifying operating pressures were within normal range for the conditions.
  • Electrical performance: Measuring the amperage draw of the blower motor, compressor, and fan motor to ensure each was within specifications.
  • UV light system: Confirming the UV light was operating properly.
  • Condensate drainage: Inspecting the drain pan and drain line for buildup or signs of clogging.

We didn’t find any red flags. The pressures were in the normal range, the amperage draws were within specifications, and there were no signs of overheating or stress on the motors. The UV light was still functioning correctly, and there were no signs of water backup in the drain system.

In short, the system was in good condition. But even a system that’s running well still benefits from a deep cleaning and drain line service, especially in a humid coastal area like Pinellas Park.

Repair and Service Process

Since there were no failures, this visit was all about preventive maintenance. Here’s how we approached the service step by step and why each part matters for a homeowner in Pinellas Park, FL 33781.

1. Verifying Safe Operation

We began by running the system through a normal cooling cycle. This let us:

  • Confirm the thermostat was communicating properly with the system
  • Listen for any unusual noises from the indoor and outdoor units
  • Check for proper start-up, run, and shut-down

Once we confirmed everything was running smoothly, we moved into more detailed checks.

2. Checking Pressures and Electrical Draw

Next, we verified that refrigerant pressures and electrical amperage were where they should be for a healthy, one-year-old system. We confirmed that:

  • The compressor was operating steadily without signs of strain
  • The outdoor fan motor was drawing normal amperage
  • The indoor blower motor was running within specifications

This helps us spot potential issues early. For example, a motor drawing too much current or pressures outside the normal range can hint at future failures, even when the system still seems to be cooling.

3. Inspecting and Confirming UV Light Operation

The home is equipped with a UV light system, which is designed to help treat the air as it passes through the equipment. We inspected the UV light, confirmed it was on and functioning properly, and checked for any visible damage or wear on the housing and wiring.

UV systems need periodic attention and lamp replacement based on manufacturer guidelines, so confirming proper operation during each maintenance visit is important.

4. Cleaning Both Indoor and Outdoor Units

Even in just one year, Florida dust, pollen, and debris can collect on coils and inside cabinets. As part of the Premium Home Therapy Plan visit, we thoroughly cleaned both units:

  • Indoor unit: We removed accessible dust and debris, checked the filter area, and ensured there was no buildup that could restrict airflow.
  • Outdoor unit: We cleared away debris from around the condenser and cleaned the coil surfaces to help maintain efficient heat transfer.

Clean equipment doesn’t just look better – it runs more efficiently, puts less strain on components, and helps maintain even comfort throughout the home.

5. Flushing the Condensate Drain Line

The condensate drain line is one of the most important – and most overlooked – parts of an AC system in our climate. Warm, humid air in Pinellas Park creates a steady stream of condensation when the AC runs. That water has to go somewhere, and it travels through the drain line.

Over time, algae and sediment can build up and clog the line. To help prevent this, we:

  • Checked the drain pan and line for standing water or signs of previous overflow
  • Flushed the drain line thoroughly to clear any developing buildup
  • Verified that water was flowing freely to the discharge point

This step is critical for avoiding water damage, ceiling stains, and system shutdowns due to float switch trips.

6. Final System Check and Clean Work Area

After cleaning and flushing, we ran the system again to confirm normal operation. We verified proper airflow and drainage and made sure there were no unusual sounds or vibrations.

Before leaving, we ensured the work areas around the indoor and outdoor units were clean and tidy, with no tools, debris, or packaging left behind. Respecting the home is as important to us as the technical work.

Why This Fix Works

In this case, the “fix” was really about preservation and prevention. Routine maintenance like this keeps an AC system in Pinellas Park, FL 33781 operating as designed and helps avoid the surprise failures that tend to happen on the hottest days.

Here’s why the key elements of this visit matter:

  • Clean coils and components: Dirty coils make the system work harder to move heat, which can increase energy use and stress the compressor and fan motors.
  • Proper electrical draw: When motors and compressors run within their specified amperage, they generate less heat and experience less wear, which supports longer equipment life.
  • Clear condensate drainage: A clear drain line prevents water backup, overflow, and shutdowns triggered by safety float switches.
  • Functional UV light: A working UV system continues to do its job treating air in the system, supporting cleaner coils and better indoor air quality.

By inspecting, cleaning, and confirming normal operation of each of these components, we left this homeowner’s one-year-old system in great shape for continued reliable service.

Pro Tips for Homeowners in Pinellas Park

Whether your system is brand new or a few years old, there are simple steps you can take between professional visits to keep it running smoothly in the Pinellas Park climate.

  • Change or clean your air filter regularly. In our humid, often dusty environment, filters can load up quickly. Check them monthly and replace as needed to maintain strong airflow.
  • Keep the outdoor unit clear. Trim back plants, remove leaves, and avoid stacking items around the condenser. Good airflow around the unit helps it reject heat efficiently.
  • Watch for drain line signs. If you notice water near the indoor unit, ceiling spots, or a safety switch tripping the system off, call for service. Those can be early signs of a clogged condensate line.
  • Use your thermostat consistently. Avoid frequent large temperature swings. Setting a comfortable, steady temperature helps your system run more efficiently and reduces wear and tear.
  • Schedule professional maintenance at least once a year. In the Tampa Bay area, many homes benefit from twice-yearly service, especially if there are pets, allergies, or high usage.
  • Ask about indoor air quality options. If you already have a UV light or are considering one, regular checkups ensure it continues working as intended and is replaced at the right interval.

Frequently Asked Questions About This Visit

My AC is only a year old. Do I really need maintenance?

Yes. Even newer systems in Pinellas Park, FL 33781 benefit from routine maintenance. Our climate is hard on equipment due to heat, humidity, and long run times. Regular inspections and cleanings help keep warranties valid and extend the system’s life.

What does a Premium Home Therapy Plan visit include?

On this visit, we performed a full system inspection, checked pressures and amperage, confirmed UV light operation, cleaned both the indoor and outdoor units, and flushed the condensate drain line. The exact steps are tailored to your equipment, but the goal is always the same: safe, efficient, reliable operation.

How do I know if my UV light is still working?

Visual indicators vary by model, but during maintenance we confirm the UV light is operating properly and inspect its housing and wiring. If it’s near the end of its expected service life, we’ll discuss replacement timing with you so it continues to perform as intended.

Why is flushing the drain line so important in Florida?

Our air conditioners pull a lot of moisture out of the indoor air. That moisture drains through a small line that can grow algae and collect debris. Flushing the drain line helps prevent clogs that can lead to water leaks, ceiling damage, and emergency shutdowns.

Will regular maintenance really prevent breakdowns?

No one can promise a system will never fail, but consistent maintenance greatly reduces the chances of surprise breakdowns. It also gives us a chance to spot small issues before they turn into major, costly repairs.

Why Choose Home Therapist for AC Maintenance

When you invite us into your home in Pinellas Park, FL 33781, you’re trusting us with your comfort and your property. We take that seriously.

  • Licensed, professional technicians: Our team is trained, experienced, and equipped to service modern HVAC systems safely and correctly.
  • Transparent communication: We explain what we’re doing, what we find, and what (if anything) we recommend next, in clear, plain language.
  • Clean, respectful work: We treat your home like our own—taking care to protect surfaces, clean up after ourselves, and leave equipment areas neat.
  • Long-term reliability focus: Maintenance visits are designed not just to “check a box” but to keep your system running smoothly for years, not just days.
  • Committed to Tampa Bay homeowners: We’re a local company serving Tampa Bay communities, including Pinellas Park, with an emphasis on safety, comfort, and trust.

If you’d like to get a feel for who we are and the work we do, you can connect with us on social media. Visit our Facebook page, follow us on Instagram, or check out our videos on TikTok.

For added peace of mind, you can also see how we show up across the community on trusted platforms like our Google business listing and customer feedback on Yelp.

To learn more about related services we offer, you can explore our pages on air filter installation and replacement, air duct cleaning, and our dedicated drain line cleaning and flushing services. We also provide comprehensive HVAC and plumbing services across the Tampa Bay area.

Schedule Your AC Maintenance in Pinellas Park, FL 33781

If you want your air conditioner in Pinellas Park, FL 33781 to stay clean, efficient, and reliable, a planned maintenance visit like this one is one of the best investments you can make. Whether your system is brand new or has a few years on it, our technicians will give it a thorough checkup, clean key components, and help you stay ahead of potential problems.

When you’re ready, reach out to Home Therapist Cooling, Heating, and Plumbing to schedule your next maintenance visit. We’ll set a firm appointment time, respect your home, and leave your system ready to handle the Florida heat with confidence.

Sewer Drain Line Replacement and Re-Leveling in Tampa, FL 33603

When a sewer line starts backing up or draining slowly in a home in Tampa, FL 33603, it’s more than an inconvenience—it can quickly become unsanitary and stressful. In this case, a homeowner in Tampa reached out to us because of ongoing drainage issues tied to aging cast iron sewer piping and an exterior drain line that needed to be properly re-leveled and routed.

As licensed plumbing professionals, our goal was simple: assess the current cast iron sewer line, design a replacement with modern piping, correct the slope of the exterior drain, and make sure the new system gives the home a reliable path for wastewater to leave the property. Along the way, we also had to consider practical details like access through the bathroom vanity area, the possibility of rerouting the bathtub waste line, and minimizing disturbance to the yard.

Case Recap: Sewer Line and Exterior Drain Replacement in Tampa

  • Home in Tampa, FL 33603 with existing cast iron sewer piping and recurring drainage concerns.
  • Recommended replacement of the cast iron sewer pipe with new piping and re-leveling of exterior drain lines.
  • Planned excavation of a dirt trench to achieve proper slope and tie into the city connection.
  • Potential need to temporarily remove the bathroom vanity for access and routing of new drain piping.
  • Possible rerouting of the bathtub waste line from a downstream connection, depending on onsite conditions.
  • Clear estimate provided with base pipe replacement costs and notes about any future additional work requiring separate approval.

Customer Problem: Aging Cast Iron and Poor Drainage

Many homes in the Tampa area, especially older properties, still rely on cast iron sewer piping. Over time, cast iron can corrode, crack, and develop rough internal surfaces that catch debris. In this Tampa, FL 33603 home, the existing cast iron sewer pipe and exterior drain layout were contributing to drainage problems and raising concerns about future reliability.

The homeowner was noticing issues that pointed to improper drainage and potential pipe failure, including slow drains and the risk of recurring backups. They wanted a long-term solution rather than repeated short-term cleanings.

During our initial visit, we discussed:

  • The condition and limitations of the existing cast iron sewer line.
  • The need for the exterior drain line to be correctly sloped so wastewater can move efficiently toward the city connection.
  • Access challenges inside the bathroom, including the likelihood that the vanity might need to be removed to route new piping correctly.
  • The possibility of modifying the bathtub waste line if a better tie-in point was available downstream.

We also explained that once old drain lines are opened up, it’s not unusual to uncover hidden issues such as damaged sections, incompatible previous repairs, or connections that no longer meet current standards. To keep everything transparent, we clearly separated the work included in this estimate from any potential future repairs that might be discovered once the pipes were exposed.

Inspection and Diagnosis: Understanding the Drainage Path

Before recommending a full sewer drain replacement, we focus on understanding exactly how the system is laid out and where the problems are likely coming from. For this Tampa, FL 33603 project, the main concerns were the failing cast iron sewer pipe and the slope and routing of the exterior drain line.

Our diagnostic approach typically includes:

  • Reviewing the existing layout of the bathroom drain lines, including the main sewer run and any branch lines.
  • Evaluating where the drain exits the home and how it runs across the yard toward the city connection.
  • Checking for signs of improper slope—sections that may be too flat or back-pitched, which can cause standing water and frequent clogs.
  • Identifying potential access points, such as under a vanity or near the bathtub, that may need to be opened for proper pipe routing.

In this estimate, we specifically noted that the bathroom vanity might need to be removed to give us enough space to work on the new piping. We also highlighted the option of rerouting the bathtub waste line from a downstream point if the existing configuration allowed for a cleaner, more reliable tie-in.

Once we had enough information about the likely path and condition of the piping, we recommended replacing the cast iron sewer segment and re-leveling the exterior drain with properly sloped PVC piping.

Repair and Installation Plan: From Cast Iron to PVC

For sewer and drain projects like this in Tampa, FL 33603, we create a step-by-step plan so the homeowner knows exactly what to expect. Here’s how this type of sewer drain replacement and re-leveling is structured.

1. Set Scope and Base Costs

The estimate included a base cost line item for pipe replacement, which covers the fundamental labor and materials required to remove old piping and install new sewer or drain lines. This gives the homeowner a clear foundation for the project, before any additional work that might be required if hidden issues are found.

2. Remove and Replace the Cast Iron Sewer Pipe

The core of the job is replacing the existing cast iron sewer pipe with new piping, typically PVC. This involves:

  • Safely accessing the old cast iron line inside and outside the home.
  • Cutting out and removing the deteriorated section of cast iron pipe.
  • Installing new piping, with proper fittings and secure connections, to create a smooth, reliable wastewater path.

Modern PVC piping is more resistant to corrosion and buildup, which helps reduce the risk of future clogs and leaks.

3. Re-Level and Re-Route the Exterior Drain Line

Outside the home, we planned to dig a trench in the yard to reach the existing drain run and then re-level it. The goal is to give the drain a consistent, correct slope from the home out to the city connection.

That process typically includes:

  • Marking the work area and carefully digging a trench along the drain path.
  • Removing or adjusting existing piping that is improperly sloped or damaged.
  • Installing new PVC piping along a re-graded trench so wastewater flows by gravity toward the city main.
  • Backfilling the trench once everything is connected and tested.

We always do our best to protect the homeowner’s lawn and landscaping during trenching, but we are clear up front: when you dig in a yard, some grass disturbance is possible, and we cannot guarantee that turf won’t be damaged. We’d rather be honest about that than overpromise.

4. Install a Cleanout (When Possible)

As part of the sewer drain replacement, we aim to install a cleanout where site conditions allow. A cleanout is an access point that makes future maintenance, inspections, and any needed drain cleaning much easier and less invasive.

If the layout supports it, this cleanout is usually installed along the exterior drain line between the home and the city connection.

5. Vanity Removal and Re-Installation, If Needed

Inside the bathroom, the existing vanity may block access to the section of drain line we need to reach. In this estimate, we noted that the vanity would only be removed if necessary to properly route and install the new sewer piping.

If removal is required, we plan for:

  • Carefully disconnecting water supply lines and drain connections.
  • Removing the vanity to access the piping behind or below it.
  • Installing or rerouting piping as needed for the new layout.
  • Reinstalling a customer-supplied vanity, faucet, and drain fixtures once the plumbing work is complete.

If additional pipes need to be run specifically to the new vanity location beyond what’s included in the base scope, that work is clearly priced separately so there are no surprises.

6. Possible Rerouting of the Bathtub Waste Line

We also identified a potential option to reroute the bathtub’s waste line from a downstream connection point on the property. Whether this is done depends on what we find once the pipes are exposed and how the existing drainage is configured.

Any reroute would only proceed with the homeowner’s approval and under a separate, clearly written estimate if it falls outside the original scope.

7. Testing and Verification

After new piping is installed and the trench is backfilled, we test the system to confirm everything is functioning as expected. That includes checking for leaks, confirming proper flow, and verifying that drains are clearing normally without signs of standing water or backup.

Why This Fix Works: Proper Slope and Modern Materials

Reliable drainage depends on two main things: the condition of the piping and the way it is sloped and routed. For a home in Tampa, FL 33603, that means using durable materials and making gravity work in your favor.

Here’s why this solution is effective:

  • New PVC piping: Modern PVC is smoother inside than old cast iron, which helps wastewater flow more freely and reduces buildup over time.
  • Proper slope: Sewer lines need a calculated downward pitch—too flat and water sits; too steep and water outruns solids. Re-leveling the exterior drain ensures everything moves together toward the city connection.
  • Clean, consistent routing: Eliminating unnecessary bends, dips, and patched-together sections reduces the risk of clogs and leaks.
  • Cleanout access: When a cleanout is installed, any future maintenance or inspection can usually be done from that point instead of tearing up flooring or landscaping.

By combining a properly sloped trench, updated piping, and better access, we’re not just clearing a one-time blockage—we’re setting up the home for long-term, reliable drainage.

Pro Tips for Homeowners in Tampa

For homeowners in Tampa and nearby neighborhoods, sewer and drain issues often show up sooner in older homes or properties with heavy tree growth and high groundwater. Here are a few practical tips to help protect your plumbing system:

  • Pay attention to slow drains and recurring gurgling. If the same drains keep slowing down or you hear gurgling when fixtures are used, it may be more than a simple clog. Early evaluation can prevent larger backups.
  • Be cautious with what goes down your drains. In our humid Florida climate, grease, wipes (even “flushable” ones), and heavy paper products can quickly build up in older pipes and low-slope lines.
  • Know where your sewer line runs. If you plan landscaping, fencing, or tree planting in Tampa, FL 33603, avoid putting deep-rooted plants or heavy structures directly over your main sewer path.
  • Schedule professional drain cleaning before major renovations. If you’re remodeling a bathroom or kitchen, having your drains inspected and cleaned first can reveal issues before you invest in new finishes. Our guide on drain cleaning services and options explains how we approach this.
  • Consider the big picture with older piping. If your home still has extensive cast iron or galvanized plumbing, it may be smarter long term to explore whole-home repiping rather than piecemeal repairs.
  • Get clear, written estimates. For larger plumbing projects, always ask for a detailed estimate that explains what is and isn’t included. If you’re planning other upgrades, our article on requesting a plumbing services estimate gives a good sense of what to expect.

FAQ: Sewer and Drain Projects Like This in Tampa, FL 33603

Will my bathroom vanity definitely need to be removed?

Not always. In this estimate, we noted that vanity removal may be required only if we cannot properly access and route the new sewer piping with the vanity in place. If removal is needed, we handle it carefully and reinstall a customer-supplied vanity, faucet, and drain fixtures once the plumbing work is complete.

Can you guarantee that my yard won’t be damaged during trenching?

We take every reasonable step to protect your lawn and landscaping—laying out spoil piles thoughtfully and working carefully—but any time a trench is dug in dirt, there is a real possibility of grass damage. We’re upfront about this so expectations are realistic.

What happens if you find more damaged pipe once you start?

It’s common to discover hidden damage, incompatible connections, or additional failed sections once old sewer lines are opened. Any work beyond the original scope is not done automatically. We document what we find, explain the options, and provide a separate written estimate for your approval before proceeding.

Why is proper slope so important for drain lines?

Drain lines rely on gravity. If the slope is too flat, wastewater can sit in the pipe and lead to clogs and odors. If it’s too steep, water can move faster than solids, leaving material behind. The goal is a controlled, consistent slope so everything flows together smoothly to the city connection.

Is PVC really better than cast iron for my sewer line?

Each material has pros and cons, but for many Tampa homes, PVC offers a smooth interior surface that resists buildup and does not corrode the way aging cast iron can. When properly installed and supported, PVC sewer piping is a durable, low-maintenance choice for modern drain systems.

Do you test the system before you finish the job?

Yes. After installation, we test the new piping to confirm proper flow and check for leaks. We verify that drains are operating as expected so you have confidence in the work before we leave.

Why Tampa Homeowners Choose Home Therapist

When you’re dealing with sewer line problems in Tampa, FL 33603, you want a team that treats your home with respect and explains the plan in clear terms. That’s how we approach every plumbing project, whether it’s a targeted drain repair or a larger repiping job.

Here’s what you can expect from Home Therapist Cooling, Heating, and Plumbing:

  • Licensed, professional technicians: Our plumbers are trained, experienced, and familiar with the soil, weather, and building styles throughout Tampa Bay.
  • Transparent communication: We provide written estimates that outline what is included, what might change based on field conditions, and how any additional work would be handled.
  • Clean, respectful work habits: From protecting interior finishes to managing yard excavation as neatly as possible, we treat your property as if it were our own.
  • Focus on long-term reliability: We don’t just clear a clog; we look at the underlying causes—pipe condition, slope, and layout—to reduce the chance of repeat problems.
  • Commitment to Tampa Bay homeowners: We live and work in this community, and we want your home’s plumbing system to be something you can depend on year-round.

If you’d like to see more about how we serve local homeowners, you can connect with us on social media and review platforms:

We’re also proud to be listed with trusted local and national organizations, so you can verify who you’re inviting into your home:

Need Sewer or Drain Help in Tampa, FL 33603?

If you’re noticing frequent backups, sluggish drains, or you know your home still has older cast iron piping, it may be time to take a closer look at your sewer line. We can walk you through your options—from targeted drain cleaning and cleanout installation to more comprehensive solutions like drain cleaning and cleanout services or full line replacement.

Homeowners in Tampa, FL 33603 and throughout Tampa Bay can count on us for straightforward advice, detailed estimates, and professional installation. When you’re ready, reach out to schedule an inspection or request a sewer line replacement estimate, and we’ll help you find the safest, most reliable path forward for your home’s plumbing.

Premium AC Maintenance Plan Visit in Tampa, FL 33629

When you live in Tampa, FL 33629, air conditioning isn’t a luxury—it’s what keeps your home livable for most of the year. That’s why many homeowners choose our Premium Therapy Plan, a maintenance membership designed to keep their AC running reliably in our hot, humid Florida climate. In this case, we were working with a homeowner in Tampa, FL 33629 who had a scheduled visit as part of their plan and some understandable questions about how those visits are booked, confirmed, and completed.

From our side as technicians, our goal is always the same: clear communication, on-time service, and a smooth experience from the first reminder call to the final check of your system. In this visit, there was some confusion about scheduling and whether a particular maintenance appointment had actually been completed. We’ll walk you through what happened, how we handle these situations, and what you can expect from your own AC maintenance plan visits in Tampa.

Case Recap

  • Location: A homeowner in Tampa, FL 33629.
  • Service: Premium Therapy Plan maintenance visit (Visit #3).
  • Main issue: Confusion about whether a scheduled visit was completed.
  • Our action: Verified the visit status, corrected the job record, and clarified next steps with the homeowner.
  • Outcome: Membership visit kept active and ready to be properly scheduled and completed.
  • Long-term benefit: Homeowner continues to receive full value from their AC maintenance plan.

Customer Problem: Confusion Around a Maintenance Plan Visit

For this Premium Therapy Plan member in Tampa, the concern wasn’t a broken AC—it was about service that they believed was still owed to them under their plan. The visit in question was the third one associated with their membership. From the homeowner’s perspective, they were expecting a technician to come out and perform the maintenance they were entitled to. When they checked in, they felt that this visit had not yet happened and wanted to know what was going on.

On our operations side, notes showed that our office team had tried multiple times to contact the homeowner to schedule the visit. Each time we called, the response was essentially, “I’ll call you back.” That’s very common in busy households—life gets hectic, and returning a service call isn’t always the top priority, even when it’s for something as important as AC maintenance.

At one point, the visit had been marked as completed in our system. Later, when the homeowner reached out and expressed concern that the visit had not been performed, that completion status was removed so we could properly address the situation. That step—unmarking the visit as completed—was our way of making sure the homeowner’s membership benefits stayed intact and that we could get their third visit scheduled correctly.

In plain language: the homeowner wanted to make sure they were getting the full value of their Premium Therapy Plan, and our job was to review our records, clarify what had (and hadn’t) been done, and make it easy to move forward with the visit they were expecting.

Inspection and Diagnosis: Verifying the Visit and Membership Status

Because this situation was about scheduling and membership, not a broken unit, our “inspection” was focused on records, communication history, and plan details rather than pressures or electrical readings. Here’s what we looked at:

  • Membership details: We confirmed that the homeowner was enrolled in our Premium Therapy Plan, which includes periodic maintenance visits designed to keep their AC system running reliably in Tampa’s heat.
  • Visit history: We checked how many visits had been completed, which ones were still open, and the notes tied to each visit.
  • Call and contact attempts: Our notes showed multiple attempts from our office to reach the homeowner to schedule the visit, with responses indicating they would call us back.
  • System status in our app: We reviewed why the visit had been marked as “completed” and verified that the actual maintenance work for this specific visit had not taken place.

Once we verified that the physical maintenance for this third visit had not been performed, we corrected the job status in our system so it clearly showed as pending. This protects the homeowner’s membership benefits and prevents any misunderstanding going forward.

Situations like this are one reason we’ve put a lot of effort into our communication processes and why we provide clear options and explanations on our AC repairs, installs, and maintenance services overview page. Our goal is always to make it simple for Tampa Bay homeowners to understand exactly what’s included in their plan and when each visit is due.

Repair or Service Process: How We Handle Membership Visits

Even though this particular job focused on scheduling and records, it’s helpful to understand how a Premium Therapy Plan visit is normally handled from start to finish. This is especially important for homeowners in Tampa, FL 33629, where AC systems work harder and maintenance matters more.

1. Scheduling and Confirmation

For plan members, we reach out proactively when it’s time for a visit. Our office team will:

  • Call the homeowner using the number on file.
  • Offer date and time windows that fit our route and the homeowner’s schedule.
  • Confirm the appointment and note any special requests (pets, gate codes, access instructions, etc.).

If we aren’t able to reach the homeowner, we keep notes on each attempt. That’s what happened in this Tampa case—multiple calls, each time with a promise to “call back later,” but no final confirmation. Without that confirmation, we won’t just show up unannounced, especially in a residential neighborhood.

2. On-Site Maintenance (What Normally Happens During a Visit)

Once a Premium Therapy Plan visit is confirmed and our technician arrives, a typical maintenance appointment in Tampa includes tasks like:

  • Checking overall system operation from thermostat to outdoor unit.
  • Inspecting and cleaning accessible components as appropriate for the system.
  • Visually checking for signs of wear, corrosion, or drainage issues common in Florida humidity.
  • Verifying normal airflow and listening for unusual noises or vibrations.

After we’re done, we walk the homeowner through what we found, note any recommendations, and make sure everything is running as expected before we leave. For more detail on how we structure these visits, you can review our AC maintenance and service options.

3. Correcting the Record When There’s Confusion

In this case in Tampa, the actual on-site visit had not taken place for this third appointment, even though it had been marked complete in the system at one point. As soon as the homeowner raised the concern, we:

  • Reviewed the notes in detail.
  • Confirmed no technician had actually performed the visit.
  • Removed the “completed” status so the visit remained active and available under the plan.
  • Prepared to reach back out and get the visit truly scheduled and performed.

This is an important step in our quality control process. If something doesn’t match between what the system says and what the homeowner experienced, we always go back and correct it. You deserve to get every visit and every benefit you’re paying for.

Why This Fix Works: Protecting Value, Comfort, and Trust

With maintenance membership plans, trust and clarity are just as important as technical skill. The real “fix” in this Tampa, FL 33629 case was not a replacement part—it was making sure that the homeowner’s membership record accurately reflected the service they were still owed.

Here’s why it matters:

  • Comfort: Regular maintenance helps your AC handle Tampa’s long cooling season. You want every scheduled visit, especially before and during the peak summer heat.
  • Reliability: Skipping a visit can allow small issues—like minor drainage problems or loose electrical connections—to grow into unexpected breakdowns.
  • Plan value: When you sign up for a Premium Therapy Plan, you’re paying for specific visits and services. Correcting the record ensures you receive the full value of that plan.
  • Transparency: By unmarking the job as completed and keeping it open, we’re being straightforward about what has and hasn’t been done.

In short, the fix worked because we aligned our records with reality, protected the homeowner’s benefits, and set things up so that the actual maintenance can be completed properly.

Pro Tips for Homeowners in Tampa

If you’re a maintenance plan member—or considering becoming one—in Tampa, FL 33629 or anywhere in Tampa Bay, here are some practical tips to keep everything running smoothly:

1. Save Our Number and Answer Scheduling Calls

When it’s time for your maintenance visit, we’ll call you. If you see our number, try to pick up or call back when you can. It’s the easiest way to get your spot on the schedule, especially during busy seasons.

2. Book Ahead of Peak Heat

In Tampa, the AC is already working hard by spring. Try to schedule your maintenance visit before the hottest months. That way, your system is checked and ready before the long, humid summer days really set in.

3. Keep Your Contact Info Updated

If you change your phone number or email, let us know. Many missed visits happen simply because we’re calling an old number. Keeping your info current helps us reach you quickly when it’s time to book your next appointment.

4. Use Your Plan Fully

Premium plans are designed to be used. If you’re not sure how many visits you have left in your membership year, ask us. We’re happy to review your plan and help you schedule what’s remaining so you don’t leave value on the table.

5. Know When You Need to Be Home

Some homeowners in Tampa prefer to be present; others are comfortable with us accessing the outdoor equipment while they’re at work. We explain the options clearly, and we even have a dedicated resource on whether you need to be home for AC appointments so you can plan your day.

FAQ: Premium AC Maintenance Visits in Tampa, FL 33629

What happens if I miss a scheduled Premium Therapy Plan visit?

If a visit is missed due to scheduling or communication issues, we review your membership record and contact history. When we confirm that the visit wasn’t actually performed, we keep it open and work with you to get it properly scheduled instead of simply marking it as done.

How often should I use my AC maintenance plan in Tampa?

Most Tampa homeowners benefit from regular maintenance at least once or twice a year, depending on their plan level and how hard the system runs. Your Premium Therapy Plan is structured to match our local climate and usage patterns, so using all of your scheduled visits is the best approach.

How do I know if my visit was really completed?

At the end of a visit, our technician will review what was done and answer any questions you have. You’ll also see notes in your service history. If you’re ever unsure whether a specific visit happened, reach out—we’ll verify it and make any corrections needed.

What if I’m too busy to take scheduling calls?

We understand busy schedules. If phone calls are hard to catch, we can discuss alternative ways to coordinate visits or agree on preferred contact windows. Let us know your situation so we can make scheduling as simple as possible.

Is AC maintenance really necessary if my system seems fine?

In Tampa, FL 33629, your AC runs many months of the year. Even when it seems to be working fine, components can slowly wear, drains can clog, and performance can drop. Maintenance helps catch those issues early, improve comfort, and reduce the chance of sudden breakdowns in the peak heat.

Where can I learn more about your AC maintenance services?

You can read more about how we structure AC maintenance for Tampa Bay homeowners on our AC maintenance and cleaning specials page and in our broader AC service guidance resources. Or, you can always call us directly—we’re happy to explain in plain language.

Why Choose Home Therapist for Your AC Maintenance Plan

When you invite us into your home in Tampa, FL 33629, you’re trusting us with your comfort, your time, and your investment in your HVAC system. We take that seriously.

Here’s what you can expect from our team:

  • Licensed, professional technicians: Our techs are trained, experienced, and focused on safe, code-compliant work—not quick shortcuts.
  • Transparent communication: From reminders and scheduling to explaining what was done on each visit, we keep things clear and straightforward.
  • Clean, respectful work: We protect your home, clean up our workspace, and treat your property the way we’d want ours treated.
  • Long-term reliability focus: We’re not just there to get through today’s visit; we’re looking at how your system will perform through many Tampa summers ahead.
  • Commitment to Tampa Bay homeowners: We live and work in this area, and we’ve built our reputation on taking good care of our neighbors.

If you’d like to see how we interact with homeowners day to day, you can follow us on social media. We share honest, behind-the-scenes looks at our work and tips for keeping your home comfortable:

And if you like to verify companies before you hire them, you can also check out our profiles on trusted platforms:

Schedule Your Next AC Maintenance Visit in Tampa, FL 33629

If you’re a current Premium Therapy Plan member in Tampa, FL 33629 and you’re unsure about the status of one of your visits, we’re here to help. We’ll review your record, confirm what’s been completed, and make sure you receive every visit you’re entitled to.

And if you’re not yet on a maintenance plan but want more reliable comfort in our Tampa climate, we can walk you through your options and help you decide what makes sense for your home. You can start by exploring our Home Therapist website or by giving us a call to speak directly with our team.

No pressure, no scare tactics—just clear answers and professional AC maintenance for homeowners in Tampa, FL 33629 and the surrounding Tampa Bay area.

Premium AC Maintenance Plan Visit in Tampa, FL 33629

When you live in Tampa, FL 33629, your air conditioning isn’t a luxury—it’s part of staying comfortable and healthy in our heat and humidity. On this visit, we stopped by a homeowner’s property in Tampa for a scheduled Premium Therapy Plan maintenance on two AC systems. Both units are about five years old, and our goal was simple: give them a thorough checkup, deep clean critical components, and make sure everything was ready for another long Florida cooling season.

By the time we wrapped up, both systems were fully cleaned, the drain lines were cleared, the UV lights were inspected, and the equipment was operating properly with normal refrigerant pressures and electrical consumption. In other words, everything was working the way it should—and set up for long-term reliability.

Case Recap

  • Location: Residential home in Tampa, FL 33629
  • Service: Premium Therapy Plan maintenance visit (Visit #3) for two central AC units
  • Equipment age: Both systems approximately five years old
  • Work performed: Full maintenance, including cleaning, drain line service, and UV light inspection
  • Results: Both units operating properly with refrigerant pressures and electrical draw within normal ranges
  • Homeowner benefit: Cleaner systems, reduced risk of breakdowns, and peace of mind heading into more hot, humid Tampa weather

Customer Problem: Staying Ahead of Breakdowns in Tampa’s Heat

For this homeowner in Tampa, the concern wasn’t a sudden breakdown. Instead, they wanted to stay ahead of problems by keeping up with their Premium Therapy Plan maintenance. With two AC units working almost year-round in Florida, it’s smart to make sure they’re clean, draining properly, and running efficiently.

By Visit #3 of the plan, these systems had already seen a few seasons of heavy use. Around the five-year mark, equipment can start showing wear if it hasn’t been maintained regularly. Common issues we see in Tampa, FL 33629 at this age include:

  • Dirty coils reducing cooling performance
  • Clogged or partially blocked drain lines causing water leaks
  • Higher energy bills due to inefficient operation
  • Indoor air quality issues if biological growth starts forming in the air handler

The homeowner enrolled in the Premium Therapy Plan to avoid these headaches. Our visit was about honoring that plan: completing the scheduled maintenance, documenting system health, and making sure both machines were in good shape.

Inspection and Diagnosis

Even on a maintenance visit where there’s no obvious failure, we treat each system like a full checkup. For this home in Tampa, FL 33629, we started with a careful visual and operational inspection of both AC units.

Here’s what we focused on and why:

  • Overall system operation — We ran both systems to listen for unusual noises, check airflow from the vents, and confirm that the thermostat was communicating properly with the equipment.
  • Refrigerant pressures — We verified that refrigerant pressures were within a normal operating range for both units. This helps us catch undercharging, overcharging, or hidden issues that can lead to compressor damage.
  • Electrical consumption (compressor and fan amperage) — We checked that the compressor and fan motors were drawing normal amperage. Abnormal readings can point to failing motors or electrical components.
  • Drain lines — In Tampa’s humidity, AC systems pull a lot of moisture from the air. That water has to go somewhere, so clear, properly flowing drain lines are essential to avoid water damage and leaks.
  • UV lights — The home had UV lights installed in the system. These help control biological growth on coils and in the air handler. We inspected them to ensure they were functioning correctly.

After completing our checks, we confirmed that both units were operating properly. Refrigerant pressures were within normal range, and the compressor and fan amperage readings were normal as well. That told us there were no immediate performance or safety issues, and we could move forward with the cleaning and maintenance portion of the visit.

Repair and Service Process

This visit was all about maintenance and prevention. Here’s how we handled the service step by step, and why it matters for homeowners in Tampa, FL 33629.

1. Thorough Cleaning of Both Systems

We completed a detailed cleaning on both AC units in line with the Premium Therapy Plan. Over time, dust, debris, and outdoor contaminants build up on critical components. Cleaning helps your system run more efficiently and reduces wear and tear.

On this visit, our focus included:

  • Cleaning accessible areas of the indoor and outdoor units
  • Wiping and clearing debris that can restrict airflow
  • Visually checking coil surfaces and other components for buildup

Keeping the equipment clean is one of the most effective ways to protect your investment, especially with the long cooling season we experience in Tampa.

2. Drain Line Cleaning

Next, we made sure the drain lines were thoroughly cleaned. AC units pull moisture out of the air and send it out through the condensate drain. When these lines clog with algae, dirt, or debris, water can back up, leading to:

  • Ceiling damage
  • Water around the air handler
  • System shutdowns if the float switch trips

As part of this Premium Therapy Plan visit, we cleaned the drain lines on both machines to keep water flowing properly and reduce the risk of leaks or nuisance shutdowns.

3. Verifying Refrigerant Pressures

Although we didn’t need to adjust refrigerant on this visit, we still verified that pressures were within a normal range. When refrigerant levels are off, your system works harder, cools less effectively, and is more likely to suffer a compressor failure over time.

By confirming that both units in this Tampa home were within normal operating ranges, we could be confident the systems were not under unnecessary stress from refrigerant issues.

4. Checking Compressor and Fan Amperage

We also checked compressor and fan amperage (electrical consumption) and found it to be normal. This is a key part of preventative care. Motors that are pulling too much current may be on their way to failure, even if they’re still running today.

In this case, the readings looked good, which supported what we were seeing and hearing from the systems: smooth, stable operation.

5. Inspecting the Installed UV Lights

The home already had UV lights installed as part of their air quality setup. We inspected these lights and confirmed they were functioning properly.

UV lights, when installed correctly, help keep coils and internal surfaces cleaner by limiting biological growth. For homes in humid areas like Tampa, FL 33629, this can make a noticeable difference in both system cleanliness and air quality over time.

6. Final System Check and Wrap-Up

After cleaning, drain line service, and all inspections, we performed another operational check on both units:

  • Confirmed smooth startup and shutdown
  • Verified steady airflow from the registers
  • Ensured thermostats were responding correctly

Once everything checked out, we documented the visit under the homeowner’s Premium Therapy Plan and marked both systems as operating properly at the time of service.

Why This Fix (and Maintenance) Works

Nothing was “broken” on this visit, and that’s exactly the point of a maintenance plan. In Tampa, your AC works almost every day during long stretches of heat and humidity. Small issues can build up quietly until they turn into a no-cool emergency at the worst possible time.

This kind of visit protects the system by focusing on three key principles:

1. Airflow

Clean components and clear filters help maintain proper airflow. When airflow is restricted, your system has to work harder to move the same amount of air, which increases wear and reduces comfort.

2. Refrigeration Cycle Health

Verifying that refrigerant pressures are within a normal range ensures the heart of your AC system — the refrigeration cycle — is operating correctly. This helps prevent major failures, especially on the compressor.

3. Drainage and Moisture Control

In Tampa, humidity is constant. Clear drain lines and properly operating equipment keep that moisture moving out of the home instead of causing leaks and potential water damage around your air handler.

By combining these checks with cleaning and UV light inspection, we help keep systems efficient, reliable, and cleaner on the inside — exactly what you want from a Premium Therapy Plan visit.

Pro Tips for Homeowners in Tampa

If you’re a homeowner in Tampa, FL 33629 or nearby areas, here are a few practical steps you can take to support what we do during professional maintenance visits:

  • Change or clean your air filter regularly. A clogged filter is one of the fastest ways to stress your system. Check it monthly during peak cooling season and replace as needed.
  • Keep the outdoor unit clear. Make sure there’s at least a couple of feet of clearance around your outdoor condenser. Keep leaves, mulch, and plants away from the coil area to maintain good airflow.
  • Watch for drain line warning signs. If you notice water near your air handler or see your system shutting off unexpectedly, it may be a drain issue. Calling for service early can prevent water damage.
  • Listen for changes. New noises, rattles, or longer run times can be early clues that something isn’t right. Catching problems early is usually less expensive than waiting for a full breakdown.
  • Stay consistent with maintenance. In Tampa’s climate, keeping up with routine AC maintenance is one of the best ways to extend system life and control energy costs.
  • Ask about indoor air quality options. If you already have or are considering UV lights or filtration upgrades, we can review your existing setup and make sure it’s still working effectively for your home.

If you’d like to see more about our AC maintenance offerings and specials in the Tampa Bay area, you can learn more on our AC maintenance and cleaning specials page or our general AC repair and maintenance services overview.

FAQ: Premium AC Maintenance Visits Like This One

What is a Premium Therapy Plan visit?

A Premium Therapy Plan visit is a scheduled maintenance appointment where we inspect, clean, and test your AC system according to your plan. For this Tampa, FL 33629 home, Visit #3 included servicing two five-year-old units, cleaning drain lines, checking refrigerant pressures, confirming normal electrical consumption, and inspecting UV lights.

Do you always check refrigerant pressures during maintenance?

Yes, part of a thorough maintenance visit is verifying that refrigerant pressures are within a normal operating range. We don’t guess; we confirm. This helps us catch potential issues before they cause damage or lead to poor cooling performance.

Why do you clean the drain lines if they aren’t clogged yet?

In Tampa’s humid climate, drain lines can clog quickly due to algae and debris. Cleaning them during routine maintenance is a preventative step to reduce the chance of leaks, ceiling damage, or system shutdowns caused by backed-up condensate.

What do you look for when inspecting UV lights?

We verify that the UV lights are on and functioning, check their placement, and look for any obvious issues with the fixtures. On this visit, the UV lights installed in the homeowner’s system were working properly at the time of inspection.

How do I know if I need a maintenance plan for my home in Tampa?

If your AC runs heavily for much of the year (which is typical in Tampa, FL 33629), a maintenance plan can help reduce unexpected breakdowns and keep your system clean and efficient. You can compare different service options by reviewing our AC repair, install, and maintenance options or contacting our team to talk through what fits your home best.

Why Choose Home Therapist for AC Maintenance in Tampa

When you invite someone into your home in Tampa, you want to know they’re qualified, respectful, and focused on doing the job the right way. That’s how we approach every visit, whether we’re responding to a breakdown or performing a scheduled Premium Therapy Plan maintenance like this one.

Here’s what you can expect from Home Therapist Cooling, Heating, and Plumbing:

  • Licensed, professional technicians — Our team is trained, experienced, and fully licensed to work on your HVAC systems. We take the time to inspect your equipment carefully and explain what we’re doing.
  • Transparent communication — We talk you through what we find, what we recommend, and what can wait. No scare tactics, no pressure — just clear, honest information.
  • Clean and respectful work — Your home is your space. We work neatly, protect the areas we access, and clean up before we leave.
  • Long-term reliability focus — Our goal isn’t just to get your system running today; it’s to help it run reliably for as long as possible. That’s why we put so much emphasis on proper maintenance and preventative care.
  • Committed to Tampa Bay homeowners — We live and work in the Tampa Bay area, and we take pride in helping our neighbors keep their homes comfortable and safe.

If you’d like to see what other homeowners are saying, you can visit us on Facebook, follow our updates on Instagram, or check out our videos on TikTok.

For independent verification and additional information, you can also find us on trusted platforms like the Better Business Bureau, the Tampa Bay Chamber of Commerce, and our Google business listing.

Ready to Schedule AC Maintenance in Tampa, FL 33629?

If you’re in Tampa, FL 33629 and want the same kind of careful, thorough AC maintenance this homeowner received, our team is here to help. Whether you’re interested in a full Premium Therapy Plan, a one-time tune-up, or reviewing your options for service, we can walk you through what makes the most sense for your home.

You can explore current maintenance offerings on our AC maintenance and cleaning specials page, learn more about next steps for AC repairs, installs, and maintenance, or reach out directly through our website to schedule a visit.

When you’re ready, Home Therapist Cooling, Heating, and Plumbing is here to keep your home comfortable, safe, and prepared for whatever the Tampa Bay weather brings.

Cooling and Heating Maintenance Tune-Up in Tampa, FL 33613

When your air conditioner and heater are working hard through our hot, humid summers and cooler winter nights in Tampa, FL 33613, a proper tune-up can make all the difference. As local Home Therapist technicians, we’re often called out for a simple question: “Is a maintenance visit really worth it?”

On this visit in Tampa, we performed a full cooling and heating maintenance tune-up. That included cleaning, flushing, checking refrigerant levels, inspecting electrical components, verifying the thermostat, and changing the air filter. By the time we wrapped up, the system was running smoother, more efficiently, and the homeowner had a clear picture of what to expect going forward.

Below, we’ll walk through what we did, why it matters for your home, and how a tune-up like this helps Tampa Bay homeowners save money and avoid uncomfortable breakdowns.

Case Recap: HVAC Tune-Up in Tampa, FL 33613

  • Performed a full cooling and heating tune-up on a residential HVAC system in Tampa, FL 33613.
  • Completed cleaning, system flushing, refrigerant check, thermostat adjustments, and electrical inspection.
  • Replaced the air filter (either homeowner-provided or supplied by us at an additional cost).
  • Verified safe, reliable operation in both cooling and heating modes after service.
  • Provided honest recommendations for any additional maintenance or future repairs.
  • Helped the homeowner improve efficiency, comfort, and reduce the risk of surprise breakdowns.

Customer Problem: A Well-Kept System That Needed Professional Attention

In this Tampa home, the HVAC system wasn’t in crisis mode. It was cooling and heating, but the homeowner had started to notice a few things:

  • The electric bill seemed a bit higher than usual.
  • Certain rooms weren’t as comfortable as they used to be.
  • They couldn’t remember the last time a professional had gone through the entire system.

This is very common for homeowners in Tampa, FL 33613. Our climate puts a lot of hours on your equipment. Even a “well-kept” system slowly builds up dirt, minor wear, and small issues that don’t cause an immediate breakdown but quietly chip away at performance.

The homeowner reached out to take advantage of our special tune-up pricing. Our maintenance visit is designed exactly for this situation: units that are generally in good shape and running, but need a proper cleaning and professional evaluation to stay that way.

Inspection and Diagnosis: What We Looked At and Why

Any good HVAC tune-up in Tampa should start with a thorough inspection. Before we touch a wrench or adjust a thermostat, we like to understand how the whole system is behaving.

On this maintenance visit, we focused on these key areas:

  • Overall system operation: We ran the unit in cooling and heating modes to listen for unusual sounds, check for short cycling, and verify basic operation.
  • Airflow and filter condition: A restricted filter or dirty blower can cause hot and cold spots, higher bills, and strain on the system.
  • Refrigerant-related performance: While we don’t guess at exact levels without proper testing, we do check that the cooling performance is in a normal range and look for signs of refrigerant-related issues.
  • Electrical components and wiring: Loose connections or worn parts can lead to intermittent failures or, in severe cases, unsafe conditions.
  • Thermostat operation: We confirm that the thermostat is sensing correctly, cycling the system properly, and set up in a way that matches how the homeowner lives.
  • Drainage and cleanliness: In humid Tampa weather, clear and clean condensate drainage is critical to avoid leaks and water damage.

Because this special tune-up offer is meant for well-kept units, we also paid attention to whether the system just needed a standard cleaning or if it showed signs of needing deeper work. If we ever find that a system needs more intensive cleaning than what the special includes, we step back and discuss options with the homeowner before moving forward.

Repair and Service Process: Step-by-Step HVAC Tune-Up

Once we completed the initial inspection and confirmed the system was a good fit for a standard tune-up, we moved into the actual maintenance steps. Here’s what that looks like for homeowners in Tampa, FL 33613.

1. Cleaning Key Components

Dust, dirt, and debris build up on indoor and outdoor components over time. That buildup acts like a blanket, forcing your equipment to work harder to move the same amount of air or transfer the same amount of heat.

As part of this tune-up, we cleaned accessible components that commonly impact efficiency and comfort. Keeping these surfaces cleaner helps the system run more smoothly, which can translate to lower electric bills and less strain on the equipment.

2. System Flushing

We also performed system flushing where appropriate. In our climate, that can include clearing debris from drainage routes and making sure water can leave the system the way it was designed to. If condensate can’t drain properly, you can end up with water backing up into the unit or into your home.

By flushing and verifying proper drainage, we help protect Tampa homeowners from unwanted leaks and moisture problems around their air handlers or indoor units.

3. Refrigerant Check

Refrigerant is at the heart of your cooling system. While we never guess at refrigerant levels or invent measurements, we do verify that the system’s cooling performance is in a normal range and look for signs of refrigerant-related issues.

On a system that qualifies for this special tune-up, we’re typically confirming that the equipment is operating as expected rather than performing major repairs. If we discover signs of a leak or serious refrigerant problem, we stop, explain what we’re seeing, and discuss next steps before recommending any additional work.

4. Thermostat Adjustment and Verification

The thermostat is the control center for your comfort. During this visit in Tampa, FL 33613, we verified that the thermostat was communicating correctly with the system and cycling on and off properly.

We also fine-tuned thermostat settings based on the homeowner’s preferences. Small adjustments can improve comfort and help reduce needless runtime, which often supports lower utility costs.

5. Wiring and Component Inspection

Next, we carefully inspected the system’s wiring and key electrical components. Over time, vibration, heat, and normal operation can loosen connections or wear certain parts.

Our inspection focused on spotting any obvious wear, discoloration, or looseness. If we find anything that could compromise safety or reliability, we bring it to the homeowner’s attention and explain options in plain language—including what’s urgent and what can be monitored over time.

6. Filter Replacement

Finally, we replaced the air filter. The homeowner can provide their own filter or request that we supply one at an additional cost. In many Tampa homes, a clogged or low-quality filter is the main reason for poor airflow and uneven temperatures.

Putting in a fresh, properly sized filter helps the system breathe easier. That means more consistent comfort, less strain on the blower motor, and better indoor air quality.

7. Final System Check and Recommendations

Once all maintenance steps were complete, we ran the system again in both cooling and heating modes. We listened, measured performance trends, and verified that everything responded the way it should.

We then reviewed our findings with the homeowner, including:

  • Current system condition.
  • Any minor concerns to watch over time.
  • Recommended maintenance habits moving forward.

Our goal at Home Therapist is to keep you informed, not pressured. If additional work is ever needed beyond a basic tune-up, we discuss it clearly before proceeding.

Why This HVAC Tune-Up Works for Tampa Homes

A proper cooling and heating maintenance visit helps your system in a few key ways:

  • Airflow: Clean filters and components reduce restrictions, allowing your system to move air more freely through your home.
  • Heat transfer: Dirt on coils and other surfaces works like insulation. Cleaning those surfaces helps your system absorb and release heat more efficiently.
  • Electrical reliability: Tight, clean connections and healthy components reduce the chances of intermittent failures or nuisance breakdowns.
  • Drainage: In Tampa’s humidity, clear drain lines help prevent water backups, leaks, and moisture problems around your equipment.
  • Controls and settings: A correctly set thermostat, matched to your home and lifestyle, helps your system run only as much as needed.

When we combine all of these in one visit, you typically see benefits like lower electric bills, more even temperatures, fewer surprise breakdowns, and extended equipment life. It’s a straightforward, preventative approach that works especially well for well-kept systems like this one in Tampa, FL 33613.

Pro Tips for Homeowners in Tampa, FL 33613

Here are some practical, no-pressure tips to help keep your HVAC system happy in our Tampa climate:

  • Change your filter regularly: In Tampa’s heat and humidity, most homes should check their filters monthly and replace them as needed. A clean filter is one of the easiest ways to protect your system.
  • Keep outdoor units clear: Trim plants and remove leaves or debris around your outdoor unit. Good airflow outdoors is just as important as indoors.
  • Use reasonable thermostat settings: Avoid constantly pushing the thermostat way down in summer or way up in winter. Steady, moderate settings usually cost less and reduce wear and tear.
  • Watch for subtle changes: Rising electric bills, new noises, or rooms that suddenly feel warmer or colder can be early signs your system needs attention.
  • Schedule routine maintenance: An annual or semi-annual tune-up, like the service we performed here in Tampa, FL 33613, helps catch small issues before they become big repairs.
  • Ask about your options: If you’re curious about upgrades such as smart thermostats, improved filtration, or other comfort solutions, we’re happy to explain what makes sense for your specific home without any pressure.

Related HVAC Resources for Tampa Bay Homeowners

If you’d like to learn more about AC maintenance and service options in the Tampa Bay area, these resources from our team may help:

FAQ: Cooling and Heating Tune-Ups in Tampa, FL 33613

What does your HVAC tune-up include?

Our tune-up includes cleaning key components, system flushing where needed, a refrigerant performance check, thermostat adjustment, wiring and component inspection, and a filter replacement (using either your filter or one we provide at an additional cost). Afterward, we review the system’s condition and offer recommendations for any further maintenance or repairs.

Is this special tune-up offer right for my system?

This particular special is designed for well-kept units that are generally running but need a professional cleaning and inspection. If, during our visit, we find that your system needs more intensive cleaning or repair than what the special includes, we pause and discuss options with you before moving forward.

How often should I schedule HVAC maintenance in Tampa?

For our climate in Tampa, FL 33613, many homeowners benefit from at least one professional tune-up per year. Systems that run heavily or serve larger homes may benefit from more frequent checks. During your visit, we can suggest a schedule that fits your home and usage.

Will a tune-up lower my electric bill?

While we never promise exact savings, a proper tune-up can help your system run more efficiently by improving airflow, heat transfer, and overall operation. Many homeowners do notice more stable comfort and more reasonable electric bills after their system is cleaned and checked.

What happens if you find something wrong during the tune-up?

If we discover any issues during your maintenance visit in Tampa, FL 33613, we explain what we found in clear, simple terms. We’ll outline your options, including what’s urgent and what can wait, and provide pricing before any additional repair work is started.

Do I need to be home during the appointment?

We generally recommend that someone be home at least for the start and end of the appointment so we can review access, thermostat preferences, and any concerns you have. That also gives us a chance to walk you through what we found and answer questions after the tune-up.

Why Tampa Bay Homeowners Choose Home Therapist

When you invite us into your home in Tampa, FL 33613, you’re trusting us with your comfort and safety. We don’t take that lightly.

  • Licensed, professional technicians: Our team is trained, licensed, and experienced with HVAC systems in the Tampa Bay area. We handle cooling, heating, and plumbing with the same level of care.
  • Transparent communication: We explain what we’re doing, why we’re doing it, and what your options are—before any additional work is done.
  • Clean and respectful work: We protect your home, clean up after ourselves, and treat your space as if it were our own.
  • Long-term reliability focus: We aren’t just trying to get you through today. Our tune-ups and recommendations are aimed at keeping your system dependable for the long run.
  • Committed to Tampa Bay homeowners: As local technicians, we understand the unique demands our heat, humidity, and seasonal swings put on your equipment.

If you’d like to see more about how we work and what other homeowners say, you can connect with us and review our reputation on these platforms:

Schedule Your Cooling and Heating Tune-Up in Tampa, FL 33613

If your system is running but you’re noticing higher bills, uneven temperatures, or it’s simply been a while since your last professional visit, a maintenance tune-up is a smart step.

Our team at Home Therapist Cooling, Heating, and Plumbing is ready to help you keep your home comfortable and your equipment in good shape in Tampa, FL 33613 and the surrounding Tampa Bay communities. We’ll arrive on time, walk you through what we’re doing, and leave you with a clear understanding of your system’s condition—without pressure or surprises.

Reach out today to schedule your cooling and heating maintenance visit and give your HVAC system the careful, professional attention it deserves.

Cooling and Heating Maintenance in Tampa, FL 33613

When your air conditioner and heater are working hard through Tampa’s heat and humidity, the last thing you want is a surprise breakdown. For a homeowner in Tampa, FL 33613, we performed a professional cooling and heating maintenance tune-up designed to keep their system clean, efficient, and reliable. During this visit, we went through a full checklist: cleaning key components, flushing the system, checking refrigerant levels, inspecting wiring and controls, adjusting the thermostat, and addressing the air filter so the system could breathe properly again. By the end of the appointment, the system was running smoothly and the homeowner could feel confident going into the next stretch of Florida weather.

Case Recap

  • Service: Professional cooling and heating maintenance tune-up
  • Location: Residential home in Tampa, FL 33613
  • Concerns: Keeping the system efficient, reducing energy bills, and avoiding breakdowns
  • Work performed: Cleaning, system flushing, refrigerant check, thermostat adjustment, wiring and component inspection, and filter service
  • Outcome: System tuned for better comfort, efficiency, and reliability

Customer Problem

Like many homeowners in Tampa, this customer wanted peace of mind. Their system was running, but they understood that Florida’s climate puts a lot of stress on cooling and heating equipment. Between long cooling seasons, heavy humidity, and occasional chilly nights in winter, an HVAC system in Tampa, FL 33613 doesn’t get much of a break.

The homeowner’s main goals were simple:

  • Keep the system running efficiently to help control electric bills.
  • Reduce the chances of an unexpected breakdown during a hot spell.
  • Extend the life of their existing equipment rather than rushing into a replacement.
  • Make sure both cooling and heating were ready for the changing seasons.

They scheduled a maintenance visit so a licensed technician could go through the system top to bottom and catch any issues early. This tune-up service is ideal for systems that have been reasonably well maintained and are not in need of heavy restoration cleaning or major repairs.

Inspection and Diagnosis

On arrival, we started with a conversation at the door. We always like to ask a few questions before touching the equipment:

  • Have you noticed any unusual noises or smells?
  • Is the system keeping up on the hottest afternoons?
  • Any recent spikes in your utility bills?
  • Any hot or cold spots in the home?

From there, we moved into a visual and operational inspection of the cooling and heating system. For a maintenance tune-up in Tampa, FL 33613, our inspection typically includes:

  • Outdoor unit inspection: Checking the condenser area for debris, vegetation, or obstructions that could restrict airflow.
  • Indoor unit check: Inspecting the air handler or furnace area, drain pan, and surrounding space for signs of leaks or blockages.
  • Thermostat operation: Confirming that the thermostat cycles the system on and off correctly and reflects real room conditions.
  • Electrical and control components: Looking over wiring connections and visible components for wear, damage, or overheating.
  • Refrigerant-related checks: Verifying that the system appears to be operating properly from a refrigerant standpoint, without guessing at specific readings or types.

Because this visit was a preventative maintenance appointment, not an emergency repair, our goal was to confirm that all major components were operating as expected and to restore the system’s performance through cleaning, adjustment, and filter service.

Repair or Service Process

Once we confirmed there were no immediate red-flag issues, we moved through our full tune-up process. For homeowners in Tampa and across Hillsborough County, this type of maintenance is one of the best ways to protect their investment in their HVAC system.

1. Cleaning Key Components

Dust, dirt, and Florida’s outdoor debris can collect on both indoor and outdoor parts of your system. During this visit, we cleaned the accessible components included in our maintenance service. Keeping these surfaces clean helps the system transfer heat more efficiently, which makes it easier to cool your home and can reduce strain on the equipment.

For more intensive cleaning beyond a standard tune-up, we also have dedicated services such as air duct cleaning in Tampa, which can be scheduled separately when needed.

2. System Flushing

We performed a system flush as part of the tune-up. In practice, this means clearing out built-up debris and ensuring that the system’s pathways are open and flowing as intended. This is especially important in our humid Tampa climate, where condensate and dirt can combine to form stubborn blockages over time.

Keeping the system flushed and draining properly helps prevent water backing up into the air handler area and reduces the risk of leaks or water damage around the unit.

3. Refrigerant Check

Next, we checked that the air conditioning side of the system was operating properly with respect to refrigerant. We do not guess at specific pressures, temperatures, or types when they’re not provided, but we always confirm that the system is behaving as it should for normal operation.

If we ever find signs of an issue—such as poor cooling performance or evidence of icing—we have clear conversations with the homeowner about next steps before proceeding with any additional work.

4. Thermostat Adjustment

The thermostat is the control center of your comfort. During this maintenance visit in Tampa, FL 33613, we:

  • Verified that the thermostat was reading room temperature appropriately.
  • Confirmed that it was calling for cooling and heating correctly.
  • Fine-tuned settings where appropriate to help the system run efficiently.

Small thermostat issues can cause big comfort problems, so we always include this as part of a thorough tune-up.

5. Wiring and Component Inspection

Electrical connections and control components play a huge role in the safety and reliability of your HVAC system. We carefully inspected accessible wiring and components for signs of wear, looseness, or damage. Loose connections, for example, can lead to intermittent operation or premature failure of critical parts.

While this was a routine maintenance visit, we still take the time to look for anything that could become a problem down the road. If we see an area of concern, we document it and review options with the homeowner before performing any additional work.

6. Filter Replacement and Airflow

A clean filter is one of the simplest and most effective ways to keep your system healthy. For this tune-up, we either used a homeowner-provided filter or could supply one at an additional cost if needed. After replacing or verifying the filter, we confirmed the system had normal airflow.

Restricted airflow can cause higher energy bills, reduced comfort, and added stress on the blower and other components. For homeowners in Tampa, where systems run many hours per day in cooling season, consistent filter maintenance is especially important. If you ever need more help with this, we also offer dedicated air filter installation and repair services throughout the Tampa Bay area.

7. Final System Check and Recommendations

Once the cleaning, adjustments, and inspections were complete, we ran the system through a full cycle to confirm proper operation. We checked that:

  • The system started, ran, and shut down as expected.
  • Airflow felt consistent at the registers.
  • There were no unusual noises or odors.

At the end of the visit, we provided the homeowner with clear, honest recommendations. If we see opportunities for additional maintenance or improvements, we explain them in plain language so you can decide what makes sense for your home and budget. Our focus is always on long-term comfort and reliability, not quick upsells.

Why This Fix Works

A tune-up doesn’t just make your system “look” better—it helps it work better. Here’s why the steps we took matter for homeowners in Tampa, FL 33613:

  • Clean components transfer heat more efficiently. Dirt and debris act like a blanket on your coils and other surfaces, making it harder for your system to move heat in or out of your home. Cleaning helps your equipment do its job with less effort.
  • Good airflow supports both comfort and equipment life. A clean filter and clear pathways mean your blower doesn’t have to strain to push air through the system. This supports even temperatures and can reduce wear on parts.
  • Proper drainage protects your home. In our humid climate, condensate drains are busy almost year-round. Keeping them flushed and clear reduces the risk of water backing up and causing damage around your air handler.
  • Healthy electrical connections support reliability. Tight, clean electrical connections help ensure your system starts smoothly and runs consistently.
  • Regular checks catch small issues early. Finding minor concerns during maintenance gives you a chance to address them before they turn into inconvenient or costly breakdowns.

All of this adds up to a system that’s better prepared to handle Tampa’s demanding weather while helping to control energy use and extend equipment life.

Pro Tips for Homeowners in Tampa

If you live in Tampa or anywhere in Hillsborough County, a little attention between professional tune-ups can go a long way. Here are some practical tips you can put to work right away:

  • Change or check your filter regularly. In our climate, many homes benefit from checking filters monthly during peak cooling season. If it looks dirty, replace it. This is one of the easiest ways to protect your system.
  • Keep the outdoor unit clear. Trim back plants and remove leaves or debris within a couple of feet of your outdoor unit so it can “breathe”. Good airflow around the unit supports efficiency and reliability.
  • Use your thermostat wisely. Avoid frequent large swings in temperature settings. Steady, reasonable settings tend to be easier on the system and can help manage your utility costs.
  • Watch for early warning signs. If you notice hot spots, unusual noises, or the system running longer than usual to keep up, it’s a good time to schedule a check before it becomes a bigger issue.
  • Consider your whole home. Duct cleanliness, dryer vent performance, and overall airflow all impact comfort. Services like dryer vent cleaning in Tampa and comprehensive HVAC services in Hillsborough County can help support a healthier, more efficient home.

FAQ: Cooling and Heating Maintenance in Tampa, FL 33613

How often should I schedule a cooling and heating maintenance tune-up?

For most homes in Tampa, it’s a good idea to schedule professional maintenance at least once a year. Because our cooling season is long, many homeowners prefer a yearly visit to keep everything clean, checked, and ready for the high-demand months.

Will a tune-up fix every problem with my system?

A tune-up is designed to clean, adjust, and inspect your system, and to catch early signs of trouble. If we discover that your system needs more extensive cleaning or repairs, we’ll explain what we found and discuss options with you before moving forward with any additional work.

Can maintenance really help lower my electric bills?

Regular maintenance can help your system run more efficiently by improving airflow, heat transfer, and overall operation. While we never guarantee specific bill reductions, many homeowners in Tampa, FL 33613 find that a well-maintained system is more consistent and can be less costly to operate than a neglected one.

What happens if my system needs more than a standard tune-up?

If your equipment requires more intensive cleaning or repair than what’s included in our special tune-up offer, we’ll review our findings with you in plain language. You’ll get clear options and pricing before we proceed, so you can make an informed decision that fits your home and budget.

Do you service both cooling and heating during the same visit?

Yes. Our cooling and heating maintenance tune-ups are designed to address both sides of your system, so you’re comfortable during Tampa’s hottest days and the occasional cool nights. We check the overall operation and make sure your equipment is ready for the seasons ahead.

Why Choose Home Therapist

When you invite us into your home, you’re trusting us with your comfort and your safety. We take that seriously. Here’s what you can expect when you choose Home Therapist for HVAC maintenance in Tampa and the surrounding Tampa Bay communities:

  • Licensed, professional technicians: Your tune-up is performed by trained technicians who understand how systems behave in real Florida homes, not just in a textbook.
  • Transparent communication: We explain what we’re doing, what we found, and what we recommend in clear, straightforward terms. No surprises and no pressure tactics.
  • Clean and respectful work: We treat your home like it’s our own—taking care around your belongings, keeping our work area tidy, and cleaning up when the job is done.
  • Long-term reliability focus: Our goal isn’t just getting you through today; it’s helping your system last longer and perform better season after season.
  • Committed to Tampa Bay homeowners: We’re proud to serve Tampa and the broader Tampa Bay area with honest, dependable cooling, heating, and plumbing services.

If you’d like to see what other homeowners are saying about us, visit us on Facebook or follow our updates and job highlights on Instagram. You can also find our location and reviews on Google Maps.

We’re also proud to be recognized by respected local and national organizations. You can view our profiles with the Better Business Bureau and the Tampa Bay Chamber of Commerce to learn more about our commitment to quality service.

Schedule Your Cooling and Heating Maintenance in Tampa, FL 33613

If you’re ready to give your system the same level of care as this homeowner in Tampa, FL 33613, we’re here to help. A professional tune-up is one of the simplest, most cost-effective ways to improve comfort, support efficiency, and reduce the risk of inconvenient breakdowns.

Whether you need routine maintenance, help with airflow and filtration, or more complete HVAC and plumbing service in Hillsborough County, you can count on our team. Start by exploring our HVAC and plumbing services in Hillsborough County or learn more about our company at our main website.

When you’re ready, schedule your cooling and heating maintenance visit and let our local Tampa Bay technicians keep your home comfortable and your system running as it should.

Whole-Home Water Supply Repipe and New Water Line Installation in Sun City Center, FL 33573

When a homeowner in Sun City Center, FL 33573 reached out to us, they were ready to invest in a more reliable water supply system for their home. Their existing water lines had reached the point where ongoing repairs weren’t a great long-term solution, and they wanted a fresh start with new piping, valves, and connections throughout the house.

As licensed plumbing professionals serving Sun City Center and the greater Tampa Bay area, our goal on this project was to design and install a new water supply system that would stay dependable for years to come. That meant trenching for new underground lines, installing a complete set of new water supply pipes inside the home, updating valves and angle stops, and tying everything together cleanly and safely.

Below, we’ll walk through what the homeowner was dealing with, how we approached the inspection and design, the installation process step by step, and what other homeowners in Sun City Center, FL can learn from this kind of whole-home water supply project.

Case Recap

  • Location: Single-family home in Sun City Center, FL 33573
  • Service: New underground water line trench and full interior water supply installation
  • Scope: New PEX-A water piping, valves, angle stops, faucet connectors, hose bibbs, and water heater/washer connections
  • Extras: Water system design, removal of old piping, and clear homeowner prep guidelines
  • Result: A cleaner, more reliable, and better-organized water supply system designed for long-term performance

Customer Problem

For this Sun City Center homeowner, the existing water piping had become a concern. Aging water lines and older connections can lead to leaks, pressure variations, and ongoing maintenance headaches. Rather than continue patching problem areas, the homeowner decided it was time to invest in a full upgrade.

The project included two main components:

  • Underground water supply trench: Running a new water line through a dirt trench on the property.
  • Complete new interior water supply installation: Re-piping and reconnecting the fixtures and appliances throughout the home.

Inside the home, the homeowner wanted all-new connections to key fixtures, including:

  • 2 toilet connections
  • 2 shower connections
  • 4 sink connections (including double bathroom sinks counted individually)
  • 1 water heater connection
  • 1 washer connection
  • 3 exterior hose bibbs
  • 3 faucet connections (fixtures supplied by the homeowner)
  • 2 shower valves and trim kits (also supplied by the homeowner)

The homeowner also asked about handling the job as simply and efficiently as possible, including questions about permitting. We discussed the process and clarified that our work follows applicable local requirements and best practices, so the installation would be done correctly and safely.

Inspection and Diagnosis

Any full water supply installation in Sun City Center, FL starts with careful planning. Even if we’re replacing everything, we still need to understand how the existing system is laid out and what the home’s specific needs are.

On this project, we focused our initial inspection on:

  • Existing water line route: Reviewing how the current line entered the property, where the main shutoff was located, and the best path for the new underground trench.
  • Fixture locations: Confirming the exact locations of toilets, showers, sinks, washer, water heater, and hose bibbs so the new design would match the homeowner’s everyday use.
  • Material and condition of old piping: Checking for corrosion, prior repairs, and any unusual connections that could affect tie-ins or removal.
  • Access points: Identifying where we’d need to open walls or ceilings, and how to keep dust and insulation disruption as controlled as possible.

Because the design included a dirt trench for the new underground run, we also took time to walk the yard with the homeowner. We explained that we do our best to protect the grass and landscaping but, as with any digging project in Florida soil, some disturbance to the turf is possible. The goal is always to minimize impact while still installing the line at the correct depth and alignment.

Inside, we reviewed ceiling heights and access areas, especially if parts of the system were routed through an attic or tight spaces. For any low-clearance areas, we explain that installation can be more challenging and may affect pricing, because it requires more time and careful maneuvering for our team to work safely.

Repair and Service Process

Once the design and plan were set, we moved into the actual installation work. For a full water supply repipe and trench project in Sun City Center, FL 33573, we break the work into clear stages so the homeowner knows what to expect.

1. Site Preparation and Protection

Before we start digging or opening walls, we ask the homeowner to prepare the space as much as possible:

  • Move or cover furniture that sits below air vents or near work areas.
  • Cover electronics, baby items, clothing, and food in rooms where we’ll be working.
  • Keep pathways and work areas clear so technicians can focus fully on the job.

On our side, we cover critical areas to help shield them from dust and any insulation that may fall during the process. We also plan out where we may need to cut small access holes in walls or ceilings so we can keep those openings as limited as possible. Part of our transparency is letting the homeowner know that while we aim for small, clean access points, we do not perform drywall or concrete finishing afterward, and they’ll need a finisher for final patching.

2. Trenching and New Underground Water Line

With the home prepped, we started work on the dirt trench for the new underground water supply line. This step typically involves:

  • Marking the route of the new line to avoid existing utilities.
  • Digging the trench to an appropriate depth and alignment.
  • Laying new water piping (often PVC or similar, depending on design) from the entry point toward the home’s main shutoff and distribution area.

We remind homeowners in Sun City Center that while we make every effort to protect their lawn, any excavation can temporarily disturb grass and landscaping. Once the piping is in place and tested, we backfill the trench, compact the soil, and leave the area as neat as reasonably possible for the homeowner to restore the grass over time.

3. Installing New Interior Piping with PEX-A

Inside the home, we installed a new water distribution system using PEX-A piping for the main supply runs and branches to each fixture. PEX-A is a flexible and durable material that’s very well-suited to Florida homes because it can handle changes in temperature and is efficient to route through attics, walls, and tight spaces.

The interior scope included:

  • New hot and cold supply lines routed to bathrooms, kitchen, laundry, and outdoor hose bibbs.
  • New angle stops at sinks, toilets, and other fixtures so each location can be isolated for maintenance.
  • New faucet connectors and valves, including updated ball valves where appropriate for reliable shutoff.
  • New hose bibbs for outdoor use, tied into the new system.
  • Connection of the new system to the water heater and washer.

We also included a complete water system design as part of the project, so the layout wasn’t just a copy of what was there before. Instead, we take into account fixture locations, pipe routing, and best practices to support consistent water flow and reduced future stress on the system.

4. Connecting Fixtures and Customer-Supplied Components

Some fixtures and components—such as certain faucets, shower valves, and trim kits—were provided by the homeowner. Our role was to connect these to the new piping wherever they were compatible and in good condition.

If at any point we find that an existing shower valve, faucet, or other component is too corroded, incompatible, or otherwise not suitable for a proper connection, we explain this on the spot and recommend replacement options. That way, the homeowner isn’t left with a weak link in an otherwise brand-new system.

We also note that if concrete needs to be cut for any connection, there is an additional charge per connection because of the extra tools, time, and cleanup involved. This is always discussed clearly before we proceed.

5. Cleanup, Haul-Away, and Final Checks

Once the new piping and connections were in place, we removed the old pipes from the property as part of the service. Hauling away the old materials helps keep the site clean and makes it easier for the homeowner to move forward with any drywall, paint, or landscaping repairs.

Finally, we pressurized and tested the new water supply system to confirm that:

  • All fixtures were receiving water as expected.
  • There were no visible leaks at new joints or valves.
  • Shutoff valves and angle stops operated smoothly.

We verified proper operation before wrapping up, and we reviewed the system with the homeowner so they understood where the new lines run, where important shutoffs are located, and what to expect going forward.

Why This Fix Works

For a home in Sun City Center, FL 33573, upgrading to a new water supply system provides several long-term benefits tied directly to how water pressure, flow, and material durability work together.

Here’s why this approach is effective:

  • Clean, consistent pathway for water: New PEX-A and properly sized lines help maintain more stable water flow to multiple fixtures, which can improve everyday comfort in showers, sinks, and appliances.
  • Reduced leak risk from aging materials: Older pipes and fittings are more prone to corrosion, pinhole leaks, and weak joints. Replacing them with modern materials reduces the number of potential failure points.
  • Better shutoff control: Updated ball valves and angle stops make it easier to isolate individual fixtures, so small issues can often be addressed without shutting down the entire home.
  • Thoughtful layout and design: A planned water system design can minimize unnecessary bends and long, inefficient runs, which helps support even pressure and reduces strain.

By combining a new underground supply line with a full interior repipe, the homeowner now has a continuous, modern system from the property entry all the way to each individual fixture. That’s a big difference compared to patching sections of an older system over time.

Pro Tips for Homeowners in Sun City Center

If you own a home in Sun City Center, FL or anywhere in Tampa Bay, here are some practical tips to keep your water supply system in good shape—especially in our warm, humid Florida climate:

  • Know where your main shutoff is: Take a moment to locate your main water shutoff valve and any key fixture shutoffs. In an emergency, knowing this saves time and can reduce water damage.
  • Watch for subtle changes in water pressure: If you notice drops in pressure at a single fixture or throughout the house, don’t ignore it. Early checks can catch small issues before they turn into leaks.
  • Pay attention to exterior hose bibbs: Hose bibbs are exposed to the elements and often used heavily in Florida yards. If they drip, feel loose, or are hard to shut off, it’s worth having them inspected.
  • Plan ahead for repiping: If your home still has older piping and you’re already seeing repeated repairs, it may be more cost-effective to plan a full or partial repipe instead of chasing leaks one by one.
  • Protect belongings before major work: For any large plumbing project, cover furniture, electronics, and personal items in work areas. Even when we protect and clean, some dust and debris are inevitable.
  • Schedule regular plumbing checkups: Periodic whole-home plumbing inspections—like those discussed in our full house plumbing inspection services—can help spot issues early and extend the life of your system.

FAQ: Whole-Home Water Supply Projects in Sun City Center, FL 33573

Do you always have to dig up the yard for a new water supply line?

For many homes, an underground trench is the most straightforward and reliable way to run a new main water line from the street or well to the house. We walk the route with you first and explain what to expect. We do our best to protect the grass, but any trench work will disturb the soil temporarily.

What if my existing faucets or shower valves are too old to connect?

During installation, if we find that a valve, faucet, or other fixture is too corroded, incompatible, or unsafe to reconnect, we explain the situation and recommend replacement options. We will not force a bad connection just to reuse an old part—our priority is a safe, reliable system.

Will you patch drywall or concrete after the plumbing work?

We carefully plan our access points and try to keep wall and ceiling openings as small as possible. However, we do not perform drywall, texture, paint, or concrete finishing. After we complete the plumbing work and confirm everything is working correctly, you can bring in a finisher to restore surfaces to your preferred look.

How long does a full water supply installation usually take?

The timeline depends on the size of the home, number of fixtures, access conditions (like attic height), and whether concrete cutting is needed. During the estimate, we discuss a realistic schedule so you know how long we expect to be on site and how the work will be phased.

What if I have questions about permits or local requirements?

Homeowners often have questions about whether permits are needed and how that process works. We’re happy to explain what typically applies in the Tampa Bay area and make sure the work we perform follows the proper standards. Our goal is to keep everything transparent so you feel comfortable with the process.

Do you offer options for full repipe projects beyond just this kind of job?

Yes. We handle a wide range of plumbing and repipe projects, from targeted sections to complete repipes, and we also provide guidance around planning and budgeting. You can learn more about our approach in our article on plumbing services for a complete repipe in Tampa Bay and our overview of payment options for full repiping services.

Why Choose Home Therapist for Water Supply Projects

When you’re trusting someone to open your walls, dig in your yard, and rebuild the water supply system that your family uses every day, you need a team that takes that responsibility seriously. That’s how we approach every plumbing project in Sun City Center, FL 33573 and across Tampa Bay.

Licensed, professional technicians: Our plumbers are trained, licensed, and experienced with whole-home water supply installations, repiping, and complex plumbing layouts specific to Florida homes.

Transparent communication: From the first walkthrough through the final test, we explain what we’re doing, why we’re doing it, and what it means for your home. That includes clear expectations around access holes, yard impact, fixture compatibility, and any additional work like concrete cutting.

Clean, respectful work: We understand we’re working in your living space. We cover critical areas to reduce dust and debris, clean up at the end of each workday, and haul away the old piping so you aren’t left with piles of material to deal with.

Long-term reliability focus: Instead of just swapping parts, we design and install systems that are meant to last—using quality materials, thoughtful layouts, and proper shutoff and valve placement. That mindset is the backbone of our plumbing services and our broader maintenance approach, as we also outline in resources like our plumbing services and promotions page.

Committed to Tampa Bay homeowners: We live and work in the same region you do. That means we’re familiar with the local water conditions, building styles, and common plumbing challenges throughout Sun City Center and the surrounding communities.

Need Water Line or Repipe Help in Sun City Center, FL 33573?

If you’re noticing recurring leaks, aging pipes, or you’re simply ready for a more reliable water supply system, we’re here to help. Whether you need a new underground water line, a full interior repipe, or a thorough plumbing inspection, our team can walk you through your options and design a solution that fits your home.

Homeowners in Sun City Center, FL 33573 and across Tampa Bay can count on us for clear communication, careful workmanship, and plumbing solutions focused on comfort and long-term reliability. When you’re ready to talk about your water supply or repipe project, reach out and we’ll be glad to schedule a visit and help you plan the next steps.

HVAC Service Visit in Sun City Center, FL 33573

When your air conditioning or heating system starts acting up in Sun City Center, FL 33573, it can make your home feel uncomfortable fast. In a Florida community where we rely on cooling almost year-round, even small issues can be frustrating. On this visit to a homeowner in Sun City Center, our Home Therapist technician walked through the system step by step, identified what was going on, and made sure everything was operating the way it should by the time we left.

In this article, we’ll walk you through how we typically approach an HVAC service visit in Sun City Center and other Tampa Bay neighborhoods—what we look for, how we diagnose issues, and how we restore reliable comfort without surprises.

Case Recap

Here’s a quick summary of a typical service call like this one for homeowners in Sun City Center:

  • Homeowner in Sun City Center, FL 33573 reported comfort or performance concerns with their HVAC system.
  • Technician arrived, listened to the homeowner’s concerns, and performed a full system evaluation.
  • We inspected critical components, checked airflow and drainage, and verified safe system operation.
  • Any issues found were corrected on the spot where possible, with clear communication before work proceeded.
  • System was run through a full operating cycle to confirm it was running as expected before we left.

Customer Problem

Most calls we receive from homeowners in Sun City Center, FL start with a simple concern:

  • “The system isn’t cooling like it used to.”
  • “Some rooms are warmer than others.”
  • “The AC runs a lot but doesn’t feel like it’s doing much.”
  • “I’m hearing a noise I haven’t heard before.”

Even when the description is brief, we know there’s always a comfort problem behind it—sleeping in a warm bedroom, a living room that never seems to cool down, or a system that just doesn’t feel trustworthy anymore. For homeowners in Sun City Center, FL 33573, the combination of high heat and humidity makes these issues even more noticeable.

When we arrive, our first step is always to listen. We ask questions like:

  • When did you first notice the problem?
  • Does it happen all the time, or only during the hottest part of the day?
  • Are certain rooms worse than others?
  • Have you noticed any water around the air handler or unusual smells or sounds?

Those answers help us focus our inspection on the parts of the system most likely to be involved. From there, we move into a systematic diagnosis.

Inspection and Diagnosis

On a typical HVAC service visit in Sun City Center, we take a structured approach. Rather than guessing at one likely cause, we check the system in logical stages so we don’t miss anything important.

Here’s what that usually looks like:

1. Thermostat and Basic Operation

We start at the thermostat, confirm it’s set correctly, and request cooling or heating to see how the system responds. This helps us understand:

  • Whether the system responds immediately or hesitates.
  • If the indoor unit and outdoor unit both start as expected.
  • Whether any obvious error messages or unusual behavior appear.

2. Indoor Unit and Airflow

Inside the home, we check the air handler or furnace and pay close attention to airflow. In the Tampa Bay area—especially in places like Sun City Center where homes may be occupied year-round or seasonally—dust, pet hair, and normal living can restrict airflow over time.

During this stage, we typically:

  • Inspect the air filter and confirm it’s clean and properly installed.
  • Listen for unusual noises from the blower.
  • Check supply and return vents for blockages or obvious airflow issues.

If a homeowner is dealing with persistent dust or allergy concerns, we may also talk about options like upgraded air filter installation or even air duct cleaning service if their ductwork conditions suggest it would be beneficial.

3. Condensate Drain and Moisture Control

Florida humidity is a major factor in HVAC performance. As the system cools the air, it pulls moisture out and sends it through a condensate drain. If that drain clogs, homeowners may see water where it doesn’t belong or safety switches shutting the system off.

On a visit like this in Sun City Center, we visually inspect the condensate line and pan and make sure there are no obvious signs of restrictions or backup. If we do find a concern, we clear the blockage and confirm that drainage is flowing normally again.

4. Outdoor Unit and Surroundings

The outdoor unit has to move a lot of air to remove heat from your home. Leaves, grass clippings, and debris can all reduce its ability to do that. We:

  • Check for debris around the outdoor unit.
  • Listen for unusual noises from the fan or compressor area.
  • Look for obvious signs of wear or damage.

Once we’ve gone through this complete evaluation, we explain what we saw to the homeowner in clear, simple terms and outline any recommended corrections.

Repair or Service Process

Every home and system is a little different, but the way we handle repairs on a visit in Sun City Center, FL 33573 follows the same principles: safety, clarity, and long-term reliability.

Step 1: Explain Findings in Plain English

Before we pick up a tool, we talk through what we observed—what looks normal, what doesn’t, and what that means for comfort and reliability. We avoid technical jargon where it doesn’t help, and we encourage homeowners to ask questions.

Step 2: Get Clear Approval

We don’t move forward with corrective work until the homeowner understands the options. If there are several ways to address a concern—such as a basic fix versus a more thorough tune-up—we explain the pros and cons of each so the homeowner can decide what fits best.

Step 3: Perform the Agreed Work

Once we get the go-ahead, we perform the needed service. Depending on what we found, that may include tasks like:

  • Correcting airflow issues at the filter or vents.
  • Clearing a restricted condensate drain and confirming proper flow.
  • Adjusting or securing components that were causing noise or vibration.
  • Addressing any safety-related concerns we uncovered.

Our technicians are trained to work neatly and clean up after themselves. Whether we’re in a garage, attic, closet, or outside the home, we treat each Sun City Center property like it’s our own.

Step 4: Test and Verify Operation

After any repair or adjustment, we don’t just assume everything is fine. We run the system through a full operating cycle to verify that:

  • Airflow feels consistent at the vents.
  • The system starts and stops as expected.
  • There are no new noises, leaks, or error indicators.

Once we’re comfortable that the system is operating properly, we walk the homeowner through what we did and what to watch for in the future.

Why This Fix Works

Most HVAC issues we see in Sun City Center and across Tampa Bay come back to a few key principles: airflow, heat transfer, drainage, and safe electrical control. When those are in balance, systems tend to run smoothly for a long time.

Here’s how the work we perform during a service visit supports that balance:

  • Airflow: Clean filters, open vents, and well-maintained blowers allow your system to move air efficiently. Restricted airflow makes the system work harder than it should.
  • Heat Transfer: A clear, unobstructed outdoor unit can release heat effectively. Debris and buildup make it harder for your home to cool down.
  • Drainage: A clear condensate line allows moisture to leave your home safely instead of backing up into the unit or surrounding areas.
  • Control and Safety: When controls and safeties are working as intended, your system is less likely to surprise you with sudden shutdowns or erratic behavior.

By addressing issues in these areas during a service visit in Sun City Center, FL 33573, we’re not just putting a bandage on today’s problem—we’re helping the system run more dependably through the long Florida cooling season.

Pro Tips for Homeowners in Sun City Center

Whether you’re here full-time or seasonally, a few simple habits can go a long way toward keeping your HVAC system running smoothly in the Sun City Center climate.

  • Stay on top of air filter changes. In Florida’s high humidity and heavy pollen seasons, filters often need to be changed more frequently than the packaging suggests. If you’re unsure what filter is best for your home, we can help you choose or even provide professional air filter installation and replacement.
  • Keep vents and returns clear. Avoid placing furniture, curtains, or large items directly over supply vents or return grills. Good airflow makes a noticeable difference in comfort and energy use.
  • Watch for drainage clues. If you ever notice water where it doesn’t belong near your indoor unit, call for service promptly. Addressing condensate issues early helps prevent water damage and unwanted system shutdowns.
  • Maintain the area around your outdoor unit. Keep plants, mulch, and debris away from the condenser so air can move freely. A clear, open space around the unit supports better cooling performance, especially during peak afternoon heat.
  • Consider periodic duct and vent attention. Over time, ducts can accumulate dust and debris. When conditions call for it, professional air duct cleaning or even dryer vent cleaning can improve airflow and safety in your home.
  • Schedule preventive service before peak season. A routine checkup before the hottest months gives us a chance to catch developing issues early and helps your system stay ready for the long Florida summer.

FAQ for HVAC Service in Sun City Center, FL 33573

How long does a typical HVAC service visit take?

Most routine service visits in Sun City Center take about an hour to an hour and a half, depending on what we find. If additional repairs are needed and approved, we’ll let you know how much extra time to expect before we begin.

Do I need to be home during the service?

It’s best if someone is home, especially at the beginning and end of the visit. We like to hear your concerns directly, confirm any access needs, and walk you through what we found and what we did before we leave.

How often should I have my system checked in Sun City Center?

For our Tampa Bay climate, we generally recommend at least one professional checkup a year. Many homeowners in Sun City Center, FL 33573 prefer spring service so their system is ready for the long cooling season.

Can you help with indoor air quality concerns?

Yes. We can discuss options such as upgraded filtration, duct cleaning, or other air quality improvements. For some homes, services like professional air filter installation or duct cleaning can make a noticeable difference.

Do you serve other areas around Sun City Center?

We serve homeowners across Tampa Bay, including many surrounding communities. You can see more about the areas we cover on our Hillsborough County HVAC and plumbing services page.

Why Choose Home Therapist for HVAC Service in Tampa Bay

When you invite someone into your home in Sun City Center, you’re trusting them not only with your HVAC system but also with your comfort and peace of mind. At Home Therapist Cooling, Heating, and Plumbing, we take that seriously.

Here’s what you can expect from our team:

  • Licensed, professional technicians: Our techs are trained, experienced, and properly licensed to work on your system. We approach every visit with a focus on safety and long-term reliability.
  • Transparent communication: We explain what we see, what it means, and what your options are before we move forward. No pressure, no surprise charges—just clear information so you can make confident decisions.
  • Clean and respectful work: We protect your home, pick up after ourselves, and treat your property with the same care we’d want in our own houses.
  • Long-term reliability focus: We’re not just interested in getting your system to start today. We look for ways to help it run more dependably through many Tampa Bay summers to come.
  • Committed to Tampa Bay homeowners: We live and work in this community, and we’re proud of the reputation we’ve built with local families.

If you’d like to get to know us a bit more, you can connect with Home Therapist on social media:

And if you’re looking for additional reassurance, you can see our standing and reviews on trusted third-party sites:

Need HVAC Help in Sun City Center, FL 33573?

If your home in Sun City Center, FL 33573 isn’t feeling as comfortable as it should, we’re here to help. Whether you’re noticing uneven temperatures, longer run times, or just want a professional set of eyes on your system before the next hot stretch, our local Tampa Bay technicians are ready to step in.

Reach out to Home Therapist Cooling, Heating, and Plumbing to schedule HVAC service at a time that works for you. We’ll arrive on time, explain what we find, and make sure your system is running as expected before we leave—so you can get back to enjoying a cool, comfortable home.

Your comfort is our focus, and we’re proud to support homeowners throughout Sun City Center and the greater Tampa Bay area.

AC Maintenance and Replacement Recommendation in Tampa, FL 33647

During a recent Premium Home Therapy Plan visit for a homeowner in Tampa, FL 33647, we started with a routine AC maintenance and ended up uncovering a much bigger story behind one of the home’s older air conditioning units. What looked like a normal tune-up turned into a conversation about system age, corrosion, efficiency, and when it truly makes sense to repair versus replace.

As we went through our maintenance checklist, one far-off air handler immediately stood out. It’s about 15 years old, the fan is drawing more power than it should, there’s visible organic growth inside the unit, and the evaporator coil is extremely corroded. System pressures were not critically low, but they were slightly lower than we’d like to see, which is often a sign of a small refrigerant leak in a weakened coil. In plain terms: the unit is dirty, inefficient, and at the end of its useful life.

In this article, we’ll walk through what we found during this Tampa AC maintenance visit, how we diagnosed the issues, why we recommended replacing the unit instead of just swapping out the coil, and what this means for other homeowners in Tampa, FL 33647 who are trying to decide how long to keep an aging system running.

Case Recap

  • Premium Home Therapy Plan maintenance visit for a homeowner in Tampa, FL 33647
  • Routine maintenance completed; one remote air handler showed multiple red flags
  • Unit is approximately 15 years old with heavy coil corrosion and organic growth inside
  • Fan is consuming more power than normal, and system pressures are slightly low
  • We discussed options: replace only the coil vs. replace the entire unit
  • Our professional recommendation: install a new, more efficient system with full warranties

Customer Problem: What the Homeowner Was Dealing With

This visit in Tampa, FL 33647 was part of a scheduled Premium Home Therapy Plan, so there wasn’t an emergency breakdown. The homeowner simply wanted to stay ahead of problems and keep their systems running reliably in our hot, humid climate.

However, they did have some general concerns you might recognize:

  • The older unit didn’t seem to cool as well as it used to, especially in the area it served.
  • Energy bills seemed higher than expected, despite regular use and no major changes in the home.
  • They knew the system was getting old and wanted an honest opinion about how much life it had left.

Because this is a Premium Home Therapy Plan customer, our job is not just to clean and go. We take the time to evaluate how each system is aging so Tampa homeowners can make informed decisions before they’re stuck without cooling on a 95-degree afternoon.

Inspection and Diagnosis: What We Checked and Why

We started the visit like we do for all AC maintenance in Tampa homes: with a thorough inspection and tune-up. That includes tasks like cleaning accessible components, checking electrical connections, verifying thermostat operation, and confirming that each unit is running as expected.

When we moved to the far-off air handler, several things caught our attention right away:

  • Age of the system: Around 15 years old, which is typically the upper end of normal life expectancy for many systems in the Tampa Bay area.
  • Organic growth inside the unit: Visible buildup inside the air handler, which is common in our humid Florida climate but still a concern for both efficiency and air quality.
  • Heavily corroded evaporator coil: The coil was not just slightly worn; it was extremely corroded, indicating long-term exposure to moisture and contaminants.
  • High fan consumption: The blower fan was drawing more energy than it should for normal operation, which usually means the motor is working harder than designed.
  • Slightly low refrigerant pressures: Not low enough to trigger a full-blown no-cool situation, but just low enough to raise a flag that something may be going on inside that coil.

Each of these findings on its own is a concern. Together, they painted a clear picture: this Tampa, FL 33647 air handler is near the end of its practical life and will likely continue to cost the homeowner in efficiency and potential repairs.

For homeowners under our Therapy Maintenance Plans, this is exactly the kind of proactive insight we want to provide—catching systems before they fail, and helping you weigh the true cost of keeping them going.

Repair or Service Process: What We Did During the Visit

Even though we identified major concerns with the older unit, we still completed all the standard maintenance tasks to keep the system running as safely and efficiently as possible for the short term.

Here’s how we approached the job step by step:

1. Performed Full Premium Maintenance

We went through our complete maintenance checklist, similar to what we offer with our dedicated AC maintenance services in Tampa. This includes cleaning accessible components, checking drain lines, inspecting electrical connections, and making sure the thermostat and controls are working properly.

This ensures that, regardless of age, the system is not being strained unnecessarily by dirty filters, loose wires, or basic issues that are easily preventable.

2. Documented Condition of the Air Handler and Coil

We carefully inspected the air handler interior and the evaporator coil. The organic growth and corrosion on the coil were significant. We documented the condition so the homeowner could clearly see what we were seeing, instead of just taking our word for it.

Showing photos and explaining in plain English helps homeowners in Tampa make confident decisions about their AC systems, especially when we’re recommending something as big as a replacement.

3. Evaluated Fan Performance and Energy Use

The fan’s high power consumption is a sign that the blower motor is working harder than normal. That can be due to age, resistance in the motor, or airflow restrictions. Regardless of the exact cause, when the fan is drawing more energy, it raises utility costs and increases the risk of eventual motor failure.

We used this information to explain how the system’s age and condition translate into ongoing cost and reliability, not just today’s performance.

4. Checked System Pressures and Overall Operation

Pressures were not critically low, but they were slightly under ideal levels for normal operation. With a coil that is extremely corroded, even a small drop in pressure can point toward a slow refrigerant leak that may worsen over time.

We verified that the system was still cooling to an acceptable degree for the moment, but we clearly communicated that this is not a unit we’d count on for many more Florida summers.

5. Discussed Options: Coil Replacement vs. Full System Replacement

We always want homeowners in Tampa, FL 33647 to understand their options. In this case, we outlined two main paths:

  • Option A – Replace just the coil: We can price out a new coil and install it, getting rid of the corroded one. However, this is a major repair on a 15-year-old system, and it does not address the age of the blower motor or other components.
  • Option B – Replace the entire unit: Install a new, more efficient system with full parts warranties, cleaner operation, and better comfort for the home.

We made it clear that we’re willing to help with either option, but our professional recommendation is to replace the unit. The homeowner deserves a system they can rely on, not just a patch on an aging one.

For many Tampa Bay homeowners, this kind of conversation naturally leads to exploring new AC installation options in Tampa so they can start planning ahead instead of waiting for a breakdown.

Why This Fix (Replacement) Makes Sense

When we suggest replacing a 15-year-old AC system instead of pursuing a major repair like a coil change, it’s not about selling the biggest job—it’s about what makes long-term sense.

Here’s the thinking behind our recommendation for this Tampa, FL 33647 home:

  • Efficiency: Older systems, especially those with corroded coils and strained blower motors, simply don’t move heat and air as efficiently. The unit has to work harder and run longer to reach the same temperature, which drives up electric bills.
  • Refrigerant concerns: A heavily corroded coil with slightly low pressures suggests a possible small leak. Even if we top off refrigerant now, the underlying issue may continue and lead to repeated service calls.
  • Multiple aging components: The fan, coil, and internal surfaces all show significant wear. Replacing just one part doesn’t reset the clock on the rest of the system.
  • Warranty and peace of mind: A new system comes with manufacturer warranties on parts and, when installed by a licensed contractor like us, a fresh start for reliability.
  • Comfort and air quality: A dirty, corroded, and growth-affected unit can’t deliver the same comfort and indoor air quality as a new, properly sized system paired with modern filtration or purification options.

In short, the principle here is simple: when key components of an AC system in Tampa are worn out and struggling, you’re paying more each month to run a system that’s more likely to fail at a bad time. Putting that money toward a new, efficient system is often the smarter move.

For homeowners who want to go a step further with their indoor environment, we can also pair new equipment with indoor air quality solutions or even targeted air duct sanitizing where it makes sense.

Pro Tips for Homeowners in Tampa

If you live in Tampa, FL 33647 or anywhere in the Tampa Bay area, your AC system works hard almost year-round. Here are some practical tips to help you get the most out of your system and avoid surprises like the one we found on this visit:

  • Know your system’s age: Once your equipment reaches 10–15 years, start planning for replacement instead of assuming it will run forever. That gives you time to budget and compare options before you’re in an emergency situation.
  • Stay consistent with maintenance: Annual (or even semi-annual) maintenance is one of the best ways to slow down corrosion, catch refrigerant issues early, and keep electrical components in good shape—especially in Florida’s salty, humid environment.
  • Watch for small changes: Longer run times, uneven cooling, or slowly rising energy bills are early warning signs. They’re easy to ignore, but they often mean your system is losing efficiency.
  • Address organic growth early: Tampa’s humidity makes air handlers a perfect place for organic buildup. If you see or suspect growth, talk to us about cleaning and air quality options before it spreads or affects performance.
  • Think long-term, not just repair cost: A big repair on a very old unit may not be the best investment. Ask for both repair and replacement estimates so you can compare the long-term costs and benefits.
  • Use your maintenance plan: If you’re on a plan like our Premium Home Therapy Plan, take full advantage of it. Ask questions, request system condition updates, and let us know your comfort and budget goals so we can tailor recommendations.

FAQ: AC Maintenance and Replacement Questions from This Visit

Is a 15-year-old AC unit automatically due for replacement?

Not automatically, but 15 years is a common point where we start to see major wear in Tampa’s climate. In this case, the combination of heavy coil corrosion, organic growth, high fan consumption, and slightly low pressures made replacement the most practical recommendation. We always look at the system’s condition, not just the age on paper.

Why not just replace the coil and keep the old unit?

We can provide an estimate for coil replacement, and some homeowners do choose that path. However, replacing a coil on a very old system is a significant investment in equipment that already shows multiple signs of aging. It doesn’t reset the clock on the blower motor, cabinet, or other internal parts, so you may still be facing future repairs sooner than you’d like.

What does slightly low refrigerant pressure mean?

In this visit, pressures weren’t drastically low, but they were lower than ideal. With a coil that is extremely corroded, that can indicate a small leak. It may not cause an immediate failure, but over time it can lead to reduced cooling, higher energy use, and eventual loss of performance if the leak worsens.

Is organic growth inside the air handler dangerous?

Organic growth inside an air handler is a performance and air quality concern. It can restrict airflow and contribute to odors or particles circulating through the home. The seriousness depends on the extent of the growth and the home’s specific conditions. During maintenance, we point out what we see and discuss cleaning or air quality options that match the homeowner’s needs.

How does high fan power consumption affect my home?

When a blower fan draws more power than normal, it usually means the motor is working harder than designed. That can drive up your electric bill and increase wear on the motor, raising the chance of a breakdown. In an older system, it’s another indicator that the unit is nearing the end of its useful life.

Will my system keep working for now if I don’t replace it immediately?

In this Tampa, FL 33647 case, the system was still operating at the time of our visit. We completed maintenance and verified operation before we left. However, given the age and condition, we advised the homeowner to plan for replacement sooner rather than later, to avoid being forced into an urgent decision during a peak-heat failure.

Why Choose Home Therapist for Your Tampa HVAC Needs

When you invite us into your home in Tampa, FL 33647, you’re not just getting someone to tighten a few screws and leave. You’re getting a licensed, professional team that treats your comfort and safety like our own.

Here’s what sets Home Therapist apart for AC maintenance, repairs, and replacements in the Tampa Bay area:

  • Licensed, experienced technicians: Our technicians are trained to spot issues that others might overlook and to explain them in clear, simple terms.
  • Transparent communication: We show you what we see, walk through your options, and never pressure you into a decision. Repair vs. replace is always your choice—we provide the facts.
  • Clean, respectful work: We treat your home with care, keep our work areas tidy, and respect your time and schedule.
  • Long-term reliability focus: Our recommendations are based on what will keep you comfortable and protected in the long run, not just what fixes today’s symptom.
  • Commitment to Tampa Bay homeowners: We live and work in this community, and we understand how tough Tampa summers are on your HVAC system.

If you’d like to see more of how we work and hear from other homeowners, you can connect with us on social media:

  • Follow us on Facebook for updates, tips, and project highlights.
  • Check out our photos and stories on Instagram.
  • Watch behind-the-scenes and educational clips on our YouTube channel.

For added peace of mind, you can also review our standing with trusted organizations and directories:

Need AC Help in Tampa, FL 33647? We’re Here for You

If you have an older AC system in Tampa, FL 33647 and you’re wondering whether it’s worth another repair, you don’t have to guess. Our team at Home Therapist can perform a thorough maintenance and evaluation, explain what we find, and help you compare repair and replacement options calmly and clearly.

Whether you’re interested in a one-time tune-up, exploring our Therapy Maintenance Plans, or planning ahead for a new AC installation in Tampa, we’re ready to help you stay comfortable and confident in your home.

Schedule your visit today, and let a Home Therapist technician give your system a professional checkup so you can enjoy reliable cooling all year long in Tampa, FL 33647.

Ductwork Replacement and R6 Flex Duct Installation in Tampa, FL 33617

When a homeowner in Tampa, FL 33617 reached out asking for pricing on a full ductwork replacement, they were dealing with more than just numbers on a quote. Old, leaky, or poorly sized ducts can mean hot rooms, uneven temperatures, high energy bills, and dusty air all through the home. Our job was to design and install a complete R6 flex duct system that would actually match the home’s needs, improve airflow, and support better comfort in our warm, humid Tampa Bay climate.

In this case, we proposed a full duct system replacement with new boots, R6 flexible duct, new grills, new distribution boxes, and a plenum sized for the system. We also took care of hauling away the old ductwork and included a full duct design so the new system wasn’t just “swapped,” but truly optimized. The homeowner in Tampa, FL 33617 ultimately chose to move forward after we paired the project with a special limited-time discount and suitable financing. The result was a cleaner, better-sealed, and better-designed duct system ready for many years of service.

Case Recap

  • Location: Single-family home in Tampa, FL 33617
  • Service: Complete ductwork replacement with R6 flexible duct
  • Scope: 11 supply drops, 5 return drops, 1 plenum, new boots, new grills, new distribution boxes
  • Materials: Johns Manville formaldehyde‑free fiberglass insulation and GREENGUARD® certified flex duct
  • Extras: Old duct removal, full duct design, attic work with careful home protection and cleanup
  • Outcome: Improved airflow, more even temperatures, and a cleaner, professionally installed duct system

Customer Problem

This Tampa homeowner contacted us specifically about replacing their existing ductwork. They weren’t shopping for a new air conditioner at the moment; they wanted a price and a plan focused just on the ducts. That tells us right away that they were most likely feeling real comfort issues indoors—rooms that never quite got cool, poor airflow from some vents, or perhaps concerns about old or damaged ducts in the attic.

From our conversations, we understood:

  • The homeowner wanted straight answers and clear pricing on the ductwork alone.
  • They were understandably surprised at the true cost of a full, properly done duct replacement.
  • They were open to financing but needed an option that would actually approve.
  • They preferred to schedule this project in a way that worked with their upcoming maintenance and budget.

Over time, we stayed in touch and followed up as promised. After revisiting the estimate and offering a special discount valid in February 2026, the homeowner decided it was the right moment to move forward with the ductwork project in Tampa, FL 33617. We also confirmed that they were eligible for a PACE-style financing option, which helped make the project more accessible.

Inspection and Diagnosis

Before replacing ductwork, we don’t just count vents and quote a number. We look at how the system is laid out, how the attic space will affect the work, and how air is currently moving through the home. That’s especially important in Tampa, where poor duct design can lead to hot rooms, high humidity, and extra stress on the AC.

For this project, our evaluation included:

  • Duct layout review: Counting supply and return runs (11 supplies, 5 returns) and identifying where each boot and grill serves the home.
  • Plenum and main trunk assessment: Verifying that the planned plenum size and distribution boxes would support the system’s capacity and desired airflow.
  • Attic conditions: Checking the attic height and accessibility, which directly affects the difficulty and time required to run new ducts.
  • Home interior impact: Identifying areas where we would be working directly below vents and where dust or insulation could potentially fall.

We also discussed expectations with the homeowner: how long the work would take, what we’d be able to protect during the process, and the possibility that we might need to open small access holes in drywall to run certain ducts. We always get approval before opening any sheetrock, and we explain clearly that we do not perform drywall repair—so the homeowner can plan ahead and coordinate any patching they’d like afterwards.

Once we had a clear duct design in place and confirmed that financing and the February discount were aligned, we were ready to move forward with the new R6 flex duct installation in Tampa, FL.

Repair and Service Process

A full duct replacement is one of the more physically demanding HVAC jobs, especially in Florida attics. Our team plans these projects carefully so the work is safe, organized, and respectful of the home.

1. Protecting the Home

Before we touch a single duct, we talk with the homeowner about preparing the space. For a project like this in Tampa, FL 33617, that included recommendations such as:

  • Moving or covering furniture directly below supply and return vents.
  • Covering electronics, baby items, clothing, and food in areas where we’d be working overhead.
  • Keeping hallways and work paths clear so our team can move safely with ladders and materials.

We then bring in our own protective coverings for critical areas to help shield them from dust and bits of insulation that can fall during attic work. While some dust is always possible, we do our best to reduce it and thoroughly clean our work areas at the end of each day.

2. Removing the Old Ductwork

Next, we disconnect and remove the existing ducts, boots, and related components that are being replaced. This step matters because:

  • It eliminates leaky, damaged, or poorly insulated ducts that were wasting energy.
  • It gives us a clean slate for a properly sized and routed system.
  • It allows us to inspect the connections at the air handler and plenums more clearly.

We also take responsibility for hauling away the old ductwork, so the homeowner isn’t left with piles of debris. All of that is built into the project scope up front.

3. Installing New Plenum and Distribution Boxes

With the old system removed, we install the new plenum (if needed and quoted) and new distribution boxes. These components act like the heart and main arteries of the duct system, distributing air from the air handler into each branch line.

Properly designed plenums and distribution boxes help ensure that each run of duct receives a fair share of airflow. This is a key part of why we include duct design in projects like this instead of just copying what was there before. Over time, many systems in Tampa Bay homes have been altered or pieced together, so a fresh design often produces a noticeable comfort improvement.

4. Running New R6 Flexible Ducts

Once the main distribution components are in place, we run the new flexible R6 ducts to each supply and return point—11 supply drops and 5 return drops in this home.

We focus on:

  • Keeping duct runs as straight and smooth as the attic allows, avoiding unnecessary bends and kinks.
  • Securing ducts properly and supporting them so they don’t sag, which can restrict airflow.
  • Ensuring tight, sealed connections at the plenum, distribution boxes, and boots.

The materials used here include Johns Manville formaldehyde‑free fiberglass insulation and GREENGUARD® certified insulated products, along with a Quietflex Rip Stop Silver Jacket that features a metalized polyester vapor barrier with rip‑stop reinforcement. In everyday terms, that means the ducts are well insulated, built to resist tears, and designed to help maintain clean, safe air distribution.

5. Installing New Boots and Grills

At each opening into the living space, we install new boots and grills. Boots connect the duct to the ceiling or wall opening; grills are the visible covers that you see inside the home.

Replacing these helps in a few ways:

  • Provides a cleaner, tighter seal around the vent openings.
  • Reduces air leakage into wall cavities or attic spaces.
  • Offers a fresh appearance that matches the new system quality.

6. Final Sealing, Cleanup, and System Check

After all ducts, boots, grills, and plenums are installed, we go through and double‑check our connections. We seal transitions, verify that each run is properly supported, and confirm that all supplies and returns are tied into the system as designed.

We then clean up the work areas, remove old ducts and debris from the property, and perform a system check to confirm the air is moving as expected through the new duct layout. While we don’t publish specific measurement readings here, we do verify proper operation and airflow patterns based on the system’s capacity and the home’s layout.

Why This Fix Works

Ductwork may be hidden, but it has a direct impact on comfort, energy use, and indoor air quality—especially in a hot, humid market like Tampa.

Here’s why a complete duct replacement with R6 flex duct is often the right solution for a home like this in Tampa, FL 33617:

  • Airflow balance: A well‑designed system with properly sized supply and return runs helps each room receive the right amount of conditioned air, reducing hot and cold spots.
  • Energy efficiency: New, well‑insulated ducts reduce heat gain in the attic and leakage into unconditioned spaces, which helps your air conditioner work more efficiently.
  • Humidity control: Steady, adequate airflow allows the AC system to do a better job removing humidity, which is crucial in Tampa Bay’s climate.
  • Cleaner air paths: Modern materials and sealed connections help limit dust intrusion and support healthier indoor air.
  • Reduced strain on equipment: When ducts are sized and routed correctly, the air handler doesn’t have to fight against restrictions, which supports long‑term reliability.

If you’d like to read more about how duct design ties into overall system performance, our team has put together resources like our HVAC retrofitting guide for Tampa Bay homes and an overview of the role of HVAC in indoor air quality. They go deeper into how air distribution, filtration, and equipment choices all work together.

Pro Tips for Homeowners in Tampa

For homeowners in Tampa, FL—especially around ZIP codes like 33617—ductwork often has to contend with high attic temperatures, intense summer seasons, and year‑round humidity. Here are some practical tips:

  • Schedule regular AC maintenance: Even with brand‑new ducts, your air handler and condenser need routine care. Consider services like an AC maintenance visit in Tampa or our Therapy Maintenance Plans to keep the whole system in good shape.
  • Change filters on time: A clogged filter can undo the benefits of new ductwork by choking airflow. Follow your filter’s recommendations or ask us what’s best for your equipment and lifestyle.
  • Keep supply and return vents clear: Avoid blocking vents with furniture, curtains, or large items. Good airflow at each grill is essential to make the most of a redesigned duct system.
  • Watch for new hot or cold spots: If you notice a room drifting out of balance over time, let us know. Sometimes small adjustments can bring everything back into line before it becomes a big issue.
  • Plan major upgrades together: If you’re considering a new AC system in the future, pairing it with a professional duct evaluation or replacement—like this project—can help you get the full benefit of the new equipment. Our AC installation services in Tampa are designed with that in mind.
  • Stay ahead of maintenance education: Resources like our HVAC maintenance checklist for homeowners can help you spot small issues before they turn into bigger repairs.

FAQ: Ductwork Replacement in Tampa, FL 33617

Do I have to replace all of my ducts at once?

Not always, but in many Tampa homes, the existing duct system was installed as one piece and has aged together. In this project, the homeowner chose a complete replacement so the new system would be fully matched, properly designed, and easier to service going forward. We review options with you so you understand what’s being replaced and why.

Will there be dust or debris in my home during duct replacement?

Any time we’re working in the attic and opening vents, there’s a chance that dust or small bits of insulation can fall. We do our best to cover critical areas, we ask you to move or cover items below vents, and we clean up at the end of our workday. Some dust is still possible, but we take it seriously and prepare you ahead of time.

Can you avoid cutting into my sheetrock?

Our goal is always to use existing openings where possible, but sometimes we may need to open small access holes in the sheetrock to properly run new ducts. If that’s needed, we’ll inform you first and proceed only with your approval. We focus on the ductwork itself and do not perform drywall repairs, so you can bring in your preferred finisher afterwards.

How long does a duct replacement like this usually take?

Timeline depends on home size, attic access, and how many supply and return drops are needed. For a system with multiple supplies and returns like this Tampa, FL 33617 home, it generally takes at least a full day and often more. We’ll give you a realistic time estimate during the proposal phase.

Is financing available for ductwork projects?

Yes. Many homeowners choose financing for larger ductwork projects, especially when they’re done alongside other HVAC upgrades. In this case, we helped the homeowner explore options and move forward with a PACE‑type solution that fit their situation. We walk you through available choices and explain them clearly before you decide.

Do you provide any warranty on new ductwork?

We stand behind our workmanship and materials. On projects like this, we provide a defined parts and labor warranty period, with reasonable exclusions for things like damage caused by rodents or people. Exact terms are explained in writing with your proposal so you know what is and isn’t covered.

Why Choose Home Therapist for Ductwork in Tampa

At Home Therapist Cooling, Heating & Plumbing, we approach every ductwork project as if it were our own home. That means taking the time to design the system correctly, explaining our recommendations in plain language, and respecting your space from the moment we arrive until the last bit of debris is hauled away.

When you work with our local Tampa Bay team for a duct replacement in Tampa, FL 33617, you can count on:

  • Licensed, professional technicians: Our installers are trained, experienced, and familiar with the challenges of Florida attics and climate.
  • Transparent communication: We discuss pricing, options, attic conditions, and possible drywall access up front so there are no surprises.
  • Clean, respectful work: We protect key areas, clean up daily, and treat your home politely and professionally.
  • Long‑term reliability focus: We don’t just swap ducts—we design and install with airflow, efficiency, and longevity in mind.
  • Commitment to Tampa Bay homeowners: We live and work in this community, and our reputation here matters to us.

If you’d like to get a feel for how we operate and how other homeowners in Tampa Bay describe their experience, you can visit us on social media:

  • Follow us on Facebook for project photos, tips, and updates.
  • See more behind‑the‑scenes work and installs on Instagram.
  • Watch helpful videos and explanations on our YouTube channel.

For added peace of mind, you can also review our standing with trusted organizations:

Need Ductwork Replacement in Tampa, FL 33617?

If your home in Tampa, FL 33617 has uneven temperatures, weak airflow from certain vents, or older ducts that you suspect are wasting energy, a professionally designed and installed duct system can make a real difference. Our team at Home Therapist Cooling, Heating & Plumbing is ready to walk you through your options, from evaluation and design to installation and cleanup.

You can learn more about our services and request a visit through our main website at Home Therapist Cooling, Heating & Plumbing or reach out directly through our contact page. We’ll take the time to understand your home, explain our recommendations clearly, and help you find a solution that fits your comfort and your budget.

When you’re ready to upgrade your ductwork in Tampa, FL 33617, our local Tampa Bay technicians are here to help—calmly, professionally, and with your long‑term comfort in mind.

Premium Home Therapy Plan HVAC Maintenance in Apollo Beach, FL 33572

When you live in Apollo Beach, FL 33572, your air conditioning works almost year-round. That kind of workload can really take a toll on your HVAC system if it isn’t checked and maintained regularly. On this visit, we were back out for a scheduled Visit #3 under our Premium Home Therapy Plan to make sure a homeowner’s comfort system was still running safely, efficiently, and ready for the long Florida cooling season.

There wasn’t an emergency breakdown or major failure this time—that’s exactly the point of a maintenance plan. By coming out on a routine schedule, we can catch small issues early, keep parts clean and tuned, and give homeowners peace of mind that their system is being watched by a licensed professional.

Below, we’ll walk through what the homeowner in Apollo Beach needed from this visit, what we inspected, and how our Premium Home Therapy Plan helps protect comfort, safety, and long-term reliability in Florida homes.

Case Recap: Premium Home Therapy Plan Visit in Apollo Beach

  • Location: Single-family home in Apollo Beach, FL 33572
  • Service type: Scheduled Visit #3 under our Premium Home Therapy Plan
  • Primary goal: Verify safe, reliable HVAC performance and catch any early signs of wear
  • Work performed: Full system inspection, cleaning where needed, and operational checkup
  • Outcome: System confirmed to be operating as expected, with recommendations for ongoing care

Customer Problem: Staying Ahead of Breakdowns, Not Chasing Them

For this homeowner in Apollo Beach, the main concern wasn’t a sudden loss of cooling—it was staying ahead of problems before they turned into expensive repairs or uncomfortable nights without air conditioning. With the Florida heat and humidity, even a short period without cooling can make a home feel miserable.

Like many of our Premium Home Therapy Plan members, this homeowner wanted:

  • Consistent comfort in every room
  • Fewer surprises and emergency calls in the middle of summer
  • Confidence that the system is being checked by the same team that knows the home and equipment
  • Help extending the life of the HVAC system through regular care

By the time we get to Visit #3 in our maintenance plan cycle, we’ve usually built a good history with the equipment. We know how it has been running, any previous concerns, and what to pay extra attention to. The homeowner trusted us to give straightforward feedback—if something looks good, we say so; if something needs attention, we explain it clearly and calmly.

Inspection and Diagnosis: What We Look For on a Plan Visit

Every Premium Home Therapy Plan visit in Apollo Beach, FL follows a structured process. Even if there are no obvious symptoms, we still run through a full system check. The goal is to confirm safe operation, check for early signs of wear, and verify that the system is handling the demand of our Florida climate.

On this Visit #3, our inspection focused on several key areas:

1. Indoor Air Handler and Airflow

We started indoors, checking the air handler and overall airflow. Good airflow is at the heart of a healthy HVAC system. Restricted airflow can lead to hot spots in the home, longer run times, and extra strain on the equipment.

During this step, we:

  • Visually inspected the air handler cabinet and surrounding area
  • Checked the air filter condition and fit
  • Looked for signs of dust buildup, air leaks around panels, or anything that might impact airflow

If you ever need help with filter upgrades or replacements beyond what’s covered during a plan visit, we also offer dedicated air filter installation and repair services throughout Tampa Bay.

2. Coil and Drainage Check

Next, we focused on the evaporator side and condensate drainage. In Apollo Beach’s humidity, your system pulls a lot of moisture out of the air. That moisture has to drain properly, or you can end up with water where it doesn’t belong.

We inspected the accessible areas for signs of:

  • Biological buildup that could restrict airflow or drainage
  • Condensate drain issues such as slow drainage or signs of backup
  • Any visible water staining or moisture concerns around the equipment

While our full air duct cleaning services are a separate, more in-depth project, a maintenance visit is the perfect time to identify whether a deeper cleaning should be scheduled in the future.

3. Outdoor Unit and System Condition

Outside, we inspected the condenser unit. Because this equipment is exposed to the elements, it can collect leaves, grass clippings, and other debris that impact performance.

Here, we:

  • Checked the unit for visible damage or corrosion
  • Looked for obstructions around the condenser that could block airflow
  • Visually verified that the fan and components appeared to be in normal condition

4. System Operation and Safety

After the visual inspection, we ran the system to observe its behavior. Even when we don’t publish the exact numbers, we still rely on our training and experience to know whether a system is behaving as expected.

During operation, we:

  • Listened for unusual sounds from the indoor and outdoor units
  • Checked that the thermostat was communicating and cycling the system properly
  • Verified that the system was cooling as expected and that airflow felt consistent at the registers

By the end of the inspection portion of this Premium Home Therapy Plan visit, we were able to confirm that the system in this Apollo Beach home was operating as expected at the time of service.

Repair or Service Process: What We Did on This Visit

Because this visit was part of a scheduled maintenance plan—not an emergency repair—the work was focused on cleaning, minor adjustments, and preventive care. That’s what keeps things running smoothly from season to season.

Step 1: Confirming System History

We began by reviewing previous visit notes from the same home. This helps us see if there were any past concerns that needed a follow-up, such as developing wear, airflow questions, or homeowner comfort complaints. Consistent record-keeping is one of the big benefits of being on a recurring plan.

Step 2: Filter and Return Air Check

Next, we checked the air filter. A clogged or improperly sized filter is one of the most common causes of comfort and efficiency issues in Apollo Beach homes.

We ensured the filter area was clean and that the filter was doing its job without restricting airflow more than it should. If a filter ever needs to be replaced during a visit, we explain the options and make sure the homeowner understands how often it should be changed in our climate.

Step 3: Indoor Unit Cleanliness and Condition

We then inspected the indoor unit for dust buildup, debris, and any signs of moisture or leakage. When safe and appropriate to do so, we perform light cleaning in accessible areas to support better airflow and indoor air quality.

Step 4: Drainage Review

The condensate drain is a small component that can cause big headaches if it clogs. On this visit, we reviewed the drain area for any signs of slow drainage, algae buildup, or moisture problems. We confirmed that drainage appeared normal at the time of service.

Step 5: Outdoor Unit Clearances and Condition

Outside, we cleared any light debris around the unit and made sure there was enough open space for proper airflow. We visually checked the cabinet, fan, and exposed components for anything unusual.

Step 6: System Test and Homeowner Review

Once the physical checks and cleaning were complete, we ran the system. We verified that it started, ran, and cycled off as expected. We also checked that the thermostat settings aligned with the homeowner’s comfort preferences.

Before leaving, we reviewed our findings with the homeowner in plain language, answered questions, and shared any recommendations for future visits. Our goal is always to leave the system running as it should and the homeowner fully informed.

Why This Maintenance Visit Matters for Apollo Beach Homes

Preventive maintenance isn’t just about avoiding today’s breakdown—it’s about protecting the entire system from unnecessary stress over time. In Apollo Beach, FL 33572, the combination of high temperatures, humidity, and salt-tinged air can be tough on HVAC equipment.

Here’s why visits like this one make a difference:

  • Airflow: Clean filters and unobstructed coils allow air to move freely, helping the system cool more effectively and with less effort.
  • Heat transfer: Clean coils inside and out allow the refrigerant to absorb and release heat more efficiently, which directly affects how quickly your home cools down.
  • Moisture control: Proper drainage prevents water from backing up, which helps protect ceilings, walls, and equipment from water damage.
  • Electrical reliability: Keeping components clean and connections visually checked reduces the chances of nuisance trips and intermittent issues.
  • System longevity: Reducing strain on major components helps extend the life of the system and can delay the need for full replacement.

For homeowners who eventually do need a new system, we also handle full replacements and upgrades across Tampa Bay, including projects like complete HVAC system installations with new ductwork. Good maintenance now helps you get the most life out of your current equipment before that step is necessary.

Pro Tips for Homeowners in Apollo Beach

Based on what we see every day in Apollo Beach and surrounding Tampa Bay communities, here are some practical, low-stress tips to keep your system running smoothly between Premium Home Therapy Plan visits:

  • Stay on top of filter changes. In our humid, sandy environment, filters often load up faster than homeowners expect. Check them monthly and replace as needed, especially during the peak cooling season.
  • Keep at least 2–3 feet of clearance around the outdoor unit. Trim bushes, clear leaves, and avoid stacking items against the condenser. Good airflow outside is just as important as inside.
  • Use reasonable thermostat settings. Setting the thermostat extremely low doesn’t cool the house faster; it only makes the system run longer. A sensible setting helps balance comfort, energy use, and equipment wear.
  • Pay attention to new noises or smells. If you notice something different—rattling, buzzing, or unusual odors—bring it up on your next plan visit or call us sooner if it seems urgent.
  • Consider whole-home comfort upgrades over time. As your home and system age, you may benefit from improvements like duct sealing, better filtration, or even ductless mini-split systems in hard-to-cool rooms.
  • Use a trusted local team. Working with the same licensed technicians for regular care means your system’s history is known, and small changes are easier to spot early.

FAQ: Premium Home Therapy Plan Visits in Apollo Beach, FL 33572

How often do you come out under the Premium Home Therapy Plan?

The Premium Home Therapy Plan includes multiple scheduled visits throughout the year, like this Visit #3, to give your system consistent attention. The exact timing is structured to match Florida’s cooling demands so your equipment is checked before and during the heaviest use.

Do you only look at the air conditioner during these visits?

Our focus on each visit is tailored to your home’s equipment and the season. For homes in Apollo Beach, we primarily concentrate on the cooling system for much of the year, but we also keep an eye on related comfort and safety items. When heating, air quality, or other systems are part of your setup, we factor that into our evaluations as appropriate.

What happens if you find a problem during a plan visit?

If we see something that isn’t operating as it should, we explain it clearly, talk through your options, and get your approval before moving forward with any repair work. The goal is to catch issues early so you have choices and aren’t forced into rushed decisions during a breakdown.

Is maintenance really necessary if my system is cooling fine right now?

In Apollo Beach, systems may run for long stretches without obvious trouble—right up until something fails under heavy load. Regular maintenance is about reducing that risk, protecting your investment, and helping the equipment run more efficiently over time.

Can you service both HVAC and plumbing under one company?

Yes. Home Therapist is licensed for both HVAC and plumbing, serving homeowners across Tampa Bay. If you need help beyond your cooling system, our HVAC and plumbing services in Hillsborough County are available to Apollo Beach residents as well.

Do you clean ducts as part of every plan visit?

Full duct cleaning is a separate, more extensive service, not something performed on every routine maintenance visit. However, during a Premium Home Therapy Plan visit, we can often spot signs that a deeper air duct cleaning may be beneficial and make that recommendation when appropriate.

Why Choose Home Therapist for Your Apollo Beach Home

When you invite someone into your home in Apollo Beach, FL 33572, you deserve a team that treats your space and your time with respect. That’s how we approach every Premium Home Therapy Plan visit.

Here’s what sets Home Therapist Cooling, Heating, and Plumbing apart for Tampa Bay homeowners:

  • Licensed, professional technicians: Our team is trained, experienced, and fully licensed for the work we perform. We show up prepared, in uniform, and ready to explain what we’re doing.
  • Transparent communication: We walk you through what we found, what looks good, and where we see potential concerns. No scare tactics, no pressure—just clear information so you can make confident decisions.
  • Clean, respectful work: We treat your home like it’s our own. That includes using care around your belongings, keeping work areas tidy, and cleaning up when we’re done.
  • Long-term reliability focus: Our maintenance plans are designed to support your system over the long haul, not just to address whatever is happening today. We think in terms of years, not just quick fixes.
  • Commitment to Tampa Bay homeowners: We’re a local company invested in the communities we serve, from Apollo Beach to the greater Tampa Bay area.

If you’d like to see what other homeowners have to say about working with us, you can visit our social pages and review sites:

For added peace of mind, you can also see our standing with local and national organizations:

Ready to Protect Your Comfort in Apollo Beach, FL 33572?

If you’re in Apollo Beach, FL 33572 and want the same kind of steady, preventive care this homeowner receives, our Premium Home Therapy Plan is a smart way to keep your system running as it should. Regular, professional maintenance helps reduce surprise breakdowns, improves comfort, and supports the long-term health of your HVAC equipment.

You can learn more about our services and schedule a visit by exploring our main site at Home Therapist Cooling, Heating, and Plumbing. Our local Tampa Bay technicians are ready to help you create a maintenance plan that fits your home, your comfort goals, and our Florida climate.

When you’re ready, reach out and let us take care of your system—so it can keep taking care of you and your family in Apollo Beach.

Air Conditioning Maintenance and Indoor Air Quality Service in Apollo Beach, FL 33572

For a homeowner in Apollo Beach, FL 33572, comfortable indoor temperatures and clean air are especially important with our long, humid Florida seasons. On this visit, we came out for a scheduled Premium Home Therapy Plan appointment to check two relatively new Carrier systems—one serving the first floor and a smaller system serving the second floor. Both units were operating within proper ranges, but we did catch a couple of indoor air quality issues starting to develop and helped the homeowner understand how to address them before they turn into bigger problems.

In this article, we’ll walk through what we found, the maintenance we performed, and why we recommended cleaning the blower wheel and adding UV lights to help protect the home’s air quality. If you have similar HVAC systems in Apollo Beach or anywhere in the Tampa Bay area, this will give you a clear idea of what a thorough tune-up should look like and what to watch out for as your system ages.

Case Recap

  • Location: Single-family home in Apollo Beach, FL 33572
  • Systems: Two Carrier air conditioning systems (one serving the first floor, one serving the second floor)
  • Service type: Scheduled Premium Home Therapy Plan maintenance visit
  • Condition on arrival: Cooling properly with no comfort complaints from the homeowner
  • Findings: Both systems operating within normal range; indoor blower wheel starting to get dirty; no UV lights installed
  • Outcome: Maintenance completed successfully; system performance confirmed; recommendations made for blower wheel cleaning and UV light installation to improve indoor air quality

Customer Problem

On this visit in Apollo Beach, we weren’t responding to a breakdown or comfort emergency. The homeowner is on our Premium Home Therapy Plan, which means we come out routinely to inspect and service the HVAC equipment before problems show up. That proactive mindset is especially important here in Florida, where long cooling seasons can put a lot of hours on even newer systems.

The home has two systems: a larger system that conditions the first floor and a smaller system that handles the second floor. Both are relatively new and were cooling the home without any noticeable issues. The main concern from the homeowner was simple: “Keep everything running efficiently and help prevent future problems.” They also care about keeping their indoor air as clean as possible, which is a common concern for families in Apollo Beach dealing with humidity and organic growth.

Because the systems are only a few years old and from a reputable brand, some people might assume they don’t need much attention yet. But even newer equipment can develop airflow restrictions and indoor air quality concerns if certain parts start to get dirty. Our goal on a visit like this is to confirm the equipment is operating within normal parameters and to catch small issues, like a dirty blower wheel, before they affect comfort or air quality.

Inspection and Diagnosis

We began with a full system check on both the first-floor and second-floor units. On a Premium Home Therapy Plan visit like this in Apollo Beach, FL, we walk through a consistent, detailed process so nothing is overlooked.

Our inspection focused on several key areas:

  • Visual inspection of indoor and outdoor units – We checked for obvious signs of wear, corrosion, or damage.
  • Electrical components – We verified wiring connections and general condition of major electrical components.
  • Airflow path – We looked at filters, return and supply areas, and the blower section to check for dirt buildup or restrictions.
  • Condensate drainage – We checked that the drainage path was clear to help prevent water issues.
  • General performance – We confirmed the systems were running within normal operating range for a Florida home.

Both systems passed the core performance checks. They were cooling as expected, and there were no signs of immediate mechanical problems. However, when we inspected the blower section more closely, we saw that the blower wheel—the component that moves air through the system—was starting to get dirty.

Dirt buildup on a blower wheel is very common in our humid Tampa Bay climate, even on newer systems. Over time, that buildup can:

  • Reduce airflow, making rooms feel less comfortable
  • Force the system to work harder, which can impact efficiency
  • Contribute to dust and particles being recirculated in the home’s air

We also noticed that neither system had a UV light installed in the air handler. UV lights are not mandatory, but they are a strong option for homeowners in Apollo Beach who want added protection against organic growth on coils and in the air-handling components.

Repair and Service Process

Since there were no active failures, this visit was all about proper maintenance and prevention. Here’s how we approached the service step by step, and why each step matters to homeowners in Apollo Beach, FL 33572.

1. System Operation Check

We ran each system and observed operation through a full cooling cycle. This allowed us to confirm that both units started correctly, ran smoothly, and shut down properly. We verified that performance was within expected ranges for normal operation. This step gives us a baseline before and after maintenance so we know the system hasn’t been negatively affected by any work performed.

2. Filter and Airflow Review

We checked the condition of the air filters and the general airflow path. Restricted airflow is one of the quickest ways to create comfort issues and strain a system, especially with the long run times common in Apollo Beach. We spoke with the homeowner about filter replacement frequency and the importance of using the right type of filter for their home and equipment.

For homeowners who want more detailed information on filtration options, we often refer to our air filter installation and repair services page, which explains how filter quality ties into system health and indoor air quality.

3. Indoor Unit Inspection and Blower Wheel Condition

Next, we opened the indoor units to inspect the blower assembly, evaporator coil area, and cabinet interior. This is where we saw that the blower wheel had started to accumulate dirt. It wasn’t to the point of causing a breakdown, but it was enough that we knew it would eventually affect airflow and cleanliness if left alone.

We recommended a proper blower wheel cleaning, which involves removing the wheel, cleaning it thoroughly, and reinstalling it. This is more effective than simply wiping surfaces in place and helps restore the blower’s ability to move air efficiently. We explained to the homeowner that this cleaning would help the system maintain better airflow and reduce the amount of dust and buildup circulating through the ductwork.

4. UV Light Recommendation

Because the home is in humid Apollo Beach, we also talked with the homeowner about installing UV lights in each system. UV lights, when properly installed in the air handler, can help limit organic growth on coils and other damp surfaces inside the unit. That doesn’t replace regular maintenance, but it does add a strong extra layer of protection for indoor air quality.

We did not install the UV lights on this visit, but we clearly outlined the benefits, the placement, and how it would integrate with their existing equipment. We also made sure the homeowner understood that UV lights need periodic bulb replacement to stay effective.

If you’re curious how this fits into a broader maintenance strategy, our air conditioner maintenance plan information goes into more detail on how ongoing service can extend equipment life and help keep indoor air cleaner.

5. Outdoor Unit and Drainage Checks

We inspected the outdoor sections of both systems, looking for debris around the condenser, condition of the cabinet, and general cleanliness. We also checked condensate drainage to help prevent water backup or leaks, which can be a concern in our humid climate.

Where needed, we cleared minor obstructions and confirmed that nothing was restricting airflow through the outdoor coils. This is important because restricted outdoor airflow can reduce efficiency and put extra strain on the compressor.

6. Final Verification

After the maintenance tasks were complete and our recommendations were discussed, we ran both systems again to confirm that they were operating as expected. We verified proper operation after our checks and made sure the homeowner knew what was done, what was recommended, and what to watch for between visits.

For homeowners who want to take cleanliness even further, especially if ducts are older or have had past dust issues, our air duct cleaning services can pair nicely with blower and coil maintenance to improve overall system hygiene.

Why This Fix and These Recommendations Work

In this Apollo Beach maintenance visit, nothing was “broken” yet, but there were early signs of potential indoor air quality issues. Here’s why the blower cleaning and UV light recommendations make sense, especially in our Florida environment.

Blower Wheel Cleaning and Airflow

The blower wheel is like the heart of your air distribution system. As it spins, it pulls air through the return, across the coil, through the filter, and into your ductwork. When dust and debris build up on the blades, each blade becomes less effective at moving air. Even a modest amount of buildup can:

  • Reduce the volume of air moving across the coil
  • Make some rooms feel less comfortable or unevenly cooled
  • Increase run times, which can show up on your power bill

By removing and properly cleaning the blower wheel, we restore its ability to move air efficiently. That supports better comfort, less strain on the system, and cleaner air circulating through the home.

UV Lights and Organic Growth

Our Tampa Bay humidity creates the perfect environment for organic growth on damp surfaces inside your air handler—think coils, drain pans, and nearby components. UV lights are designed to shine on these surfaces and help prevent that growth from taking hold.

When installed and maintained correctly, UV lights can:

  • Help keep coils cleaner between professional cleanings
  • Support more stable airflow and efficiency
  • Reduce the potential for musty odors from the HVAC system

They’re not a replacement for filters or maintenance, but they are a strong add-on for homeowners in Apollo Beach, FL 33572 who want another layer of indoor air quality protection.

Pro Tips for Homeowners in Apollo Beach

Based on what we see every day in homes around Apollo Beach and the larger Tampa Bay area, here are some practical steps you can take to keep your system running smoothly and your indoor air cleaner:

  • Stay consistent with filter changes. In our climate, filters often need to be replaced more frequently than homeowners expect, especially during peak cooling months. Check them monthly and change them as needed.
  • Keep outdoor units clear. Make sure plants, mulch, and debris are at least a couple of feet away from your outdoor unit so it can breathe. Restricted outdoor airflow reduces efficiency and increases wear.
  • Watch for subtle changes. Even newer systems can start to show early warning signs—like certain rooms feeling stuffy or a light musty smell when the AC starts. Don’t ignore those changes; they can be clues that ducts or blower components need attention.
  • Consider indoor air quality upgrades. If anyone in your home has allergies or respiratory concerns, talk with a professional about filtration, air purification, and UV light options that work with your existing system.
  • Schedule routine maintenance. A regular plan, like the Premium Home Therapy Plan this homeowner uses, helps catch issues like dirty blower wheels before they impact comfort or cause more expensive problems.
  • Address duct and vent cleanliness. Over time, dust, debris, and other contaminants can collect in ductwork. Pairing routine maintenance with services like dryer vent cleaning and, when appropriate, duct cleaning can help improve overall system health.

FAQ: Maintenance and Indoor Air Quality for Apollo Beach Homes

How often should I have my AC systems serviced in Apollo Beach, FL 33572?

With our long cooling season, we generally recommend at least one thorough check-up per year for each system, and many homeowners choose a maintenance plan that includes two visits per year. Regular service helps keep your equipment efficient and allows us to catch issues like dirty blower wheels before they affect comfort or air quality.

Do newer systems really need this much attention?

Yes. Even newer systems can develop dust buildup, drainage issues, or airflow restrictions simply from normal use, especially in humid areas like Apollo Beach. Routine maintenance is less about age and more about hours of operation and the environment the system runs in.

What does a dirty blower wheel actually do to my home?

A dirty blower wheel can reduce how much air your system moves, which can make some rooms harder to cool and may cause the system to run longer than necessary. Over time, this can increase wear on the components and contribute to particles recirculating through your home’s air.

Are UV lights worth it for my HVAC system?

For many homeowners in the Tampa Bay area, UV lights are a helpful add-on, especially in homes where humidity is a concern. They help limit organic growth on coils and nearby surfaces. While they don’t replace filters or professional maintenance, they can support cleaner components and more stable performance over time.

Will these kinds of recommendations be forced on me during maintenance visits?

No. Our job is to inspect, explain, and recommend. We’ll always tell you clearly what we’ve found and why we’re suggesting a particular service or upgrade, but the decision is yours. In this Apollo Beach visit, the systems were operating well, and our recommendations focused on keeping them that way and improving air quality.

How do I know if my home needs duct cleaning too?

Some signs include visible dust at vents, uneven airflow, or a history of construction or remodeling that may have introduced debris into the ducts. During a visit, we can inspect your vents and discuss whether services like air duct cleaning are appropriate for your home.

Why Choose Home Therapist for Your Apollo Beach HVAC Needs

When you invite a technician into your home in Apollo Beach, FL 33572, you want more than just someone who can tighten a screw or swap a part. You want a licensed professional who will respect your home, communicate clearly, and focus on long-term comfort—not just quick fixes.

At Home Therapist Cooling, Heating, and Plumbing, that’s how we approach every visit:

  • Licensed, professional technicians – Our team is trained to handle everything from routine maintenance to more complex repairs, and we work carefully on both newer and older systems.
  • Transparent communication – We walk you through what we see, what we recommend, and why. You’ll know exactly what’s going on with your system, in plain English.
  • Clean and respectful work – We treat your home like our own, keeping work areas neat and minimizing disruption while we service your equipment.
  • Long-term reliability focus – Our goal is not just to get your system running today, but to keep it running reliably and efficiently for years whenever possible.
  • Committed to Tampa Bay homeowners – We live and work in the communities we serve, including Apollo Beach, and we understand the specific challenges of our Florida climate.

If you’d like to see what your neighbors are saying or stay connected with us, you can find Home Therapist on social platforms like Facebook and Instagram. Our YouTube channel is another way to learn more about our services and see tips straight from our technicians.

For added peace of mind, you can also review our presence on trusted platforms like Yelp and BuildZoom, or verify our local listing on Google Maps. We want you to feel confident in who you’re working with from the first phone call to the final system check.

Ready to Tune Up Your AC in Apollo Beach, FL 33572?

If you live in Apollo Beach, FL 33572 and want to keep your air conditioning system running smoothly—while also protecting your indoor air quality—routine maintenance is one of the best investments you can make. Whether you’re interested in a full maintenance plan, blower wheel cleaning, UV light installation, or just a thorough check-up, our local Tampa Bay technicians are here to help.

Reach out to Home Therapist Cooling, Heating, and Plumbing today to schedule your next AC maintenance visit. We’ll take the time to explain what we find, keep your home clean while we work, and help you make informed decisions about your comfort and air quality.

Your home should feel comfortable, clean, and safe—and we’re here to help keep it that way.

Thermostat Installation in Holiday, FL 34690

When a homeowner in Holiday, FL 34690 reached out to us for help installing a new thermostat they had purchased themselves, their main concern was simple: they wanted it installed safely and correctly so their air conditioning and heating would run the way it should. In Florida’s heat and humidity, even a small thermostat issue can turn into real discomfort quickly.

On this visit, we provided labor-only thermostat installation, verified the setup, and made sure the homeowner understood how everything worked. We also resubmitted an updated estimate when the original one could not be accepted through the system, keeping everything clear and transparent.

Case Recap

  • Location: Single-family home in Holiday, FL 34690
  • Service: Labor-only installation of a customer-supplied thermostat
  • Concern: Needed safe, professional installation and a clear, updated estimate
  • Work performed: Removed old thermostat, installed and wired new unit, configured settings, and tested HVAC operation
  • Outcome: Thermostat operating correctly and homeowner comfortable and informed

Customer Problem

Our homeowner in Holiday had already purchased a new thermostat but didn’t feel comfortable installing it themselves. That’s a very smart call—thermostats may look simple on the wall, but they’re the control center for your entire HVAC system. A miswired or incorrectly configured thermostat can lead to:

  • Systems that won’t turn on or shut off
  • Short cycling and unnecessary wear on equipment
  • Uneven temperatures and higher energy bills

They wanted a professional to handle the installation so they wouldn’t have to worry about damaging the system or guessing at the wiring. On top of that, the original estimate we sent through our system was giving them trouble—it wouldn’t let them accept it properly. In the job notes, we documented that we sent another estimate because the earlier one would not allow acceptance. Clear paperwork is just as important as correct installation, so we took care of that before moving forward.

Inspection and Diagnosis

Even though this was a straightforward thermostat installation in Holiday, FL 34690, we still follow a structured process. Any time we touch the control side of an HVAC system, we want to be sure we fully understand how the existing setup is working.

On arrival, we:

  • Spoke with the homeowner about the old thermostat and any recent issues with heating or cooling.
  • Verified power to the air handler and condenser to ensure we could work safely.
  • Removed the existing thermostat cover to inspect wiring, terminals, and labels.
  • Confirmed what type of system the thermostat was controlling (cooling, heating, fan) based on the wiring present.

Our goal here was to make sure the new thermostat would be compatible with the existing wiring and that the connections were clearly identified. Even with a customer-supplied thermostat, we treat the installation the same way we would if we provided the device—careful, methodical, and focused on long-term reliability.

Repair or Service Process

Once we confirmed that the wiring layout matched what the new thermostat required, we moved into the installation itself. For our neighbors in Holiday, FL, we always keep the steps clean and simple, and we explain what we’re doing as we go.

Here’s how the process typically goes for a thermostat installation like this:

1. Power and Safety

Before touching the thermostat wiring, we shut off power to the HVAC system at the appropriate disconnect or breaker. This protects both the system and the technician. Low-voltage wiring can still cause damage to sensitive control boards if it’s shorted or mishandled.

2. Remove the Old Thermostat

We carefully removed the old thermostat, keeping the existing wires accessible and clearly identified. In many homes around Holiday, we see older thermostats that have been on the wall for years, so we take care not to let wires fall back into the wall cavity and we avoid damaging drywall or paint.

3. Verify and Label Wiring

Next, we verified each wire by its color and terminal position on the old thermostat. Typical terminals might include connections for power, cooling, heating, fan, and common, depending on the system. Instead of guessing by color alone, we rely on how the wires were actually landed on the old thermostat and on standard wiring practices.

If there is any doubt, we trace the wiring back at the air handler or furnace side to confirm what each conductor is doing. That helps ensure the new thermostat’s terminals are wired correctly.

4. Mount the New Thermostat Base

After confirming the wiring, we mounted the new thermostat base to the wall. This includes leveling it so the display looks right and making sure the wiring opening is sealed reasonably well to reduce drafts from inside the wall, which can affect temperature readings.

5. Connect Wires to the New Thermostat

We then connected each wire to the proper terminal on the new thermostat according to the manufacturer’s diagram and the existing system wiring. This is the most critical step—one wrong connection can prevent the system from operating correctly or, in some cases, damage components.

6. Attach the Thermostat and Configure Settings

Once the base was wired, we attached the thermostat face or display, restored power to the system, and walked through the startup or configuration steps. That can include:

  • Selecting the proper system type in the thermostat menu
  • Setting cooling and heating modes, if applicable
  • Adjusting basic user settings like time, schedule, and temperature units

For more advanced smart models, many homeowners in Holiday later choose to explore features like Wi-Fi setup or app integration. When requested, we can help walk through those steps or, for a deeper dive, we may recommend resources like our guide on smart thermostat installation and upgrades in Tampa or our article on why upgrading to a smart thermostat in Tampa Bay can be beneficial.

7. System Testing

After configuration, we tested the HVAC system to confirm it responded properly in different modes. We cycled the system through cooling and fan operations and checked that the equipment started and stopped as expected.

We don’t leave a thermostat installation in Holiday, FL 34690 until we’ve verified that the system is responding correctly to temperature changes and mode selections. At the end, we review the basics of operation with the homeowner so they feel in control of their comfort.

Why This Fix Works

A thermostat is the brain of your HVAC system. When it’s installed and configured correctly, it sends the right low-voltage signals to your air handler, furnace, and condenser, telling them when to start, stop, and at what temperature.

Proper thermostat installation matters because it ensures:

  • Accurate temperature control: Correct placement and wiring help the thermostat sense room conditions reliably.
  • Efficient equipment operation: When the thermostat speaks the same “language” as your system, it reduces unnecessary cycling and strain.
  • Protection of control boards and components: Proper wiring keeps voltage where it belongs and helps prevent shorts and misfires.
  • Comfort and predictability: Schedules, setbacks, and setpoints work the way they’re supposed to.

In Florida’s climate, where cooling systems run hard for much of the year, a solid thermostat setup is one of the simplest ways to protect your investment. Our job on this Holiday project was to make sure the homeowner’s new thermostat was a help—not a headache—for their system.

Pro Tips for Homeowners in Holiday

Whether you’re in Holiday, New Port Richey, or anywhere around Tampa Bay, a few small habits can keep your HVAC system and thermostat working smoothly:

  • 1. Don’t rush thermostat changes. When you adjust the temperature, give the system several minutes to respond before changing it again. Rapid back-and-forth adjustment can cause unnecessary starts and stops.
  • 2. Avoid extreme setpoints. Setting the thermostat very low in summer won’t cool your home faster—it just makes the system run longer. Choose a reasonable temperature and let the system do its job.
  • 3. Keep the area around the thermostat clear. Avoid placing lamps, electronics, or direct sunlight near the thermostat. Extra heat can trick it into thinking the room is warmer than it is.
  • 4. Use scheduling features in our Florida climate. If your thermostat supports scheduling, use it to ease off cooling slightly when you’re away and bring it back to a comfortable level before you return. This works especially well with our long, hot afternoons in Holiday.
  • 5. Pair thermostat care with regular HVAC service. A correctly installed thermostat is only part of the picture. Routine maintenance—filter changes, coil cleaning, and ductwork checks like we performed on a ductwork and AC installation project in Holiday—helps the entire system respond accurately to thermostat commands.
  • 6. Call a pro before experimenting with wiring. If you’re ever tempted to move, add, or remove thermostat wires yourself, it’s safer to call a licensed technician. A short across the wrong terminals can be more costly than a service visit.

FAQ: Thermostat Installation for Holiday, FL Homeowners

Can I install a thermostat myself if I already bought it?

Some homeowners are comfortable with DIY projects, but thermostat wiring ties directly into your HVAC control system. A small mistake can stop the system from running or damage components. In this Holiday, FL 34690 project, the homeowner chose to have us handle the installation for peace of mind, and that’s usually the safest choice.

Will you install a thermostat that I purchase myself?

Yes, we offer labor-only thermostat installation, just like we did for this homeowner in Holiday. We’ll verify compatibility as part of our process and install the thermostat to manufacturer and industry standards.

What do you do after installing the thermostat?

After installation, we configure the basic settings, restore power, and test the HVAC system in different modes to confirm it responds correctly. We don’t rely on guesswork—we verify that your system is running as expected before we wrap up.

What if there’s a problem accepting or approving my estimate?

If our system gives you trouble when you try to accept an estimate, we’ll do exactly what we did on this job: send a new, updated estimate that works properly. You’ll always know what you’re approving and what to expect from the visit.

Do I need a smart thermostat to save energy in Florida?

You don’t have to, but a smart thermostat can make it easier to manage your schedule and adjust temperatures around your lifestyle. If you’re curious, you can learn more from our articles on smart thermostat upgrades in Tampa Bay, or you can simply start with a quality programmable thermostat installed correctly.

Can a thermostat fix other HVAC problems?

A new thermostat can improve control and reliability, but it won’t fix issues like refrigerant problems, duct leaks, or plumbing-related concerns. For broader home needs, we also handle services such as plumbing repair in Holiday so you have one trusted team for multiple systems.

Why Choose Home Therapist for Thermostat Installation and HVAC Work

When you invite us into your home in Holiday, FL 34690, you’re not just getting a quick install—you’re getting a licensed, professional technician who treats your home and equipment with respect.

Here’s what we focus on every time we handle a thermostat installation or HVAC service:

  • Licensed, experienced technicians: We work on HVAC and plumbing systems across Tampa Bay every day, from simple thermostat swaps to full system replacements.
  • Transparent communication: If something in our system doesn’t work right—like an estimate that won’t let you accept it—we fix it and keep you updated. You’ll always know what we’re doing and why.
  • Clean, respectful work: We protect surfaces where we work, keep our tools organized, and leave the area around your thermostat and equipment as tidy as we found it.
  • Long-term reliability: Whether it’s a thermostat, ductwork, or plumbing, we set things up so they’ll serve you well through many Florida summers to come.
  • Commitment to Tampa Bay homeowners: We’re part of the local community, serving areas like Holiday, New Port Richey, Clearwater, and beyond.

If you’d like to get a feel for who we are beyond the toolbox, you can follow us on social platforms like Pinterest or connect with us through our Reddit community presence. For added peace of mind, you can also review our credentials and reputation through our Better Business Bureau profile and our listing with the Tampa Bay Chamber of Commerce.

Need Thermostat or HVAC Help in Holiday, FL 34690?

If you’re in Holiday, FL 34690 and you’ve bought a new thermostat or you’re noticing issues with your current one, we’re here to help. Our team can handle everything from a simple labor-only installation to more involved HVAC or plumbing projects, so you don’t have to guess your way through wiring or system settings.

Reach out to schedule thermostat installation or other home comfort services, and we’ll walk you through a clear estimate, arrive on time, and make sure your system is running the way it should. Whether it’s cooling, heating, or related home repairs, Home Therapist Cooling, Heating, and Plumbing is ready to keep your Holiday home comfortable, safe, and running smoothly.

AC Maintenance Premium Therapy Plan Service in Port Richey, FL 34668

When your air conditioner is only about a year old, you want to keep it running like new—especially with the heat and humidity we see around Port Richey, FL 34668. On this visit, we were out as part of our Premium Therapy Plan to perform a scheduled maintenance on a relatively new system and make sure everything was operating safely, efficiently, and ready for the seasons ahead.

The homeowner was doing the right thing by staying on top of maintenance. Our job was to go through the full checklist: inspect all major components, verify electrical performance, confirm refrigerant pressures, clean the equipment, and make sure the condensate drain was clear. By the time we wrapped up, the system in this Port Richey home was running within normal parameters and ready to keep the house comfortable.

Case Recap

  • Location: Single-family home in Port Richey, FL 34668
  • Service: Scheduled AC maintenance under our Premium Therapy Plan
  • System age: Approximately 1 year old
  • Work performed: Full operational inspection, electrical and pressure checks, indoor/outdoor cleaning, and condensate drain cleaning
  • Findings: All readings within manufacturer specs and normal operating range
  • Outcome: System confirmed to be running properly and ready for continued use

Customer Problem: Staying Ahead of Issues, Not Chasing Breakdowns

In this case, the homeowner in Port Richey wasn’t calling because something was broken. They wanted to stay on schedule with their Premium Therapy Plan and make sure their one-year-old system didn’t turn into a surprise repair later on. That’s exactly how a maintenance plan should work: we catch small issues early, verify everything is in line with manufacturer expectations, and keep the system clean so it can run efficiently.

They also had specific timing needs for the visit and needed us to arrive within a set time window. We planned the appointment around that, arrived as scheduled, and got right to work so we could complete the inspection without disrupting their day.

From the homeowner’s perspective, their main goals were simple:

  • Make sure the AC was operating correctly before the weather really pushes it.
  • Protect the investment in a newer system.
  • Have a licensed professional verify that everything looked and sounded right.

When we’re providing AC repair, installation, and maintenance services for Tampa Bay and Port Richey homeowners, we treat maintenance visits just as seriously as repair calls. A little time now typically means fewer surprises later.

Inspection and Diagnosis: Verifying a Healthy One-Year-Old System

Even though this was a planned maintenance visit, we still approached it the same way we would any professional inspection. Our goal is to verify, not assume. On this Port Richey, FL 34668 service call, we followed the Premium Therapy Plan process step by step.

Here’s what we focused on and why:

Operational Inspection

We started with a complete operational inspection of the system. That means we:

  • Started the system and listened for abnormal noises.
  • Verified the thermostat was communicating properly with the equipment.
  • Confirmed the system was cycling on and off as expected.

This tells us right away if there are any obvious comfort or control issues before we dive into detailed checks.

Refrigerant Pressures

Next, we checked the operating pressures of the system. While we don’t list exact numbers in our summaries, the key point is that they were within normal range for this particular setup. This matters because pressures that are too high or too low can signal refrigerant problems, airflow issues, or component stress.

Electrical Performance

We then measured the electrical consumption of the major components:

  • Blower motor (indoor unit)
  • Compressor (the heart of the outdoor unit)
  • Condenser fan motor (outdoor fan)

All of these readings were confirmed to be within manufacturer specifications. That tells us the motors and compressor are not being overworked and are drawing power as expected, which is a strong indicator of overall health and efficiency.

Drainage and Cleanliness

Finally, we checked the cleanliness of the system and the condensate drain line. In Florida, where humidity is high for most of the year, drainage is a big deal. A clogged drain can cause water backup, ceiling damage, or indoor air quality concerns. On this visit, we inspected and cleaned the drain line to ensure proper flow.

After the full diagnostic process, we were able to confirm that the system in this Port Richey home was operating properly and within normal parameters.

Repair and Service Process: What We Actually Did

Because this was a maintenance visit and not a repair call, the focus was on thorough service rather than replacement of parts. Under the Premium Therapy Plan visit, we completed the following steps.

1. Full System Startup and Functional Check

We began by starting the air conditioner through the thermostat and confirming that both the indoor and outdoor units responded correctly. This included listening for unusual sounds, checking for vibrations, and making sure the airflow felt consistent at the supply vents.

2. Electrical Measurements Within Spec

We measured electrical consumption on the blower motor, compressor, and condenser fan motor. By confirming these values were within manufacturer specifications, we verified:

  • The motors were not under strain.
  • The compressor was operating as expected.
  • There were no immediate signs of electrical issues that could lead to premature failure.

This step directly supports long-term reliability and helps avoid surprise failures during peak heat.

3. Pressure Check for the Refrigerant Circuit

Next, we checked the operating pressures of the system. Pressures that sit in the normal range for the equipment and current conditions suggest that:

  • The refrigerant charge is appropriate.
  • Airflow across the coil is in line with expectations.
  • The compressor is not being forced to work outside its comfort zone.

For this Port Richey, FL 34668 home, the pressures were within normal range, which is exactly what we want to see on a one-year-old system.

4. Cleaning the Indoor and Outdoor Units

Both the indoor and outdoor units were thoroughly cleaned. A clean system is more than just looks—dirt and debris can restrict airflow, reduce efficiency, and place extra load on components.

Our cleaning process helps:

  • Maintain strong, even airflow throughout the home.
  • Support energy-efficient operation.
  • Reduce strain on motors and the compressor.

For Florida homes, where AC systems work nearly year-round, this cleaning step is critical.

5. Condensate Drain Inspection and Cleaning

We inspected and cleaned the condensate drain line to make sure water produced by the system could flow freely out of the home. A blocked or partially blocked drain can lead to leaks or shutdowns. Keeping this line clear is a simple but important part of any maintenance visit.

6. Final Operational Confirmation

After the cleaning and checks, we put the system back into normal operation and confirmed that it ran smoothly. We verified that the system was operating properly and within normal parameters before leaving the property.

For homeowners who want an overview of the types of AC services we provide across Tampa Bay, including Port Richey, our AC repairs, installs, and maintenance options page breaks down the choices in more detail.

Why This Fix (and Maintenance) Works

On this visit, there wasn’t a single “big repair” to talk about. Instead, the value came from a full system tune-up and verification. Here’s why that matters for an AC system in Port Richey, FL 34668:

  • Airflow: Clean filters, coils, and blower components maintain steady airflow. When air can move freely, the system doesn’t have to work as hard to cool the home.
  • Refrigeration cycle: Normal operating pressures tell us the refrigerant is circulating as intended, transferring heat out of the home efficiently.
  • Electrical health: Motors and the compressor pulling the right amount of current means they’re not overloading. That protects components and helps prevent nuisance trips or premature failures.
  • Drainage: A clear condensate drain keeps moisture moving out of the home and reduces the risk of water damage or system shutdowns due to backed-up water.

All of these pieces work together to keep the home comfortable while controlling energy use. That’s the core idea behind our Premium Therapy Plan: regular, careful attention so your AC can keep doing its job quietly in the background.

If you’d like to learn more about how we structure AC maintenance for Tampa Bay homeowners, you can also review our AC maintenance and cleaning specials and how they fit different homes and budgets.

Pro Tips for Homeowners in Port Richey

Living in Port Richey means your air conditioner sees a lot of hours every year. Here are some practical tips to help your system between professional visits:

  • Change or clean filters regularly: In our humid Florida climate, filters can load up quickly with dust and debris. Check them monthly and replace or clean as needed to keep airflow strong.
  • Keep outdoor units clear: Make sure there’s at least a couple feet of open space around the outdoor unit. Clear away leaves, weeds, and debris so the system can breathe and reject heat properly.
  • Watch your thermostat habits: Large temperature swings can stress the system. Instead of constantly turning the thermostat way up and down, choose a comfortable range and let the system maintain it.
  • Listen for changes: If you notice new noises—rattling, grinding, or buzzing—or if airflow suddenly feels weaker, it’s a good time to schedule a check before it becomes a bigger problem.
  • Plan maintenance before peak season: For Port Richey, FL 34668 and the surrounding area, scheduling your maintenance before the hottest months gives us a chance to catch issues early and avoid the stress of a breakdown in midsummer.
  • Consider a maintenance plan: A structured plan, like our Premium Therapy Plan, keeps maintenance on schedule so you don’t have to remember when it’s time. It also helps protect system warranties when annual service is required.

For more background on what to expect from our AC services across Tampa Bay, including Port Richey, you can read our overview of AC repairs, installs, and maintenance services.

FAQ: AC Maintenance Under the Premium Therapy Plan

How often should I schedule AC maintenance for my Port Richey home?

Most homeowners in Port Richey, FL 34668 benefit from professional AC maintenance at least once a year, given how hard systems run in our climate. Our Premium Therapy Plan is designed to keep those visits on a predictable schedule so your system is checked and cleaned regularly.

My system is only a year old. Do I really need maintenance already?

Yes. Even a one-year-old system, like the one in this case, should be inspected and cleaned. Regular maintenance supports efficiency, comfort, and can help keep manufacturer warranties valid when they require annual service by a licensed professional.

What do you check during a Premium Therapy Plan visit?

On a Premium Therapy Plan maintenance visit, we perform a complete operational inspection, check operating pressures, measure electrical consumption on key components, clean the indoor and outdoor units, and inspect and clean the condensate drain line. We finish by confirming the system is operating properly and within normal parameters.

What if my schedule is tight and I need a firm appointment time?

We work with homeowners in Port Richey to respect their schedules. For this visit, the homeowner needed a firm time window and we honored that. When you schedule, just let our office know your timing needs, and we’ll do our best to set a visit that works for you.

What happens if you find something wrong during maintenance?

If we discover an issue during a Premium Therapy Plan visit, we explain what we found, what it means for your system, and what your options are before moving forward. We don’t guess or pressure; we walk through the situation with you so you can make an informed decision.

Can I combine maintenance with future upgrades or repairs?

Absolutely. Many homeowners use maintenance visits as a chance to ask about comfort concerns, future upgrades, or indoor air quality options. If you’re considering changes, we can talk through them during your visit and help you plan out next steps over time.

Why Choose Home Therapist for AC Maintenance in Tampa Bay

When you invite us into your home in Port Richey, FL 34668 or anywhere in the Tampa Bay area, you’re trusting us with your comfort and your equipment. We take that seriously on every single visit.

  • Licensed and professional technicians: Our team is trained, experienced, and licensed to work on modern HVAC systems. We follow manufacturer guidelines and industry best practices on every job.
  • Transparent communication: We explain what we’re doing, what we find, and what it means in plain language. No surprises, no hidden steps.
  • Clean and respectful work: We treat your home with the same care we’d want in ours—respecting your schedule, keeping work areas as clean as possible, and being mindful of noise and disruption.
  • Long-term reliability focus: Our maintenance work is aimed at keeping your system running smoothly for the long haul, not just getting through today’s visit.
  • Commitment to Tampa Bay homeowners: We live and work in this community, and we aim to be the AC partner you can call year after year.

If you’d like to get a better feel for who we are, you can connect with us on social media. We share updates, tips, and real-world project highlights on Facebook, Instagram, and TikTok.

For added peace of mind, you can also see our standing with trusted organizations and directories, including our profiles with the Better Business Bureau and the Tampa Bay Chamber of Commerce.

Ready to Schedule AC Maintenance in Port Richey, FL 34668?

If you’d like the same level of care this homeowner received, we’re here to help. Whether your system is brand new or has a few seasons behind it, regular maintenance is one of the best ways to keep it reliable, efficient, and ready for Port Richey’s heat and humidity.

Schedule your AC maintenance or ask about our Premium Therapy Plan for your home in Port Richey, FL 34668, and let our local Tampa Bay technicians take care of the details. You can learn more about our company and services any time on our Home Therapist Cooling, Heating, and Plumbing website, and we’ll be ready when you’re ready to book your next visit.

Complete Toilet Repair Kit Installation in Tampa, FL 33647

When a toilet starts running nonstop, flushing weakly, or making strange noises, it quickly becomes more than just an annoyance. For a homeowner in Tampa, FL 33647, these issues had been getting worse over time. They reached out to our plumbing team at Home Therapist Cooling, Heating, and Plumbing to get their bathroom back to normal with a complete toilet repair kit installation.

In this visit, we upgraded the internal components of the toilet using an all-in-one repair kit. The goal was simple: stop the wasted water, restore a strong, reliable flush, and give the homeowner peace of mind. By the end of the appointment, the toilet was running like new again—without leaks, constant refills, or the need to jiggle the handle.

Case Recap

Here’s a quick overview of what we did for this plumbing service in Tampa, FL 33647:

  • Responded to a homeowner reporting a constantly running toilet and inconsistent flushing.
  • Inspected the internal tank components for wear, mineral buildup, and improper adjustments.
  • Removed aging parts and installed a complete all-in-one toilet repair kit.
  • Adjusted water level, fill rate, and flush components for optimal performance.
  • Tested multiple flushes to verify proper operation and check for leaks.
  • Reviewed basic maintenance tips with the homeowner for long-term reliability.

Customer Problem: A Frustrating, Always-Running Toilet

By the time we were called out to this home in Tampa, FL 33647, the homeowner’s toilet had become a daily frustration. While the exact wording varies from visit to visit, the concerns we often hear in situations like this include:

  • The toilet runs for a long time after every flush.
  • Sometimes it starts refilling on its own with no one using it.
  • The flush feels weak or incomplete, requiring two flushes.
  • They are worried about wasting water and higher utility bills.

Most homeowners don’t see inside the toilet tank very often, so these symptoms can feel mysterious. Our job is to make what’s going on simple and clear. In many Tampa homes, especially with our hard water and mineral content, internal toilet parts can wear out or build up deposits over time. That leads to leaks between the tank and bowl, noisy refills, and unreliable flushing.

Rather than chasing one part at a time, this homeowner chose a complete toilet repair kit. It’s a straightforward way to refresh all the main moving parts at once and extend the useful life of the toilet without replacing the entire fixture.

Inspection and Diagnosis

When we arrive at a plumbing call like this in Tampa, FL, we start with a quick conversation, then move into a systematic inspection. For a problematic toilet, our diagnostic steps typically include:

  • Visual check inside the tank: Looking at the condition of the fill valve, flapper, flush valve, and handle assembly.
  • Listening for leaks and refills: Identifying whether water is slowly seeping from the tank to the bowl or through the fill valve.
  • Testing the flush: Observing water level, flush strength, and how long the toilet takes to refill.
  • Checking for mineral buildup: Noting any scale or debris on seals and moving parts that can prevent a proper seal.

In cases like this Tampa, FL 33647 home, we often find a combination of worn rubber seals, aged plastic components, and out-of-adjustment water levels. Individually, each issue can cause small problems; together, they lead to the constant running and weak flush the homeowner was experiencing.

Based on the symptoms and the visible wear inside the tank, a full internal rebuild with an all-in-one repair kit is usually the most cost-effective and reliable approach. It also lets us start fresh with new parts that are designed to work together.

Repair Process: Installing the Complete Toilet Repair Kit

Once we confirmed that a full rebuild was the right solution, we walked the homeowner through what the process would look like. Clear communication is important to us, especially when we’re working inside someone’s bathroom in Tampa, FL 33647.

Here’s how we typically handle a complete toilet repair kit installation:

1. Shutting Off Water and Preparing the Area

We began by turning off the water supply to the toilet and flushing to lower the water level in the tank. We protected the work area, making sure the bathroom floor stayed clean and dry while we handled the parts. A neat workspace helps prevent accidental drips, mess, and slipping hazards.

2. Removing Old Internal Components

Next, we removed the aging components inside the tank. This often includes:

  • The fill valve (which controls how the tank refills after a flush).
  • The flapper (which opens to allow water to rush from the tank into the bowl).
  • Associated seals, gaskets, and internal hardware as needed.

Over time, rubber flappers can harden or warp, and plastic parts can become brittle. Carefully removing everything reduces the chance of small pieces breaking off and causing future issues.

3. Installing the New All-In-One Repair Kit

With the tank cleared out, we installed the new components from the complete repair kit. Because this kit is designed as a matched set, the parts are made to work together efficiently. We followed proper orientation and secure mounting to ensure stability and prevent leaks.

This type of kit typically includes a new fill valve, flush mechanism components, and related hardware. The advantage for Tampa homeowners is that you’re not mixing new parts with older, worn ones—you’re giving the toilet a fresh start internally.

4. Adjusting Water Level and Flush Settings

After installation, we turned the water back on and began fine-tuning the setup. Adjustments can include:

  • Setting the correct water level in the tank for a strong flush without waste.
  • Ensuring the fill valve shuts off properly when the tank is full.
  • Adjusting the chain or lift mechanism so the flapper opens and closes smoothly.

Dialing these details in is where experience matters. In a humid, high-use environment like Tampa Bay, proper adjustment helps maintain consistent performance and avoids nuisance running.

5. Testing for Leaks and Verifying Operation

We then performed multiple test flushes, watching and listening carefully. During testing, we verify that:

  • The tank fills to the correct level and shuts off reliably.
  • Each flush is strong and complete.
  • No water is slowly seeping from the tank to the bowl.
  • There are no visible leaks around the supply line or tank components.

Only after everything is working as expected do we consider the repair complete. Before leaving, we also make sure the area is clean and dry, and we answer any questions the homeowner has about what we did and what to watch for in the future.

Why This Fix Works

A toilet is a simple system, but it relies on several parts working together. The key principles involved in this kind of plumbing repair in Tampa, FL are:

  • Water control: The fill valve must allow water in quickly after a flush and then shut off completely once the tank reaches the right level.
  • Sealing: The flapper and related seals must close fully to hold water in the tank until the next flush.
  • Flow and pressure: When you flush, the stored water needs to move rapidly from the tank into the bowl to create a strong, effective flush.

When valves and seals wear out, water starts leaking from the tank to the bowl or through the fill valve. That’s when you hear the toilet running randomly or see it refilling without anyone using it. By replacing all the critical internal parts with a coordinated kit, we restore proper water control, sealing, and flow.

The result for this homeowner in Tampa, FL 33647 was a toilet that:

  • Flushes consistently and completely.
  • Stops running once the tank is full.
  • Helps avoid unnecessary water waste.

Pro Tips for Homeowners in Tampa

Living in Tampa Bay means your plumbing deals with warm temperatures, high humidity, and mineral content in the water. Here are some practical tips to keep toilets and other fixtures in good shape:

  • Listen for subtle changes: If your toilet starts refilling on its own, running longer than usual, or making new sounds, it’s your first sign that internal parts may be wearing out.
  • Check around the base occasionally: A quick glance at the floor around your toilet can reveal early signs of leaks before they damage flooring or subflooring.
  • Avoid harsh chemical drop-in tablets: Some in-tank cleaners can break down rubber seals faster, especially in our warm Florida climate. Gentle cleaning and periodic professional service are safer.
  • Know where your shutoff valve is: In case of an emergency, it’s important to know how to stop water to a toilet quickly. Make sure the valve beside the toilet is accessible and functional.
  • Schedule plumbing inspections as your home ages: As fixtures and piping age, small issues become more common. A routine plumbing check can catch wear in toilets, supply lines, and shutoff valves before they become emergencies.
  • Consider broader plumbing upgrades when needed: If you’re experiencing frequent plumbing issues, a larger project such as whole-home repiping may be worth discussing to protect your Tampa home long-term.

Related Plumbing Services for Tampa Bay Homeowners

Toilets are just one part of your overall plumbing system. If you’re dealing with other issues in your Tampa Bay home, our team can help with a range of services, including:

Whether it’s a simple toilet repair or a more involved plumbing project, we approach every job with the same focus on safety, cleanliness, and reliability.

FAQ: Toilet Repair Kit Installations in Tampa, FL 33647

Do I need to replace my entire toilet if it keeps running?

Not necessarily. In many Tampa, FL 33647 homes, the issue is with the internal tank components, not the porcelain itself. A complete toilet repair kit often restores proper operation without the cost and disruption of a full toilet replacement.

How long does a complete toilet repair kit installation take?

Most installations can be completed in a single visit. While exact times vary depending on the condition of the existing parts and shutoff valve, we plan the visit so we can remove the old components, install the new kit, make adjustments, and fully test the toilet before we leave.

Will this repair help lower my water bill?

If your toilet has been running frequently, refilling randomly, or leaking from the tank to the bowl, replacing worn internal parts can help reduce wasted water. We can’t promise a specific savings amount, but stopping unnecessary refills is a step in the right direction for Tampa homeowners.

How do I know if it’s time to call a plumber for my toilet?

It’s a good idea to reach out when you notice ongoing symptoms like constant running, weak flushing, water on the floor, or the need to jiggle the handle frequently. A quick professional visit can prevent small issues from turning into bigger plumbing problems.

Can you check the rest of my plumbing during a toilet repair visit?

Yes, if you’re in Tampa, FL 33647 and want a broader look at your home’s plumbing, let us know when you schedule. We can often combine a toilet repair with a basic inspection of other fixtures and drains so you have a clearer picture of your system’s overall condition.

Why Choose Home Therapist for Plumbing in Tampa Bay

At Home Therapist Cooling, Heating, and Plumbing, we treat every toilet repair in Tampa, FL 33647 the same way we would treat a repair in our own homes. Our focus is on making sure you understand what’s happening, what we recommend, and why.

Here’s what sets our team apart for Tampa Bay homeowners:

  • Licensed, professional technicians: Your plumbing work is handled by trained, licensed professionals who work with toilets, drains, and piping every day.
  • Transparent communication: We explain our findings in plain language, walk you through options, and make sure you’re comfortable with the plan before we move forward.
  • Clean, respectful work: We protect your home, keep the workspace neat, and clean up thoroughly before we leave your bathroom.
  • Long-term reliability focus: Whenever possible, we recommend solutions—like complete toilet repair kits—that prioritize lasting performance and fewer repeat visits.
  • Committed to Tampa Bay homeowners: We live and work in this community, and we’re here to keep local plumbing and comfort systems running smoothly.

If you’d like to get a better feel for who we are and how we serve Tampa Bay, you can find us on social media:

  • Connect with us on Facebook for updates and homeowner tips.
  • See behind-the-scenes and project highlights on Instagram.

We’re also listed with trusted local and industry directories, so you can check out more information and additional feedback from Tampa area homeowners:

Need Toilet Repair in Tampa, FL 33647?

If your toilet is running constantly, flushing poorly, or simply not working the way it should, our team at Home Therapist is ready to help. We’ll inspect the problem, explain your options, and, when appropriate, install a complete toilet repair kit to get things back to normal.

For homeowners in Tampa, FL 33647, a reliable, quiet, and efficient toilet is one quick plumbing visit away. Reach out to schedule service, and we’ll take care of the diagnosis, repair, and clean-up so you can get back to a comfortable, worry-free bathroom.

AC Contactor and Capacitor Replacement with Condenser Fan Motor Evaluation in Tampa, FL 33625

When the air conditioner starts acting up during a warm, humid day in Tampa, FL 33625, it doesn’t take long for the house to feel uncomfortable. For this homeowner, the outdoor condenser wasn’t running correctly, and the system was no longer cooling the home the way it should. Our Home Therapist technician arrived, diagnosed the issue, and restored operation by replacing a failing contactor and capacitor. We also performed a full performance test and discovered signs that the condenser fan motor and condenser coil needed attention to keep the system reliable for the long term.

Case Recap

  • Location: Residential home in Tampa, FL 33625
  • Services performed: New condenser contactor and new capacitor installed
  • Post-repair testing revealed the condenser fan motor was drawing higher than its rated amperage
  • High-side refrigerant pressure was elevated, likely due to a heavily soiled condenser coil
  • Compressor operation was confirmed to be within normal parameters at the time of service
  • Recommendations: Replace condenser fan motor and perform a thorough condenser coil cleaning

Customer Problem

For homeowners in Tampa, FL 33625, a properly running air conditioner isn’t a luxury—it’s a necessity. In this case, the homeowner reached out because the system wasn’t cooling as expected and there were clear signs the outdoor unit was struggling. The condenser wasn’t starting and running reliably, which can show up as warm air from the vents, longer run times, or the system cycling on and off without real comfort improvement.

From the homeowner’s perspective, the main concerns were:

  • Restoring cooling as quickly as possible in the Florida heat
  • Making sure the fix would be reliable and not just a temporary band-aid
  • Understanding what was going on with the outdoor unit and whether there were bigger issues coming

When a system reaches middle age—around eight years old in this case—components like contactors, capacitors, and fan motors start to show normal wear. The goal for us is not just to swap parts, but to look at the system as a whole and explain what we find so the homeowner can make informed decisions about future repairs or upgrades.

Inspection and Diagnosis

On arrival, our technician started with a visual and electrical inspection of the outdoor condenser. The symptoms pointed toward a control or start-up issue, so we focused first on the electrical components that tell the system when and how to run.

Key checks included:

  • Inspecting the condenser contactor for pitted or burned contacts
  • Testing the capacitor serving the compressor and fan motor
  • Verifying incoming power and control voltage from the indoor system
  • Checking wiring connections for overheating, corrosion, or looseness

The contactor and capacitor are two of the most common failure points in a residential AC system, especially in Tampa’s hot, humid climate where equipment runs hard for much of the year. In this case, both components were found to be in need of replacement. Once those issues were addressed, we moved on to a more detailed performance evaluation.

After installing the new contactor and capacitor and confirming the system would start and run, we conducted a full performance test. That included:

  • Measuring the condenser fan motor amperage and comparing it to the nameplate rating
  • Observing compressor operation and listening for abnormal sounds
  • Checking refrigerant pressures, including high-side pressure
  • Visually inspecting the condenser coil for dirt and debris buildup

This thorough approach helps us confirm that we’ve solved the immediate problem and also identify any developing issues that could cause future breakdowns for homeowners in Tampa, FL 33625.

Repair and Service Process

With the diagnosis in hand, we walked the homeowner through the findings and obtained approval to move forward with the necessary repairs.

1. Contactor Replacement

The contactor is essentially the switch that allows high-voltage power to flow to the compressor and condenser fan motor when the thermostat calls for cooling. Over time, the contacts inside can become pitted or burned, leading to intermittent operation, chattering, or complete failure.

We removed the old contactor, carefully transferred the wiring to a new, properly rated condenser contactor, and secured all connections. This helps ensure a reliable electrical path every time the system calls for cooling, reducing the risk of nuisance failures and protecting the compressor and fan motor from erratic power.

2. Capacitor Replacement

The capacitor gives the compressor and fan motor the electrical boost they need to start and run efficiently. When a capacitor weakens or fails, you may see issues such as the fan not starting, the compressor overheating, or the system tripping breakers.

We removed the old capacitor and installed a new one that meets the system’s specifications. The new capacitor helps the compressor and fan motor start smoothly and operate more efficiently, which is especially important given how hard AC systems have to work in Tampa’s climate.

3. System Performance Testing

After replacing the contactor and capacitor, we restored power and ran the system under normal operating conditions. During this testing:

  • The condenser fan motor amperage was measured at approximately 1.67 amps.
  • The unit data plate listed a normal fan motor draw of 1.52 amps.

This higher-than-rated amp draw tells us that the motor is working harder than it should. While the difference may seem small, running above the rated value over time puts additional strain on the motor and increases the risk of sudden failure.

We also checked refrigerant pressures and found the high-side pressure to be elevated. The condenser coil showed significant dirt and debris accumulation, which restricts heat rejection. That forces the system to operate at higher pressures and run longer to maintain comfort inside the home.

Despite these concerns, the compressor itself was operating within normal parameters at the time of service. We verified that the system was cooling again after the immediate electrical repairs.

4. Clear, Proactive Recommendations

Once we had the full picture, we explained everything to the homeowner in plain language. Based on the over-amping condenser fan motor and the heavily soiled coil, we recommended:

  • Proactive condenser fan motor replacement to prevent unexpected failure
  • Thorough condenser coil cleaning to bring down operating pressures and improve efficiency

The system is approximately eight years old, so this level of wear on the fan motor is consistent with normal aging. By addressing the fan motor and coil now, the homeowner can reduce the risk of a major midsummer breakdown and help extend the life of the equipment.

Why This Fix Works

Every component in an air conditioning system has a job, and when one part struggles, it can affect the whole system. Here’s why the repairs and recommendations on this Tampa, FL 33625 job make such a difference.

Electrical Reliability: Contactor and Capacitor

The contactor and capacitor work together to control and support the operation of the compressor and fan motor. A worn contactor can cause intermittent operation, arcing, and heat buildup at the electrical connections. A weak capacitor makes it harder for motors to start, which increases their operating temperature and shortens their lifespan.

By replacing both components, we restored clean, consistent power delivery and proper starting torque. That’s the foundation for any reliable AC repair.

Motor Health: Amperage and Load

Electric motors are designed to run within a certain amperage range. When a motor draws more current than its rating over time, it’s effectively telling us it’s under more load than it was designed for or that internal wear is increasing resistance. In this case, the condenser fan motor was rated for 1.52 amps but was drawing about 1.67 amps.

That extra load creates heat inside the motor windings. Over time, elevated heat can damage insulation, reduce efficiency, and eventually lead to a sudden motor failure. Replacing the motor before it fails helps avoid a no-cooling emergency and reduces stress on the compressor and other components.

System Efficiency: Coil Cleanliness and Pressure

The condenser coil’s job is to reject heat from inside the home out into the outdoor air. When the coil is heavily soiled, it cannot release heat efficiently. The system compensates by running at higher pressures and longer runtimes. That’s exactly what we observed here with elevated high-side refrigerant pressure.

A professional coil cleaning allows the system to move heat the way it was designed to. That helps lower operating pressures, reduce wear on the compressor and fan motor, and improve overall energy efficiency—important benefits for homeowners across Tampa, FL 33625 and the wider Tampa Bay area.

Pro Tips for Homeowners in Tampa

Florida’s heat, humidity, and coastal air are tough on HVAC systems. Here are a few practical tips to keep your air conditioner running more reliably in Tampa and nearby neighborhoods:

  • Keep the outdoor unit clear. Trim back plants and remove debris around the condenser so it has at least 2–3 feet of open space for airflow. Restricted airflow makes the fan and compressor work harder.
  • Change filters regularly. Dirty indoor filters can reduce airflow, increase operating pressures, and shorten equipment life. Most Tampa homes do well with filter changes every 1–3 months. If you need help with filtration options, our air filter services in Tampa Bay can guide you.
  • Schedule routine maintenance. A yearly professional tune-up that includes coil inspection, electrical checks, and performance testing goes a long way toward preventing surprise breakdowns, especially before peak summer heat.
  • Watch for early warning signs. Unusual noises from the outdoor unit, longer run times, or warm air from the vents are all reasons to have a technician check the system before it fails completely.
  • Consider air quality services. Clean ducts and proper filtration help your system breathe easier. Services like air duct cleaning in Tampa can support comfort and system performance together.
  • Plan ahead for aging systems. Around the 8–12 year mark, it’s wise to start planning for more frequent repairs or eventual replacement. We often discuss options with homeowners and can also point to solutions like full system upgrades with new ductwork when the time is right.

FAQ: AC Repair and Fan Motor Issues in Tampa, FL 33625

Is it safe to keep running my AC if the fan motor is over-amping?

If the condenser fan motor is drawing more current than its rated value, it is operating under extra strain. While it may still run for a period of time, prolonged use increases the risk of sudden failure and can add stress to the compressor. We generally recommend addressing the issue proactively, as we did on this Tampa, FL 33625 job by advising fan motor replacement.

Why do contactors and capacitors fail so often in Florida?

High heat, long run times, and frequent cycling during our Tampa summers all contribute to electrical wear. Contactors experience arcing every time they open and close, and capacitors are under constant electrical stress. Over the years, this normal wear and tear leads to failure. That’s why these parts are among the most common items we replace during HVAC service in Tampa Bay.

What does elevated high-side pressure mean for my AC?

Elevated high-side refrigerant pressure usually indicates the system is having difficulty rejecting heat. A very common cause is a dirty or clogged condenser coil, as we saw on this job. If not corrected, high pressures can increase energy use and put extra strain on both the compressor and fan motor. A professional coil cleaning often brings those pressures back closer to normal.

How long should a condenser fan motor last?

Service life varies with run time, maintenance, and outdoor conditions. In our area, an eight-year-old condenser fan motor that is over-amping and working against a dirty coil is showing typical signs of wear. At that point, proactive replacement is usually a smart way to avoid an inconvenient no-cool situation in the middle of the Tampa summer.

Will cleaning the condenser coil really help my energy bills?

Yes, a clean coil allows the system to transfer heat more efficiently. That can reduce operating pressures, shorten run times, and help lower energy use. While we don’t promise specific savings numbers, coil cleaning is one of the most cost-effective ways to support both performance and longevity, especially for homeowners in Tampa, FL 33625.

Why Tampa Bay Homeowners Choose Home Therapist

For HVAC repairs like contactor and capacitor replacement, fan motor evaluation, and system performance checks, homeowners throughout Tampa Bay choose Home Therapist because of how we approach every job:

  • Licensed, professional technicians: Our team is trained, experienced, and licensed to work safely on your air conditioning and heating systems.
  • Transparent communication: We explain what we find in clear, plain English and review options before any work begins.
  • Clean and respectful work: We treat your home like our own, keep the work area tidy, and take care not to leave a mess behind.
  • Long-term reliability focus: We don’t just swap parts; we look at how your system is performing as a whole and make recommendations that protect your comfort and investment.
  • Committed to Tampa Bay homeowners: From Tampa, FL 33625 to the wider region, we’re local technicians who understand how Florida’s climate affects your equipment.

If you’d like to see more of what we do and how we serve local homeowners, you can connect with us on social media and through our verified profiles:

For broader HVAC and plumbing needs beyond this type of AC repair, you can also explore our HVAC and plumbing services in Hillsborough County to see how we support homes across the region.

Need AC Service in Tampa, FL 33625?

If your air conditioner is struggling, making unusual sounds, or just not keeping up with the Florida heat, we’re here to help. Whether you need a contactor or capacitor replacement, a fan motor evaluation, or a thorough condenser coil cleaning, our Home Therapist technicians will walk you through the findings and keep you informed every step of the way.

Homeowners in Tampa, FL 33625 can count on us for careful diagnostics, honest recommendations, and repairs focused on comfort, safety, and long-term reliability. When your system needs a little therapy, schedule your visit with Home Therapist and let our local Tampa Bay team get your home feeling comfortable again.

New Sewage and Water Supply Installation in Tampa, FL 33604

When a homeowner in Tampa, FL 33604 reached out about updating both their sewage and water supply lines, they were dealing with more than just an inconvenience. Aging plumbing can threaten comfort, cleanliness, and even the long-term health of a home. Our team at Home Therapist Cooling, Heating, and Plumbing was called in to design and install a new sewage and water supply system, including connections for toilets, showers, sinks, and the water heater.

In this project, we installed new PEX water lines, PVC sewage piping, new valves and angle stops, and fresh connections to key fixtures. We also removed the old piping, designed the new layout, and left the home ready for a drywall/finish professional to close everything up once the plumbing work was complete.

Case Recap: Whole-Home Sewage and Water Supply Upgrade

  • Location: Single-family home in Tampa, FL 33604
  • Scope: New sewage and water supply installation for multiple fixtures
  • Installed new PEX water lines, PVC drain/sewage lines, valves, and angle stops
  • Connected toilets, shower, sinks, water heater, and meter as specified
  • Old pipes removed from the property and disposed of
  • Water system design and a 2-year labor warranty included

Customer Problem: Aging Plumbing and the Need for Reliable Water & Drain Lines

For this homeowner in Tampa, FL 33604, the existing plumbing system was no longer meeting their expectations for reliability and peace of mind. They wanted:

They also needed connections for specific fixtures, including:

  • 1 toilet connection
  • 1 shower connection
  • 2 bathroom sink connections
  • Water heater connection and connection to the water meter

Like many homes in Tampa and the surrounding Tampa Bay area, this property had some access limitations. Certain areas required us to work through walls or attic spaces, and there was a possibility that concrete would need to be cut for some connections. Our goal was to complete the work safely and efficiently while keeping the home as clean and protected as possible.

Inspection and Diagnosis: Planning the New Sewage and Water System

Before we ever start cutting pipe or opening walls, we spend time understanding the existing layout and the homeowner’s priorities. On this Tampa, FL 33604 project, our inspection and planning phase focused on:

  • Identifying all fixtures to be connected: toilet, shower, sinks, and water heater
  • Tracing current water and sewage routes to determine the best new layout
  • Checking access points in walls, ceilings, and attic spaces
  • Confirming where we might encounter concrete that would need cutting
  • Reviewing existing valves, faucets, and shower trim for compatibility with new lines

During this process, we also look closely at existing fixtures and connection points. If we find that any shower valves, faucets, or other fittings are corroded, mismatched, or otherwise not suitable for a reliable connection, we document it and discuss replacement options with the homeowner. We do not guess or force questionable connections—everything is evaluated for long-term function and safety.

We then design the new water system so that:

  • Water supply lines are sized and routed for consistent flow
  • Shutoff points are placed in convenient, accessible locations
  • The sewage lines are properly sloped and supported
  • Future maintenance, drain cleaning, or fixture replacements will be easier

This design step is critical. A good plan reduces unnecessary openings in walls, minimizes time on site, and helps keep the home organized and safe while we work.

Repair and Installation Process: Step-by-Step Plumbing Upgrade

Once the plan was in place and the homeowner approved the scope, we moved into the installation phase. Here’s how we approached the new sewage and water supply installation for this Tampa, FL 33604 home.

1. Protecting the Home and Setting Up the Work Area

Before touching the plumbing, our team took steps to protect the home:

  • Covering critical areas where dust or insulation might fall, especially near air vents
  • Coordinating with the homeowner so they could move or cover furniture below vents
  • Recommending that electronics, baby items, clothing, and food be covered or moved
  • Establishing clear work zones so our technicians could move safely and focus on the job

We explain to every homeowner that even with protection, some dust and debris is normal during major plumbing work. What we can control is how thoroughly we clean at the end of each workday and how respectfully we treat your home throughout the project.

2. Removing Old Pipes and Preparing for New Lines

Next, we isolated water supplies and safely removed the old water and sewage piping that was being replaced. As we removed sections, we:

  • Capped or secured exposed lines as needed
  • Kept removed materials organized to avoid clutter and tripping hazards
  • Loaded old pipes for removal so they did not remain on the property

Part of our service on projects like this in Tampa is hauling away the old piping. It keeps your property clean and saves you from having to coordinate disposal yourself.

3. Installing New PEX Water Supply Lines

For the water supply, we installed new PEX A piping. PEX is a flexible, durable material that performs well in Florida’s climate when installed correctly. On this project, we:

We also installed new hose bibs and ball valves where needed, giving the homeowner more reliable outdoor water access and better shutoff control throughout the property.

4. Installing New PVC Sewage Lines

For the sewage system, we used PVC piping. PVC is standard for modern drain and sewer systems and, when properly sloped and supported, provides a smooth interior surface that helps waste and water flow efficiently.

On this Tampa, FL 33604 project, that included:

  • New drain lines from the toilet, shower, and sinks
  • Properly aligned connections to existing sewer tie-in points
  • Support and strapping where needed to maintain grade and stability

In some homes, reaching certain drains or water lines requires cutting through concrete. When that is necessary, we explain the additional cost per connection ahead of time and obtain approval before any concrete cutting is performed. We also clarify that we do not pour new concrete after the plumbing work; that portion is left to a concrete or flooring professional once our rough-in is complete.

5. Making Fixture Connections and Verifying Compatibility

As we tied into existing fixtures, we examined each shower valve, faucet, and connection point. If a component is:

  • Severely corroded
  • Not compatible with modern fittings
  • Damaged or unsafe

we do not force it to work. Instead, we recommend replacement and discuss those options on the spot so there are no surprises later. This is a key part of long-term reliability and safety for plumbing systems in Tampa homes.

6. Pressure Testing, Flow Checks, and Clean-Up

Once all new piping and connections were in place, we tested the system to ensure it was running as expected. That included:

  • Checking for leaks at all new connections
  • Verifying proper water flow to each fixture
  • Confirming drains were clearing as expected

We then cleaned our work areas, gathered all debris, and left the home ready for the next tradesperson (such as a drywall repair specialist) to close any access openings. We always try to keep holes in walls and ceilings as small and as limited as possible, but any patching or painting is handled by the homeowner’s chosen contractor.

Why This Fix Works for Tampa Homes

For a home in Tampa, FL 33604, a properly designed and installed sewage and water supply system provides day-to-day comfort and long-term protection. This type of project works well because it addresses key plumbing principles:

  • Reliable water distribution: New PEX lines, valves, and angle stops give more predictable water flow, simpler shutoff control, and a reduced likelihood of hidden leaks from aging pipes.
  • Efficient drainage: PVC sewage lines with the proper slope help waste and water move out of the home smoothly, reducing the chances of frequent clogs or slow drains.
  • Serviceability: With updated shutoff valves and organized piping, future maintenance—whether it’s a water heater replacement, a fixture swap, or drain cleaning—is easier and less disruptive.
  • Compatibility and safety: By evaluating each fixture connection for corrosion or mismatched parts, we avoid patchwork solutions and focus on dependable, modern connections.

Combined with our 2-year labor warranty on this type of installation, the homeowner can feel confident that their updated plumbing system is built to serve them reliably.

Pro Tips for Homeowners in Tampa

If you’re a homeowner in Tampa or the surrounding Tampa Bay area considering new water or sewage lines, here are a few practical tips:

  • Plan ahead for access: Major plumbing work may require opening walls, ceilings, or working in attics. Move or cover furniture, electronics, and personal items before the crew arrives to keep them clean and protected.
  • Ask about materials: In Florida’s climate, quality PEX and PVC installed correctly can provide long-term performance. Don’t hesitate to ask which materials your plumber is using and why.
  • Understand attic and tight-space work: Working in low-clearance attics is more labor-intensive and sometimes not feasible. If your plumbing runs through tight spaces, expect a conversation about what’s practical and safe for the crew.
  • Plan for finishing work: Plumbing professionals typically do not handle drywall, texturing, painting, or concrete finishing. Budget and schedule separately for a drywall or concrete contractor to follow after the plumbing is complete.
  • Schedule periodic inspections: After a major upgrade, it’s still smart to have your plumbing system inspected from time to time. A full-house plumbing inspection can help catch small issues before they turn into bigger repairs.
  • Know your shutoffs: Once new valves and ball valves are installed, make sure you know where they are and how to use them. That knowledge can protect your home if you ever have an unexpected leak.

FAQs About New Sewage and Water Supply Installations

Do you design the new water system layout, or do I need to provide a plan?

We handle the water system design as part of the project. Our team looks at your current layout, fixture locations, and access points, then designs a new supply and sewage system that supports good flow, drainage, and future serviceability.

What if my existing shower or faucet can’t be reconnected to the new lines?

If we discover that any existing shower valve, faucet, or other fixture can’t be safely or reliably connected—due to corrosion, incompatible fittings, or damage—we’ll show you what we found and recommend replacement. We don’t guess, and we don’t force poor connections that could cause future leaks.

Will you patch the walls, ceilings, or concrete after the plumbing work?

Our responsibility is to perform the plumbing work safely and correctly. We always try to keep access holes as small and controlled as possible, but we do not patch drywall, texture, paint, or pour concrete. After we finish, we recommend hiring a qualified drywall or concrete professional to restore surfaces.

What happens if concrete has to be cut for my connections?

In some Tampa homes, certain water or sewage lines run beneath or through concrete. If we need to cut concrete to access or install a connection, there is an additional charge per connection. We explain this ahead of time, get your approval, and clearly outline what will and will not be restored by our team.

Is there a warranty on the labor for this kind of installation?

Yes. On projects like this one in Tampa, FL 33604, we provide a 2-year labor warranty for the new sewage and water supply installation. If an issue arises related to our workmanship during that period, we address it according to the terms of that warranty.

Can you help with full repiping or larger plumbing projects beyond just a few fixtures?

Absolutely. We regularly help Tampa Bay homeowners with full or partial repipes, new water supply designs, and drainage upgrades. You can learn more about complete repiping options in our article on plumbing services for a complete repipe and see how we structure larger projects.

Why Choose Home Therapist for Plumbing Projects in Tampa

When you invite a plumbing company into your home, you’re trusting them with your comfort, your property, and your time. At Home Therapist Cooling, Heating, and Plumbing, we take that seriously—especially for homeowners in Tampa, FL 33604 and the wider Tampa Bay community.

Here’s what you can expect from our team:

  • Licensed, professional technicians: Our plumbers are trained, experienced, and licensed to work on complex water and sewage systems. From new installations to full repipes, we follow industry best practices on every job.
  • Transparent communication: We explain what we’re doing, why we’re doing it, and what your options are before work begins. If something unexpected comes up—like a corroded valve or a concrete section that needs cutting—we talk it through with you first.
  • Clean and respectful work habits: Plumbing work can be messy, but our approach is not. We protect critical areas where we can, clean at the end of each workday, and treat your home like it were our own.
  • Long-term reliability: We focus on systems that are built to last. From material choices like PEX and PVC to properly placed shutoff valves and logical piping layouts, we think ahead to how your system will perform years down the road.
  • Commitment to Tampa Bay homeowners: We live and work in this community and are proud to serve our neighbors. Whether it’s a new installation, a maintenance plan, or help understanding payment options for repiping, we’re here to make the process as smooth as possible.

If you’d like to see more of what we do around Tampa Bay, you can connect with us on social media and review platforms:

For independent information and credentials, you can also find us on trusted directories and business organizations:

If you’re exploring broader plumbing solutions, you can also learn more about our plumbing services and promotions and ongoing maintenance plan options.

Need New Sewage or Water Lines in Tampa, FL 33604?

If you’re considering a new sewage or water supply installation, or you suspect your current system is reaching the end of its useful life, our local Tampa Bay team is ready to help. We’ll walk you through the design, installation, and follow-up steps so you know exactly what to expect.

To schedule a visit for your home in Tampa, FL 33604, contact Home Therapist Cooling, Heating, and Plumbing today. We’ll evaluate your plumbing system, explain your options in clear terms, and provide a solution focused on safety, comfort, and long-term reliability.

Shower Head Replacement in Apollo Beach, FL 33572

When a shower isn’t working the way it should, it can turn a simple daily routine into a frustrating chore. Recently, our Home Therapist team was called out to help a homeowner in Apollo Beach, FL 33572 with a shower head, handle, and trim that needed to be replaced. The goal was straightforward: install the new parts correctly, avoid unnecessary wall damage, and leave the bathroom clean and ready for daily use.

In this visit, we removed the old shower head and arm, installed a new shower head, handle, and faceplate that the homeowner had selected, and carefully checked for leaks and proper operation. By the time we were done, the shower in this Apollo Beach home was performing the way it should—delivering a better look, smoother operation, and reliable water flow.

Case Recap: Shower Trim Upgrade in Apollo Beach

  • Location: Residential home in Apollo Beach, FL 33572
  • Service: Shower head, shower arm, handle, and plate replacement (labor only)
  • Parts: Provided by the homeowner, with the option for us to supply parts on request
  • Scope: Trim and fixture replacement only—no shower valve replacement on this visit
  • Outcome: Clean, leak-free installation with properly operating shower controls

Customer Problem: Worn-Out Shower Fixtures

By the time homeowners in Apollo Beach reach out to us for shower fixture work, they’re usually dealing with one or more of the same issues:

Common complaints include:

  • A shower head that is clogged with mineral buildup or spraying in odd directions
  • Handles that feel loose, stiff, or difficult to control
  • Trim plates that are corroded, discolored, or just dated looking
  • Concerns about small drips or water getting behind the trim and into the wall

In this Apollo Beach, FL 33572 home, the homeowner wanted a straightforward refresh of the visible shower components: a new shower head and arm, plus a new handle and decorative plate. They had already chosen the style and purchased the parts, and they called us in to make sure everything was installed correctly and safely.

They also wanted clarity on what this type of service includes. For this kind of job, our standard labor-only shower head and arm replacement, along with handle and plate swap, focuses on:

  • Removing old trim and external hardware
  • Installing new fixtures provided by the homeowner (or sourced by us, if requested)
  • Checking for leaks at accessible connections
  • Verifying that the shower turns on, off, and adjusts temperature as expected

It does not automatically include replacing the internal shower valve buried inside the wall, and it does not include drywall or tile repair if access is required. We are always upfront about that so homeowners in Apollo Beach and across Tampa Bay understand exactly what to expect before we start.

Inspection and Diagnosis: Confirming What Needed to Be Done

Before we touch any plumbing in a home, we take a moment to assess the setup. In this Apollo Beach bathroom, our technician started by looking at three key areas:

1. Existing shower head and arm
We checked how the existing shower head and arm were mounted, and whether there were any signs of leaks at the connection to the wall. This is important because a loose or poorly sealed arm can allow water to drip behind the wall over time.

2. Shower handle and trim plate
Next, we inspected the handle and the trim (plate) around it. We looked for:

  • Visible gaps between the plate and the wall
  • Signs of moisture or staining around the opening
  • Any play or wobble in the handle operation

This tells us whether we’re dealing with a simple trim swap or if there might be deeper issues with the valve or mounting behind the wall. On this visit, everything pointed to a normal trim replacement with no immediate signs of hidden damage.

3. Access and wall condition
We also check whether the wall is tile, fiberglass, or drywall and whether any access is needed from the back side. For a standard trim and shower head replacement, we usually do not need to open walls. However, if something is damaged, seized, or improperly installed, more invasive work can sometimes be necessary. When that happens, we clearly explain to the homeowner that creating an access opening is a possibility and that patching or tile repair is not part of this specific service.

With everything inspected and no red flags, we confirmed that a straightforward shower head, arm, handle, and plate replacement was the right approach for this Apollo Beach, FL 33572 project.

Repair and Service Process: How We Replaced the Shower Fixtures

Once the homeowner understood the scope and gave the go-ahead, we walked through the replacement step by step. Here’s how we typically handle this kind of shower trim upgrade for our Tampa Bay and Apollo Beach customers.

1. Preparing the Work Area

We started by protecting the tub or shower floor and any nearby surfaces. Dropping a metal shower head or tool on a tub can cause chips or scratches, so we like to lay down a protective mat or towel and keep everything organized.

We also verified that the water shutoff was accessible if needed. For trim work only, we can often work without shutting off the whole home’s water, but we always make sure we’re ready in case something unexpected shows up when we remove the old parts.

2. Removing the Old Shower Head and Arm

The next step was to remove the old shower head and shower arm. We carefully unscrewed the head first, then the arm from the fitting inside the wall. As we do this, we look for:

  • Corrosion or damage on the threads
  • Signs of past leaks or water staining
  • Loose or unstable fittings inside the wall

If we see anything concerning, we discuss it with the homeowner. In this case, the connection was in usable shape, so we cleaned the threads at the wall fitting and prepared it for the new arm.

3. Installing the New Shower Arm and Head

Using the new arm provided by the homeowner, we applied fresh thread sealant (such as approved plumber’s tape) and carefully threaded the arm into the fitting, making sure it was snug and properly oriented. Proper sealing here is important to prevent slow leaks inside the wall.

Once the arm was set, we installed the new shower head, tightened it to manufacturer-recommended snugness, and wiped away any excess sealant. We left the final shower head alignment for after testing to make sure the spray angle worked well for the homeowner.

4. Removing the Old Handle and Trim Plate

For the handle and plate, we removed the old components carefully so as not to chip tile or damage the surrounding surface. That typically involves:

  • Removing the handle cap (if present) and handle screw
  • Sliding or pulling off the handle
  • Unscrewing the trim plate and gently pulling it away from the wall

After removing the old trim, we inspected the opening. We looked for any active moisture, mold-like staining, or deterioration around the valve opening. Everything appeared normal for this Apollo Beach shower, so we proceeded with the new trim installation.

5. Installing the New Handle and Plate

Next, we installed the new trim plate and handle assembly that matched the homeowner’s chosen style. We carefully aligned the plate, made sure the gasket or seal (if included) was properly positioned, and secured it snugly to the wall.

Then we installed the new handle onto the valve stem, confirmed it was tight, and checked the full range of motion—from off, through cold, to hot—without binding or slipping. This step is important for both safety and comfort, especially in homes with children or guests who may not be familiar with the shower controls.

6. Testing for Leaks and Proper Operation

Finally, we turned the water on and tested the shower thoroughly. For our Apollo Beach, FL 33572 homeowner, this included:

  • Checking all visible connections at the shower head and arm for leaks
  • Looking behind the trim plate opening for any signs of seepage
  • Running the shower through hot and cold ranges to confirm smooth control

Once we were confident the installation was sound, we cleaned up the work area, removed any debris or packaging, and made sure the bathroom looked as neat as when we arrived.

Why This Fix Works

A proper shower head and trim replacement may seem simple, but there are a few important plumbing principles behind it that matter for homeowners in Apollo Beach and across Tampa Bay.

1. Water Control and Safety
The handle and trim are your interface with the shower valve. When they’re installed correctly, you get smooth, predictable control over water temperature and flow. While this visit did not include replacing the internal valve, ensuring the trim is snug and properly aligned helps prevent unintended leaks around the valve opening and supports safe, consistent operation.

2. Leak Prevention
A properly sealed shower arm connection prevents water from slowly seeping inside the wall every time the shower is used. In Florida’s humid climate, hidden moisture can lead to damage over time if not addressed. By cleaning the threads, using proper sealant, and tightening to the right degree, we help protect your walls and framing.

3. Comfort and Experience
A new shower head can significantly improve how the shower feels, even without changing water pressure at the home. More even spray patterns, adjustable settings, and a clean interior free from mineral buildup all contribute to a better daily experience.

For this Apollo Beach, FL 33572 home, the combination of a new shower head, arm, handle, and plate offered a nice refresh without the cost and complexity of a full shower renovation.

Pro Tips for Homeowners in Apollo Beach

Here are a few practical tips for homeowners in Apollo Beach and surrounding Tampa Bay areas to keep their showers in good shape:

  • Watch for slow drips. A shower head that drips for a long time after shutoff can indicate wear inside the valve or debris in the cartridge. It’s usually easier and less expensive to address this early.
  • Clean mineral buildup regularly. Our local water can leave deposits that clog nozzles. Soaking the shower head in a mild descaling solution (or following manufacturer instructions) can help maintain a consistent spray.
  • Use quality parts rated for wet areas. When you pick out new trim in Apollo Beach, choose fixtures designed for shower use, with good seals and corrosion-resistant finishes. Cheaper parts can pit, peel, or fail faster in Florida’s humid environment.
  • Don’t ignore soft walls or stains. If you notice soft drywall, swelling, or discoloration around your shower, that can be a sign of hidden moisture. Even if your fixtures work fine, it’s a good idea to have a professional take a look.
  • Consider a full valve replacement during major updates. If you’re opening walls for tile work or a full remodel, that’s often the right time to update the internal shower valve, not just the trim. It can improve reliability and make future repairs easier.

If you’re not sure whether you need trim work, valve work, or both in your Apollo Beach bathroom, we’re always happy to talk it through and give you clear options.

FAQ: Shower Head and Trim Replacement in Apollo Beach, FL 33572

Does a shower head and handle replacement include replacing the shower valve inside the wall?

No. A standard shower head, arm, handle, and plate replacement focuses on the external components only. The internal shower valve inside the wall is a separate service, since it involves more labor and sometimes opening walls or access panels. If you’re in Apollo Beach and think your valve may need attention, we can evaluate it and explain options before any work is done.

Can you provide the shower head and trim, or do I need to buy them?

You can do it either way. Many Apollo Beach homeowners like to choose their own style and finish and provide the parts. If you prefer, we can also source recommended fixtures for you and simply pass along the material cost on your invoice so everything is handled in one visit.

Will you repair drywall or tile if an access hole is needed?

For this type of plumbing service, our scope is focused on the plumbing itself. If we ever need to create an access opening in sheetrock, tile, or other wall materials to reach a valve or piping, we do not perform the patching or tile work. We’ll always tell you beforehand if that kind of access is required, so you’re not surprised.

How long does a typical shower head and handle replacement take?

Most straightforward replacements take about a visit’s time frame, assuming no major corrosion, damaged fittings, or hidden issues are discovered. In Apollo Beach homes where everything is in normal condition, we can usually complete the work efficiently while still taking the time to test and clean up properly.

Is this kind of work covered under a plumbing inspection or membership?

Shower head and trim replacements are typically considered a specific repair or upgrade visit rather than a quick inspection item. If you’re in Apollo Beach, FL 33572 and you have questions about how this fits with ongoing maintenance or membership, we can review your options and help you decide what makes the most sense for your home.

Why Choose Home Therapist for Plumbing Work in Apollo Beach

When you invite someone into your home to work on your bathroom, you want more than a quick fix—you want a professional team that respects your space and explains what they’re doing. That’s exactly how we approach every plumbing visit in Apollo Beach and throughout Tampa Bay.

Licensed, professional technicians. Our plumbers are trained to handle everything from simple fixture swaps to more involved plumbing repairs. We don’t cut corners, and we work to leave your shower functioning the way it should.

Transparent communication. Before we start, we explain what’s included in the service, what isn’t, and what might change the scope—such as the need to open a wall or replace an internal valve. You’ll always know what you’re approving.

Clean, respectful work. We protect your bathroom surfaces, keep tools organized, and clean up when we’re done. Our goal is to leave your Apollo Beach home as tidy as when we arrived, with the plumbing in better shape.

Long-term reliability. Even on a simple shower head replacement, we think about the long term: leak prevention, safe operation, and minimizing the risk of future surprises. If we see something that needs attention, we’ll point it out and give you honest recommendations.

To learn more about our team and the services we provide across Tampa Bay, you can visit our About Us page or explore our dedicated plumbing repair services and plumbing solutions in nearby communities. We also assist homeowners throughout the region with more complex plumbing projects, similar to those highlighted on our Pasco County plumbing repair page.

If you’d like to see what other Tampa Bay homeowners say about working with us, you can find reviews and updates on our Facebook page and Instagram, or check out quick tips and project highlights on TikTok.

For added peace of mind, you can also view our profiles with local and national organizations, including our listing with the Better Business Bureau and the Tampa Bay Chamber of Commerce, or find us on Google Maps.

Need Shower Help in Apollo Beach, FL 33572?

If your shower head, handle, or trim isn’t working or looking the way you want, we can help. Whether you already have the parts picked out or you’d like guidance choosing the right fixtures, our local Tampa Bay team is ready to take care of the installation for your Apollo Beach, FL 33572 home.

Reach out to Home Therapist to schedule a visit, and we’ll walk you through your options, perform the work cleanly and professionally, and leave you with a shower that feels better, looks better, and works the way it should.

Shower Head and Trim Replacement in Apollo Beach, FL 33572

When a shower isn't working the way it should, it can turn a simple daily routine into something frustrating. That was the situation for a homeowner in Apollo Beach, FL 33572 who reached out to our team at Home Therapist Cooling, Heating, and Plumbing. They needed a straightforward shower head, arm, handle, and trim plate replacement, and wanted a professional to handle the installation so everything would look clean, work properly, and avoid future leaks.

In this plumbing visit, our licensed technician provided labor to replace the visible shower fixtures (the head, arm, handle, and plate). The customer supplied the parts, but we also explained that, when needed, we can source materials and simply pass the cost through on the invoice. After the work was complete, we tested the shower, checked for leaks, and made sure operation felt smooth and comfortable for everyday use.

Case Recap: Shower Fixture Upgrade in Apollo Beach

  • Location: Residential bathroom in Apollo Beach, FL 33572
  • Service: Replacement of shower head, shower arm, handle, and trim plate
  • Scope: Labor-only installation; customer provided the visible parts
  • What we did not do: No shower valve replacement and no wall repair (sheetrock/tile patching)
  • Outcome: Clean, secure installation with smooth handle operation and no leaks at time of completion
  • Benefit: Improved shower appearance, better functionality, and peace of mind for the homeowner

Customer Problem: Outdated, Worn, or Poorly Functioning Shower Fixtures

By the time most homeowners in Apollo Beach reach out to us for shower head replacement, they've already tried simple fixes. They may have changed the shower head themselves, used thread tape from the hardware store, or attempted to tighten a loose handle. But when fixtures are older, corroded, or not installed correctly to begin with, those quick fixes don't always hold up.

In this home, the visible shower components needed attention:

  • The shower head and arm were ready to be replaced, often due to age, mineral buildup, or cosmetic wear.
  • The shower handle felt tired and the trim plate around it no longer matched the homeowner's preferred style.
  • The customer wanted a cleaner, updated look without touching the plumbing inside the wall.

They did the right thing by calling a licensed plumber rather than forcing parts or overtightening connections. In Florida's humid climate, small plumbing issues can turn into stained drywall, mold concerns, or hidden damage if a shower leak goes unnoticed. Our job was to perform a careful, code-conscious replacement so the homeowner could enjoy the new fixtures confidently.

Inspection and Diagnosis: Confirming the Scope Before We Start

Any time we perform a shower head and trim replacement for a homeowner in Apollo Beach, FL 33572, we start by clearly defining the scope of work. In this case, the service was specifically for:

  • Shower head and shower arm replacement
  • Shower handle and trim plate replacement
  • Labor only – parts provided by the homeowner (with the option for us to supply them if needed)

Before removing anything, our technician walked through a few key checks:

  • Valve type and condition: We verified that the existing shower valve inside the wall was functioning and did not need replacement. This job did not include a valve change.
  • Access and wall condition: We checked the tile and surrounding wall to confirm that we could remove and reinstall the fixtures without opening new access holes.
  • Water shutoff setup: We identified where to isolate water if needed so the work could be done safely without sudden sprays or unexpected leaks.
  • Compatibility of trim: We confirmed the new handle and trim plate were compatible with the existing valve style. This helps avoid situations where parts look right in the box but don't fit what's inside the wall.

This initial assessment is important. It protects the homeowner from surprises and ensures that, when we say we're doing a shower head, arm, handle, and plate replacement, we're not accidentally stepping into a bigger job—like a full shower valve replacement or wall repair—without a conversation first.

Repair and Service Process: Step-by-Step Shower Fixture Replacement

Once we confirmed the scope, our technician walked the homeowner through the plan and then started work. Even for what seems like a simple fixture swap, we treat the process with the same care we give larger whole-home plumbing projects.

1. Protecting the Work Area

We began by protecting the bathroom surfaces. That includes laying down drop cloths where needed, being careful with tools, and keeping the work area as neat as possible. Respecting the homeowner's space is a core part of how we operate for every plumbing service in the Tampa Bay area.

2. Removing the Old Shower Head and Arm

Next, we carefully removed the existing shower head and arm. This is more than just unscrewing a part:

  • We checked for signs of corrosion or damage at the connection where the arm meets the plumbing behind the wall.
  • We cleaned the threads and removed any old tape or sealant that could interfere with a tight, new connection.
  • We inspected the surrounding trim and tile to confirm there were no visible cracks or water staining.

Taking time here helps prevent leaks at the drop ear (the fitting the arm screws into inside the wall), which is a common trouble spot if parts are forced in at the wrong angle.

3. Installing the New Shower Arm and Head

With the old components out of the way, we prepared and installed the new arm and shower head provided by the homeowner:

  • We applied appropriate thread sealing material to the new shower arm threads.
  • We installed the arm carefully, aligning it so the new head would sit level and look clean.
  • We attached the new shower head, tightening it securely while avoiding overtightening that could damage the fixture.

Our goal is to ensure the shower arm is secure, the head is properly supported, and the assembly is leak-free while also presenting a neat, finished appearance.

4. Removing the Existing Handle and Trim Plate

Replacing the handle and plate required us to first remove the existing trim from the shower valve. This step must be done carefully to avoid chipping tile or scratching the new finishes.

We gently removed the old handle and escutcheon (trim plate), then inspected the valve stem and surrounding area. Because this job did not include a valve replacement, we focused on ensuring the existing valve was operating correctly and that the new trim would seat properly against the wall.

5. Installing the New Handle and Trim Plate

With the old trim out of the way, we installed the new plate and handle:

  • We checked that the new trim plate covered the same or larger area than the original, to avoid exposing unfinished wall.
  • We installed the plate snug against the wall, making sure any gaskets or seals were in place as designed by the manufacturer.
  • We mounted the handle to the valve stem so that it turned smoothly and aligned properly with hot/cold markings if present.

This step is where experience really matters. Even if the parts are "universal," each manufacturer has its own mounting style and clearances. Taking the time to align everything correctly helps avoid loose handles or trim that sits crooked over time.

6. Testing for Leaks and Proper Operation

Once the physical installation was complete, we restored water and carefully tested the shower. For every plumbing repair near Apollo Beach, our standard is the same: we don't consider the job complete until we've verified the system is running as expected.

Our technician:

  • Turned the shower on and off multiple times to check for smooth handle operation.
  • Inspected around the trim plate and behind the shower head for any signs of leaks.
  • Let the shower run long enough to confirm there were no slow drips or seepage.

After confirming the installation was dry and operating normally, we walked the homeowner through what was done and answered any questions about caring for the new fixtures.

Why This Fix Works: The Plumbing Basics Behind a Good Shower

A shower head and trim replacement might look like a purely cosmetic upgrade, but when it's done correctly, it also supports reliability and safety for homeowners in Apollo Beach, FL 33572.

Here's why the approach we used works well:

  • Secure, sealed connections: Carefully cleaning and resealing threads on the shower arm connection helps prevent slow leaks inside the wall, which can cause hidden moisture damage over time.
  • Proper alignment: Ensuring the shower arm, head, and trim are aligned avoids stress on the fittings. When parts are forced or crooked, they're more likely to loosen or crack.
  • Valve compatibility: Using trim that matches the existing valve ensures the handle operates the way it was designed to, helping maintain safe temperature control.
  • Visual inspection during the process: Each time we open up a plumbing connection, we have a chance to catch early signs of corrosion or wear before they become emergency leaks.

For bigger plumbing concerns—like aging pipes or recurring leaks—our team also handles larger projects such as whole-home repiping and other plumbing repairs for Tampa Bay area homeowners. But in this Apollo Beach visit, a focused fixture replacement was exactly what was needed.

Pro Tips for Homeowners in Apollo Beach

Living on the Gulf Coast in Florida means your plumbing deals with humidity, mineral content in the water, and heavy daily use. Here are a few practical tips if you're thinking about a shower upgrade in Apollo Beach, FL 33572:

  • Choose quality fixtures, not just looks. In our climate, cheaper finishes and plastic threads can fail early. A slightly better-built shower head and handle can save you from drips and wobbly handles down the road.
  • Match trim to your existing valve. Before buying a new handle and plate, confirm the brand and style of your current valve. Bringing a photo to the store or asking a pro can help avoid returns and frustration.
  • Watch for early signs of hidden leaks. If you notice soft drywall, discoloration, or loose tiles around the shower, have it checked. Even a small, slow leak behind the trim is worth addressing before it spreads.
  • Use gentle cleaners on finishes. Harsh chemicals and abrasives can ruin the finish on new fixtures. A mild cleaner and soft cloth will keep your shower looking fresh longer.
  • Consider water quality upgrades. If you see heavy scale buildup on shower heads or plumbing fixtures, a filtration or conditioning solution can help. We offer water filtration installation services that can protect fixtures and improve water quality throughout your home.
  • Schedule professional help when in doubt. If replacing a simple shower head turns into stuck parts, crumbling threads, or mystery leaks, it's safer to bring in a licensed plumber than to push harder on the wrench.

FAQ: Shower Head, Handle, and Plate Replacement in Apollo Beach

Does a shower head and trim replacement include changing the valve inside the wall?

No. In this service, we replaced the shower head, shower arm, handle, and trim plate only. The valve inside the wall was left in place. A shower valve replacement is a separate service with its own pricing, because it typically requires additional labor and sometimes opening the wall for access.

Can you supply the shower fixtures, or do I have to buy them myself?

We're happy to work either way. In this Apollo Beach, FL 33572 project, the homeowner provided the fixtures. If you prefer, we can source compatible parts for you and simply pass the material cost through on your invoice so you have a single, clear bill.

Will you patch tile or drywall if a hole needs to be opened?

For this type of service, our role is focused on the plumbing. If we ever need to open sheetrock, tile, or another surface to access the plumbing, wall repair is not included in the plumbing scope. We explain that clearly ahead of time so you can plan for a tile or drywall professional if needed.

How long does a shower head and trim replacement usually take?

Most straightforward replacements can be completed in a single visit, assuming the new parts are compatible and there are no hidden issues like severe corrosion or damaged piping. We take the time needed to ensure everything is installed correctly and tested before we leave.

Is it worth calling a plumber for just a shower head and handle swap?

For many Apollo Beach homeowners, the answer is yes—especially if the fixtures are older or if the handle connects to a more complex mixing valve. A licensed plumber can help avoid cross-threading, leaks inside the wall, or improperly installed trim that might affect temperature control.

What if we discover the valve is bad during the visit?

If we find that the existing valve is not operating safely or correctly, we'll stop, explain what we're seeing, and go over options and pricing for a proper repair or replacement. We don't proceed with major additional work without your approval.

Why Choose Home Therapist for Plumbing Work in Tampa Bay

Whether it's a simple shower head replacement or a more involved plumbing repair, homeowners throughout Tampa Bay—including Apollo Beach, FL 33572—count on Home Therapist Cooling, Heating, and Plumbing for professional, respectful service.

Here's what you can expect when you call our team:

  • Licensed and professional technicians: Our plumbers are trained to handle everything from small fixture changes to complex piping projects with the same attention to detail.
  • Transparent communication: We explain what we're doing, what is and isn't included, and what your options are—no pressure, no surprise add-ons.
  • Clean and respectful work: We treat your bathroom like it's in our own home, keeping the space as tidy as possible and cleaning up before we go.
  • Long-term reliability focus: Even on smaller jobs, we look for early warning signs of bigger issues and let you know what we see so you can plan ahead.
  • Commitment to Tampa Bay homeowners: We're a local company serving communities across the region, from Apollo Beach to Brandon, Clearwater, and beyond.

If you'd like to get a feel for how we work and how our customers describe their experience, you can visit us on Facebook, follow along on Instagram, or check out more of our projects and tips on TikTok.

For added peace of mind, you can also see our profiles with trusted organizations and directories, including the Better Business Bureau and the Tampa Bay Chamber of Commerce, or view our location and reviews on Google Maps.

Need Shower or Plumbing Help in Apollo Beach, FL 33572?

If your shower head, handle, or trim is loose, leaking, or simply outdated, you don't have to live with the frustration. Our local Tampa Bay technicians regularly help homeowners in Apollo Beach, FL 33572 with fixture replacements, plumbing repairs, and upgrades throughout the home.

Whether you already have parts picked out or want our guidance on what to buy, we're here to make the process smooth and straightforward. From simple shower fixes to larger plumbing repair projects across the Tampa Bay area, we focus on doing the job right, keeping you informed, and protecting the comfort of your home.

When you're ready, contact Home Therapist Cooling, Heating, and Plumbing to schedule your shower fixture service in Apollo Beach, FL 33572. We'll take care of the details so you can get back to a comfortable, reliable shower routine.

Electric Water Heater Installation in Tarpon Springs, FL 34689

When your water heater is aging or unreliable, you feel it in your daily routine—cold showers, inconsistent temperatures, or worries about leaks. A homeowner in Tarpon Springs, FL 34689 reached out to our team at Home Therapist because it was time to replace an old unit with a dependable, efficient electric water heater that would serve the home for years to come.

For this project, we installed a premium Rheem 40-gallon electric water heater (medium size, 5500 watts) with upgraded accessories: hot water line insulation, an expansion tank, service valve, drain pan, and discharge line. We also made sure the homeowner was fully covered with a strong manufacturer parts warranty and labor warranty from our Plumbing Therapist team.

Below, we’ll walk you through what the homeowner was dealing with, how we approached the installation, and what this kind of upgrade means for comfort, safety, and peace of mind for families in Tarpon Springs and the greater Tampa Bay area.

Case Recap

  • Location: Single-family home in Tarpon Springs, FL 34689
  • Service: Premium electric water heater replacement and installation
  • Equipment: Rheem 40-gallon, 5500-watt medium electric water heater (model series XE40M09EL55U1)
  • Upgrades: Hot water line insulation, expansion tank, service valve, drain pan, and discharge line
  • Warranty: 9-year manufacturer parts coverage and 2-year labor warranty from Plumbing Therapist
  • Outcome: Reliable hot water, safer installation, and a cleaner, more efficient setup tailored to the home

Customer Problem

Like many homeowners in Tarpon Springs, this customer wanted to stop worrying about their hot water. Older water heaters can be a real source of anxiety—especially if you’ve already noticed signs of age such as:

  • Inconsistent water temperatures or slow recovery time between showers
  • Concerns about leaks or a rusting tank
  • Higher electric bills from an inefficient, outdated unit

The homeowner was ready for a straightforward solution: remove the uncertainty and get a modern, reliable electric water heater installed by licensed professionals. They also wanted the assurance that the installation would be done to current standards, with the right safety components and a solid warranty backing everything up.

Because this job required handling a full-size tank, electrical connections, and plumbing tie-ins, our team ensured the visit was properly staffed and planned so the work could be done efficiently and safely with minimal disruption to the home.

Inspection and Diagnosis

Before installing any new water heater, we start with a careful look at the existing setup. For this Tarpon Springs, FL 34689 home, our inspection focused on:

  • Existing water heater location: Checking clearances, ventilation needs, surrounding materials, and access for removal and installation.
  • Plumbing connections: Verifying hot and cold water lines, shutoff valves, and the condition of existing piping.
  • Electrical supply: Confirming that the circuit size and wiring were appropriate for a 5500-watt electric water heater.
  • Drainage and safety components: Looking for a proper drain pan, discharge (T&P relief) line, and a safe place for water to go in the event of a leak or over-temperature condition.

We also confirmed that a 40-gallon tank was an appropriate capacity for the home. In many Florida households, a 40-gallon electric unit is a good balance between recovery speed, energy use, and space requirements. A medium-size model with dimensions around 50 1/2″ high by 20 1/4″ in diameter fits comfortably in many standard water heater locations, such as closets or utility rooms.

Once we verified that the existing plumbing and electrical setup could support the new Rheem unit and that we had the necessary clearance and drainage options, we moved ahead with the installation plan.

Repair and Installation Process

Water heater replacement is more than just swapping tanks. Done properly, it’s a careful, step-by-step process that protects your home and ensures long-term reliability. Here’s how we handled this job in Tarpon Springs:

1. Safely Shutting Down and Removing the Old Heater

We started by shutting off power to the existing electric water heater at the breaker panel and verifying that the unit was de-energized. Then we isolated the water lines and drained the old tank using a hose and appropriate drainage path. Once drained, we disconnected the plumbing and electrical connections and carefully removed the old unit from the home.

This part of the process is important for safety—no live power, controlled water flow, and careful handling to avoid any mess or damage to flooring or walls.

2. Preparing the Area for the New Rheem Unit

With the old heater out, we cleaned the installation area and inspected the floor and surrounding surfaces. We then positioned a new drain pan under the installation spot. The drain pan is a key protective feature: if the tank ever leaks, the water is directed into the pan instead of onto your floor.

We also made sure the discharge (temperature and pressure relief) line routing was appropriate, so any future discharge from the T&P valve would be safely carried away from living spaces.

3. Setting and Leveling the New 40-Gallon Water Heater

Next, we brought in the new Rheem 40-gallon electric water heater and set it into the drain pan. Leveling the tank is important to ensure proper operation and to prevent stress on the plumbing connections. Once we had it positioned correctly, we aligned the hot and cold connections with the home’s plumbing.

4. Installing the Expansion Tank

As part of this premium installation, we added an expansion tank to the water heater system. An expansion tank absorbs excess pressure caused by heated water expanding inside the plumbing system. In many Florida homes, especially those with backflow prevention or pressure-reducing devices, an expansion tank is an important safeguard against pressure spikes that can stress pipes, fixtures, and the water heater itself.

We sized and installed the expansion tank according to the home’s water pressure and water heater specifications, then secured it properly on the cold-water side of the system.

5. Adding a Service Valve and Reconnecting Plumbing

We installed a dedicated service valve, which makes future maintenance and emergency shutoff much easier. Instead of having to shut down water to a large section of the home, the homeowner (or a plumber) can isolate just the water heater when needed.

We then reconnected the hot and cold water lines to the new heater, ensuring all joints were secure and leak-free. As part of this installation, we included hot water line insulation to help reduce heat loss as hot water travels through the pipes—especially important in Florida homes where energy efficiency and comfort are both priorities.

6. Electrical Connections and LED System Check

For the electrical side, we connected the Rheem unit to the existing circuit, following manufacturer guidelines and electrical safety practices. This water heater includes an electronic LED system that indicates element and thermostat operation. Once powered, we confirmed that the LED indicators behaved as expected and that both heating elements were operating correctly.

7. Filling, Bleeding Air, and Final Testing

After all connections were secure, we opened the water supply and carefully filled the tank, purging air from the system by opening hot water faucets in the home. Only after verifying the tank was fully filled with water did we restore power at the breaker.

We then allowed the heater to come up to temperature and checked:

  • For leaks at all plumbing joints, valves, and the tank connections
  • Proper operation of the thermostat and heating elements
  • Normal function of the T&P relief valve and discharge line routing

Once we confirmed everything was operating as expected, we reviewed the system with the homeowner, including basic operation, what the LED indicators mean, and how the warranties apply.

Why This Fix Works

Replacing an older water heater with a properly sized, modern electric unit is one of the most effective ways to restore reliable hot water and improve safety in a home. For this Tarpon Springs, FL 34689 installation, several elements work together:

  • Capacity and recovery: A 40-gallon, 5500-watt electric heater provides a good balance of capacity and heating speed for typical family use.
  • Efficient heat transfer: Electric heating elements warm the water inside the tank, controlled by thermostats that maintain a stable set temperature.
  • Pressure management: The expansion tank relieves stress on the plumbing system by giving expanding water a safe place to go, helping protect pipes, fittings, and the tank.
  • Safety routing: The discharge line connected to the T&P relief valve ensures that if pressure or temperature ever get too high, water is safely carried away from the living space.
  • Insulation and accessories: Hot water line insulation and a proper drain pan help conserve energy and protect the home from potential leaks.

All of this, combined with professional installation and clear warranties, means the homeowner now has a system designed for long-term reliability rather than a temporary patch.

Pro Tips for Homeowners in Tarpon Springs

For homeowners in Tarpon Springs, FL 34689 and the surrounding Tampa Bay area, here are some practical tips to get the most out of a new electric water heater:

  1. Know where your shutoff and breaker are. Take a moment to learn where the water heater shutoff valve and the dedicated electrical breaker are located. In an emergency, this helps you act quickly and safely.
  2. Watch for subtle changes. If you notice reduced hot water, longer recovery times, or popping sounds from the tank, it’s a good idea to schedule a checkup before it becomes a bigger issue.
  3. Plan for regular maintenance. Annual or periodic maintenance—such as checking the anode rod, flushing sediment, and testing the T&P valve—can extend the life of your system. Our water heater maintenance plans and promotions are designed to make that easy.
  4. Protect against Florida’s hard water and minerals. Many Tampa Bay homes experience mineral buildup that can collect in the bottom of the tank. Routine flushing and inspections, like those outlined in our water heater maintenance scheduling and annual inspections, help keep elements cleaner and more efficient.
  5. Understand your coverage. This homeowner received a 9-year warranty on parts from the manufacturer and a 2-year labor warranty from Plumbing Therapist. If you’re unsure what your own coverage looks like, resources like our overview of annual water heater maintenance coverage can help clarify options.
  6. Consider broader plumbing protection. If your water heater is new, it’s a great time to think about the rest of the plumbing system. Our plumbing services maintenance plans and options help homeowners in Tarpon Springs stay ahead of leaks, clogs, and other surprises.

FAQ: Water Heater Installations in Tarpon Springs, FL 34689

How long does an electric water heater installation usually take?

Most standard electric water heater replacements can be completed in a single visit. For a typical home in Tarpon Springs, the work often takes a few hours, depending on the condition of existing plumbing and electrical connections and whether accessories like expansion tanks, drain pans, or new valves are being added.

What size water heater do I need for my home?

A 40-gallon electric water heater, like the one installed in this Tarpon Springs home, is a common choice for many small to medium households. The right size for you depends on the number of occupants and hot water usage patterns. During a visit, we’ll walk through your needs and recommend an appropriate size rather than guessing.

Why do I need an expansion tank on my water heater?

As water heats up, it expands. In many modern plumbing systems, that expanding water has nowhere to go, which can increase pressure in your pipes and water heater. An expansion tank provides a cushion for that expansion, helping protect your system, reduce stress on fixtures, and support the long-term health of the water heater.

What does the LED indicator system on my water heater tell me?

On this Rheem electric water heater, the electronic LED system indicates element and thermostat operation. It gives a quick visual check that the unit is powered and heating as expected. During installation, we review these indicators with you so you know what normal operation looks like and when it may be time to call for service.

What kind of warranty comes with a premium water heater installation?

In this case, the homeowner received a 9-year manufacturer warranty on parts and a 2-year labor warranty from Plumbing Therapist. Warranties can vary by model and plan, but we always explain your specific coverage at the end of the job so you know exactly what’s protected and for how long.

Do I need to be home during the installation?

It’s best if someone is home when we arrive, so we can review the scope of work, confirm details, and go over the final results and system operation. We work efficiently and respect your schedule, keeping you updated throughout the visit.

Why Choose Home Therapist for Water Heater Installation

For homeowners in Tarpon Springs, FL 34689 and across Tampa Bay, our goal is simple: make your home more comfortable, safe, and reliable—with clear communication from start to finish.

When you choose Home Therapist for your water heater installation or plumbing needs, you can expect:

  • Licensed, professional technicians: Our team is trained and experienced with electric water heaters, plumbing safety, and local requirements.
  • Transparent communication: We explain your options in plain language, discuss pricing before work begins, and keep you updated during the job.
  • Clean, respectful work: We treat your home like our own—protecting work areas, minimizing mess, and cleaning up before we leave.
  • Focus on long-term reliability: We don’t just swap equipment; we install the right accessories and safety features to help your system last longer.
  • Commitment to Tampa Bay homeowners: We’re a local team serving Tarpon Springs and the surrounding communities, and we stand behind our work.

If you’d like to see more of what we do and how we serve local homeowners, you can connect with us on our official profiles and directories:

For added peace of mind, you can also check our standing with trusted organizations:

Ready to Upgrade Your Water Heater in Tarpon Springs, FL 34689?

If your current water heater is aging, unreliable, or just not keeping up with your family’s needs, we’re here to help. Whether you need a premium electric water heater installation like this homeowner in Tarpon Springs, FL 34689 or want to discuss maintenance options for your existing system, our Plumbing Therapist team is ready to step in.

Contact Home Therapist today to schedule a visit. We’ll assess your home’s needs, walk you through your options, and install your new water heater with the same care, cleanliness, and professionalism we bring to every Tampa Bay home.

Your comfort and peace of mind are our priority—one careful installation at a time.

Water Heater Installation in Tarpon Springs, FL 34689

When a water heater starts getting older or unreliable, it can turn everyday routines into a headache—cold showers, inconsistent temperatures, or worrying about leaks. A homeowner in Tarpon Springs, FL 34689 reached out to our team at Home Therapist Cooling, Heating & Plumbing to upgrade to a reliable, long-term hot water solution. We recommended and installed a premium 40-gallon Rheem electric water heater with strong manufacturer and labor warranties, along with all the safety and protection accessories needed for a clean, code-compliant installation.

Case Recap

  • Location: Single-family home in Tarpon Springs, FL 34689
  • Service: Premium electric water heater installation (40-gallon Rheem unit)
  • Equipment: Medium-size 40-gallon, 5500-watt electric water heater with electronic LED status indicators
  • Accessories: Expansion tank, drain pan, discharge line, service valve, and hot water line insulation
  • Warranties: 9-year parts warranty from the manufacturer and 2-year labor warranty from our Plumbing Therapist team
  • Outcome: Clean, professional install and dependable hot water for everyday use

Customer Problem

Like many homeowners in Tarpon Springs, this customer wanted peace of mind. Older water heaters can become less efficient over time and more prone to leaks or sudden failures. Even if the tank hasn’t burst, signs like inconsistent water temperature, longer recovery times, or visible corrosion are indicators that it’s smart to plan a replacement before an emergency happens.

In this case, the homeowner was ready to invest in a premium option with strong warranties rather than risk an unexpected breakdown. The goal was simple:

  • Reliable hot water for daily showers, laundry, and dishes
  • A modern, efficient electric model sized correctly for the home
  • Professional installation that meets current plumbing standards
  • Clear warranty coverage on both parts and labor

Because a water heater is a heavy and awkward piece of equipment, our internal notes flagged this job to be scheduled with two technicians once approved. That allows us to remove the old unit and set the new one safely, without rushing and without risking damage to the home.

Inspection and Diagnosis

Before we install any new water heater in a home in Tarpon Springs, FL 34689, we take time to evaluate the current setup and make sure the new unit is the right fit. For this project, our process included:

  • Checking the existing water heater location: We look at clearances, access, and nearby materials to be sure the new tank will sit safely and can be serviced in the future.
  • Verifying electrical requirements: A 5500-watt electric water heater needs the proper circuit and wiring. We confirm the electrical setup is appropriate for the new unit.
  • Reviewing venting and drainage arrangements: Even though an electric water heater doesn’t require combustion venting, it still needs a proper drain pan and discharge line to manage any leaks or relief-valve discharge.
  • Assessing water pressure and expansion needs: Modern plumbing codes and best practices often call for an expansion tank to protect the system when water heats and expands.

Once we ensured the space and connections could support the new Rheem 40-gallon electric heater, we walked the homeowner through the plan, explained what we would be installing, and confirmed they were comfortable with the warranty details and scope of work.

Repair and Installation Process

On installation day, we arrived with two technicians, the new water heater, and all required accessories. We treat every water heater install as a full system upgrade—not just a tank swap.

1. Safely removing the old water heater

We started by turning off power to the existing electric water heater and shutting the water supply. After confirming everything was safely isolated, we drained the old tank and disconnected the piping and electrical connections. With two technicians on site, we were able to remove the old unit carefully, protecting floors and nearby finishes.

2. Setting the new Rheem 40-gallon water heater

Next, we positioned the new medium-size 40-gallon Rheem water heater in place. This model is a 5500-watt electric unit equipped with an electronic LED system that indicates element and thermostat operation. That LED indicator helps both homeowners and technicians quickly see basic operating status and can aid in future troubleshooting if needed.

3. Installing the drain pan and discharge line

Because water heaters are usually installed in garages, closets, or utility areas, managing potential leaks is critical. For this Tarpon Springs home, we installed a dedicated drain pan under the new heater. We then connected a discharge line to safely route any water from the temperature and pressure relief valve away from living areas.

This step helps reduce the risk of water damage in the event of a malfunction or overpressure situation and is an important protection in Florida homes, where humidity can already be tough on building materials.

4. Adding and configuring the expansion tank

We installed an expansion tank on the hot water line. As water heats up, it expands and needs somewhere to go—especially in homes with pressure-regulating valves or backflow prevention. An expansion tank provides a controlled, cushioned space for that extra volume.

This helps stabilize system pressure, protects plumbing fixtures, and can extend the life of both the water heater and the home’s piping.

5. Installing the service valve and insulating hot water lines

Our team added a dedicated service valve, which makes it easier to shut off water to the heater for any future maintenance or repairs. This is a simple addition that pays off over the life of the system by making service quicker and less disruptive.

We also installed hot water line insulation. Insulating the hot water piping reduces standby heat loss between the tank and the fixtures, helping hot water arrive faster and stay hotter in the line. In a humid climate like Tarpon Springs, FL 34689, insulation also helps reduce condensation on pipes.

6. Making electrical and plumbing connections

With the mechanical components in place, we reconnected the cold water supply, hot water outlet, and electrical wiring to the new heater according to manufacturer specifications. All connections were tightened, secured, and checked for proper support.

7. Filling, purging air, and testing operation

Once everything was connected, we:

  • Filled the tank and purged air from the hot water lines
  • Checked for any signs of leaks at all new fittings and accessories
  • Restored power and confirmed proper startup

We verified proper operation after installation and confirmed the unit was heating water as expected. We also showed the homeowner the LED indicators for element and thermostat operation and explained what normal behavior looks like.

8. Reviewing warranties and care with the homeowner

A big part of our job is education. Before we wrapped up, we reviewed:

  • The 9-year parts warranty provided by the manufacturer*
  • The 2-year labor warranty provided by our Plumbing Therapist team
  • The fact that the warranty start date is the day of installation

We also reminded the homeowner that model numbers may vary depending on availability, but performance and specifications remain in line with what was promised.

*As always, we encourage homeowners to keep their paperwork and register equipment per manufacturer instructions when applicable.

Why This Fix Works

Replacing an aging or unreliable water heater with a properly sized, professionally installed unit addresses several issues at once:

  • Capacity and recovery: A 40-gallon electric water heater is a good fit for many small to medium households, giving enough hot water for typical showers and household tasks when matched to usage.
  • Efficient heating: The 5500-watt elements provide solid heating performance. When combined with proper insulation and good installation practices, this helps keep energy use in check.
  • Pressure management: The expansion tank and discharge line work together to manage pressure changes safely. This protects valves, fixtures, and the tank itself from unnecessary stress.
  • Leak and damage protection: The drain pan and correct discharge routing offer a layer of defense against potential water damage, especially important in finished areas or spaces with storage nearby.
  • Ease of service: A dedicated service valve and clear access points make future maintenance simpler and faster.

All of these pieces—equipment, accessories, and installation details—come together to create a reliable hot water system that should serve this Tarpon Springs home well for many years, especially when paired with routine maintenance.

Pro Tips for Homeowners in Tarpon Springs

Living in the Tampa Bay area, and specifically in Tarpon Springs, FL 34689, comes with unique conditions: high humidity, warm temperatures, and frequent year-round water use. Here are a few practical tips to help keep your water heater in good shape:

  • 1. Check around your water heater monthly. A quick visual check for moisture in the pan, rust stains, or drips on the piping can help you catch small issues before they become big problems.
  • 2. Know where your shut-off valves and breaker are. In the event of a leak or unusual noise, being able to quickly turn off water and power can limit damage and make it safer for our technicians to work when we arrive.
  • 3. Consider periodic flushing. Florida’s water can leave mineral buildup in the bottom of the tank over time. Flushing the heater periodically can help reduce sediment accumulation and support efficient heating. If you’re not comfortable doing this yourself, we can include it as part of a plumbing maintenance plan.
  • 4. Don’t ignore changes in hot water performance. If you notice water not getting as hot as before, running out faster, or making unusual sounds, that’s a good time to schedule a visit rather than waiting for a full breakdown.
  • 5. Ask about water quality solutions. If your home has hard water, a water filtration or conditioning system can help protect your water heater and plumbing fixtures from scale buildup.
  • 6. Plan ahead for replacement. Most tank-type water heaters have an expected service life range. If yours is approaching that age, it’s smart to talk through replacement options ahead of time—just like this homeowner did—so you’re not making decisions under pressure.

FAQ: Water Heater Installation for Tarpon Springs Homeowners

How long does a typical 40-gallon electric water heater installation take?

Every home is a little different, but most standard replacements can be completed in a single visit. Having two technicians on site, as we did for this Tarpon Springs project, helps us safely remove the old unit and install the new one efficiently while still taking the time to do things cleanly and correctly.

What kind of warranties came with this water heater?

For this installation, the water heater included a 9-year parts warranty from the manufacturer, and our Plumbing Therapist team provided a 2-year labor warranty. The coverage begins on the day of installation. We always review the specific warranty details with the homeowner before we leave.

Why did you install an expansion tank?

An expansion tank is a small but important part of a modern water heater system. As water heats up, it expands and increases pressure. The expansion tank gives that extra volume somewhere safe to go, helping to stabilize pressure and protect the water heater and plumbing fixtures, especially in homes with pressure-regulating devices.

Is a 40-gallon water heater enough for my home?

For many small to medium households, a 40-gallon electric water heater is a great fit. The right size depends on how many people are in the home and how you use hot water (showers, laundry, dishwashing, etc.). When we visit, we talk through your usage and recommend a size that fits your specific situation.

What signs tell me I should replace my old water heater?

Common warning signs include rusty or discolored hot water, rumbling or popping noises from the tank, visible corrosion around fittings, repeated need for repairs, or hot water running out much faster than it used to. If you’re seeing these symptoms in your Tarpon Springs home, it’s a good time to schedule an inspection.

Do you offer maintenance for water heaters after installation?

Yes. We provide ongoing plumbing maintenance options, and we also offer dedicated water heater maintenance plans and promotions to help keep your system running smoothly and support its full service life.

Why Choose Home Therapist for Water Heater Service

When you invite us into your home in Tarpon Springs, FL 34689, you’re trusting us with your comfort and your property. We take that seriously.

  • Licensed and professional technicians: Our team is trained, properly licensed, and experienced with water heater installations, plumbing repairs, and full-system upgrades across Tampa Bay.
  • Transparent communication: We explain what we find, what we recommend, and why. You’ll know the equipment options, warranty details, and pricing before work begins.
  • Clean and respectful work: From protecting floors to cleaning up our workspace, we aim to leave your home as tidy as we found it—sometimes better.
  • Long-term reliability focus: We don’t just install a tank; we look at the whole plumbing system—expansion, drainage, access, and maintenance—to support long-term performance.
  • Committed to Tampa Bay homeowners: We’re local, and we stand behind our work for our neighbors throughout Tarpon Springs and the greater Tampa Bay area.

If you’d like to see more of what we do and how we serve our community, you can connect with us on social platforms like Pinterest and Reddit, or review our standing with trusted organizations such as the Better Business Bureau and the Tampa Bay Chamber of Commerce.

Need Water Heater Help in Tarpon Springs, FL 34689?

If your current water heater is aging, unreliable, or you’re simply ready for an upgrade, our team at Home Therapist Cooling, Heating & Plumbing is here to help. We install premium water heaters with thoughtful attention to details like expansion tanks, drain pans, and insulation so your system is safe, efficient, and built to last.

Whether you need a straightforward replacement, help diagnosing a hot water issue, or broader plumbing repair support for your Tampa Bay home, you can count on our local technicians serving Tarpon Springs, FL 34689. Reach out today to schedule your water heater service and enjoy reliable hot water with confidence.

New Bathroom Plumbing Rough-In and Sewage System Installation in Tampa, FL 33611

Adding a new bathroom is one of the best upgrades you can make to a home, but it only pays off if the plumbing is designed and installed the right way. For a homeowner in Tampa, FL 33611, we were called in to handle a complete plumbing rough-in and new sewage and water supply installation for a new bathroom space. Our job was to make sure every pipe, drain, and vent was laid out correctly, connected safely, and ready to pass inspection and perform reliably for years to come.

On this project, we installed new PEX water lines, PVC drains and vent piping, a sewage grinder pump system, and all of the plumbing connections for the tub, shower, toilet, vanity, water heater, and roof vent termination. We also handled the concrete cutting, trenching, and patching related to the plumbing work, leaving the system ready for rough-in and final inspections by the general contractor and the permitting authority.

Below is a walkthrough of what the homeowner needed, how we approached the installation, and what other homeowners in Tampa Bay can learn if they’re planning a similar project.

Case Recap

  • Location: Single-family home in Tampa, FL 33611
  • Service: Full bathroom plumbing rough-in plus new sewage and water supply installation
  • Water lines: New PEX hot and cold supply, valves, and connections
  • Drainage: New PVC drain, vent, and a sewage grinder pump system tied into the existing sewer
  • Concrete: Slab cutting, trenching, backfill, and functional concrete patching after installation
  • Results: New bathroom plumbing system installed, pressure-tested, and ready for rough-in and final inspections

Customer Problem: Building a New Bathroom the Right Way

The homeowner in Tampa, FL 33611 was adding a new bathroom and needed a licensed plumbing team to design and install the full system from start to finish. The existing plumbing layout wasn’t set up to simply “tie in” a new bathroom. That meant:

  • New hot and cold water lines had to be run to the new fixtures.
  • New drains and vent piping had to be installed for proper flow and sewer gas control.
  • A sewage grinder pump was needed to move waste from the new bathroom to the existing sewer line.
  • The work had to be done through an existing slab, which meant careful concrete cutting and patching.

The homeowner supplied the sewage grinder pump, fixtures (tub, toilet, vanity, shower trim, water heater), and in coordination with a licensed electrician for the pump’s electrical connection. Our responsibility was the plumbing design and installation: everything from the underground rough-in to the final hook-ups, all within an agreed plumbing scope and price.

They also wanted clear expectations: what we would cover, what would be handled by their roofer and electrician, and what kind of warranty and support they could expect from us after the job was complete.

Inspection and Diagnosis: Planning the New Bathroom Plumbing Layout

With new construction or an addition like this in Tampa, FL 33611, the most important “diagnosis” happens at the planning stage. We spent our time up front confirming the layout and how everything would tie into the home’s existing system. That included:

  • Fixture locations: Confirming the exact location of the tub, shower, toilet, vanity, and water heater so we could lay out drains and water lines precisely.
  • Sewage pump placement: Identifying the best spot for the pump basin to receive waste from the bathroom and discharge to the existing sewer.
  • Drain and vent routes: Planning how PVC drain and vent piping would run under the slab and up through the walls and roof.
  • Tie-in points: Establishing where the new pump discharge would connect to the existing sewer line and where water supplies would tie into the home’s main system.
  • Concrete access: Marking precise slab cuts for drains, the pump basin, and trenching routes so we removed only what was necessary.

We also walked through expectations with the homeowner, including:

  • That we would use PEX A for the water lines and PVC for the sewage system.
  • That our concrete finish would be functional (ready for flooring and finishes later), not decorative.
  • That any roofing work around the vent penetration would be handled by their roofer after we ran the vent through the roof.
  • That an independent general contractor would perform rough-in and final checks before the official codes inspection.

This kind of upfront planning helps avoid surprises once the concrete is cut and pipes are in the ground.

Repair and Service Process: Step-by-Step Rough-In and Installation

Once the layout and scope were confirmed, we moved into the actual installation. For this Tampa, FL 33611 project, our process followed a clear sequence to keep things clean, safe, and code-compliant.

1. Concrete Cutting, Trenching, and Access

Because this was a slab-on-grade home, we needed to access the space below the concrete for drains and the sewage pump. We:

  • Marked all slab penetration points for the toilet, tub/shower, vanity drain, and pump basin.
  • Cut the concrete at those locations and along the paths where trenches were required.
  • Trenched to allow proper slope on the drain lines and to run the grinder pump discharge line.

The homeowner assisted by handling the dirt trenching around the outside of the house where needed for sewer line routing, which helped keep the project efficient and within the agreed plumbing scope.

2. Installing PVC Drains, Vents, and Sewage Grinder Pump System

With access open, we installed the PVC waste and vent system and the sewage grinder pump components. This included:

  • Setting the pump basin at the correct depth and location.
  • Connecting the owner-supplied sewage grinder pump inside the basin.
  • Running PVC discharge piping from the pump to the existing sewer line.
  • Installing a check valve and required pump-side plumbing components to prevent backflow into the basin.
  • Running PVC drain lines from the toilet, tub/shower, vanity, and other fixtures to the basin or main drain as designed.
  • Installing vent piping and running it up through the structure to the roof for proper air movement in the system.

We handled all plumbing-side venting and roof penetration. The roofer’s responsibility was to flash and seal around that vent penetration afterward to maintain a watertight roof.

3. Running New PEX Water Supply Lines

Next, we installed the hot and cold PEX A water supply lines for the new bathroom. This step covered:

  • Running dedicated PEX lines from the home’s main supply to each new fixture location.
  • Installing new angle stops, valves, and ball valves where needed for shutoff and serviceability.
  • Adding new faucet connectors and hose bibs within the agreed scope.

We designed the water system layout as part of the job so the homeowner would have balanced pressure, good flow, and future service access to key components.

4. Shower Liner and Bathroom Fixture Prep

For the shower, we installed the shower liner and prepared the drain setup according to the homeowner’s choice of drain:

  • If a standard drain was used, we tied in the standard drain assembly provided by the homeowner.
  • If a linear drain was selected, we connected the owner-supplied linear drain to our PVC system.

We also roughed in:

  • The tub drain and water lines.
  • The shower valve, riser, and showerhead location.
  • The toilet flange location and drain.
  • The vanity drain, water lines, and shutoffs.
  • The water heater connections.

5. Backfilling, Concrete Pour-Back, and Cleanup

After all plumbing rough-in lines and the sewage grinder pump system were installed and checked, we:

  • Backfilled trenches around the drain and discharge piping.
  • Poured back concrete over the cut and trenched areas to restore the slab with a functional finish.
  • Left the floor ready for the next trades (flooring, framing adjustments, etc.).

Our concrete patch is meant to be strong and serviceable, not decorative. Final floor finishes are handled by the appropriate trades afterward.

6. Final Fixture Connections and Inspection Readiness

Once the space was ready for finish work and the homeowner’s fixtures were on site, we returned to complete final connections for:

  • Tub and tub trim.
  • Shower valve, showerhead, and trim.
  • Toilet connection.
  • Pre-assembled vanity, faucet, and drain.
  • Water heater connections.
  • Sewage grinder pump plumbing connections and vent terminations.

The electrical connection for the grinder pump was completed separately by the homeowner’s licensed electrician, as electrical work is outside the plumbing scope.

We tested the plumbing system for leaks and proper flow and confirmed that the layout and installation were ready for the independent GC’s rough-in and final checks, followed by the official codes inspection.

Why This Plumbing Design and Grinder Pump Setup Works

For homes in Tampa, FL 33611, especially when adding a bathroom where traditional gravity drainage isn’t ideal, a properly installed sewage grinder pump system can make the project possible without major structural changes.

Here’s why this setup is effective and reliable when done correctly:

  • Grinder pump function: The grinder pump macerates waste and pumps it under pressure through smaller-diameter discharge piping to tie into the existing sewer line, even if the new bathroom is lower than the main sewer connection.
  • PVC drainage and venting: Correctly sloped PVC drain lines and properly sized and placed vent piping allow waste and water to move freely and prevent sewer gases from entering the home.
  • PEX A water distribution: PEX is durable, flexible, and well-suited for new construction and remodels. Properly supported and connected, it gives stable water pressure and helps resist corrosion issues common in older piping materials.
  • Check valve protection: The check valve on the pump discharge prevents sewage from flowing back into the basin, protecting the pump and the bathroom.
  • Accessible shutoffs: New angle stops and ball valves give the homeowner and future technicians easy control during maintenance and repairs.

Taken together, this design supports good drainage, consistent water pressure, and long-term reliability, as long as the system is used properly and maintained when needed.

Pro Tips for Homeowners in Tampa Planning a New Bathroom

If you’re in Tampa, FL 33611 or nearby Tampa Bay communities and considering a new bathroom or major plumbing upgrade, a few practical steps can make the process smoother:

  • Plan fixture locations early. Locking in your tub, shower, toilet, vanity, and water heater locations before we start cutting concrete helps avoid changes mid-project and keeps costs under control.
  • Coordinate trades ahead of time. For projects like this, you’ll typically need a plumber, electrician, GC, and possibly a roofer and flooring contractor. Having everyone loosely aligned on timing makes the whole job move faster.
  • Protect your home before work starts. We work cleanly and do our best to shield critical areas, but it’s smart to cover furniture, electronics, baby items, clothes, and food, and to move items away from vents and work areas.
  • Expect some wall and ceiling openings. To run vent piping, water lines, or access tight areas, we sometimes have to open walls or ceilings. We keep openings as small as we reasonably can, but drywall and paint repair is usually handled by others after plumbing is complete.
  • Ask about warranties and materials. For example, on this project, we used PEX A and PVC and provided a defined labor warranty on our work. Knowing exactly what’s installed in your home and what’s covered gives peace of mind.
  • Consider future service access. When possible, we place valves and key components where they can be reached later. It’s worth a quick conversation during planning so you know where things are and how to turn them off if needed.

If you’re exploring larger plumbing changes elsewhere in your home, our team also handles projects like whole-home repiping in Tampa, sink installation and repair, and ongoing plumbing maintenance plans and options designed for Tampa Bay homeowners.

FAQ: New Bathroom Plumbing and Grinder Pump Installations

Do I need a sewage grinder pump for every new bathroom?

Not always. A grinder pump is usually recommended when the new bathroom is below or far from the main sewer connection and gravity alone can’t move waste effectively. In this Tampa, FL 33611 project, the layout made a grinder pump the practical solution. During a site visit, we’ll look at your existing plumbing and elevation to see what makes the most sense.

Who handles the electrical work for the grinder pump?

The plumbing scope covers the pump basin, plumbing connections, and discharge piping. A licensed electrician handles the electrical supply, wiring, and breaker configuration for the grinder pump. On this project, the homeowner’s electrician completed that portion after we finished the plumbing work.

What happens if my existing fixtures or valves can’t be reused?

Sometimes older showers, faucets, or valves are corroded, incompatible, or simply not in good condition. If we find that something can’t be connected safely or reliably, we’ll explain the issue on the spot and recommend replacement options. We won’t force a bad connection just to make something “fit.”

Will you repair drywall or paint after running new lines?

Our focus is on the plumbing itself. We do our best to keep openings as small and neat as possible, but we do not perform drywall or finish repairs. After inspections are complete, a drywall or general contractor can patch and finish the walls and ceilings as needed.

How clean will my home be during and after the project?

Plumbing work—especially through a slab—can be dusty and involve concrete cutting and trenching. We shield critical areas as best we can and clean up our work areas at the end of each day. We still recommend that you cover furniture and belongings and keep clear of the work area so our technicians can focus and stay safe.

Is there a warranty on this type of plumbing installation?

For this project, we provided a defined labor warranty on the plumbing scope, including the new piping and fixture connections. The specific terms can vary by project, but we’re always clear about what is covered before we start. Manufacturer warranties on fixtures and pumps are typically handled through the product manufacturers.

Why Choose Home Therapist for Plumbing Projects in Tampa Bay

When you’re opening up concrete, installing a sewage grinder pump, and building a new bathroom from the ground up, you want a team that treats your home like their own. At Home Therapist Cooling, Heating, and Plumbing, we approach every project in Tampa Bay with a focus on professionalism, safety, and long-term reliability.

Here’s what you can expect when you work with us on a bathroom rough-in or any plumbing project in Tampa, FL 33611:

  • Licensed, professional technicians: Our plumbers are trained, licensed, and experienced with everything from small repairs to full plumbing redesigns and repipes.
  • Transparent communication: We explain what we’re doing, why we’re doing it, and what’s included in your scope and pricing—before we start cutting or drilling.
  • Clean and respectful work: We know we’re working in your home, not a jobsite warehouse. We protect critical areas, manage dust as best we can, and clean up at the end of each day.
  • Long-term reliability: We design systems with future maintenance and performance in mind, not just to “pass inspection today.”
  • Local Tampa Bay commitment: We live and work in the same communities we serve, so your comfort and trust mean a lot to us.

If you’d like to see more of what we do and how we work, you can find us on social media and local platforms:

We’re also proud to be listed with trusted local and national organizations, including:

Need New Bathroom Plumbing or Sewage Work in Tampa, FL 33611?

If you’re planning a new bathroom, upgrading old piping, or considering a sewage grinder pump system in Tampa, FL 33611, our team at Home Therapist Cooling, Heating, and Plumbing is here to help. We’ll walk you through the options, design a system that fits your home, and complete the work with the same care we brought to this project.

Whether it’s a full rough-in, targeted drain work like drain line cleaning and flushing, or a larger repipe or remodel, we’re ready to help you move from plans on paper to a bathroom that works the way it should—quietly and reliably behind the walls.

Reach out today to schedule your plumbing consultation in Tampa, FL 33611 and the surrounding Tampa Bay area. We’ll take the time to understand your project and give you clear, straightforward recommendations.

AC Capacitor Replacement and Maintenance Plan in Tampa, FL 33618

When the air conditioner stops cooperating in the middle of a warm, humid day in Tampa, FL 33618, it doesn’t take long for the house to feel uncomfortable. For this homeowner, the problem turned out to be a failing AC capacitor, and during the same visit we also helped them lock in extra protection with our Premium Therapy Plan for future maintenance and discounts.

In this case study, we’ll walk through how our technician diagnosed the issue, replaced the capacitor, and explained the benefits of enrolling in a maintenance plan for reliable HVAC service in Tampa, FL. Our goal is always the same: restore comfort quickly, keep your system safe, and help you avoid surprise breakdowns.

Case Recap

  • Location: Single-family home in Tampa, FL 33618
  • Primary service: AC capacitor replacement
  • Additional service: Premium Therapy Plan enrollment with discount
  • Technician: Licensed Home Therapist technician (Jandiel)
  • Outcome: AC system returned to normal operation and homeowner gained ongoing protection and savings

Customer Problem

By the time we arrived at this home in Tampa, the homeowner knew something was wrong with the air conditioner but wasn’t sure what. Common complaints with a failing capacitor often include things like:

  • The outdoor unit making a humming sound but not starting
  • The fan not spinning or starting and then stopping again
  • Warm air coming from the vents instead of cool air
  • System struggling to keep up with the set temperature

Capacitors are small electrical components that help the compressor and fan motors start and run smoothly. When they weaken or fail, the system may try to start repeatedly, trip breakers, or simply sit there humming. For a homeowner in Tampa, FL 33618, that quickly turns into a hot, sticky home and rising frustration.

Our technician’s job was to find out exactly what was causing the trouble, confirm it was safe to operate after repair, and talk through options that would help prevent similar issues in the future.

Inspection and Diagnosis

Because we see a lot of capacitor issues in Florida’s heat, we follow a structured, safety-focused diagnostic process on every call. For this service visit in Tampa, FL 33618, the inspection included:

  • Visual inspection of the outdoor unit: Checking for obvious signs of damage, overheating, or disconnected wires around the condenser and electrical panel.
  • Safety and power checks: Ensuring power was properly shut off before opening any electrical compartments, then confirming that breakers, disconnects, and wiring looked normal.
  • Capacitor condition assessment: Inspecting the existing capacitor for swelling, leaking, discoloration, or other signs of failure.
  • Overall system check: Looking at wiring connections, contactor condition, fan motor behavior, and general cleanliness around the outdoor system.

Based on these checks, the technician confirmed that the capacitor was no longer in good working condition and needed to be replaced. Capacitors are wear-and-tear parts; over time, heat, electrical stress, and frequent cycling can cause them to weaken.

We also took this opportunity to discuss the homeowner’s recent experience with the system—how often it runs, whether they’ve had prior issues, and how long it had been since their last professional AC maintenance in Tampa. That conversation naturally led into the benefits of our Therapy maintenance plans.

Repair and Service Process

Once we confirmed the failed component and explained our findings, we moved forward with the AC capacitor replacement and the homeowner’s enrollment in our Premium Therapy Plan. Here’s how that process worked, step by step.

1. Power Off and Safety Preparation

Any time we work on electrical components, safety comes first. Our technician shut off power at the outdoor disconnect and took precautions to ensure the system was fully de-energized before touching the capacitor or wiring. This protects both the technician and the equipment.

2. Removing the Old Capacitor

With the panel open, we carefully disconnected the wiring from the existing capacitor. We documented the wiring layout and verified each connection point so that everything would be reattached correctly to the new component. The old capacitor was then removed and set aside for proper disposal.

3. Installing the New Capacitor

Next, we installed the new capacitor, mounting it securely and reattaching each wire to the proper terminal. Even though we don’t list specific ratings or model numbers here, we always match parts to the manufacturer’s specifications for that particular system. A properly sized and installed capacitor helps the compressor and fan motor start smoothly and run reliably.

4. System Reassembly and Visual Double-Check

Before restoring power, we inspected all electrical connections, ensured there were no loose wires, and confirmed that the capacitor was firmly mounted and positioned correctly inside the compartment. We then closed and secured the panel so it would be protected from weather and debris.

5. Start-Up and Operational Check

With the new capacitor installed, we restored power and started the system. Our technician listened for normal start-up sounds, confirmed that the outdoor fan was running properly, and checked that cool air was moving through the home. We verified that the system was operating as expected after the repair.

6. Enrolling the Homeowner in the Premium Therapy Plan

During the visit, we also helped the homeowner enroll in our Premium Therapy Plan. This plan is designed to keep air conditioning systems in Tampa running reliably, especially through our long cooling season. It includes scheduled maintenance, priority service, and discounts on qualifying repairs—like this capacitor replacement.

We walked the homeowner through what to expect from the plan, how visits are scheduled, and how membership can help catch small issues before they become bigger, more expensive problems. For Tampa Bay homeowners, consistent maintenance and membership benefits can make a big difference when systems are working hard almost year-round.

Why This Fix Works

Capacitors play a key role in the electrical side of your air conditioner. In simple terms, they store and release energy to help motors start and stay running smoothly. When a capacitor is weak or failed, the motors can struggle to turn on, overheat, or stop mid-cycle. That’s why you might hear humming or buzzing, but see no fan movement or feel no cooling.

By replacing the bad capacitor with a properly matched new one, we restored the electrical support that the compressor and fan motor need. That means:

  • More reliable start-up when your thermostat calls for cooling
  • Less strain on motors and other electrical components
  • More consistent comfort inside the home

The addition of the Premium Therapy Plan helps this homeowner in Tampa, FL 33618 by pairing the immediate fix with a long-term strategy. Regular inspections, tune-ups, and priority scheduling reduce the likelihood of unexpected breakdowns, especially during peak summer heat.

Pro Tips for Homeowners in Tampa

Living in the Tampa Bay area means your air conditioner works hard for much of the year. Here are some practical, no-nonsense tips we share with homeowners in Tampa to keep systems running smoothly:

  • Schedule routine maintenance: A yearly visit for professional AC tune-up services gives a technician the chance to spot early signs of capacitor wear, wiring issues, and other problems before they interrupt your comfort.
  • Keep the outdoor unit clear: Make sure the area around your condenser is free of leaves, tall grass, and debris. Good airflow around the unit helps it run cooler and reduces stress on electrical components.
  • Change filters regularly: A clogged air filter makes every part of your system work harder. In Tampa’s humid climate, that can add up quickly—especially during long stretches of high heat and daily use.
  • Pay attention to start-up sounds: If you notice the outdoor unit repeatedly trying to start or humming without the fan spinning, turn the system off and call a professional. Catching a failing capacitor early can prevent additional damage.
  • Consider a maintenance plan: Enrolling in a program like our Therapy maintenance plans helps ensure your system is checked regularly and that you receive discounts on covered repairs.
  • Don’t ignore small comfort changes: If some rooms feel warmer, or it takes longer to cool the house, it might be more than just the weather. A quick inspection can identify whether the issue is airflow, refrigerant, or an electrical component like a capacitor.

FAQ: AC Capacitor Replacement and Maintenance Plans

How do I know if my AC capacitor might be failing?

Common signs include the outdoor unit humming but not starting, the fan not spinning, warm air coming from vents, or the system taking longer than usual to cool your home. If you notice these symptoms at your home in Tampa, FL 33618, it’s best to shut the system off and schedule a visit so a licensed technician can safely test and inspect the electrical components.

Is it safe to keep running my AC if I suspect a bad capacitor?

We do not recommend continuing to run your AC if you suspect a capacitor problem. A failing capacitor can cause extra strain on the compressor and fan motors. Turning the system off and calling for service helps protect your equipment and reduces the risk of further damage.

How long does an AC capacitor replacement usually take?

Once a technician has diagnosed the issue and confirmed that a capacitor is the problem, the actual replacement is typically a straightforward, same-visit repair. The overall service time includes safety checks, installation, and verifying proper operation afterward.

What is the advantage of a Premium Therapy Plan for Tampa homeowners?

A Premium Therapy Plan pairs regular maintenance with practical benefits like priority scheduling and discounts on qualifying repairs. For homeowners in Tampa, where AC systems run heavily most of the year, this means fewer surprises, better efficiency, and a clear plan for taking care of your equipment over time.

Will a maintenance plan prevent all future AC problems?

No plan can guarantee that a system will never have an issue, but consistent maintenance significantly reduces the chance of unexpected breakdowns and often catches small concerns early. Our goal is to keep your system as reliable and efficient as possible, year after year.

When should I consider AC replacement instead of more repairs?

When your system is older, having frequent breakdowns, or no longer keeping up with comfort needs, it may be time to compare repair costs with the benefits of a new system. During a visit, we can discuss whether continued repairs or a new air conditioner installation in Tampa makes more sense for your home and budget.

Why Tampa Homeowners Choose Home Therapist

At Home Therapist Cooling, Heating, and Plumbing, we approach every service call as if we were working on our own home. For this AC capacitor replacement and Premium Therapy Plan enrollment in Tampa, FL 33618, we focused on clear communication, clean workmanship, and long-term reliability.

Here’s what you can expect when you call us for HVAC service in Tampa Bay:

  • Licensed, professional technicians: Our team is trained and licensed to handle electrical components, refrigerant circuits, and system diagnostics safely and correctly.
  • Transparent communication: We explain what we find in plain language, review your options, and answer your questions before moving forward with any work.
  • Clean and respectful work: From your yard to your indoor spaces, we treat your home with care and clean up after ourselves when the job is done.
  • Long-term reliability focus: We don’t just swap parts and leave. We look at the system as a whole and recommend steps—like maintenance plans—that support comfort and reliability over time.
  • Committed to Tampa Bay homeowners: We live and work in this community, and we take pride in helping neighbors stay comfortable in Florida’s challenging climate.

If you’d like to see more of how we serve Tampa Bay, you can connect with us on social media or review platforms:

  • Follow us on Facebook for updates and homeowner tips.
  • See our work and behind-the-scenes on Instagram.
  • Check out short service clips on TikTok.

For added peace of mind, you can also review our standing with trusted organizations and local directories:

Need AC Help in Tampa, FL 33618?

If your AC is humming, struggling to start, or simply not keeping your home comfortable, we’re here to help. Whether you need an urgent capacitor replacement, a thorough AC maintenance visit in Tampa, or you’re ready to explore our Therapy maintenance plans, our local Tampa Bay technicians are ready to assist.

Homeowners in Tampa, FL 33618 can reach out to us to schedule service, ask questions, or plan ahead for the next cooling season. Contact our team today, and we’ll make sure your system is cared for with the same attention and respect we’d want for our own homes.

AC Maintenance and Capacitor Replacement in Tampa, FL 33618

When your air conditioner is working hard through our long, humid summers in Tampa, FL 33618, staying ahead on maintenance is one of the best ways to avoid surprise breakdowns. During a recent Premium Therapy Plan visit for a homeowner in this area, we performed a full AC tune-up, uncovered two hidden issues, and completed a capacitor replacement to keep the system running reliably.

In this visit, we checked a system we originally installed in 2021, verified overall operation, and found that the UV light inside the air handler was off and the outdoor condenser capacitor was out of range. We corrected the capacitor issue during this visit and recommended replacing the UV light at a future appointment. By the time we left, the AC was running as expected and the homeowner understood exactly what was done and why.

Case Recap

  • Location: Residential home in Tampa, FL 33618
  • Service type: Premium Therapy Plan maintenance visit and AC tune-up
  • System: Central air conditioner installed by our team in 2021
  • Findings: Non-operational UV light in the air handler and an outdoor capacitor out of range
  • Repair completed: Replacement of the outdoor condenser capacitor
  • Next step recommended: Replace the UV light to restore indoor air quality protection

Customer Problem

For this Tampa homeowner, this visit was part of their scheduled Premium Therapy Plan, not an emergency breakdown call. They wanted to stay on top of maintenance so their AC would be ready for the Florida heat without surprise failures or discomfort.

During the last maintenance, nothing unusual had been reported. The system had been running, and there were no major comfort complaints like rooms not cooling or the unit shutting off unexpectedly. Still, the homeowner understood that problems can develop quietly inside components like capacitors or UV lights before they show obvious symptoms.

Because the system is only a few years old and was installed in 2021, it would be easy to assume it doesn’t need much attention. But in the Tampa Bay climate, heat, sun, and humidity can stress electrical components and indoor air quality accessories faster than many people expect. That’s exactly why routine visits under our AC repairs, installs, and maintenance services are so valuable.

Inspection and Diagnosis

On this visit, our technician approached the system the same way we do any professional AC maintenance in Tampa, FL 33618: a careful, step-by-step inspection focused on safety, reliability, and comfort.

Here’s how we approached the diagnosis:

  • Visual and safety inspection: We started by inspecting the air handler and outdoor condenser for any obvious signs of wear, damage, or wiring concerns that could affect safe operation.
  • Air handler and UV light check: Inside the air handler, we verified cleanliness, checked components, and confirmed that the installed UV light was not operating. The light was off and not providing the intended air quality benefits.
  • Outdoor unit electrical inspection: At the condenser, we checked electrical connections and inspected the capacitor, which helps the compressor and fan start and run correctly.
  • Capacitor evaluation: During testing, we found that the capacitor’s performance was out of range for proper operation. While we are not listing specific readings here, it was clearly no longer within acceptable tolerance.
  • System operation check: After identifying these issues, we evaluated the overall cooling performance to ensure there were no additional obvious problems.

Nothing was catastrophically failing yet, but the capacitor’s condition meant the system was at risk of hard starting, poor efficiency, or an outright no-cool situation if left unaddressed. The non-functioning UV light wasn’t stopping the AC from cooling, but it meant the homeowner wasn’t getting the indoor air quality protection they thought they had.

Repair or Service Process

Because this visit was scheduled under our Premium Therapy Plan, the goal was to complete the tune-up, address any urgent issues on the spot, and give the homeowner clear recommendations for anything that could be handled at a later time.

1. Full Tune-Up and System Maintenance

We began with a standard AC tune-up procedure, similar to what we offer in our AC maintenance and cleaning specials in Tampa Bay. This included checking key components, inspecting airflow and drainage, and verifying that the system was cycling on and off normally.

This step matters because many AC problems in Tampa start small: a bit more strain on the motor here, a little extra heat on electrical components there. Catching issues during a scheduled tune-up usually costs less and involves less disruption than waiting for a breakdown.

2. Identifying the UV Light Issue

While inspecting the air handler, we verified that the UV light installed for indoor air quality was not functioning. The homeowner still had the unit physically in place, but it was off and not actively treating the air.

We documented this and explained that while this doesn’t stop the AC from cooling, it does mean the system is no longer benefiting from UV treatment. We recommended scheduling a separate visit to replace the UV light so they can restore that layer of protection, especially helpful in our humid Tampa climate where indoor air quality can be a concern. For homeowners considering similar upgrades, we also share more information in our article on adding UV lights for air conditioner installations in Tampa Bay.

3. Confirming the Capacitor Problem

At the outdoor condenser, we inspected the electrical panel and tested the capacitor. Our tests showed that it was out of range for reliable operation. A weak or failing capacitor is one of those issues that often gets ignored until the unit suddenly fails to start on a hot afternoon.

We reviewed the situation with the homeowner, explained what the capacitor does in plain terms, and recommended replacing it during this same visit. The note on the job confirms: we proceeded to replace only the capacitor at this time.

4. Replacing the Condenser Capacitor

With approval, we carefully removed the failing capacitor and installed a new one matched appropriately to the system’s requirements. We secured all wiring connections and ensured everything in the electrical compartment was neat and properly positioned.

This step is critical for both safety and reliability. A poorly installed or incorrect capacitor can cause more damage to the compressor or fan motor over time. We always make sure components are installed cleanly and correctly, with the panel closed and secured when we’re done.

5. Post-Repair Testing and Verification

After installing the new capacitor, we restarted the system and let it run to confirm normal operation. We listened for proper startup, ensured the outdoor fan and compressor were running smoothly, and confirmed that the indoor system was cooling as expected.

We verified proper operation after the repair, and there were no additional issues noted during this visit. The homeowner now has a stronger, more reliable starting system, and a clear plan to address the non-working UV light at a future appointment.

Why This Fix Works

The heart of this visit was electrical reliability. In simple terms, the capacitor is like a short burst of energy that helps your outdoor compressor and fan motor start and run smoothly. When that component drifts out of range, the motors can struggle.

Here’s what replacing the capacitor accomplishes for homeowners in Tampa, FL 33618:

  • Easier startups: The compressor and fan can start reliably instead of hesitating or failing to kick on.
  • Reduced strain on motors: With the correct electrical support, the motors don’t have to work as hard, which can support longer equipment life.
  • More consistent cooling: When the outdoor unit starts and runs properly, you’re less likely to experience random warm spells or intermittent cooling.
  • Lower risk of sudden breakdowns: A failing capacitor is a leading cause of no-cool calls. Replacing it proactively reduces the chance of a mid-summer outage.

On the indoor side, the UV light is about air quality and cleanliness rather than basic cooling. When it’s off, the AC can still cool, but you lose the added benefit it was installed for. Replacing that UV light in a follow-up visit will help restore the system’s designed indoor air quality performance.

Pro Tips for Homeowners in Tampa

Based on what we see every day providing HVAC service in Tampa, FL and surrounding areas, here are some practical tips to help you avoid unexpected issues like the ones we found on this visit:

  • 1. Stay consistent with maintenance visits. Our climate is hard on outdoor equipment. Having your system checked at least once a year—ideally before peak summer—gives us a chance to catch weak capacitors, failing contactors, and dirty components before they cause a breakdown.
  • 2. Don’t assume a newer system is problem-free. Even a system installed in 2021, like this one, can develop electrical or air quality issues. Heat, vibration, lightning, and everyday use all take a toll in Florida.
  • 3. Pay attention to subtle changes. If you notice your outdoor unit sounds different when starting, or if it occasionally hesitates to turn on, mention it during your next visit. These small signs can point to a weakening capacitor or other electrical issue.
  • 4. Check UV and air quality devices annually. UV lights and similar accessories have a limited effective life. If you have one installed in your air handler, make sure it’s checked during maintenance. If the light is off, it may be time for replacement.
  • 5. Keep the outdoor unit clear. Trim plants and clear debris around your condenser. Good airflow and clear access help your system run more efficiently and make it safer and easier for technicians to service.
  • 6. Consider a maintenance plan. Plans like our Premium Therapy options make it easier to stay on schedule with maintenance and budget for repairs. For many Tampa homeowners, that peace of mind is just as valuable as the technical work itself.

FAQ: AC Maintenance and Capacitor Replacement in Tampa, FL 33618

Can my AC still run with a bad capacitor?

Sometimes it will for a while, but it may start slowly, make unusual noises, or fail randomly. In this Tampa home, we found the capacitor out of range during a routine visit, before it caused a complete no-cool situation. Replacing it proactively is usually the safest, most cost-effective choice.

Does a non-working UV light affect cooling performance?

No, a non-working UV light does not usually stop the system from cooling. In this case, the AC still cooled the home, but the UV light in the air handler was off and not providing the intended air quality benefits. We recommended scheduling a UV light replacement to restore that function.

How often should I schedule AC maintenance in Tampa?

For most homeowners in Tampa, FL 33618, we recommend at least one professional AC maintenance visit per year, and many benefit from twice-yearly visits because of our long cooling season. Routine maintenance is built into our Premium Therapy Plan to keep this simple and predictable.

What are the signs my capacitor might be failing?

Common signs include the outdoor unit not starting, frequent tripping of breakers, humming noises from the condenser without the fan or compressor running, or the system taking longer than usual to start. Even if you don’t notice symptoms, our maintenance checks are designed to catch weak capacitors before they fail.

Why didn’t we replace the UV light during the same visit?

In this particular visit, we focused on the urgent reliability issue—the failing condenser capacitor. The UV light, while important for indoor air quality, was not preventing the system from cooling. We documented the problem and recommended a follow-up visit so the homeowner can plan that upgrade at a convenient time.

Is this type of work covered by your AC services?

Yes. Capacitor replacement, UV light inspection, and full tune-ups are all part of the AC services we provide throughout Tampa Bay. You can learn more about how we approach repairs and maintenance in our overview of AC repairs, installs, and maintenance services and in our other project stories, such as this air conditioner maintenance and cleaning project in Tampa, FL 33647.

Why Choose Home Therapist for Your AC in Tampa Bay

When we visit a home in Tampa, FL 33618, our goal is simple: leave your system safer, more reliable, and easier to live with. We treat every visit—whether it’s an emergency repair or a Premium Therapy Plan tune-up—with the same level of care.

Here’s what you can expect when you work with Home Therapist Cooling, Heating, and Plumbing:

  • Licensed, professional technicians: Our team is trained, experienced, and fully licensed to handle your HVAC and plumbing needs across Tampa Bay.
  • Transparent communication: We explain what we find in clear, plain language, like we did with the capacitor and UV light on this job, so you can make informed decisions without pressure.
  • Clean, respectful work: We treat your home like it’s our own—keeping work areas tidy, closing panels properly, and leaving everything in better shape than we found it.
  • Focus on long-term reliability: We don’t just fix what’s broken today. We also look ahead to what might cause problems tomorrow, helping you plan for replacements and upgrades instead of reacting to emergencies.
  • Commitment to Tampa Bay homeowners: We live and work here too, and we’re proud to support our community with dependable service and honest guidance.

If you’d like to see what we’re up to around the area, you can connect with us on social platforms like Pinterest and Reddit. For added peace of mind, you can also review our standing with trusted organizations such as the Better Business Bureau and the Tampa Bay Chamber of Commerce.

Need AC Help in Tampa, FL 33618?

If you’re in Tampa, FL 33618 and you’re not sure how your AC is holding up, or you’re interested in a maintenance plan like the Premium Therapy Plan used in this visit, we’re here to help. Whether it’s a capacitor starting to fail, a UV light that’s gone out, or just time for a thorough tune-up, our local Tampa Bay technicians are ready to take care of it.

Reach out to Home Therapist Cooling, Heating, and Plumbing to schedule your next AC maintenance or repair in Tampa, FL 33618. We’ll walk you through what we find, keep the work clean and professional, and make sure your system is running the way it should—so your home stays comfortable when the Florida heat rolls in.

AC Maintenance and Duct Sanitation in Largo, FL 33773

As part of our Elite Home Therapy Plan, we recently completed a scheduled AC maintenance and duct sanitation visit for a homeowner in Largo, FL 33773. Even though the air conditioner was still cooling, there were a few developing issues that needed attention to keep the system running reliably in our hot, humid Florida climate. During this visit, we completed the maintenance, left fresh filters on site, applied a duct sanitation treatment, and confirmed that everything was operating safely while also recommending follow-up repairs based on what we found.

Case Recap: Elite Home Therapy Plan Visit in Largo

For homeowners in Largo, FL 33773, routine HVAC maintenance is one of the best ways to avoid breakdowns during peak summer heat. Here’s a quick summary of this Elite Home Therapy Plan visit:

  • Completed scheduled Elite Home Therapy Plan AC maintenance visit.
  • Delivered and left six properly sized air filters on the bench outside the home for easy access.
  • Applied a duct sanitation solution and left the blower set to ON to circulate it through the ductwork.
  • Advised the homeowner to switch the thermostat fan setting back to AUTO the following morning around 10 a.m.
  • Confirmed the AC was cooling but documented several issues that require future repair.
  • Sent clear, written repair estimates for the homeowner to review and approve at their convenience.

Customer Problem: Keeping the AC Reliable and the Air Clean

Our client in Largo, FL 33773 is enrolled in our Elite Home Therapy Plan to keep their AC system maintained and to stay ahead of problems before they turn into emergencies. By the time we arrived for this visit, the system was still running, but there were some concerns noted during earlier checkups that needed follow-through.

The main priorities for this visit were:

  • Completing the scheduled maintenance to keep the system efficient and reliable.
  • Performing duct sanitation to help improve indoor air quality.
  • Reviewing previously identified concerns and confirming whether they had changed or worsened.

The homeowner wanted peace of mind knowing that their AC would handle Largo’s heat and humidity, that their ductwork was being sanitized properly, and that any recommended repairs were clearly explained with no pressure or surprises.

Inspection and Diagnosis: What We Checked and Why

As with every Elite Home Therapy Plan visit, we followed a structured, step-by-step inspection designed for Florida homes. In Largo, systems run nearly year-round, so we focus on both performance and cleanliness.

During this visit, we:

  • Visually inspected the indoor air handler and outdoor unit for any obvious wear, corrosion, or damage.
  • Checked the condition of existing air filters and confirmed sizing for the replacements (six filters, 18x24x1).
  • Reviewed airflow through return and supply vents to confirm normal circulation.
  • Inspected accessible ductwork areas related to the duct sanitation service.
  • Verified that the system was running and cooling, even though some previously noted issues remained.

Some of the issues we saw had already been identified on earlier visits. Rather than rushing the homeowner into a same-day decision, we documented everything clearly and sent updated estimates. This allows the homeowner in Largo to review the options, budget as needed, and schedule additional work when ready.

If you’re curious about how a more intensive cleaning looks, our air duct cleaning services page walks through what’s involved when ducts need deeper attention beyond sanitation treatments.

Repair and Service Process: What We Did During This Visit

This appointment was primarily a maintenance and sanitation visit, not a major repair day. Our goal was to protect the system, clean the air pathway, and keep everything safe while planning follow-up work. Here’s how we approached it step by step.

1. Elite Maintenance Checklist

We worked through our Elite Home Therapy Plan maintenance steps, which are tailored to systems in the Tampa Bay area, including Largo. While we do not list every checkpoint here, the focus areas included:

  • Checking that the system started, ran, and shut down as expected.
  • Listening for unusual noises that might indicate fan, motor, or airflow issues.
  • Confirming that air was moving evenly through the home’s vents.
  • Evaluating system cleanliness and overall condition for a unit that operates heavily in Florida’s climate.

We verified proper operation for the current visit and made sure there were no immediate safety concerns.

2. Filter Delivery and Planning

Per the job notes, this visit included bringing new filters—six filters sized 18x24x1. Rather than just swapping them quickly and leaving, we coordinated with the homeowner’s preferences and schedule:

  • We delivered the filters and left them neatly on the bench outside the home.
  • This makes it easy for the homeowner to see exactly what size they have on hand.
  • It also allows flexibility if they prefer to change filters themselves at intervals they’re comfortable with.

For many homeowners in Largo, filter changes are one of the simplest ways to protect their investment. If you ever need professional help with filter sizing, replacements, or upgraded filter options, we explain the process in more detail on our air filter installation and repair page.

3. Duct Sanitation Treatment

A key task for this visit was applying a duct sanitation solution. Florida’s humidity and long cooling season can make ducts a collection point for dust and other contaminants. Duct sanitation is one part of improving indoor air quality.

Here’s how we handled it:

  • We applied an appropriate duct sanitation product through the system according to manufacturer and industry guidelines.
  • We set the thermostat fan to ON instead of AUTO so that the blower would run continuously for a period of time.
  • This constant airflow helps circulate the sanitation solution throughout the ductwork, giving it time to pass through the system and make contact with interior duct surfaces.

We advised the homeowner to leave the blower in the ON position until the following day and then switch it back to AUTO around 10 a.m. This balance allows the treatment to do its job without running the fan constantly long-term.

For homes that need more extensive ductwork help—such as heavy dust, visible buildup, or major airflow concerns—we often discuss full duct cleaning or even duct repairs. You can read more about those options on our dedicated air duct cleaning page.

4. Documenting Existing Issues and Sending Estimates

While the AC was cooling, we observed system issues that had also been noted in previous visits. Rather than guessing or rushing, we:

  • Reconfirmed the concerns we had identified earlier.
  • Made sure they were clearly documented in our visit notes.
  • Prepared updated estimates outlining recommended repairs and associated costs.
  • Sent those estimates to the homeowner for review.

This approach gives our Largo, FL 33773 homeowner the information they need to make a decision with zero pressure. When they’re ready, we’ll schedule the repair work and bring the system back to its best possible condition.

Why This Approach Works for Largo, FL 33773 Homes

The combination of regular maintenance, duct sanitation, and clear planning for future repairs is especially important in a place like Largo, where AC systems work almost nonstop.

Here’s why the steps we took are effective:

  • Continuous blower operation for sanitation: Leaving the blower set to ON for a limited period helps the duct sanitation solution move throughout the duct system, rather than just staying near the indoor unit. The moving air is essentially the vehicle that carries the treatment through the supply ducts.
  • Healthy airflow protects the system: Clean filters and reasonable airflow help reduce strain on the blower motor and keep coils from getting clogged with dust. This can improve both comfort and system life.
  • Staged repairs prevent surprises: Documenting issues early and providing estimates lets homeowners plan ahead, instead of facing sudden breakdowns at the worst possible time.
  • Regular maintenance preserves efficiency: In the Tampa Bay area, where systems run hard, routine checkups help catch minor issues before they cause bigger problems, wasting energy or shortening equipment life.

If you want to see more examples of how we protect systems in our region, take a look at our project and education blog, where we share real-world jobs from around Tampa Bay.

Pro Tips for Homeowners in Largo

For homeowners in Largo, FL 33773, a little routine attention can make a big difference in comfort and reliability. Here are some practical tips based on what we see every day in the field:

  • Keep up with filter changes: In our humid, dusty climate, many homes benefit from changing 1-inch filters more frequently than once every three months—often every 4–6 weeks, depending on pets, occupancy, and dust. When in doubt, check the filter; if it looks dirty, don’t wait.
  • Use the fan setting intentionally: For special treatments like duct sanitation, it makes sense to run the fan in ON temporarily. Day to day, though, AUTO is usually the better choice so the fan runs only when cooling or heating, keeping energy use in check.
  • Watch for subtle changes, not just warm air: Higher energy bills, new noises, reduced airflow, or more dust in the home can all be early signs that your system needs attention, even if the air still feels cool.
  • Keep vents and returns clear: Avoid blocking vents or returns with furniture, rugs, or boxes. Restricted airflow can strain the system and reduce comfort in rooms further down the duct runs.
  • Consider periodic duct services: For homes with allergies, pets, or older ductwork, occasional duct-related services—such as duct cleaning, sealing, or sanitation—can support cleaner air and more consistent temperatures.
  • Schedule maintenance before peak season: Plan your Elite Home Therapy Plan visits or preventive maintenance before the hottest months so small issues are caught before your AC is under maximum load.

FAQ: AC Maintenance & Duct Sanitation in Largo, FL 33773

Why did you leave the AC blower set to ON instead of AUTO?

We set the blower to ON temporarily so the fan would run continuously and circulate the duct sanitation solution through the ductwork. That constant airflow helps the product travel through the supply ducts and come into contact with interior surfaces. After the recommended period—in this case, until around 10 a.m. the next day—the homeowner can switch the fan back to AUTO for normal operation.

Is it safe to leave my system running while the duct sanitation is circulating?

Yes, the system is designed to operate with the blower running. We verify proper operation and safety before we leave. The blower setting simply determines when the fan runs; in the ON position, it runs continuously, which is useful for certain treatments. If we ever had concerns about safety or equipment condition, we would not leave the system operating that way.

Why are my repair recommendations separate from the maintenance visit?

Maintenance visits, especially under our Elite Home Therapy Plan, are focused on inspection, cleaning, and optimization. When we identify issues that go beyond routine maintenance, we document them and provide separate estimates. This way, you can clearly see what is recommended, why it’s needed, and what it will cost—without feeling rushed into a same-day decision.

Do I have to replace my filters myself if you leave them outside?

No. In some cases, homeowners prefer us to replace filters during each visit. In other cases, they like having a stock of properly sized filters on hand so they can change them more frequently between visits. For this homeowner in Largo, we delivered six correctly sized filters and left them on the bench outside for convenience. If you prefer us to handle every change, we’re happy to do that during your scheduled service.

How often should I schedule AC maintenance in Largo, FL 33773?

In our local climate, we strongly recommend at least one thorough maintenance visit per year, and for many systems that run heavily, two visits (spring and fall) are ideal. Our Elite Home Therapy Plan is built around regular checkups so we can keep an eye on developing issues and help you avoid unexpected breakdowns during the busiest months.

What if I decide to move forward with the recommended repairs later?

The estimates we sent after this visit clearly outline the work needed and the associated pricing. When you’re ready, just contact us to schedule a follow-up visit. We’ll review the recommendations again, answer any questions you have, and complete the work with the same care and cleanliness you experienced during this maintenance appointment.

Why Choose Home Therapist for Your Largo Home

For homeowners in Largo, FL 33773 and across Tampa Bay, our goal is to make HVAC and plumbing service feel calm, clear, and straightforward. When you invite us into your home, here’s what you can expect:

  • Licensed, professional technicians: Our team is trained and licensed to work on your AC and duct systems safely and correctly. We approach every visit with the mindset of a trusted home therapist—listening first, then treating the problem.
  • Transparent communication: We explain what we find in plain language, show you photos or videos when helpful, and provide written estimates so you can decide what works best for your budget and comfort.
  • Clean, respectful work: We treat your Largo home as if it were our own—using drop cloths where needed, cleaning up after ourselves, and being careful around your belongings.
  • Focus on long-term reliability: Maintenance visits like this one are about more than a quick tune-up. We look for patterns and developing issues so we can help you avoid repeated breakdowns and premature system replacements.
  • Committed to Tampa Bay homeowners: We’re a local company serving the greater Tampa Bay area, and we stand behind our work. Our reputation is built on referrals, reviews, and long-term relationships.

If you’d like to see what neighbors are saying, you can visit us on Facebook, follow along on Instagram, or watch more of our work on YouTube. For additional peace of mind, you can also review our standing with organizations like the Better Business Bureau and the Tampa Bay Chamber of Commerce.

Whether you need focused services like duct cleaning, help with dryer vent cleaning, or comprehensive HVAC and plumbing care in our broader service area, including nearby communities like Clearwater, our team is ready to help. You can learn more about our coverage on our local Tampa Bay service pages.

Need AC Maintenance or Duct Sanitation in Largo, FL 33773?

If you’re in Largo, FL 33773 and your AC is running but you’re not sure it’s in top shape—or you’re interested in duct sanitation and cleaner indoor air—our team at Home Therapist Cooling, Heating, and Plumbing is here to help. We’ll walk you through what we find, keep the process low-stress, and focus on long-term comfort and reliability for your home.

Whether you’re ready to join our Elite Home Therapy Plan or simply want a one-time maintenance visit, reach out to schedule service. Our local Tampa Bay technicians will arrive on time, explain each step, and make sure your system is cared for the way it should be.

When you’re ready, contact Home Therapist to schedule your AC maintenance or duct sanitation visit in Largo, FL 33773—we’ll take it from there.

Commercial AC Maintenance and System Evaluation in Hudson, FL 34669

When you run a daycare in Hudson, FL 34669, reliable air conditioning isn’t a luxury—it’s a necessity. Little ones, staff, and parents all depend on a safe, cool, and comfortable environment, especially in our hot, humid Florida climate. On this quarterly service visit, our Home Therapist technician performed a full commercial AC maintenance and system evaluation on six rooftop units serving a local childcare facility. We took care of filter changes and preventive maintenance, documented multiple aging systems, identified a few non-operational units, and confirmed that the newest system is running properly. By the end of the visit, the daycare had a clear picture of their current equipment and a practical plan for next steps.

Case Recap: Quarterly Commercial AC Service in Hudson, FL 34669

  • Location: Daycare / nursery facility in Hudson, FL 34669.
  • Service: Quarterly commercial AC maintenance and system checkup on six units.
  • Findings: Several older Goodman systems with high energy consumption, refrigerant issues, and failing components.
  • Repairs/Actions: Full preventive maintenance, filter replacement, basic thermostat battery replacement; detailed recommendations for repairs and replacements.
  • Status: One newer Goodman system operating well, multiple older systems nearing end of life or already out of service.
  • Outcome: Immediate comfort supported where equipment is still functional, plus clear estimates and guidance for long-term reliability.

Customer Problem: Keeping a Daycare Comfortable with Aging HVAC Systems

This visit was part of the daycare’s Quarterly Service Agreement with Home Therapist. For a busy childcare center in Hudson, FL 34669, AC outages don’t just cause discomfort. They disrupt classrooms, worry parents, and can force rooms to be closed on very hot days. That’s why the facility invests in regular maintenance—to catch problems early and keep as many systems running as safely and efficiently as possible.

The building is served by six rooftop Goodman systems. Over time, several of these units have aged into the 15–17 year range, which is near or beyond the typical life expectancy for commercial equipment in Florida’s harsh climate. Previous visits had already flagged some concerns, including a unit that had been down for about a year and another with an unresolved contactor and thermostat issue.

On this quarterly visit, the daycare needed three things from us:

  • Thorough maintenance on every system that was still operable.
  • Clear, honest feedback on which units are worth repairing vs. replacing.
  • Updated documentation and estimates so they can plan responsibly and budget for future upgrades.

Our technician approached the job system by system, documenting the condition of each unit and performing all included maintenance tasks.

Inspection and Diagnosis: System-by-System Evaluation

During commercial AC maintenance for businesses in Hudson, FL, we start with a structured process. That ensures nothing is missed and the facility manager gets a straightforward report. Here’s how we broke down the inspection at this daycare.

System 1: 3.5-Ton Goodman (Older R-22 System)

The first unit was a 3.5-ton Goodman system, approximately 15 years old and still using R-22 refrigerant. During inspection, we noted:

  • High electrical consumption for its size and age.
  • Low refrigerant level, with pressures reading lower than normal.
  • Oil traces at the indoor coil, a common visual sign of a refrigerant leak.

While the unit was still technically operational after cleaning and maintenance, running low on refrigerant increases the risk of coil freeze-ups and poor cooling, especially during peak heat in Hudson, FL.

System 2: Large 7.5-Ton Goodman

The second system is a larger, approximately 7.5-ton Goodman unit from around 2009–2011. For this system we observed:

  • High power consumption typical of older equipment.
  • Acceptable operation at the time of service.
  • No immediate failures found during this visit.

We completed the full maintenance checklist and filter changes. The system is still providing cooling, but its age and consumption level mean it should be watched closely.

System 3: Out of Service with Control Issues

System 3 had already been flagged in a previous visit. We had previously recommended replacement of the three-phase compressor contactor to get this unit back online.

On this visit, we tested the unit again and found:

  • The blower was not starting.
  • The thermostat had dead batteries, which we replaced.
  • Even with new batteries, the thermostat still provided no signal.

Given the age of this unit—similar to System 2 at roughly 15–17 years—and the cost of replacing both the contactor and thermostat, we recommended the facility review repair vs. replacement options.

System 4: 4-Ton Straight Cool Goodman (2009)

System 4 is a 4-ton straight cool Goodman unit from 2009, making it about 17 years old. During inspection we found:

  • High energy consumption.
  • Overall operation acceptable after maintenance and filter replacement.
  • No single catastrophic failure, but clear signs of age and inefficiency.

Given the combination of age, energy use, and likely upcoming repairs, we advised that replacement would be the best long-term option.

System 5: Out of Service with Coil Leak

System 5 has been out of service for roughly a year. On earlier visits, a leak had been identified in the indoor coil. For this visit, we confirmed the unit remained non-operational. Recharging a leaking system is not a lasting solution, and with the age of the equipment, replacing the system is typically the more responsible choice.

System 6: Newer Goodman with Modern Refrigerant

The sixth system is the newest Goodman unit on site, using a newer refrigerant type. It had been installed by another company prior to our involvement. On this visit we:

  • Performed full maintenance service.
  • Verified normal operation.
  • Confirmed there were no immediate issues affecting comfort or safety.

This system is currently the most reliable piece of equipment on the roof, helping carry the cooling load while the older units approach end-of-life.

Repair and Maintenance Process: What We Did on This Visit

During a Quarterly Service Agreement visit like this one in Hudson, FL 34669, our main goals are to keep existing systems running as safely and efficiently as possible and to give the building owner a clear roadmap for future decisions.

1. Filter Replacement

Clean filters are critical in a daycare setting because they affect both airflow and indoor air quality. For this visit, the facility required a variety of filter sizes, including:

  • 18x24x1 (2 filters)
  • 20x20x1 (2 filters)
  • 20x25x1 (2 filters)
  • 12x24x1 (6 filters)

We replaced the filters as needed across the systems. This supports better airflow, helps protect the coils from dirt buildup, and contributes to cleaner air for children and staff.

2. Routine Cleaning and Visual Inspection

On each unit, we performed standard commercial AC maintenance tasks, such as:

  • Inspecting coils for dirt and debris buildup.
  • Checking accessible electrical connections for obvious wear or damage.
  • Looking for signs of oil or refrigerant leakage.
  • Confirming drain lines were not obviously backed up.

These steps help prevent breakdowns and give us a baseline on the condition of each system.

3. Operational Checks and Basic Diagnostics

Where systems were still operational (Systems 1, 2, 4, and 6), we:

  • Verified that the units started and ran when called by the thermostat.
  • Monitored that the blower and condenser fans were operating as expected.
  • Checked that air was being delivered to the space.

For System 1, we documented low refrigerant and low pressures along with signs of a leak at the indoor coil. For System 2 and 4, we confirmed operation but noted high consumption and age. For System 6, we confirmed normal performance.

4. Thermostat Battery Replacement and Controls Check

With System 3, we replaced the thermostat batteries as a basic first step. When that did not restore a signal or operation, we moved on to checking the contactor and blower. With both the control component and thermostat failing and the unit’s age being comparable to System 2, we recommended replacing both the contactor and thermostat, while also advising the client to consider full system replacement instead of investing repeatedly into aging equipment.

5. Recommendations and Documentation

At the end of the visit, we provided the daycare with:

  • A summary of the condition of each of the six units.
  • Recommendations for replacing multiple older systems that are leaking, inefficient, or already out of service.
  • Confirmation that the newest system is operating correctly after maintenance.

For a commercial property in Hudson, FL, this kind of documentation helps with budgeting, planning phased replacements, and avoiding sudden, unplanned outages when the weather is at its worst.

Why These Recommendations Make Sense

For commercial HVAC systems in Hudson, FL 34669, decisions often come down to balancing three factors: reliability, energy cost, and repair risk.

Here’s why our recommendations for this daycare are practical and not just theoretical:

  • Age and efficiency: Many of the daycare’s units are 15–17 years old. In Florida’s heat and humidity, that’s typically beyond the sweet spot for efficiency and reliability. Older systems draw more power and are more prone to leaks and failures.
  • Refrigerant concerns: The older R-22 equipment is increasingly difficult and expensive to keep charged. Once a leak is present, topping off refrigerant doesn’t address the root cause and can become an ongoing expense.
  • Component failure risk: When contactors, thermostats, and blowers start failing on older units, it’s often a sign that multiple parts are near the end of their useful life. Replacing the entire system can avoid a chain of repeat service calls.
  • Comfort in a sensitive environment: A daycare can’t easily shift kids to another area for long periods without AC. Reliable cooling is part of keeping the environment safe and compliant.

By maintaining all currently running units and honestly flagging the systems that are no longer good candidates for repair, we helped the daycare move toward a more dependable and efficient setup over time.

Pro Tips for Commercial Property Owners in Hudson

If you manage a daycare, school, or other commercial building in Hudson, FL 34669, here are some practical steps to keep your AC systems healthier for longer:

  • Stick to a routine maintenance schedule: Quarterly visits, like this service agreement, are a smart choice for high-usage facilities. Regular cleaning and checks catch small problems before they become emergencies.
  • Keep filters on a strict replacement plan: In a high-occupancy building with kids and staff, filters load up quickly. Talk with your HVAC provider about appropriate filter types and replacement intervals based on your actual conditions.
  • Budget for phased replacements: Once units pass 12–15 years in our Florida climate, start planning for replacement. Spreading upgrades over a few years is easier than replacing multiple failed units at once.
  • Monitor hot rooms and recurring issues: If the same classroom or office is always warm, mention it at each maintenance visit. That helps us pinpoint airflow or equipment problems early.
  • Protect electrical and control components: Keep thermostats accessible but out of reach of small hands, and avoid storing items around rooftop access areas so technicians can safely service electrical panels and controls.
  • Ask for clear reports: After each maintenance visit, request a simple written summary of unit conditions. This makes it easier to justify capital improvements and coordinate with ownership or your board.

FAQ: Commercial AC Maintenance for Daycares in Hudson, FL 34669

How often should a daycare in Hudson schedule AC maintenance?

In a high-use environment like a daycare, quarterly maintenance is a solid choice. It keeps filters fresh, allows us to catch refrigerant or electrical issues early, and helps ensure dependable cooling through Florida’s long warm season. That’s why this facility chose a Quarterly Service Agreement.

Why did you recommend replacing some of the older systems instead of repairing them?

Several units at this daycare are 15–17 years old with issues like refrigerant leaks, failed controls, and high energy use. At that age, major repairs can be almost as costly as investing in new equipment, and there’s a higher chance of additional components failing soon after. Recommending replacement helps the owner put money into long-term reliability instead of repeated short-term fixes.

Is it safe to keep running a system that’s low on refrigerant?

Running a system that’s low on refrigerant can lead to problems like evaporator coil freeze-ups and additional stress on the compressor. In this case, we documented the low refrigerant and signs of a leak and recommended replacement rather than simply adding more refrigerant. That approach is safer for the equipment and more transparent for the customer.

What does a Quarterly Service Agreement typically include?

While details can vary, a typical agreement for a commercial property in Hudson, FL 34669 includes scheduled maintenance visits, filter changes, basic system cleaning, operational checks, and a written report of findings. It’s designed to reduce surprise breakdowns and extend the life of your equipment. You can learn more about maintenance options on our maintenance plans page.

Do you service both commercial and residential AC systems?

Yes. Home Therapist Cooling, Heating, and Plumbing services both residential homes and commercial buildings across the Tampa Bay area, including Hudson. For businesses, our commercial AC services are tailored to facilities like daycares, offices, and retail spaces that rely on consistent comfort.

What if I’m not ready to replace my system yet?

If you’re not ready to replace older equipment, we’ll focus on honest maintenance, safety, and documenting issues so you know exactly where you stand. We can also discuss repair options, energy considerations, and future AC replacement when the time is right.

Why Choose Home Therapist for Commercial HVAC in Hudson

When you bring our team into your daycare, office, or commercial space, you’re trusting us with the comfort and safety of everyone inside. We take that seriously.

  • Licensed, professional technicians: Our techs are trained, experienced, and familiar with both residential and commercial systems across Tampa Bay, including Hudson, FL 34669.
  • Transparent communication: On this daycare project, we walked the client through each of the six units—what’s working, what’s not, and what we recommend next. No scare tactics, no pressure, just clear information.
  • Clean, respectful work: We understand we’re working around children, teachers, and families. That means keeping work areas tidy, being mindful of noise and timing, and respecting the property at all times.
  • Long-term reliability focus: Instead of pushing quick fixes, we look at the big picture—age, condition, and operating costs—to help you decide whether maintenance, repair, or replacement is the smartest move.
  • Commitment to Tampa Bay homeowners and businesses: From Hudson to the greater Tampa Bay area, we’re here to support year-round comfort, not just one-time service calls.

If you’d like to see what other customers say about working with us, you can visit our Facebook page or follow us on Instagram and TikTok for behind-the-scenes looks at our work.

We’re also proud to be recognized by trusted organizations such as the Better Business Bureau and the Tampa Bay Chamber of Commerce, reflecting our commitment to ethical, reliable service in the communities we serve.

Need Commercial AC Service in Hudson, FL 34669?

If you manage a daycare, school, or other commercial property in Hudson, FL 34669 and you’re dealing with aging systems, hot rooms, or rising energy bills, we’re here to help. Whether you need a one-time tune-up, a Quarterly Service Agreement, or a plan to replace older equipment, our team will walk you through your options step by step.

Learn more about routine care on our AC maintenance services page, or explore long-term solutions on our AC replacement and commercial AC services pages. When you’re ready, reach out and we’ll schedule a visit at a time that works for your operation.

Home Therapist Cooling, Heating, and Plumbing is ready to support your comfort, your staff, and the families who trust you—right here in Hudson, FL 34669.

Shower Cartridge Replacement in Wesley Chapel, FL 33545

When a shower starts running too hot, too cold, or won’t fully shut off, it can quickly turn a relaxing routine into a daily frustration. That was the situation for a homeowner in Wesley Chapel, FL 33545 who reached out to our team at Home Therapist for help with a shower that needed a new cartridge. Our licensed plumber Alejandro was dispatched to diagnose the issue and perform a professional shower cartridge replacement so the family could get back to a comfortable, predictable shower again.

Case Recap: Quick Look at This Shower Repair

  • Location: Residential home in Wesley Chapel, FL 33545
  • Service: Level 1 plumbing repair – shower cartridge replacement
  • Main concern: Inconsistent or unreliable shower valve performance
  • Solution: Remove old shower cartridge and install a new cartridge assembly
  • Result: Restored proper valve operation and reliable water control

Customer Problem: A Shower That Just Wouldn’t Behave

By the time a homeowner calls us for shower cartridge replacement in Wesley Chapel, FL 33545, they’re usually dealing with one or more of these symptoms:

– Water temperature suddenly swings from hot to cold or vice versa
– The handle feels difficult to turn or doesn’t move smoothly
– The shower won’t fully shut off and continues to drip or run
– Uneven water flow or low flow even though other fixtures are fine

In this home, the shower control was no longer operating the way it should. While the exact day-to-day symptoms can vary from one home to another, worn shower cartridges commonly create comfort, convenience, and water-waste issues. The homeowner was understandably concerned about both comfort and the possibility of wasting water over time.

They wanted a licensed professional who works on plumbing repair for Tampa Bay–area homes to safely open up the valve, identify the issue, and install the correct replacement cartridge so they wouldn’t have to fight with the shower every morning.

Inspection and Diagnosis: Confirming a Failed Shower Cartridge

When Alejandro arrived, he took a calm, step-by-step approach. Even with a straightforward Level 1 plumbing repair like a shower cartridge replacement, it’s important to verify that the cartridge really is the root cause and not just a symptom of something else.

Our diagnostic steps on a visit like this typically include:

  • Listening to the homeowner describe exactly what the shower has been doing and for how long.
  • Visually inspecting the shower valve trim, handle movement, and any obvious leaks around the escutcheon plate.
  • Checking how the handle feels as it moves from hot to cold and from off to on.
  • Confirming that water pressure and flow at other nearby fixtures are normal.

If the handle is stiff, the valve doesn’t shut off cleanly, or temperature control is inconsistent while other fixtures behave normally, the cartridge inside the shower valve is usually worn, clogged, or damaged.

After confirming that the issue was isolated to the valve itself, the next step was to access the cartridge assembly, inspect its condition, and replace it with a new part. In this job, the cost of the new cartridge was handled separately from the labor so the homeowner only paid for the part that was actually needed.

Repair Process: How We Replaced the Shower Cartridge

Shower cartridge replacement is a common plumbing repair for homeowners in Wesley Chapel, but it still requires care to protect the valve body, surrounding tile, and trim. Here’s how our process typically looks on a Level 1 cartridge job:

1. Safely Shutting Down the Water

The first priority is safety and control. Alejandro located the appropriate shutoff (either local to the bathroom or at the main) and turned off the water feeding the shower. This prevents unexpected sprays when the valve is opened and protects the home from accidental leaks during the repair.

2. Removing the Trim and Accessing the Valve

Next, he carefully removed the shower handle, decorative trim, and escutcheon plate. This step has to be done methodically to avoid damaging the finish, tile, or waterproofing behind the wall. We keep the work area clean and organized, setting screws and trim aside so everything goes back together correctly.

3. Extracting the Old Cartridge

With the valve body exposed, Alejandro removed the retaining clip or nut (depending on the valve design) and gently pulled the old cartridge from the valve. Cartridges can sometimes be stuck from years of mineral buildup, so this step is done slowly and carefully to avoid cracking the valve body or breaking the cartridge inside the wall.

Once removed, the old cartridge is inspected for wear, debris, and damage. This helps confirm that the issues the homeowner was experiencing match the condition of the part we’re replacing.

4. Installing the New Cartridge

After confirming the correct orientation and fit, the new cartridge is inserted into the valve body. Proper alignment is important so the hot and cold sides match the handle’s movement and the valve seals correctly when turned off.

Once in place, the retaining clip or nut is reinstalled to secure the cartridge. We take a moment here to double-check that the cartridge is fully seated and that there are no visible issues around the seals.

5. Reassembling the Trim and Restoring Water

With the new cartridge secured, Alejandro reinstalled the escutcheon plate, trim, and shower handle. This is where a clean, professional finish matters: the plate needs to sit flat and sealed, and the handle should look and feel like it belongs in the home—not like it was just thrown back together.

After reassembly, the water supply was turned back on slowly while Alejandro monitored the valve area for any leaks. This controlled restart helps catch issues before they become problems.

6. Testing Operation and Verifying Comfort

Finally, the shower was tested through a full range of motion:

  • Checking for smooth handle operation from off to full on.
  • Verifying that the valve shuts off completely.
  • Confirming that temperature control feels consistent and predictable.

We verified proper operation after the repair and made sure the homeowner was comfortable with how the shower felt and functioned before wrapping up the visit.

Why This Fix Works: What a Shower Cartridge Actually Does

Inside many modern shower valves, the cartridge is the main working component that mixes hot and cold water and controls flow. Over time, mineral deposits, normal wear, and internal seal failure can cause the cartridge to lose its ability to:

  • Maintain a steady temperature as you move the handle.
  • Seal fully when you turn the shower off.
  • Move smoothly without sticking or grinding.

By replacing the old cartridge with a new one, we’re essentially giving the valve a fresh internal control mechanism while keeping the existing valve body and plumbing in place. That’s why a shower cartridge replacement is often a cost-effective repair for homeowners in Wesley Chapel instead of opening walls for a full valve replacement.

The new cartridge restores reliable water mixing and on/off control, which directly improves everyday comfort and helps prevent unnecessary water waste from constant dripping or partial flow.

Pro Tips for Homeowners in Wesley Chapel

Living in Wesley Chapel, FL 33545, you’re dealing with Florida’s heat, humidity, and local water conditions, which all play a role in how long plumbing components last. Here are some practical tips to help you get the most from your showers and fixtures:

  • Watch for early signs of valve trouble. If your shower handle starts to feel stiff, you notice sudden temperature swings, or the water won’t fully shut off, it’s a good time to schedule a checkup before the problem worsens.
  • Consider water quality. Minerals in the water can shorten the life of cartridges, faucets, and other fixtures. If you’re noticing buildup around showerheads or faucets, ask us about filtration or softening options during a visit. Our other plumbing services can help you explore long-term solutions.
  • Don’t force a stubborn handle. Forcing a tight or stuck shower handle can damage the valve internals. If something doesn’t feel right, it’s safer to call a licensed plumber than to muscle it and risk a bigger repair.
  • Address drips promptly. A slowly dripping shower after shutoff isn’t just annoying; over time, it adds up on your water bill. A simple cartridge replacement often solves this, and our local plumbing repair services for nearby Pasco County communities make it easy to get help.
  • Schedule whole-home plumbing checkups. If you’re already calling us for one issue, it can be a good opportunity to have other fixtures, like sinks and toilets, looked over as well. Our team can help with faucet repairs, sink issues, and toilet problems during the same visit when appropriate.

FAQ: Shower Cartridge Replacement in Wesley Chapel, FL 33545

How do I know if my shower cartridge needs to be replaced?

Common signs include difficulty turning the handle, sudden changes in water temperature, a shower that won’t fully shut off, or inconsistent water flow while other fixtures work fine. If you’re seeing these symptoms in your Wesley Chapel home, it’s a good idea to have a licensed plumber inspect the valve and cartridge.

Will I need a whole new shower valve or just a cartridge?

In many cases, only the cartridge needs to be replaced, not the entire valve. During a visit, we inspect the existing valve body and cartridge. If the valve body is in good shape and compatible parts are available, a cartridge replacement is often the most efficient solution.

Is water shutoff required for a shower cartridge replacement?

Yes. To safely remove and replace the cartridge, we shut off the water supply feeding the shower or the home. This protects your property, prevents accidental spraying, and allows us to work cleanly and carefully inside the valve.

How long does a typical shower cartridge replacement take?

Most Level 1 shower cartridge replacements are relatively quick once we confirm the issue and have the correct part on hand. The actual time can vary depending on access, the condition of the old cartridge, and the valve design, but we always aim to complete the repair efficiently while maintaining quality and cleanliness.

Can you help with other plumbing issues during the same visit?

Often, yes. If time allows and the scope is appropriate, we can look at other common plumbing concerns such as leaks, faucet issues, or toilet problems during the same appointment. Our team provides full HVAC and plumbing services in Wesley Chapel and the surrounding Tampa Bay area.

Why Choose Home Therapist for Plumbing Repair in Wesley Chapel

When you invite a technician into your home, you want someone who will treat your space with respect and handle your plumbing issues the right way the first time. That’s how we approach every shower cartridge replacement and every plumbing repair in Wesley Chapel, FL 33545.

  • Licensed and professional technicians: Our plumbers are trained, experienced, and licensed to work on residential plumbing systems throughout Tampa Bay.
  • Transparent communication: We explain what we’re seeing, what we recommend, and what it will cost—before we move forward. In this case, the cost of the replacement cartridge itself was clearly noted separately from the labor.
  • Clean, respectful work: We protect the work area, handle your fixtures carefully, and clean up when the job is done so your bathroom is ready to use again.
  • Long-term reliability focus: We’re not just swapping parts; we’re looking at how your plumbing system as a whole is performing and advising you on what will help it last.
  • Committed to Tampa Bay homeowners: From Wesley Chapel to the rest of our service area, we’re focused on dependable, neighborly service you can count on.

If you’d like to see more of how we work and connect with us online, you can find Home Therapist on Facebook, follow along on Instagram, or watch our content on YouTube.

For added peace of mind, you can also review our standing with trusted organizations. We’re listed with the Better Business Bureau, and we’re proud to be part of the Tampa Bay Chamber of Commerce, reflecting our ongoing commitment to quality service in the community.

Need Shower or Plumbing Help in Wesley Chapel, FL 33545?

If your shower isn’t cooperating—whether it’s temperature swings, a handle that won’t turn smoothly, or a valve that won’t shut off—our team is here to help. We provide professional shower cartridge replacement and a full range of plumbing repairs for homeowners in Wesley Chapel, FL 33545 and across the Tampa Bay area.

Reach out to Home Therapist to schedule a visit with one of our local technicians. We’ll take the time to diagnose the issue, explain your options in plain language, and complete the work cleanly and carefully so you can get back to a comfortable, dependable shower.

HVAC Heating Repair and TXV Replacement in Spring Hill, FL 34606

When a heating problem pops up during a Florida cold snap, it can be frustrating—especially when the system is only a year old. That was the case for a homeowner in Spring Hill, FL 34606 who called us because their system would cool just fine, but would not heat the home. As local Tampa Bay HVAC technicians serving Spring Hill, we know how important it is to get both heating and cooling working reliably, even in our mild winters.

On this visit, we traced the issue to a defective TXV (thermostatic expansion valve) that had developed a leak. We installed this system last year, so we treated this as a warranty concern, confirmed the problem, and set up a plan to replace the TXV, restore proper refrigerant charge, and verify safe, reliable operation for both heating and cooling.

In this article, we’ll walk through what the homeowner noticed, how we diagnosed the problem, what’s involved in a TXV replacement, and what homeowners in Spring Hill can do to keep their systems running smoothly.

Case Recap: No Heat on a Newer System in Spring Hill

  • Location: Single-family home in Spring Hill, FL 34606
  • System age: Installed by our team last year
  • Main complaint: Air conditioner was cooling, but not providing heat
  • Initial finding: Defective/leaking TXV inside the system
  • Solution: TXV replacement under warranty, full refrigerant recovery and recharge, and system testing
  • Outcome: System left operating, with plan to complete full warranty repair and final checks

Customer Problem: Cooling But No Heat

The homeowner in Spring Hill reached out to us because their air conditioner was not heating the home. They reported that the system would cool as expected but would not switch over to provide warm air when needed. Since we had installed the unit in June of the previous year, they were understandably concerned that something was already failing.

On the day of service, the homeowner could not be present, so we coordinated with her spouse at the home. Clear communication is especially important in those situations. Our technician made sure to:

  • Review the reported issue: no heat, only cooling
  • Confirm the system’s installation history with our company
  • Explain that we would perform a full diagnostic, then review options before making any major repair decisions

From the homeowner’s perspective, the symptoms were simple: the thermostat called for heat, but the home stayed cold. Behind the scenes, though, that can point to several possible causes—electrical, refrigerant-related, or control-board issues—so we moved into a structured inspection.

Inspection and Diagnosis: Tracking Down the TXV Issue

When we respond to a no-heat call like this in Spring Hill, FL, we follow a step-by-step diagnostic process to avoid guessing and to make sure we identify the root cause, not just the symptom.

On this visit, our technician:

  • Verified thermostat settings and confirmed a heat call
  • Checked that the air handler and outdoor unit were powering on as expected
  • Observed system behavior when switching between heating and cooling modes
  • Evaluated refrigerant-side components, including the metering device (TXV)

During these checks, we noted that the system behavior was not consistent and the control board was “acting up”—not always responding the way it should. To keep the home as comfortable as possible while we continued our evaluation, we temporarily bypassed part of the control logic to leave the unit operating. This was a controlled, temporary measure so the system could still function while we arranged parts and a full repair.

The key finding came when we inspected the TXV. We confirmed that the TXV valve had developed a leak and was not performing as it should. Given the age of the system and the way the component failed, this pointed strongly toward a factory defect rather than anything the homeowner did wrong.

At that point, we explained to the homeowner that:

  • The TXV is a core component in the refrigeration cycle and must be replaced.
  • The part would be covered under the system’s warranty.
  • Additional materials—like refrigerant, filter-drier, and line flushing—may not be fully covered and could involve extra cost.

We also made it clear that when a system cannot be fully diagnosed until a failed part is replaced, there is always a small chance that an additional issue could show up afterward. We don’t like surprises any more than homeowners do, so we set that expectation up front before moving forward.

Repair Process: TXV Replacement and System Restoration

TXV replacement is a precise repair that has to be done correctly to protect the system and keep it under warranty. Here is how we planned and executed the work for this Spring Hill HVAC repair:

1. Warranty Part Procurement

Because we installed this system, we handled the warranty process on the homeowner’s behalf. The technician coordinated pickup of the new air-handler TXV from the local distributor, making sure the exact approved replacement part was obtained. This helps maintain the manufacturer’s warranty and ensures proper fit and operation.

2. Refrigerant Recovery and Pump Down

Any time we open the sealed refrigerant circuit, we must safely recover the existing refrigerant instead of venting it. For this job, we:

  • Pumped down the remaining refrigerant to the outdoor condenser to isolate it
  • Prepared the indoor side of the system for component replacement

The key point we explained to the homeowner was that, because we were working inside the sealed system, all of the refrigerant would ultimately need to be replaced and recharged to proper levels. The cost of new refrigerant is typically separate from the warranty coverage of the part itself.

3. Removing the Old TXV

Next, we carefully disconnected the old TXV. This requires:

  • Accessing the refrigerant lines at the air handler/coil
  • Cutting or desoldering connections without damaging nearby components
  • Inspecting for signs of oil or staining that confirm leakage around the valve

Because the TXV was suspected to be defective from the factory, this step also gave us a chance to visually confirm the condition of the part and surrounding piping.

4. Installing the New TXV

We then installed the new TXV under warranty. Proper installation includes:

  • Positioning the valve correctly for accurate sensing and flow
  • Making solid, clean brazed connections
  • Protecting sensitive components from excess heat during soldering

After brazing, we performed a leak check at the newly soldered joints. This is critical—any small leak left behind will cause refrigerant loss over time and can bring the homeowner right back to square one with performance problems or a warm home in the winter.

5. Filter-Drier and Line Flush (If Needed)

On many TXV replacements, it is best practice to replace the filter-drier and flush the copper lines to help remove moisture or contaminants from the system. These components and steps are often not included in the basic part warranty and may be quoted separately. We always explain this clearly so the homeowner understands which items are warranty-covered and which are additional protective measures for long-term reliability.

6. Vacuum and Dehydration

With the new TXV in place and connections sealed, we evacuated the system using a vacuum pump. Pulling a deep vacuum removes air and moisture from the refrigerant circuit. Leaving moisture inside can lead to corrosion, poor performance, and internal damage over time, so this step is not optional—it’s essential.

7. Recharging with Refrigerant

Once the vacuum held steady and passed checks, we recharged the system with new refrigerant. The amount of refrigerant added is carefully controlled to meet the manufacturer’s specifications. We also discussed with the homeowner that needing to add several pounds of refrigerant could indicate a leak in some situations. In this case, we had already identified a failed TXV as the source of leakage, and our leak checks around the repair area help ensure we’ve addressed the problem.

8. Final Testing in Heating and Cooling Modes

After the system was fully recharged, we tested it in both cooling and heating modes. This included verifying:

  • Proper system start-up and shut-down
  • Correct response to thermostat calls
  • Normal airflow and temperature change across the coil
  • Stable, expected operation at the new TXV

We do not leave a Spring Hill homeowner without confirming that their system is operating as expected. If we see anything questionable, we address it before wrapping up the job or schedule a prompt follow-up visit.

Why This Fix Works: The Role of the TXV in Heating and Cooling

The TXV is essentially the traffic controller for your refrigerant. It meters how much refrigerant flows into the evaporator coil based on operating conditions. When it does its job correctly, you get efficient heat transfer, steady comfort, and reliable performance in both heating and cooling modes (for systems designed to provide both).

When a TXV fails or leaks, several things can go wrong:

  • The system may struggle to maintain correct pressures and temperatures.
  • Performance drops—rooms may feel too warm, too cold, or inconsistent.
  • In heating mode, the system may simply not be able to move enough energy to warm the home.
  • Refrigerant can be lost, which further reduces capacity and can cause the system to shut down or run unsafely.

By replacing the defective TXV, evacuating the system properly, and installing fresh refrigerant at the correct charge, we restored the heart of the refrigeration cycle. That’s why the homeowner in Spring Hill, FL 34606 could expect normal heating operation again once the repair was complete and all final tests were passed.

Pro Tips for Homeowners in Spring Hill

Our Tampa Bay climate is tough on HVAC systems—long cooling seasons, high humidity, and occasional cold snaps all put extra stress on equipment. Here are some practical tips for homeowners in Spring Hill, FL to help avoid surprise breakdowns like this one:

  • Schedule regular maintenance. A yearly professional tune-up helps catch issues like weak components, restricted airflow, or early signs of leaks before they become major problems. Our overview of AC repairs and maintenance services explains what’s typically included.
  • Use your thermostat wisely. During cooler nights, avoid large, sudden temperature swings. Gradual adjustments put less stress on the system, especially when switching between heating and cooling modes.
  • Keep filters clean. In Florida’s dusty, humid environment, filters can clog faster than many homeowners expect. Check them monthly and replace as needed to protect expensive components like coils and TXVs.
  • Pay attention to changes in performance. If you notice longer run times, uneven temperatures, or unusual noises, it’s worth calling for a checkup before the problem grows. Our article on AC maintenance and cleaning specials in Tampa Bay shares more about what proactive service can do.
  • Plan ahead for repairs. Some warranty repairs still involve labor, refrigerant, or accessory parts that are not fully covered. When we quote a repair, we clearly separate what’s under warranty from what isn’t so you can plan your budget.
  • Know who installed your system. Because we had installed this Spring Hill system, we could quickly access history, confirm warranty coverage, and move straight to solutions. If we installed your system, you can always reach out for repair and maintenance options tailored to your equipment.

FAQ: Heating and TXV Repairs for Spring Hill Homeowners

Why would a relatively new HVAC system stop heating?

Even newer systems can experience factory defects or early component failures. In this Spring Hill, FL 34606 home, the thermostatic expansion valve developed a leak, which directly affected how the system handled refrigerant and prevented proper heating. The good news is that, when identified early, these issues are often covered by the manufacturer’s warranty.

What exactly is a TXV and why is it important?

The TXV (thermostatic expansion valve) controls how much refrigerant enters the evaporator coil. It helps the system maintain efficient operation in a variety of conditions. If the TXV sticks, clogs, or leaks, the system may not cool or heat correctly and can become unreliable or inefficient.

Is TXV replacement covered under warranty?

It depends on the system’s warranty terms, who installed it, and the age of the equipment. In this case, because we had installed the system last year and determined that the TXV issue was likely a factory defect, we were able to replace the part under warranty. However, items like refrigerant, filter-driers, and some labor may not always be fully covered and are quoted separately.

Why does all the refrigerant need to be replaced during this repair?

Any time we open the sealed refrigerant circuit—especially at key components like the TXV—it is best practice to recover the existing refrigerant, evacuate the system to remove air and moisture, and then recharge with fresh refrigerant to the correct level. This approach helps protect the system, maintain warranty coverage, and ensure stable, reliable operation.

Could there be more issues after the TXV is replaced?

Sometimes, a failed component can mask or contribute to other underlying issues. That’s why we explain ahead of time that a full diagnosis is only possible once the primary problem is corrected. After the TXV is replaced and the system is running again, we perform additional checks. If anything else shows up, we provide clear estimates before proceeding.

How can I reduce the risk of similar problems in my home?

Regular professional maintenance, prompt attention to performance changes, and having your system installed and serviced by licensed technicians all help reduce risk. Our piece on what to expect from an AC installation quote gives a good sense of how a proper install sets the stage for fewer problems down the road.

Why Spring Hill Homeowners Choose Home Therapist

When your home in Spring Hill, FL 34606 loses heating or cooling, you need more than just a quick patch—you need a team that takes responsibility, explains the situation clearly, and stands behind the work. That’s how we approach every visit at Home Therapist Cooling, Heating, and Plumbing.

Licensed, Professional Technicians. Our technicians are trained, licensed, and experienced with modern HVAC systems, including the equipment we install ourselves. We follow industry best practices on refrigerant recovery, brazing, leak detection, and system testing so your home stays safe and comfortable.

Transparent Communication. In this Spring Hill case, we explained that the TXV was being replaced under warranty, but that refrigerant, filter-driers, or line flushing might involve additional cost. We also made it clear that hidden issues can sometimes appear only after the primary repair is done. We bring that same level of honesty to every job.

Clean, Respectful Work. Whether we are working in your attic, garage, or side yard, we treat your home as if it were our own—laying down protection where needed, cleaning up after ourselves, and minimizing disruption for your family.

Focused on Long-Term Reliability. Our goal isn’t just to get the system running today; it’s to help it run well for years. That’s why we emphasize correct installation, proper evacuation and charging, and routine maintenance. You can learn more about our broader services on our main website.

Connected to the Tampa Bay Community. We are proud to serve homeowners throughout Tampa Bay and nearby communities like Spring Hill. You can see more of our work, updates, and customer interactions on our social channels, including Facebook, Instagram, and YouTube.

For added peace of mind, you can also check our standing with trusted organizations such as the Better Business Bureau and the Tampa Bay Chamber of Commerce. We work hard to maintain a reputation that reflects the care we bring to every home.

Need Heating or Cooling Help in Spring Hill, FL 34606?

If your system in Spring Hill, FL 34606 is not heating, not cooling, or just not running the way it used to, our local Tampa Bay technicians are here to help. Whether it’s a warranty issue on a newer system, a suspected refrigerant leak, or a more complex control problem, we’ll take the time to diagnose it properly, explain your options, and perform the repair the right way.

To schedule HVAC service for your Spring Hill home, contact Home Therapist Cooling, Heating, and Plumbing today. We’ll work with your schedule, keep you informed at every step, and leave your system operating as it should—so your home stays comfortable in every season.

Dishwasher Replacement and Installation in St. Petersburg, FL 33703

When your dishwasher isn’t doing its job, it can make everyday life a lot less convenient. For a homeowner in St. Petersburg, FL 33703, it was time to swap out an older unit for a new, customer-supplied dishwasher. Our Home Therapist technician, Adalberto, came out to handle the full removal and installation so everything would be connected safely, set up correctly, and ready for years of reliable use.

In this project, we removed the existing dishwasher, inspected the plumbing and electrical connections, installed the new unit, and tested the system to confirm there were no leaks and that the dishwasher was operating as expected. Below, we’ll walk through what we did, why each step matters, and how homeowners in St. Petersburg and across Tampa Bay can keep their kitchens running smoothly.

Case Recap

  • Location: Single-family home in St. Petersburg, FL 33703
  • Service: Replacement of an existing dishwasher with a customer-supplied unit
  • Focus: Safe removal, proper water and drain connections, and secure electrical hookup
  • Verification: Checked for leaks, ensured proper drainage, and confirmed normal operation
  • Outcome: New dishwasher installed, leveled, and tested for reliable performance

Customer Problem

The homeowner in St. Petersburg, FL 33703 had already purchased a new dishwasher and needed a licensed professional to remove the old one and install the new unit the right way. They wanted to avoid surprises like hidden leaks, improper drainage, or electrical issues that can show up days or weeks after a hasty installation.

Common concerns we hear from homeowners in the St. Petersburg area include:

  • Worry about slow leaks under the cabinet causing damage over time
  • Uncertainty about how to safely disconnect electrical and water lines
  • Concerns that the dishwasher might not drain properly if the hose isn’t routed correctly
  • Not wanting to damage surrounding cabinets, flooring, or countertops during removal

In this case, the homeowner simply wanted peace of mind: a clean, professional dishwasher replacement done by a licensed technician who would respect their home and leave everything tidy.

Inspection and Diagnosis

Even for a straightforward dishwasher replacement in St. Petersburg, FL 33703, we always start with a careful inspection. Before touching anything, Adalberto took a few minutes to understand how the existing dishwasher was installed and what conditions we were working with.

Our inspection steps included:

  • Verifying shutoffs: Confirming the location and operation of the water shutoff valve and confirming the electrical disconnect method for the dishwasher.
  • Checking existing water line: Inspecting the supply line for signs of corrosion, kinks, or prior leaks.
  • Reviewing the drain setup: Looking at how the drain hose was routed—through the cabinet, into an air gap or disposal, and whether it had a proper high loop to prevent backflow.
  • Cabinet and space check: Ensuring the new dishwasher would have proper clearance and that the cabinet opening was suitable.

If we find any obvious issues at this stage—such as deteriorated supply lines or a poorly routed drain—we discuss them with the homeowner before moving forward. That’s part of our commitment to transparent communication on every plumbing service we perform across Tampa Bay.

Repair and Service Process

With the initial inspection complete, our technician moved through the replacement in a careful, step-by-step process. Even though the homeowner provided the new dishwasher, our responsibility is everything in between: safe removal of the old unit, code-conscious connections, and proper final testing.

1. Safely Shutting Down Power and Water

The first priority is safety. The dishwasher uses both electricity and water, and we never take shortcuts with either.

Adalberto shut off the water supply to the dishwasher and confirmed that power to the unit was disconnected. This protects both the home and the technician during the removal phase.

2. Removing the Existing Dishwasher

Next, we removed the old dishwasher without damaging surrounding finishes:

  • Disconnecting the water supply line and drain hose
  • Unfastening mounting brackets from the countertop or cabinetry
  • Carefully sliding the unit out to avoid scraping floors or sides

We also checked the cabinet cavity for any signs of past leaks or moisture staining. If we see something concerning, we always point it out to the homeowner and explain what we’re seeing in plain language.

3. Inspecting and Preparing the Connections

Before installing the new dishwasher, we reviewed the existing connections to ensure they were still in good shape:

  • Confirming the shutoff valve operated correctly
  • Checking the condition and routing of the drain line path through the cabinet
  • Reviewing the electrical connection method to match the new unit’s requirements

If a supply line or fitting shows obvious wear or doesn’t look reliable, we recommend replacement so we don’t leave a potential trouble spot hidden behind the new appliance.

4. Setting and Leveling the New Dishwasher

With the space prepared, we positioned the new, customer-supplied dishwasher into the cabinet opening. Leveling is especially important here—a dishwasher that isn’t level can have problems with door sealing, washing performance, and even drainage.

We adjusted the legs of the new unit to ensure it sat level side-to-side and front-to-back, then secured it using the manufacturer-approved mounting points so it wouldn’t shift over time.

5. Making the Water, Drain, and Electrical Connections

Once the dishwasher was properly positioned, we connected it to the home’s systems:

  • Water supply: Connecting the inlet line with appropriate fittings and ensuring snug but not over-tightened connections.
  • Drain line: Routing the drain hose correctly and ensuring a proper high loop or connection point as appropriate for the home’s setup.
  • Electrical: Making a secure electrical connection according to the new unit’s design and verifying that it was firmly enclosed and protected.

Our goal at this stage is no drips, no strain on the lines, and no loose or exposed wiring—just a clean, professional installation.

6. Testing for Leaks, Operation, and Drainage

After restoring water and power, we ran the dishwasher through a test cycle. During testing, we:

  • Watched for any signs of water leaking at the supply or drain connections
  • Confirmed that the unit filled, washed, and drained as expected
  • Listened for unusual noises and verified that the unit remained solidly in place

Before wrapping up, Adalberto walked the homeowner through what was done, what to watch for, and how to reach us if they had any concerns afterward. We left the area clean, with tools and packaging cleared away.

Why This Fix Works

A dishwasher might seem simple from the outside, but it depends on several systems working together: water pressure, drainage, and electrical power. When installed correctly, these systems support each other; when installed poorly, they can quietly cause problems behind the scenes.

Here’s why a professional dishwasher replacement matters for homeowners in St. Petersburg, FL 33703:

  • Water connections: Tight, properly sized connections reduce the risk of slow, hidden leaks that can damage cabinets and floors over time.
  • Drainage: Correct routing and support of the drain hose helps prevent standing water in the tub, foul odors, and backflow from the sink or disposal.
  • Electrical safety: Secure electrical connections and proper grounding support safe operation and help protect both the appliance and the home.
  • Leveling and mounting: A level, firmly mounted dishwasher closes properly, runs more quietly, and drains more reliably.

By following a careful, methodical installation process, we help extend the life of the new dishwasher and reduce the chances of callbacks or inconvenient breakdowns for the homeowner.

Pro Tips for Homeowners in St. Petersburg

Living in the St. Petersburg and greater Tampa Bay area means dealing with humidity, frequent use of kitchen appliances, and sometimes harder water, depending on your neighborhood. Here are a few ways to keep your new dishwasher running smoothly:

  • Run hot water before starting: Let the kitchen sink run hot for a minute before starting the dishwasher. This helps the unit begin cycles with hotter water, improving cleaning performance.
  • Scrape, don’t rinse: Scrape excess food off plates, but avoid fully hand-washing. Most modern dishwashers are designed to handle a normal amount of residue, and over-rinsing can actually reduce cleaning efficiency.
  • Check under the sink periodically: Every month or so, take a quick look at the dishwasher supply line and drain hose under the sink for any signs of moisture or corrosion.
  • Clean the filter: Many newer dishwashers include a removable filter at the bottom. Rinsing this under the tap every few weeks can help maintain good performance and odor control.
  • Use the right detergent and settings: Follow the manufacturer’s recommendations for detergents and cycles. In our Florida climate, using a regular hot cycle periodically can help keep the interior cleaner.
  • Address plumbing issues early: If you notice slow draining at the kitchen sink or gurgling noises, it may affect your dishwasher drainage as well. That’s a good time to have a plumber take a look before it turns into a bigger issue.

If you ever run into broader plumbing concerns, our team also helps Tampa Bay homeowners with services like general plumbing repair, whole-home repiping projects, and water filtration system installations. For another example of this type of work, you can also see a similar dishwasher installation and setup project we completed in Plant City.

FAQ: Dishwasher Replacement in St. Petersburg, FL 33703

Do I need a plumber to replace a dishwasher if I already bought the new one?

You’re not required to use a plumber, but it’s strongly recommended. A dishwasher connects to your home’s water, drain, and often a hardwired electrical circuit. Having a licensed professional do the work reduces the risk of leaks, improper drainage, or electrical problems. For homeowners in St. Petersburg, FL 33703, we’re happy to install customer-supplied dishwashers safely and correctly.

Can you reuse my existing dishwasher water supply and drain lines?

Often, existing lines can be reused if they’re in good condition and compatible with the new unit. During our inspection, we check for signs of wear, corrosion, or poor routing. If anything looks questionable, we’ll explain the issue and recommend replacement so you’re not left with a weak point behind your new appliance.

How long does a typical dishwasher replacement take?

Most dishwasher replacements take about a couple of hours from arrival to final testing, assuming there are no major surprises with the existing plumbing or electrical connections. Our goal is to work efficiently while still giving each step the attention it deserves.

What should I watch for after a new dishwasher is installed?

Over the first few cycles, keep an eye on the area under your sink and around the base of the dishwasher for any signs of moisture or unusual odors. If you notice slow draining in the sink or water remaining in the bottom of the dishwasher after cycles, it’s a good idea to have us take a look so we can address it early.

Can you help with other plumbing issues in my kitchen?

Yes. In addition to dishwasher replacements, we help Tampa Bay homeowners with kitchen sink plumbing, garbage disposals, faucet replacements, and larger plumbing projects. If you’re in St. Petersburg, FL 33703 and notice recurring clogs, older pipes, or water quality concerns, we can evaluate the situation and recommend options that fit your home and budget.

Why Choose Home Therapist for Plumbing Services

When you invite someone into your home in St. Petersburg or anywhere in Tampa Bay, you deserve a team that treats your space with care and respects your time. At Home Therapist Cooling, Heating, and Plumbing, we take that responsibility seriously on every visit—whether we’re replacing a dishwasher or handling a larger plumbing project.

  • Licensed, professional technicians: Our plumbers are trained, licensed, and experienced with both plumbing and connected systems, so you get a safe, code-conscious installation.
  • Transparent communication: We explain what we’re doing in clear, plain English, review options when there are choices to make, and keep you informed from arrival to cleanup.
  • Clean and respectful work: We protect your floors where we work, handle your cabinets and countertops carefully, and leave the space tidy when we’re finished.
  • Long-term reliability: Our focus isn’t just getting the appliance to run today; it’s setting it up in a way that supports reliable performance over time.
  • Committed to Tampa Bay homeowners: We live and work in this community, serving homeowners throughout the Tampa Bay area, including St. Petersburg, FL 33703.

If you’d like to get to know us a bit more, you can find Home Therapist on social media. Check out our Facebook page or follow us on Instagram for updates, project highlights, and home comfort tips. You can also see how local homeowners rate their experience with us on our Google business profile and our Yelp listing.

Schedule Dishwasher Replacement in St. Petersburg, FL 33703

If you’ve already purchased a new dishwasher and want it installed correctly, we’re here to help. Our team regularly handles appliance-related plumbing work for homeowners in St. Petersburg, FL 33703 and across Tampa Bay, making sure water, drainage, and electrical connections are all taken care of the right way.

Whether you’re replacing an older unit, remodeling your kitchen, or dealing with a failed dishwasher that needs to come out quickly, reach out to Home Therapist Cooling, Heating, and Plumbing. We’ll set up a convenient appointment, walk you through the process, and leave you with a clean, professionally installed dishwasher you can rely on.

Plumbing Inspection and Tankless Water Heater Maintenance in Tampa, FL 33603

During a recent plumbing visit for a homeowner in Tampa, FL 33603, our team was called out for a routine inspection and service on a tankless water heater. While nothing was “broken” or obviously wrong, the homeowner wanted peace of mind that everything was working as it should and that their tankless system was properly maintained.

On this visit, we performed a full plumbing inspection throughout the home and a professional descaling (flush) of the tankless water heater. All visible plumbing components were operating properly, and the water heater was functioning correctly with no leaks or performance concerns when we finished. This kind of proactive plumbing service in Tampa, FL 33603 helps prevent surprise breakdowns, keeps hot water consistent, and protects your investment in your home.

Case Recap: Plumbing Inspection & Tankless Water Heater Service

  • Location: Residential home in Tampa, FL 33603
  • Reason for visit: Routine plumbing inspection and tankless water heater maintenance
  • What we did: Full plumbing inspection plus professional descaling (flush) of the tankless water heater
  • Findings: All visible fixtures, supply lines, drains, and connections operating properly at time of service
  • Water heater status: No leaks or performance issues after descaling; unit operating as expected
  • Recommendation: Continue with regular plumbing maintenance, including annual tankless water heater descaling

The Customer’s Concern: Stay Ahead of Problems, Not React to Them

The homeowner in Tampa wanted to make sure their plumbing system and tankless water heater were in good shape before any issues had a chance to show up. They weren’t calling because of a major leak or total loss of hot water. Instead, they were being proactive—something we encourage for all homeowners in the Tampa Bay area, especially with our local water quality and humidity.

The main requests during this visit were:

  • Check the home’s plumbing system for any visible issues or early warning signs.
  • Service and descale the tankless water heater to protect performance and efficiency.

The homeowner understood that tankless water heaters, like any mechanical system, need regular maintenance. Over time, minerals in the water can build up inside the unit, affecting flow and efficiency. In our area, that buildup can happen faster than many people realize. They wanted to avoid future problems like reduced hot water output, longer wait times for hot water, or unexpected shutdowns.

So, our job was clear: perform a thorough inspection of the plumbing system, professionally flush and descale the tankless water heater, and give an honest report on the current condition of everything we could see.

Inspection and Diagnosis: What We Checked and Why

On arrival, our technician introduced himself, confirmed the scope of the visit, and walked through the homeowner’s main concerns. For this type of plumbing service in Tampa, FL 33603, we focus on both system reliability and safety.

During the plumbing inspection, we evaluated:

  • Visible fixtures: Sinks, faucets, showers, tubs, and toilets were checked for proper operation, unusual noises, and obvious leaks.
  • Supply lines: We visually inspected exposed water supply lines for signs of corrosion, wear, or active leaks.
  • Drains: We verified that drains were flowing as expected and checked for slow drainage, gurgling, or other signs of developing blockages.
  • Connections and joints: We looked at accessible connections under sinks, at toilets, and near the water heater for dripping or moisture.

For the tankless water heater itself, we:

  • Visually inspected the unit and surrounding piping for signs of leakage or corrosion.
  • Checked for any obvious issues with venting and clearances where applicable.
  • Evaluated the unit’s general condition before performing the descaling service.

At the time of our inspection, all visible plumbing fixtures, supply lines, drains, and connections were operating properly. There were no active leaks or signs of immediate concern. The tankless water heater showed no signs of current malfunction, but based on age and local water conditions, descaling was the right maintenance step to keep it that way.

It’s important to note that any plumbing inspection reflects what we can see and test at that moment. Hidden components—like pipes inside walls or underground—are not fully visible, and no one can predict future issues with certainty. Our job is to give a clear picture of the system’s present condition and help the homeowner make good decisions going forward.

Tankless Water Heater Descaling & Plumbing Service Process

Once we confirmed that there were no immediate plumbing issues, we moved on to servicing the tankless water heater. Proper descaling is more involved than simply running water through the system. It needs to be done in a controlled way to protect the unit and ensure that mineral buildup is effectively removed.

Here’s how we approached the service on this home in Tampa, FL 33603:

1. Preparing the System

We started by safely turning off power and/or gas to the tankless water heater and isolating it from the home’s plumbing system using the service valves. This step is essential for both safety and effectiveness. It allows us to run a cleaning solution through the heater itself without sending that solution into the home’s drinking water.

2. Setting Up the Flush

Next, we connected hoses and a pump designed for tankless water heater maintenance. A descaling solution was circulated through the heat exchanger to dissolve mineral deposits that naturally build up from the water supply over time.

By recirculating the solution through the unit for a set period, we’re able to reach and loosen buildup inside the passages where water is heated. This is especially important in Florida, where mineral content in the water can contribute to faster scale formation.

3. Flushing and Rinsing the Unit

After the descaling process had enough time to work, we flushed the unit thoroughly with clean water to remove any remaining solution and loosened mineral deposits. This step ensures the unit is safe and ready to be put back into service without leaving cleaning chemicals inside.

4. Restoring Service and Testing

Once the flush was complete, we re-opened the service valves, restored power and/or gas, and carefully brought the system back online. We then tested the tankless water heater under normal operating conditions.

During testing, we verified that:

  • The unit fired as expected when hot water was called for.
  • Hot water delivery was consistent.
  • There were no visible leaks at any of the connections we had worked with.

At the end of the visit, the tankless water heater was functioning correctly with no signs of leaks or performance issues, and the home’s visible plumbing systems were operating properly.

Why This Fix Works and Why It Matters

Tankless water heaters provide hot water on demand, but they rely on a relatively narrow passageway inside the heat exchanger where water is heated. Over time, minerals in the water can deposit along those internal surfaces. As that buildup increases, it can:

  • Restrict water flow through the unit.
  • Force the heater to work harder to deliver the same temperature.
  • Lead to inconsistent water temperature or longer wait times for hot water.
  • Increase wear on internal components.

By professionally descaling the tankless water heater, we remove much of that buildup and restore more normal water flow through the heat exchanger. This helps maintain efficiency, supports consistent hot water delivery, and reduces unnecessary strain on the system.

For homeowners in Tampa, FL 33603 and across the Tampa Bay area, staying on top of maintenance like this is especially important because our water conditions can speed up scale formation. Regular flushing doesn’t just fix a current problem—it helps prevent future issues and can extend the life of the equipment.

The same principle applies to the broader plumbing system. Routine inspections allow us to catch symptoms early—like small drips, slow drains, or minor corrosion—before they turn into more expensive repairs or water damage. In this case, the great news was that everything visible was in good working order. Our main value to the homeowner was verification, maintenance, and a clear plan to keep things that way.

Pro Tips for Homeowners in Tampa to Protect Plumbing and Tankless Systems

Whether you have a tankless water heater or a traditional tank-style unit, a little attention goes a long way. Here are some practical tips tailored to homes in Tampa and the wider Tampa Bay area:

1. Schedule Annual Tankless Water Heater Descaling

In our region, annual descaling is a smart standard for most tankless systems. It helps control mineral buildup, supports consistent hot water, and reduces wear on the unit. Skipping this service for several years can allow scale to harden and become harder to remove.

2. Pay Attention to Small Changes in Water Performance

If you notice reduced hot water flow, longer waits for hot water, or fluctuating temperatures, don’t ignore it. These can be early signs of scale buildup or developing plumbing issues. Addressing them early is usually less costly than waiting for a full failure.

3. Keep an Eye on Visible Plumbing

Periodically look under sinks, around toilets, and near your water heater for signs of moisture, staining, or corrosion. A slow drip today can become a bigger problem tomorrow. Catching these small issues early is one of the best ways to avoid emergency plumbing calls in Tampa, FL 33603.

4. Avoid Harsh Chemical Drain Cleaners

When drains slow down, many people reach for chemical drain cleaners. Over time, those harsh chemicals can damage pipes and fixtures. Mechanical cleaning or professional drain service is safer for your plumbing system and often more effective.

5. Consider a Regular Maintenance Plan

A structured maintenance plan that includes routine inspections and water heater servicing can help keep your plumbing system in top shape. It also provides a record of ongoing care, which can be helpful if you ever sell your home or need warranty support on certain equipment.

FAQ: Plumbing Inspections & Tankless Water Heater Maintenance

How often should I have my tankless water heater descaled?

For most homeowners in the Tampa area, an annual descaling is a good guideline. Local water conditions can lead to faster mineral buildup, so staying on a yearly schedule helps maintain performance and reduce the risk of future issues.

If everything is working, do I really need a plumbing inspection?

Yes, there’s value in having a professional verify that your system is operating properly, even when there are no obvious problems. Routine plumbing inspections can catch early signs of wear, minor leaks, or drainage issues before they escalate into major repairs or water damage.

Will descaling my tankless water heater improve my hot water pressure?

If mineral buildup inside the water heater has started to restrict flow, a proper descaling can help restore more normal water flow through the unit. While it won’t fix unrelated plumbing restrictions elsewhere in the system, it can improve performance when scale is part of the problem.

Is there anything I can do between professional visits?

Yes. Regularly check under sinks and around fixtures for moisture, listen for running toilets, and pay attention to any changes in water pressure or hot water delivery. If something doesn’t seem right, it’s usually best to have it looked at sooner rather than later.

What does it mean that the inspection only reflects conditions “at the time of service”?

Plumbing systems are dynamic. An inspection tells you how things are performing and what we can see on the day of the visit. Hidden components and future changes—like a new leak or an unexpected failure—can’t be predicted with certainty. That’s why regular maintenance over time is so important.

Why Choose Home Therapist for Plumbing and Tankless Service

When you invite someone into your home to work on your plumbing, you deserve more than a quick in-and-out visit. At Home Therapist Cooling, Heating, and Plumbing, we approach every plumbing inspection and water heater service with the same priorities: your safety, comfort, and long-term peace of mind.

Here’s what sets our team apart for homeowners in Tampa, FL 33603 and across Tampa Bay:

  • Licensed, professional technicians: Our plumbers and technicians are trained, experienced, and follow proven best practices on every visit.
  • Transparent communication: We explain what we’re doing, what we find, and what (if anything) we recommend—without pressure or scare tactics.
  • Clean, respectful work: We treat your home as if it were our own, protect the work area, and clean up when we’re done.
  • Focus on long-term reliability: Our goal is to prevent problems, not just react to them. Routine maintenance and honest evaluations are a big part of that.
  • Commitment to Tampa Bay homeowners: We live and work in this community, and we understand the specific plumbing and water heater challenges that come with Florida’s climate and water conditions.

In this visit, the best outcome was a simple one: everything was working properly, the tankless water heater received the maintenance it needed, and the homeowner walked away with confidence in their plumbing system. That’s exactly the kind of result we aim for whenever we perform plumbing service in Tampa, FL 33603.

Schedule Plumbing Service in Tampa, FL 33603

If you’d like the same level of care for your home, our team at Home Therapist is here to help. Whether you need a routine plumbing inspection, tankless water heater descaling, or help tracking down a concern you’ve noticed, we’re ready to respond.

Homeowners in Tampa, FL 33603 and throughout the Tampa Bay area can count on us for calm, professional service, clear explanations, and work that’s done with your long-term comfort in mind. Reach out to schedule your plumbing visit, and let us help keep your home’s water systems running the way they should.

Air Conditioning System Replacement Recommendation in Tampa, FL 33610

On a recent maintenance visit for a Premium Home Therapy Plan homeowner in Tampa, FL 33610, we were called out for a routine check-up that turned into a very important conversation about comfort, safety, and long-term costs. What started as a regular tune-up revealed an aging, low-efficiency air conditioning system and a ceiling issue caused by condensation from an uninsulated refrigerant line. Our goal during every visit is simple: give clear, honest information and help the homeowner make the best decision for their home and health.

In this case, we carefully evaluated the 15-year-old system, identified the cause of the leakage and ceiling damage, and then walked the homeowner through why a system replacement is the most reliable path forward. We also respected her situation—recovering from a recent surgery—by coordinating arrival times and making sure the visit was as low-stress as possible.

Case Recap

  • Location: Premium maintenance visit for a homeowner in Tampa, FL 33610
  • System age: Approximately 15 years old, low efficiency and high energy use
  • Issue found: Ceiling damage caused by condensation from a poorly insulated low-side copper line
  • Service performed: Full system inspection, diagnosis, and detailed replacement recommendations
  • Outcome: Multiple system replacement estimates provided; homeowner reviewing with family
  • Comfort and care: Extra scheduling consideration due to homeowner’s recent surgery

Customer Problem

This visit in Tampa, FL 33610 was part of our Premium Home Therapy Plan, which means we see this homeowner regularly to keep her system in the best shape possible. She relies on her air conditioning not only for comfort, but also for recovery and day-to-day wellbeing—especially in Florida’s heat and humidity.

When we arrived, there wasn’t a sudden breakdown or emergency. Instead, the main concern was making sure her system stayed reliable and that any small issues were caught early. However, she had noticed a problem in one of the rooms: signs of moisture and damage on the ceiling. This kind of issue is easy to dismiss as a minor nuisance, but over time it can lead to more serious damage and indoor air quality concerns if not addressed correctly.

As we walked through the home and discussed her concerns, we focused on two key points:

  • How efficiently the system was running and whether it still made sense to keep investing in it
  • Where the moisture in the ceiling was coming from and how it related to the AC system

She also shared that she is recently post-surgery, so comfort and stability in the home are especially important right now. Because of that, we coordinated our arrival by calling ahead about 20 minutes before getting there, giving her time to prepare without rushing or stress.

Inspection and Diagnosis

Even on a routine maintenance visit, we treat the system like we are seeing it for the first time. For this homeowner in Tampa, FL 33610, our inspection had two main goals: evaluate the overall health and efficiency of the 15-year-old unit, and track down the source of the ceiling damage.

Our inspection process included:

  • Visual inspection of the indoor and outdoor units for signs of wear, corrosion, and age
  • Checking refrigerant lines and insulation along the low-side (suction) copper line
  • Inspecting the area around the ceiling damage to look for signs of active moisture or past leaks
  • Evaluating airflow and general system condition to understand efficiency and performance

During this process, a few critical things became clear:

1. The system is at the end of its typical service life. At around 15 years old, most air conditioning systems are well past the point where they operate efficiently. Even if they still cool, they typically use more energy, run longer, and are more likely to suffer unexpected breakdowns. That was the case here—the system was still operating, but it was outdated and working harder than it should.

2. The ceiling damage was linked to the AC system. In the room with the damaged ceiling, we traced the path of the low-side copper refrigerant line. This is the line that carries cold refrigerant back to the outdoor unit while the system is in cooling mode. We found that the insulation on this line was damaged and incomplete in that section.

Without proper insulation, this cold line is exposed to warm, humid indoor air. That causes condensation—essentially, the moisture in the air turns to water droplets on the outside of the copper line. Over time, this water can drip onto surrounding materials, such as drywall, and eventually show up as stains, bubbling paint, or soft spots in the ceiling. That’s exactly what was happening here.

3. Risk of future failure is high. While we did not have a sudden mechanical failure during the visit, the combination of advanced age, reduced efficiency, and the visible impact of related issues (like condensation damage) tells us that this system is at a stage where breakdowns can occur with little warning. That’s why we were very clear in our recommendation: it’s time to seriously consider replacing the system.

Repair or Service Process

During this maintenance visit in Tampa, FL 33610, our role was to stabilize the situation, clearly explain what we found, and help the homeowner plan next steps. Here is how we approached the service process:

1. Routine maintenance checks. As part of her Premium Home Therapy Plan, we performed our standard maintenance tasks—cleaning, checking components, and verifying that the system was operating as expected during the visit. Regular maintenance helps catch issues early and keeps the system running as safely and efficiently as possible, even when it’s older.

2. Detailed inspection of the low-side copper line. Once we identified the area with ceiling damage, we focused on the route of the low-side refrigerant line that passes through that space. We confirmed that the insulation was damaged and incomplete, which allowed the cold line to sweat (condense moisture) while the AC was in cooling mode. This repeated condensation was the source of the staining and damage on the ceiling.

3. Explained the immediate and long-term options. We always aim to be transparent and practical. In this situation, there are two levels of response:

  • Address the insulation issue: Restoring proper insulation on the low-side copper line can significantly reduce or eliminate the condensation that caused the ceiling problem. This is important to prevent further damage.
  • Plan for full system replacement: Given the system’s age and low efficiency, replacement is the best long-term solution. A new system can offer better comfort, lower electric bills, and improved reliability.

4. Provided multiple replacement estimates. We prepared several replacement options tailored to the home and her comfort needs. These estimates give a clear picture of initial investment, expected efficiency improvements, and what’s included with installation. That way, she can compare options and decide what fits best with her budget and long-term plans.

5. Respected the homeowner’s need to consult family. The homeowner let us know she wanted to discuss everything with her grandson before making a decision. We fully support that. System replacement is a major decision, and we’d rather you feel confident and informed than rushed. We left all the information in writing and made sure she understood what each option included, so that conversation with her family would be easier.

6. Scheduled-friendly communication due to her health. Because she is recently post-operative, we made sure to note clearly that technicians should always call about 20 minutes before arriving for any future visits. This allows her time to prepare without overexerting herself and keeps the process as comfortable as possible.

Why This Fix and Recommendation Work

There are two main principles behind our recommendations in this Tampa, FL 33610 home: controlling moisture and improving overall system reliability and efficiency.

1. Moisture control through proper insulation. The low-side refrigerant line gets very cold when the AC is running. In Florida’s humid climate, warm air holds a lot of moisture. When that warm, moist air touches a cold surface—like an uninsulated copper line—it naturally condenses into water. Proper insulation creates a barrier between the cold line and the humid air, dramatically reducing how much water forms on the pipe. By restoring or improving this insulation, we help prevent ongoing condensation and protect ceilings, walls, and other building materials from moisture damage.

2. Reliability and comfort with system replacement. A 15-year-old AC system is usually near the end of its service life. Even if it still cools today, components are worn, efficiency has dropped, and the likelihood of a sudden breakdown—especially during peak summer heat—is much higher. Replacing the system proactively allows the homeowner to:

  • Enjoy more consistent cooling and humidity control
  • Reduce monthly energy costs with a more efficient unit
  • Lower the risk of emergency breakdowns and surprise repair bills

By addressing both the moisture source (insulation on the low-side line) and the bigger picture (system age and efficiency), we’re not just putting a bandage on the problem—we’re helping the homeowner move toward a safer, more comfortable, and more predictable home environment.

Pro Tips for Homeowners in Tampa

For homeowners in Tampa, FL 33610 and across the Tampa Bay area, this visit highlights a few practical lessons about living with air conditioning in a hot, humid climate. Here are some tips to help protect your home and your system:

  • Keep an eye on ceilings and walls near AC lines. If you notice stains, bubbling paint, or soft spots in ceilings or walls, especially near where refrigerant lines run, don’t ignore it. Early attention can prevent more expensive repairs down the road.
  • Ask about insulation on refrigerant lines. During your next maintenance visit, ask your technician to inspect the insulation on the low-side (suction) line. In our Florida humidity, proper insulation is essential to prevent condensation and energy loss.
  • Don’t wait on very old systems. If your system is 12–15 years old or older, it’s wise to start planning for replacement before a failure happens in the middle of a Tampa summer. Early planning gives you time to compare options instead of making a rushed decision under pressure.
  • Use a maintenance plan to stay ahead of issues. A maintenance plan like our Premium Home Therapy Plan helps catch problems early—before they turn into leaks, ceiling damage, or breakdowns. Regular visits are especially valuable in our region, where systems work hard almost year-round.
  • Communicate health or mobility needs. If you have medical or mobility concerns, let your HVAC company know. Simple steps like calling ahead before arrival can make visits more comfortable and less stressful, just as we did for this homeowner.
  • Listen to your energy bills. A steady rise in your power bill without a big change in how you use your home can be a sign that your system is working too hard. In older systems, that often means it’s time to look at higher-efficiency replacement options.

FAQ: AC System and Ceiling Moisture in Tampa, FL 33610

Why did my ceiling get damaged even though my AC is still cooling?

Your AC can still cool the home while creating hidden issues. In this case, a damaged or missing insulation layer on the low-side copper refrigerant line allowed condensation to form and drip over time. That moisture collected on the ceiling materials and eventually showed up as visible damage. The system is cooling, but the side effects of poor insulation caused the problem.

Is a 15-year-old AC system automatically unsafe?

Not automatically, but it is typically well past its peak efficiency and reliability. At around 15 years, many systems are more prone to unexpected failures, may cool less effectively, and often use more energy than newer models. We focus on giving honest guidance: if we see clear signs of age and wear, we’ll recommend replacement so you can plan ahead instead of being caught off guard.

Can just fixing the insulation solve the ceiling issue?

Repairing or replacing the insulation on the low-side copper line can greatly reduce condensation in that area and help prevent future ceiling damage. However, that doesn’t change the age or efficiency of the overall system. It addresses the moisture source but doesn’t upgrade the older equipment. That’s why we often recommend both addressing the specific issue and planning for long-term system replacement.

Do I have to decide on a new system right away?

No. We provide clear estimates and explanations so you can review them with family members or trusted advisors, just like this homeowner did with her grandson. While we do recommend planning sooner rather than later—especially in our Tampa heat—the final decision is always yours, and we’re here to answer questions at your pace.

What does a Premium Home Therapy Plan include?

A maintenance plan like the Premium Home Therapy Plan typically includes regular system check-ups, cleaning, and performance checks aimed at keeping your system running as reliably and efficiently as possible. It’s designed to catch issues early, extend the life of your equipment, and provide peace of mind for homeowners in Tampa and the surrounding Tampa Bay communities.

How do you handle visits for homeowners with medical needs?

We make note of any special instructions—like calling 20 minutes before arrival—so each visit is as smooth and comfortable as possible. Our technicians respect your health, privacy, and routines. In this case, we followed those instructions carefully so the homeowner, who was recently operated on, had time to prepare and didn’t feel rushed.

Why Choose Home Therapist

When you invite us into your home in Tampa, FL 33610, you’re trusting us with your comfort, your safety, and often your health. We take that responsibility seriously. Every technician on our team is licensed and trained to work carefully, cleanly, and respectfully in your home, whether it’s a quick maintenance visit or a full system replacement.

We believe in transparent communication. That means explaining what we find in plain language, outlining your options clearly, and never pressuring you into a choice. In this visit, that meant being honest about the reality of a 15-year-old system while also helping the homeowner feel confident taking time to consult with her grandson before deciding.

Cleanliness is another priority. We treat your home as if it were our own—protecting work areas, cleaning up after ourselves, and respecting your schedule and health considerations. For Tampa Bay homeowners, especially those dealing with medical issues or recovery, that level of care makes a real difference.

Most importantly, our focus is on long-term reliability, not quick fixes. We address immediate concerns, like damaged insulation and condensation, but we also look ahead—how can we help you avoid surprise breakdowns, reduce your energy use, and keep your home comfortable for years to come? That mindset guides every recommendation we make.

Schedule Your AC Service in Tampa, FL 33610

If you’re a homeowner in Tampa, FL 33610 and you’ve noticed ceiling stains, rising energy bills, or you know your air conditioning system is getting older, now is a good time to have it checked. A straightforward maintenance visit can reveal issues early and help you plan for repair or replacement on your terms.

The team at Home Therapist Cooling, Heating, and Plumbing is here to help you stay comfortable, protect your home, and make informed decisions—without pressure or alarm. When you’re ready, schedule a visit and let us take a careful, professional look at your system so you can move forward with clarity and confidence.

Bathroom Plumbing Rough-In and Sewage Grinder Pump Installation in Tampa, FL 33611

When you add a new bathroom or remodel an existing space in Tampa, FL 33611, the hidden plumbing work under the floors and behind the walls is what ultimately makes everything function safely and reliably. For one homeowner in this area, our team at Home Therapist was called in to provide a full plumbing rough-in for a new bathroom, install an owner-supplied sewage grinder pump system, and get everything ready for rough-in and final inspections.

The project involved cutting into the concrete slab, running new PEX water lines and PVC drains and vents, installing a grinder pump basin and discharge piping, and completing all the functional plumbing work so the independent general contractor (GC) could review it before the permitting official arrived. Our goal was to deliver a clean, code-compliant installation that would support the new bathroom for years to come.

Case Recap

  • Location: New bathroom plumbing project for a homeowner in Tampa, FL 33611.
  • Scope: Full plumbing rough-in for a new bathroom, including water supply, drains, vents, and sewage grinder pump system.
  • Materials: PEX for hot and cold water, PVC for drain and vent piping, pump basin, check valve, and owner-supplied fixtures.
  • Concrete work: Cutting, trenching, and functional concrete pour-back after plumbing installation.
  • Fixtures: Tub, shower valve and trim, toilet, vanity, water heater, sewage grinder pump, and roof vent termination—all supplied by the owner.
  • Outcome: Plumbing work completed ready for rough-in and final inspections, with electrical and roofing handled by other licensed professionals.

Customer Problem

The homeowner in Tampa wanted to add a full bathroom in a space that didn't have existing plumbing in place. That meant everything had to be built from the ground up: water lines, drainage, venting, and a way to move wastewater into the existing sewer system even though the new bathroom location wasn't ideal for simple gravity drainage.

Because of the layout and elevations, the project required a sewage grinder pump system. This type of pump takes wastewater from the bathroom, grinds solids, and discharges it under pressure to tie into the existing sewer line. The homeowner supplied the grinder pump system and fixtures, and our job was to install them correctly as part of a complete plumbing rough-in.

There were a few key concerns:

  • Making sure the sewer trench path around the house was properly planned so our team could install the new line efficiently.
  • Ensuring the slab openings and trenches were cut cleanly and restored after plumbing installation, without compromising the structure.
  • Coordinating scopes with other trades: the homeowner's licensed electrician for the pump power connection, and a roofer to handle any final roof sealing where the vent exited.

In the job notes, our technician Adalberto also documented a scheduling need: the homeowner requested that we arrive as close to 8:00 a.m. as possible. This particular visit was for measuring where the trench would go and how deep and wide it needed to be. Getting those details right early is important on any bathroom rough-in project, especially on a concrete slab.

Inspection and Diagnosis

Even though this wasn't a “repair” visit, there is still a diagnostic phase in any new rough-in project. In Tampa, FL 33611 homes, every property has a slightly different layout, elevation, and existing sewer configuration. Before we brought in tools to start cutting concrete, we walked through a careful inspection and planning process.

During the visit, our technician focused on:

  • Evaluating the sewer path: Measuring where the new sewer line would need to run around the house, and what depth and width the trench should be. The homeowner planned to dig this trench themselves, so we had to be crystal clear about the layout and depth.
  • Confirming tie-in location: Identifying the best point to connect the grinder pump discharge into the existing sewer line without creating future flow or maintenance issues.
  • Planning slab penetrations: Determining where to cut the concrete for each drain, the pump basin, and any necessary trenching under the slab.
  • Vent routing: Mapping a path for the plumbing vent up through the structure and out through the roof, while staying within the plumbing scope and leaving roof sealing to a roofer.

By confirming all of these details in advance, we reduce the risk of surprises once the work starts. In a bathroom rough-in, a couple of inches in the wrong direction can cause problems lining up the toilet, shower, or vanity later. That's why planning and measurement are so important at this stage.

Repair or Service Process

Once the planning was complete and the homeowner prepared the exterior trench path, we moved into the actual plumbing rough-in work for this Tampa, FL 33611 bathroom project. Here's how we approached it, step by step.

1. Concrete Cutting and Trenching

We started by carefully cutting the concrete slab where new pipes needed to penetrate or run beneath the floor. This included openings for:

  • The toilet drain and flange area.
  • The tub or shower drain location.
  • The vanity drain and water connections.
  • The grinder pump basin.
  • Any necessary interior trenching to reach the pump basin and main sewer connection.

After cutting, we removed the concrete in sections, excavated the soil beneath to create trenches, and shaped the paths so all piping could be properly sloped and supported. The goal is always a clean, intentional trench—never a random or overcut opening.

2. Drain and Vent Rough-In (PVC)

With access created, we installed the PVC drain and vent piping. Drain lines were run from each fixture location (toilet, tub or shower, vanity) to the grinder pump basin and to the main discharge connection. Proper slope on the drains is critical to keep waste moving and to avoid standing water or clogs.

We also installed the plumbing venting system. Vents allow air into the system so drains can flow freely and traps don't get siphoned out. On this project, the vent piping was run up through the structure and out through the roof to a vent termination. Our scope covered the plumbing-side work and creating the roof penetration if needed, while a roofer would be responsible for sealing and flashing the roof afterward.

3. Grinder Pump Basin and Discharge Plumbing

The owner supplied a sewage grinder pump system, and our team handled the plumbing-side installation. That included:

  • Setting the pump basin at the proper depth and orientation.
  • Connecting the incoming drains from the bathroom fixtures to the basin.
  • Installing and connecting the grinder pump and discharge piping.
  • Installing a check valve and required pump-side fittings to prevent backflow and protect the pump.
  • Running the discharge line to tie into the existing sewer system.

The electrical connection for the grinder pump was specifically excluded from the plumbing scope and was to be completed by the homeowner's licensed electrician. Clear separation of responsibilities like this keeps each trade working within their license and expertise.

4. Water Supply Rough-In (PEX)

For the hot and cold water supply, we installed new PEX piping as part of the rough-in. Lines were run to serve:

  • The tub or shower valve.
  • The vanity faucet.
  • The toilet (cold water supply).
  • The water heater and associated connections.

PEX is a great option in Tampa Bay homes because it's flexible, durable, and handles our local temperature and humidity swings well when installed to code. We supplied all the PVC and PEX piping for the job as part of the agreed-upon plumbing scope.

5. Concrete Backfill and Functional Pour-Back

After pressure-checking the water lines and verifying the layout of drains and vents, we backfilled the trenches and prepared the slab for pour-back. Our responsibility was to provide a functional concrete finish—strong, level, and suitable to support the finished flooring and fixtures later. Decorative finishes or special flooring prep are handled by others, such as the GC or flooring contractor.

6. Fixture and Equipment Installation

Once rough-in was completed and the project progressed to the right stage, we returned for final connections. Using the owner-supplied fixtures and equipment, we:

  • Set and connected the tub.
  • Installed the shower valve, showerhead, and trim.
  • Set the toilet and connected it to the rough-in flange and water supply.
  • Installed the pre-assembled vanity and tied in water and drain connections.
  • Installed and connected the water heater on the plumbing side.
  • Completed plumbing connections for the sewage grinder pump and confirmed discharge routing.
  • Installed the roof vent termination for the plumbing vent system.

The shower liner was also installed as part of our scope. If a standard drain was used, it was provided by us; if a linear drain was selected, the owner supplied it, and we installed it to match the rough-in.

All work was completed with the understanding that rough-in and final inspections would first be reviewed by an independent GC, and then by the permitting official for code compliance.

Why This Fix Works

In a new bathroom project like this in Tampa, FL 33611, the “fix” isn't about repairing a failure; it's about designing and building a system that will work reliably for the long term. A few key plumbing principles make this installation successful:

  • Proper drainage and slope: Drain lines must be sloped correctly so wastewater flows by gravity from fixtures into the grinder pump basin. Even with a pump, the sections of pipe leading to the basin still depend on gravity to move waste.
  • Ventilation and trap protection: Vents keep air pressure balanced in the plumbing system. Without good venting, water can get pulled out of traps, leading to sewer odors and sluggish drainage. The roof vent termination helps the entire system breathe.
  • Grinder pump operation: The pump collects wastewater, grinds solids, and then pushes the discharge under pressure to the existing sewer line. This allows a bathroom to be installed in locations where gravity flow alone would not work.
  • Separation of trades: Having a licensed plumber install the piping and a licensed electrician handle the pump's power supply ensures each component is installed according to the correct codes and best practices.
  • Concrete restoration: Cutting and replacing the slab correctly protects the structure and ensures the finished bathroom feels solid underfoot, not patched or unstable.

By following these principles and verifying proper operation at the end, we help ensure the homeowner's new bathroom will drain, vent, and supply water the way it's supposed to.

Pro Tips for Homeowners in Tampa

If you're planning a new bathroom or a major plumbing addition in Tampa, FL 33611 or anywhere in the Tampa Bay area, here are some practical tips based on projects like this one:

  • Plan the layout before you demo: Work with your plumber early to confirm where fixtures can realistically go based on drain and vent routing. Moving a toilet a few feet after concrete is cut can get expensive.
  • Coordinate trenches and access: If you're digging your own exterior trench for a sewer line, get exact measurements from your plumber first—depth, width, and route. A little planning avoids re-digging or running into other utilities.
  • Choose quality fixtures and pumps: Owner-supplied equipment is common, but make sure the grinder pump, water heater, and fixtures are appropriate for your home's needs and local code requirements.
  • Don't skip venting details: In Florida's humid climate, good venting helps keep odors under control and maintains smooth drainage. Shortcuts on venting can lead to nuisance issues later.
  • Use licensed professionals for electrical and roofing: For grinder pumps and roof penetrations, always involve licensed electricians and roofers. This protects you, your home, and your warranties.
  • Schedule inspections thoughtfully: Allow time for your GC to review the rough-in before the official inspection. Catching small issues early keeps projects moving instead of stalling at inspection time.

FAQ: New Bathroom Plumbing Rough-In and Grinder Pumps

Do I always need a grinder pump for a new bathroom in Tampa, FL 33611?

No. You only need a grinder or sewage pump when the new bathroom is too low or too far from the existing sewer line to rely on gravity alone. In this project, a grinder pump was the right solution to move wastewater reliably to the home's sewer connection.

Who is responsible for the grinder pump's electrical connection?

On this job, the electrical connection for the grinder pump was specifically handled by the homeowner's licensed electrician. As plumbers, we installed the pump basin, plumbing connections, and discharge line, but left the electrical work to a qualified electrician.

What does “functional finish” mean for concrete pour-back?

A functional finish means the concrete we replace is structurally sound, level, and ready for flooring and finishes. It's not a decorative or polished finish—that part is typically handled by the GC or flooring contractor as part of the overall remodel.

Can I supply my own fixtures and pump?

Yes, many Tampa homeowners provide their own tubs, toilets, vanities, and even grinder pumps. We'll install owner-supplied equipment as long as it's appropriate for the application and installed within the agreed scope, just like we did on this project.

Who handles inspections on a project like this?

In this case, the work was completed ready for rough-in and final inspection. An independent GC reviewed the work before the permitting official came for the official codes inspection. We make sure our plumbing is installed to support a smooth inspection process.

Will you open the roof for the vent and also seal it?

Our plumbing scope includes running the vent pipe and opening a hole in the roof if needed. A roofer then seals and flashes that penetration. This division of work helps keep both plumbing and roofing within their proper specialties.

Why Choose Home Therapist for Plumbing Projects in Tampa Bay

When you're adding a bathroom or taking on a major plumbing project in Tampa, FL 33611, you want a team that treats your home like a system, not just a set of pipes. At Home Therapist Cooling, Heating, and Plumbing, we approach every job with the same mindset we used on this project:

  • Licensed and professional technicians: Our plumbers are trained, licensed, and experienced with Florida codes and local conditions, from slab construction to sewer layouts.
  • Transparent communication: We clearly define what's included in our scope—like plumbing rough-in, fixture connections, and pump piping—and what's handled by others, such as electrical hook-ups and roof sealing.
  • Clean, respectful work: Concrete cutting and trenching can be messy, but we plan carefully, contain debris as much as possible, and leave the job in a safe, ready-for-next-step condition.
  • Long-term reliability focus: We're not just trying to get you through inspection; we're aiming for a bathroom that drains, vents, and supplies water reliably for the long term.
  • Commitment to Tampa Bay homeowners: We live and work here, so we understand the unique needs of homes in the Tampa Bay area—from high groundwater concerns to older sewer connections and slab foundations.

Whether it's a new bathroom rough-in, a grinder pump installation, or a complete plumbing upgrade, our goal is to give you peace of mind from the first measurement to the final inspection.

Need Bathroom Plumbing Help in Tampa, FL 33611?

If you're planning a new bathroom or a major plumbing change in Tampa, FL 33611, Home Therapist can walk you through the process from rough-in to final fixture connection. We'll help you plan the layout, coordinate with your GC and other trades, and install your plumbing system so it's ready for inspection and everyday use.

Reach out to our team today to schedule a visit. We'll take the time to listen, measure carefully, explain your options in plain language, and provide a clear scope and price before work begins. Your comfort and confidence in your home's plumbing are always our top priorities.

Sewer Drain Unclogging in Tampa, FL 33610

When a main sewer line clogs in a home in Tampa, FL 33610, it can quickly turn from a minor annoyance into a real disruption. Slow drains, gurgling sounds, or wastewater backing up into tubs or toilets are stressful for any homeowner. Our plumbing team was called to a home in Tampa, FL 33610 to address a stubborn sewer drain clog and restore normal flow as quickly and safely as possible.

On this visit, our technician Adalberto accessed the home’s sewer cleanout and used a professional drain snake to clear the blockage. We also made sure the homeowner understood what was included in the service, what might require additional work and cost, and how to help prevent future clogs.

Below, we’ll walk through what the homeowner was experiencing, how we diagnosed the issue, the steps we took to clear the sewer line, and some practical tips for homeowners in Tampa dealing with similar problems.

Case Recap

  • Location: Single-family home in Tampa, FL 33610
  • Service: Sewer drain unclogging using a professional drain snake
  • Access point: Exterior cleanout (no toilet removal included in the base price)
  • Goal: Restore proper drainage and reduce risk of sewage backup
  • Communication: Service scope and pricing approved through our scheduling platform before work began

Customer Problem: A Stubborn Sewer Line Clog

The homeowner in Tampa reached out because the home’s drains were not working the way they should. Typically, when multiple fixtures in the house start draining slowly or backing up at the same time, it points to a problem in the main sewer line rather than just a single sink or shower.

While every situation is a little different, common signs of a main sewer clog include:

  • Water backing up in tubs or showers when toilets are flushed
  • Multiple fixtures draining slowly at once
  • Gurgling noises coming from drains
  • Occasional sewage smells around drains or near the cleanout

In this Tampa, FL 33610 home, the homeowner knew something wasn’t right and wanted the line cleared before it turned into a full backup. They approved the work ahead of time through our platform, including a clear note that the base price covered snaking the sewer through an accessible cleanout. If a toilet needed to be removed for access, that would be an additional service and fee.

This kind of transparency helps homeowners in Tampa make confident decisions about their plumbing repair options before we ever put a tool on the line.

Inspection and Diagnosis

When we arrive at a sewer clog job in Tampa, our first priority is confirming that we have safe and effective access to the line. For this home, we had a sewer cleanout available outside, which is typically the best starting point.

Our diagnostic steps included:

  • Locating and opening the main cleanout. This gives us direct access to the home’s main sewer pipe without disturbing interior fixtures.
  • Observing standing water or flow at the cleanout. This helps us confirm that the problem is indeed a main line restriction and not just a localized issue.
  • Discussing symptoms with the homeowner. When the homeowner explains which fixtures are affected and when, it gives us a better picture of where and how severe the clog is.

Because the cleanout was accessible and the symptoms matched a sewer line obstruction, snaking the line from that cleanout was the appropriate next step. At this stage, there was no need to remove a toilet for access, which keeps the service more straightforward and cost-effective for the homeowner.

For homeowners across Tampa Bay and Hillsborough County, this is a common scenario. Whenever we can, we prefer to work through an existing cleanout before moving to more invasive options.

Repair Process: Snaking the Sewer Line Through the Cleanout

Once we confirmed access and the scope of work, Adalberto proceeded with the sewer drain unclogging through the home’s cleanout. Here’s how that process works, step by step.

1. Preparing the Work Area

Even though we were working outside at the cleanout, cleanliness and safety are still top priorities. We:

  • Positioned our equipment safely to avoid damage to landscaping or outdoor areas
  • Ensured the cleanout cap was removed carefully and set aside for reinstallation
  • Verified we had the correct cable and head style for the type of sewer line and expected blockage

This preparation helps us work efficiently and reduces the chance of mess or disruption on the property.

2. Running the Drain Snake

With the cleanout open, we fed a professional-grade drain snake (also called a sewer machine or auger) into the line. As we advance the cable, we can feel resistance points that often indicate:

  • Heavy buildup of grease or soap scum
  • Foreign objects lodged in the line
  • Intruding roots (in some cases)

In a typical Tampa, FL 33610 home, blockages in the main sewer line often come from a mix of flushed items that shouldn’t go down the toilet, kitchen grease, and normal buildup over time. As the cable spins, the head breaks up or clears these materials, allowing wastewater to pass through again.

3. Working the Clog Thoroughly

We don’t just push through the blockage once and call it a day. The cable is usually worked back and forth through the trouble area several times to clear as much of the obstruction as possible. This extra effort helps reduce the chance of the line re-clogging quickly after we leave.

Throughout the process, we monitor how the cable moves and how the line responds. This helps us judge when the clog has been adequately cleared.

4. Flushing and Verifying Flow

After running the snake, we verify that the sewer line in this Tampa home is flowing properly again. While we don’t quote or publish specific measurements unless they’re recorded on-site, we always confirm:

  • Wastewater is draining through the cleanout without backing up
  • Indoor fixtures that were previously affected are now draining normally
  • No immediate signs of continued restriction in the line

Only once we’re satisfied that the line is moving as expected do we close the cleanout and wrap up.

5. Restoring and Cleaning the Area

To finish, we:

  • Securely re-installed the cleanout cap
  • Ensured the surrounding area was left clean and orderly
  • Reviewed what we did and what the homeowner should watch for in the coming days

Our goal with every plumbing repair around Tampa Bay is to leave the home and yard as tidy as we found them, with the added benefit of properly working drains.

Why This Sewer Drain Fix Works

A main sewer line is the highway that carries all wastewater from your home to the city sewer or septic system. When that pipe is partially or fully blocked, everything upstream slows down or backs up.

Snaking the line through a cleanout is effective because:

  • Direct access: The cleanout connects directly to the main line, letting us target the blockage at its source.
  • Mechanical action: The spinning cable and cutting head physically break through clogs made of debris, wipes, grease, or roots.
  • Full-pipe contact: As the cable travels, it scrubs the inner walls of the pipe, helping clear built-up material along the way.

For a home in Tampa, FL 33610, restoring that clear path allows wastewater to move freely again, which:

  • Reduces the risk of sewage backing up into tubs, showers, or toilets
  • Improves how quickly sinks and tubs drain
  • Helps protect the home from water damage and odors related to sewer blockages

When we finish a job like this, we always test the system to make sure it’s operating as expected before we leave.

Pro Tips for Homeowners in Tampa to Prevent Sewer Clogs

Living in the Tampa Bay area, with our mix of older homes, tree-lined neighborhoods, and heavy summer rains, sewer lines can see a lot of stress. Here are some practical tips for homeowners in Tampa, FL 33610 and nearby communities:

  • Be careful what you flush. Only human waste and toilet paper should go down the toilet. Avoid wipes (even “flushable” ones), feminine products, cotton swabs, dental floss, and paper towels.
  • Keep grease out of the kitchen sink. Hot grease feels liquid, but it cools and hardens in your pipes. Pour cooled grease into a container and throw it away instead of rinsing it down the drain.
  • Use strainers in showers and tubs. Hair and soap buildup are common contributors to clogs. A simple strainer can catch a lot before it reaches the main line.
  • Pay attention to early warning signs. If you notice gurgling, slow drains throughout the home, or bubbles in one fixture when another is in use, call for service before it turns into a full backup.
  • Consider periodic inspections for older homes. Many Tampa homes are older, with aging sewer lines that can develop low spots, cracks, or root intrusion. Periodic professional inspection and maintenance can catch issues early.
  • Know where your cleanout is. Knowing where your main cleanout is located makes it faster and easier for a technician to respond if you ever have an emergency sewer clog.

If you ever find yourself dealing with repeated clogs, our team can help you explore options beyond snaking, such as camera inspections or more extensive plumbing repairs in Hillsborough County to address underlying pipe issues.

FAQ: Sewer Drain Unclogging for Tampa, FL 33610 Homeowners

Do you always need to remove a toilet to clear a sewer clog?

No. In many Tampa homes, we can reach the main sewer line through an exterior or interior cleanout, like we did for this sewer drain unclogging in Tampa, FL 33610. Our base price for this job covered snaking through the cleanout only. Removing a toilet is sometimes necessary if there’s no usable cleanout or we need a different access point, and that would be quoted as an additional service.

How do I know if the problem is in the main sewer line and not just one drain?

If only one fixture is slow or clogged, the issue may be limited to that particular drain. When multiple fixtures in your Tampa home start acting up at the same time—especially lower-level tubs, showers, and toilets—it often indicates a main sewer line problem. That’s when snaking the main line through a cleanout is usually the right approach.

Will snaking the sewer line fix the problem permanently?

Snaking the line removes existing blockages and often clears a good amount of buildup, but it doesn’t change the condition of the pipe itself. If your sewer line is damaged, sagging, or has significant root intrusion, the clog may return over time. In those cases, additional solutions—such as more extensive plumbing repairs or repiping—may be recommended after further inspection.

Is snaking my sewer line safe for my plumbing?

When done by a trained, licensed plumber using the right equipment, snaking is a standard and safe method for clearing clogs in most residential sewer lines in Tampa. We choose the appropriate cable size and head type based on your home’s plumbing to reduce stress on the pipes while still effectively clearing the obstruction.

What should I do if my drains start backing up again after a cleaning?

If your drains in Tampa, FL 33610 begin to slow down or back up again after a recent cleaning, reach back out to us. In some cases, a recurring blockage can be a sign of a deeper issue, such as an offset pipe, heavy buildup, or roots. We can discuss whether a camera inspection or more detailed plumbing evaluation is the next best step. Our team also handles leak detection in Tampa if there are concerns about pipe integrity.

Why Choose Home Therapist for Sewer and Plumbing Issues in Tampa

When you’re dealing with a sewer clog in Tampa, you want more than just a quick fix. You want a plumbing team that treats your home with the same care you do and explains what’s happening in clear, straightforward language.

Here’s what you can expect when you call Home Therapist for plumbing and sewer services in the Tampa Bay area:

  • Licensed, professional technicians. Our plumbers are trained, experienced, and fully licensed to work on residential plumbing systems throughout Hillsborough County.
  • Transparent communication. Just as with this sewer drain unclogging in Tampa, FL 33610, we clearly outline what’s included in the service—such as snaking through a cleanout—and what would be an additional charge, like toilet removal if needed.
  • Clean and respectful work. We protect your property, work carefully at access points, and leave the area tidy when we’re done.
  • Focus on long-term reliability. We’re not just interested in getting in and out quickly. We want your system working properly and will let you know if we see signs that a bigger issue may be developing.
  • Commitment to Tampa Bay homeowners. We live and work in this community and take pride in serving our neighbors across Tampa and the surrounding areas.

If you’d like to get a feel for who we are and how we serve homeowners, you can connect with us on social media or review sites:

  • Follow us on Facebook for updates and tips.
  • See more of our day-to-day work on Instagram.
  • Check out additional content and short videos on TikTok.

For independent verification of our reputation and standing in the community, you can also view our profiles on trusted platforms:

Whether you need sewer drain unclogging, fixture help, or general plumbing repair, we also offer a full range of services throughout the region, including toilet installation and repair in Tampa Bay and broader plumbing repairs in Hillsborough County.

Need Sewer Drain Unclogging in Tampa, FL 33610?

If you’re noticing slow drains, gurgling toilets, or signs of a main line clog in your Tampa, FL 33610 home, it’s best to address it before it becomes a full sewage backup. Our local Tampa Bay plumbing team can access your sewer cleanout, professionally snake the line, and check that everything is flowing as it should.

We’ll walk you through what we recommend, what’s included, and any additional options if we find signs of a more serious issue. From simple sewer drain unclogging to more involved plumbing repairs in Hillsborough County, we’re here to help keep your home safe, comfortable, and sanitary.

If you live in or around Tampa, FL 33610 and need reliable sewer or plumbing service, reach out to Home Therapist and let our team take care of the problem calmly, cleanly, and professionally.

AC Tune-Up and Heating Maintenance in St. Petersburg, FL 33711

When your air conditioning and heating system has to keep up with our Florida heat and humidity, staying ahead on maintenance makes a big difference. For a homeowner in St. Petersburg, FL 33711, we were called out to perform a professional cooling and heating tune-up. Our goal was simple: give the system a thorough check, clean what needed attention, and make sure it was ready to deliver reliable comfort without wasting energy.

In this visit, we completed our $89 tune-up, which includes cleaning, flushing the system, checking refrigerant levels, inspecting wiring and components, adjusting the thermostat, and replacing the air filter (either provided by the homeowner or supplied by us at an additional cost). After the service, we reviewed our findings with the homeowner and provided clear recommendations for ongoing maintenance.

Case Recap

  • Location: Residential home in St. Petersburg, FL 33711
  • Service: Cooling and heating system tune-up (maintenance only)
  • Work performed: Cleaning, system flushing, refrigerant check, thermostat adjustment, wiring and component inspection, air filter replacement
  • Focus: Improve efficiency, reduce risk of breakdowns, and extend system life
  • Outcome: System operating smoothly with clear guidance for future maintenance

Customer Problem

Like many homeowners in St. Petersburg, the customer wanted to stay ahead of problems rather than wait for a breakdown. With our long cooling season and humid climate, air conditioners and heat pumps run hard almost year-round. That constant run time can lead to:

  • Higher electric bills
  • Dust and debris buildup on coils and components
  • Wear on electrical parts and moving components
  • Reduced cooling and heating performance

The homeowner reached out to schedule our $89 tune-up special for a well-kept unit. They weren’t reporting a specific failure, but they were concerned about energy costs, reliability during the hottest days, and making sure the system would last as long as possible.

Because this was a maintenance visit rather than a repair call, our role as technicians was to go through the full tune-up checklist, look for any early signs of trouble, and share honest feedback about what we found. That way, the homeowner could make informed decisions before small issues turned into major problems.

Inspection and Diagnosis

On arrival, we introduced ourselves, discussed the homeowner’s concerns, and confirmed that this visit was for a routine cooling and heating maintenance service. We then performed a systematic inspection of the equipment, both indoors and outdoors.

Here’s how we approached the diagnosis and overall system health check:

  • Visual inspection of indoor and outdoor units: We looked for signs of rust, corrosion, damage, or previous makeshift repairs that might affect long-term reliability.
  • Airflow and filter condition: We checked the existing air filter and inspected return and supply vents for dust buildup or restrictions.
  • Electrical and control components: We examined wiring connections, contact points, and controls for wear, looseness, or heat damage.
  • Refrigerant-related checks: We reviewed the system’s refrigerant condition for any obvious signs of issues such as icing, oil residue, or unusual noises.
  • Thermostat operation: We verified that the thermostat was properly set, responding correctly, and accurately controlling the system.
  • Drainage and condensate: We checked the condensate drain line and pan area for clogs, standing water, or algae buildup.

Because this tune-up special is intended for well-maintained units, we also made sure the system was a good fit for the offer. If a unit is heavily neglected and needs a deep coil cleaning or more intensive restoration work, we always pause and discuss options and pricing with the homeowner before proceeding beyond the standard tune-up scope.

Repair or Service Process

This visit was focused on maintenance, not major repair. Our technician followed our standard cooling and heating tune-up process step by step to bring the system back to peak condition for St. Petersburg, FL 33711 weather.

1. System Cleaning

Dust and debris can collect on coils, panels, and around components over time. We carefully cleaned accessible areas to help improve heat transfer and airflow. A cleaner system doesn’t just look better; it typically runs more efficiently and puts less strain on the equipment.

2. System Flushing

We flushed key parts of the system to help clear out buildup, especially around the condensate drainage path. In our humid Florida climate, drain lines are prone to algae and slime. Flushing helps reduce the risk of clogs, which can lead to water leaks, ceiling damage, or safety switch shutdowns.

3. Refrigerant Check

We performed a refrigerant check within the scope of a standard tune-up. While we don’t guess or report specific pressures without documented readings, we look for indicators that the system is operating as expected. Any signs of a refrigerant issue—such as frost on lines or poor cooling—would be explained clearly to the homeowner along with next steps. In this case, the system was performing normally for a routine maintenance visit.

4. Thermostat Adjustment

The thermostat is the “brain” of the system. We verified that the settings matched the homeowner’s comfort preferences and made any needed adjustments for accurate temperature control. A properly calibrated thermostat helps avoid unnecessary run time and keeps comfort more consistent from room to room.

5. Wiring and Component Inspection

Loose or worn electrical connections are a common cause of intermittent problems and full system failures. We inspected wiring, connections, and key components to look for:

  • Signs of overheating or discoloration
  • Loose terminals or connections
  • Damaged insulation or exposed wiring

Addressing electrical concerns early can prevent nuisance breakdowns during peak heat and can also reduce safety risks associated with stressed electrical parts.

6. Filter Replacement

The homeowner can either provide their own air filter or choose to have us supply one at an additional cost. During this visit, we swapped out the existing filter for a fresh one. A clean filter is one of the simplest ways to protect your HVAC system—it supports healthy airflow, helps keep coils cleaner, and can improve indoor air quality.

After completing all the tune-up steps, we restarted the system and allowed it to run. We listened for unusual sounds, checked for proper cycling, and confirmed that the equipment responded correctly to thermostat commands. We verified proper operation after the maintenance work and then sat down with the homeowner to review our findings and any recommendations.

Why This Fix Works

For homeowners in St. Petersburg, FL 33711, a well-done tune-up is less about fixing a single broken part and more about protecting your entire comfort system. Here’s why this kind of maintenance makes such a difference:

  • Airflow: A clean filter, clear return grills, and clean coils help air move freely through the system. Good airflow reduces strain on the blower motor and helps each room reach the set temperature more consistently.
  • Refrigeration cycle: When coils are clean and the system is operating as expected, heat is transferred more efficiently. That means better cooling performance with less run time.
  • Electrical reliability: Tight, clean electrical connections help prevent nuisance trips, failed starts, and premature component failures.
  • Condensate management: Proper drainage is critical in our humid climate. Flushing helps prevent clogs that can cause water damage or shut your system down when you need it most.

When all of these areas are addressed during a maintenance visit, the result is usually improved comfort, more stable operation, and often lower energy use compared to a neglected system.

If you’d like to read more about how regular service supports system performance, we’ve put together a detailed guide to HVAC maintenance for homeowners and a practical HVAC maintenance checklist that many Tampa Bay families find helpful.

Pro Tips for Homeowners in St. Petersburg

Whether your system is brand new or more seasoned, a few simple habits can go a long way in our coastal Florida climate. Here are some practical tips we often share with homeowners in St. Petersburg and the surrounding Tampa Bay area:

  • Change filters regularly: In our humid, sandy environment, filters tend to load up faster. For most homes, checking the filter every month and replacing it as needed is a smart routine.
  • Keep outdoor units clear: Make sure plants, mulch, and debris are kept away from the outdoor condenser. A couple of feet of clearance around the unit helps with airflow and efficiency.
  • Watch your condensate drain: If you notice water near the indoor unit or drain line, call for service sooner rather than later. A partially clogged drain can often be resolved before it causes damage.
  • Use reasonable thermostat settings: In St. Petersburg, bumping the thermostat up just a degree or two in summer (or down slightly in winter) can reduce strain on the system without sacrificing comfort.
  • Schedule maintenance before peak season: Having your system checked in spring and fall helps ensure it’s ready for the hottest and coolest days, when breakdowns are most inconvenient.
  • Know when to ask for help: Unusual noises, short cycling (turning on and off quickly), or rooms that no longer cool evenly are all good reasons to have a technician take a look.

For deeper reading about keeping your system healthy in Florida’s climate, you can explore our air conditioning maintenance guide for Tampa Bay or learn how often you should service your AC in Florida.

FAQ: AC Tune-Ups and Heating Maintenance in St. Petersburg, FL 33711

What does your $89 tune-up include?

Our $89 tune-up for well-kept systems includes cleaning key components, flushing the system where needed, a refrigerant check, thermostat adjustment, wiring and component inspection, and an air filter replacement. The filter can be provided by you, or we can supply one at an additional cost. Afterward, we go over any recommended maintenance or repairs so you can make informed decisions.

Is this tune-up offer right for older or neglected systems?

This special is designed for units that have been reasonably well maintained. If your system needs intensive work—such as heavy coil cleaning or significant repairs—we’ll explain what we’re seeing, discuss options, and review pricing before moving beyond the standard tune-up. We never proceed with major work without your approval.

How often should I schedule maintenance in St. Petersburg, FL 33711?

Most homes in our area benefit from at least one professional maintenance visit per year due to the long cooling season. Many homeowners choose spring for cooling-focused maintenance and fall for a heating check. For more guidance, you can review our article on why it’s important to schedule HVAC maintenance.

Will a tune-up lower my electric bill?

While every home is different, a properly cleaned and inspected system typically runs more efficiently than one that’s been ignored. By improving airflow, checking controls, and addressing minor issues early, a tune-up can help reduce unnecessary energy waste and keep your monthly bills from creeping up over time.

Do you check both cooling and heating during the same visit?

Yes, during a combined cooling and heating maintenance visit, we look at both sides of the system as long as conditions allow safe and proper testing. The goal is to confirm that your home is ready for hot summers and cooler evenings alike.

Will I get a report or recommendations after the service?

Absolutely. We walk you through what we did, what we observed, and any recommendations we have for repairs or future maintenance. Our goal is clear, transparent communication so you always understand the condition of your system and your options.

Why Choose Home Therapist for HVAC Maintenance in Tampa Bay

When you invite someone into your home in St. Petersburg, FL 33711, you should feel confident that they’ll treat your space and your time with respect. At Home Therapist Cooling, Heating, and Plumbing, that’s how we approach every visit.

Our licensed, professional technicians focus on doing the job the right way, not the fast way. We take the time to explain what we’re seeing, answer your questions in plain language, and lay out options without pressure. Whether we’re performing a simple tune-up or helping you plan for a larger project down the road, our priority is long-term comfort and reliability for your home.

Cleanliness matters to us, too. We use care around your floors, furniture, and belongings and clean up our work area before we leave. The only thing we want to leave behind is a system that’s running as it should.

If you’d like to see what other Tampa Bay homeowners are saying, you can visit us on Facebook, follow along on Instagram, or check out our updates on TikTok.

We’re proud to be recognized by trusted organizations as well. You can view our standing with the Better Business Bureau and our listing with the Tampa Bay Chamber of Commerce. These profiles reflect our ongoing commitment to professionalism, accountability, and service to our community.

Need a Tune-Up in St. Petersburg, FL 33711?

If you live in St. Petersburg, FL 33711 and want your cooling and heating system to be ready for whatever Florida weather brings, we’re here to help. Our maintenance visits are designed to keep your equipment running smoothly, reduce surprise breakdowns, and protect your comfort all year long.

Whether it’s time for your first tune-up or you’re looking for a new long-term HVAC partner in the Tampa Bay area, reach out to Home Therapist Cooling, Heating, and Plumbing to schedule your service. We’ll treat your home with care, communicate clearly, and make sure you understand every step we take to keep your system in good shape.

When you’re ready, simply schedule a visit, and we’ll take it from there—so you can relax and enjoy a comfortable home in St. Petersburg, FL 33711.

HVAC Maintenance and UV Air Purifier Inspection in Tampa, FL 33637

When you live in Tampa, FL 33637, your air conditioning system works overtime almost year-round. That’s why regular HVAC maintenance and indoor air quality checks are so important. On this visit, we came out for a scheduled Premium Therapy Plan maintenance for a homeowner in Tampa and discovered a few key things: the AC system itself was running properly, but the attic UV REME HALO air purifier was not functioning, and the ducts needed sanitation as part of an older plan benefit.

In this article, we’ll walk through what we did during this visit, why the UV system wasn’t working, how duct sanitation fits into a healthy HVAC system, and what homeowners in Tampa, FL 33637 can do to keep their systems running clean and efficiently.

Case Recap

  • Location: Single-family home in Tampa, FL 33637
  • Service: Scheduled Premium Therapy Plan maintenance visit
  • System condition: Operating properly with normal refrigerant pressures and electrical readings
  • Finding: Existing REME HALO UV system in the attic was not functioning due to previously damaged wiring
  • Additional work: Duct sanitation performed as part of older Premium Plan benefits
  • Recommendations: Replace the REME HALO unit and replace the air filter; return the thermostat fan setting from ON back to AUTO the next day

Customer Problem

This visit in Tampa, FL 33637 was part of the homeowner’s ongoing Premium Therapy Plan. There wasn’t a specific breakdown or emergency call – the main goal was to keep the system in top shape with routine maintenance and to make sure all the accessories, like the UV air purifier, were still doing their job.

The homeowner had previously dealt with a rodent issue in the attic. Rodents had chewed some wiring, and while that issue had been addressed, it left concerns about what might have been affected, especially around the UV REME HALO system that was installed near the ductwork. The homeowner wanted the reassurance that everything was safe, functional, and clean.

As part of their older Premium Plan, the home also qualified for a duct sanitation service during this visit. In Florida’s humid climate, especially around Tampa, keeping ducts as clean as possible goes a long way in helping with comfort and indoor air quality.

Inspection and Diagnosis

When we arrive for a maintenance visit under a Premium Therapy Plan, we treat it as a full system checkup. At this Tampa, FL 33637 home, our technician Barbaro followed a thorough procedure to make sure the AC system and key components were operating correctly.

Here’s what we inspected and why:

  • Refrigerant pressures: We verified that pressures were within normal range for the system. This helps confirm the system is moving heat correctly and that there are no clear signs of low charge or major restriction.
  • Electrical readings: We checked the breaker load, compressor, and fan motor operation. All were running within normal specifications, indicating no obvious electrical strain or failing motor at the time of service.
  • General system operation: We confirmed the AC was cycling and operating properly, with normal behavior during the maintenance visit.
  • UV REME HALO system: We inspected the UV air purifier in the attic area. This unit is designed to provide UV light and additional air purification, but it was not functioning.

During the inspection, we traced the likely cause of the non-working REME HALO back to wiring that had previously been damaged when rodents were in the attic. One of the wires that had been chewed was tied to the HALO system, and the damage had affected the UV light itself.

We also confirmed that the ducts were a good candidate for sanitation as part of the older Premium Plan, and we prepared the system for that process.

Repair or Service Process

Because this visit was primarily a maintenance and duct sanitation appointment rather than a repair call, most of the work focused on cleaning, checking, and documenting system condition, along with clear recommendations for next steps.

1. Full Maintenance Under the Premium Therapy Plan

First, we performed a complete maintenance service based on the homeowner’s Premium Plan agreement. That included:

  • Inspecting major components such as the condenser, air handler, and accessible duct connections
  • Reviewing refrigerant pressures to confirm they were within normal operating range
  • Checking electrical readings on the breaker, compressor, and fan motor to verify safe operation
  • Visually checking for obvious signs of wear, damage, corrosion, or loose connections

Once all of these checks were completed, we were able to say confidently that the main HVAC system was operating properly at the time of service.

2. Evaluating the REME HALO UV Air Purifier

Next, we turned our attention to the REME HALO unit. This type of UV system is installed to help treat the air as it circulates through the ductwork. It typically helps reduce certain airborne particles and can support better indoor air quality when it’s working correctly.

At this Tampa, FL 33637 home, the REME HALO was not operating. Given the prior rodent activity in the attic, we looked closely at the wiring and the condition of the UV assembly. The chewed wire related to the HALO system had led to damage in the UV light section of the unit.

Because of that damage, the most reliable and long-term solution is to replace the REME HALO unit. This restores the UV light and air purification features, rather than trying to piece together repairs on a compromised assembly.

3. Performing Duct Sanitation

As part of the homeowner’s older Premium Plan benefits, we performed a duct sanitation service. This is not the same as a full mechanical duct cleaning; instead, it is a process intended to treat the interior surfaces of the ductwork to help reduce microbial growth and improve overall freshness in the air distribution system.

For Tampa, FL 33637 homeowners, duct sanitation can be especially beneficial after issues like rodents in the attic or when there have been concerns about odors or cleanliness in the duct system.

4. Thermostat Fan Setting and Filter Replacement Instructions

Because of the duct sanitation process, we left the thermostat’s fan setting in the ON position rather than AUTO. This keeps air moving through the ducts for a period after the service and helps circulate treated air throughout the system.

We advised the homeowner to:

  • Replace the air filter, which was not available at the time of service
  • Return the thermostat fan setting from ON back to AUTO the next day

Those two simple steps help maintain air cleanliness and ensure the system goes back to normal fan operation once the sanitation process is complete.

Why This Fix and Maintenance Plan Work

This visit wasn’t about a dramatic breakdown; it was about protecting the system and the home’s air quality over the long term. For homeowners in Tampa, FL 33637, that’s often the smarter play – prevent issues instead of waiting for something to fail in the middle of a hot afternoon.

Here’s why the work we did makes a difference:

  • Verified operating conditions: By confirming that refrigerant pressures and electrical readings were within normal range, we reduced the risk of surprise breakdowns and helped maintain efficiency.
  • Identifying non-working accessories: Spotting the non-functioning REME HALO means the homeowner can make an informed decision about replacing it, rather than assuming they’re getting air purification that isn’t actually happening.
  • Duct sanitation: Treating the duct system helps support a cleaner air path through the home, which is particularly helpful after past rodent issues or in high-humidity areas like Tampa Bay.
  • Proper fan usage and filtration: Leaving the fan on temporarily after duct sanitation and then returning it to AUTO the next day keeps airflow balanced while avoiding unnecessary energy use over the long term. Replacing the air filter on schedule supports good airflow and indoor air quality.

Combined, these steps help the AC system run reliably while also supporting healthier air in the home.

Pro Tips for Homeowners in Tampa

If you live in Tampa, FL 33637 or anywhere in the Tampa Bay area, here are a few practical tips to keep your AC and indoor air systems in good shape:

  • Stay on top of filter changes: In Florida’s climate, many homes benefit from checking and changing filters more often than once every three months, especially if you have pets, allergies, or run the system heavily.
  • Watch for attic activity: If you’ve ever had rodents or other pests in the attic, have your HVAC accessories – like UV lights and wiring – checked. Damage isn’t always obvious from inside the living space.
  • Use fan settings wisely: It’s fine to run the fan in the ON position temporarily after duct-related work, but for daily use, AUTO is usually the better setting for energy efficiency and comfort.
  • Consider UV or air quality upgrades: Systems like REME HALO and other UV or air purification options can be a good fit for Tampa homes, especially in high-humidity or allergy seasons. Just make sure they’re maintained and replaced when needed.
  • Schedule regular maintenance: A consistent maintenance plan helps catch issues like failing UV lights, weak capacitors, or airflow problems early. Our guide to HVAC maintenance for homeowners explains how this protects comfort and system life.
  • Ask about duct and IAQ services: If you notice musty odors or dust buildup, talk with us about options like duct sanitation or UV enhancements. Our article on the role of HVAC in indoor air quality can help you understand what’s available.

FAQ: Premium Plan HVAC Maintenance and UV Systems

Is it a problem if my REME HALO or UV light isn’t working?

If your REME HALO or other UV light stops working, your main AC system can still cool your home, but you lose the additional air purification benefits. In this Tampa, FL 33637 home, we recommended replacing the unit so the homeowner could restore those features and maintain better indoor air quality.

Why did you leave the thermostat fan set to ON instead of AUTO?

We temporarily left the fan setting on ON after performing duct sanitation. This keeps air circulating through the treated ducts for a short period. We advised the homeowner to switch it back to AUTO the next day. For everyday use, AUTO is usually the best option for efficiency.

What does a Premium Therapy Plan maintenance include?

Under our Premium Therapy Plan, we perform a full system maintenance visit that includes inspecting key components, checking refrigerant pressures, verifying electrical readings, and confirming proper operation. Some older plans, like the one at this Tampa, FL 33637 home, may also include benefits such as duct sanitation. For more detail on ongoing care, take a look at our AC maintenance and cleaning options in Tampa Bay.

How often should I schedule HVAC maintenance in Tampa?

In our climate, we typically recommend at least once-a-year maintenance, and many homeowners choose twice a year to stay ahead of Florida’s long cooling season. Our HVAC maintenance checklist for homeowners breaks down what regular service looks like and why it matters.

Do I need duct sanitation if I’ve had rodents in the attic?

If you’ve dealt with rodents in the attic, it’s a good idea to have your ducts evaluated. In this home in Tampa, FL 33637, we performed duct sanitation as part of the existing plan benefits, which helped treat the duct surfaces and support a cleaner air path. We can review your specific situation and recommend whether duct sanitation or other services make sense.

Why Choose Home Therapist for HVAC Maintenance in Tampa

At Home Therapist Cooling, Heating, and Plumbing, we approach every job as if we were working on our own home. For homeowners in Tampa, FL 33637 and across Tampa Bay, that means you get a licensed, professional technician who takes the time to explain what we’re doing and why.

Here’s what you can expect when you choose us:

  • Licensed and professional technicians: Our team is trained to handle both standard HVAC systems and add-ons like UV lights and duct-related services, so you get a complete picture of your home’s comfort system.
  • Transparent communication: We explain our findings in clear, everyday language – just like we did during this Premium Therapy Plan visit – so you can make informed decisions about repairs or upgrades.
  • Clean and respectful work: We treat your home with care, keep work areas tidy, and respect your schedule. Maintenance should make your life easier, not more stressful.
  • Long-term reliability focus: We don’t just look at what’s broken today. We look at what can be improved to prevent future issues, extend equipment life, and support better indoor air quality.
  • Commitment to Tampa Bay homeowners: We live and work in this community, and we’re proud to serve Tampa-area neighborhoods with honest, dependable service.

If you’d like to see more of what we do, you can connect with us on social media and through trusted local directories:

We’re also listed with trusted organizations so you can easily check out reviews and our standing in the community:

Need HVAC Maintenance or UV System Help in Tampa, FL 33637?

If it’s been a while since your last AC tune-up, or if you’re not sure whether your UV light or air purification system is working correctly, we’re here to help. Whether you’re on a Premium Therapy Plan or just getting started with regular service, our team can inspect your system, verify safe operation, and give you clear options for improving comfort and air quality.

Homeowners in Tampa, FL 33637 can count on Home Therapist Cooling, Heating, and Plumbing for straightforward, reliable HVAC maintenance, duct sanitation, and UV system evaluations. When you’re ready, reach out to schedule your next visit and keep your home comfortable, clean, and prepared for Tampa’s heat and humidity.

Commercial HVAC Maintenance and Replacement Recommendation in Tampa, FL 33634

For businesses in Tampa, FL 33634, a reliable HVAC system is not just about comfort—it’s about keeping employees productive, equipment protected, and customers happy. On a recent quarterly maintenance visit for a commercial client, we were called out to service a 27-year-old system that was still cooling but no longer providing heat. During our inspection, we confirmed that the unit was operating in cooling mode but struggling in heating, showed significant wear, and was no longer a good long-term fit for the business. In the end, we completed the scheduled maintenance, documented all concerns, and recommended a full system replacement as the most practical next step.

Case Recap

  • Location: Commercial property in Tampa, FL 33634
  • Service: Quarterly HVAC maintenance under a service agreement
  • System: 27-year-old R22 commercial unit with heavy wear and organic growth
  • Main complaint: System cools but does not heat properly
  • Findings: High energy consumption, rust, organic buildup, age-related deterioration
  • Outcome: Maintenance completed; replacement of the system recommended for reliability and efficiency

Customer Problem: An Aging Commercial System That Won’t Heat

This visit was part of a standing quarterly service agreement for a commercial client in Tampa, FL 33634. Their business opens around 10 a.m., so we coordinated our visit to be firm on time and date to avoid disrupting their operations. The concern they expressed was straightforward: the HVAC system would cool, but the heat wasn’t working.

For a business, this kind of issue is more than a comfort problem. Employees and guests rely on consistent indoor temperatures, especially when we get those cooler mornings in the greater Tampa Bay area. The system in question has been in service for about 27 years, using R22 refrigerant. While it has been maintained every three months under their agreement, age has taken its toll:

  • The unit still produces cooling, but heating performance has declined significantly.
  • Organic growth was visible inside the machine.
  • Rust and corrosion were present on internal components.
  • Energy consumption is higher than what a modern system would require to do the same job.

The business wanted to know two things: Could we restore the heat, and was this system still worth keeping, or was it time to move on to a new unit?

Inspection and Diagnosis: Why the Heat Wasn’t Working

During any commercial HVAC service in Tampa, FL 33634, our first priority is to fully understand how the system is behaving and why. On this visit, that meant carefully checking both the cooling and heating sides of the unit.

Our diagnostic approach included:

  • Verifying thermostat calls for both heating and cooling modes.
  • Confirming that the system would start and run in cooling.
  • Observing the system’s behavior when switched to heat.
  • Inspecting internal components for age-related damage, corrosion, and organic buildup.
  • Reviewing how long the system has been in service and its maintenance history.

We confirmed what the customer reported: the unit was functioning in cool but having problems in heat. Combined with the visible rust and organic growth, and knowing the unit is an older R22 system, it was clear we were dealing with more than a simple, isolated component failure.

At this age, it’s common for multiple parts to be near the end of their useful life. Even if we addressed one immediate issue, others are likely to follow, and the overall efficiency of the unit would still be far behind current standards.

Repair or Service Process: What We Did on This Visit

Even when we know a system is nearing the end of its life, we still treat every maintenance visit with the same thoroughness. For this commercial HVAC maintenance in Tampa, FL 33634, we followed our standard quarterly procedure while documenting the larger concerns.

Here’s how we approached the service:

1. Performed Full Maintenance Under the Agreement

The system is on a regular three-month maintenance plan, so we completed all the tasks included in that agreement. This typically involves:

  • Checking and cleaning accessible components as appropriate.
  • Inspecting filters and airflow paths to ensure the system can breathe properly.
  • Looking over electrical connections for signs of wear, overheating, or looseness.
  • Verifying proper system operation in the available modes.

Regular maintenance is one of the reasons this 27-year-old unit has made it this far. Even so, no amount of care can fully overcome the limitations of age and older technology.

2. Documented Organic Growth and Rust

Inside the unit, we observed organic growth and rust on several components. Organic buildup can restrict airflow, trap moisture, and contribute to odors and potential air quality issues. Rust, meanwhile, is a sign of long-term exposure to moisture and age. Over time, corrosion can weaken metal parts, affect heat transfer, and increase the likelihood of leaks or failures.

We made sure to document these findings so the business owner has a clear understanding of the system’s condition—not just for this visit, but for planning ahead.

3. Evaluated Heating Performance Issues

The key complaint was that the heater was not working properly. We verified that the system would respond in cooling mode but not provide proper heat. Given the age of the unit, its R22 refrigerant, and the overall wear and corrosion we found, we determined that the heating problem was part of a broader pattern of end-of-life decline rather than a simple, isolated issue.

Because we do not want to guess with a commercial customer’s comfort and budget, we focused on giving clear options rather than chasing short-lived fixes.

4. Recommended System Replacement

After completing the maintenance and reviewing everything we found, we recommended that the business move forward with a system replacement. Our reasoning included:

  • The system’s age: 27 years is well beyond the typical lifespan for most commercial HVAC units.
  • R22 refrigerant: This older refrigerant is being phased out and is increasingly costly to manage.
  • Visible organic growth and rust: Indicators of long-term wear that will not improve over time.
  • Heating malfunction: A sign that core system components are no longer performing as intended.
  • High energy consumption: Older systems usually cost significantly more to run than modern equipment.

We presented the recommendation clearly so the client can make an informed decision: they can keep limping along with an inefficient, unreliable unit, or invest in a new system that offers better comfort, reliability, and energy performance.

Why This Fix (Replacement) Is the Right Move

For a commercial property in Tampa, FL 33634, the HVAC system works hard nearly year-round. Long cooling seasons, humidity, and frequent cycling put a lot of strain on equipment. Over decades, this leads to worn components, corrosion, and declining efficiency.

Here’s why planning a replacement is the sensible solution in this case:

  • Airflow and Heat Transfer: Organic growth and rust reduce the ability of coils and other components to transfer heat efficiently. That hurts both heating and cooling performance.
  • Refrigerant Considerations: R22 systems are older technology. As this refrigerant has been phased out, supporting these systems becomes more challenging and expensive over time.
  • Energy Use: Older commercial systems often draw much more power than newer equipment to achieve the same comfort level, especially when internal surfaces are dirty or corroded.
  • Reliability: At 27 years old, even well-maintained equipment is prone to unexpected breakdowns. For a business, that can mean uncomfortable staff, unhappy customers, or even lost revenue.

By moving toward a new system, this business can expect more stable temperatures, quieter operation, better control, and typically lower operating costs compared to an aging, compromised unit.

For property owners who want to see what modern upgrades can look like, we have examples of installation projects, such as a recent HVAC system installation with new ductwork in Tampa, that illustrate how we approach long-term comfort solutions.

Pro Tips for Commercial Property Owners in Tampa

Running a business in Tampa, FL 33634 means your HVAC system works through long cooling seasons and high humidity. Here are some practical steps to protect your investment and keep your building comfortable:

  • Stick to a consistent maintenance schedule. Quarterly maintenance, like this client has, is ideal for many commercial properties. It helps catch issues early and keeps filters, coils, and drains in better shape.
  • Pay attention to heating performance, not just cooling. Even in Tampa Bay, heat is important on cooler mornings and nights. If your system cools but won’t heat, don’t ignore it—it’s often a sign of deeper wear.
  • Watch your energy bills. A steady increase in power use, without a change in usage patterns, can be a sign that your system is working harder than it should. Old R22 systems in particular tend to be less efficient than modern equipment.
  • Don’t overlook indoor air quality. Organic growth inside equipment and ductwork can affect air quality. Services like air duct cleaning and regular filter maintenance can make a noticeable difference.
  • Plan for replacement before an emergency. When a system is past its typical lifespan, it’s wise to budget and plan for replacement on your terms. Waiting for a total breakdown can mean more downtime and rushed decisions.
  • Check filtration and airflow regularly. In busy commercial spaces, filters load up faster. Our team can help with air filter installation and replacement to keep airflow strong and systems healthier.

FAQ: Commercial HVAC Maintenance and Replacement in Tampa, FL 33634

Why would my HVAC system cool but not heat?

When a system cools but doesn’t heat, it usually indicates an issue on the heating side of the equipment—whether that’s related to components, controls, or age-related deterioration. In this case, the system was very old with visible corrosion and organic growth, so the heating problem was part of a larger pattern of wear rather than a simple, isolated issue.

Is it worth repairing a 27-year-old R22 commercial unit?

In most cases, once a commercial HVAC system reaches this age—especially an R22 system—major repairs become less cost-effective. You can often spend significant money on parts and labor only to be left with an inefficient, unreliable system. That’s why we recommended replacement for this property in Tampa, FL 33634.

Does regular maintenance really help older systems?

Yes, regular maintenance is likely one of the reasons this unit lasted as long as it did. Quarterly service helps keep components cleaner, reduces strain, and allows issues to be caught early. However, maintenance can’t reverse age or outdated design. At some point, replacement becomes the smart move.

How often should a commercial HVAC system in Tampa be serviced?

For many commercial properties in Tampa Bay, quarterly maintenance is a solid schedule, especially when equipment runs heavily in our long cooling season. This client’s system was maintained every three months, which is a good benchmark for similar businesses.

What are the signs that my commercial HVAC system is near the end of its life?

Common signs include frequent repairs, uneven temperatures, rising energy bills, visible rust or corrosion, organic growth inside the unit, and issues like this case where cooling still works but heating does not. When several of these appear together—especially on an older system—it’s time to discuss replacement options.

Can you help with both maintenance and replacement planning?

Absolutely. We handle both ongoing maintenance and full system replacements for commercial and residential clients. During visits like this one in Tampa, FL 33634, we not only perform the scheduled service but also provide honest guidance about when it makes sense to repair and when it’s wiser to upgrade.

Why Choose Home Therapist for Your HVAC Needs

When you invite us to your property, you’re getting more than a quick tune-up. Our licensed technicians focus on long-term comfort and clear communication, whether we’re servicing a small home system or a larger commercial unit in Tampa, FL 33634.

Here’s what you can expect from our team:

  • Licensed, professional technicians: We stay current on industry standards and best practices so your system is handled correctly and safely.
  • Transparent communication: We explain what we find in plain language, outline your options, and never pressure you into a decision.
  • Clean and respectful work: We treat your business or home as if it were our own, keeping work areas as tidy as possible and minimizing disruption.
  • Focus on long-term reliability: Our recommendations, like advising replacement for this 27-year-old unit, are based on what will serve you best over time—not just today.
  • Commitment to Tampa Bay homeowners and businesses: We live and work in this community and take pride in supporting local properties across the region.

If you’d like to see more of what we do or connect with us online, you can find Home Therapist on social media, including Facebook, Instagram, and TikTok.

For added peace of mind, you can also review our standing with local and national organizations such as the Better Business Bureau and the Tampa Bay Chamber of Commerce, or view our location and reviews on Google Maps.

If you’re considering a future system upgrade, you can also explore some of our past projects on our blog, such as a blow-in insulation service in Tampa and other HVAC improvements that support whole-home and whole-building comfort.

Need Commercial HVAC Help in Tampa, FL 33634?

If your business in Tampa, FL 33634 is dealing with an older HVAC system, inconsistent heating, or rising energy bills, we’re here to help. Whether you need a thorough maintenance visit, a second opinion on repairs, or a straightforward plan to replace aging equipment, our team will walk you through each option calmly and clearly.

Contact Home Therapist to schedule your next HVAC service in Tampa, FL 33634. We’ll evaluate your system, explain what we find, and help you choose the best path to reliable, efficient comfort for your property.

AC Maintenance Visit in St. Petersburg, FL 33710

For this Elite Therapy Plan visit, we were scheduled to perform routine AC maintenance for a homeowner in St. Petersburg, FL 33710. The goal was simple: keep their system running reliably through our Florida heat and humidity. However, this visit turned into a good real-world example of why we need access to both the indoor and outdoor units to truly care for your air conditioning system.

On this visit, no one was home, so we couldn’t get inside to check the thermostat or the air handler. That meant we could only work on the outdoor condenser. We still completed what we safely could outside, documented the condition of the unit—including an oxidized fan on an eight-year-old condenser—and sent an estimate for replacement for the homeowner to review.

Case Recap: AC Maintenance in St. Petersburg, FL 33710

  • Location: Residential AC maintenance for a homeowner in St. Petersburg, FL 33710
  • Plan: Scheduled Elite Therapy Plan visit (ongoing maintenance membership)
  • Access issue: No one home, so we couldn’t inspect the indoor air handler or thermostat
  • Work completed: Maintenance and visual inspection on the outdoor condenser only
  • Findings: Outdoor unit approximately 8 years old with a noticeably oxidized fan
  • Outcome: Sent an estimate for system replacement and noted need for a future visit to complete indoor maintenance

Customer Problem: A Routine Visit That Couldn’t Be Fully Completed

This visit was part of our Elite Therapy Plan—our ongoing maintenance program designed to keep systems clean, efficient, and reliable for homeowners across Tampa Bay, including St. Petersburg, FL 33710. The appointment was scheduled as Visit #4 on the plan, which typically includes:

  • A full check of the outdoor condenser
  • A detailed inspection and tune-up of the indoor air handler
  • Filter replacement based on the homeowner’s filter size and needs

For this home, we arrived with the correct filters—six filters sized 14x18x1—ready to replace them as part of their scheduled maintenance. When our technician arrived, though, no one was available to open the door. Without access to the inside of the home, we couldn’t reach the thermostat, the indoor unit, or any return filter grills.

This was actually the second visit where we ran into the same access issue. We noted in our internal records that if a plumbing tune-up is scheduled in the future, our plumbing and HVAC technicians can coordinate so the indoor air handler maintenance can be done at the same time—provided someone is home to let us in.

From the homeowner’s perspective, everything may have seemed fine: the system still cools, it’s still cycling on and off, and nothing looks broken from the outside. But as professionals serving St. Petersburg, FL 33710 and surrounding Tampa Bay communities, we know that skipping the indoor portion of a tune-up leaves a big piece of the system unchecked.

Inspection and Diagnosis: What We Could and Couldn’t Check

Even with limited access, we treat every visit with the same level of care and documentation. On this maintenance appointment, our technician focused on the outdoor condenser and completed the work that could be done safely without entering the home.

Here’s what we were able to do and assess outside:

  • Visual inspection of the condenser cabinet and fan: We checked for corrosion, physical damage, debris around the unit, and overall condition.
  • Age verification: We confirmed that the outdoor unit is about 8 years old, which is right in the range where wear and tear starts to show more clearly in Florida’s climate.
  • Fan condition: We noted that the condenser fan was visibly oxidized. In our environment—salt air, high humidity, and heat—that’s common, but it’s also a clear sign of aging components.

Because we did not have access to the thermostat and indoor equipment, there were several important checks we could not perform on this visit:

  • We couldn’t safely check refrigerant pressures.
  • We couldn’t verify how well the system was cooling under load.
  • We couldn’t measure fan or compressor electrical consumption.
  • We couldn’t open and inspect the indoor air handler, evaporator coil, or drain line.
  • We couldn’t replace the indoor air filters, even though we brought the correct sizes.

All of those tests and inspections require the system to be operating and controlled through the thermostat, with full access to both sides of the system. Without that, we document the limitations clearly and only proceed with what’s safe and honest for the homeowner.

If you’d like a broader overview of what a complete maintenance visit typically includes, our AC repairs, installs, and maintenance services overview explains how we normally handle a full-system check for Tampa Bay homeowners.

Repair and Service Process: What We Did on the Outdoor Condenser

Even though we couldn’t complete the entire Elite Therapy Plan checklist, we still carried out key outdoor maintenance steps to help keep the system as healthy as possible until we can return.

Our process for the outdoor condenser on this visit in St. Petersburg, FL 33710 included:

1. Visual Safety and Condition Check

We started with a visual inspection around the unit, looking for anything that could restrict airflow or pose a safety concern, such as:

  • Debris, leaves, or vegetation crowding the unit
  • Visible physical damage or loose panels
  • Signs of rust or corrosion on the cabinet and fan components

This step helps us quickly identify any obvious issues and determine whether the unit is safe to operate.

2. Condenser Fan Condition Review

During the outdoor inspection, we paid close attention to the fan assembly. The fan on this unit showed notable oxidation, which is common as systems age in coastal and humid areas like St. Petersburg. Oxidation doesn’t automatically mean the fan is about to fail, but it does tell us that the system is aging and that parts may be closer to the end of their expected lifespan.

That level of visible wear is one of the reasons we recommended that the homeowner begin planning ahead for a system replacement, rather than waiting for a sudden breakdown during peak summer heat.

3. Documenting Age and Condition for Future Planning

We confirmed that the condenser is around eight years old. In Florida, where AC systems work almost year-round, many units start showing more serious wear around this age, especially if full maintenance (indoor and outdoor) isn’t consistently completed.

Based on the age, visible oxidation, and the limited diagnostic access we had on this visit, we prepared and sent an estimate for replacing the system. This gives the homeowner time to review options and ask questions, instead of being rushed into a decision during an emergency breakdown.

For homeowners who want to understand what to expect when planning a replacement, our guide on air conditioner installation quotes in Tampa, FL walks through how we structure quotes and discuss options.

4. Planning the Next Visit

Because this was the second time we were unable to access the indoor equipment, we made detailed notes for our team. If a plumbing tune-up is scheduled for this home, we’ll coordinate so that our HVAC technician can perform the indoor air handler maintenance at the same time—assuming the homeowner is available to provide entry.

Until then, we’ve clearly documented that the indoor portion of the Elite Therapy Plan visit remains outstanding, and we’ll complete it on a future visit.

Why This Approach Works, Even with Limited Access

An air conditioning system is a complete loop: the outdoor condenser, the indoor air handler, the refrigerant lines, the thermostat, and the ductwork all work together. Ideally, every maintenance visit in St. Petersburg, FL 33710 includes both indoor and outdoor checks so we can:

  • Confirm proper airflow through the indoor coil and ductwork
  • Inspect and clean the condensate drain for safe drainage
  • Verify that the thermostat is communicating correctly with the system
  • Measure refrigerant pressures and electrical readings under normal operating conditions

On this visit, we couldn’t complete that full loop. Instead of guessing or trying to force partial diagnostics, we focused on what we could see and verify: the outdoor unit’s age and physical condition.

Recommending that the homeowner plan for replacement at around the eight-year mark—especially with visible oxidation—is about being proactive. It reduces the chances of a surprise breakdown and gives the homeowner time to consider options, financing, and scheduling at a pace that works for them.

For those weighing whether to repair, maintain, or replace, our page on AC repairs, installs, and maintenance options explains how we help Tampa Bay homeowners choose the right path for their situation.

Pro Tips for Homeowners in St. Petersburg, FL

Whether you’re on our Elite Therapy Plan or just planning ahead, here are some practical tips tailored to homeowners in St. Petersburg, FL 33710 and the surrounding Tampa Bay area:

1. Make Sure Someone Can Let Us In

To get the full value of a maintenance plan, we need access to both the indoor and outdoor units. If you can’t be home, consider:

  • Having another adult family member or trusted neighbor let us in
  • Using a lockbox or smart lock if that fits your comfort level and policies allow
  • Scheduling visits on days when you know you’ll be available

We even have a dedicated article that explains whether you need to be home for AC repairs, installs, or maintenance appointments, so you can plan ahead.

2. Don’t Skip Filter Changes

This homeowner’s plan included six 14x18x1 filters, which we brought to the visit. Since we couldn’t get inside, the filters couldn’t be replaced. In our humid Florida environment, dirty filters can quickly strain your system, reduce airflow, and increase energy use. If we ever have to reschedule an indoor visit, try to replace filters yourself in the meantime, or ask us to walk you through it over the phone.

3. Keep the Outdoor Unit Clear

Even when we can’t inspect inside, you can help protect your system by keeping at least 2–3 feet of clear space around the outdoor condenser. Trim shrubs, remove leaves, and avoid stacking items near the unit. Good airflow helps your system reject heat more efficiently, which matters on our hot St. Petersburg afternoons.

4. Plan Ahead for System Replacement

An eight-year-old system in Florida isn’t necessarily at the end of its life, but it’s far enough along that planning ahead makes sense. If we point out signs of aging—like an oxidized fan or visible corrosion—take that as a cue to start budgeting and asking questions rather than waiting for a failure in the middle of summer.

5. Use Maintenance Plans to Your Advantage

Maintenance plans like our Elite Therapy Plan are designed to protect your comfort and minimize surprise repairs. To get the most from them, prioritize keeping appointments, being available for access, and letting us know if your schedule changes. Our AC maintenance and cleaning specials in Tampa Bay explain some of the benefits and options available for homeowners like you.

FAQ: AC Maintenance and Access Issues in St. Petersburg, FL 33710

What happens if I’m not home for my AC maintenance visit?

If no one is home and we can’t access the indoor unit, we’ll complete whatever safe work we can on the outdoor condenser and document what was missed. Just like this visit in St. Petersburg, FL 33710, we’ll note that indoor maintenance is still needed and help you reschedule so the full system can be checked.

Can you replace my filters if I’m not there?

We can only replace filters if we can access the inside of the home and the return filter locations. Even if we bring the correct filter sizes, like the 14x18x1 filters for this homeowner, we still need a way to get inside safely and securely.

Why did you recommend a replacement for an 8-year-old unit?

In Florida’s climate, AC systems run hard most of the year. Around the 8–10 year mark, visible wear (such as an oxidized fan) and the unknown condition of internal components can make it wise to start planning for replacement. We don’t force decisions, but we do want you to have time to review options before an emergency breakdown.

Can you fully test my AC from outside only?

No. A complete performance test requires access to both the indoor and outdoor units, as well as the thermostat. Without indoor access, we cannot safely check refrigerant pressures, verify cooling performance, or thoroughly inspect the air handler and drain system.

How can I avoid missed or incomplete visits?

The best way is to schedule appointments for days and times when you or another adult can be home. If something changes, let us know as early as possible so we can adjust. Our office team will work with you to find a window that fits your schedule.

Will you remind me when it’s time for my next visit?

Yes. For homeowners on our maintenance plans, we provide reminders and help you schedule follow-up visits. If a visit is partially completed—like this one where only the outdoor unit was checked—we note that clearly and work with you to finish the remaining tasks on a future date.

Why Choose Home Therapist for AC Service in Tampa Bay

When you invite us to your home in St. Petersburg, FL 33710, you’re trusting us with your comfort and safety. We take that seriously, whether we’re performing a full tune-up or documenting access limitations like we did on this visit.

Here’s what you can expect from Home Therapist Cooling, Heating, and Plumbing:

  • Licensed, professional technicians: Our team is trained, experienced, and properly licensed to work on your HVAC and plumbing systems.
  • Transparent communication: If we can’t complete part of a visit, we’ll tell you exactly why, what we did, and what still needs attention—no guesswork, no pressure.
  • Clean, respectful work: We treat your home as if it were our own. From wearing protective gear where appropriate to keeping our work area tidy, respect is built into how we operate.
  • Long-term reliability focus: Our recommendations are based on long-term comfort and reliability, not quick one-time fixes. That’s why we’ll proactively suggest planning for replacement when we see aging systems.
  • Commitment to Tampa Bay homeowners: We live and work in this community, and we’re proud to serve homeowners across Tampa Bay, including St. Petersburg, FL 33710.

If you’d like to see more of what we do and stay connected, you can follow us on social platforms like Pinterest and Reddit where we share insights and updates.

For added peace of mind, you can also review our standing with trusted local and national organizations. We’re listed with the Better Business Bureau and are proud members of the Tampa Bay Chamber of Commerce. These partnerships reflect our commitment to professionalism and accountability.

Need AC Maintenance in St. Petersburg, FL 33710?

If you’re in St. Petersburg, FL 33710 and want reliable AC maintenance, honest recommendations, and clear communication, our team at Home Therapist Cooling, Heating, and Plumbing is ready to help. Whether you’re already on an Elite Therapy Plan or you’re just starting to think about regular maintenance or replacement options, we’ll walk you through each step in plain language.

Schedule your next visit with us, make sure someone will be available to provide access, and we’ll take care of the rest—so your home stays comfortable, safe, and ready for whatever the Tampa Bay weather sends your way.

To learn more about how we can support your system throughout its life cycle, start with our AC service overview for Tampa Bay homeowners, then reach out when you’re ready to schedule service in St. Petersburg, FL 33710.

Water Heater and Plumbing Inspection in Tampa, FL 33647

When a homeowner in Tampa, FL 33647 scheduled a Premium Home Therapy Plan visit with us, their main goal was simple: understand the true condition of their water heater and plumbing before something went wrong. During this plumbing inspection, we took a close look at the existing water heater and shut-off valves throughout the home. We found an aging water heater nearing the end of its life and several plastic angle stop valves that could become leak risks in Florida’s heat and humidity. In the end, we recommended proactive replacement options to help prevent surprise water damage and keep hot water reliable for the long term.

Case Recap

  • Location: Single-family home in Tampa, FL 33647
  • Service: Premium Home Therapy Plan plumbing inspection
  • Main concerns: Aging water heater and overall plumbing health
  • Findings: Water heater at end of expected service life; seven plastic angle stop valves identified
  • Recommended solutions: Replace water heater and upgrade all plastic angle stops to quarter-turn metal valves
  • Outcome: Homeowner received a clear, no-pressure plan to prevent leaks and maintain dependable hot water

Customer Problem

For many homeowners in Tampa, FL 33647, plumbing issues don’t always show up as obvious leaks or loss of hot water. In this case, the homeowner enrolled in our Premium Home Therapy Plan and wanted peace of mind about their plumbing system. They wanted to know:

  • Is the water heater still safe and reliable?
  • Are there any hidden risks that could cause leaks or water damage?
  • What should be planned for now versus later?

They weren’t reporting an active leak or no-hot-water emergency. Instead, they were being proactive, which is something we always encourage for plumbing and HVAC service in Tampa. Our visit was scheduled as a firm time appointment, and the homeowner needed us to arrive within a specific window, so we made sure to respect that schedule and come prepared to complete a thorough but efficient inspection.

Because Tampa homes often deal with high humidity, heat, and sometimes variable water quality, plumbing components can age faster than expected. The homeowner wanted expert eyes on the system to avoid surprise breakdowns and costly damage down the road.

Inspection and Diagnosis

On this Premium Home Therapy Plan visit, our technician performed a focused plumbing inspection, with special attention on the water heater and shut-off valves around the home. For homeowners in Tampa, FL 33647, this type of checkup is one of the best ways to spot developing issues before they turn into emergencies.

Here’s what we evaluated and why:

  • Water heater age and condition: We visually inspected the tank, connections, and surrounding area for signs of rust, corrosion, staining, or moisture.
  • Safety and shut-off points: We checked accessible angle stop valves at fixtures such as sinks and toilets, paying attention to the material and condition of each valve.
  • General plumbing health: We looked for any visible leaks, corrosion on piping, or other red flags that might affect reliability.

During the inspection, we found that:

  • The water heater was significantly aged and approaching the end of its typical service life.
  • Due to age and condition, flushing the tank posed a real risk of stirring up internal sediment and potentially causing leaks.
  • There were seven plastic angle stop valves installed throughout the home, rather than more durable metal valves.

Because of what we saw, we made a careful decision not to flush the existing water heater. On older tanks, performing a flush can sometimes do more harm than good by disturbing long-settled sediment and exposing weak spots inside the tank. Instead, we documented the condition and shifted our focus to providing safe, long-term options.

Repair or Service Process

Even though we didn’t replace the water heater or valves on this visit, we treated the appointment like any other plumbing repair or plumbing inspection in Tampa: thoroughly investigate, clearly explain, and offer practical solutions.

1. Evaluating the aging water heater

First, we confirmed the water heater’s age and overall condition. On an older unit, the interior tank typically has corrosion and sediment buildup. That’s normal up to a point, but once a tank is beyond its expected life, the risk of leaks increases.

Because this particular water heater was significantly aged, we:

  • Checked for any active leaks or dampness around the base of the unit.
  • Looked for rust, corrosion, or deterioration on the tank shell and fittings.
  • Reviewed the installation area to make sure there were no immediate safety concerns.

After confirming the condition, we explained to the homeowner that proactively planning a water heater replacement in Tampa would be a smarter and safer choice than trying to squeeze a few more years out of this unit.

2. Making the call not to flush the tank

Flushing a water heater can be a great way to maintain a relatively new or mid-life tank. But with older units, especially those showing age-related wear, that same process can backfire.

In this Tampa home, we chose not to flush the water heater because:

  • Internal sediment was likely acting as a “patch” in weakened areas of the tank.
  • Disturbing that sediment can reveal thin spots or cracks, causing leaks.
  • The tank was already close to the end of its expected service life.

We explained to the homeowner that skipping the flush wasn’t neglect—it was a safety and risk-based decision. Instead of investing in maintenance on an aging tank, the better path is to budget for a full replacement and avoid potential water damage.

3. Inspecting plastic angle stop valves

Next, we turned our attention to the angle stop valves throughout the home. These are the small shut-off valves usually located under sinks, behind toilets, and at other fixtures. We identified seven plastic angle stop valves installed in different areas.

In Florida’s climate, these plastic valves can become brittle over time, especially in warm, enclosed spaces like under-sink cabinets. They are more prone to:

  • Cracking at the body of the valve
  • Splitting at the threads or connection points
  • Failing when you try to turn them during an emergency

We recommended replacing these with durable, quarter-turn metal valves. Quarter-turn valves are much more reliable, easier to operate, and less likely to fail suddenly. This is a straightforward upgrade, and we walked the homeowner through what that work would look like.

4. Laying out clear replacement options

One of our priorities for plumbing repair and upgrade recommendations for homeowners in Tampa is transparency. We avoid pressure tactics and instead provide clear, honest options.

For this Tampa, FL 33647 home, we recommended:

  • Water heater replacement: Install a new, code-compliant water heater and bring all connections up to current standards.
  • Angle stop upgrades: Replace all seven plastic angle stops with quarter-turn metal shut-off valves.

We also encouraged the homeowner to consider how this work could fit into their broader plumbing plans, such as future whole-home repiping in Tampa if the piping itself ever shows age-related issues, or improving water quality through water filtration installation if needed later on.

Why This Fix Works

Our recommendations were all about managing risk and improving reliability for this home in Tampa, FL 33647.

Water heater replacement: Managing age and corrosion

Most standard tank-style water heaters last around 8–12 years. As they age, the glass lining and internal metal surfaces break down. Sediment collects at the bottom and can trap heat, stressing the tank. Eventually, the metal thins out enough that it can leak or fail suddenly.

By planning a water heater replacement before that failure point, the homeowner can:

  • Reduce the risk of sudden leaks and water damage.
  • Ensure consistent hot water for daily use.
  • Take advantage of modern, more efficient equipment and updated installation standards.

And if they ever have questions about coverage, our water heater replacement warranty policy page explains how we stand behind our work.

Angle stop valve upgrades: Better control and fewer surprises

Angle stop valves give you a way to quickly shut off water to a single fixture without cutting water to the entire home. When those valves are plastic and aging, there’s always a chance they’ll crack or refuse to turn when you need them most.

Upgrading to quarter-turn metal valves provides:

  • Durability: Metal valves hold up much better over time, especially in Florida’s climate.
  • Ease of use: Quarter-turn operation makes it simple to shut off water quickly in an emergency.
  • Leak prevention: A more reliable seal reduces the risk of slow drips and sudden failures.

Together, a new water heater and upgraded valves give the homeowner more control, better safety, and fewer worries about surprise plumbing problems.

Pro Tips for Homeowners in Tampa

If you live in Tampa, FL 33647 or anywhere in the Tampa Bay area, here are some practical steps you can take to protect your plumbing system:

  • Check the age of your water heater: If it’s over 8–10 years old, start planning for replacement rather than waiting for a leak. A simple visual check of the label can tell you the manufacture date.
  • Look under sinks and behind toilets: See what kind of angle stop valves you have. If you notice plastic valves or valves that are hard to turn, consider upgrading them before you have an emergency.
  • Keep the area around your water heater clear: Give the unit some space so you can easily spot rust, moisture, or unusual smells. This is especially important in our humid Florida climate.
  • Schedule routine plumbing inspections: A yearly or biannual plumbing inspection can catch small issues early, much like this Premium Home Therapy visit did for our Tampa, FL 33647 homeowner.
  • Know where your main shut-off is: Every homeowner should know how to shut off water to the entire house. This knowledge can save you from major water damage if a pipe or valve fails.
  • Consider system-wide planning: If your home is older, talk with a licensed plumber about long-term options like plumbing repair in Hillsborough County or even whole-home repiping in Tampa when appropriate.

FAQ: Plumbing and Water Heater Questions From This Visit

How do I know if my water heater is too old?

The best indicator is the manufacture date on the water heater’s label. Most tank-style units last around 8–12 years. If your heater in Tampa, FL 33647 is beyond that range or showing signs of rust, corrosion, or inconsistent performance, it’s wise to plan for replacement instead of waiting for a failure.

Why didn’t you flush the old water heater?

On this visit, the water heater was significantly aged. Flushing an older tank can stir up sediment that’s been sitting for years and may be covering thin or weak spots inside the tank. Disturbing it can sometimes cause leaks. To avoid increasing that risk, we chose not to flush and instead recommended planning for a full replacement.

Are plastic angle stop valves really a problem?

Plastic angle stop valves are more prone to cracking and breaking over time, especially in Florida’s heat and humidity. When they fail, they can cause leaks or be difficult to shut off when you need them most. Metal, quarter-turn valves are more durable and offer better control in an emergency.

What is a quarter-turn shut-off valve?

A quarter-turn shut-off valve is a type of valve that opens and closes with just a 90-degree turn of the handle. This makes it easier to quickly shut off water to a single fixture. The design is generally more reliable and user-friendly than older multi-turn valves, which can seize up or leak.

Should I wait until the water heater leaks before replacing it?

We don’t recommend waiting for a leak. By the time a water heater leaks, it can already cause water damage to floors, walls, or nearby belongings. For homeowners in Tampa, FL 33647, planning a proactive replacement once the unit nears the end of its typical life span is usually more cost-effective and less stressful than dealing with an emergency.

Can I combine water heater replacement with other plumbing upgrades?

Yes. Many homeowners choose to combine a water heater replacement with other planned plumbing work, such as valve upgrades, fixture replacements, or even general plumbing repairs in Hillsborough County. This can be more efficient and minimize disruption to your home.

Why Choose Home Therapist for Plumbing in Tampa

At Home Therapist Cooling, Heating, and Plumbing, we approach every visit—whether it’s an emergency repair or a routine inspection—the same way: with professionalism, clear communication, and respect for your home.

Here’s what homeowners in Tampa, FL 33647 and across Tampa Bay can expect from us:

  • Licensed, professional technicians: Our plumbers and HVAC technicians are trained, licensed, and experienced in handling everything from water heater replacement to full plumbing repair across Hillsborough County.
  • Transparent communication: We explain what we find in plain English, discuss risks and options, and never pressure you into work you don’t need.
  • Clean, respectful work: We treat your home like our own, keep our work areas tidy, and respect your schedule and time windows.
  • Long-term reliability focus: Instead of just putting a bandage on a problem, we help you plan for long-term comfort and safety—like recommending water heater replacement before it fails.
  • Commitment to Tampa Bay homeowners: We’re a local company that understands Florida’s climate, water conditions, and construction styles, and we tailor our recommendations accordingly.

If you’d like to get a feel for who we are and how we work, you can connect with us on social media:

And if you’re looking for extra peace of mind, you can see how we’re represented by trusted directories and organizations:

Schedule Plumbing Service in Tampa, FL 33647

If you’re in Tampa, FL 33647 and you’re not sure how old your water heater is, or you’re concerned about the condition of your shut-off valves and plumbing, we’re here to help. Whether you need a focused inspection, are considering water heater replacement, or want to plan upgrades over time, our team will walk you through your options calmly and clearly.

Reach out to Home Therapist Cooling, Heating, and Plumbing to schedule your next plumbing visit in Tampa. We’ll evaluate your system, explain what we see, and help you choose the right path to protect your home and keep your hot water and plumbing running reliably.

Professional Ductwork Replacement in Tampa, FL 33617

When the duct system in a Tampa, FL 33617 home is outdated, leaking, or poorly designed, the air conditioner can struggle to keep up. Rooms feel uneven, the system runs longer than it should, and utility bills creep higher every month. On this project, our Home Therapist team was called out to provide pricing for a complete ductwork replacement using R6 flexible ducts and to walk the homeowner through what a full duct renovation really involves. After some careful planning, financing approval through a PACE program, and a limited-time February discount, we designed and installed a new duct system focused on comfort, efficiency, and cleaner air.

Case Recap

  • Location: Single-family home in Tampa, FL 33617
  • Service: Full ductwork replacement with R6 flexible ducting
  • Scope: New boots, grills, distribution boxes, and plenums as needed
  • Design: Custom duct layout to match the home and existing HVAC system
  • Extras: Old duct removal and haul-away included
  • Outcome: Quieter airflow, better distribution room-to-room, and a fresh start for the HVAC system

Customer Problem: Why This Home Needed New Ducts

The homeowner in Tampa reached out specifically looking for pricing on ductwork only. Like many homeowners, they were feeling the effects of an older duct system: inconsistent temperatures across the house, concerns about air quality, and frustration that the AC seemed to run hard without delivering the comfort they expected.

They weren’t asking for a new air conditioner — just a full duct replacement. That tells us a lot about what they were noticing day to day: the air coming out of the vents didn’t feel right, and any patchwork repairs done in the past likely hadn’t solved the bigger problem.

We walked them through a detailed duct replacement proposal that included:

  • New supply and return boots
  • New R6 flexible ducts sized for their system
  • New supply and return grills
  • New plenums and distribution boxes where needed
  • Removal and disposal of the old ductwork
  • Professional duct design tailored to the home

When we first reviewed the cost together, the homeowner was understandably surprised. Complete ductwork replacement is a major project — it affects the entire comfort system, not just one or two rooms. To support them, we looked at available discounts and financing options. With a special discount valid only in February 2026 and approval through a PACE program, the homeowner decided to move forward and invest in the long-term comfort of their Tampa, FL 33617 home.

Inspection and Diagnosis: Planning the Right Duct Solution

Before we ever pull old ducts out of an attic, we take time to plan carefully. On this home, our focus was on designing a duct system that would work with the existing equipment and the layout of the house, not just replacing old ducts with new ones in the same spots.

Our evaluation covered:

  • Existing supply and return locations — We confirmed where air was delivered and where it was pulled back to the air handler, and how well that matched the way the home was actually used.
  • Number and size of drops — This project included 11 supply drops, 5 return drops, and 1 plenum, so we needed to be sure the sizing and routing supported proper airflow.
  • Attic access and height — Attic height matters for both safety and labor. Part of our disclaimer on every duct project is that lower attic areas may change the price per drop due to the difficulty and time involved.
  • Condition of existing plenums and distribution boxes — Some can be reused if they are in good condition and properly sized, but others need replacement to ensure a tight, efficient system.

From there, our duct design team created a layout that balanced comfort and practicality. That included sizing and routing the flexible R6 ducts, planning for any new plenums or distribution boxes, and confirming how the new grills and boots would tie into the rooms below.

We also clarified some important expectations with the homeowner:

  • We do our best to protect furniture and belongings from dust and insulation, but working in attics and ceilings can still cause some debris.
  • In some cases, we may need to open small holes in the sheetrock to route ducts correctly. We always discuss that beforehand so the homeowner can decide how they want to proceed.
  • Our team does not patch or repair sheetrock. If access holes are needed, we leave them ready for a drywall professional to finish.

By setting these expectations clearly, we help homeowners in Tampa feel prepared and avoid surprises on installation day.

Repair and Service Process: How We Replaced the Duct System

Once the design, pricing, financing, and scheduling were finalized, we moved into the installation phase. For a full ductwork replacement in a Tampa, FL 33617 home, the process typically looks like this:

1. Preparing the Home and Work Areas

We always start by protecting the home as much as reasonably possible. For this project, that included:

  • Walking the homeowner through which rooms we’d be working in
  • Advising them to move or cover furniture below vents
  • Recommending they cover electronics, baby items, clothing, and food
  • Setting up drop cloths and protection where we would be entering and exiting the attic

Ductwork is physically demanding, especially in Florida attics. We ask that homeowners give our crew clear space to move and enough time to focus on doing the job safely and correctly.

2. Removing Old Ductwork

Next, we safely disconnected and removed the existing ducts, boots, and related materials. Proper removal matters — we don’t want old, leaky, or crushed duct sections left behind where they could interfere with the new layout.

As part of our scope, we hauled away the old ducts so the homeowner wasn’t left with a pile of debris. That’s one less thing for them to worry about once the work is complete.

3. Installing New Boots, Plenums, and Distribution Boxes

Once the old system was cleared, we installed new connection points where needed:

  • New boots at the ceiling openings to securely connect the ducts to the grills
  • New plenums if the existing ones weren’t in good condition or didn’t fit the new design
  • New distribution boxes to split airflow effectively to different rooms

These components act like the “junctions” in the air distribution system. If they’re poorly built or leaking, even the best duct material can’t perform properly.

4. Running New R6 Flexible Ducts

With the structural pieces in place, we installed new R6 flexible ducts according to the design. The homeowner chose a package that included:

  • Johns Manville formaldehyde-free fiberglass insulation inside the duct
  • GREENGUARD®-certified insulated products, which are tested for low chemical emissions
  • A Quietflex Rip Stop Silver Jacket with a metalized polyester vapor barrier and “rip-stop” reinforcement

In simple terms, these materials help the ducts hold up better in a Florida attic, where high heat and humidity are the norm.

Each of the 11 supply drops and 5 return drops was routed to minimize sharp bends and kinks, which can restrain airflow. We secured and supported the ducts properly to prevent sagging over time.

5. Installing New Grills and Final Connections

After the attic work, we moved inside to install new grills and confirm that each boot and duct connection was tight. This step is about both function and appearance: good grills can improve airflow pattern in a room and give a cleaner, updated look to the ceilings.

6. Clean-Up and Final Checks

At the end of the workday, our crew cleaned up debris, old duct materials, and any mess created during the installation. While working in an attic can always let some dust or insulation fall, we’re committed to leaving the home as tidy as the scope of work allows.

We then:

  • Visually inspected all duct connections
  • Confirmed airflow through each new supply and return
  • Verified that the system was operating as expected with the new ducts

Because this project was completed with PACE financing and required inspection, we also ensured that the inspection-related documentation, including site photos, would be completed before closing out the job.

Why This Ductwork Fix Works

For homeowners in Tampa, the duct system is just as important as the air conditioner itself. You can have a perfectly good AC unit, but if the ducts are undersized, leaking, or poorly designed, you’ll still be uncomfortable.

This full duct replacement works because it addresses the core issues:

  • Airflow balance: Properly sized and routed ducts help each room receive the right amount of conditioned air.
  • Reduced leakage: New, tightly connected ducts mean less cold air lost into the attic and more air delivered to the living spaces.
  • Improved insulation: R6 insulated ducts with a reinforced outer jacket help reduce temperature gain in hot attics, so the air coming out of the vents stays closer to the temperature the system is producing.
  • Cleaner air path: Replacing old, damaged, or contaminated ductwork gives the home a fresh air distribution pathway, which can support better indoor air quality when combined with good filtration and maintenance.

Over time, this kind of upgrade can support better comfort, more consistent room temperatures, and more efficient HVAC operation for a Tampa, FL 33617 home.

Pro Tips for Homeowners in Tampa

If you’re considering ductwork replacement or you’re just trying to get the most from your existing system in Tampa, here are a few practical tips:

  • Pay attention to hot and cold spots. If some rooms are always uncomfortable, it may be a duct design or airflow issue, not just the thermostat setting.
  • Check your vents and returns regularly. Make sure furniture, rugs, or curtains aren’t blocking grills. Blocked vents can throw off the balance of the entire system.
  • Stay on top of filter changes. In Florida’s humid, high-pollen environment, a dirty filter can quickly reduce airflow and stress both the ducts and the equipment.
  • Have your ducts inspected if they’re older. If your home has original ductwork and has been through renovations or additions, it’s worth a professional look to see if the design still fits how the home is used.
  • Consider related upgrades. When ducts are being replaced, it can be a good time to talk about options like air duct sanitizing, enhanced air filtration, or indoor air quality solutions to make the most of the new system.
  • Ask about insulation. In some Tampa Bay homes, pairing duct upgrades with better attic insulation, such as blown-in insulation, can further improve comfort and efficiency.

FAQ: Ductwork Replacement for Tampa, FL 33617 Homes

Do I need to replace my ducts if my AC still runs?

Not always, but if you have uneven temperatures, weak airflow, or very old ductwork, replacement can sometimes deliver more comfort improvement than just changing equipment. In this Tampa, FL 33617 home, the focus was on the ducts because that’s where the biggest opportunity for improvement was.

Will my home be very dusty during duct replacement?

Any time we’re working in an attic and opening vents, some dust or insulation can fall. We do our best to cover critical areas and clean at the end of each workday. We also recommend that homeowners move or cover furniture underneath vents and protect sensitive items like electronics, baby items, clothing, and food ahead of time.

Can you patch the sheetrock if you have to open holes?

No. As we explain before the job starts, we may need to open holes in the sheetrock to route new ducts correctly, especially in tight or complex spaces. We will always inform you before doing so and proceed only with your approval, but we do not perform drywall repairs. Most homeowners bring in a drywall professional afterward for finishing.

What kind of warranty comes with new ductwork?

For this project, we provided a 1-year parts and labor warranty from The AC Therapist/Home Therapist. That warranty does not cover damage caused by rodents, people, or similar issues that crush, tear, or cut the ducts. It also does not cover the ducts getting dirty inside from lack of maintenance. We review the warranty terms with each homeowner so there are no surprises.

Does attic height affect the price?

Yes, attic height can affect the difficulty and time required to install each duct drop. For example, there are price differences when working in attics between 4 feet and 3 feet, and even more when space is under 3 feet. Very low attics may be turned down depending on safety and duct design feasibility. We always explain these details ahead of time so homeowners understand how attic conditions influence the project.

Can ductwork replacement be financed?

In many cases, yes. On this Tampa, FL 33617 project, we helped the homeowner explore financing options and move forward using a PACE program, which also required an inspection. While available options can change over time, our office can review current financing choices with you and help you find a path that fits your budget.

Why Choose Home Therapist for Ductwork Replacement

When you invite our team into your Tampa home, you’re trusting us with your comfort, your safety, and your living space. We take that seriously.

Here’s what you can expect when you choose Home Therapist for ductwork replacement and related HVAC services in Tampa, FL 33617:

  • Licensed, professional technicians: Our techs are trained to handle full-system duct replacements, inspections, and documentation for programs like PACE.
  • Transparent communication: From the initial estimate to attic height considerations, possible sheetrock access, and financing, we explain each step in clear language.
  • Clean, respectful work: We protect your home as best we can, clean up each day, and treat your property with respect.
  • Long-term reliability focus: We don’t just swap parts. We look at the whole system design and how it will serve you for years, not just today.
  • Commitment to Tampa Bay homeowners: Our company is rooted in the Tampa Bay area, and we’re here for ongoing support, maintenance, and upgrades as your home’s needs evolve.

If you’d like to see more of our work and how we interact with customers, you can visit us on social media:

And if you’re looking for additional peace of mind, you can check our standing with trusted organizations:

Need Ductwork Replacement in Tampa, FL 33617?

If your home in Tampa, FL 33617 has inconsistent temperatures, noisy vents, or ductwork that’s seen better days, a professional duct evaluation is a smart next step. Our Home Therapist team can inspect your current system, explain your options in plain language, and design a solution that fits your home and budget.

Whether you need a full ductwork replacement, targeted air duct repairs, or a complete comfort plan that includes ductwork replacement in Tampa and AC installation, we’re here to help. Reach out to schedule your visit, and we’ll take the time to make sure your home’s comfort system is set up to serve you well for Florida’s heat and humidity.

Water Heater Replacement and Piping Upgrades in Largo, FL 33770

When your hot water runs out too quickly, daily life in a Largo, FL 33770 home gets inconvenient fast. Showers get cut short, dishes don’t feel fully clean, and laundry becomes a chore you have to plan around. That’s what this homeowner was dealing with when they reached out to our team at Home Therapist Cooling, Heating, and Plumbing for help with their electric water heater.

Our licensed plumbing technician Alejandro visited the home, evaluated the existing water heater, and took a close look at the surrounding piping. We found more than just an undersized tank — the shutoff valve was in poor condition, and the connections on top of the heater had a mix of push-to-connect fittings and tape that weren’t ideal for a long-term, professional installation. We recommended a new Rheem 40-gallon electric water heater along with upgraded pipe connections and a new shutoff valve. The result: safer piping, more reliable hot water, and a system better suited to the family’s needs.

Case Recap

  • Location: Single-family home in Largo, FL 33770
  • Concern: Hot water not lasting long enough and visible issues with water heater piping
  • Findings: Aging water heater, deteriorated shutoff valve, and mixed, non-ideal fittings above the tank
  • Solutions: New Rheem 40-gallon electric water heater plus professional pipe reconfiguration and valve replacement
  • Extras: Labor specifically allocated to fix and replace water heater pipe connections
  • Outcome: More dependable hot water and a cleaner, safer plumbing layout around the heater

Customer Problem: Not Enough Hot Water and Questionable Piping

This homeowner in Largo, FL was already on our radar: in 2024 we had provided an estimate for a water heater replacement. That proposal lived in an older account, so when they called back ready to move forward, we recreated the estimate using the same details and updated photos. In the meantime, their hot water frustrations hadn’t gone away.

The key concerns were:

  • Hot water not lasting long enough for normal household use
  • Desire for a water heater with better capacity and performance
  • Visible issues with the pipe connections and valve above the heater

On inspection, we found that the shutoff valve for the water heater was in poor condition. Above the heater, some of the connections used push-to-connect (“shark bite”-style) fittings and others had Teflon tape in ways that told us the piping had been pieced together over time. While these products can have a place, they’re not a substitute for a well-planned, fully professional pipe layout—especially on a critical appliance like a water heater.

The homeowner also mentioned that the existing water heater simply wasn’t keeping up. The hot water would run out too quickly, which is especially frustrating in a busy household in a humid Florida climate where showers are a daily must.

Inspection and Diagnosis

Our first step was a careful, low-disruption inspection. We always start by listening, then verifying. In this Largo, FL 33770 home, Alejandro walked through the past history, including the earlier estimate, and then confirmed the current conditions on site.

Here’s what we focused on during the inspection:

  • Water heater condition: Age, visible wear, signs of past leaks, and overall setup, including the existing tank’s size and electrical configuration.
  • Piping layout: How the cold water feeds the tank, how hot water leaves the tank, and how the shutoff valve and fittings are arranged.
  • Shutoff valve health: The main valve serving the water heater was in bad shape, which can be a problem in an emergency or any time you need to service the heater.
  • Connection quality: The presence of shark-bite style fittings and taped joints on top of the heater told us the system had been patched rather than properly laid out.
  • Household hot water use: How many people live in the home, how they use hot water, and when they notice it running out.

From this, we confirmed two things: the current water heater was not ideal for the home’s needs, and the supporting plumbing work around it needed a professional upgrade to ensure safety, reliability, and easier service in the future.

Repair and Service Process

Once the homeowner approved our recommendations, we moved forward with a complete solution: a new Rheem 40-gallon, 4500-watt electric water heater and upgraded piping around the unit. The specific model noted on the estimate was a medium-size tank rated at 40 gallons, suitable for typical residential use.

Here’s how we approached the work, step by step:

1. Safely Shutting Down and Preparing the Area

We started by turning off power to the existing electric water heater at the breaker panel and closing the water supply feeding the tank. Safety comes first, so we always verify the power is off before touching any wiring. We also protected the surrounding area to keep the workspace clean, which is especially important in tight indoor utility spaces that many Largo homes have.

2. Draining and Removing the Old Water Heater

Next, we drained the old tank using the drain valve and a hose to a safe discharge location. Once empty, the old heater was disconnected from the electrical and plumbing connections and removed from its pan. This step gives us the opportunity to look for any moisture issues or past leaks around the base that might not be obvious when the tank is in place.

3. Upgrading the Piping and Shutoff Valve

With the old heater out of the way, we focused on what the homeowner couldn’t easily see: the health and design of the piping.

Our labor on this project specifically included:

  • Replacing the failing shutoff valve: We removed the old, deteriorated valve and installed a new, professional-grade shutoff so the water heater can be isolated quickly and safely when needed.
  • Removing shark-bite style and improvised fittings: We took out push-to-connect fittings and tape-heavy joints that were not ideal for a permanent installation.
  • Reconfiguring the pipe layout: We adjusted the hot and cold lines to create a cleaner, more direct, and properly supported route above the heater.

Each of these steps improves long-term reliability. It’s not just about making it “look nice” — it’s about reducing potential leak points and making future service easier and safer.

4. Installing the New Rheem 40-Gallon Electric Water Heater

We then set the new Rheem tank in place. The estimate called for a 40-gallon, 4500-watt, medium-size (approximately 48 1/2″ high by 20 1/4″ diameter) electric unit. Rheem is a solid, well-known brand in our area, and this capacity is a good fit for many homes in Largo, FL.

As part of the installation, we included key materials and accessories:

  • Hot water line insulation to help reduce heat loss in the first run of piping leaving the tank.
  • Service valve for proper isolation and future maintenance.
  • Drain pan under the heater to help manage any future leaks or overflows.
  • Proper discharge line for the temperature and pressure relief valve, routed to a safe termination point.

We connected the new heater to the reworked piping and tied it back into the home’s electrical circuit, following manufacturer guidelines and standard best practices for electric water heaters.

5. Testing, Bleeding Air, and Verifying Operation

After the plumbing and electrical work were complete, we reopened the water supply and carefully bled air from the hot water lines. Once the tank was full and all connections were verified dry, we restored power at the breaker.

We then allowed the tank to heat and checked for:

  • Secure, leak-free pipe connections
  • Proper operation of the new shutoff and service valves
  • Normal heating behavior at the water heater

We verified proper operation after the installation and confirmed that hot water was being delivered as expected at the fixtures. Before leaving, we walked the homeowner through basic operation and what to watch for, and we reviewed their warranty details—6 years on parts from the manufacturer and 2 years on labor from Home Therapist, as outlined on the estimate.

Why This Fix Works for Largo, FL Homes

In a warm, humid climate like Largo and the greater Tampa Bay area, water heaters see year-round use. A properly sized and professionally installed electric tank brings together three key elements: capacity, safety, and reliability.

Here’s why this solution made sense:

  • Capacity: A 40-gallon electric water heater is a solid fit for many typical households, balancing recovery time with the amount of stored hot water.
  • Consistent temperature: Electric elements, when correctly sized and wired, provide steady, predictable water temperatures for showers, laundry, and dishwashing.
  • Safe, stable piping: Replacing improvised fittings and a failing shutoff valve reduces the risk of leaks and makes it easier to service or shut down the heater when needed.
  • Modern accessories: Proper insulation, a drain pan, and a correctly routed discharge line help protect the home and improve efficiency.

By addressing both the appliance and the supporting plumbing, we helped this Largo, FL 33770 homeowner enjoy more dependable hot water and a cleaner, safer mechanical area.

Pro Tips for Homeowners in Largo

If you live in Largo, FL or nearby Pinellas County, here are some practical tips to keep your electric water heater running smoothly:

  • Look at the shutoff valve once in a while. Make sure the valve above your water heater isn’t corroded, leaking, or stuck. If it looks questionable, have a professional check it before there’s an emergency.
  • Pay attention to hot water “run out.” If you notice showers getting shorter or the water going lukewarm faster than it used to, that can be an early sign the heater is undersized for your current household needs or that it’s starting to struggle.
  • Keep the area around the heater clear. In many Largo homes, water heaters are in closets or garages. Give the heater some breathing room and avoid stacking items around it, especially flammable materials.
  • Consider annual maintenance. Flushing sediment, checking the anode rod, and inspecting valves and connections can extend the life of your heater. Our water heater maintenance services are designed to help with exactly that.
  • Don’t ignore small drips. A tiny drip at the top of the tank, around fittings, or from the T&P discharge line can turn into a bigger problem if left alone. A quick visit from a licensed plumber can save you from water damage down the road.
  • Ask about your options before it fails. If your heater is getting older or your family’s hot water use has changed, it’s better to look at replacement options now rather than waiting for a complete failure. Our water heater installation services walk you through those choices.

FAQ: Water Heater Replacement and Piping Upgrades

How did you know the piping above the water heater needed to be changed?

We look for the overall quality and consistency of the pipe layout. In this Largo, FL 33770 home, the shutoff valve was in poor condition and the connections above the heater used a mix of push-to-connect fittings and taped joints that suggested a patchwork history. That’s a sign it’s time to upgrade to more permanent, professional connections.

Why not just replace the water heater and leave the old valve and fittings?

We could have swapped the tank only, but that would leave known weak points in place. A failing valve or improvised fittings can cause leaks and make future service more difficult. Upgrading the piping while replacing the heater is usually the most sensible, long-term solution.

Is a 40-gallon electric water heater enough for my home?

It depends on how many people live in your home and how you use hot water. For many Largo-area households, 40 gallons is a good fit. During an in-home visit, we discuss your usage and can recommend whether 40 gallons is appropriate or if you should consider a different size or style.

What kind of warranties come with a water heater like this?

In this project, the estimate included a 6-year parts warranty from the manufacturer and a 2-year labor warranty from our team. Warranty terms can vary by model and installation, so we always review the specific coverage with you. You can also read more about our approach in our water heater replacement warranty policy.

Can you help if I’m in another part of Pinellas County?

Yes. We serve homeowners across the Tampa Bay area, including many cities in Pinellas County. If you’re nearby and dealing with similar hot water or piping issues, our plumbing repair services in Pinellas County can help with water heaters, leaks, and other plumbing concerns.

Why Choose Home Therapist for Water Heater Work

When you invite us into your home in Largo, FL or anywhere in Tampa Bay, you’re trusting us with your comfort and safety. We take that seriously.

Here’s what you can expect from Home Therapist Cooling, Heating, and Plumbing:

  • Licensed, professional technicians: Our plumbers are trained, licensed, and experienced with electric water heaters, piping upgrades, and whole-home plumbing systems.
  • Transparent communication: We explain what we see, what we recommend, and why. For this homeowner, that meant reviewing the past estimate, updating it, and clearly outlining the separate labor for correcting the pipe connections.
  • Clean, respectful work: We protect the work area, remove old equipment and debris, and leave the space as tidy as possible when we’re done.
  • Long-term reliability: We’re not just there to “swap a tank and run.” We look at the whole installation, including valves and piping, to help reduce future problems.
  • Commitment to Tampa Bay homeowners: We live and work here too, serving communities like Largo, Clearwater, Pinellas Park, and the broader Tampa Bay region.

If you’d like to get a feel for who we are, you can connect with us on social media:

And if you prefer to check credentials and reviews, you can find us on these trusted platforms:

Need Water Heater Help in Largo, FL 33770?

If your hot water doesn’t last, your shutoff valve looks questionable, or the piping above your heater doesn’t give you confidence, we’re here to help. Our team at Home Therapist Cooling, Heating, and Plumbing can assess your system, walk you through repair and replacement options, and complete the work with the same careful approach we used on this project in Largo, FL 33770.

Whether you’re ready for a full water heater replacement or just want a professional evaluation of your existing system, reach out to schedule service. We’ll take the time to explain what we find and help you choose the solution that keeps your home comfortable and your hot water dependable.

Premium AC Maintenance Plan Visit in Pinellas Park, FL 33782

For homeowners in Pinellas Park, FL 33782, reliable air conditioning isn’t a luxury—it’s what keeps everyday life comfortable in our Florida heat and humidity. During this Premium Home Therapy Plan visit, our technician performed preventative AC maintenance on two systems and the shared drain line so the home would be ready for the next stretch of warm weather.

Because the homeowner wasn’t available and the thermostat wasn’t accessible, we couldn’t turn the systems on to verify operation during this visit. Even so, we were still able to complete important cleaning and visual checks, and we documented clear next steps for the following maintenance to keep everything on track.

Case Recap: AC Maintenance Visit in Pinellas Park, FL 33782

  • Location: Single-family home in Pinellas Park, FL 33782
  • Service: Premium Home Therapy Plan maintenance visit (#4 in the plan)
  • Work performed: Cleaning of two AC units and the condensate drain line
  • Limitation: Thermostat not accessible, so system operation could not be tested this visit
  • Next visit focus: Thoroughly check electrical consumption and system pressures
  • Goal: Maintain comfort, prevent breakdowns, and extend system life for this Pinellas Park home

Customer Problem: Keeping AC Reliable Without Being Home

This homeowner is on our Premium Home Therapy Plan, which means we visit on a regular schedule to keep their AC equipment clean and running as efficiently as possible. For this particular appointment in Pinellas Park, FL 33782, the homeowner could not be present but still wanted to stay on track with the maintenance plan.

They arranged safe access for our technician through the garage so we could reach the air handlers in the attic. However, without the homeowner home, the thermostat inside the living space was not available. That meant we could not power on the system, adjust settings, or observe the units running from inside the home.

Even though we could not perform a full operational test this time, skipping a scheduled maintenance visit in Florida’s climate is never ideal. Dust, biological growth, and drain issues can build up quickly in Pinellas County homes, especially with our humidity and long cooling season. The homeowner’s main concern was simple: keep the equipment cleaned and maintained so it’s ready when they need it most.

Inspection and Diagnosis: What We Could Safely Check

Our technician entered through the garage as instructed and accessed the attic where both indoor units are located. From there, we focused on the parts of the maintenance that can be completed even when the thermostat and indoor controls are out of reach.

During this visit in Pinellas Park, we:

  • Visually inspected both air handlers and accessible components for obvious signs of damage or leaks.
  • Checked the condition of the drain line and trap for signs of buildup or restriction.
  • Verified that panels and access doors were in place and secure after cleaning.

Because we did not have control of the thermostat, we did not attempt to force the system on or bypass normal controls. We also did not perform electrical consumption tests or pressure checks, as those require the units to be running and accessible readings from the full system.

Instead, we focused on the maintenance tasks that have a major impact on reliability and water-related issues: keeping coils, cabinets, and the condensate drain line clean and clear.

Repair and Service Process: Step-by-Step Maintenance Work

Even without a full operational check, there’s a lot of meaningful work that can be done during a maintenance visit. Here’s how we approached this Premium Home Therapy Plan appointment for our Pinellas Park, FL 33782 homeowner.

1. Safe Access to the Attic Units

Following the homeowner’s instructions, our technician entered through the garage, then used the interior access to reach the attic where the air handlers are located. Whenever we’re in an attic, we move carefully, protect the home’s structure, and keep our work area as clean as possible.

2. Visual Inspection of Both Systems

We began with a visual inspection of both units, looking for:

  • Signs of water around the drain pan or drain line
  • Loose or missing panels
  • Obvious wiring issues in accessible areas
  • Excessive dust buildup on accessible surfaces

This step helps us catch anything that looks abnormal before we start cleaning or disturbing components.

3. Cleaning Both Indoor Units

The technician then cleaned both units as part of the Premium Home Therapy Plan. While specifics like coil type and exact layout vary by system, the goals are the same:

  • Remove dust and debris from accessible areas that can restrict airflow.
  • Wipe down and clean surfaces that tend to collect dirt and moisture.
  • Help reduce strain on the blower and keep air moving smoothly through the system.

In Pinellas Park’s humid climate, keeping the indoor unit clean is a key part of preserving efficiency and comfort throughout the year.

4. Condensate Drain Line Cleaning

We also cleaned the condensate drain line that carries water away from the air handlers. Over time, algae, dirt, and other buildup can form inside that line, especially in Florida where AC systems run frequently and produce a lot of condensation.

Cleaning the line helps reduce the risk of:

  • Water backing up into the drain pan
  • Ceiling or wall damage from overflows, especially with attic units
  • Float switch trips that shut the system down to prevent water damage

With attic units in a Pinellas Park home, a clean and clear drain line is just as important for protecting the home as it is for protecting the equipment.

5. Confirming the System Was Left Safe and Secure

After cleaning, we ensured all panels and access doors were properly closed and secured. We also confirmed that nothing was left in the attic that could interfere with the system or create a safety concern. Since we could not turn the system on, there were no changes made to thermostat settings or homeowner preferences.

6. Planning for the Next Maintenance Visit

Because we couldn’t confirm system performance during this appointment, we documented clear priorities for the next scheduled visit:

  • Thoroughly check electrical consumption of the systems while running.
  • Measure system pressures to confirm proper refrigerant-side performance.
  • Verify overall operation, including temperature split and general behavior, once we have access to the thermostat.

We noted these items so that during the next Premium Home Therapy Plan maintenance in Pinellas Park, FL 33782, we can focus on the performance side after having already taken care of this round of cleaning.

Why This Maintenance Matters for Your AC System

Preventative maintenance is about more than just checking if your AC turns on. Cleaning and visual inspection, especially for attic units in Pinellas Park, are critical for three main reasons: airflow, drainage, and system stress.

Airflow

Dust and debris restrict airflow over the indoor coil and through the blower. When the system is dirty, it has to work harder to move the same amount of air, which can lead to higher energy use and more wear on components. By keeping surfaces clean, we help the system move air more freely and reduce unnecessary strain.

Drainage

Every time your AC runs, it pulls moisture out of the air. That moisture has to go somewhere, and in our climate, that “somewhere” is almost constantly the condensate drain line. If that line clogs, water can back up into the pan and potentially overflow. Cleaning the line helps keep water moving out of the home where it belongs.

System Stress and Longevity

Clean systems typically run cooler and under less stress. That doesn’t guarantee a system will never have issues, but it does stack the odds in your favor. For homeowners in Pinellas Park, FL 33782, keeping up with a plan like our Therapy Maintenance Plans is one of the best ways to catch small problems early and support a longer, more reliable life for your AC equipment.

Pro Tips for Homeowners in Pinellas Park

Based on what we see every day in Pinellas County and around Tampa Bay, here are some practical tips to help you get the most from your AC system:

  • Stay consistent with maintenance. With our long cooling season, once-a-year tune-ups often aren’t enough. A structured plan, like the Premium Home Therapy Plan, helps keep your AC ready for heavy use.
  • Make sure we can access the thermostat. If you can’t be home for a visit, consider leaving temporary access to the thermostat or making remote access available. That way, we can fully test operation after cleaning.
  • Keep supply and return vents clear. Avoid blocking vents with furniture or rugs. Good airflow helps your system cool more evenly and reduces strain.
  • Change or clean filters regularly. In Pinellas Park’s humidity and dust, filters can load up faster than you expect. Ask us about proper filter change intervals during your next AC maintenance visit.
  • Pay attention to water around the air handler. If you ever see moisture around your indoor unit or notice a musty smell near the attic access, it’s worth scheduling a check before it becomes a bigger issue.
  • Know who to call when something changes. Unusual noises, new odors, or changes in comfort are all good reasons to call a licensed HVAC technician serving Pinellas Park, FL 33782.

FAQ: AC Maintenance Visits for Pinellas Park Homeowners

Do I need to be home for my AC maintenance appointment?

You don’t always have to be home, as this visit in Pinellas Park, FL 33782 shows. We can often access the equipment through the garage or exterior entrances if arrangements are made in advance. However, if we can’t reach the thermostat or indoor controls, we may be limited to cleaning and visual checks and won’t be able to fully test system operation.

What can be done if you can’t turn the system on?

When we can’t power the system on, we focus on what we can safely complete: cleaning the units, clearing the drain line, and visually checking for obvious issues. Then we document specific performance checks—like electrical consumption and pressures—for the next visit when the thermostat and system controls are accessible.

Why is drain line cleaning so important for attic units?

For homes in Pinellas Park and across Tampa Bay, many air handlers are in the attic. If the condensate drain line clogs, water can back up and overflow into the ceiling or walls. Regular drain line cleaning helps prevent water damage and system shutdowns caused by float switches.

What happens during a Premium Home Therapy Plan visit?

Each Premium Home Therapy Plan visit focuses on preventative care for your system. That typically includes cleaning key components, clearing the drain line, checking for visible issues, and—when we can access the thermostat—testing system operation and performance. In this case, we completed the cleaning and visual work and scheduled more detailed electrical and pressure checks for the next visit.

How often should I schedule AC maintenance in Pinellas Park?

In Florida’s climate, we recommend regular maintenance rather than waiting for a problem. Our maintenance plans are designed around our local weather and usage patterns, so your system is checked and cleaned on a schedule that makes sense for Pinellas Park homeowners.

What if you find a problem during a maintenance visit?

If we spot something that needs attention during a maintenance visit, we’ll explain what we found in clear terms and review repair options with you. Our goal is always transparency and helping you make an informed decision that fits your home and budget.

Why Choose Home Therapist for AC Maintenance in Pinellas Park

When you invite us to care for your AC system in Pinellas Park, FL 33782, you’re trusting us with both your comfort and your home. We take that seriously.

  • Licensed, professional technicians: Our team is trained and licensed to work on HVAC systems throughout Tampa Bay, including Pinellas Park.
  • Transparent communication: If we’re limited by access—like not being able to reach the thermostat—we document that clearly and outline exactly what will be done on the next visit.
  • Clean, respectful work: Whether we’re in your attic or near your living spaces, we treat your home carefully and leave the work area as we found it.
  • Long-term reliability focus: Our Therapy Maintenance Plans are built to support long-term system health, not just quick checkups.
  • Committed to Tampa Bay homeowners: We live and work here, serving communities across the region, including Pinellas Park and surrounding areas.

If you’d like to see more of how we work and connect with us day to day, you can visit us on social media:

And if you’re looking for additional peace of mind, you can check out our profiles on trusted directories and local organizations:

Need AC Maintenance in Pinellas Park, FL 33782?

If you’re in Pinellas Park, FL 33782 and want your AC systems to be cleaned, checked, and cared for on a proper schedule, we’re here to help. Whether you’re home during the visit or need us to work while you’re away, we’ll clearly explain what we can safely do and what needs to be handled during the next appointment.

Learn more about our AC maintenance services and Therapy Maintenance Plans, or explore all of our HVAC and plumbing services for Tampa Bay homeowners. When you’re ready, our local team will be glad to schedule your next maintenance visit and keep your home comfortable, season after season.

Premium AC Maintenance Plan Service in Gibsonton, FL 33534

For homeowners in Gibsonton, FL 33534, staying ahead of AC problems is one of the best ways to stay comfortable in our hot, humid climate. On this visit, we stopped by a home in Gibsonton to perform a scheduled Premium Therapy Plan maintenance on a system our team installed last year. The goal was simple: give the system a thorough checkup, clean everything properly, and make sure it’s still running exactly the way it should.

During this visit, we completed a full system inspection, verified that operating pressures and electrical consumption were within normal parameters, and cleaned both the indoor and outdoor units, including the rear line. By the time we wrapped up, the system was operating smoothly with no issues and ready for another season of Florida heat.

Case Recap

  • Service type: Scheduled Premium Therapy Plan AC maintenance visit
  • Location: Single-family home in Gibsonton, FL 33534
  • System history: Installed by our Home Therapist team about a year ago
  • Work performed: Full inspection, performance check, and detailed cleaning of both units and rear line
  • Findings: All components operating correctly with normal pressures and compressor consumption
  • Outcome: System left clean, efficient, and running without any issues

Customer Problem: Staying Ahead of Issues in Gibsonton Heat

This visit wasn’t driven by an emergency breakdown. Instead, the homeowner in Gibsonton scheduled this appointment as part of their Premium Therapy Plan to keep their AC in top shape and avoid surprise failures when the weather is at its worst.

In our Tampa Bay and Gibsonton, FL 33534 area, systems run hard for much of the year. Even a relatively new system—like this one, installed last year—can start to lose efficiency if it isn’t cleaned and checked regularly. Dust, pollen, and debris can build up on coils, drains can begin to restrict, and a system that looks fine from the thermostat can quietly drift out of its ideal operating range.

The homeowner’s main goals were:

  • Keep the system running efficiently and reliably through long cooling seasons
  • Catch any small problems before they turn into expensive breakdowns
  • Protect their investment in a relatively new AC system

Because this visit was part of the Premium Therapy Plan, we followed a structured maintenance process designed specifically for Florida homes and our local conditions.

Inspection and Diagnosis: Verifying Healthy Operation

Even when a system is cooling well, we don’t assume everything is fine just because it “feels” okay inside the home. On this Premium Therapy Plan visit in Gibsonton, FL 33534, we started with a full visual and functional inspection of the equipment.

Here’s what we focused on during the inspection:

  • System age and installation quality: Since our team installed this system last year, we already knew its history and layout. We still visually checked mounting, supports, line set routing, and clearances.
  • Electrical components: We inspected wiring connections, contactor condition, and general electrical integrity to ensure nothing was loose, worn, or showing signs of overheating.
  • Compressor performance: We confirmed that the compressor’s power consumption was within normal parameters for this system and operating conditions.
  • Refrigerant-side operation: We checked operating pressures and compared them to expected normal ranges for a healthy system under current load.
  • Airflow and cleanliness: We inspected indoor and outdoor coils, blower area, and surrounding spaces for dirt buildup, blockages, or debris that could restrict airflow.
  • Condensate and rear line: We checked the rear line and overall condensate path to confirm there were no obvious restrictions or signs of improper drainage.

After going through these checks, we confirmed that the system was operating correctly. Pressures were in normal range, the compressor was drawing power within expected limits, and there were no obvious mechanical or electrical issues. With the operational side in good shape, we moved on to detailed cleaning as part of the maintenance service.

Repair and Service Process: Detailed Cleaning and Preventive Care

For a Premium Therapy Plan visit like this, our work in Gibsonton, FL 33534 focused on preventive care and cleaning rather than reactive repair. Even with normal readings, cleaning is critical for keeping the system efficient and extending its life.

Here’s how we approached the service:

1. Cleaning the Outdoor Unit

The outdoor unit is constantly exposed to Florida’s weather—heat, humidity, grass clippings, dust, and storm debris. Over time, this can clog the fins and force the system to work harder to release heat.

We carefully cleaned the outdoor unit to remove buildup from the coil and cabinet area. This helps maintain proper heat transfer, reduce strain on the compressor, and support efficient operation during the hottest days in Gibsonton.

2. Cleaning the Indoor Unit

On the indoor side, we focused on keeping the system’s air path as clean and unrestricted as possible. Dust and organic material can collect on the evaporator coil, blower, and surrounding components, leading to reduced airflow, uneven cooling, and potential air quality concerns.

Our technician cleaned the indoor unit, paying attention to areas where buildup often appears. Clean indoor components support:

  • Better airflow through the coil
  • More consistent temperatures room-to-room
  • Reduced strain on the blower motor

3. Rear Line and Drain Path Check

We also cleaned the rear line and confirmed that water could move freely. In our humid Florida climate, a restricted drain can quickly become a serious problem—leading to leaks, ceiling damage, or system shutdowns.

By cleaning and inspecting this area during a scheduled maintenance visit, we help reduce the risk of unexpected water damage and nuisance service calls later.

4. Final Operational Check

After cleaning and reassembling everything, we performed a final operational check. We verified that the system cycled on and off correctly, listened for unusual sounds, and confirmed that it continued to operate within normal parameters.

When we left the home in Gibsonton, FL 33534, the AC system was clean, running smoothly, and ready to handle the ongoing demands of our local climate.

Why This Preventive Maintenance Works

The work we performed during this Premium Therapy Plan visit may not look as dramatic as replacing a failed part, but from a technical perspective, it’s just as important. Here’s why this type of maintenance is so effective for homeowners in Gibsonton and across Tampa Bay.

Airflow and Heat Transfer

Your AC system’s job is to move heat from inside your home to the outside. It does this by:

  • Pulling warm indoor air across the cold evaporator coil
  • Moving that heat outside to the condenser coil
  • Releasing the heat into the outdoor air

When coils and fins are dirty, airflow drops and heat transfer becomes less efficient. The system then needs to run longer cycles to achieve the same comfort, using more energy and putting more hours on the equipment.

Compressor and Component Protection

The compressor is one of the most expensive components in your AC system. Keeping pressures and power consumption within normal ranges helps protect it from unnecessary stress. Regular checks, like we performed on this Gibsonton, FL 33534 home, are designed to catch unusual readings early—before they turn into major failures.

Condensate Management in Humid Florida

In our part of Florida, the AC pulls a lot of moisture out of the air. That water needs a clear, reliable path to drain away from your home. Cleaning the rear line and drain path helps prevent clogs that can cause leaks or shut the system down at the worst possible time.

By combining cleaning, inspection, and performance checks into a single visit, the Premium Therapy Plan helps keep systems like this one-year-old unit in Gibsonton running efficiently and reliably year after year.

Pro Tips for Homeowners in Gibsonton

Whether you’re on a maintenance plan or not, here are some practical steps homeowners in Gibsonton, FL 33534 can take to support their AC system between professional visits:

  • Change or clean filters regularly: In our humid, dusty climate, many homes benefit from checking filters monthly and replacing them as needed. A clean filter supports good airflow and helps your system breathe easier.
  • Keep outdoor units clear: Trim vegetation back and avoid stacking items around your outdoor unit. Aim for at least a couple of feet of clearance on all sides so air can move freely through the coil.
  • Watch for changes in comfort: If you notice rooms staying warmer, longer run times, or unusual noises, that’s a good reason to schedule a check even if the system is still cooling.
  • Use your thermostat wisely: Avoid frequent large temperature swings. In Gibsonton’s climate, a steady, reasonable setpoint is often more comfortable and easier on your system than constant adjustments.
  • Schedule annual professional maintenance: Even newer systems, like the one at this home, benefit from a yearly inspection and cleaning. Plans like our Premium Therapy Plan make it easier to stay on schedule.

If you’d like a broader overview of how we approach regular AC care, you can explore our AC repairs, installs, and maintenance services overview or review the different AC maintenance options we offer for Tampa Bay homeowners.

FAQ: Premium AC Maintenance for Gibsonton Homeowners

How often should I schedule AC maintenance in Gibsonton, FL 33534?

For most homes in Gibsonton and the greater Tampa Bay area, we recommend professional AC maintenance at least once a year. With our long cooling season and high humidity, many homeowners benefit from a structured plan like our Premium Therapy Plan to keep things consistent.

My system is only a year old. Do I really need a maintenance plan?

Yes. Even newer systems collect dust, debris, and biological growth on coils and in drain lines, especially in Florida. Regular maintenance—like the visit we performed at this Gibsonton home—helps keep efficiency high, protects your warranty in many cases, and can extend the life of the equipment.

What do you actually check during a Premium Therapy Plan visit?

On a Premium Therapy Plan visit, we perform a full visual and operational inspection, verify that components are operating correctly, check that pressures and compressor consumption are within normal parameters, and clean key parts of the system. We wrap up with a final test to confirm the system is running as expected.

Will maintenance help lower my energy bills?

While we don’t promise specific savings amounts, a clean, properly maintained system doesn’t have to work as hard to cool your home. That typically means more efficient operation compared to a neglected system, which can help control energy use over time.

What happens if you find a problem during a maintenance visit?

If we find anything concerning during a visit—such as unusual wear, out-of-range readings, or failing components—we explain our findings clearly, go over your options, and provide recommendations before moving forward with any repairs. Our goal is transparent communication so you can make informed decisions.

Why Choose Home Therapist for AC Maintenance in Gibsonton

When you invite us into your home in Gibsonton, FL 33534, you’re trusting us with your comfort. We take that seriously on every visit, whether it’s a new installation, a repair, or a routine Premium Therapy Plan checkup like this one.

Here’s what you can expect from our team:

  • Licensed, professional technicians: Our technicians are trained, licensed, and experienced with the types of systems commonly found in Tampa Bay homes.
  • Clear, honest communication: We explain what we’re doing, what we find, and what your options are—without pressure or confusing jargon.
  • Clean, respectful work habits: We treat your home with care, work neatly, and leave our work area as clean as we found it.
  • Focus on long-term reliability: Our goal is not just to get your system running today, but to help it run better and last longer.
  • Commitment to Tampa Bay homeowners: We’re a local company serving communities like Gibsonton and the rest of Tampa Bay, and we stand behind the work we do.

If you’d like to see more of what we’re up to, you can connect with us on social media. Visit us on Facebook, follow our updates on Instagram, or check out short tips and job highlights on TikTok.

For added peace of mind, you can also review our standing with trusted organizations. We’re listed with the Better Business Bureau and included in the Tampa Bay Chamber of Commerce, reflecting our ongoing commitment to professionalism and service.

To learn more about how we structure AC care for our customers, you can also read about our AC maintenance and cleaning specials in Tampa Bay and see how they might fit your home’s needs.

Schedule Your AC Maintenance in Gibsonton, FL 33534

If you live in Gibsonton, FL 33534 and want your AC system to run as reliably as the one in this case, a consistent maintenance plan is one of the best steps you can take. Whether your system is brand new or has been working for years, we’re here to inspect it carefully, clean it thoroughly, and help you avoid surprise breakdowns.

When you’re ready, reach out to our local Tampa Bay team to schedule an AC maintenance visit in Gibsonton. We’ll treat your home with respect, communicate clearly, and make sure your system is running the way it should—so you can stay comfortable through every season.

Tub Spout and Shower Diverter Repair in Tampa, FL 33611

When a tub spout or shower diverter stops working correctly, it quickly becomes more than a small annoyance. For a homeowner in Tampa, FL 33611, two showers were no longer behaving the way they should. Water wasn’t flowing where it needed to, and everyday routines were getting frustrating.

Our plumbing technician Adalberto visited the home to perform a level 1 tub spout and diverter repair. The goal was simple: diagnose why the diverter and tub spout weren’t operating properly, adjust both showers, and restore reliable, comfortable use without unnecessary parts or guesswork.

Below, we’ll walk through what the homeowner was experiencing, how we approached the inspection, the repair steps we took, and how we confirmed that both showers were back to working as expected. If you’re dealing with similar issues in Tampa, FL 33611 or anywhere in Tampa Bay, this breakdown will help you understand what’s going on behind the wall and what a professional repair actually looks like.

Case Recap

  • Location: Single-family home in Tampa, FL 33611
  • Service: Level 1 tub spout and shower diverter repair
  • Scope: Adjust and restore proper operation for two separate showers
  • Focus: Labor-only repair, with parts only used if truly necessary
  • Outcome: Both showers adjusted, water redirected correctly, and fixtures operating as intended

Customer Problem

By the time we were called out, the homeowner in Tampa, FL 33611 was dealing with daily frustration in the bathroom. The problems centered around two showers:

On one or both showers, the tub spout and diverter were no longer doing their job correctly. Common symptoms we see in situations like this include:

  • Water continuing to pour from the tub spout even when the diverter is pulled to send water to the showerhead
  • Weak or inconsistent water flow from the showerhead
  • Difficulty engaging or disengaging the diverter
  • Water not switching properly between tub and shower modes

While every home is a little different, these issues usually come down to wear and tear in the diverter mechanism, alignment problems inside the spout or valve, or build-up that keeps moving parts from sealing the way they should. The homeowner wasn’t looking for a full remodel—just for both showers to work the way they did when the home was newer.

Because this was listed as a labor-only visit, our job was to evaluate the condition of the existing fixtures, make precise adjustments, and only recommend parts or replacements if they were truly needed for a safe and reliable repair.

Inspection and Diagnosis

When we arrive at a plumbing repair in Tampa, especially in bathroom fixtures, we start with a calm, systematic inspection. For these two showers, our technician Adalberto moved through a focused diagnostic checklist to understand exactly what was going wrong.

Key steps in the inspection included:

  • Visual check of the tub spouts and diverters: Looking for visible damage, corrosion, looseness, or signs of previous temporary fixes.
  • Operational testing: Turning on the water in both tub and shower modes, engaging and disengaging the diverter several times to see how the water behaved.
  • Flow behavior: Watching how much water was still coming from the tub spout when the diverter was activated, and whether the showerhead was getting adequate flow.
  • Fixture stability: Checking if the tub spout was solidly mounted to the wall or if there was movement that might affect sealing or alignment.
  • Listening for internal issues: Sometimes, grinding, rattling, or hissing can hint at deeper problems with the valve or supply lines.

On a level 1 repair like this, we focus on the most likely and accessible issues first—things that can often be corrected through proper adjustment, cleaning, and tightening. If a diverter is badly worn, cracked, or beyond adjustment, we’ll communicate clearly with the homeowner about replacing that component.

After running each shower through these tests, it was clear that adjustment and fine-tuning were the right starting point. There were no signs of major leaks into the wall or other red flags that would require opening up the tile or doing extensive repiping work. That allowed us to move forward with an efficient labor-focused repair.

Repair and Service Process

Once we confirmed that the problem was centered on the diverter function and tub spout behavior, we moved into the repair phase. The work here focused on careful adjustment and making sure each piece was doing its job correctly.

Our process included steps such as:

1. Securing and Adjusting the Tub Spout Assemblies

A loose or slightly misaligned tub spout can keep the diverter from sealing properly. On each shower, we checked how the spout was mounted and made adjustments to ensure it was snug and correctly positioned. Proper alignment helps water flow smoothly and allows the internal diverter components to close more effectively when you switch to shower mode.

2. Inspecting and Adjusting the Diverter Mechanism

Next, we focused on the diverter itself. Depending on the exact style of tub spout and diverter setup, this can involve:

  • Cleaning internal surfaces to help the diverter seal better
  • Checking for debris or mineral buildup that might keep parts from moving freely
  • Realigning pieces that may have shifted over time

These adjustments can make a big difference in directing more water to the showerhead when the diverter is engaged.

3. Balancing Flow Between Tub and Shower Modes

On both showers, we cycled between tub and shower modes several times, adjusting as needed to reduce the amount of water that continued to leak from the tub spout once the diverter was pulled. The goal isn’t always 100% shutoff—most tub spouts will still allow a small amount of water to pass—but the majority of the flow should be redirected up to the showerhead.

4. Confirming Comfort and Usability for the Homeowner

Once the mechanical adjustments were complete, we turned our attention to the user experience:

  • Ensuring the diverter lever or knob moved smoothly without sticking
  • Checking that the showerhead flow was strong and consistent
  • Verifying that switching back to tub mode returned water fully to the spout

For a plumbing repair in Tampa homes, especially in high-use areas like showers, everyday comfort is just as important as the technical fix. We want the homeowner to feel a clear difference the first time they step back into the shower.

5. Final System Check

Before wrapping up, we performed a final test on both showers. We verified proper operation after our adjustments and made sure there were no visible leaks, drips behind the fixtures, or unusual behavior. With everything operating as expected, we cleaned up the work area and walked the homeowner through what we had done.

Why This Fix Works

Shower diverters and tub spouts do a simple but important job: they control where your water goes. When you turn on the faucet, water naturally flows out of the tub spout because it’s the path of least resistance. When you pull the diverter, you’re essentially blocking that path and forcing water up to the showerhead instead.

Over time, a few things can interfere with this process:

  • Wear on internal seals and moving parts: This can prevent a tight seal and allow water to leak past the diverter.
  • Mineral buildup: Hard water deposits can limit movement or keep surfaces from sealing smoothly.
  • Loose or misaligned fixtures: If the tub spout isn’t firmly positioned, water can escape where it shouldn’t instead of being redirected.

By carefully adjusting the tub spout and diverter assemblies, we restore that proper pathway for the water. The majority of the flow heads up to the showerhead when the diverter is engaged, and then fully returns to the tub spout when it’s released.

This kind of repair is especially effective when the fixture is structurally sound but just not performing well anymore. Instead of jumping straight to replacement, a professional can often extend the life of your existing fixtures with precise, labor-focused adjustments.

Pro Tips for Homeowners in Tampa

For homeowners in Tampa, FL 33611 and throughout Tampa Bay, our climate and water conditions can have a real impact on bathroom fixtures. Here are a few practical tips to help keep your tub spouts, diverters, and showers working smoothly:

  • Operate the diverter gently: Avoid slamming or forcing the diverter lever or knob. Smooth, controlled movement helps protect internal parts and reduces wear.
  • Run the tub for a few seconds after a shower: After using the shower, briefly switch back to tub mode and let water run. This can help flush out the spout and minimize mineral buildup.
  • Watch for early warning signs: If you notice more water than usual still coming from the tub spout in shower mode, or the showerhead flow feels weaker, that’s a good time to have it checked before it gets worse.
  • Address hard water buildup: Tampa Bay’s water can leave deposits over time. Regular cleaning of showerheads and visible fixtures helps reduce buildup that can affect flow and operation.
  • Have a professional inspect older bathrooms: If your home is older or you’ve had multiple small plumbing issues, a professional inspection can help identify whether a simple adjustment will do or if a larger update, such as whole-home repiping, might be worth considering down the line.

If you ever feel unsure about taking something apart, it’s usually safer to call a licensed plumber rather than risk damaging the valve or causing a hidden leak inside the wall.

Related Plumbing Services for Tampa Bay Homeowners

Bathroom fixture issues often show up alongside other plumbing concerns, especially in older or heavily used homes. Along with tub spout and diverter work, our team at Home Therapist Cooling, Heating, and Plumbing helps Tampa Bay homeowners with a wide range of plumbing services.

For example, if you’re noticing frequent leaks, low water pressure, or aging pipes in addition to shower problems, you may benefit from exploring our whole-home repiping services in Tampa. For homes dealing with water quality concerns, our water filtration installation services can help improve both taste and fixture health.

Even if you’re outside Tampa itself, our team supports many nearby communities. Homeowners looking for reliable plumbing repair in Brandon or broader HVAC and plumbing services across Hillsborough County can count on the same level of care and clear communication that we brought to this shower repair in Tampa, FL 33611.

FAQ: Tub Spout and Diverter Repairs

Why is water still coming from my tub spout when the shower is on?

This usually means the diverter isn’t sealing as well as it should. Wear, debris, mineral buildup, or alignment issues inside the tub spout can all cause water to keep flowing out of the spout instead of being fully redirected to the showerhead. A professional inspection can determine whether an adjustment is enough or if a replacement part is needed.

Can a tub spout and diverter issue be fixed without replacing the whole faucet?

In many cases, yes. As with this home in Tampa, FL 33611, careful adjustment and cleaning can often restore proper operation. If the internal parts are badly worn, cracked, or corroded, we may recommend replacement, but we always explain your options before moving forward.

Is it safe to keep using the shower if the diverter isn’t working right?

Most of the time, a malfunctioning diverter is more of a comfort and convenience issue than a safety hazard. However, if you see signs of leaks behind the wall, water stains, or feel unusual temperature swings, it’s important to have it checked. We can evaluate the system and confirm that everything is operating safely.

How long does a typical tub spout or diverter repair take?

For a straightforward, level 1 repair like this one, most tub spout or diverter adjustments can be completed in a single visit. The exact time depends on the condition of your existing fixtures and whether parts need to be sourced or replaced.

What should I tell the technician when I schedule service?

It helps to describe exactly what you’re seeing: for example, whether water is still coming from the tub spout in shower mode, if the diverter is hard to pull, or if one shower is worse than the other. Mentioning that you’re in Tampa, FL 33611 or elsewhere in Tampa Bay also helps us schedule you efficiently and confirm which technician is closest.

Why Tampa Bay Homeowners Choose Home Therapist

When you invite a technician into your home, you want to know the work will be done professionally, respectfully, and with your long-term comfort in mind. That’s how we approach every plumbing repair in Tampa and the surrounding communities.

Here’s what you can expect when you work with Home Therapist Cooling, Heating, and Plumbing:

  • Licensed, professional technicians: Our team is trained, experienced, and qualified to work on your home’s plumbing and HVAC systems safely and correctly.
  • Transparent communication: We explain what we find, what we recommend, and why—before we move ahead with any repair.
  • Clean, respectful work: We treat your bathroom and your home like our own, keeping the workspace neat and cleaning up when we’re finished.
  • Focus on long-term reliability: We don’t look for quick, temporary fixes. We aim for repairs that help your system run reliably and comfortably over time.
  • Commitment to Tampa Bay homeowners: We live and work in this community, and we’re proud to support homeowners across Tampa, FL 33611 and the greater Tampa Bay area.

If you’d like to get a feel for who we are and how we serve local homeowners, you can connect with us on social media. Visit us on Facebook, follow our updates and project highlights on Instagram, or check out more content on TikTok.

For added peace of mind, you can also review our standing with trusted local and national organizations. Take a look at our profile with the Better Business Bureau, or see our listing with the Tampa Bay Chamber of Commerce to learn more about our commitment to the community.

Need Tub or Shower Help in Tampa, FL 33611?

If your tub spout or shower diverter isn’t working the way it should, you don’t have to just live with it. A simple, professional repair can often restore proper operation and make daily routines more comfortable again.

Home Therapist Cooling, Heating, and Plumbing is here to help homeowners in Tampa, FL 33611 and throughout Tampa Bay with dependable, clear, and respectful service. Whether you need a quick adjustment on a single shower or want a broader plumbing check-up, we’ll walk you through your options and take care of the details.

When you’re ready, reach out to schedule your tub spout and shower diverter repair. We’ll send a local technician who understands Tampa homes, Tampa water, and Tampa weather—and who’s focused on making your bathroom feel comfortable and reliable again.

Premium HVAC Maintenance Service in Wimauma, FL 33598

During a recent Premium Home Therapy Plan visit in Wimauma, FL 33598, our Home Therapist tech team was called out to perform scheduled maintenance on two HVAC systems in the same home. Both systems are around 10 years old, so this visit was an important checkup to keep them running reliably in our hot, humid Florida climate.

On this visit, we fully inspected and tested both systems, verified that key components were operating within normal ranges, and completed a thorough cleaning of the indoor and outdoor units and drain lines. We also discovered a developing issue with the low-voltage control wiring on one of the systems and documented it so the homeowner can address it before it becomes a costly breakdown.

Below is a walkthrough of what we found, what we did, and what we recommend for other homeowners in Wimauma, FL 33598 who want their AC systems to stay dependable year-round.

Case Recap

  • Location: Single-family home in Wimauma, FL 33598
  • Service: Premium Home Therapy Plan visit on two HVAC systems
  • Systems: Both approximately 10 years old
  • Key work performed: Full inspection, electrical and refrigerant checks, indoor/outdoor cleaning, and drain line flushing
  • Finding: Damaged insulation on low-voltage control wire for System #2, with exposed sections documented
  • Next step: Estimate to repair low-voltage cable to prevent possible future failures

Customer Problem

This homeowner in Wimauma is enrolled in our Premium Home Therapy Plan, which means we come out on a regular schedule to clean, inspect, and test their equipment before problems show up as breakdowns. On this particular visit, the homeowner was not reporting a specific failure. Instead, their focus was on staying ahead of issues, especially with two older systems that work hard through long Florida cooling seasons.

With systems around the 10-year mark, a few concerns naturally come up:

  • Will the systems continue to cool properly through the hottest months?
  • Are there any hidden electrical or refrigerant issues starting to develop?
  • Is the equipment being kept clean enough to maintain efficiency and airflow?
  • Are there any safety or reliability concerns that could cause sudden outages?

Our visit in Wimauma, FL 33598 was all about answering those questions clearly and giving the homeowner confidence that their systems are safe, clean, and operating as they should be.

Inspection and Diagnosis

Because this was a scheduled Premium Maintenance Service, we approached the visit with a full-system mindset. Rather than just giving things a quick look, we followed a structured process for each of the two HVAC systems.

Here is what we focused on and why:

Electrical components

We checked the blower motor, compressor, and condenser fan for proper electrical consumption. Our goal was to confirm that each component was operating within normal ranges for the system and not drawing more power than it should, which can be an early sign of wear or internal damage.

All of these components on both systems were found to be operating within normal ranges during this visit.

Refrigerant operation

Next, we verified refrigerant pressures on both systems. Proper refrigerant levels are critical for cooling performance and compressor safety. Too low or too high can lead to inefficient operation or long-term damage.

On this visit, refrigerant pressures on both systems were checked and verified to be operating properly.

UV light systems

Each system is equipped with a UV light. These are typically installed to help reduce microbial growth on coils and within the air handling unit. We confirmed that both UV lights were functioning correctly. That’s especially beneficial in the humid climate around Wimauma, where moisture can encourage mold and mildew on indoor components.

Indoor and outdoor cleaning

Dirt and debris are the enemies of efficiency. We carefully cleaned both indoor and outdoor units for each system. That includes areas around the coils and cabinet surfaces where buildup can restrict airflow or create hot spots on electrical components.

We also flushed and cleaned the condensate drain lines. In Florida, clogged drains are a very common source of water leaks and AC shutdowns. By clearing the lines, we reduce the chance of water backing up and tripping a safety switch or causing water damage.

Low-voltage wiring inspection on System #2

During our inspection of System #2, we noticed something that could easily be overlooked in a quick visit: the low-voltage control wire running to the condenser had multiple sections where the insulation was damaged and the low-voltage conductors were exposed.

This doesn’t always cause an immediate failure, but it is a risk. Exposed low-voltage wires can touch each other, the equipment frame, or other components and create a short. Depending on how and where that short happens, it could damage important parts such as:

  • Contactor
  • Transformer
  • Thermostat
  • Control fuse
  • Control board
  • Other related low-voltage components

We documented this condition clearly in the report so the homeowner knows exactly what we found and why it matters. We then prepared an estimate to repair the low-voltage cable to prevent future issues.

Repair or Service Process

Because this was a maintenance visit in Wimauma, FL 33598 rather than a repair call, our work centered on thorough cleaning, inspection, and documenting any developing issues. Here is how we handled the visit step by step.

1. System startup and initial checks

We started each system and listened for abnormal noises or unusual operation. This helps us catch problems like noisy bearings, fan issues, or compressor struggles early. Both systems started and ran as expected at the beginning of our visit.

2. Electrical and refrigerant measurements

We checked the blower motor, compressor, and condenser fan electrical consumption and verified that each was operating within normal ranges. We also checked refrigerant pressures on both units to confirm proper operation.

These checks help protect the compressor and ensure the systems are not running under unnecessary strain, which is especially important as equipment ages past 10 years.

3. UV light confirmation

We visually confirmed that the UV lights on both systems were functioning. When these lights are working properly, they help keep coils and interior surfaces cleaner over time, which supports better airflow and indoor air quality.

4. Cleaning indoor and outdoor units

We cleaned the indoor air handlers and the outdoor condensers for both systems. Removing dirt, leaves, and debris from these components helps maintain proper heat transfer and airflow.

For homeowners in Wimauma and the surrounding Tampa Bay area, outdoor units are constantly exposed to dust, pollen, grass clippings, and other debris. Regular cleaning like this is one of the best ways to keep the system efficient and reduce wear.

5. Flushing and cleaning drain lines

We flushed and cleaned the condensate drain lines for both systems. This step is critical in Florida homes, where air conditioners run for long hours and produce a lot of condensation.

Keeping the drain line clear helps prevent water backups, leaks near the air handler, and emergency shutdowns caused by float switches. It’s a small task that prevents big headaches.

6. Documenting the low-voltage wiring issue on System #2

Rather than ignoring the damaged insulation on the low-voltage control wire, we took the time to carefully inspect the entire length, identify the affected sections, and document what we found.

We then noted the potential risks of a shorted low-voltage circuit, including possible damage to the contactor, transformer, thermostat, fuse, or control board. The condition and our recommendations were clearly written in the report, and we advised that an estimate would be provided for a proper low-voltage cable repair.

By handling it this way, the homeowner gets full transparency and has the information needed to make a proactive decision—before a short causes a no-cool situation on a hot Wimauma afternoon.

Why This Fix and Maintenance Approach Works

For HVAC systems in Wimauma, FL 33598 and across Tampa Bay, reliability comes down to a few core principles: good airflow, proper refrigeration, clean drainage, and safe electrical control. This visit addressed all four.

Airflow and cleanliness

Clean indoor and outdoor units help maintain strong airflow and efficient heat exchange. Dirt and debris act like a blanket around coils and fan blades, forcing the system to work harder to move the same amount of heat. That leads to higher energy bills and shorter equipment life. Regular cleaning directly protects comfort and efficiency.

Refrigerant and compressor protection

Verifying that refrigerant pressures are operating properly helps shield the compressor from running under harmful conditions. When pressures are off, the compressor can overheat or struggle to pump effectively. By confirming proper operation, we reduce the chance of surprise compressor failures, which are some of the most expensive repairs on an older system.

Drainage and water protection

Flushing condensate drain lines keeps water moving away from the air handler the way it should. In our humid Florida climate, plugged drains are a leading cause of water issues around HVAC equipment. Keeping those lines clear is a simple, effective way to prevent leaks and nuisance shutdowns.

Electrical safety and control reliability

The damaged insulation on the low-voltage control wiring for System #2 is a great example of a quiet issue that can suddenly become a big problem. Low-voltage circuits are the “communication lines” that tell the system when to turn on and off. Exposed wiring can cause shorts that knock out key components or bring the system to a halt.

By identifying the problem early and planning a proper cable repair, we help the homeowner avoid surprise costs and downtime. That’s the real value of a maintenance-focused visit: not just cleaning the system, but catching developing issues before they turn into emergencies.

Pro Tips for Homeowners in Wimauma

If you live in Wimauma or nearby Tampa Bay communities, here are some simple ways to keep your HVAC systems healthier between professional maintenance visits:

  • Change filters regularly. In our dusty, humid climate, filters can clog quickly. Check your filter monthly and replace it as needed. If you’re unsure about the right type of filter, our team can help or you can explore our air filter services.
  • Keep outdoor units clear. Trim plants and bushes back from the condenser and keep at least a couple of feet of space around it. Avoid stacking items or leaning objects against the unit so air can flow freely.
  • Watch for signs of drain issues. If you notice water near the air handler, damp spots on ceilings, or a musty smell around the unit, it could be a drain line problem. Early attention can prevent water damage.
  • Schedule annual professional maintenance. Especially once systems reach 8–10 years old, regular maintenance is key. A professional technician can catch developing problems like the low-voltage wiring issue we found in this Wimauma home.
  • Consider duct and indoor air quality services. Over time, dust and debris in your ductwork can affect both comfort and cleanliness. Our team offers air duct cleaning and other services to support better airflow and indoor air quality throughout Tampa Bay.
  • Protect your home from lint and heat buildup. While not part of this particular visit, keeping your dryer vent clean is also important for safety and efficiency. Our dryer vent cleaning service is another way we help Tampa Bay homeowners stay safe and comfortable.

FAQ: Maintenance Visit in Wimauma, FL 33598

Why do I need maintenance if my AC is still cooling?

Maintenance is about prevention. In this Wimauma home, both systems were cooling, but we still found damaged low-voltage wire insulation that could eventually cause a short and system failure. Regular checkups catch issues like that before they become breakdowns or expensive repairs.

Is low-voltage wiring damage really that serious?

It can be. Exposed low-voltage wiring may cause short circuits that damage parts like the contactor, transformer, thermostat, or control board. You might not see a problem until the wire finally shorts out, often on a hot day when the system is running hardest. Repairing the wiring before that happens is usually far less expensive than replacing multiple controls.

How often should I have maintenance done in the Wimauma area?

For homes in Wimauma and greater Tampa Bay, we strongly recommend at least once-a-year professional HVAC maintenance, and in many cases twice a year (cooling and heating seasons). Our Premium Home Therapy Plan is designed to keep systems in good shape despite the long cooling season and high humidity.

What’s included in a Premium Home Therapy Plan visit?

A Premium Home Therapy Plan visit typically includes a full inspection, electrical and refrigerant checks, system cleaning, drain line flushing, and documentation of any developing issues. The goal is to keep your system safe, efficient, and reliable—not just for today, but for the long term.

Will you tell me if you find something that needs attention later?

Yes. Just like with the low-voltage control wire on System #2 in this Wimauma, FL 33598 home, we document anything we see that could cause future trouble and go over it with you. We’ll provide options and, when appropriate, a written estimate so you can make an informed decision without pressure.

Why Choose Home Therapist for Your HVAC in Tampa Bay

When you invite Home Therapist into your home, you’re getting more than a quick tune-up. You’re getting a licensed, professional technician who treats your equipment with the same care we would in our own homes.

Here’s what sets us apart for homeowners in Wimauma, FL 33598 and throughout Tampa Bay:

  • Licensed and professional technicians. Our team is trained to handle everything from routine maintenance to complex diagnostics, always with safety and reliability in mind.
  • Transparent communication. We explain what we find in plain language, document issues like damaged wiring, and talk through your options before any repair work is done.
  • Clean and respectful work. We treat your home with care, keep our work areas tidy, and respect your time and schedule.
  • Long-term reliability focus. Maintenance visits are structured to extend equipment life, improve comfort, and reduce surprise breakdowns—not just to “check a box.”
  • Commitment to Tampa Bay homeowners. We’re a local team serving communities across Hillsborough and surrounding counties, with services tailored to our Florida climate and home types. You can learn more about our work in the region on our Hillsborough County service page.

If you’d like to get a feel for who we are and how we serve families across Tampa Bay, you can connect with us on social media:

We’re also proud to be listed with respected local and national organizations, reflecting our ongoing commitment to professionalism and customer trust:

Need HVAC Maintenance in Wimauma, FL 33598?

If you’re a homeowner in Wimauma, FL 33598 and you want your AC systems to be as reliable as possible through our long Florida cooling season, we’re here to help. Whether you have multiple older systems like this home or a single newer unit, a structured maintenance visit can make a big difference in comfort, efficiency, and peace of mind.

Reach out to Home Therapist to schedule a maintenance visit or learn more about our Premium Home Therapy Plan. We’ll inspect, clean, and test your system, clearly explain anything we find, and help you make the best decisions for your home and budget—without pressure and without surprises.

Your comfort is our priority, and we’re proud to serve Wimauma and the greater Tampa Bay community with honest, professional HVAC care.

Premium HVAC Maintenance Service in Wimauma, FL 33598

When you live in Wimauma, FL 33598, your air conditioning systems don’t get much of a break. That’s why keeping up with professional maintenance is one of the best ways to stay comfortable and avoid surprise breakdowns. On this visit, our Home Therapist technician performed a Premium Home Therapy Plan maintenance on two HVAC systems for a homeowner in Wimauma. Both systems are around 10 years old, so this visit focused on thorough inspection, deep cleaning, and catching any developing issues before they turned into bigger problems.

During the visit, we verified that both systems were operating within normal ranges, cleaned the indoor and outdoor equipment, flushed the drain lines, and confirmed the UV lights were working properly. We also documented a developing safety concern with the low-voltage control wiring going to one of the condensers and recommended a repair before it causes damage to any of the control components.

Case Recap

  • Location: Homeowner in Wimauma, FL 33598 with two HVAC systems (about 10 years old).
  • Service: Premium Home Therapy Plan maintenance on both systems.
  • Findings: Electrical consumption and refrigerant pressures operating within expected ranges.
  • Work completed: Full cleaning of indoor and outdoor units, drain line flushing, and UV light operation confirmed.
  • Issue discovered: Damaged insulation on the low-voltage control wiring for System #2’s condenser, exposing the conductors.
  • Next step: Estimate provided for low-voltage cable repair to prevent future shorts and component failures.

Customer Problem: Keeping Two Older Systems Reliable in Wimauma

In our Tampa Bay climate, a 10-year-old HVAC system has already put in a lot of work. For this homeowner in Wimauma, the priority was simple: keep both systems running reliably through the Florida heat and humidity, and avoid being stuck without cooling at the worst possible time.

They’re enrolled in our Premium Home Therapy Plan, which means we return on a regular schedule to perform detailed maintenance, catch early warning signs, and keep the systems as efficient and dependable as possible. Going into this visit, there wasn’t a specific breakdown or no-cool emergency. Instead, the concern was long-term comfort and protection of the investment they’ve made in their equipment.

Because both systems are around a decade old, we approach each visit with a focus on:

  • Verifying that major components are still operating as expected.
  • Keeping coils and drain lines clean so the systems can move air and remove moisture properly.
  • Checking electrical and control wiring for wear that could lead to sudden failures.
  • Confirming UV lights are working to help keep indoor components cleaner.

That’s exactly what we did during this Premium maintenance visit in Wimauma, FL 33598.

Inspection and Diagnosis: What We Checked and Why

With two systems of similar age, we treated each one as its own patient. Our technician started by performing a visual and functional inspection on both the indoor and outdoor units.

Here’s how we approached the inspection and diagnostic checks:

Mechanical and Electrical Components

We inspected the blower motors, compressors, and condenser fan motors on both systems. For each component, we checked electrical consumption to confirm it was within normal ranges for those motors and compressors. This helps us identify motors that are struggling or drawing abnormal current, which can be an early sign of failure.

We also looked over electrical connections and controls for signs of overheating, corrosion, or loose terminals. Stable electrical connections are critical for reliable operation, especially in a humid area like Wimauma.

Refrigerant Pressures and Cooling Performance

Next, we verified the refrigerant pressures on both systems and confirmed they were operating properly. We do this to make sure the system has enough refrigerant and that it’s circulating and absorbing heat the way it should. While we don’t list specific numbers in this report, both systems were functioning as expected during our tests.

Proper refrigerant levels and pressures affect:

  • How effectively the system cools your home.
  • How efficiently it runs (which impacts your electric bill).
  • How much stress is placed on the compressor long term.

UV Lights and Indoor Air Components

Each system in this Wimauma home is equipped with a UV light. During maintenance, we confirm that the UV lights are operating correctly. These lights are installed to help inhibit microbial growth on internal components such as the indoor coil and drain pan, which can support cleaner coils and better indoor air quality when used as part of an overall maintenance plan.

Low-Voltage Wiring Issue on System #2

The most important finding of the visit was related to the control wiring on System #2. While inspecting the condenser outside, we traced the low-voltage control cable that carries the thermostat signal to the outdoor unit.

We found multiple sections where the insulation on this low-voltage wire was damaged and the conductors were exposed. This doesn’t immediately stop the system from running, but it does create a risk:

  • Exposed low-voltage wires can touch each other or metal surfaces and cause a short.
  • A short in the control circuit can damage components like the contactor, transformer, thermostat, fuse, or control board.
  • Depending on how severe the short is, it can lead to intermittent problems or a complete loss of cooling.

Our goal during a maintenance visit in Wimauma, FL 33598 is not just to say, “It runs today,” but to identify issues like this that could take the system down in the middle of a hot afternoon if they’re left unaddressed.

Repair and Service Process: What We Did on This Visit

This visit was scheduled as a Premium maintenance rather than a repair call. That means our work was focused on tune-up and preventive care, plus documenting any developing issues for the homeowner.

1. Full System Inspection

We began with a complete inspection of both HVAC systems, inside and out. This included:

  • Checking blower assemblies and indoor components.
  • Inspecting outdoor condensers, fan motors, and cabinets.
  • Reviewing electrical connections and controls.
  • Looking for any visible signs of wear, corrosion, or damage.

This step is the foundation of good HVAC maintenance. It tells us what’s working well, what’s aging, and what might need attention soon.

2. Verifying Electrical Consumption

We tested the blower motors, compressors, and condenser fan motors on both systems and confirmed that their electrical consumption was within normal operating ranges at the time of service. This helps us ensure the motors are not overloaded or struggling, which is key for long-term reliability and energy efficiency for homeowners in Wimauma.

3. Confirming Refrigerant Pressures

We checked the refrigerant pressures on both systems and verified that they were operating properly. This confirms that the systems are currently capable of delivering the cooling performance they were designed for. If we had seen any concerning readings, we would have recommended further diagnostics or repairs, but that was not necessary on this visit.

4. Cleaning Indoor and Outdoor Units

Both indoor and outdoor units were cleaned as part of the Premium maintenance. Clean equipment can move air more freely and transfer heat more efficiently. For Tampa Bay and Wimauma homes, where systems run almost year-round, this cleaning plays a big role in:

  • Maintaining consistent comfort throughout the home.
  • Reducing strain on motors and compressors.
  • Helping keep energy use under control.

5. Flushing and Cleaning Drain Lines

We flushed and cleaned the condensate drain lines for both systems. In Florida’s humidity, your system removes a lot of moisture from the air, and that moisture has to drain away properly. Clogged or partially blocked drain lines can cause water backups, ceiling damage, or system shutdowns.

By cleaning and flushing the drain lines, we help reduce the risk of water leaks and ensure the system can continue to dehumidify effectively.

6. Verifying UV Light Operation

We inspected the UV lights on both HVAC systems and confirmed they were operating correctly. When maintained, these lights can help keep certain internal surfaces cleaner and support healthier indoor air, which is especially appreciated in closed-up homes during hot Wimauma summers.

7. Documenting the Low-Voltage Wiring Concern

On System #2, we carefully documented the damaged insulation on the low-voltage control wire going to the condenser. The conductors were exposed in multiple spots, creating a risk of a future low-voltage short.

Instead of waiting for that short to damage a contactor, transformer, thermostat, fuse, or control board, we noted the condition in this report and prepared an estimate for a proper low-voltage cable repair. This gives the homeowner clear information and the chance to correct the issue proactively.

Why This Fix – and This Maintenance – Works

The work we performed on this Wimauma, FL 33598 home is about more than just today’s comfort. It’s about how HVAC systems operate over time in Florida’s climate.

Healthy Airflow and Heat Transfer

Clean indoor and outdoor units can move air and transfer heat more efficiently. When coils and filters are dirty, the system has to work harder to do the same job, which wears out components faster and drives up energy bills. Regular cleaning and tune-ups help the system breathe and cool the way it was designed to.

Stable Refrigerant Circuit

Proper refrigerant pressures indicate that the system’s refrigerant circuit is working as intended. This means the refrigerant is absorbing heat inside and releasing it outside efficiently. Verifying this during maintenance tells us that, at the time of the visit, there was no obvious refrigerant-related issue affecting performance.

Safe, Reliable Electrical Controls

The low-voltage control wiring that runs between your thermostat and outdoor unit is like the nervous system of your HVAC system. When the insulation is damaged and wires are exposed, even a small movement or contact can cause a short. That can blow a fuse, damage a transformer, or take out a control board.

By spotting and documenting this issue early for the homeowner in Wimauma, we’re helping protect the contactor, thermostat, transformer, and other sensitive components from unnecessary stress and avoidable failures.

Pro Tips for Homeowners in Wimauma

For homeowners in Wimauma, FL 33598 and across Tampa Bay, here are a few practical steps you can take to keep your HVAC systems reliable between professional visits:

  • Change your air filters regularly. In our dusty, humid climate, filters can clog quickly. Check them monthly and replace them as needed to keep airflow strong and protect your blower and coil.
  • Keep the outdoor unit clear. Trim back plants and remove debris around the condenser so it has at least a couple of feet of open space for proper airflow.
  • Watch your drain line. If you see water pooling near the indoor unit or notice musty smells, it could be a sign of a drain issue. Addressing it early can prevent water damage.
  • Listen for new noises. Clicking, buzzing, or grinding sounds that weren’t there before can be early warning signs. Calling for service sooner rather than later often keeps a small issue from turning into a major repair.
  • Schedule routine maintenance. Twice-yearly professional maintenance – like the Premium Home Therapy Plan this Wimauma homeowner uses – is one of the best ways to extend system life and reduce emergency calls.
  • Keep vents open and unblocked. Closing too many supply vents or blocking them with furniture can restrict airflow and put extra strain on your system.

FAQ About This HVAC Maintenance Visit

Why is regular HVAC maintenance so important for homes in Wimauma, FL 33598?

Our climate puts a heavy workload on air conditioners. Regular maintenance helps keep components clean, confirms that motors and refrigerant circuit are operating properly, and catches issues like damaged wiring before they cause breakdowns. It’s a straightforward way to improve comfort and reduce the likelihood of emergency repairs.

What did you actually check during this Premium Home Therapy Plan visit?

We inspected both indoor and outdoor units on two HVAC systems, checked blower motors, compressors, and condenser fan motors, verified electrical consumption and refrigerant pressures, cleaned the equipment, flushed the drain lines, and confirmed UV light operation. We also carefully checked the wiring and documented the damaged low-voltage control cable on System #2.

Is exposed low-voltage wiring really that serious?

Yes, it can be. Even though low-voltage wiring doesn’t carry the same power as high-voltage lines, a short in the control circuit can still damage components such as the contactor, transformer, thermostat, fuse, or control board. It can also cause intermittent or complete loss of cooling. Repairing or replacing damaged cables is a smart preventive step.

My system is around 10 years old too. Should I be thinking about replacement?

Age is only one factor. Many 10-year-old systems in Tampa Bay and Wimauma are still worth maintaining if they’re operating properly and have been cared for. During maintenance, we focus on the actual condition and performance of your equipment and can make honest recommendations based on what we see instead of just the age on the label.

What can I expect after a similar maintenance visit?

After a Premium maintenance visit, you can expect your systems to be clean, checked for safe and proper operation, and tuned as needed. If we find any concerns – like the low-voltage wiring issue on System #2 in this home – we’ll explain them clearly, document them in your report, and provide an estimate so you can decide how to proceed.

Do you offer other services that help keep my system clean and efficient?

Yes. In addition to routine maintenance, we offer related services such as air duct cleaning, dryer vent cleaning, and air filter replacement and upgrades. We also provide comprehensive HVAC and plumbing services throughout Hillsborough County, including Wimauma.

Why Choose Home Therapist for HVAC Service in Wimauma

When you invite us into your home in Wimauma, FL 33598, you’re trusting us with your comfort and your equipment. We take that seriously.

Our licensed, professional technicians treat every system as if it were cooling their own home. We focus on clear, honest communication – explaining what we find, what we recommend, and why. You’ll know what’s working well, what needs attention, and what can wait.

We also prioritize cleanliness and respect for your home. From careful work around your property to cleaning up our work areas, we want you to feel that your space was looked after, not just your equipment.

Most importantly, our approach is built around long-term reliability. Whether we’re performing a Premium Home Therapy Plan maintenance, repairing a control wire, or recommending related services, our goal is to keep your system running safely, efficiently, and dependably in Tampa Bay’s demanding climate.

If you’d like to see more of how we care for homeowners across the area, you can connect with us on social media and review platforms:

  • Follow us on Facebook for updates and maintenance tips.
  • See what we’re working on over at Instagram.
  • Check out our local presence and reviews on Google Maps.

For added peace of mind, you can also look us up on trusted directories and organizations:

Need HVAC Maintenance in Wimauma, FL 33598?

If you’re a homeowner in Wimauma, FL 33598 and you’d like the same kind of thorough, preventive HVAC maintenance we provided on these two 10-year-old systems, our local Tampa Bay team is here to help. Whether it’s a routine Premium Home Therapy Plan visit or a specific concern like damaged wiring or poor drainage, we’ll inspect your system carefully, explain our findings in plain language, and recommend the right next steps for your home.

Schedule your maintenance visit with Home Therapist today and keep your cooling system ready for whatever Florida weather brings.

Programmable Thermostat Replacement and Installation in Palmetto, FL 34221

When a thermostat stops responding, it doesn’t just become a small nuisance — it can leave a home or rental property stuck at an uncomfortable temperature. That’s exactly what happened at a property in Palmetto, FL 34221, where the thermostat was stuck at 75°F and wouldn’t allow any changes. On top of that, the tenant wasn’t happy with the existing model and wanted a Honeywell thermostat instead.

Our team was called in to replace the old thermostat with a new programmable model (a Honeywell T4 Pro or similar), make sure it worked correctly with the HVAC system, and ensure the new unit covered the existing paint marks on the wall. We also provided warranty coverage — 5 years on parts and 1 year on labor — and verified proper operation before leaving.

Case Recap: Thermostat Replacement in Palmetto, FL 34221

  • Location: Residential rental property in Palmetto, FL 34221
  • Problem: Thermostat stuck at 75°F and not responding to temperature changes
  • History: Thermostat had already been replaced once, but the new one also wasn’t working correctly
  • Comfort issue: Tenant disliked the existing thermostat model and requested a Honeywell option
  • Solution: Install a new programmable thermostat (Honeywell T4 Pro or similar), confirm proper wiring and operation
  • Outcome: Fully functional thermostat, improved comfort control, and clean wall coverage with warranty protection

Customer Problem: Stuck Thermostat and Unhappy Tenant

By the time we were asked to help at this Palmetto, FL 34221 property, the situation had already gone through a few frustrating steps for the people involved. The thermostat was reported as being stuck at 75 degrees and simply wouldn’t allow changes, no matter what the tenant tried. That meant the home could easily feel too warm, especially in our Florida humidity, with no reliable way to adjust it.

According to the customer, the thermostat had already been replaced once before. Unfortunately, the new unit still wasn’t behaving correctly. The temperature control problem continued, so we knew there could be more going on than just a bad screen or simple setting.

On top of the functional issues, there was a comfort and preference issue: the tenant didn’t like the model that had been installed. They specifically wanted a Honeywell thermostat, which is a common choice for clear displays and straightforward controls.

There was also an appearance concern. The previous thermostat footprint had left exposed paint around the wall opening, and the customer wanted to make sure the new thermostat would cover that area so the install looked clean and finished. For a rental home in Palmetto, that kind of detail matters — it keeps both owners and tenants satisfied.

Inspection and Diagnosis: Looking Beyond the Screen

When we arrive to address a thermostat problem like this in Palmetto, FL 34221, we don’t just swap parts and hope it works. We walk through a simple, methodical process to make sure the new thermostat will truly solve the issue.

Our technician started with a few key checks:

  • Visual inspection of the existing thermostat: Confirm the model, how it was mounted, and whether anything looked obviously damaged or out of place.
  • Wiring inspection: Check the low-voltage thermostat wiring behind the wall plate to see if any wires were loose, mis-landed, or not matching the equipment requirements.
  • System compatibility: Make sure the HVAC system type (cooling and heating setup) matched what a Honeywell T4 Pro or similar programmable thermostat is designed to control.
  • Power and control signals: Verify that the system was providing the thermostat with the correct control power.

Based on the customer’s report that two different thermostats weren’t working properly, our focus was on making sure the problem wasn’t in the wiring, the way the thermostat was configured, or the way it was connected to the HVAC equipment. A thermostat that appears “stuck” at a certain temperature can sometimes be caused by:

  • Incorrect wiring on the control terminals
  • Incorrect system settings inside the thermostat
  • Miscommunication between the thermostat and the air handler or outdoor unit

Once we confirmed we could safely install a new programmable thermostat and that the system was compatible, we moved forward with the replacement and setup.

Repair and Service Process: Installing the New Programmable Thermostat

For a clean and reliable thermostat installation in a Palmetto, FL 34221 home, we follow a clear, step-by-step process. Here’s how we approached this job.

1. Powering Down the System Safely

Before handling any thermostat wiring, we shut off power to the HVAC system at the appropriate disconnect or breaker. Even though these are low-voltage wires, doing this protects the equipment controls and helps prevent accidental shorts or damage.

2. Removing the Existing Thermostat

We carefully removed the old thermostat from the wall, taking note of how the wires were landed on the existing terminals. In many cases, we’ll take a photo before removing any wires so we can reference it as needed. This also helped us evaluate whether earlier work may have contributed to the thermostat behaving incorrectly.

3. Inspecting and Preparing the Wiring

Once the old thermostat base was off, we checked the wiring for:

  • Any damaged or pinched conductors
  • Loose or frayed ends that needed re-stripping
  • Proper number of wires available for the new programmable thermostat

If needed, we trim and re-strip the wire ends to ensure a solid, clean connection at the new thermostat terminals. Reliable, tight connections are important for consistent signals between thermostat and system.

4. Mounting the New Thermostat Base and Covering the Paint

The customer specifically asked that the new thermostat cover the existing paint marks. We positioned the new thermostat base so that it would hide the old footprint as much as possible while still being level and secure. This is a small detail, but it makes the finished installation look intentional and professional, which matters in a well-maintained Palmetto rental.

Once we confirmed coverage and alignment, we mounted the base securely to the wall.

5. Connecting the Wires to the New Thermostat

With the base mounted, we connected the low-voltage wires to the appropriate terminals on the new programmable thermostat (Honeywell T4 Pro or similar), matching them to the system’s heating and cooling configuration. Each wire is inserted and tightened so there’s no play or chance of loosening over time.

6. Attaching the Thermostat and Restoring Power

After confirming the wiring was correct, we attached the thermostat body to the base and restored power at the breaker or disconnect. The thermostat powered up, allowing us to begin configuration and testing.

7. Programming and System Testing

With a new programmable thermostat, setup is just as important as the physical install. We:

  • Entered the appropriate system type and configuration options in the thermostat settings
  • Set basic temperature targets for cooling and heating
  • Verified that changing the setpoint from 75°F actually triggered the system to respond

We then cycled the system through the relevant modes (cooling, and heating if needed), confirming that the equipment responded properly and that the thermostat was no longer stuck at one temperature. Once everything was operating as expected, we walked through the basic operation so the user would know how to adjust the settings comfortably.

Finally, we verified that the thermostat sat neatly on the wall and that the old paint marks were covered as requested, leaving a clean, finished appearance.

Why This Fix Works for Thermostat Problems

A programmable thermostat acts as the control center for your HVAC system. When it’s not reading correctly or not sending the right signals, the entire system can feel like it’s failing — even when the air conditioner or heater itself is in good shape.

By installing a properly matched Honeywell T4 Pro or similar thermostat and confirming the wiring and settings, we restored the communication between the HVAC equipment and the control on the wall. That means:

  • The thermostat can accurately read room temperature.
  • When the setpoint is changed, the thermostat sends a clear signal to start or stop cooling or heating.
  • The system cycles on and off in a way that maintains comfort and protects the equipment.

In a humid area like Palmetto, FL 34221, having a reliable thermostat is critical. It keeps indoor temperatures consistent, helps manage humidity when the AC cycles properly, and allows tenants and homeowners to fine-tune comfort without fighting the controls.

If you’re interested in more detail on how smart and programmable thermostats can improve comfort and efficiency in Tampa Bay homes, you can explore our smart thermostat installation overview and our guide to thermostat features that help manage Florida humidity.

Pro Tips for Homeowners and Property Managers in Palmetto

For homeowners and property managers in Palmetto, FL 34221, a thermostat upgrade is often a simple way to improve comfort and reduce service headaches. Here are a few practical tips we share on jobs like this:

  • Choose a thermostat that fits the occupants’ comfort style. Some tenants prefer simple up/down controls; others like full programmable or smart features. Picking the right style reduces confusion and callbacks.
  • Match the thermostat to the system, not just the brand you like. Make sure any new thermostat is compatible with your specific HVAC setup. If you’re unsure, have a licensed HVAC technician handle the selection and install.
  • Protect the wiring behind the wall. In older Florida homes, the thermostat wiring may have been spliced or stretched over time. A quick inspection during replacement can prevent intermittent issues later.
  • Keep settings reasonable in extreme heat. In our Tampa Bay climate, trying to force the home 20 degrees below outdoor temperatures can strain equipment. A properly working thermostat lets you find a comfortable range without overworking the system.
  • Schedule regular HVAC maintenance. A new thermostat is only part of the comfort equation. Pairing it with routine system maintenance helps keep airflow, refrigerant charge, and drainage in good shape. Our HVAC maintenance checklist for homeowners walks through helpful basics.
  • Document upgrades for rental properties. When you manage multiple properties in places like Palmetto, keeping records of thermostat models and install dates makes it easier to troubleshoot and communicate with tenants down the line.

FAQ: Thermostat Replacement in Palmetto, FL 34221

Why was the thermostat stuck at 75°F and not responding?

A thermostat can appear stuck when there’s an issue with the controls, settings, or wiring between the thermostat and the HVAC system. In this Palmetto, FL 34221 property, the best solution was to replace the thermostat with a properly configured, compatible programmable model and verify correct wiring and operation.

We already replaced the thermostat once. Why didn’t that fix it?

Simply swapping in a new thermostat doesn’t always solve the underlying issue. If the wiring, setup, or system configuration isn’t correct, a replacement can behave just like the old one. Our approach is to inspect, verify compatibility, and then install and program the new thermostat correctly so the system responds as it should.

Can you install a specific brand like Honeywell if my tenant requests it?

Yes, in many cases we can install a specific brand or style, such as a Honeywell programmable thermostat, as long as it’s compatible with the HVAC system. On this Palmetto job, the tenant preferred a Honeywell model, and we installed a Honeywell T4 Pro or similar that worked with the equipment and met the property’s needs.

Will the new thermostat cover old paint marks on the wall?

We do our best to position and select the thermostat so it covers the previous footprint and exposed paint whenever possible. On this thermostat replacement in Palmetto, FL 34221, the customer specifically requested full coverage of the old painted area, and we mounted the new thermostat accordingly for a clean finish.

What kind of warranty do you offer on a new thermostat installation?

For this project, we provided a 5-year parts warranty and a 1-year labor warranty on the new thermostat installation. We always explain the warranty terms clearly so property owners and tenants know what’s covered going forward.

Will you test the system after installing the new thermostat?

Yes. After every thermostat replacement, we test the system to make sure it responds properly in the relevant modes and that temperature changes on the thermostat actually trigger the HVAC equipment. We don’t consider the job complete until we’ve confirmed proper operation.

Why Choose Home Therapist for Thermostat Service in Palmetto

When you call Home Therapist for thermostat replacement or HVAC service in Palmetto, FL 34221, you’re getting more than just a quick install. You’re getting a licensed, professional technician who treats your home or rental property with care.

Here’s what we focus on:

  • Licensed and professional technicians: Our team is trained to handle both straightforward thermostat swaps and more complex control issues, so we’re not just guessing at the fix.
  • Transparent communication: We explain what we find, what we recommend, and why — in clear, plain language so you’re never left wondering what was done.
  • Clean and respectful work: From covering paint marks with the new thermostat to cleaning up our work area, we treat every property like it’s our own.
  • Long-term reliability: We focus on proper wiring, configuration, and testing so your system runs reliably after we leave, not just for the next hour.
  • Commitment to Tampa Bay homeowners: We’re local, and we understand what our climate does to HVAC systems. That experience shapes every recommendation we make.

If you’d like to see more of how we work and stay connected with our team, you can find us on Facebook, follow our updates on Instagram, or check out short tips and clips on TikTok.

Many homeowners and property managers also like to review independent profiles before choosing an HVAC company. You can learn more about our reputation through our Better Business Bureau listing, our presence with the Tampa Bay Chamber of Commerce, or our Google business profile.

For a broader look at how we handle cooling needs across Tampa Bay, you can also review our AC repair, installation, and maintenance service overview.

Need Thermostat Help in Palmetto, FL 34221?

If your thermostat is stuck, not responding, or just not a good fit for the people living in the home, we’re here to help. Whether you’re a homeowner or a property manager in Palmetto, FL 34221, our technicians can inspect your existing setup, recommend a compatible programmable or smart thermostat, and install it cleanly and correctly.

Reach out to Home Therapist today to schedule thermostat replacement or HVAC service in Palmetto. We’ll take the time to get it right, verify proper operation, and leave you with a comfortable, well-controlled home.

Garbage Disposal Installation in St. Petersburg, FL 33703

When a garbage disposal stops working or needs to be upgraded, it can bring kitchen cleanup to a halt. For this homeowner in St. Petersburg, FL 33703, our job was simple on paper: install a customer-supplied garbage disposal. But even a “quick” kitchen plumbing project still deserves professional attention to protect the sink, piping, and home from leaks or future headaches.

In this visit, our Home Therapist technician completed a labor-only garbage disposal installation. The customer already had the new unit on hand and wanted to make sure it was installed correctly, safely, and up to professional standards. We removed the old equipment, installed the new disposal, tested all connections, and left the kitchen clean and ready to use.

Case Recap

  • Location: Single-family home in St. Petersburg, FL 33703
  • Service: Labor-only installation of a customer-supplied garbage disposal
  • Scope: Remove existing disposal (or old drain assembly) and install new unit
  • Focus: Leak-free connections, safe electrical hookup, proper alignment with sink and plumbing
  • Outcome: New disposal operating smoothly, with the sink area cleaned and work site left tidy

Customer Problem

For homeowners in St. Petersburg, a working garbage disposal is a big help with day-to-day cooking and cleaning—especially in a busy kitchen. In this case, the homeowner had already taken the step to purchase a new garbage disposal, but didn’t want to risk:

  • Leaks under the sink from misaligned or loose connections
  • Improper installation that might damage the new unit or the sink
  • Electrical hazards from incorrect wiring or connections
  • Future clogs or backups due to poor drain alignment

They called our team because they wanted a licensed plumbing professional to handle the installation. Even though the job was just for the cost of labor, we treat these service calls with the same care as a full system replacement. The goal is always the same: protect the home, respect the space, and leave everything working the way it should.

Inspection and Diagnosis

Before we start any installation, we take a few minutes to assess the existing setup under the sink. For this St. Petersburg, FL 33703 kitchen, that meant checking:

  • Existing disposal or drain assembly: How it was mounted to the sink, what type of flange was in place, and whether the mounting ring or hardware was reusable or needed replacement.
  • Drain configuration: How the trap, dishwasher connection (if present), and branch lines were arranged and whether any adjustments would be needed for the new disposal’s outlet height.
  • Electrical supply: Whether the unit was hardwired or plugged into a dedicated outlet, and that the circuit and switch were functioning properly.
  • Sink condition: The stability of the sink, condition of the sink drain opening, and any signs of corrosion or water damage from previous leaks.

This quick but careful inspection allows us to see potential issues before we mount the new disposal. If alignment is off, if the trap is stressed, or if old components are poorly sealed, you can end up with slow leaks or repeated clogs. By catching those concerns early, we can adjust the installation to give the homeowner a better long-term result.

Repair and Installation Process

Once we understood the existing setup, our technician in St. Petersburg, FL 33703 walked the homeowner through the plan and got started on the labor-only installation.

1. Removing the Old Disposal or Drain Assembly

The first step is always to safely remove what’s already there. That may be an older garbage disposal or a simple basket strainer if this is a first-time disposal install. We:

  • Turned off power to the disposal circuit to ensure a safe work area.
  • Disconnected the drain lines and any dishwasher discharge line attached to the old unit.
  • Released the disposal from the mounting bracket and removed it from the sink.
  • Cleaned the sink opening and removed old plumber’s putty or gasket material.

This is where a lot of hidden issues show up—such as worn gaskets, rusted assemblies, or evidence of slow leaks. Cleaning everything down to a fresh surface helps the new disposal seal properly and reduces the risk of future drips.

2. Preparing the Sink Flange and Mount

The sink flange is the visible ring inside the sink that connects to the disposal underneath. Using the components that came with the homeowner’s new unit, we:

  • Set the new flange in place with the manufacturer-recommended seal (often a gasket or plumber’s putty).
  • Installed the mounting assembly from below, tightening it evenly so the flange sat level and secure.
  • Verified the flange was properly centered and that the sink surface was making good contact all the way around.

This step is critical because even a small gap or uneven pressure can allow water to sneak through. In a humid, coastal area like St. Petersburg, unnoticed leaks can quickly lead to cabinet damage and mold growth, so we take extra care to get this right.

3. Wiring or Connecting the New Disposal

Next, we addressed the electrical connection to the homeowner’s new disposal. Depending on the unit and existing setup, this can involve:

  • Attaching the disposal’s power leads to the home’s wiring in an approved junction box, or
  • Connecting a factory or field-installed power cord to a dedicated under-sink outlet.

We made sure all connections were secure, properly strain-relieved, and enclosed according to the unit’s instructions. The disposal must be safely grounded and powered from a suitable circuit to reduce electrical risk and help the motor start and run as designed.

4. Mounting the Disposal and Aligning the Drain

With the flange and wiring ready, we lifted the new disposal into place, locked it onto the mounting ring, and carefully rotated it so the discharge outlet lined up with the existing drain trap. This alignment step helps avoid:

  • Stress on PVC piping or fittings
  • Sags or misalignment that can collect debris
  • Water pooling that leads to clogs or odors

If needed, we adjusted the trap and piping to match the new disposal’s outlet height and angle. All slip-joint connections were assembled with the correct washers, and everything was hand-tightened then snugged just enough to seal without cracking any plastic components.

5. Dishwasher Connection (If Present)

When a dishwasher is present and designed to drain through the disposal, we ensure that:

  • The disposal’s dishwasher knockout plug (if any) is removed properly.
  • The dishwasher drain hose is securely clamped to the disposal inlet or to an air gap fitting where required.

This helps prevent backups from the sink into the dishwasher and keeps the drain system flowing correctly.

6. Leak Check and Operational Test

After everything was assembled in this St. Petersburg, FL 33703 home, we carefully tested the system:

  • Ran the faucet on both hot and cold to fill and drain the sink.
  • Inspected every connection under the sink for drips or weeping.
  • Turned on the disposal to verify smooth operation, proper sound, and effective grinding.

Only after we confirmed there were no leaks and the disposal was operating as expected did we clean up the work area and review the installation with the homeowner.

Why This Fix Works

A garbage disposal is a simple appliance on the surface, but it relies on a few key principles to work properly and safely:

  • Sealed water path: From the sink bowl, through the flange, into the disposal, and out through the trap, all connections must be tight and properly aligned to prevent leaks.
  • Proper drainage: The disposal’s outlet must align with the existing drain system so gravity and flow can carry ground food waste away without pooling or clogging.
  • Safe power: The motor requires a correct electrical connection and appropriate circuit to start and run reliably.
  • Mechanical stability: A securely mounted disposal vibrates less, makes less noise, and puts less stress on plumbing connections.

By professionally installing the customer’s new disposal, we protected the plumbing system while giving them the functionality they wanted. Everything is supported, aligned, and sealed the way it should be, which helps extend the life of both the disposal and the surrounding plumbing.

Pro Tips for Homeowners in St. Petersburg

Here are some practical tips for keeping a garbage disposal and kitchen plumbing in good shape in a humid, coastal climate like St. Petersburg, FL 33703:

  • Run plenty of water: Always run cold water before, during, and after using the disposal. This helps carry ground food waste fully through the trap and out into the drain line.
  • Avoid stringy or hard items: Things like corn husks, celery strings, bones, and fruit pits can be tough on the grinding mechanism and may lead to jams or motor strain.
  • Limit grease and fats: Even in warm Florida temperatures, fats and oils can coat the inside of pipes. Let them cool and throw them away in the trash instead.
  • Use it regularly: Running the disposal periodically helps prevent rust, keeps seals from drying out, and discourages odors from stagnant water or food particles.
  • Watch for early signs of trouble: Gurgling noises, slow draining, or recurring resets are signs that it’s time to have a professional take a look before a full clog or leak develops.
  • Know when to call a pro: If you notice water under the sink, electrical issues, or repeated tripping, it’s safer to bring in a licensed technician than to keep resetting or forcing the unit.

FAQ: Garbage Disposal Installation in St. Petersburg, FL 33703

Can you install a garbage disposal I purchased myself?

Yes. In this St. Petersburg, FL 33703 job, we provided labor-only installation for a customer-supplied disposal. As long as the unit is appropriate for your sink and electrical setup, we can install it, test for leaks, and verify proper operation.

How long does a standard garbage disposal installation take?

Most straightforward garbage disposal installations can be completed in about an hour or two, depending on the existing plumbing and electrical setup. We take the time to remove old components carefully, align piping correctly, and test thoroughly before we leave.

Do I need a plumber for a garbage disposal, or can any handyman install it?

A garbage disposal is tied directly into your kitchen plumbing and, in many cases, your dishwasher and electrical system. A licensed plumbing professional understands proper sealing, venting, and alignment so you don’t end up with leaks, clogs, or electrical issues down the road.

What if my sink or drain layout is different from the new disposal?

If the new disposal’s outlet doesn’t line up perfectly with the existing trap, we can often adjust the piping to match. During our inspection, we look for these differences and plan the installation so everything drains properly and stays within acceptable plumbing practices.

Will installing a new disposal help with kitchen odors?

It can. A properly working disposal grinds food more effectively and flushes it through the pipes, which helps reduce the chance of old food sitting in the drain. Regular use and plenty of water are still important to keep things fresh.

Why Choose Home Therapist for Kitchen Plumbing

Whether it’s a garbage disposal, faucet, or sink issue, homeowners in St. Petersburg, FL 33703 and across Tampa Bay trust Home Therapist because of how we approach every job:

  • Licensed and professional technicians: Our plumbers are trained, licensed, and experienced with all types of kitchen plumbing and disposal installations.
  • Transparent communication: We explain what we’re doing, why we’re doing it, and what it means for your home—without jargon or pressure.
  • Clean, respectful work: We treat your kitchen like it’s our own, protecting surfaces, cleaning up after ourselves, and respecting your time and space.
  • Long-term reliability focus: Even on a simple labor-only job, we’re looking out for alignment, sealing, and support so your system runs reliably, not just today but for the long haul.
  • Commitment to Tampa Bay homeowners: We’re local, we know the homes and conditions in this area, and we stand behind our work.

If you’d like to see more of how we work and connect with us online, you can find Home Therapist on social media:

We’re also proud to be listed with trusted local and national organizations, so homeowners in St. Petersburg and across Tampa Bay can verify who we are and how we operate:

If your garbage disposal issue turns out to be part of a bigger plumbing concern, we also offer a full range of services, including plumbing repair in Pinellas County, other plumbing services throughout Tampa Bay, sink installation and repair, and faucet installation and repair.

Need Garbage Disposal Help in St. Petersburg, FL 33703?

If you have a new disposal ready to go, or if your current one is noisy, leaking, or not running at all, our local Tampa Bay plumbing team is ready to help. We’ll come out to your home in St. Petersburg, FL 33703, inspect your setup, install or replace the disposal, and verify that everything is operating as it should.

Reach out to Home Therapist today to schedule professional garbage disposal installation or kitchen plumbing service. We’ll handle the details so you can get back to a clean, comfortable, and fully functional kitchen.

Air Handler Coil and TXV Replacement in Largo, FL 33770

When your air conditioner is struggling in the Florida heat, it doesn’t take long to feel it. For a homeowner in Largo, FL 33770, that discomfort showed up as poor cooling and a system that just wouldn’t keep up. Our technician Alejandro from Home Therapist Cooling, Heating, and Plumbing was called out, and after a thorough inspection, we recommended a full air handler coil replacement, a new TXV (thermostatic expansion valve), a new filter dryer with flushed copper lines, and a complete refrigerant change.

In this article, we’ll walk through what we found, why these parts mattered, and how the final repair left the system operating reliably again for this family in Largo, FL 33770.

Case Recap: What We Did for This Largo Home

  • Inspected the air handler and outdoor unit to confirm restricted cooling and performance issues.
  • Replaced the air handler coil and installed a new TXV under warranty.
  • Replaced the filter dryer and flushed the copper refrigerant lines to clear blockages and debris.
  • Vacuumed the system, checked all soldered joints for leaks, and performed a full refrigerant change.
  • Reviewed refrigerant usage and potential leak concerns with the homeowner.
  • Enrolled the homeowner in our Elite Therapy Plan for ongoing maintenance and savings.

Customer Problem: Symptoms Inside the Home

By the time we were called to this home in Largo, FL 33770, the homeowner was already dealing with a few classic signs of AC trouble:

– Rooms taking longer to cool down
– Inconsistent temperatures throughout the house
– A system that seemed to run a lot without really catching up

For a Florida homeowner, especially in Pinellas County’s humidity, that’s more than just an inconvenience. A struggling system can lead to higher energy bills, excess wear on parts, and even indoor humidity issues that make the home feel sticky and uncomfortable.

The initial concern was that something deeper was going on inside the air handler and refrigerant circuit. The previous notes and system behavior pointed toward internal restrictions or failing components, not just a dirty filter or a quick tune-up issue. That’s when our team stepped in to perform a detailed inspection.

Inspection and Diagnosis: Finding the Root Cause

When we arrive at a home in Largo for an HVAC issue like this, we never just start replacing parts. We start with a structured diagnostic process to narrow down what’s really going on.

For this job, here’s what our inspection focused on:

  • Air handler condition: We inspected the evaporator (indoor) coil for signs of damage, corrosion, and restriction.
  • Refrigerant circuit: We evaluated the refrigerant path from the condenser outside, through the filter dryer and lines, to the coil and TXV inside.
  • TXV operation: We assessed whether the thermostatic expansion valve was correctly allowing refrigerant to expand and feed the coil.
  • Filter dryer and line cleanliness: We considered the potential for debris or moisture in the lines causing restrictions.

The findings supported what the earlier notes suggested: the air handler coil and TXV needed to be replaced, and the filter dryer and copper lines needed to be properly flushed. Because we were working inside the refrigerant circuit, a full refrigerant change was also required after the repairs were completed.

In situations like this, especially if more than a few pounds of refrigerant need to be added, it can be an indicator that the system has experienced a leak at some point. That doesn’t automatically mean there’s an active leak at the moment of repair, but it is something we always discuss with homeowners so they understand why proper diagnosis and repair matter.

Repair and Service Process: Step by Step

Once we’d confirmed the plan with the homeowner in Largo, FL 33770, we moved forward with a detailed, step-by-step repair. Our focus throughout the job was safety, cleanliness, and long-term reliability.

1. Pumping Down and Recovering Refrigerant

Because we were replacing major components in the sealed refrigerant system, we first needed to handle the existing refrigerant properly.

We:

  • Pumped down the remaining gas to the condenser to isolate and recover it correctly.
  • Prepared the system for opening by ensuring pressures were relieved safely.

This step is critical both for safety and for protecting the environment. Refrigerant must be handled according to industry standards and regulations, never just vented.

2. Air Handler Coil Replacement

Next, we replaced the indoor air handler coil. The coil is where refrigerant absorbs heat from the air inside your home. When it’s failing or restricted, your system simply can’t cool properly.

Our process included:

  • Removing the old evaporator coil from the air handler.
  • Installing the new coil (the coil and TXV were under warranty in this case).
  • Carefully soldering the new connections to the refrigerant lines.
  • Checking each solder joint for leaks.

Any time we solder refrigerant lines, we take our time to ensure clean connections, proper technique, and a thorough leak check after the work is complete.

3. TXV (Thermostatic Expansion Valve) Replacement

The TXV controls how much refrigerant flows into the evaporator coil. If it’s not working correctly, your system may freeze up, fail to cool, or run inefficiently.

For this homeowner in Largo, we:

  • Disconnected the old TXV at the air handler.
  • Installed the new TXV (with the part under warranty).
  • Soldered any necessary connections and again checked for leaks.
  • Prepared the system for proper evacuation after all components were replaced.

Replacing the TXV along with the coil ensures the coil gets the correct amount of refrigerant for efficient heat transfer.

4. Filter Dryer Replacement and Copper Line Flush

The filter dryer is a small but vital component. It helps remove moisture and contaminants from the refrigerant. Debris or moisture in the system can cause blockages and long-term damage.

Our steps here included:

  • Pumping down the gas to the condenser to work safely on the lines.
  • Flushing the refrigerant lines with the appropriate cleaning agents and nitrogen to clear blockages.
  • Replacing the filter dryer to provide fresh protection against moisture and debris.
  • Inspecting and either cleaning or replacing the piston where applicable.

Completing a line flush with a new filter dryer helps protect the new coil and TXV from issues caused by old contaminants circulating through the system.

5. System Vacuum and Leak Check

With all new components in place, we needed to prepare the system for refrigerant again. That starts with a deep vacuum.

We:

  • Pulled a vacuum on the system to remove air and moisture from the lines and components.
  • Rechecked all soldered joints for any sign of leaks.
  • Confirmed that the system held vacuum before proceeding.

This step is critical. Moisture or non-condensable gases left inside the system can cause poor performance and long-term damage. Taking the time to do this correctly helps protect the homeowner’s investment.

6. Full Refrigerant Change and Final Testing

Because we were working inside the sealed system and had replaced major components, the refrigerant needed to be fully replaced. The job included adding more than three pounds of R410A to the unit as part of the recharge.

Industry notes remind us that adding over two pounds of refrigerant can be a sign that the system has had or still has a leak. That’s why we always talk this through with the homeowner and recommend monitoring and, when appropriate, additional leak checks or follow-up if there are future symptoms.

After charging the system, we:

  • Verified proper system operation.
  • Confirmed the air handler and condenser were working together as expected.
  • Checked airflow and overall comfort inside the home.

By the end of the visit, the system was cooling as it should again, and the homeowner in Largo, FL 33770 had their comfort restored.

7. Warranty Handling and Elite Therapy Plan Enrollment

Because the new air handler coil and TXV were under warranty, there was a supplier warranty handling fee associated with processing those parts. We’re always transparent about these fees so homeowners know exactly what they’re paying for.

During the visit, we also enrolled the homeowner in our Elite Therapy Plan, one of our ongoing maintenance options. This plan helps keep the system maintained and offers discounts on certain services. You can learn more about our maintenance options on our Therapy Maintenance Plans page.

Why This Fix Works: The HVAC Basics Behind the Repair

The components we replaced in this Largo home all work together within the refrigeration cycle. When they’re healthy and properly installed, you get reliable, efficient cooling. When they’re failing or restricted, you get hot rooms, long run times, and frustration.

Here’s how it all ties together:

  • Evaporator (air handler) coil: This is where indoor air passes over cold refrigerant. Heat from your home is absorbed into the refrigerant and carried outside.
  • TXV: The thermostatic expansion valve precisely meters how much refrigerant enters that coil. Too much or too little refrigerant flow can cause poor cooling, icing, or system stress.
  • Filter dryer: It captures moisture and debris that would otherwise circulate and clog or damage small passages inside the TXV and coil.
  • Clean copper lines: Flushing the lines removes old contaminants so the new parts aren’t immediately exposed to the same issues that caused trouble in the first place.
  • Proper refrigerant charge: Once everything is sealed, a correct refrigerant charge allows the system to move heat efficiently from inside to outside.

By addressing all of these components together, we restored the system’s ability to move heat, protect itself from internal contamination, and cool the home as designed. That’s especially important for homeowners in places like Largo, where air conditioning is essential for most of the year.

Pro Tips for Homeowners in Largo

If you live in Largo, FL 33770 or nearby Tampa Bay communities, your AC system works hard in high heat and humidity. Here are some practical tips to help protect your system and reduce the chances of major repairs:

  • Schedule regular maintenance: Annual or semi-annual tune-ups help catch issues with coils, TXVs, and refrigerant levels early. Our AC maintenance services are designed with Florida conditions in mind.
  • Change filters on time: A clogged filter reduces airflow and can cause the coil to freeze or overwork, especially during our long cooling season.
  • Watch for subtle changes: If you notice longer run times, warm spots, or unusual noises, don’t ignore them. Early attention can turn a potential major repair into a smaller service visit.
  • Keep outdoor equipment clear: Make sure your condenser outside has space around it for proper airflow. Overgrown plants or debris can reduce efficiency.
  • Consider a maintenance plan: Plans like our Elite Therapy Plan spread out maintenance costs and often include discounts, which can be especially helpful for homeowners in humid areas like Largo and across Tampa Bay.
  • Use trusted, local technicians: Working with a licensed local HVAC company familiar with Largo’s climate means your system will be set up and serviced for real-world Florida conditions.

FAQ: Coil, TXV, and Refrigerant Service in Largo, FL

Do I always need to replace my coil and TXV together?

Not always, but in many cases—especially when there are signs of internal restriction or contamination—it makes sense to replace them together. The coil and TXV work as a pair to move refrigerant and absorb heat. Replacing both at the same time can improve reliability and help prevent future issues in similar systems.

Why would my system need more than a few pounds of refrigerant?

When a system needs a significant amount of refrigerant added, it usually means some refrigerant has been lost over time. Notes commonly state that adding over two pounds can be an indicator that the system has had a leak. That’s why we always discuss this with the homeowner and recommend monitoring and appropriate follow-up if any new symptoms appear.

What is a filter dryer, and why is it important?

A filter dryer is a small component in the refrigerant line that helps remove moisture and debris from the system. Moisture and contaminants can cause corrosion, clogs, and damage inside the coil and TXV. Replacing the filter dryer during major repairs helps protect your new components and improve system longevity.

Is flushing the copper lines really necessary?

When a system has had internal issues, or when we’re replacing key components like the coil and TXV, flushing the lines is a smart step. It clears out old oil, debris, and potential blockages so the new parts aren’t immediately exposed to the same contaminants. For homeowners in Largo and the wider Tampa Bay area, where systems run heavily, this helps maintain long-term reliability.

How can I reduce the chances of another major AC repair?

Routine maintenance, timely filter changes, and addressing small issues early are the best ways to reduce the risk of major repairs. Enrolling in a maintenance plan such as our Elite Therapy Plan can help keep your system on a regular schedule and give you peace of mind that a licensed professional is periodically checking all major components.

Do you handle AC repairs outside of Largo?

Yes. While this particular project was in Largo, FL 33770, we serve homeowners across Tampa Bay. You can see more about our local services on our Largo HVAC and plumbing services page and our broader AC repair services page.

Why Choose Home Therapist for AC Service in Largo

When you invite us into your home in Largo, FL 33770, you’re trusting us with your comfort. We take that seriously.

  • Licensed, professional technicians: Our team is trained to handle complex repairs like coil and TXV replacement safely and correctly, following industry best practices.
  • Transparent communication: We explain what we find, what we recommend, and why. You’ll know what’s covered under warranty, what isn’t, and what fees—such as warranty handling—are for.
  • Clean, respectful work: We work carefully around your home, keep our work area as neat as we can, and treat your property like it’s our own.
  • Long-term reliability focus: Instead of band-aid fixes, we look for solutions that restore proper operation and protect your system for the long run.
  • Commitment to Tampa Bay homeowners: From Largo to the rest of the Tampa Bay area, we’re a local company built around the needs of Florida homeowners.

If you’d like to see how we interact with customers and share tips, you can connect with us on social media. Visit us on Facebook, follow our updates on Instagram, or check out our short videos on TikTok.

We’re also proud to be listed with trusted local and national organizations. You can view our profile with the Better Business Bureau and see our business listing with the Tampa Bay Chamber of Commerce. For directions and reviews, you can also find us on Google Maps.

Need AC Coil or TXV Service in Largo, FL 33770?

If your air conditioner is running but not keeping you comfortable, or if you’ve been told you might have a coil, TXV, or refrigerant issue, we’re here to help. Our team at Home Therapist Cooling, Heating, and Plumbing regularly handles detailed repairs like the air handler coil, TXV, and filter dryer replacement we performed for this homeowner in Largo, FL 33770.

Whether you’re looking for targeted repair, ongoing AC maintenance, or you’re exploring options for a future AC installation, we’re ready to talk through your options in plain language. You can also read about a similar project in another Tampa-area home in our coil replacement project overview.

When you’re ready, schedule your service with a local Tampa Bay technician who understands what your system is up against in our climate. We’ll take the time to diagnose the problem, explain your choices, and leave your home in Largo as comfortable as it should be.

Premium HVAC Maintenance Plan Visit in Riverview, FL 33579

For a homeowner in Riverview, FL 33579, a reliable air conditioning and heating system isn’t a luxury—it’s a necessity. Florida heat and humidity work an HVAC system hard, especially when the equipment is around 15 years old. On this visit, we came out for a scheduled Premium Therapy Plan maintenance visit and completed a detailed tune-up. We verified that the system was operating properly in both heating and cooling modes, cleaned critical components, and confirmed that everything was running as expected when we left.

Case Recap

  • Location: Single-family home in Riverview, FL 33579
  • Service: Premium Therapy Plan maintenance visit (#5)
  • System age: Approximately 15 years old
  • Work performed: Full inspection, cleaning, and testing in heating and cooling
  • System pressures and electrical consumption checked and found normal
  • Indoor and outdoor units cleaned, drain line cleared, and overall operation verified

Customer Problem

Our customer in Riverview is enrolled in our Premium Therapy Plan, which means we see this system on a regular schedule. That consistency is especially important when a system is around 15 years old. At this age, even small issues can snowball into inconvenient breakdowns if they aren’t caught early.

During a previous maintenance visit, we had detected a small refrigerant leak. At that time, under the customer’s plan, we added refrigerant and replaced a failing capacitor to keep the system operating properly. The plan also includes duct sanitation as part of the older version of the Premium plan this homeowner is on.

For this current visit (#5), the homeowner didn’t report any major comfort complaints. The main goal was to:

  • Confirm that the system was still cooling and heating reliably after the earlier repairs
  • Make sure energy consumption stayed reasonable
  • Keep the equipment clean so it could handle the Riverview, FL 33579 weather without unnecessary strain

Even when everything “seems” to be working, a system of this age in our Tampa Bay climate needs a thorough checkup to prevent surprises during the hottest and coldest days.

Inspection and Diagnosis

On arrival, we started with a visual and functional inspection of both the indoor and outdoor units. Our goal was not just to confirm that the system turned on, but to make sure each key component was performing the way it should.

Here is what we focused on during this Premium Therapy Plan visit in Riverview, FL 33579:

1. Overall System Operation

We began by running the system in cooling mode and then in heating mode. For each mode, we confirmed:

  • System started and shut off normally using the thermostat
  • Indoor airflow felt consistent at the vents
  • No unusual noises from the indoor blower or outdoor condenser unit
  • No obvious signs of icing, sweating in the wrong places, or other red flags

2. Refrigerant Pressures

Because there had been a small leak detected on a past visit, we paid close attention to system pressures. Using our gauges, we checked that pressures were within the normal operating range for the conditions at the time of service.

The pressures were found to be normal, which told us that:

  • The system was currently charged adequately
  • There were no immediate signs of an active severe leak impacting performance

3. Electrical Consumption

Electrical issues, especially on older systems, can sneak up on you. We checked the electrical consumption of:

  • The indoor blower motor
  • The compressor
  • The outdoor condenser fan motor

All were operating properly at the time of our visit. That means no obvious over-amping or signs that a motor was straining. On a 15-year-old system in Riverview, that’s an important check to help prevent unexpected shutdowns.

4. Cleanliness and Drainage

Next, we inspected the indoor unit, outdoor unit, and condensate drainage. Dirt and restricted drainage are two of the biggest causes of nuisance breakdowns and water damage around HVAC equipment in Florida homes.

Our inspection confirmed that a thorough cleaning and drain line service would be beneficial and was included as part of this Premium Therapy Plan visit.

Repair and Service Process

Since this was a scheduled maintenance visit and not an emergency breakdown, our work focused on preventative care, efficiency, and system reliability. Here’s how we carried out the service for this homeowner in Riverview, FL 33579.

Step 1: Clean the Outdoor Unit (Condenser)

We started by cleaning the outdoor condenser unit. Over time, dust, grass clippings, pollen, and debris build up on the coil and around the cabinet. That buildup makes it harder for the system to reject heat outdoors, which can cause longer run times and higher energy use.

By carefully cleaning the outdoor unit, we help:

  • Maintain proper heat transfer
  • Reduce strain on the compressor
  • Support better cooling performance during peak summer days

Step 2: Clean the Indoor Unit

Inside, we cleaned the accessible areas of the indoor unit. Dust on the indoor coil and blower can reduce airflow and efficiency, especially in a humid area like Riverview. While this system is older, keeping the indoor components as clean as possible gives it a better chance at consistent comfort.

As part of the customer’s premium plan, duct sanitation was previously included as well. Clean ducts and a clean indoor unit work together to improve air movement and reduce the amount of dust circulating through the home.

Step 3: Clear and Clean the Drain Line

In Florida, condensate drain lines are a big deal. They can clog with algae, dirt, and buildup, leading to water leaks and potential ceiling or wall damage. We cleaned the drain line to help ensure proper condensate removal and minimize the chance of future clogs.

A clean drain line means:

  • Less risk of water backing up into the air handler
  • Lower chance of float switches tripping and shutting the system down
  • Better protection for the home’s finishes and structure

Step 4: Verify Heating and Cooling Operation

With cleaning complete, we tested the system again in both heating and cooling modes. This double-check is important, particularly after any maintenance on an older system. We confirmed that:

  • The thermostat properly called for heating and cooling
  • The blower, compressor, and fan motor operated as expected
  • Airflow felt normal at the supply registers
  • The system cycled off correctly

We left the home with the system running correctly in both modes.

Step 5: Final Safety and Performance Check

Before wrapping up, we performed a final check of the equipment area for any signs of water, loose panels, or obvious electrical concerns. While this visit did not require part replacement, we still made sure the system was buttoned up safely and operating within normal parameters.

Why This Fix (and Maintenance) Works

For HVAC systems in Riverview, FL 33579, especially those 10–15+ years old, preventative maintenance can make a meaningful difference in comfort and reliability.

Here’s why the steps we took are effective:

  • Normal system pressures indicate the refrigerant side of the system is currently able to move heat effectively. That’s essential for both heating (in heat pump mode) and cooling.
  • Proper electrical consumption tells us that motors and the compressor are not overworking. When amperage climbs, components overheat and fail more quickly.
  • Clean indoor and outdoor coils improve heat transfer and airflow, which reduces energy usage and stress on the equipment.
  • Clear drain lines help prevent nuisance shutdowns and water damage—two of the most common issues we see in Tampa Bay homes.
  • Regular inspection under a maintenance plan allows us to track past issues—like the small refrigerant leak and capacitor replacement—and verify that the system is still operating as it should.

The goal with this Premium Therapy Plan visit wasn’t to push unnecessary replacements; it was to get the most reliable performance possible from a 15-year-old system while keeping the homeowner informed about its condition.

Pro Tips for Homeowners in Riverview

If you live in Riverview, FL 33579 or anywhere in the Tampa Bay area, your HVAC system faces high heat, humidity, and long run times for most of the year. Here are some practical tips to help protect your equipment between professional visits:

  • Change or clean your air filter regularly. In our climate, many homes need a clean filter every 30–60 days, sometimes more often if you have pets or allergies. If you’re unsure what type of filter is best, our air filter installation and replacement services can help you choose the right setup.
  • Keep the outdoor unit clear. Trim back plants, remove leaves, and avoid stacking objects around the condenser. Give it at least a couple of feet of clearance on all sides for proper airflow.
  • Watch for signs of drainage issues. If you see water around your indoor unit, hear gurgling, or notice the system shutting off unexpectedly, it could be a drain line problem. Catching it early can prevent damage.
  • Consider periodic duct and vent cleaning. Dust and debris in ducts can reduce airflow and contribute to poor indoor air quality. Our professional air duct cleaning services are designed for Florida homes and help support cleaner, more consistent airflow.
  • Don’t ignore unusual sounds or short cycling. If your system in Riverview starts making new noises or turns on and off frequently, schedule a check before it turns into a breakdown.
  • Include the whole system in your maintenance routine. Dryer vents, for example, can affect both safety and indoor humidity. Our dryer vent cleaning helps reduce fire risk and supports better airflow in the home.

FAQ About This Premium Therapy Plan Visit

How often should I schedule maintenance for an older HVAC system in Riverview, FL 33579?

For a system that’s around 15 years old, twice-yearly maintenance is a smart approach in our climate. The Premium Therapy Plan this homeowner is on provides regular visits so we can check performance in both heating and cooling seasons, catch developing issues early, and keep the system as reliable as possible.

Does a small refrigerant leak mean I have to replace my system?

Not always. In this case, a small leak was previously detected, and we added refrigerant and replaced a capacitor under the plan. The system pressures on this visit were within normal range, and the equipment was operating properly. Whether a system needs repair or replacement depends on the size and location of the leak, overall system condition, and how often it’s losing refrigerant. We discuss options with each homeowner based on what we actually find.

What’s the benefit of checking electrical consumption during maintenance?

Checking electrical consumption helps us see how hard the blower, compressor, and fan motors are working. If they draw more power than they should, it can indicate stress or developing problems. On this Riverview visit, everything was operating properly, which is reassuring for a 15-year-old system. It’s one of the ways we keep an eye on component health over time.

Why do you clean both the indoor and outdoor units?

Both units are part of the same system. The outdoor unit releases heat, and the indoor unit absorbs it and moves air through your home. Dirt on either side interrupts that process. Cleaning both helps maintain efficiency, supports better comfort, and reduces strain on major components—especially important for older equipment in Tampa Bay homes.

Is duct sanitation or duct cleaning really necessary?

In many Riverview homes, ducts collect dust, debris, and sometimes microbial growth over time, particularly in high-humidity conditions. Duct sanitation and cleaning can improve air movement and help reduce contaminants in the air you breathe. The homeowner on this Premium plan had duct sanitation included as part of an older plan version, which complements their regular HVAC maintenance.

What if my system is running but my utility bills are high?

A system can still cool or heat the home while using more energy than it should, especially as it ages. Maintenance visits like this one in Riverview, FL 33579 help us look at cleanliness, electrical consumption, and overall operation. If we see signs that the system is working harder than it needs to, we’ll discuss repair options or, when appropriate, replacement options so you can make an informed decision.

Why Choose Home Therapist

At Home Therapist Cooling, Heating, and Plumbing, we treat every visit—whether it’s an emergency repair or a scheduled Premium Therapy Plan checkup—the same way: with careful attention, clear communication, and respect for your home.

Here’s what homeowners in Riverview, FL 33579 and across Tampa Bay can expect from us:

  • Licensed and professional technicians: Our team is trained to handle both newer and older systems carefully and correctly. We follow proven procedures and use our experience to protect your comfort and safety.
  • Transparent communication: We explain what we find, what we recommend, and why—without pressure. On this visit, for example, we reviewed previous work (like the refrigerant top-off and capacitor replacement) and confirmed that the system was still operating as expected.
  • Clean and respectful work: We work neatly around your home, take care with panels and components, and leave the equipment area tidy when we’re done.
  • Long-term reliability focus: Especially with older systems, our goal is to give you honest feedback and help you get as much dependable life as possible out of your equipment, while also letting you know when it may make sense to plan for replacement.
  • Committed to Tampa Bay homeowners: We live and work in this area, and we understand the demands the Riverview climate puts on HVAC systems. That local knowledge shapes how we maintain and service your equipment.

If you’d like to see what other Tampa Bay homeowners say about us, you can find us on social media and trusted local directories:

  • Follow us on Facebook for updates and homeowner tips.
  • See our latest projects and behind-the-scenes work on Instagram.
  • Check out short videos and quick tips on TikTok.

For additional peace of mind, you can also review our standing with trusted organizations:

When you’re ready for help beyond maintenance—whether it’s a repair, a new system, or plumbing services—our HVAC and plumbing services in Hillsborough County are just a call away.

Schedule Your Next HVAC Service in Riverview, FL 33579

If you’re in Riverview, FL 33579 and you’d like your system checked with the same level of care this homeowner received, our team at Home Therapist is ready to help. Whether your equipment is brand new or 15 years old, regular, professional maintenance can make a real difference in comfort, reliability, and peace of mind.

Reach out to schedule a Premium Therapy Plan visit or a one-time tune-up, and we’ll walk you through what your system needs in clear, straightforward terms. Our local Tampa Bay technicians are here to keep your home comfortable, season after season.

Plumbing Inspection and Fixture Consultation in Valrico, FL 33596

When a homeowner in Valrico, FL 33596 reached out to us, they weren’t dealing with a burst pipe or a complete plumbing failure. Instead, they had several nagging plumbing concerns and wanted clear, honest guidance before committing to any repairs or replacements. Our role on this visit was to listen, inspect what we reasonably could, explain options, and respect the homeowner’s decision to wait for a second opinion before moving forward.

During this appointment, our plumbing technician helped the homeowner talk through issues with a toilet component, a shower head support, and a kitchen faucet concern. Because no diagnostic testing or repair work was authorized, we did not open up fixtures, remove parts, or perform hands-on troubleshooting. We focused on education, expectations, and next steps, while making sure the homeowner understood our service call fee and what a full diagnostic visit would look like if they chose to proceed later.

Case Recap

  • Location: Single-family home in Valrico, FL 33596
  • Reason for visit: Multiple plumbing concerns and questions about potential fixture replacements
  • Main concerns mentioned: Toilet fill/valve area, shower head support, and a kitchen sink faucet/aerator
  • Scope of work: Conversation and basic visual review only — no authorized diagnostics or repairs
  • Outcome: Homeowner chose to wait for another plumber’s evaluation; our service call fee applied as agreed
  • Next step if they call us back: Schedule a full plumbing diagnostic and proceed with any approved repairs

Customer Problem: Multiple Small Plumbing Concerns Adding Up

The homeowner in Valrico contacted us because they had a list of plumbing issues that, while not emergencies, were causing frustration and uncertainty. They wanted to understand what it would take to get everything working and looking the way they wanted.

Here’s what they shared with us when we arrived:

1. Toilet component replacement. The homeowner described a part inside the toilet — in the area where water comes into the tank — and mentioned they already had a replacement part on hand. From their description, it sounded like a fill-related component, but without authorization to disassemble or test, we did not remove the lid, shut off water, or confirm the exact part or condition.

2. Shower head support. They also wanted to explore options for adding a support or bracket to better hold or position the shower head. This is a common request in homes across Valrico and the greater Tampa Bay area, especially when existing fixtures become loose or when someone wants a more comfortable shower height.

3. Kitchen faucet and aerator concerns. In the kitchen, the homeowner described an issue at the sink and was initially interested in changing the aerator. During the conversation, our technician explained that in some situations, a simple aerator swap is not enough and a full faucet or valve replacement may be the better long-term solution. The homeowner decided not to proceed with that work during this visit.

We had also explained our standard service call fee of $49 prior to the visit. The homeowner agreed to the fee, with the understanding that if they chose to hire us for approved work, that fee could be waived or discounted toward the job total.

Inspection and Diagnosis: What We Could and Couldn’t Do

On any plumbing visit in Valrico, FL 33596 or elsewhere in Tampa Bay, our first priority is safety — for your home, your water supply, and our technicians. That means we do not partially disassemble plumbing fixtures or perform tests unless we have clear authorization to move forward with diagnostic work.

On this visit, here is what we focused on:

  • Listening carefully to the homeowner’s description of issues in the bathroom and kitchen.
  • Clarifying expectations around what a full diagnostic would involve (shutting off water, opening fixtures, testing valves, etc.).
  • Explaining possible repair paths in plain English, without pressure or upselling.
  • Respecting boundaries when the homeowner chose not to authorize further evaluation.

Because no diagnostic work was approved, we did not:

  • Remove toilet components or confirm the exact part the homeowner had on hand.
  • Open or test shut-off valves at the toilet or under the kitchen sink.
  • Remove or replace the shower head, shower arm, or mounting hardware.
  • Measure water pressure, flow rates, or check for hidden leaks.

Without that hands-on evaluation, it would not be honest or responsible for us to “diagnose” the problems or promise specific repair outcomes. Instead, we kept the conversation high-level, explaining what typical solutions might look like for:

  • Toilet fill or valve-related issues
  • Shower head support or mounting upgrades
  • Kitchen faucet or aerator performance concerns

Ultimately, the homeowner let us know that another plumber would be visiting the property for a second opinion. We fully respected that choice and did not push further.

Repair or Service Process: What Would Happen If the Work Was Approved?

Even though no repairs were completed on this particular visit in Valrico, FL 33596, it can be helpful to understand what a typical service process looks like for these kinds of issues. If the homeowner calls us back and authorizes work, here is how we would normally proceed.

1. Toilet Component or Fill Valve Work

When a toilet is not refilling properly, keeps running, or is noisy, the problem is often in the fill valve or related internal components. A standard approach usually includes:

  • Shutting off water to the toilet and safely draining the tank.
  • Removing the old fill-related components to inspect for wear or damage.
  • Installing a suitable replacement part, whether supplied by the homeowner or sourced by us.
  • Checking for proper water level, shut-off operation, and leak-free connections.

This kind of repair helps prevent wasted water, unexpected running toilets, and unnecessary strain on your plumbing system. Our team frequently performs this work in combination with other plumbing maintenance services across Tampa Bay.

2. Shower Head Support or Bracket Installation

For a shower head that droops, doesn’t stay in place, or needs to be repositioned, we typically:

  • Inspect the existing shower arm, wall connection, and any current brackets.
  • Recommend hardware that properly supports the shower head and suits the homeowner’s preferred height and style.
  • Install the new support or bracket with secure anchoring.
  • Confirm that the shower head holds its position and that there are no leaks at the connection point.

Done correctly, this not only improves comfort but also reduces the risk of stress on piping behind the wall.

3. Kitchen Faucet or Aerator Concerns

Kitchen faucets work hard in Florida homes, and in areas like Valrico, mineral buildup or aged components can cause poor flow, inconsistent spray patterns, or leaks. Depending on what we find during a full diagnostic, options might include:

  • Cleaning or replacing a clogged aerator if that is the sole issue.
  • Inspecting the faucet body, cartridge, and supply lines for wear or leaks.
  • Recommending a complete faucet replacement when it offers better long-term reliability and performance than a minor repair.

Our team regularly handles these types of projects as part of our sink and faucet installation and repair services throughout the Tampa Bay area.

Why This Kind of Fix Works When Properly Diagnosed

Even though we did not perform troubleshooting during this specific appointment in Valrico, FL 33596, the solutions we often recommend for toilets, shower heads, and kitchen faucets are based on a few simple plumbing principles.

1. Water control and shutoff. Components like toilet fill valves and faucet cartridges are designed to control how water enters and leaves a fixture. When they wear out, you may see constant running, dripping, or weak flow. Replacement restores proper start-and-stop control and helps reduce water waste.

2. Secure mounting and support. A shower head or faucet that isn’t properly supported can slowly loosen over time, leading to wobble, leaks, or even damage behind the wall or under the sink. Installing the correct support hardware keeps everything stable and reduces stress on joints and connections.

3. Clean flow paths. Aerators, valves, and narrow passages in fixtures can collect mineral deposits, especially in Florida’s water conditions. When cleaned or replaced as part of a thorough plumbing repair or plumbing service in Hillsborough County, you typically get smoother, more consistent water flow and better everyday performance.

When we’re authorized to fully diagnose and repair a system, we always verify proper operation afterward. That means checking for leaks, confirming reasonable water flow, and ensuring everything is operating the way a homeowner in Tampa Bay should expect.

Pro Tips for Homeowners in Valrico

Homes in Valrico and across the Tampa Bay area face a combination of humidity, frequent use, and mineral content in the water that can be tough on plumbing fixtures. Here are some practical tips to help you stay ahead of problems:

  • 1. Don’t ignore a “just a little” running toilet. Even a soft, occasional refill sound can signal a fill or flapper issue. Addressing it early can save water and reduce the risk of surprise spikes in your utility bill.
  • 2. Check under sinks monthly. In our climate, small leaks can quickly create moisture issues. Take a moment each month to feel for dampness and look for staining under bathroom and kitchen sinks.
  • 3. Gently clean aerators instead of forcing them. If your kitchen or bathroom faucet starts to spray oddly, the aerator may be partially clogged. If you’re comfortable, remove it gently and rinse out debris. If it resists or looks damaged, it’s safer to call for professional help than to force it and crack the fixture.
  • 4. Pay attention to fixture movement. A loose shower head, wobbling faucet, or moving handle is more than an annoyance. In many Valrico homes, these early signs show up before an actual leak. Addressing them promptly can help prevent damage inside walls or cabinets.
  • 5. Schedule periodic whole-home plumbing checks. Having a licensed plumber walk through your home, test key fixtures, and check for early warning signs is one of the best ways to avoid bigger headaches. Our team offers plumbing repair and inspection services near Valrico and Brandon that can be tailored to your home’s age and usage.

FAQ: Plumbing Consultations and Service Call Visits

Do you always charge a service call fee for plumbing visits in Valrico, FL 33596?

Yes. For this type of visit, a $49 service call fee applies. It helps cover the time and travel for a licensed technician to come to your home, listen to your concerns, and review your system. If you decide to move forward with our recommended work, that fee is typically waived or discounted from the final job cost.

What happens if I decide not to approve diagnostics or repairs during the visit?

If you choose not to authorize diagnostic work or repairs, we respect that decision. We’ll still answer questions to the extent we can without opening or testing systems, and the agreed-upon service call fee will apply for the visit.

Can I supply my own toilet or faucet parts?

Many homeowners in Valrico purchase parts on their own. In those cases, we’re happy to discuss whether the part appears appropriate for the fixture. However, we do need authorization to perform diagnostics and installation. When we supply the parts ourselves, we can also better support you with warranties and long-term reliability.

Why might you recommend replacing a faucet instead of just the aerator?

If a faucet is older, has internal wear, or shows signs of corrosion and leaks, simply changing the aerator may only provide a short-term improvement. Replacing the faucet or valve assembly can be a better long-term solution, giving you more reliable performance and fewer future service calls.

What can I expect from a full plumbing diagnostic visit?

On a full diagnostic visit, our technician will test fixtures, operate shut-off valves when needed, open access points, and look for the root cause of your concerns. We then explain what we find, walk you through repair or replacement options, and provide clear pricing before we do any work.

Why Choose Home Therapist for Plumbing Help in Tampa Bay

Whether you’re in Valrico, FL 33596 or elsewhere in Tampa Bay, our goal is to make plumbing service feel straightforward and stress-free. Even on visits where no work is approved, we show up prepared, communicate clearly, and treat your home with respect.

Licensed, professional technicians. Our plumbers are trained, licensed, and experienced with Florida’s plumbing systems. From simple fixture concerns to whole-home issues, we know how to approach your home safely and systematically.

Transparent communication. We explain our service call fee up front, talk through what we can and cannot do without authorization, and never pressure you into repairs. If you want a second opinion, we fully respect that choice — just as we did for this homeowner in Valrico.

Clean and respectful work. When we’re invited to perform diagnostics or repairs, we protect floors and work areas, clean up after ourselves, and take the time to answer your questions before we leave. Our reputation matters to us, and it’s reflected in the feedback we receive on platforms like Facebook and Instagram.

Focused on long-term reliability. We don’t believe in quick fixes that just kick the can down the road. Our recommendations aim to balance cost, reliability, and comfort. That’s true whether we’re handling a small faucet issue or more complex plumbing repairs across Tampa Bay.

Trusted in the community. Homeowners can find us on trusted directories and local organizations, including our BBB profile and the Tampa Bay Chamber of Commerce. You can also see where we’re located and read reviews on our Google Maps business listing.

Need Plumbing Help in Valrico, FL 33596?

If you’re dealing with toilet issues, loose shower hardware, or a frustrating kitchen faucet in Valrico, FL 33596, you don’t have to guess your way through it. Our local Tampa Bay team is here to provide clear explanations, professional diagnostics, and straightforward repair options tailored to your home.

Whether you’re ready for a full plumbing diagnostic or you’d like to discuss a broader plumbing repair plan for your property, we’re only a call away. Reach out to Home Therapist to schedule your visit, and let our licensed technicians help you keep your home’s plumbing running smoothly and reliably.

From quick fixture fixes to more involved plumbing repairs across Tampa Bay, we’re committed to doing the job the right way, at a pace and scope that you’re comfortable with.

HVAC Maintenance and UV Light Inspection in Apollo Beach, FL 33572

When your air conditioning system is working hard in the Apollo Beach, FL 33572 heat and humidity, routine maintenance becomes more than just a good idea—it’s what keeps your home comfortable, efficient, and healthy. On this visit, we came out to a homeowner in Apollo Beach as part of their Premium Home Therapy Plan to complete a scheduled HVAC maintenance. The system itself was running well, but we did find one important issue: the UV light designed to help treat the air inside the home was not operating.

In this walkthrough, we’ll explain what we did during the maintenance visit, how we discovered the UV light problem, what it means for indoor air quality, and how we left the system ready for reliable cooling while the homeowner considers replacement options.

Case Recap

  • Location: Residential home in Apollo Beach, FL 33572
  • Service: Scheduled HVAC maintenance under our Premium Home Therapy Plan
  • System status: Cooling system operating and maintenance completed successfully
  • Issue found: UV light for indoor air quality not working
  • Action taken: Full inspection, confirmed UV failure, estimate for UV light replacement sent
  • Outcome: System left running properly; homeowner will decide on UV replacement timing

Customer Problem: Staying Comfortable and Healthy in Apollo Beach

For homeowners in Apollo Beach, FL 33572, air conditioning isn’t a luxury—it’s a necessity. Between the coastal humidity and long cooling season, equipment runs many hours a day. This homeowner is enrolled in our Premium Home Therapy Plan to make sure the system is cleaned, inspected, and tuned up on a regular schedule, so they don’t have to worry about surprise breakdowns in the middle of a hot day.

On this particular visit, the homeowner didn’t report any major comfort complaints. The system was cooling, and the home felt comfortable. Their main expectation was simple: keep everything in top shape and let them know if we spotted anything that could affect performance, efficiency, or air quality.

Because the home also has a UV light installed as part of the air quality setup, the homeowner relies on that device to help treat air as it passes through the system. If that UV light stops working, you won’t necessarily feel it immediately in temperature, but it can reduce some of the protection they’ve invested in for cleaner air.

Inspection and Diagnosis: What We Checked and Why

During a scheduled HVAC maintenance visit in Apollo Beach, our goal is to look at the entire system from end to end. Even when everything seems to be working, we want to catch any developing issues early. On this visit under the Premium Home Therapy Plan, here’s the kind of work we focus on:

  • Visual inspection of indoor and outdoor equipment for wear, damage, or corrosion
  • Checking filters, airflow paths, and return grilles
  • Inspecting the condensate system to help prevent leaks or overflow
  • Verifying thermostat operation and basic system controls
  • Listening for unusual noises and checking for abnormal vibrations

Because this home also uses a UV light as part of the air quality system, we include that device in our inspection. We looked for the normal signs of operation that indicate the UV light is on and doing its job. On this visit, it became clear that the UV light was not functioning.

From there, we focused specifically on confirming that the cooling side of the system was still operating correctly, separate from the UV light. We do not guess when it comes to homeowners’ comfort and safety in Apollo Beach—we verify that the core HVAC equipment is working, even when an accessory like a UV light needs attention.

Repair or Service Process: How We Handled This Maintenance Visit

Even though the only issue discovered was with the UV light, we still completed a full maintenance service for this homeowner in Apollo Beach, FL 33572. Here’s how the visit flowed and why each step matters:

1. Completing the Scheduled Maintenance

First, we went through the standard maintenance tasks for the system. That includes cleaning and inspecting components, confirming normal operation, and looking for signs of wear. Keeping up with maintenance helps extend system life and reduce surprise failures, especially in a coastal community like Apollo Beach where equipment sees heavy use.

We also confirmed that air was moving through the system as expected. Airflow is a big factor in both efficiency and comfort. While more advanced work like professional air duct cleaning may be recommended in some cases, that would only be brought up when we see specific signs that ducts are restricting airflow or are heavily contaminated.

2. Inspecting the Indoor Air Quality Components

With the core maintenance tasks on track, we turned our attention to the UV light. This device is installed to treat air as it passes through the system, supporting healthier indoor air. We checked the typical indicators that show a UV light is operating properly.

During that inspection, we confirmed the UV light was not working. A failed UV light will not stop your AC from cooling, but it does mean you are not getting the air treatment benefits you paid for. Because we respect both safety and transparency, we do not attempt to “revive” a UV lamp that is at the end of its life. Instead, we focus on replacement when appropriate.

3. Confirming the System Was Still Cooling Properly

Next, we verified that the main HVAC system was still running normally. The UV light is an accessory—it works with the system, but it is not the core cooling mechanism. We made sure that the AC started, ran, and cycled as expected and that there were no immediate concerns with operation.

After this verification, we were confident letting the homeowner continue using the system for cooling while they decided if and when to replace the UV light.

4. Communicating Clearly With the Homeowner

Once our technician had the full picture, we explained everything to the homeowner in plain language:

  • The routine maintenance under their Premium Home Therapy Plan was completed successfully.
  • The AC system was operating as expected at the end of the visit.
  • The UV light was not working and would not provide air treatment in its current state.
  • An estimate for UV light replacement was prepared and sent for review.

The homeowner chose to wait and think about the timing of the UV light replacement, which is completely understandable. Our role is to provide honest information, not pressure. We left the system safe and cooling properly for their Apollo Beach home.

Why This Approach Works for Apollo Beach Homeowners

In our climate around Apollo Beach, FL 33572, systems run almost year-round. That puts a lot of strain on both mechanical components and indoor air quality accessories. The approach we took on this visit is designed to protect both comfort and long-term reliability.

Routine Maintenance Protects Cooling Performance

Maintenance visits like this one keep the system clean, help maintain good airflow, and allow us to spot developing issues early. It’s similar to an oil change on a vehicle—skipping it doesn’t cause immediate failure, but over time it can shorten the life of the equipment and reduce performance.

By handling the inspection and tune-up under a plan like the Premium Home Therapy Plan, we can monitor things like airflow, drainage, and general system condition on a regular schedule. If we see a need for more focused services—such as filter replacement or air filter upgrades or dryer vent cleaning that can affect overall air quality and safety—we bring that to the homeowner’s attention.

UV Lights Support, But Do Not Replace, Core HVAC Performance

A UV light is one tool in the larger indoor air quality toolbox. It helps treat air moving through the system, but it does not create cooling, and it does not replace the need for good filtration and ductwork design. When a UV light fails, your AC can still cool your Apollo Beach home, but you lose that additional layer of air treatment.

By clearly separating the UV light issue from the rest of the HVAC system, we make sure the homeowner understands that comfort is still being maintained while they decide on next steps for air quality improvements.

Clear Communication Builds Long-Term Trust

For us, it’s not enough to just fix things—we want homeowners in Apollo Beach, FL 33572 to understand what we’re doing and why. Letting the homeowner know that maintenance was completed, explaining the UV light issue, and providing an estimate without pressure is how we support long-term relationships and comfort, not just one-time repairs.

Pro Tips for Homeowners in Apollo Beach

Whether or not you have a UV light installed, there are a few simple practices that can help keep your HVAC system running reliably in Apollo Beach’s heat and humidity.

  • Change your air filter regularly. In Florida’s climate, filters often need to be changed more frequently due to high humidity and extended run times. Follow your system’s recommendations, and consider upgrades that improve filtration if you have allergies or pets.
  • Keep supply and return vents clear. Avoid blocking vents with furniture, curtains, or rugs. Restricted airflow can strain your system, reduce comfort, and increase operating costs.
  • Pay attention to unusual sounds or smells. If you hear new noises from your AC or notice musty odors, it’s worth having a technician take a look before a small issue becomes a major problem.
  • Schedule routine maintenance before peak seasons. Having your system serviced under a plan—like the maintenance we performed on this Apollo Beach home—helps ensure everything is ready before the hottest months hit.
  • Consider air quality add-ons thoughtfully. UV lights, filtration upgrades, and duct cleaning can be very helpful, but they work best as part of a whole-system approach. If you are curious what makes sense for your home, we can walk you through options without pressure.
  • Keep outdoor equipment clear. Make sure plants, debris, and outdoor items are kept away from the outdoor unit. Good airflow around that equipment is essential in our coastal environment.

FAQ: HVAC Maintenance and UV Lights in Apollo Beach, FL 33572

Does a broken UV light stop my AC from cooling?

No. In this Apollo Beach home, the UV light was not working, but the AC system itself was still cooling properly. A failed UV light affects air treatment, not the core cooling function. We verified proper system operation before leaving.

Is it safe to keep using my system if the UV light is out?

Generally, yes—the system can still cool your home. You’re simply not getting the air treatment benefits from the UV light. On this visit in Apollo Beach, we confirmed the HVAC system was operating as expected and then provided an estimate so the homeowner could decide on replacement timing.

How often should I schedule HVAC maintenance in Apollo Beach?

With our hot, humid climate and long cooling season, regular maintenance is very important. Many homeowners prefer a plan that includes visits timed around seasonal changes, so the system is checked before heavy use periods. This homeowner’s Premium Home Therapy Plan visit is a good example of that approach.

Will you automatically replace parts like UV lights during maintenance?

No. We do not replace components like UV lights without discussing it with you first. Our process is to inspect, explain what we find, and provide estimates. You choose when and how to move forward. That’s what happened with this Apollo Beach, FL 33572 visit: the homeowner requested time to decide on replacement.

What else can I do to improve air quality besides a UV light?

UV lights are one option, but they work best as part of a broader strategy. Proper filtration, clean ducts, and a well-maintained system all play a role. Depending on your needs, services like air duct cleaning and upgraded air filters can also support cleaner, healthier air in your Apollo Beach home.

Why Choose Home Therapist for Your Apollo Beach HVAC Needs

When you invite us into your home in Apollo Beach, FL 33572, you’re trusting us with your comfort, your air quality, and your peace of mind. We take that seriously.

  • Licensed and professional technicians. Our team is trained to handle both routine maintenance and more complex HVAC issues with care and competence.
  • Transparent communication. We explain what we find, what it means, and what your options are—just like we did when we discovered the non-working UV light on this visit.
  • Clean and respectful work. We treat your home as if it were our own, working neatly and safely from start to finish.
  • Focus on long-term reliability. Our maintenance plans and service recommendations are designed to protect your system over time, not just solve today’s problem.
  • Committed to Tampa Bay homeowners. As a local company serving Tampa Bay communities, including Apollo Beach, we understand how our climate affects your HVAC system and what it takes to keep it running well.

If you’d like to see more of how we work in the community, you can follow us on Facebook or Instagram, and you can also find us on Google Maps for directions and reviews.

For added peace of mind, you can also review our standing with trusted organizations like the Better Business Bureau or the Tampa Bay Chamber of Commerce. We’re proud to serve our neighbors with honest, reliable HVAC and plumbing services.

Need HVAC Maintenance or UV Light Service in Apollo Beach, FL 33572?

If you live in Apollo Beach, FL 33572 and want to keep your home comfortable and your system running smoothly, we’re here to help. Whether you’re interested in a maintenance plan like our Premium Home Therapy Plan, need a UV light inspected or replaced, or simply want a professional eye on your equipment, our local Tampa Bay technicians are ready to serve.

Reach out to Home Therapist to schedule your next HVAC maintenance visit in Apollo Beach, and let us keep your home feeling comfortable, clean, and cared for—season after season.

Whole-Home Plumbing Inspection and Water Heater Flush in Apollo Beach, FL 33572

For this visit, one of our Home Therapist technicians headed out to a home in Apollo Beach, FL 33572 for a scheduled plumbing maintenance appointment. The homeowner is on our Premium Home Therapy Plan and wanted peace of mind that the plumbing system and water heater were operating properly. During this visit, we completed a full whole-home plumbing inspection and performed a professional water heater flush. Everything was found to be in good working order, and the home left in safe, reliable condition.

Case Recap

Customer Problem: Looking for Peace of Mind, Not Just a Quick Fix

In this case, the homeowner in Apollo Beach wasn’t calling us out for a specific plumbing emergency. Instead, they wanted to stay ahead of problems. As part of their Premium Home Therapy Plan, they requested a routine plumbing inspection and water heater maintenance visit.

Like many Florida homeowners, they understand that our plumbing systems work hard year-round. High humidity, mineral content in the water, and heavy everyday use can all add up over time. Even when things “seem fine,” small issues can be developing behind walls, under sinks, or inside the water heater tank.

The goals for this visit were simple:

  • Confirm there were no hidden leaks or obvious signs of wear in the plumbing system
  • Flush the water heater to remove sediment and help keep hot water performance consistent
  • Give the homeowner clear feedback on the overall condition of their plumbing

There were no reports of low water pressure, unusual noises, or hot water issues. This was truly a proactive maintenance visit, which is exactly what we like to see from homeowners in Apollo Beach who want to avoid surprise plumbing problems.

Inspection and Diagnosis: What We Checked and Why

Even when everything appears to be working, we treat a full plumbing inspection seriously. Our technician followed a systematic approach throughout the home to make sure nothing was overlooked.

During this plumbing visit in Apollo Beach, FL 33572, we focused on:

  • Visible plumbing lines and connections: Looking under sinks, around toilets, at exposed piping, and around the water heater for any signs of corrosion, moisture, or prior leaks.
  • Fixtures and drains: Running water at sinks, tubs, and showers to observe drainage, listen for gurgling, and check for any slow drains or backups.
  • Toilets: Inspecting for continuous running, weak flushes, or small leaks around the base or supply line connections.
  • Water heater: Checking the general condition of the tank, supply pipes, shutoff valves, and safety components before starting the flush.
  • General water usage behavior: Verifying that flow at fixtures appeared normal and that there were no signs of irregular pressure.

Throughout the inspection, our technician was looking for a few common issues we often see in Tampa Bay homes:

  • Minor leaks that haven’t yet shown up as visible damage
  • Corroded shutoff valves or supply lines
  • Early signs of water heater tank deterioration
  • Drains starting to build up debris or scale

At this Apollo Beach property, everything checked out well. At the time of service, we did not observe any active leaks, obvious failures, or performance issues in the plumbing system or the water heater. With the inspection complete, we moved on to flushing the water heater as part of the scheduled maintenance.

Repair and Service Process: Step-by-Step Maintenance

Even though no “repairs” were needed, the work we performed during this visit still plays a big role in long-term reliability and comfort. Here’s how we handled the water heater flush and overall plumbing maintenance.

1. Preparing the Water Heater for Flushing

Before starting the flush, our technician made sure the water heater was safe to work on. That includes:

  • Confirming power or fuel controls were in the correct position for maintenance
  • Verifying that shutoff valves and drain valves were operational
  • Checking for any visible signs of damage or leaks around the tank

This preparation is crucial for both safety and to make sure the flush is effective. If anything had looked questionable, we would have paused and discussed next steps with the homeowner before proceeding.

2. Flushing Sediment from the Water Heater Tank

Over time, minerals and sediment in the water can settle at the bottom of a conventional tank-style water heater. In Florida, this buildup can happen faster than people realize, especially in areas with higher mineral content.

During the flush, we:

  • Connected to the water heater drain valve
  • Drained water from the tank in a controlled manner
  • Flushed until the water ran clear, helping remove built-up sediment

This process helps the burner or heating elements interact with cleaner water and a cleaner tank bottom, which supports more efficient heating and can reduce unnecessary strain on the system.

3. Verifying Plumbing Fixtures and Drains

With the water heater flush complete, we did another quick pass through key fixtures to ensure everything was still operating as expected. Any time we work on a plumbing system in Apollo Beach or anywhere in Tampa Bay, we like to double-check:

  • That hot water is reaching fixtures properly
  • That there are no new drips at shutoff valves or connections
  • That drains are still clearing normally

Again, all fixtures in this home behaved as expected, and no concerns were observed at the time of service.

4. Final System Check and Homeowner Communication

We wrapped up by reviewing our findings with the homeowner. Since everything was in good condition, there were no repair recommendations or upsells—just straightforward feedback and practical guidance. We confirmed:

  • The plumbing system was functioning properly at the time of inspection
  • The water heater had been successfully flushed
  • No immediate actions were required

We also recommended keeping up with annual plumbing inspections and periodic water heater flushes as part of their Premium Home Therapy Plan, which is consistent with the maintenance information we share on our plumbing maintenance plans and options page.

Why This Fix (and Maintenance) Works

Even though nothing was “broken” at this Apollo Beach, FL 33572 home, the maintenance we performed directly supports comfort, safety, and long-term reliability.

Plumbing Inspection: Catching Issues Before They Escalate

A thorough plumbing inspection helps uncover small problems before they become bigger, more expensive headaches. Things like a slow drip under a sink, a sweating shutoff valve, or a weak flush can often be corrected fairly easily when caught early. Left alone, they can turn into water damage, mold growth, or fixture failures.

By methodically checking exposed piping, valves, fixtures, and drains, we give homeowners in Apollo Beach a snapshot of their plumbing health at that moment in time. This is why scheduling routine inspections is a key part of our maintenance services across Tampa Bay.

Water Heater Flushing: Protecting Efficiency and Hot Water Comfort

Sediment buildup at the bottom of a water heater tank can act like an insulating blanket between the burner or heating element and the water. The more sediment builds up, the harder the heater has to work to bring water up to temperature.

Flushing the tank helps:

  • Maintain more consistent hot water delivery
  • Reduce unnecessary strain on the heater
  • Support better overall efficiency

Regular flushing is one of the most effective, straightforward ways to help extend the life of a tank-style heater. It’s one of the reasons we emphasize it so strongly in our water heater maintenance education.

Pro Tips for Homeowners in Apollo Beach

Here are a few practical tips for homeowners in Apollo Beach, FL 33572 and the surrounding Tampa Bay area who want to keep their plumbing and water heater in great shape:

  • Schedule annual plumbing inspections: Even if you don’t see or hear a problem, a yearly check lets us spot early warning signs before they become leaks, clogs, or failures.
  • Don’t ignore small changes: A slightly slower drain, a toilet that runs occasionally, or a faucet that drips every so often can be early clues that something needs attention.
  • Consider routine water heater flushing: Regular flushing, especially in Florida’s mineral-rich water conditions, helps protect your heater and can support more reliable hot water.
  • Know where your main shutoff is: Be familiar with how to turn off the water to your home in case a pipe or fixture suddenly fails. This can significantly reduce water damage.
  • Watch for moisture in cabinets: Periodically open sink cabinets and check for dampness, discoloration, or musty smells—these can indicate a slow leak.
  • Use your membership benefits: If you’re on a maintenance plan like our Premium Home Therapy Plan, use your included visits. They’re designed to protect your plumbing and HVAC systems in communities like Apollo Beach.

FAQ: Plumbing Inspections and Water Heater Flushes in Apollo Beach, FL 33572

How often should I schedule a whole-home plumbing inspection?

For most homes in Apollo Beach and the greater Tampa Bay area, we recommend a full plumbing inspection once a year. Annual visits give us a consistent record of your system’s condition and help catch issues before they lead to leaks or water damage. If your home is older or you’ve had frequent plumbing issues, we may suggest more frequent check-ins.

How often should my water heater be flushed?

The ideal schedule depends on your water quality and usage, but many homeowners benefit from a water heater flush about once a year. During this visit in Apollo Beach, we performed a routine flush as part of the homeowner’s maintenance plan. On future visits, we can adjust the frequency based on what we observe inside your system.

Will a plumbing inspection in Apollo Beach disrupt my day?

In most cases, a routine plumbing inspection and water heater flush are minimally disruptive. We’ll need access to fixtures, the water heater, and key areas of your home, but we work efficiently and cleanly. We also coordinate appointment times carefully so they fit your schedule, just like we did for this homeowner in Apollo Beach, FL 33572.

What if you find a problem during the inspection?

If we find anything concerning—such as an active leak, failing valve, or water heater issue—we’ll explain what we found, discuss options, and provide clear pricing before doing any repair work. For this particular visit, everything was operating normally, so no repairs were needed. When repairs are necessary, our goal is always to be transparent and give you control over how to move forward.

Is routine plumbing maintenance really worth it if nothing seems wrong?

Yes. Much like regular checkups with a doctor, plumbing maintenance is about preventing problems, not just reacting to them. In this Apollo Beach home, the system was in good shape—but the inspection and water heater flush still helped protect against future issues. Over time, that kind of proactive care can save money, reduce stress, and extend the life of your plumbing and water heater.

Why Choose Home Therapist for Plumbing Service in Apollo Beach

When you invite us into your home in Apollo Beach, FL 33572, you’re trusting us with your comfort, safety, and property. We take that seriously on every visit—whether it’s a full repipe, an emergency leak repair, or a routine water heater flush.

  • Licensed, professional technicians: Our team is trained, licensed, and experienced with Florida plumbing systems, from older homes to new builds.
  • Transparent communication: We explain what we’re doing, what we find, and why we recommend certain options. On this visit, that meant confirming everything looked good and no repairs were required.
  • Clean and respectful work: We protect your home, work neatly, and leave your space as clean—or cleaner—than we found it.
  • Long-term reliability focus: We don’t just chase quick fixes. Our maintenance and repair recommendations are built around keeping your system reliable for the long run.
  • Commitment to Tampa Bay homeowners: We live and work in the Tampa Bay area, and we’re proud to care for neighbors all across communities like Apollo Beach.

If you’d like to get a feel for who we are and how we work, you can connect with us on social media or check out our standing with local organizations:

For more details about how we structure maintenance, you can also review our plumbing maintenance plans and our dedicated water heater maintenance services, as well as a similar inspection and water heater flush project we completed in Tampa.

Need Plumbing Maintenance in Apollo Beach, FL 33572?

If you live in Apollo Beach, FL 33572 and it’s been a while since your last plumbing inspection or water heater service, we’re here to help. Whether you’re interested in a one-time checkup or joining a maintenance plan, our local Tampa Bay team can walk you through your options and schedule a visit that works with your day.

Reach out to Home Therapist for courteous, professional plumbing service in Apollo Beach, and let us help keep your home’s water systems running smoothly and reliably—season after season.

AC Maintenance Premium Therapy Plan in Tampa, FL 33614

For a homeowner in Tampa, FL 33614, a reliable air conditioner isn’t a luxury—it’s a necessity. In this visit, our team came out for a scheduled Premium Therapy Plan maintenance on a three-year-old HVAC system. The goal was simple: give the system a full checkup, catch any issues before they start, and keep the home comfortable and efficient through the Florida heat.

During this visit, we performed a complete maintenance service: inspecting all major components, checking electrical consumption and system pressures, cleaning both indoor and outdoor units, flushing the condensate drain line, verifying the UV light, and replacing the air filter. The outcome was exactly what any homeowner wants to hear—everything was operating correctly, and no repairs were needed.

Case Recap: Premium AC Maintenance in Tampa, FL 33614

Here’s a quick overview of what we did during this Premium Therapy Plan visit:

  • Performed full HVAC system maintenance under the Premium Therapy Plan.
  • Verified electrical consumption for blower, compressor, and condenser fan were within normal ranges.
  • Checked refrigerant system pressures and found them to be normal.
  • Thoroughly cleaned indoor and outdoor units, including the condensate drain line.
  • Inspected the UV light for proper operation and replaced the air filter.
  • Confirmed the system was running efficiently with no issues or further action required.

Customer Problem: Staying Ahead of Breakdowns in Tampa's Heat

This homeowner in Tampa, FL 33614 wasn’t calling because of a breakdown. The system is only about three years old and was cooling the home well. Their main concern was staying ahead of problems, especially with how hard air conditioners work in our hot, humid climate.

When we scheduled the appointment, we made sure the visit time and date were firm so the family could plan around it. A family member would be at home to let us in and answer any questions. That kind of coordination matters—especially when we're working in and around your living spaces.

On arrival, the homeowner’s priorities were clear:

They wanted:

– The system fully checked from top to bottom.

– Confirmation that everything was running efficiently.

– Peace of mind that no hidden issues were building up inside the equipment.

That’s exactly what our Premium Therapy Plan is designed to do for Tampa Bay homeowners—protect comfort, prevent surprise breakdowns, and extend the life of the system through regular, detailed maintenance.

Inspection and Diagnosis: A Full-Body Checkup for the AC System

With maintenance visits like this, we approach the system as if we’re giving it a full physical exam. For this home in Tampa, FL 33614, we started with a visual and functional inspection, then moved into more detailed checks.

Here’s how we worked through the system:

1. Overall System Inspection
We began by checking both the indoor air handler and the outdoor condenser. We looked for signs of wear, corrosion, loose connections, or anything that might hint at future trouble. Since the system is only about three years old, we expect things to look relatively clean and tight—but we still verify.

2. Electrical Consumption Checks
Next, we checked electrical consumption on the major components:

– Blower motor (indoor fan)
– Compressor
– Condenser fan (outdoor fan)

Our readings showed that all three were operating within normal ranges for this system. That tells us the motors and compressor aren’t overworking and that there aren’t signs of developing electrical problems.

3. System Pressure Checks
We also checked system pressures. Proper pressures help confirm that the refrigerant circuit is running as it should and that there are no obvious signs of undercharge, overcharge, or restriction. On this visit, pressures were normal, which is what we want to see on a healthy, relatively new system.

4. Airflow and Cleanliness
We inspected the indoor coil, blower area, and accessible duct connections for dust buildup or airflow restrictions. We then moved outside to inspect the condenser coil and surrounding area. Good airflow is critical for both comfort and efficiency, especially in Tampa’s long cooling season.

5. Drainage and Condensate Line
Florida humidity means your AC pulls a lot of moisture from the air. That moisture has to go somewhere, and it normally drains through the condensate line. If that line clogs, you can get leaks, overflows, or even system shutdowns. During this visit, we inspected and cleaned the drain line as part of the maintenance.

6. UV Light and Filtration
This system uses a UV light to help treat the air as it passes through the HVAC system. We verified the UV light was on and operating properly. We also replaced the air filter to keep dust and debris from recirculating and from coating the coil.

After all checks were complete, we determined that the system was operating normally, with no issues and no repairs needed at this time.

Repair and Service Process: What We Did During the Visit

Even when nothing is "broken," there’s a lot we do during a premium maintenance visit. For this Tampa, FL 33614 home, our work focused on cleaning, verifying, and tuning the system so it can keep running smoothly.

Step 1: Safe Arrival and Home Protection
We began by greeting the family member who was present, confirming the service requested, and reviewing any concerns. We used protective gear and floor protection as needed to keep the home clean while we worked.

Step 2: Indoor Unit Cleaning
At the air handler, we carefully cleaned accessible areas of the unit. The goal here is to remove dust and debris that can restrict airflow, stress the blower motor, and lower efficiency. We also checked for any unusual noises or vibrations while the blower was running.

Step 3: Outdoor Unit Cleaning
Outside, we cleaned the condenser unit. Dirt, grass clippings, and debris often collect on the coil fins. Removing that buildup helps the system release heat more easily, which is especially important in our Tampa climate where the outdoor unit has to work hard almost year-round.

Step 4: Condensate Drain Line Service
We cleaned the condensate drain line to help prevent clogs and overflows. In Florida, where systems run for long stretches and pull a lot of moisture from the air, this step is crucial to avoid water damage or sudden system shutdowns.

Step 5: UV Light Inspection
We inspected the UV light to confirm it was operating properly. A working UV light can help treat the air that passes through the system and keep internal components cleaner over time. We verified that it was functioning as intended during this visit.

Step 6: Air Filter Replacement
We replaced the air filter with a fresh one. A clean filter supports good airflow, better air quality, and more efficient operation. It’s one of the simplest but most important parts of regular HVAC care for homeowners in Tampa, FL 33614.

Step 7: Final System Check
Once cleaning and component checks were complete, we ran the system and confirmed normal operation. Temperatures, airflow, and general performance were consistent with what we expect from a healthy, three-year-old system. No further action was required.

Why This Maintenance Visit Matters

Even though we didn’t find any problems on this visit, that in itself is a win. For homeowners in Tampa, FL 33614, routine AC maintenance is one of the best ways to protect comfort and avoid bigger expenses down the road.

Here’s why this type of service works:

Protecting Airflow
By cleaning coils, checking the blower, and replacing the air filter, we help the system move air freely. Restricted airflow makes the system work harder, increasing wear and energy usage.

Keeping Pressures and Electrical Loads in Check
When pressures and electrical consumption stay within normal ranges, it means the system isn’t overworking. That reduces stress on the compressor and motors, which are some of the most expensive parts to replace.

Preventing Water Issues
A clear condensate drain line helps prevent water leaks, standing water in the pan, and potential damage to ceilings, walls, or floors. In a humid area like Tampa Bay, that’s a major reason we always include this step in maintenance.

Maintaining Indoor Air Quality Components
Verifying the UV light and replacing the air filter helps keep the air cleaner and the system interior in better shape. That can contribute to a more comfortable home environment and more stable performance over time.

All of these pieces work together so the system can continue running efficiently and reliably, instead of slowly drifting toward higher bills and unexpected failures.

Pro Tips for Homeowners in Tampa

If you’re a homeowner in Tampa, FL 33614 or nearby Tampa Bay communities, here are a few practical tips to keep your AC system in good shape between professional visits:

1. Stay Consistent With Filter Changes
Check your air filter monthly and replace it as needed. In our humid, dusty environment, filters can load up faster—especially if you have pets or run the system heavily.

2. Keep the Outdoor Unit Clear
Make sure there’s at least a couple of feet of clear space around your outdoor unit. Trim back plants and avoid stacking items nearby so the condenser can breathe properly.

3. Watch for Drain Line Signs
If you see water near your indoor unit or notice a musty smell around it, that could be a sign of a condensate drain issue. Getting it checked early can prevent damage.

4. Don’t Ignore Small Changes
If you notice new noises, reduced airflow from vents, or rooms that aren’t cooling evenly, schedule a checkup before it turns into a breakdown—especially in Tampa’s peak summer months.

5. Consider a Maintenance Plan
Plans like our Premium Therapy Plan help ensure your system is routinely inspected and cleaned. That kind of consistency is especially valuable in Florida, where systems see heavy use almost all year.

6. Combine Maintenance With Other Home Services
If you’ve never had your ducts cleaned or your vents inspected, services like our air duct cleaning in Tampa can pair well with regular AC maintenance for better airflow and cleanliness throughout the home.

FAQ: Premium AC Maintenance for Tampa, FL 33614 Homeowners

How often should I schedule AC maintenance in Tampa, FL 33614?

For most homeowners in Tampa, we recommend at least one thorough maintenance visit per year, though many systems benefit from twice-yearly service due to our long cooling season. A plan like the Premium Therapy Plan helps keep those visits on a regular schedule.

My system is only a few years old. Do I really need maintenance?

Yes. Even a three-year-old system, like the one in this home, needs regular maintenance. Dust, debris, and normal wear can build up over time. Routine service helps keep warranties valid, prevents issues from developing, and maintains efficiency.

What does a Premium Therapy Plan visit include?

Visits under our Premium Therapy Plan include a full system inspection, electrical and pressure checks, cleaning of indoor and outdoor units, condensate drain line service, filter replacement, and verification of accessories like UV lights when present.

Do I need to be home during my AC maintenance appointment?

We do need access to both the indoor and outdoor units, so someone should be present or arrangements should be made in advance. If you’re unsure, this article about whether you need to be home for AC service can help you plan your appointment.

What should I expect after a maintenance visit?

After a maintenance visit, you should expect your system to run smoothly and efficiently, with any concerns clearly explained. In this Tampa, FL 33614 home, no further action was needed, and the homeowner received confirmation that their system was operating as it should.

What if an issue is found during a maintenance visit?

If we do find something that needs attention, we explain what’s going on, discuss options, and provide clear pricing before moving forward. Our goal is to catch issues early and give you the information you need to make confident decisions.

Why Choose Home Therapist for Your Tampa Bay HVAC Care

When you invite someone into your home for AC maintenance, you’re trusting them with your comfort and your safety. At Home Therapist Cooling, Heating, and Plumbing, we take that seriously—especially for our neighbors in Tampa, FL 33614 and across Tampa Bay.

Licensed, Professional Technicians
Our technicians are licensed and experienced with modern HVAC systems. Whether it’s a three-year-old unit or an older system, we treat each visit with the same level of care and attention.

Clear, Transparent Communication
We explain what we’re doing, what we find, and what—if anything—needs to be addressed. You’ll never be pushed into unnecessary work. For more insight into how we approach system upkeep, you can read our article on when AC repairs and maintenance really require action.

Clean, Respectful Work
We protect your home while we work, clean up after ourselves, and respect your schedule—just as we did for this homeowner during their Premium Therapy Plan visit in Tampa, FL 33614.

Focused on Long-Term Reliability
Our maintenance plans and services are built around long-term performance, not quick, one-time fixes. We want your system to run reliably for years, not just until the next heat wave. If you’re interested in broader HVAC and plumbing support in the area, you can learn more about our HVAC and plumbing services across Hillsborough County.

Connected With Our Community
We’re proud to serve Tampa Bay homeowners and stay connected through our official channels. You can learn more about us, see updates, and connect with our team here:

– Follow us on Facebook for news and tips.
– See behind-the-scenes and project highlights on Instagram.
– Check our Google Business profile for reviews and service information.

If you’d like to see more about our professional standing and reputation, you can also find us on trusted directories such as BuildZoom and HomeGuide.

For homeowners interested in additional equipment options, like zoning or small-room solutions, we also install systems such as ductless mini-splits in Tampa, which can complement a main central system.

Ready to Schedule Your AC Maintenance in Tampa, FL 33614?

If you live in Tampa, FL 33614 and want the same level of detailed care this homeowner received, our team at Home Therapist Cooling, Heating, and Plumbing is here to help. Whether you’re interested in a Premium Therapy Plan visit or a one-time tune-up, we’ll walk you through what to expect and keep you informed at every step.

Visit our main air filter and indoor air quality service page to see how we can support the health and performance of your system, or explore our blog for more practical guidance on caring for your HVAC and plumbing.

When you’re ready, schedule your service with our local Tampa Bay technicians serving Tampa, FL 33614. We’ll make sure your system is clean, checked, and ready to keep your home comfortable—without surprises.

HVAC Maintenance Plan Service in Valrico, FL 33596

When you live in Valrico, FL 33596, your air conditioning and plumbing don’t get much of a break. That’s why many homeowners choose a maintenance plan instead of waiting for something to break down in the middle of a Florida summer. On this visit, we came out for a scheduled Premium Therapy Plan appointment, part of an ongoing series of visits designed to keep this home’s comfort systems running smoothly and reliably.

As a Home Therapist technician, my goal on every maintenance plan visit is simple: keep you comfortable, avoid surprises, and catch small issues before they turn into big, expensive headaches. On this Premium Therapy Plan visit in Valrico, we performed a thorough checkup, verified safe operation, and confirmed that everything was working as it should by the time we left.

Case Recap: Premium Therapy Plan Visit in Valrico

  • Location: Routine maintenance visit for a homeowner in Valrico, FL 33596
  • Service: Scheduled Premium Therapy Plan visit (#5 in the plan cycle)
  • Focus: Check comfort systems, verify safe and efficient operation, and honor plan discounts
  • Approach: Careful inspection, cleaning where needed, and testing of key components
  • Outcome: System operating normally at the end of the visit, with ongoing protection under the maintenance plan

Customer Problem: Staying Ahead of Breakdowns, Not Chasing Them

For this homeowner in Valrico, the focus wasn’t a major breakdown or an emergency. Instead, it was peace of mind. They enrolled in our Premium Therapy Plan so they wouldn’t have to worry about whether their air conditioning or plumbing systems were quietly wearing out in the background.

Florida’s heat, humidity, and frequent storms can be tough on equipment. Even when everything seems to be running fine, dust buildup, restricted airflow, worn components, and minor drain issues can slowly creep in. By the time symptoms show up inside the home – warm rooms, musty smells, slow drains, or higher utility bills – the problem is usually bigger than it needed to be.

The homeowner’s main goals with this Premium Therapy Plan visit were:

  • Keep the AC system running reliably through the heat and humidity.
  • Avoid surprise breakdowns and after-hours emergency calls.
  • Have a professional set of eyes on the equipment on a regular schedule.
  • Take advantage of plan discounts and priority service if something comes up later.

Our job on Visit #5 of their plan was to stay proactive: verify that the system was still in good shape, address any early signs of concern, and document the condition of their equipment for the long term.

Inspection and Diagnosis: What We Looked For

Even when there isn’t a loud noise or visible leak, a good maintenance visit in Valrico, FL 33596 follows a structured process. We don’t guess; we inspect, test, and confirm.

On this Premium Therapy Plan appointment, our inspection focused on:

  • Overall system condition: Visual inspection of the indoor and (if accessible during the visit) outdoor components for signs of wear, rust, corrosion, or damage.
  • Airflow and cleanliness: We looked for dust buildup, dirty filtration, or debris around the equipment that could restrict airflow or reduce efficiency.
  • Electrical and control components: We checked for secure wiring connections and normal control operation so the system responds properly when called to heat or cool.
  • Drainage and moisture: Where applicable, we reviewed condensate drainage to make sure there were no obvious signs of clogs or backups starting.
  • General safety and operation: We verified that the system started up, ran, and shut down normally.

Because this was a scheduled plan visit and not an emergency call, we did not chase a single urgent complaint. Instead, we treated this as a full wellness checkup for the home’s comfort systems, with the goal of keeping everything steady and predictable for the homeowner.

Repair and Service Process: What Happens on a Premium Therapy Plan Visit

Every home is a little different, but the structure of a Premium Therapy Plan visit in Valrico, FL 33596 is consistent. We walk through the system step by step so nothing gets overlooked.

Here’s how a typical visit like this one goes:

1. Meet the Homeowner and Review Any Concerns

We start by asking a few simple questions: Have you noticed any hot or cold spots? Any strange noises? Any unusual smells, higher bills, or water where it shouldn’t be? Even if the answer is “Everything seems fine,” that conversation helps us know where to pay extra attention.

2. Visual Inspection Around the Equipment

We look over the indoor unit, accessible duct connections, and the surrounding area. We check for signs of water staining, corrosion, or anything that might indicate stress on the system. If the outdoor unit is part of the visit, we check that it’s clear of debris and has good airflow around it.

3. Airflow and Filtration Review

Good airflow is one of the most important parts of reliable HVAC service in Valrico, FL 33596. During a plan visit, we:

  • Check the condition of the air filter and confirm it’s appropriate for the system.
  • Look for anything that could be restricting airflow, such as blocked returns or heavy dust buildup.

If the homeowner wants more information on filter options or professional help with filter changes, we often point them to our air filter installation and service options for a deeper dive.

4. Electrical and Control System Check

Next, we confirm that the system responds correctly to thermostat commands and that controls cycle on and off as expected. We look for obvious electrical issues such as loose connections or components that may be showing early signs of wear. We do not publish exact measurements or readings, but we do make sure operation appears normal by the end of the visit.

5. Drainage and Moisture Review

With Florida’s humidity, proper drainage is essential. When accessible as part of the plan visit, we:

  • Check that the condensate line is draining as expected.
  • Look for signs of standing water or past overflow incidents.

For homeowners dealing with frequent drain or sewer issues, we often recommend looking into more specialized help, like our drain cleaning and cleanout services.

6. System Operation Test

Finally, we run the system and simply listen, observe, and verify. We make sure the unit starts, runs, and shuts off without unusual noises or behavior. We don’t list specific pressures or temperatures, but we do confirm that, based on our professional experience, the system is running as expected for the conditions.

At the end of the visit, we communicate our findings clearly: what looks good, what to keep an eye on, and anything we recommend addressing in the near future. Because this homeowner is on our Premium Therapy Plan, they also know they’ll receive plan discounts if any future repairs are needed.

Why This Maintenance Approach Works

The reason a Premium Therapy Plan is so effective for homeowners in Valrico, FL 33596 comes down to prevention and stability. Comfort systems don’t usually fail out of nowhere; they wear down over time. Regular maintenance lets us catch the wear before it turns into failure.

Here are a few key principles behind this type of visit:

  • Airflow is everything: Clean filters and open returns keep your system from working harder than it should. Poor airflow often leads to higher bills and early equipment failure.
  • Small issues become big issues: Corrosion, loose connections, and drainage problems rarely fix themselves. Finding them early is far less stressful and less expensive than waiting for a breakdown.
  • Consistency extends equipment life: Regular checkups and cleaning help your system run closer to its intended design, which supports longer service life and better comfort.
  • Documentation builds a history: Each visit in the Premium Therapy Plan is one more data point about your home. That history helps us make better long-term recommendations tailored to your equipment and usage.

When you combine that with access to our maintenance plan options for HVAC and plumbing, you end up with a much more predictable, controlled approach to home comfort.

Pro Tips for Homeowners in Valrico

If you live in Valrico or anywhere in the Tampa Bay area, here are some practical steps you can take between professional visits to keep your system in good shape:

  • Stay on top of filter changes. In our hot, humid climate, filters often need to be changed more frequently than the package suggests, especially if you have pets or allergies. Clean filters are the easiest way to support system performance.
  • Keep vents and returns clear. Avoid blocking supply vents or the main return grille with furniture, drapes, or boxes. Restricted airflow makes your system run longer and can create comfort issues in certain rooms.
  • Give your outdoor unit breathing room. If you have an outdoor condenser, keep plants, leaves, and debris at least a couple of feet away. Good airflow around the unit is just as important as airflow inside.
  • Watch for subtle changes. If you notice new noises, hot spots, or musty smells, don’t ignore them. Mention them during your next maintenance visit so we can check them while the issue is still small.
  • Consider whole-home care. Water heaters, plumbing, and drains also benefit from regular attention. Our water heater maintenance plans and promotions and other plumbing services help keep the entire home running smoothly, not just the AC.

FAQ: Premium Therapy Plan Visits in Valrico, FL 33596

What is the Premium Therapy Plan?

The Premium Therapy Plan is an ongoing maintenance program where we schedule regular visits to inspect, clean, and check your home comfort systems. It’s designed to reduce surprise breakdowns, prioritize your calls, and provide discounts on repairs if they’re needed.

How often do you come out under a maintenance plan?

The exact visit schedule depends on the specific plan, but like this Visit #5 in Valrico, we follow a structured timeline so your equipment gets checked consistently throughout the year. During each visit, we review operation, safety, and overall condition.

Do you only look at the air conditioner during these visits?

The focus of each appointment can vary based on your equipment and plan, but our Premium Therapy Plan is built to support the comfort systems that keep your home livable in Florida’s climate. That often includes HVAC, and, depending on your setup and plan, we may review related systems such as water heating or basic plumbing concerns and recommend more detailed services where appropriate.

Will you tell me if something needs attention soon?

Yes. Part of our job is to spot early warning signs and communicate them clearly. If we see something that should be addressed sooner rather than later, we explain what we found, why it matters, and what your options are. There’s no pressure—just straightforward information so you can decide.

What happens if my system breaks down even though I’m on the plan?

No plan can prevent every problem, but being on a Premium Therapy Plan means you’ll be prioritized and eligible for plan discounts on qualifying repairs. You also start from a better baseline because the system has been maintained regularly.

Do I need to be home during a maintenance visit?

In most cases, yes, someone needs to be available to provide access and answer basic questions. If you’re curious about scheduling and what to expect logistically, we have additional resources—such as our guidance on what’s required for AC repairs and maintenance visits—to help you plan.

Why Tampa Bay Homeowners Choose Home Therapist

Homeowners across Tampa Bay, including those in Valrico, FL 33596, trust Home Therapist because we approach every visit like we’re working on our own homes. That means:

  • Licensed, professional technicians: Every technician who comes to your door is trained, experienced, and focused on doing the job correctly and safely.
  • Transparent communication: We explain what we’re doing, what we find, and what your options are—without scare tactics or surprise charges.
  • Clean and respectful work: We treat your home with care, keep our work area tidy, and respect your time and schedule.
  • Long-term reliability focus: Our maintenance plans and service recommendations are built around preventing problems, not just reacting to them.
  • Commitment to Tampa Bay homeowners: We live and work in the same communities we serve, and we take that responsibility seriously.

If you’d like to see more of how we work day to day, you can follow us on social media. We share helpful tips, behind-the-scenes looks at real jobs, and updates for Tampa Bay homeowners:

You can also verify our reputation and community involvement through trusted third-party sites:

Schedule Your Next Maintenance Visit in Valrico, FL 33596

If you’re a homeowner in Valrico, FL 33596 and you’d rather stay ahead of breakdowns than scramble during a heat wave, a maintenance plan is one of the best tools you can have. Our Premium Therapy Plan visits are designed to keep your home comfortable, your equipment protected, and your decisions informed.

Whether you’re ready to enroll in a plan or simply want to learn more about how regular maintenance works, our local Tampa Bay team is here to help. Reach out to schedule your next visit, and we’ll walk you through everything in clear, simple terms—no pressure, just professional guidance and dependable service.

Air Conditioner Maintenance Under Premium Therapy Plan in Valrico, FL 33596

When your air conditioner is working hard year-round in Valrico, FL 33596, small hidden issues can slowly build up inside the system. During this Premium Therapy Plan visit, we helped a homeowner in Valrico stay ahead of those problems with a scheduled maintenance check on two 6-year-old Carrier systems. We found elevated fan energy consumption and organic growth inside the indoor coils, performed a full maintenance service, and recommended proactive upgrades for better efficiency and cleaner indoor air.

Case Recap

  • Location: Single-family home in Valrico, FL 33596
  • Service: Premium Therapy Plan maintenance visit on two Carrier air conditioning systems
  • Main concerns: Keep systems running reliably through the Florida heat and maintain good indoor air quality
  • Findings: Elevated fan energy consumption and organic growth on indoor heat exchangers (evaporator coils)
  • Work performed: Complete maintenance on both systems, including cleaning and performance checks
  • Recommendations: Replace fans showing high consumption and install UV lights at the indoor units to help control organic growth

Customer Problem: Staying Comfortable Through Valrico Heat

On this visit, the homeowner in Valrico wasn’t calling because of a breakdown. Instead, they wanted to make sure their two Carrier systems stayed reliable and efficient through the long Florida cooling season. They’re part of our Premium Therapy Plan, which means we come out on a regular schedule to inspect, clean, and tune up their equipment.

In our climate, air conditioners in Valrico, FL 33596 run heavily most of the year. Even if everything “seems” fine from the thermostat, components inside the air handler and condenser can slowly get dirty or start working harder than they should. That extra strain often turns into higher utility bills, more frequent repairs, or discomfort during the hottest afternoons.

For this visit, the goal was simple:

  • Confirm both systems were operating safely and efficiently
  • Look for early signs of wear or developing problems
  • Address indoor air quality concerns before they affected comfort or health

Because this was Visit #5 under their plan, we already knew the home and equipment, which helps us spot subtle changes from one maintenance visit to the next.

Inspection and Diagnosis

For Premium Therapy Plan customers in Valrico and across Tampa Bay, we follow a consistent, detailed maintenance process. On this visit, we focused on both the outdoor units (condensers) and the indoor air handlers.

Here’s what we did and why:

Indoor System Checks

  • Fan operation and energy draw: We evaluated how the indoor fans were running and noted that fan consumption was elevated on these 6-year-old units. This tells us the fans are working harder than they should, which can mean wear, dirt buildup, or developing mechanical or electrical issues.
  • Heat exchangers (evaporator coils): We inspected the indoor coils and found organic growth on the surfaces. In Florida’s humid climate, moisture in the air handler can provide the conditions for this kind of growth if it’s not controlled.
  • Drainage and airflow: We checked airflow through the system and ensured the drain was moving condensate properly to help avoid water damage or backups.

Outdoor System Checks

  • General condition: We inspected the outdoor units for visible wear, debris, and airflow restrictions around the cabinet.
  • Operation and performance: We confirmed that both condensers were running as expected for this maintenance visit.

We did not record or provide specific measurements like pressures, temperatures, or amperage readings here, but we did verify that the systems were operating properly after the maintenance.

The two main findings were:

  • Indoor fans with elevated consumption, indicating added strain and future risk if left unaddressed
  • Organic growth inside the indoor heat exchangers, which can affect both efficiency and indoor air quality

Repair and Service Process

Because this visit was part of a scheduled maintenance plan in Valrico, FL 33596, the focus was on cleaning, optimizing, and preventing problems rather than making major repairs on the spot. Here’s how we approached the job.

1. Full System Maintenance

We performed the contracted maintenance on both Carrier systems. That included:

The goal of this step is to give the systems a “reset” so they can run as smoothly and efficiently as possible under normal operation.

2. Addressing Organic Growth on Indoor Coils

Organic growth on indoor heat exchangers is common in Florida because warm, humid air passes over cold surfaces every day during cooling season. That moisture can allow growth on coil surfaces if it isn’t properly controlled or treated.

During maintenance, we focused on:

  • Cleaning coil surfaces where accessible
  • Checking that condensate was draining correctly to reduce standing moisture
  • Reviewing filtration and air movement to limit dust and particles that can contribute to buildup

Because this is a recurring, climate-driven issue, we also discussed long-term solutions rather than relying only on periodic cleanings.

3. Evaluating Fan Condition and Consumption

The elevated fan consumption we observed tells us the fan motors are under more load than they should be. That extra load can result from normal wear over six years of heavy use, from dirt buildup, or from other internal factors.

We did not replace any components during this visit, but based on what we observed, we recommended replacing the fans as a proactive step rather than waiting for a failure in the middle of a hot Valrico afternoon.

4. Recommendations: UV Lights and Fan Replacement

At the end of the visit, we walked the homeowner through our findings and recommended:

  • Fan replacement: To reduce strain on the system, improve efficiency, and lower the risk of unexpected breakdowns.
  • UV light installation at the indoor units: To help control organic growth on the coils and inside the air handler, supporting cleaner air and more consistent performance.

We also answered questions about how UV systems work and how they fit into the larger maintenance plan for homes in Valrico and across Tampa Bay.

After completing the maintenance, we tested both systems and confirmed they were running as expected for the conditions at the time of the visit.

Why This Fix and These Recommendations Work

The work and recommendations on this visit are all about reducing strain and keeping airflow and indoor air quality where they should be.

Fan Replacement and Efficiency

When an indoor fan motor draws more power than it should, it’s usually a sign that it’s working harder to move the same amount of air. That extra effort shows up as:

  • Higher utility bills
  • Increased operating temperature inside the motor
  • A greater chance of failure during long run times

By replacing fans before they fail, we help homeowners in Valrico, FL 33596 avoid surprise outages and keep the systems operating closer to their original efficiency levels.

UV Lights and Indoor Air Quality

UV lights are installed inside the air handler, near the coil, where moisture and organic growth tend to appear. While they aren’t a complete air purification system, they are a strong supplemental tool for:

  • Reducing organic growth on the indoor coil surfaces
  • Helping keep coil fins cleaner for better heat transfer
  • Supporting more stable airflow and performance over time

For homes in humid Florida communities like Valrico, UV lights combined with regular maintenance can make a noticeable difference in both system cleanliness and long-term reliability.

Pro Tips for Homeowners in Valrico

If you live in Valrico or anywhere in the Tampa Bay area, your air conditioner works harder than most. Here are some practical tips to help your system stay clean and reliable between professional visits:

  • Stay on a regular maintenance schedule: Systems that cool for most of the year need consistent checkups. A plan like our Premium Therapy Plan helps catch issues early and keeps performance consistent.
  • Change filters on time: In our humid, dusty climate, filters can load up faster than expected. Check them monthly and replace them as needed to maintain good airflow.
  • Keep supply and return vents open and clear: Avoid blocking vents with furniture or rugs. Restricted airflow increases fan strain, just like we saw on this visit in Valrico, FL 33596.
  • Watch for changes in air quality or smell: Musty odors when the system first turns on can be a sign of organic growth in the air handler. If you notice this, mention it during your next maintenance visit.
  • Consider UV lights if you’ve had recurring organic growth: In many Florida homes, UV systems are a practical way to support cleaner coils and improve indoor air quality over time.
  • Protect the outdoor unit: Keep vegetation, mulch, and debris away from the condenser so it can move air freely and reject heat efficiently.

Related Resources for Tampa Bay Homeowners

If you’d like to learn more about ongoing care for your system, we’ve put together several helpful guides on our website, including an HVAC maintenance checklist for homeowners, a detailed air conditioning maintenance guide for Tampa Bay, and an overview of our AC maintenance and cleaning specials. If you’re curious about UV options, our guide on adding UV light to your air conditioner can help you decide if it’s right for your home.

FAQ: AC Maintenance and UV Lights in Valrico, FL 33596

How often should I have my AC serviced in Valrico?

In our climate, we typically recommend at least one comprehensive maintenance visit per year, and for many homes that run cooling most of the year, twice annually is ideal. A maintenance plan makes it easier to stay on schedule.

What does elevated fan consumption mean for my system?

Elevated fan consumption means the fan motor is working harder than expected to move air. Over time, that can shorten the motor’s life and increase energy usage. Addressing it early, as we did on this Valrico visit, helps avoid sudden breakdowns and keeps operating costs in check.

Is organic growth on my indoor coil dangerous?

Organic growth on the coil is primarily a sign that moisture and conditions inside the air handler are supporting growth. It can impact efficiency and contribute to musty odors or air quality concerns. The best approach is a combination of proper drainage, regular cleaning, good filtration, and, in many Florida homes, UV light treatment.

Do UV lights replace the need for maintenance?

No. UV lights are a helpful tool, but they don’t replace the need for professional maintenance. You still need regular inspections, cleaning, and checks on electrical and mechanical components. UV simply adds another layer of protection against organic buildup inside the system.

When should I consider replacing my fan instead of repairing it?

If a fan motor is drawing more power than it should or showing other signs of stress, proactive replacement can be more cost-effective than waiting for a failure. During maintenance, we look at the age, condition, and performance of the fan and make recommendations based on what we see, just as we did for this home in Valrico, FL 33596.

Why Choose Home Therapist for AC Maintenance in Tampa Bay

When you invite us into your home, you’re trusting us with your comfort and safety. We take that seriously on every visit in Valrico and throughout Tampa Bay.

  • Licensed, professional technicians: Our team is trained, experienced, and qualified to work on your cooling and heating systems, from routine maintenance to more complex issues.
  • Transparent communication: We explain what we find in clear, plain language and walk you through your options without pressure. On this Premium Therapy Plan visit, we laid out exactly why we recommended fan replacement and UV lights.
  • Clean and respectful work: We treat your home as if it were our own, keeping work areas tidy and being mindful of your schedule and privacy.
  • Focused on long-term reliability: Our goal isn’t just to get your system running today; it’s to keep it running reliably season after season in the demanding Florida climate.
  • Committed to Tampa Bay homeowners: We’re an active part of the local community and stand behind our work for families across Valrico, FL 33596 and the surrounding areas.

If you’d like to see what other homeowners are saying or stay connected with us, you can find Home Therapist on Pinterest and join the conversation on Reddit. For added peace of mind, you can also review our standing with organizations like the Better Business Bureau, the Tampa Bay Chamber of Commerce, and our contractor profile on BuildZoom.

Schedule Your AC Maintenance in Valrico, FL 33596

If it’s been a while since your last tune-up, or if you’re interested in a maintenance plan like our Premium Therapy Plan, we’re here to help. Regular maintenance is one of the best ways to avoid surprise breakdowns, keep energy bills under control, and protect your comfort in Valrico, FL 33596.

Reach out to Home Therapist Cooling, Heating, and Plumbing to schedule your next maintenance visit or to talk about upgrades like fan replacement and UV light installation. We’ll walk you through your options, answer your questions, and make sure your system is ready for the next stretch of Florida heat.

Water Heater Flush and Plumbing Inspection in Wimauma, FL 33598

When a homeowner in Wimauma, FL 33598 reached out for our $89 water heater flush and free plumbing inspection, they wanted peace of mind. Hot water is something you don’t think about until there’s a problem, and in Florida’s humid climate, sediment buildup and corrosion can sneak up on a water heater faster than many people realize. Our job was to give this system a thorough checkup, flush out sediment, and make sure the home’s plumbing was operating safely and reliably.

Case Recap

  • Location: Single-family home in Wimauma, FL 33598
  • Service: $89 water heater flush with free whole-home plumbing inspection
  • Checked: Heating elements/ignition, anode rod, TPR valve, tank condition, and visible plumbing
  • Performed: Full tank drain and sediment rinse-out
  • Goal: Improve water heater performance, reduce risk of leaks, and verify overall plumbing health
  • Outcome: System verified for proper operation after service and homeowner advised on maintenance timing

Customer Problem

Like many homeowners in Wimauma, this customer wanted to stay ahead of costly plumbing surprises rather than wait for something to break. The promotion for a water heater flush plus a free plumbing inspection was a good fit: affordable, straightforward, and focused on prevention.

The homeowner’s main concerns were:

  • Making sure the water heater was still safe and in good shape
  • Knowing whether there was heavy sediment buildup in the tank
  • Getting a professional eye on the rest of the plumbing system

On our end, there was also a quick clarification call to confirm the service details and get approval, since there had been some confusion about an option the customer expected to see. Once we cleared that up and the homeowner approved, our technician Adalberto moved forward with the scheduled plumbing service in Wimauma, FL 33598.

Inspection and Diagnosis

When we arrive for a water heater flush and plumbing inspection, we treat it as a health check for both the appliance and the plumbing system that supports it. In this Wimauma home, we focused on three main areas: safety, condition, and performance.

Water Heater Safety Checks

First, we verified that it was safe to work on the unit. That meant checking for obvious signs of trouble around and under the heater—visible leaks, rust streaks, or scorched areas. We also confirmed that the shutoff valves and electrical or gas controls were accessible and functioning.

From there, we tested critical safety and performance components:

  • Heating elements or ignition system: We checked that the system was responding normally and could reliably heat water. If we see signs of weak heating or unreliable ignition, we discuss replacement options with the homeowner.
  • Temperature and pressure relief (TPR) valve: This valve is a key safety device that prevents dangerous pressure buildup. We tested it to ensure it operated as expected and looked for any corrosion, leakage, or sticking.
  • Anode rod condition: The anode rod helps protect the tank from rusting from the inside out. We inspected the rod’s condition and, if it shows heavy wear or is near the end of its life, we recommend replacement to extend the tank’s lifespan.

Tank and Connection Inspection

Next, we inspected the water heater body and its connections:

  • Looked for rust around fittings, seams, and the base of the tank
  • Checked for signs of past or active leaks on the hot and cold water lines
  • Confirmed that visible electrical or gas connections appeared secure and in normal condition

In Florida, garages and utility spaces can get hot and humid, especially around Wimauma, so we pay extra attention to corrosion and moisture-related wear.

Whole-Home Plumbing System Check

As part of the free plumbing inspection, we did a visual review of accessible plumbing. That included:

  • Checking exposed piping for obvious corrosion or damage
  • Spot-checking fixtures for leaks, drips, or slow drains
  • Listening for signs of water hammer or abnormal pressure changes when fixtures were used

The goal was not just to focus on the water heater, but to let this homeowner in Wimauma know if there were any early warning signs elsewhere in the plumbing system.

Repair and Service Process

Once the inspection steps were complete, we moved into the actual water heater flush. Sediment buildup is a normal side effect of Florida’s water conditions, and Wimauma is no exception. Over time, minerals and debris collect at the bottom of the tank, which can affect performance and, in more severe cases, contribute to noise or tank stress.

1. Preparing the Water Heater for Flushing

We began by safely shutting down the water heater. Depending on the unit, that means turning off power at the breaker or shutting off the gas control. We also closed the water supply valve and allowed the tank to cool to a safe temperature before draining.

Taking this step slowly and methodically is important for safety, especially around pressurized hot water.

2. Draining the Tank

Once the heater was ready, we connected a hose to the drain valve at the bottom of the tank and directed the water to an appropriate drain point. We opened the valve and let the tank drain fully, watching the flow for signs of heavy sediment.

Per the promotion details, if a tank is so clogged that water will not flow out through the drain valve, it requires additional work and time to clear the blockage. In that situation, there is an added charge to remove the excess sediment. In this visit, we monitored flow closely to make sure the drain process proceeded as expected.

3. Flushing Out Sediment

After the initial drain, we used controlled refills and drains to help wash out remaining sediment from the bottom of the tank. The goal is to remove as much loose material as reasonably possible, improving heat transfer and helping the heater run more smoothly.

We continued the process until the discharge water indicated that we had effectively rinsed the tank. This is where experience matters—knowing when continued flushing is still productive versus when it has reached a reasonable point.

4. Final Checks and Refill

Once the flush was complete, we closed the drain, reopened the cold-water supply, and allowed the tank to refill. We bled air from nearby hot-water fixtures until a steady stream came through, then restored power or gas to the water heater.

We then:

  • Rechecked for any leaks at fittings and drain valves
  • Confirmed that the unit began heating as expected
  • Verified normal operation after the service was completed

Our technician also wrapped up the full plumbing inspection by reviewing any findings with the homeowner—what looked good, and what to keep an eye on for the future.

Why This Fix Works

A water heater flush is simple in concept, but it addresses several real-world issues we see every day around Wimauma and greater Tampa Bay.

Sediment and Efficiency

Sediment settles at the bottom of the tank and creates a barrier between the heating surface and the water. That can cause:

By draining and flushing the tank, we remove much of that buildup. The heater doesn’t have to work as hard, which can help with both comfort and long-term reliability.

Safety Components and Peace of Mind

The TPR valve and anode rod don’t get much attention from most homeowners, but they quietly protect the system. The TPR valve provides a safety release if pressure or temperature climb too high, and the anode rod sacrifices itself to corrosion to slow down rusting of the tank.

Inspecting and testing these parts during a visit gives a homeowner clearer information: Is the heater still in good shape, or is it time to start planning for replacement or component upgrades? In this Wimauma, FL 33598 service call, the emphasis was on making sure everything was operating as it should and giving the customer a clear report on the state of their water heater and plumbing.

Pro Tips for Homeowners in Wimauma

Living in Wimauma and the surrounding Tampa Bay area means high humidity, warm temperatures, and plenty of mineral content in the water. Here are some practical tips to keep your plumbing and water heater in better shape:

  • Schedule routine flushes: Depending on your water quality and usage, a regular water heater flush can help slow down wear and keep performance more consistent. Don’t wait until there’s noise or visible rust.
  • Keep the area around the heater clear: Make sure there’s enough space around the water heater for ventilation and access. Stacked storage tight against the unit can trap moisture and make inspections harder.
  • Watch for small warning signs: Brief temperature changes, discolored hot water, or small drips near the base of the tank are all reasons to have a technician take a look before a small issue grows.
  • Check fixtures periodically: Every few months, walk through your home and check under sinks and around toilets for damp spots, slow drips, or musty smells. Those small signs often show up before a bigger leak.
  • Consider a broader plumbing maintenance plan: If you’d like more structured, ongoing care, our plumbing maintenance options can help keep both your water heater and piping system on track.

For homeowners who want to plan ahead, you can learn more about our plumbing maintenance offerings on our plumbing maintenance plans and options page, and see how we structure water heater maintenance plans and promotions for Tampa Bay and surrounding communities.

FAQ: Water Heater Flush and Plumbing Inspection in Wimauma, FL 33598

How long does a water heater flush and plumbing inspection usually take?

Most visits like this one in Wimauma, FL 33598 can be completed within a single appointment, typically within a couple of hours. Timing can vary based on how easily the tank drains and how accessible the plumbing is for inspection.

What happens if my water heater is too clogged to flush normally?

If sediment buildup is severe enough that water will not flow through the drain valve, additional work is needed to clear the blockage. In those cases, there is an extra charge to remove excess sediment, and we explain that clearly before proceeding so there are no surprises.

Will you tell me if I should replace my water heater?

Yes. If we see signs that the tank, anode rod, heating components, or safety devices are near the end of their useful life, we explain what we found and what your options are. We do not pressure you; we simply provide clear information so you can plan ahead.

Does a water heater flush fix low hot water pressure?

In some cases, a flush can help if sediment buildup inside the tank or at the outlet is contributing to the issue. However, low pressure can also be related to piping, valves, or fixtures elsewhere in the home. That is why pairing the flush with a whole-home plumbing inspection, like we did for this Wimauma homeowner, is so useful.

How often should I schedule this service in Wimauma?

The ideal interval depends on your water quality and usage, but many Tampa Bay homeowners benefit from regular checkups. During your visit, we can give you a recommendation based on the actual condition of your system rather than a one-size-fits-all schedule.

Is this type of service messy?

We take care to control where the drained water goes and to keep the work area clean. Part of our job is leaving your home in Wimauma as tidy as we found it, while making sure the plumbing system is in better shape than before we arrived.

Why Choose Home Therapist for Plumbing in Wimauma

When you invite us into your home, you’re trusting us with your comfort and safety. We take that seriously. For this homeowner in Wimauma, FL 33598, our technician showed up on time, explained the service clearly, completed the water heater flush and inspection, and reviewed the results in everyday language.

Here is what you can expect when you choose Home Therapist Cooling, Heating, and Plumbing for your plumbing or water heater service:

  • Licensed, professional technicians: Our plumbers are trained, licensed, and focused on doing the job the right way, not the fastest way.
  • Transparent communication: We explain what we are doing, why it matters, and what it costs before we begin. That applies whether it is a simple flush or a more involved plumbing repair.
  • Clean and respectful work: We protect your home, work carefully, and clean up after ourselves. Our goal is to leave the space neat, with your system in better shape.
  • Long-term reliability: We are not just chasing today’s fix. We look for ways to keep your water heater and plumbing system reliable for the long run, and we will tell you when it is time to start planning for future upgrades.
  • Commitment to Tampa Bay homeowners: We serve Wimauma and the greater Tampa Bay area with the same standard of care, whether we are flushing a single water heater or inspecting an entire plumbing system.

If you would like to see more of how we work, you can connect with us on social media at Facebook, follow our updates on Instagram, or check out our short videos on TikTok. For independent information about our company, you can also review our presence on trusted platforms like Google Maps and Yelp, or see our contractor profile on BuildZoom.

For more examples of the type of work we do, including similar projects, you can also explore our whole-home plumbing inspection and water heater flush project in another Tampa-area neighborhood, or read about our drain line cleaning and flushing services if you are dealing with slow or backed-up drains.

Need Water Heater or Plumbing Service in Wimauma, FL 33598?

If you live in Wimauma, FL 33598 and want a professional to look over your water heater and plumbing system, we are here to help. Whether you are interested in a simple water heater flush, a detailed plumbing inspection, or ongoing maintenance, our local Tampa Bay technicians will walk you through the options and take care of the work with safety and cleanliness in mind.

Schedule your service today and let Home Therapist Cooling, Heating, and Plumbing help keep your hot water and plumbing running the way they should, season after season, in your Wimauma home.

Plumbing Inspection and Tankless Water Heater Maintenance in St. Petersburg, FL 33704

For a homeowner in St. Petersburg, FL 33704, consistent hot water and reliable plumbing are part of feeling truly comfortable at home. During this visit under our Premium Home Therapy Plan, we were called out for a full plumbing inspection, routine maintenance on a tankless water heater, and to discuss replacing an exterior hose bib. By the time we wrapped up, the home’s plumbing was confirmed to be in great shape, the tankless unit was professionally flushed, and we helped the homeowner plan a proactive upgrade for their outdoor water connection.

Case Recap

  • Location: Single-family home in St. Petersburg, FL 33704
  • Service type: Full plumbing inspection and tankless water heater maintenance
  • Plan: Premium Home Therapy Plan visit
  • Findings: Interior plumbing systems operating properly; tankless water heater functioning as expected
  • Recommendation: Proactive replacement of an exterior hose bib with a new, code-compliant unit
  • Outcome: System left operating normally with a clear plan to prevent future hose bib leaks or failures

Customer Problem: Peace of Mind and Proactive Plumbing Care

This homeowner in St. Petersburg, FL 33704 wasn’t calling us because of a major leak or emergency. Instead, they wanted peace of mind. As part of their Premium Home Therapy Plan, they requested:

First, a full plumbing inspection. They wanted to be sure there were no hidden issues in the home—no slow leaks, no problem valves, and no surprises waiting behind walls or under sinks.

Second, routine maintenance on their tankless water heater. Tankless units can last a long time and work very efficiently, but only when they’re maintained correctly. In Florida’s climate, with our water conditions, mineral buildup and scale can eventually affect performance if the system isn’t flushed on a regular schedule.

Finally, the homeowner asked us to look at an exterior hose bib. While it wasn’t actively failing, they were interested in proactively replacing it before it ever turned into a leak or a nuisance. They wanted reliable outdoor water access for gardening, washing down patios, and everyday outdoor tasks, without having to worry about drips or future failures.

Our job was to confirm that everything inside the home was in good working order, keep their tankless water heater in top shape, and provide a simple, straightforward plan to address the hose bib.

Inspection and Diagnosis: A System-Wide Look at the Plumbing

When we perform a plumbing visit like this in St. Petersburg, FL 33704, we work methodically through the home. Even when everything seems fine on the surface, a proper inspection helps catch small issues before they turn into headaches.

During this visit, we:

  • Walked the home to visually inspect accessible plumbing fixtures (sinks, toilets, tubs, showers, and hose bibs).
  • Checked for signs of active or past leaks around fixtures, under sinks, and at visible piping.
  • Verified normal operation of faucets, flush mechanisms, and drains throughout the home.
  • Inspected the tankless water heater area for any indications of leaks, corrosion, or improper venting or clearances.

Everything inside the home’s plumbing system was operating as it should. There were no active leaks observed, and fixtures were behaving normally. The tankless water heater showed no visible issues and was ready for its scheduled maintenance flush.

For the exterior, we evaluated the hose bib the homeowner was concerned about. At the time of the visit, it was still functional but showing signs that made a proactive replacement a smart idea. In our climate, outdoor fixtures are exposed to sun, rain, salt air, and temperature swings. Over time, that exposure can accelerate wear on seals and threads, eventually leading to leaks or difficulty shutting the water off completely.

Because all inspected components were accessible and operating normally, there were no diagnostic limitations. We didn’t have to guess—we could see and confirm the condition of the plumbing systems we were called out to review.

Repair and Service Process: Flushing the Tankless and Planning the Hose Bib Upgrade

Once we had a clear picture of the home’s plumbing, we focused on the two key tasks: tankless water heater maintenance and the hose bib replacement plan.

Routine Tankless Water Heater Flush

Tankless water heaters are great for Florida homes because they provide hot water on demand and can be very efficient. However, regular maintenance is essential, especially in our area where mineral buildup can occur inside the heat exchanger over time.

During this visit in St. Petersburg, FL 33704, we performed a standard flush as part of the homeowner’s Premium Home Therapy Plan. While every unit and setup can be a little different, a typical flush process includes:

  • Shutting off power and isolating the tankless unit from the home’s plumbing system.
  • Connecting hoses to the service valves on the unit.
  • Circulating cleaning solution through the system to break down mineral deposits internally.
  • Flushing the system with clean water to remove loosened debris and any remaining solution.
  • Restoring normal operation and checking for leaks at the connections.

After the flush, we restored power and water, then verified that the tankless water heater was functioning as expected. The system produced hot water normally and showed no signs of operational issues. This kind of routine care helps the unit maintain efficiency and can extend its service life.

Planning the Exterior Hose Bib Replacement

Next, we focused on the exterior hose bib. While it hadn’t failed yet, the homeowner made a smart decision by asking about replacing it proactively.

We explained that the recommended solution is to replace the existing hose bib with a new, properly installed, code-compliant unit. This approach offers several benefits:

  • Helps prevent future leaks that could cause water damage or waste water.
  • Ensures the shutoff mechanism works smoothly and reliably.
  • Provides a more dependable connection point for hoses and outdoor equipment.
  • Brings the installation up to current best practices and local requirements.

Because this was a planned maintenance visit rather than an emergency, we walked the homeowner through what the replacement would involve, discussed timing that works for them, and left them with a clear, straightforward option. The goal is to perform the swap before any leak develops, rather than waiting for a failure during a busy season or right before guests arrive.

Why This Fix and Maintenance Plan Works

For plumbing systems in St. Petersburg, FL 33704, the combination of routine maintenance and targeted upgrades is one of the most effective ways to protect comfort and avoid surprise repairs.

Keeping a Tankless Water Heater Efficient

Inside a tankless water heater, water flows through a heat exchanger rather than sitting in a storage tank. Over time, minerals in the water can settle and form scale inside that heat exchanger. When that happens, the system has to work harder to transfer heat, which can reduce efficiency and stress internal components.

Regular flushing helps remove those deposits so water can move freely and heat can transfer efficiently. That means:

  • Consistent, reliable hot water.
  • Less strain on the equipment.
  • Better long-term performance from your investment.

By building the flush into a recurring visit under the Premium Home Therapy Plan, this homeowner doesn’t have to worry about remembering the schedule—we handle it for them.

Proactive Hose Bib Replacement

Outdoor hose bibs are often the first place homeowners in Florida notice wear. Sun, rain, and frequent use can wear out seals and threads. A small drip today can become a steady leak later, increasing water bills and potentially causing damage to walls, foundations, or landscaping.

By replacing the hose bib before it fails, we’re addressing:

  • Water conservation – preventing wasted water from slow leaks.
  • Property protection – reducing the risk of moisture-related issues near walls or foundations.
  • Everyday convenience – ensuring the outdoor faucet operates smoothly when you need it.

It’s a simple, cost-effective upgrade that aligns exactly with the homeowner’s goal: a trouble-free plumbing system they don’t have to think about.

Pro Tips for Homeowners in St. Petersburg

If you live in St. Petersburg, FL 33704 or anywhere in the Tampa Bay area, a few simple habits can go a long way toward keeping your plumbing and tankless water heater in good shape:

  • Schedule regular maintenance for your tankless water heater. Depending on your water quality and usage, a routine flush helps keep your unit efficient and reliable. If you’re unsure how often to service it, ask us during your next visit.
  • Give your hose bibs a quick check each season. Turn them on and off, look for drips at the handle or spout, and make sure hoses aren’t left under constant pressure. Catching small leaks early is especially important in our humid, coastal climate.
  • Look under sinks and around toilets periodically. A quick glance for moisture, discoloration, or musty odors can help you spot hidden leaks before they turn into bigger issues.
  • Know where your main water shutoff is. In the event of a sudden leak, especially in older St. Petersburg homes, turning off water quickly can significantly limit damage while you wait for professional help.
  • Be mindful of what goes down your drains. In kitchens and bathrooms, avoid pouring grease, wipes, or other non-dissolving materials into the plumbing. Even when everything seems fine, buildup can slowly create clogs over time.
  • Consider a maintenance plan if you like staying ahead of problems. A structured plan helps ensure important tasks—like flushing a tankless water heater—happen on time without you needing to track dates or details.

FAQ: Plumbing Maintenance and Tankless Water Heaters in St. Petersburg, FL 33704

How often should I flush my tankless water heater?

The ideal schedule depends on your water quality and how much hot water you use, but many homeowners benefit from a routine flush about once a year as part of regular maintenance. During your visit, we can look at your system and usage and recommend a schedule that fits your home.

What are the signs that my hose bib needs to be replaced?

Common signs include a handle that’s hard to turn, dripping even when fully closed, visible corrosion, or water seeping from around the stem or wall penetration. In coastal areas like St. Petersburg, FL 33704, weather exposure can speed up that wear, so proactive replacement is often a smart move.

Is it normal for my tankless water heater to make noise?

Some sound when the unit turns on and off is normal, but excessive rattling or unusual noises can be a sign of mineral buildup or other issues. Regular maintenance helps reduce these problems. If you notice a change in noise level, it’s a good time to have a technician take a look.

Do I need a maintenance plan if everything is working fine?

You don’t need a plan, but many homeowners in St. Petersburg choose one for convenience and peace of mind. A structured plan, like our Premium Home Therapy Plan, keeps tasks such as plumbing inspections and tankless water heater flushes on a reliable schedule, helping to prevent surprise breakdowns.

Can a leaking hose bib really increase my water bill?

Yes. Even a small, steady drip can add up over time. It’s especially easy to miss an exterior drip in the yard or on a side wall. Replacing a worn hose bib with a new, code-compliant unit is an inexpensive way to avoid wasted water and potential damage near your home’s exterior.

Related Services for Tampa Bay Homeowners

While this visit in St. Petersburg, FL 33704 focused on a plumbing inspection, tankless water heater maintenance, and a hose bib replacement plan, our team can help with a wide range of other plumbing needs. From leak repairs to larger projects, we’re equipped to handle it.

For more information about our plumbing repair services in the Tampa Bay area, or to explore larger upgrades like whole-home repiping or water filtration installation, our licensed technicians are here to help you plan the right solution for your home. We also provide comprehensive HVAC and plumbing services in nearby Clearwater and across the region.

Why Homeowners Choose Home Therapist

When you invite us into your home in St. Petersburg, FL 33704, you’re trusting us with your comfort, safety, and property. We take that seriously on every visit.

  • Licensed, professional technicians: Our team is trained, experienced, and licensed to work on both plumbing and HVAC systems. We approach every job with a focus on doing it right the first time.
  • Transparent communication: We walk you through what we’re seeing, explain options in plain language, and help you prioritize what truly matters. No scare tactics, no pressure—just honest recommendations.
  • Clean, respectful work: We treat your home like it’s our own. That means using care around your property, cleaning up when we’re done, and respecting your time and schedule.
  • Long-term reliability: Whether we’re flushing a tankless water heater, inspecting plumbing, or replacing a hose bib, we’re thinking about how the system will perform for you over the long run.
  • Commitment to Tampa Bay homeowners: We live and work in the same communities we serve. Our team is proud to support homeowners throughout Tampa Bay, including St. Petersburg, with dependable, high-quality service.

If you’d like to see what other homeowners are saying or stay connected with our team, you can visit us on Facebook, follow us on Instagram, or check out our videos on TikTok.

For added reassurance, you can also review our standing with local and national organizations. We’re listed with the Tampa Bay Chamber of Commerce and accredited by the Better Business Bureau, reflecting our ongoing commitment to professionalism and customer care.

Schedule Plumbing Service in St. Petersburg, FL 33704

If you’re a homeowner in St. Petersburg, FL 33704 and you’d like the same kind of thorough plumbing inspection and tankless water heater maintenance, we’re here to help. Whether you’re being proactive with a plan like this homeowner or you’ve noticed something that doesn’t seem quite right, our local Tampa Bay technicians are ready to take a careful look and walk you through your options.

Reach out to schedule your visit, keep your plumbing and hot water systems running smoothly, and enjoy the confidence that comes with having a trusted, licensed team on your side.

Hose Bib Replacement in St. Petersburg, FL 33704

When a hose bib (outdoor faucet) starts leaking or becomes difficult to use, it can turn simple chores like watering the lawn or washing the car into a constant frustration. That was the case for a homeowner in St. Petersburg, FL 33704 who contacted us for help. As a Premium Plan member, they wanted a long-term solution that would protect their home and make everyday outdoor water use easy again.

On this visit, our Home Therapist technician Alejandro performed a full hose bib replacement and verified that everything was secure and leak-free. We also walked the homeowner through what to expect when a hose bib is inside a block or framed wall, including why we sometimes need to open an access hole and what we do—and don’t do—once the plumbing work is complete.

Case Recap

  • Location: Single-family home in St. Petersburg, FL 33704
  • Service: Replacement of a worn hose bib (outdoor faucet)
  • Membership: Home Therapist Premium Plan plumbing customer
  • Scope: Remove old hose bib, install new faucet, check for leaks
  • Important note: Wall or block access may be required for some hose bibs; we do not patch concrete after plumbing repairs
  • Outcome: Secure, smooth-operating hose bib with verified proper operation and no active leaks at completion

Customer Problem

For our St. Petersburg homeowner, the hose bib had become a constant source of worry. Outdoor faucets here in coastal Florida see a lot of use—watering plants almost year-round, rinsing off salt and sand, and connecting to hoses and pressure washers. Over time, valves and seals inside the hose bib can wear out, causing leaks or making the handle hard to turn.

The homeowner reported that the outside faucet was no longer working the way it should and was concerned about:

  • Water leaking around the handle or spout
  • The risk of water getting into the wall or block
  • Wasting water every time they used the hose

Because they’re a Premium Plan member, they wanted to get ahead of any possible damage and make sure the fix would be done correctly and safely the first time. In a humid and rainy area like St. Petersburg, FL 33704, that’s a smart move—persistent moisture around exterior walls can lead to bigger issues if it’s not managed properly.

Inspection and Diagnosis

When Alejandro arrived, he began with a straightforward inspection to understand exactly how the hose bib was installed and what condition it was in. With hose bib replacements, we’re not just looking at the visible faucet; we’re also thinking about what’s happening behind the wall.

Here’s what we focus on during a hose bib evaluation for homeowners in St. Petersburg:

  • Condition of the hose bib: Checking for visible corrosion, cracks, dripping from the spout or stem, and stiffness in the handle.
  • Wall or block construction: Determining whether the hose bib is mounted through a concrete block wall, stucco, brick, or framed wall with siding.
  • Interior piping layout: Understanding how the water line feeds the hose bib and whether there’s an accessible shutoff or not.
  • Potential for hidden leaks: Looking for signs of moisture, staining, or deterioration around the mounting area.

After the inspection, it was clear that the best long-term solution was a full hose bib replacement rather than trying to band‑aid individual components. This is a common situation in older homes in St. Petersburg, FL 33704, where years of exposure, minerals in the water, and constant use have simply worn the faucet out.

Repair and Service Process

Once we confirmed that replacement was the right option, we walked the homeowner through the process step by step, including the possibility of opening a small access area in the wall or block. It’s important to be transparent here: sometimes there is no safe way to disconnect and reconnect the pipe without creating an access opening. We always explain this before we start.

For this type of hose bib replacement, our process typically looks like this:

1. Shut Off and Make the Area Safe

We start by shutting off the water feeding the hose bib so we can work safely and cleanly. Then we relieve any pressure by opening the faucet. This helps prevent unwanted spraying when we disconnect the line.

2. Carefully Access the Connection Point

Depending on how the home was built, the hose bib may be connected from the inside of a block wall or from an interior framed wall. On some occasions, the only way to reach that connection is to open a small hole in the wall or block. When that’s necessary, we:

  • Mark the area to minimize the size of the access opening
  • Use appropriate tools to reduce vibration and prevent unnecessary damage
  • Protect nearby surfaces and clean up debris as we go

We always remind homeowners that our scope is plumbing: we do not patch or repair concrete, stucco, or other wall finishes after the hose bib replacement is complete. Many customers choose to have a handyman or contractor finish that part, or they handle simple patching themselves.

3. Remove the Old Hose Bib

With access to the connection, we detach the old hose bib from the piping. Depending on the style, that may involve unscrewing a threaded connection or cutting out a section of pipe. We check the condition of the surrounding pipe as well, making sure there are no obvious weak points right next to the joint we’re working on.

4. Install the New Hose Bib

Next, we install the new hose bib, using appropriate fittings and sealing methods for the existing piping material. Our goals here are:

  • A secure, leak‑free connection at the pipe
  • Proper support so the hose bib doesn’t wobble or put strain on the piping when a hose is attached
  • Correct orientation so the spout and handle are easy to use for everyday tasks

5. Turn Water Back On and Test Thoroughly

After the new hose bib is in place, we restore the water supply and test the faucet under normal operating conditions. We check:

  • Operation of the handle from fully closed to fully open
  • Any drips from the spout, stem, or around the wall penetration
  • The connection inside the wall or block for signs of moisture

Once we confirmed proper operation and no active leaks, we cleaned up the work area and went over the results with the homeowner. As with all our plumbing work in St. Petersburg, FL 33704, the goal was not just to fix the immediate problem, but to leave the homeowner confident in their outdoor plumbing going forward.

Why This Fix Works

A hose bib may look simple from the outside, but it plays an important role in managing water safely around your home. When internal seals wear out or the valve body starts to corrode, you can end up with:

  • Continuous dripping that wastes water
  • Water seeping back into the wall or foundation
  • Difficulty shutting the water off completely

Replacing the entire hose bib addresses the problem at its source. Instead of trying to chase down one worn seal after another, we install a new, properly sealed assembly that:

  • Provides a positive shutoff at the valve
  • Reduces the risk of hidden leaks in the wall cavity
  • Handles the regular on‑off cycling that comes with everyday hose use

For homes in St. Petersburg and the greater Tampa Bay area, this is especially important because our warm, humid climate keeps outdoor plumbing in regular use. A properly installed hose bib helps manage water pressure and directs water where it belongs—outside, not into the structure.

Pro Tips for Homeowners in St. Petersburg

To keep your outdoor faucets and plumbing in good shape in St. Petersburg, FL 33704 and nearby neighborhoods, a few simple habits go a long way.

  • Turn the hose off at the faucet, not just at the sprayer. Leaving a spray nozzle closed while the faucet is fully open keeps your hose and hose bib under constant pressure. Shutting off at the faucet helps reduce strain on the valve and piping.
  • Check periodically for drips or moisture around the wall. Even small, slow leaks can add up over time. If you notice damp spots, staining, or mold near the hose bib, have it checked by a licensed plumber.
  • Don’t hang heavy items on the hose bib. Using the faucet as a hanger for heavy hoses or tools can stress the connection inside the wall. Use a proper hose hanger mounted to the wall instead.
  • Know where your main shutoff is. In a coastal Florida city like St. Petersburg, sudden plumbing issues can happen. Knowing how to shut off water quickly can limit damage if a hose or faucet fails.
  • Consider a plumbing maintenance plan. As this homeowner did with their Premium Plan membership, routine inspections help catch worn fixtures—like aging hose bibs—before they cause water damage or higher utility bills.

If you’d like to learn more about how we approach ongoing plumbing care, our article on plumbing maintenance plans and options is a helpful starting point for Tampa Bay homeowners.

FAQ: Hose Bib Replacement for St. Petersburg Homeowners

Do you always have to open a hole in the wall to replace a hose bib?

No, not always. In some homes, the connection is accessible from inside a utility room or crawl space. However, in many block or stucco homes in St. Petersburg, FL 33704, the only safe way to reach the piping is to open a small access area in the wall or block. We explain this clearly before we begin and keep the opening as small and neat as possible.

Do you patch or repair concrete or stucco after the hose bib is replaced?

Our work focuses on the plumbing itself. We do not patch or repair concrete, stucco, or other wall finishes after the hose bib replacement. Many customers choose to bring in a handyman, mason, or contractor for the wall repair portion, or handle simple patch work on their own.

How long does a typical hose bib replacement take?

Most hose bib replacements can be completed in a single visit. The exact time depends on how accessible the piping is and whether an access opening is required. Our goal is always to work efficiently while protecting your home and leaving the area clean.

Is hose bib replacement covered by my Premium Plan membership?

Membership benefits can include priority scheduling, preferred pricing, and other advantages. The specific coverage for a hose bib replacement depends on your particular plan details. Our office team can review your Premium Plan benefits with you and explain any costs before work begins. You can also see how we handle membership details in our overview of verifying plumbing service memberships.

Can a leaking hose bib lead to bigger plumbing problems?

Left unaddressed, a leaking hose bib can waste water and, in some cases, allow moisture into walls or near the foundation. That’s why it’s smart for homeowners in St. Petersburg to take persistent drips seriously. Replacing a worn hose bib is a relatively small project that can help prevent larger moisture issues later.

Should I have the rest of my plumbing checked at the same time?

Many homeowners choose to bundle small repairs with a broader inspection, especially under a maintenance plan. If you’d like a more comprehensive review of your home’s plumbing, our team can schedule a whole-home plumbing inspection and water heater flush at a time that works for you.

Why Choose Home Therapist for Plumbing in St. Petersburg

When you invite us to your home in St. Petersburg, FL 33704, you’re trusting us with both your comfort and your property. We take that seriously on every visit, whether we’re replacing a hose bib or handling a larger plumbing project.

Here’s what you can expect from Home Therapist Cooling, Heating, and Plumbing:

  • Licensed, professional technicians: Our plumbers are trained, experienced, and properly licensed to work on your home’s plumbing systems.
  • Transparent communication: We explain what we find, what your options are, and what’s included in the work—before we begin. For example, we’re always upfront that we do not patch concrete or stucco after accessing a hose bib.
  • Clean, respectful work: We treat your home as if it were our own, protecting work areas and cleaning up when we’re finished.
  • Long-term reliability: Rather than quick, temporary fixes, we focus on solutions that help your plumbing perform reliably in Tampa Bay’s climate.
  • Commitment to Tampa Bay homeowners: Our team lives and works in this community, and we’re proud to serve homeowners across St. Petersburg and the surrounding areas.

If you’d like to see more of what we do and how we serve local homeowners, you can follow us on social media and review sites:

  • Browse our project highlights on Pinterest.
  • Connect with us and see discussions on Reddit.

We’re also proud to be listed with trusted local and national organizations:

For more examples of our plumbing work and services, you can also explore how we handle drain line cleaning and flushing and our water heater maintenance plans and promotions for Tampa Bay homeowners.

Need Hose Bib or Plumbing Help in St. Petersburg, FL 33704?

If your outdoor faucet is leaking, hard to turn, or just not working the way it should, we’re here to help. Our licensed plumbers can inspect your hose bib, explain your options, and perform a professional replacement when needed—always with clear communication and respect for your home.

Whether you’re already a Premium Plan member or you’re just looking for a trustworthy local plumbing company, Home Therapist Cooling, Heating, and Plumbing is ready to serve you in St. Petersburg, FL 33704. Contact us today to schedule hose bib service or to ask about our plumbing maintenance plans for Tampa Bay homeowners.

AC Tune-Up and Condenser Fan Motor Replacement in St. Petersburg, FL 33705

When your air conditioner is nine years old and you live in a humid place like St. Petersburg, FL 33705, keeping it running smoothly becomes especially important. For this homeowner, selling the house in a few years meant it didn’t make sense to rush into a full system replacement. Instead, they wanted reliable cooling, fewer surprises, and a smart investment in maintenance.

We were called out to perform a full AC tune-up and address an aging condenser fan motor. Our goal was to clean and optimize the system, replace any failing components, and make sure the home would stay comfortable without unnecessary spending.

In this case study, we’ll walk through what we found, what we recommended, and how the final tune-up and condenser fan motor replacement helped extend the life of the system and improve its reliability for this St. Petersburg homeowner.

Case Recap

  • Location: Single-family home in St. Petersburg, FL 33705
  • System age: Approximately 9 years old
  • Services performed: Full AC tune-up and universal condenser fan motor replacement (with new capacitor as needed)
  • Homeowner goal: Keep the system running reliably for the next few years until the home is sold, without investing in a full replacement
  • Work performed by: Licensed Home Therapist technician
  • Outcome: Cleaner, more efficient operation and a refreshed outdoor unit designed to run more reliably through Florida’s heat and humidity

Customer Problem: Comfort Now, Replacement Later

When we arrived at this home in St. Petersburg, the situation was one we see often around Tampa Bay. The air conditioner was not brand new, but not at the end of its life either—about nine years old. The homeowner explained that they plan to sell the property within the next three years and were not interested in investing in a full system replacement.

Instead, they wanted to:

  • Keep the AC running reliably through our long Florida cooling season
  • Avoid major breakdowns or emergency calls, especially in the middle of summer
  • Make sensible, targeted repairs that support resale without overspending

They scheduled a full system tune-up to get ahead of potential problems and asked us to pay close attention to any components that could fail in the near future—including the condenser fan motor outside.

This is a smart approach for homeowners in St. Petersburg, FL 33705: instead of waiting for the system to fail, a tune-up lets us find issues early and decide together what’s worth fixing and what’s better left for a future replacement.

Inspection and Diagnosis

We started with a thorough AC tune-up, moving through the system piece by piece. The goal during an inspection like this is to answer three big questions:

  • Is the system safe to operate?
  • Is it running as efficiently as it reasonably can for its age?
  • Are there any obvious weak points that could cause a breakdown soon?

On this visit in St. Petersburg, our inspection covered, among other items:

  • Evaporator coil cleanliness and condition
  • Condenser coil cleanliness and airflow around the outdoor unit
  • Drain line condition and flow
  • Thermostat operation and settings
  • Electrical connections, wiring, contacts, capacitors, and relays
  • Condenser fan motor operation, mounting, and blades
  • Compressor behavior at startup

We also inspected overall system operation and checked refrigerant levels and pressures to ensure there were no obvious signs of under-charge or over-charge, without guessing or forcing a repair that wasn’t needed.

During the outdoor inspection, we confirmed that the existing condenser fan motor was a concern. Age, wear, and normal Florida use had taken a toll. A failing or weak condenser fan motor can lead to:

  • Poor heat rejection from the outdoor unit
  • Higher operating temperatures at the compressor
  • Increased strain on the entire system and potential premature failure

Based on the condition of the motor and the homeowner’s goals, we recommended replacing it with a universal condenser fan motor and addressing the supporting electrical components (such as the capacitor) as needed.

Repair and Service Process

Once we walked the homeowner through what we found and answered their questions, we moved ahead with the agreed tune-up and condenser fan motor replacement.

1. Full System Tune-Up

The tune-up itself focused on cleaning, tightening, and verifying proper operation across the system. For this St. Petersburg home, that included:

  • Coil cleaning and sanitizing: We acid washed and sanitized both the evaporator coil (inside) and the condenser coil (outside). Clean coils allow better heat transfer, which means cooler air inside and less strain on the equipment.
  • Drain line flush and sanitize: We flushed and sanitized the condensate drain line and provided a limited guarantee on the cleaned line. In our humid Florida climate, clogs and algae buildup are common, and a blocked drain can quickly lead to water leaks and ceiling damage.
  • Refrigerant level and pressure check: We reviewed refrigerant behavior under normal operation to ensure there were no obvious signs of a serious charge issue. If anything had looked off, we would have discussed it before proceeding.
  • Thermostat check and adjustment: We confirmed that the thermostat was communicating properly with the system and set up in a way that made sense for the homeowner’s comfort and schedule.
  • Electrical tightening and inspection: We tightened wiring, contacts, capacitors, relays, and the outdoor disconnect. Loose electrical connections can create intermittent issues that are hard for homeowners to trace.
  • Mechanical checks: We tightened the condenser fan motor mounting hardware and blades, inspected the compressor at startup, and verified that the system cycled on and off as expected.
  • Filter replacement: We ensured that the air filter was addressed, either using a customer-provided filter or one supplied by us if needed.

At each stage, we kept the homeowner updated, explained what we were doing, and made sure there were no surprises in terms of work or cost.

2. Universal Condenser Fan Motor Replacement

With the tune-up tasks in motion, we moved to the core repair for this visit: replacing the failing condenser fan motor with a universal motor designed to match the system’s needs.

Here’s how we handled it:

  • Safe shutdown: We shut off power at the outdoor disconnect and verified that the unit was fully de-energized before touching any components.
  • Removal of the old motor: We disconnected the old condenser fan motor wiring, removed the fan blade, and unmounted the motor from the unit.
  • Installation of the new universal motor: We installed a new universal condenser fan motor, properly positioned and secured. The motor comes with a one-year warranty, which is a good fit for a system the homeowner plans to keep for a few more years.
  • New capacitor as needed: Fan motors depend on their matching capacitor to start and run correctly. Where required, we installed a new capacitor rated appropriately for the motor, helping ensure smooth startup and reliable operation.
  • Reassembly and wiring: We re-mounted the fan blade, confirmed correct rotation direction, and carefully wired the new motor and capacitor according to best practices and manufacturer guidance.
  • Operational test: After restoring power, we brought the system back online and observed operation. We verified that the fan started correctly, moved air as expected across the coil, and that the outdoor unit sounded and behaved like a healthy system.

By the time we wrapped up, the outdoor unit at this St. Petersburg, FL 33705 property had a fresh, warrantied condenser fan motor and a carefully tuned system around it.

Why This Fix Works for a 9-Year-Old System

For homeowners in St. Petersburg who are planning to sell in a few years, this type of targeted repair makes a lot of sense. Instead of putting thousands into a full replacement right away, we focus on the components that:

  • Directly affect everyday comfort
  • Protect more expensive parts (like the compressor)
  • Are clearly worn or close to failure

The condenser fan’s job is to move outdoor air across the condenser coil so the system can release heat. When the fan motor is weak or failing, heat builds up around the compressor. That can lead to nuisance trips, poor cooling, and in the worst case, compressor damage.

By installing a new fan motor and making sure the capacitor and wiring are in good shape, we help the system:

  • Reject heat more effectively
  • Operate within a more normal temperature range
  • Run with less stress on the compressor and other components

Combined with the tune-up—clean coils, clear drain, tight electrical connections—this approach improves reliability and efficiency without over-investing in a system that the homeowner doesn’t plan to keep long-term.

After completing the work, we tested the system to confirm that it was operating as expected and provided recommendations for any future maintenance the homeowner might want to consider before selling the home.

Pro Tips for Homeowners in St. Petersburg

If you’re in St. Petersburg, FL 33705 or elsewhere around Tampa Bay, here are some practical steps you can take to help your AC last and avoid headaches:

  • Change filters regularly: In our humid, high-pollen climate, filters tend to load up quickly. Check them monthly during peak season and replace as soon as they look dirty, not just on a fixed schedule.
  • Keep the outdoor unit clear: Trim plants and remove debris around your condenser so air can flow freely. At least 2–3 feet of open space around the unit helps it reject heat more effectively.
  • Use your thermostat wisely: Avoid constantly adjusting the temperature. Set a comfortable range and let the system work steadily instead of forcing it to short-cycle.
  • Schedule routine maintenance: Annual or semi-annual tune-ups give us a chance to catch problems early. Resources like our HVAC maintenance guide for homeowners and this air conditioning maintenance guide for Tampa Bay can help you know what to expect.
  • Address small issues quickly: Unusual noises, short run times, or warm air from the vents aren’t normal in our climate. Getting them checked sooner can often turn a big repair into a small one.
  • Plan your budget: If your system is approaching 10–15 years old, talk with us about long-range planning. Our HVAC maintenance checklist and AC repair and maintenance overview can help you understand your options.

FAQ: AC Tune-Up and Condenser Fan Motor Replacement

How often should I schedule an AC tune-up in St. Petersburg, FL?

For our climate around St. Petersburg and Tampa Bay, once a year is a good minimum for most homes. If your system is older, runs almost year-round, or has had issues in the past, scheduling maintenance before each major cooling season can be helpful.

Does a tune-up really help an older system last longer?

While no tune-up can make an older unit brand new, regular maintenance helps reduce strain on key components, improve airflow, and catch small problems early. For a nine-year-old system like this one in St. Petersburg, a thorough tune-up is a sensible way to support the system until you’re ready for a full replacement.

When is it worth replacing a condenser fan motor instead of the whole system?

If your system is generally in fair condition and you plan to keep the home for several years, replacing a failing condenser fan motor is usually a good investment. In this case, the homeowner planned to sell within about three years, so replacing the motor—with a one-year warranty—was a practical way to keep the system running without paying for a new installation.

Will I notice a difference after a tune-up and fan motor replacement?

Most homeowners notice that their system sounds smoother and seems to keep up with the thermostat more consistently, especially on hotter days. The biggest benefits are often behind the scenes: reduced strain on the compressor, improved reliability, and a lower risk of surprise breakdowns.

Do I need to be home during this type of service?

It’s helpful if someone can be available at the beginning so we can review concerns, access the equipment, and confirm thermostat settings. After that, our technician can handle most of the work while you go about your day. We always review what we found and what we did before we leave.

What if I decide to replace the system later?

If you choose to replace your system in the future, the work we’ve done—like cleaning coils and addressing failing parts—helps keep things running until that day. When you’re ready to discuss replacement options, we’ll walk you through choices that fit your home, budget, and plans.

Why Choose Home Therapist for AC Service in Tampa Bay

When you invite someone to work on your AC in St. Petersburg, FL 33705, you’re trusting them with your comfort, your home, and your budget. At Home Therapist Cooling, Heating, and Plumbing, we take that seriously.

Here’s what you can expect from our team:

  • Licensed, professional technicians: Our techs are trained, experienced, and focused on doing the job the right way, not the fastest way.
  • Transparent communication: We explain what we find in plain language, show you your options, and never pressure you into work you don’t need.
  • Clean and respectful work: We treat your home like our own—protecting surfaces, cleaning up after ourselves, and taking care around your property.
  • Long-term reliability focus: Whether you’re planning to stay in your home for decades or sell in a few years, we tailor our recommendations to your situation and priorities.
  • Commitment to Tampa Bay homeowners: We live and work in this community, and our reputation across Tampa Bay matters to us.

If you’d like to get a feel for who we are beyond this case study, you can find us on social platforms and local directories:

We’re also listed with trusted organizations and directories, so you can easily check our standing in the community:

Need AC Service in St. Petersburg, FL 33705?

If your air conditioner is getting older, not cooling like it used to, or you’re planning to sell your home in the next few years, a targeted tune-up and any needed repairs can go a long way. For homeowners in St. Petersburg, FL 33705, we’re here to help you balance comfort, reliability, and budget.

Whether you need a full system tune-up, help with a noisy outdoor unit, or want to understand your options for future replacement, our local Tampa Bay technicians are ready to take a look, explain what’s going on, and recommend the next best step for your home.

When you’re ready, reach out to Home Therapist Cooling, Heating, and Plumbing to schedule your AC service in St. Petersburg. We’ll take the time to listen, inspect carefully, and leave your system in better shape than we found it.

Premium AC Maintenance and Therapy Plan Visit in Tampa, FL 33618

For a homeowner in Tampa, FL 33618, staying ahead of the Florida heat means keeping their air conditioning system in top shape. On this visit, we performed a scheduled Premium Therapy Plan maintenance on a relatively new air handler paired with a slightly older outdoor condenser. The system was cooling well, but our job was to make sure it stays that way through the long, humid Tampa Bay season.

During this visit, we inspected the entire system from top to bottom, verified operation in both cooling and heating modes, cleaned components, and flushed the drain line. By the end, everything was running smoothly, with all readings and operations within normal specifications.

Case Recap

  • Location: Residential AC system in Tampa, FL 33618
  • Service type: Scheduled Premium Therapy Plan maintenance visit (#4)
  • Equipment: 2024 air handler paired with a 2018 outdoor condenser
  • System status: Operating efficiently with no reported comfort issues
  • Work performed: Full inspection, cleaning, and drain line flush
  • Outcome: All components tested normal; system verified for reliable performance

Customer Problem: Staying Ahead of the Heat, Not Waiting for a Breakdown

This homeowner in Tampa, FL 33618 wasn’t calling us because the AC stopped working. Instead, they’re on our Premium Therapy Plan and wanted to keep their system healthy with routine maintenance. Their last maintenance was in July of the previous year (el último mantenimiento que le dimos fue julio del año pasado), so it was time for another thorough checkup before the next cycle of heavy use.

Even when everything seems fine inside the home, Florida’s heat, humidity, and frequent use can quietly wear on an HVAC system. Dust buildup, algae in the drain line, and unseen electrical or mechanical strain can turn into bigger problems if they’re not caught early. With this visit, our goal was simple: confirm the system was operating correctly, clean what needed cleaning, and make sure the homeowner could rely on their cooling without surprises.

Because this is a Premium Therapy Plan visit, the homeowner also benefits from consistent documentation of how the system is performing over time. That history helps us spot any small changes before they become big repairs, which is especially valuable in high-demand areas like Tampa Bay.

Inspection and Diagnosis: What We Checked and Why

Even though there were no comfort complaints, we approached this maintenance visit the same way we would in any Tampa, FL 33618 home: methodically and detail-focused. Our technician walked through a full system inspection, paying close attention to both the indoor and outdoor units.

Here’s what we focused on and why it matters:

  • Indoor air handler (2024 unit): We inspected the blower assembly, electrical connections, and general condition of the cabinet and coil area. The blower motor consumption was checked and confirmed to be within normal range, indicating it wasn’t overworking or drawing abnormal power.
  • Outdoor condenser (2018 unit): We evaluated compressor operation and fan performance. Both the compressor and condenser fan were operating normally, without signs of stress, noise, or cycling issues.
  • System pressures: System pressures were within specifications, which tells us the refrigerant circuit is behaving as expected for the current operating conditions and configuration.
  • Cooling and heating modes: We tested both modes to ensure the system would be ready for year-round comfort, not just summer cooling. Both modes checked out and were operating correctly.
  • Drainage and cleanliness: In a humid climate like Tampa, keeping the drain line clear is crucial to prevent water backups and potential ceiling or closet damage.

Throughout the inspection, we verified each component was working within its normal operating range. No unusual noises, no irregular cycling, and no signs of short-term or long-term failure. That’s exactly what we want to see during preventative maintenance for homeowners in Tampa, FL.

Repair and Service Process: Step-by-Step Preventive Care

Because the system was in good shape, the focus of this visit was preventive maintenance rather than emergency repair. Still, the work we did on this Tampa, FL 33618 home directly supports reliability and efficiency for the months ahead.

1. Full System Operation Check

We started by running the system and confirming normal operation:

  • Verified blower motor consumption was within normal range.
  • Confirmed compressor operation was normal with stable cycling.
  • Checked condenser fan operation for smooth, consistent performance.
  • Confirmed system pressures were within specifications.

This step lets us build a baseline and quickly spot anything that might need closer attention.

2. Cooling and Heating Mode Testing

Even in Tampa, where cooling is king, heating still matters during the cooler snaps. We cycled the system through both cooling and heating modes and confirmed that:

  • Thermostat commands were recognized correctly.
  • The system switched modes smoothly.
  • Airflow remained consistent during both modes.

By testing both, we make sure the homeowner doesn’t run into a surprise issue when the weather changes.

3. Cleaning the Indoor and Outdoor Units

Next, we moved on to cleaning. Both the indoor air handler and the outdoor condenser were cleaned as part of the Premium Therapy Plan service. While the exact level of buildup can vary, regular cleaning generally helps:

  • Maintain strong, even airflow through the system.
  • Support efficient heat transfer at the indoor coil and outdoor coil.
  • Reduce strain on motors and the compressor.

Clean equipment is not just about appearance; it is directly tied to performance and energy use, especially in a high-demand area like Tampa, FL 33618.

4. Drain Line Flush and Cleaning

One of the most important tasks for AC maintenance in Florida is keeping the condensate drain line clear. We flushed and cleaned the drain line as part of this visit. This matters because:

  • High humidity means more condensate water, which can encourage algae growth in the line.
  • A clogged drain can back up water into the air handler area, causing leaks and potential damage.
  • Keeping the drain clear helps prevent water-related shutdowns or float switch trips.

By flushing the line during this visit, we helped protect the homeowner’s property and kept their system ready for the long, humid Tampa Bay season.

5. Final Verification and Documentation

After cleaning and flushing, we restarted the system and verified that everything was operating as expected. We confirmed:

  • Normal airflow from the registers.
  • Stable cooling performance.
  • No unusual noises or cycling issues.
  • Proper drainage at the condensate line.

We then documented the findings for the homeowner and for future visits under their Premium Therapy Plan. At the time of service, the system was operating efficiently with no reported or observed problems.

Why This Maintenance Keeps the System Reliable

For homeowners in Tampa, FL 33618, air conditioning systems often run many months out of the year. That extended runtime is why maintenance like this visit is so important.

This particular system pairs a newer 2024 air handler with a 2018 condenser. Even though both are relatively modern, they still depend on the same fundamentals:

  • Airflow: If the blower or duct system is restricted, the coil can get too cold, and the system has to work harder to move the same amount of air.
  • Heat transfer: Clean coils and proper refrigerant pressures allow the system to move heat efficiently from inside to outside (in cooling mode) or the opposite in heating modes.
  • Drainage: All the moisture pulled from the indoor air has to go somewhere. A clear drain line lets that water leave the system safely.
  • Electrical and mechanical health: Motors, compressors, and fans all rely on proper power and minimal obstruction to operate within their design range.

By confirming blower motor consumption is normal, compressor and fan operation are stable, and system pressures are within specifications, we’re essentially confirming the system is working within its design envelope. That means less wear and tear, fewer surprise breakdowns, and better comfort for the homeowner in Tampa.

Pro Tips for Homeowners in Tampa

Based on what we see every day providing HVAC service in Tampa, FL 33618 and throughout Tampa Bay, here are some practical tips to keep systems like this one running smoothly between visits:

  • Change or clean your air filter regularly. In Florida’s dusty, humid environment, most homes benefit from checking filters monthly and replacing them as needed. A clean filter protects your blower, coil, and air quality.
  • Keep the outdoor unit clear. Trim back plants and remove leaves or debris around the condenser. Good airflow around the unit is critical for efficiency and compressor life.
  • Watch for drainage issues. If you see water near your air handler, hear gurgling, or the system randomly shuts off, it may be a drain issue. Catching it early can prevent water damage.
  • Use your thermostat wisely. Avoid constantly bumping the thermostat up and down. Set a comfortable temperature and let the system do its job. In Tampa Bay’s climate, slow, steady operation is often more efficient than frequent on/off cycling.
  • Schedule maintenance at least once a year. Just like this Premium Therapy Plan visit, annual or semi-annual maintenance helps us catch small issues before they become big repairs, especially important in high-use areas like Tampa, FL 33618.
  • Ask about indoor air quality options. If you notice dust, allergies, or musty smells, services such as air duct cleaning in Tampa or upgraded air filter solutions may help.

FAQ: AC Maintenance Visit in Tampa, FL 33618

How often should I schedule AC maintenance in Tampa, FL 33618?

In our climate, we recommend at least one thorough maintenance visit per year, and many homeowners benefit from two—one before peak cooling season and one later in the year. This homeowner’s last maintenance was in July of the previous year, so this visit kept them on a healthy schedule.

Is it a problem if my air handler and condenser are different ages?

Not necessarily. In this home, the air handler was a 2024 unit and the condenser was a 2018 unit, and both were operating properly. What matters most is that the components are compatible, correctly installed, and regularly maintained.

Why is drain line cleaning so important in Florida?

High humidity in Tampa means your AC pulls a lot of moisture out of the air. That water travels through the condensate drain line. If it clogs with algae or debris, water can back up into the air handler area and cause leaks or shutdowns. Flushing and cleaning the drain line, like we did on this visit, helps prevent that.

What does it mean when you say system pressures are within specifications?

System pressures tell us how refrigerant is moving through the system. When pressures are within the appropriate range for the system and conditions, it’s a good sign that the refrigerant circuit is functioning properly and the system is transferring heat efficiently.

Do I still need maintenance if everything seems to be working fine?

Yes. This Tampa, FL 33618 homeowner’s system was working well, but maintenance allows us to confirm normal operation, clean critical components, and prevent issues before they cause a breakdown. It’s like an annual checkup for your home’s comfort system.

What are the benefits of a plan like the Premium Therapy Plan?

Plans like the Premium Therapy Plan provide scheduled maintenance, consistent documentation of system health, and peace of mind. Instead of waiting for something to go wrong, we keep your system on a proactive care schedule tailored to Tampa Bay conditions.

Why Choose Home Therapist for Your AC in Tampa Bay

When we visit a home in Tampa, FL 33618, our focus is always the same: safe, reliable comfort and clear communication. As licensed and professional technicians, we take the time to explain what we’re doing, why we’re doing it, and what we find during every visit.

Our team is trained to work cleanly and respectfully in your home. We protect your floors and walls, clean up our work area, and treat your system as if it were our own. Whether we’re performing a Premium Therapy Plan visit like this one or helping with a repair, we stay focused on long-term reliability, not just a quick fix.

If you’d like to see more of how we work and connect with us online, you can follow Home Therapist on social platforms such as Pinterest or join the conversation with us on Reddit. You can also find additional information about our services and reputation on directories like Networx.

For homeowners who like to check credentials, we maintain active listings with trusted organizations. You can learn more about our business through the Tampa Bay Chamber of Commerce and our profile with the Better Business Bureau. These profiles reflect our commitment to serving Tampa Bay homeowners with honesty, professionalism, and consistent quality.

If you’re considering additional maintenance, repairs, or upgrades, you can also explore our main AC service resources, including our AC repair and maintenance overview, our detailed AC service options guide, and current AC maintenance and cleaning specials in Tampa Bay.

Need AC Maintenance in Tampa, FL 33618?

If you live in Tampa, FL 33618 and want your AC system to be as dependable as the one in this case, we’re here to help. Whether you’re interested in a one-time tune-up or a Premium Therapy Plan that keeps your system on a regular maintenance schedule, our local Tampa Bay technicians are ready to serve.

Reach out to Home Therapist Cooling, Heating, and Plumbing to schedule your next maintenance visit. We’ll inspect, clean, and verify your system so you can enjoy steady, comfortable cooling all season long—without the stress of surprise breakdowns.

Premium AC Maintenance Plan Service in Tampa, FL 33626

For a homeowner in Tampa, FL 33626, staying comfortable in our heat and humidity depends on knowing the air conditioning system is truly ready for the workload. On this visit, we returned to a home where we installed the HVAC system about two years ago as part of our Premium Home Therapy Plan. This was Visit #3 on their plan, and the goal was simple: thoroughly inspect, clean, and confirm that everything is running exactly the way it should.

During this premium AC maintenance visit in Tampa, FL 33626, we carefully checked the complete system from top to bottom. We verified that the blower motor, compressor, and fan were drawing current within normal ranges, confirmed that system pressures were correct, and cleaned both units and the condensate drain line. The outcome: the system is operating properly, no issues found, and the home is set up for another season of reliable comfort.

Case Recap

  • Location: Single-family home in Tampa, FL 33626
  • Service: Premium Home Therapy Plan maintenance visit (Visit #3)
  • System age: Approximately two years since installation by our team
  • Full inspection of indoor and outdoor units for proper operation
  • Blower, compressor, and fan amp draws within normal range
  • System pressures normal; both units and the condensate drain line thoroughly cleaned

Customer Problem

In this case, the homeowner wasn’t calling us because something was broken. They wanted to stay ahead of problems by keeping up with their Premium Home Therapy Plan. With Florida’s heat and humidity, especially around Tampa, FL 33626, even a well-installed system can run hard for much of the year. That constant workload makes regular maintenance one of the best ways to avoid breakdowns and surprise expenses.

The homeowner’s main concerns were straightforward:

  • Confirm that the system we installed two years ago was still operating the way it should.
  • Make sure the indoor and outdoor units were clean so airflow and efficiency stayed high.
  • Prevent any drain clogs that could cause water leaks or ceiling damage.

Because this was Visit #3 on their plan, this Tampa homeowner was already familiar with our process. They appreciate that our maintenance isn’t just a quick filter change—we take the time to inspect, test, and clean the equipment so they know exactly how their system is doing.

Inspection and Diagnosis

Even when everything seems to be working fine, we never assume. For every Premium Home Therapy Plan visit in Tampa, FL 33626 and across Tampa Bay, we follow a consistent inspection process so nothing important gets overlooked.

On this visit, we:

  • Looked over the indoor air handler and outdoor condenser for any visible wear, corrosion, or loose connections.
  • Checked electrical components for signs of overheating or damage.
  • Measured blower motor, compressor, and fan amp draws to confirm they stayed within normal ranges.
  • Verified system operating pressures were correct for the conditions.
  • Confirmed proper condensate drainage to avoid backups and water damage.

All readings and visual checks came back normal. There were no unusual noises, no signs of strain, and no evidence of water issues. That told us the system was operating the way it should for a well-maintained two-year-old installation.

We always explain our findings in clear terms. In this home in Tampa, FL 33626, we let the homeowner know that the equipment was healthy, the controls were responding as expected, and there were no concerns to flag at this time. From there, we moved into cleaning and preventive work to help keep it that way.

Repair or Service Process

Since there were no repairs needed on this visit, the focus was on detailed maintenance tasks that protect performance and comfort over the long term. Here’s how we handled it step by step.

1. Cleaning the Indoor Unit

The indoor air handler does a lot of quiet work behind the scenes, especially in humid places like Tampa. Dust, buildup, and biological growth can slowly collect on internal surfaces if the system isn’t maintained properly.

During this visit we:

  • Cleaned accessible components of the indoor unit so airflow through the system stayed steady.
  • Visually checked the evaporator coil and surrounding areas for buildup or blockages.
  • Confirmed that nothing was obstructing the return and supply paths.

This kind of cleaning work helps the system move air more easily, which can support more consistent temperatures and reduce strain on the blower motor over time.

2. Cleaning the Outdoor Unit

The outdoor condenser sits in the elements year-round. Leaves, dirt, grass clippings, and other debris can collect around and inside the cabinet, which can interfere with heat transfer.

At this Tampa, FL 33626 home, we:

  • Cleaned the outdoor unit cabinet and surrounding areas.
  • Visually checked the condenser coil to ensure nothing was restricting airflow.
  • Confirmed the fan was clear of debris and spinning freely.

Keeping the outdoor unit clean helps the system reject heat more effectively, which supports smoother operation and can help the equipment last longer.

3. Drain Line Cleaning

In our climate, the drain line is one of the most important parts of your air conditioning system. The system pulls a lot of moisture out of the air, and that water needs a clear path to drain away. Over time, algae, dirt, and other buildup can create clogs that lead to water backups and leaks.

On this visit, we thoroughly cleaned the condensate drain line. This preventive step helps:

  • Reduce the risk of water overflowing from the drain pan.
  • Prevent ceiling, wall, or flooring damage from unnoticed leaks.
  • Keep the system running without nuisance shutdowns caused by float switches.

For homeowners in Tampa, FL 33626 and across Tampa Bay, regular drain line cleaning is one of the simplest ways to avoid an aggravating water issue tied to the AC system.

4. System Performance Check

Once cleaning and inspection were complete, we brought the system back online and watched it operate. We listened for any unusual noises, monitored start-up behavior, and confirmed that air was moving steadily through the home.

We verified proper operation after the maintenance, confirming that:

  • The compressor started and ran smoothly.
  • The indoor blower was moving air consistently.
  • The outdoor fan was running as expected.
  • The system cycled normally.

The homeowner ended the visit with a system that was clean, inspected, and performing normally, with no outstanding concerns noted.

Why This Fix (and Maintenance) Works

Premium maintenance is about much more than checking a box. For air conditioning systems in Tampa, FL 33626, the combination of high temperatures, long run times, and heavy humidity puts every part of the system to the test. The work we did on this visit supports several key principles:

  • Airflow: Cleaning the indoor and outdoor units helps maintain clear airflow over the coils and through the duct system. Good airflow means the system doesn’t have to work as hard to move conditioned air.
  • Heat transfer: A clean outdoor coil can release heat more effectively, which supports efficient operation and stable comfort inside the home.
  • Drainage: A clear condensate drain line allows the moisture removed from your air to exit the home without backing up, protecting ceilings and flooring from water damage.
  • Electrical health: Verifying that blower, compressor, and fan amp draws are within normal range helps confirm that motors and electrical components are operating comfortably within their expected load.

By combining inspection, testing, and cleaning, our Premium Home Therapy Plan helps homeowners in the Tampa area address small issues early, keep their equipment cleaner, and support the longest possible life for their investment.

Pro Tips for Homeowners in Tampa

Whether we installed your system or not, there are a few simple habits that can make a real difference for HVAC systems in Tampa, FL 33626 and surrounding neighborhoods.

  • Stay consistent with maintenance: In our climate, an annual or semi-annual professional maintenance visit is one of the best ways to catch small problems before they turn into breakdowns.
  • Keep the area around the outdoor unit clear: Trim back grass, shrubs, and plants so there’s room for air to flow around the condenser. Avoid stacking items against the unit.
  • Change or clean filters regularly: Dirty filters restrict airflow, which makes the system work harder. How often you need to change them depends on your home and usage, but checking monthly is a good habit.
  • Watch for water around the air handler: If you ever see moisture, staining, or dripping near your indoor unit, call for service quickly—drain issues are easier and less expensive to address early.
  • Use your thermostat wisely: Avoid constantly raising and lowering the temperature. Steady, moderate settings reduce wear on the system and keep humidity control more stable.
  • Ask about maintenance plans: A structured plan, like our Premium Home Therapy Plan, keeps visits on schedule and helps ensure your system in Tampa, FL 33626 gets the attention it needs throughout its life.

FAQ: Premium Maintenance for AC Systems

How often should I schedule AC maintenance in Tampa, FL 33626?

Because systems in our area run so often, we generally recommend at least one thorough professional maintenance visit per year, and many homeowners with higher usage prefer two. Plans like our Premium Home Therapy Plan are designed to keep those visits on a regular schedule.

Do I still need maintenance if my system is only a couple of years old?

Yes. The system in this Tampa, FL 33626 home was only about two years old, and maintenance was still important. Regular inspection and cleaning help protect your investment, keep warranties in good standing, and reduce the risk of early wear or unexpected failures.

What happens if the AC drain line clogs?

A clogged drain line can cause water to back up into the drain pan and potentially overflow, leading to ceiling or wall damage. In many systems, a safety switch will shut the system off when this is detected. Regular cleaning, like we performed on this visit, is the best way to avoid those water-related headaches.

What does a premium maintenance visit include?

A premium visit focuses on detailed inspection, system testing, and cleaning. That includes checking electrical components, verifying blower, compressor, and fan amp draws, confirming system pressures, cleaning the indoor and outdoor units as needed, and clearing the condensate drain line.

Will you tell me if something needs attention soon?

Absolutely. If we see developing wear or anything that could become a concern, we explain it clearly, go over your options, and answer your questions. Our goal is to give homeowners in Tampa, FL 33626 the information they need to make decisions comfortably—without pressure.

Can I combine maintenance with other HVAC services?

Yes. Many homeowners schedule maintenance alongside other upgrades or services. For example, if you’re considering thermostat improvements, you can learn more about our smart thermostat installation and upgrades, or if you need more detailed information about scheduling work, our article on whether you need to be home for AC maintenance appointments can help.

Why Choose Home Therapist for Your Tampa AC Maintenance

When you invite us into your home, you’re trusting us with your comfort and your equipment. We take that seriously on every visit in Tampa, FL 33626 and across Tampa Bay.

  • Licensed and professional technicians: Our team is trained, licensed, and experienced with the systems we install and maintain. We follow consistent procedures so your maintenance is thorough every time.
  • Transparent communication: We explain what we’re doing, what we find, and what—if anything—we recommend next. No surprises, no pressure, and no confusing jargon.
  • Clean and respectful work: We treat your home carefully, work neatly, and clean up after ourselves so you can get back to your day with minimal disruption.
  • Focus on long-term reliability: Our maintenance plans are designed to keep your system running smoothly for years, not just get you through the next month.
  • Committed to Tampa Bay homeowners: We’re a local company serving the Tampa Bay area, and we take pride in building long-term relationships with our customers.

If you’d like to see more about how we work and connect with us online, you can find us on Pinterest or join the conversation on Reddit. You can also explore more about our services on HomeGuide.

For added peace of mind, you can review our standing and reputation with organizations such as the Better Business Bureau, the Tampa Bay Chamber of Commerce, and contractor resources like BuildZoom.

If you’re interested in digging deeper into maintenance and related services, you may also find these helpful:

Schedule Your Next AC Maintenance in Tampa, FL 33626

If you’d like the same level of detailed care we provided on this Premium Home Therapy Plan visit in Tampa, FL 33626, we’re here to help. Whether we installed your system or you’re simply looking for a reliable local team, we can inspect, clean, and tune your equipment so you know exactly where it stands before the next stretch of hot weather.

Reach out to schedule your AC maintenance or to talk through plan options that fit your home. Our goal is to keep your system running smoothly, your home comfortable, and your experience with us straightforward and stress-free.

Plumbing Inspection and Water Heater Replacement Recommendation in Largo, FL 33770

When a homeowner in Largo, FL 33770 reached out to us, their goal was simple: make sure the home’s plumbing was in good shape and avoid any surprise issues down the road. As part of an Elite Therapy Plan visit, we completed a full plumbing inspection and took a close look at the home’s aging water heater. Everything visible was working properly, but the condition and age of the water heater meant we had an important conversation about safety, maintenance limits, and when replacement makes more sense than pushing old equipment any further.

Case Recap

  • Location: Single-family home in Largo, FL 33770
  • Service: Scheduled plumbing visit under an Elite Therapy Plan
  • Goal: Confirm that the home’s plumbing system was operating properly
  • Findings: No active plumbing failures; aging water heater that could not be safely flushed
  • Recommendation: Proactive replacement of the existing water heater with a modern, up-to-date unit
  • Outcome: Homeowner left with a clear picture of current conditions and next-step options to protect their home

Customer Problem: Peace of Mind About Plumbing and Hot Water

For many homeowners in Largo, a plumbing issue doesn’t usually start with a big leak. It starts with a question: “Is everything actually okay, or am I one bad day away from a problem?” In this case, the homeowner contacted us as part of their Elite Therapy Plan to schedule a dedicated plumbing visit. They wanted a full checkup on the home’s plumbing system to make sure there were no hidden problems with pipes, fixtures, or the water heater.

They weren’t seeing active leaks or major performance problems. This visit was all about prevention—catching any concerns early instead of reacting to an emergency later. That’s especially important in Florida, where our humid climate and warm water temperatures can be hard on plumbing materials over time.

Because this plumbing visit was tied to a maintenance membership, we also reviewed any items related to the plan, including filters and general system health, to make sure the homeowner was getting the full benefit of their Elite Therapy Plan. Our main focus, though, was the plumbing system and, in particular, the home’s older water heater.

Inspection and Diagnosis: What We Checked and What We Found

On a full plumbing inspection visit like this in Largo, FL 33770, we move methodically through the home. Even when there’s no obvious issue, we’re looking for early warning signs that most people wouldn’t notice until it turns into a bigger problem.

During this visit, our technician Alejandro focused on:

  • Visible plumbing lines: Looking for signs of corrosion, staining, or previous leaks around accessible piping.
  • Fixtures and drains: Checking sinks, tubs, and toilets for slow drainage, drips, or improper operation.
  • Shut-off valves: Making sure key valves function and aren’t frozen in place.
  • Water heater: Inspecting the unit’s exterior, connections, and general condition.

The good news: all visible plumbing components in the home were functioning properly at the time of the visit. We didn’t find active leaks, drainage failures, or obvious fixture problems. From a day-to-day usability standpoint, the home was in solid shape.

The one area that required a deeper conversation was the water heater. It was an older unit, and while it was still operating, its advanced age meant that certain routine maintenance steps—especially flushing the tank—could not be performed safely.

We always weigh the benefit of maintenance against the risk on older equipment. In this case, attempting to flush the tank could have increased the chance of internal damage or leaks. That’s not a risk we’re willing to take with a customer’s home, so Alejandro documented a diagnostic limitation: the internal condition of the tank (sediment levels and interior deterioration) could not be fully evaluated because we could not safely flush the unit.

Repair or Service Process: How We Handled the Visit

Even when no immediate repair is made, there is still a very clear process we follow on plumbing visits in Largo, FL 33770. For this home, our steps looked like this:

1. Full visual plumbing inspection

We started with a whole-home walk-through of the plumbing system. That included checking exposed supply lines, drain lines, and accessible connections. We verified that fixtures were operating as expected and that there were no visible signs of current leaks or water damage around plumbing areas.

2. Focused water heater evaluation

Next, we turned our attention to the water heater. Our technician inspected the unit’s exterior, looked at the connections, and evaluated its general condition and age. We consider things like:

  • Rust, corrosion, or staining around the base or fittings
  • Condition of visible piping and valves
  • Whether the age of the unit puts it near or beyond common service life

While the water heater was still producing hot water, its age was a concern. Normally, part of routine care includes flushing the tank to remove built-up sediment. In this case, Alejandro determined that attempting a flush on such an old unit posed too much risk of causing internal damage or a sudden leak.

3. Explaining the maintenance limitation

Instead of pushing forward with maintenance that could cause a problem, we stopped and had a clear conversation with the homeowner. We explained that:

  • The water heater could not be safely flushed due to its advanced age.
  • Because we could not flush the tank, we could not fully evaluate its internal condition.
  • Sediment buildup and interior tank wear were likely, but we would not speculate beyond what we could see and safely test.

We always want homeowners in Largo and across Tampa Bay to understand not just what we’re recommending, but why. That’s especially important when we’re talking about equipment that may be near the end of its life.

4. Recommending proactive water heater replacement

With the limitations clearly laid out, we recommended replacing the existing unit with a modern, up-to-date water heater. The reasoning was straightforward:

  • Older tanks are more vulnerable to leaks and failures, especially when sediment has likely been building inside for years.
  • Skipping flushing isn’t a long-term solution; it just avoids stirring up existing issues today.
  • Proactive replacement lets the homeowner choose the timing, instead of dealing with a no-hot-water emergency or potential water damage later on.

We also discussed what to expect from a replacement project and how it would help preserve comfort and reliability for years to come. For homeowners who want to dive deeper into what goes into this kind of work, we have additional resources like our water heater replacement warranty policy overview and other project write-ups.

Why This Fix (and Recommendation) Works

A water heater doesn’t usually fail without warning signs, but those signs often develop inside the tank where no one can see them. Over time, especially in Florida’s water conditions, minerals and sediment collect at the bottom of the tank. Regular flushing helps remove that buildup, but once a unit is very old, the metal can become thin or weakened.

On an older water heater in a Largo, FL 33770 home, forcing a flush can do more harm than good by:

  • Stirring up sediment that may be sealing tiny weak spots inside the tank
  • Putting stress on already fragile components
  • Potentially triggering a leak that wasn’t showing yet

By recommending replacement instead of aggressive maintenance, we’re prioritizing:

  • Safety: Reducing the risk of sudden tank rupture or significant leaks.
  • Reliability: Ensuring consistent hot water without surprise failures.
  • Predictability: Letting the homeowner plan the project and budget, rather than reacting to an emergency.

Newer water heaters, when installed correctly and maintained on a sensible schedule, handle sediment better and are easier to keep in good shape over time. For homeowners who like the idea of structured care, our water heater maintenance plans and promotions and broader plumbing maintenance plan options can be a great fit.

Pro Tips for Homeowners in Largo

Whether you’re on a plan like this homeowner or just trying to stay ahead of issues, here are a few practical tips for Largo and Tampa Bay homes:

  • Know the age of your water heater. If you’re not sure how old it is, we can help you check during a routine visit. Once a tank-style heater moves into the older range of its service life, it’s time to start planning, not just reacting.
  • Watch for subtle changes. Longer heat-up times, reduced hot water volume, or new popping/rumbling sounds can be early signs of sediment buildup or wear inside the tank.
  • Check around the base regularly. A quick visual check for moisture, rust, or staining at the bottom of the heater or nearby walls can catch small leaks before they become major issues.
  • Don’t ignore shut-off valves. Make sure you know where your main water shut-off is and that it’s accessible. In a humid climate like ours around Largo, FL 33770, valves can stick if they’re never operated.
  • Consider a maintenance plan. Being on a proper service schedule helps keep both your plumbing and HVAC systems on track. That includes things like regular inspections, filter changes, and timely discussions about when to repair vs. replace.
  • Address small plumbing issues early. A slow drain or minor drip rarely fixes itself. Getting it checked during a scheduled visit is usually simpler and more affordable than waiting for a bigger failure.

FAQ: Plumbing Inspection and Aging Water Heaters

Why couldn’t you flush the water heater during this visit?

Because the water heater in this Largo, FL 33770 home was at an advanced age, flushing it carried a higher risk of causing internal damage or leaks. On very old tanks, the metal can be weakened, and the sediment can actually be helping to seal small weak areas. In that situation, we don’t take unnecessary chances with a homeowner’s property.

If the water heater is still working, why replace it?

A water heater can still produce hot water while being very close to the end of its reliable life. The goal of recommending replacement is to give the homeowner control over timing and budget, instead of waiting until there is a no-hot-water emergency or water damage from a leak.

What did you actually inspect during the plumbing visit?

We completed a full visual inspection of the home’s accessible plumbing: piping, fixtures, drains, and the water heater itself. We confirmed that visible components were functioning properly at the time of the visit. The only limitation was inside the water heater tank, where we could not safely perform a flush due to its age.

Can you fully tell what’s happening inside an old water heater without flushing it?

No. Without flushing and internal inspection tools that would require more invasive steps, we can’t see exactly how much sediment is inside or how thin the tank walls may be. That’s why we clearly documented that internal conditions such as sediment buildup or tank deterioration could not be fully evaluated on this visit.

How do maintenance plans help with plumbing systems?

Maintenance plans create a schedule for routine inspections and service, so small issues are more likely to be caught early. In addition to HVAC care, our plans can include plumbing visits like this one in Largo, FL 33770, where we confirm proper operation, document any limitations, and give you recommendations before problems grow.

Where can I learn more about similar plumbing and water heater projects?

If you’d like to see how we handle similar work, you can review another detailed project breakdown in our article on a whole-home plumbing inspection and water heater flush project in the Tampa area. It walks through a case where flushing was appropriate and compares nicely to situations like this one, where age changes the plan.

Why Choose Home Therapist for Plumbing and Water Heater Needs

When you invite us into your home in Largo, FL 33770, you’re not just getting a quick look at your plumbing. You’re getting licensed, professional technicians who treat your home and time with respect.

Here’s what we focus on every visit:

  • Licensed and professional technicians: Our team is trained to balance thoroughness with safety. If a procedure isn’t in your best interest, we won’t do it just to check a box.
  • Transparent communication: We explain what we find in clear, plain language and make sure you understand your options before moving forward.
  • Clean and respectful work: From wearing protective gear where needed to cleaning up our work areas, we treat your home as carefully as we would our own.
  • Long-term reliability: Our goal isn’t a quick fix. It’s to help you avoid repeat issues and surprise breakdowns, whether that means targeted repairs, better maintenance, or planned replacement.
  • Commitment to Tampa Bay homeowners: We live and work in this community, serving homes across Tampa Bay, from Largo to surrounding areas. We’re here when you need us, not just for emergencies but for everyday reliability and comfort.

If you’d like to see more of how we work and stay connected, you can follow us on our Facebook page, check out updates and project highlights on Instagram, or watch helpful content on our TikTok channel.

For added peace of mind, you can also review our standing in the community and with trusted organizations, including our Better Business Bureau profile, our Tampa Bay Chamber of Commerce membership listing, and our Google Business Profile.

Need a Plumbing Inspection or Water Heater Evaluation in Largo, FL 33770?

If you’re wondering whether your plumbing or water heater is truly ready for another Florida summer, you don’t have to guess. Our local Tampa Bay technicians are ready to perform a thorough plumbing inspection, explain what we find, and help you decide on the right next step for your home in Largo, FL 33770.

Whether you need a one-time evaluation, are considering a maintenance plan, or are ready to talk about water heater replacement, we’re here to help calmly, clearly, and professionally. Reach out to Home Therapist Cooling, Heating, and Plumbing to schedule your visit, and let us make sure your home’s plumbing and hot water systems are set up for safe, reliable operation.

HVAC Maintenance and Water Heater Inspection in Wesley Chapel, FL 33545

For this visit in Wesley Chapel, FL 33545, we were out to perform a scheduled Premium Home Therapy Plan maintenance on a relatively new air conditioning system and to give the home’s water heater a careful look. Even when everything seems to be working fine, regular maintenance like this plays a huge role in keeping surprise breakdowns and water issues away, especially in our Florida climate.

During the visit, we completed a full tune-up on the HVAC system, noted a small amount of green algae starting to form, and recommended a UV light solution to help keep things cleaner over the long term. We also inspected the water heater and found that it was around 12 years old—considered near the end of its typical service life—so we discussed replacement options and sent an estimate for the homeowner to review. By the time we wrapped up, the system was operating properly, and the homeowner knew exactly where things stood and what to plan for next.

Case Recap

  • Location: Wesley Chapel, FL 33545
  • Service type: Premium Home Therapy Plan maintenance visit
  • Equipment: Central HVAC system installed in 2023 (about 2.5–3 years old)
  • Finding: Light green algae growth observed near the HVAC equipment
  • Recommendation: Add UV light for improved cleanliness and long-term protection
  • Additional finding: Water heater roughly 12 years old, approaching end of normal life expectancy
  • Outcome: Maintenance successfully completed and estimate provided for future water heater replacement

Customer Problem

This homeowner in Wesley Chapel relies on their HVAC system to keep the house comfortable through Florida’s heat and humidity. They’re enrolled in our Premium Home Therapy Plan, which means we return regularly to inspect, clean, and tune their equipment so they don’t have to worry about it.

On this visit, the homeowner wasn’t calling about a specific breakdown. The system was cooling the home, there were no obvious leaks, and they hadn’t noticed any strange noises or smells. But they understood that, in our area, ignoring routine maintenance can lead to clogged drain lines, algae buildup, and premature equipment failure—so they wanted to stay ahead of problems.

They also had some quiet concerns about their water heater. It had been in the house since they moved in, and they knew it was getting older but weren’t sure when it would really need to be replaced or what signs to look for. Rather than waiting for a leak or loss of hot water, they asked us to give it a professional once-over while we were there.

So our goals on this visit in Wesley Chapel, FL 33545 were straightforward:

  • Perform a full maintenance service on the relatively new HVAC system.
  • Look for early warning signs of algae, drainage, or cleanliness issues.
  • Inspect the aging water heater and provide honest feedback about its condition and remaining life.

Inspection and Diagnosis

When we arrive for a maintenance visit like this, our first step is always to listen. Even if everything is “working,” how the home feels and what the homeowner has noticed gives us a starting point. After a quick conversation, we began our standard inspection.

HVAC system inspection

The air conditioning system in this Wesley Chapel home was installed in 2023, so it’s only about two and a half to three years old. That’s still very young for an HVAC system, but early maintenance is just as important as maintenance on older systems.

We focused on:

  • Overall system cleanliness and any signs of biological growth.
  • Indoor unit condition, including coil area and surrounding surfaces.
  • Drainage path to ensure condensation can exit the system properly.
  • General operation to confirm the system was cycling and cooling as expected.

During this inspection, we noticed a small amount of green algae starting to form around part of the equipment area. It wasn’t severe yet and it wasn’t causing a blockage or failure, but it was enough of an early sign that we wanted the homeowner to be aware of it and to consider preventive options.

Water heater inspection

Next, we moved to the water heater. Based on the home’s age and the equipment label, we confirmed that the water heater was roughly 12 years old. For many tank-style water heaters, that is at or beyond the typical life expectancy.

Our inspection focused on:

  • Visible condition of the tank and connections.
  • Any signs of active leaking or past leaks, such as rust trails or water staining.
  • Corrosion or deterioration on fittings and valves.
  • General performance as reported by the homeowner (noises, recovery time, consistent hot water).

While we did not observe an active leak at the time of the visit, the age alone is a strong indicator that the water heater is approaching the end of reliable operation. Rather than waiting for a failure that could cause water damage or an unexpected loss of hot water, we recommended that the homeowner start planning for replacement.

Repair or Service Process

Because this was a Premium Home Therapy Plan maintenance visit in Wesley Chapel, FL 33545, our main task was thorough service and documentation rather than an emergency repair. Still, we treat maintenance with the same care we would give a major fix.

1. Completing the HVAC maintenance

We performed a full maintenance service on the HVAC system, including cleaning and checks appropriate for a system of this age. While we avoid unnecessary intrusion on newer systems, we still want to make sure everything is operating smoothly and that airflow and drainage are not being compromised.

As part of this process, we took note of the light green algae growth around the equipment area. We ensured that nothing was currently blocked and that the system could continue draining properly. Once we finished our checks and any light cleaning needed, we confirmed that the system was running as expected.

2. Discussing the algae finding and UV light option

Instead of just writing “algae” in a report, we took time to explain what we saw and what it means. In Florida, where warmth and humidity are constant, biological growth like algae and mildew can show up even on relatively new systems. It doesn’t always mean something is wrong, but it can be a sign that the environment around the equipment is ideal for growth.

We recommended installing a UV light assembly designed to help control microbial growth in and around key parts of the HVAC system. The goal is to keep coils and nearby surfaces cleaner over time, which can support better air quality, better efficiency, and reduced buildup that could lead to drainage issues later.

Importantly, we made this a recommendation, not a scare tactic. The system was still working well. We simply wanted the homeowner to have the option to take a proactive step now, while the equipment is still relatively new.

3. Evaluating the water heater and planning ahead

For the water heater, our role was to evaluate its current state and provide honest, practical guidance. A roughly 12-year-old unit is in the range where many homeowners start to see issues like:

  • Reduced hot water volume.
  • Longer recovery time between showers.
  • Rusty or discolored water in some cases.
  • Higher risk of tank leaks.

We did not find an immediate emergency situation, but based on the age and overall condition, we advised the homeowner that replacement should be on their near-term priority list. Rather than pressuring them on the spot, we prepared and sent a clear estimate for a new water heater so they could review it, ask questions, and schedule the work at a time that made sense for them.

4. Final checks and homeowner communication

Before wrapping up, we performed final checks to verify everything we had worked on or inspected was left in proper working order. For the HVAC system, that meant confirming normal operation after the maintenance. For the water heater, that meant ensuring nothing had been disturbed during the inspection and that it continued to operate as it had before we arrived.

We then walked the homeowner through:

  • What we found on the HVAC system.
  • Why we recommended a UV light and what it would do if they chose to move forward.
  • The age and condition of the water heater, and why we recommended replacement planning.
  • What was included in the estimate we sent.

Our goal is always to leave homeowners in Wesley Chapel feeling informed and in control, not pressured.

Why This Fix and These Recommendations Work

Even though this visit did not involve a major mechanical breakdown, the steps we took have a real impact on comfort, safety, and long-term reliability.

Controlling algae and growth around the HVAC system

In our Florida climate, condensation is a normal part of air conditioning. As warm, humid air passes over the cold indoor coil, moisture condenses and drains away. That constant moisture, combined with warmth and darkness, creates ideal conditions for algae and other biological growth in and around the system.

By keeping the equipment area clean and recommending UV light protection, we help:

  • Discourage growth on and around coils and surfaces.
  • Support better airflow over time by reducing buildup.
  • Lower the risk of clogs in the drainage path caused by biological material.
  • Promote better overall indoor air quality.

It’s a preventive measure rather than a repair, but it supports the system’s ability to run efficiently and reliably for years to come.

Planning for timely water heater replacement

Water heaters work under pressure, holding many gallons of hot water inside a steel tank. Over time, minerals in the water and normal corrosion slowly weaken that tank from the inside out. Most tank-style units have an average life span, and while some last longer and some fail sooner, age is a reliable indicator of increased risk.

By identifying that this Wesley Chapel home’s water heater is around 12 years old and clearly communicating that to the homeowner, we help them:

  • Avoid the surprise of a sudden loss of hot water.
  • Reduce the risk of water damage from a ruptured tank.
  • Budget and plan for a new, more efficient unit on their own schedule.

Instead of reacting to a crisis, the homeowner can make a calm, informed decision about replacement, with a clear estimate already in hand.

Pro Tips for Homeowners in Wesley Chapel

Whether your system is brand new or over a decade old, a few simple habits can go a long way in Wesley Chapel, FL 33545.

  • Stay consistent with maintenance. In Florida’s heat and humidity, HVAC systems work hard nearly year-round. Sticking with a maintenance plan keeps components clean, helps catch algae growth early, and can extend the life of your equipment.
  • Keep an eye on your drain line. If you have access to your air handler or indoor unit, take an occasional glance at the drain line area. If you notice standing water, unusual dripping, or signs of algae, let a professional know before it becomes a bigger issue.
  • Know the age of your water heater. If you’re not sure how old your water heater is, it’s worth finding out. Once it crosses the 10-year mark, it’s smart to start talking with a professional about replacement options so you’re not caught off guard.
  • Listen to changes in your hot water. Longer wait times for hot water, inconsistent temperatures, or metallic or rusty-looking water can all be early signs that a water heater is aging out.
  • Don’t ignore “small” growth around equipment. A little bit of green or dark growth might not seem serious today, but in our climate it often spreads. Addressing it early with cleaning and possible UV solutions can save you from future clogs and comfort issues.
  • Schedule maintenance before peak season. For homeowners in Wesley Chapel and the broader Tampa Bay area, it’s wise to get your system checked before the hottest months. That way, if anything needs attention, it can be handled on your schedule instead of during a rush.

FAQ: HVAC Maintenance and Water Heater Age

My AC is only a few years old. Do I really need maintenance?

Yes. Even in a newer home in Wesley Chapel, a 2–3-year-old system still benefits from maintenance. Florida’s humidity can lead to algae growth and drain issues early on. Regular maintenance helps keep things clean, catches minor problems before they grow, and supports the manufacturer’s recommended care.

What does green algae around my HVAC system mean?

Light green algae usually means moisture and warmth are present in a way that supports growth. It doesn’t automatically mean your system is failing, but it is a sign to pay attention. If it spreads into drain lines or key areas, it can cause blockages and water backup. Addressing it early, and considering options like UV light, helps keep the system cleaner and more reliable.

Is installing a UV light mandatory?

No. A UV light is a preventive upgrade, not a mandatory component. We recommend it when we see conditions that favor microbial growth, especially in Florida homes, but the final decision is always up to you. Our job is to lay out the benefits and let you choose what fits your comfort goals and budget.

How old is “too old” for a water heater?

While exact life span varies, many tank-style water heaters start to reach the end of their typical life somewhere around 10–12 years. At about 12 years, like the unit in this Wesley Chapel home, we strongly encourage homeowners to plan for replacement. That doesn’t mean it will fail tomorrow, but the likelihood of problems increases with age.

Do I have to replace my water heater right away if it’s 12 years old?

Not necessarily. If it’s still operating without leaks or major performance issues, you do have some time. However, it makes sense to get an estimate and think through your options now. That way, if you choose to replace it before it fails, you can do so on your terms instead of during an emergency.

What should I expect after a maintenance visit?

After a proper maintenance visit, you should notice that your system operates smoothly, with no new noises, leaks, or issues. You should also receive clear communication about any findings and recommendations, like we provided for this homeowner in Wesley Chapel, FL 33545—so you understand what’s working well and what may need attention in the future.

Why Choose Home Therapist

When you invite a technician into your home, you’re not just buying a service—you’re trusting someone with your comfort, safety, and property. At Home Therapist Cooling, Heating, and Plumbing, we take that responsibility seriously, especially for our neighbors in Wesley Chapel and across Tampa Bay.

Here’s what you can expect from our team on every visit:

  • Licensed, professional technicians. Your system is serviced by trained professionals who understand both HVAC and plumbing systems and how they interact in a Florida home.
  • Transparent communication. We explain what we find in plain language, show you where possible, and give you clear recommendations without pressure. Whether it’s light algae growth or a 12-year-old water heater, you’ll know exactly what’s going on.
  • Clean, respectful work. We treat your home like it’s our own—putting care into cleanliness, minimizing disruption, and making sure everything is left in good order when we’re done.
  • Focus on long-term reliability. Our Premium Home Therapy Plan and our maintenance visits are designed to prevent surprises, not just fix emergencies. We’d rather help you plan ahead than see you stressed in the middle of a breakdown.
  • Commitment to Tampa Bay homeowners. We live and work in the communities we serve, from Wesley Chapel, FL 33545 to the wider Tampa Bay area. Our reputation depends on the comfort and trust of local families just like yours.

Whether you’re dealing with a small concern like minor algae growth or a big decision like replacing an aging water heater, our goal is to give you the information, options, and support you need to feel confident about your home’s systems.

Schedule Service in Wesley Chapel, FL 33545

If you’re a homeowner in Wesley Chapel, FL 33545 and your HVAC system or water heater hasn’t been checked in a while, now is a good time to get ahead of problems. A routine maintenance visit can confirm that everything is operating properly, highlight early signs of issues like algae or wear, and give you clear recommendations so you can plan calmly instead of reacting to an emergency.

Reach out to Home Therapist Cooling, Heating, and Plumbing to schedule your next maintenance, discuss UV light options, or review water heater replacement choices. We’re here to keep your home comfortable, safe, and reliable—with straightforward advice and professional service every step of the way.

Premium HVAC Maintenance Plan in Brandon, FL 33511

When you live in Brandon, FL 33511, your air conditioning system isn’t a luxury – it’s what keeps your home livable for most of the year. On this visit, we returned to a home where our team had installed the HVAC system last year and enrolled it in our Premium Home Therapy Plan. Our job was to perform a routine maintenance visit: verify that everything was running efficiently, check electrical and refrigeration performance, and give both units and the drain line a thorough cleaning. By the time we were done, the system was operating properly, airflow was strong, and the homeowner could feel confident heading into the next stretch of Florida heat.

Case Recap

  • Location: Single-family home in Brandon, FL 33511
  • Service: Scheduled visit under our Premium Home Therapy Plan
  • System type: Central HVAC system installed by our team last year
  • Work performed: Electrical consumption check, pressure check, full cleaning of indoor and outdoor units, and drain line flush
  • Results: System operating within normal ranges with clean coils, clear drainage, and proper airflow
  • Outcome for the homeowner: Reliable comfort, better efficiency, and fewer surprises during peak season

Customer Problem

This visit wasn’t triggered by a breakdown or a comfort complaint – it was part of a planned maintenance schedule under our Premium Home Therapy Plan. The homeowner in Brandon wanted to make sure the system we installed last year would stay in top shape, especially with how hard air conditioners work in our area.

Like many busy families in Brandon, the homeowner also had a tight schedule and needed us to arrive within a firm time window due to a medical appointment later in the day. Respecting that window and keeping the visit efficient was just as important as the technical work we performed.

Even though there were no major symptoms like warm air, strange noises, or leaks, that’s exactly when you want us to check the system. Preventive visits like this help us catch small issues before they turn into expensive repairs and keep energy bills as low as possible in the Florida heat.

Inspection and Diagnosis

Because this was a Premium Home Therapy Plan visit, we followed a structured inspection process. Our goal was to confirm that the system was running safely and efficiently, and that no hidden issues were starting to develop.

Here’s what we focused on for this Brandon, FL 33511 home:

  • Power consumption check: We monitored the power draw of the blower motor, compressor, and outdoor fan. This helps us see if any component is working harder than it should, which can be an early warning sign of future failure.
  • System pressures: We checked system pressures to confirm the refrigeration cycle was operating properly. Pressures outside normal ranges can indicate airflow problems, low refrigerant, or restrictions in the system.
  • Indoor and outdoor unit condition: We inspected both units for dirt buildup, rust, damage, and any signs of wear that could affect performance.
  • Drainage: We looked at the condensate drain line, which is especially critical in our humid Florida climate. A clogged drain can cause water leaks and ceiling damage.

The good news for this homeowner in Brandon was that all of the monitored power readings were within normal range and system pressures were operating properly. That told us the main components were healthy and the system was performing as expected. From there, our focus shifted to deep cleaning and preventive care to keep it that way.

Repair or Service Process

Even a system that’s running well can benefit greatly from proper cleaning and maintenance, especially in Tampa Bay’s combination of heat, humidity, and airborne dust. Here’s how we approached this visit step by step.

1. Verifying safe electrical performance

We started by confirming the blower motor, compressor, and fan were drawing power within expected ranges. This is built into our Premium Home Therapy Plan. When we see power consumption within normal limits, it tells us those components are not under undue stress.

In simple terms, if a motor or compressor starts pulling more power than usual, it’s often a sign of trouble ahead. Catching that early allows us to address dirt buildup, airflow problems, or failing parts before they leave you without cooling on a hot Brandon afternoon.

2. Checking system pressures

Next, we checked the operating pressures of the HVAC system. While we don’t share exact numbers unless needed, we make sure they fall within normal operating ranges for that type of equipment and installation.

Normal system pressures told us that:

  • Airflow across the indoor coil was adequate
  • The outdoor unit was rejecting heat properly
  • There were no obvious signs of low charge or major restrictions

With both electrical and refrigeration checks looking good, we moved on to cleaning and preventive steps that really make a difference for homeowners in Brandon, FL 33511.

3. Cleaning both indoor and outdoor units

We gave both the indoor and outdoor units a thorough cleaning. Over time, dust, pollen, and yard debris build up on coils and components, even in a relatively new system installed just last year.

This cleaning helps to:

  • Improve heat transfer so the system can cool more efficiently
  • Reduce strain on the compressor and blower
  • Support better indoor air quality by reducing the amount of dirt circulating through the home

For homeowners throughout Hillsborough County who want even better air quality and efficiency, services like our air duct cleaning and professional air filter installation can further enhance what routine maintenance provides.

4. Flushing and cleaning the drain line

One of the most important steps we took at this Brandon home was flushing and cleaning the condensate drain line. In Florida, your system removes a tremendous amount of moisture from the air, and that water has to go somewhere.

Over time, algae, sludge, and debris can build up inside the drain line, causing:

  • Water backing up into the indoor unit
  • Ceiling or wall leaks
  • Musty odors around the air handler

By thoroughly flushing and cleaning the drain line, we helped protect the home from water damage and kept the system draining freely. This is a simple step that prevents some of the most frustrating and messy AC issues we see in Brandon and across Tampa Bay.

5. Final checks and confirmation

After cleaning both units and clearing the drain line, we performed a final start-up and operational check. We confirmed that:

  • The system cycled on and off properly
  • Airflow felt strong at the registers
  • There were no unusual sounds or vibrations

Once everything passed our final inspection, we wrapped up, kept the work area clean, and confirmed the homeowner’s comfort before we left. With their Premium Home Therapy Plan visit complete, they were set up for another season of reliable cooling in Brandon, FL 33511.

Why This Fix (and Maintenance) Works

In this case, there wasn’t a single “fix” like replacing a broken part. Instead, the value came from verifying proper operation and performing preventive care that keeps everything running smoothly.

Here’s why this type of service is so effective for homeowners in Brandon and the surrounding Tampa Bay area:

  • Proper electrical performance reduces failures: When motors and compressors are drawing normal power, they run cooler and last longer. Monitoring that gives us a health snapshot of your major components.
  • Healthy system pressures mean efficient cooling: Pressures that are within normal operating ranges indicate that refrigerant, airflow, and coils are all working together the way they should.
  • Clean coils improve heat transfer: Dirt acts like a blanket on your coils. Cleaning them helps the system move heat more efficiently, which can reduce run time and help control energy costs.
  • Clear drains prevent water damage: In our humid climate, a clogged drain can quickly lead to leaks and water damage. Flushing the drain line is cheap insurance.

All of this comes together to deliver what most homeowners really care about: steady comfort, reasonable energy bills, and fewer emergency calls in the middle of a hot Brandon summer.

Pro Tips for Homeowners in Brandon

If you’re a homeowner in Brandon, FL 33511 or elsewhere in Hillsborough County, here are a few practical steps you can take between professional visits:

  • Change or clean your air filter regularly: In Florida’s climate, filters often need attention more frequently than the “every 3 months” rule of thumb. Check monthly, especially during heavy use. If you want help choosing the right type, our air filter installation services can guide you.
  • Keep the outdoor unit clear: Trim plants back at least a couple of feet around the condenser and keep it free of leaves and debris. Good airflow outside is just as important as inside.
  • Monitor your energy bills: If your power bill suddenly jumps without a change in usage, it may be a sign your HVAC system is working harder than it should. That’s a good time to schedule a check-up.
  • Watch for water around the air handler: In Brandon’s humidity, a small drip can turn into a big problem quickly. If you notice moisture around your indoor unit, don’t ignore it.
  • Consider additional cleaning services: If you’ve recently renovated, have pets, or suffer from allergies, services like air duct cleaning or even dryer vent cleaning can improve air quality and safety.
  • Stay on a maintenance plan: A structured plan, like our Premium Home Therapy Plan, keeps maintenance from being forgotten and helps protect your system for the long term.

FAQ: Premium HVAC Maintenance in Brandon

How often should I schedule maintenance for my HVAC system in Brandon, FL 33511?

For our climate, we strongly recommend at least one thorough maintenance visit per year, and many homeowners benefit from twice-yearly visits. Under our Premium Home Therapy Plan, we schedule routine visits so your system stays clean, efficient, and fully checked before peak seasons.

What does monitoring power consumption tell you about my system?

Monitoring the power consumption of the blower motor, compressor, and fan helps us see if any component is under abnormal strain. If a motor starts drawing more power than expected, it can be an early sign of wear, airflow issues, or other mechanical problems. Catching that early helps prevent breakdowns.

Why is drain line cleaning so important in Florida?

Because of our high humidity, your system removes a lot of moisture from the air. That water flows through the condensate drain line, which can build up algae and sludge over time. If the line clogs, water can back up and leak into ceilings, closets, or walls. Regular flushing helps avoid those messy, costly issues.

If my system seems to be working fine, do I really need a maintenance plan?

Yes. The best time to service your system is when it’s still running well. Maintenance helps keep components within normal operating ranges, extends equipment life, and reduces the risk of sudden breakdowns during the hottest days of the year in Brandon. It’s about protecting your comfort and your investment.

Is this type of maintenance only for older systems?

No. In this case, the system was installed just last year, and maintenance was still critical. New systems benefit from clean coils, clear drains, and verified performance just as much as older ones. Regular service helps a new system stay “new” for as long as possible.

Do you offer other HVAC and plumbing services in the Brandon area?

Yes, we provide a full range of HVAC and plumbing services throughout Hillsborough County. You can learn more about our offerings on our Hillsborough County HVAC and plumbing services page, and we also handle services like plumbing repair in Brandon when needed.

Why Choose Home Therapist for Your Brandon Home

When you invite someone into your home in Brandon, FL 33511, you’re trusting them not just with equipment, but with your comfort and safety. At Home Therapist Cooling, Heating, and Plumbing, we take that seriously on every visit.

  • Licensed and professional technicians: Our team is fully trained and licensed to work on modern HVAC and plumbing systems. We installed this homeowner’s system last year and returned under a structured plan to care for it properly.
  • Transparent communication: We explain what we’re checking, what we find, and what we recommend in plain language. If everything is operating normally, we’ll tell you that. If we see something developing, we’ll explain your options.
  • Clean, respectful work: We show up on time, respect your schedule, protect your home, and clean up when we’re done. In this case, the homeowner had a medical appointment later in the day, and we kept firmly to the agreed time window.
  • Long-term reliability focus: Our Premium Home Therapy Plan is designed to keep systems running smoothly year after year, not just patch problems when they’re already disruptive.
  • Committed to Tampa Bay homeowners: We’re a local company serving Brandon and the greater Tampa Bay area, and we stand behind our work.

If you’d like to get a feel for who we are and how we work, you can connect with us on social media. Visit us on Facebook, check out our updates on Instagram, or see more of our content on TikTok.

For extra peace of mind, you can also see our standing with trusted organizations such as the Better Business Bureau and the Tampa Bay Chamber of Commerce. We work hard to earn and keep that trust every day.

Schedule Your Next HVAC Visit in Brandon, FL 33511

If you’re in Brandon, FL 33511 and want your HVAC system to run as reliably as the one in this home, our team is ready to help. Whether you’re interested in a Premium Home Therapy Plan visit, need a system check before peak season, or want to explore other HVAC and plumbing options, we’ll walk you through everything step by step.

Reach out to schedule your service, and let Home Therapist Cooling, Heating, and Plumbing keep your Brandon home comfortable, efficient, and protected through every Florida season.

Zone Board Replacement in Tampa, FL 33603

When a zoning system starts acting up in a Florida home, comfort can quickly go out the window. That was the situation for a homeowner in Tampa, FL 33603 who called us out because their zoned HVAC system wasn’t working the way it should. After inspecting the system, we recommended replacing the existing control zone board and a zone damper motor to restore proper control to each area of the home.

In this case, the home was using a Honeywell zoning setup, and the zone control board (HZ221) had reached the point where replacement was the most reliable option. One of the zone dampers also needed a new motor. By the end of the visit, we had the control board and damper motor updated, verified the existing low-voltage wiring, and confirmed the system was operating as expected for each zone.

Case Recap

  • Location: Single-family home in Tampa, FL 33603
  • Services: Zone control board replacement and zone damper motor replacement
  • Equipment: Honeywell zoning system with HZ221 zone control board
  • Goal: Restore reliable temperature control to each zone in the home
  • Approach: Replace the aging control board, install a new damper motor, and reuse existing low-voltage wiring
  • Outcome: Zoning restored, with each area responding correctly to its thermostat settings

Customer Problem

For homeowners in Tampa, FL 33603, zoning is a great way to stay comfortable without overworking the system. But when a zone board or damper motor starts failing, you can see issues like rooms not cooling properly, thermostats not responding, or one part of the house feeling completely different from the rest. That’s essentially what was happening here.

The homeowner reached out because their zoned HVAC system wasn’t behaving consistently. Certain areas of the home weren’t getting the airflow they expected, and the control system wasn’t reliably directing air to the right zones. Since zoning equipment sits in the background and doesn’t have obvious moving parts like an outdoor unit, it’s not always clear to a homeowner where the problem is coming from. They just know the house doesn’t feel right.

From the symptoms described, our technician, Jandiel, suspected an issue with the zoning controls rather than the main HVAC equipment. The zoning system uses a control board and multiple motorized dampers to open and close ducts, sending conditioned air where it’s needed. If the board fails or a damper motor stops working, that control breaks down.

The homeowner wanted two things: comfort back in all areas of the home and a repair that would be reliable, not just a temporary patch. That’s especially important in the Tampa Bay climate, where systems run hard for a large portion of the year.

Inspection and Diagnosis

On arrival, we started with a focused inspection of the zoning system. Since the main issue appeared to be zone control, we went straight to the zone panel and dampers rather than just looking at the air handler or outdoor unit.

Our diagnostic process for a zoning problem like this typically includes:

  • Visually inspecting the zone control board for signs of damage, age, or loose connections
  • Checking the status lights or indicators on the board (if available) to understand how it’s reading each zone
  • Verifying that each thermostat is calling correctly for heating or cooling
  • Confirming that each zone damper is opening and closing when commanded
  • Inspecting low-voltage wiring for damage, corrosion, or poor terminations

During this visit in Tampa, FL 33603, we identified the control board as a Honeywell HZ221 model. This board is designed to manage multiple zones and coordinate the dampers with the main HVAC equipment. Based on the behavior of the system and the board’s condition, replacement was the best option for long-term reliability.

We also tracked down one specific zone damper that wasn’t responding properly. The motor on that damper had failed, meaning the damper wasn’t opening and closing the way it was supposed to. That would absolutely cause uneven comfort from room to room.

Our diagnosis: the home needed a new HZ221 zone control board and a replacement motor for one of the Honeywell dampers, using the existing low-voltage wiring that was still in good shape.

Repair and Service Process

Once we confirmed the issues and discussed options with the homeowner, we moved forward with a straightforward but detailed repair plan: replace the zone board, replace the faulty damper motor, and reuse the existing wiring to keep the project efficient and clean.

1. Powering Down and Preparing the Work Area

Before touching any control wiring or components, we safely shut down power to the system. This protects the equipment and ensures the technician can work safely. We also protected nearby areas from dust and debris and kept the workspace as tidy as possible. Respecting the home is a priority on every visit.

2. Removing the Existing Zone Control Board

Next, we carefully documented the existing wiring connections on the old HZ221 zone board. Even when you’re replacing a board with the same model, it’s important to make sure each wire goes back exactly where it belongs on the new board.

We then removed the old board from the panel area, confirming that the mounting surface and wiring had no underlying issues such as burnt spots, loose wire nuts, or corrosion. Fortunately, in this Tampa, FL 33603 home, the wiring was in good enough shape to reuse, which kept the repair focused and cost-effective.

3. Installing the New HZ221 Zone Board

With the old board out, we mounted the new HZ221 zone control board in place. This model is designed specifically for zoning applications, coordinating between multiple thermostats and motorized dampers. We reconnected all existing low-voltage wiring to the correct terminals, double-checking each zone, thermostat, and equipment connection.

We did not need to run any new wiring on this job. When the existing low-voltage cable is in good condition, reusing it is both efficient and completely acceptable. If this had been a brand-new zoning installation rather than a replacement, we would have added low-voltage cable runs and an appropriate line item for that work.

4. Replacing the Honeywell Damper Motor

Once the new control board was in place, we turned our attention to the faulty damper. This home used Honeywell dampers, so we installed a compatible Honeywell damper motor to match the existing damper assembly.

The process included:

  • Accessing the duct where the problem damper was located
  • Removing the old motor assembly from the damper shaft
  • Installing the new Honeywell damper motor in its place
  • Confirming proper alignment so the damper opens and closes fully
  • Connecting the motor wiring back to the zone board terminals

For homeowners in Tampa, FL 33603, a properly operating damper motor is key to making sure each part of the home actually receives the air the zone board is calling for. Without it, the board might be sending the right signals, but the air just won’t get where it needs to go.

5. System Startup and Functional Testing

With both the new HZ221 board and damper motor installed, we restored power and began a step-by-step test of the system. We cycled each thermostat through a call for cooling and, where applicable, heating, and watched how the board and dampers responded.

During this testing, we verified:

  • Each thermostat was communicating correctly with the zone board
  • The new damper motor opened and closed in sync with the thermostat calls
  • Other dampers responded correctly and weren’t being affected by the repair
  • The main HVAC system (air handler and outdoor unit) started and stopped as expected when zones called for conditioning

We confirmed proper operation after the repairs and made sure the homeowner understood how their zones should now behave. Our goal was not just to fix the immediate issue but to give them confidence in their zoning setup going forward.

Why This Fix Works

Zoning is all about control. The zone board and dampers work together to send conditioned air only where it’s needed. When either of those key components fails, the entire system’s performance suffers.

Here’s how this repair restored comfort and reliability for this home in Tampa, FL 33603:

  • New zone control board (HZ221): The board is the “brain” of the zoning system. By installing a fresh, properly functioning HZ221, we ensured that thermostat calls are being read correctly and that the system knows which zones should be open or closed at any given time.
  • New Honeywell damper motor: Even with a perfect zone board, a failed damper motor means no airflow to that zone. Replacing the motor brought that duct back into the system, letting air flow whenever that area of the home calls for heating or cooling.
  • Reusing good wiring: Reliable low-voltage connections are important for signals to travel between thermostats, board, and dampers. Since the wiring in this home was in good condition, we could reuse it confidently.

Together, these elements allow the HVAC system to deliver the right amount of air to each zone, reducing hot and cold spots and helping the equipment run more efficiently. That’s especially valuable in the Tampa Bay area, where high heat and humidity can put a lot of strain on systems that aren’t controlling airflow properly.

Pro Tips for Homeowners in Tampa

If you have a zoned HVAC system in Tampa, FL 33603 or anywhere in the surrounding Tampa Bay area, a little attention can go a long way toward keeping it running smoothly. Here are some practical tips:

  • Pay attention to uneven temperatures. If one area of your home suddenly feels much warmer or cooler than usual, and you know you have zoning, it could be a sign that a damper or zone board isn’t working correctly.
  • Don’t ignore thermostat quirks. If a thermostat doesn’t seem to respond, or changes on the display don’t affect comfort, it might be a communication issue with the zone board. Mention any thermostat issues when you call for service.
  • Keep air filters clean. Even with zoning, your system still relies on good airflow through the main return. In Florida’s humid climate, a dirty filter can add unnecessary strain and make zoning problems more noticeable.
  • Schedule routine maintenance. Having a licensed HVAC technician inspect your system regularly can catch signs of zoning trouble early—like sticky dampers or aging boards—before they lead to major comfort problems.
  • Tell your technician you have zoning. When you schedule service in Tampa, be sure to mention that your home has a zone control system. That helps us arrive prepared to inspect boards, dampers, and thermostats, not just the main unit.
  • Avoid DIY wiring changes. Zone boards and dampers use low-voltage wiring that might look simple, but incorrect connections can damage components. It’s safer and usually cheaper in the long run to let a trained technician handle wiring changes.

FAQ: Zoning and Zone Board Replacement

What are the signs that my zone board might be failing?

Common signs include zones that stop responding, thermostats that appear to work but don’t change comfort, or rooms that suddenly stop getting airflow while others are fine. In this Tampa, FL 33603 home, inconsistent zone operation and a non-responsive damper led us to the board and damper motor as the source of the issue.

Why did you reuse the existing low-voltage wiring?

We inspected the wiring and found it to be in acceptable condition, with no damage or corrosion. When wiring is sound, reusing it is both safe and efficient. If this had been a new installation or if the wiring was compromised, we would have added low-voltage cable replacement to the scope.

Do all zoning repairs require a new damper motor?

No. Sometimes the problem is limited to the zone board or even the thermostats. In this case, we had both a board that needed replacement and a specific Honeywell damper motor that had failed. We only recommend damper motor replacement when testing shows the existing motor is not operating correctly.

Will a new zone board improve efficiency?

A new zone board by itself doesn’t change the efficiency rating of your equipment, but it can help your system run more efficiently by making sure air goes only where it’s needed. That can reduce unnecessary runtime and improve comfort, especially in a zoned home in a climate like Tampa’s.

How long does a zone board or damper motor replacement usually take?

Most replacements can be completed in a single visit, assuming compatible parts are available and the existing wiring is usable. On this Tampa, FL 33603 job, we were able to replace the HZ221 board and the damper motor and test the system the same day.

Can I keep using my system if a damper motor fails?

In some cases, the system will still run, but comfort will suffer in the affected zone, and the system may work harder than it should. It’s better to have a failed damper motor addressed promptly to protect comfort and help avoid extra strain on your equipment.

Why Choose Home Therapist for Zoning Service

When your zoning system isn’t working right, you’re not just dealing with an inconvenience—you’re losing the control that zoning is supposed to give you. At Home Therapist Cooling, Heating, and Plumbing, we treat each zoning call in Tampa, FL 33603 and across Tampa Bay with the same care we’d want in our own homes.

Here’s what you can expect when you work with our team:

  • Licensed, professional technicians: Our technicians are trained to handle complex zoning equipment, including zone boards, dampers, and low-voltage controls.
  • Transparent communication: We explain what we find in clear, plain language and walk you through options before we begin repairs.
  • Clean, respectful work: We protect your home, keep our work areas tidy, and leave everything as neat as we found it.
  • Long-term reliability focus: We recommend repairs that prioritize safety, reliability, and comfort—not just short-term fixes.
  • Commitment to Tampa Bay homeowners: We understand how hard your HVAC system works in our climate, and we tailor our recommendations to real-world conditions here in Tampa and the surrounding communities.

Whether you’re dealing with a failing zone board, a stuck damper, or you’re not sure why your zones aren’t behaving, we’re here to help you get your home comfort back under control.

Schedule Zoning Service in Tampa, FL 33603

If your zoned HVAC system isn’t delivering consistent comfort, it doesn’t have to stay that way. Whether you suspect a zone board issue, a damper motor problem, or you just know something isn’t right, Home Therapist Cooling, Heating, and Plumbing can help.

Contact us today to schedule professional zoning service in Tampa, FL 33603. We’ll inspect your system, explain what we find, and provide a clear plan to get your home feeling comfortable and balanced again—all with the calm, professional service Tampa Bay homeowners trust.

AC Maintenance Plan Visit in Tampa, FL 33615

For homeowners in Tampa, FL 33615, keeping your air conditioner clean and reliable isn’t just a comfort issue—it’s essential in our heat and humidity. On this visit, we were out for a scheduled Elite Therapy Plan appointment on an approximately eight-year-old system. Our goal was simple: give the system a full checkup, perform a deep maintenance cleaning, verify all readings, and leave the home comfortable and protected for the months ahead.

Case Recap

  • Location: Routine AC maintenance for a homeowner in Tampa, FL 33615
  • Service: Elite Therapy Plan visit (Visit #4) on an ~8-year-old air conditioning system
  • Work performed: Full system inspection, indoor and outdoor coil cleaning, condensate drain cleaning, duct sanitation treatment, and UV light check
  • System condition: Operating properly with normal pressures and amperage readings
  • Indoor air quality: UV light confirmed operating, duct sanitation completed, and extra air filters left on site
  • Outcome: Clean, efficient system ready for continued reliable cooling in Tampa’s climate

Customer Problem

This wasn’t an emergency breakdown—this was a proactive homeowner in Tampa, FL 33615 who wanted to keep their system healthy through our Elite Therapy Plan. With our local weather, waiting until something fails usually means a hot, uncomfortable house and a more expensive repair. By staying on a maintenance plan, this homeowner is aiming to avoid that situation.

The system is about eight years old, which is right in the window where regular maintenance makes a big difference. Around this age, dirt buildup, clogged drain lines, and neglected electrical components can start turning into:

  • Weak airflow and longer run times
  • Higher electric bills
  • Water leaks from a clogged drain line
  • Unreliable cooling during the hottest parts of the day

On this visit, our job as Home Therapist technicians was to go through the full Elite Maintenance Plan procedure: inspect, clean, sanitize where needed, verify that everything was operating within a normal range, and leave the homeowner with clean filters and peace of mind.

Inspection and Diagnosis

Even though this was a planned maintenance visit and not a repair call, we still approach it with the same careful diagnostic mindset. For homeowners in Tampa, FL 33615, regular AC maintenance is all about catching small issues before they grow into expensive failures.

Here’s what we focused on during our inspection:

System Age and General Condition

We confirmed the air conditioning system was approximately eight years old. At this age, we pay extra attention to wear on moving parts and electrical components. We look for signs like discoloration, corrosion, overheating, or vibration that might point to future problems.

Refrigerant Pressures and Operating Readings

We checked system pressures and confirmed they were within a normal operating range for this equipment and conditions. We also measured compressor and blower motor amperage and confirmed they were drawing normal levels.

We did not need to add or remove refrigerant; everything was stable and operating as expected. When pressures and amperage are in range, that’s a strong sign the system is not under unusual strain.

Indoor and Outdoor Units

Both the air handler (indoor unit) and the condenser (outdoor unit) were inspected. We looked for:

  • Dirt or debris on coils and in the cabinet
  • Blocked airflow around the outdoor unit
  • Signs of water issues around the indoor unit or drain line
  • Any unusual sounds or vibration

In the Tampa Bay area, outdoor units tend to collect grass clippings, dust, and salt-related residue over time, while indoor units deal with high humidity and biological growth risk without regular cleaning.

Condensate Drain Line

We inspected the condensate drain line to make sure it was flowing properly and not restricted. In Florida’s humidity, this drain is critical—if it clogs, water can back up and cause ceiling damage, biological growth, or system shutdown.

UV Light and Air Quality Measures

The home already had a UV light installed as part of its indoor air quality setup. We verified that the UV light was operating properly. A non-working UV light won’t cause an immediate cooling failure, but it does reduce the home’s protection against biological growth inside the HVAC system.

Ductwork and Sanitation Needs

As part of this Elite Therapy Plan visit, we also evaluated the ductwork for basic cleanliness and air movement. For this appointment, a duct sanitation treatment was included and performed to help support better air quality for the home.

Repair or Service Process

Once we confirmed the system was operating correctly, we moved into the heart of the Elite Maintenance Plan service for this Tampa, FL 33615 home: thorough cleaning and preventive care.

1. Cleaning the Indoor and Outdoor Units

We cleaned both the indoor and outdoor units. This process helps restore and protect airflow, which is one of the most important factors in AC performance.

On the outdoor unit, removing dirt and debris from the coil allows heat to be released more efficiently. A dirty coil forces the system to work harder, run longer, and use more electricity. On the indoor side, keeping the coil and surrounding area clean helps maintain good airflow and reduces the chance of drain issues.

2. Condensate Drain Line Cleaning

We cleaned the condensate drain line to help prevent future clogs and water leaks. In our Tampa climate, this line is constantly handling moisture, and small amounts of buildup can grow into a full blockage if not maintained.

By cleaning the line as part of this visit, we helped reduce the risk of:

  • Water backup and potential ceiling or wall damage
  • System shutdowns from safety float switches
  • Musty odors around the air handler

3. UV Light Check

The UV light was tested and confirmed to be operating properly. When we check a UV system, we look for safe operation and verify that the light is active. If it had been out, we would have discussed replacement options with the homeowner, but in this case everything checked out.

4. Duct Sanitation Treatment

We performed a duct sanitation treatment as part of this Elite Therapy Plan visit. This service is aimed at improving indoor air quality by treating the inside of the duct system.

For homeowners in Tampa, FL 33615, where homes are often closed up with the AC running most of the year, duct sanitation can help reduce buildup inside the ducts and support fresher indoor air when combined with good filtration and regular maintenance.

5. Filter Support and Extras Left on Site

We ensured the home had the correct filter sizes and left extra filters on site so the homeowner can keep up with changes between visits. The job notes indicated the following filters were provided:

  • Four (4) 12x12x1 filters
  • Two (2) 18x18x1 filters

Having the correct filters ready to go makes it much easier for the homeowner to stay on top of basic maintenance. Clean filters protect the system, improve airflow, and support better air quality.

6. Final Operation Check

After cleaning and treatment, we restored normal operation and rechecked the system. We verified that:

  • The system was cycling on and off properly
  • Airflow felt strong and consistent at the registers
  • No abnormal noises or vibrations were present

We confirmed normal operation before wrapping up the visit and left the homeowner with a system ready to handle Tampa’s heat.

Why This Fix Works

Even though there was no specific “broken” part to replace on this visit, the work we performed has a big impact on comfort, efficiency, and reliability for this home in Tampa, FL 33615.

Airflow and Heat Transfer

Clean indoor and outdoor coils allow the system to move heat efficiently. When the coils are dirty, the refrigerant circuit has to run longer and harder to do the same job. Over time, that extra strain can wear out compressors and fan motors.

Drainage and Humidity Control

A clean condensate drain line helps the system manage humidity as it was designed to. If the line clogs, it not only risks water damage, but it can also affect how well the system removes moisture from the air. In Tampa’s climate, that humidity control is a major part of feeling comfortable.

Indoor Air Quality Support

The UV light (when operating properly) and duct sanitation work together with good filtration to support cleaner air moving through the home. They are not a replacement for basics like filter changes and regular cleaning, but they are solid tools in an overall air quality strategy.

Reduced Wear and Tear

By keeping electrical, mechanical, and airflow components operating within normal ranges, we help extend the useful life of an eight-year-old system. This doesn’t guarantee the system will never have a problem, but it significantly reduces the risk of avoidable failures due to neglect.

Pro Tips for Homeowners in Tampa

If you’re a homeowner in Tampa, FL 33615 or nearby, here are some practical ways to protect your AC system between professional maintenance visits:

  • Change filters on schedule. With our heat and humidity, many homes benefit from filter changes more often than once every three months. Follow the filter manufacturer’s instructions and consider checking monthly during peak summer.
  • Keep the outdoor unit clear. Make sure there’s open space around your outside unit—no stacked items, overgrown plants, or heavy grass clippings. A clear unit can breathe and cool much more efficiently.
  • Watch for drain issues. If you notice water around your indoor unit, stains on ceilings, or your system shutting off unexpectedly, it could be a drain problem. Turn the system off and schedule service before water damage spreads.
  • Use your thermostat wisely. Large temperature swings put extra stress on your system. Aim for a comfortable, steady setting rather than constantly adjusting it up and down.
  • Stay consistent with maintenance. An Elite-style maintenance plan helps keep everything on schedule so you’re not trying to remember when to call. Consistency is one of the best ways to control long-term costs.
  • Ask about indoor air quality options. If you’re sensitive to dust or allergies, talk with your technician about UV lights, filtration options, and ductwork solutions that make sense for your specific home.

FAQ: Elite AC Maintenance Visits

What is included in an Elite Therapy Plan visit?

An Elite Therapy Plan visit typically includes a full inspection of the indoor and outdoor units, checking system pressures, verifying motor amperage, cleaning the equipment, clearing the condensate drain line, and confirming proper operation. When applicable, we also inspect UV lights and perform air quality treatments that are part of the plan.

How often should I have AC maintenance in Tampa, FL 33615?

For most homes in Tampa, we recommend at least one thorough maintenance visit per year, and often two—before and after peak cooling season. Our Elite plans are designed to keep you on a regular schedule so your system is always prepared for heavy use.

Does duct sanitation replace the need to clean my system?

No. Duct sanitation is an added layer of protection for your indoor air quality, but it does not replace regular coil cleaning, filter changes, and drain line maintenance. All of these work together to keep your air clean and your system efficient.

Why do you check UV lights during maintenance?

UV lights are usually installed to help control biological growth in the HVAC system. Over time, bulbs age and can stop working. During a maintenance visit, we verify that the UV light is operating properly so it can continue to support better indoor air quality.

What happens if you find a problem during a maintenance visit?

If we find something that isn’t operating correctly during an Elite Therapy Plan visit, we explain what we found, discuss your options, and provide clear pricing before moving forward with any repairs. Our goal is to keep you informed so there are no surprises.

Is an eight-year-old system worth maintaining?

Yes, in most cases an eight-year-old system is absolutely worth maintaining. With regular maintenance, many systems can continue to run reliably for years. We also keep an eye out for signs that it may be approaching the point where discussing replacement makes sense, and we’ll communicate that honestly when the time comes.

Helpful Resources for AC Maintenance

If you’d like to learn more about how regular maintenance helps your system, we’ve put together several guides for Tampa Bay homeowners:

Why Choose Home Therapist

As local technicians serving Tampa, FL 33615 and the greater Tampa Bay area, we treat every maintenance visit as if we were working on our own homes. On this Elite Therapy Plan appointment, that meant being thorough, respectful of the property, and clear in our communication.

Here’s what you can expect when you work with Home Therapist Cooling, Heating, and Plumbing:

  • Licensed, professional technicians. Our team is trained to handle everything from routine maintenance to complex system issues, always with safety and code compliance in mind.
  • Transparent communication. We explain what we’re doing, what we’re seeing, and what we recommend—before we move ahead. No surprises, no pressure.
  • Clean and respectful work. We respect your home, wear appropriate protection when needed, and clean up our work area so you’re left with comfort, not a mess.
  • Long-term reliability focus. We don’t just fix symptoms; we look for root causes and ways to help your system run stronger and last longer.
  • Commitment to Tampa Bay homeowners. We live and work in this community, and we understand how Florida’s climate affects your AC and plumbing systems.

If you’d like to see what others say about working with us, you can find Home Therapist Cooling, Heating, and Plumbing on several trusted platforms, including:

We’re also listed with multiple trust and business organizations, including:

Schedule Your AC Maintenance in Tampa, FL 33615

If you’re in Tampa, FL 33615 and want your system cared for the same way, we’re here to help. Whether your AC is brand new or eight years old like the one on this visit, regular maintenance is one of the best investments you can make in your home’s comfort and your system’s lifespan.

Reach out to Home Therapist Cooling, Heating, and Plumbing to schedule an AC maintenance visit or to learn more about our Elite Therapy Plan options for Tampa Bay homeowners. We’ll walk you through your choices, answer any questions, and help you keep your home comfortable, efficient, and prepared for Florida’s climate.

HVAC Tune-Up and Heating Zoning Diagnosis in Tarpon Springs, FL 34688

When a homeowner in Tarpon Springs, FL 34688 reached out to us, they wanted to take advantage of our $89 HVAC tune-up offer for both of their systems and get to the bottom of a heating issue at the same time. In a Florida climate where cooling is king, it can be easy to forget about the heat—until the one cool morning you really need it, and it doesn’t come on.

During this visit, we performed a full tune-up on both HVAC systems, confirmed that cooling was working properly, and uncovered a likely issue with the zoning control board that was affecting heat operation in one area of the home. The systems themselves were in good condition; the problem was in how the heat was being controlled and distributed.

Below, we’ll walk through what we found, how we approached the diagnosis, and what we recommended moving forward for reliable heating and cooling in this Tarpon Springs home.

Case Recap

  • Location: Single-family home in Tarpon Springs, FL 34688
  • Service requested: $89 HVAC tune-up for two systems, plus evaluation of a heating problem
  • Systems: Two HVAC units, both installed roughly a year ago and generally well maintained
  • Findings: Proper cooling performance, clean equipment, clear condensate drains
  • Issue identified: Suspected zoning control board problem affecting heating in one zone
  • Recommendation: Provide an estimate to further diagnose and repair or replace the zoning control board

Customer Problem: Heat Not Coming On in One Area

The homeowner in Tarpon Springs explained that they had two HVAC systems installed about a year ago. Overall, they were happy with how everything cooled, but they noticed that one part of the home was not heating when they switched over to heat mode. They suspected a crossed wire or connection problem and wanted it checked while we were already there for the advertised tune-up.

We had previously offered an $89 tune-up promotion, and even though that promotion had passed, our office approved an exception for this visit so the homeowner could still benefit from it. During our initial conversation, we confirmed:

  • There are two relatively new HVAC systems serving the home.
  • Cooling seemed to be working fine throughout the house.
  • The issue appeared only when the system was set to heat.
  • One zone (or area) of the house was not responding properly to the heat call.

For a homeowner, this usually shows up as certain rooms staying cooler than the thermostat setting, or no warm air coming from the vents in specific areas, even though other spaces feel comfortable. That’s a common sign that zoning or controls—not necessarily the main heating equipment—may be the root cause.

Inspection and Diagnosis

Because this visit in Tarpon Springs, FL 34688 included both routine maintenance and a specific heating concern, we handled the call in two phases: a full tune-up on both systems, followed by targeted diagnostics on the heating and zoning controls.

Step 1: Overall System Tune-Up

We started by performing our standard tune-up on both HVAC systems. For each unit, we:

  • Visually inspected the air handler and outdoor condenser for cleanliness and condition.
  • Checked refrigerant pressures to verify they were within normal operating ranges.
  • Verified compressor amp draw was normal for current operating conditions.
  • Confirmed both indoor and outdoor fan motors were running correctly.
  • Cleaned accessible components as part of the $89 tune-up service.
  • Flushed and cleared the condensate drain lines to help prevent clogs and water leaks.

Both systems appeared to be in good shape, which is exactly what we like to see with equipment that’s only about a year old. Cooling performance was normal, airflow was consistent, and drainage was functioning as expected after the cleaning and flushing.

Step 2: Focusing on the Heating Complaint

Once we confirmed that basic operation and maintenance items were in order, we shifted our attention to the heating issue and the zoning controls. The homeowner had noted that one system would not start properly in heat mode, or that certain areas were not warming as they should.

During our testing:

  • We operated both systems in cooling mode and confirmed they cycled and cooled correctly.
  • We then switched over to heat mode and monitored how the system responded.
  • We observed how the zones responded to different thermostat calls for heat.

Based on these tests, we found indications that the problem was not with the main mechanical components (like the compressor or fan motors), but rather with the control side—specifically, the zoning control board that manages how heating is distributed across different areas of the home.

At this point, the most likely cause of the issue was a zoning control board malfunction or a related wiring/control problem that was affecting the heating function. Cooling continued to operate normally.

Repair or Service Process During This Visit

Because this appointment was scheduled as a tune-up with an added diagnostic check, our primary goal was to get the systems cleaned, tested, and then clearly identify the next step for the heating issue.

1. Complete Tune-Up on Both Systems

We delivered our full $89 tune-up service on each HVAC system, which in this case included:

  • Cleaning key components to help maintain efficiency and airflow.
  • Flushing condensate lines to reduce the risk of clogs and overflows.
  • Checking refrigerant levels and pressures for proper cooling performance.
  • Inspecting wiring and major components for visible signs of wear or damage.
  • Verifying thermostat operation and response.

Our tune-up special is designed for relatively well-kept units—like these Tarpon Springs systems. When a system needs heavier cleaning or more involved work, we always pause, explain what we’ve found, and discuss options with the homeowner before moving forward. In this case, no heavy remediation was required.

2. Heating and Zoning Control Evaluation

Next, we focused our time on evaluating why one area of the home was not heating correctly. With zoning systems, the control board acts like the “traffic controller,” deciding which zone gets conditioned air based on thermostat calls.

Our evaluation at this visit led us to a working diagnosis: a probable issue with the zoning control board specifically affecting heat operation. Cooling calls were being handled correctly, but heat calls were not behaving the way they should for at least one zone.

Because zoning control boards can be complex and involve multiple connections, we recommended a follow-up repair visit or estimate that would allow time for deeper diagnostics and, if needed, repair or replacement of the control board.

3. Clear Options and Next Steps

We always want homeowners in Tarpon Springs, FL 34688 and across Tampa Bay to have clear choices, without pressure. For this visit, we outlined two main options:

  • Option 1: Proceed with further diagnostics and a zoning control board repair/replace estimate.
    We recommended preparing an estimate to fully diagnose and correct the zoning control board issue. This path is best for restoring proper heating operation in all zones and protecting the long-term performance of the system.
  • Option 2: Continue using the systems as they are for now.
    The homeowner could continue to operate the systems, especially in cooling mode, while taking time to review the estimate once provided. However, heating performance in the affected zone would likely remain limited until the control issue is addressed.

We explained these options in plain language, answered questions, and left the final decision in the homeowner’s hands.

Why This Fix Works: Understanding Zoning and Control Boards

In many newer homes in Tarpon Springs and the greater Tampa Bay area, zoning systems are used to divide the home into separate temperature zones. Each zone may have its own thermostat and set of dampers in the ductwork that open or close to direct airflow where it’s needed.

The zoning control board is the central brain of this setup. It:

  • Receives signals from the thermostats in each zone.
  • Decides whether the system should be in cooling, heating, or fan mode.
  • Opens and closes dampers to send conditioned air to the correct areas.

When a zoning control board or its related wiring has an issue, the symptoms can include:

  • Certain zones not heating or cooling as expected.
  • One mode (often heating) not responding correctly while the other mode works fine.
  • Inconsistent comfort from room to room.

By focusing on the zoning control board for this Tarpon Springs home, we’re targeting the part of the system that actually routes heating to the right areas. Once that control issue is properly diagnosed and corrected, the heating side of the system can do its job again, using equipment that is already in good shape.

Pro Tips for Homeowners in Tarpon Springs

For homeowners in Tarpon Springs, FL 34688 and the surrounding Tampa Bay communities, here are a few practical tips to keep your HVAC systems running smoothly—and to avoid surprises when you finally switch over to heat:

  1. Use the shoulder seasons to test heat.
    Even though we don’t use heat often in Florida, it’s smart to switch your system to heat for a short test in the fall. If something isn’t working, you’ll have time to get it resolved before a cold snap hits.
  2. Keep up with regular tune-ups.
    A yearly tune-up—like the $89 service this homeowner scheduled—helps catch small issues before they turn into bigger, more expensive problems. It also keeps newer equipment in the best possible shape.
  3. Change filters regularly in our humid climate.
    Florida’s humidity means filters can load up faster with dust and biological debris. A clean filter helps airflow, protects your equipment, and supports both cooling and heating performance.
  4. Pay attention to zone behavior.
    If you have a zoned system, notice whether all areas respond when you adjust their thermostats. If one part of the home never seems to match the set temperature, that can be an early sign of a control or damper issue.
  5. Keep drains and outdoor units clear.
    Condensate drains and outdoor condensers can be impacted by debris, algae, and landscaping. Keeping them clear—either on your own or through professional maintenance—helps prevent leaks and short cycling.
  6. Ask questions about your controls.
    If you’re not sure how your thermostats and zoning system work, we’re happy to walk you through it during a visit. Understanding your setup makes it easier to spot when something isn’t right.

FAQ: HVAC Tune-Up and Zoning Issues in Tarpon Springs, FL 34688

Do I still need a tune-up if my systems are only a year old?

Yes. Even newer systems in homes around Tarpon Springs benefit from a yearly tune-up. It keeps components clean, confirms proper operation, and helps maintain warranty coverage in many cases. In this visit, both one-year-old systems were in good condition, and the tune-up helped us confirm that the main equipment wasn’t the source of the heating issue.

Why would cooling work fine but heating have a problem?

It’s common for control or zoning issues to show up in one mode more than the other. In this home, cooling operated normally, but heat calls were not being handled correctly for at least one zone. That pointed us toward the zoning control board and related controls instead of the main mechanical components.

Is it safe to keep using my system if a zoning control board might be failing?

In many cases, you can continue to use the system—especially in cooling mode—while you review repair options, as we explained to this Tarpon Springs homeowner. However, heating performance may stay limited in the affected zones until the control issue is corrected. We discuss any specific risks or concerns with you based on what we find during inspection.

What’s included in your $89 tune-up?

Our special tune-up offer (for well-kept units) includes cleaning key components, flushing the system drains, checking refrigerant levels, inspecting wiring and major components, and verifying thermostat operation. We can also replace the air filter using one you provide or supply one at an additional cost. Afterward, we give clear recommendations for any additional maintenance or repairs.

What happens if my system needs more than a basic tune-up?

If we find that your system in Tarpon Springs needs more intensive cleaning or repairs beyond what’s covered in the tune-up special, we pause and talk it through with you. We explain what we found, outline options, and provide pricing before moving forward—no surprises.

Can you help with other HVAC maintenance questions?

Absolutely. We regularly help Tampa Bay homeowners with maintenance planning and common questions. For more detailed guidance, you can also read resources like our FAQ on common AC repairs, installations, and maintenance and our HVAC maintenance project case study.

Why Choose Home Therapist for HVAC Service in Tarpon Springs

When you invite us into your home in Tarpon Springs, FL 34688, you’re trusting us with your comfort and your equipment. We take that seriously.

  • Licensed, professional technicians: Our team is trained, experienced, and fully licensed to work on heating, cooling, and controls across Tampa Bay.
  • Transparent communication: We explain what we find in plain language and review options before any work is performed, just as we did on this zoning control issue.
  • Clean, respectful work: We treat your home as if it were our own—protecting work areas, cleaning up after ourselves, and respecting your time and schedule.
  • Long-term reliability focus: We don’t just look for quick fixes. We consider how today’s decisions affect your system’s performance over the coming years.
  • Commitment to Tampa Bay homeowners: We’re a local company serving communities like Tarpon Springs, and we stand behind our work.

If you’d like to see what other homeowners are saying or stay connected with us online, you can find Home Therapist on social media and local platforms:

  • Follow us on Facebook for updates and homeowner tips.
  • See project highlights and behind-the-scenes content on Instagram.
  • Check out short educational clips on TikTok.

For independent reviews and verification of our standing in the community, you can also visit:

For more in-depth information on our AC and HVAC services, you can explore resources such as our guide on what to expect when AC repairs or maintenance are needed or our article on air conditioner installation quotes in Tampa.

Need HVAC Service in Tarpon Springs, FL 34688?

If you’re in Tarpon Springs, FL 34688 and your home has newer systems that need a tune-up, or you suspect a zoning or heating control issue, we’re here to help. Our goal is to keep your equipment running efficiently, your comfort steady, and your options clear—without pressure or surprises.

Schedule your HVAC tune-up or heating diagnostic with Home Therapist today, and let our local Tampa Bay team make sure your system is ready for whatever the Florida weather brings—cooling or heating.

HVAC Tune-Up and Heating Zoning Check in Tarpon Springs, FL 34688

When a homeowner in Tarpon Springs, FL 34688 reached out to us, they were taking advantage of an $89 tune-up offer and also wanted us to look into a heating issue. Their home has two relatively new HVAC systems, and while cooling seemed fine, one system wouldn’t come on in heat mode. During our visit, we completed a full maintenance tune-up on both systems and uncovered a likely issue with the zoning control board that affects the heating function.

In this article, we’ll walk through what we found, how we serviced both systems, what’s going on with the heating and zoning, and what we recommended so the homeowner can make an informed decision. If you live in Tarpon Springs, FL 34688 and rely on your HVAC for both cooling and heating, this kind of visit is a great example of how regular maintenance can catch control issues before they become bigger problems.

Case Recap

  • Location: Single-family home in Tarpon Springs, FL 34688
  • Service requested: $89 HVAC tune-up for two systems, plus a heating concern
  • Equipment age: Both HVAC systems installed roughly one year ago
  • What we did: Full maintenance on both systems, cleaned components, cleared condensate drains, checked refrigerant pressures, amps, and fan operation
  • What we found: Cooling worked correctly; a suspected zoning control board issue is limiting proper heating operation
  • Next step: Provide an estimate for deeper diagnosis and potential zoning board repair or replacement

Customer Problem: Heating Not Kicking On

The homeowner in Tarpon Springs initially contacted us because they had seen an $89 tune-up promotion previously and wanted to take advantage of it for their two systems. Even though the promotion had passed, we honored the offer as an exception and scheduled a maintenance visit.

During scheduling, they also asked us to look at a heating issue at the same time. The home has two separate HVAC systems, both installed around 12 months ago. Cooling seemed to be working well, but one of the systems would not turn on when they switched to heat. The homeowner suspected that it might be something simple, like a miswired connection or a crossed cable related to the thermostat or zoning controls.

Here were their main concerns:

  • “One of my systems won’t start in heat mode, even though it cools fine.”
  • “Both units are relatively new, so I don’t expect major failures yet.”
  • “If it’s a wiring or control board problem, I want to know what my options are.”

They also wanted reassurance that their newer equipment was in good shape in general. Living in Tarpon Springs, FL 34688, where cooling is critical most of the year, it was important to them that the systems run efficiently and reliably, and that the heating would work correctly when needed.

Inspection and Diagnosis

Our first step was to treat this as both a routine tune-up and a troubleshooting visit. That means we didn’t just look at the one system that was having heating trouble—we evaluated both HVAC systems from top to bottom.

Here’s how we approached the visit:

1. Overall System Condition

We began by visually inspecting both air handlers and condensers. For systems that are only about a year old, we expect them to be fairly clean and structurally sound, and that was the case here. We checked for obvious issues like loose panels, damaged insulation, or signs of water around the air handler.

2. Refrigerant and Compressor Operation

Next, we verified cooling performance. We checked refrigerant pressures, compressor amp draw, and outdoor fan operation on each system. All readings and behavior were within normal ranges for systems of this age and type. That helped confirm that the core refrigeration cycle (compressor, refrigerant, and outdoor fan) was functioning properly.

3. Indoor Airflow and Fan Operation

We confirmed that the indoor blower fans were running correctly, with normal sound and airflow behavior. While we didn’t find major airflow restrictions on this visit, homeowners in areas like Tarpon Springs often benefit from regular filter changes and occasional professional duct cleaning to keep the system breathing easily in our humid Florida climate.

4. Cleaning and Condensate Drain Lines

As part of the tune-up, we cleaned key components where appropriate and cleared the condensate drain lines on both systems. A blocked drain can cause water backup, safety shutdowns, and even water damage, so clearing those lines is a simple but important step to keep the system reliable.

5. Heating and Zoning Controls

Finally, we turned our attention to the homeowner’s main concern: the heating issue. We tested the systems in heat mode and monitored how the control system responded. Cooling operation checked out, but when we tested the heating side, we noticed that the problem was not with the basic equipment itself, but with how the heating call was being handled by the control system.

The home is using a zoning setup—meaning different areas (zones) of the home can call for heating or cooling independently. Based on our testing, the zoning control board appears to be the likely source of the problem affecting heat operation in at least one of the zones. The board is essentially the “traffic director” that decides which zone gets air and when; if it isn’t interpreting the heating call correctly, certain zones may not heat even though the equipment is capable of running.

Because we don’t guess with electronics, our recommendation was to move to a more detailed diagnostic visit focused on the zoning control board and associated wiring before committing to repair or replacement.

Repair and Service Process

Even though the heating control issue requires a separate estimate and deeper diagnosis, we still completed a thorough maintenance tune-up on both systems during this visit. That way, the homeowner in Tarpon Springs, FL 34688 gets maximum value from the appointment and knows their equipment is otherwise in good condition.

Step 1: Full Tune-Up Setup

We started by reviewing thermostat settings and system modes, then safely shutting off power where needed so we could open panels and access internal components. Safety and cleanliness come first—drop cloths, careful tool placement, and wiping down any work areas we touch are part of our normal routine.

Step 2: Cleaning Accessible Components

We cleaned accessible areas of both systems, focusing on parts that affect efficiency and airflow. While these systems were relatively clean, even a year of operation in Florida’s humid, sandy environment can begin to build up dust and debris. Keeping components clean helps maintain smooth airflow and reduces strain on motors.

Step 3: Condensate Drain Line Clearing

We flushed and cleared the condensate drain lines for each system. In our climate, drain lines can quickly accumulate algae and buildup. A simple blockage can shut down cooling at the worst possible time, so clearing the drains is a standard part of our maintenance. After clearing, we verified that the lines were draining properly.

Step 4: Electrical and Component Check

We inspected visible wiring connections, contactors, and control components that are part of the normal maintenance checklist. The homeowner had mentioned a possible crossed wire; while our initial visit pointed more toward the zoning board than simple thermostat wiring, it was still important to visually inspect for any obvious miswiring or loose connections during the tune-up.

Step 5: Cooling and Heating Test

With cleaning and checks done, we restored power and tested both systems in cooling mode and then in heating mode. Cooling tested normally on both systems—good refrigerant behavior, normal compressor operation, and proper fan function.

When we switched to heating, that’s where we confirmed that the equipment itself wasn’t the primary concern. The system’s response pointed to the zoning control board or related controls as the likely cause of the limited or missing heating in certain areas of the home. Rather than replacing parts blindly, we recommended a focused diagnostic and estimate specifically for the zoning board and its connections.

Step 6: Honest Options and Next Steps

Before leaving, we explained two clear options to the homeowner:

  • Schedule a dedicated visit to fully diagnose the zoning control board and, if needed, repair or replace it.
  • Continue operating the systems as they are for now, understanding that cooling is working well but heating performance may remain limited until the control issue is resolved.

We also reminded them that, beyond the zoning issue, both systems are in good overall condition and have been cleaned, drained, and tested. That gives them peace of mind while they decide how and when to move forward with the zoning repair.

Why This Fix Works (and Why Zoning Matters)

In this Tarpon Springs home, the main issue is not a failed furnace or a bad heat pump component—it’s a control problem. The zoning control board is responsible for:

  • Receiving signals from thermostats in different zones
  • Telling the HVAC equipment when to run in heating or cooling mode
  • Opening and closing zone dampers to route air where it’s needed

If the board is not processing the heat call correctly, or if part of the board has failed, you can end up with situations where:

  • Cooling works fine, but heating doesn’t engage in certain zones
  • Some rooms stay comfortable while others never warm up
  • The system short cycles or doesn’t respond properly to thermostat changes

By diagnosing and addressing the zoning control board, we’re not just chasing a symptom—we’re going after the root of the control issue. Once the board and its wiring are verified and corrected, the same heating equipment that already works well mechanically can distribute warm air correctly to every zone.

On the maintenance side, the cleaning, electrical checks, and drain line clearing we performed help the systems run more efficiently and reliably. That means:

  • Less strain on motors and compressors
  • Better airflow and comfort
  • Lower risk of nuisance shutdowns from simple issues like clogged drains

When you combine sound controls with well-maintained equipment, you get a system that’s far more likely to provide steady comfort and fewer surprises throughout the year.

Pro Tips for Homeowners in Tarpon Springs

Whether you’re in Tarpon Springs, FL 34688 or elsewhere in the Tampa Bay area, here are a few practical tips to keep your HVAC systems running smoothly:

  • Change filters regularly. In Florida’s humid, dusty environment, most homes benefit from changing standard filters every 1–3 months. If you’d like help choosing the right filter or upgrading your filtration setup, we can also assist with air filter installation and service.
  • Don’t ignore small heating issues. Even if you only use heat a few weeks a year, a control problem with heating can be a sign of a zoning or wiring issue that may affect cooling down the road if left unchecked.
  • Schedule annual tune-ups for each system. Two systems mean twice the equipment, and both should be checked and maintained yearly. An annual tune-up helps catch minor issues early and keeps your efficiency up.
  • Keep drains and ducts in mind. Clearing condensate drains and maintaining clean ductwork helps your system breathe better and reduces the chance of water damage or musty odors. Our air duct cleaning services are designed for Tampa Bay homes dealing with dust and humidity.
  • Know where your thermostats and zones are. In a zoned home, understand which thermostat controls which area, and pay attention if one area consistently behaves differently. That information helps us pinpoint zoning and control issues faster.
  • Plan ahead for busy seasons. In Tarpon Springs, most homeowners don’t think about HVAC service until the first big heat wave. Scheduling maintenance before the peak season gives you more flexibility and less chance of unexpected breakdowns.

FAQ: HVAC Tune-Up and Heating Zoning in Tarpon Springs, FL 34688

Do I really need a tune-up if my systems are only a year old?

Yes, a yearly tune-up is still a good idea, even for newer systems. In this Tarpon Springs home, both systems were about one year old and already benefitted from cleaning and drain line clearing. Early maintenance helps keep warranties valid, reduces wear, and can catch control issues like zoning or thermostat problems before they affect comfort.

Why would cooling work but heating not work on the same system?

When cooling works but heating does not, it often points to a control or zoning issue rather than a basic mechanical failure. In this case, the refrigerant pressures, compressor operation, and fan functions were normal. The problem appears to be how the zoning control board is handling the heating call, not whether the equipment can run.

Can I keep using my HVAC system while I decide on zoning control repairs?

In this situation, cooling is operating correctly, so the homeowner can continue to use the system while they review the estimate for zoning board diagnosis and repair. The tradeoff is that heating performance may stay limited in certain areas until the control issue is properly addressed. We always explain these options clearly so you can decide what works best for your home and budget.

What does the $89 tune-up include?

For well-kept units, our promotional tune-up includes cleaning key components, flushing condensate drain lines, checking refrigerant operation, reviewing thermostat settings, inspecting wiring and major components, and replacing the filter (you can provide your own or we can supply one at an additional cost). Afterward, we review any recommended maintenance or repairs so you know exactly where your system stands.

Is this type of service available outside Tarpon Springs?

Yes. We serve homeowners throughout the Tampa Bay area. If you’re near Tarpon Springs, New Port Richey, or surrounding communities, our local technicians can help with HVAC tune-ups, repairs, and zoning control issues. You can learn more about nearby coverage on our New Port Richey HVAC and plumbing service page.

How will I know if my zoning control board really needs to be replaced?

We don’t replace control boards based on guesswork. The next step after a visit like this is a focused diagnostic appointment where we test the zoning board, verify wiring, and confirm how it responds to heating and cooling calls. Only if the board or related controls fail those checks do we recommend repair or replacement, and we’ll walk you through those findings before any work is done.

Why Choose Home Therapist for HVAC Service in Tarpon Springs

When you invite us into your home in Tarpon Springs, FL 34688, you’re trusting us with your comfort, your equipment, and your time. We take that seriously.

Here’s what you can expect from our team:

  • Licensed, professional technicians: Our techs work on HVAC systems across Tampa Bay every day, including zoned systems and newer high-efficiency equipment.
  • Transparent communication: We explain what we find in plain language, review your options, and never pressure you into a repair you don’t understand.
  • Clean, respectful work: From wearing shoe covers to cleaning up our work area, we treat your home like our own.
  • Focus on long-term reliability: We’re not just trying to get the system running for today—we want it to run well through the long Florida cooling season and the occasional cool snaps.
  • Commitment to Tampa Bay homeowners: We live and work here too, and we’re proud to serve communities like Tarpon Springs, New Port Richey, Clearwater, and beyond.

If you’d like to see more of what we do, you can follow us on social platforms like Pinterest or connect with us on Reddit. For extra peace of mind, you can also review our standing with trusted organizations such as the Better Business Bureau and the Tampa Bay Chamber of Commerce.

For more information about how we handle routine maintenance, you can also read our guide on what to expect from AC repairs, installs, and maintenance visits. It’s a helpful resource if you’re planning your next service call in the Tampa Bay area.

Ready to Schedule HVAC Service in Tarpon Springs, FL 34688?

If you’re noticing heating issues, uneven comfort between rooms, or it’s simply time for a tune-up on your system in Tarpon Springs, FL 34688, we’re here to help. Our technicians can perform a thorough maintenance visit, check your zoning and controls, and give you clear options if we find anything that needs attention.

Whether you have one system or two—new equipment or older units—our goal is the same: safe, reliable, and efficient comfort for your home. Reach out to Home Therapist Cooling, Heating, and Plumbing to schedule your HVAC tune-up or heating zoning evaluation, and we’ll take care of the rest.

Water Heater Inspection and Plumbing Visit in Gibsonton, FL 33534

When a homeowner in Gibsonton, FL 33534 reached out to us, they wanted peace of mind about their plumbing system and water heater. Hot water is something most of us don’t think about until it stops working, and in Florida’s heat and humidity, the last thing you want is a surprise leak or a flooded garage or utility room. Our technician visited the home for a scheduled plumbing visit, inspected the water heater, and provided clear recommendations based on what we found and what we could safely verify during this appointment.

Case Recap: Plumbing Visit in Gibsonton, FL 33534

  • Homeowner requested a water heater inspection and general plumbing checkup.
  • Water heater found to be past its typical service life and at higher risk of failure.
  • Full-home plumbing inspection could not be completed due to limited access to some areas.
  • We recommended proactive water heater replacement with a modern, efficient unit.
  • We also recommended a follow-up visit to complete the full plumbing inspection once access is available.

Customer Problem: Wanting Peace of Mind About Plumbing and Hot Water

For this visit in Gibsonton, FL 33534, the homeowner’s main goal was simple: make sure the water heater and plumbing system were in good shape. They requested:

– An inspection of the existing water heater.
– A general plumbing inspection of the home.

Like many homeowners, they understood that plumbing problems often start small and stay out of sight until they become costly issues. Slow leaks, corrosion, aging equipment, and hidden pipe problems can all lead to water damage or loss of hot water at the worst possible time. Rather than wait for a failure, this homeowner wanted a professional set of eyes on their system.

Because this was a planned plumbing visit, not an emergency call, our focus was on safety, reliability, and early detection of potential issues. The homeowner wanted honest feedback and clear options, not guesswork or pressure. That’s exactly how we approach every plumbing visit in the Gibsonton and greater Tampa Bay area.

Inspection and Diagnosis: What We Could See and What We Couldn’t

When our technician arrived, the first step was to listen. We confirmed what the homeowner was concerned about, what they had noticed (if anything), and whether they had experienced any recent issues like inconsistent hot water, visible leaks, or unusual noises from the water heater.

From there, we moved into the inspection phase. Our focus during this visit included:

  • Checking the age and visible condition of the water heater.
  • Looking for obvious signs of wear, corrosion, or potential leaks around the tank and connections.
  • Verifying that there were no immediate safety concerns visible at the water heater location.

During the inspection, our technician determined that the water heater was past its expected service life. Even if a unit is still producing hot water, age alone is a major factor in reliability and risk. Older tanks are more prone to internal corrosion and can develop leaks with little warning.

At the same time, we attempted to perform a broader plumbing inspection. However, a full plumbing review requires access to certain areas, such as specific bathrooms, utility spaces, or shut-off locations. In this case, we did not have full access to all necessary areas of the plumbing system, so a complete whole-home plumbing inspection could not be finished during this visit.

We made sure to clearly communicate this limitation to the homeowner. Rather than guessing about unseen piping or fixtures, we focused on what we could safely verify: the condition and age-related risk of the water heater itself.

Repair and Service Process: What We Did During the Visit

Because this visit in Gibsonton, FL 33534 was primarily diagnostic and consultative, our role was to evaluate the current condition, explain our findings, and lay out practical next steps. Here’s how we approached it:

1. Water Heater Assessment

We began by visually inspecting the water heater and surrounding area. During this assessment, we looked for:

  • Signs of corrosion on the tank or connections.
  • Evidence of previous leaks or water damage around the base.
  • Condition of visible piping connected to the unit.
  • General age and wear of the unit.

Based on its age, we informed the homeowner that the water heater was beyond its typical service life. Older units are statistically more likely to develop leaks or fail unexpectedly, especially in our Florida climate where hard water and constant use put additional strain on equipment.

2. Safety and Risk Discussion

Once we confirmed that the unit was older and at higher risk, we explained, in clear terms, what that means for a homeowner:

  • Increased chance of sudden tank failure or leak.
  • Potential for water damage to the surrounding area.
  • Greater likelihood of inconsistent hot water in the future.

We did not try to alarm the homeowner; our goal was to give them realistic expectations. A water heater that has outlived its expected lifespan might still be running today, but waiting until it fails can lead to a more stressful and expensive situation.

3. Addressing the Limited Plumbing Access

For the general plumbing inspection, we were limited by access. Some of the key areas we would typically inspect were not available during this visit. Rather than making assumptions, we documented that a complete plumbing inspection could not be performed and explained this clearly.

We recommended scheduling a follow-up plumbing visit once the homeowner is able to provide access to the remaining areas. That follow-up would allow us to take a more complete look at fixtures, visible piping, and potential hidden issues that might not show up until much later.

4. Presenting Options and Next Steps

At the end of the visit, we summarized our findings and provided specific recommendations:

  • Replace the existing water heater with a new, energy-efficient unit (recommended).
  • Schedule a follow-up appointment to complete the full plumbing inspection once access is available.

We walked the homeowner through what a replacement project would involve, what to expect in terms of downtime, and how a modern unit can improve reliability and efficiency. We also made it clear that there may be additional plumbing issues that simply cannot be identified until we can see more of the system.

Why This Fix Works: The Logic Behind Proactive Water Heater Replacement

For homeowners in Gibsonton, FL 33534, hot water is non-negotiable. Showers, laundry, dishes, and everyday cleaning all depend on a reliable water heater. When a unit has moved past its expected service life, the risk of failures increases even if it appears to be working.

Proactively replacing an aging water heater is effective for a few key reasons:

  • Reduces the risk of leaks and water damage: Older tanks can develop internal corrosion that eventually leads to leaks or ruptures. Replacing the unit before that happens helps protect your home and belongings.
  • Improves reliability: A new water heater is far less likely to leave you suddenly without hot water.
  • Can improve efficiency: Modern units are generally designed to use energy more efficiently, which can help lower utility costs over time compared to an older, worn system.
  • Provides predictability: Instead of reacting to an emergency, you can choose the timing that works best for your schedule and budget.

Pairing that with a full plumbing inspection during a follow-up visit allows us to look for early signs of other issues—such as slow leaks, corroded shut-off valves, or drainage concerns—so problems can be handled before they escalate.

Pro Tips for Homeowners in Gibsonton

If you own a home in Gibsonton or anywhere in the Tampa Bay area, here are some simple, practical tips to help you stay ahead of plumbing and water heater issues:

  • Know the age of your water heater: If you’re not sure how old your unit is, it’s worth finding out. Once it’s past its typical service life, talk to a professional about a replacement timeline so you’re not caught off guard.
  • Look around the base of the tank regularly: Every month or so, take a quick look for signs of moisture, rust, or staining around the bottom of the water heater. Early moisture can be a warning sign.
  • Watch your water pressure: If you notice sudden changes in water pressure or frequent faucet issues, it could be related to your plumbing system. Don’t ignore it—have it checked.
  • Pay attention to water quality and temperature: Fluctuating temperatures, cloudy water, or odd smells from hot water taps can all be signals that the water heater is struggling.
  • Plan ahead for replacements: In Florida’s climate, equipment works hard year-round. Planning a water heater or major plumbing upgrade on your schedule is always easier than handling an emergency leak.
  • Make access easy for inspections: When you schedule a plumbing inspection, try to clear the areas around your water heater, main shut-off, and key fixtures so your technician can get a complete look at your system.

FAQ: Water Heater and Plumbing Visits in Gibsonton, FL 33534

What does it mean if my water heater is past its expected service life?

When a water heater is past its expected service life, it usually means it has reached the age where failures and leaks become more common. The unit might still be working today, but the risk of sudden problems increases, especially under everyday use. At that point, replacement is typically the most reliable long-term solution.

Can I just wait until the water heater stops working?

You can wait, but it’s not always the best idea. Waiting until a water heater fails can leave you without hot water unexpectedly and may increase the risk of leaks or water damage. Proactive replacement lets you choose the timing and often reduces stress and potential repair costs.

Why couldn’t you complete the full plumbing inspection during this visit?

In this particular Gibsonton, FL 33534 visit, we did not have access to all the areas needed to check the entire plumbing system. A thorough plumbing inspection requires access to fixtures, shut-offs, and sometimes specific rooms or spaces. Without that access, we can’t responsibly say we’ve inspected the full system, so we recommend a follow-up visit once access is available.

Is it normal to schedule a follow-up plumbing visit?

Yes. If we can’t see everything we need to see, or if a homeowner wants a deeper level of inspection, a follow-up visit is very common. That visit allows us to complete our checklist and give you a more complete picture of your plumbing system’s health.

Will a new water heater really be more efficient?

While exact savings depend on the specific model and usage, newer water heaters are generally designed with more efficient technology than older units. That can translate into reduced energy usage over time, especially when replacing a very old or worn system.

How often should I have my plumbing inspected?

Many homeowners in the Tampa Bay area benefit from having a professional look over their plumbing system every year or two, or any time they notice changes in performance. Regular checkups can catch small issues early, before they turn into larger, more expensive problems.

Why Choose Home Therapist for Plumbing and Water Heater Service

When you invite someone into your home in Gibsonton, FL 33534, you want to know they’ll respect your space, communicate clearly, and focus on long-term solutions—not quick, temporary fixes. That’s how our team approaches every plumbing and water heater visit.

  • Licensed and professional technicians: Our techs are trained, experienced, and focused on doing the job the right way. We don’t cut corners, especially when it comes to your home’s plumbing and hot water.
  • Transparent communication: We explain what we see, what it means, and what your options are—without pressure or scare tactics. In this Gibsonton visit, we were upfront about the water heater’s age and the limits of what we could inspect that day.
  • Clean and respectful work: We treat your home like we would treat our own, keeping work areas tidy and minimizing disruption as much as possible.
  • Long-term reliability focus: Our recommendations are aimed at keeping your system reliable and safe over time, whether that means replacing an aging water heater or planning a follow-up inspection.
  • Committed to Tampa Bay homeowners: From Gibsonton to the broader Tampa Bay area, we’re here to help homeowners understand their systems and make confident decisions about their comfort and safety.

Whether you need a simple checkup, a detailed plumbing inspection, or a full water heater replacement, we approach each job with the same level of care and professionalism.

Need Plumbing or Water Heater Help in Gibsonton, FL 33534?

If you’re a homeowner in Gibsonton, FL 33534 and you’re unsure about the age or condition of your water heater—or you just want a professional assessment of your plumbing system—we’re here to help. We can inspect your equipment, explain what we find in plain language, and give you practical options that fit your home and budget.

Whether it’s planning a proactive water heater replacement or scheduling a follow-up plumbing inspection to get a more complete look at your system, our team is ready to support you. Reach out to Home Therapist to schedule your next visit, and let our local Tampa Bay technicians help you keep your home’s plumbing safe, reliable, and ready for everyday life.

HVAC Maintenance and UV Air Treatment in Port Richey, FL 34668

When a homeowner in Port Richey, FL 34668 reached out to us for routine heating and cooling maintenance and a UV air treatment system, their goal was simple: keep the system reliable and improve the air their family breathes. Our job was to make sure the HVAC equipment was operating safely and efficiently, then integrate a UV solution that would support cleaner indoor air over the long term.

In the Tampa Bay area, including Port Richey, systems work hard almost year-round. A thorough tune-up paired with the right indoor air quality upgrades can make a noticeable difference in comfort, energy bills, and peace of mind. In this visit, we completed a full HVAC maintenance service and moved forward with a UV air treatment solution that the homeowner had already approved on a previous estimate.

Case Recap

  • Location: Single-family home in Port Richey, FL 34668
  • Services: Heating and cooling maintenance plus UV air treatment solution
  • Goals: Improve efficiency, reduce breakdown risk, and enhance indoor air quality
  • Work performed: System cleaning, flushing, refrigerant check, thermostat check, wiring and component inspection, filter service guidance, and UV air treatment installation planning
  • Outcome: System verified for proper operation and homeowner set up with an air quality upgrade approved on a prior estimate

Customer Problem

The homeowner in Port Richey wanted to stay ahead of problems rather than wait for a breakdown. They contacted us for a professional tune-up on their heating and cooling system and to move forward on a UV light air treatment option they had discussed with us before.

Like many Tampa Bay homeowners, they were concerned about:

  • Keeping the system running efficiently to avoid high electric bills
  • Reducing the chance of a mid-season breakdown
  • Improving indoor air quality, especially around mold and germs inside the air handler

They had already reviewed an earlier estimate for a UV air treatment system and decided they were ready to proceed. Our technician, Jandiel, arrived prepared to perform the full maintenance service and confirm the details for the UV installation so everything would work together correctly.

Inspection and Diagnosis

On any maintenance visit in Port Richey, FL 34668, our first priority is to get a clear picture of how the system is currently operating. That way we can catch small issues before they turn into bigger, more expensive problems.

Here’s how we approached the inspection on this home:

  • Visual system inspection: We checked the indoor air handler and outdoor unit for obvious signs of wear, damage, or heavy dirt buildup. This helps us spot issues like restricted airflow, corrosion, or signs of past water leaks.
  • Cleaning and system flushing: We looked at components that typically collect dust and debris. Proper cleaning helps the system breathe better and work less hard to cool and heat the home.
  • Refrigerant-related checks: While we do not list specific pressures or amounts unless needed, we checked for signs that the refrigerant side of the system was operating as expected for normal conditions.
  • Thermostat inspection: We confirmed that the thermostat settings and response matched what the equipment was doing. A miscalibrated thermostat can cause comfort issues and higher bills.
  • Wiring and component inspection: We inspected electrical connections and key components for wear, loose connections, or signs of overheating.
  • Filter condition review: We checked the air filter and discussed replacement options with the homeowner. Our tune-up includes replacement with a customer-provided filter (or we can supply one at an additional cost).

At the same time, we confirmed the placement and compatibility for the UV air treatment system the homeowner had already approved. UV systems are usually installed inside the air handler, so it’s important to make sure there’s proper access, line-of-sight to the coil, and no conflicts with existing components.

Repair and Service Process

Once we completed the inspection and confirmed there were no major underlying issues requiring separate repair, we moved into the actual maintenance work and UV setup. For homeowners in Port Richey, FL 34668, this type of visit is all about tightening up performance and cleanliness so the system is ready for the long cooling season.

1. Detailed Cleaning and System Flushing

We performed a careful cleaning of accessible components and flushed the system where applicable. Clearing dirt and debris supports better airflow, helps the equipment transfer heat properly, and lowers the strain on motors and compressors.

This is particularly important in our humid Florida climate, where coils and drain components can accumulate buildup more quickly. Cleaner components mean more consistent comfort and reduced risk of water leaks from clogged drains.

2. Refrigerant and Operating Check

With everything cleaned, we evaluated the system’s cooling and heating operation. While we don’t list specific readings here, the goal is to confirm the equipment is running within expected ranges and not showing signs of low performance that could point to a hidden issue.

When we finish this step, we want to be confident telling the homeowner that, based on what we can see and test during maintenance, the system is operating as expected.

3. Thermostat Adjustment and Verification

We checked the thermostat for proper operation and responsiveness. If the thermostat is out of sync with the actual temperature or if the settings don’t match the household’s routine, comfort and efficiency both suffer.

We made the necessary adjustments so the system cycles on and off appropriately, helping the home in Port Richey stay comfortable without unnecessary run time.

4. Wiring and Component Inspection

Next, we inspected major electrical connections, contact points, and other key components. This step helps us catch signs of wear, loose connections, or components that may be nearing the end of their life.

When we see something that could cause a breakdown down the road, we explain what we found, why it matters, and what options the homeowner has. On this visit, our focus was on confirming solid connections and looking for anything that might create future reliability concerns.

5. Filter Service Guidance

The tune-up includes replacement of the air filter when the homeowner provides one, or we can supply a filter for an additional cost. Proper filtration is one of the simplest ways to protect both the HVAC equipment and indoor air quality.

We discussed filter type and replacement frequency with the homeowner so they understand how to keep the system breathing easily between professional visits. For homeowners interested in upgraded filtration, we can also help with air filter installation and replacement options.

6. UV Air Treatment System Installation Planning

The homeowner had previously reviewed and approved the UV light air treatment option on a separate estimate. During this visit, we confirmed the details needed for proper installation, including placement near the evaporator coil inside the air handler.

UV lights are most effective when they have clear line-of-sight to surfaces where mold and biofilm tend to grow, such as coils. Once installed, the UV light operates continuously to help control microbial growth in that area, supporting both cleaner equipment and better indoor air quality.

After confirming the UV setup and completing the maintenance tasks, we tested the HVAC system again to ensure it was running as expected.

Why This Fix Works

Regular HVAC maintenance and UV air treatment work together to protect both your equipment and your indoor air.

Efficiency and Reliability

When coils, blower components, and filters stay clean, air flows more freely through the system. That means:

  • The system doesn’t have to run as long to reach the set temperature.
  • Components like the compressor and blower motor experience less stress.
  • Energy use typically stays closer to what the equipment was designed for.

For homeowners in Port Richey, FL 34668, where air conditioners work most of the year, that can translate into lower electric bills and fewer surprise breakdowns.

Improved Indoor Air Quality

UV air treatment focuses on the inside of the air handler, especially around the coil. The UV light helps kill or deactivate many types of mold, bacteria, and other microorganisms that would otherwise grow on damp surfaces inside the unit.

While UV lights are not a complete air purification solution by themselves, they are a strong addition to good filtration and regular maintenance. By keeping the coil cleaner, they support:

  • More consistent heat transfer and system performance
  • Reduced microbial growth inside the equipment
  • Better-smelling air and a cleaner system interior

Combined with options like professional air duct cleaning, UV air treatment helps create a cleaner overall air path from your equipment to your living spaces.

Pro Tips for Homeowners in Port Richey

If you live in Port Richey or anywhere in the Tampa Bay area, here are a few practical steps you can take to support your HVAC system and indoor air quality between professional visits:

  • Change filters regularly: In our humid, dusty climate, many homes benefit from changing standard filters every 30–60 days. If you have pets or allergies, even more frequent changes can help.
  • Keep supply and return vents clear: Avoid blocking vents with furniture, rugs, or curtains. Good airflow helps your system run more efficiently and evenly cool or heat your home.
  • Watch for drainage issues: If you notice water near your indoor unit or see signs of a clogged drain line, call for service promptly. Catching drain problems early can prevent water damage.
  • Schedule annual maintenance: A yearly tune-up for your heating and cooling system in Port Richey, FL 34668 helps spot small issues early and keeps your equipment running closer to its original performance.
  • Consider duct and IAQ upgrades: If you’re sensitive to dust or odors, pairing a UV system with services like air duct cleaning or enhanced filtration can make a noticeable difference in comfort.
  • Don’t ignore short cycling or strange noises: If the system turns on and off quickly, or you hear new sounds, it’s worth having a licensed technician take a look before it becomes a bigger issue.

FAQ: Maintenance and UV Air Treatment for Port Richey Homes

How often should I schedule HVAC maintenance in Port Richey?

For most homes in Port Richey, FL 34668, we recommend at least one professional tune-up per year. Because our systems run heavily through much of the year, some homeowners choose to schedule maintenance before the main cooling season and again before the cooler months. Regular tune-ups help maintain efficiency, reduce breakdowns, and extend equipment life.

What does your tune-up include?

Our tune-up service includes cleaning key components, system flushing where applicable, checks related to refrigerant operation, thermostat inspection and adjustment, wiring and component inspection, and air filter replacement (with a homeowner-provided filter or one we supply at an additional cost). Afterward, we review our findings with you and provide recommendations for any additional maintenance or repairs.

Is a UV light system safe for my home?

When installed correctly inside the air handler by a licensed technician, a UV light system is designed to operate safely out of direct view. The UV light targets surfaces inside the equipment, especially around the coil, to help control microbial growth. We follow manufacturer guidelines and best practices to ensure proper placement and operation.

Will a UV air treatment system replace my need for filters?

No. UV systems complement, but do not replace, air filters. Filters capture dust and particles moving through your ductwork, while UV light helps control microbial growth on surfaces inside the unit. For the best results, we recommend using both: a properly sized and regularly changed filter plus a professionally installed UV air treatment system.

Can I add a UV system to my existing HVAC equipment?

In many cases, yes. UV systems are commonly added to existing air handlers, as long as there is safe and accessible space for installation. During a visit like this Port Richey tune-up, we verify the best mounting location and compatibility before proceeding. If any issues arise, we explain your options clearly before moving forward.

What other services can help my indoor air quality?

In addition to UV air treatment, services like upgraded filtration, duct cleaning, and even checking for duct leaks can all support better indoor air quality. Our team can review your home’s specific needs and suggest a combination that makes sense for you.

Why Choose Home Therapist for Your Port Richey HVAC Needs

At Home Therapist Cooling, Heating, and Plumbing, we treat every maintenance visit in Port Richey, FL 34668 as an opportunity to protect your comfort and your investment in your home.

Here’s what you can expect when you work with our team:

  • Licensed, professional technicians: Our techs are trained, experienced, and follow industry best practices on every visit, from routine maintenance to UV system installations.
  • Transparent communication: We explain what we find in plain language, review your options, and never move forward with additional work without your approval.
  • Clean, respectful work: We treat your home as if it were our own, taking care to protect work areas and clean up when we’re done.
  • Long-term reliability focus: Our goal isn’t just to get your system running today; it’s to help reduce future breakdowns and keep your equipment operating as reliably as possible.
  • Commitment to Tampa Bay homeowners: We proudly serve Port Richey and the greater Tampa Bay area with services ranging from routine tune-ups to full HVAC and plumbing services in New Port Richey and nearby communities.

If you’d like to see more of how we work and connect with our team, you can find us on social media:

For added peace of mind, you can also review our standing with local and national organizations:

Schedule Your HVAC Maintenance in Port Richey, FL 34668

If it’s been a while since your last tune-up or you’re interested in upgrading your indoor air quality with UV treatment, our local Tampa Bay technicians are here to help. A routine maintenance visit in Port Richey, FL 34668 is one of the simplest ways to improve comfort, control energy costs, and reduce the risk of unexpected breakdowns.

Contact Home Therapist Cooling, Heating, and Plumbing today to schedule your service, discuss UV air treatment options, or learn more about our dryer vent cleaning services and other ways we can help keep your home comfortable and safe.

We’ll walk you through every step, answer your questions clearly, and leave you with a system you can feel confident in.

Sewer Drain Unclogging in Tampa, FL 33610

When a main sewer line backs up in a home in Tampa, FL 33610, it can turn a normal day into a stressful situation very quickly. Slow drains, gurgling sounds, or sewage backing up into tubs or toilets are more than just an inconvenience – they can put your home and health at risk if not handled correctly. On this visit, our Home Therapist technician was called out to perform a sewer drain unclogging, using a professional drain snake through an existing cleanout and advising the homeowner about options for adding a new, more accessible cleanout for future protection.

In this case, we focused on safely clearing the blockage, protecting the plumbing system, and making sure the homeowner understood what we were doing at every step. By the time we wrapped up, the line was flowing again and the home in Tampa, FL 33610 was back to normal.

Case Recap

  • Main sewer line was clogged, causing drainage issues in the home.
  • We ran a professional drain snake through the existing cleanout to remove the blockage.
  • We confirmed that fixtures were draining properly again after clearing the line.
  • We discussed when removing a toilet may be necessary and the additional cost involved.
  • We also reviewed the benefits of installing a new cleanout for easier access in the future.

Customer Problem: Symptoms of a Main Sewer Line Clog

For this Tampa homeowner, the first signs of trouble were drainage issues that didn’t match a simple single-fixture clog. When more than one drain starts acting up at the same time, especially when it involves lower-level fixtures, that often points to a problem with the main sewer line rather than just a sink or tub trap.

Common concerns we often hear in situations like this include:

  • Water backing up into a tub or shower when a toilet is flushed.
  • Multiple drains running slowly at the same time.
  • Gurgling noises coming from drains or toilets.
  • Occasional sewage smell near floor drains or outside near the cleanout.

The service requested here was straightforward: run a drain snake through the cleanout to clear the sewer line. Our job details also made it clear that the base price did not include removing a toilet, and that if a toilet had to be pulled to gain access, it would be an additional charge. There was also a note about installing a new cleanout – something that can make future maintenance easier and reduce disruption inside the home.

Our goal in every sewer drain unclogging job in Tampa is simple: get the line flowing again safely, explain what we’re doing in plain English, and help the homeowner understand their options for preventing repeat issues.

Inspection and Diagnosis: Confirming the Source of the Clog

Before we start running equipment, we take a few minutes to understand what the home is telling us. On a visit like this in Tampa, FL 33610, the inspection usually includes:

  • Asking the homeowner which fixtures are backing up and when the problem started.
  • Checking inside drains (toilets, tubs, sinks) to see which ones are affected.
  • Locating the existing cleanout and confirming it provides access to the main line.
  • Looking for any signs of leaks or overflow around the property.

If only one fixture is clogged, we’ll often start right there at that fixture. But when multiple fixtures are backing up, especially the lowest ones in the home, it almost always points to a main sewer line issue. In this case, using the cleanout was the right first step.

Once we verified the symptoms and confirmed that the cleanout gave us good access to the main sewer, we were ready to move into the unclogging process.

Repair and Service Process: Running the Snake Through the Cleanout

For this sewer drain unclogging in Tampa, FL 33610, the primary task was to clear the blockage using a professional-grade drain snake (also called a cable machine) through the main cleanout. Here’s how that process typically works and why each step matters.

1. Preparing the Work Area

We start by making sure the area around the cleanout is safe and as clean as possible. That can include laying down protective material and positioning our equipment so that we can work efficiently without tracking dirt or debris through the property. Respecting the home is just as important to us as fixing the problem.

2. Opening the Cleanout Safely

The cleanout is a capped access point tied into the main sewer line. We carefully remove the cap, watching for any built-up pressure or standing sewage that could release when the cap is loosened. This step is about both safety and preventing unnecessary mess.

3. Feeding the Drain Snake Into the Line

Once the cleanout is open, we feed the drain snake cable into the pipe and slowly work it down the line. We use feel and experience to tell the difference between normal turns in the piping and resistance from a blockage. When we encounter a clog, we carefully work the cable back and forth to break it up or pull it through.

The goal is not just to poke a small hole in the blockage, but to clear as much of it as reasonably possible so the line can carry waste and water again without immediately clogging back up.

4. Flushing and Testing the Line

After we feel the blockage give way, we retract the cable and then test the system. This often includes:

  • Running water from multiple fixtures.
  • Flushing toilets and watching for any backup.
  • Visually confirming that the cleanout is draining properly again.

We don’t just pack up as soon as the machine is off. We take the extra time to confirm that the home’s drains are flowing as expected and that there are no obvious signs of ongoing blockage.

5. Discussing Toilet Removal and Additional Access (If Needed)

In some homes, the best or only way to reach a problem section of piping is through a toilet flange. That’s why the job details here clearly stated that removing a toilet, if necessary, would be an additional cost. Toilet removal involves more work: turning off the water, draining the tank and bowl, unbolting the toilet, safely lifting it out of the way, and then re-installing it with a proper wax seal and hardware afterward.

On this visit, the primary plan was to work through the cleanout first, since that tends to be the least invasive and most efficient access point. We always explain to the homeowner when toilet removal might be needed and discuss costs before taking that step.

6. Reviewing Options for Installing a New Cleanout

The job notes also mentioned installing a new cleanout. In many Tampa homes, especially older ones, the original cleanout can be hard to reach, buried, or missing altogether. Adding a properly located cleanout can make a big difference for future maintenance and emergency calls.

We take time to explain:

  • Where a new cleanout could be installed.
  • How it would make future sewer drain unclogging faster and less disruptive.
  • What’s involved in the installation process and how it affects the yard or exterior.

Installing or relocating a cleanout is an investment in easier access and quicker service down the road, especially in Florida where tree roots and shifting soil can contribute to recurring sewer line problems.

Why This Fix Works: How Sewer Snaking Restores Flow

The main sewer line is the “highway” for all of your home’s wastewater. When that line clogs, everything upstream starts to slow down or back up. Common causes include buildup of wipes and hygiene products, grease, scale inside the pipes, or root intrusion in older lines.

Running a drain snake through the cleanout works because:

  • The cable physically cuts, breaks up, or pushes through obstructions in the line.
  • It can travel much farther than a small hand snake used on a sink or tub.
  • It uses mechanical power instead of harsh chemicals that can damage pipes.

Once the blockage is removed or reduced, wastewater can move freely again, preventing pressure buildup and backups into tubs, showers, and toilets. After a successful sewer drain unclogging, we always test the system and make sure fixtures are draining as expected before we leave.

For some homes, especially those with recurring issues, we may also recommend more in-depth services like a full drain line cleaning and flushing or locating and improving cleanout access with services like our drain cleaning and cleanout location solutions. The right approach depends on the home, the age of the piping, and how often problems are showing up.

Pro Tips for Homeowners in Tampa

Living in Tampa means dealing with sandy soil, high humidity, and lots of tree growth, all of which can affect your plumbing over time. Here are some practical tips to help reduce the chances of another sewer clog in a home like the one we serviced in Tampa, FL 33610:

  • Watch what goes down the toilet. Only flush toilet paper and human waste. Items labeled “flushable” wipes can still hang up in the line and start a blockage.
  • Keep grease out of the kitchen drain. Cooking oil, bacon grease, and fatty residues cool and harden inside pipes. Pour them into a container, let them solidify, and throw them away instead.
  • Be careful with older trees near your sewer line. In some Tampa neighborhoods, tree roots seek out moisture and can find small openings in older sewer pipes. If you have large trees near the line, periodic professional drain cleaning is a smart preventive step.
  • Know where your cleanout is located. If you have a cleanout, keep it accessible and not buried under landscaping or concrete. Quick access can save time and reduce labor costs if you ever have another backup.
  • Schedule periodic plumbing maintenance. Just like your HVAC system, your plumbing benefits from regular checkups. Our plumbing maintenance plans can help catch small issues before they become emergencies.
  • Call early when you notice changes. Slow drains, occasional gurgling, or faint sewer odors are early warning signs. Addressing them quickly is usually easier and less disruptive than waiting for a full backup.

FAQ: Sewer Drain Unclogging for Tampa, FL 33610 Homeowners

How do I know if my main sewer line is clogged and not just one drain?

When a main line is clogged, more than one fixture is usually affected. You might see a toilet backing up when you run the shower, or water coming up in a tub when you use a sink. If several drains in your Tampa home start acting up at the same time, it’s a strong sign of a main sewer issue rather than a simple local clog.

Why do plumbers use a cleanout instead of working from inside the home?

A cleanout is designed as an external access point to the main sewer line. Using it lets us run larger, more effective equipment while keeping mess and disruption outside as much as possible. It’s safer, cleaner, and usually more efficient than working through smaller interior drains.

When would you need to remove a toilet to clear a clog?

We consider removing a toilet when there is no usable cleanout, when the cleanout doesn’t reach the problem area, or when the layout of the piping makes the toilet flange the best access point. Because toilet removal involves extra time, care, and reassembly, it’s listed as an additional service and cost, and we always discuss it with the homeowner before proceeding.

Will snaking the line fix the problem permanently?

Snaking restores flow by clearing the blockage, but it doesn’t change the age or condition of the pipe itself. If the clog was caused by one-time misuse, you may not see the issue again. If it’s due to heavy buildup, roots, or damaged piping, you might need periodic cleaning or further investigation. For recurring problems, we may recommend more thorough cleaning or inspection options, which we outline in resources like our key drain inspection tips for Tampa homeowners.

Is chemical drain cleaner a good alternative to professional snaking?

We generally do not recommend harsh chemical drain cleaners. They can be rough on older pipes, are not very effective against serious main-line clogs, and can create safety issues if a plumber later has to work on the line. Mechanical cleaning with professional equipment is safer for the system and more effective for main sewer blockages.

Can I do anything to prepare before a plumber arrives for a sewer clog?

If it’s safe to do so, avoid running water or flushing toilets so you don’t worsen the backup. Clear access to the cleanout if you know where it is, and move any personal items or outdoor obstacles in the work area. Beyond that, let us handle the dirty work – we’ll walk you through what we’re doing and update you as we go.

Why Choose Home Therapist for Sewer and Drain Service

When you invite Home Therapist to handle a sewer drain unclogging in Tampa, FL 33610, you’re getting more than someone with a machine and a cable. You’re getting licensed, professional plumbing technicians who treat your home with the same care we’d want in our own.

Here’s what we focus on every time we visit:

  • Licensed, knowledgeable technicians: We bring real-world experience to diagnosing and solving drain and sewer problems, not guesswork.
  • Transparent communication: We explain what we find, what we recommend, and what it will cost before we move forward.
  • Clean, respectful work habits: We protect your home, manage mess as much as possible, and clean up our workspace when we’re done.
  • Long-term reliability: We don’t just clear the clog and run; we talk about why it happened and what can be done to reduce the chances of it returning.
  • Commitment to Tampa Bay homeowners: We live and work in this area, and we understand the plumbing challenges that come with Florida’s climate and soil.

If you’d like to get a feel for who we are and how we work, you can connect with us on social media or see what other homeowners are saying:

  • Follow us on Facebook for updates and helpful home tips.
  • See behind-the-scenes service photos on Instagram.
  • Watch educational videos and walk-throughs on our YouTube channel.

For extra peace of mind, you can also check out our profiles with respected local and national directories:

Need Sewer Drain Unclogging in Tampa, FL 33610?

If you’re dealing with slow drains, gurgling toilets, or a full backup in your home in Tampa, FL 33610, don’t wait for it to get worse. Our team at Home Therapist is ready to safely clear your sewer line, explain your options, and help you prevent future problems.

Whether you need immediate sewer drain unclogging, help finding or installing a cleanout, or want to explore ongoing plumbing services and support in Tampa, we’re here to help. Contact us today to schedule a visit with a local Tampa Bay technician who will take the time to diagnose the issue, fix it the right way, and leave your home comfortable and cared for.