Outdoor Hose Bib Replacement at a Home in Ruskin, FL 33570


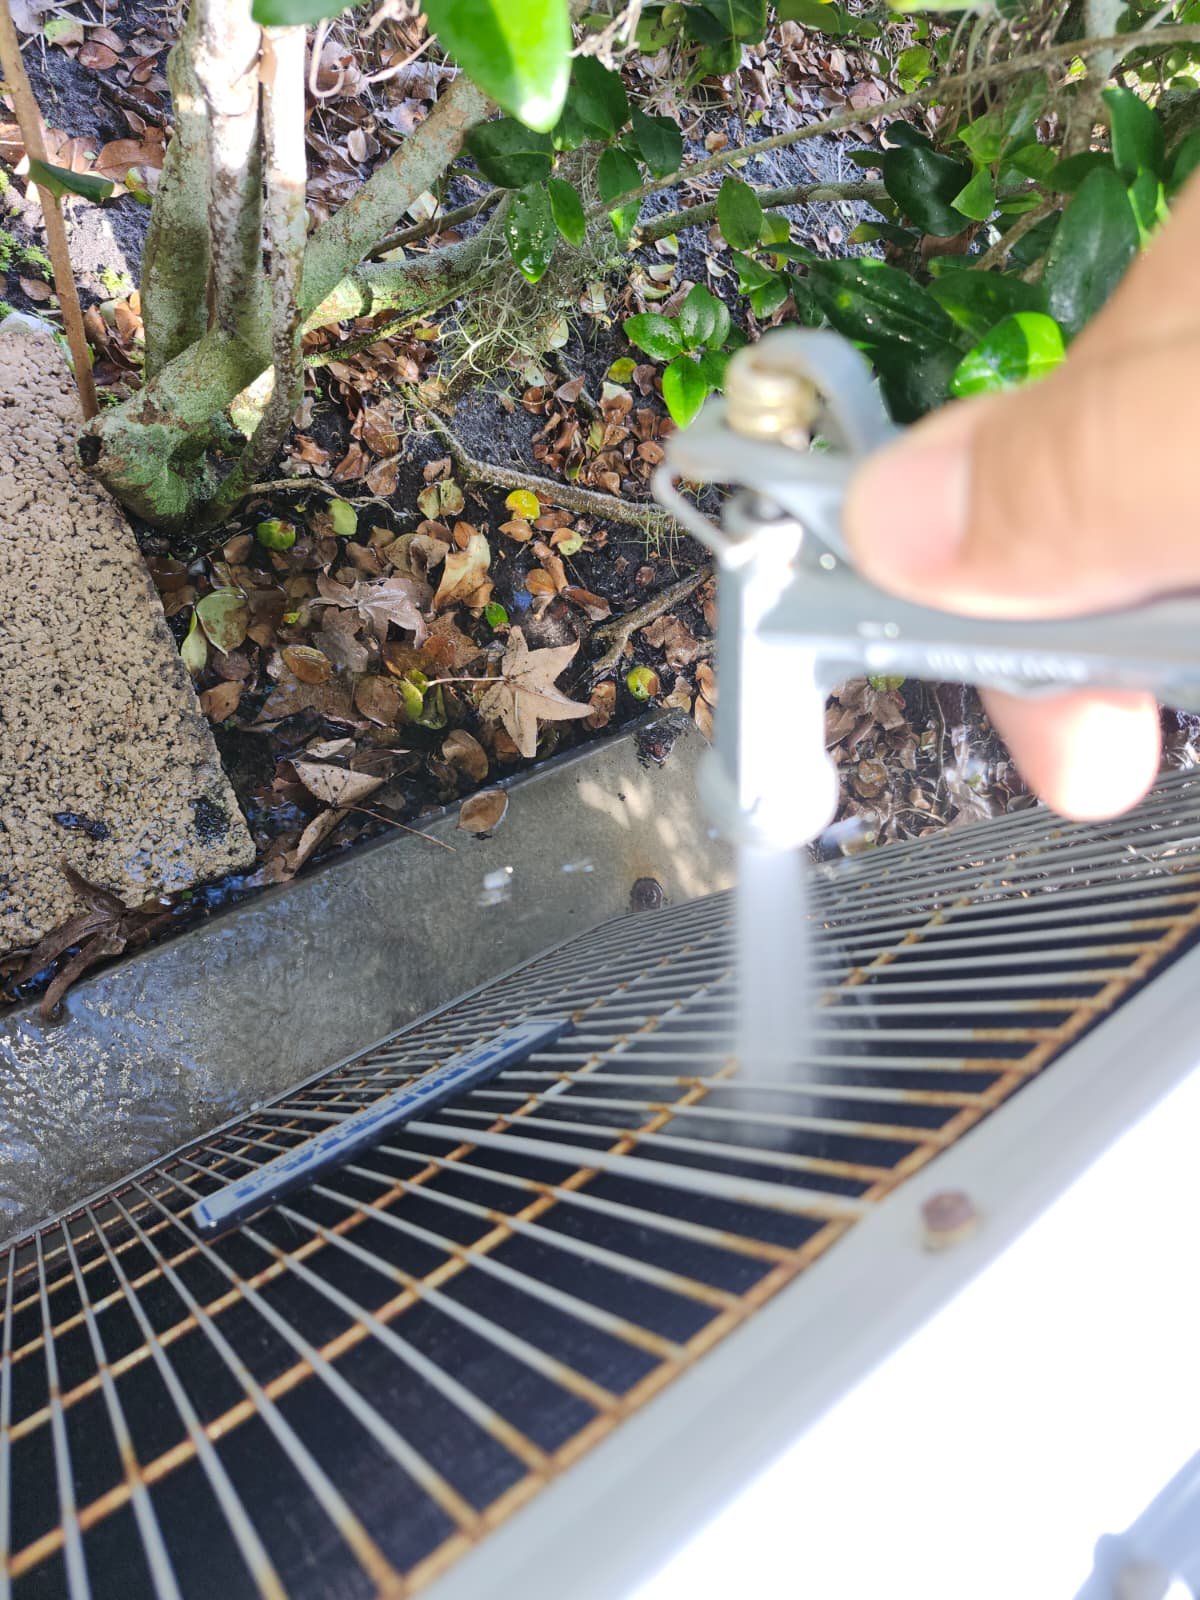
When an outdoor faucet starts leaking or barely delivers water, it can turn simple chores like watering the lawn or washing the car into a frustrating mess. At a home in Ruskin, FL 33570, our plumbing team at Home Therapist Cooling, Heating, and Plumbing was called out to take care of a worn-out hose bib (also called a garden faucet). The homeowner needed a reliable, long-term solution, not just another temporary patch.
In this case study, we’ll walk through what was happening at the home, how we approached the hose bib replacement, and what homeowners in Ruskin and throughout the Tampa Bay area should know about outdoor faucet repairs and maintenance.
Customer Problem: What Was Happening at the Home
The client in Ruskin reached out because their outdoor faucet was no longer working the way it should. Although the internal notes simply confirm that the estimate was resent and approved, in our experience there are a few common reasons homeowners call us about hose bibs:
- Constant dripping from the spout, even when the handle is fully closed
- Water spraying from behind the faucet, at the wall connection
- Difficulty turning the handle on or off
- Very low water flow from the garden hose
- Signs of water staining, mold, or soft spots on the wall near the faucet
Any of these symptoms can point to a worn-out hose bib, a failed washer, corrosion inside the valve, or a problem with the pipe feeding the faucet. In Florida’s humid, coastal environment, outdoor fixtures are constantly exposed to sun, rain, and mineral-rich water, so it’s normal for them to wear out over time.
Because the client approved the repair estimate, we scheduled our plumber to perform a Level 1 hose bib replacement. This type of repair focuses on safely removing the old outdoor faucet and installing a new, properly sealed unit.
Our Hose Bib Inspection & Diagnosis Process
When our technician arrived at the Ruskin home, the first step was a quick but thorough inspection. For a hose bib replacement, we typically look at several key areas:
- Condition of the existing hose bib: Is it visibly corroded, cracked, or loose?
- Leak source: Is the leak coming from the spout, the handle, or the wall connection?
- Wall and structure around the faucet: Is it stucco, block, brick, siding, or another material?
- Water shutoff options: Is there a local shutoff for that line, or do we need to use the main shutoff for the home?
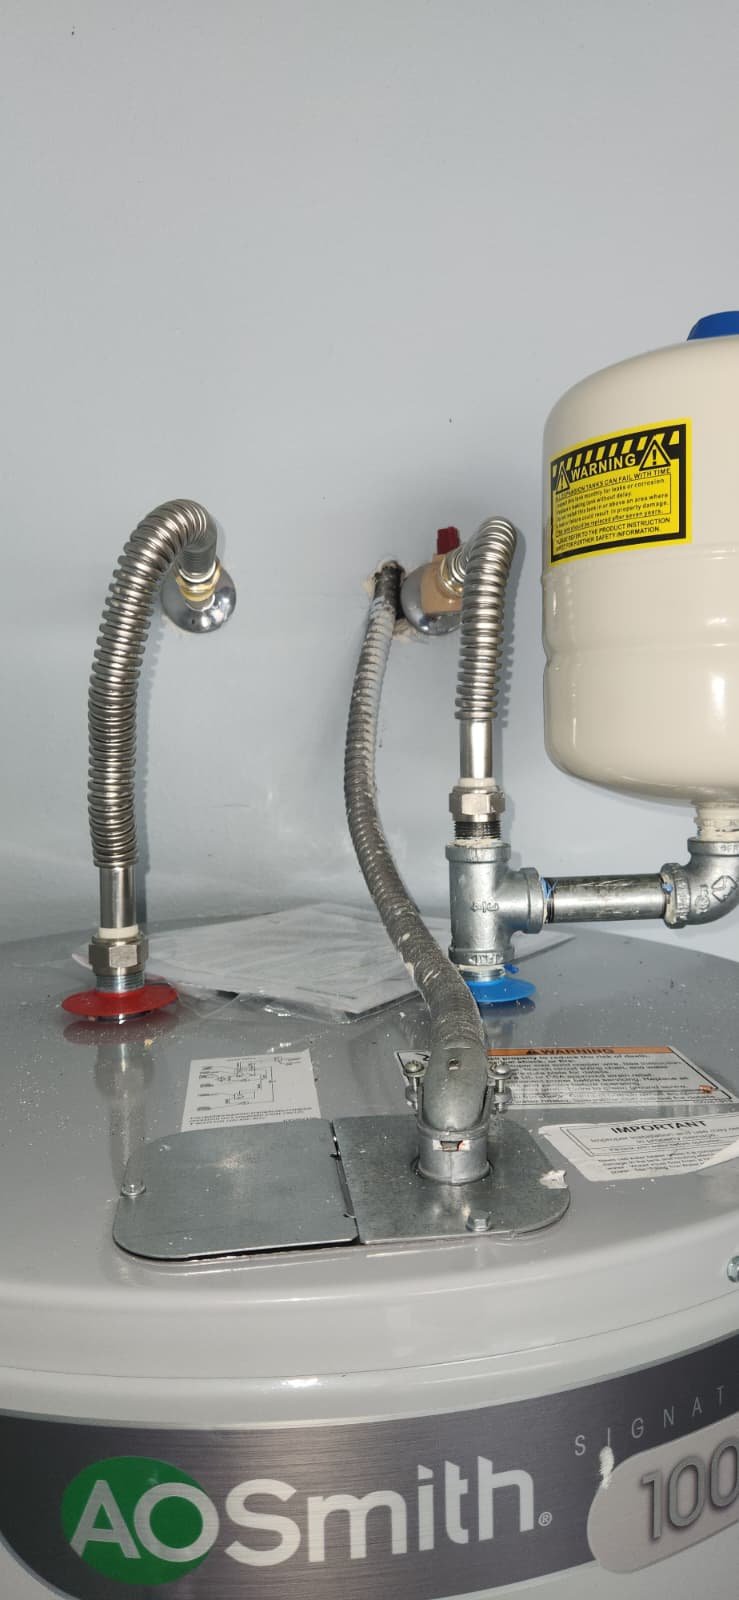
- Pipe material and routing: Copper, CPVC, PEX, or galvanized, and how it’s tied into the home’s plumbing system.
These details help us determine whether a straightforward hose bib swap will be enough, or whether we’ll need to open a small access hole in the wall or block to reach and replace the connection behind the faucet. As we explain to all our clients up front, sometimes the only way to do a safe, lasting replacement is to get to the connection behind the wall. In that case, we handle the plumbing work and leave any concrete, stucco, or wall patching to the appropriate trade afterward.
In Ruskin, especially in communities near the water and around Little Manatee River, we see a lot of block and stucco exteriors. Outdoor plumbing penetrations in these walls must be handled carefully to prevent hidden leaks that could damage the structure over time.
Step-by-Step: How We Replaced the Hose Bib
Every home is a little different, but the core steps of a hose bib replacement in Ruskin, FL look something like this:
1. Shutting Off the Water Safely
We start by shutting off water to the line that supplies the outdoor faucet. Depending on the plumbing layout, this might be:
- A dedicated shutoff valve near the hose bib
- A nearby branch shutoff in a utility room or garage
- The main water shutoff for the home if no local isolation valve exists
After closing the appropriate valve, we open the hose bib and sometimes a nearby indoor faucet to relieve pressure and drain any remaining water in the line.
2. Evaluating the Connection Behind the Wall
Once the water is off, we gently remove the existing hose bib. This tells us a lot about what’s going on behind the wall:
- We check the threads and connection point for corrosion or damage.
- We confirm whether the faucet screws into an elbow or is soldered/bonded to the pipe.
- We look for movement in the pipe, which could indicate a loose or unsupported connection inside the wall.
If the connection is accessible and in good condition, we can often replace the hose bib directly without opening the wall. However, if the connection is badly corroded, cracked, or recessed too far into the block or stucco, we sometimes need to create a small access opening to safely replace the fitting and ensure there are no hidden leaks.
As our estimate description clearly states, when an access hole is required in block or concrete, we handle the plumbing portion only and do not patch the concrete or stucco afterward. This keeps pricing transparent and ensures the right trade (such as a mason or stucco specialist) can restore the wall’s finish to match the home.
3. Removing the Old Hose Bib
With everything exposed and safe, we remove the old hose bib using the appropriate tools. This might involve:
- Unscrewing a threaded faucet from a female adapter
- Cutting out a damaged section of copper or CPVC pipe
- Cleaning old solder or adhesive from the connection
We take care to avoid twisting or stressing the pipe inside the wall, which could cause a new leak further up the line.
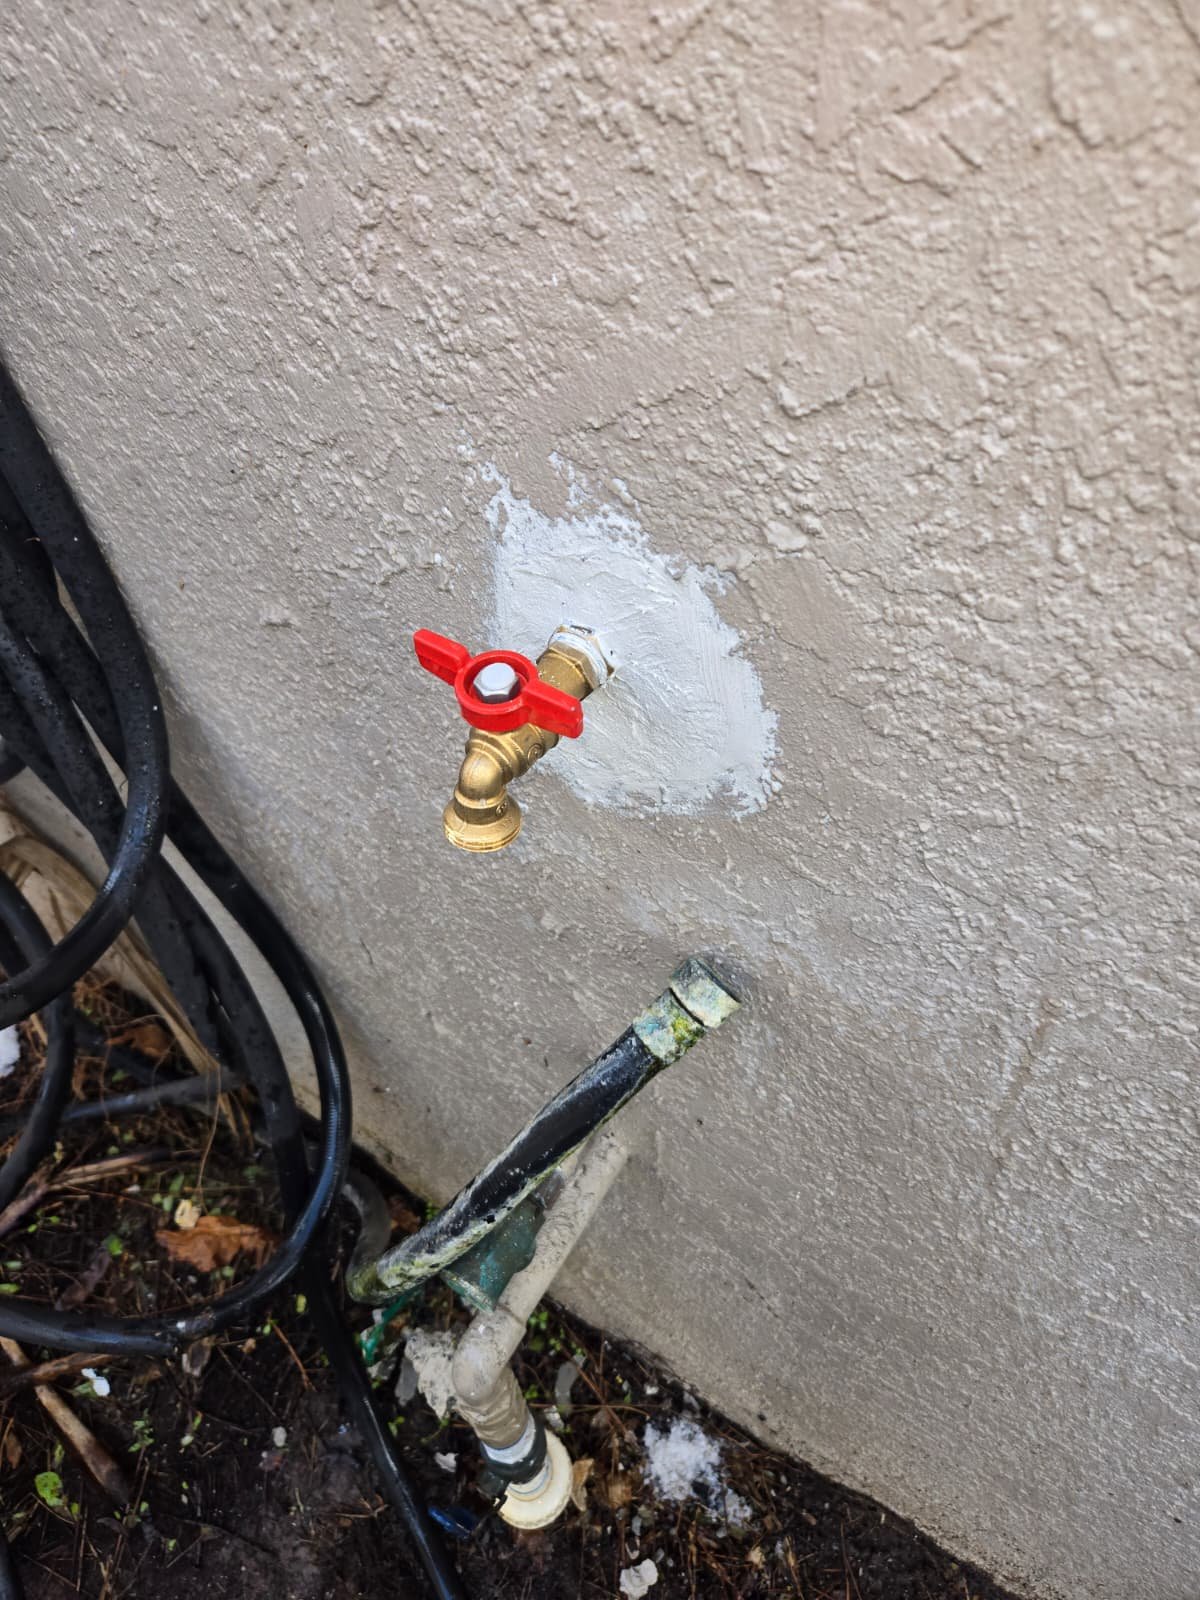
4. Installing the New Hose Bib or Garden Faucet
Next, we install a new, high-quality hose bib built to handle outdoor conditions. Depending on the setup, this can include:
- Threading the new hose bib into a secure fitting with fresh thread sealant or tape
- Using appropriate fittings for copper, CPVC, or PEX connections
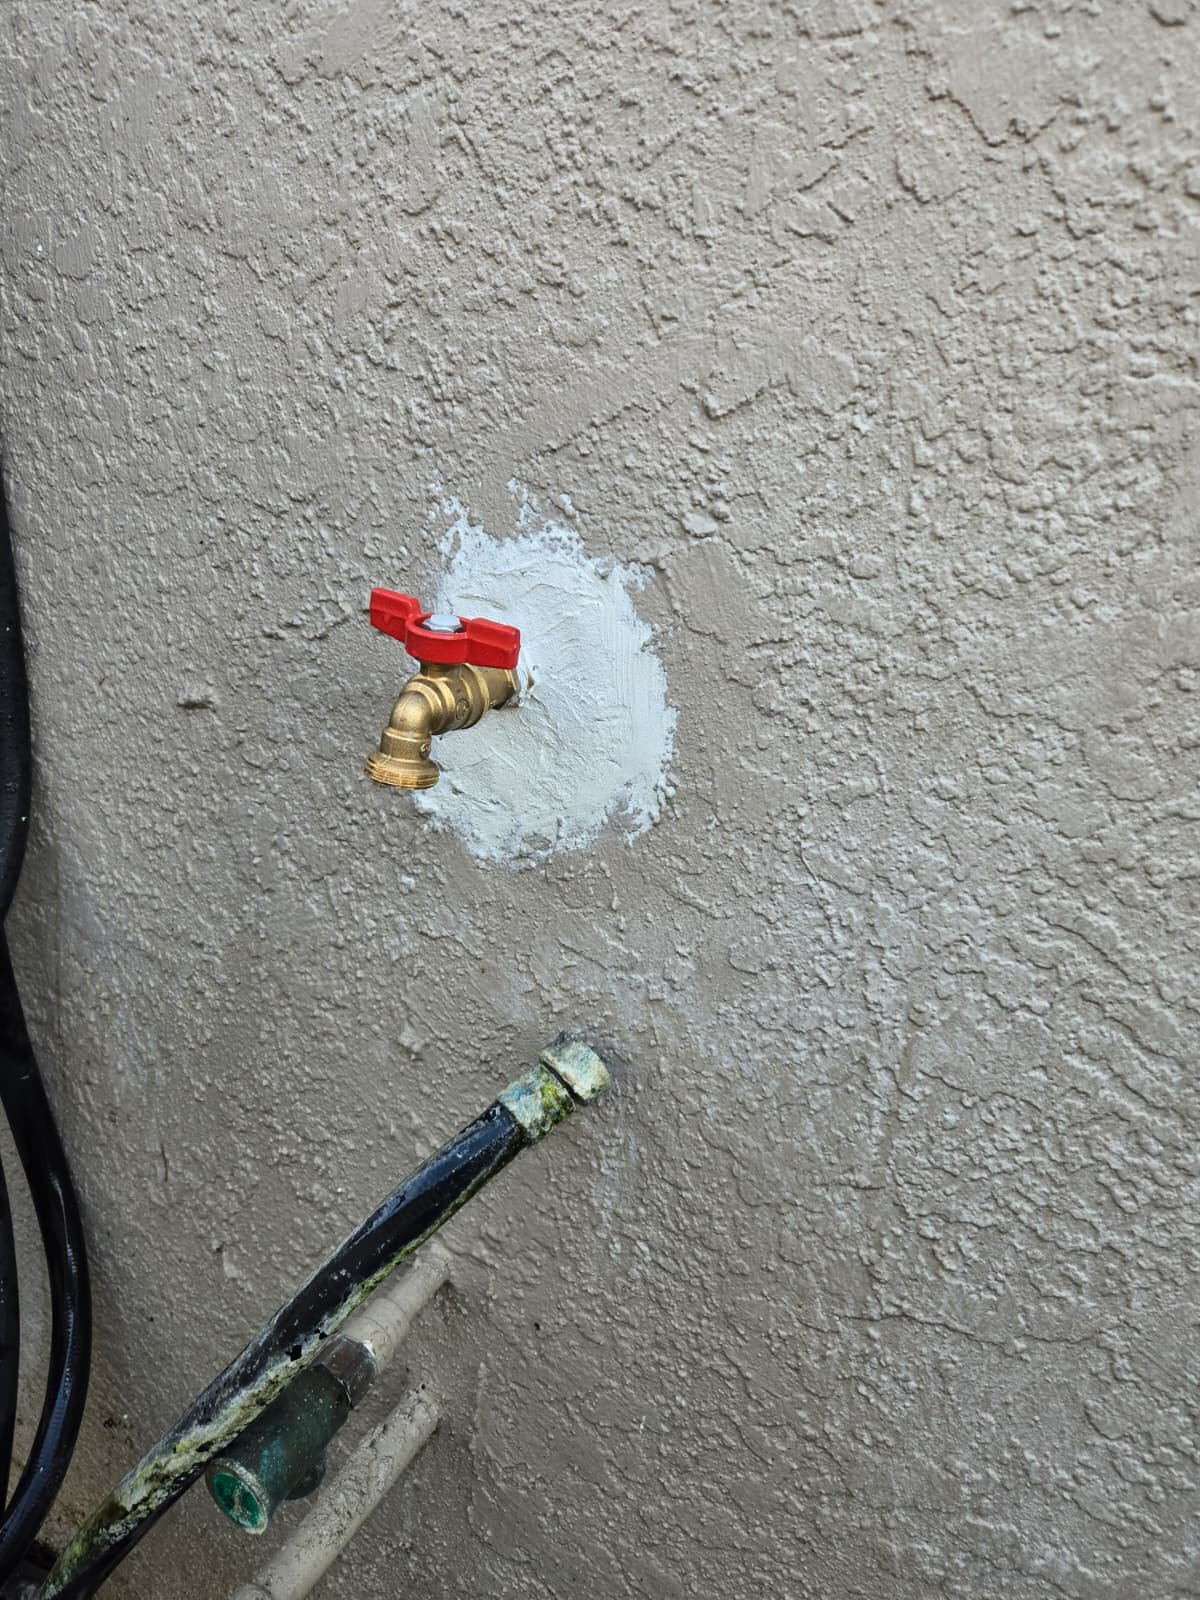
- Ensuring the faucet is properly supported and sits snugly against the wall
- Adding a proper seal where the faucet meets the exterior surface to reduce the chance of water intrusion
Our goal is to give the homeowner a faucet that feels solid when you turn it, doesn’t wobble at the wall, and delivers reliable water flow for years of everyday use.
5. Testing the New Installation for Leaks
Once the new hose bib is in place, we carefully turn the water back on and test the system:
- We check for leaks at the connection behind the wall (if accessible) and at the visible exterior joint.
- We verify that the faucet shuts off properly without dripping.
- We confirm that water flow and pressure to the garden hose meet expectations.
If everything looks good, we walk the homeowner through what we did and what to watch for in the future. Transparency and communication are a big part of how we do plumbing repairs in Ruskin and the greater Tampa Bay area.
Why a Professional Hose Bib Replacement Matters
It’s easy to underestimate an outdoor faucet. After all, it’s a simple fixture you use for watering plants or rinsing the driveway. But when a hose bib fails, it can lead to some expensive problems if it’s not handled correctly:
- Hidden wall leaks: A slow leak inside a block or stucco wall can cause moisture intrusion, mold growth, and structural damage over time.
- Higher water bills: Even a small drip at the hose bib can waste hundreds of gallons of water per month.
- Foundation issues: Constant water pooling near the foundation can weaken soil and promote settling.
- Attracting pests: Damp areas around the exterior wall can attract insects and other pests.
By addressing the worn or leaking hose bib properly—and inspecting the connection behind the wall when needed—we help protect both the plumbing system and the structure of the home.
For homeowners who want a more comprehensive look at their plumbing, we often recommend pairing repairs like this with a whole-home plumbing inspection. It’s a great way to catch small issues before they become big headaches.
What Could Have Happened If the Hose Bib Wasn’t Replaced?
Choosing to replace a failing outdoor faucet isn’t just about convenience; it’s about preventing future damage. If the homeowner in Ruskin had delayed this hose bib replacement, they might have eventually faced:
- Progressive leaks that started small and gradually worsened over months or years.
- Water-damaged stucco or siding, requiring more extensive exterior repairs.
- Moisture inside the wall cavity, potentially leading to mold or mildew.
- Rust or corrosion spreading to other nearby fittings in the plumbing system.
In the humid Gulf Coast climate, staying ahead of leaks and deteriorating fixtures is one of the best ways to keep your home in good shape. That’s why plumbing repair in Ruskin, FL is about more than just fixing what’s visibly broken—it’s about protecting the whole system.
Tips to Care for Outdoor Faucets in Ruskin, FL
Whether you’re right in Ruskin or elsewhere in the Tampa Bay area, a little attention to your hose bibs can go a long way. Here are some practical tips:
- Check for drips regularly: After shutting the faucet off, wait a minute and see if it continues to drip. If it does, it may need service.
- Look at the wall around the faucet: Stains, soft spots, or peeling paint near the faucet can be signs of a hidden leak.
- Don’t over-tighten the handle: Cranking down as hard as you can can actually wear out the internal parts faster.
- Use a quality hose and washer: If water sprays where the garden hose attaches, the issue might be the hose gasket, not the faucet.
- Know where your shutoff is: Before an emergency happens, locate your home’s main water shutoff so you can respond quickly to any leak.
- Schedule a periodic plumbing checkup: Consider a plumbing maintenance plan to keep an eye on fixtures, supply lines, and water heaters.
For homeowners who are unsure whether a problem is “big enough” to call a plumber, we always say: if water is going where it shouldn’t, or you’re losing sleep over it, it’s worth having a professional take a look.
Plumbing Repair Services for Ruskin and the Tampa Bay Area
Although this particular visit focused on a single hose bib replacement, our team provides a wide range of plumbing repair services in Hillsborough County, including Ruskin and the surrounding communities. That includes:
- Outdoor faucet and hose bib repairs and replacements
- Sink and faucet repairs inside the home – learn more about our sink installation and repair services
- Toilet, shower, and tub repairs
- Drain cleaning and line flushing for slow or clogged drains
- Water heater repairs, maintenance, and replacement
- Whole-home plumbing inspections and repipe consultations
If you’re planning a larger plumbing project or just want to understand your options, our guide on how to get started with plumbing services is a helpful resource.
Living in Ruskin, FL: Why Plumbing Upkeep Matters
Ruskin, FL is a beautiful community along the eastern shore of Tampa Bay, known for its access to the water, proximity to parks like Little Manatee River State Park, and easy trips to attractions throughout Hillsborough County. You can learn more about the area on Ruskin’s Wikipedia page or explore the area map on Google Maps.
With our warm, humid climate and frequent storms, plumbing systems around Tampa Bay work a little harder than in some other parts of the country. That means:
- Outdoor fixtures like hose bibs are exposed to sun, salt-tinged air, and heavy rain.
- Soil movement and settling can put extra stress on buried plumbing lines.
- Mineral content in the water can contribute to internal wear in faucets and valves.
Staying on top of minor issues—like a leaky hose bib—helps protect your home from bigger repairs down the road.
Why This Homeowner Chose Home Therapist
From the job notes, we know the homeowner reviewed and approved our estimate before we returned to complete the hose bib replacement. That’s important to us: we never want a client to feel surprised about what we’re doing or why.
Homeowners in Ruskin and throughout the Tampa Bay area often choose Home Therapist Cooling, Heating, and Plumbing because we:
- Explain the problem in plain language instead of using confusing jargon.
- Provide clear estimates before starting work, so you know what to expect.
- Offer options when possible, whether it’s repair versus replacement or doing work in phases.
- Respect your home by working cleanly and communicating about any access we need, such as opening a small section of block or wall.
- Stand behind our workmanship and are available if you have questions after the job is done.
For many of our clients, it’s not just about fixing a leak—it’s about having a trusted team they can call whenever something in the home doesn’t feel right.
When to Call a Plumber for a Hose Bib Issue
If you’re in Ruskin, FL or elsewhere in the Tampa Bay region and you notice any of the following, it’s a good time to give us a call:
- A hose bib that constantly drips or won’t shut off fully
- Water leaking from behind the faucet where it meets the wall
- A sudden drop in water flow at one outdoor faucet only
- Visible rust, green corrosion, or cracking around the faucet body
- Unexplained dampness or staining on the interior wall opposite the hose bib
Sometimes the solution is as simple as replacing an internal washer. Other times, like at this Ruskin home, a full hose bib replacement is the safest path. Our job is to inspect, explain, and help you make the decision that fits your home and your comfort level.
Need Hose Bib Replacement or Plumbing Repair in Ruskin, FL?
Outdoor faucets may be small, but they play a big role in day-to-day life, from keeping your landscaping healthy to helping you enjoy time outside with family. When something’s not right, you deserve a straightforward answer and a lasting fix.
If you’re dealing with a leaking, loose, or unreliable hose bib in Ruskin, FL 33570—or any plumbing issue in your Home—our team at Home Therapist Cooling, Heating, and Plumbing is here to help. We serve homeowners across the Tampa Bay area with honest recommendations and professional repairs.
Call Home Therapist or visit our website to schedule service, request an estimate, or learn more about our plumbing repair and maintenance options. We’ll walk you through what’s going on, what your options are, and what we recommend based on the condition of your system. #HomeTherapist #TheTherapyYourHomeNeeds
When an outdoor faucet starts leaking or barely delivers water, it can turn simple chores like watering the lawn or washing the car into a frustrating mess. At a home in Ruskin, FL 33570, our plumbing team at Home Therapist Cooling, Heating, and Plumbing was called out to take care of a worn-out hose bib (also called a garden faucet). The homeowner needed a reliable, long-term solution, not just another temporary patch.
In this case study, we’ll walk through what was happening at the home, how we approached the hose bib replacement, and what homeowners in Ruskin and throughout the Tampa Bay area should know about outdoor faucet repairs and maintenance.
Customer Problem: What Was Happening at the Home
The client in Ruskin reached out because their outdoor faucet was no longer working the way it should. Although the internal notes simply confirm that the estimate was resent and approved, in our experience there are a few common reasons homeowners call us about hose bibs:
- Constant dripping from the spout, even when the handle is fully closed
- Water spraying from behind the faucet, at the wall connection
- Difficulty turning the handle on or off
- Very low water flow from the garden hose
- Signs of water staining, mold, or soft spots on the wall near the faucet
Any of these symptoms can point to a worn-out hose bib, a failed washer, corrosion inside the valve, or a problem with the pipe feeding the faucet. In Florida’s humid, coastal environment, outdoor fixtures are constantly exposed to sun, rain, and mineral-rich water, so it’s normal for them to wear out over time.
Because the client approved the repair estimate, we scheduled our plumber to perform a Level 1 hose bib replacement. This type of repair focuses on safely removing the old outdoor faucet and installing a new, properly sealed unit.
Our Hose Bib Inspection & Diagnosis Process
When our technician arrived at the Ruskin home, the first step was a quick but thorough inspection. For a hose bib replacement, we typically look at several key areas:
- Condition of the existing hose bib: Is it visibly corroded, cracked, or loose?
- Leak source: Is the leak coming from the spout, the handle, or the wall connection?
- Wall and structure around the faucet: Is it stucco, block, brick, siding, or another material?
- Water shutoff options: Is there a local shutoff for that line, or do we need to use the main shutoff for the home?
- Pipe material and routing: Copper, CPVC, PEX, or galvanized, and how it’s tied into the home’s plumbing system.
These details help us determine whether a straightforward hose bib swap will be enough, or whether we’ll need to open a small access hole in the wall or block to reach and replace the connection behind the faucet. As we explain to all our clients up front, sometimes the only way to do a safe, lasting replacement is to get to the connection behind the wall. In that case, we handle the plumbing work and leave any concrete, stucco, or wall patching to the appropriate trade afterward.
In Ruskin, especially in communities near the water and around Little Manatee River, we see a lot of block and stucco exteriors. Outdoor plumbing penetrations in these walls must be handled carefully to prevent hidden leaks that could damage the structure over time.
Step-by-Step: How We Replaced the Hose Bib
Every home is a little different, but the core steps of a hose bib replacement in Ruskin, FL look something like this:
1. Shutting Off the Water Safely
We start by shutting off water to the line that supplies the outdoor faucet. Depending on the plumbing layout, this might be:
- A dedicated shutoff valve near the hose bib
- A nearby branch shutoff in a utility room or garage
- The main water shutoff for the home if no local isolation valve exists
After closing the appropriate valve, we open the hose bib and sometimes a nearby indoor faucet to relieve pressure and drain any remaining water in the line.
2. Evaluating the Connection Behind the Wall
Once the water is off, we gently remove the existing hose bib. This tells us a lot about what’s going on behind the wall:
- We check the threads and connection point for corrosion or damage.
- We confirm whether the faucet screws into an elbow or is soldered/bonded to the pipe.
- We look for movement in the pipe, which could indicate a loose or unsupported connection inside the wall.
If the connection is accessible and in good condition, we can often replace the hose bib directly without opening the wall. However, if the connection is badly corroded, cracked, or recessed too far into the block or stucco, we sometimes need to create a small access opening to safely replace the fitting and ensure there are no hidden leaks.
As our estimate description clearly states, when an access hole is required in block or concrete, we handle the plumbing portion only and do not patch the concrete or stucco afterward. This keeps pricing transparent and ensures the right trade (such as a mason or stucco specialist) can restore the wall’s finish to match the home.
3. Removing the Old Hose Bib
With everything exposed and safe, we remove the old hose bib using the appropriate tools. This might involve:
- Unscrewing a threaded faucet from a female adapter
- Cutting out a damaged section of copper or CPVC pipe
- Cleaning old solder or adhesive from the connection
We take care to avoid twisting or stressing the pipe inside the wall, which could cause a new leak further up the line.
4. Installing the New Hose Bib or Garden Faucet
Next, we install a new, high-quality hose bib built to handle outdoor conditions. Depending on the setup, this can include:
- Threading the new hose bib into a secure fitting with fresh thread sealant or tape
- Using appropriate fittings for copper, CPVC, or PEX connections
- Ensuring the faucet is properly supported and sits snugly against the wall
- Adding a proper seal where the faucet meets the exterior surface to reduce the chance of water intrusion
Our goal is to give the homeowner a faucet that feels solid when you turn it, doesn’t wobble at the wall, and delivers reliable water flow for years of everyday use.
5. Testing the New Installation for Leaks
Once the new hose bib is in place, we carefully turn the water back on and test the system:
- We check for leaks at the connection behind the wall (if accessible) and at the visible exterior joint.
- We verify that the faucet shuts off properly without dripping.
- We confirm that water flow and pressure to the garden hose meet expectations.
If everything looks good, we walk the homeowner through what we did and what to watch for in the future. Transparency and communication are a big part of how we do plumbing repairs in Ruskin and the greater Tampa Bay area.
Why a Professional Hose Bib Replacement Matters
It’s easy to underestimate an outdoor faucet. After all, it’s a simple fixture you use for watering plants or rinsing the driveway. But when a hose bib fails, it can lead to some expensive problems if it’s not handled correctly:
- Hidden wall leaks: A slow leak inside a block or stucco wall can cause moisture intrusion, mold growth, and structural damage over time.
- Higher water bills: Even a small drip at the hose bib can waste hundreds of gallons of water per month.
- Foundation issues: Constant water pooling near the foundation can weaken soil and promote settling.
- Attracting pests: Damp areas around the exterior wall can attract insects and other pests.
By addressing the worn or leaking hose bib properly—and inspecting the connection behind the wall when needed—we help protect both the plumbing system and the structure of the home.
For homeowners who want a more comprehensive look at their plumbing, we often recommend pairing repairs like this with a whole-home plumbing inspection. It’s a great way to catch small issues before they become big headaches.
What Could Have Happened If the Hose Bib Wasn’t Replaced?
Choosing to replace a failing outdoor faucet isn’t just about convenience; it’s about preventing future damage. If the homeowner in Ruskin had delayed this hose bib replacement, they might have eventually faced:
- Progressive leaks that started small and gradually worsened over months or years.
- Water-damaged stucco or siding, requiring more extensive exterior repairs.
- Moisture inside the wall cavity, potentially leading to mold or mildew.
- Rust or corrosion spreading to other nearby fittings in the plumbing system.
In the humid Gulf Coast climate, staying ahead of leaks and deteriorating fixtures is one of the best ways to keep your home in good shape. That’s why plumbing repair in Ruskin, FL is about more than just fixing what’s visibly broken—it’s about protecting the whole system.
Tips to Care for Outdoor Faucets in Ruskin, FL
Whether you’re right in Ruskin or elsewhere in the Tampa Bay area, a little attention to your hose bibs can go a long way. Here are some practical tips:
- Check for drips regularly: After shutting the faucet off, wait a minute and see if it continues to drip. If it does, it may need service.
- Look at the wall around the faucet: Stains, soft spots, or peeling paint near the faucet can be signs of a hidden leak.
- Don’t over-tighten the handle: Cranking down as hard as you can can actually wear out the internal parts faster.
- Use a quality hose and washer: If water sprays where the garden hose attaches, the issue might be the hose gasket, not the faucet.
- Know where your shutoff is: Before an emergency happens, locate your home’s main water shutoff so you can respond quickly to any leak.
- Schedule a periodic plumbing checkup: Consider a plumbing maintenance plan to keep an eye on fixtures, supply lines, and water heaters.
For homeowners who are unsure whether a problem is “big enough” to call a plumber, we always say: if water is going where it shouldn’t, or you’re losing sleep over it, it’s worth having a professional take a look.
Plumbing Repair Services for Ruskin and the Tampa Bay Area
Although this particular visit focused on a single hose bib replacement, our team provides a wide range of plumbing repair services in Hillsborough County, including Ruskin and the surrounding communities. That includes:
- Outdoor faucet and hose bib repairs and replacements
- Sink and faucet repairs inside the home – learn more about our sink installation and repair services
- Toilet, shower, and tub repairs
- Drain cleaning and line flushing for slow or clogged drains
- Water heater repairs, maintenance, and replacement
- Whole-home plumbing inspections and repipe consultations
If you’re planning a larger plumbing project or just want to understand your options, our guide on how to get started with plumbing services is a helpful resource.
Living in Ruskin, FL: Why Plumbing Upkeep Matters
Ruskin, FL is a beautiful community along the eastern shore of Tampa Bay, known for its access to the water, proximity to parks like Little Manatee River State Park, and easy trips to attractions throughout Hillsborough County. You can learn more about the area on Ruskin’s Wikipedia page or explore the area map on Google Maps.
With our warm, humid climate and frequent storms, plumbing systems around Tampa Bay work a little harder than in some other parts of the country. That means:
- Outdoor fixtures like hose bibs are exposed to sun, salt-tinged air, and heavy rain.
- Soil movement and settling can put extra stress on buried plumbing lines.
- Mineral content in the water can contribute to internal wear in faucets and valves.
Staying on top of minor issues—like a leaky hose bib—helps protect your home from bigger repairs down the road.
Why This Homeowner Chose Home Therapist
From the job notes, we know the homeowner reviewed and approved our estimate before we returned to complete the hose bib replacement. That’s important to us: we never want a client to feel surprised about what we’re doing or why.
Homeowners in Ruskin and throughout the Tampa Bay area often choose Home Therapist Cooling, Heating, and Plumbing because we:
- Explain the problem in plain language instead of using confusing jargon.
- Provide clear estimates before starting work, so you know what to expect.
- Offer options when possible, whether it’s repair versus replacement or doing work in phases.
- Respect your home by working cleanly and communicating about any access we need, such as opening a small section of block or wall.
- Stand behind our workmanship and are available if you have questions after the job is done.
For many of our clients, it’s not just about fixing a leak—it’s about having a trusted team they can call whenever something in the home doesn’t feel right.
When to Call a Plumber for a Hose Bib Issue
If you’re in Ruskin, FL or elsewhere in the Tampa Bay region and you notice any of the following, it’s a good time to give us a call:
- A hose bib that constantly drips or won’t shut off fully
- Water leaking from behind the faucet where it meets the wall
- A sudden drop in water flow at one outdoor faucet only
- Visible rust, green corrosion, or cracking around the faucet body
- Unexplained dampness or staining on the interior wall opposite the hose bib
Sometimes the solution is as simple as replacing an internal washer. Other times, like at this Ruskin home, a full hose bib replacement is the safest path. Our job is to inspect, explain, and help you make the decision that fits your home and your comfort level.
Need Hose Bib Replacement or Plumbing Repair in Ruskin, FL?
Outdoor faucets may be small, but they play a big role in day-to-day life, from keeping your landscaping healthy to helping you enjoy time outside with family. When something’s not right, you deserve a straightforward answer and a lasting fix.
If you’re dealing with a leaking, loose, or unreliable hose bib in Ruskin, FL 33570—or any plumbing issue in your home—our team at Home Therapist Cooling, Heating, and Plumbing is here to help. We serve homeowners across the Tampa Bay area with honest recommendations and professional repairs.
Call Home Therapist or visit our website to schedule service, request an estimate, or learn more about our plumbing repair and maintenance options. We’ll walk you through what’s going on, what your options are, and what we recommend based on the condition of your system. #HomeTherapist #TheTherapyYourHomeNeeds