

How to Improve Home Heating for Maximum Comfort and Savings
Every Tampa Bay homeowner knows the frustration of rising energy bills when your home never feels quite cozy enough. Cold drafts and uneven warmth often point to hidden issues in your heating system or insulation. By focusing on a thorough assessment and addressing problem spots early, you can unlock greater comfort while lowering costs. This guide highlights key steps for measuring your current heating efficiency so you spend wisely and keep your family warm through the Florida winter.
Table of Contents
- Step 1: Assess Current Heating System and Insulation
- Step 2: Upgrade Equipment and Seal Air Leaks
- Step 3: Optimize Thermostat Settings and Controls
- Step 4: Verify Efficiency and Monitor Performance
Quick Summary
| Key Insight | Explanation |
|---|---|
| 1. Assess Your Current System | Understand your heating system and insulation to prioritize improvements. Document age, type, and condition. |
| 2. Upgrade Equipment for Efficiency | Replace old units with high-efficiency models to reduce energy consumption by 20-30 percent. |
| 3. Seal Air Leaks Effectively | Prevent heated air from escaping through gaps; air sealing is often cheaper than equipment upgrades. |
| 4. Optimize Thermostat Settings | Adjust thermostat settings and consider smart models to enhance energy savings by up to 15 percent. |
| 5. Monitor Performance Regularly | Track your utility bills and system performance post-upgrade to ensure expected savings and catch issues early. |
Step 1: Assess Current Heating System and Insulation
Before making any upgrades, you need to understand what you’re working with. Your current heating system and insulation determine your comfort level and energy costs. A proper assessment reveals exactly where improvements will deliver the biggest impact.
Start by identifying your heating system type. Is it a furnace, heat pump, boiler, or something else? Look at the equipment in your basement, attic, or utility closet. Check the age of your system by finding the manufacturer’s label with the installation date or model number. This tells you whether your system is near the end of its lifespan.
Check these heating system details:
- Age and condition of your furnace or heat pump
- Fuel type (natural gas, oil, electric)
- Whether the system has been regularly serviced
- Current thermostat type (manual, programmable, or smart)
- Visible damage, rust, or leaking connections
Next, examine your insulation. Walk through your attic if accessible. Look at the batts, blankets, or blown-in insulation covering the ceiling joists. Touch it carefully to feel the thickness and type. In Tampa Bay’s climate, you’ll want at least R-30 to R-38 insulation in your attic, depending on your roof orientation and sun exposure.
Check your walls and basement too. Older Tampa homes often lack wall insulation entirely. Basement rim joists are frequently uninsulated, letting cold air seep directly into living spaces. Understanding heating system fundamentals helps you evaluate how well your current setup performs.
Here’s a quick summary of popular heating system types and their typical lifespan:
| Heating System Type | Typical Lifespan | Common Fuel | Replacement Benefits |
|---|---|---|---|
| Furnace | 15-20 years | Gas or oil | Lower energy costs |
| Heat Pump | 10-15 years | Electricity | Improved efficiency |
| Boiler | 20-30 years | Gas or oil | Even heat distribution |
| Ductless Mini-Split | 15-20 years | Electricity | Targeted comfort zones |
Look for air leaks around windows, doors, and electrical outlets. Feel for drafts with your hand. These gaps waste energy faster than poor insulation does. Regional consumption data shows that proper insulation and heating efficiency directly impact your monthly bills.
Inspect these insulation trouble spots:
- Attic insulation depth and condition
- Basement rim joists and band board areas
- Crawlspace vents and exposed pipes
- Gaps around exterior doors and windows
- Electrical outlet boxes and light fixtures in exterior walls
Understanding your current heating system and insulation is the foundation for smart upgrades that save money and improve comfort.
Document what you find. Take photos of your furnace nameplate, attic insulation, and any problem areas. This information becomes invaluable when discussing upgrades with professionals. You can also measure your attic insulation depth using a ruler dropped into the fiberglass.
Pro tip: Request a professional energy audit from a certified technician who can measure actual insulation R-values, perform blower door testing to quantify air leaks, and provide a detailed report showing exactly where to invest your money for maximum returns.
Step 2: Upgrade Equipment and Seal Air Leaks
Now that you understand your current system, it’s time to make strategic upgrades. The biggest energy savings come from combining equipment improvements with air sealing. These two actions work together to maximize comfort and minimize your heating bills.
Start by evaluating whether your heating equipment needs replacement. If your furnace or heat pump is over 15 years old, upgrading to a modern high-efficiency model will pay dividends. Modern units use 20 to 30 percent less energy than older systems. Look for units with high AFUE (Annual Fuel Utilization Efficiency) ratings of 95 percent or higher for furnaces, or HSPF (Heating Seasonal Performance Factor) ratings above 8 for heat pumps.
Consider these equipment upgrades:
- High-efficiency furnace or heat pump replacement
- Smart thermostat installation for better temperature control
- Ductless mini-split systems for targeted heating
- Improved ventilation fans to reduce moisture and drafts
After upgrading equipment, seal air leaks to prevent heated air from escaping. Air leakage wastes more energy than you might think. Start with the biggest culprits: basement rim joists, attic penetrations, and gaps around windows and doors.
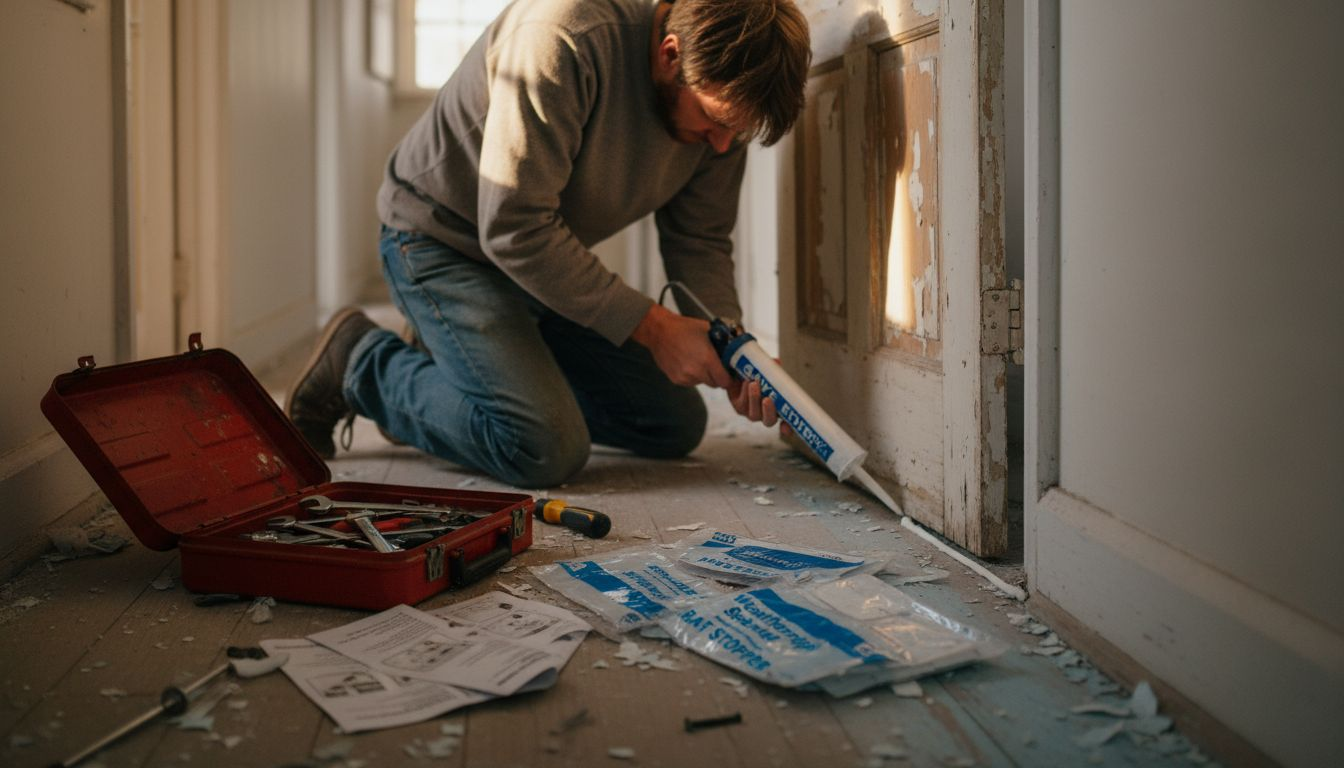
Use caulk for small gaps and spray foam for larger holes. Air sealing around plumbing penetrations prevents energy losses where pipes pass through walls and ceilings. Pay special attention to electrical outlets, light fixtures, and ductwork connections in your attic and basement.
Don’t forget your ductwork itself. Leaky ducts lose conditioned air before it reaches your rooms. Detecting HVAC leaks early prevents wasted heating energy and ensures efficient system performance.
Target these air sealing priorities:
- Basement rim joists and band board areas
- Attic penetrations around pipes, wires, and vents
- Gaps around exterior doors and windows
- Ductwork connections in unconditioned spaces
- Electrical outlet boxes in exterior walls
- Plumbing and gas line penetrations
Sealing air leaks costs far less than replacing equipment, yet delivers immediate energy savings that compound over time.
When replacing your heating system, coordinate the installation with air sealing work. Proper sequencing ensures your new equipment operates at peak efficiency. A sealed, well-insulated home makes your new furnace or heat pump work smarter, not harder.
Pro tip: Have your HVAC contractor perform a post-upgrade blower door test to confirm all air leaks have been properly sealed and your system is operating at maximum efficiency.
Step 3: Optimize Thermostat Settings and Controls
Your thermostat is the command center for your entire heating system. Getting it right means comfort and savings work hand in hand. Small adjustments to your setpoints can reduce energy consumption by 10 to 15 percent without sacrificing comfort.
Start by understanding how thermostats work. A thermostat maintains your desired temperature by turning your heating system on and off. Heating and cooling setpoints determine when your system activates. Setting your winter heating point to 68 degrees Fahrenheit during occupied hours is a solid baseline for Tampa homes.
Consider lowering your setpoint by just 2 to 3 degrees when you’re away or sleeping. This single change saves roughly 1 to 3 percent on your heating bill per degree per day. Over a winter season, those small reductions add up significantly.
Adjust these thermostat settings:
- Daytime occupied setpoint (68 to 70 degrees Fahrenheit)
- Nighttime sleeping setpoint (66 to 68 degrees Fahrenheit)
- Away or vacant setpoint (62 to 65 degrees Fahrenheit)
- Hold mode to prevent frequent adjustments
If you have a manual thermostat, upgrading to a programmable or smart model transforms how efficiently your system runs. Modern smart thermostats learn your patterns and automatically adjust temperatures based on your schedule. They also provide real-time energy usage data so you see the impact of your choices.
Compare thermostat options to make smarter heating choices:
| Thermostat Type | Control Features | Energy Savings Potential | Best for |
|---|---|---|---|
| Manual | Basic on/off control | Limited | Fixed schedules |
| Programmable | Scheduled adjustments | Moderate (up to 10%) | Regular routines |
| Smart | Adaptive learning, app access | Highest (up to 15%) | Variable schedules |
Smart thermostat algorithms optimize building microclimates by learning your temperature preferences and adjusting operations to balance comfort with energy savings. This intelligent learning means less guesswork on your part.
Place your thermostat on an interior wall away from direct sunlight, drafts, and heat sources. A thermostat in a cold spot or near a window will read temperatures incorrectly and trigger unnecessary heating. Location matters more than most homeowners realize.
Avoid placing thermostats near:
- Windows or exterior doors
- Heat-generating appliances
- Direct sunlight or lamps
- Cold air return vents
- Exterior walls
Proper thermostat placement and programming can reduce your heating costs as much as upgrading equipment itself.
For Tampa’s climate where heating needs are moderate but variable, a programmable schedule prevents wasting energy when nobody is home. Set your program to warm your home just before you arrive and cool it back down when you leave.
Pro tip: Install a smart thermostat with mobile app access so you can adjust temperatures remotely if your schedule changes unexpectedly, preventing unnecessary heating while maintaining comfort when you return home.
Step 4: Verify Efficiency and Monitor Performance
Your upgrades are in place. Now it’s time to confirm they’re actually delivering the savings you expected. Monitoring your heating system’s performance reveals whether everything is working as designed and helps you catch problems early.

Start by establishing a baseline of your current energy usage. Check your utility bills from the past year to understand your heating consumption patterns. Record your baseline kilowatt hours or therms during peak winter months. This gives you a starting point to measure against.
After implementing your improvements, compare your new bills to your baseline. A well-executed upgrade typically reduces heating costs by 15 to 30 percent depending on the scope of work. Track your consumption month by month for at least one full winter season.
Monitor these performance indicators:
- Monthly utility bills compared to previous year
- Thermostat run-time and temperature consistency
- System startup frequency and cycling patterns
- Indoor temperature stability throughout your home
- Energy usage reports from smart thermostat apps
Use performance measurement and verification protocols to assess your heating improvements accurately. These standardized methodologies help you distinguish between actual efficiency gains and seasonal variations in weather. Proper verification ensures your investments are performing as promised.
Watch for warning signs that indicate problems. If your heating bill jumps unexpectedly or your system cycles constantly, something is wrong. Check your thermostat settings first. Then inspect visible ductwork for disconnections or leaks.
Modern HVAC systems benefit from continuous monitoring through fault detection and diagnostics technology. This technology uses data analytics to identify performance issues before they become expensive problems. Many smart thermostats now include basic fault detection capabilities.
Schedule these maintenance checks:
- Monthly thermostat performance review
- Quarterly filter inspection and replacement
- Annual professional system inspection and cleaning
- Seasonal ductwork visual inspection for leaks
- Yearly efficiency comparison against baseline data
Consistent monitoring catches efficiency problems early, preventing wasted energy and protecting your investment.
Keep detailed records of all maintenance and repairs. Document filter changes, service calls, and any adjustments made to your system. Over time, this record helps you spot patterns and plan for future maintenance needs.
Pro tip: Set a monthly reminder to photograph your utility bills and thermostat’s energy report so you build a documented record that clearly shows your savings and allows you to detect any unexpected changes in performance immediately.
Upgrade Your Home Heating for Lasting Comfort and Savings
Struggling with high heating costs and uneven warmth in your home? This article showed how assessing your current heating system and sealing air leaks can dramatically improve your comfort and reduce energy bills. Whether it is upgrading to a high-efficiency furnace or installing a smart thermostat, you deserve expert guidance tailored to Tampa Bay’s unique climate conditions.
Take the next step with Home Therapist Cooling, Heating, and Plumbing. Our certified technicians specialize in HVAC solutions designed to optimize your heating system’s performance. Explore real customer experiences in our Case Studies Archives and discover how we deliver reliable, energy-saving heating upgrades. Call (813) 343-2212 for a personalized consultation that makes your home truly comfortable and energy efficient.
Frequently Asked Questions
How can I assess my current heating system and insulation?
Start by identifying the type and age of your heating system, checking for visible damage and service history. Next, inspect your insulation in the attic and walls to determine if it meets recommended R-values for efficiency.
What are the benefits of upgrading my heating equipment?
Upgrading to a high-efficiency heating system can reduce your energy costs by 20 to 30 percent. Look for units with high Annual Fuel Utilization Efficiency (AFUE) ratings to maximize savings and comfort.
How can I seal air leaks effectively in my home?
Use caulk for smaller gaps and spray foam for larger holes to seal potential air leaks around windows, doors, and ductwork. Sealing these leaks can improve your heating efficiency and reduce energy waste.
What thermostat settings can help me save on heating costs?
Setting your thermostat to 68 degrees Fahrenheit during the day and lowering it by 2 to 3 degrees at night can save 1 to 3 percent on your heating bill for each degree lowered. Consider upgrading to a programmable or smart thermostat for greater control and energy savings.
How can I verify the efficiency of my heating upgrades?
Monitor your utility bills to compare energy usage before and after upgrades. Track this data for at least one winter season to identify savings, aiming for a reduction of 15 to 30 percent in heating costs.
What maintenance should I schedule after upgrading my heating system?
Regular maintenance includes monthly filter inspections, quarterly reviews of thermostat performance, and annual professional system checkups. Consistent monitoring helps catch efficiency issues early and prolongs the life of your heating system.
About This Guide
Written and reviewed by the Home Therapist Cooling, Heating & Plumbing team, a family-owned Tampa Bay HVAC and plumbing company serving the area since 2011. Our licensed techs hold Florida HVAC license CAC1819196 and Plumbing license CFC1431159, with over 1,100 five-star reviews across Tampa, St. Petersburg, Clearwater, Wesley Chapel, Lutz, Riverview, Brandon, Valrico, Apollo Beach, Palm Harbor, Land O’ Lakes, Plant City, New Port Richey, and surrounding Tampa Bay zip codes.
Honest pricing: $279 labor minimum. Upfront quotes, no high-pressure sales, no surprise fees.
Questions about your home? Call (813) 343-2212 for a real tech, or request a callback. Available 7 days a week including evenings and weekends for emergencies.
Recommended
- Affordable Heating and Air: My Guide to Quality Comfort Home Therapist Cooling, Heating, and Plumbing
- Optimizing for Water Heater Replacement Services: Inquire about Replacement Options for Heating Systems Home Therapist Cooling, Heating, and Plumbing
- Role of Heating Systems – Comfort and Efficiency at Home
- HVAC Retrofitting Explained: Enhancing Home Comfort – Home Therapist Cooling, Heating, and Plumbing
- Spray Foam Removal London, Brighton & Portsmouth | Mortgage Approved | £2,500+ | Free Quote
More Related Articles
- 7-Hour Toilet Repair and AC Maintenance Visit on Eastwyck Dr: Tampa, FL 33647
- Ductwork Replacement and R6 Flex Duct Installation in Tampa, FL 33617
- AC Performance Check on El Turco Ct: HVAC Service Visit in Sun City Center, FL 33573
- A $89 Tune-Up on Villespin De Avila: Cooling and Heating Maintenance in Tampa, FL 33613
- Air Conditioner Installation Repair Tampa FL Bay FL Services Review from Bonnie Wakefield


