

Garbage Disposal Not Working: Reset, Unjam, Fix In Minutes
You flip the switch and nothing happens, or worse, you hear a low hum that tells you something’s stuck. A garbage disposal not working is one of those kitchen problems that feels urgent, especially when food scraps are piling up in the sink. The good news? Most disposal issues are surprisingly simple to fix yourself, often in under ten minutes with tools you already have at home.
Before you call for backup, this guide walks you through the most common causes, from a tripped reset button to a jammed flywheel, and gives you step-by-step instructions to get things grinding again. We’ll also cover the warning signs that mean it’s time to stop troubleshooting and bring in a professional.
At Home Therapist, we’ve handled thousands of plumbing calls across the Greater Tampa Bay Area since 2011, and garbage disposal issues are among the most frequent. Our licensed technicians see the same handful of problems over and over, so we put this guide together based on real field experience. If your DIY fix doesn’t do the trick, we offer same-day service with upfront pricing, no surprises.
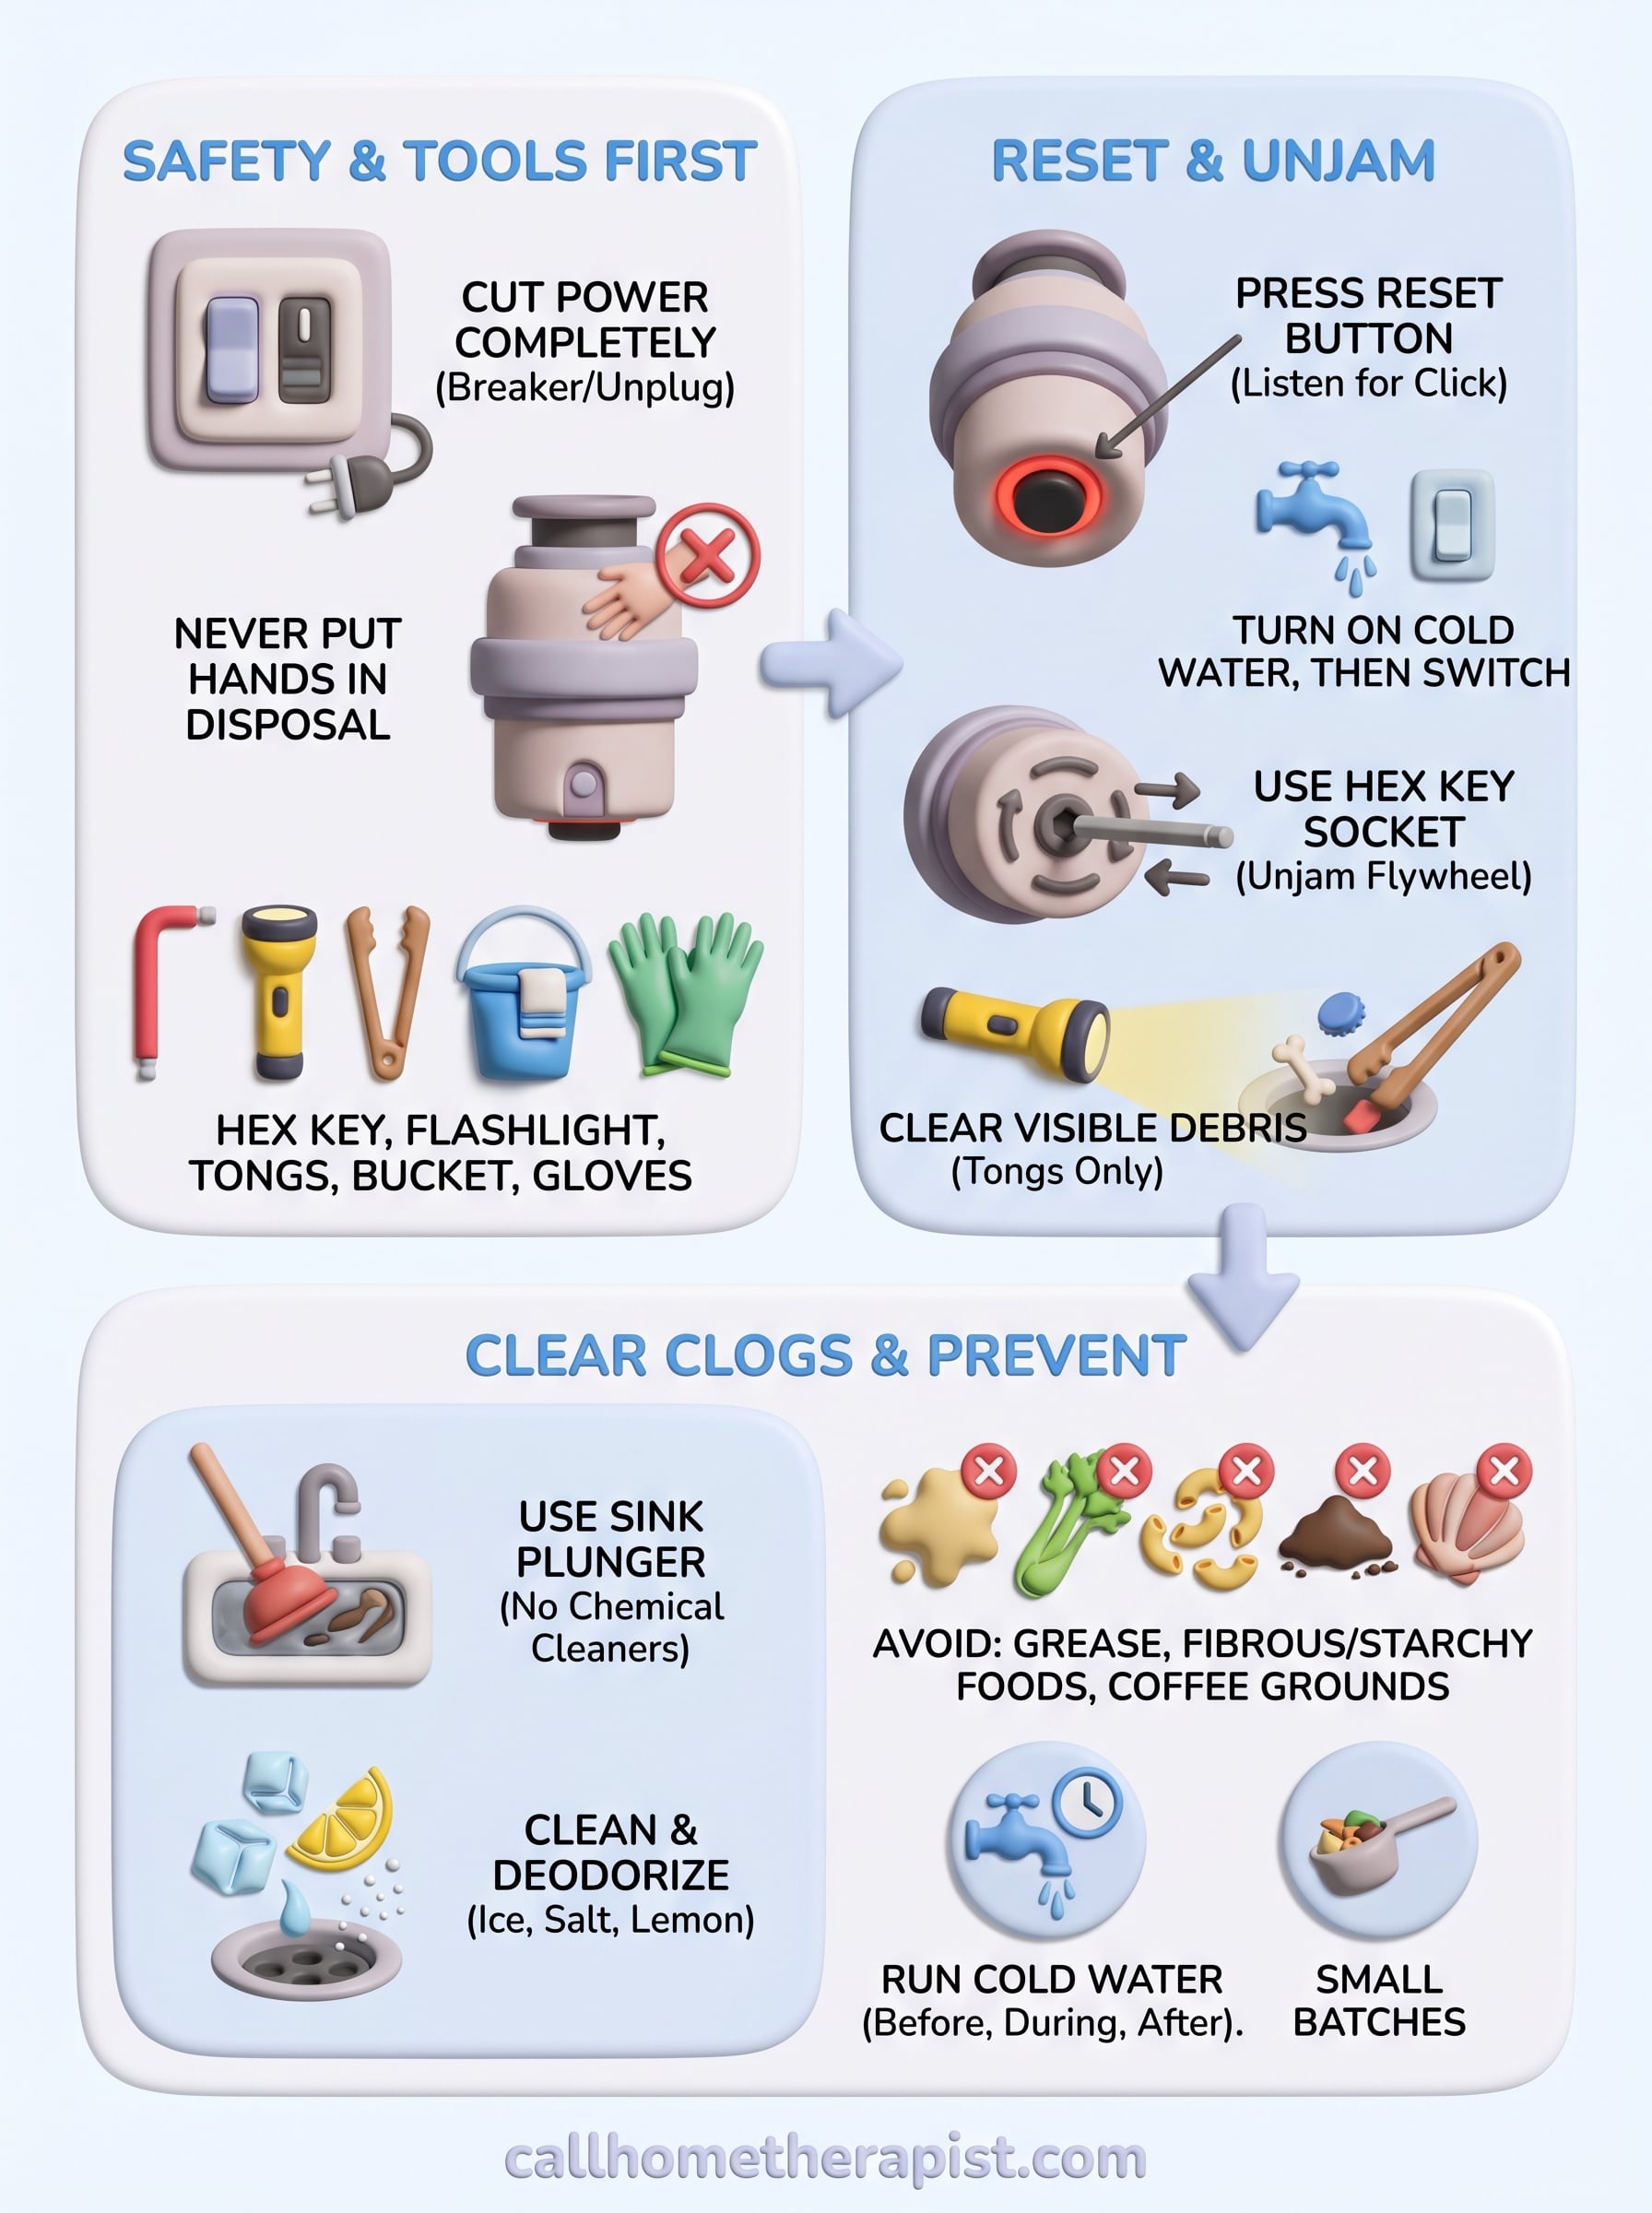
Safety first and tools to grab
Before you touch anything inside or under your disposal, cut the power completely. Disposals combine spinning metal components with electrical connections, and reaching in without disconnecting power puts your fingers at real risk. Whether your garbage disposal not working situation turns out to be a quick fix or something more involved, safety always comes before any troubleshooting step. Taking 60 seconds to confirm the unit is de-energized protects you from the one scenario that has no easy fix.
Never put your hand into the disposal opening, even when the unit appears completely dead and silent.
Cut the power the right way
You have two straightforward options for cutting power. The easiest method is to unplug the disposal directly from the outlet inside the cabinet under your sink. Most residential units connect to a standard 120-volt outlet that you can reach without any tools at all.
If your disposal is hardwired to your home’s electrical system, head to your breaker panel and flip the dedicated circuit for the kitchen or disposal. Place a strip of tape over the breaker so no one accidentally flips it back on while you’re working under the sink.
Tools to have ready
You don’t need a full toolbox for this job. Gathering everything before you start keeps the repair moving and prevents you from stopping mid-task with wet hands. Here’s what to have within reach:
- Allen wrench (1/4-inch hex key): fits the manual unjamming socket on the bottom of most disposals
- Flashlight or phone light: lets you see inside the drain opening without reaching in blind
- Wooden spoon or tongs: useful for nudging visible debris safely
- Bucket and old towels: important when checking connections under the sink for leaks
- Rubber gloves: protect your hands from food waste and standing water
Having these items ready before you start means you can move through each step without interruption.
Step 1. Check power and hit the reset button
A garbage disposal not working after you flip the switch usually points to one thing: a loss of power. Before assuming anything is broken, confirm the unit is actually getting electricity. Start at the outlet under your sink and make sure the disposal’s plug sits firmly in the socket. A loose connection cuts power just as effectively as a tripped breaker.
Look for the reset button
The reset button is a small red or black button on the bottom of your disposal unit. When the motor overloads from too much food waste, a thermal overload trips and pops this button out about a quarter inch. Reach under the sink, feel for the button, and press it in firmly until you hear or feel a click.

If the reset button pops out again immediately after you press it, the motor is still overloaded or jammed, and you need to move to Step 2 before trying the power again.
Test the switch
After resetting, turn the cold water on first, then flip the disposal switch. Running water helps the motor engage smoothly and flushes any loose debris down the drain. If the unit hums but does not spin, move on to the next step.
Step 2. Unjam a humming disposal in minutes
A humming disposal means the motor is running but the flywheel is stuck. This is the most common reason a garbage disposal not working issue persists even after you’ve hit the reset button. Food waste, a small bone fragment, or a foreign object like a bottle cap can lock the grinding plate completely. You need to free it manually before the motor can spin again.
Use the hex key socket
Grab your 1/4-inch Allen wrench and locate the center of the bottom of the disposal unit. You’ll find a small hex socket built into every modern disposal for exactly this purpose. Insert the wrench and work it back and forth in both directions until the resistance breaks and the flywheel moves freely. This typically takes 30 to 60 seconds of steady motion.
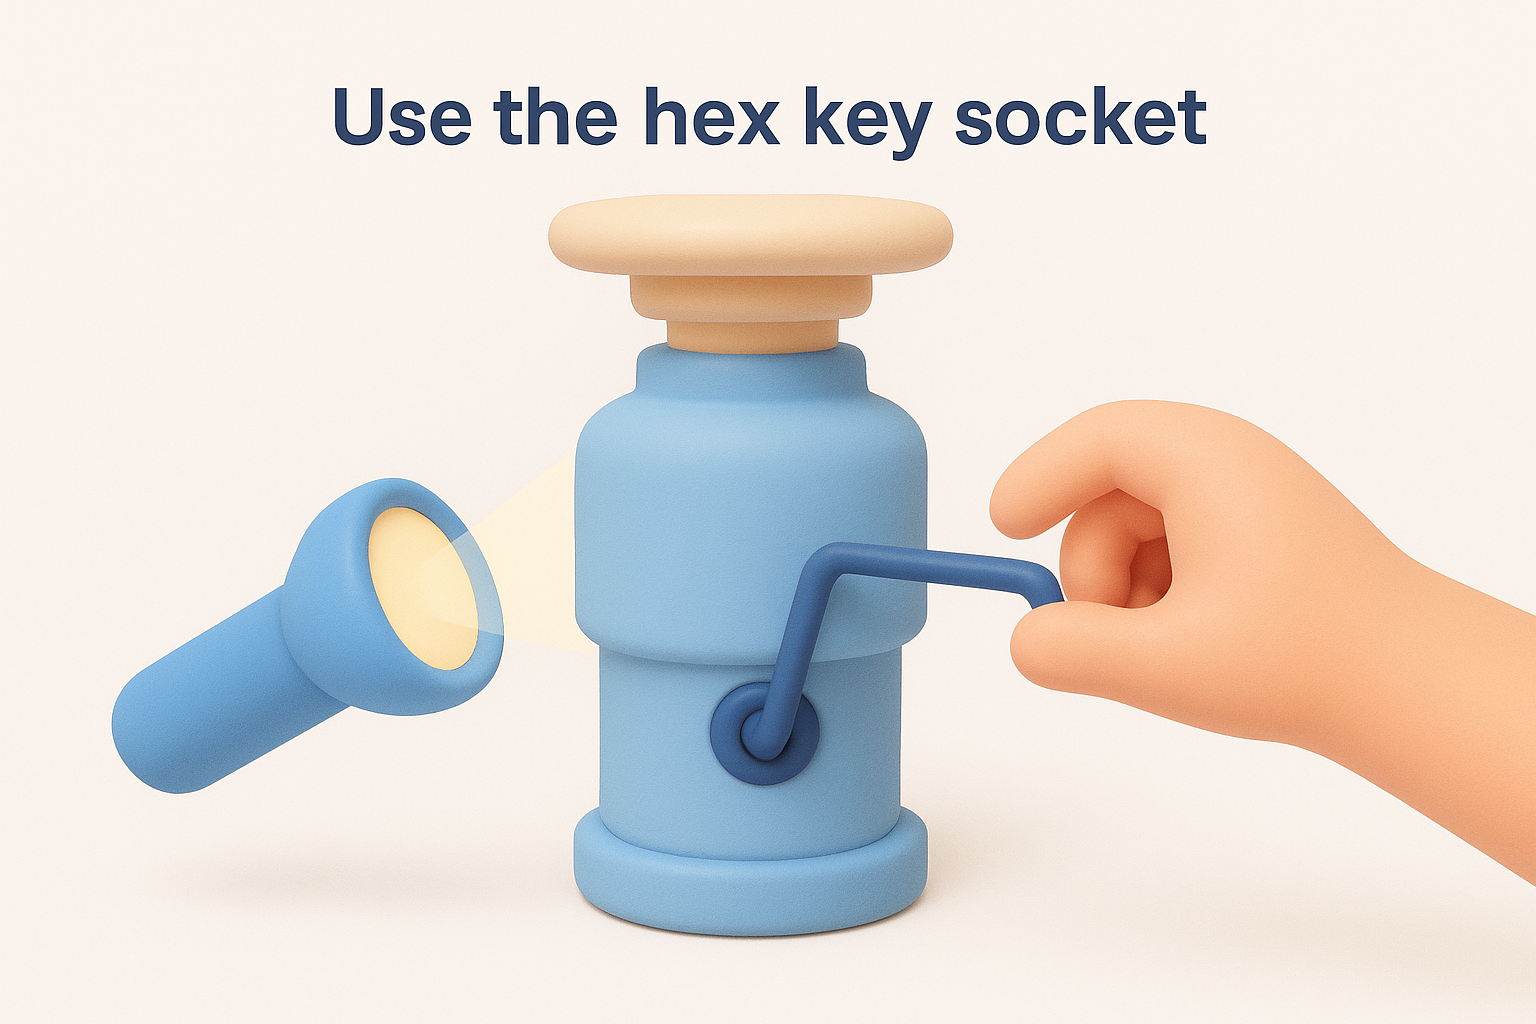
Once the flywheel turns freely in both directions, remove the wrench completely before you restore power.
Clear any visible debris
Shine your flashlight into the drain opening and look for whatever caused the jam. Use tongs or a wooden spoon to pull out visible debris, and never use your fingers inside the opening. Press the reset button, run cold water, and flip the switch back on.
Common items that jam disposals:
- Small bones or fruit pits
- Bottle caps or twist ties
- Broken glass or utensil parts
Step 3. Fix clogs, leaks, and bad smells
A garbage disposal not working properly sometimes comes down to issues beyond a jammed flywheel. Clogs, leaks, and odors are all fixable without a service call if you catch them early and follow the right steps.
Clear a stubborn clog
If water backs up into your sink after the disposal runs, you have a clog sitting downstream from the grinding chamber. Turn the unit off, then use a sink plunger to push the blockage through the drain line. Avoid chemical drain cleaners, which corrode the rubber seals inside the disposal.
Run cold water for 30 seconds after clearing any clog to flush remaining debris fully through the drain line.
Stop a leak and kill bad smells
Leaks typically start at three spots: the sink flange at the top, the dishwasher inlet hose connection, or the drain pipe fitting on the side of the unit. Tighten each connection with a screwdriver and inspect the gaskets. Replace any gasket that looks cracked or compressed flat.
Bad smells come from food buildup coating the grinding walls inside the chamber. Drop six ice cubes and a handful of kosher salt into the drain, run cold water, and switch the disposal on for 15 seconds. Follow immediately with two lemon wedges to cut through remaining odor.
Keep it from happening again
A garbage disposal not working situation is almost always preventable. Most failures come from putting the wrong items down the drain or running the unit dry. Building a couple of consistent habits now saves you from repeating this repair later.
What to keep out of the disposal
Your disposal handles soft food waste well, but certain items cause jams and clogs every time. Avoid these:
- Grease, fat, or cooking oil
- Fibrous vegetables like celery or corn husks
- Starchy foods like pasta, rice, or potato peels
- Coffee grounds and fruit pits
- Small bones or shellfish shells
Treating the disposal like a general trash can is the fastest way to shorten its lifespan.
Simple habits that protect the motor
Always run cold water before, during, and for 30 seconds after you use the disposal. Cold water solidifies grease so the blades chop it rather than coat the walls. Feed scraps in small batches so the motor doesn’t overload.
Clean the chamber once a week using ice cubes and kosher salt. Fifteen seconds of this keeps odor and buildup from slowing the motor over time and helps your disposal run reliably for years.
Quick wrap-up
Most garbage disposal not working problems trace back to three simple causes: a tripped reset button, a jammed flywheel, or a downstream clog. You now have the steps to handle all three, plus the habits that keep your disposal running without problems year after year.
If you’ve worked through every step in this guide and your disposal still won’t cooperate, the unit likely has a failed motor or a damaged internal component that requires professional attention. Forcing a worn disposal to keep running typically leads to a bigger repair bill and potential water damage down the road.
Home Therapist has served Tampa Bay homeowners since 2011 with same-day plumbing repairs and transparent, upfront pricing. When the DIY fix isn’t enough, our licensed technicians can diagnose and resolve the issue the same day. Schedule your garbage disposal repair and get your kitchen back to normal fast.
More Faucet & Fixture Repair Articles
- Plumber For Garbage Disposal Repair: Cost And Who To Call
- Garbage Disposal Won’t Turn On: Fixes Before You Call
- Garbage Disposal Replacement Cost: DIY Vs. Pro Pricing
- Two Fixture Points, One Practical Visit: Faucet Replacement in Riverview, FL 33569
- Garbage Disposal Humming Not Spinning: Grant Park Tampa FL 33619 Job


