

Water Softener Installation: How To Install A Water Softener
If you’ve noticed white crusty buildup on your faucets, dry skin after showers, or soap that won’t lather properly, Tampa Bay’s notoriously hard water is likely the culprit. Learning how to install a water softener can save you hundreds in labor costs, but it’s not a project to walk into blind. You’ll need basic plumbing skills, the right tools, and a clear understanding of your home’s water supply layout before you cut into your main water line.
A water softener works by exchanging hard minerals like calcium and magnesium for sodium ions, which protects your pipes, appliances, and fixtures from scale damage over time. For many Tampa Bay homeowners, it’s one of the smartest upgrades for long-term home comfort and plumbing health. At Home Therapist, we’ve installed and serviced water softeners across the Greater Tampa Bay Area since 2011, so we know exactly what this job demands, and where DIYers commonly run into trouble.
This guide walks you through the full installation process step by step, from choosing the right location and gathering your materials to connecting the unit and programming the regeneration cycle. We’ll also cover the tools you’ll need, common mistakes to avoid, and how to tell when it’s time to call in a licensed plumber instead.
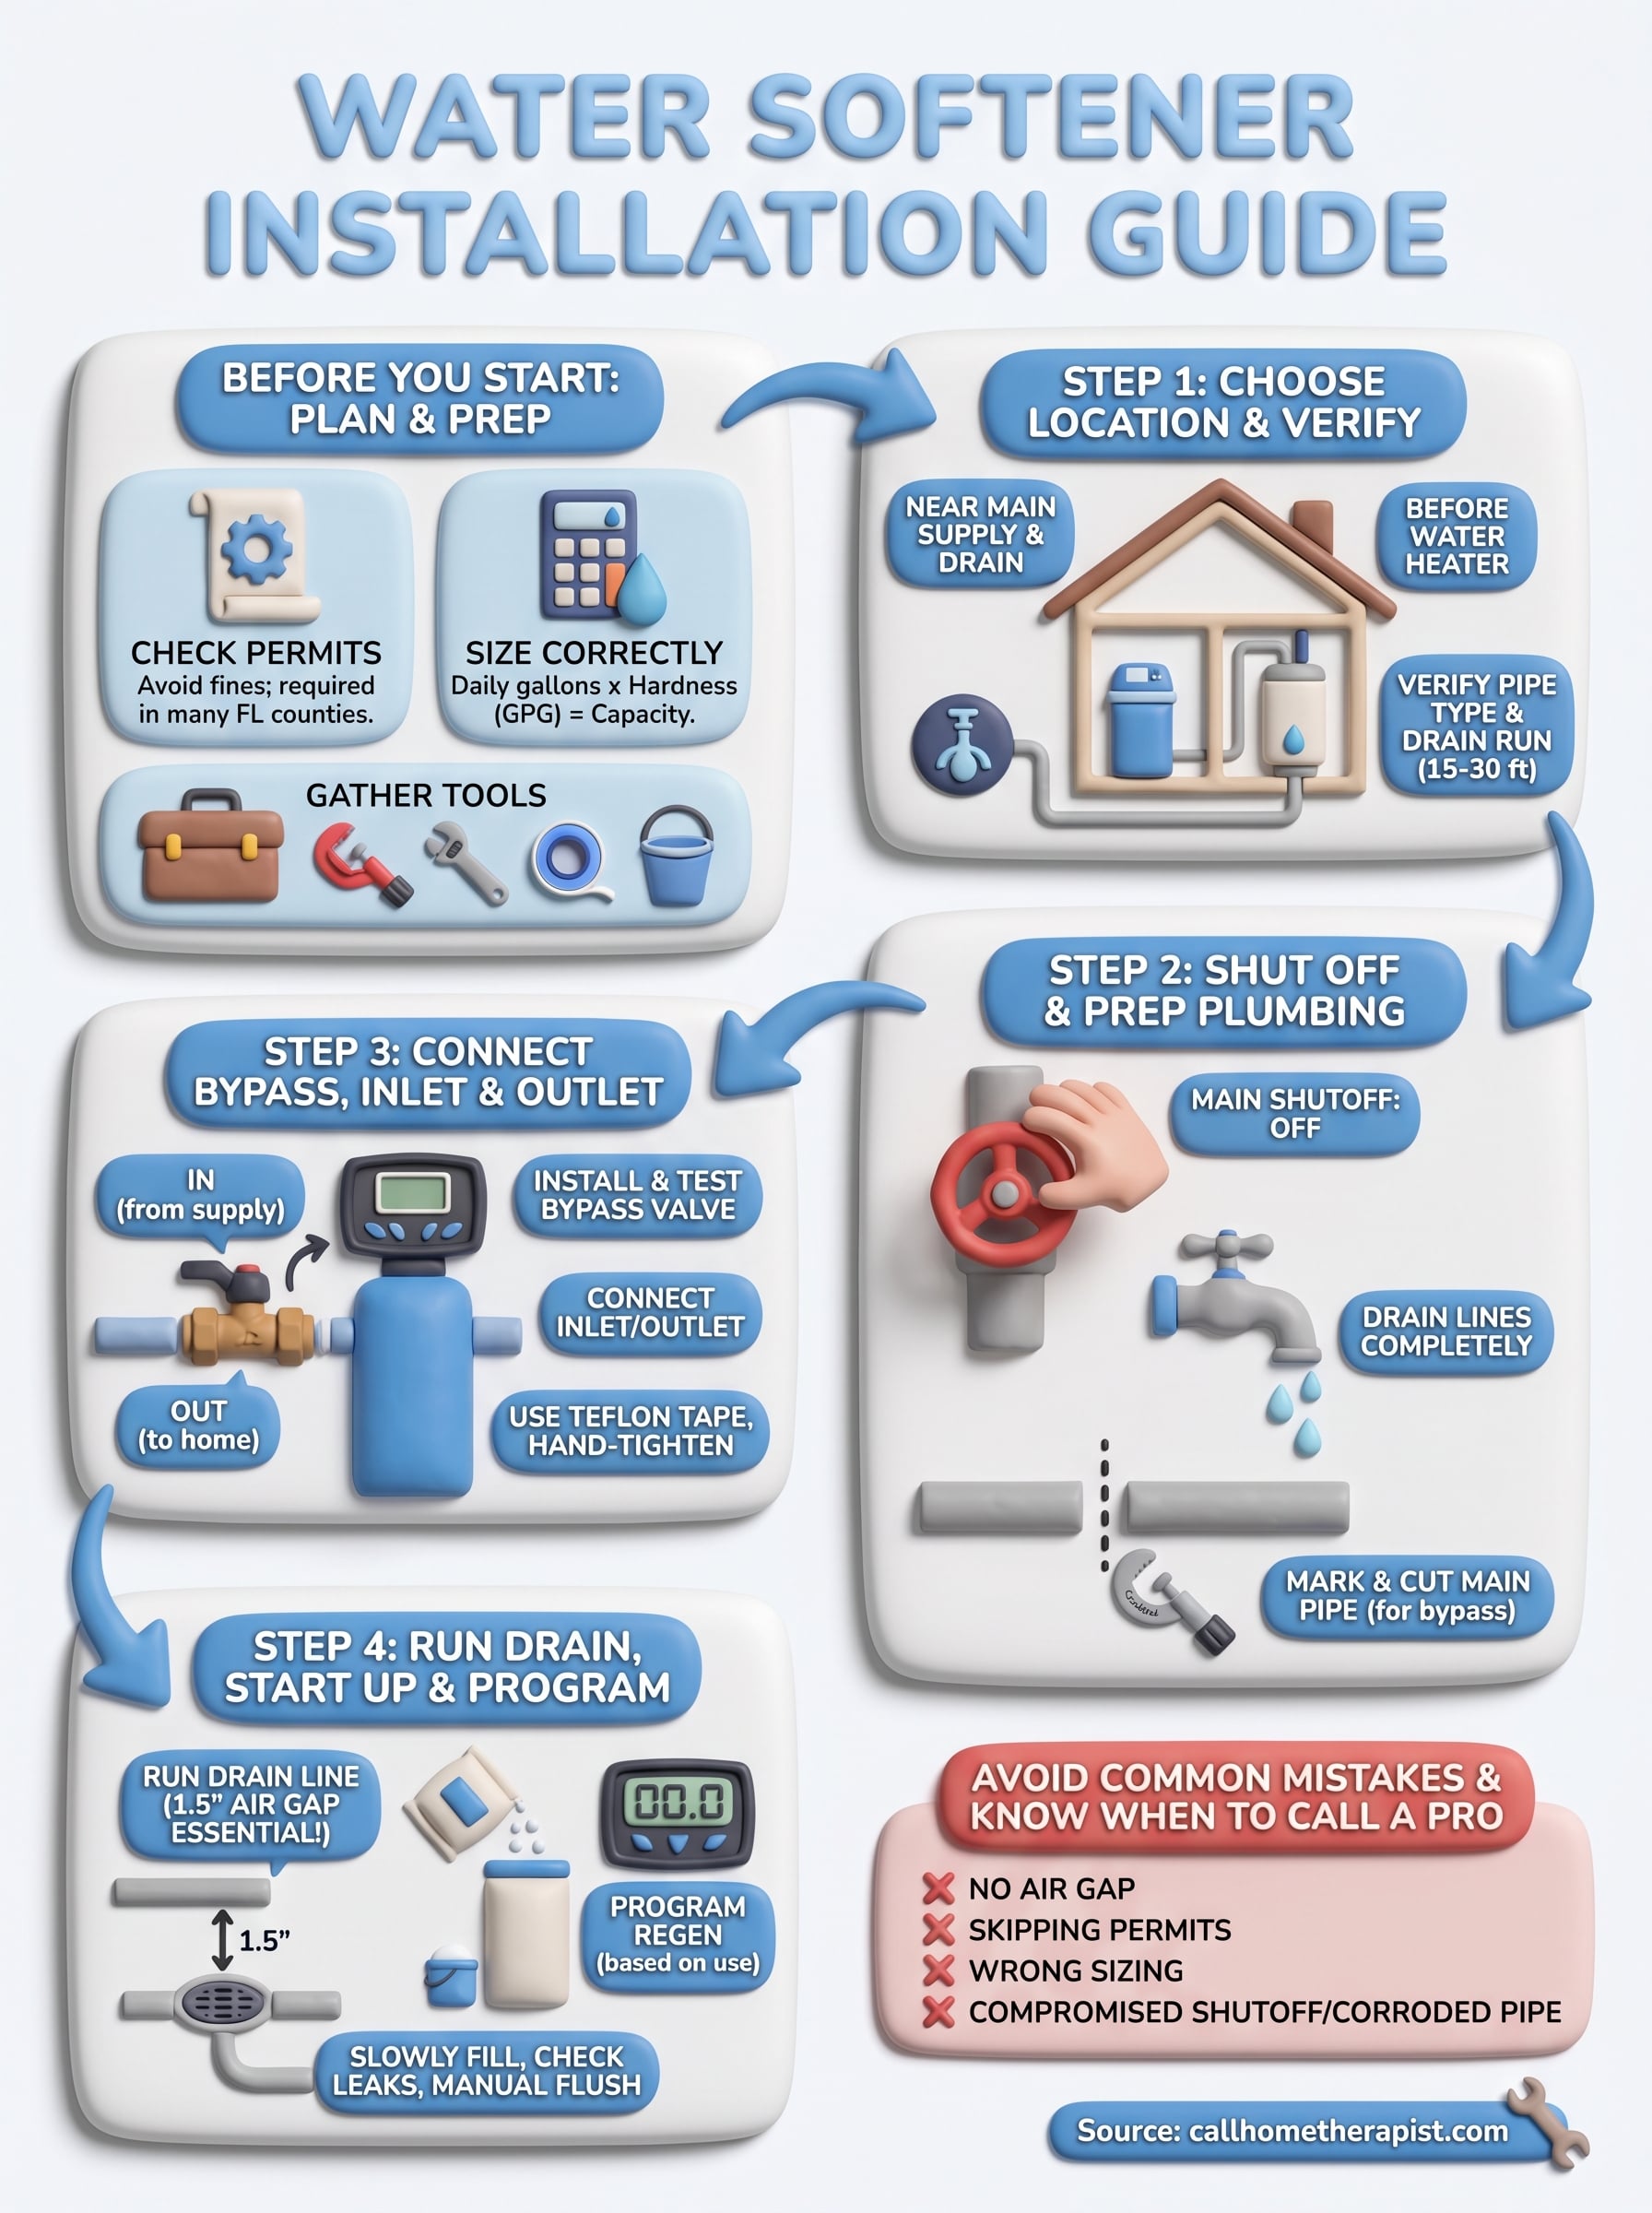
Before you start: plan, code, and sizing
Rushing a plumbing project without preparation will cost you time and money. Before you figure out how to install a water softener, sort out three things first: local permit requirements, the correct softener size for your household, and the tools and materials you need on hand before you pick up a wrench.
Check local codes and permits
Most Florida municipalities require a permit for any work that involves modifying your main water supply line. In Hillsborough, Pinellas, and Pasco counties, unpermitted plumbing work can result in fines and can complicate a future home sale. Contact your local building department before you start, and ask specifically whether a homeowner permit is available or whether a licensed plumber must pull it.
Some jurisdictions also require a licensed plumber to perform the final connection to the main line, even if you handle the rest yourself. Confirm this early so you don’t complete the job and then find out it needs to be redone.
Skipping the permit step is one of the most common and costly mistakes homeowners make during water softener installations.
Size your unit correctly
Water softener capacity is measured in grains, which represents the total number of hard minerals the resin tank can remove before it regenerates. To find the right size, multiply your daily household water use (roughly 75 gallons per person per day) by your water hardness level in grains per gallon (GPG). Your local utility can often provide a free hardness report, or you can use a test kit from any hardware store.
A family of four using 300 gallons per day at 20 GPG hardness needs a unit that handles at least 6,000 grains daily. Most residential softeners range from 24,000 to 64,000 total grain capacity, designed to regenerate every 7 to 10 days.
Gather your tools and materials
Confirm you have everything ready before installation day:
- Pipe cutter and fittings (push-fit or copper, matched to your existing plumbing)
- Bypass valve (usually included with the softener unit)
- CPVC or copper pipe sections cut to the lengths you need
- Teflon tape, drain line tubing, and a power drill
- Adjustable wrench, bucket, and towels for water cleanup
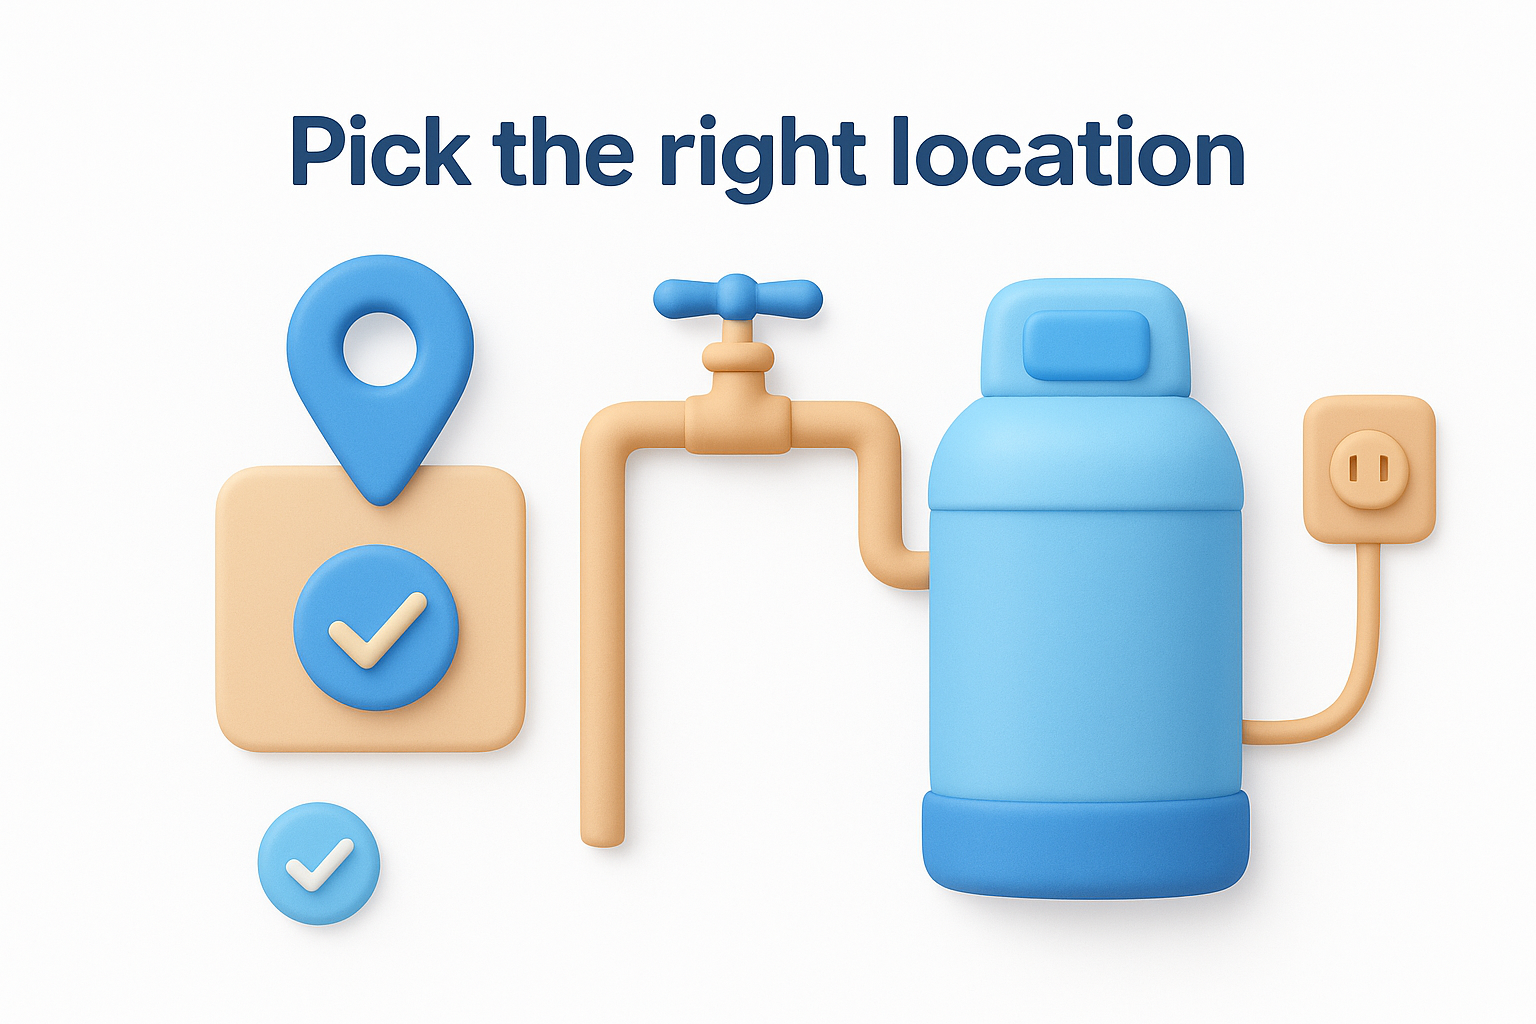
Step 1. Choose the install spot and verify hookups
The location you pick is one of the most important decisions in how to install a water softener correctly. A poor spot creates long-term access problems and limits your drainage options. Most softeners need to sit on the main water supply line before it splits off to your water heater, so all the water entering your home gets treated.
Pick the right location
Your install spot needs four things: proximity to the main water supply line, access to a drain for the regeneration cycle, a nearby electrical outlet (most softeners need a standard 120V plug), and enough floor space to set the unit and still reach the control head comfortably. Garages and utility rooms near the water meter are the most common choices in Tampa Bay homes.
Placing the softener after the water heater is one of the most common mistakes in DIY installations and will void most manufacturer warranties.
Verify your hookups before cutting any pipe
Check that your drain connection point is within 15 to 30 feet of the install location, since most drain tubing runs have a maximum length before backflow becomes a risk. Also confirm your existing pipe material, whether copper, CPVC, or PEX, so you buy the correct fittings before installation day. Mismatched fittings are a leading cause of leaks after the job is done.
Step 2. Shut off water and prep the plumbing
Before you touch any pipe, locate your main water shutoff valve and turn it fully clockwise until it stops. Open a faucet on the lowest floor of your home to drain pressure from the lines and confirm water flow has stopped. This is a non-negotiable step in how to install a water softener safely, and skipping it risks flooding your utility room.
Drain the lines completely
Turn on several faucets throughout the house to release any remaining water pressure in the system. Let them run until flow stops completely, then close them. Keep a bucket and towels nearby at the install location, because residual water will drain from the pipe once you make your cut.
Failing to fully depressurize your lines before cutting means water will spray when you open the pipe, creating a mess and a potential slip hazard.
Mark and cut the pipe
Measure the section of main supply pipe where the softener will connect. You need to remove enough pipe length to fit the bypass valve assembly, which is typically 6 to 10 inches depending on your specific unit. Use a pipe cutter for a clean, square cut on both sides, then deburr the cut ends with an emery cloth or the built-in reamer on your cutter before attempting to fit any connections.
Step 3. Connect bypass, inlet and outlet lines
With your pipe ends cut and clean, you’re ready for the most critical connection in how to install a water softener: attaching the bypass valve and running the inlet and outlet lines. Work slowly here, because a poor seal on either line will cause a slow leak that damages your floor over time.
Install the bypass valve
Your softener unit ships with a bypass valve assembly that slides into the back of the control head. Push it firmly into place until you hear or feel it click, then hand-tighten the locking clips or collar rings. The bypass valve lets you isolate the softener for maintenance without shutting off water to the entire house, so confirm it moves freely between the service, bypass, and shut-off positions before you go further.
Never skip testing the bypass valve before connecting it to your supply line. A stuck valve turns a 10-minute maintenance job into a full water shutoff.
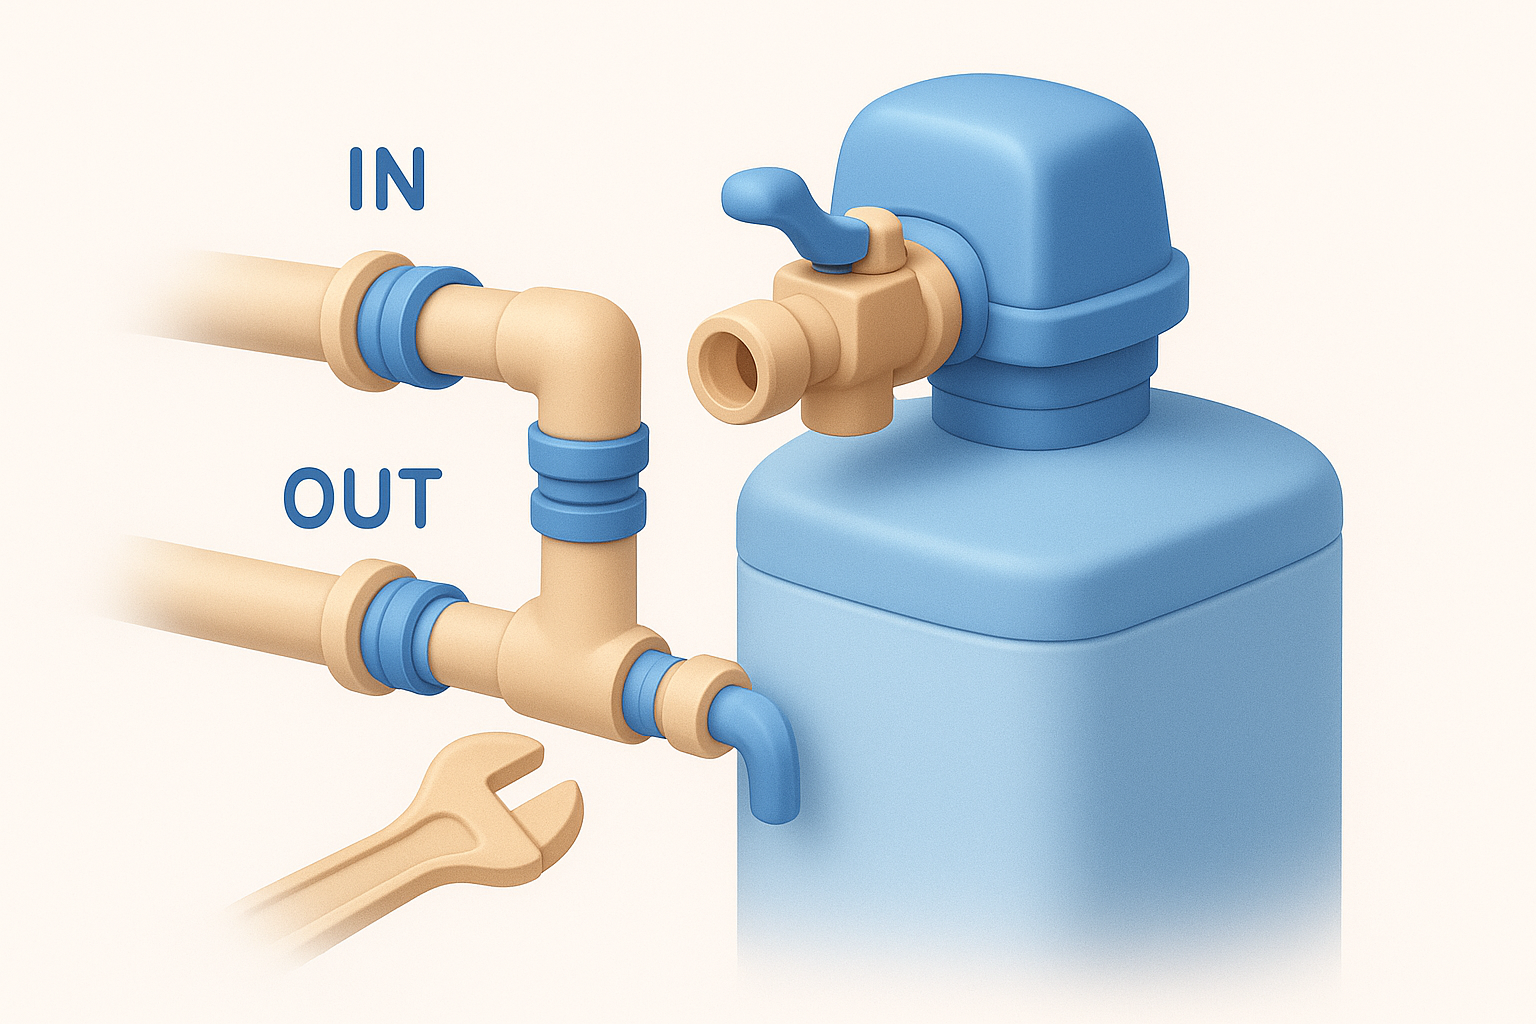
Connect the inlet and outlet lines
Check your softener’s control head label for the inlet (IN) and outlet (OUT) ports, as reversing them is a common error. Connect your supply pipe to the inlet port using the fittings matched to your existing pipe material, whether copper, CPVC, or PEX. Wrap all threaded connections with two to three layers of Teflon tape, then hand-tighten before giving each fitting a quarter turn with your wrench. Overtightening cracks plastic fittings and creates leaks.
Step 4. Run drain lines, start up, and program
The final stage of how to install a water softener covers three tasks: routing your drain line, running a manual regeneration cycle to flush the resin, and programming the control head. Do these steps in order and your softener will be fully operational within an hour.
Run the drain line
Connect the drain tubing from the control head’s drain port to the nearest floor drain, laundry standpipe, or utility sink. Keep the run as short and straight as possible, and secure the tubing with clips every few feet so it doesn’t sag or kink. Most manufacturers require a 1.5-inch air gap between the end of the drain tube and the drain opening to prevent backflow contamination. Do not tie the drain line directly into a drain under pressure.
Skipping the air gap violates most plumbing codes and creates a contamination risk that can affect your entire household water supply.
Start up and program the unit
Add two to three bags of softener salt to the brine tank before startup. Slowly open the bypass valve to let water fill the resin tank, then check every connection for drips before moving on. Trigger a manual regeneration cycle using the control head to flush resin beads and confirm the drain line flows properly. Finally, program the regeneration schedule based on your household size and hardness level, typically every seven days for an average four-person home.
Next steps
You now have a complete picture of how to install a water softener from location planning to final programming. The process is manageable for a homeowner with solid plumbing experience, but it requires careful prep at every stage. Skipping steps like the air gap, permit check, or proper sizing will cost you more time and money than the installation saves.
If you hit a snag during the job, or if your home has copper soldered lines, a crowded utility room, or an older main shutoff valve that won’t fully close, those are situations where calling a professional makes sense. Attempting a connection on a compromised shutoff or corroded pipe can turn a planned upgrade into an emergency repair fast.
The team at Home Therapist has handled water softener installations across the Greater Tampa Bay Area since 2011. Reach out for same-day service, upfront pricing, and no hidden fees.


