
Tag: Grandaire HVAC review

HVAC Maintenance Plan Visit in Tampa, FL 33634

For homeowners in Tampa, FL 33634, keeping your air conditioning system on a regular maintenance plan is one of the best ways to stay ahead of Florida’s heat and humidity. On this visit, one of our Home Therapist technicians, Jandiel, came out for a Pro Care Maintenance Plan appointment—Visit #7—for a homeowner whose system has been running well. Our goal was simple: confirm everything was still operating properly, perform a thorough tune-up, and replace the air filter so the system stays reliable through the long Tampa cooling season.

Because this visit was part of an ongoing plan, we were coming in with a history of prior checkups. That allowed us to move efficiently, focus on the details that matter most in our climate, and leave the homeowner with peace of mind knowing their system was clean, inspected, and ready to go.

Case Recap

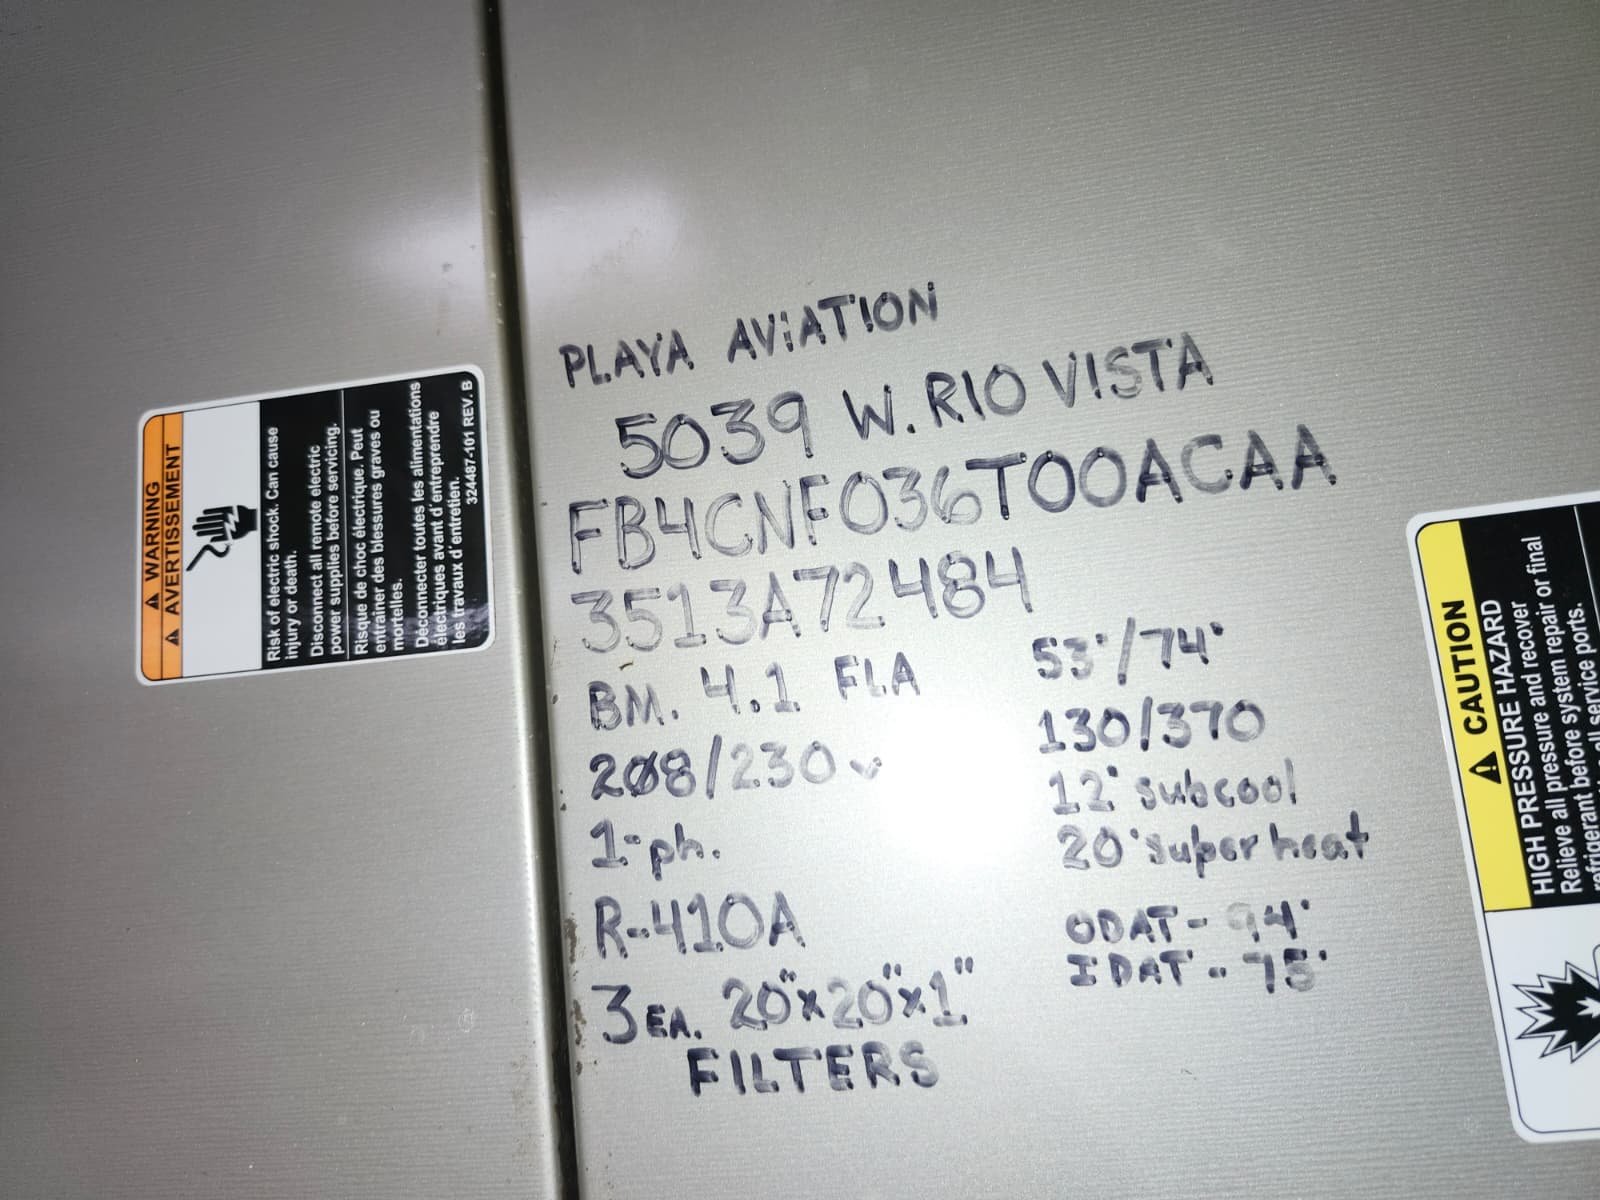
  • Location: Residential home in Tampa, FL 33634
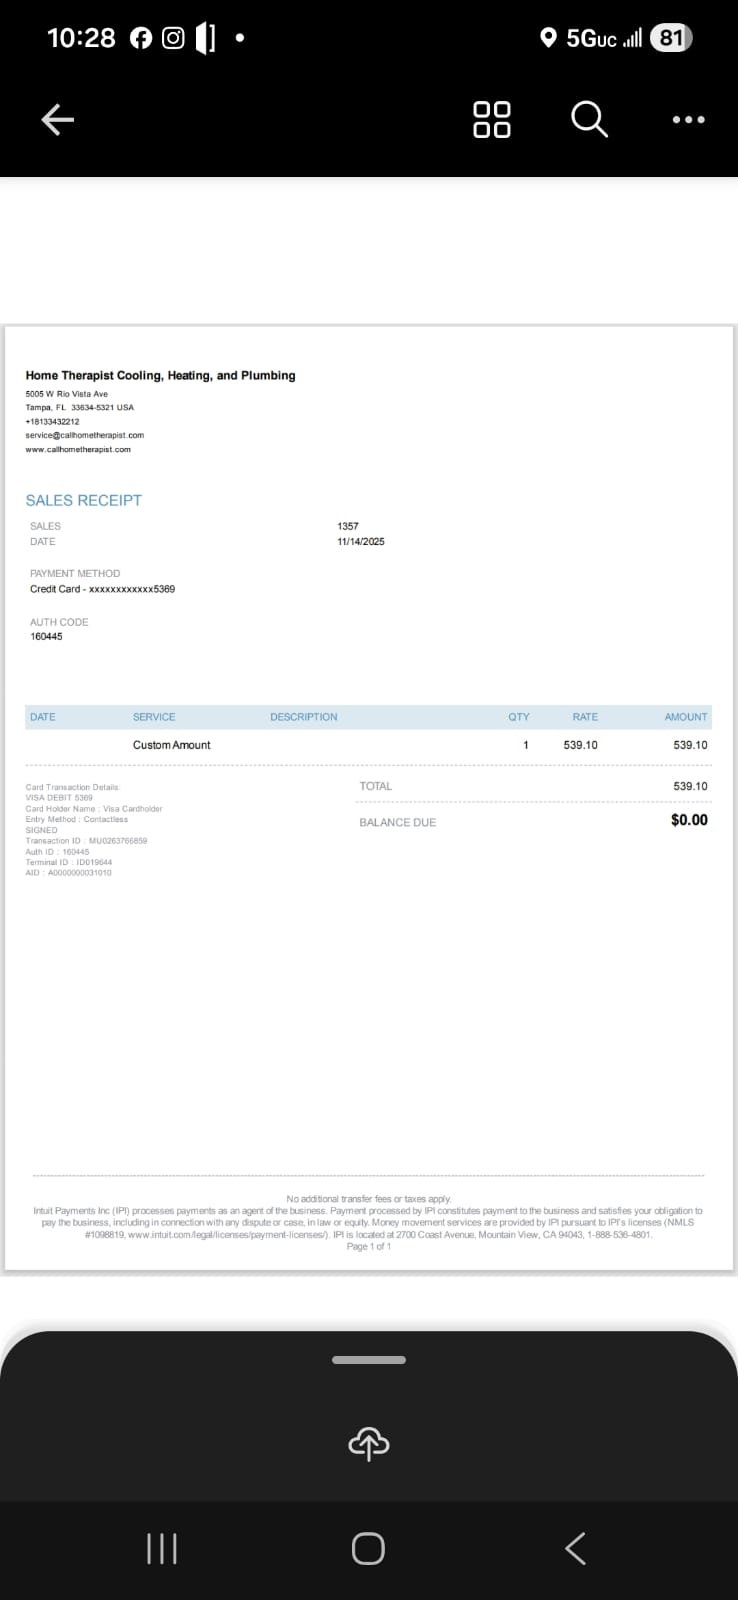
  • Service: Pro Care Maintenance Plan – scheduled Visit #7
  • System status on arrival: Operating properly with no active comfort complaints
  • Work performed: Full maintenance service and air filter replacement
  • Result: System confirmed to be running properly after service, with clean filtration and routine upkeep completed

Customer Problem

In this case, the homeowner in Tampa, FL 33634 wasn’t calling because something was broken. They were calling because they wanted to keep it that way. They’re enrolled in our Pro Care Maintenance Plan, which means we come out on a regular schedule to inspect, clean, and service the system before small issues have a chance to turn into breakdowns.

By the time we reached Visit #7, this homeowner had already seen the benefits of staying proactive: more consistent comfort, fewer surprises, and confidence that the equipment is being watched over by a licensed HVAC team familiar with Tampa’s climate. For this particular visit, there were no special complaints—no unusual noises, no hot spots in the home, and no humidity concerns beyond the usual Florida stickiness.

Even when a system “seems fine,” there are a few quiet worries that most Tampa homeowners share:

  • Will the system make it through the next long stretch of heat without a breakdown?
  • Is the unit working harder than it needs to, driving up energy bills?
  • Is the filter still doing its job, or is dust building up in the system?

Our maintenance visit was focused on answering those questions with a thorough inspection, cleaning, and filter replacement—and then clearly communicating what we found.

Inspection and Diagnosis

Even though this was a routine Pro Care Maintenance Plan appointment, we treat every visit in Tampa, FL as an opportunity to double-check safety, performance, and comfort. We don’t assume that “no complaint” means “no problem.”

On this visit, we:

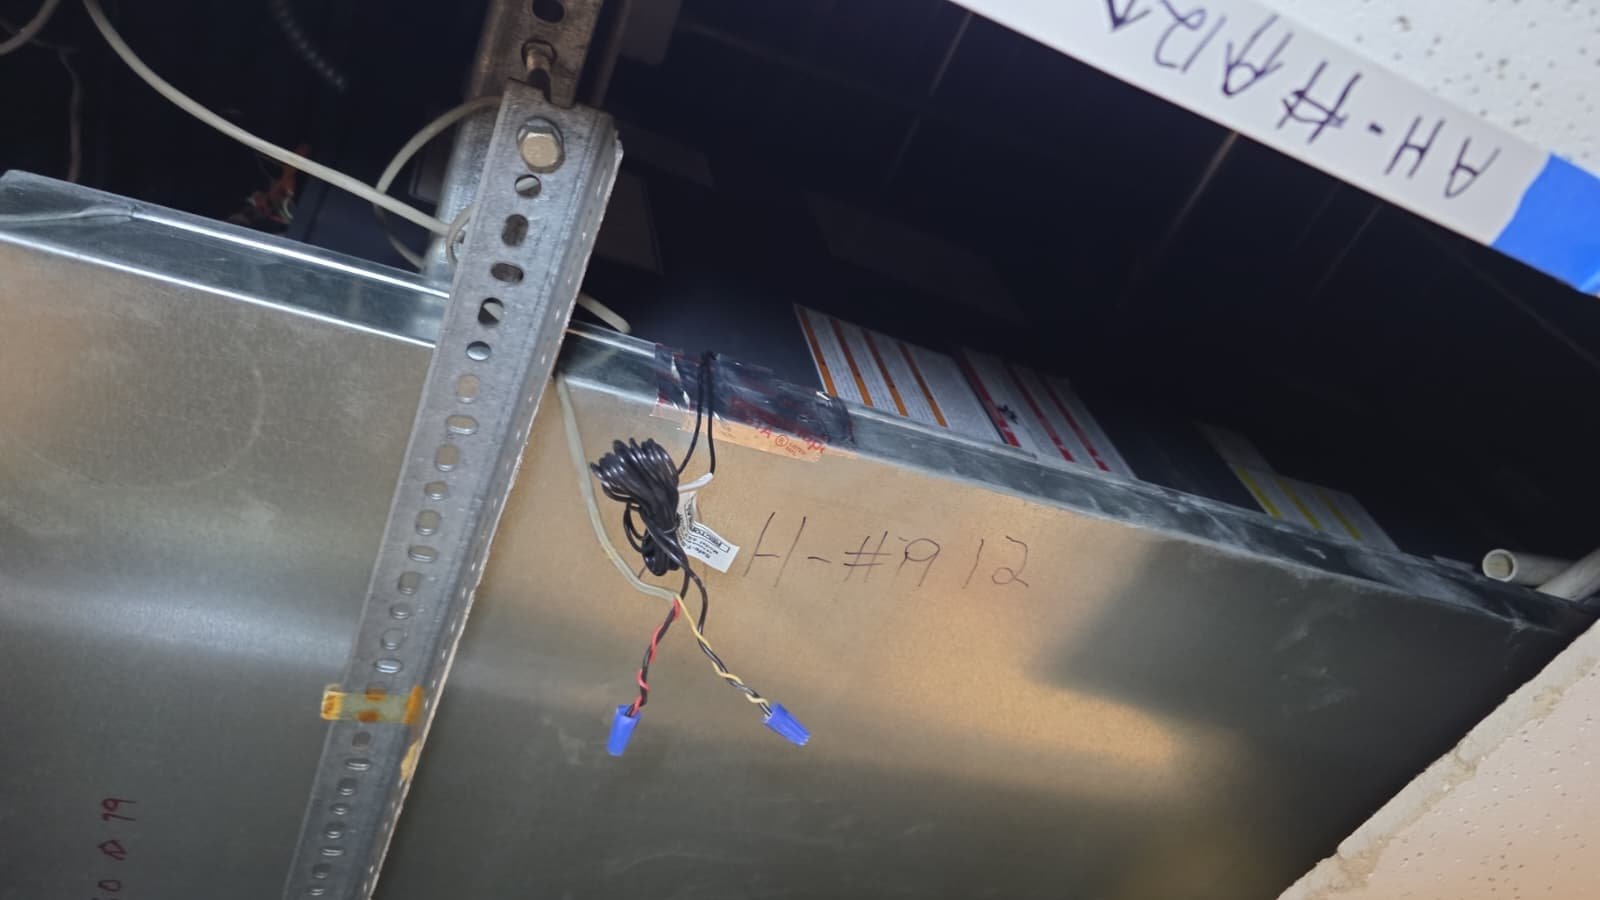
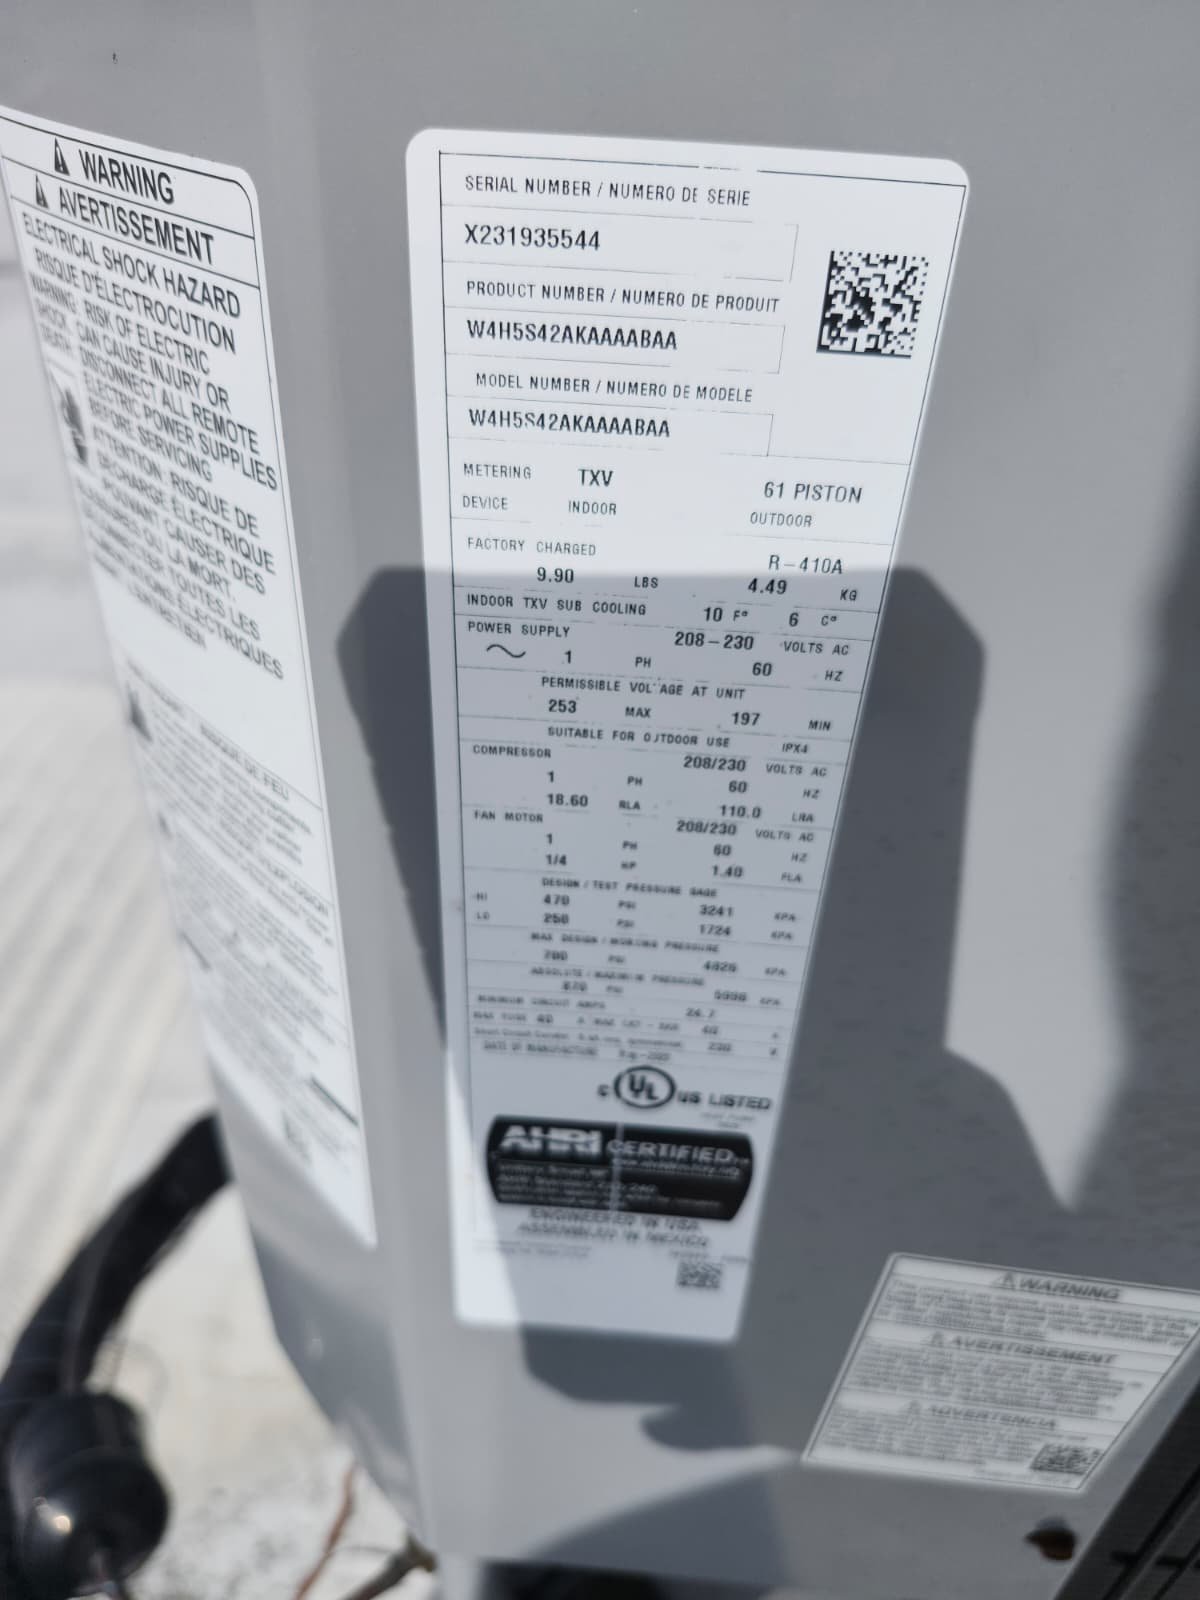
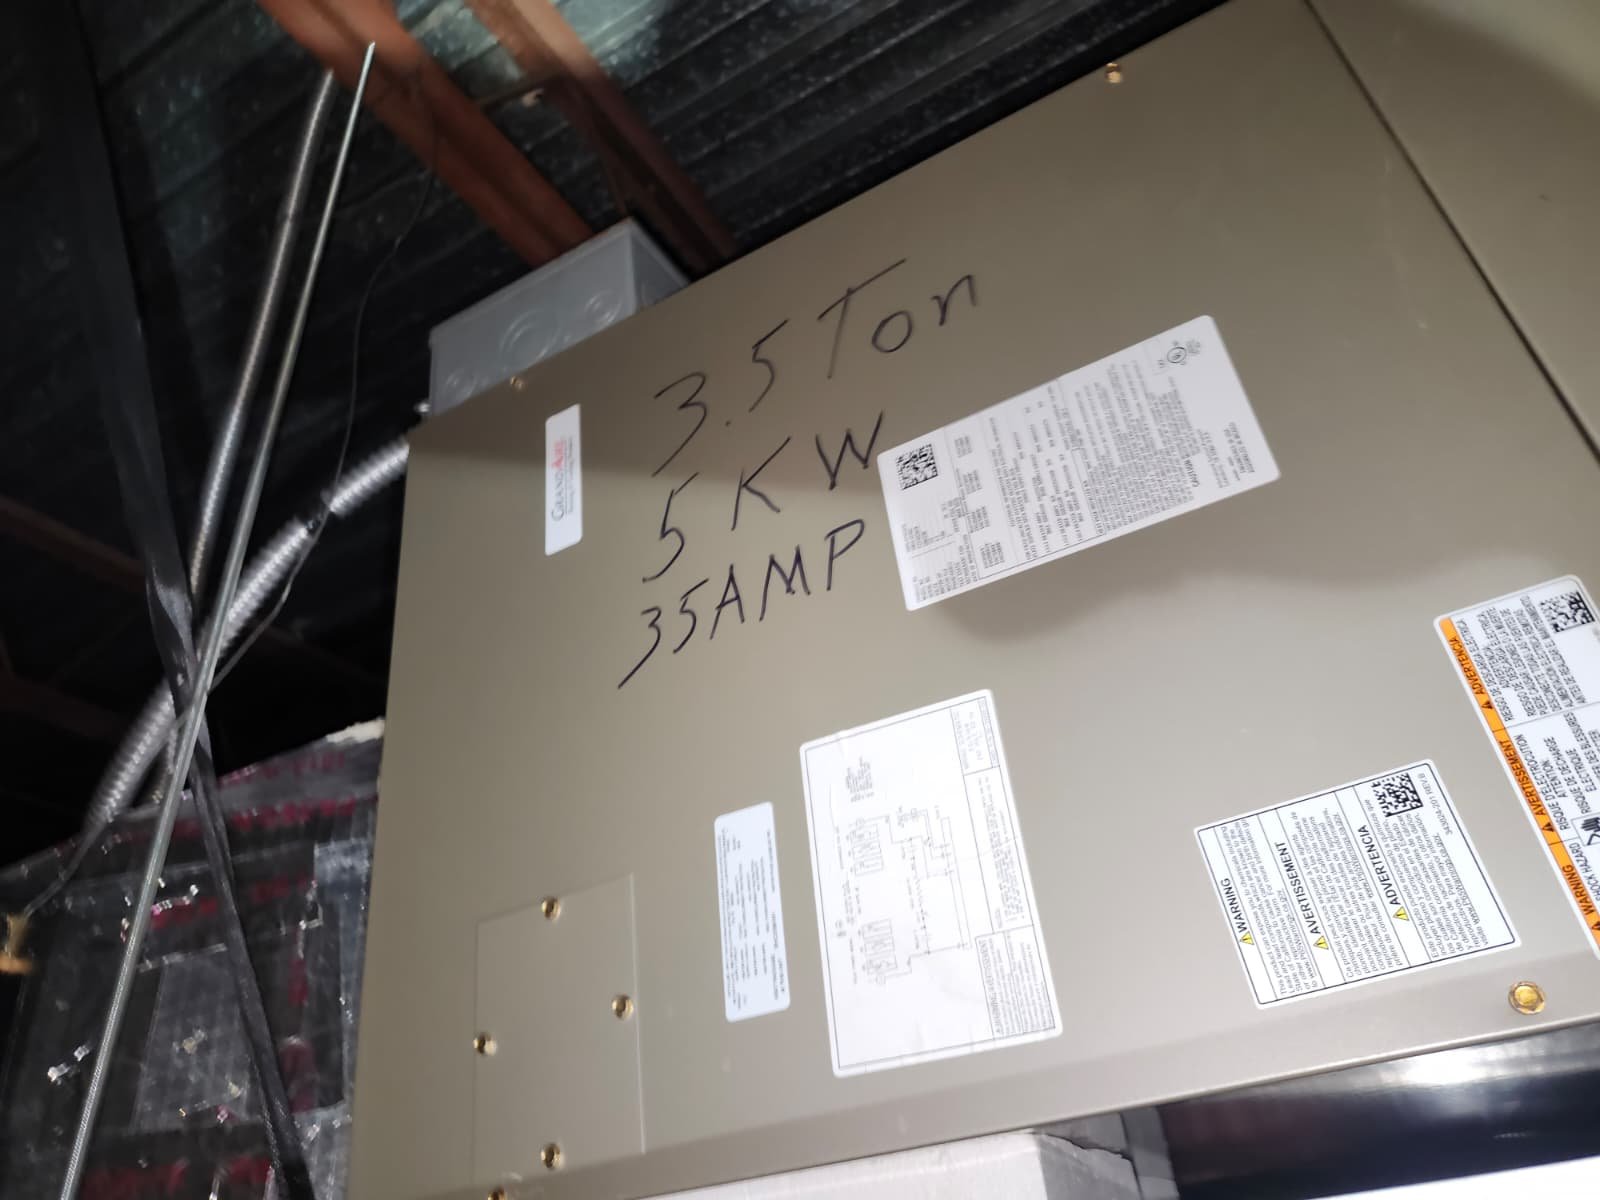
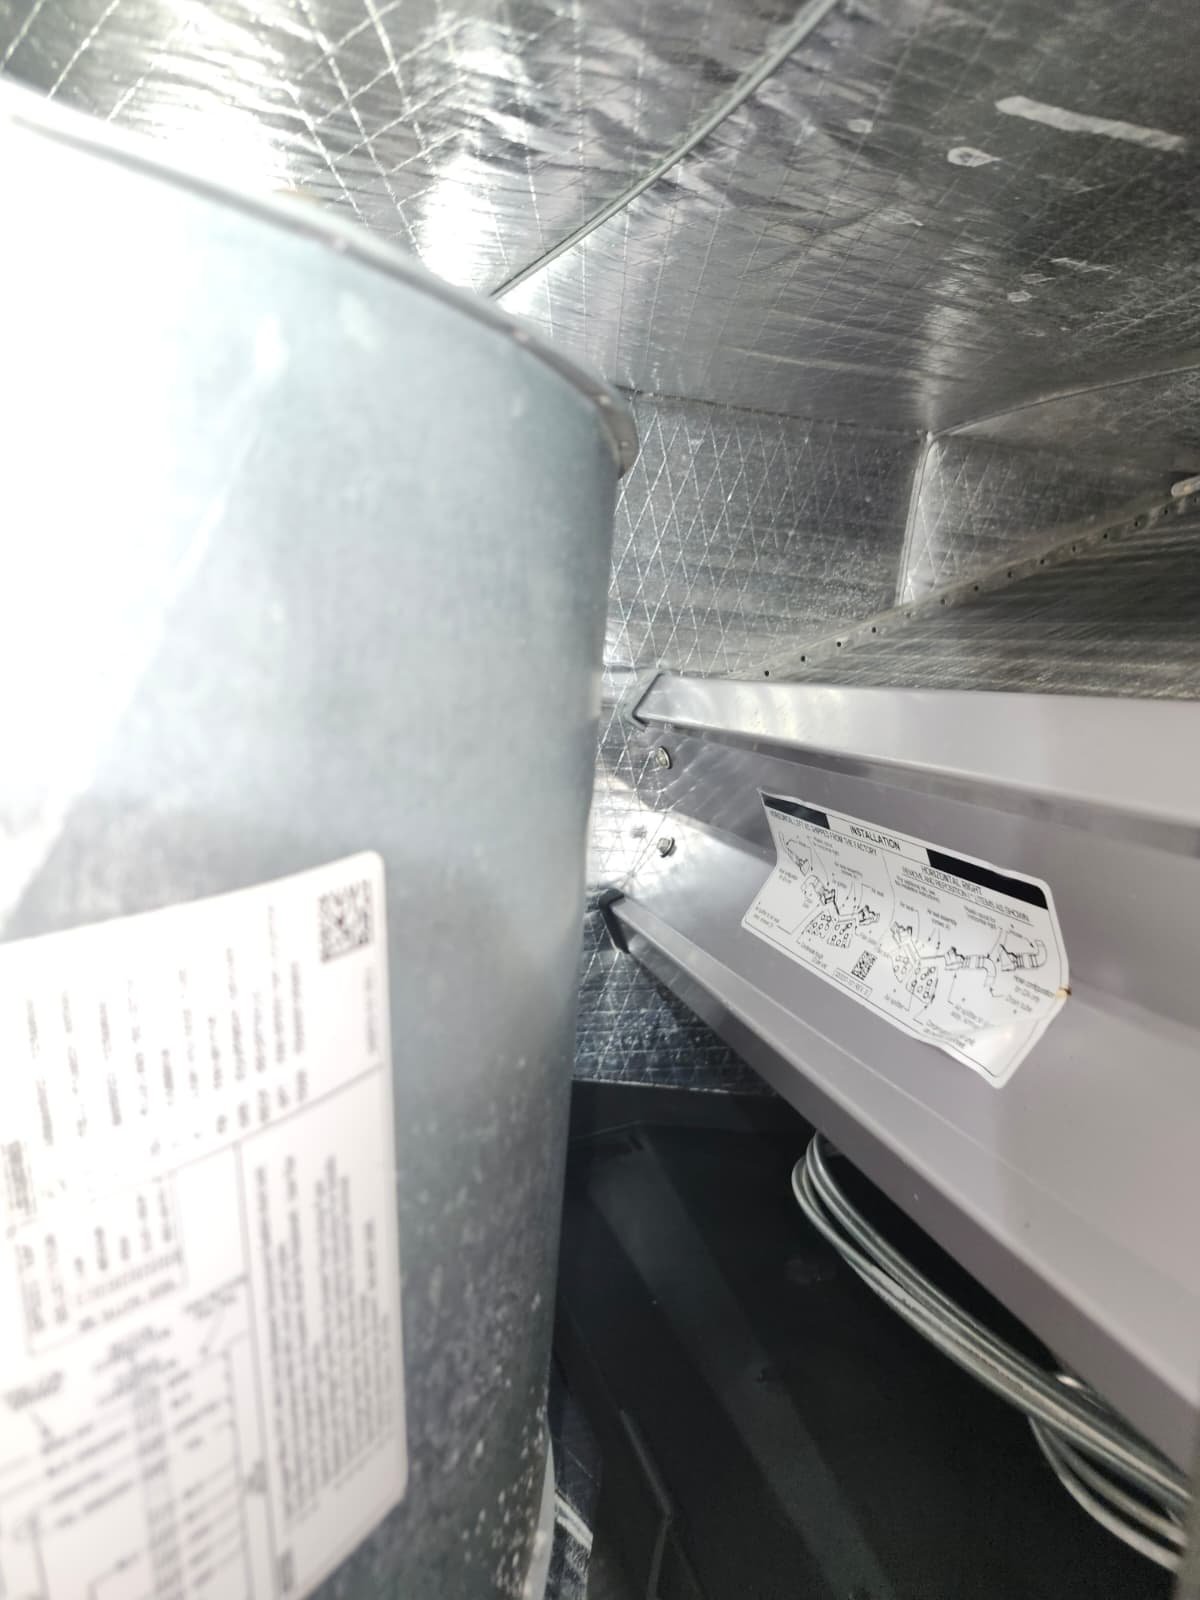
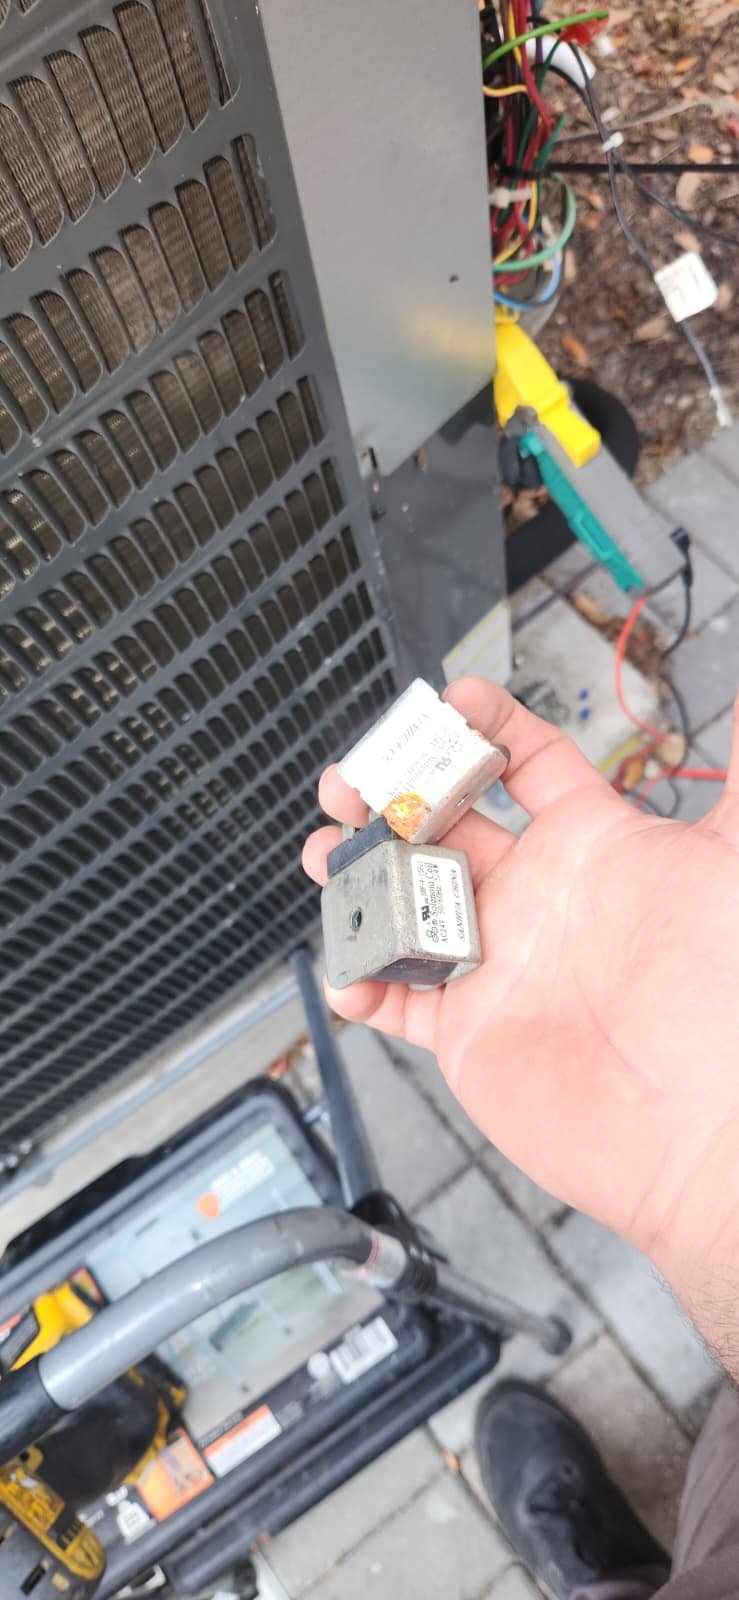
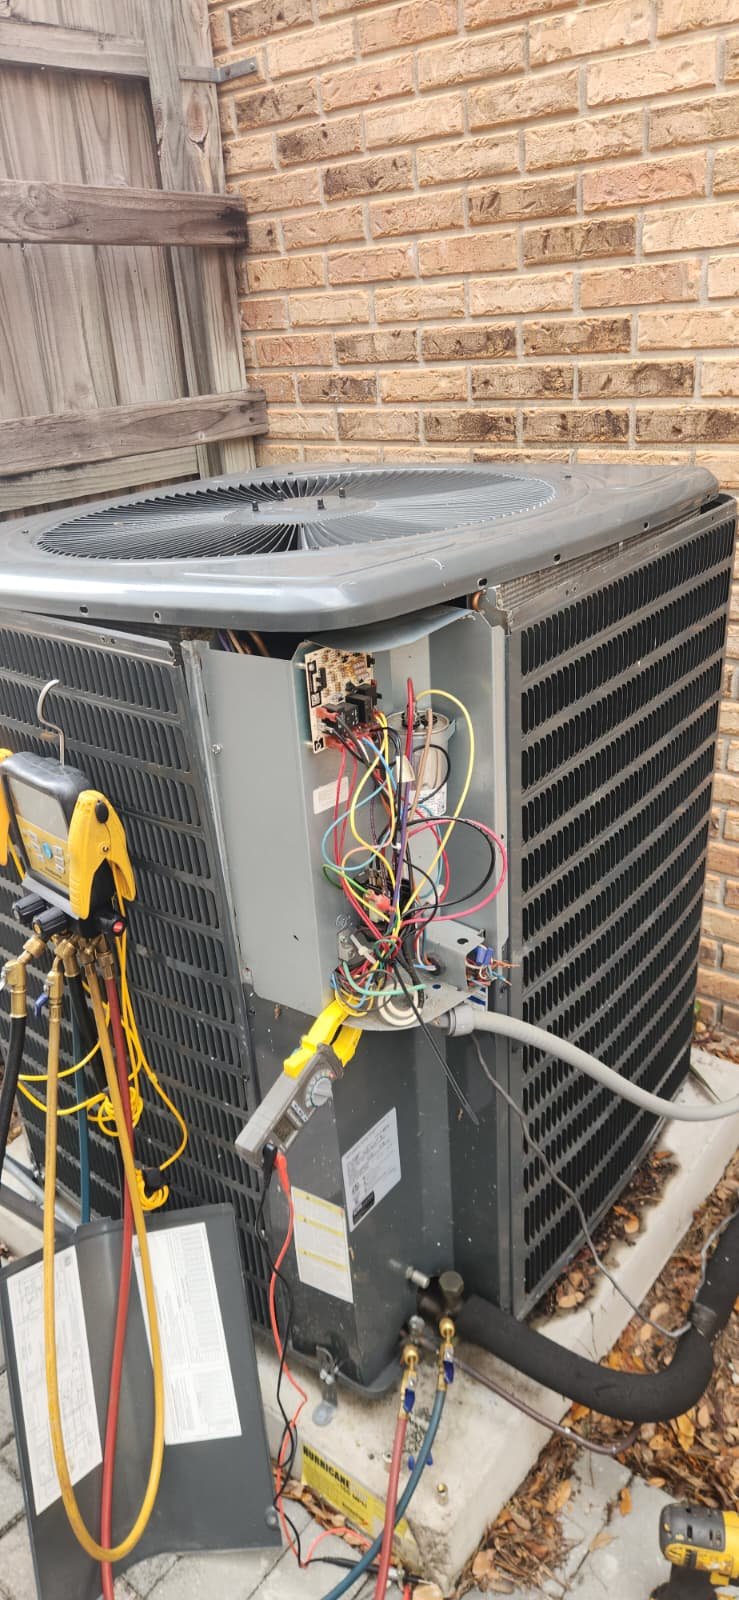
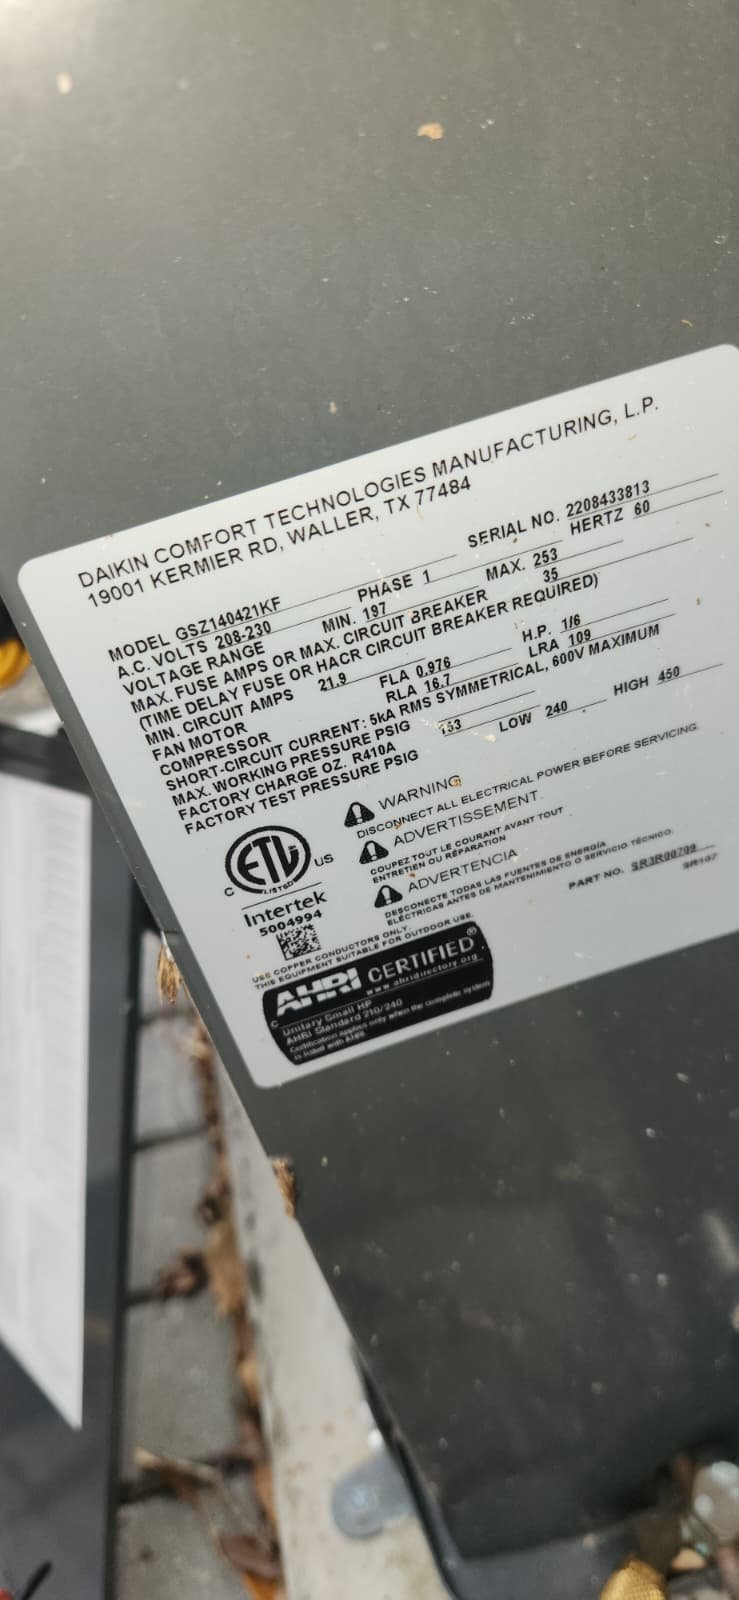
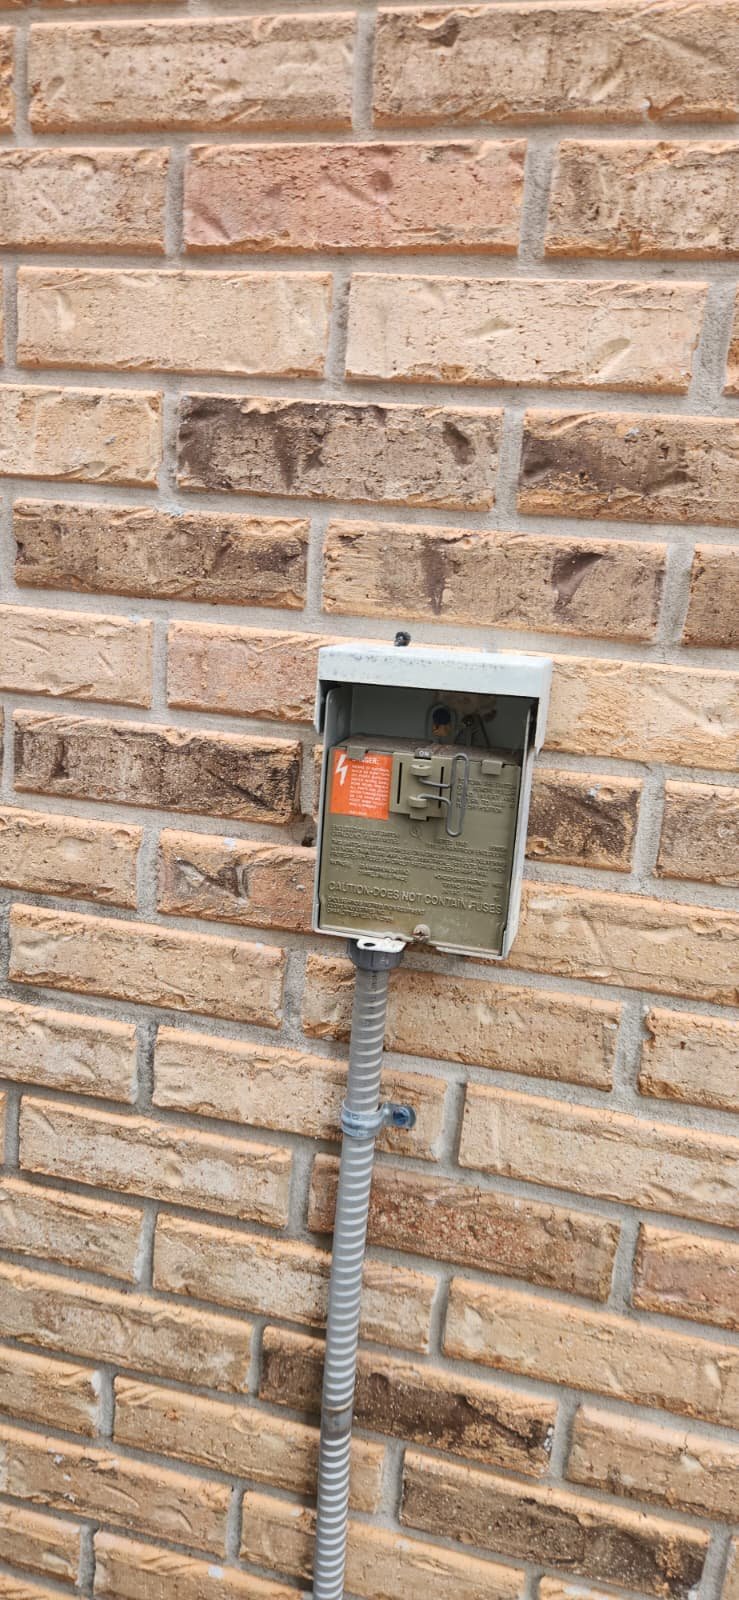
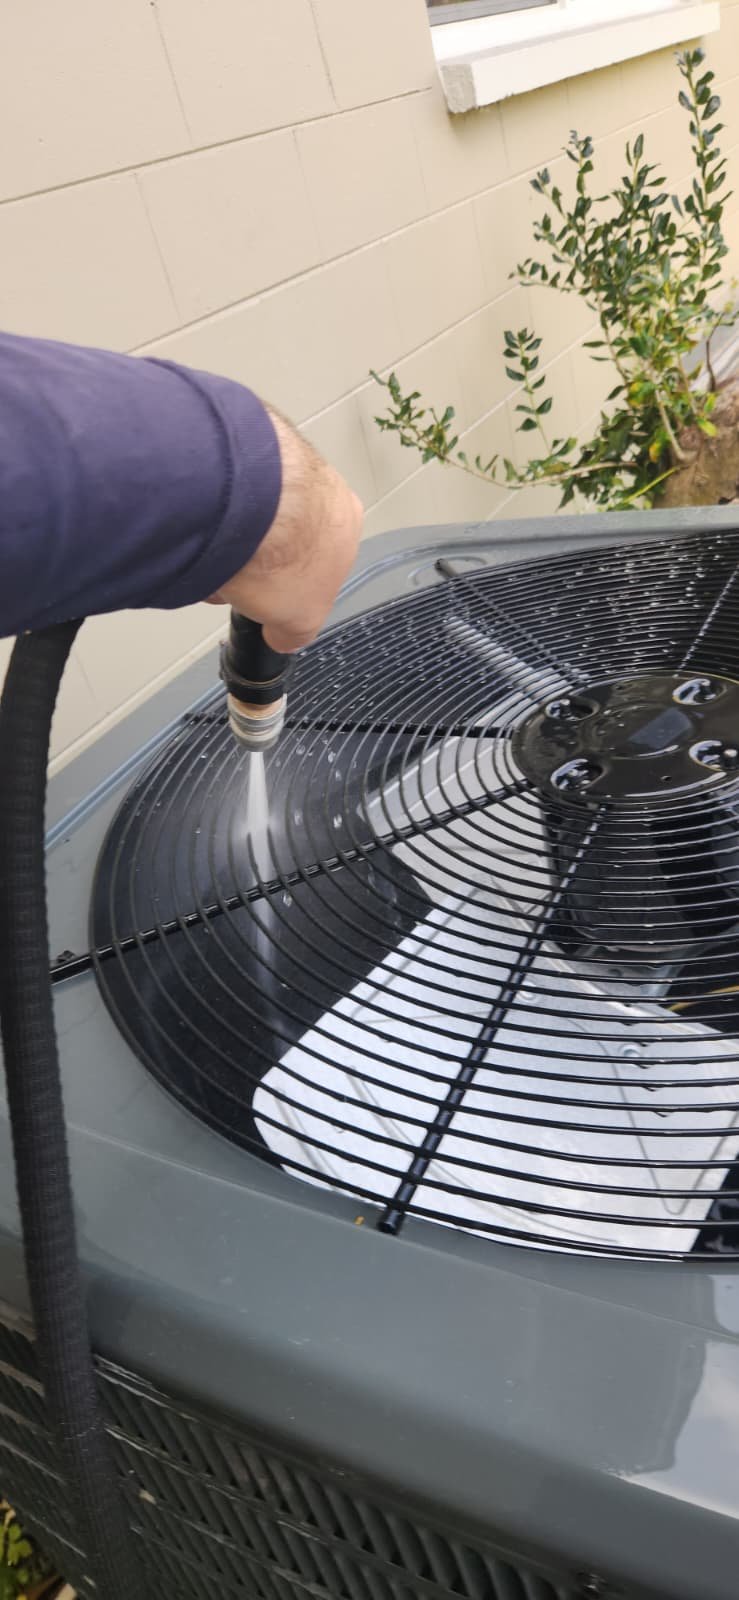
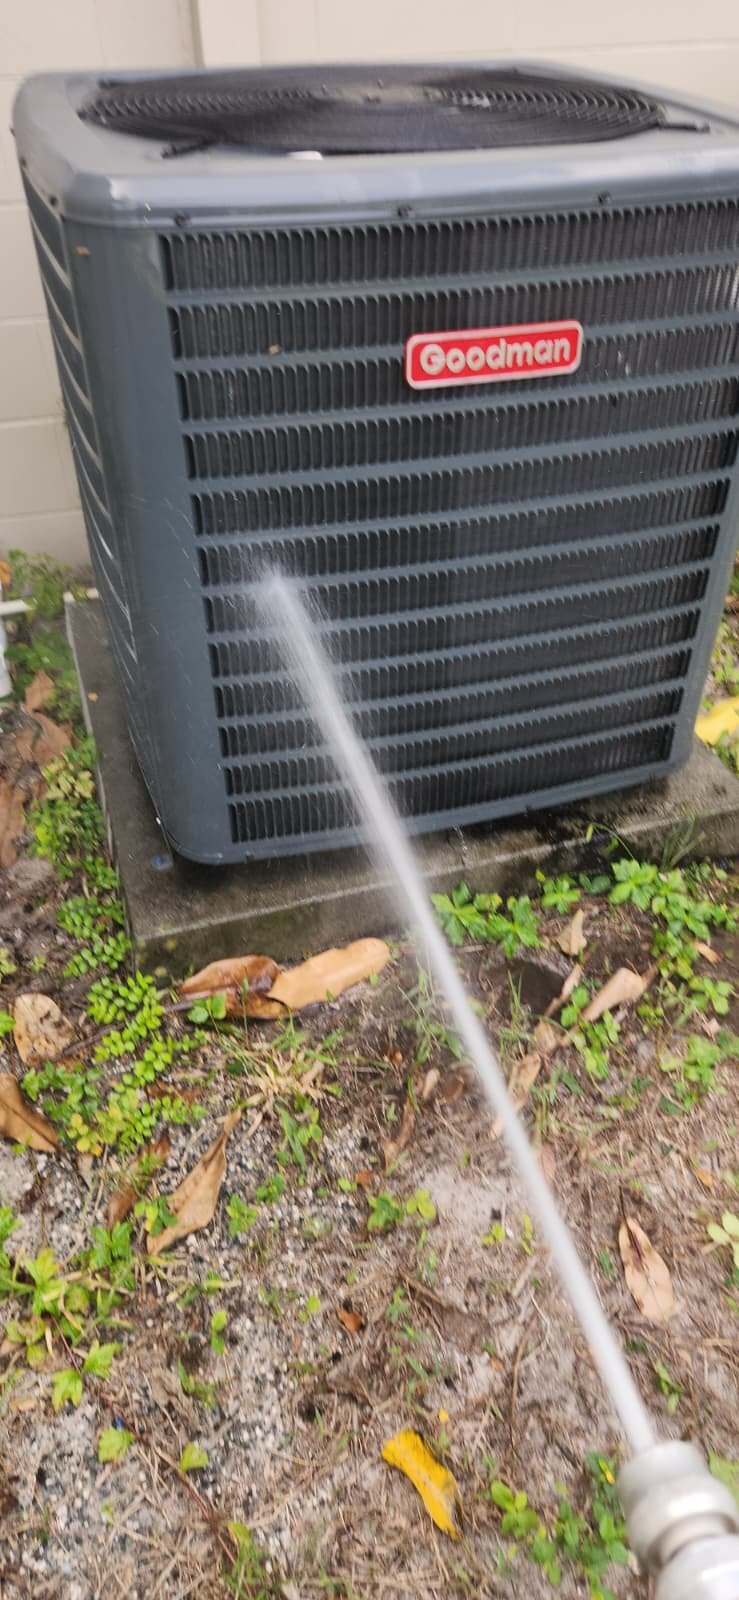
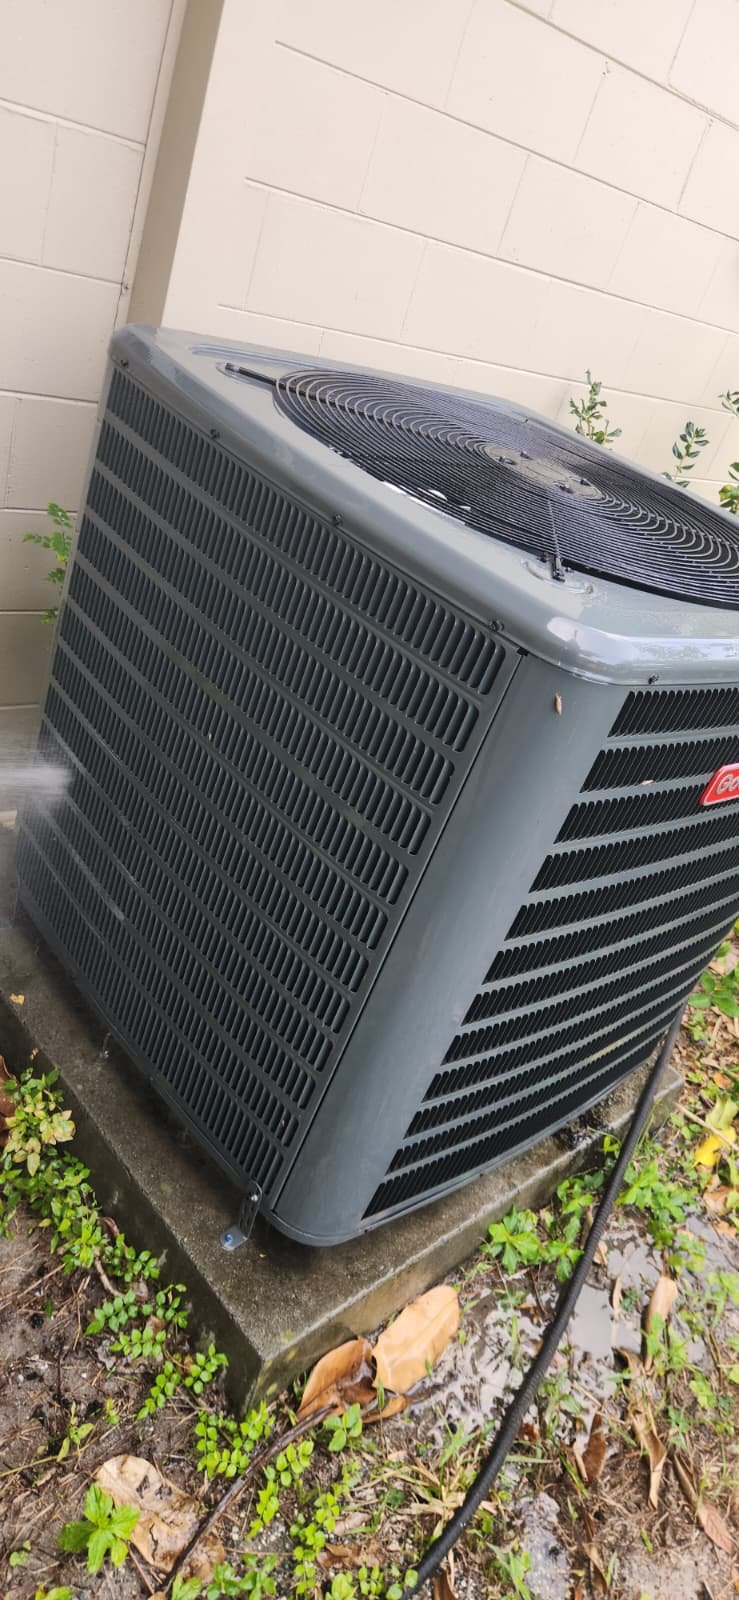
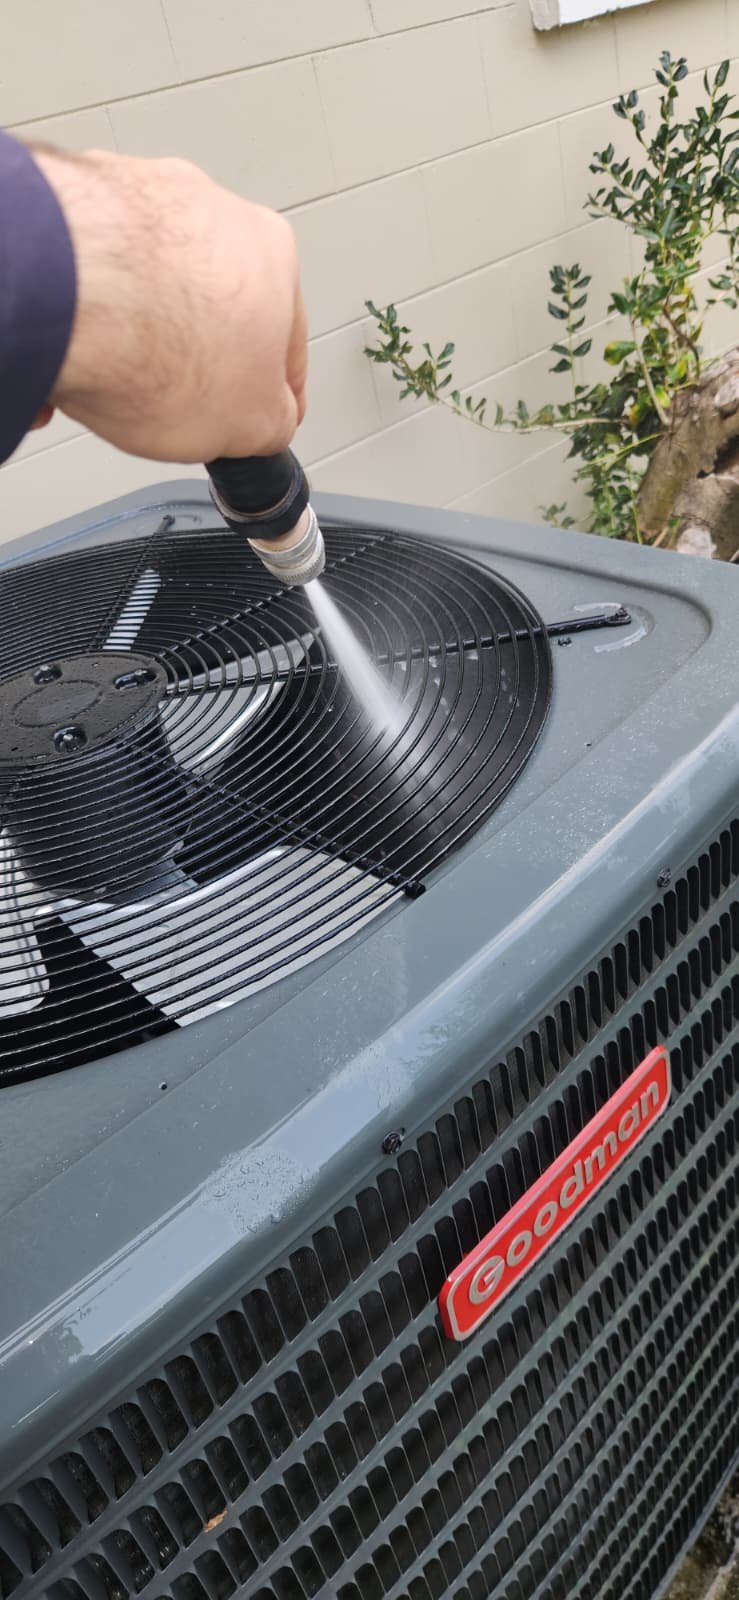
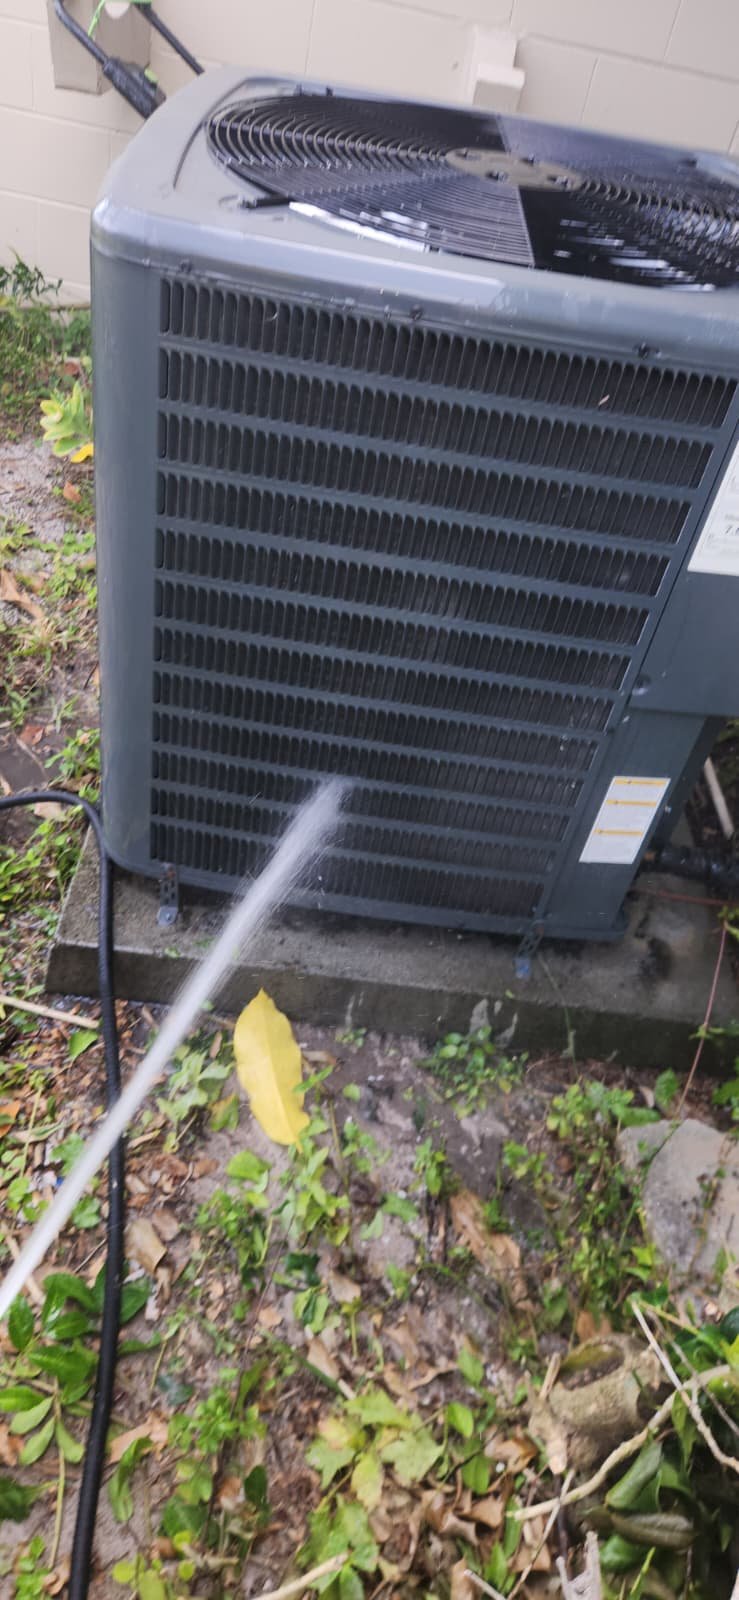
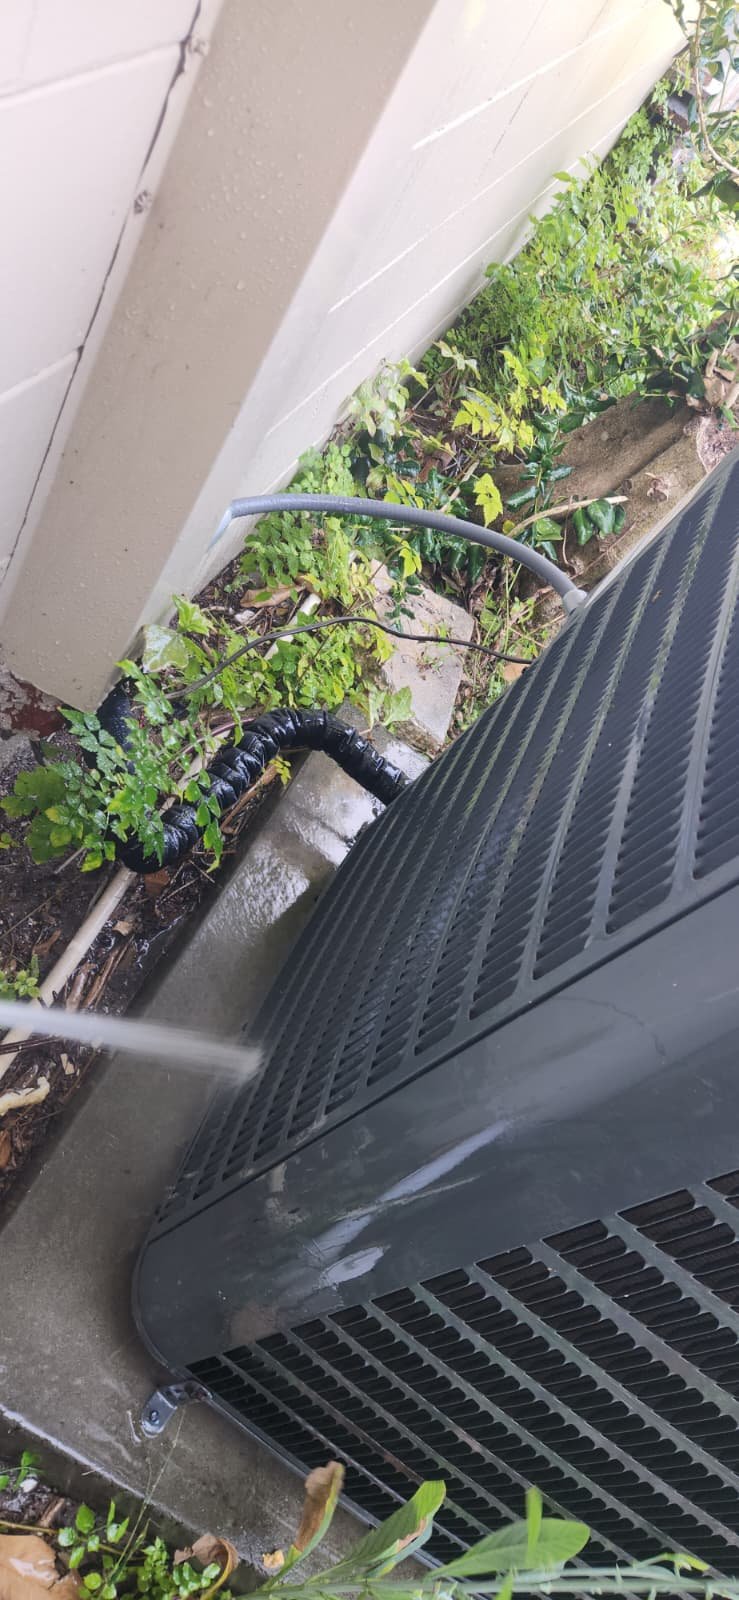
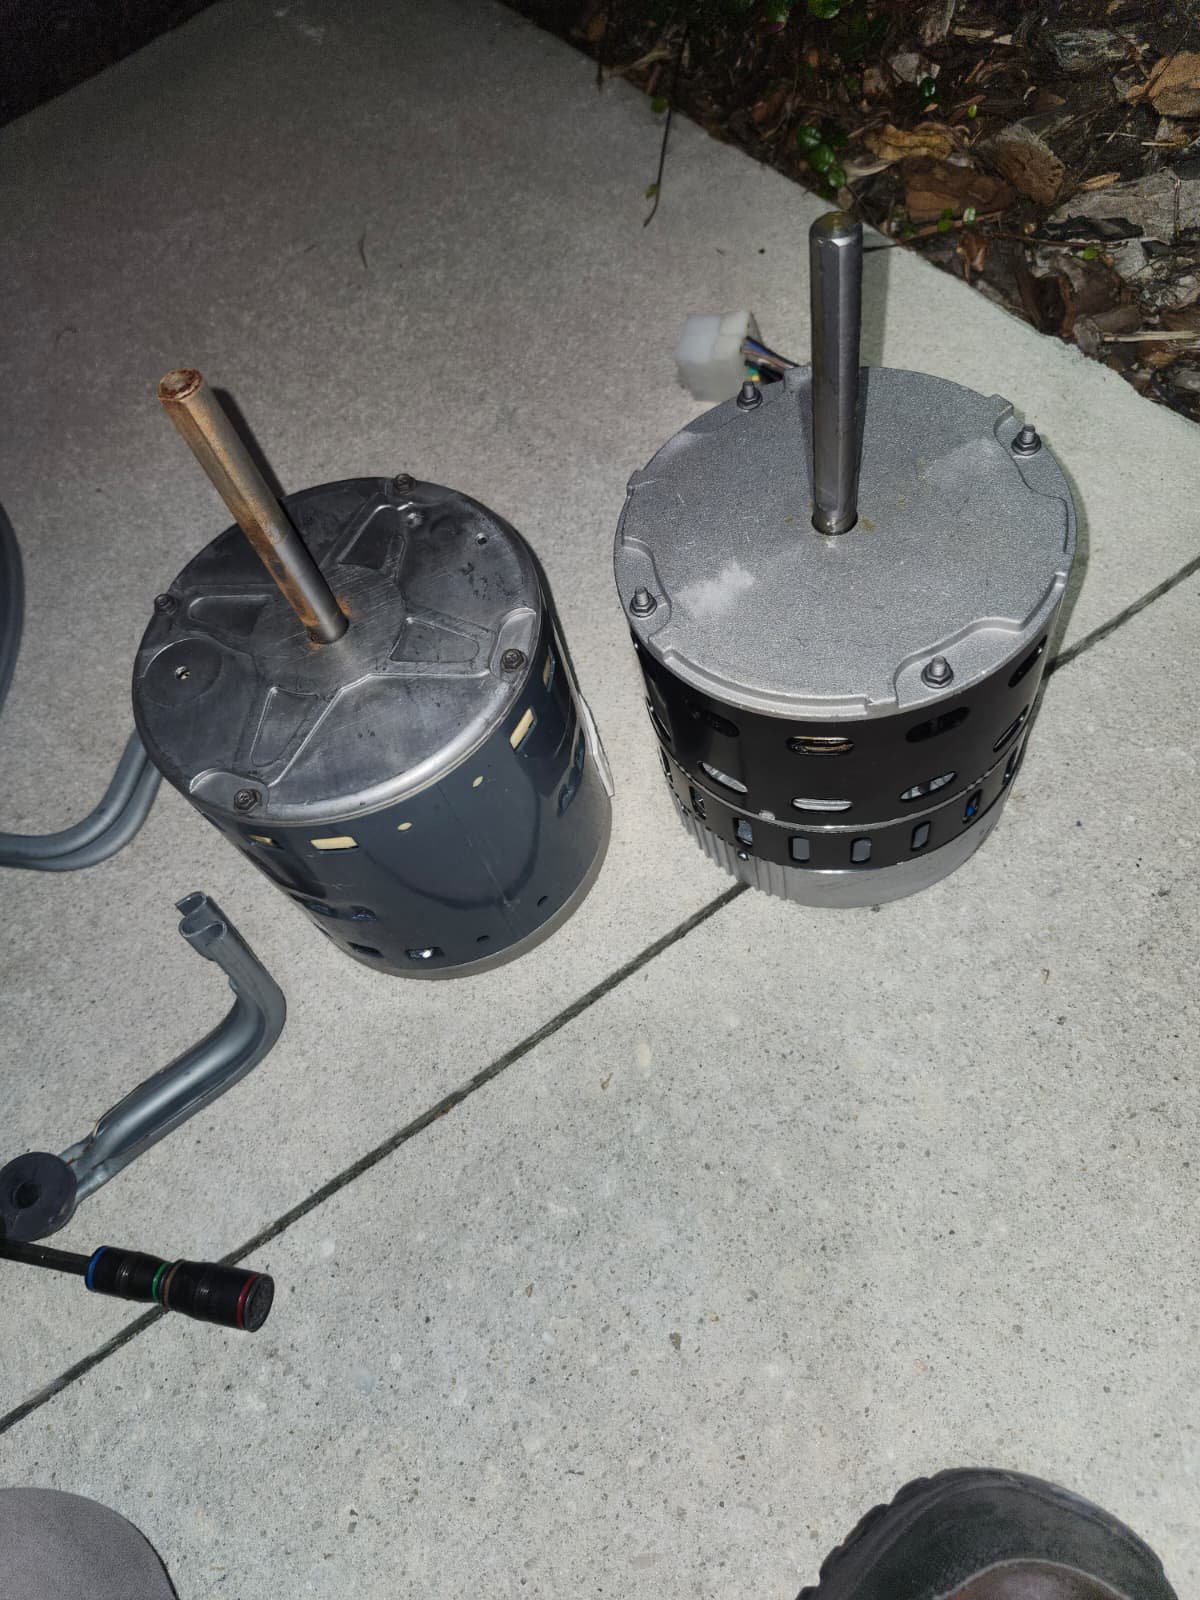
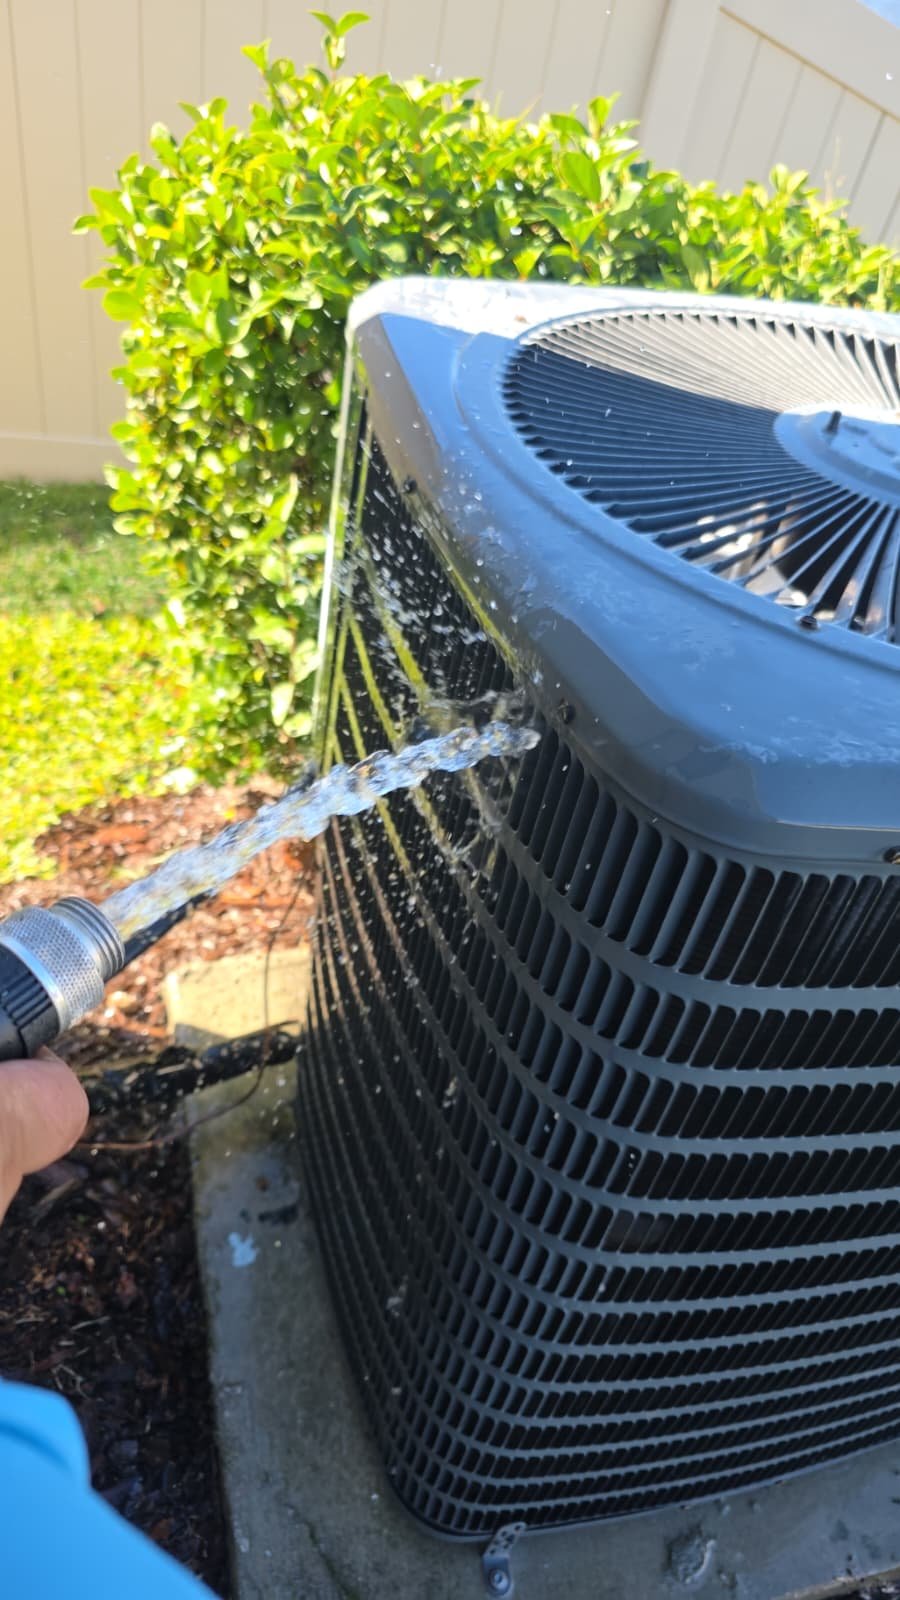
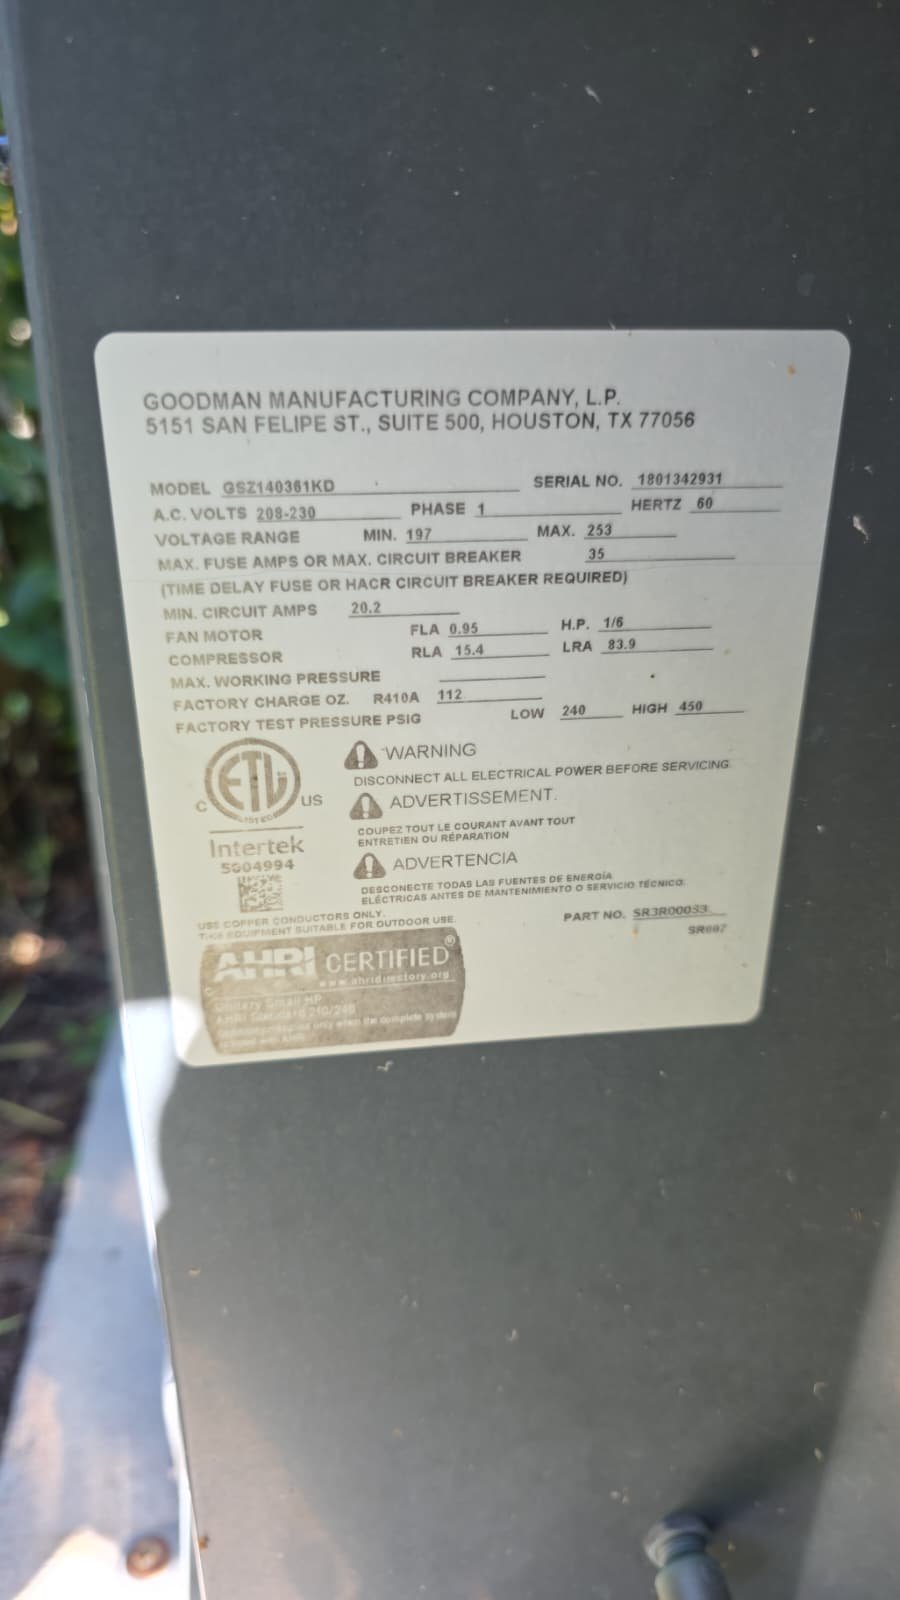
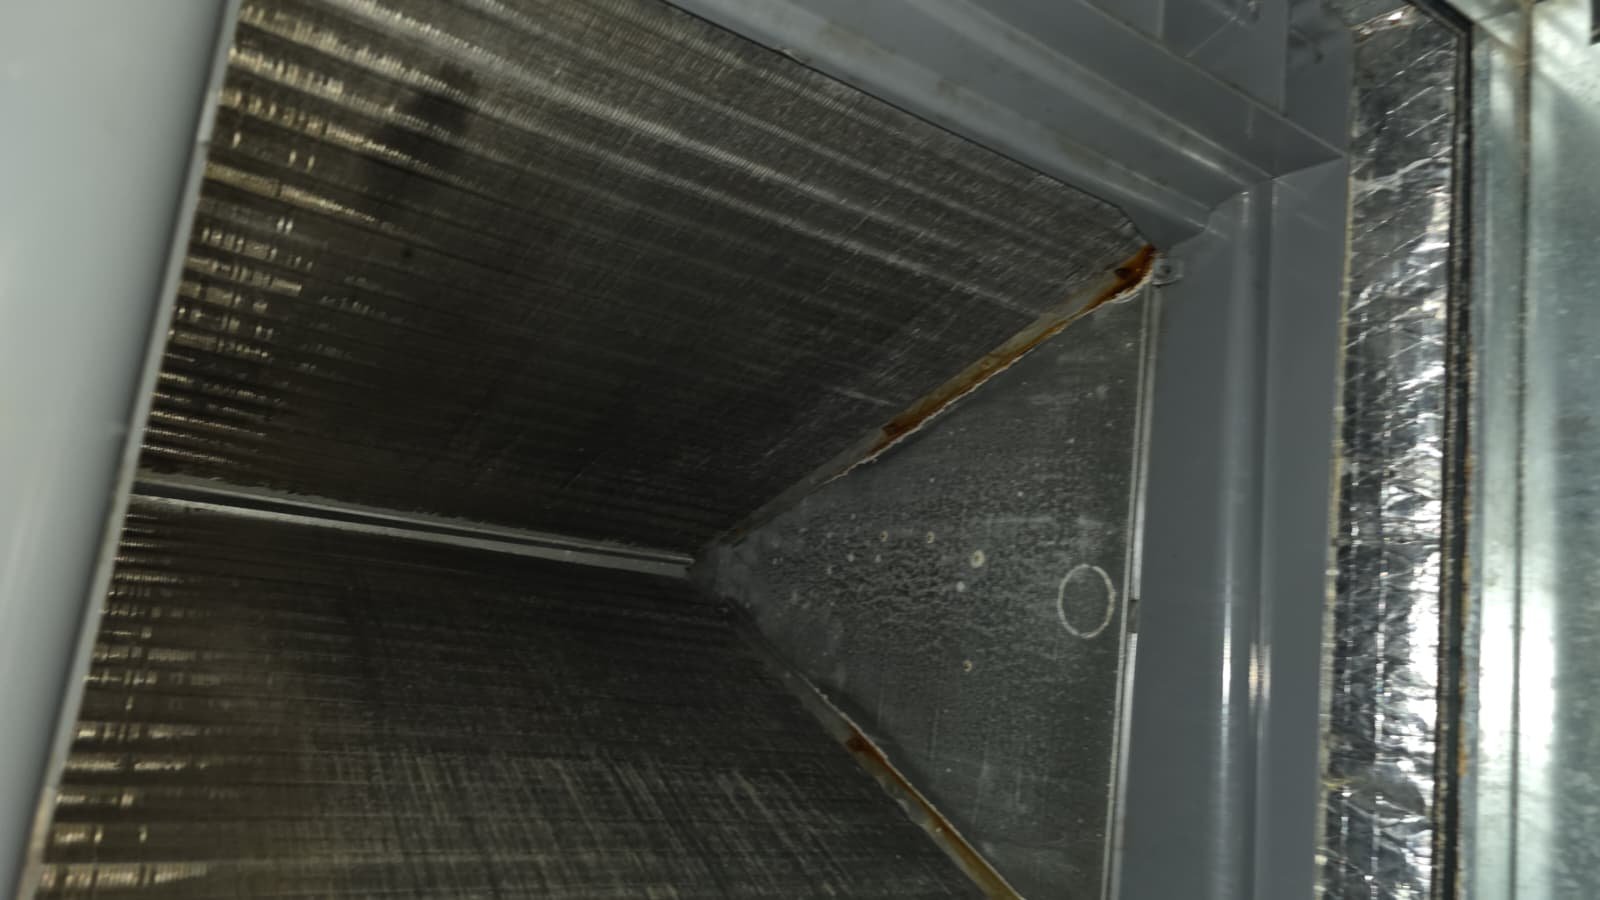
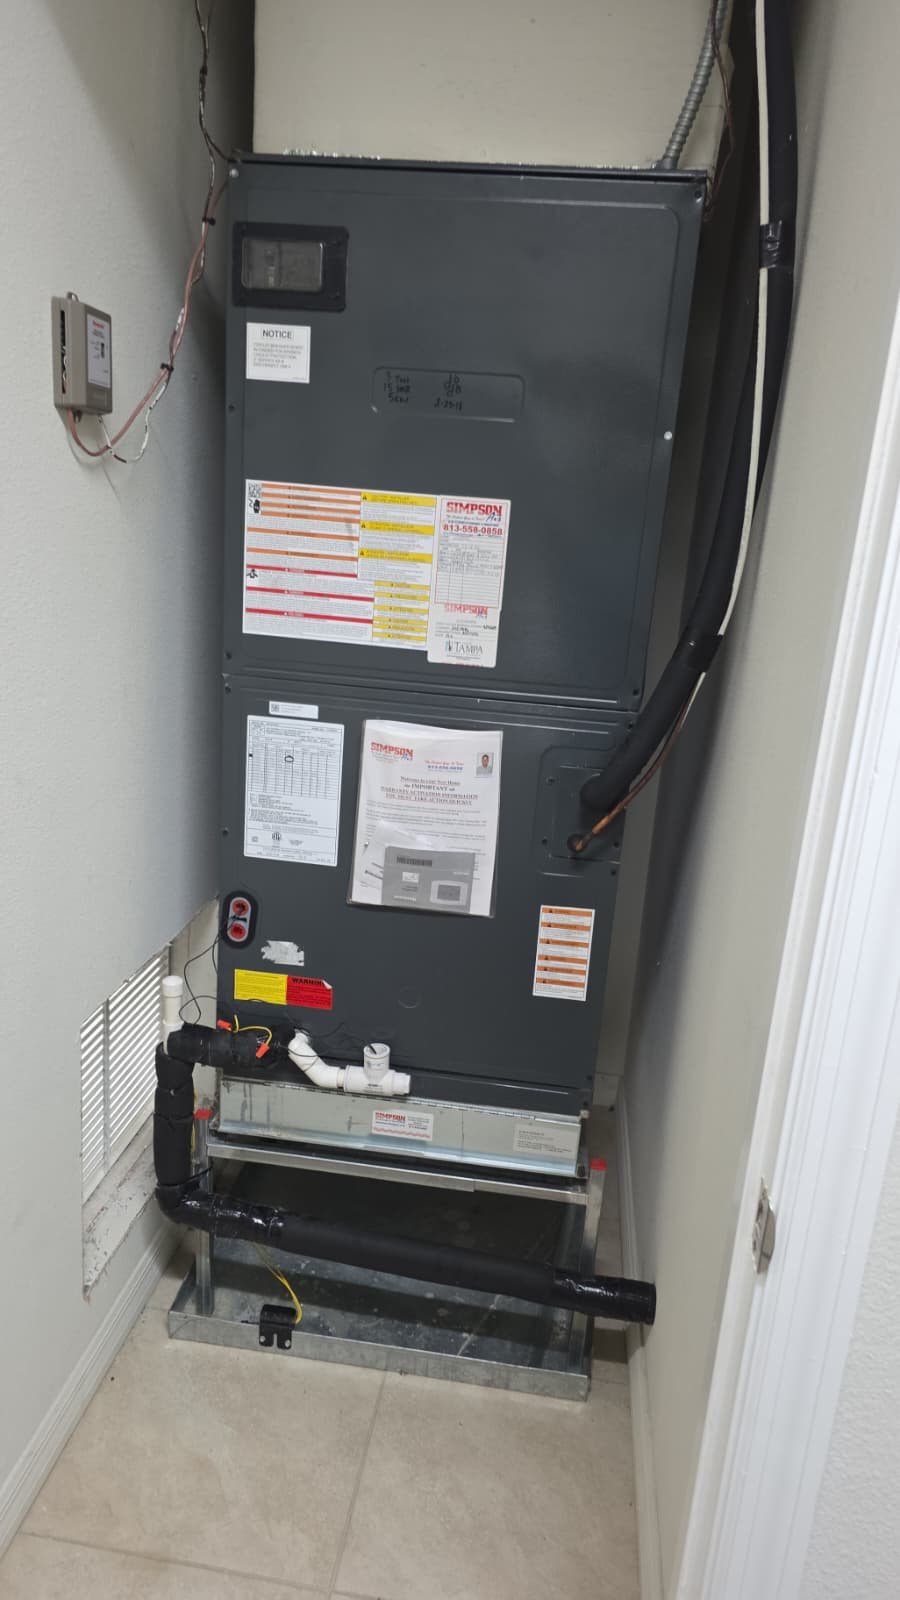
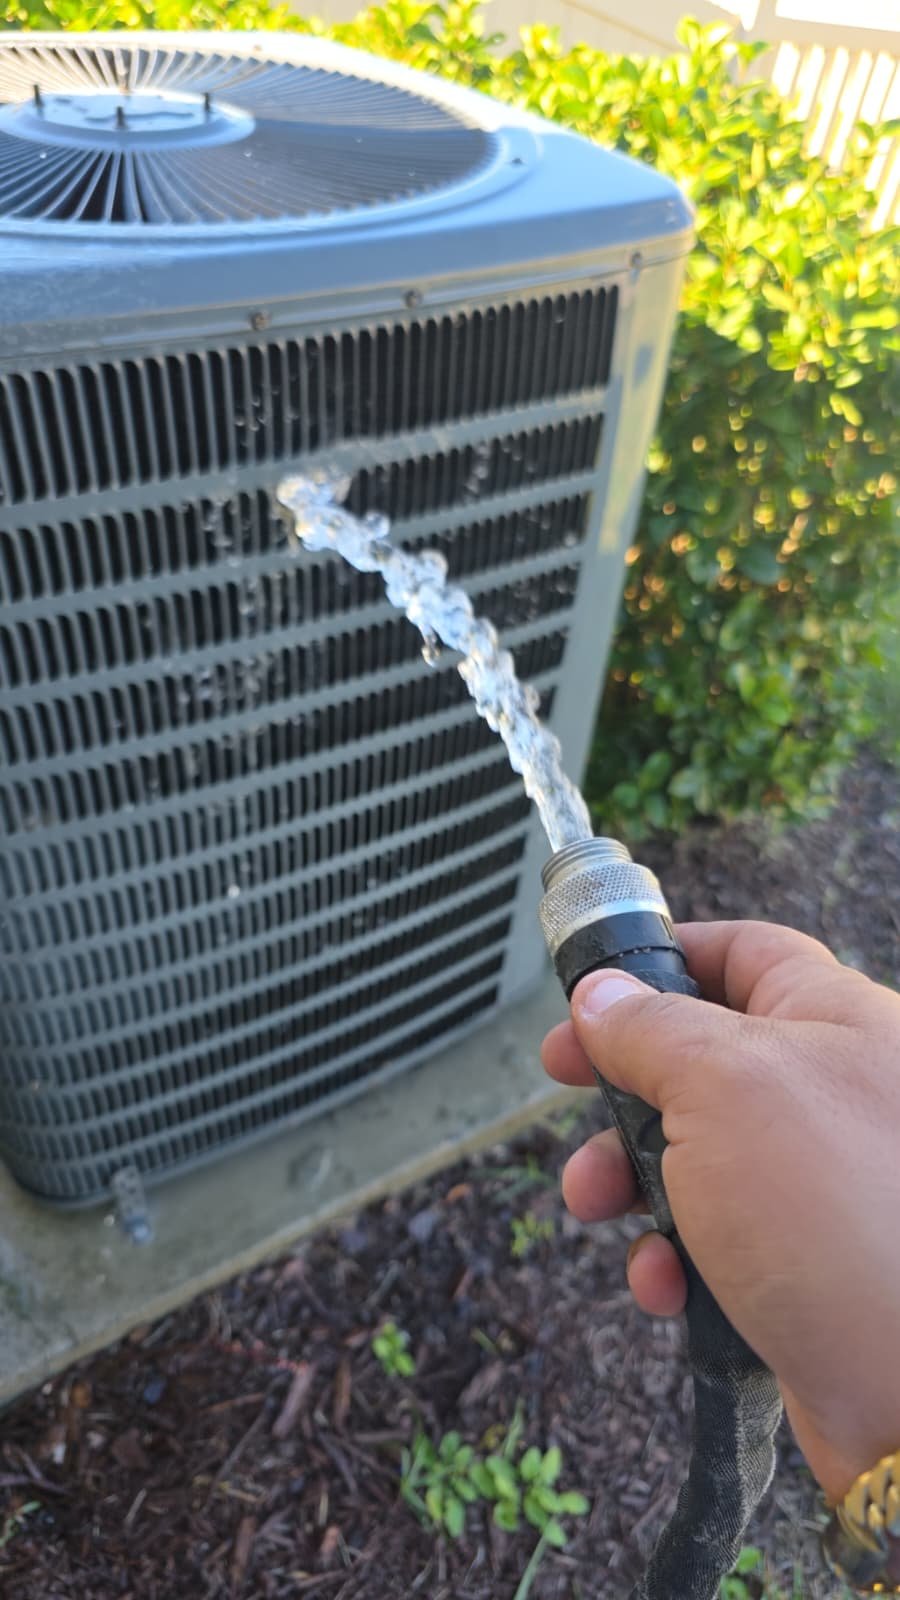
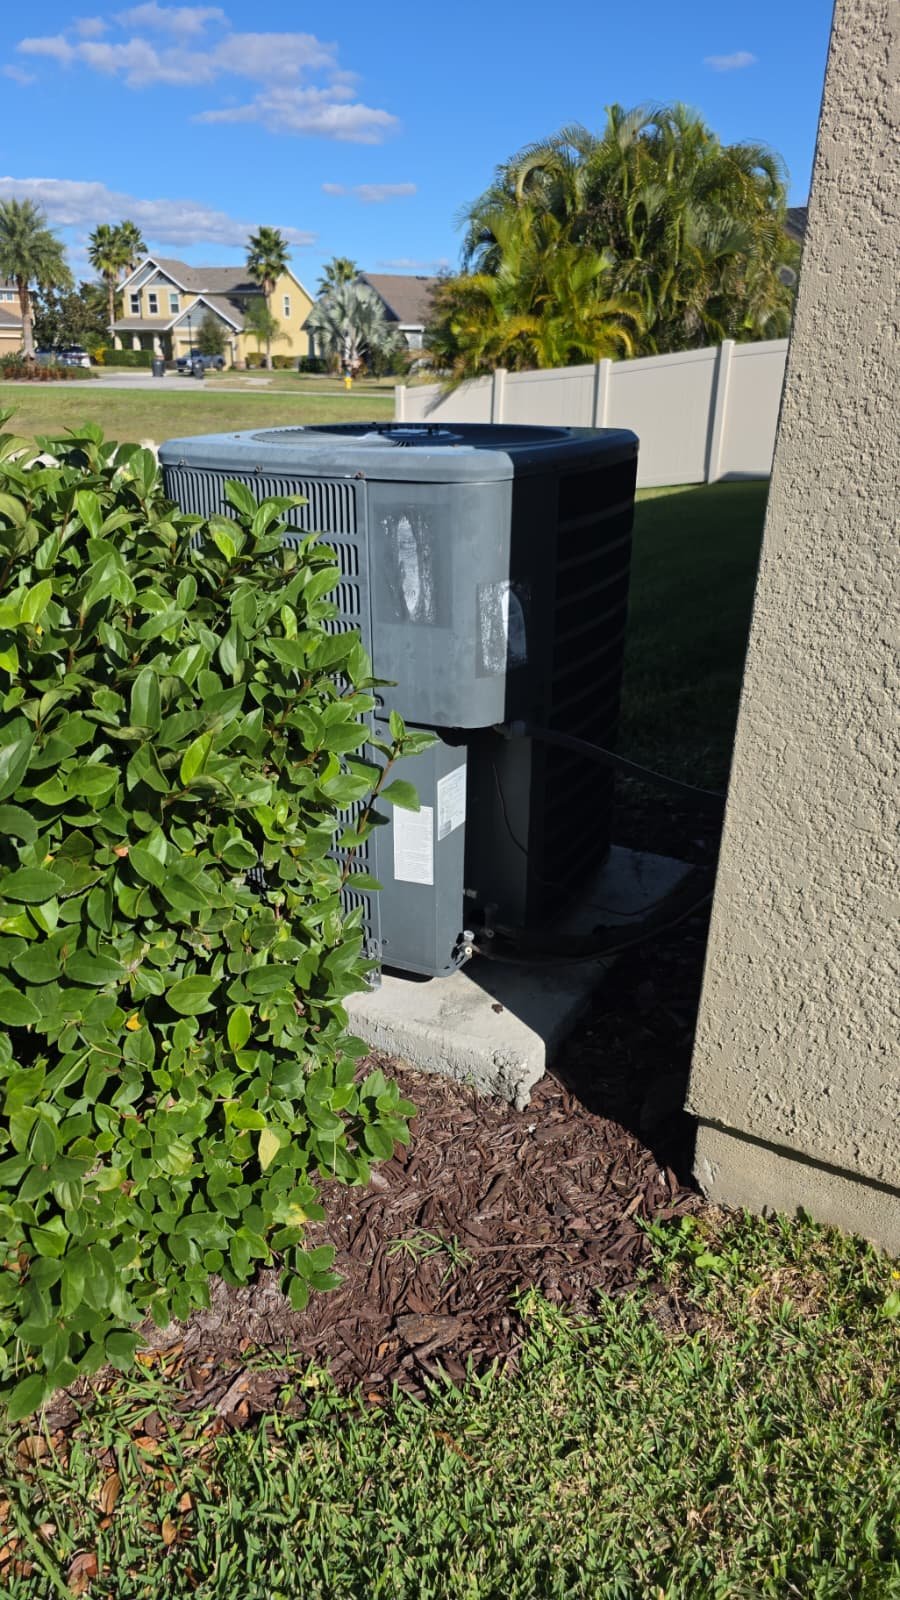
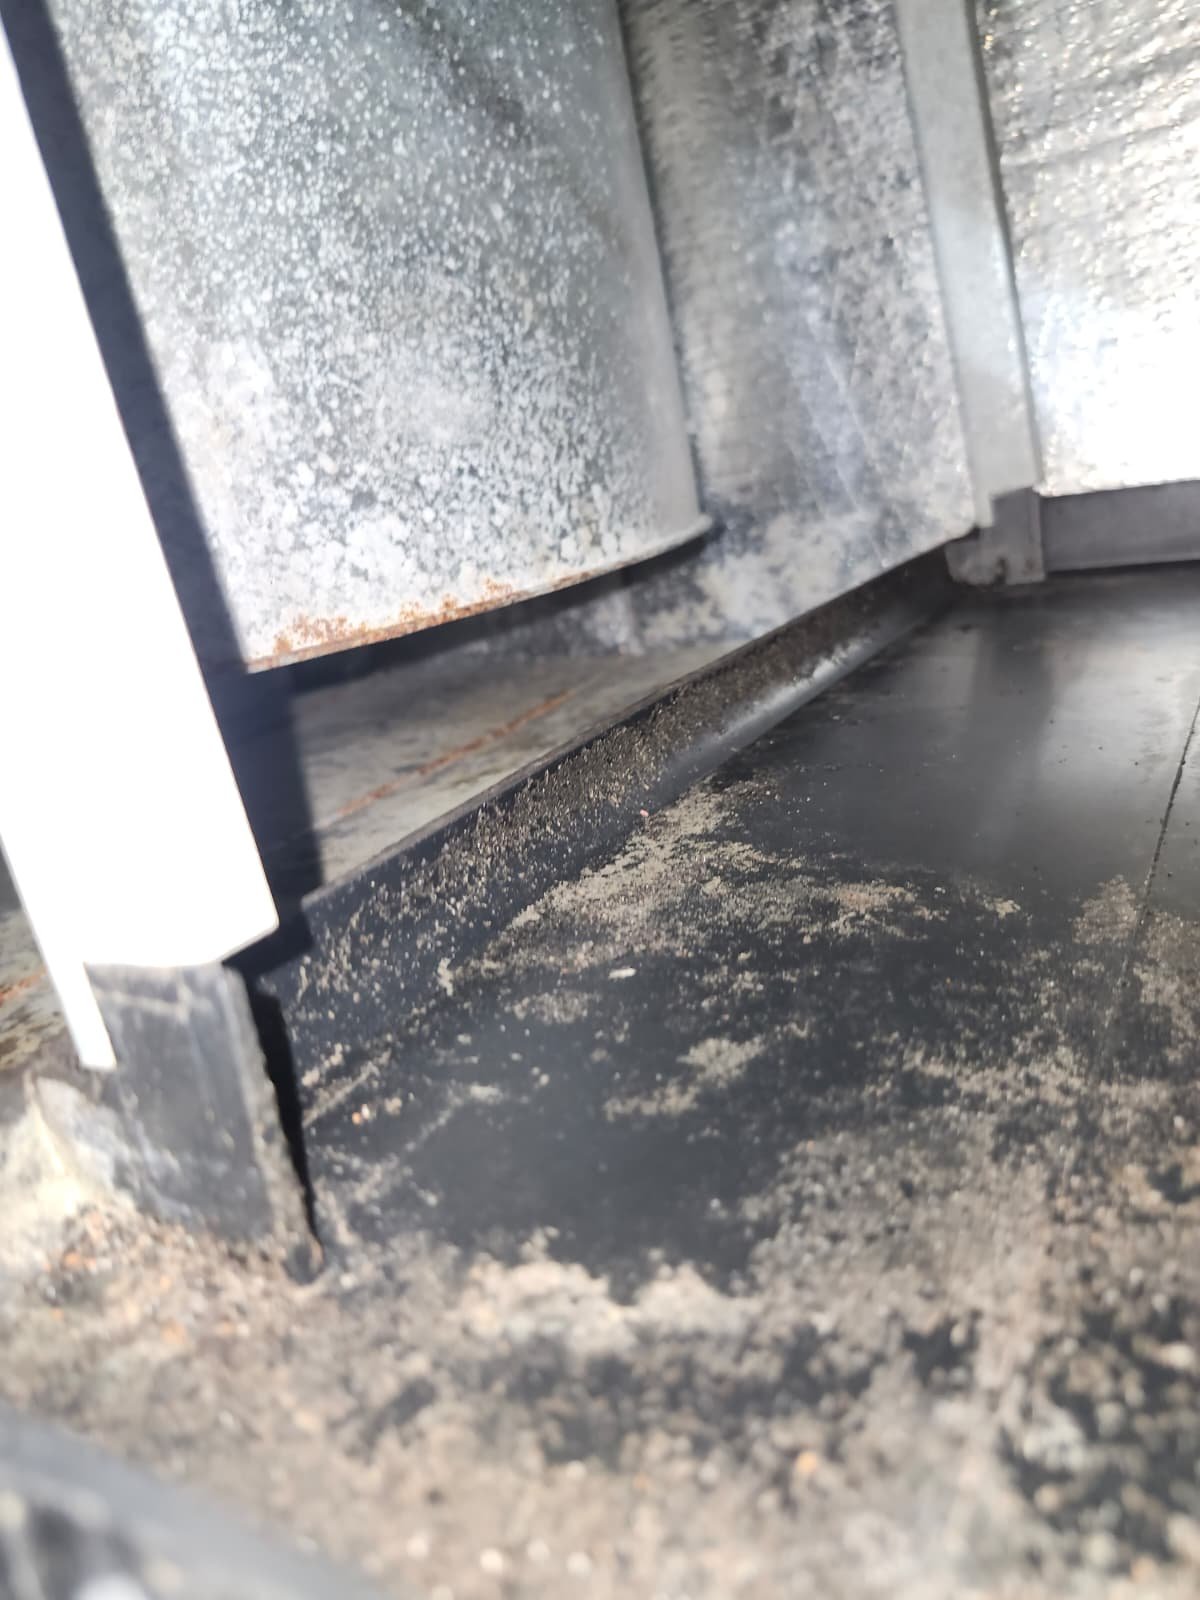
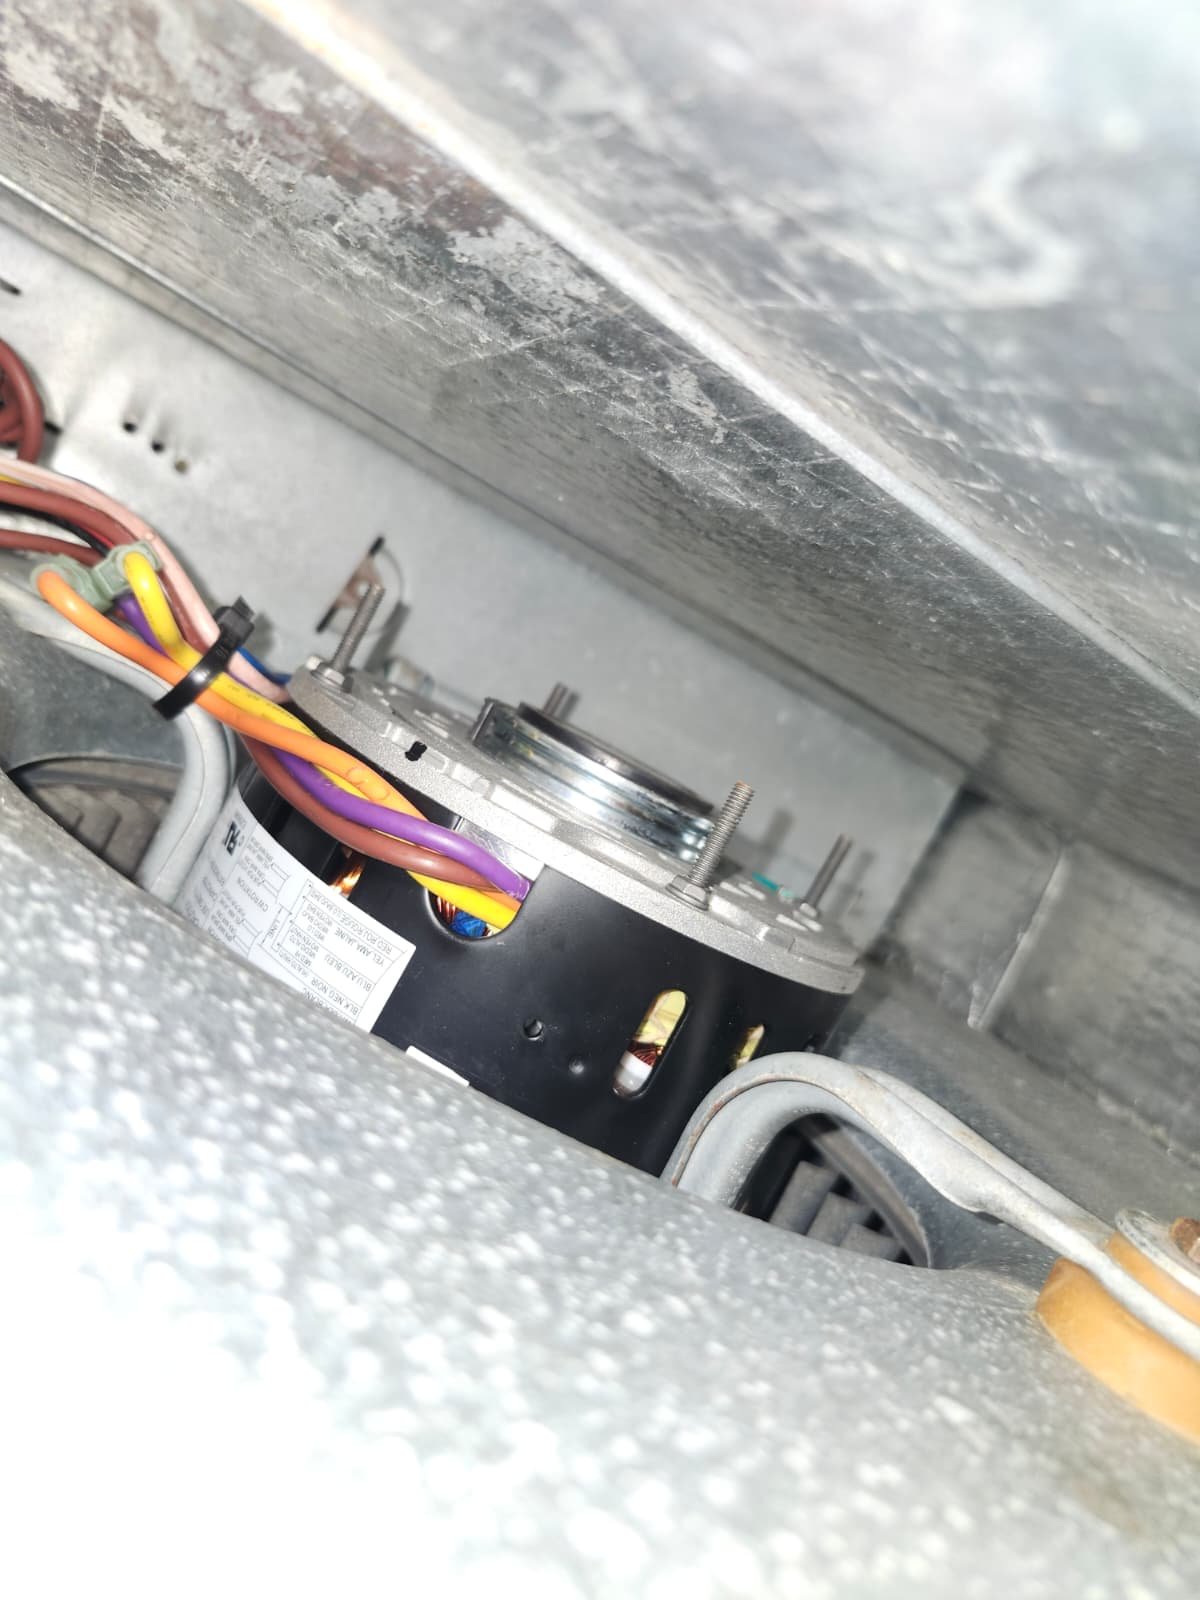
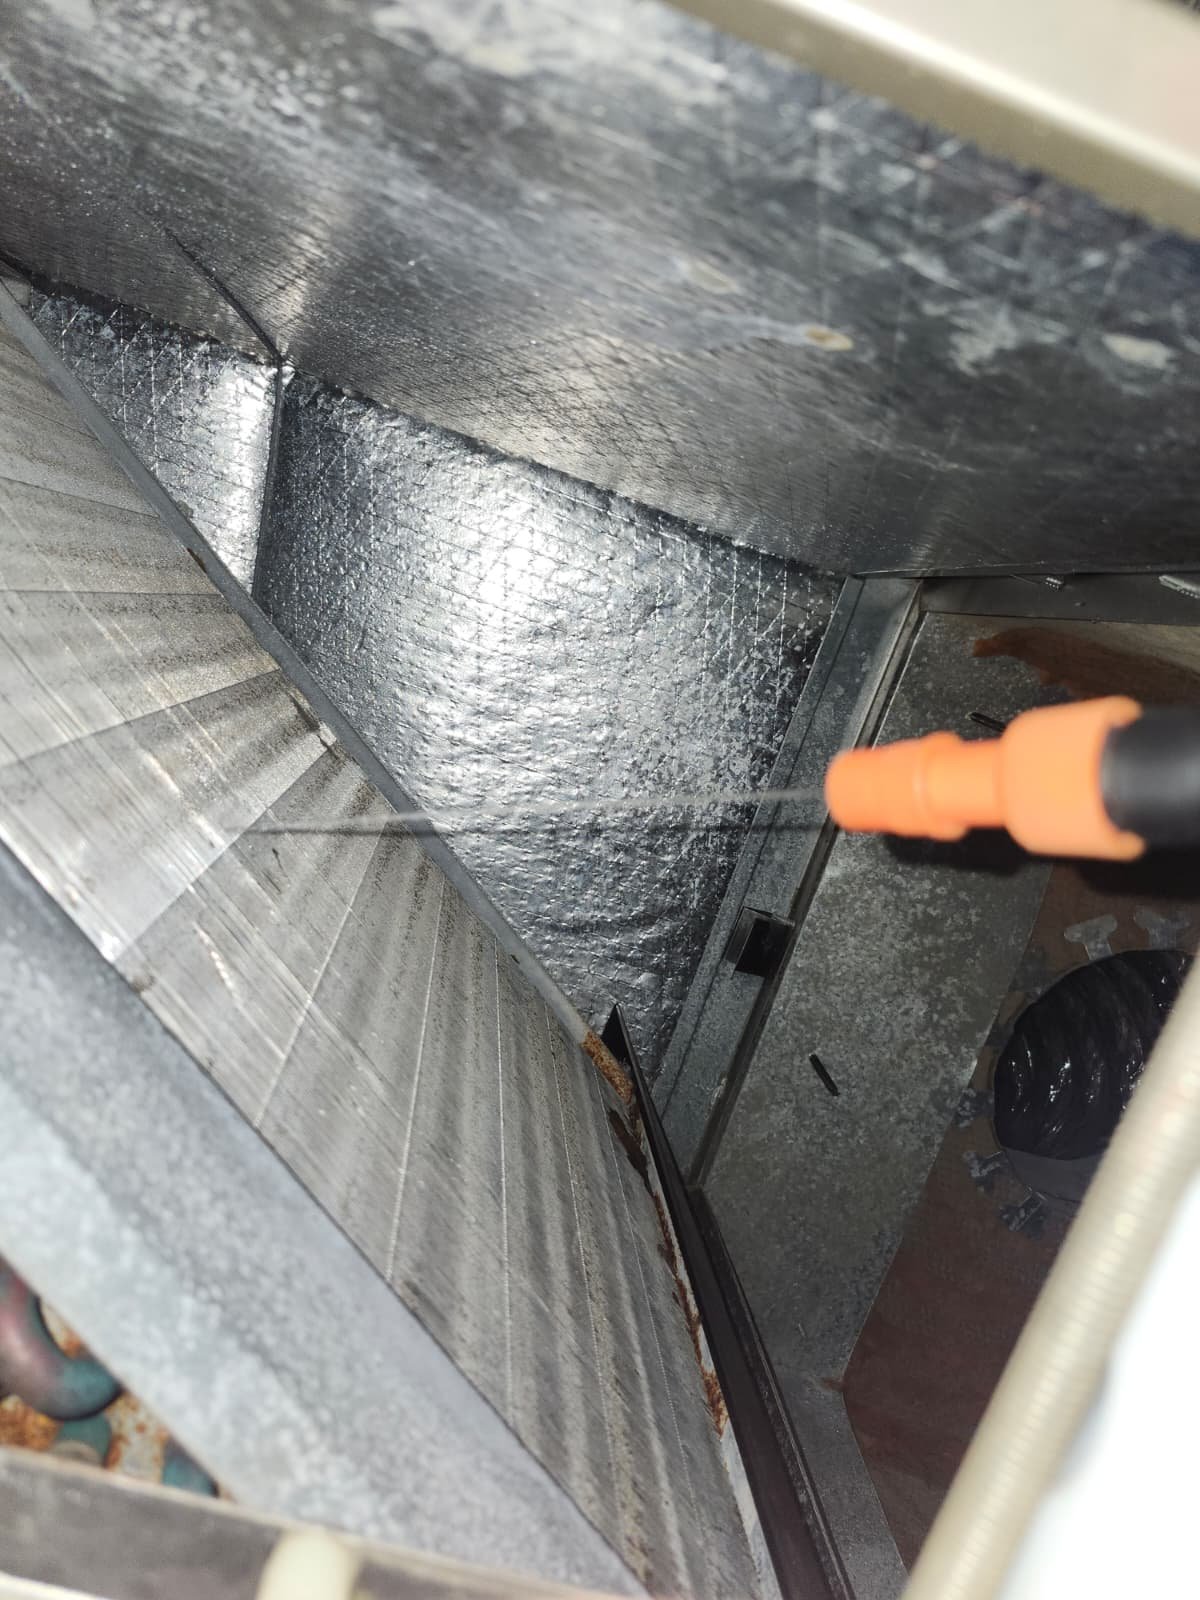
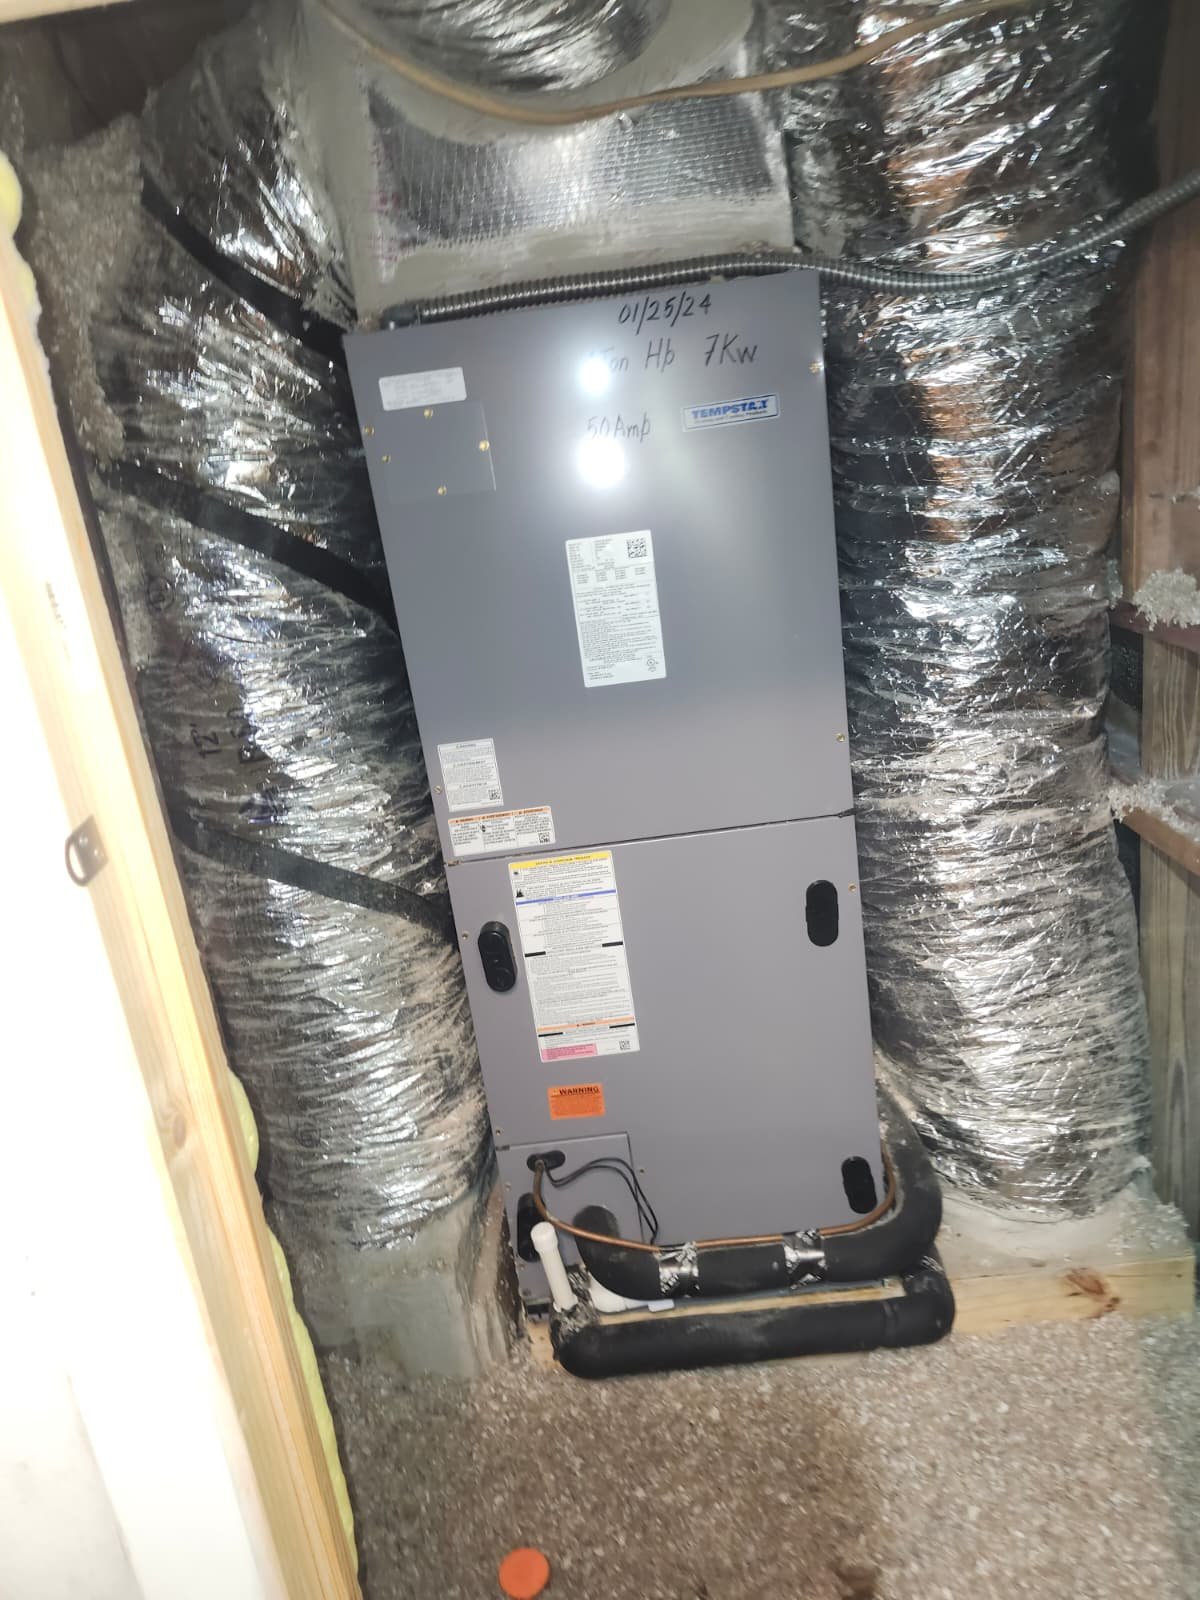
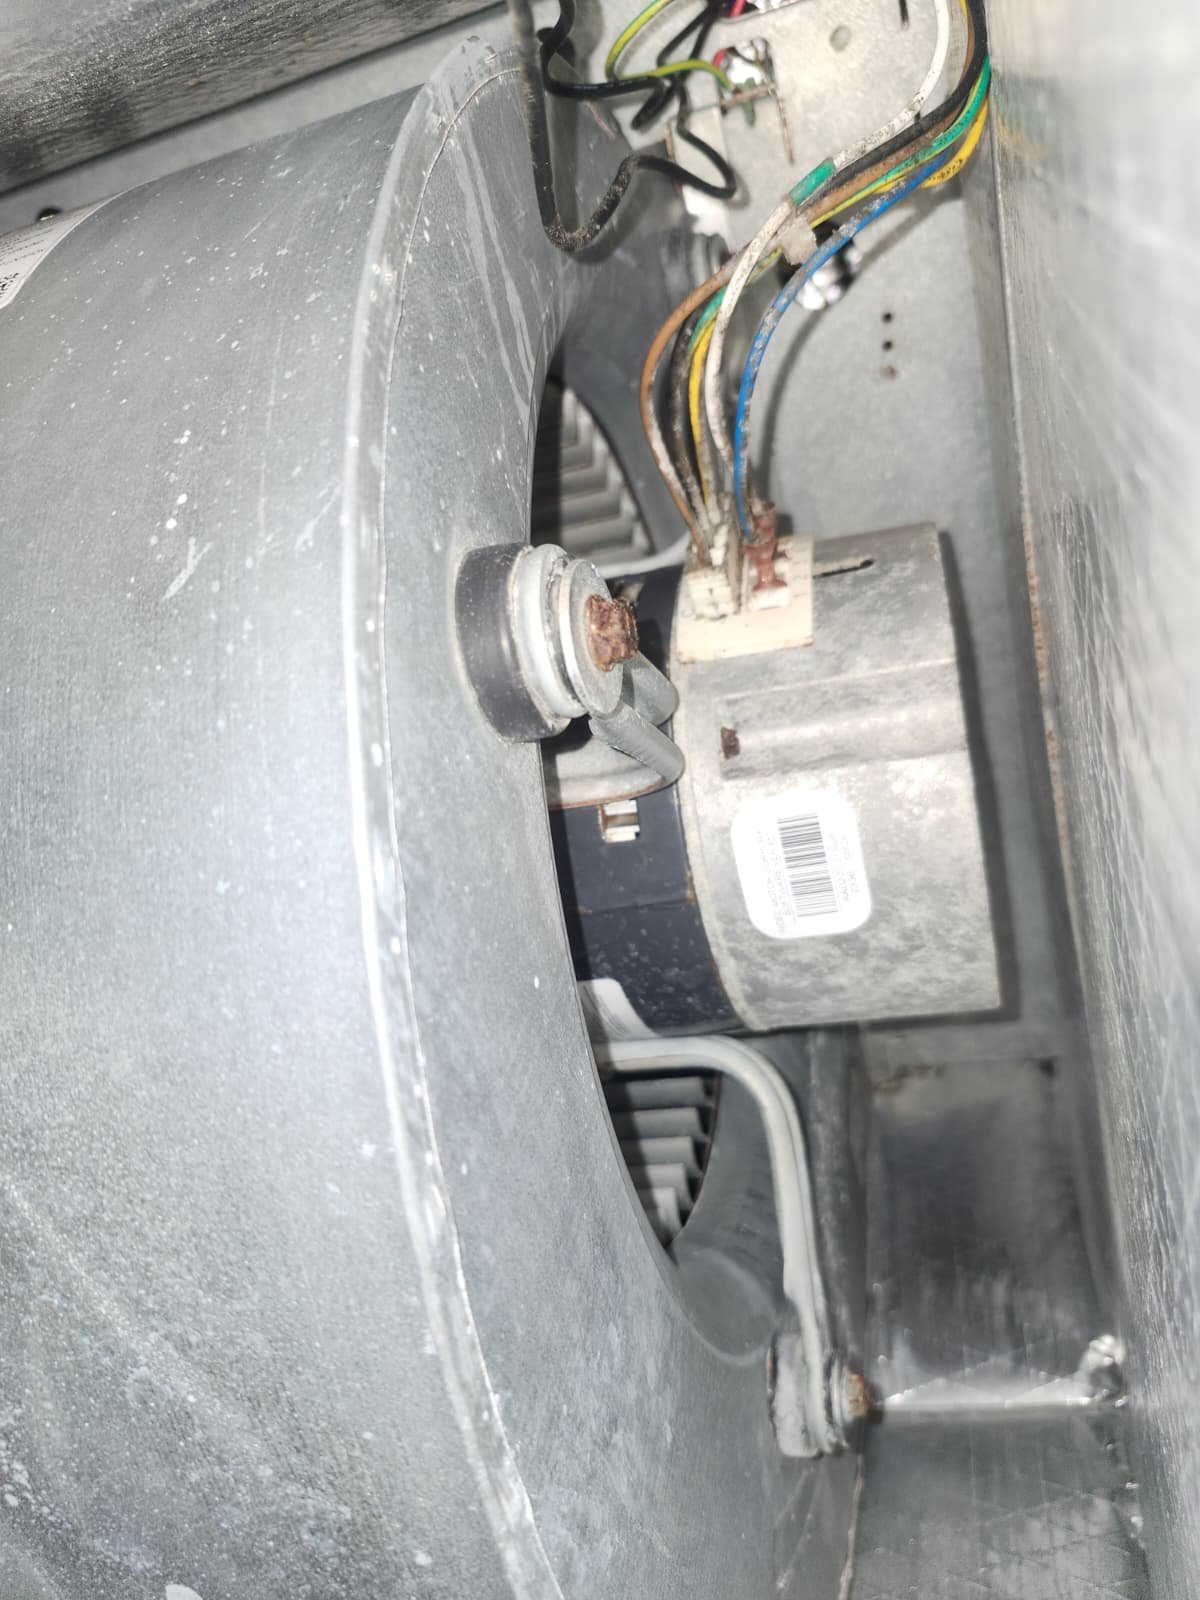
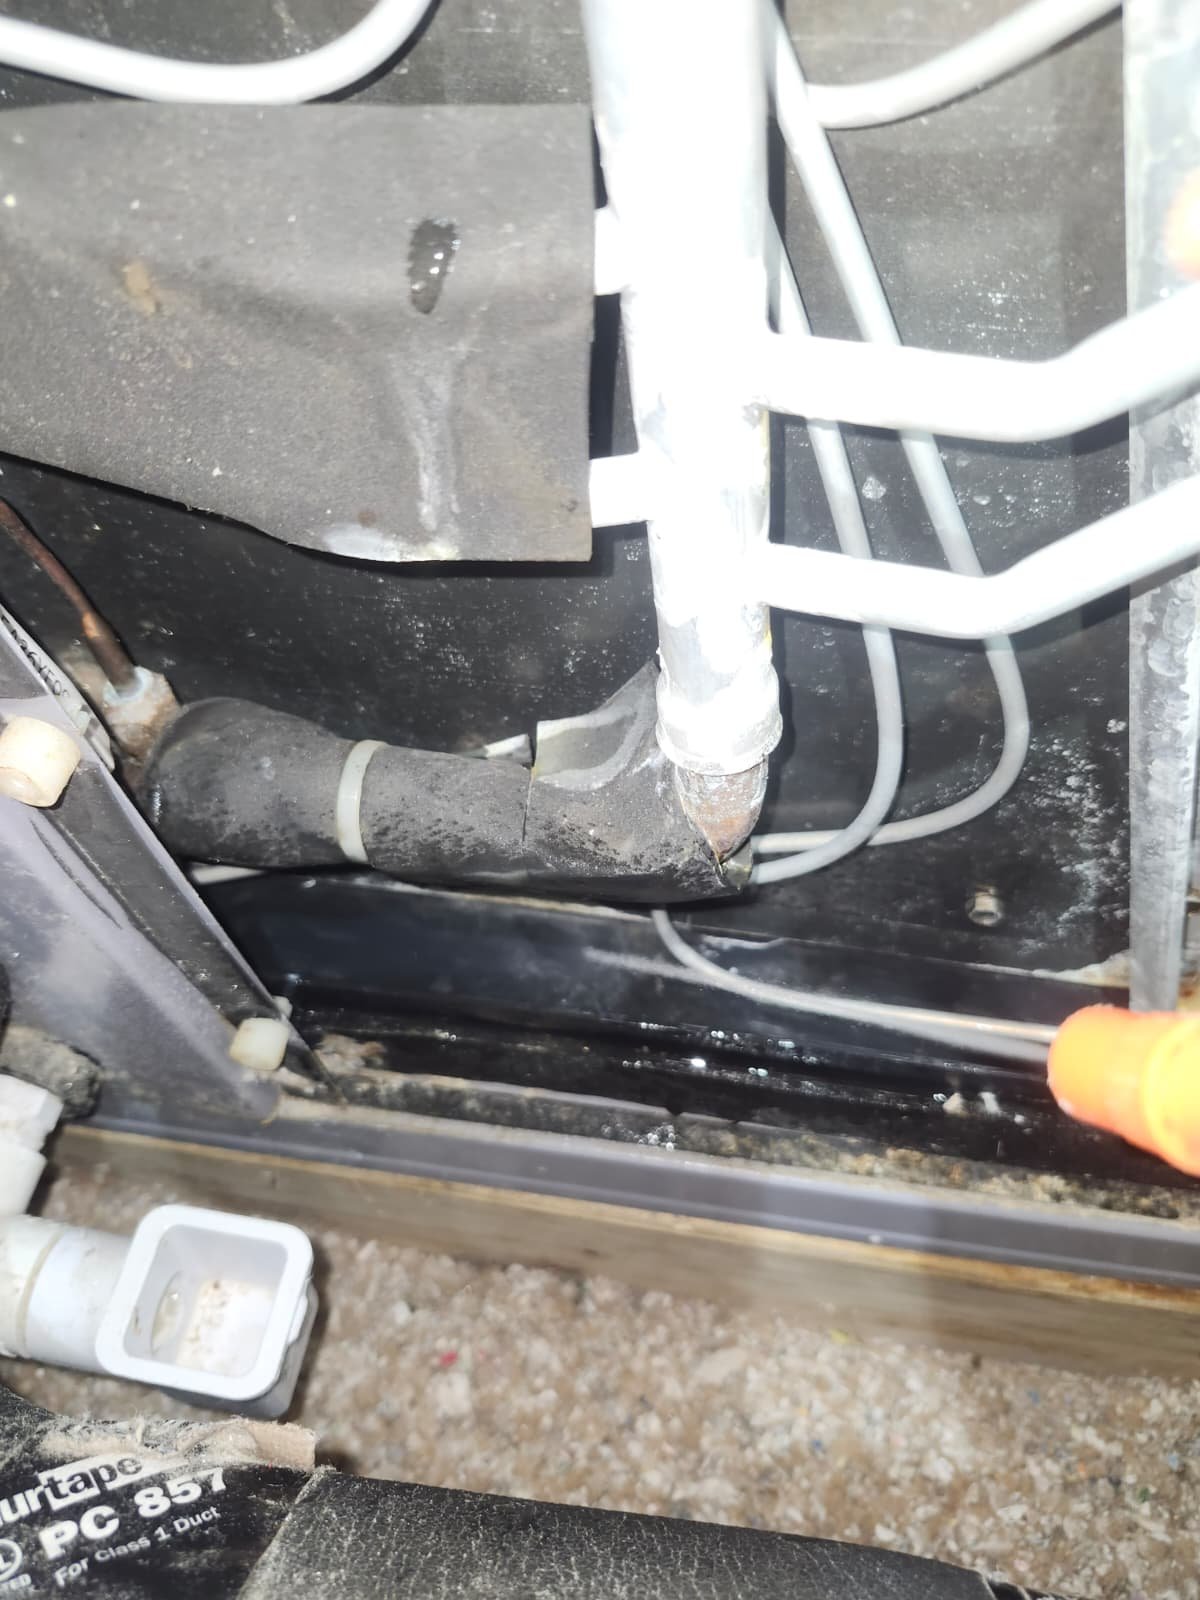
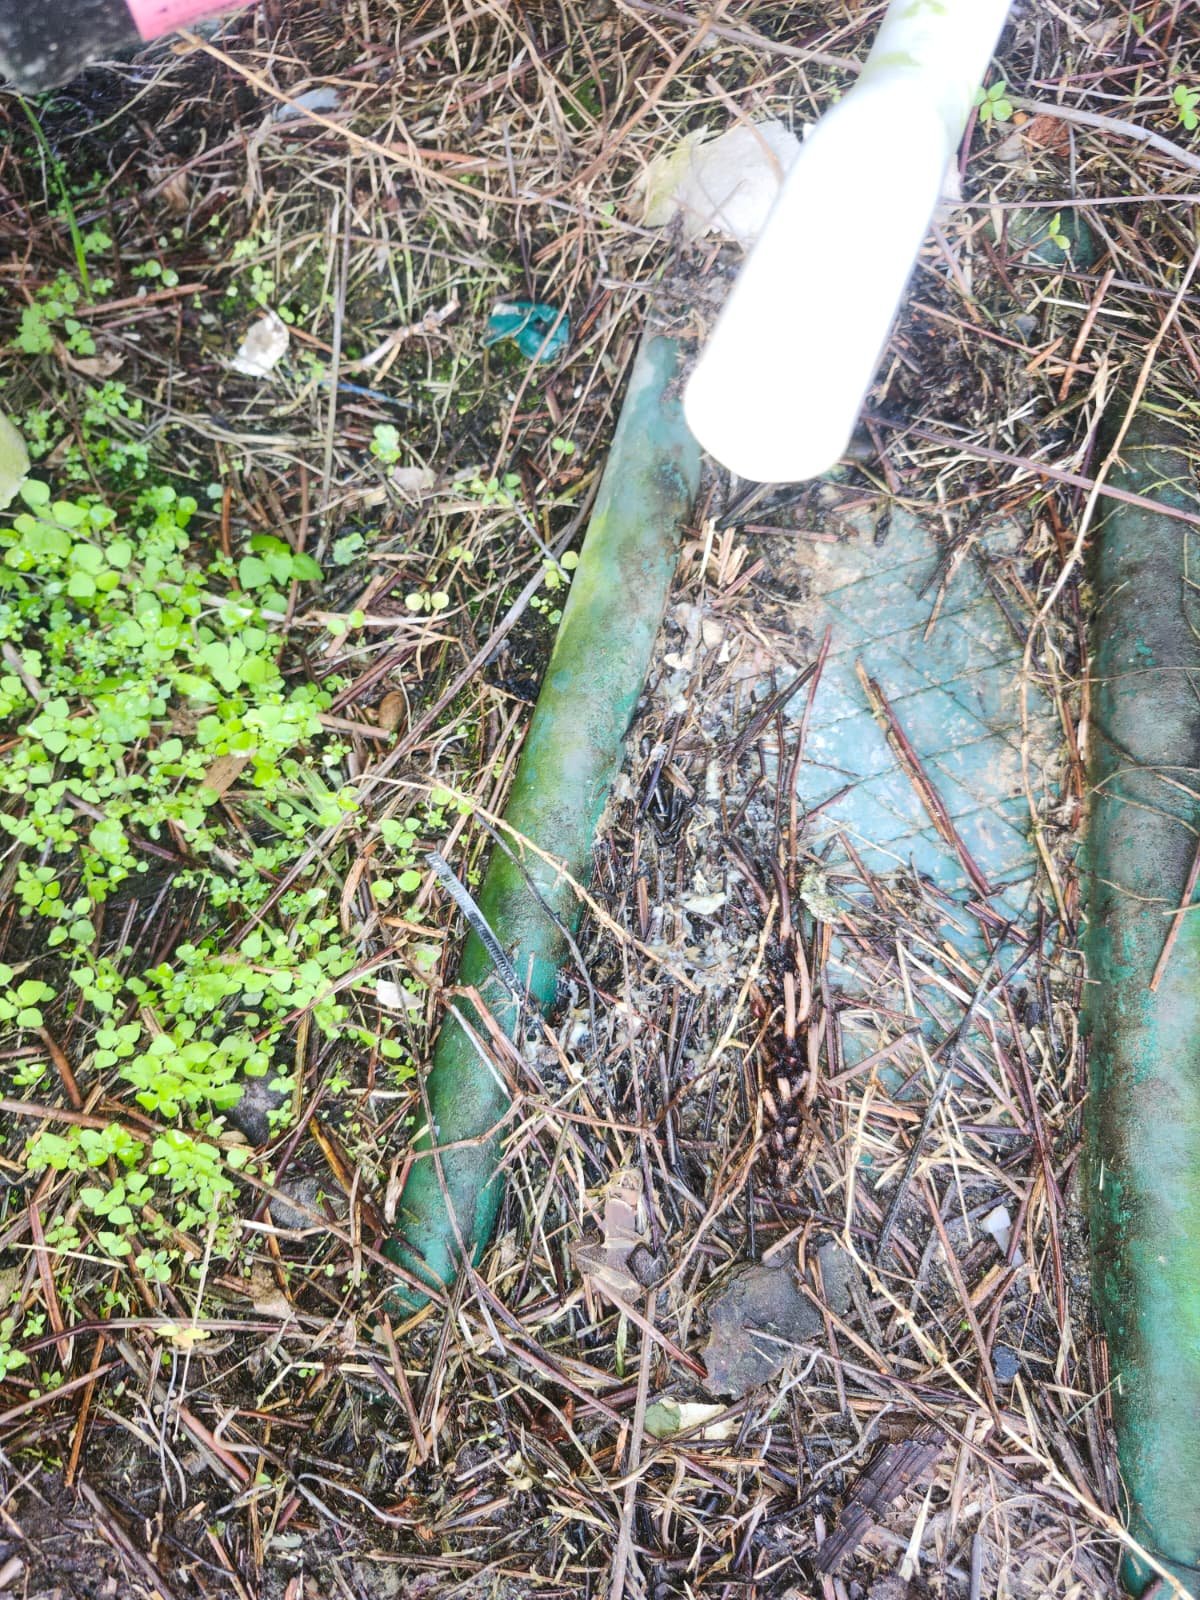
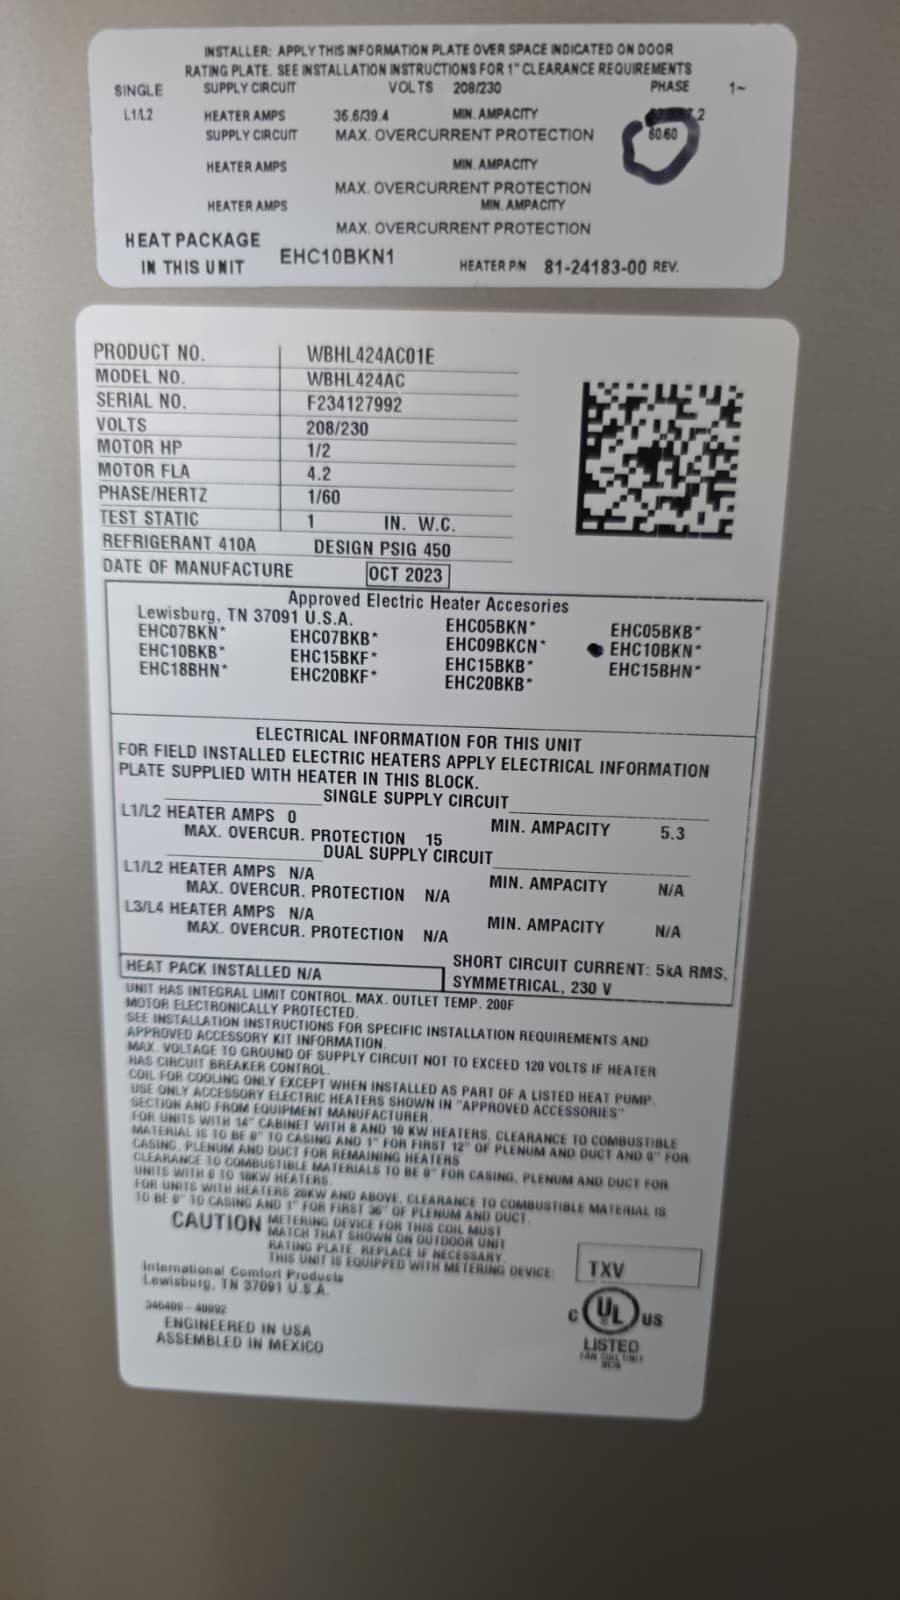
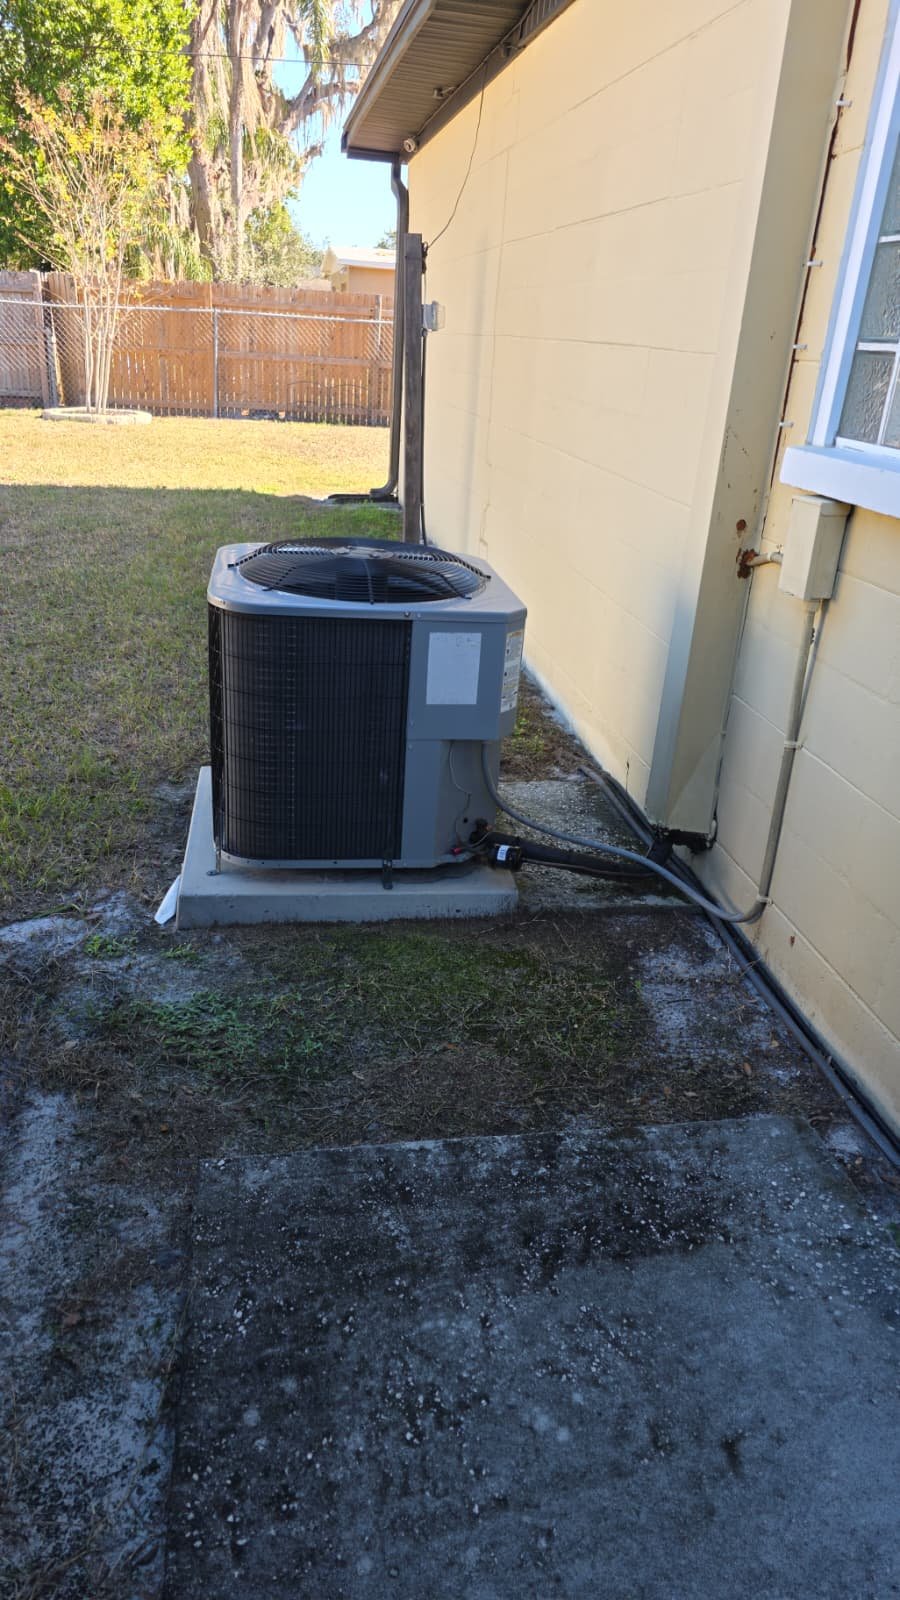
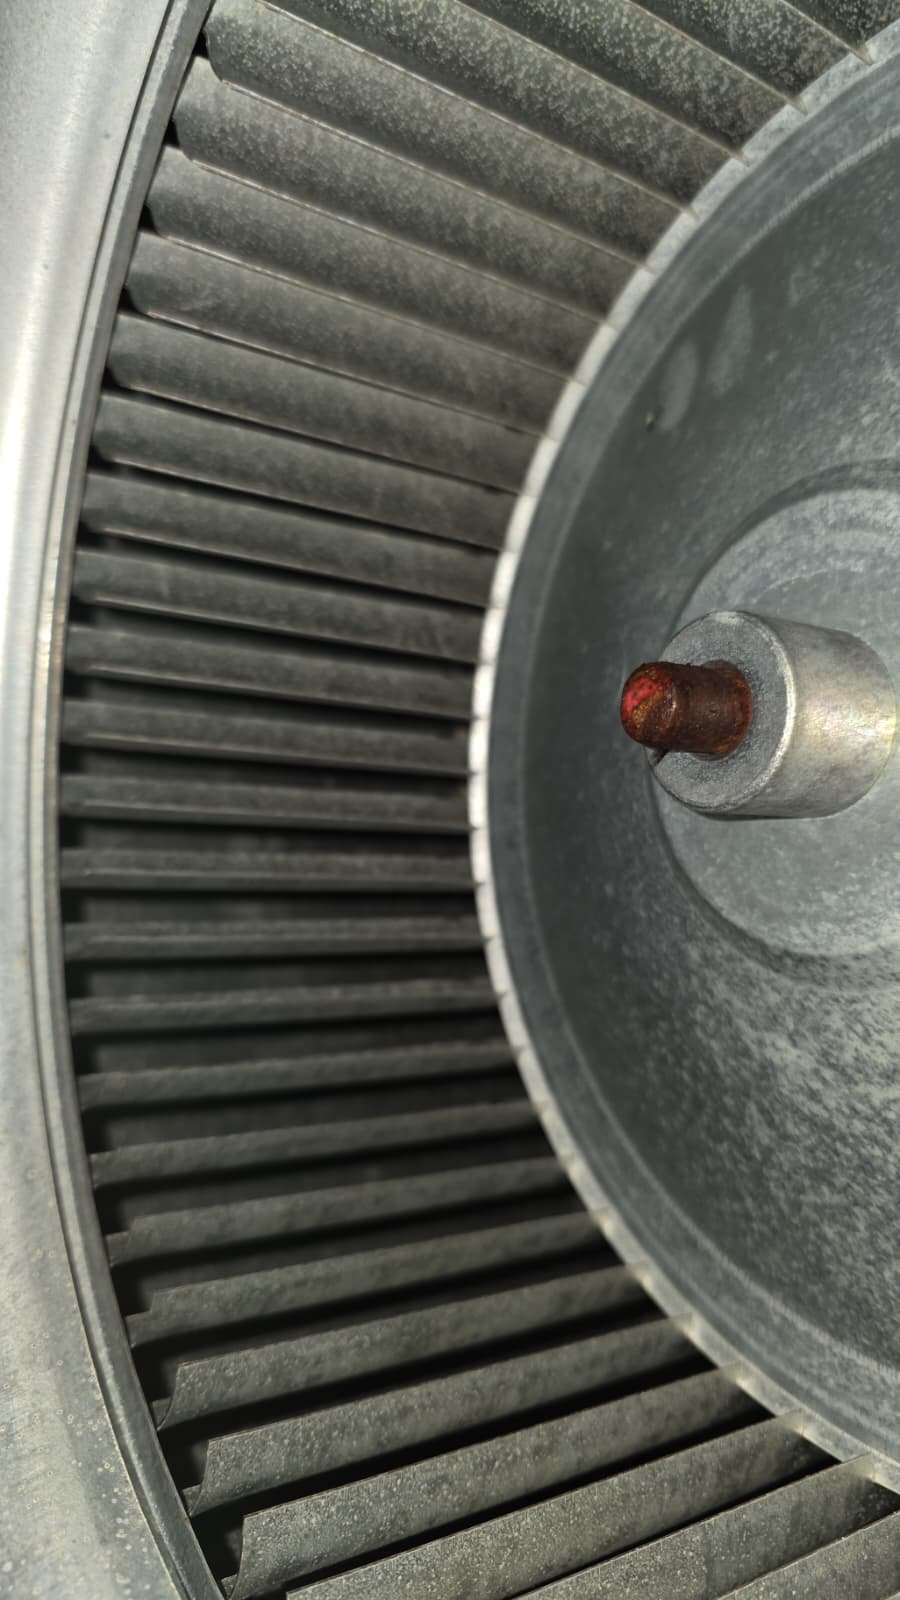
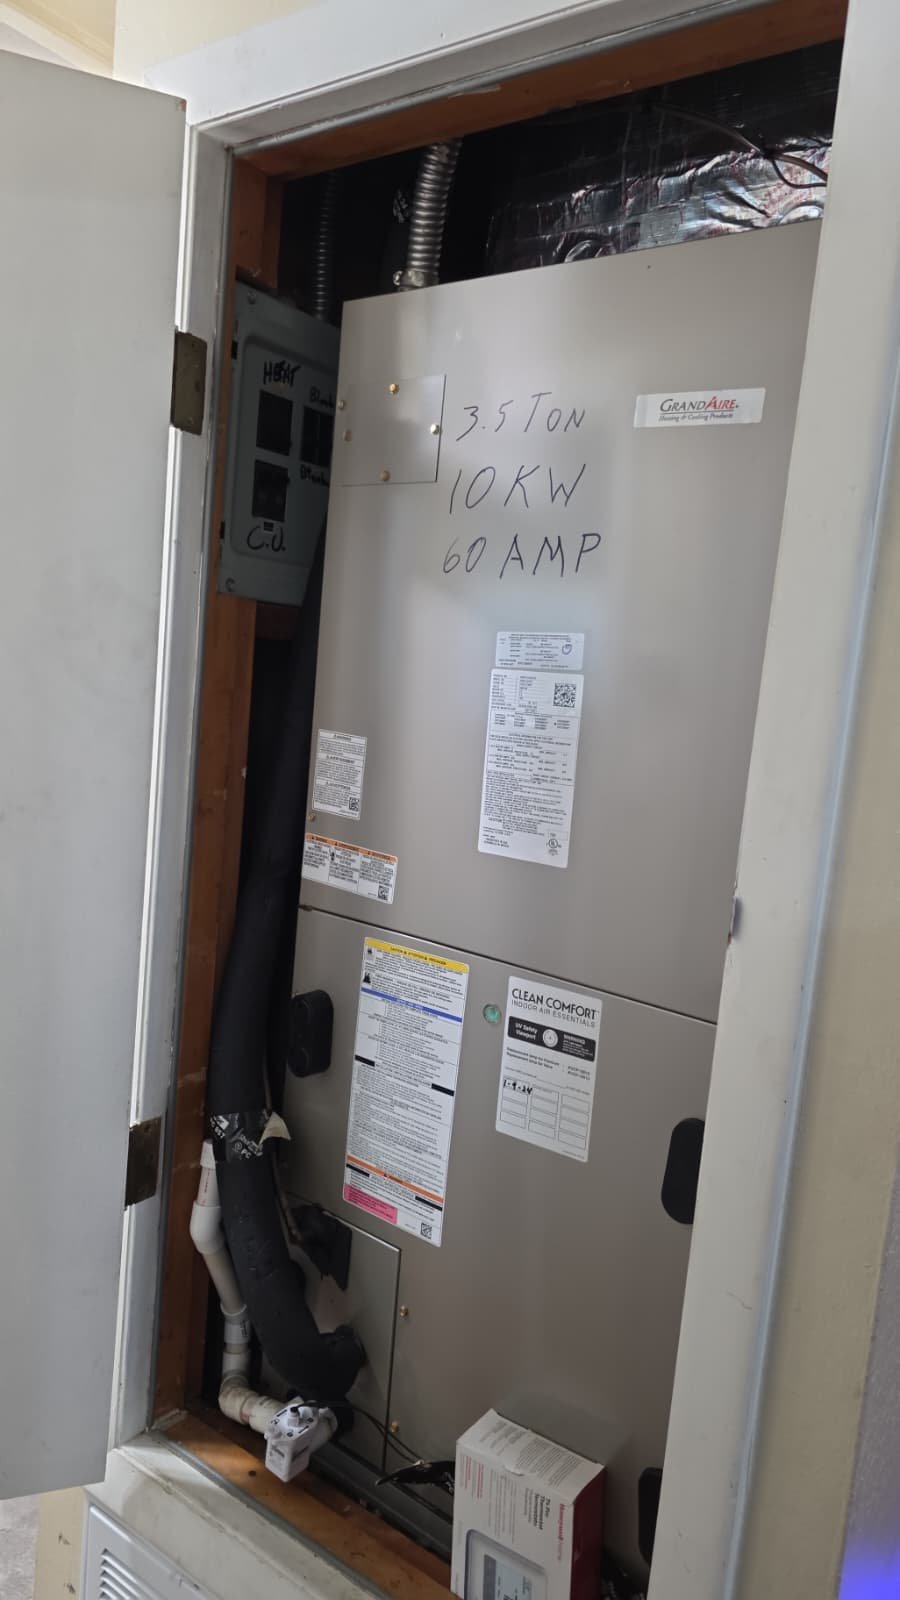
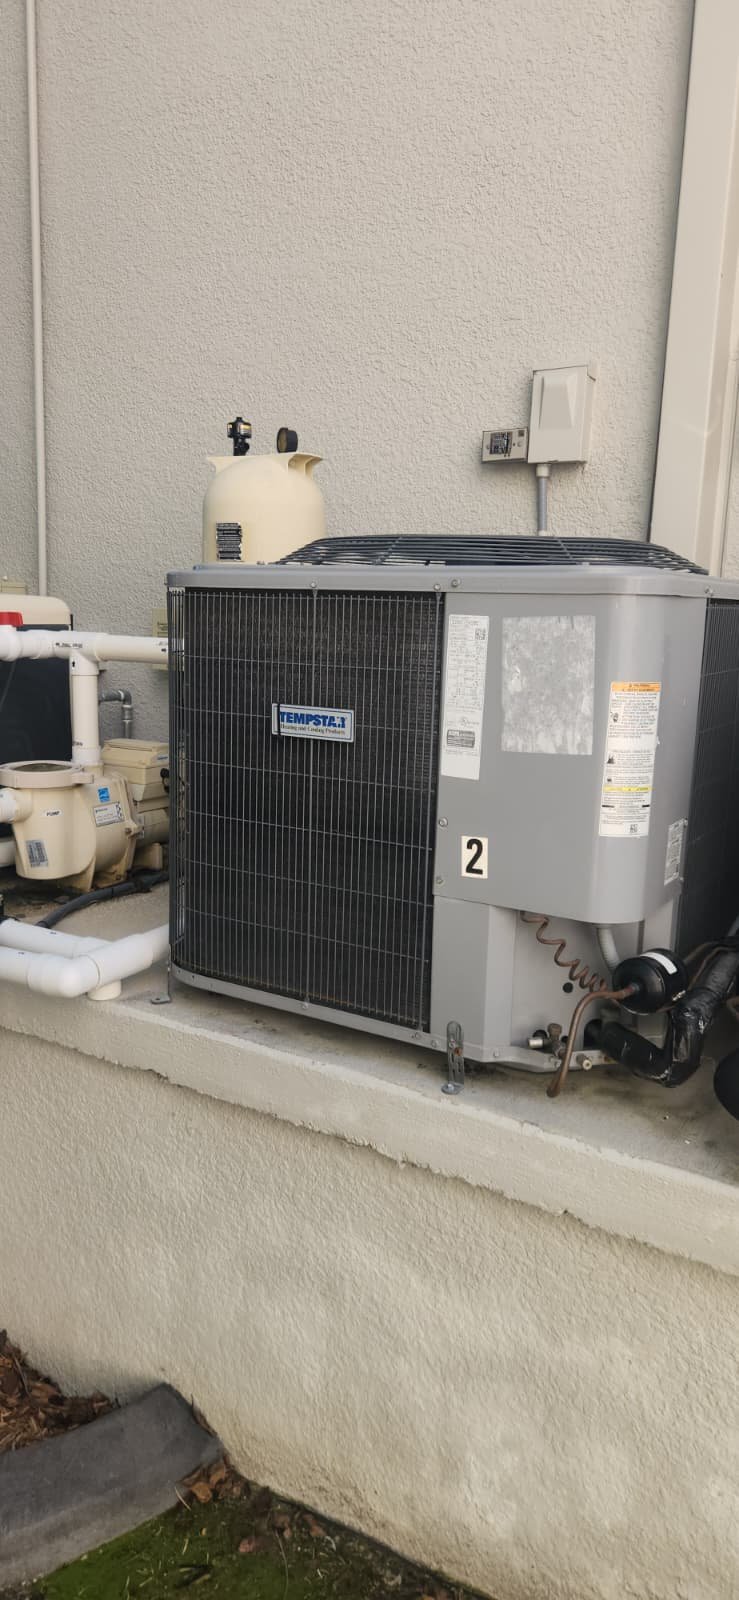
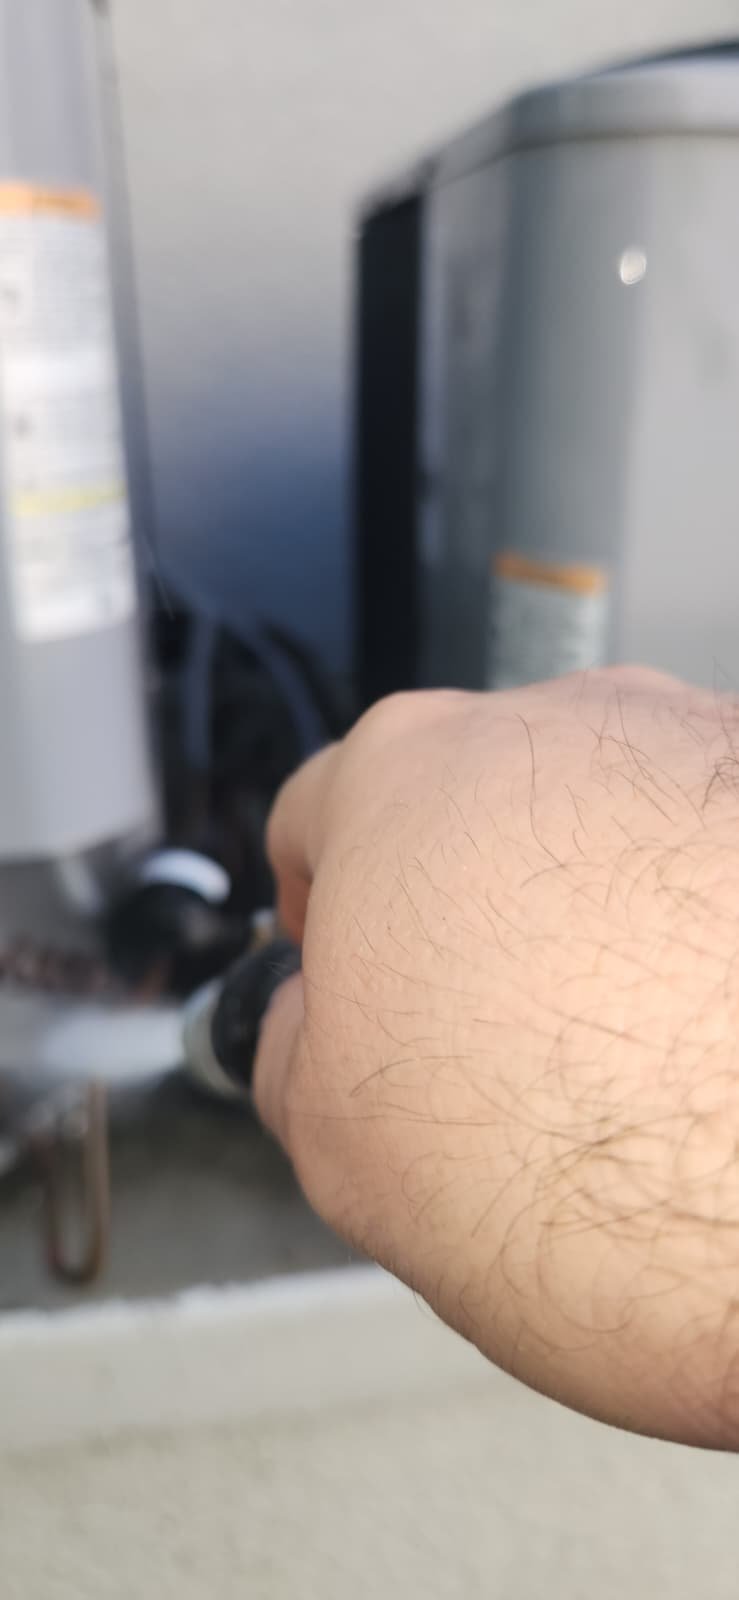
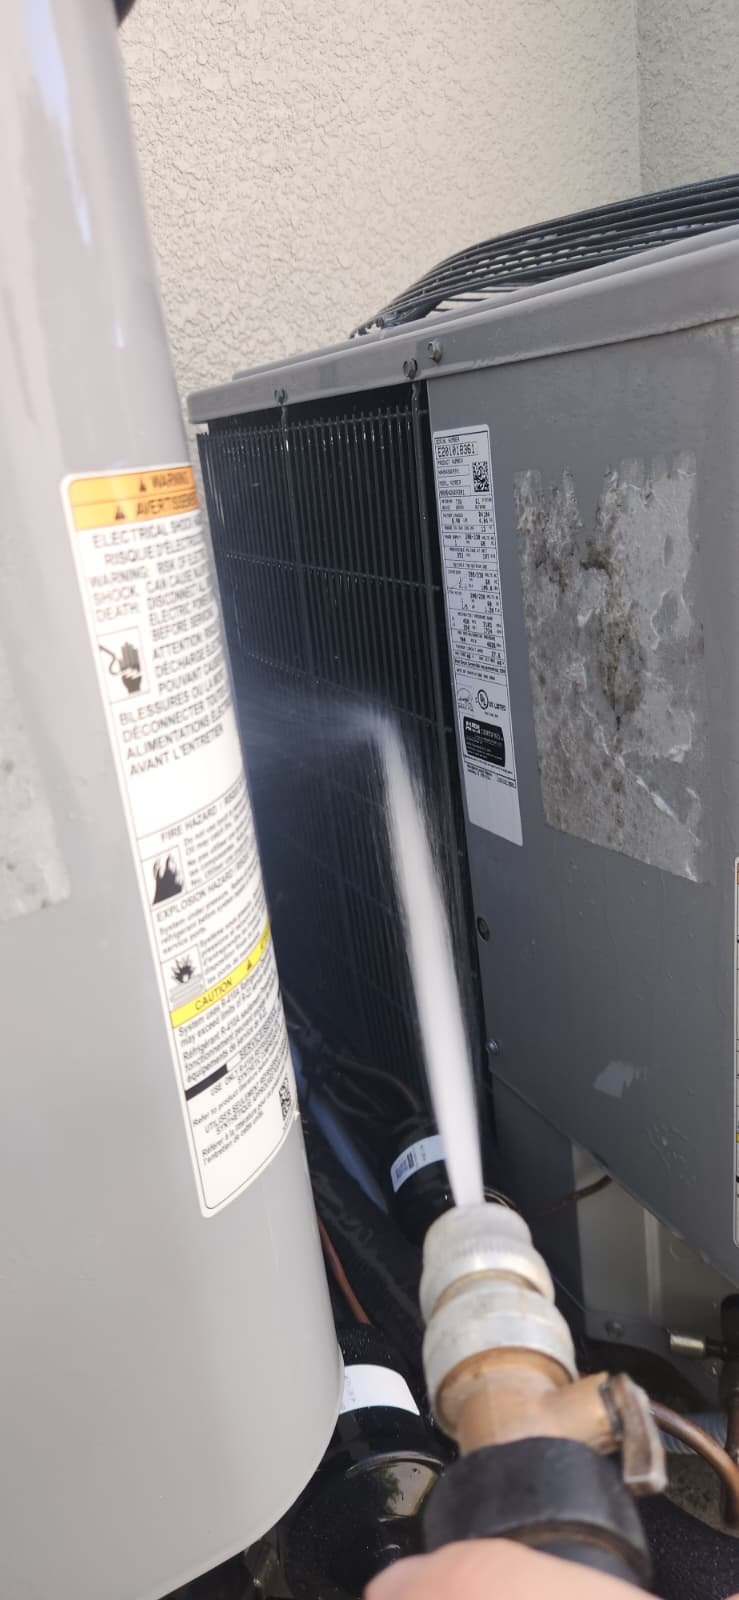
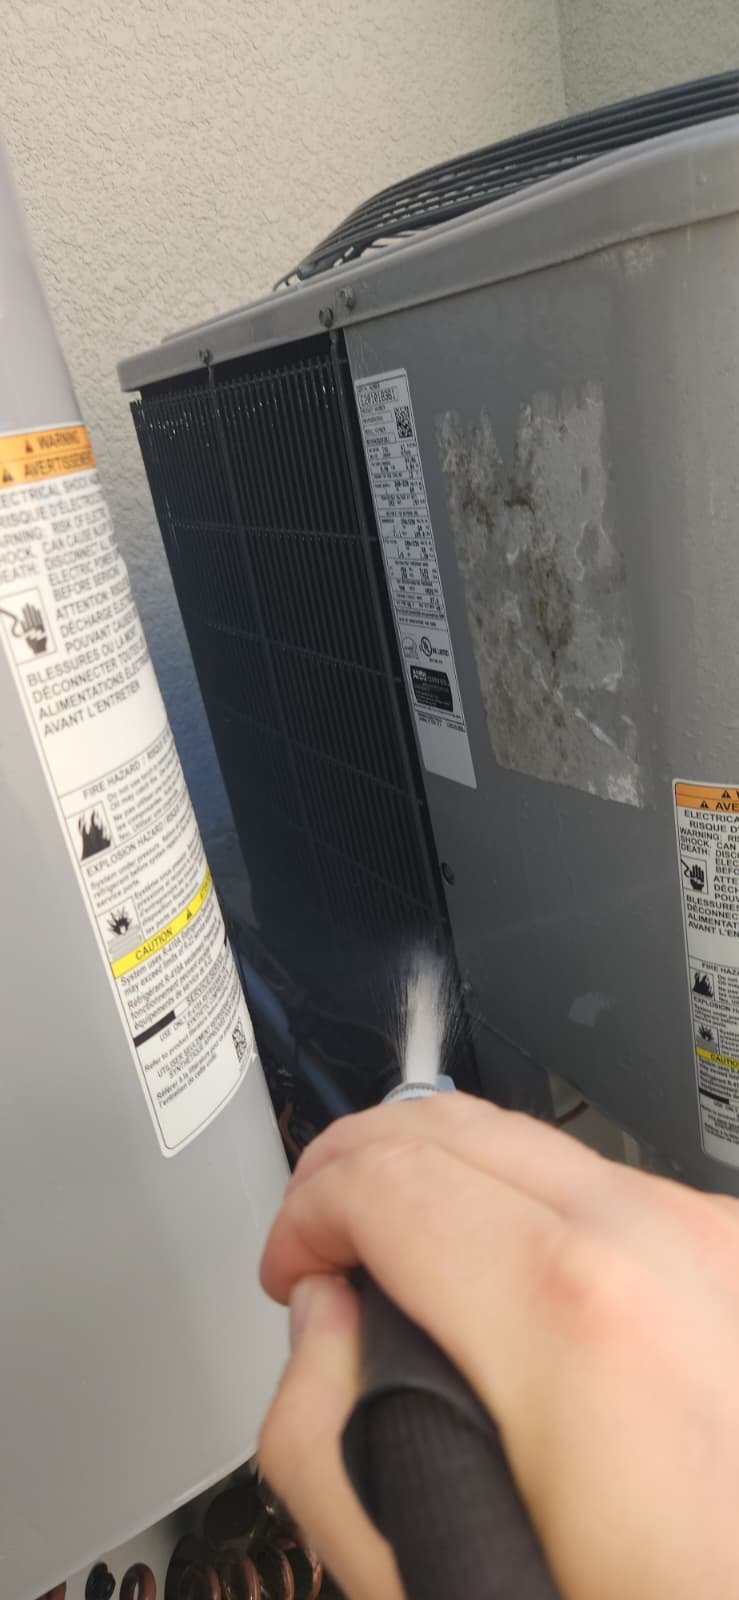
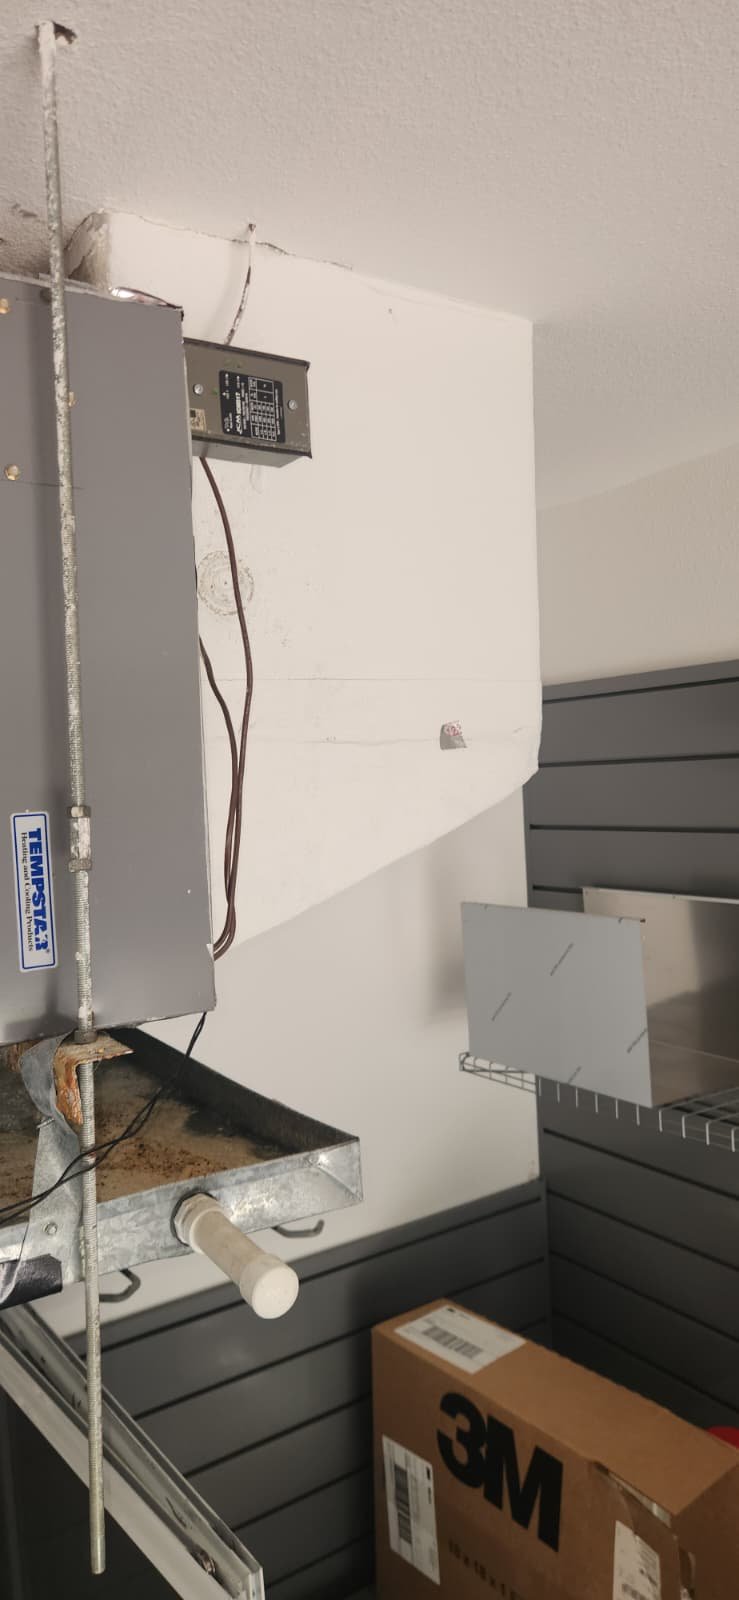
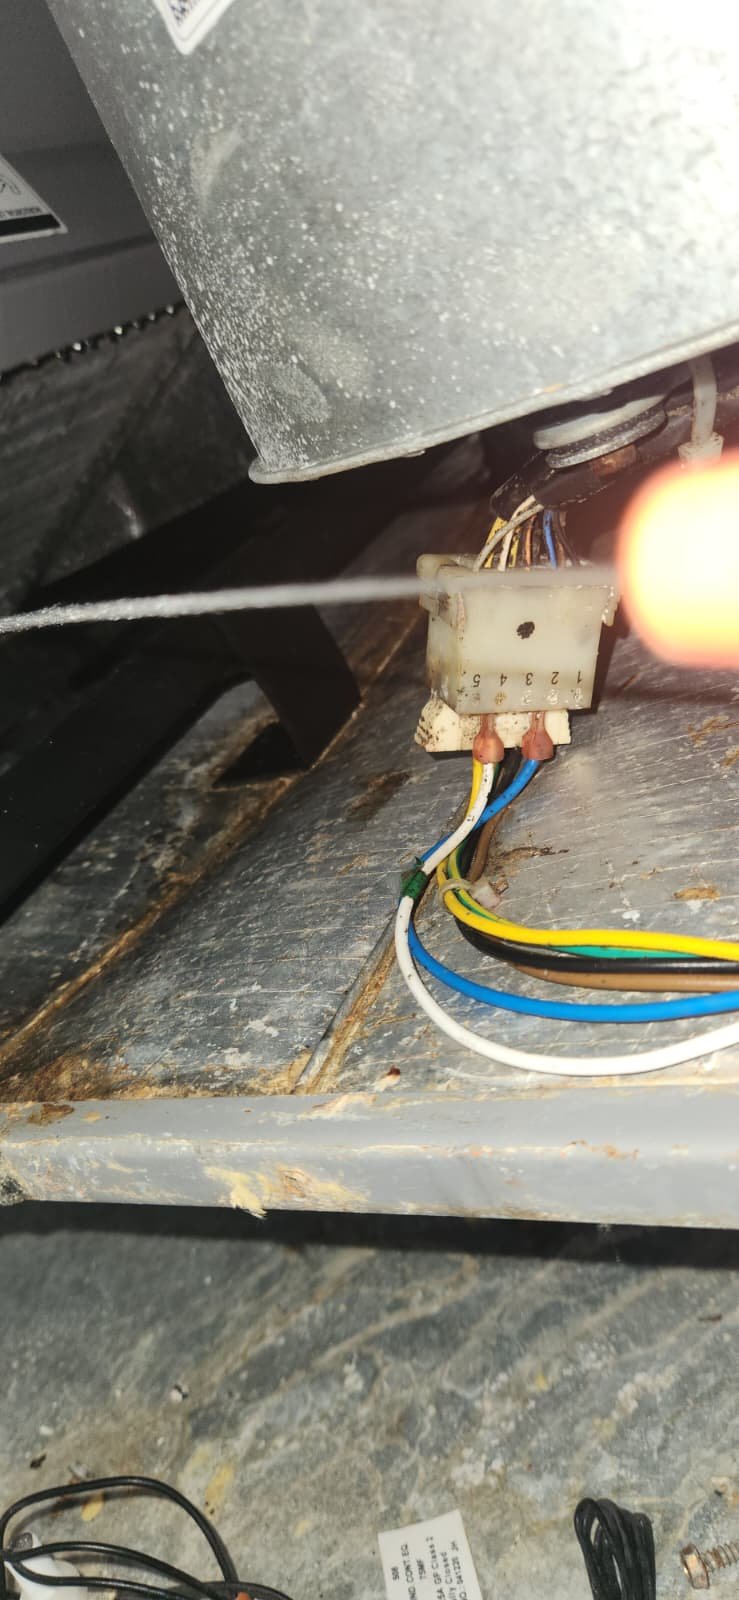
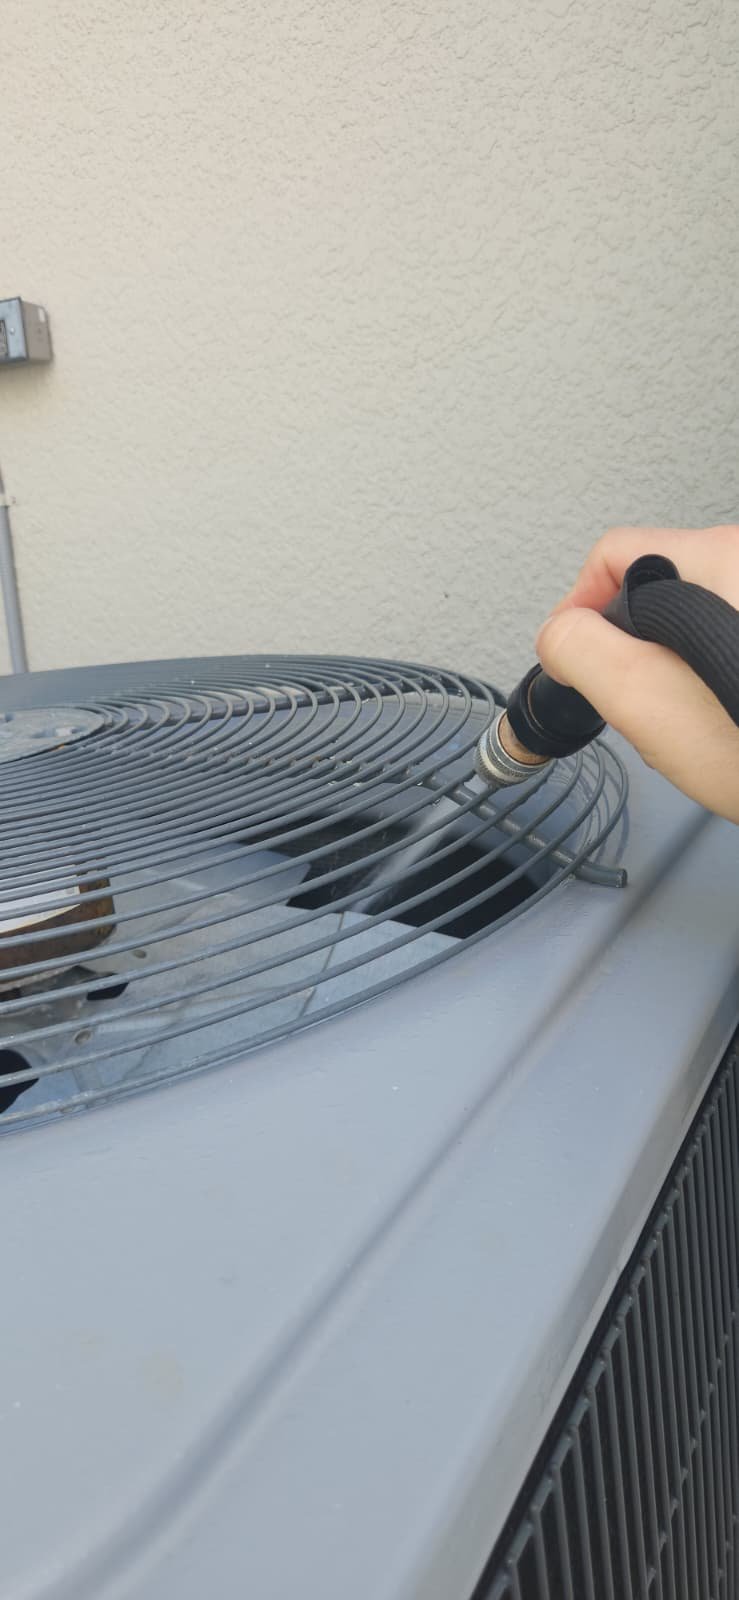
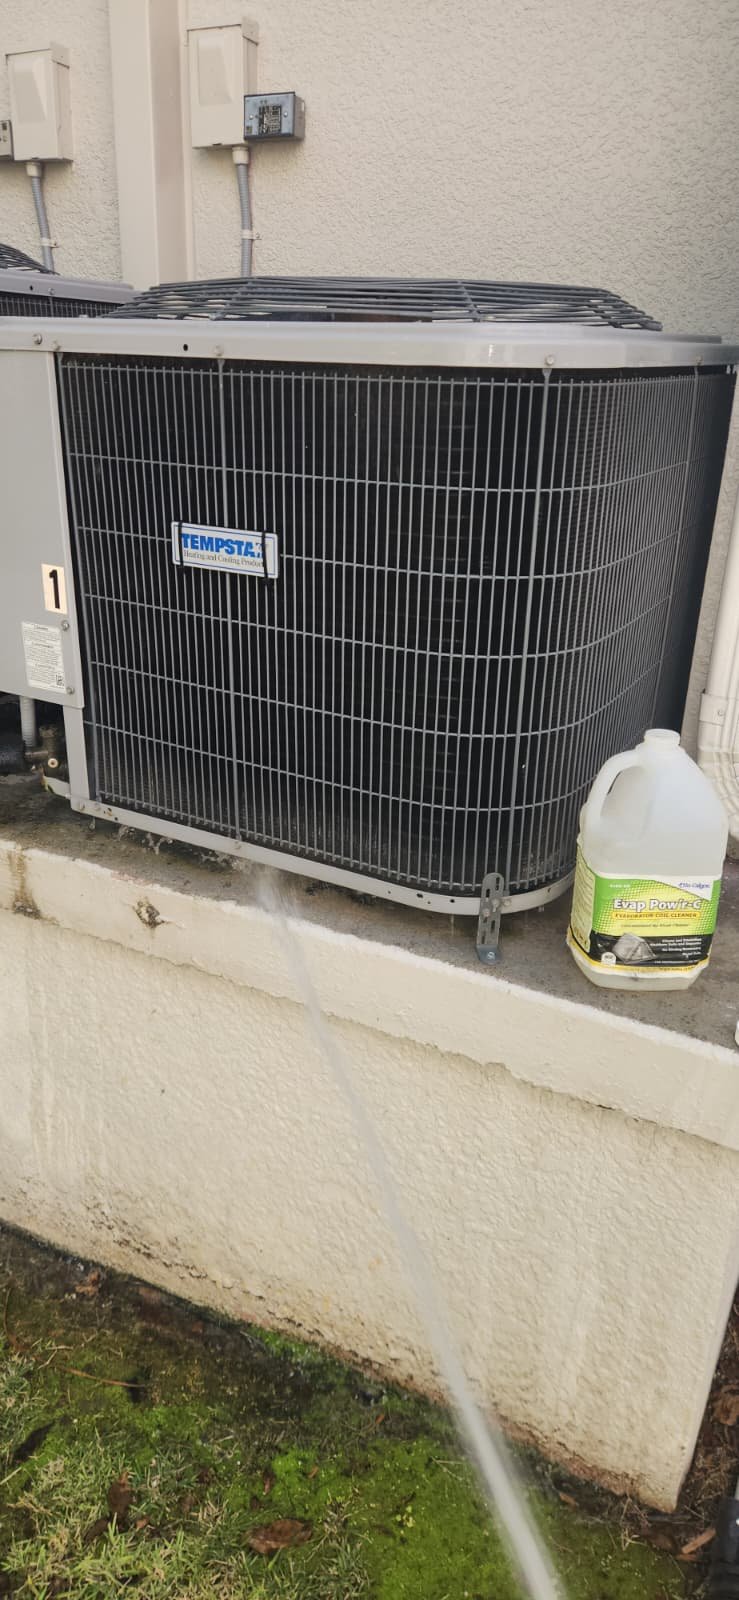
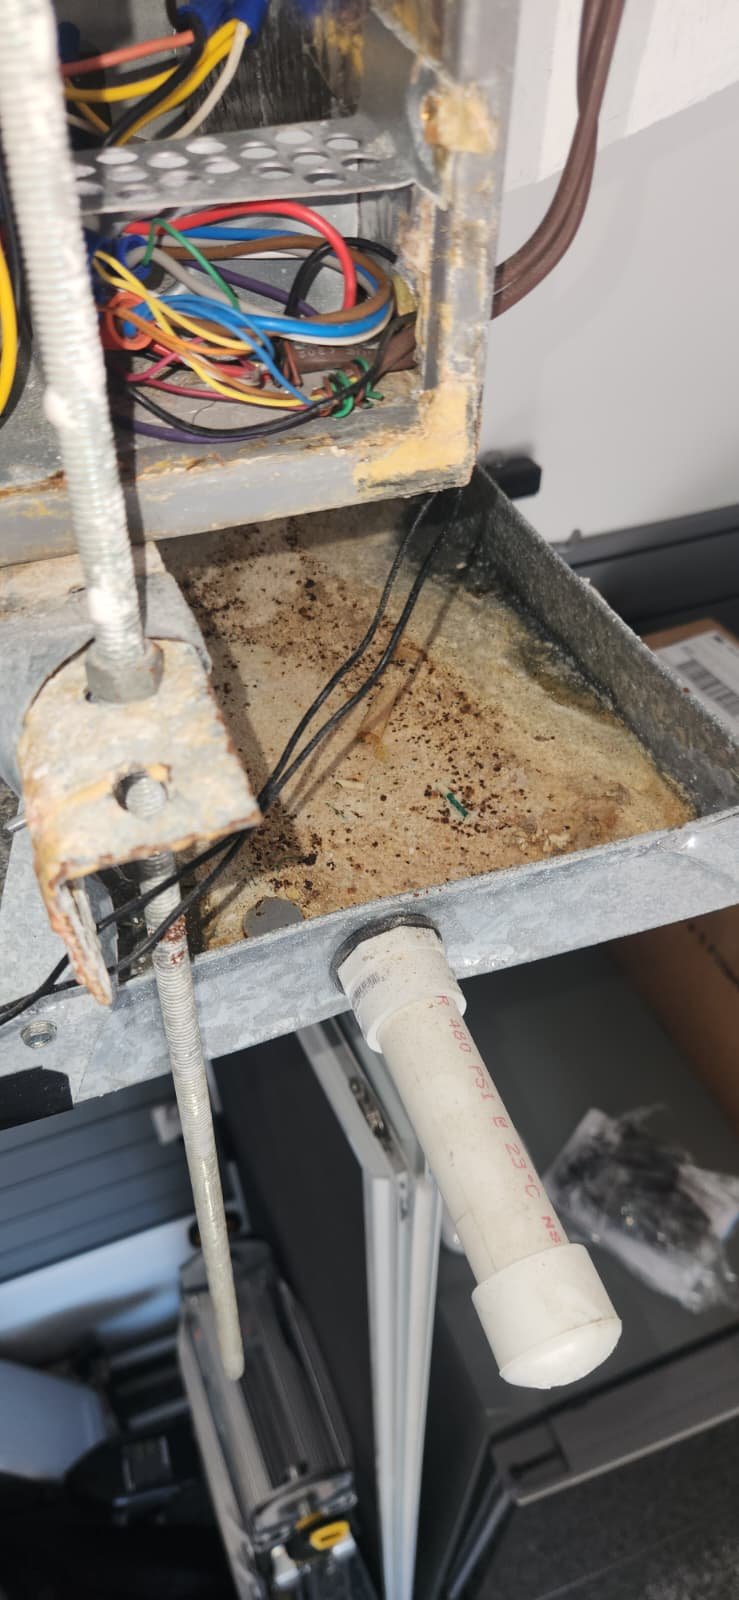
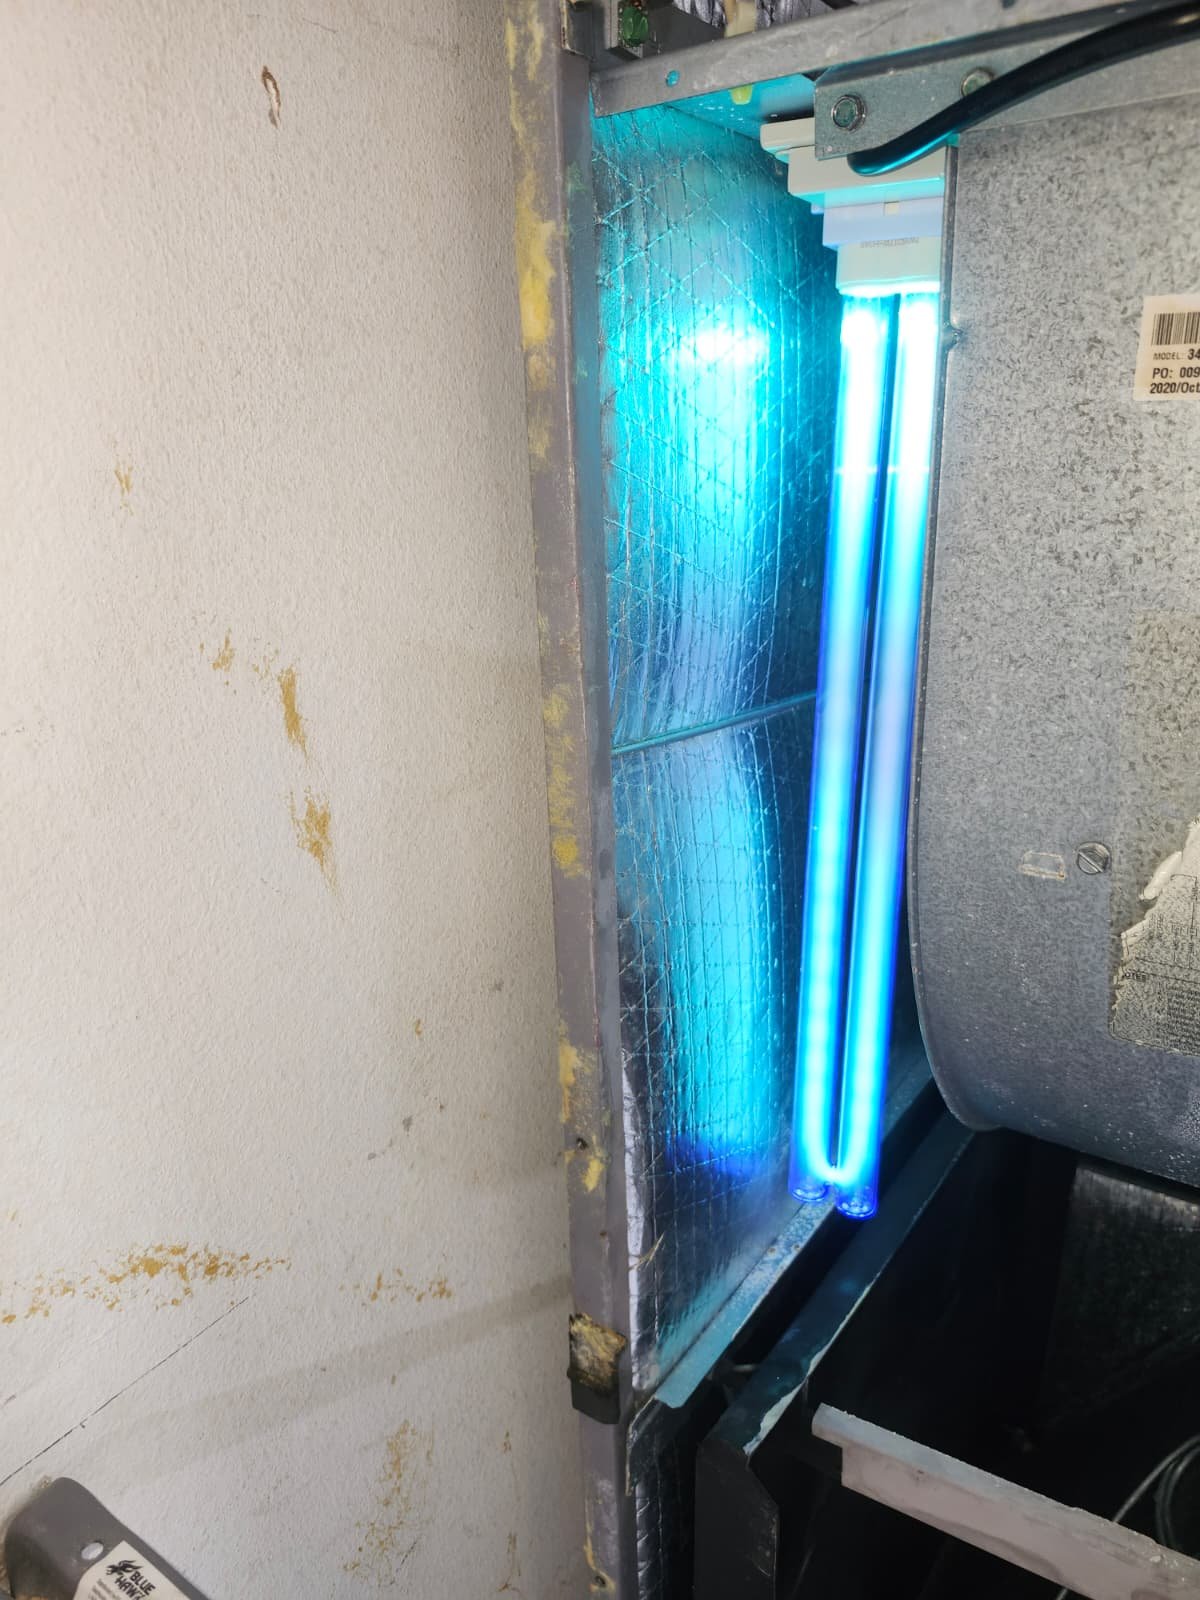
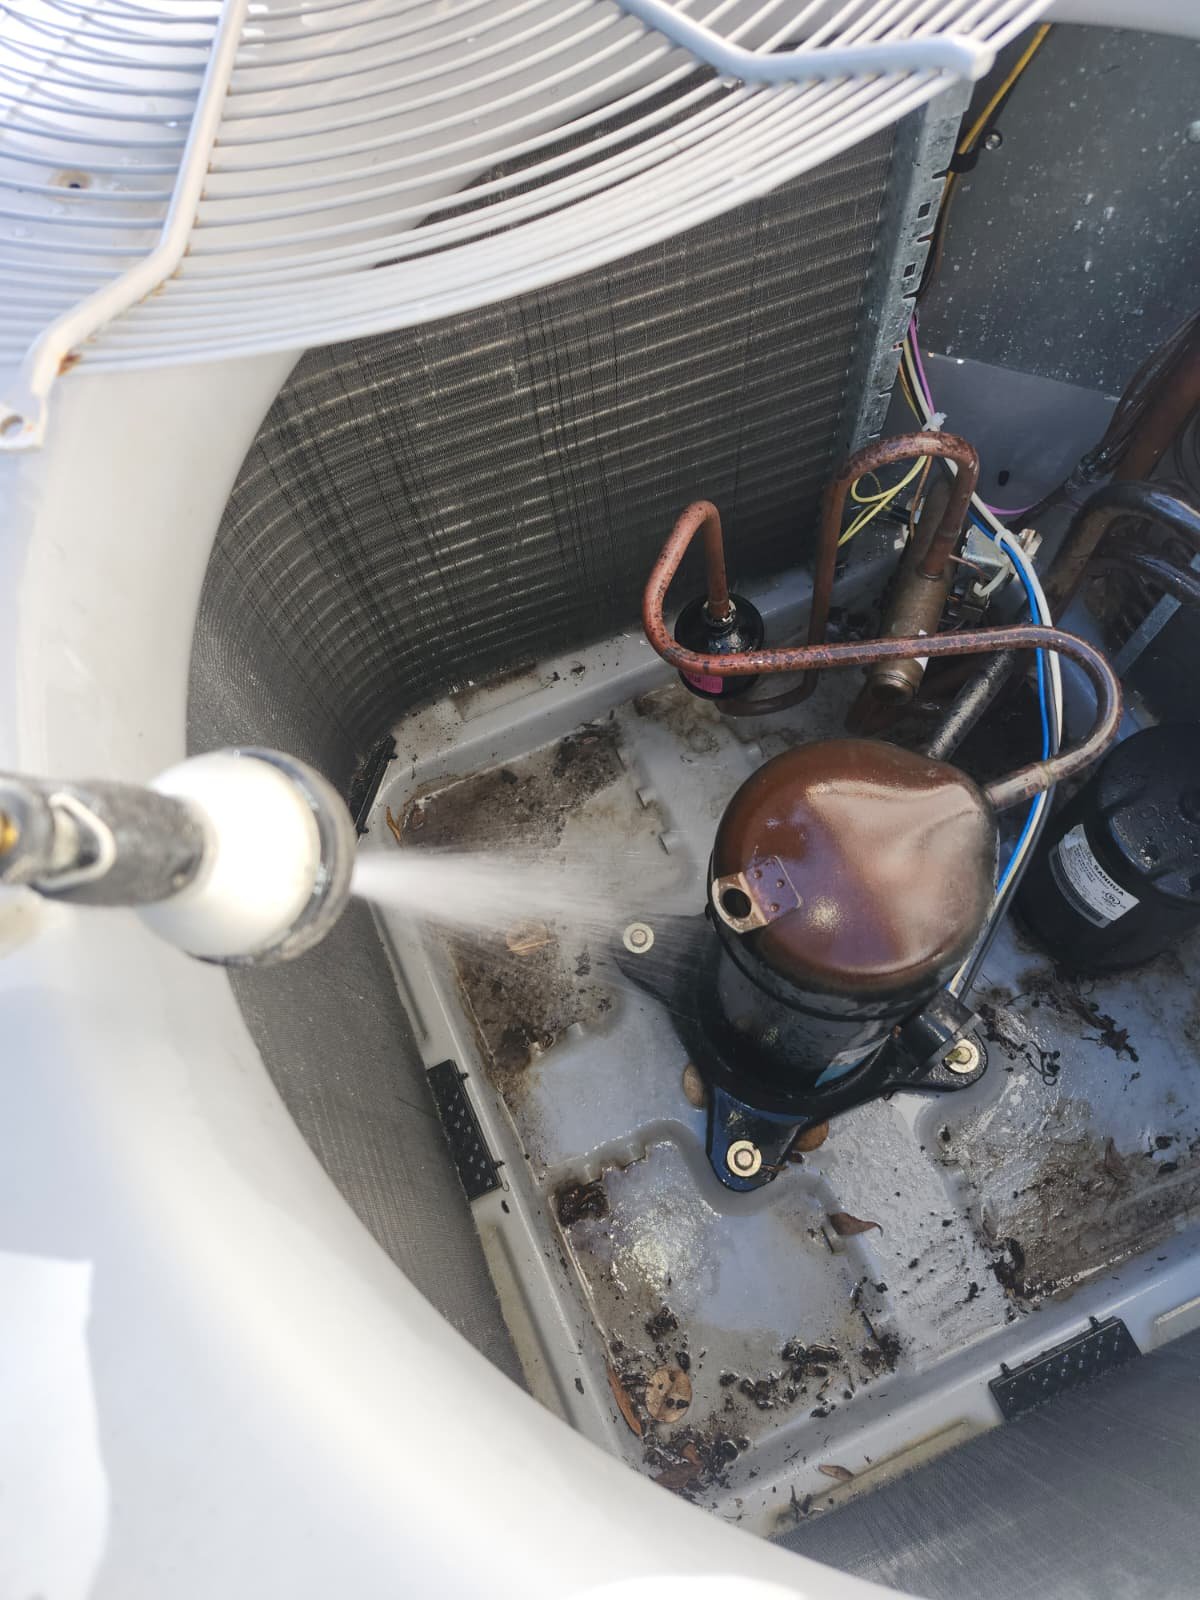
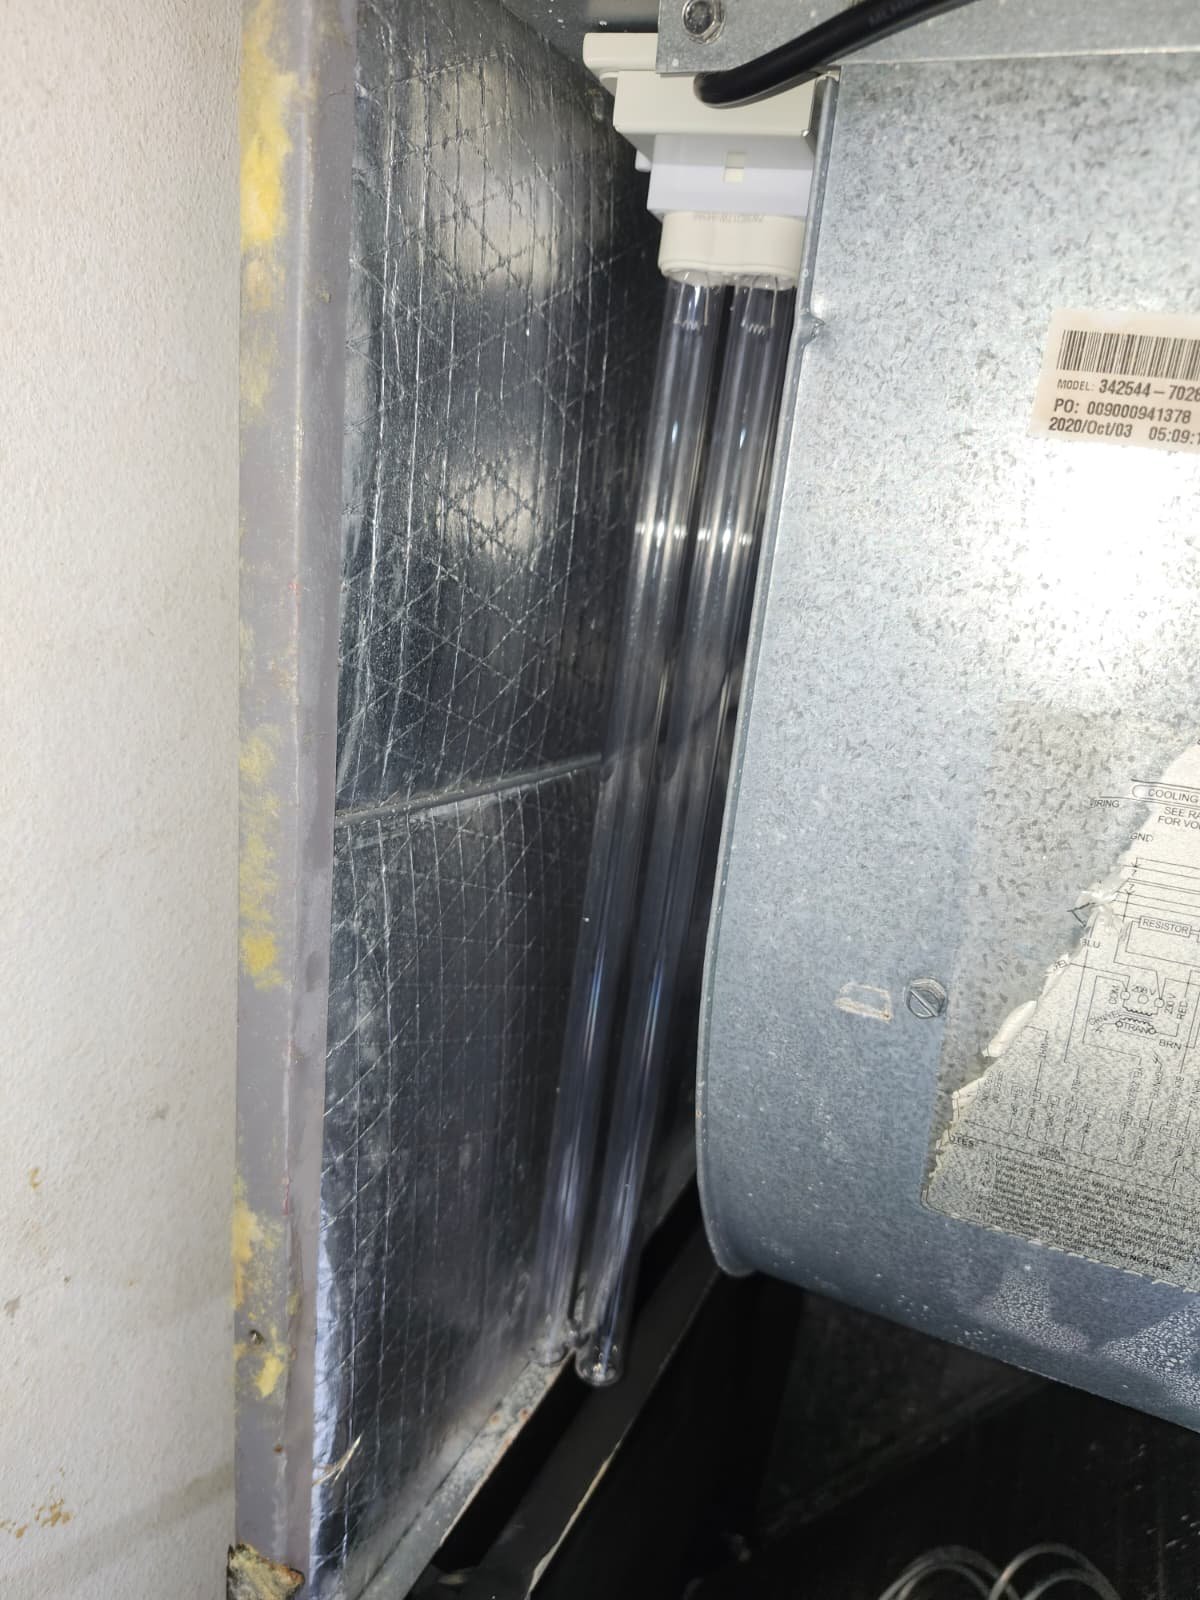
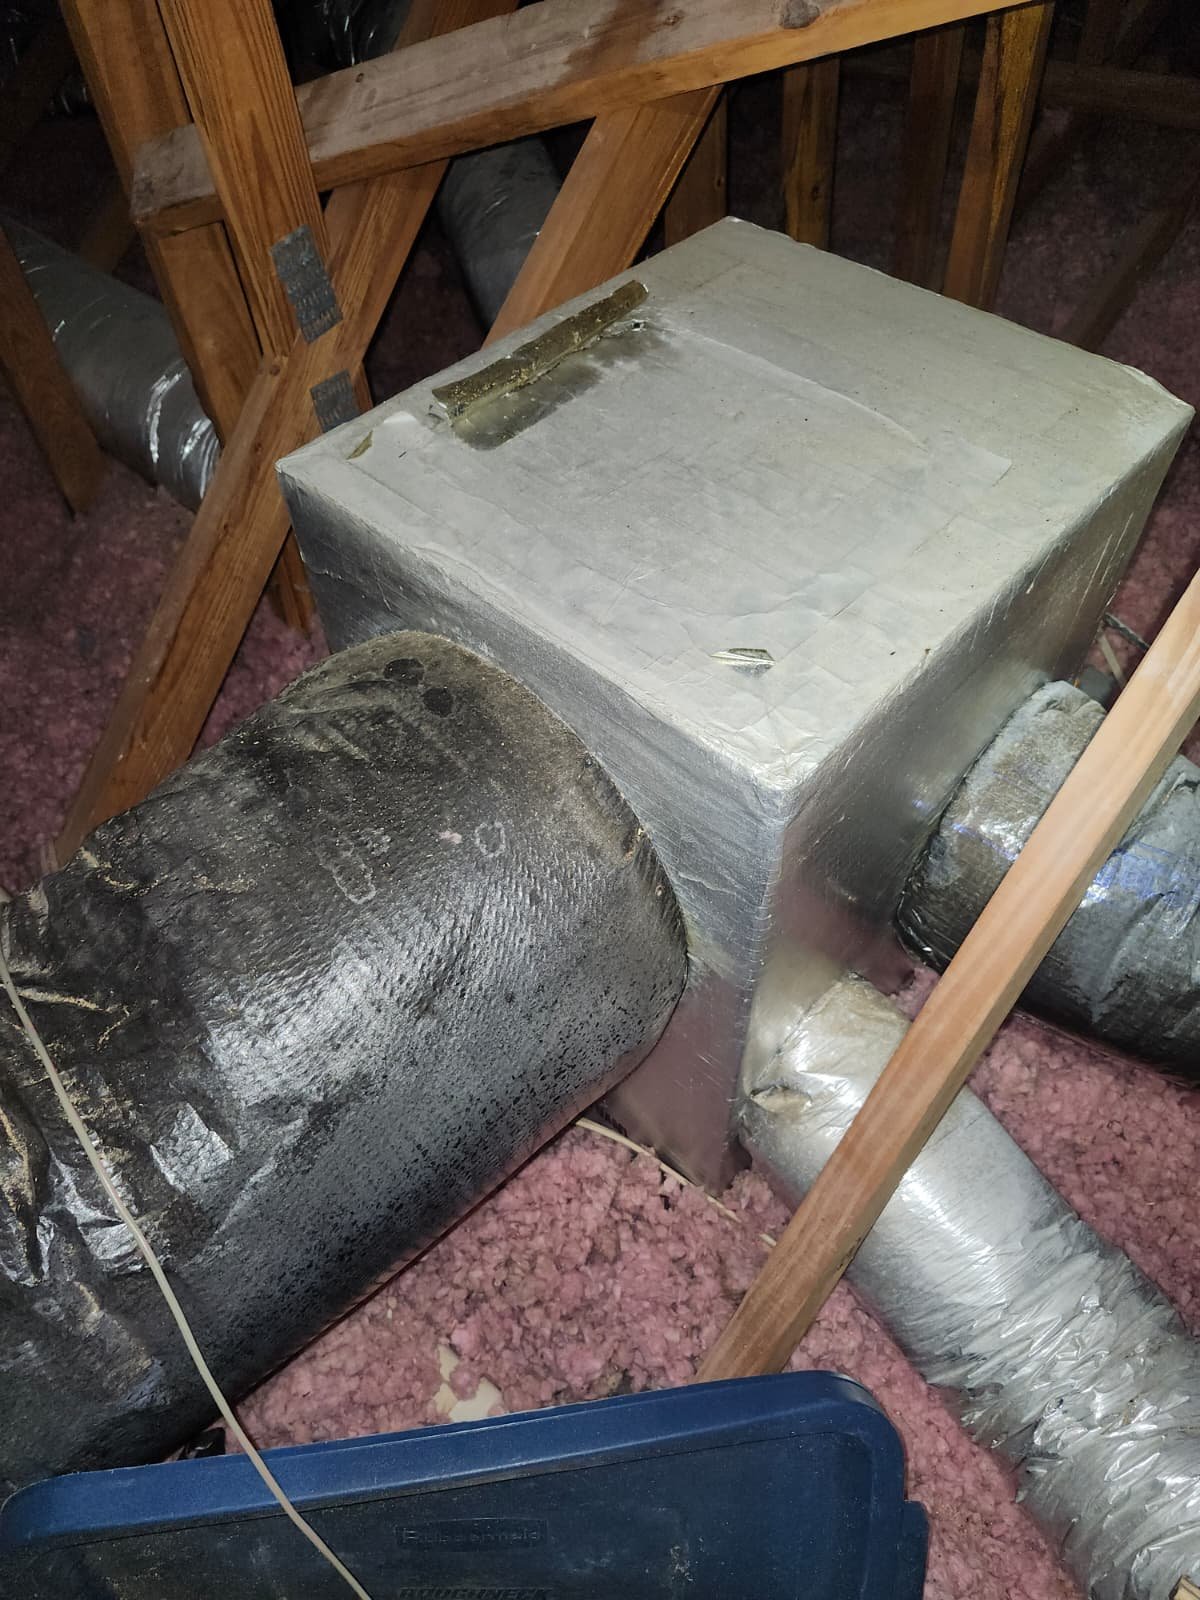
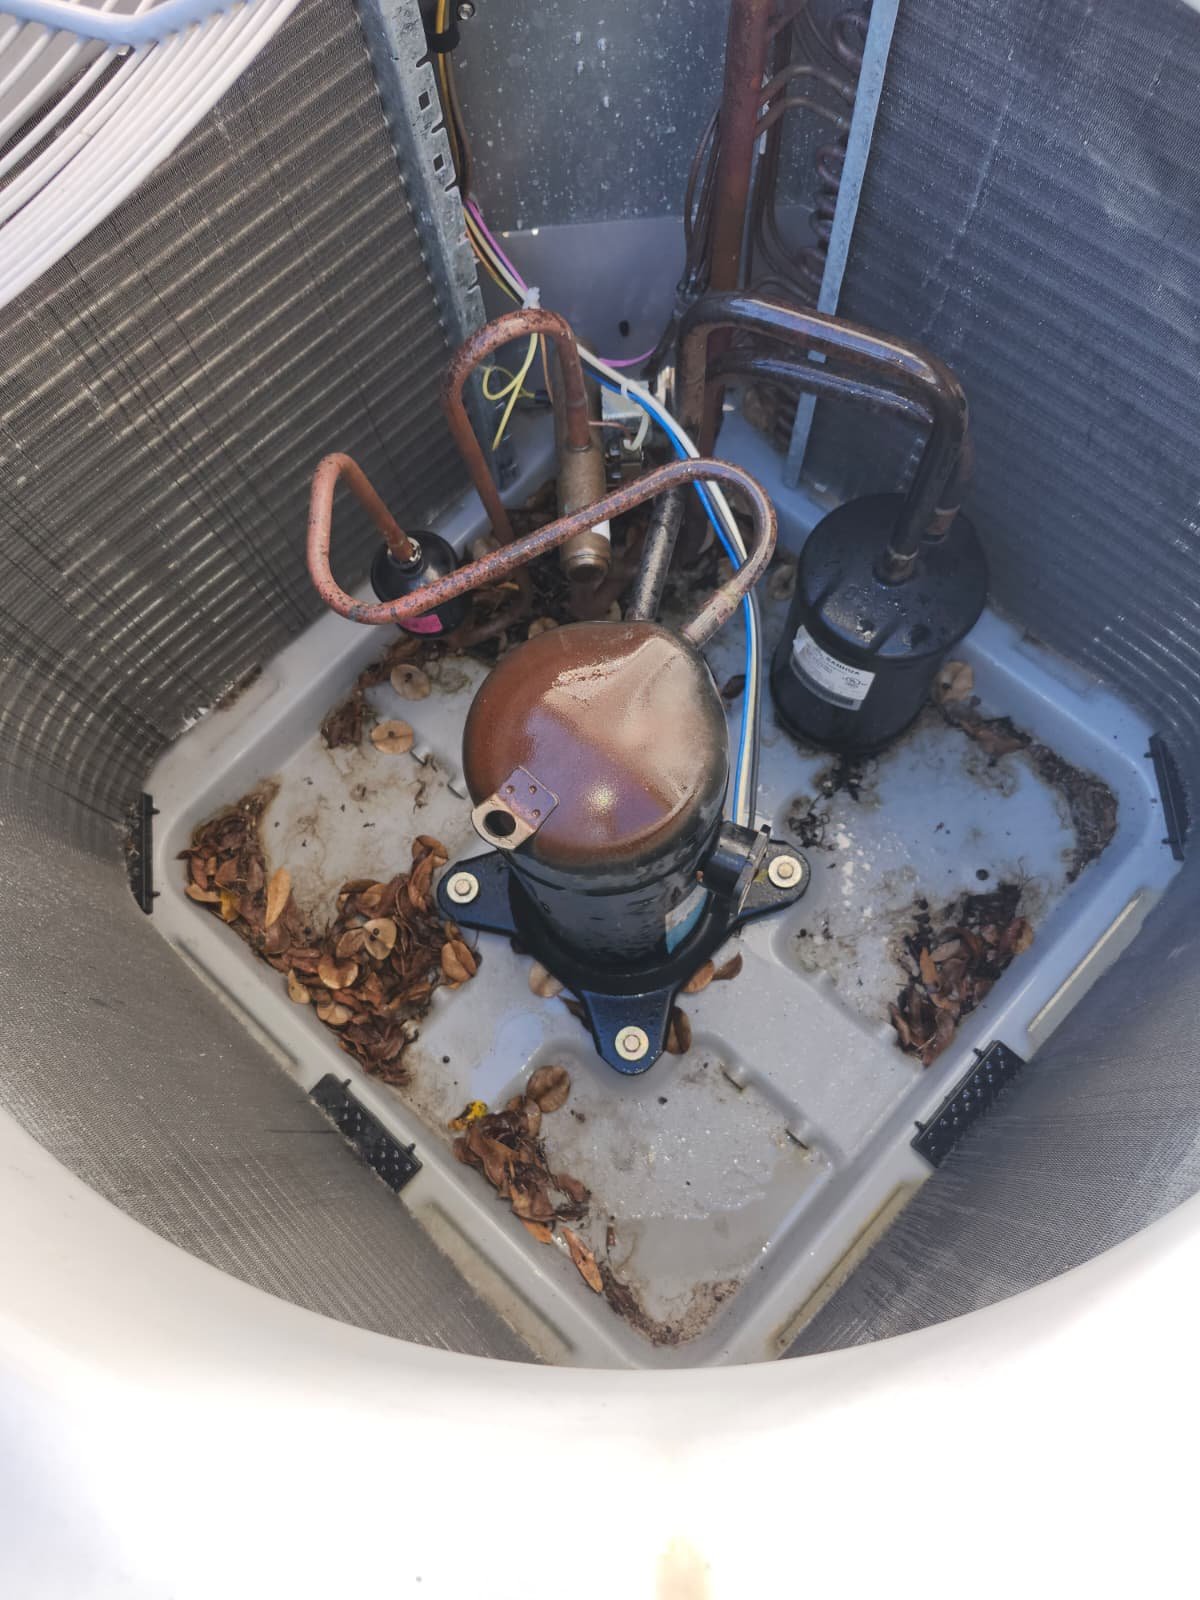
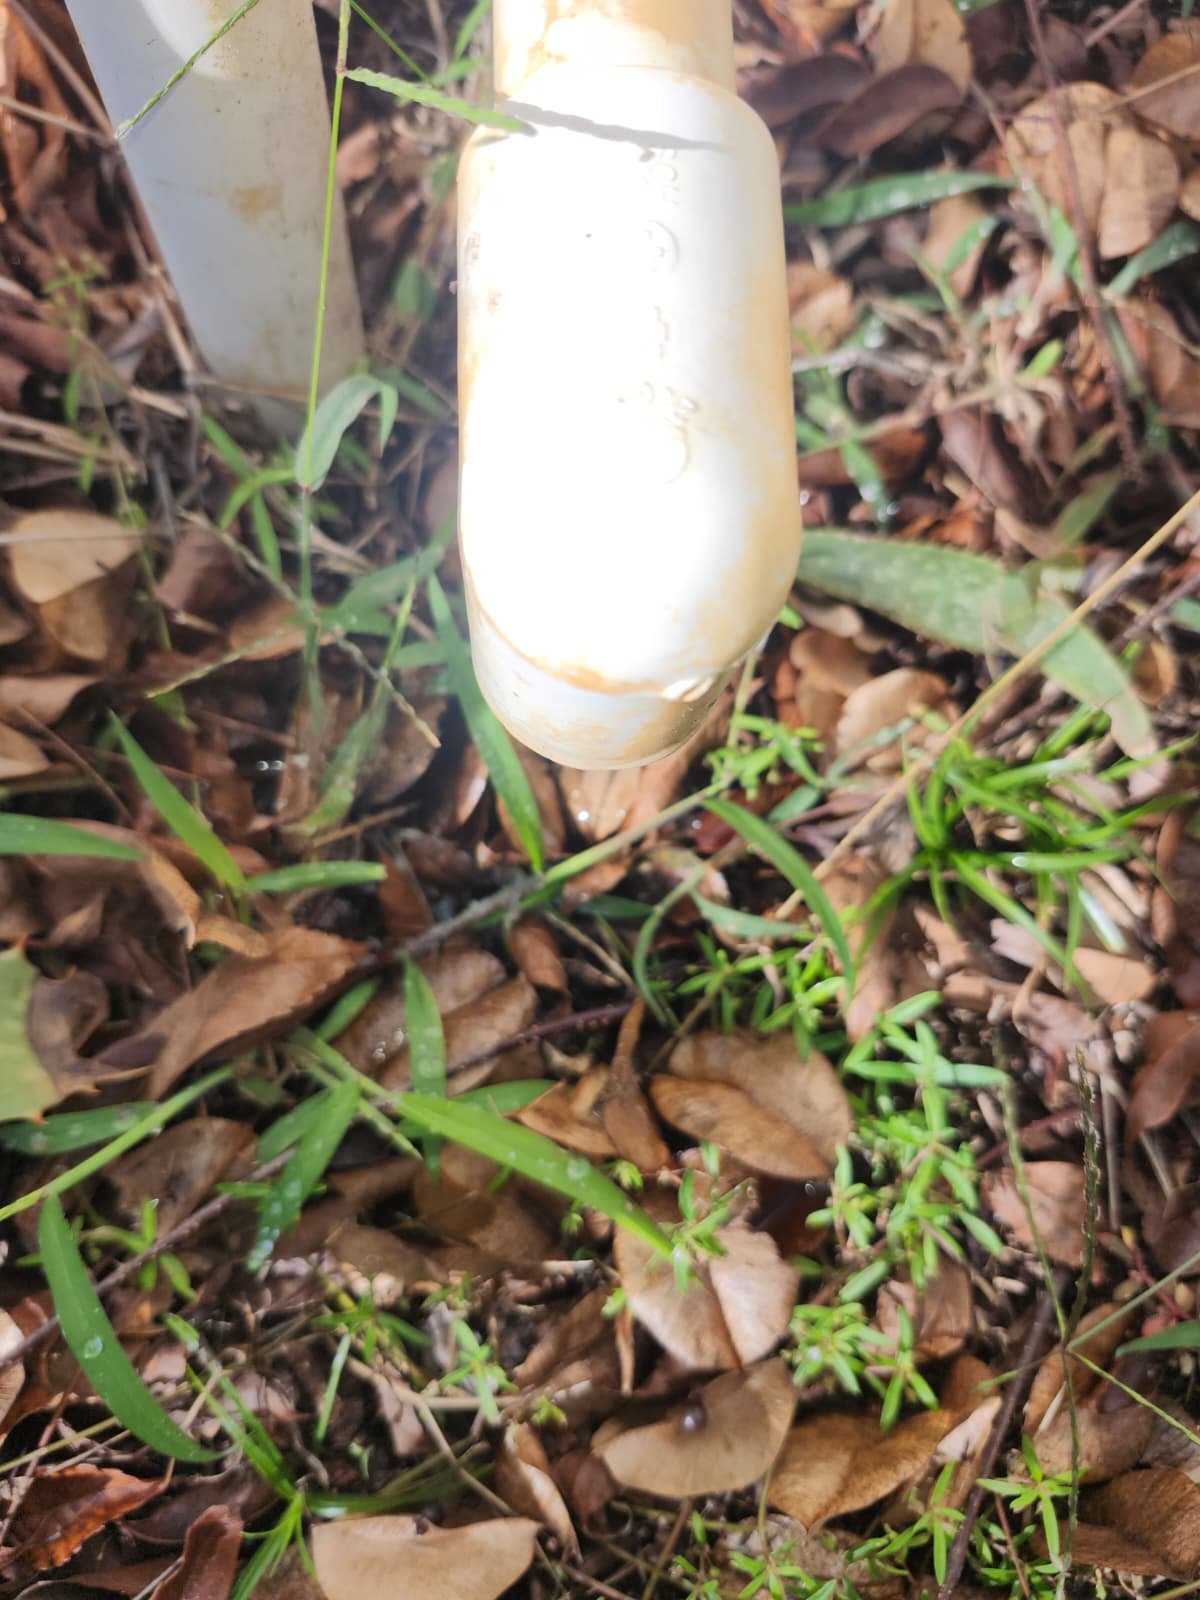
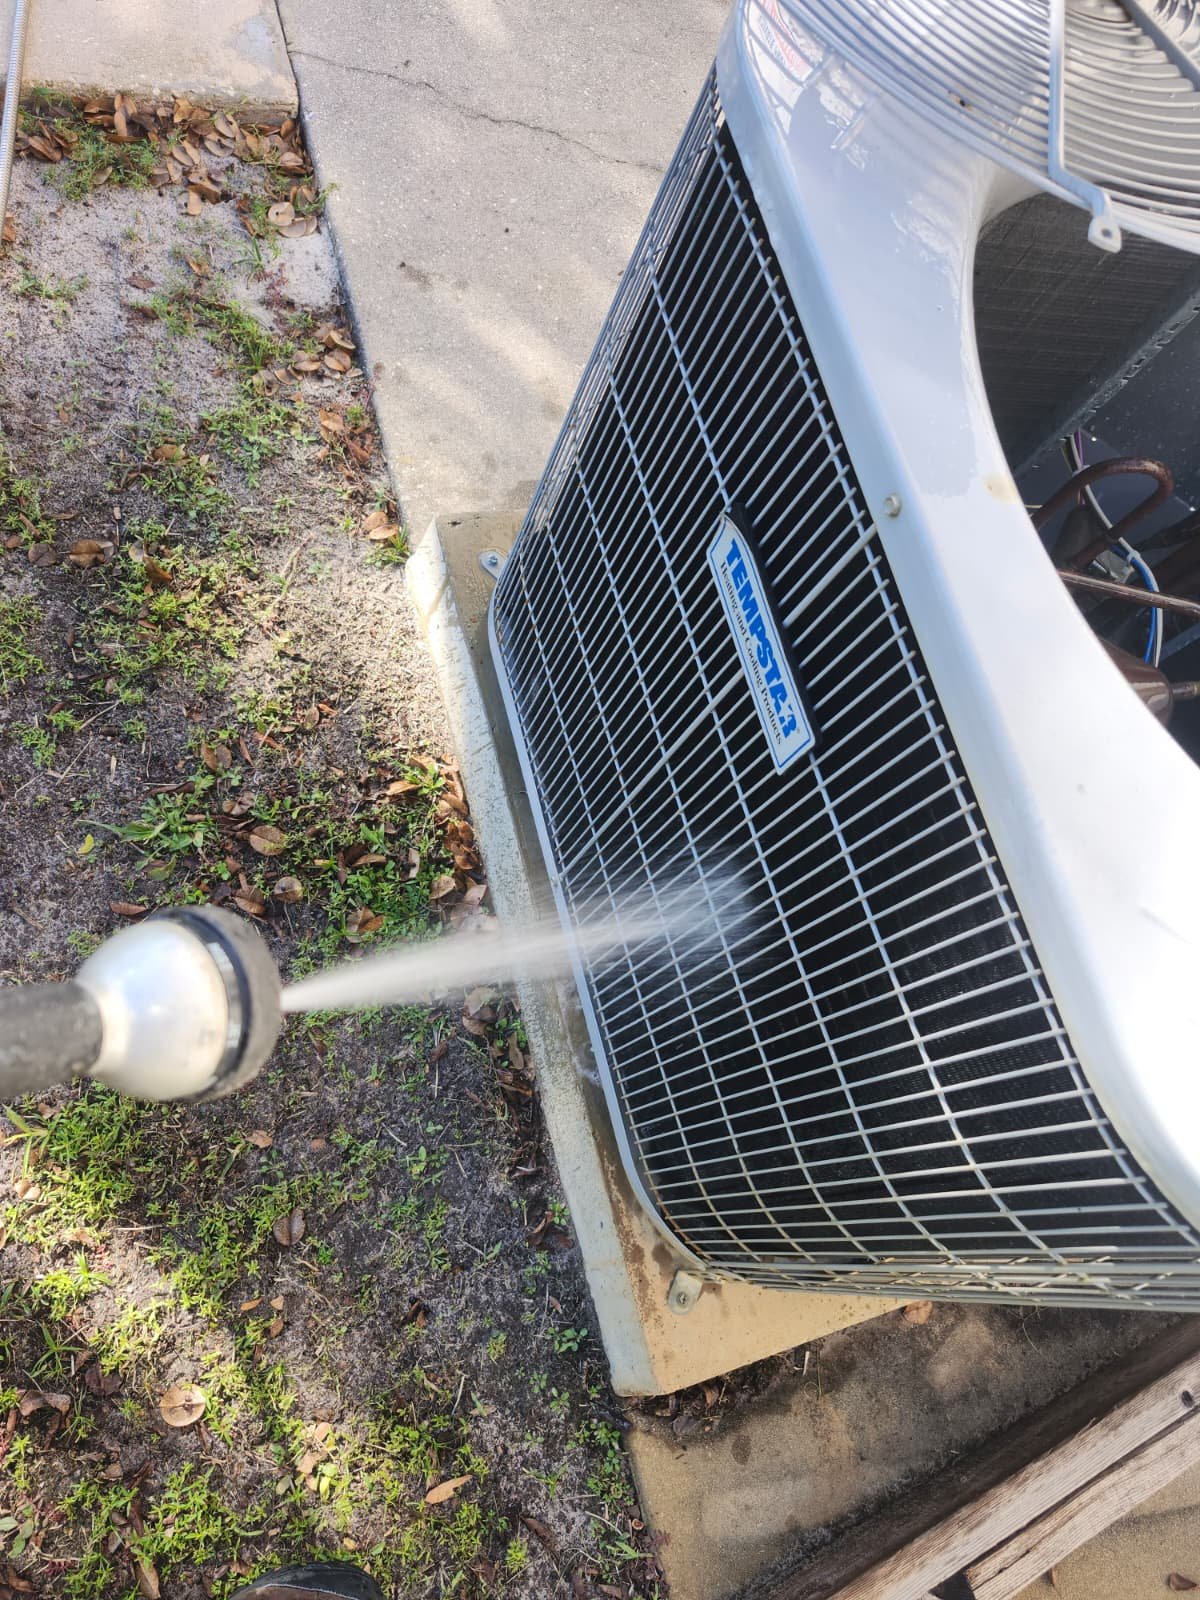
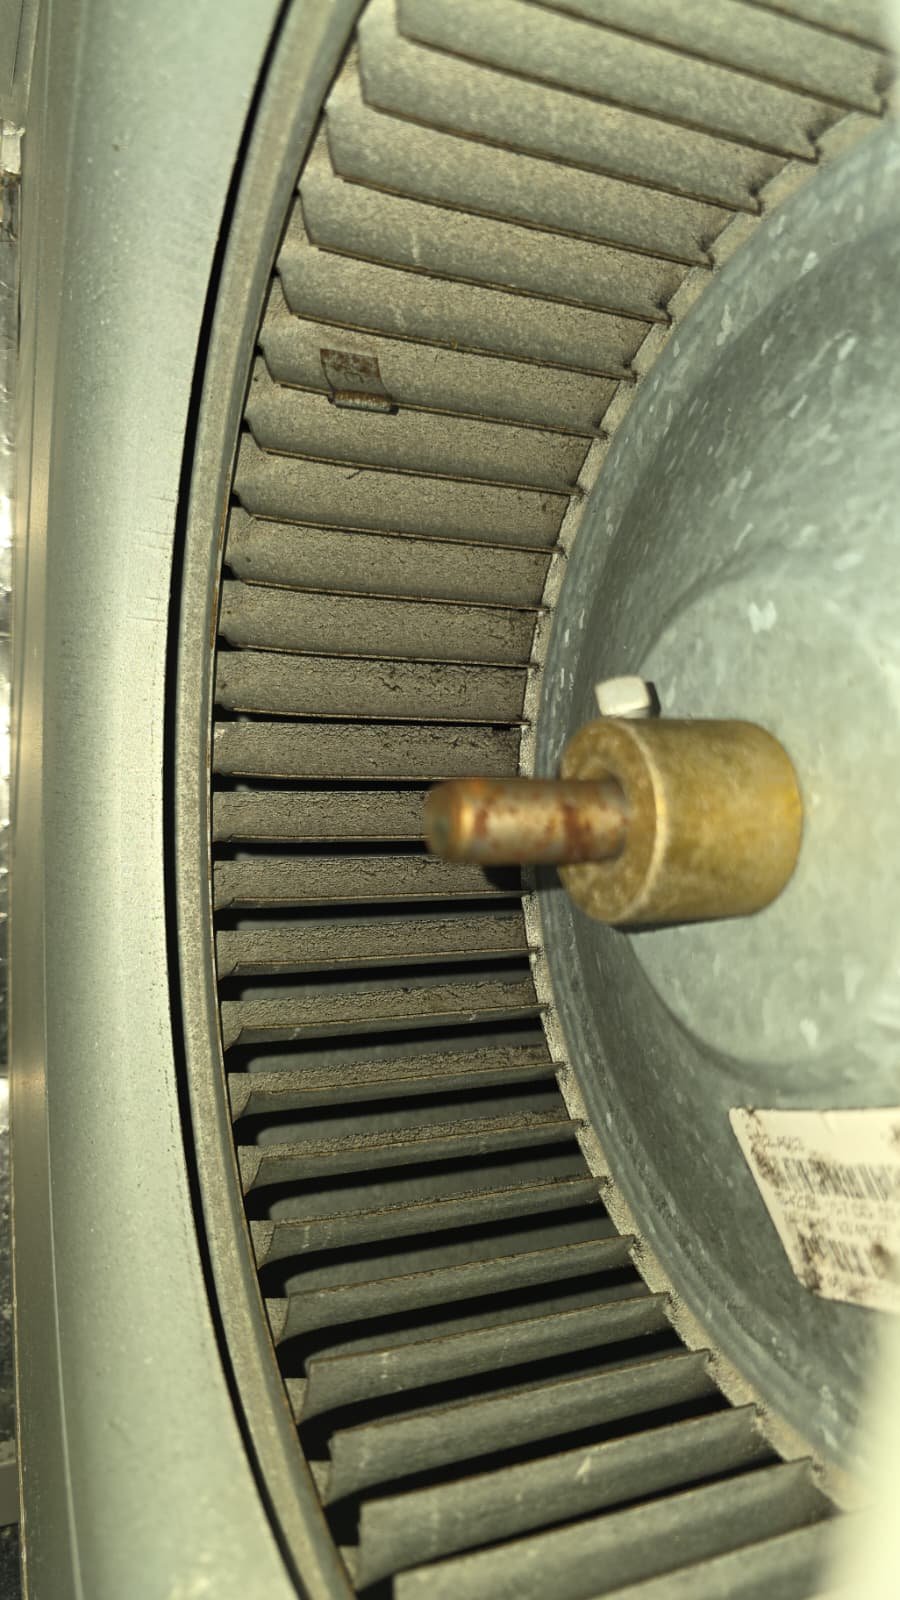
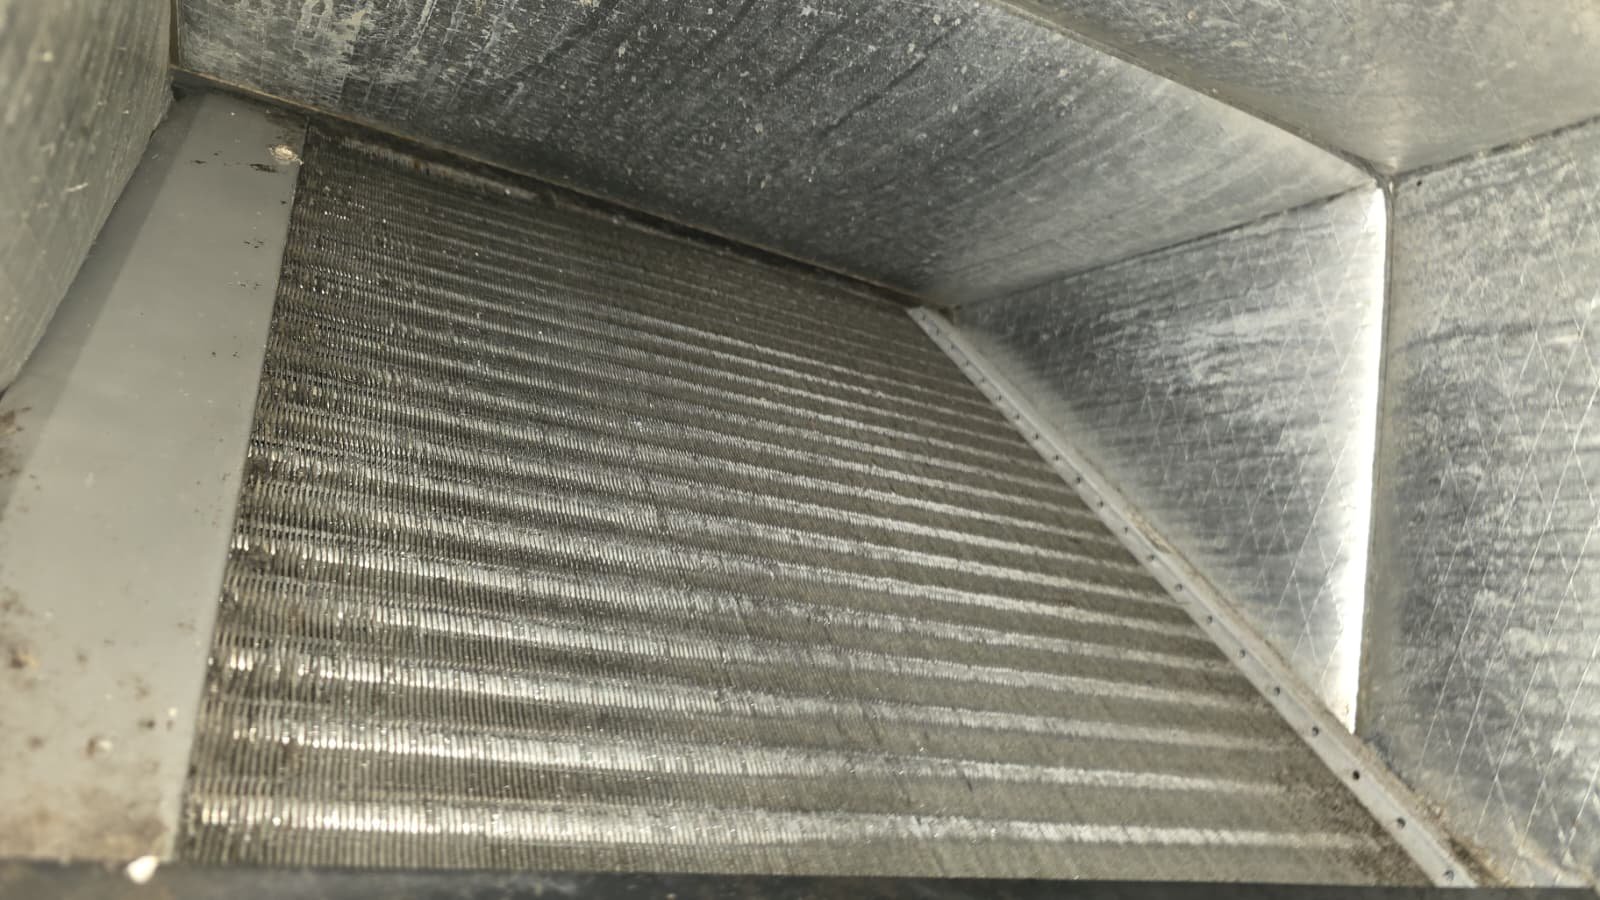
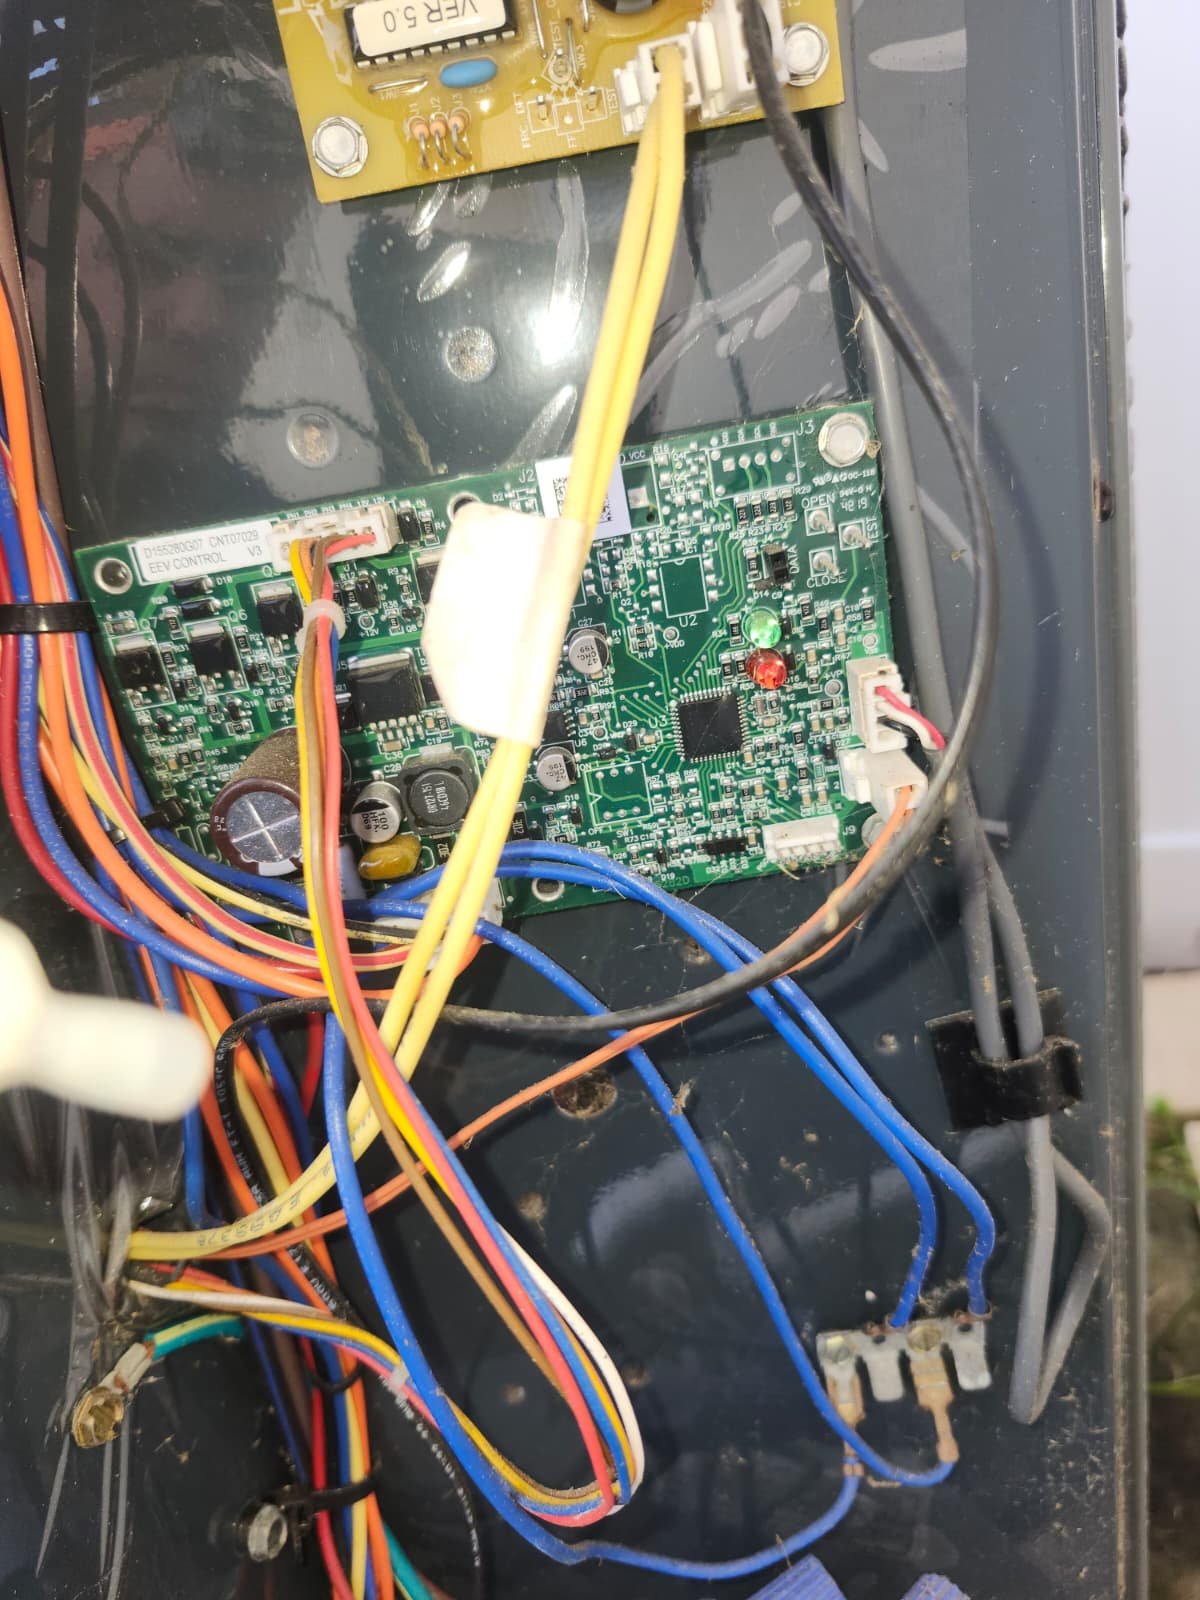
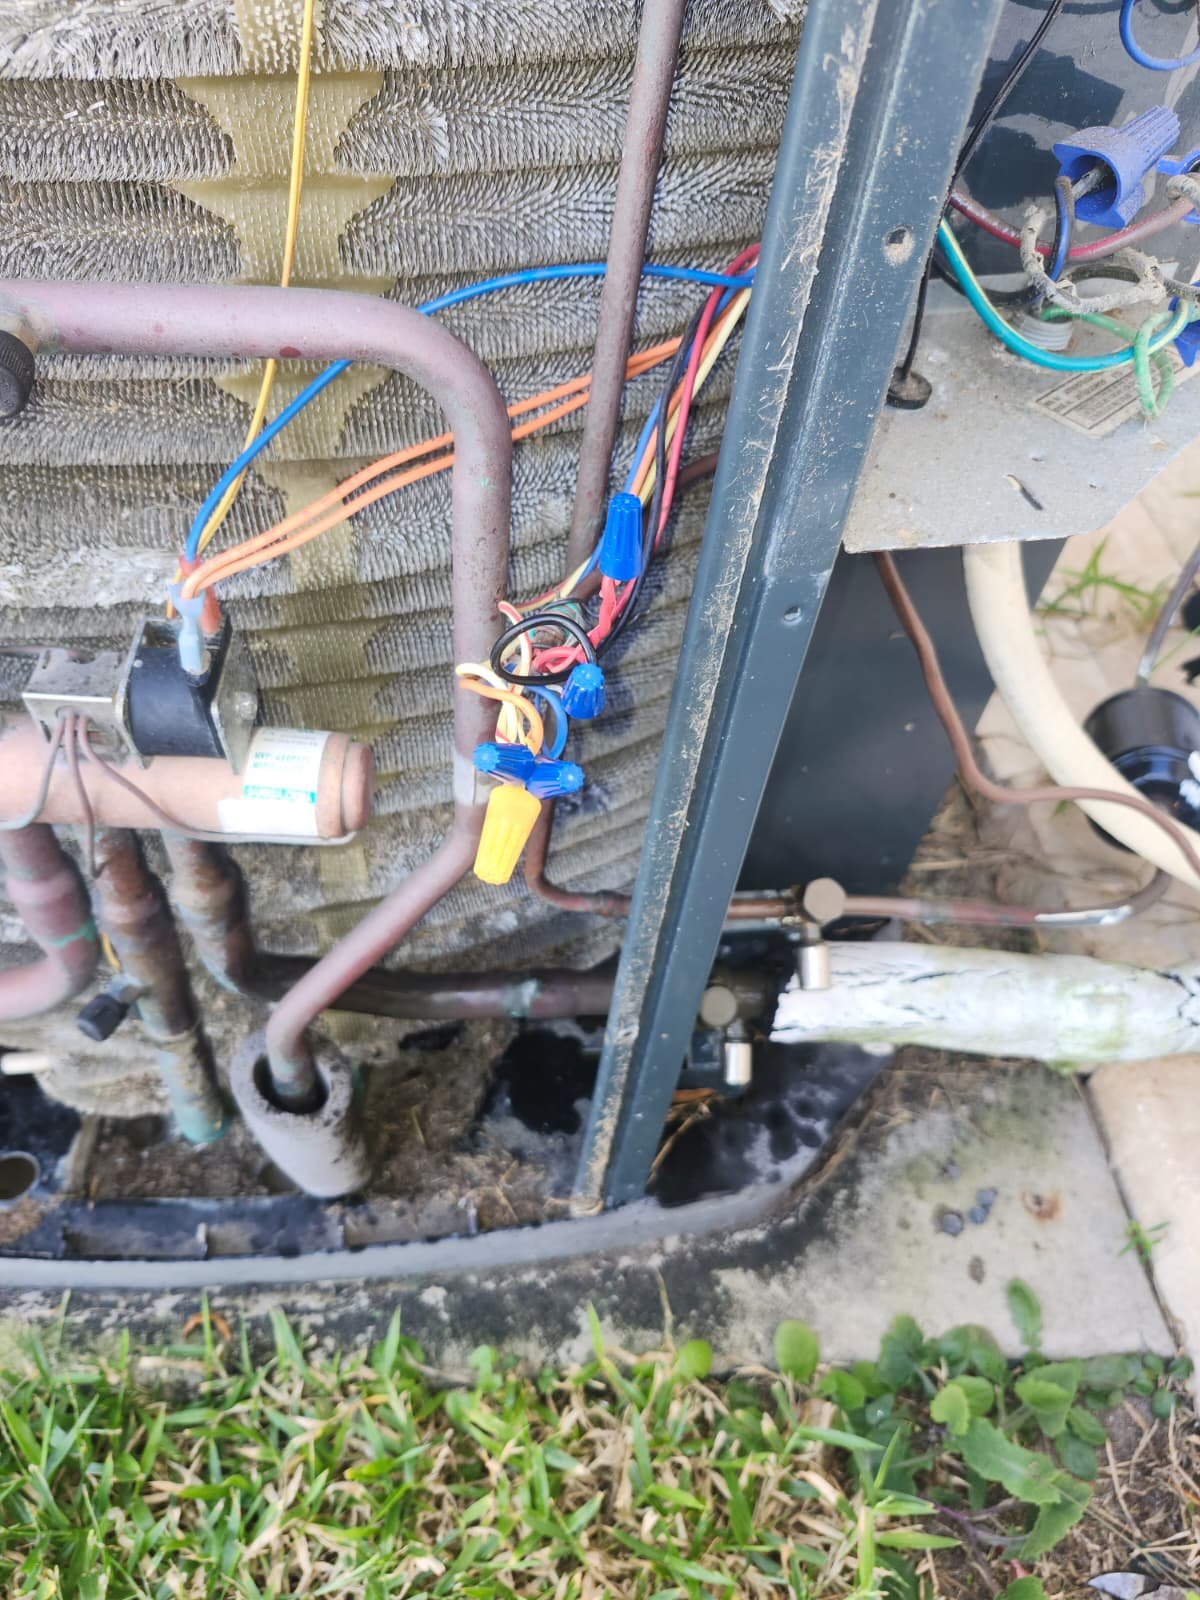
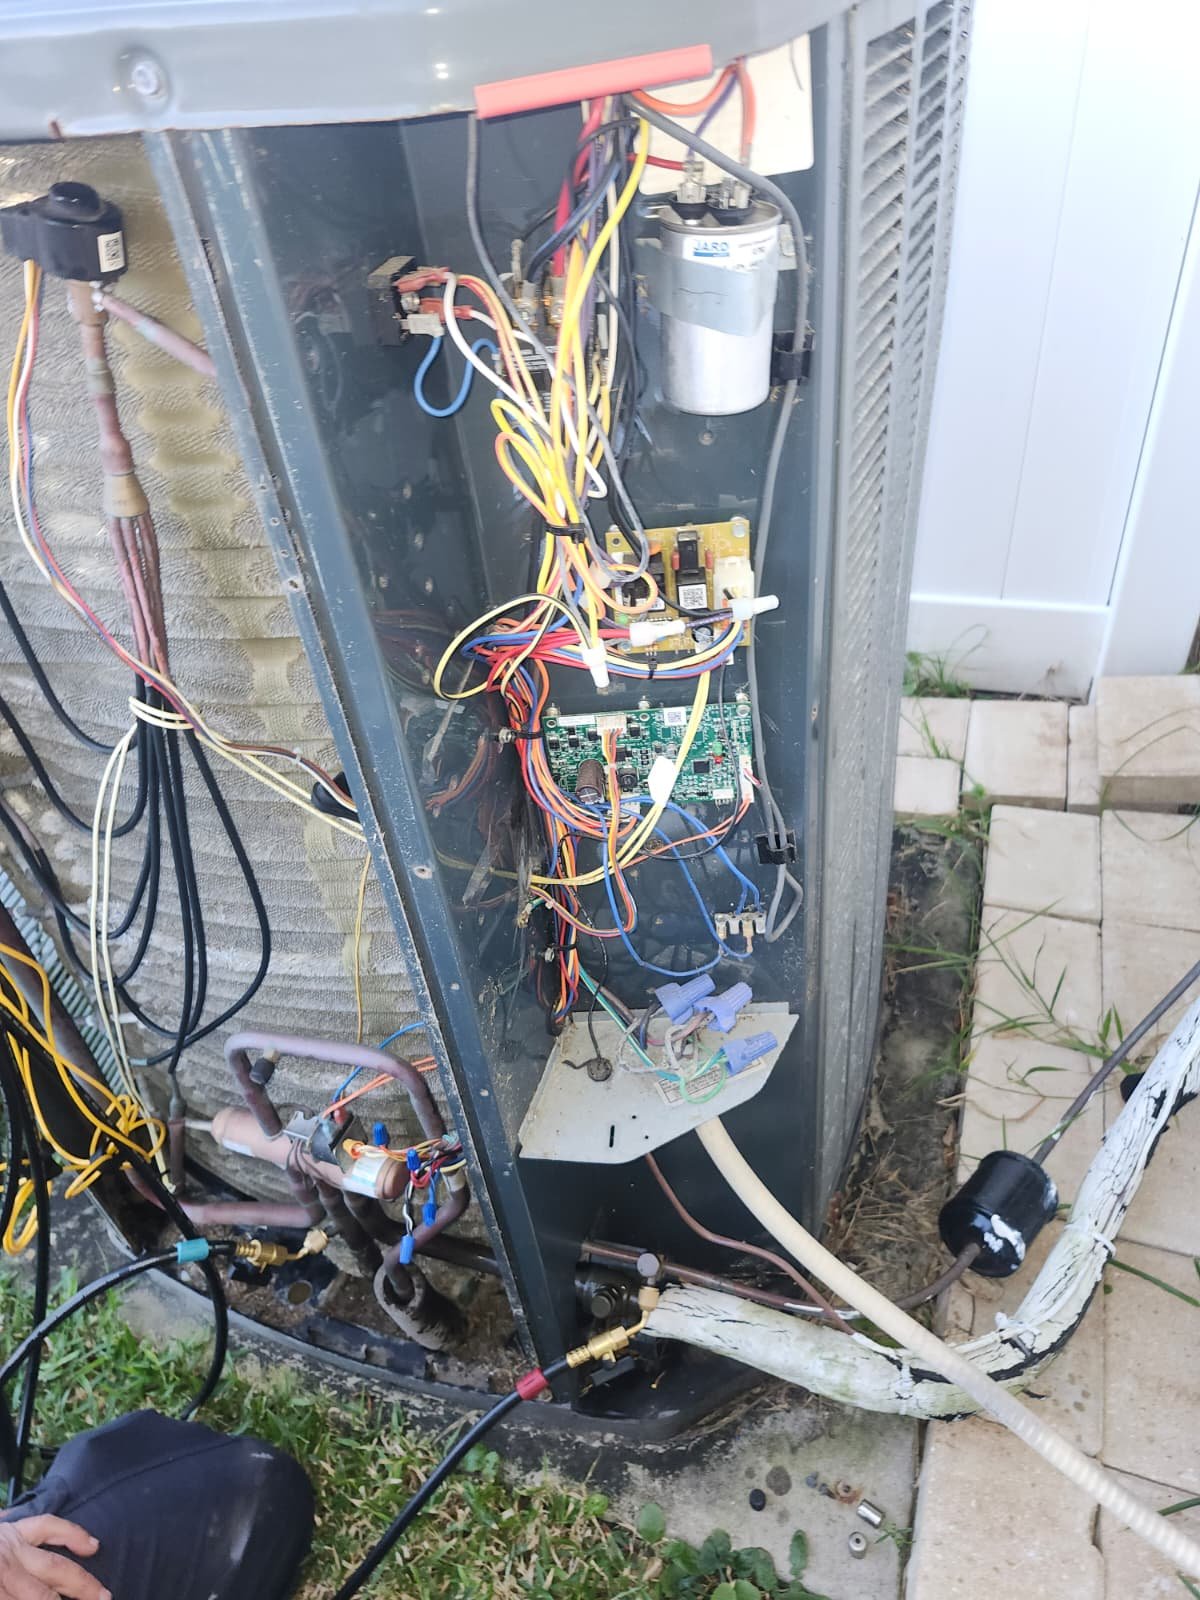
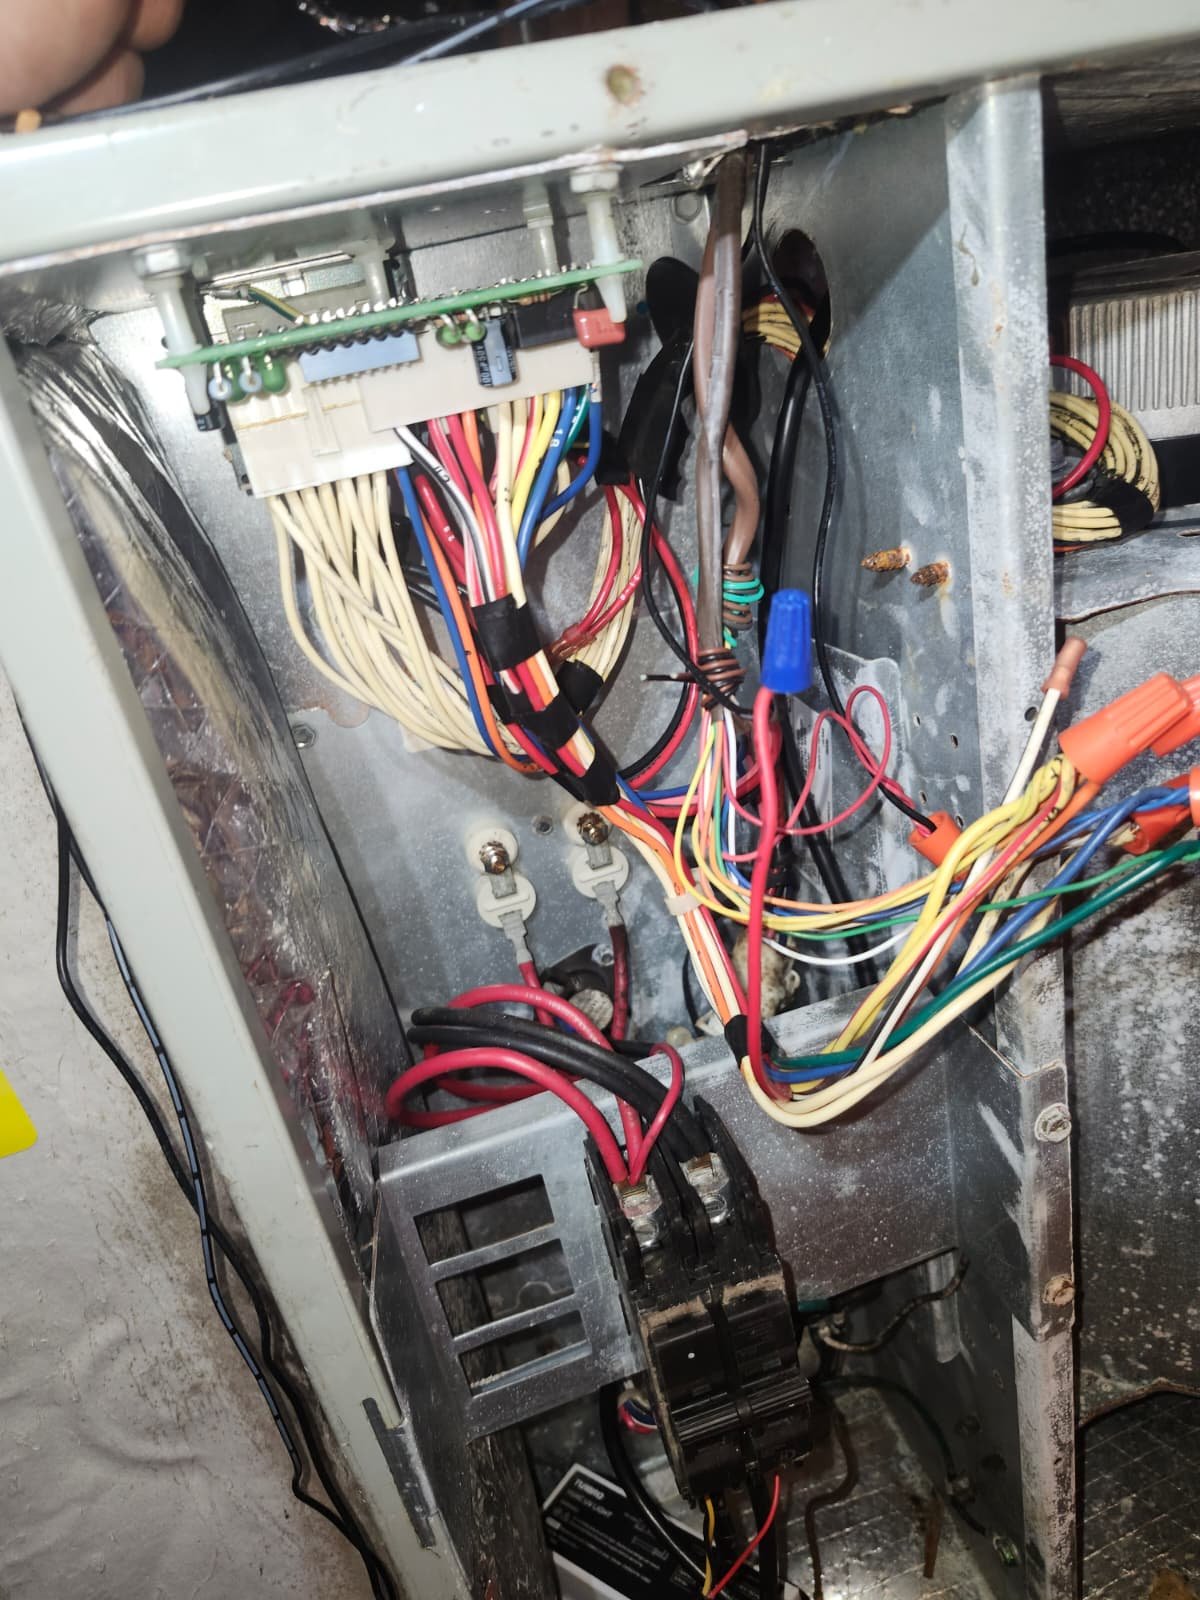
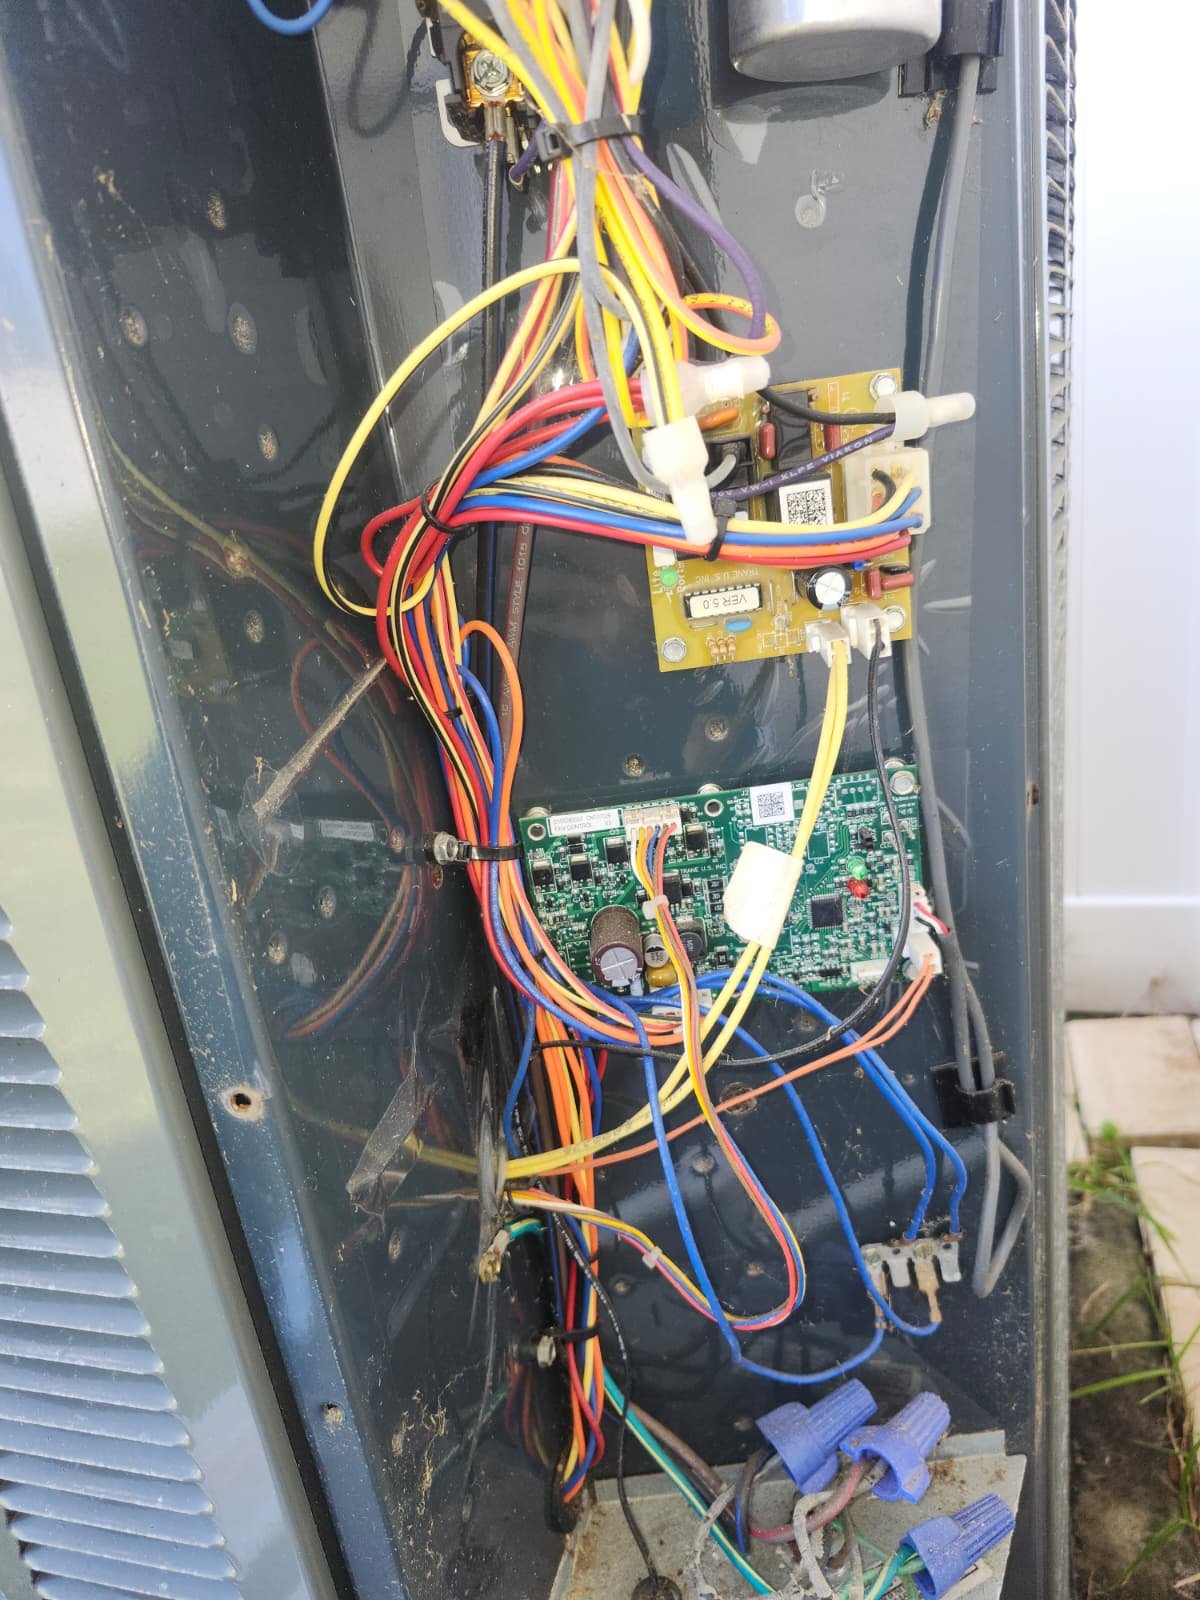
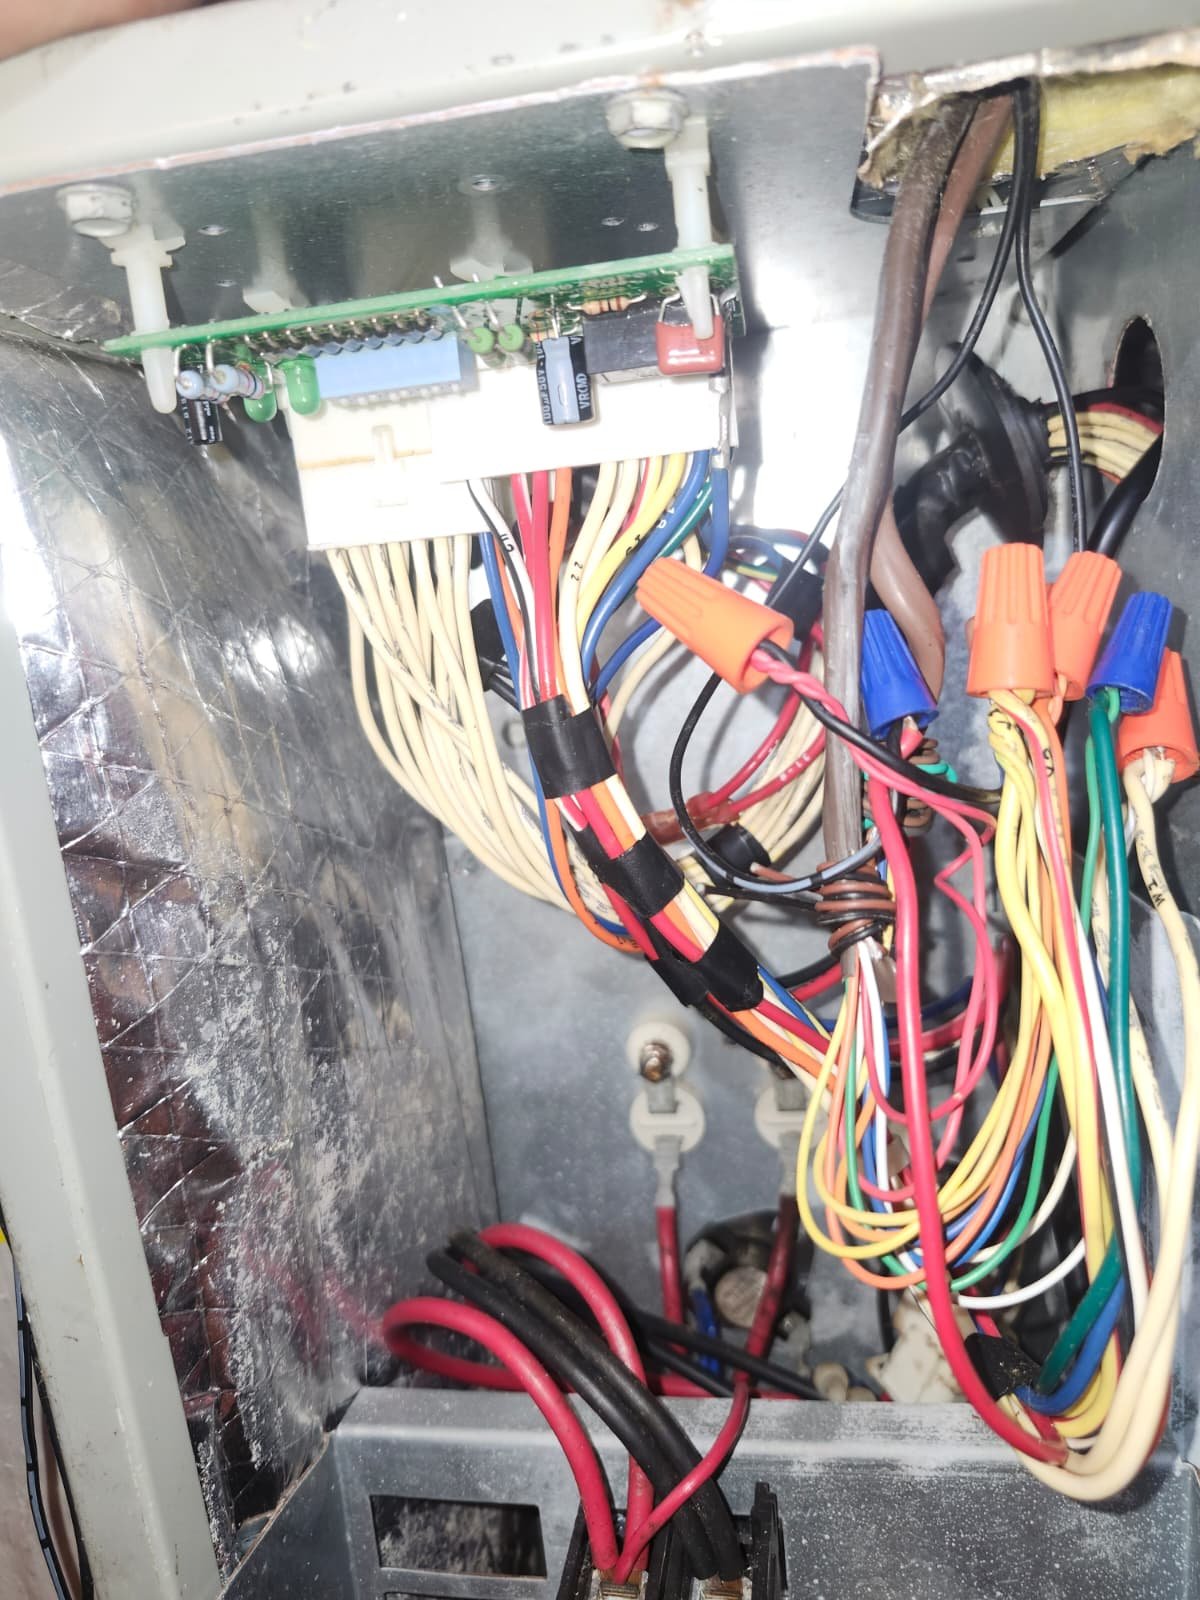
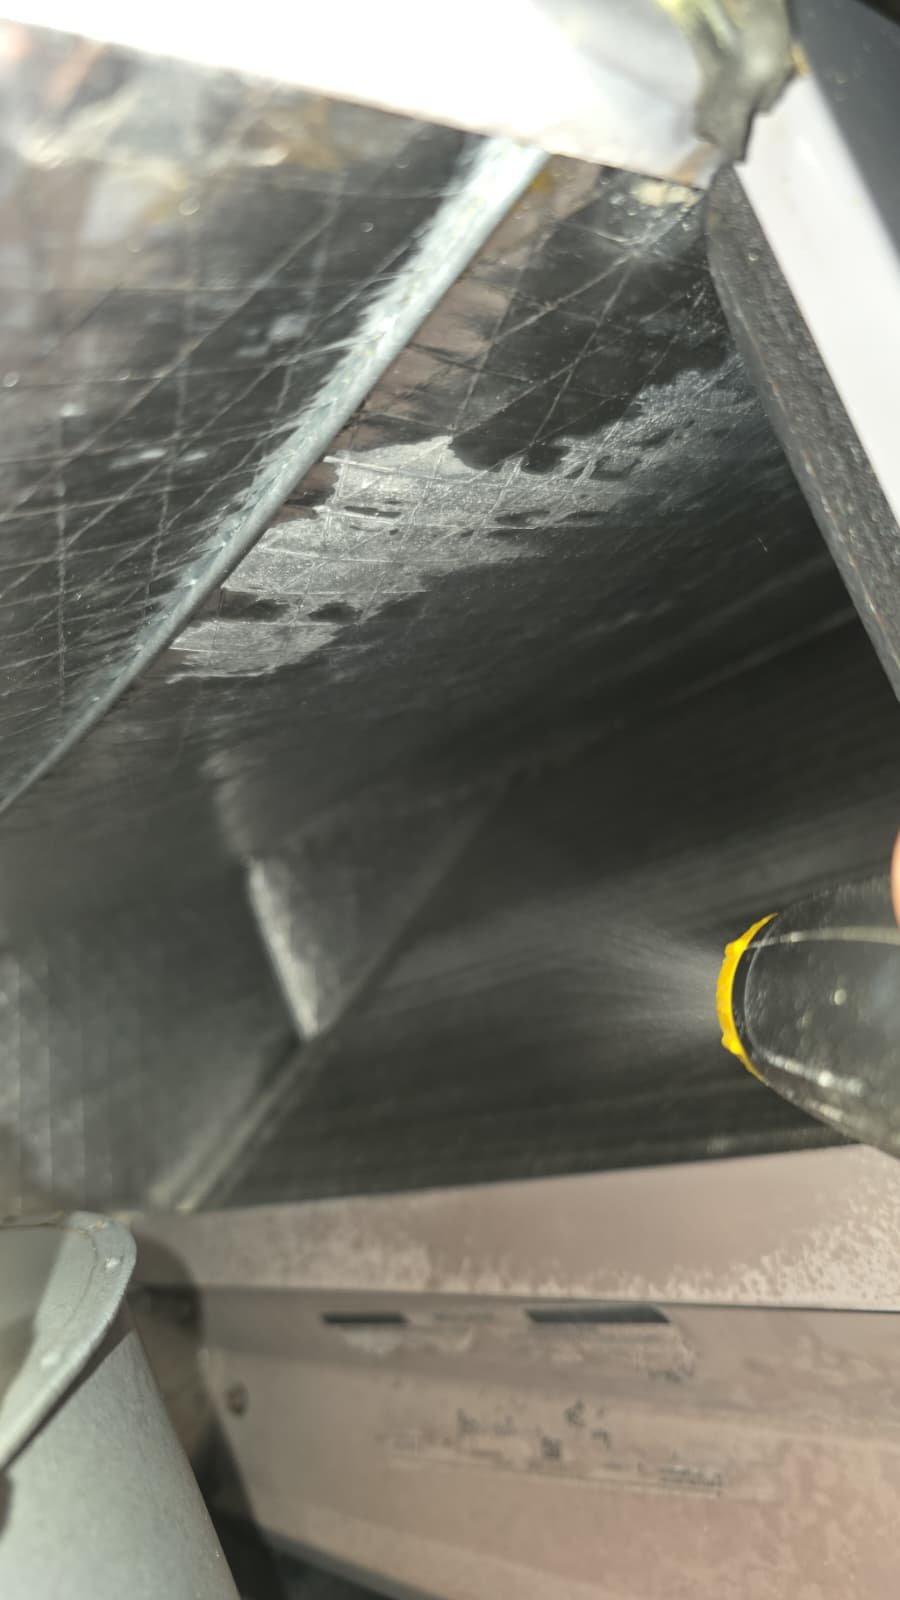
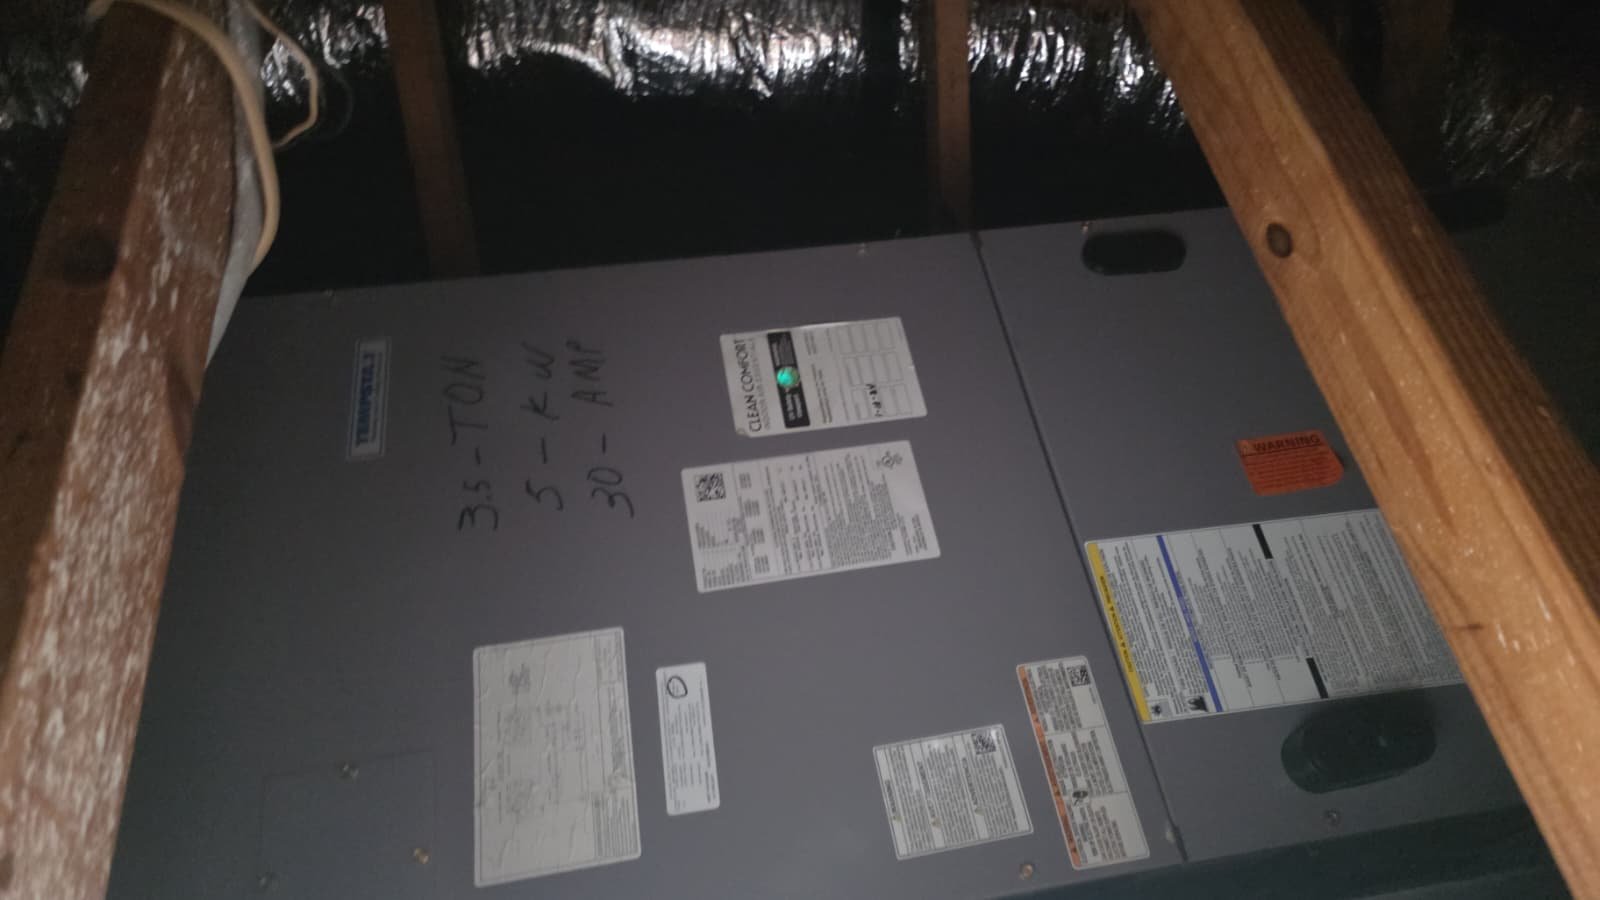
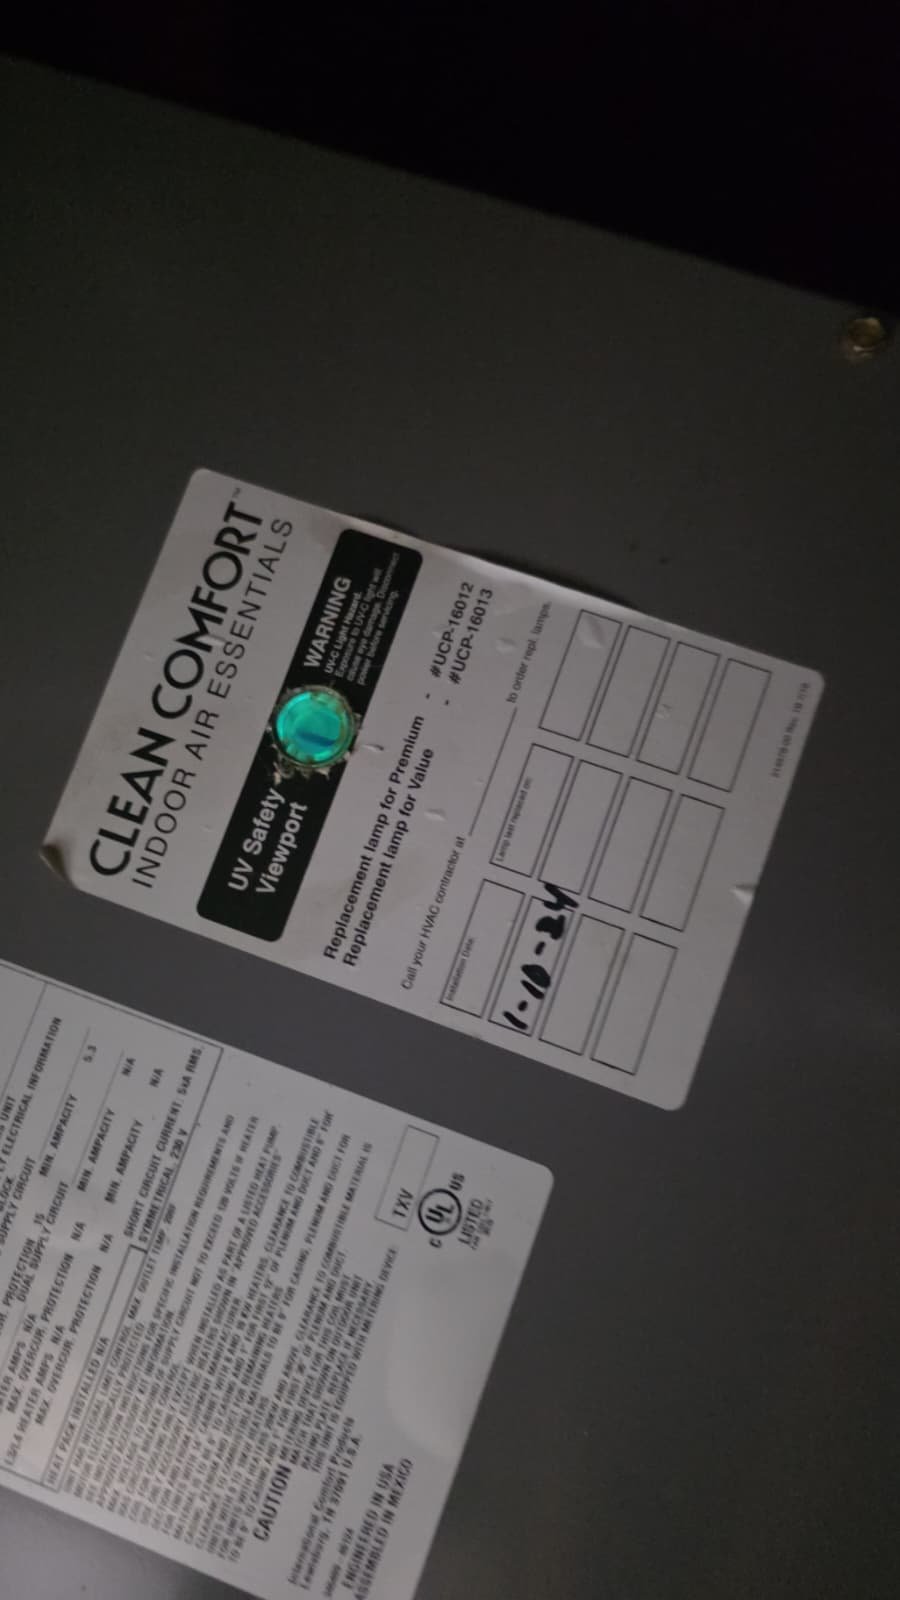
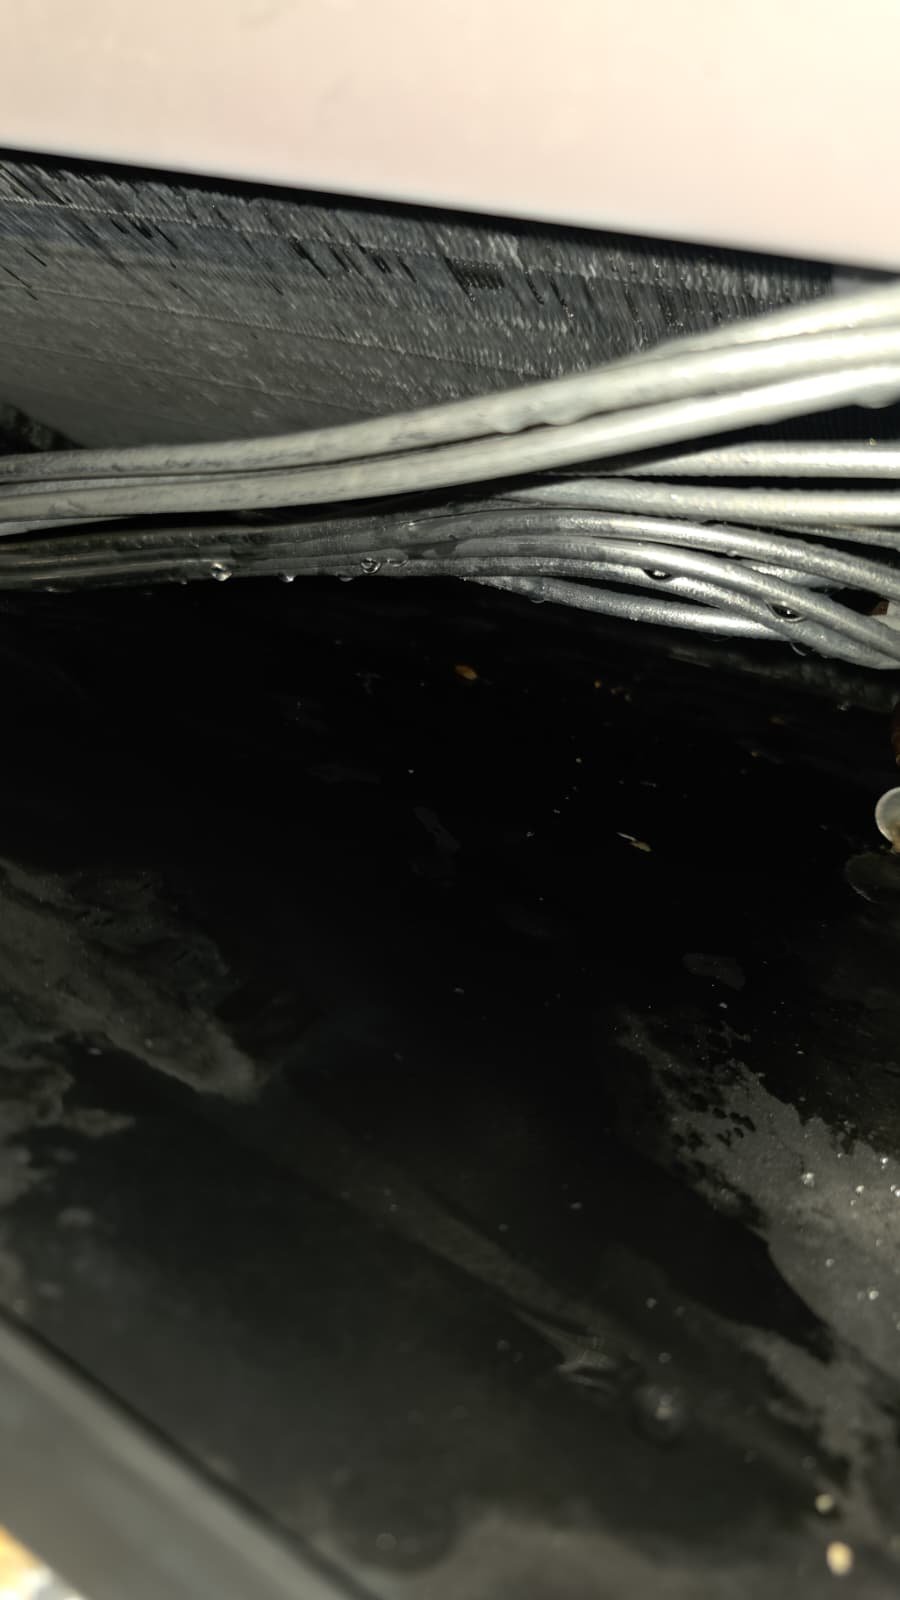
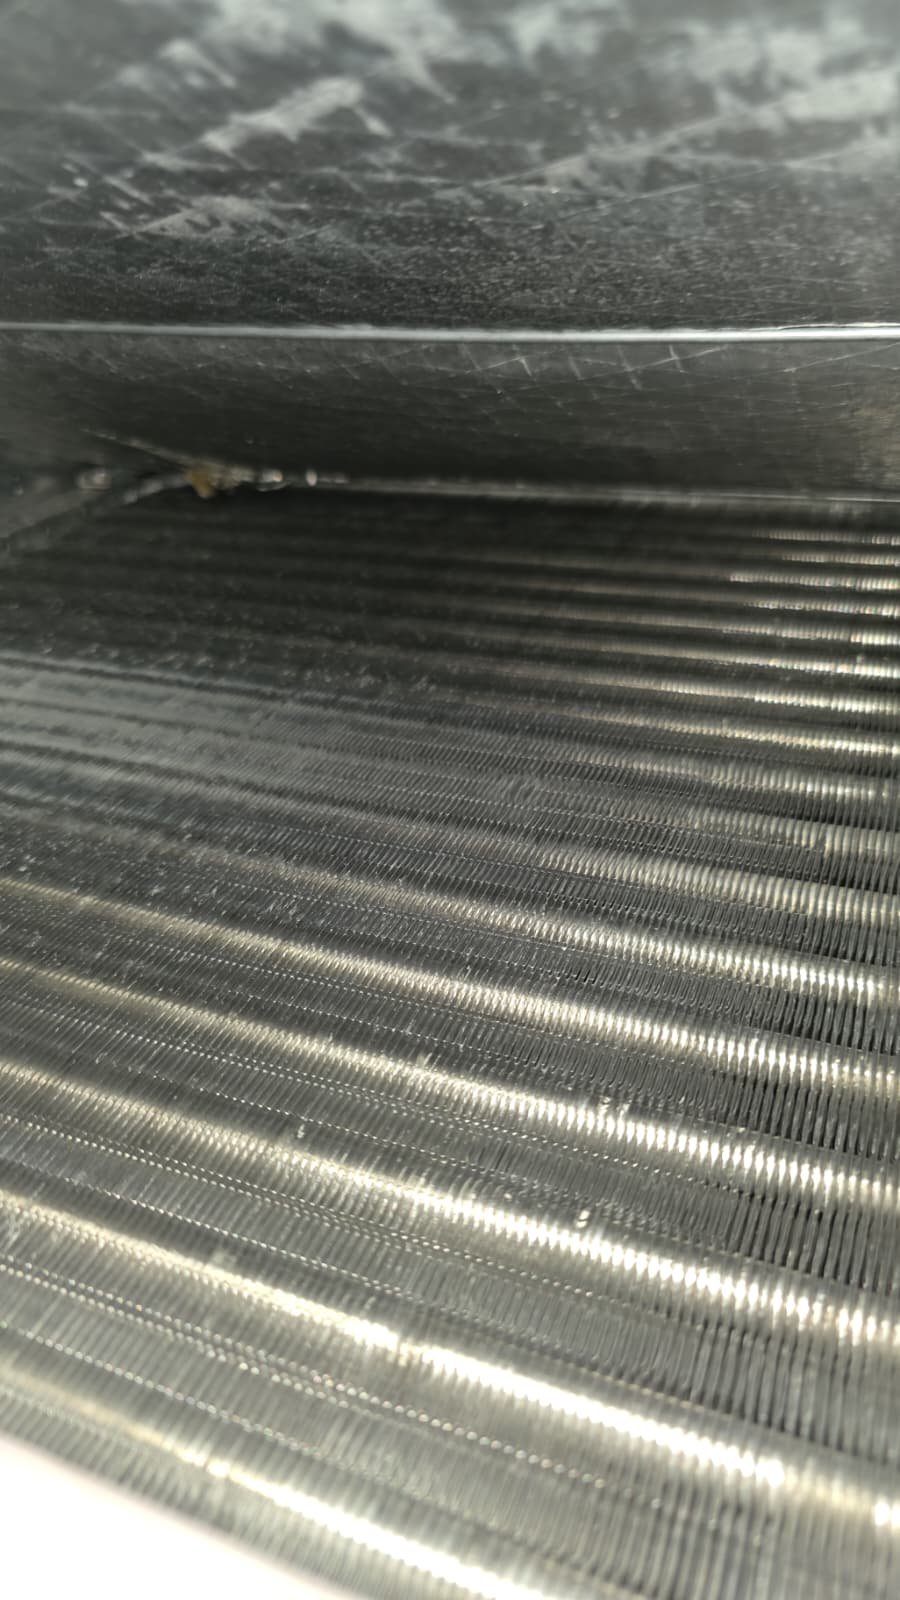
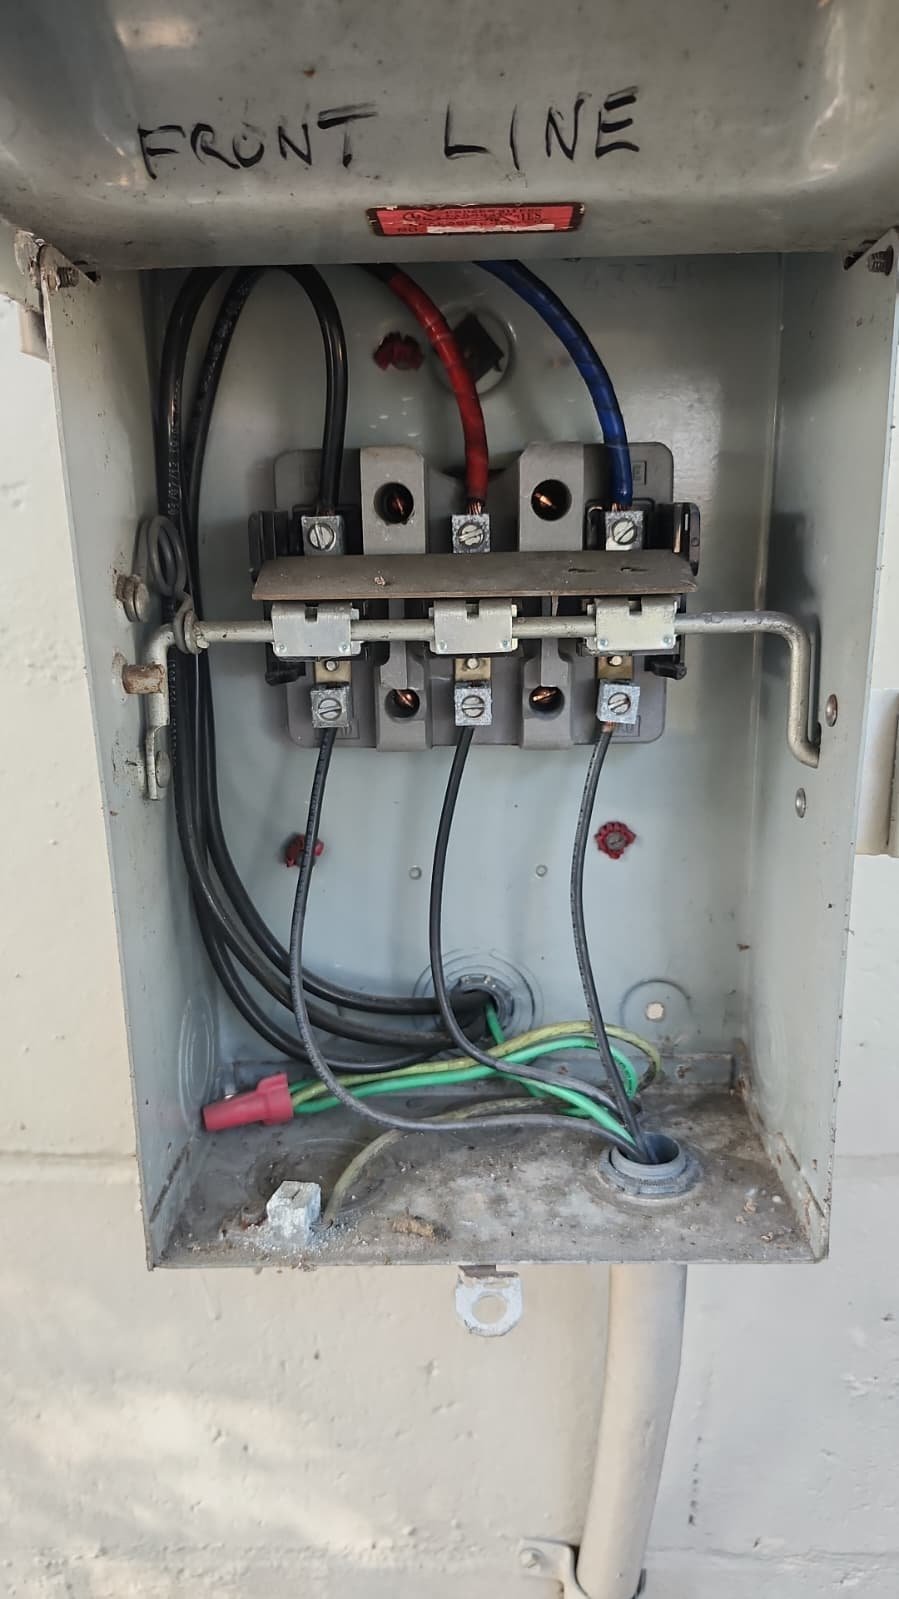
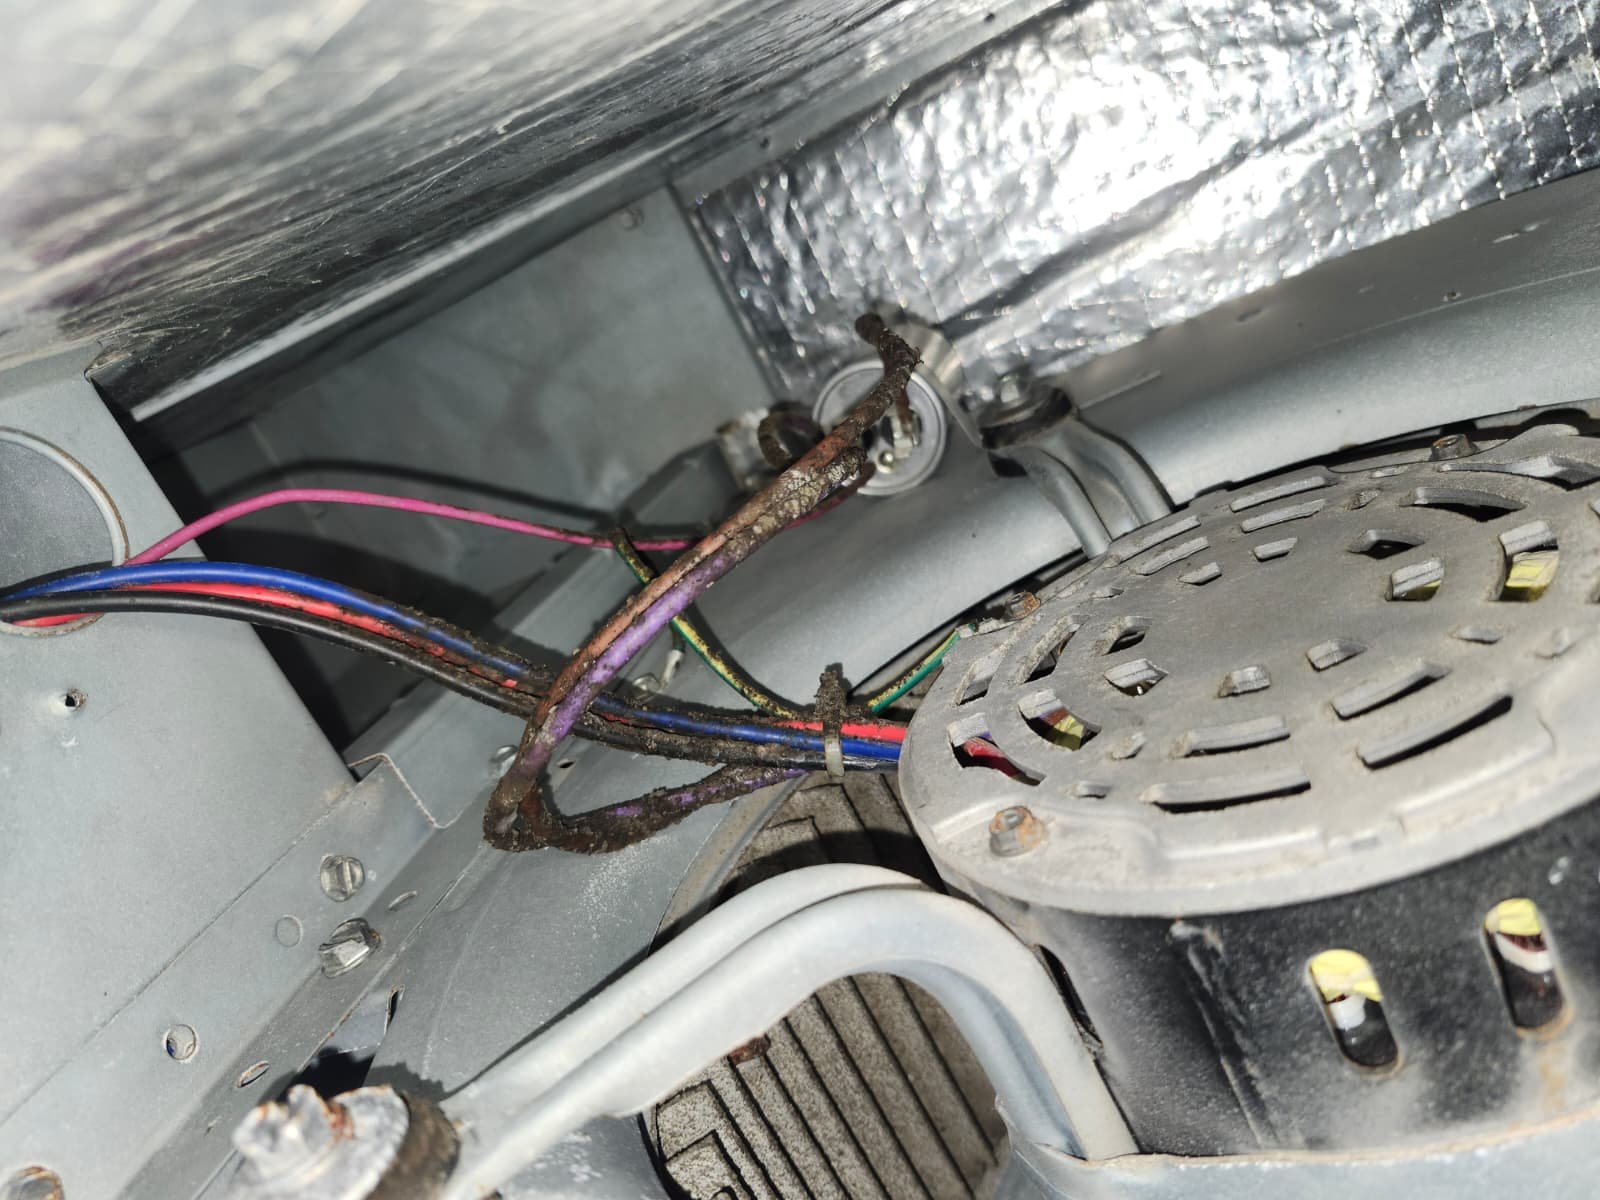
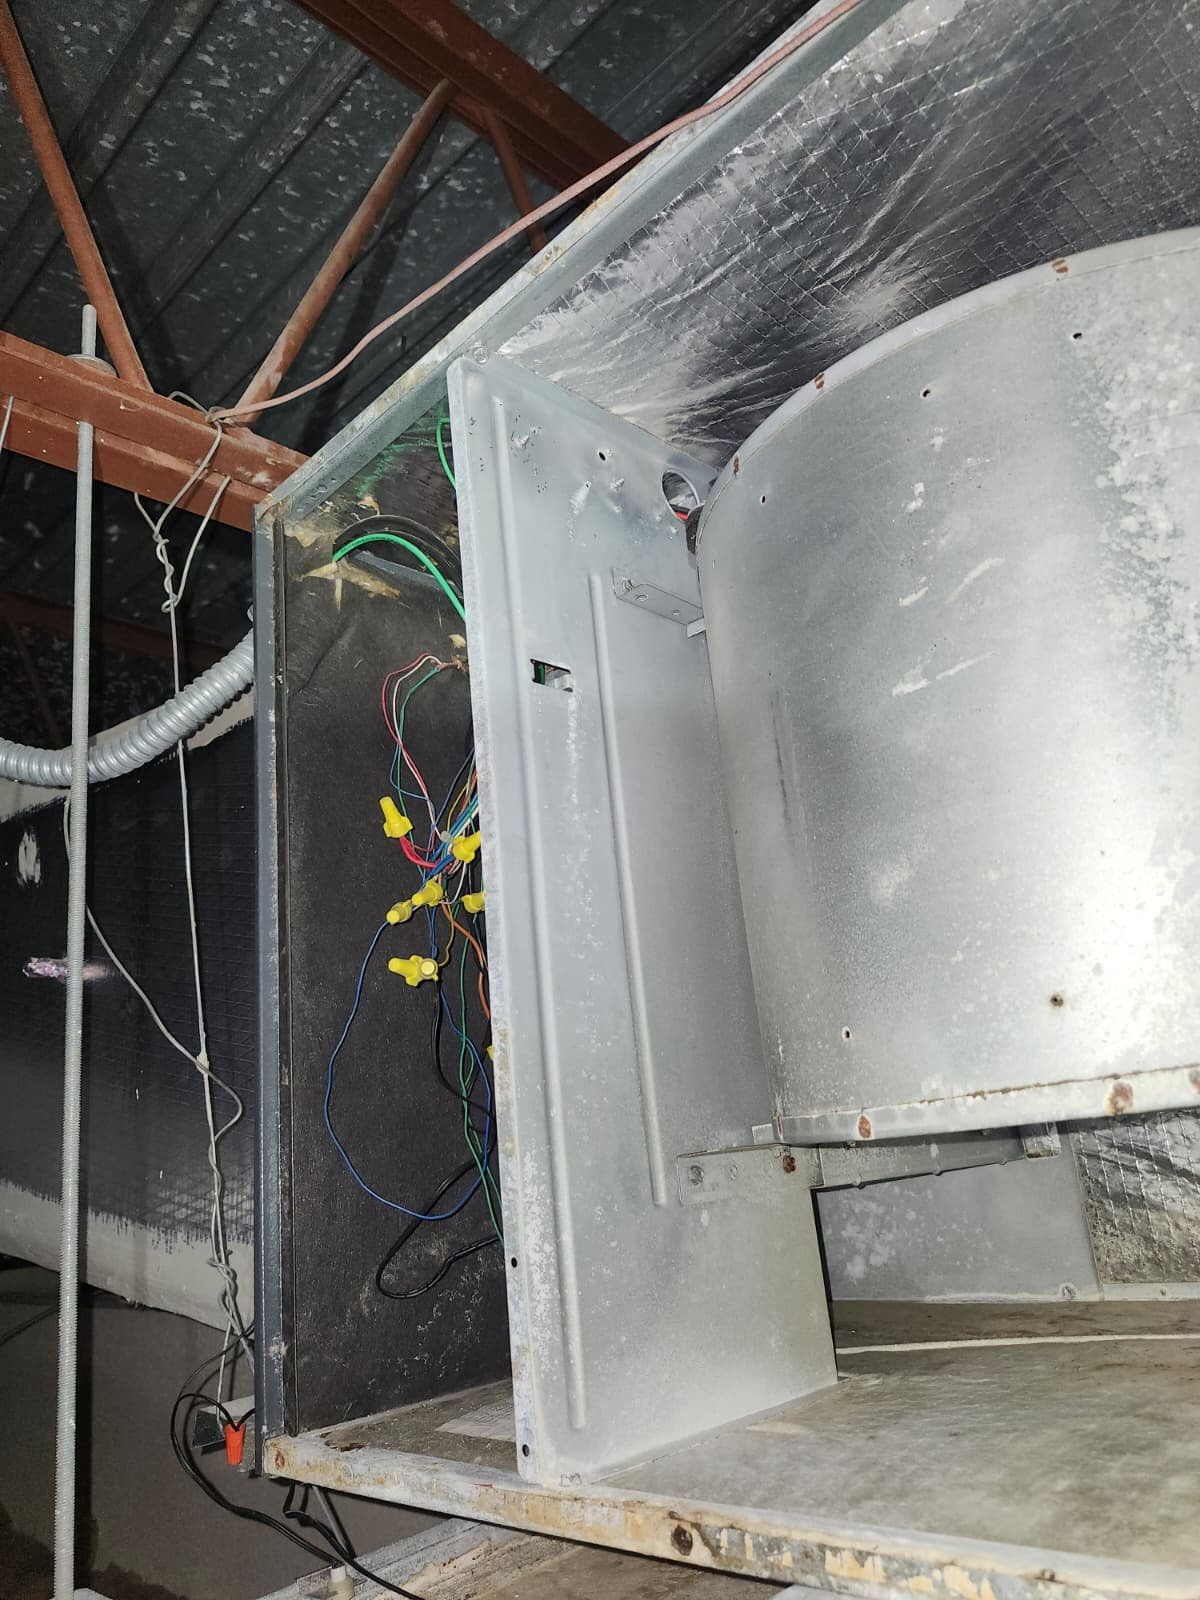
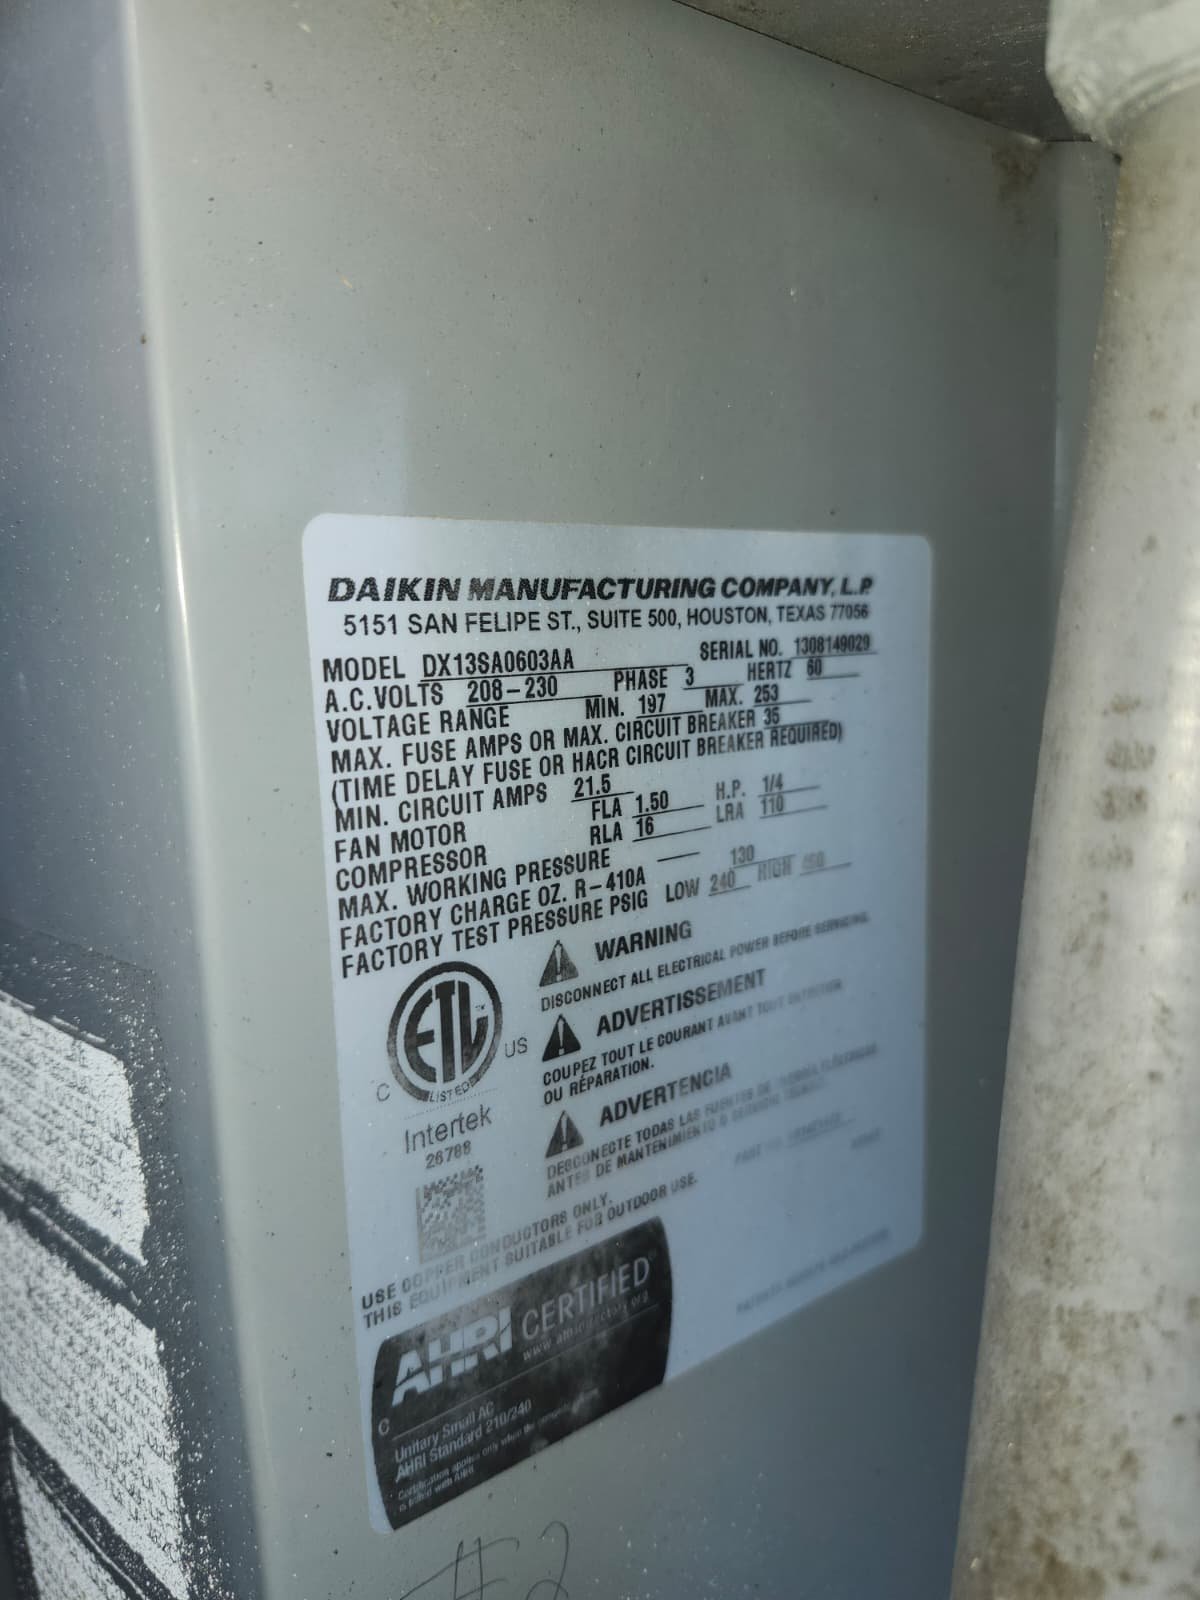
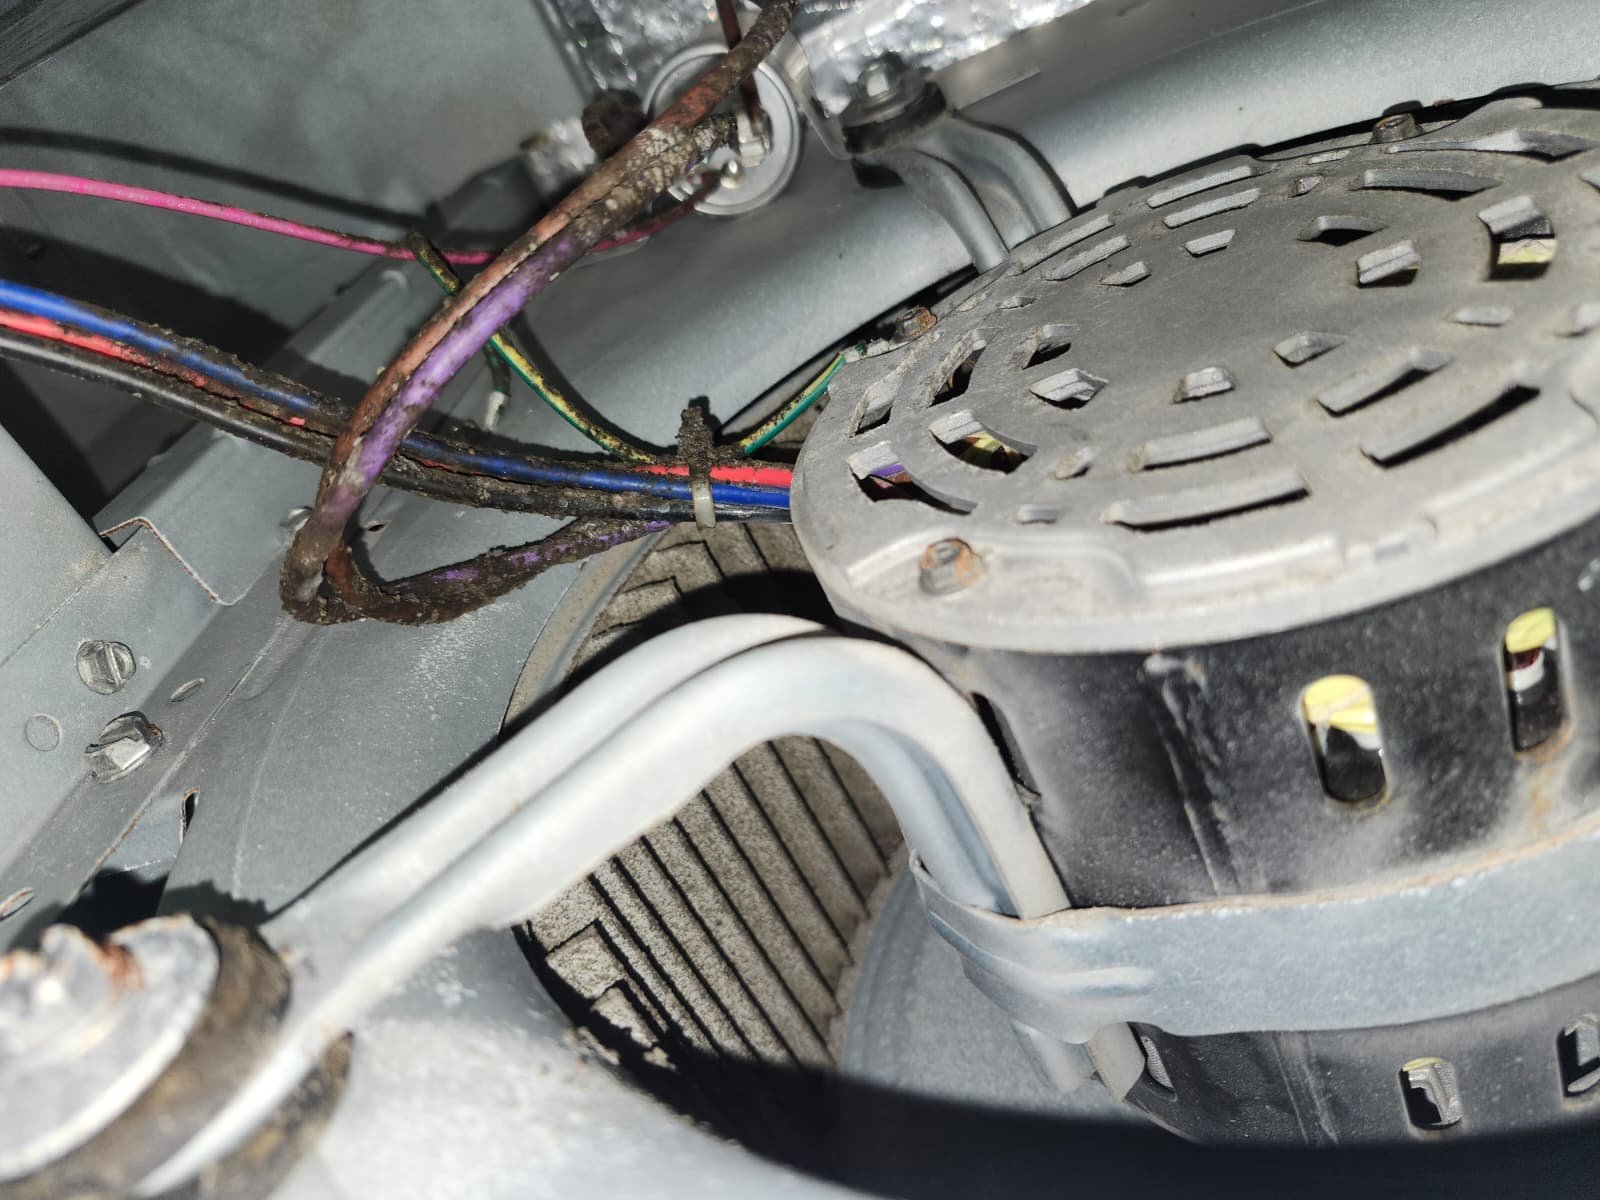
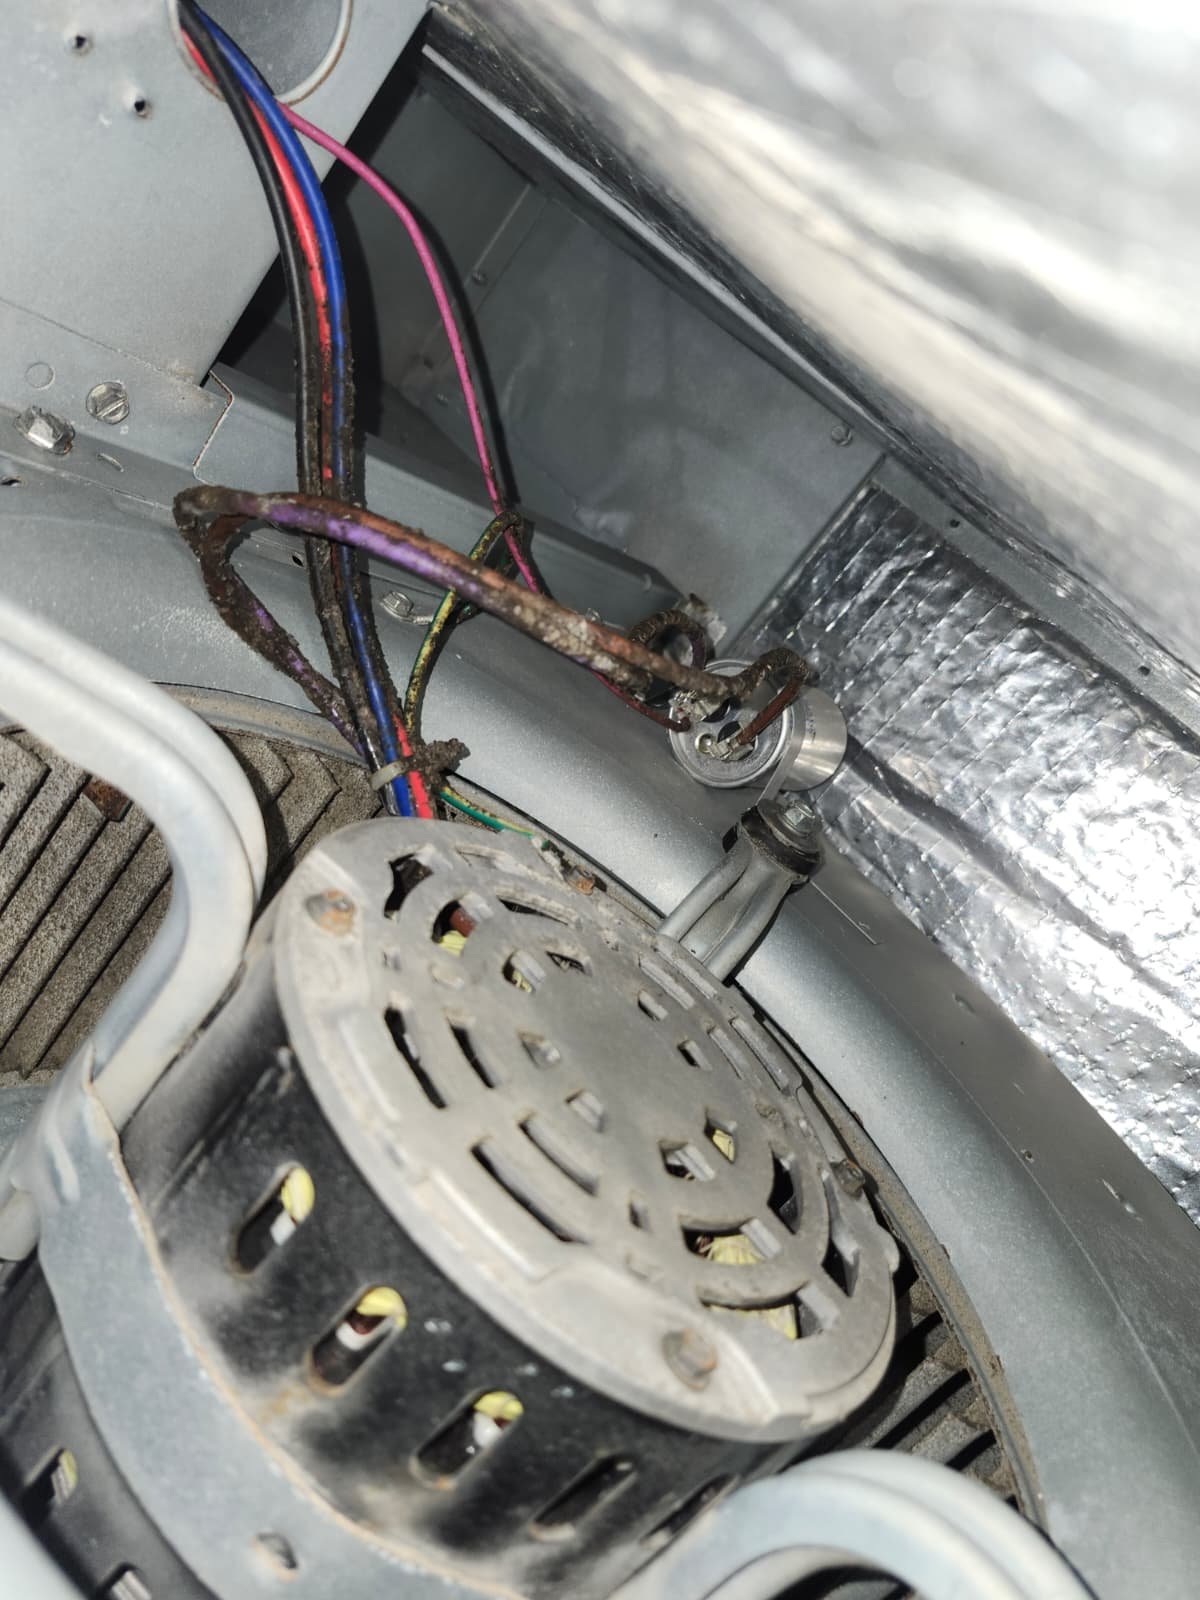
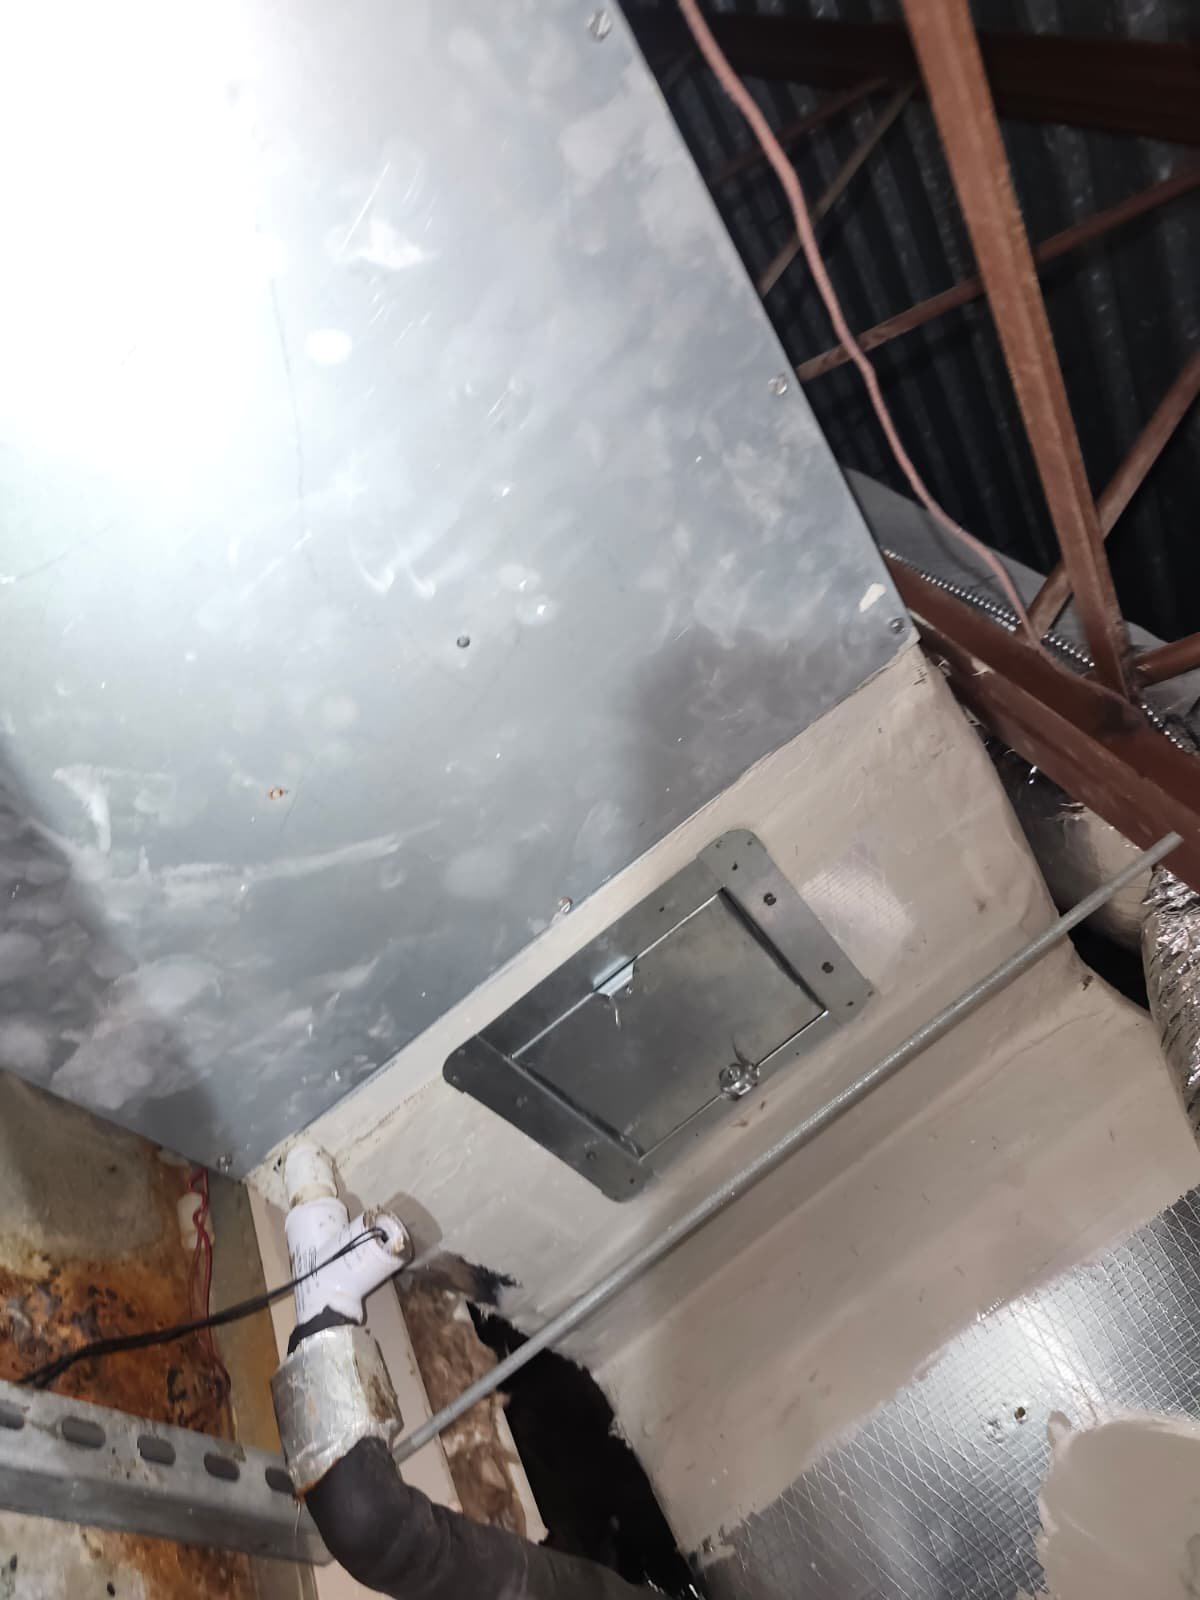
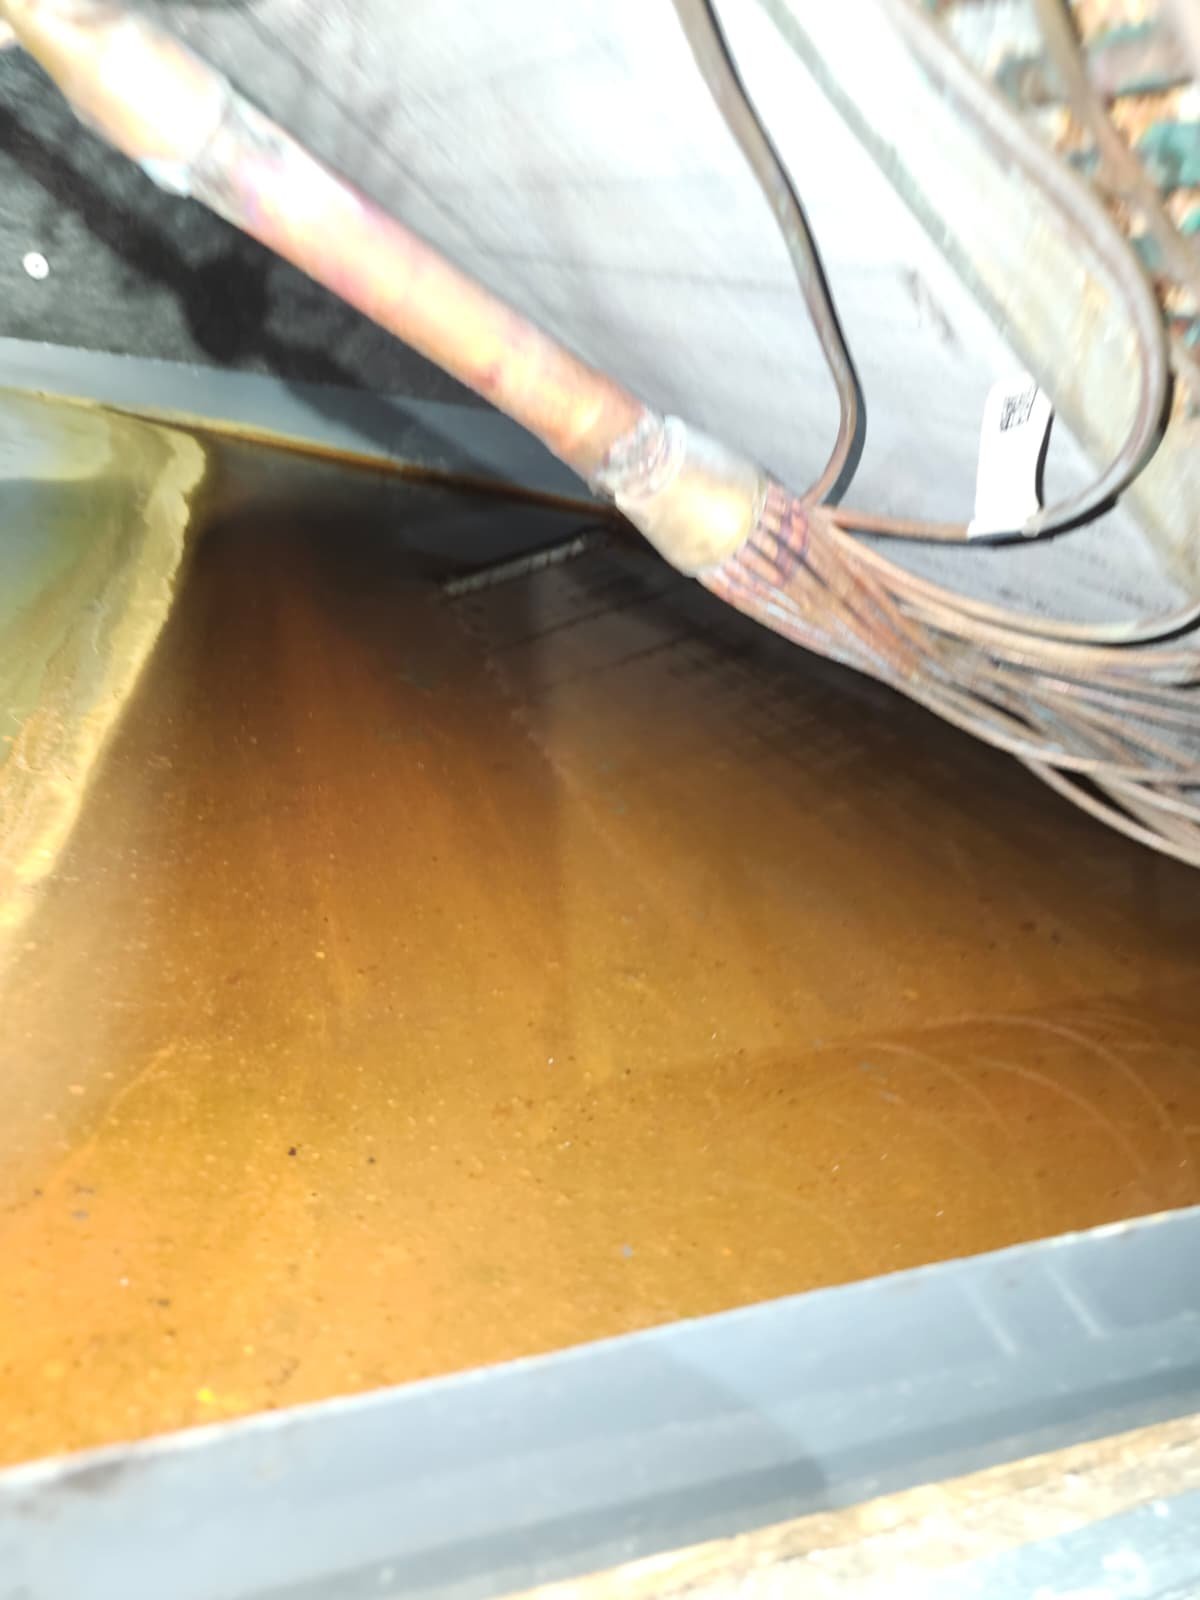
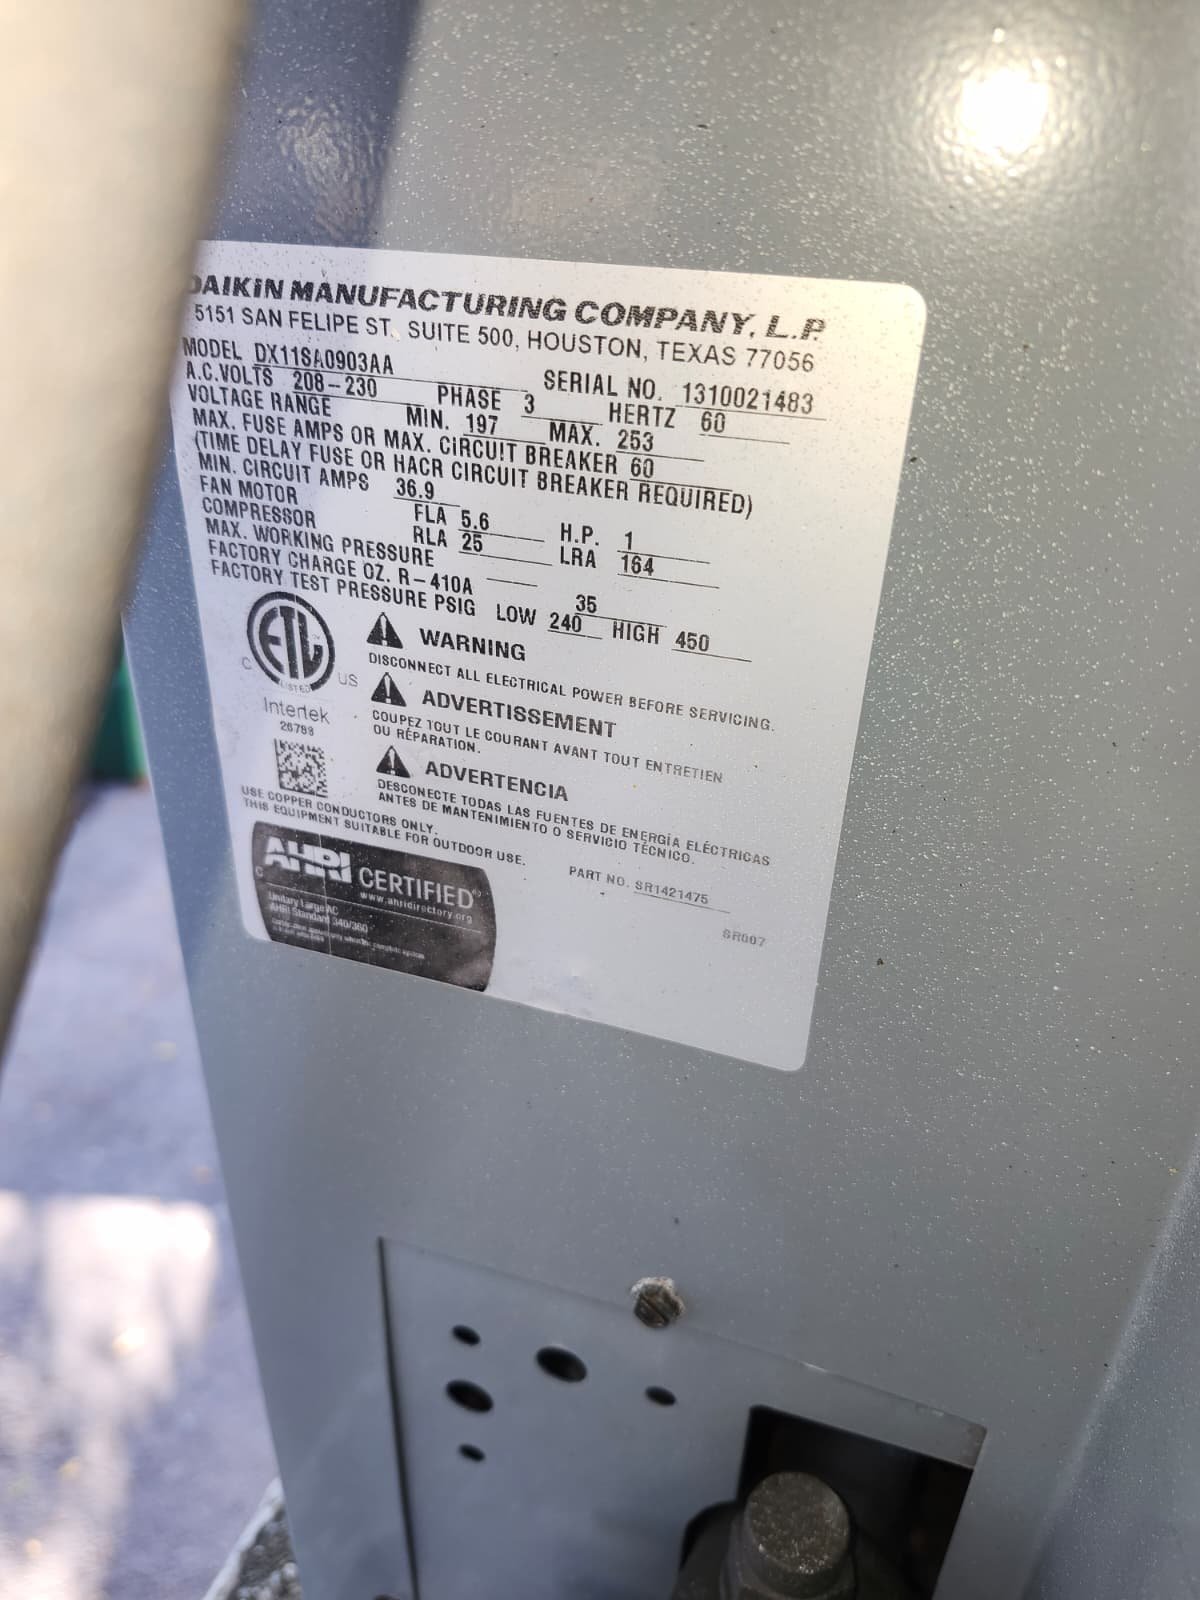
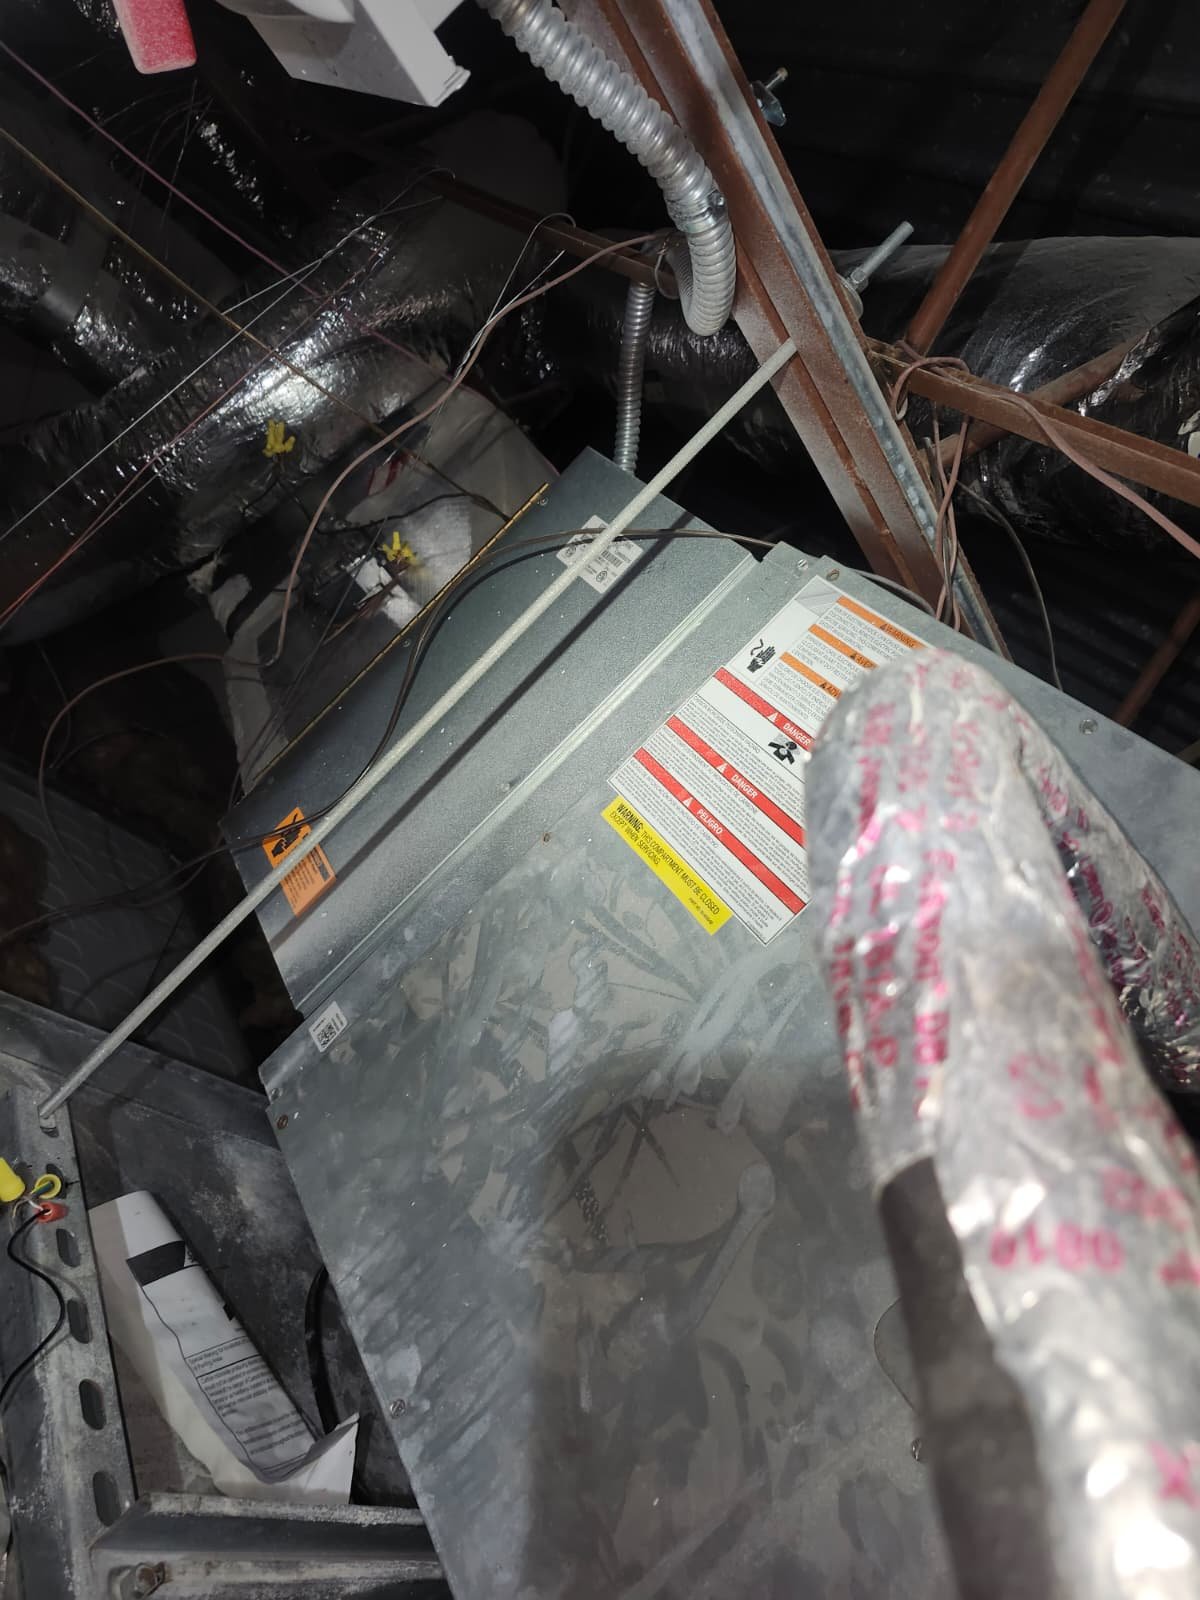
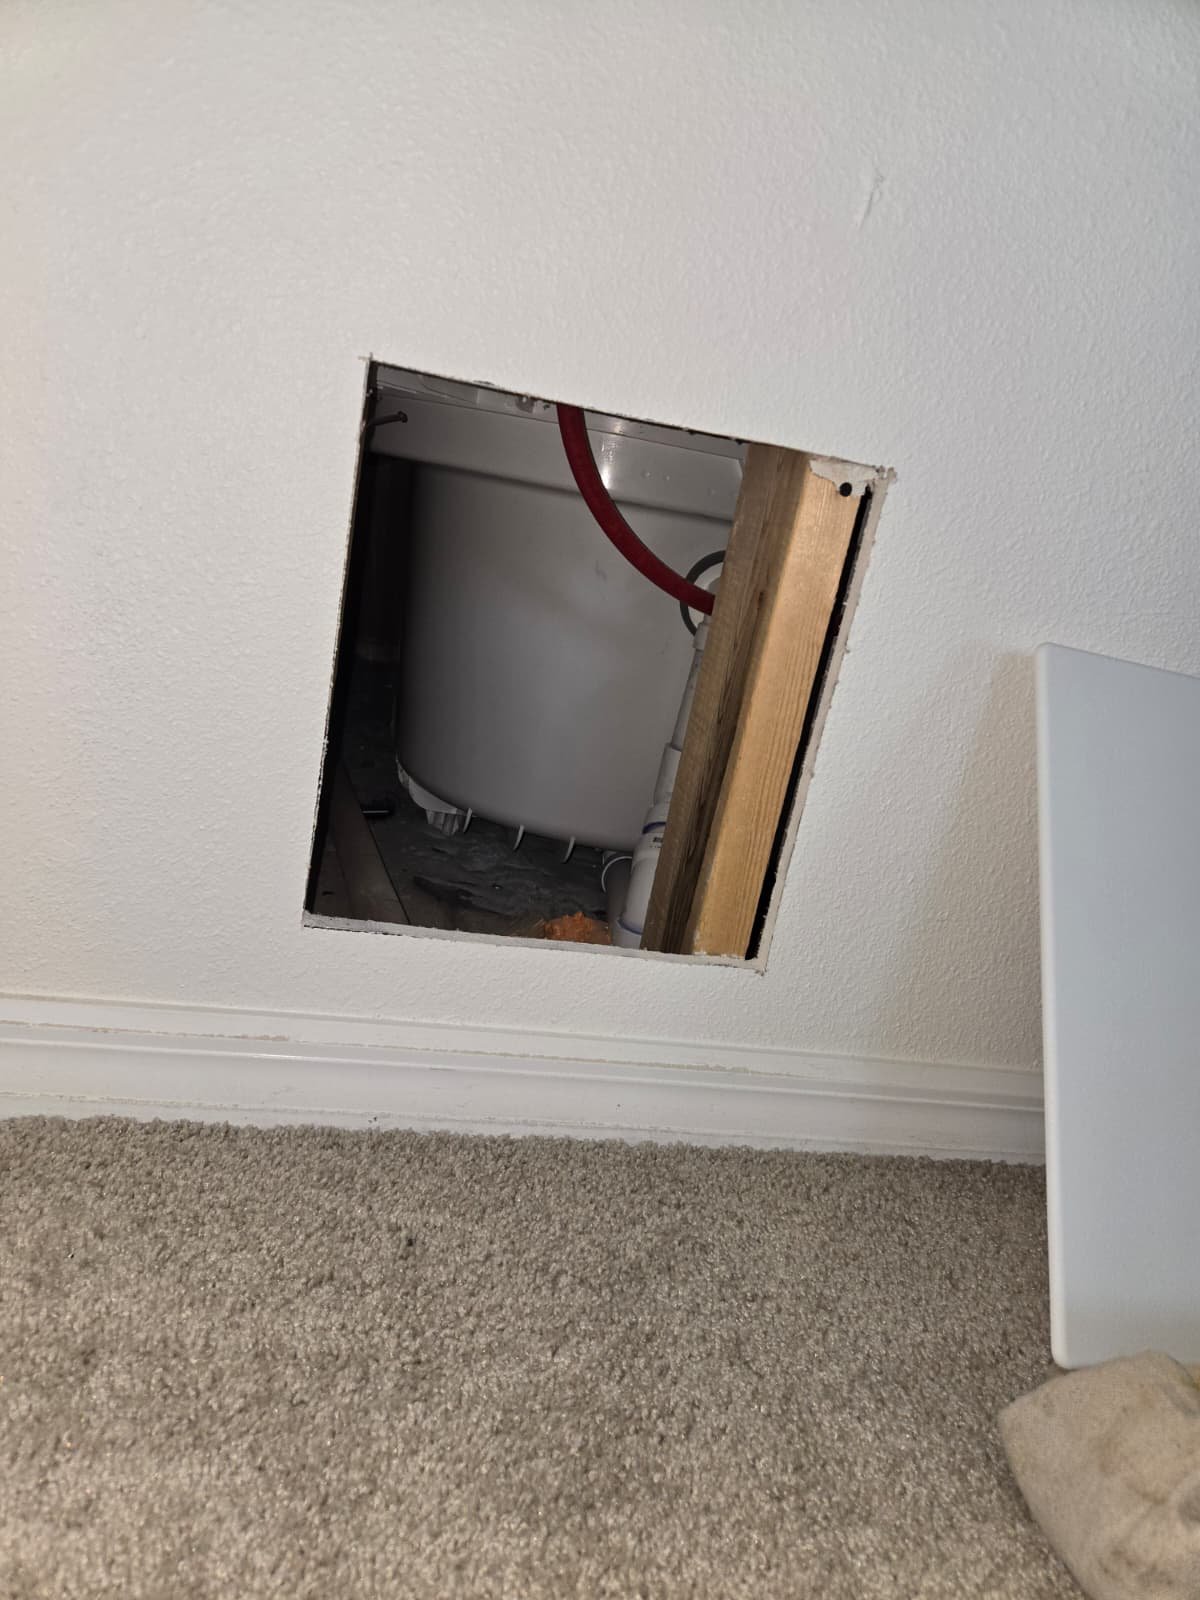
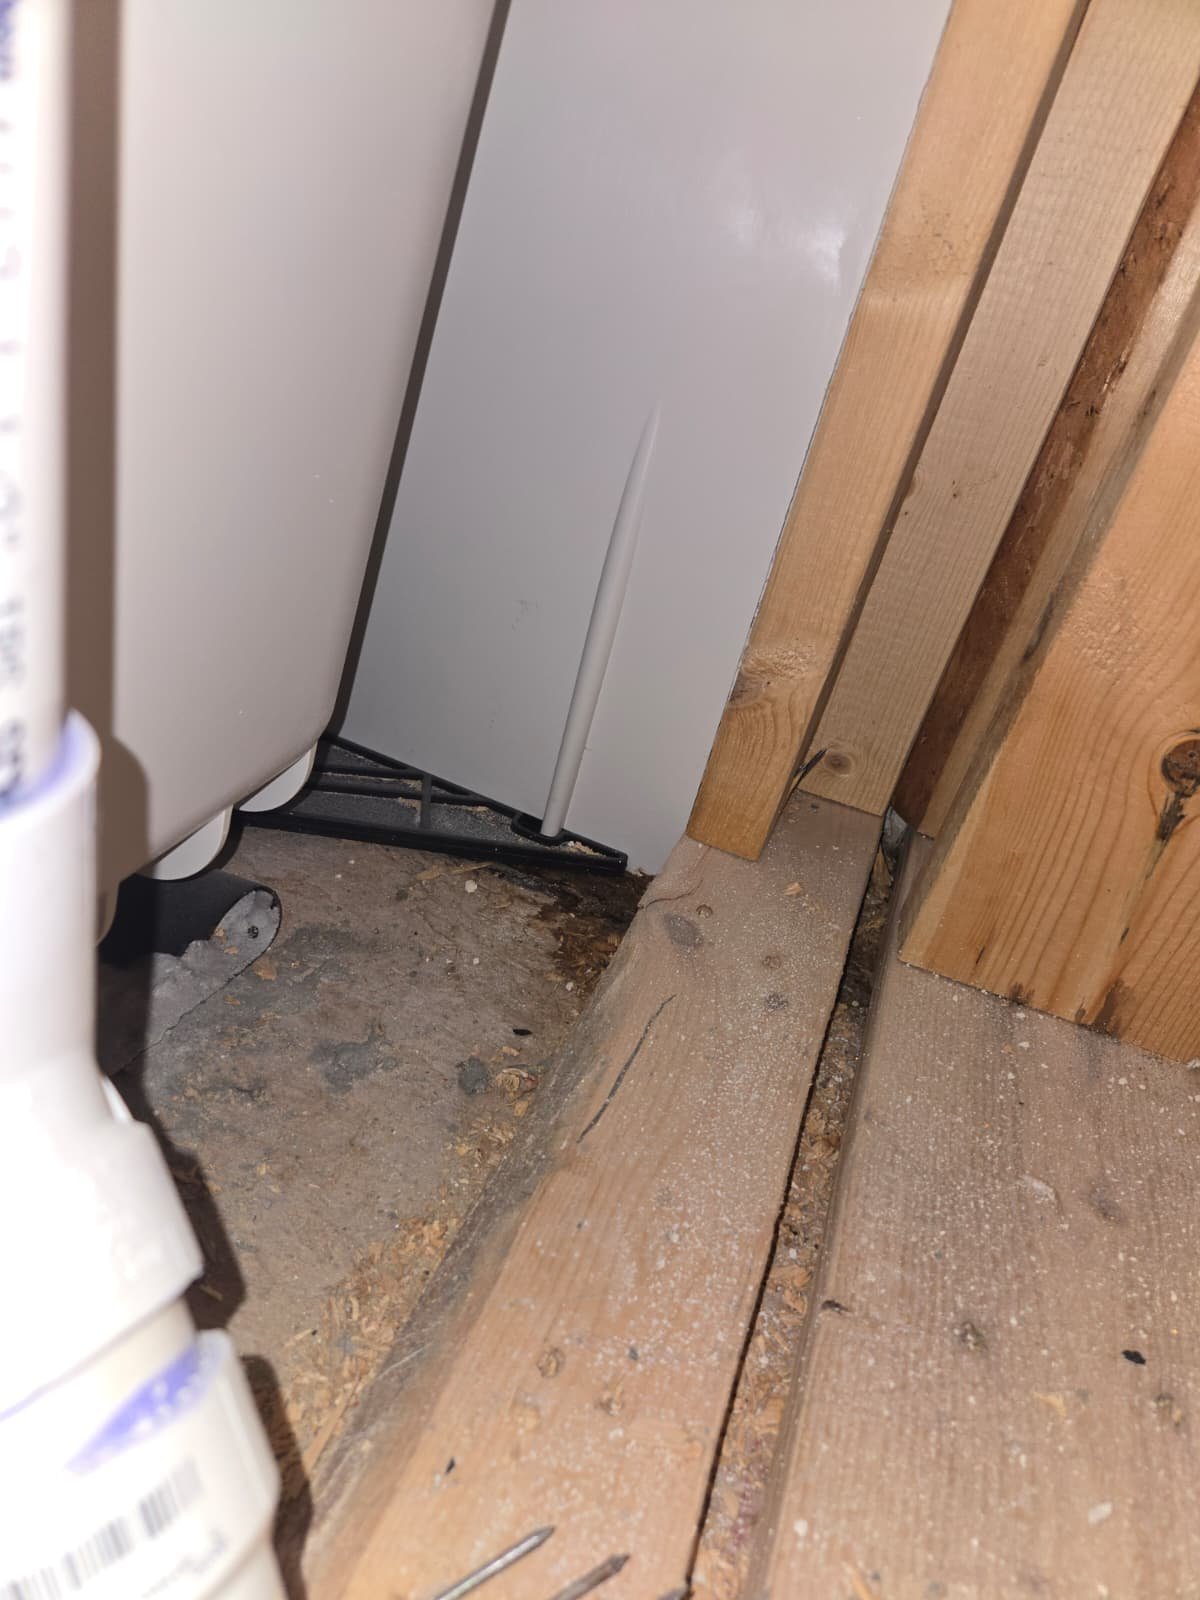
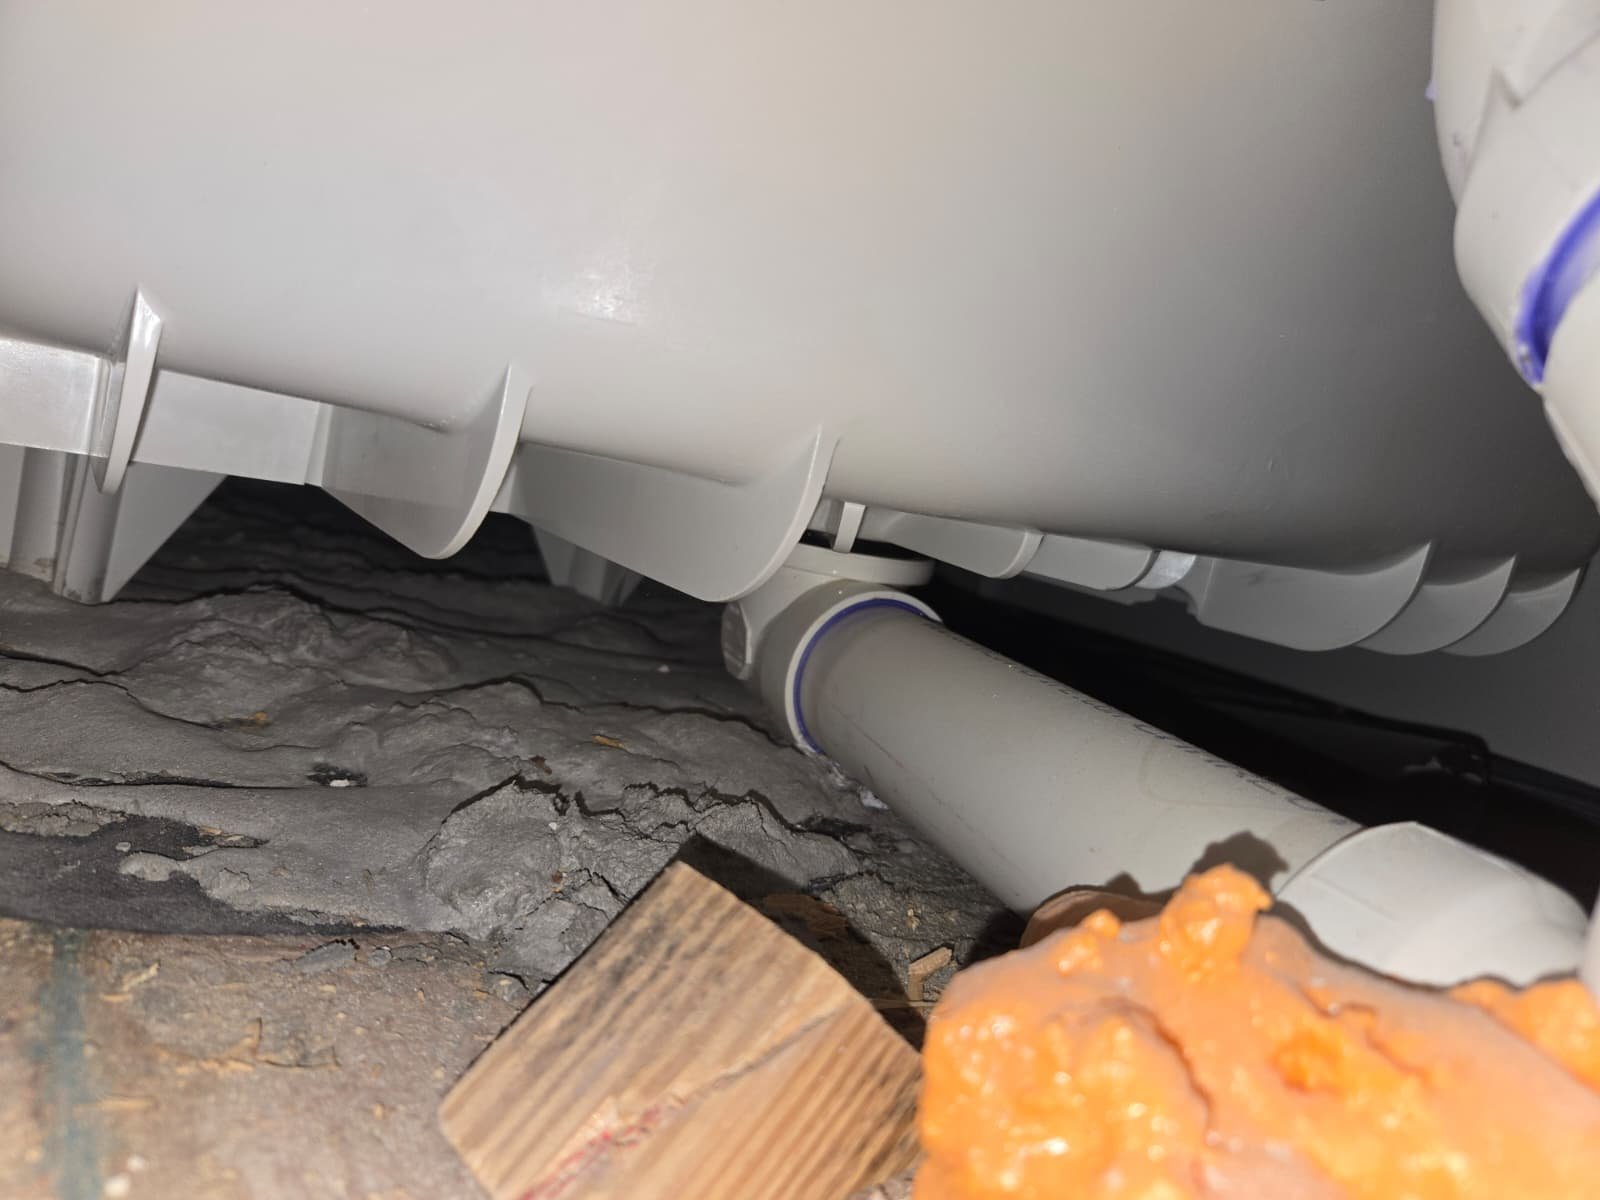
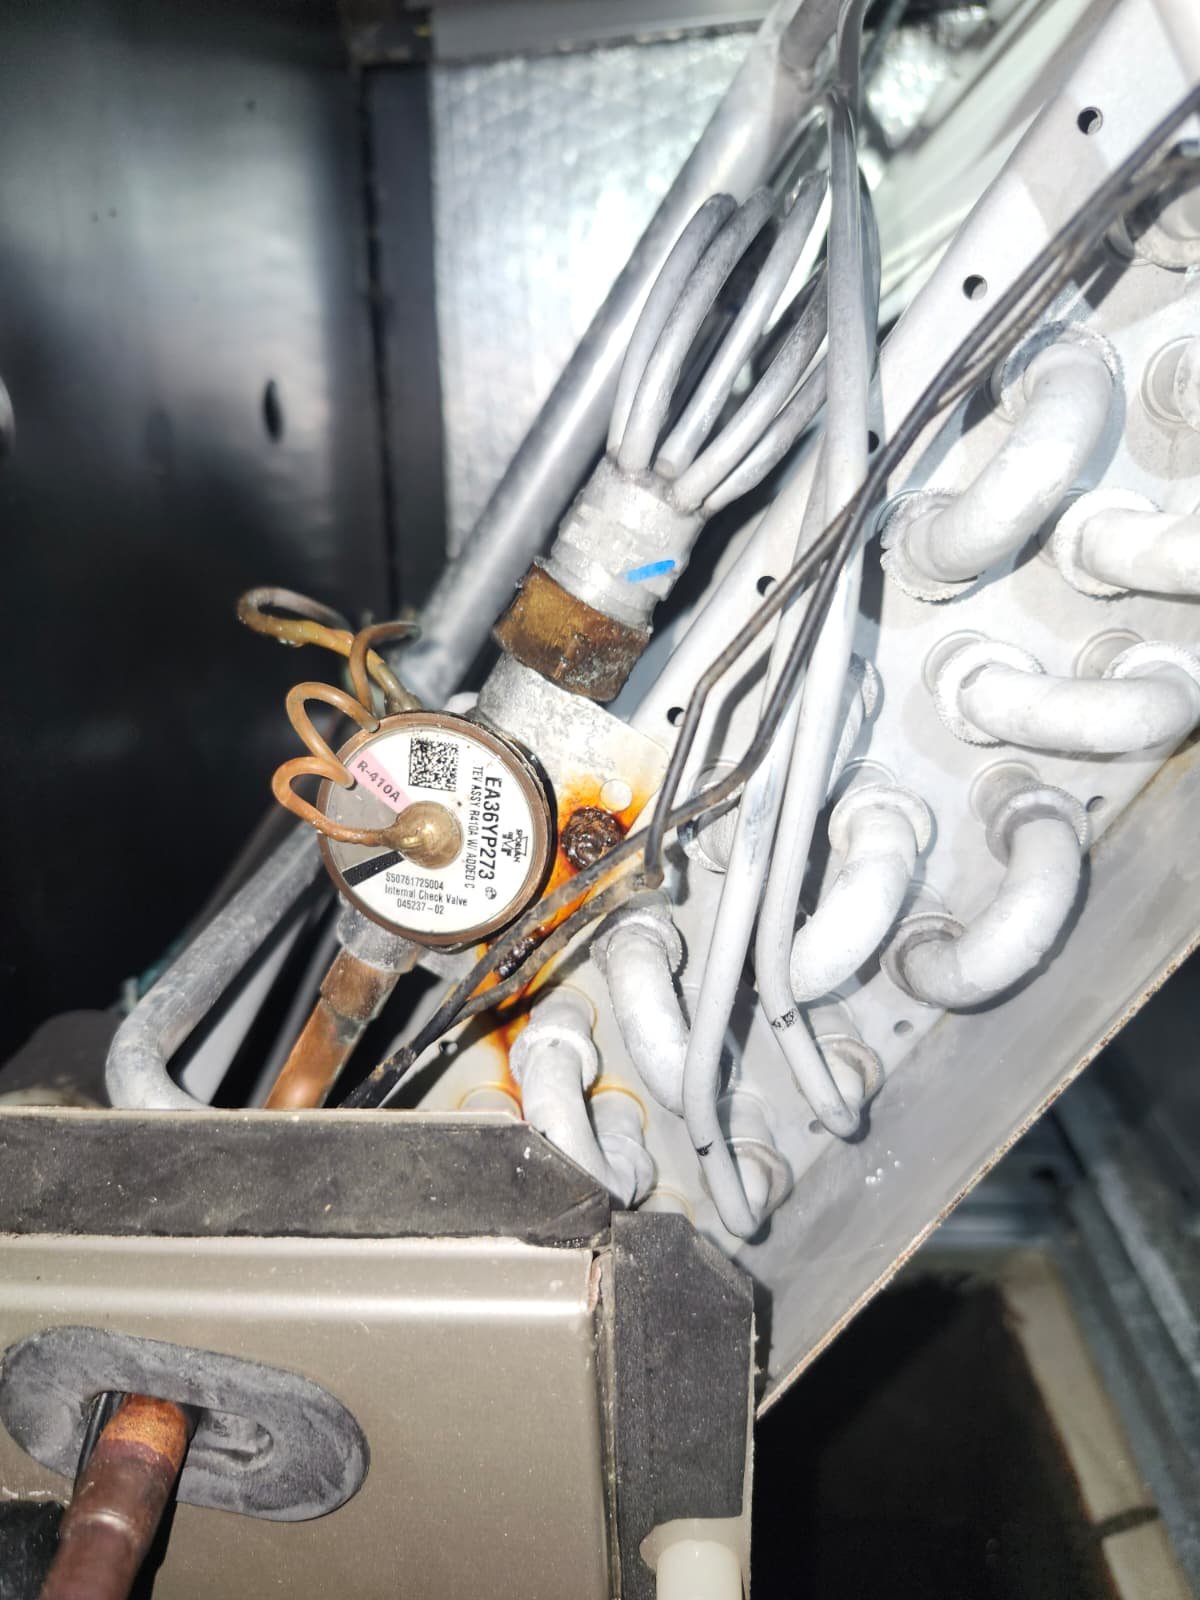
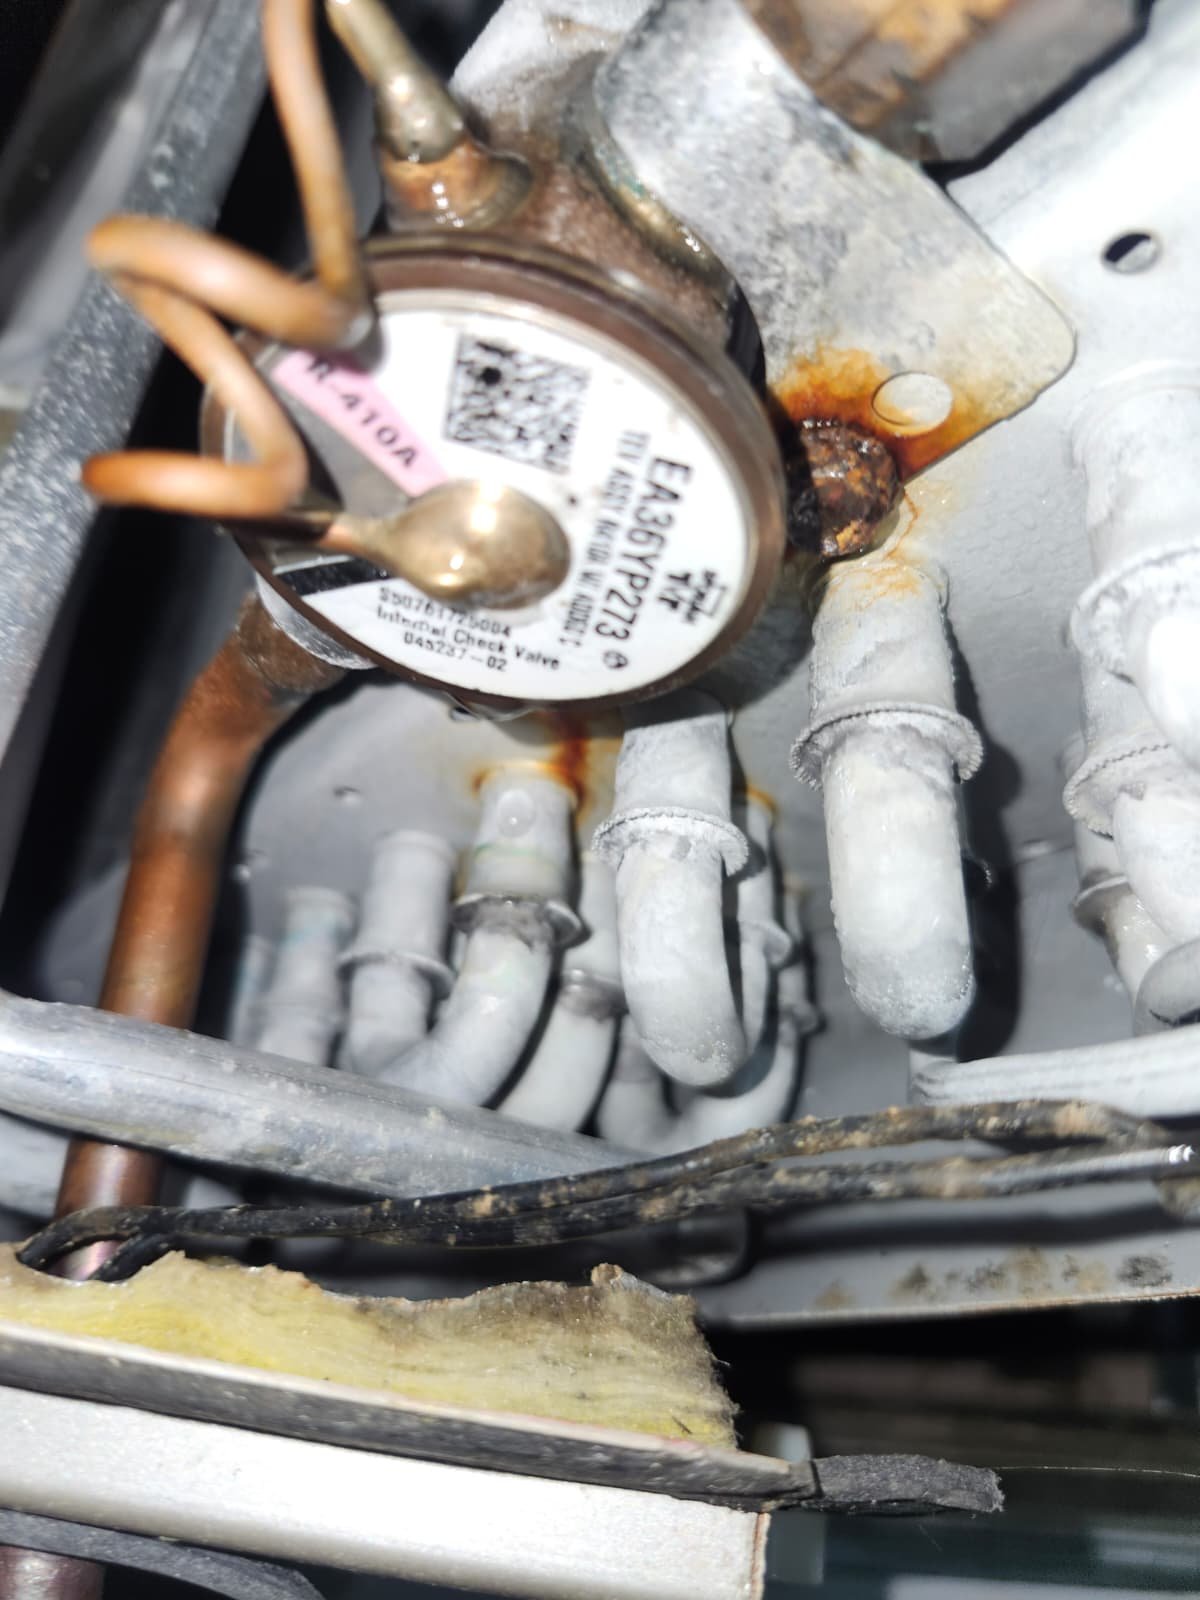
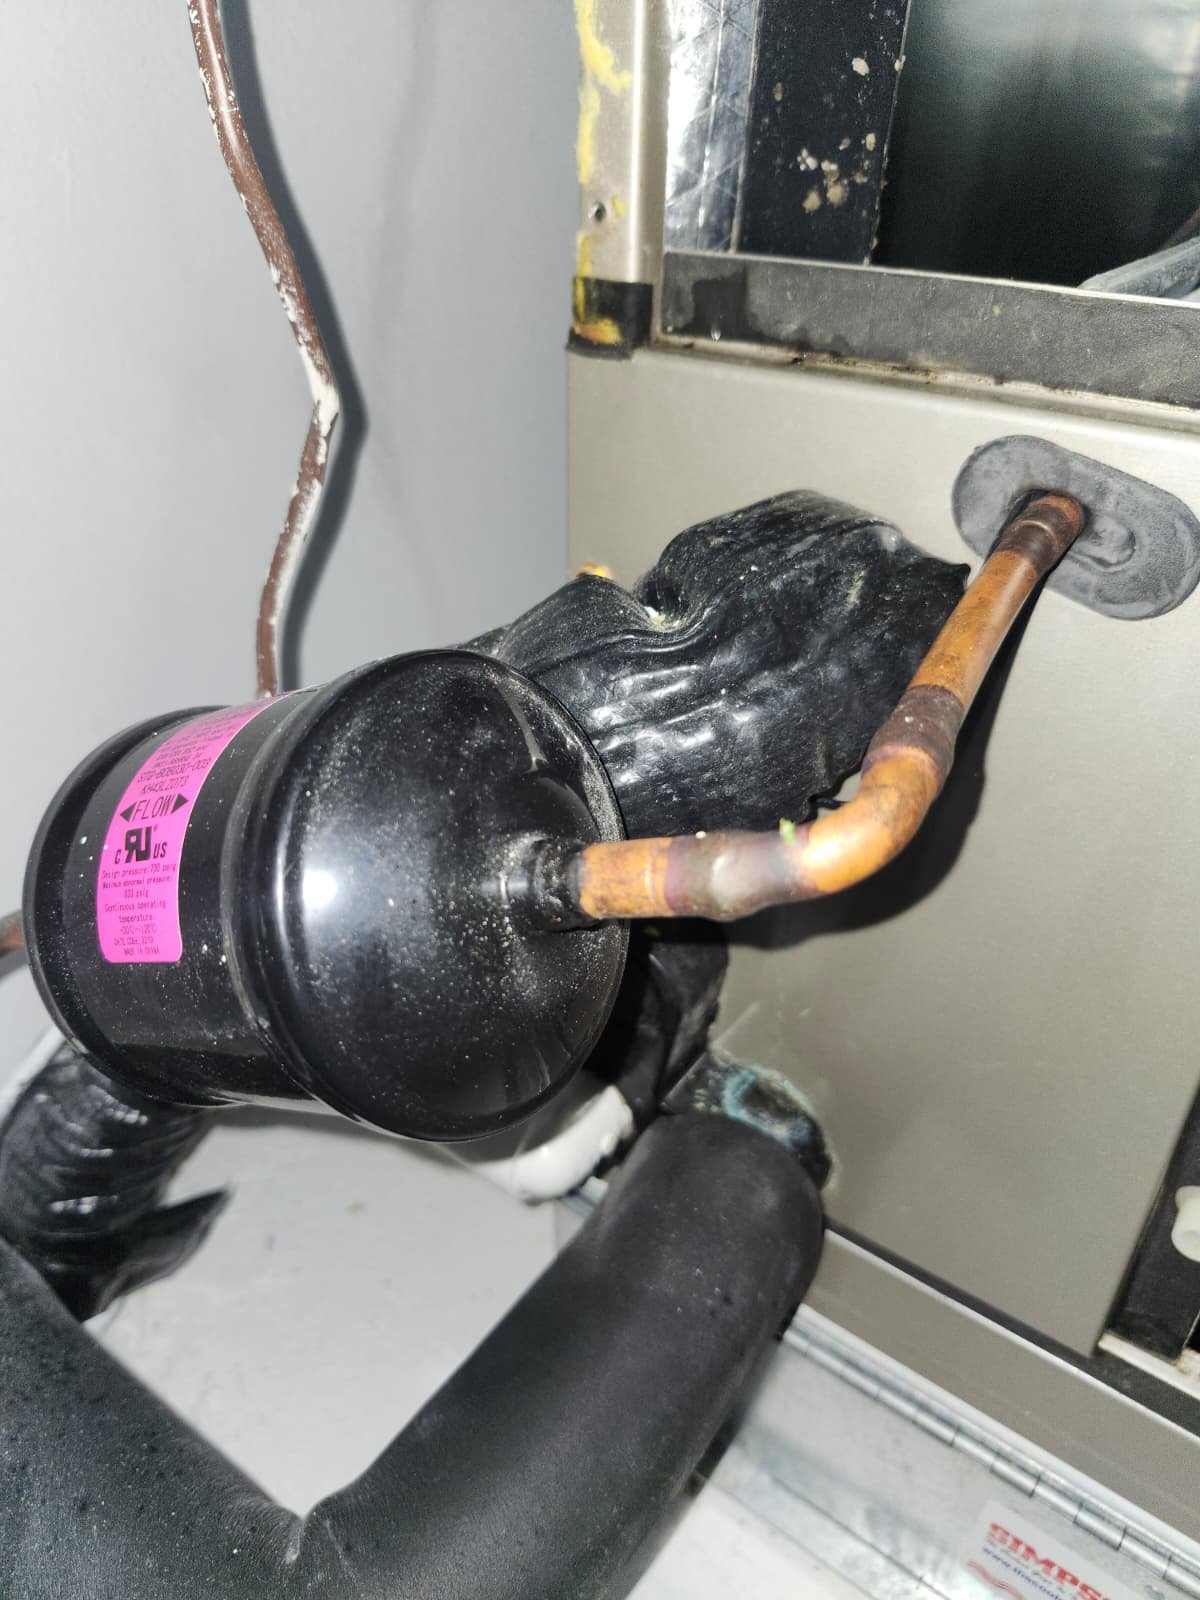
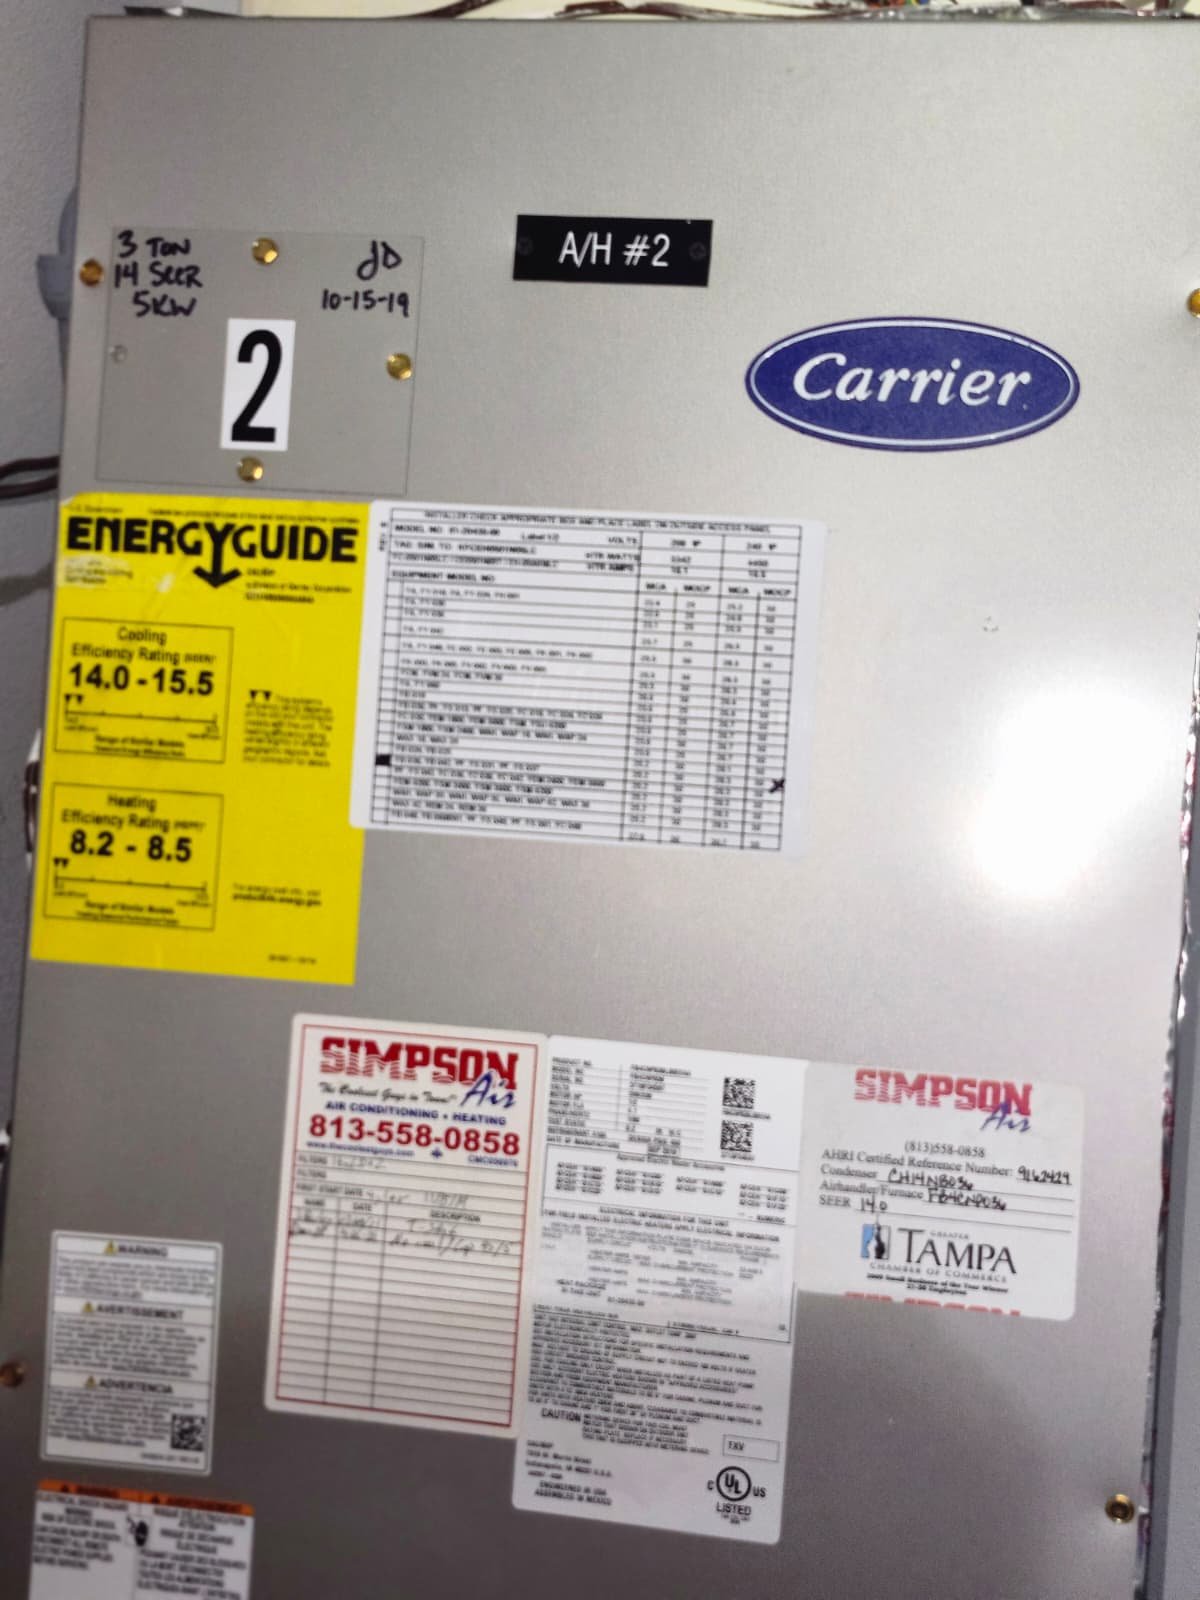
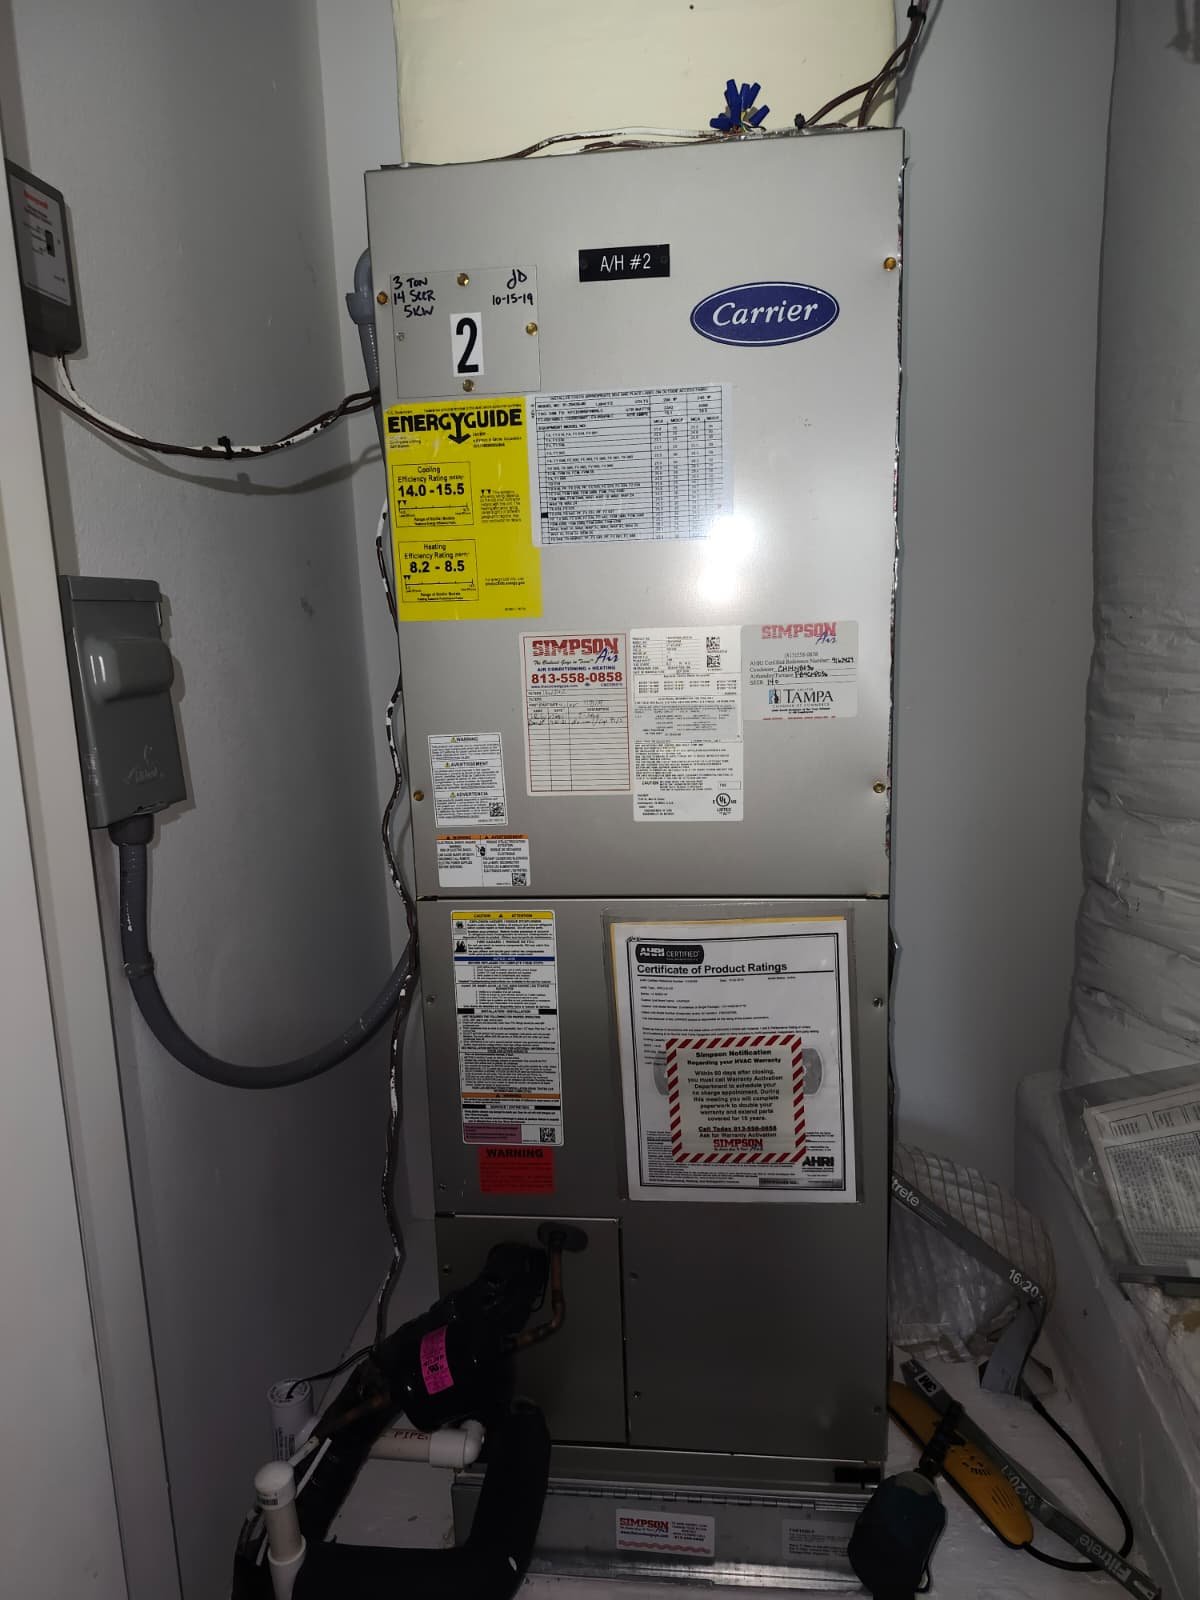
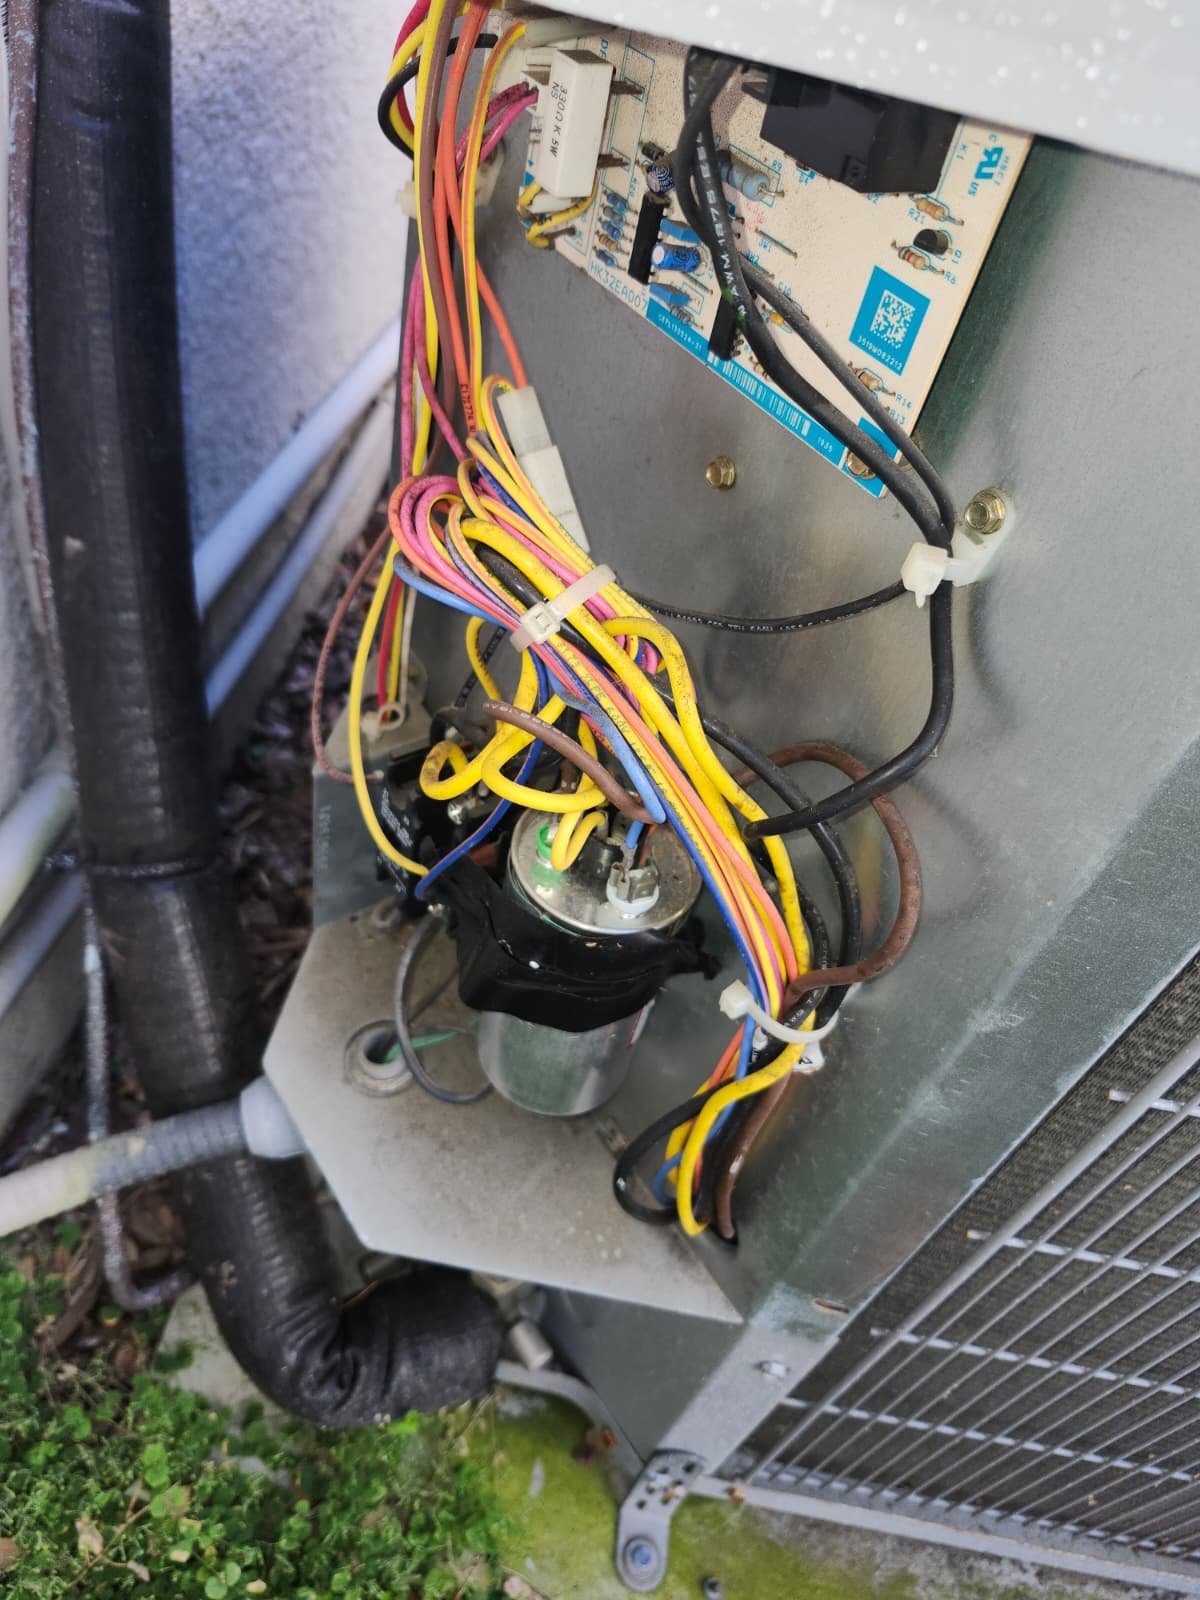
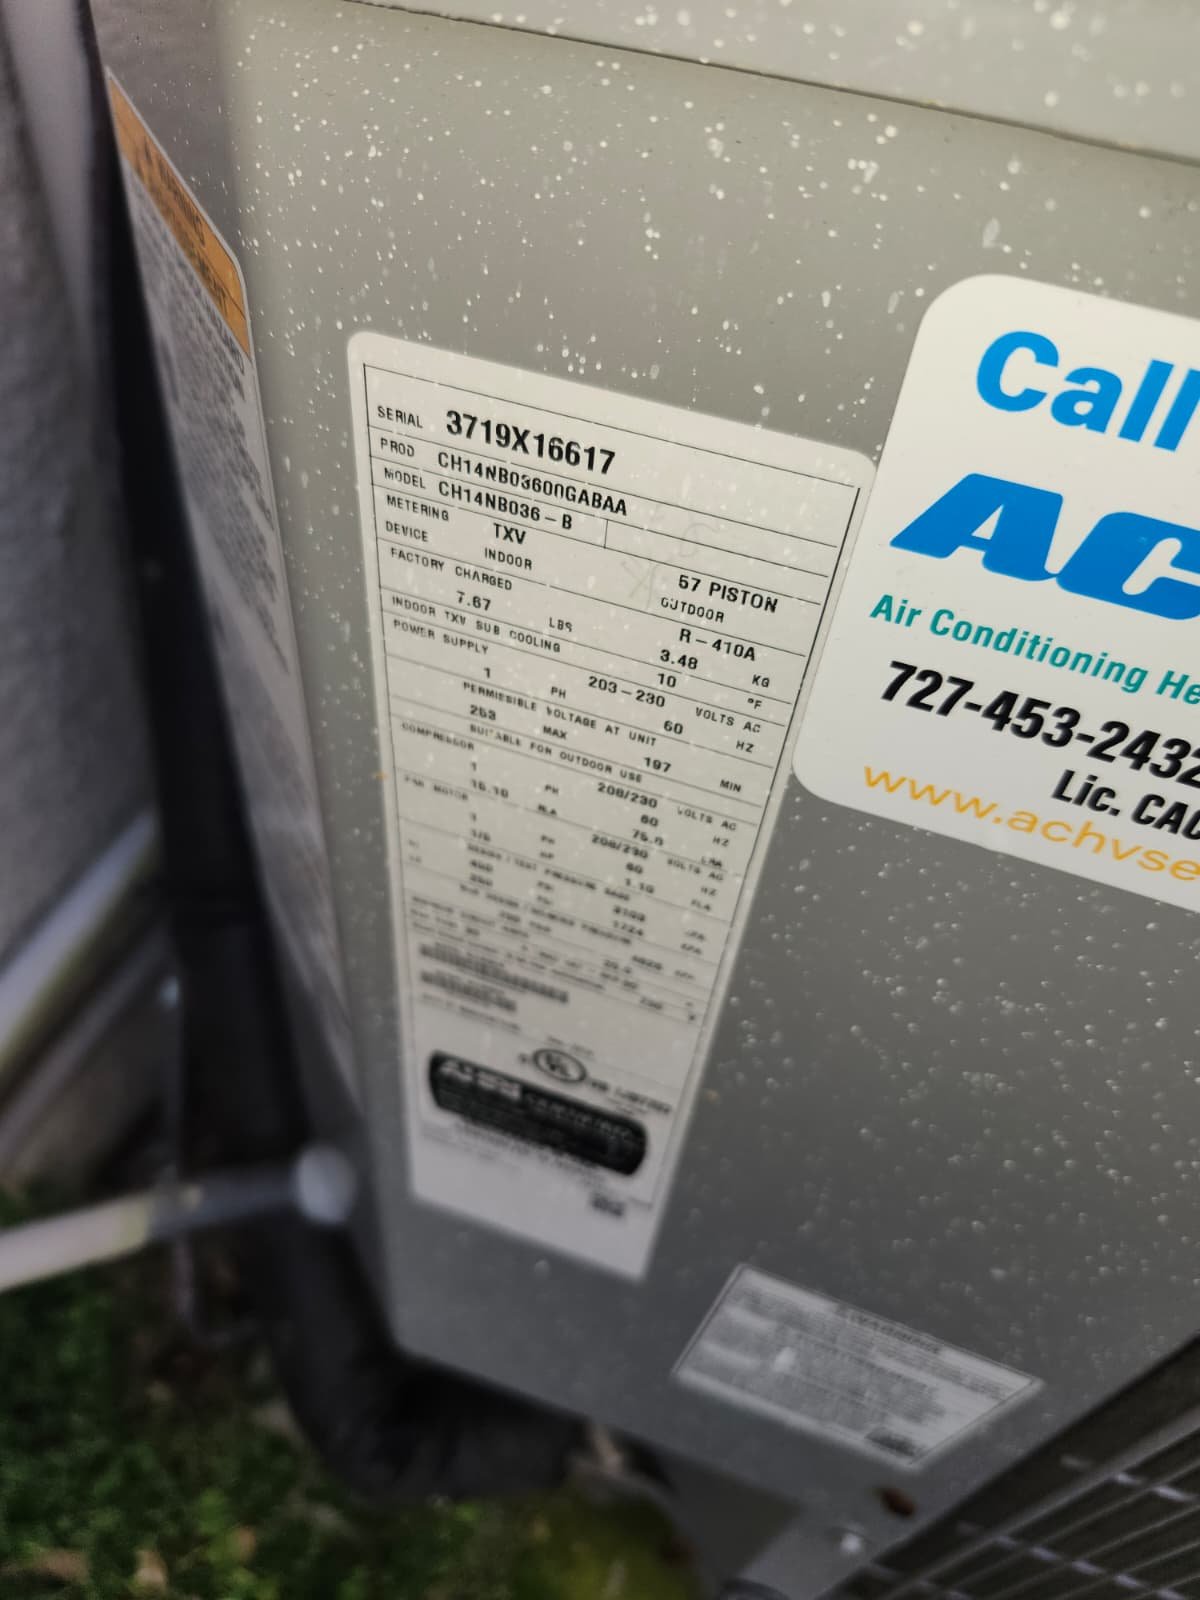
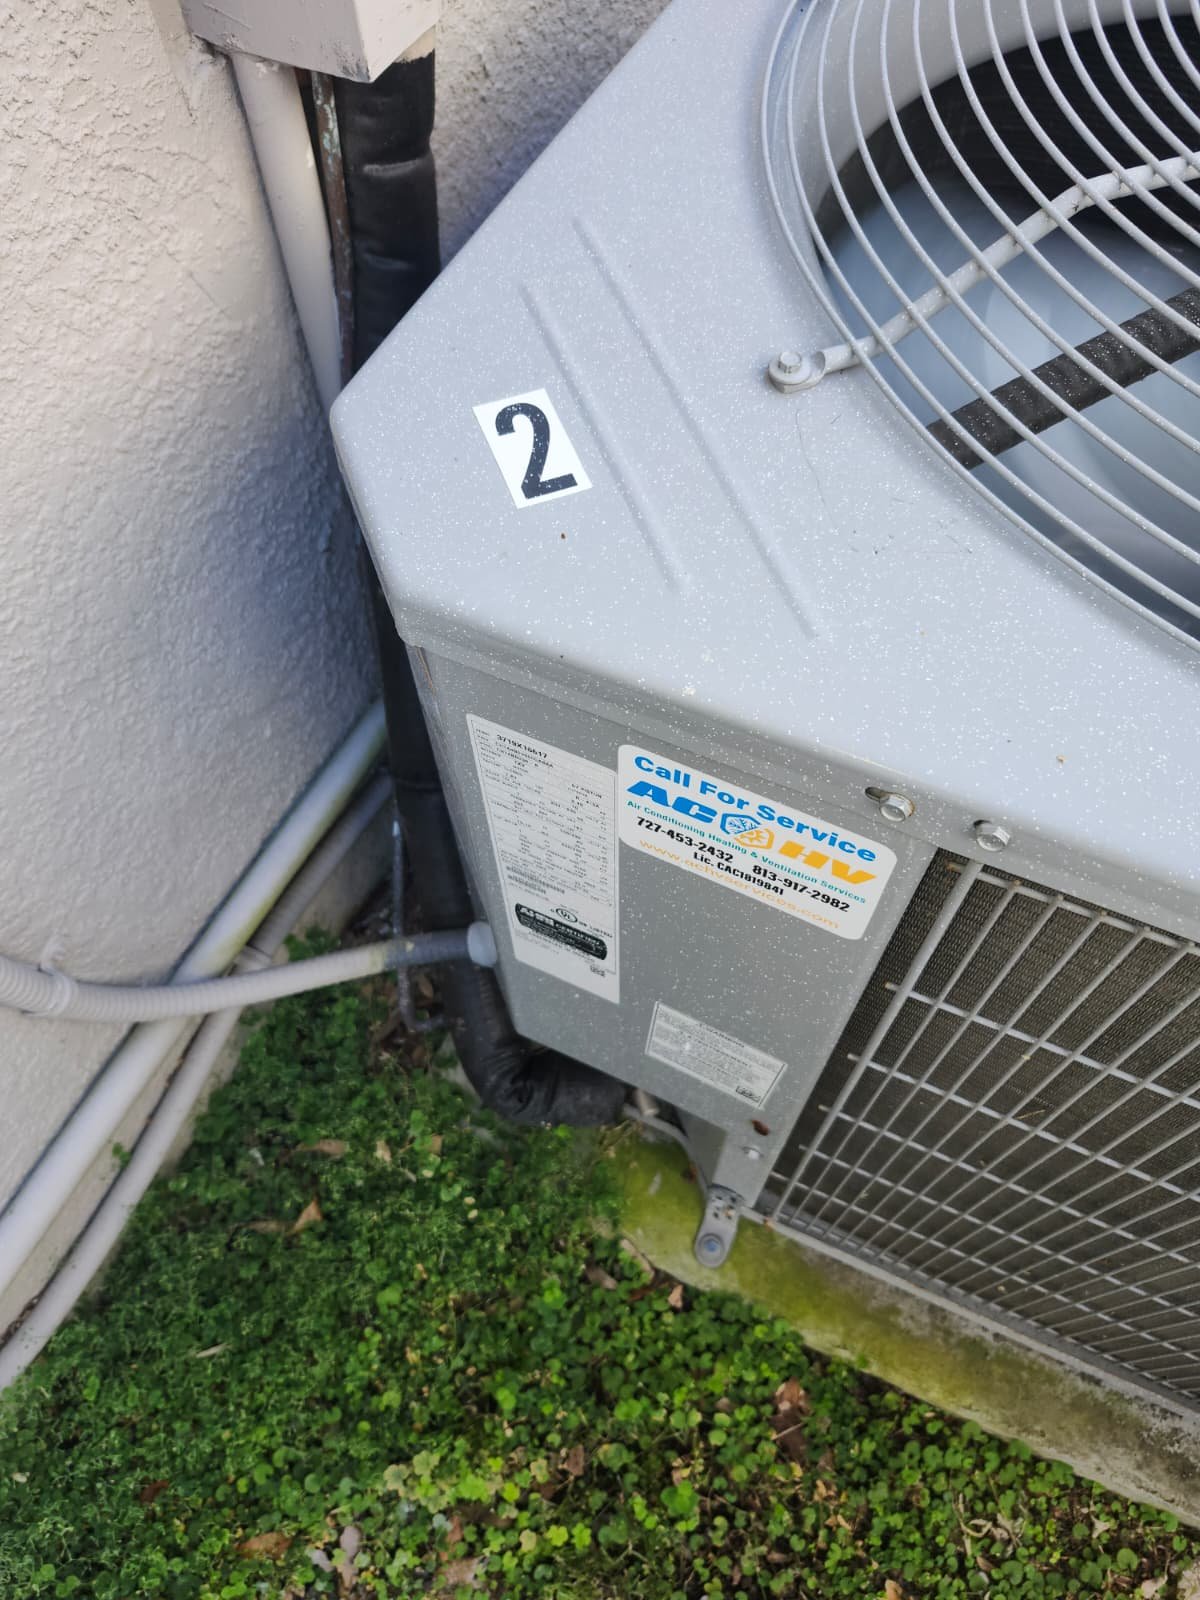
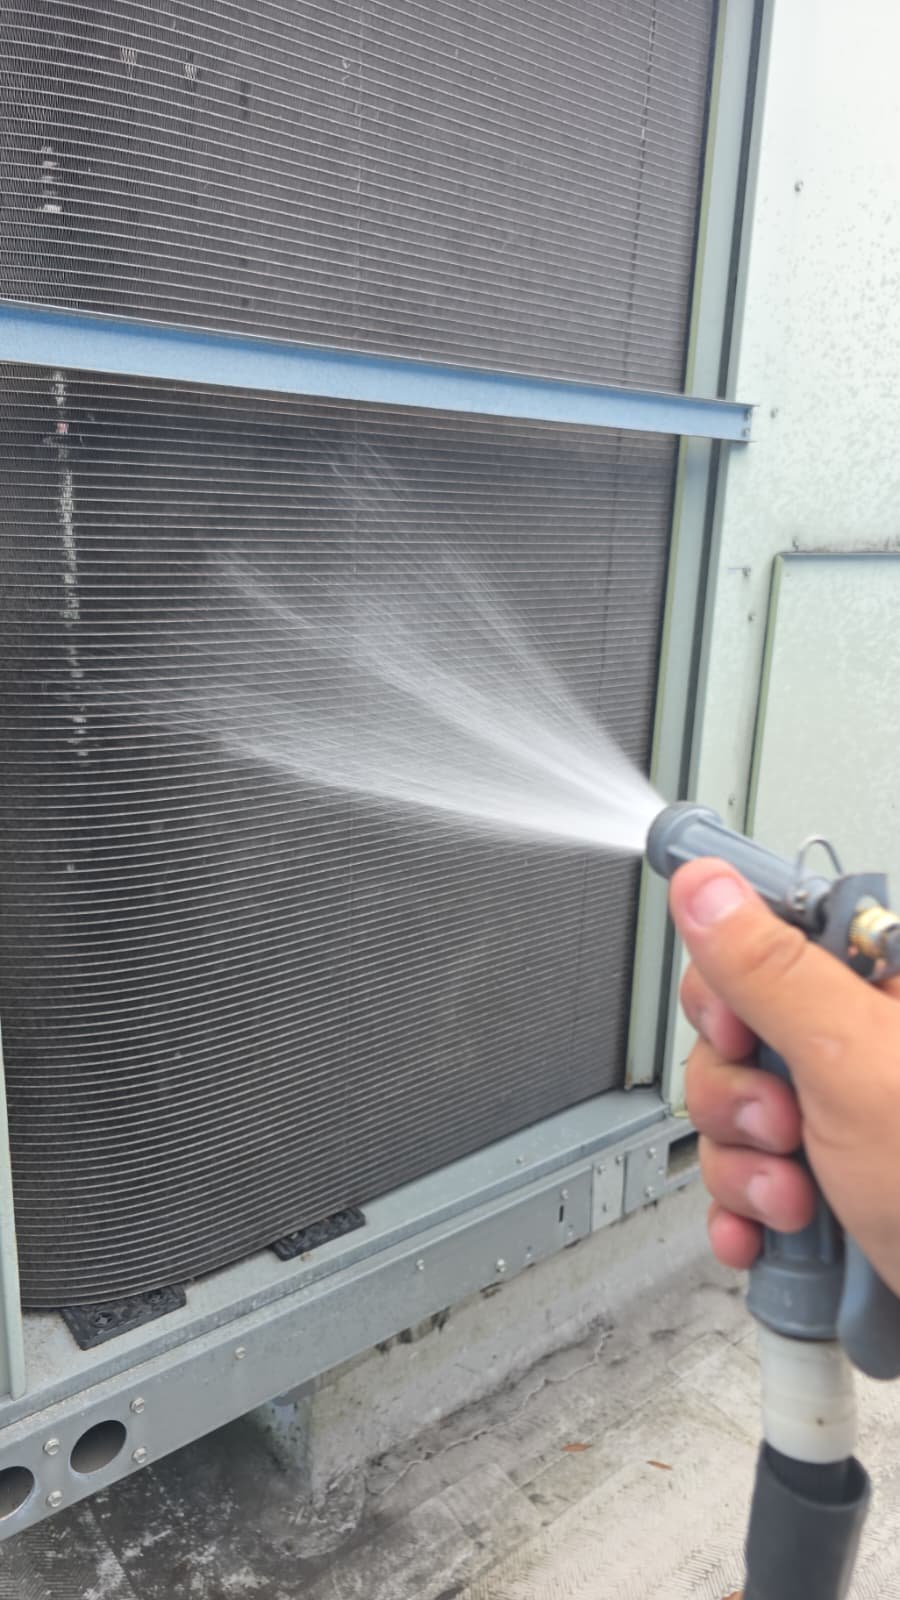
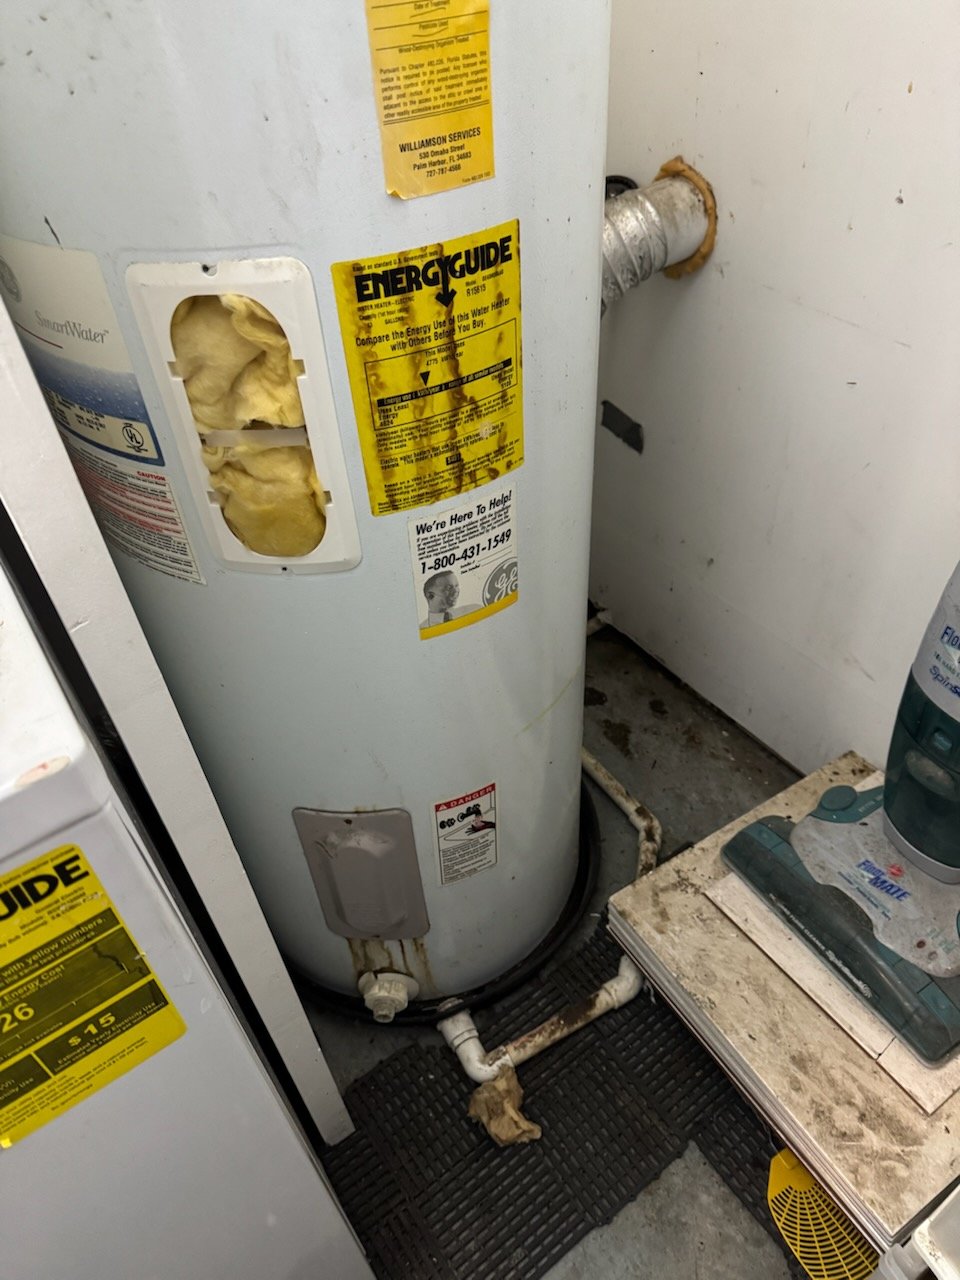
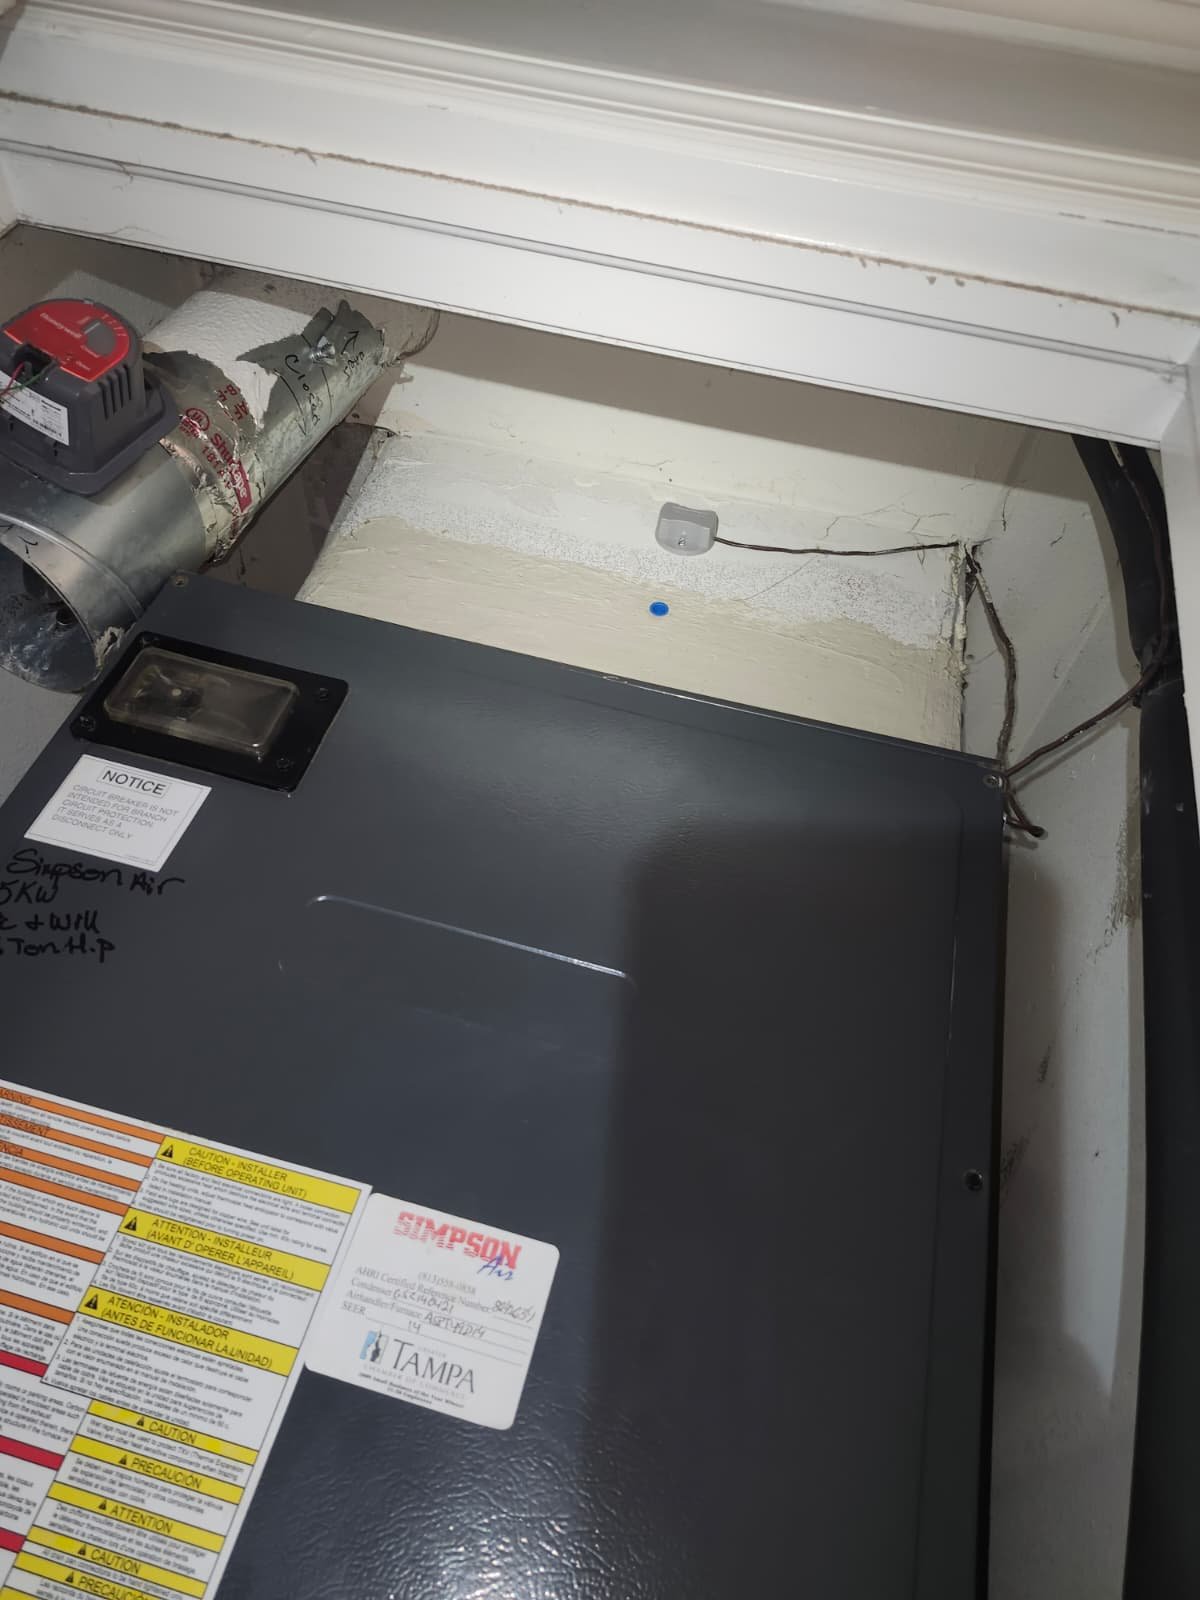
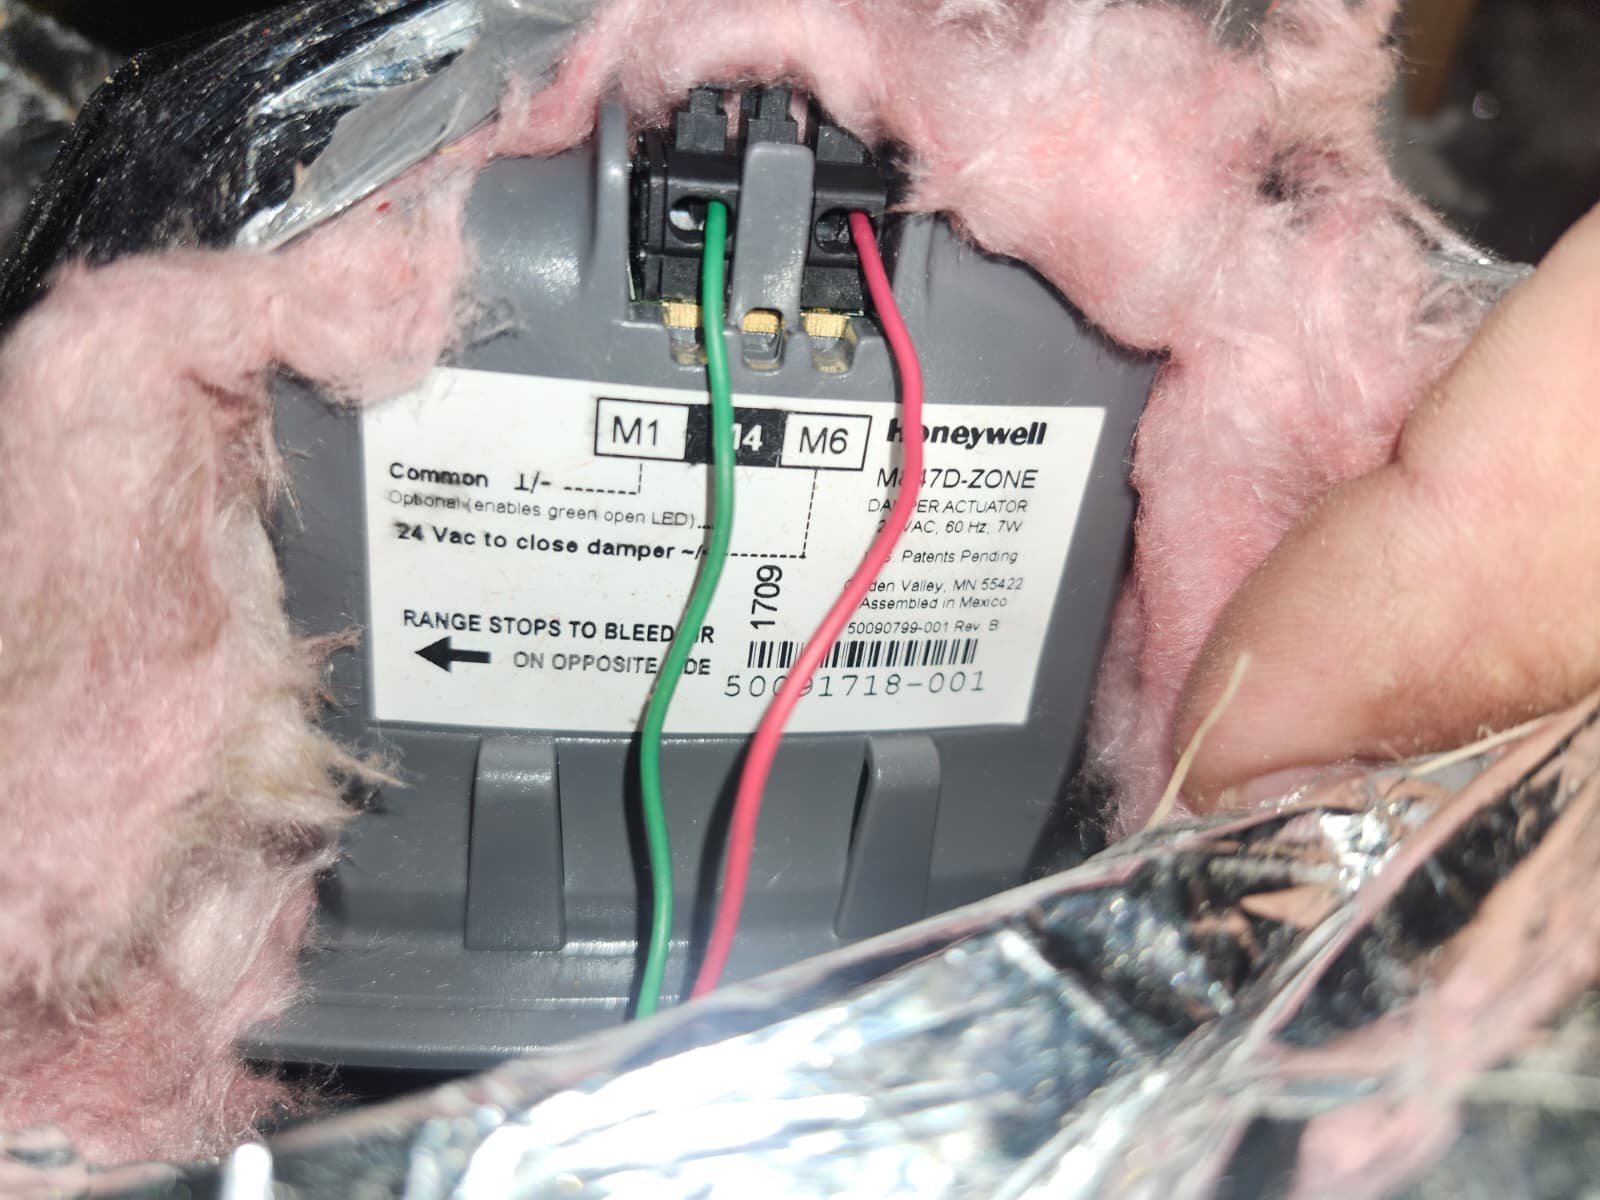
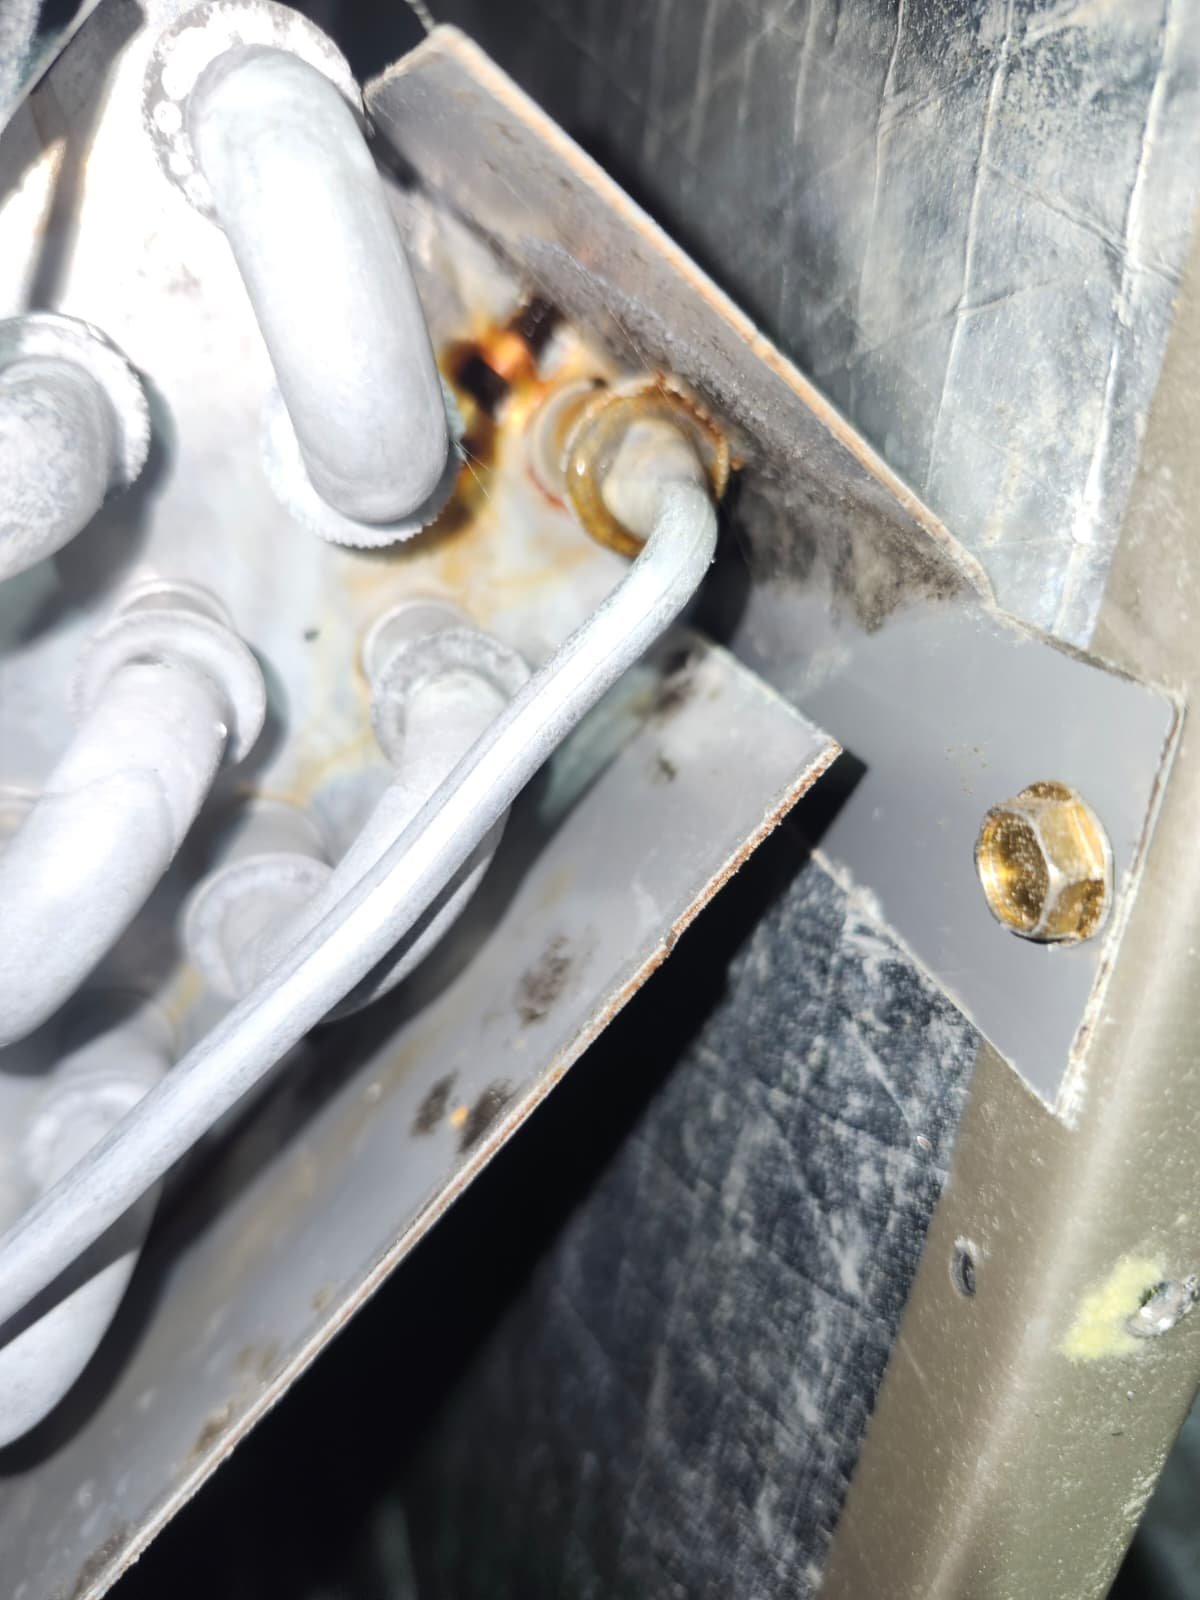
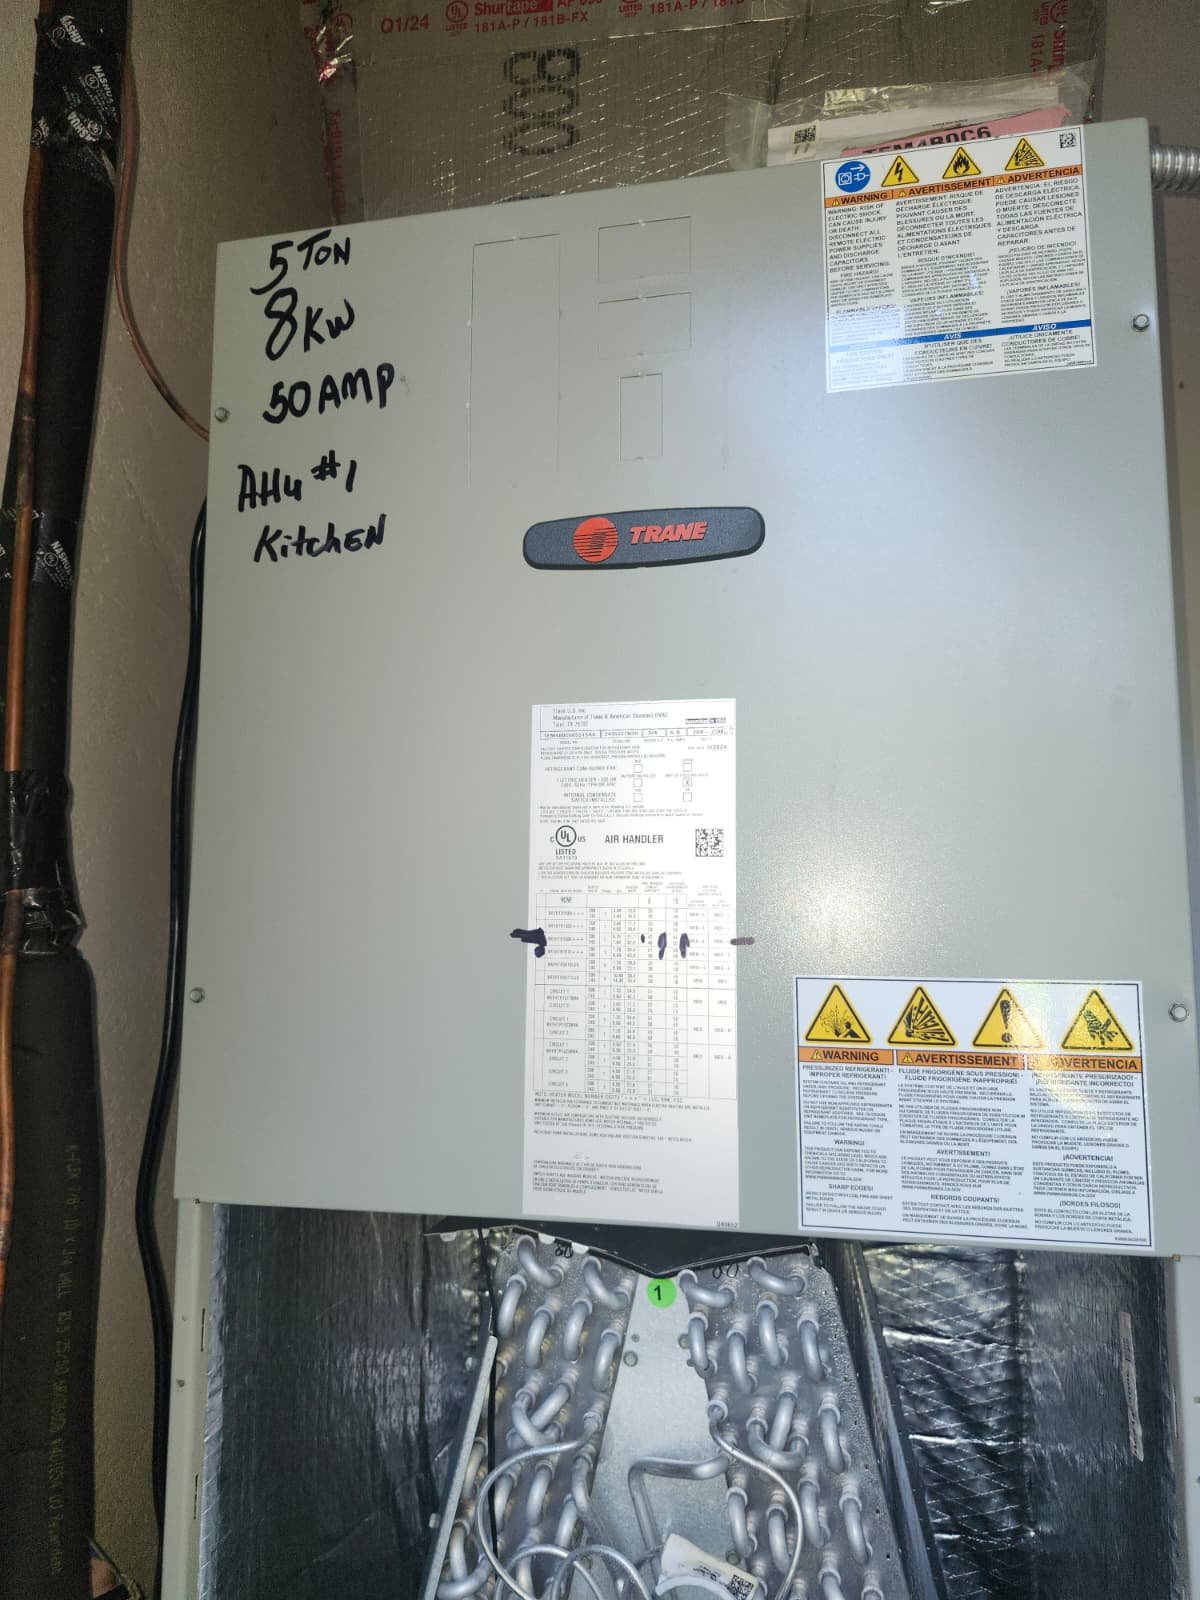
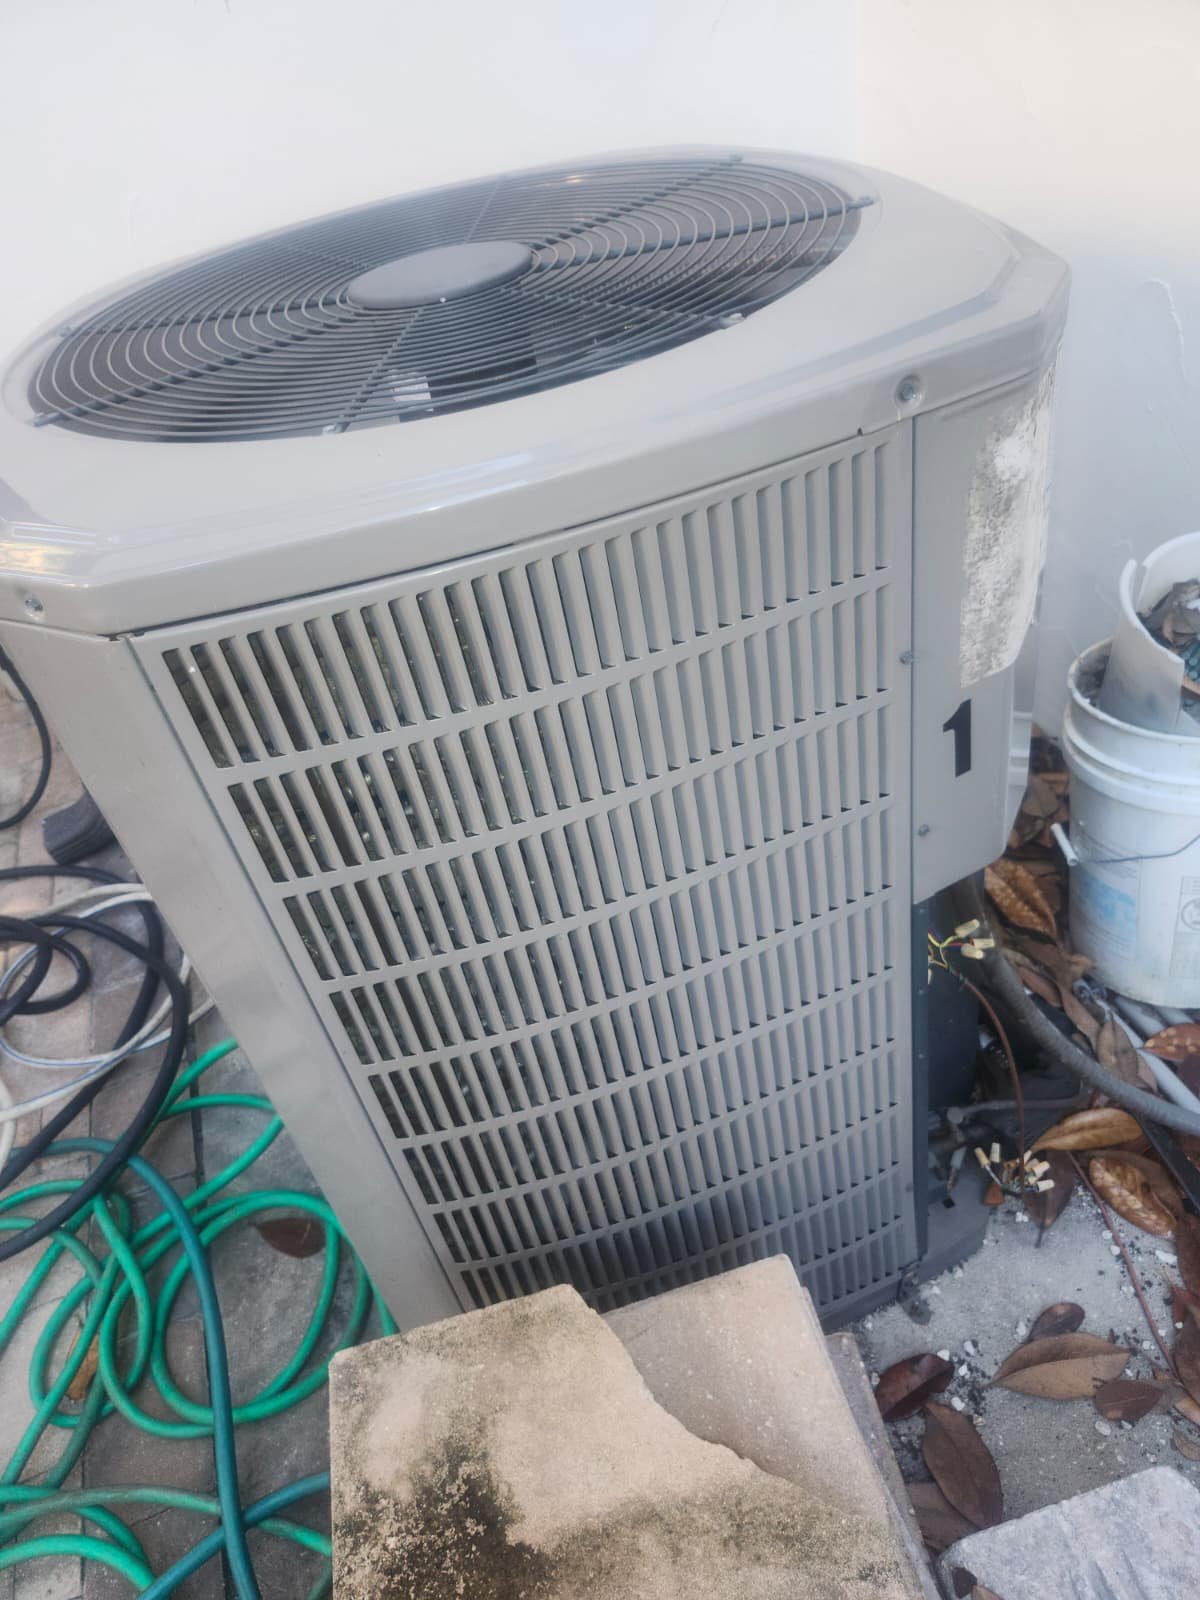
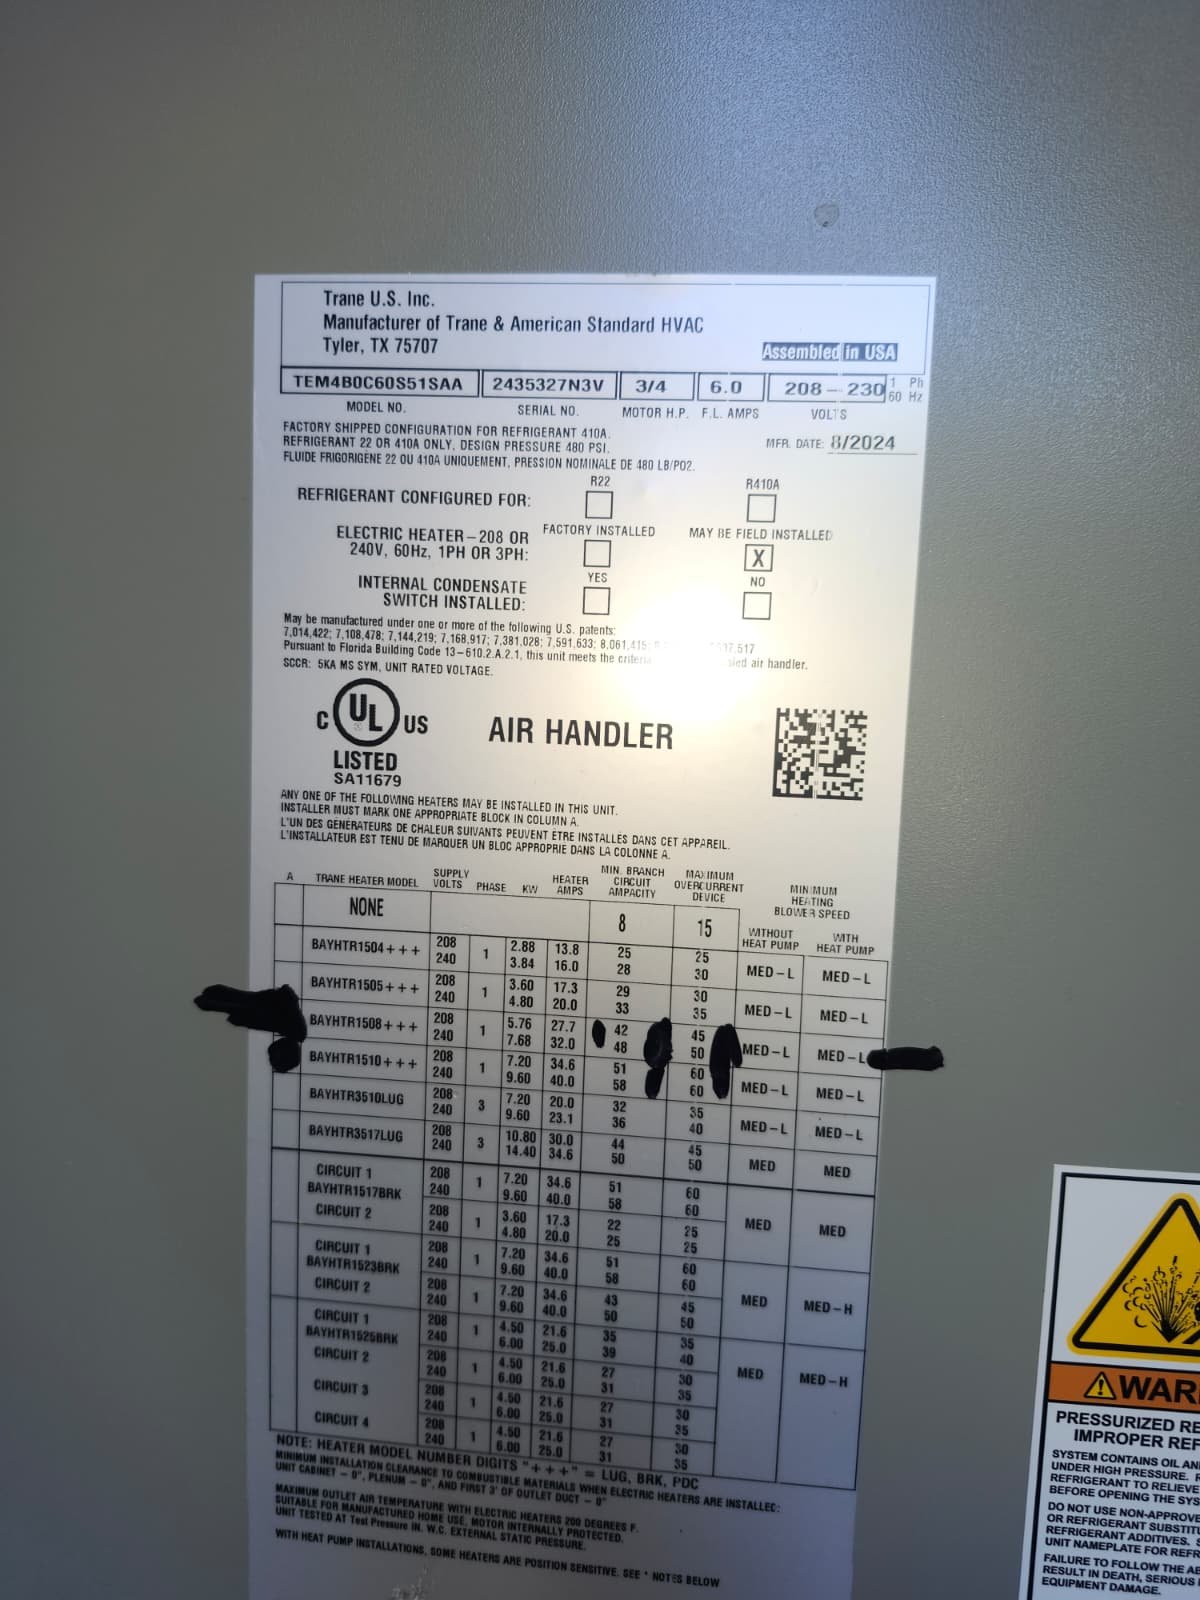
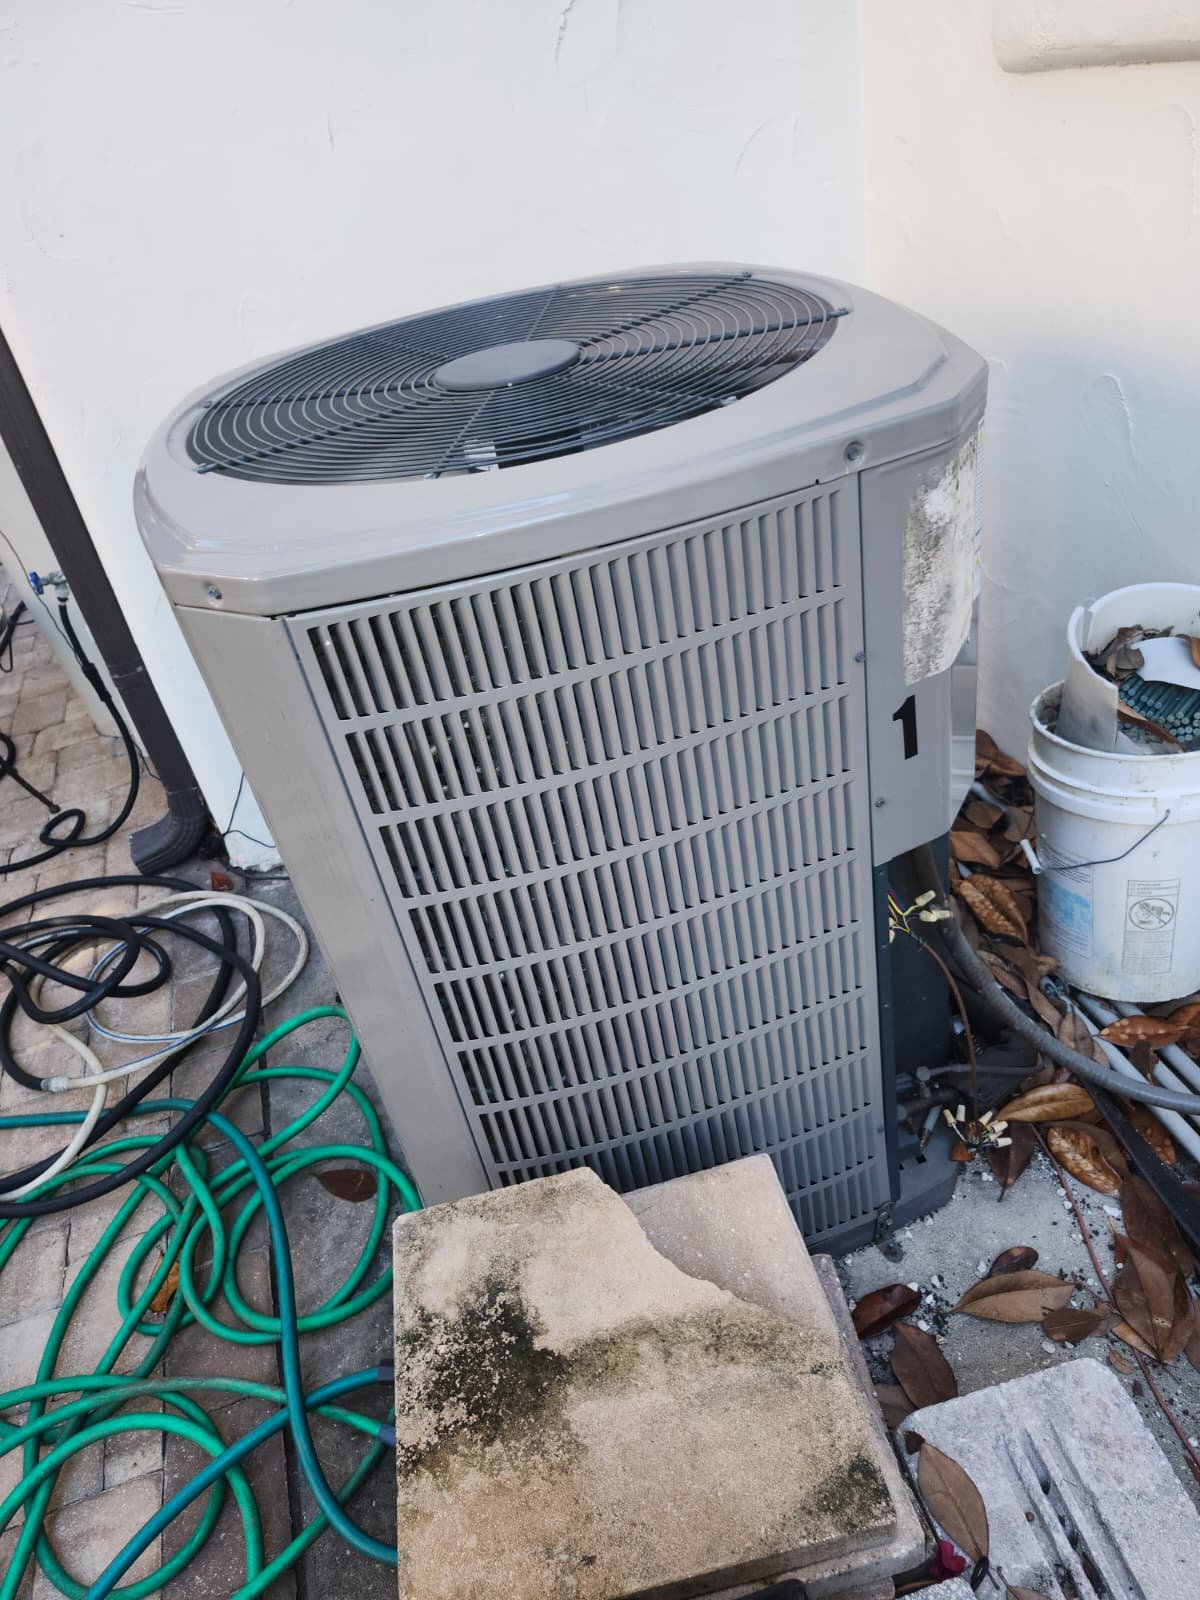
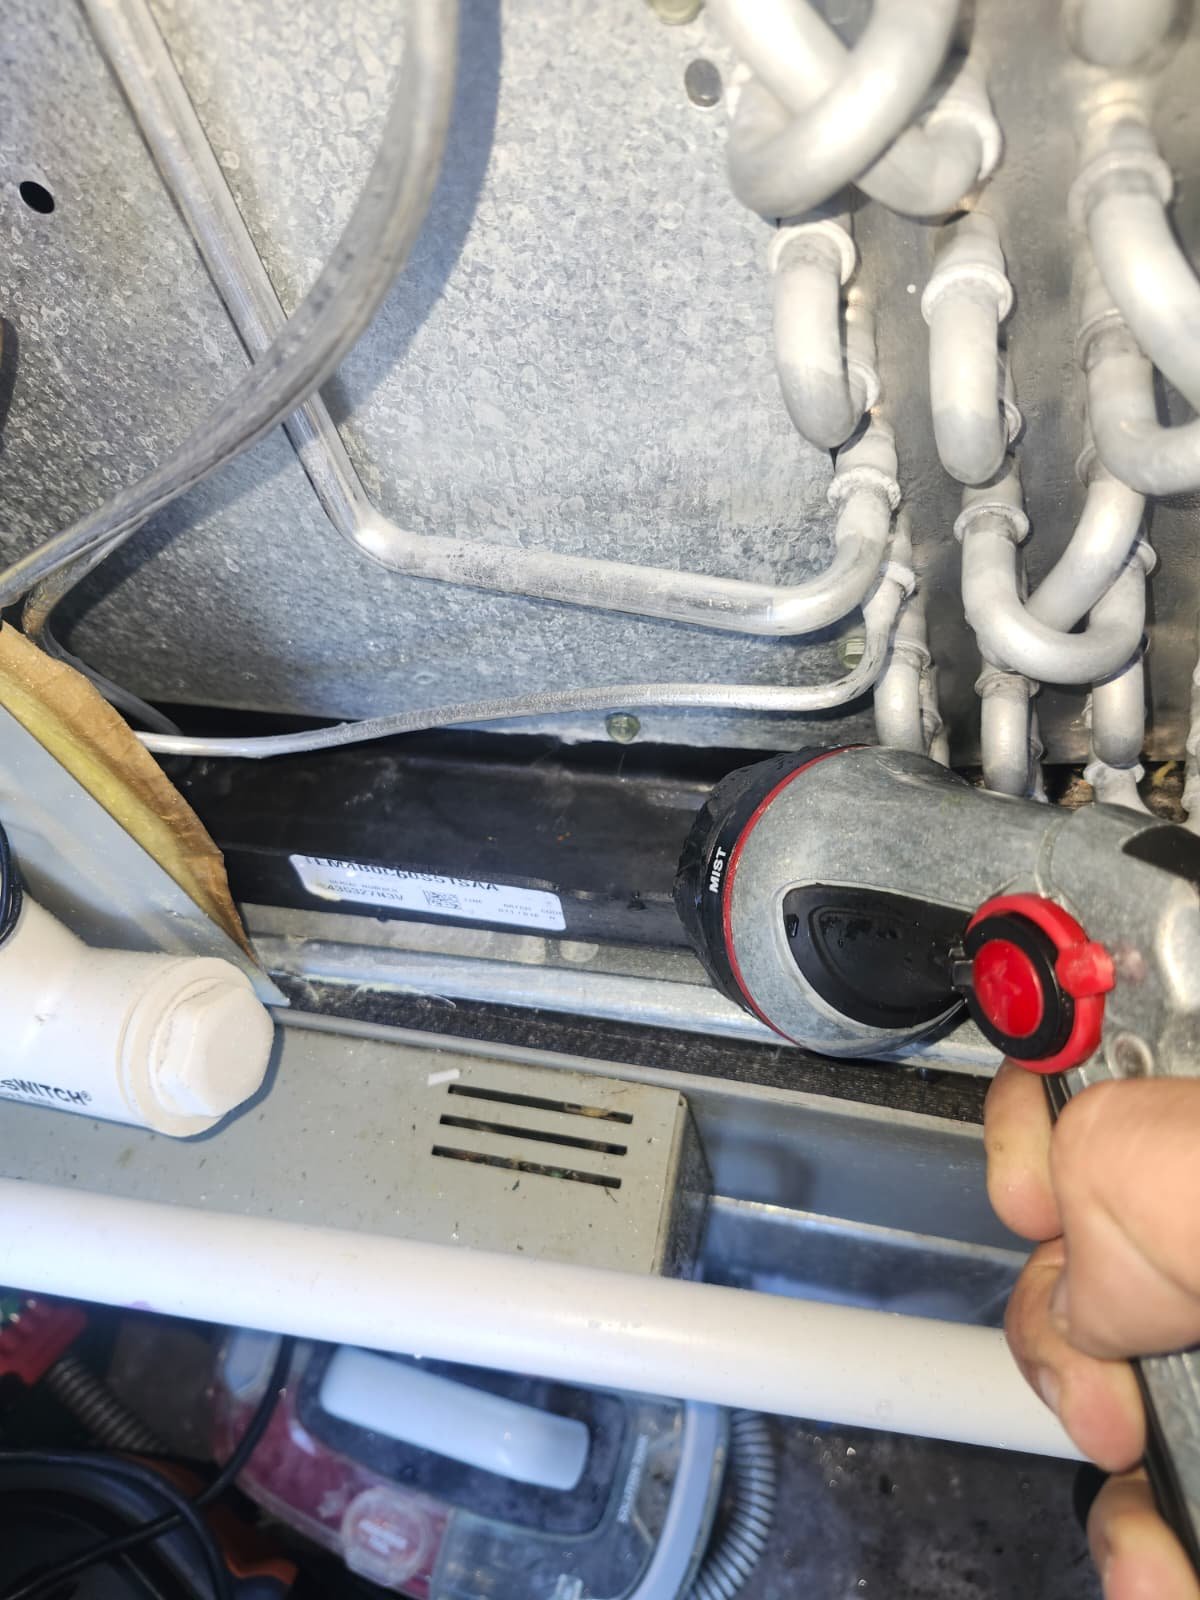
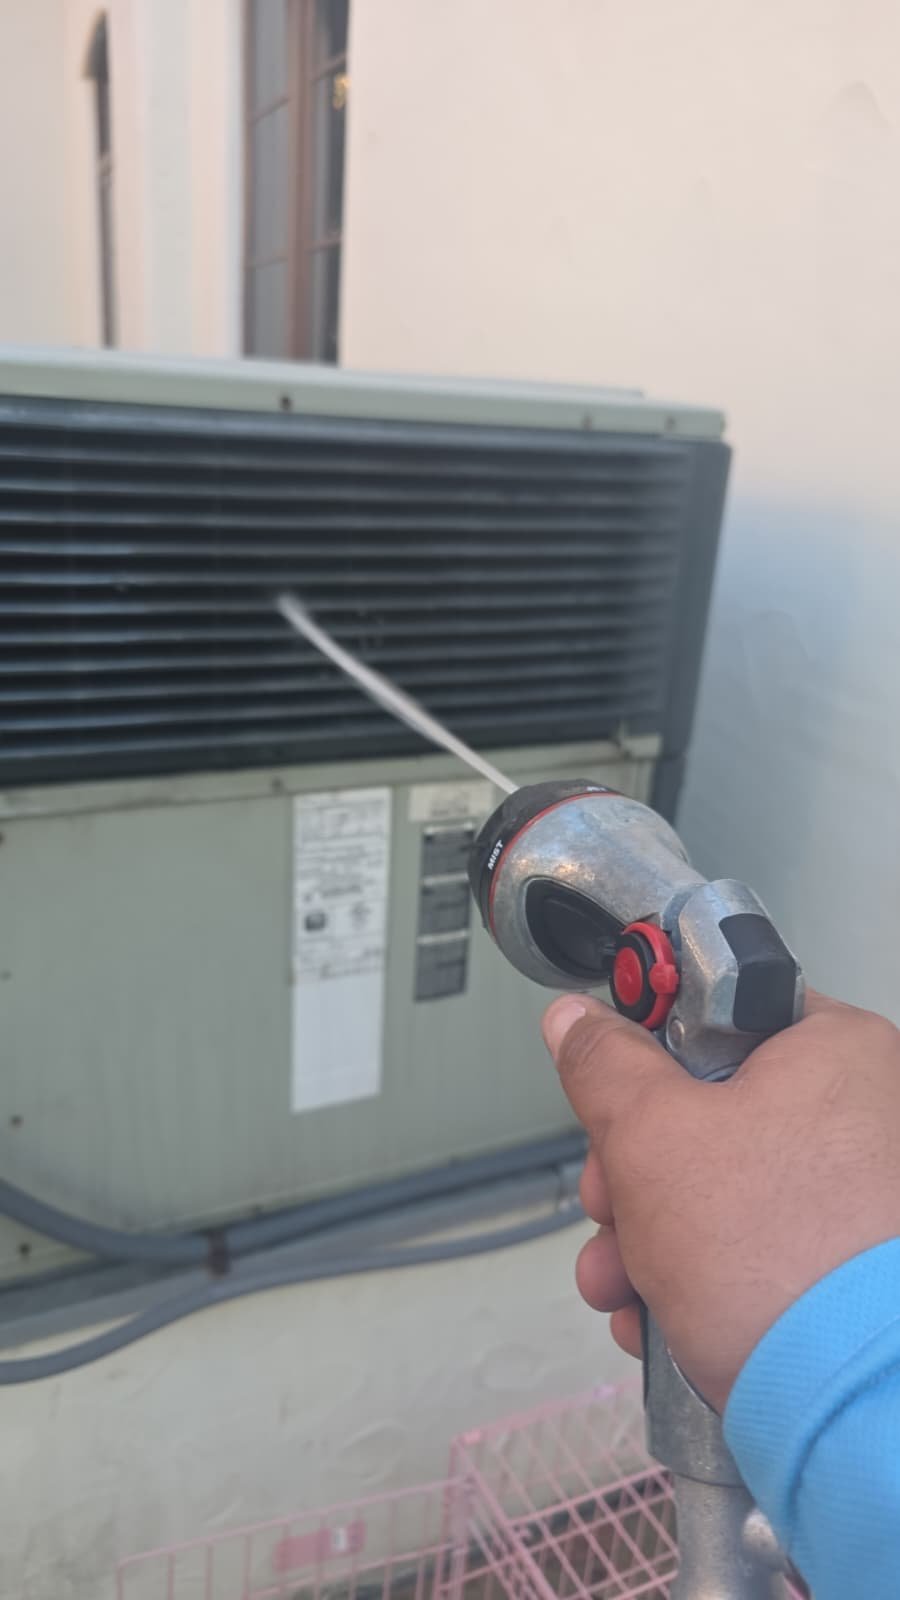
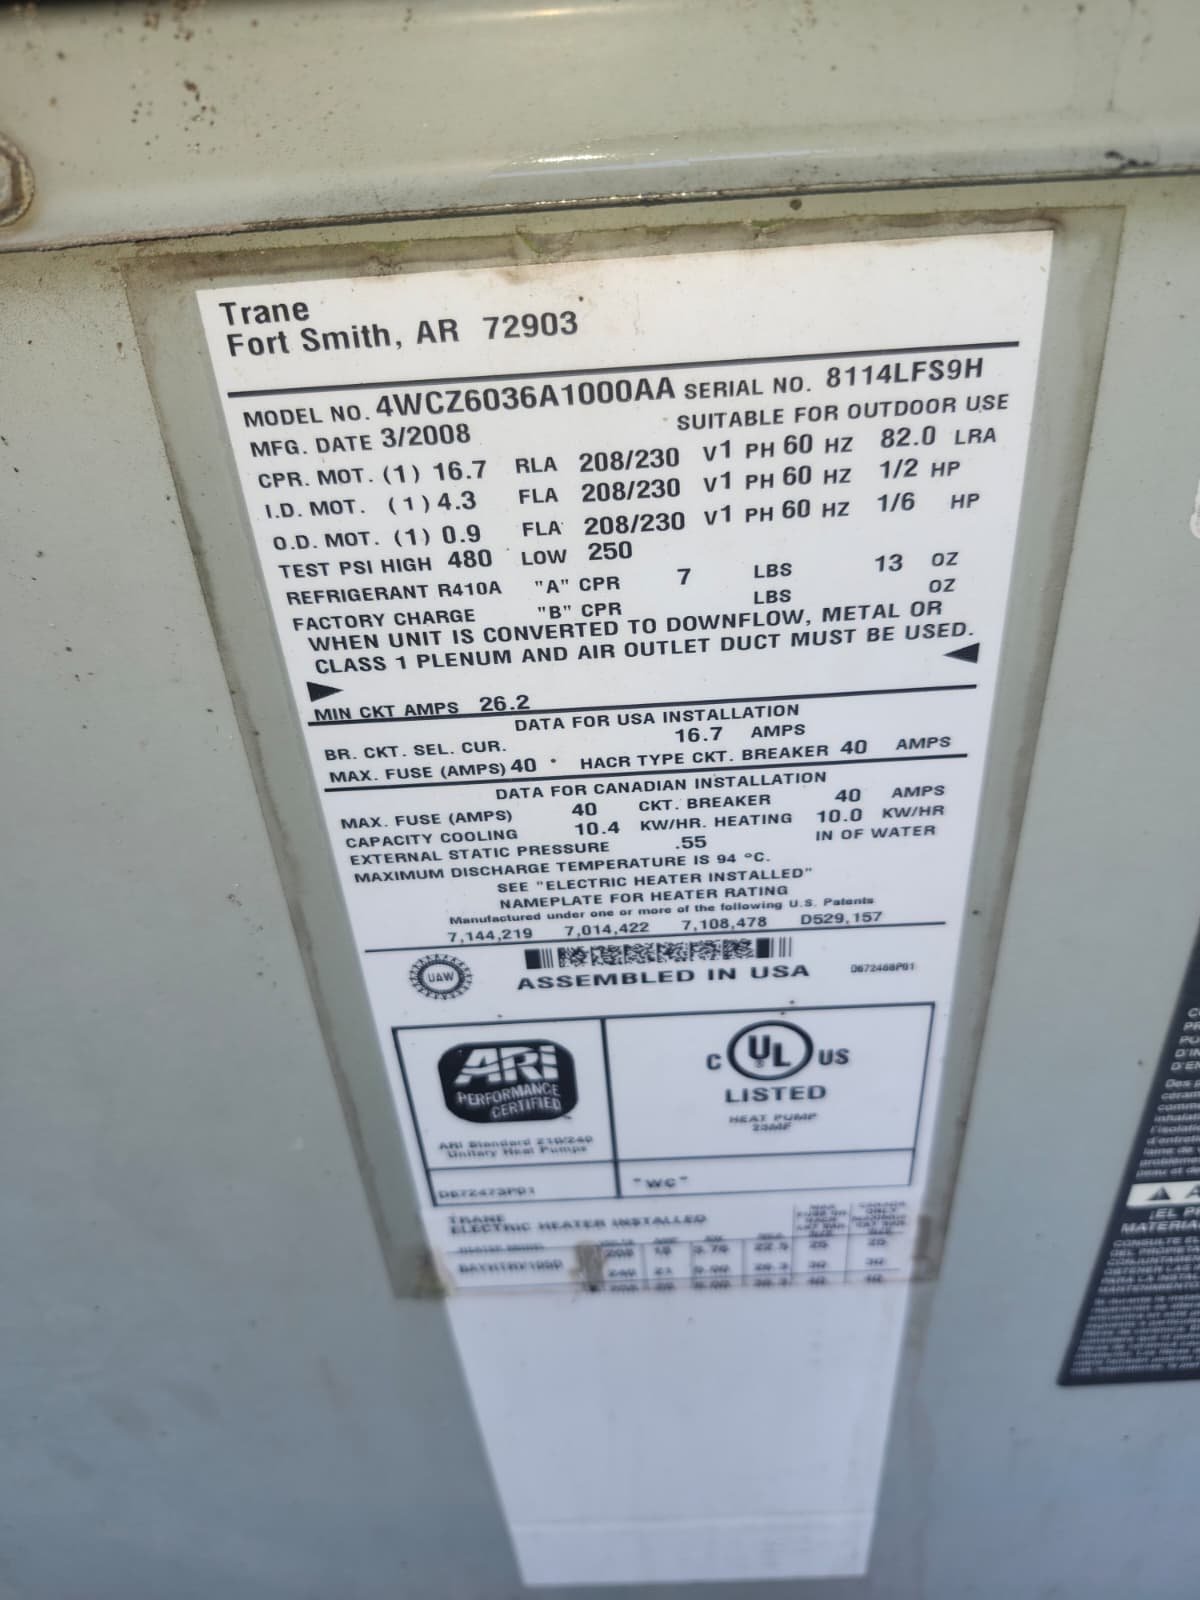
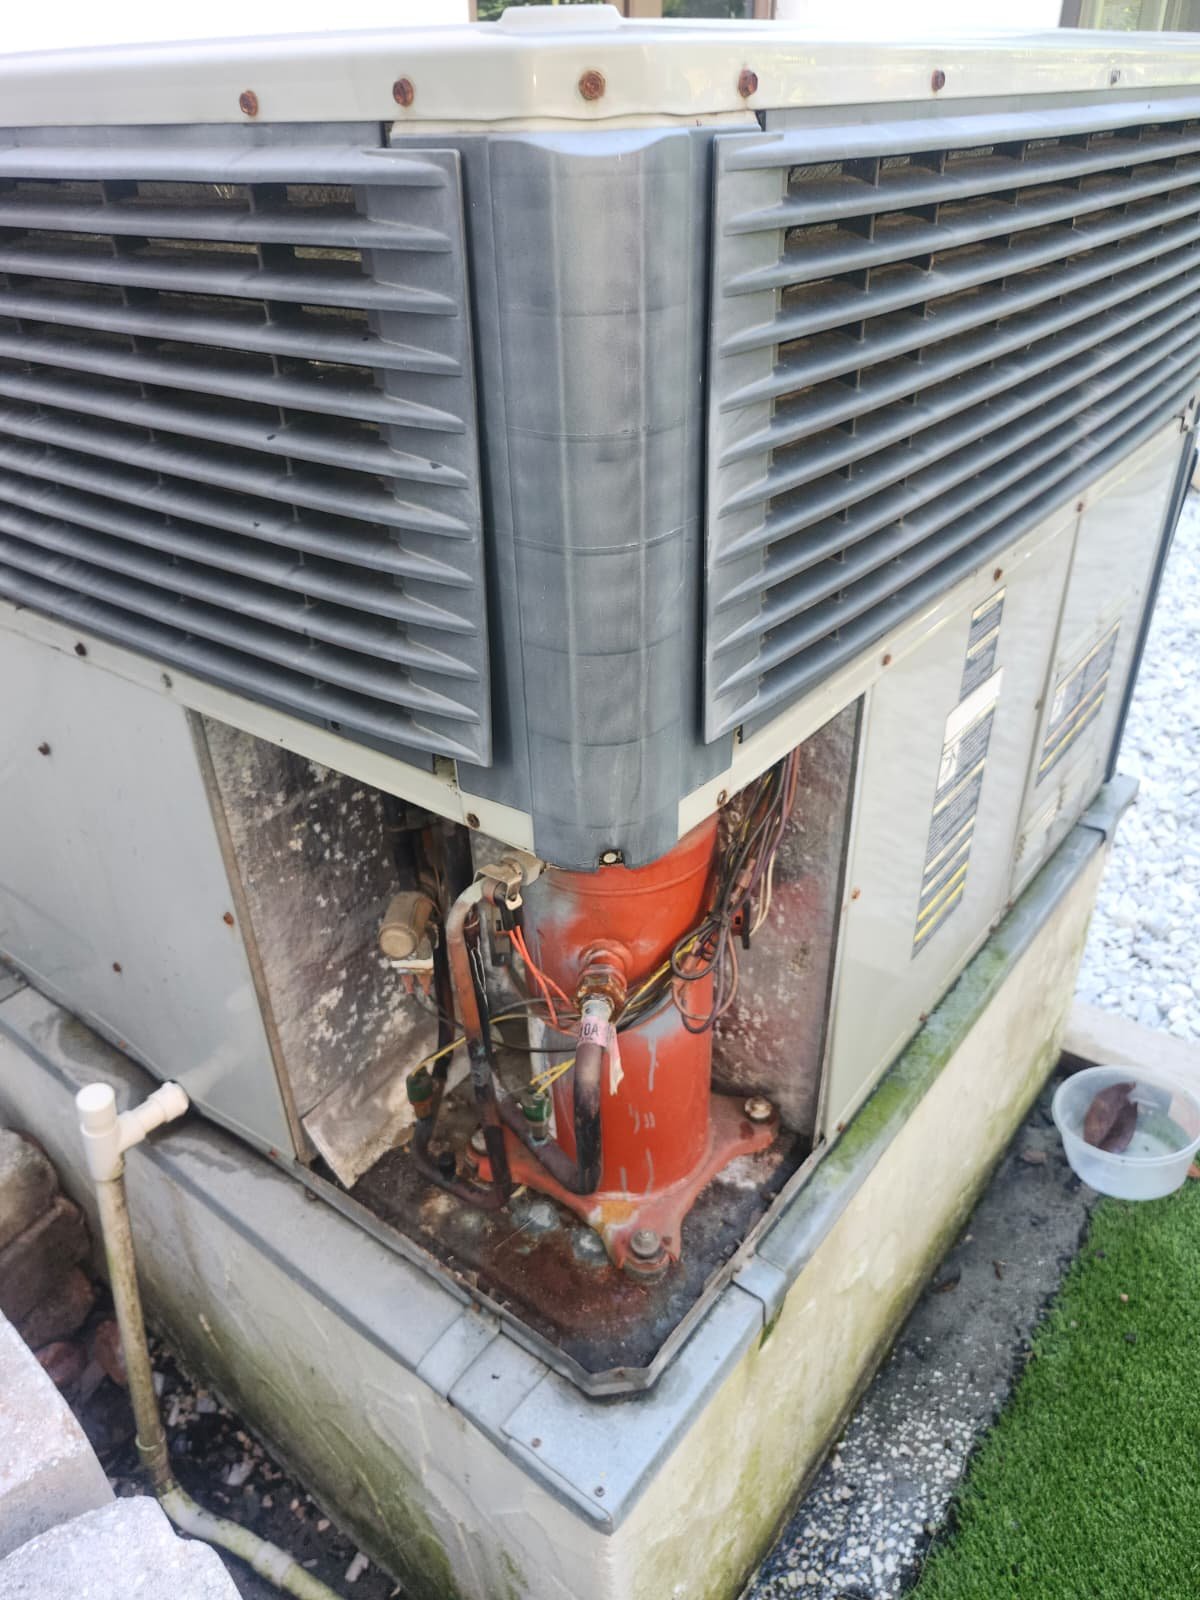
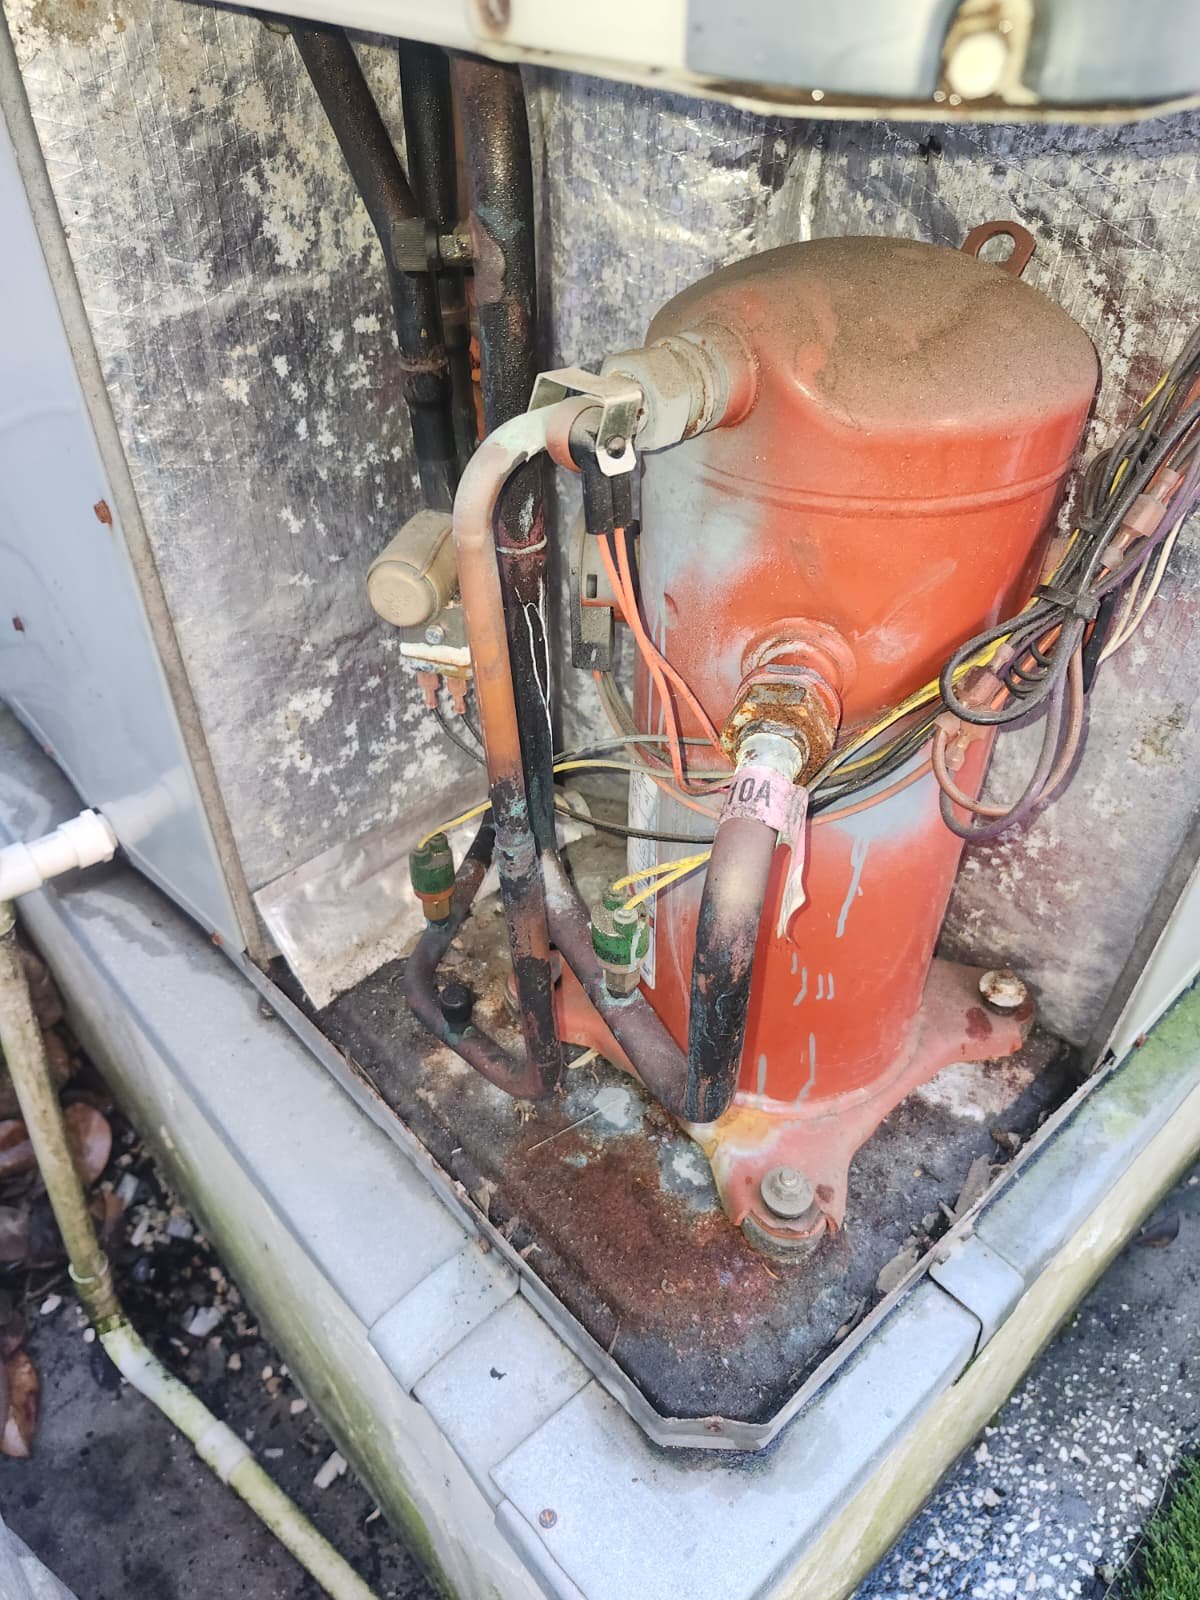
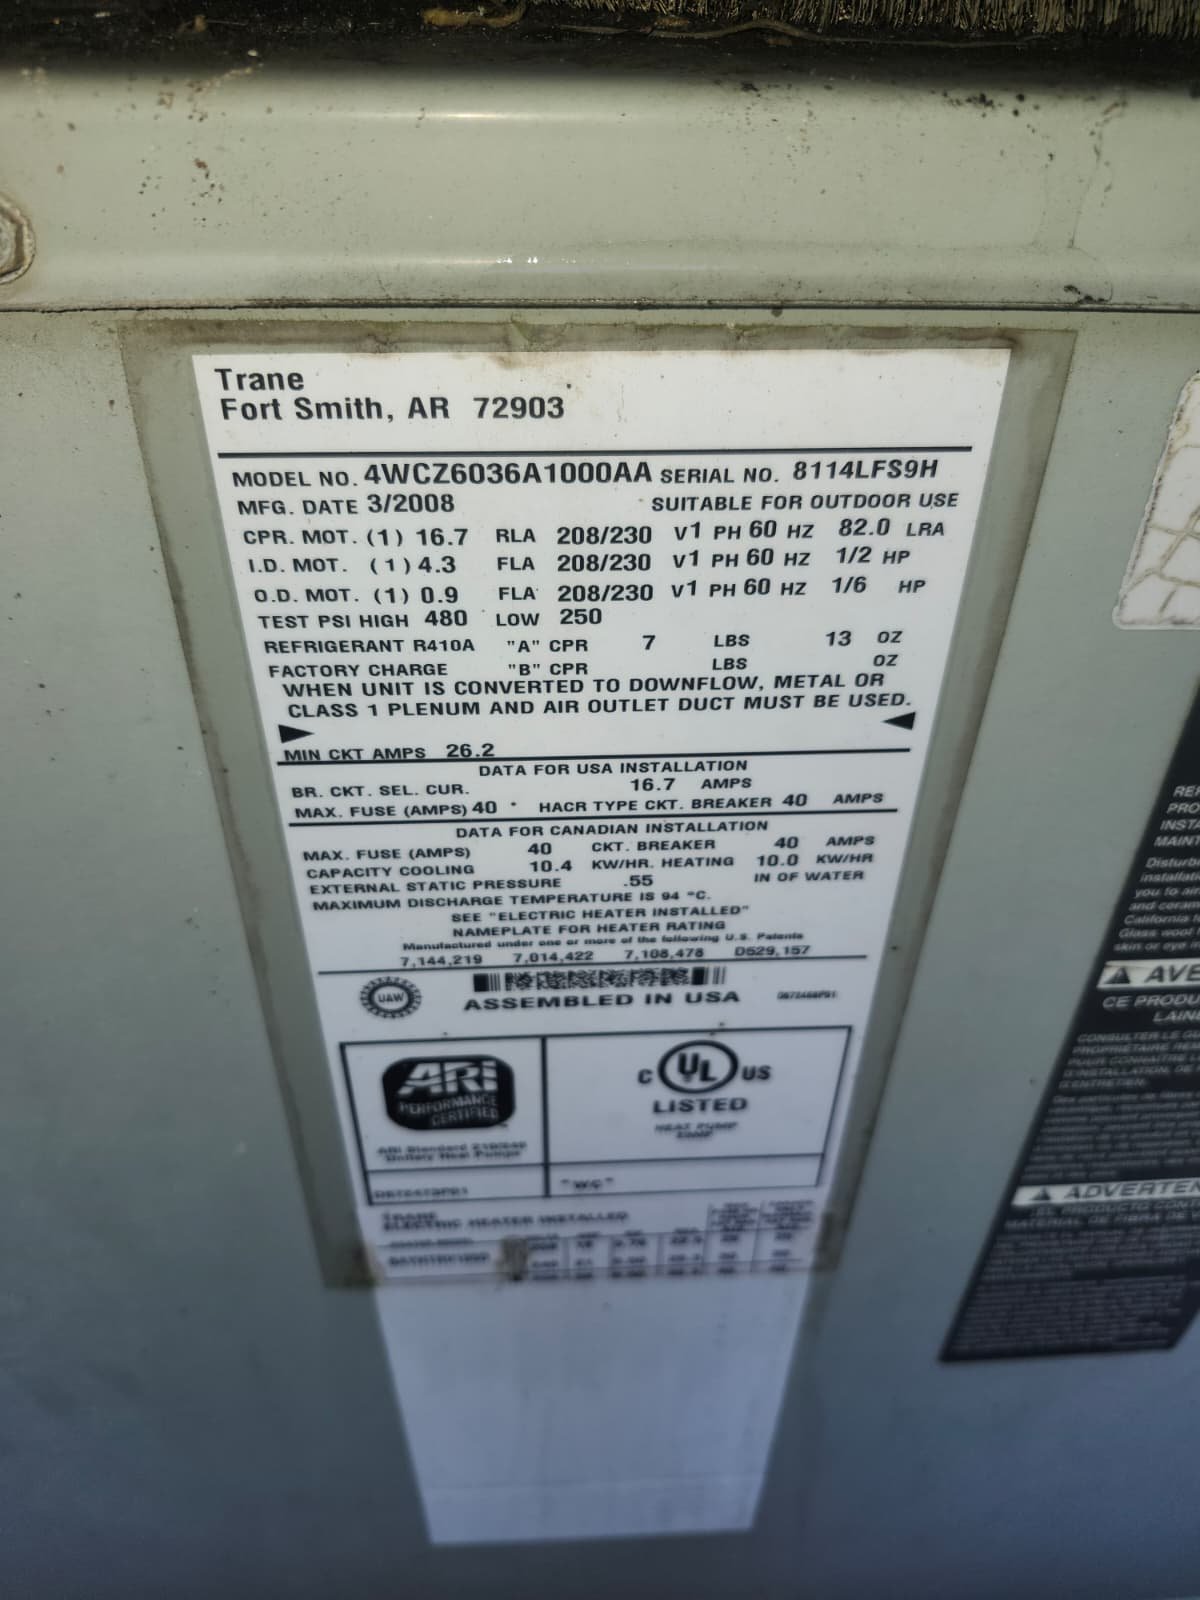
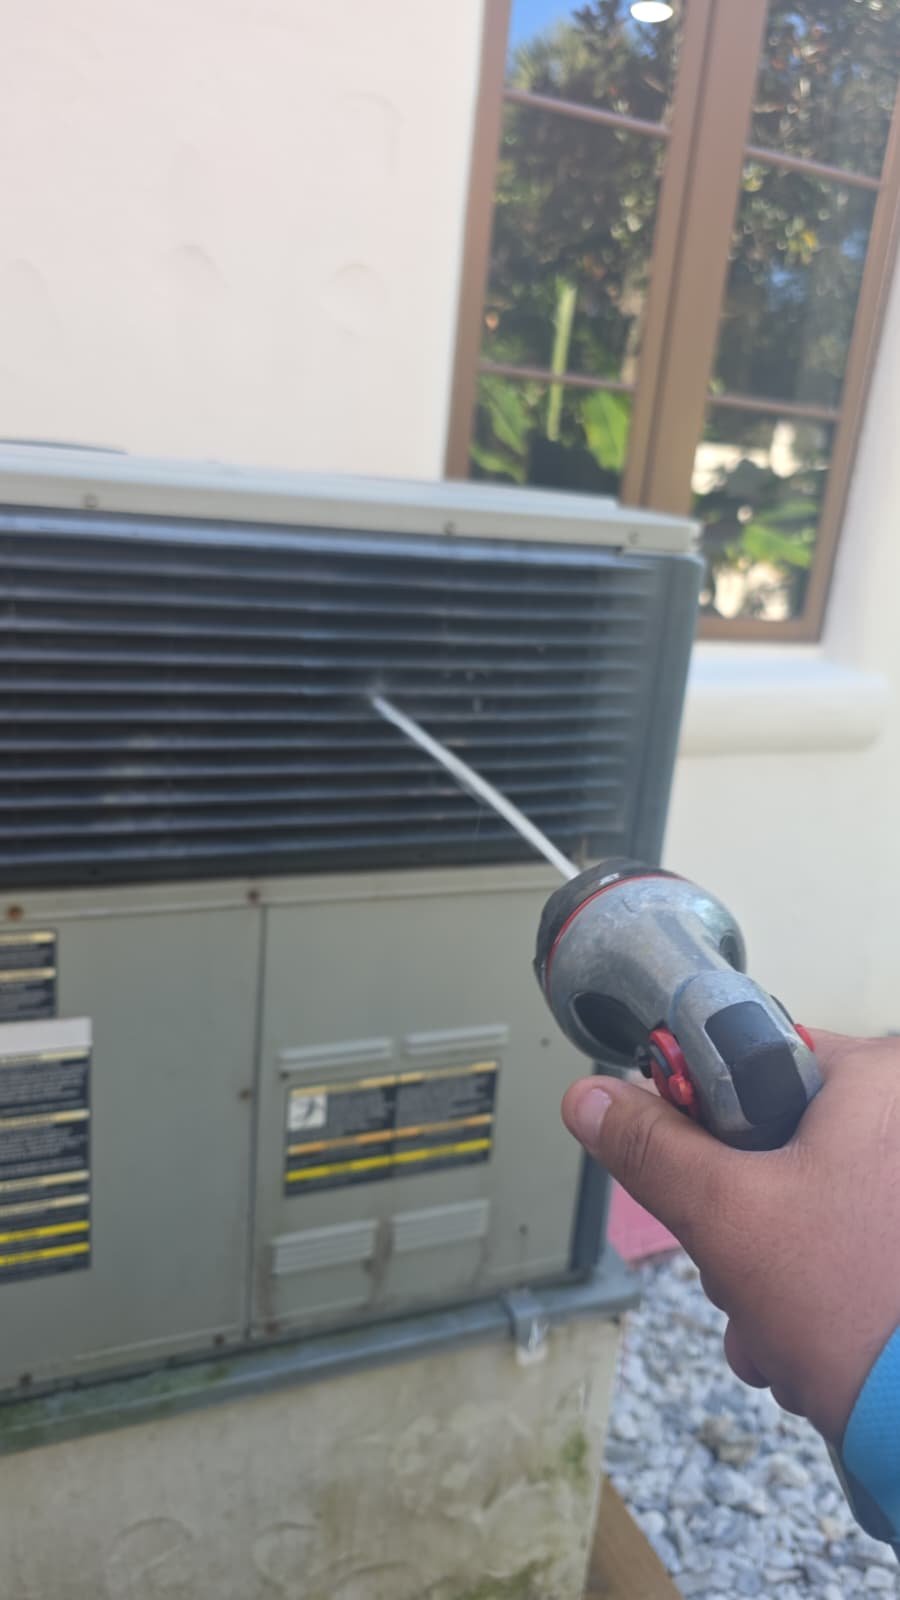
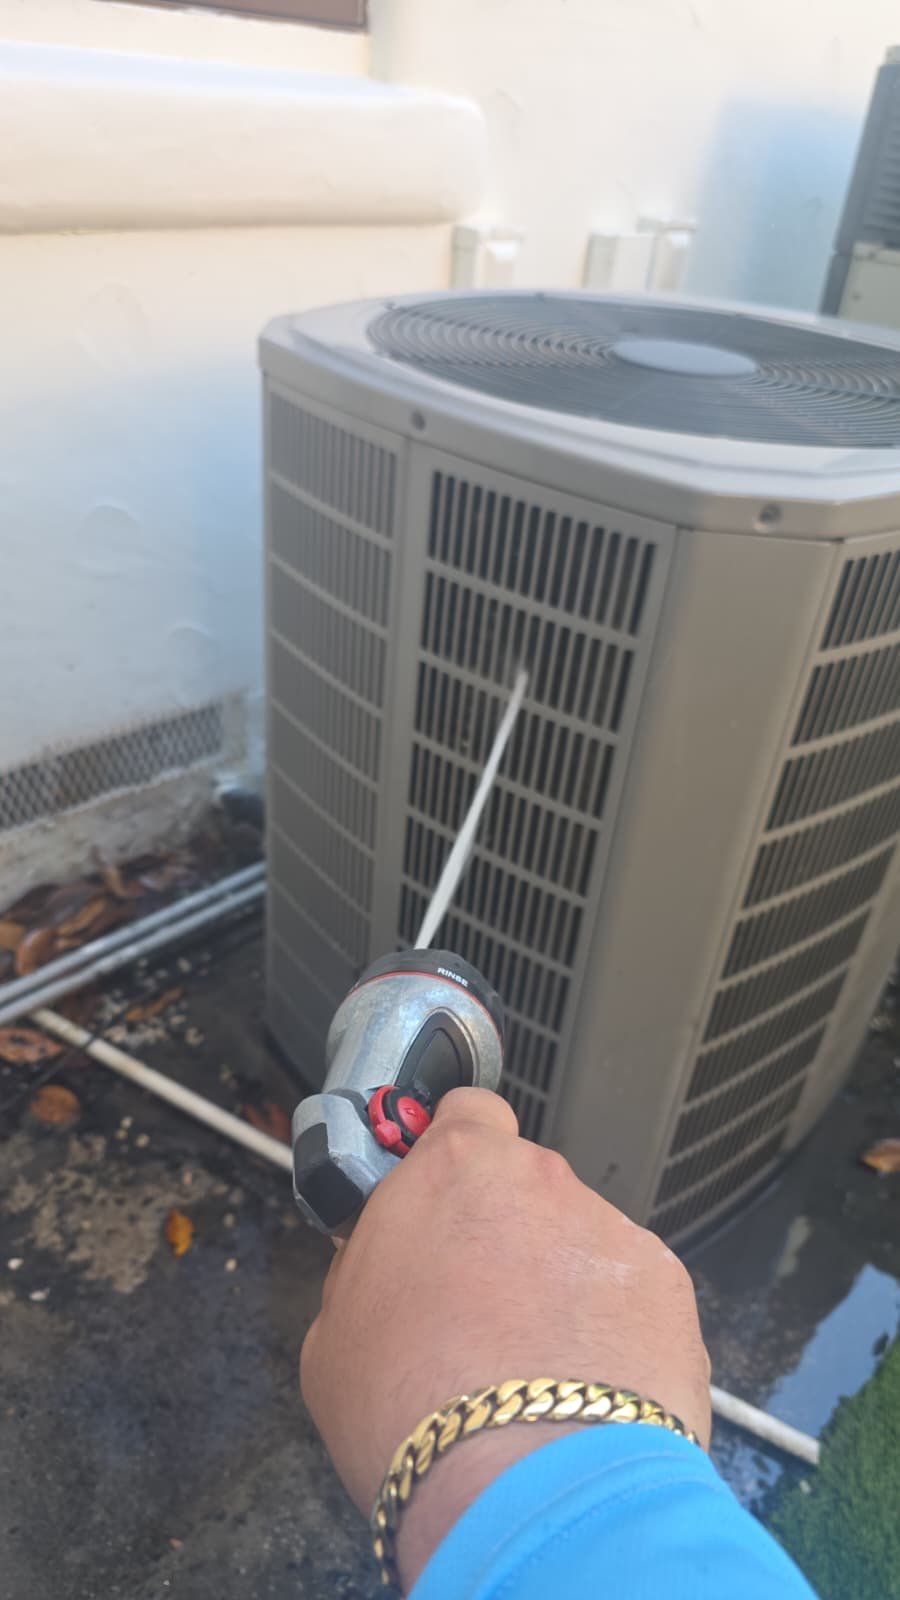
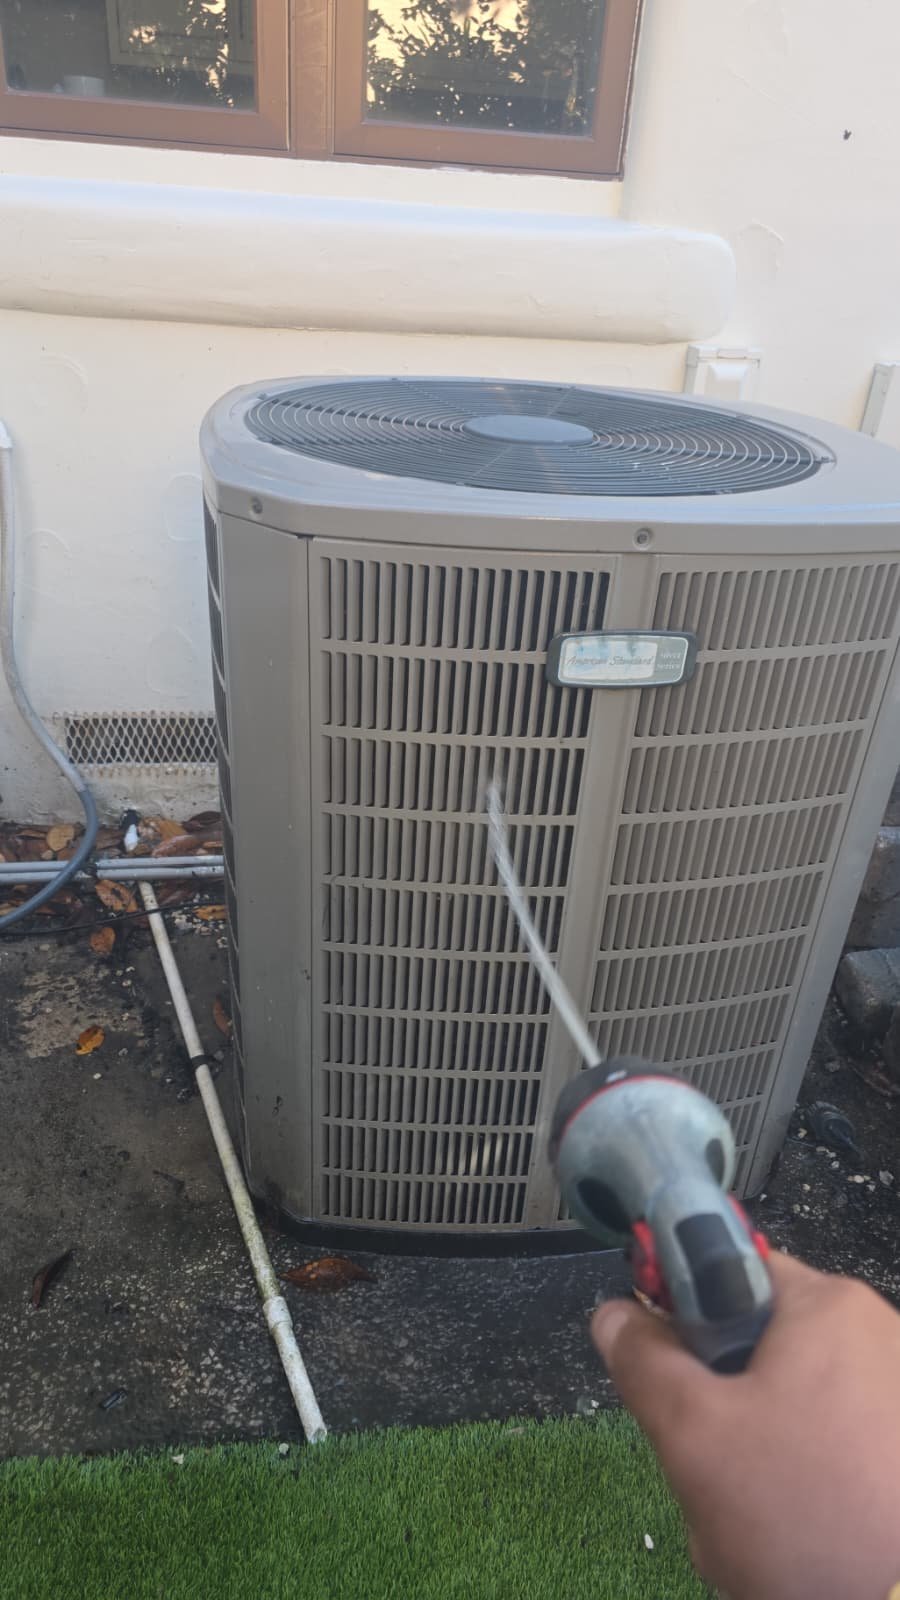
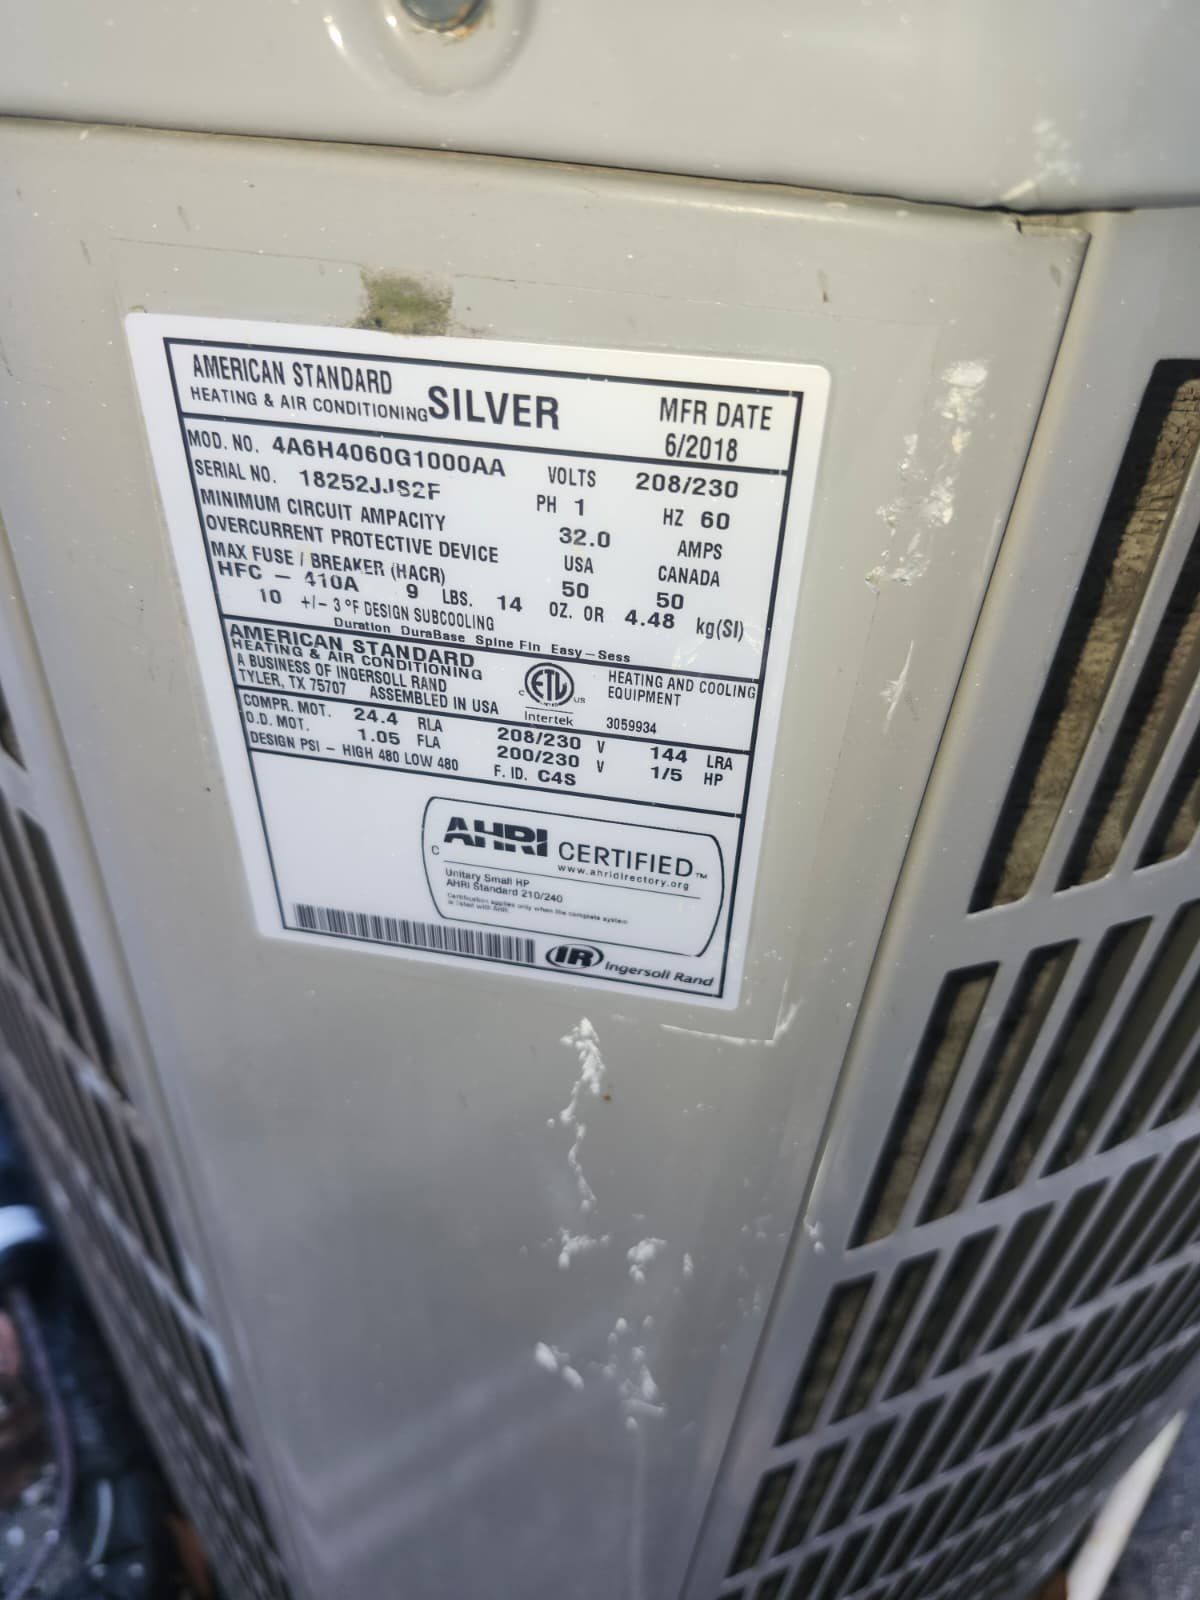
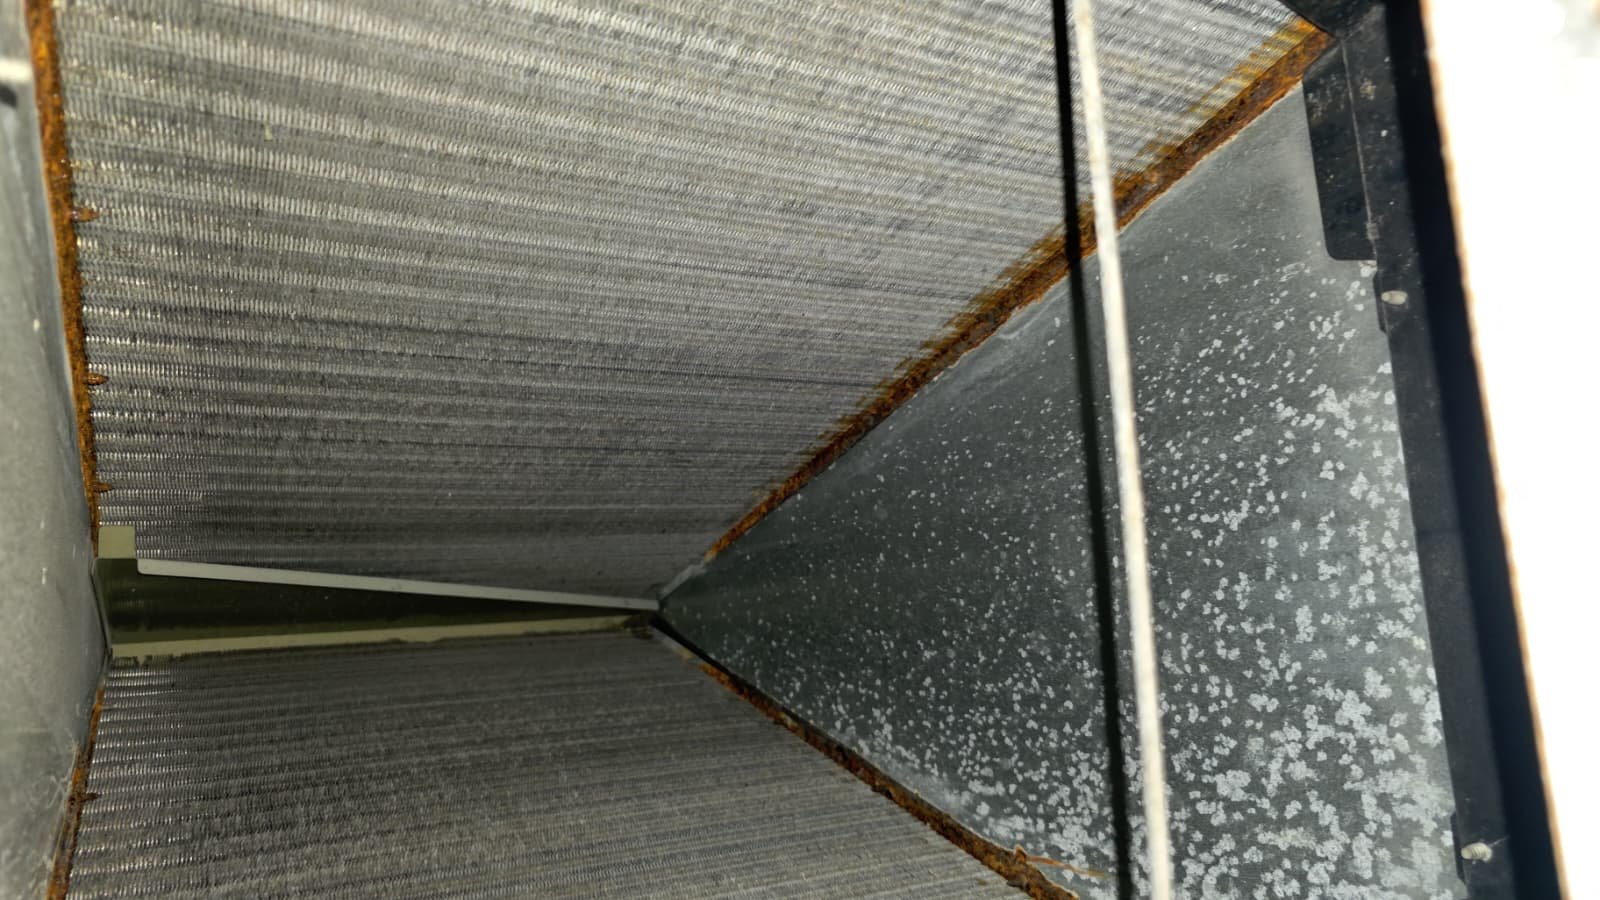
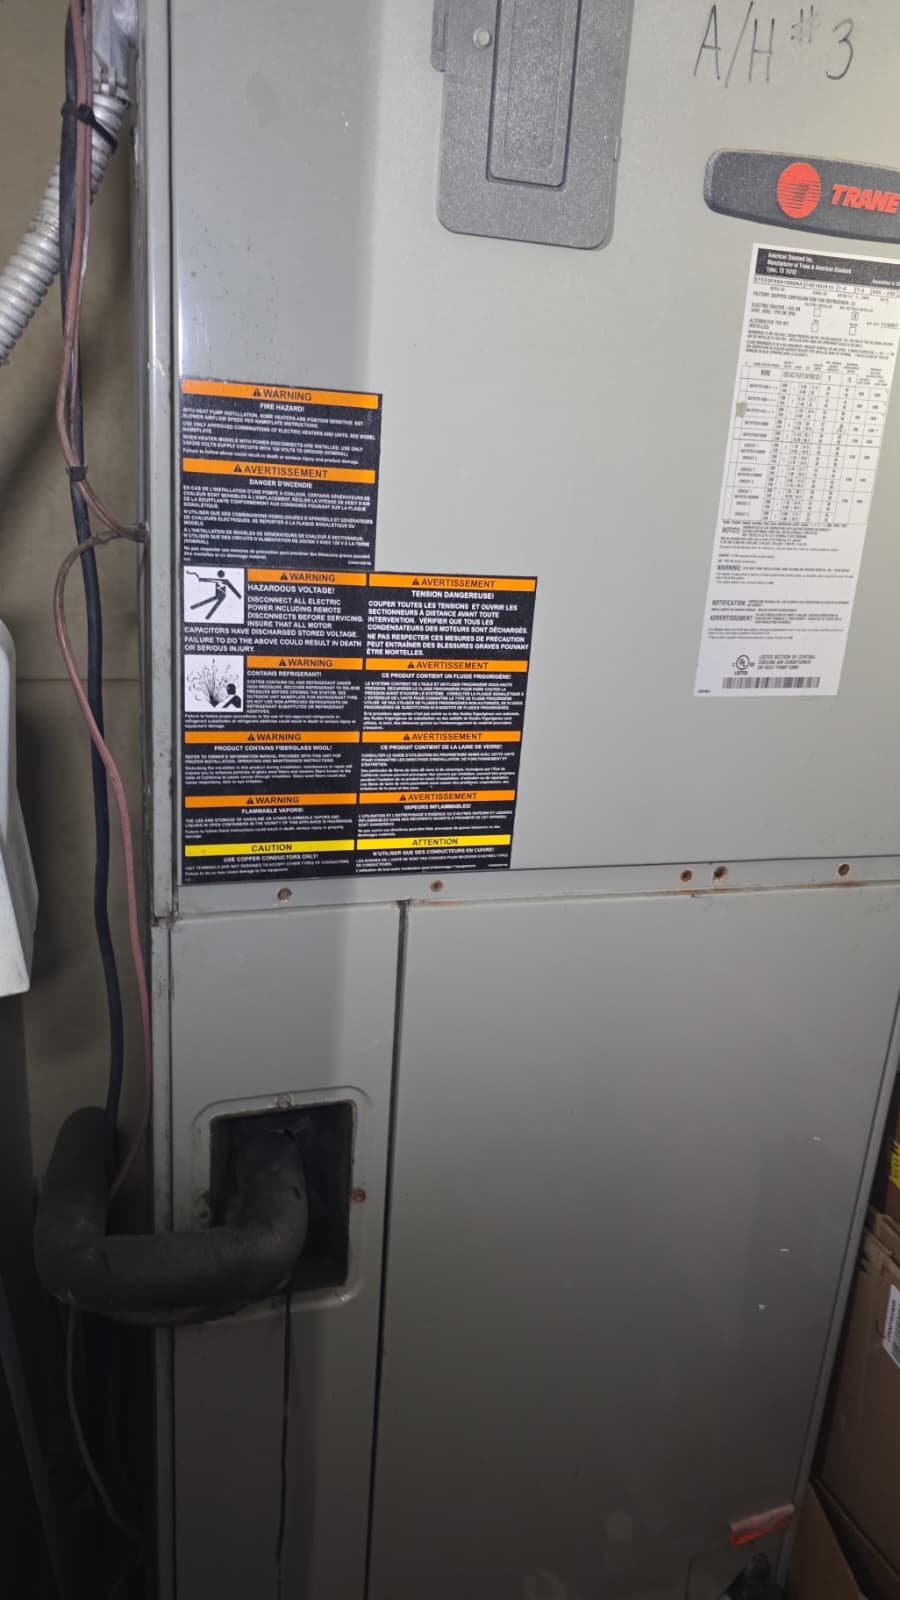
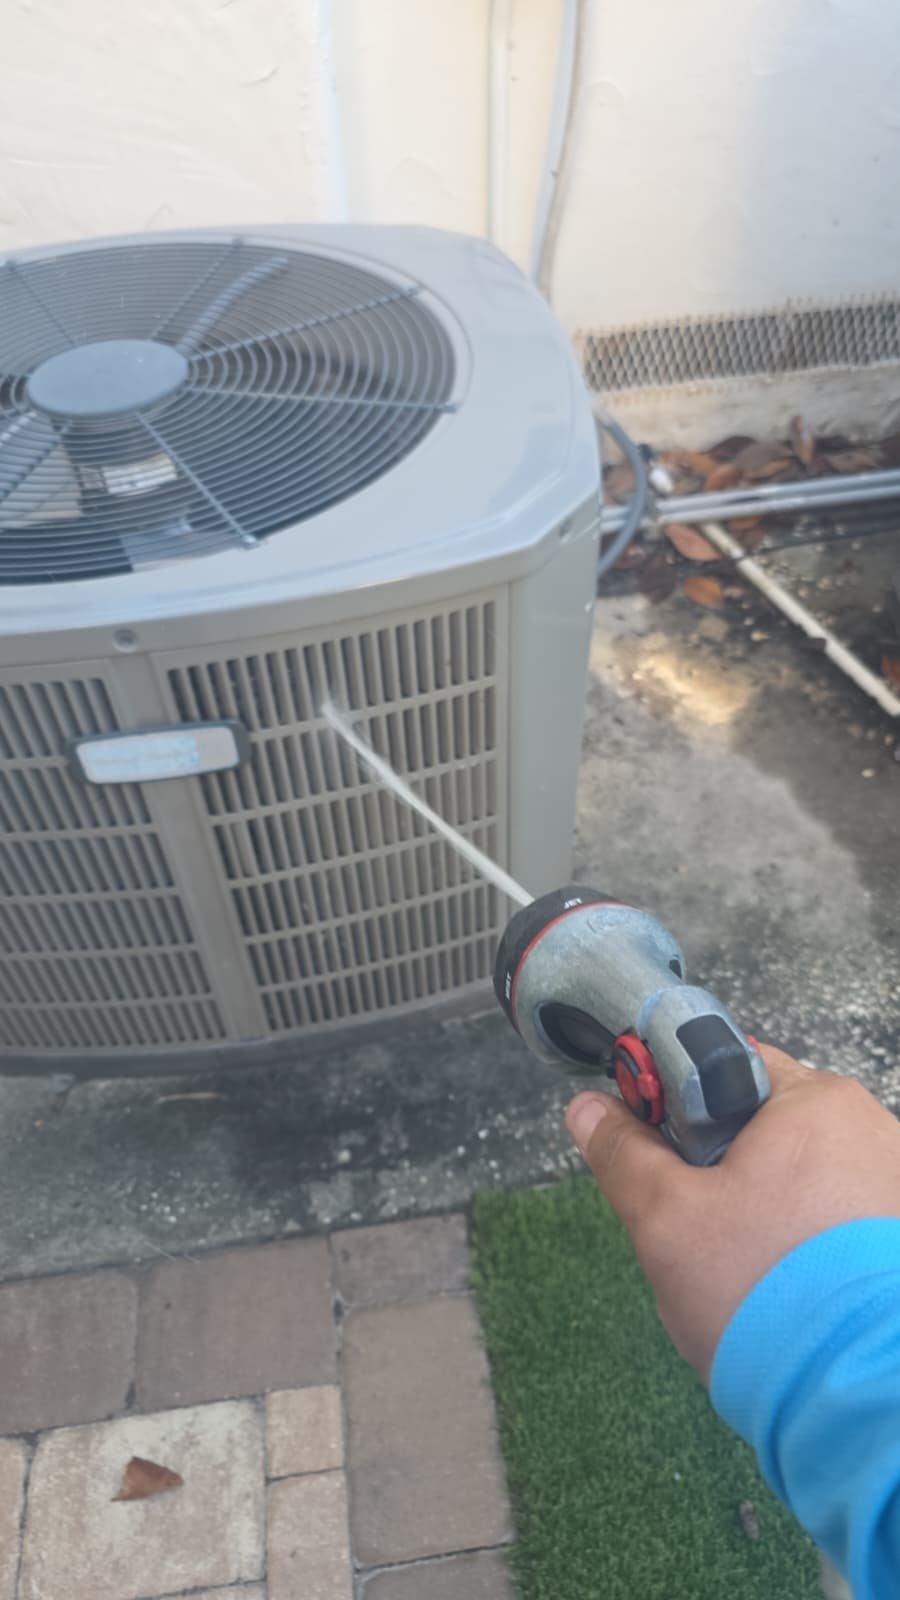
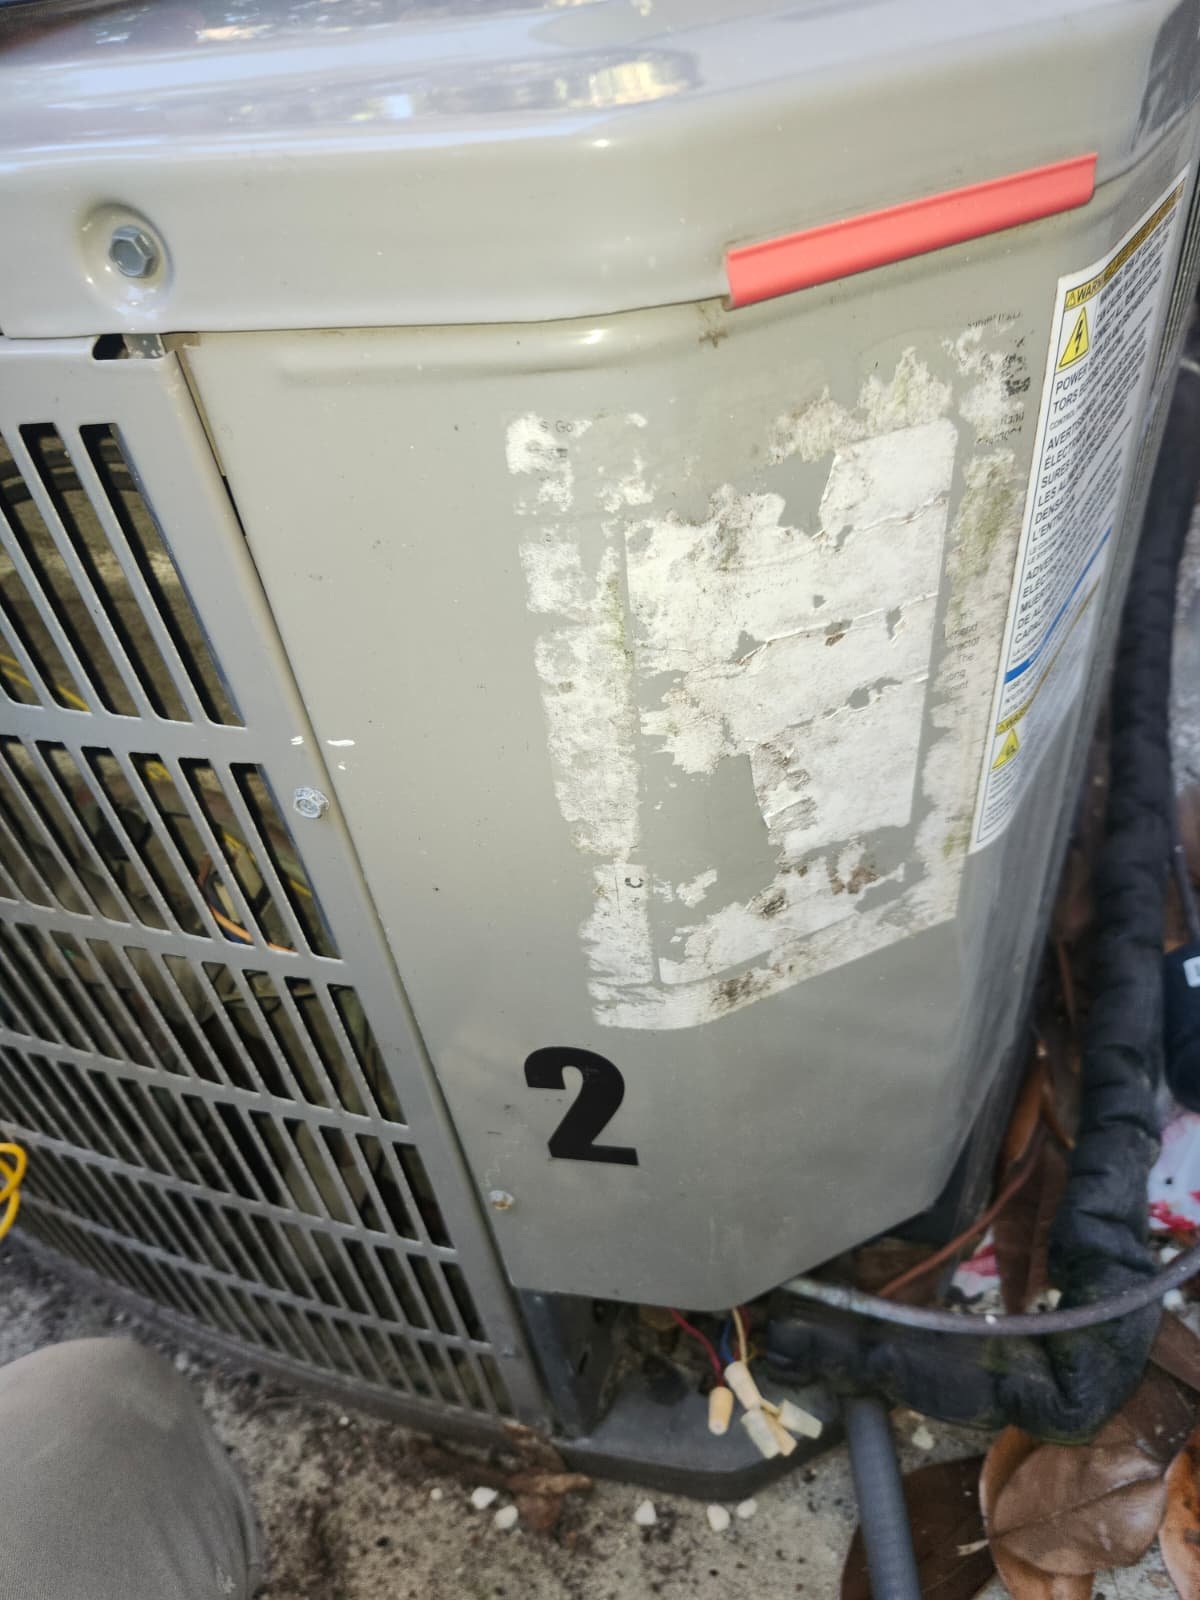
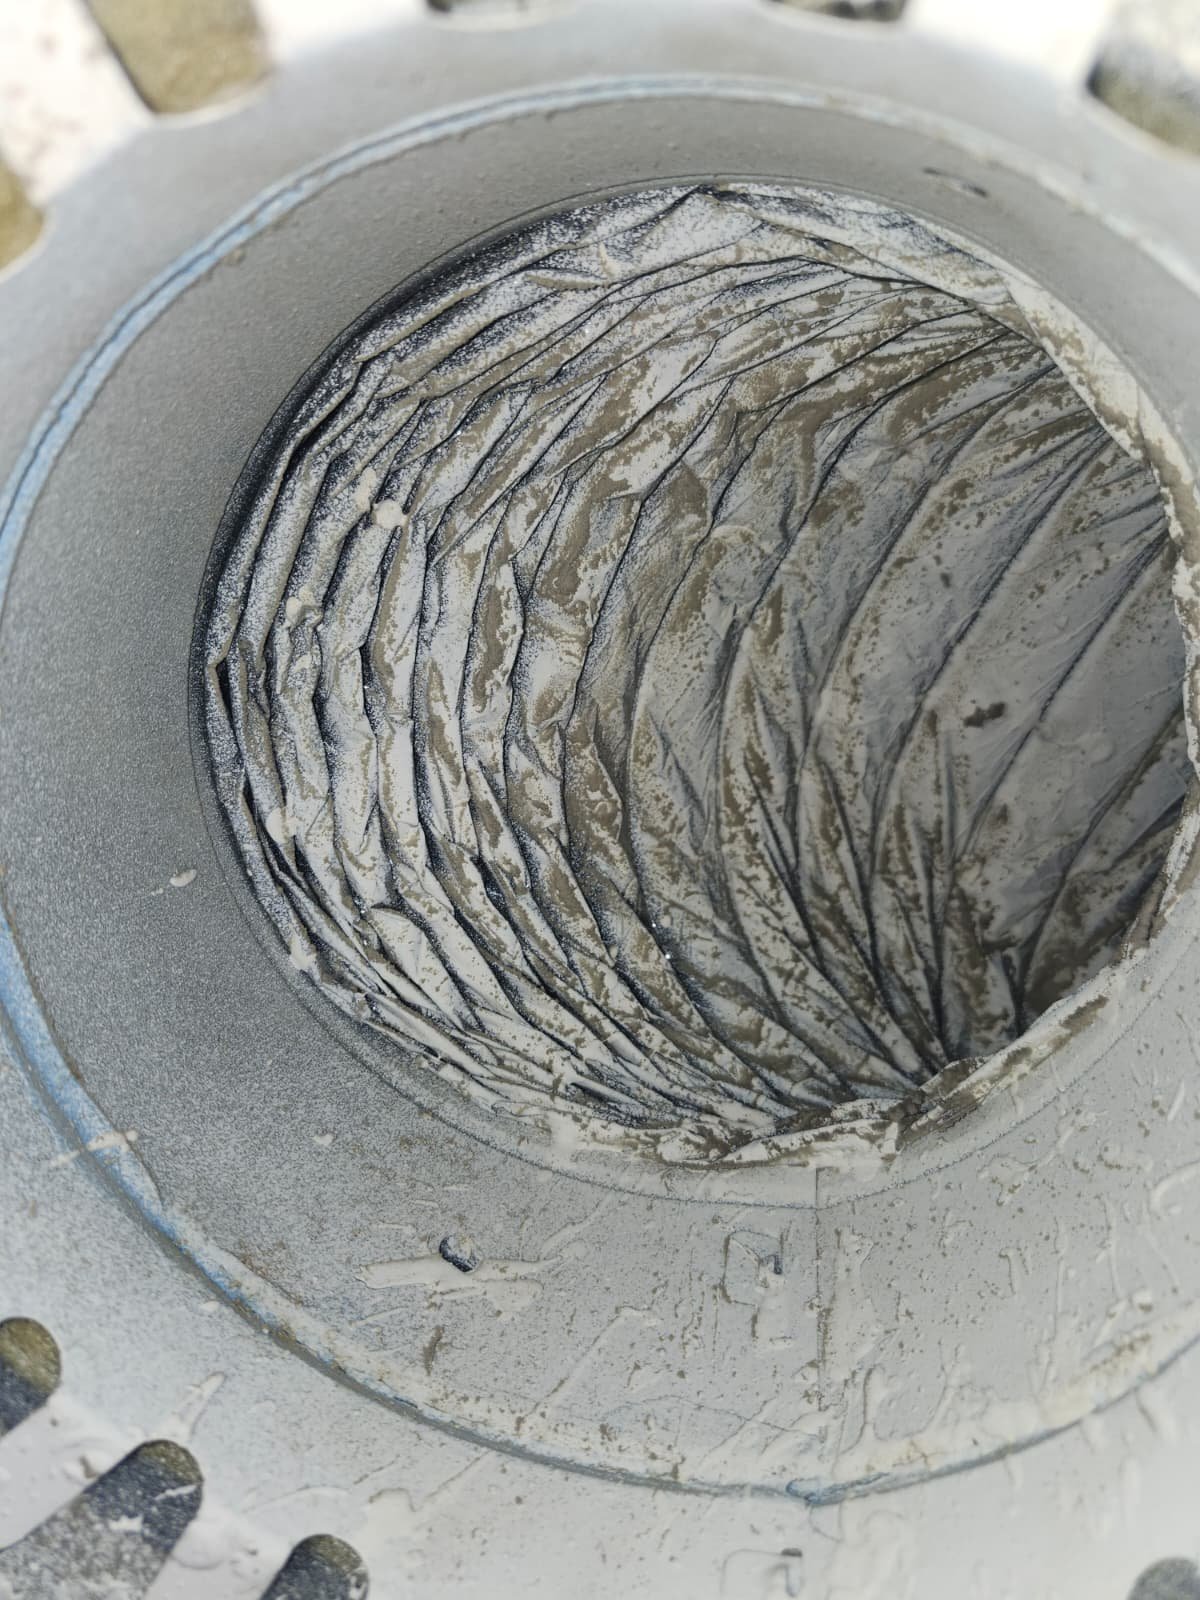
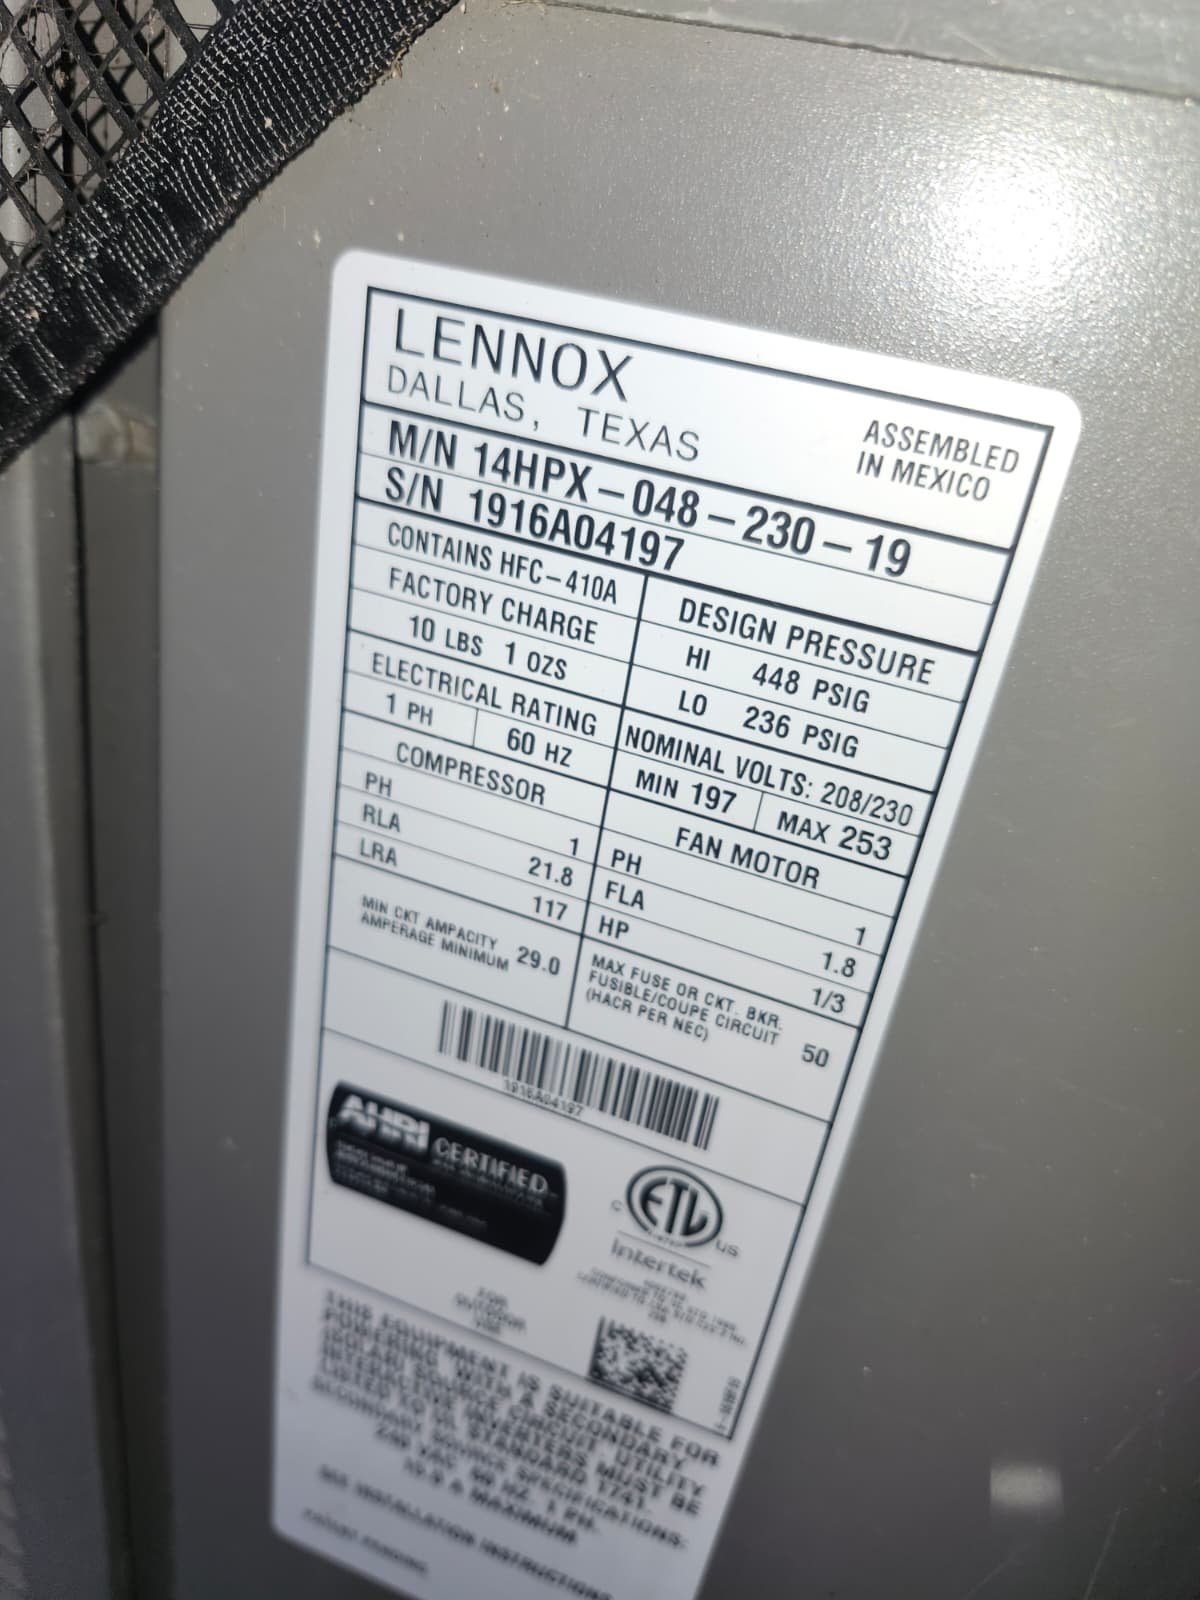
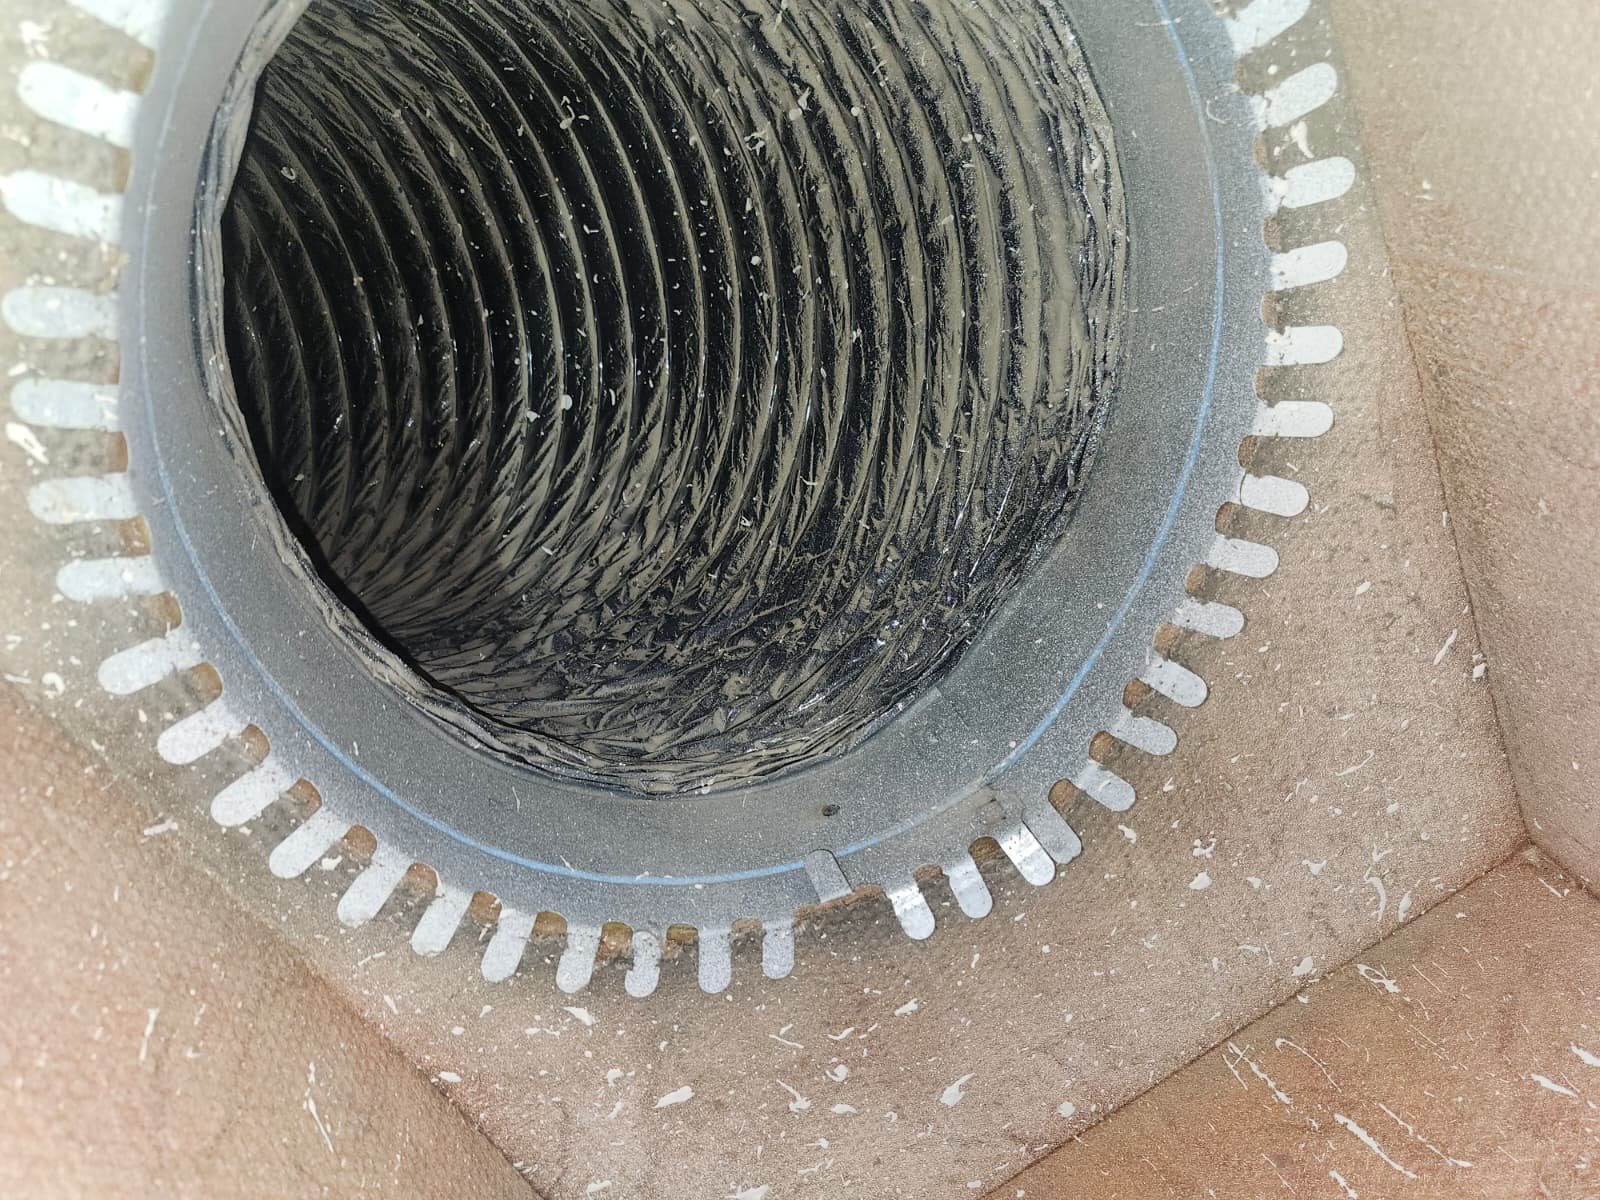
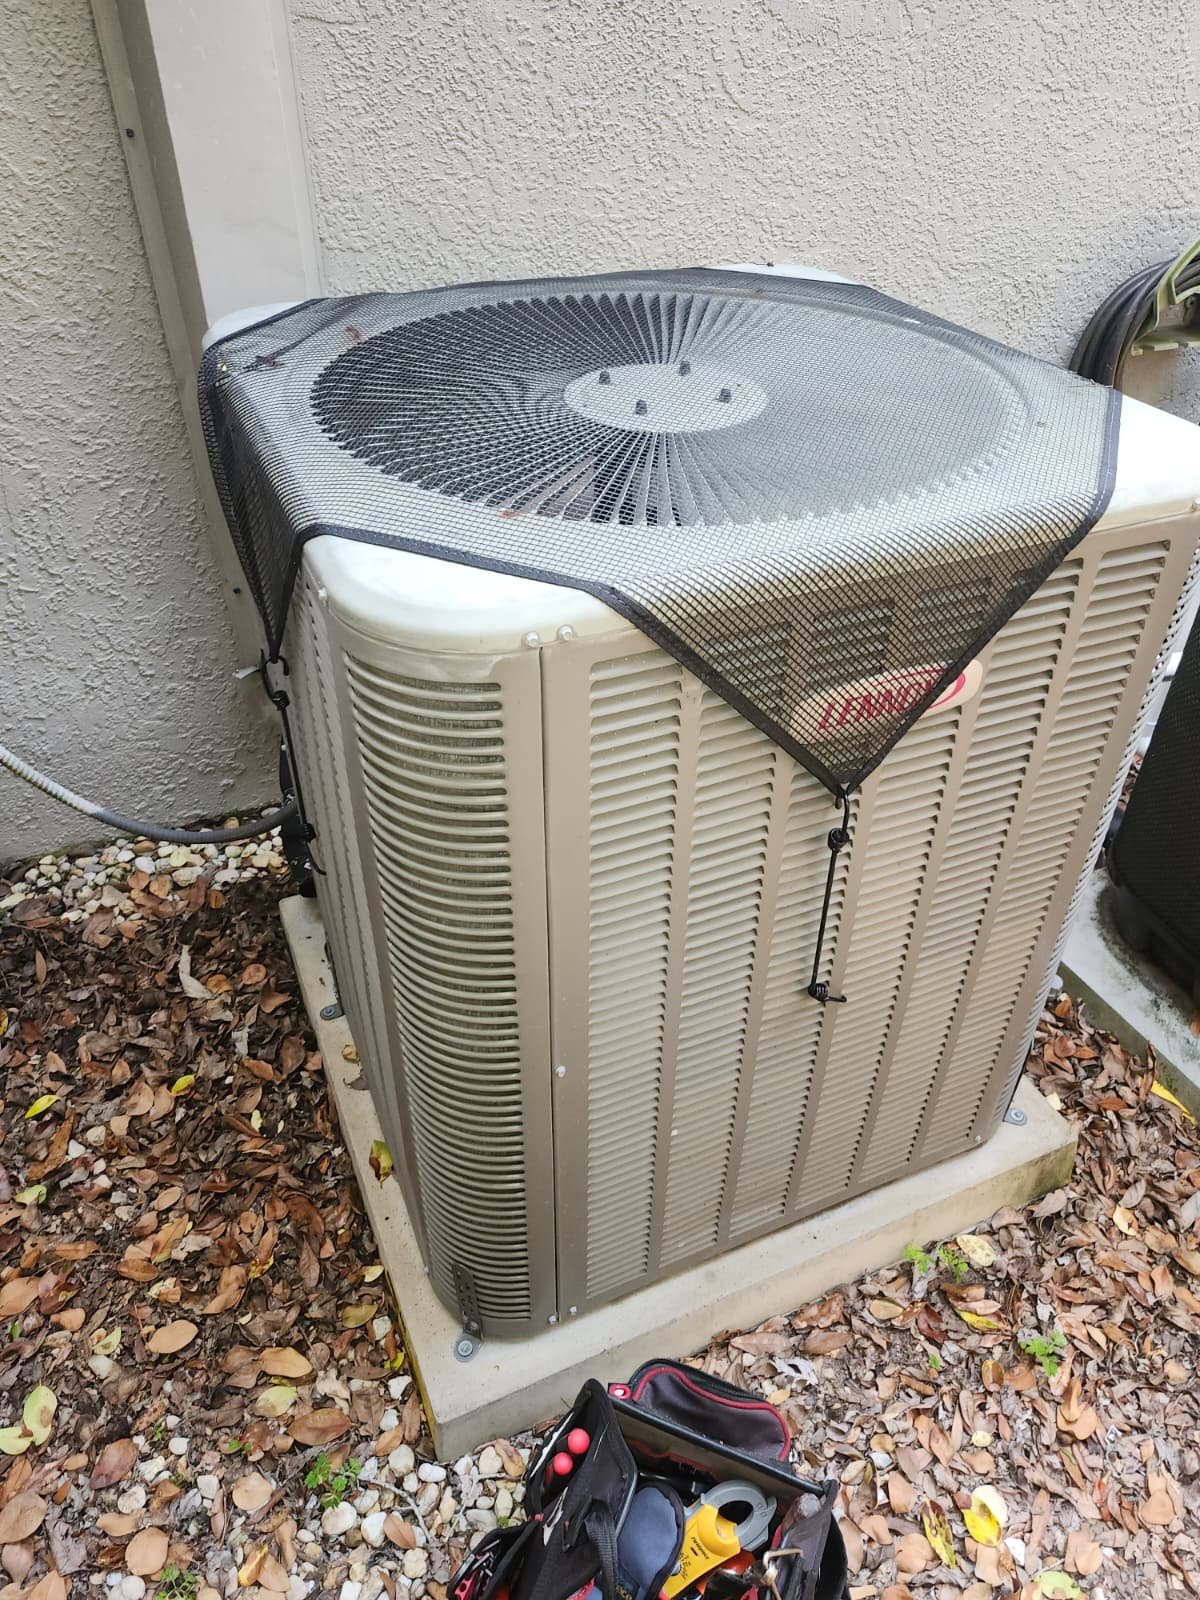
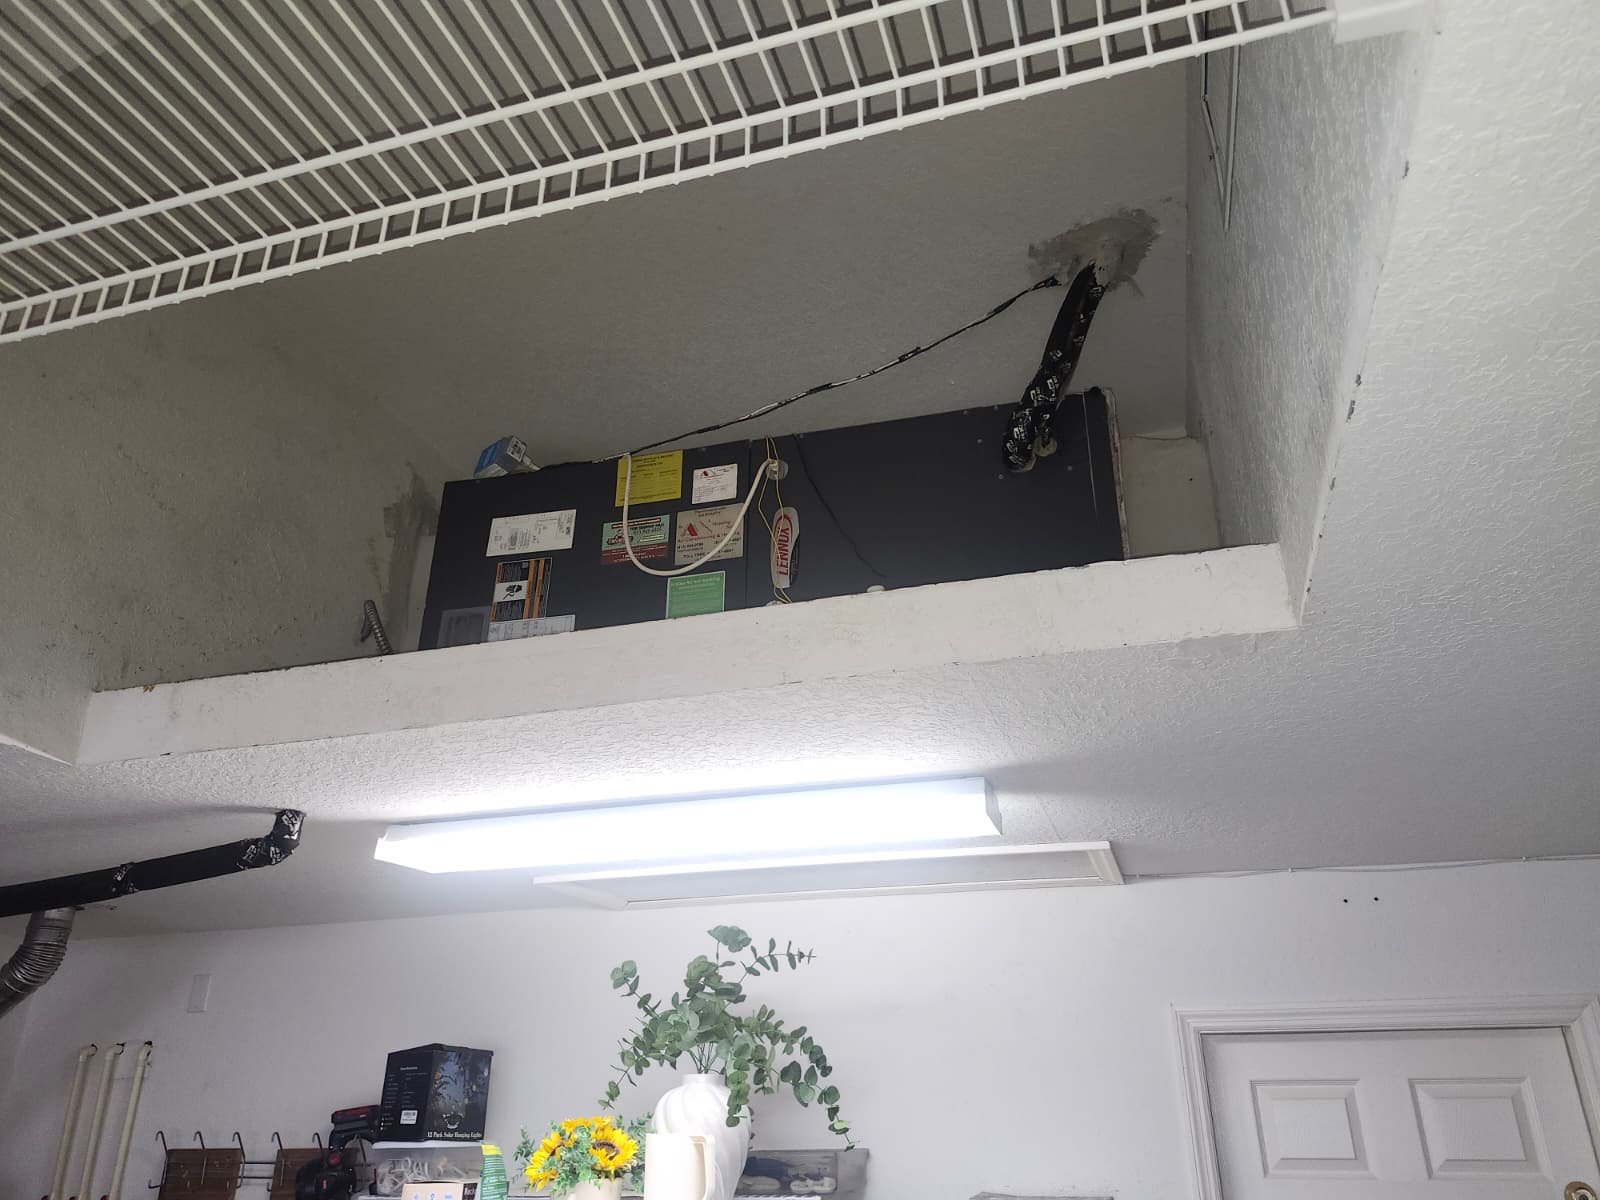
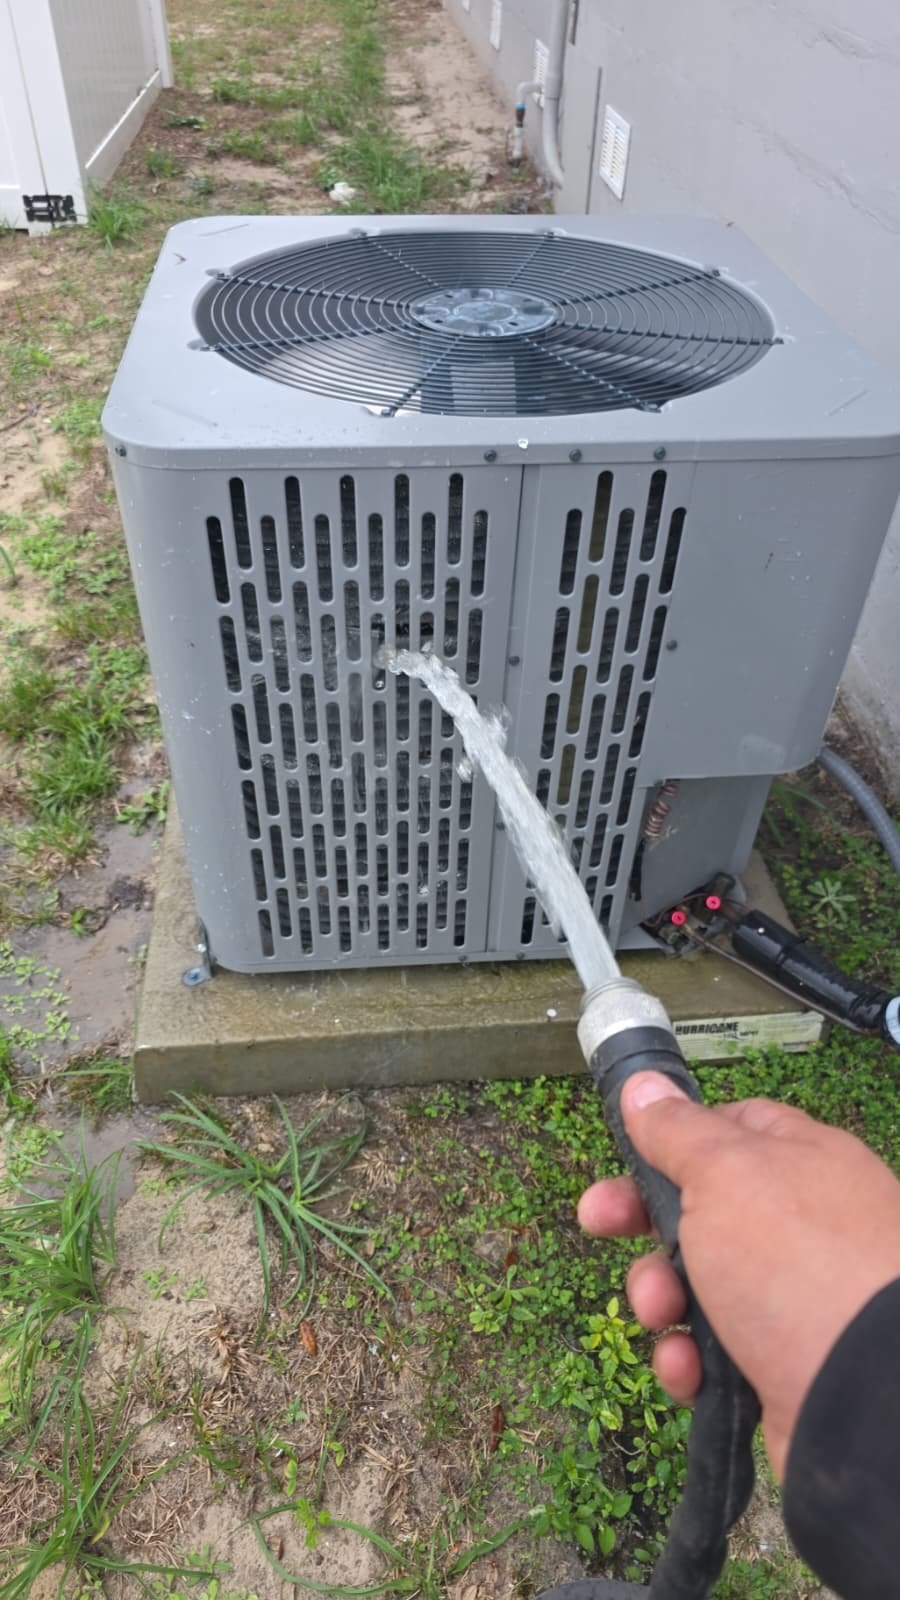
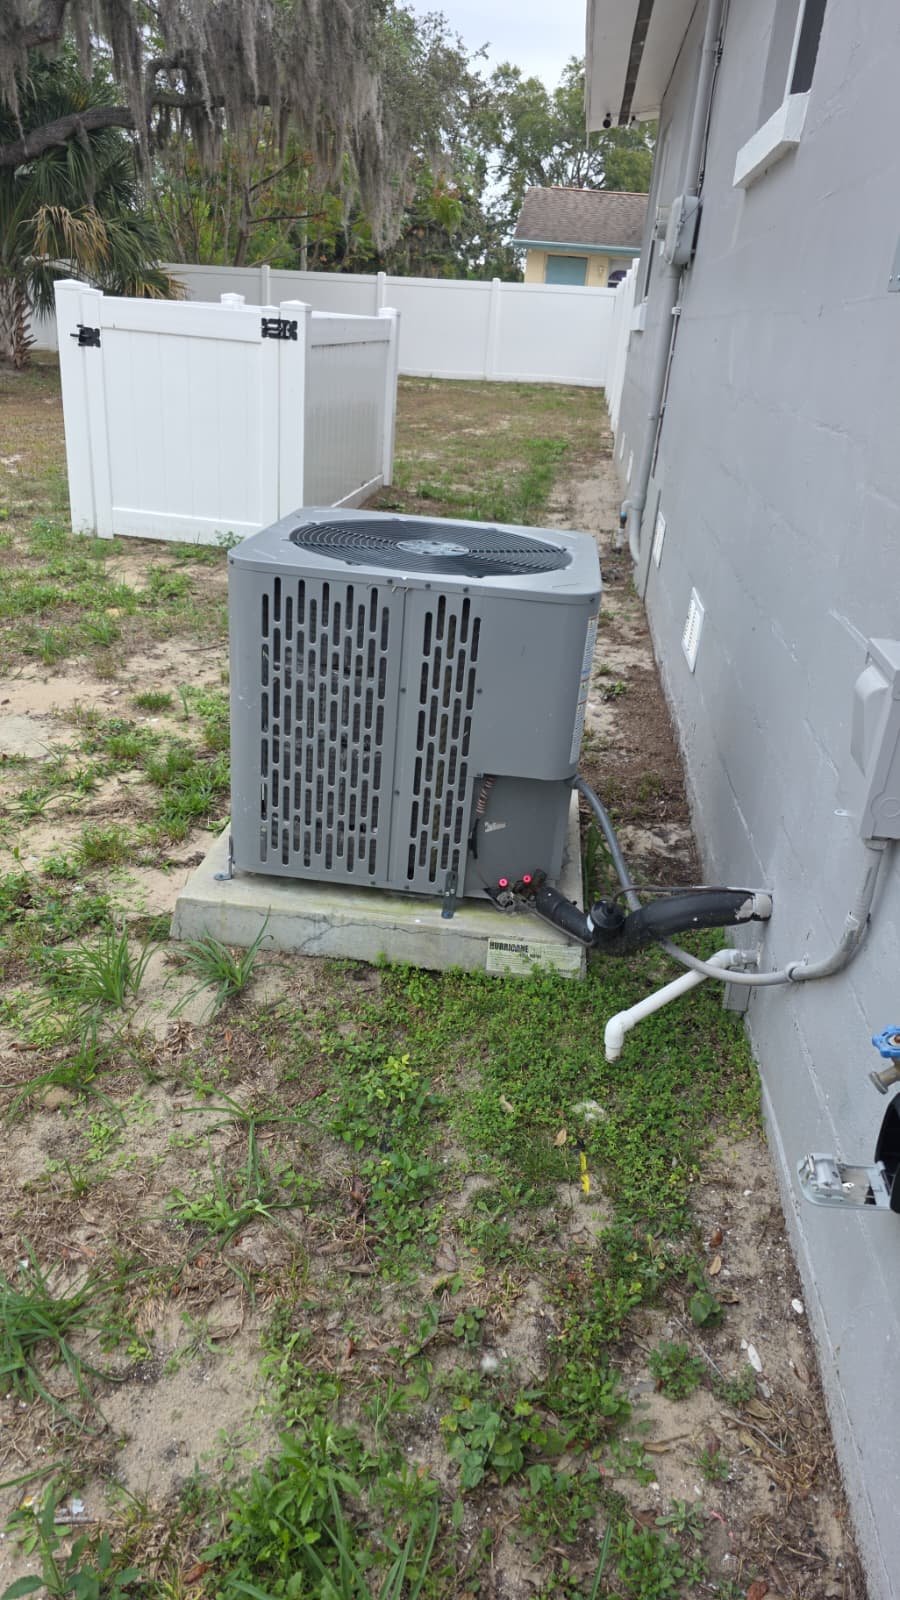
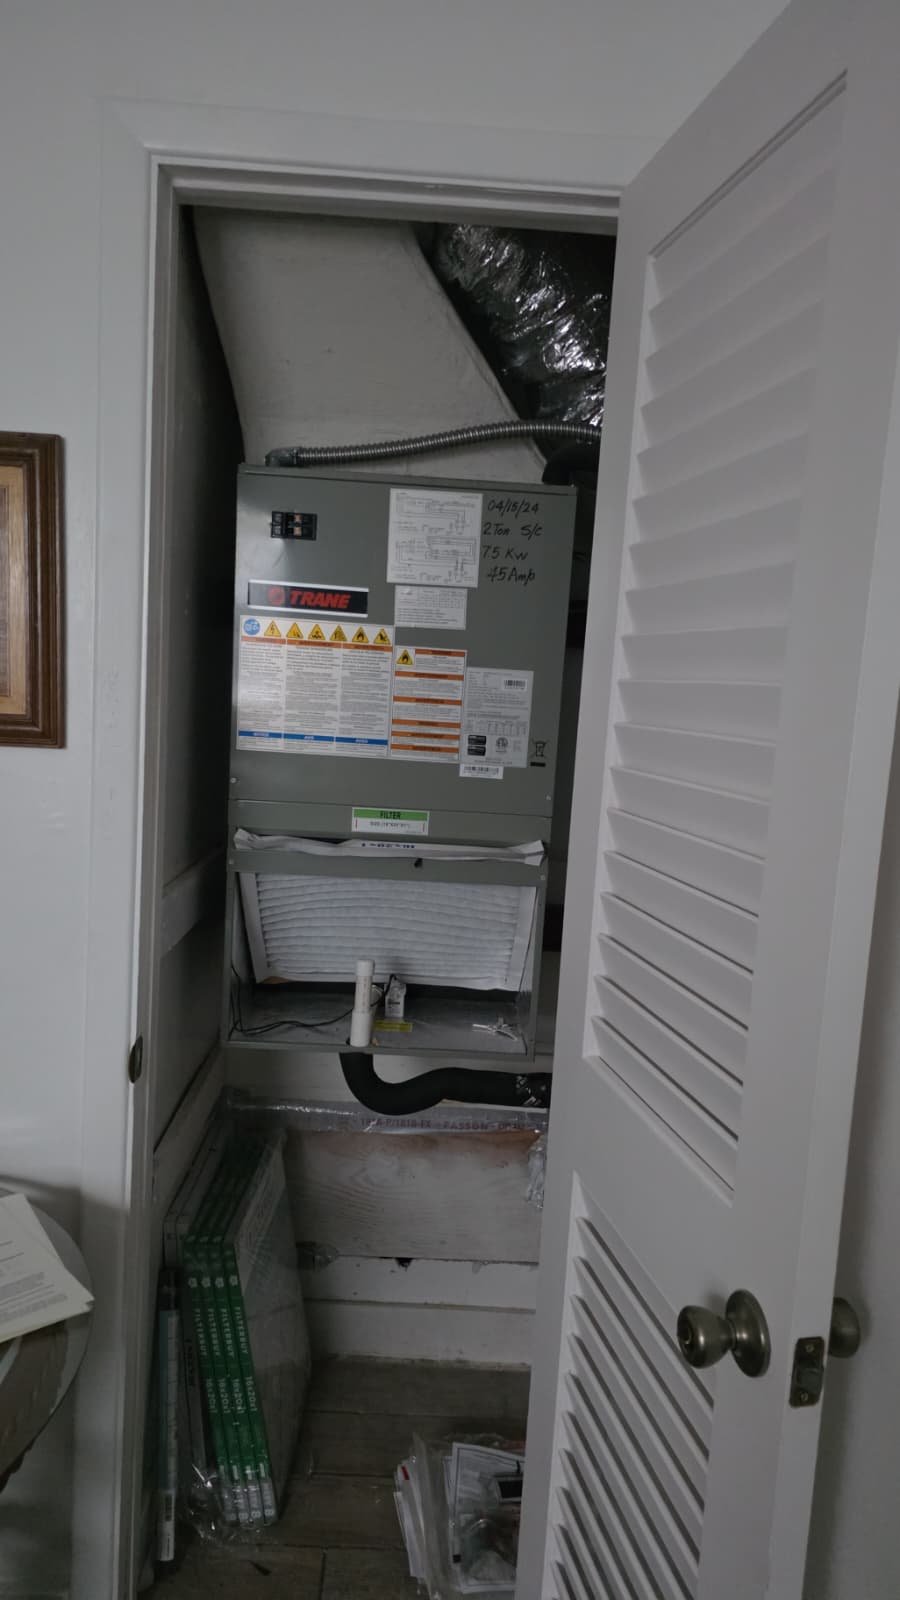
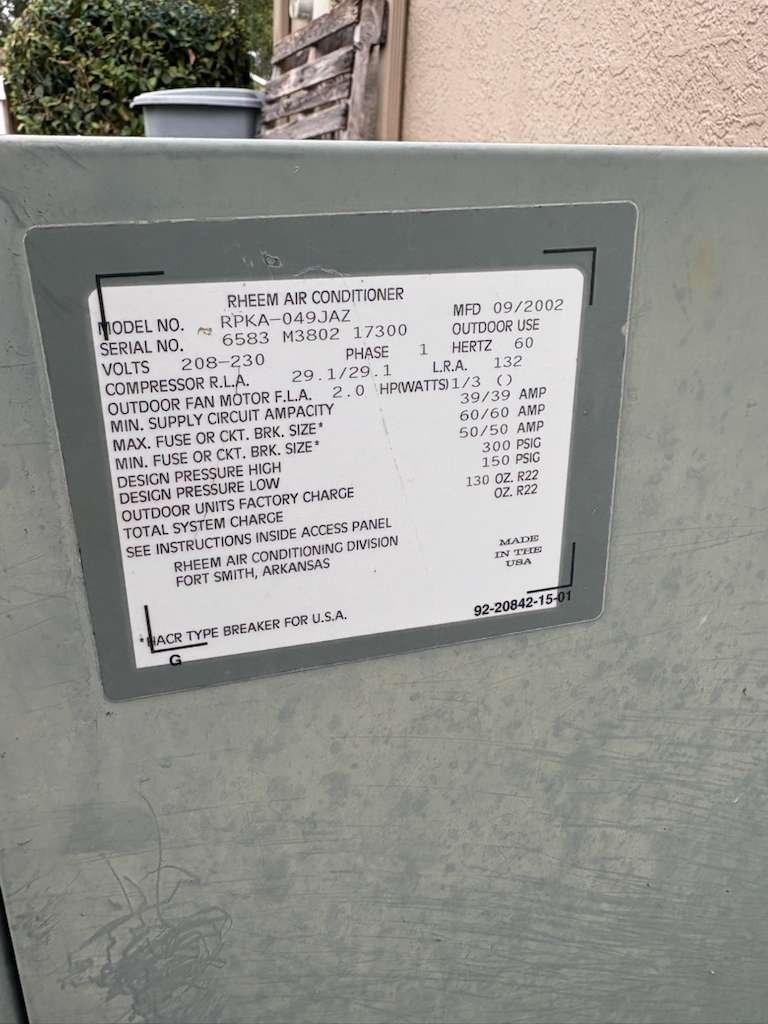
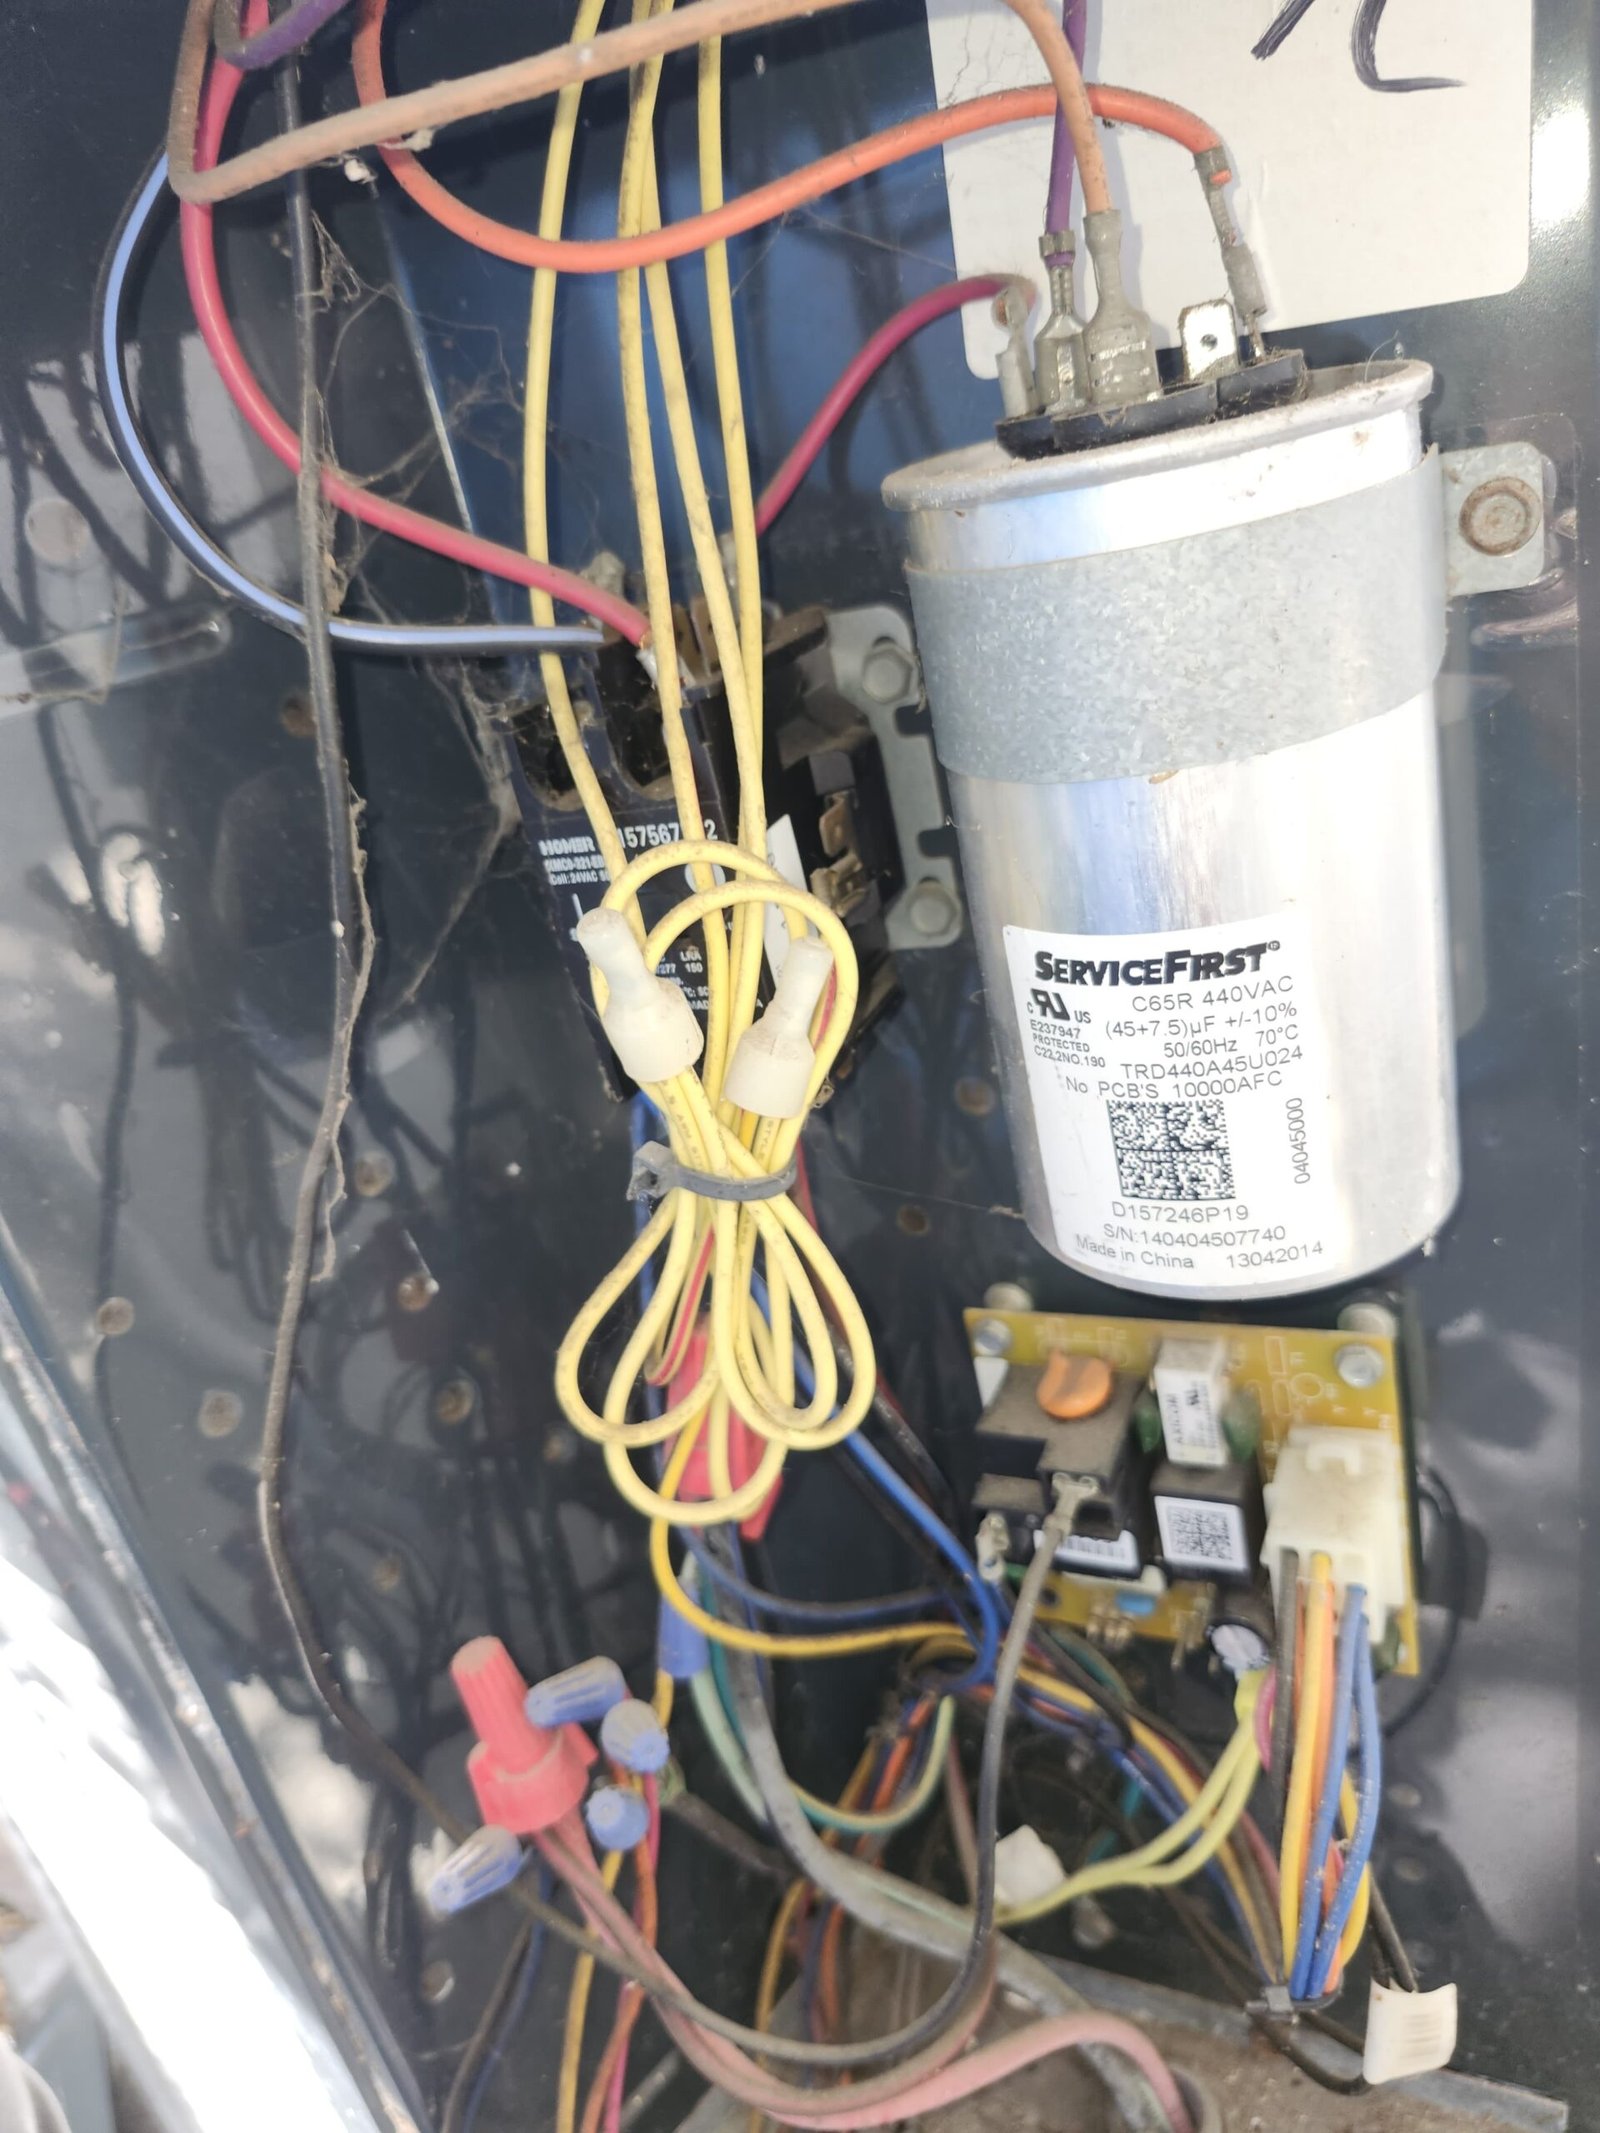
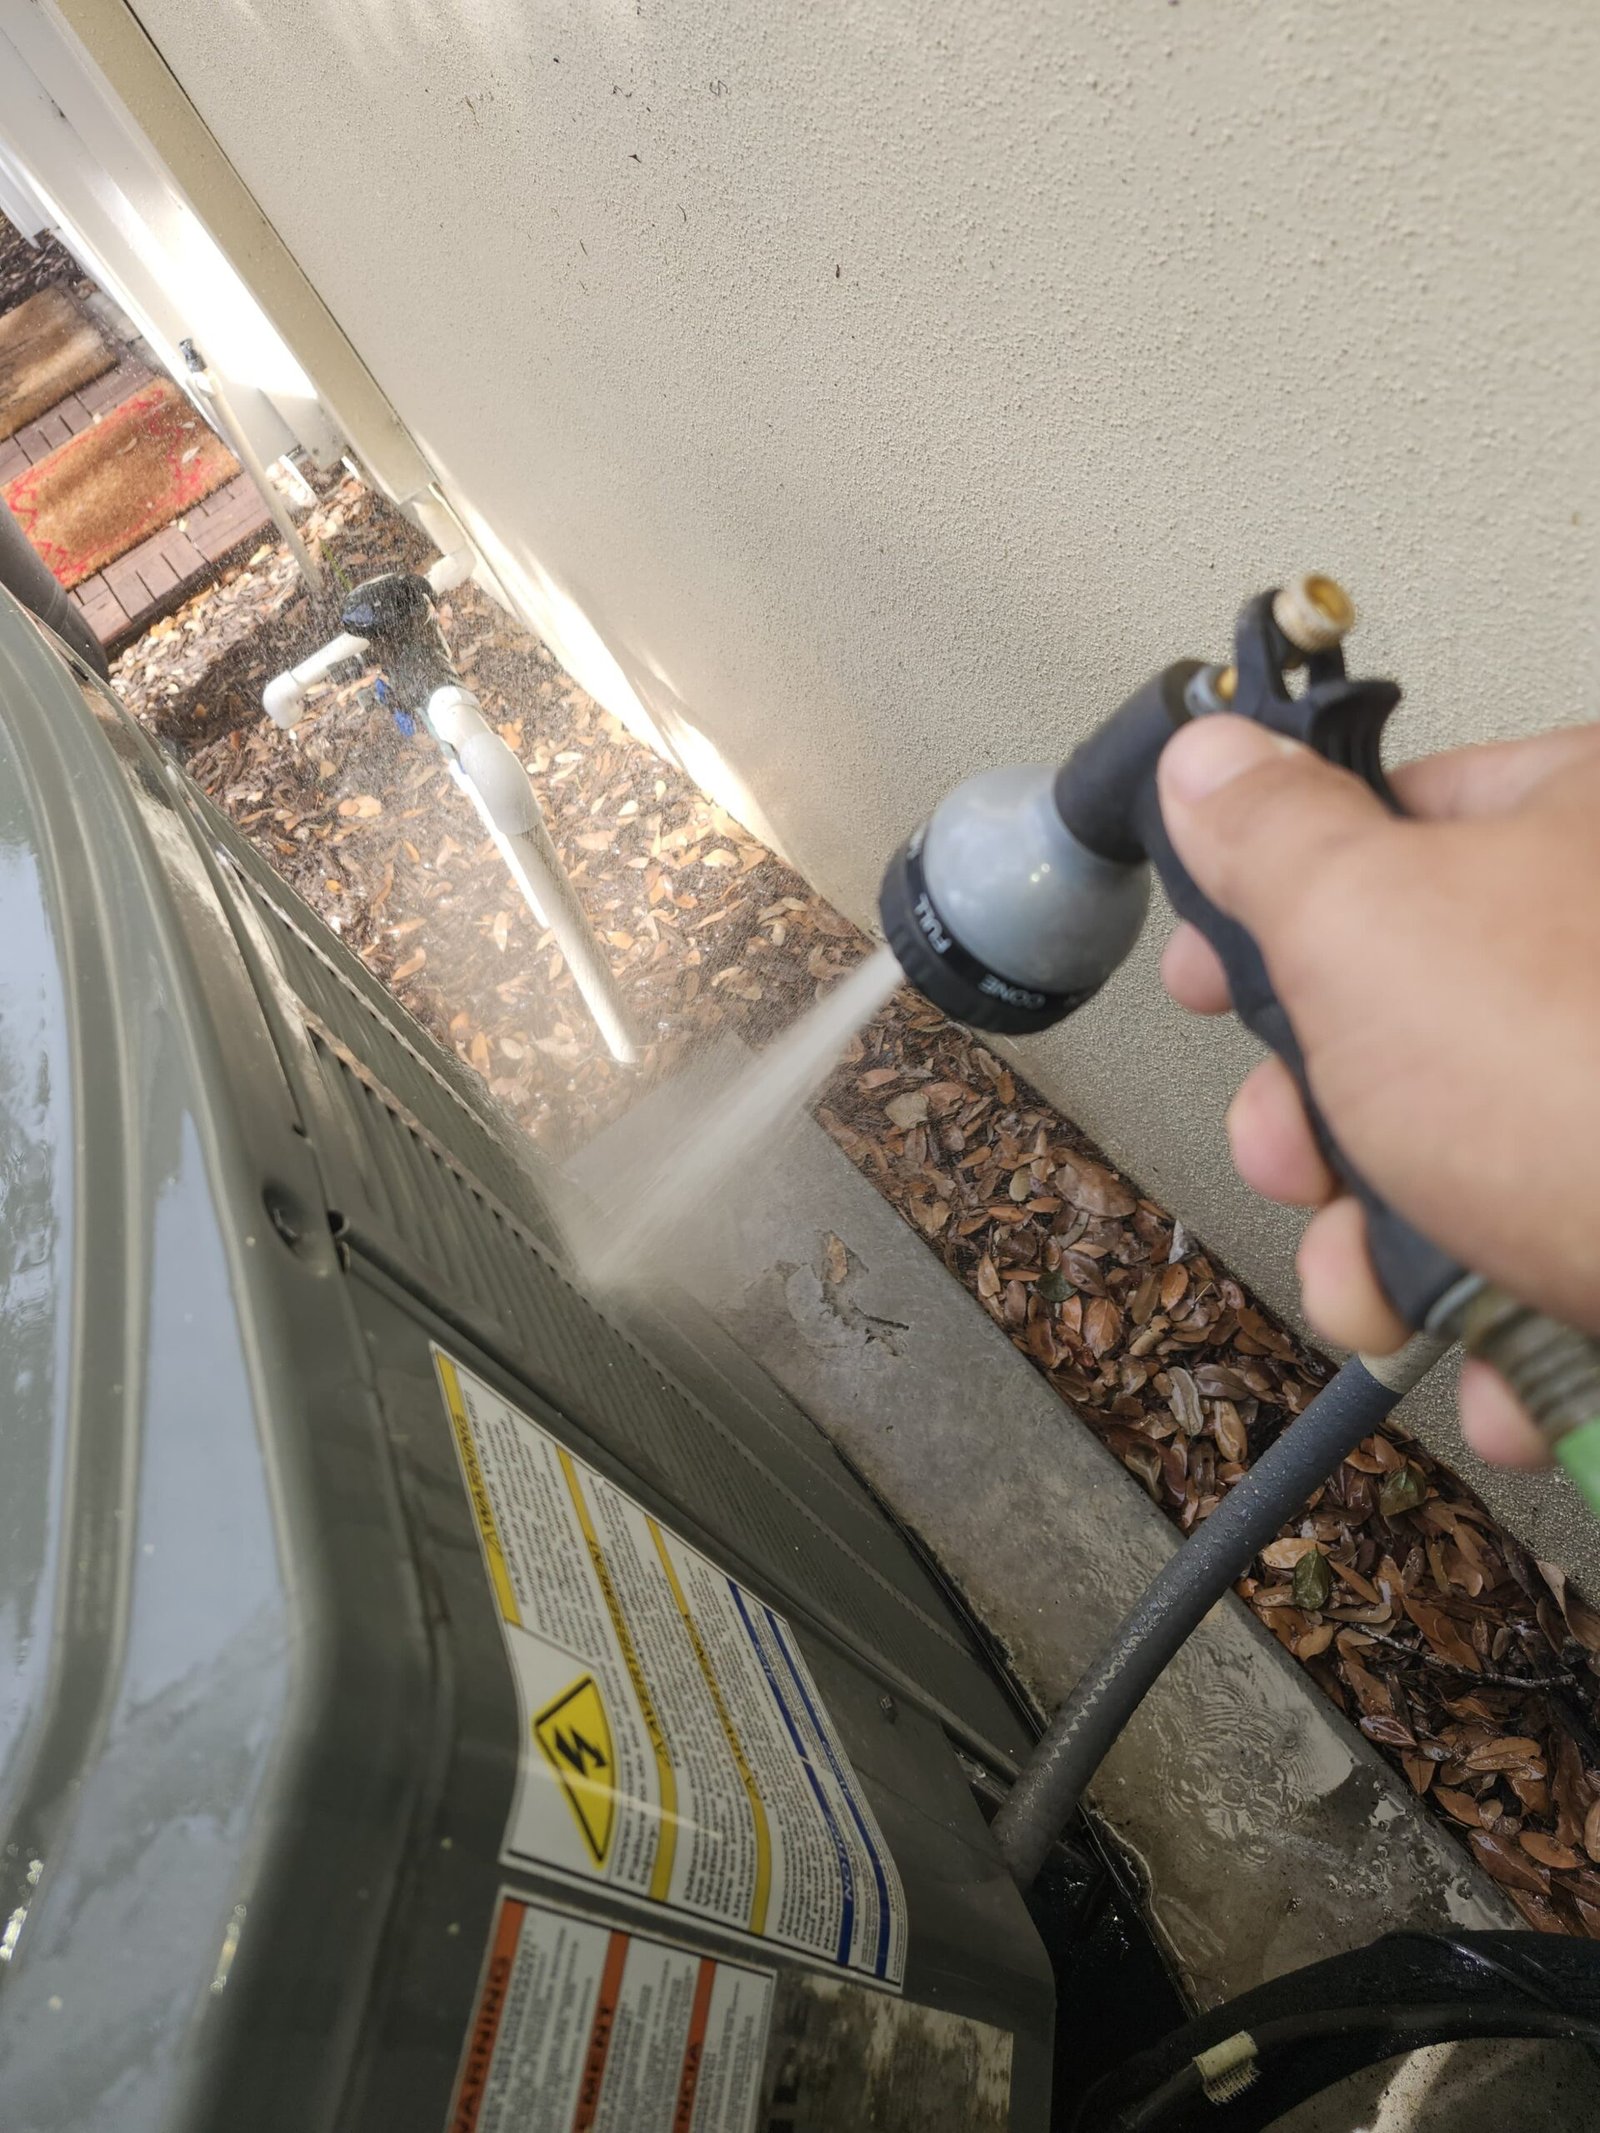
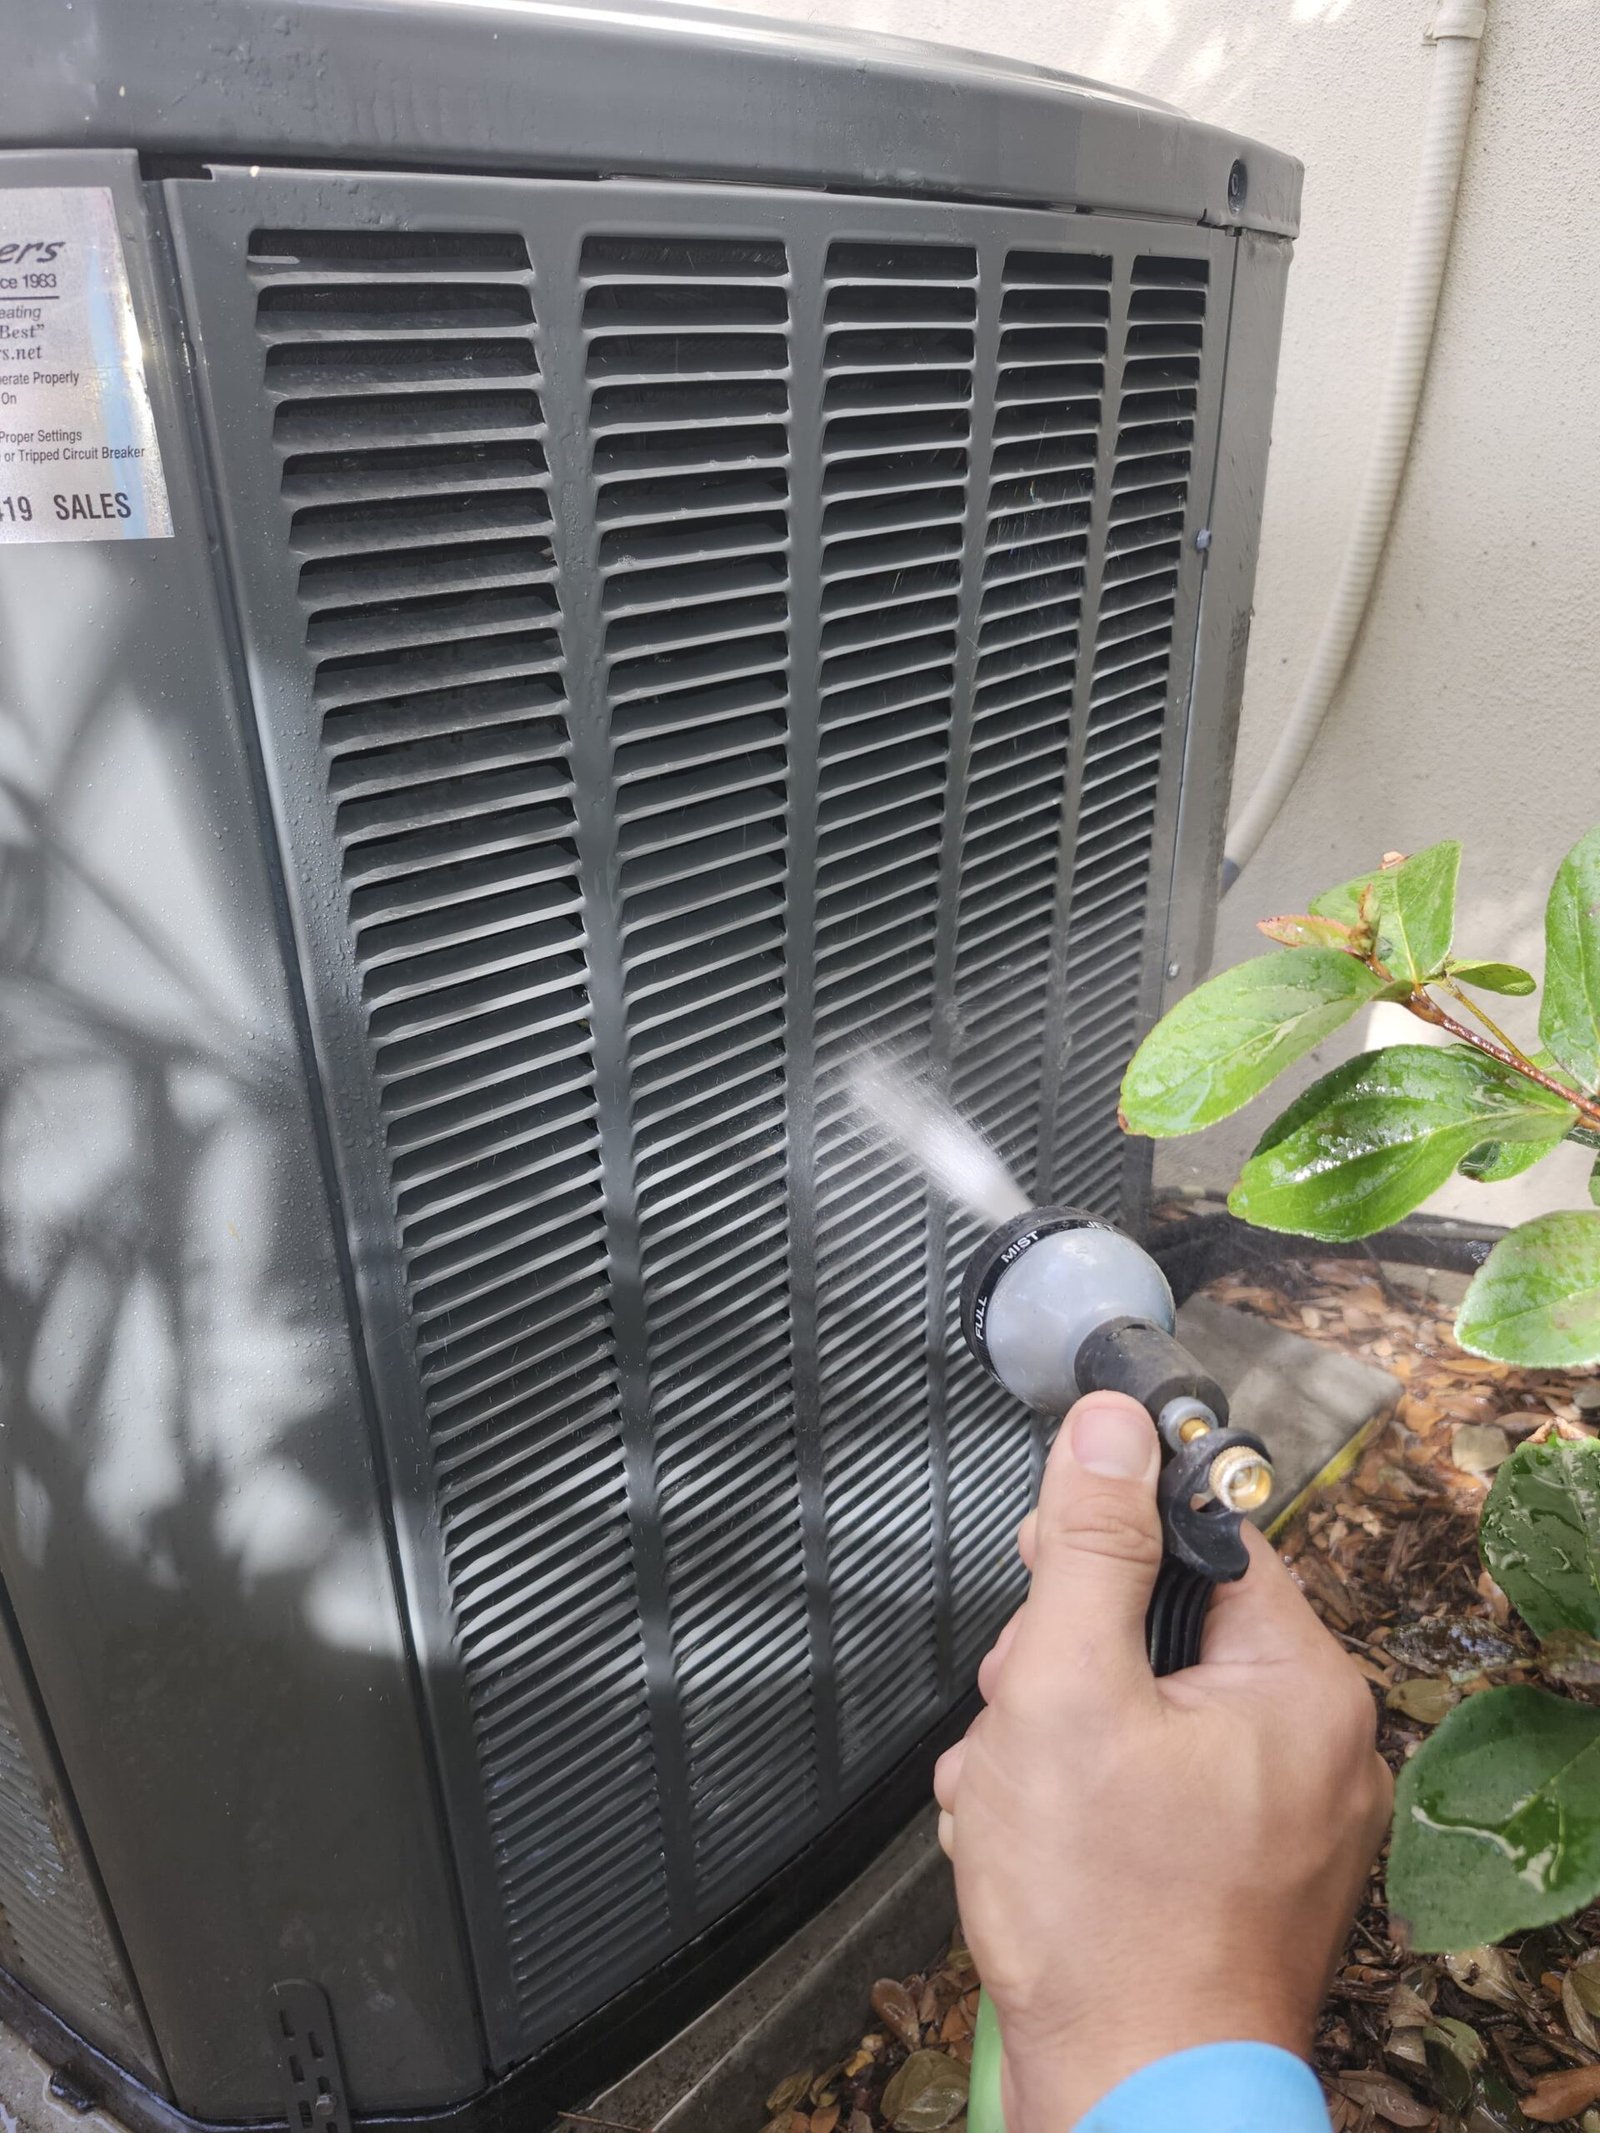
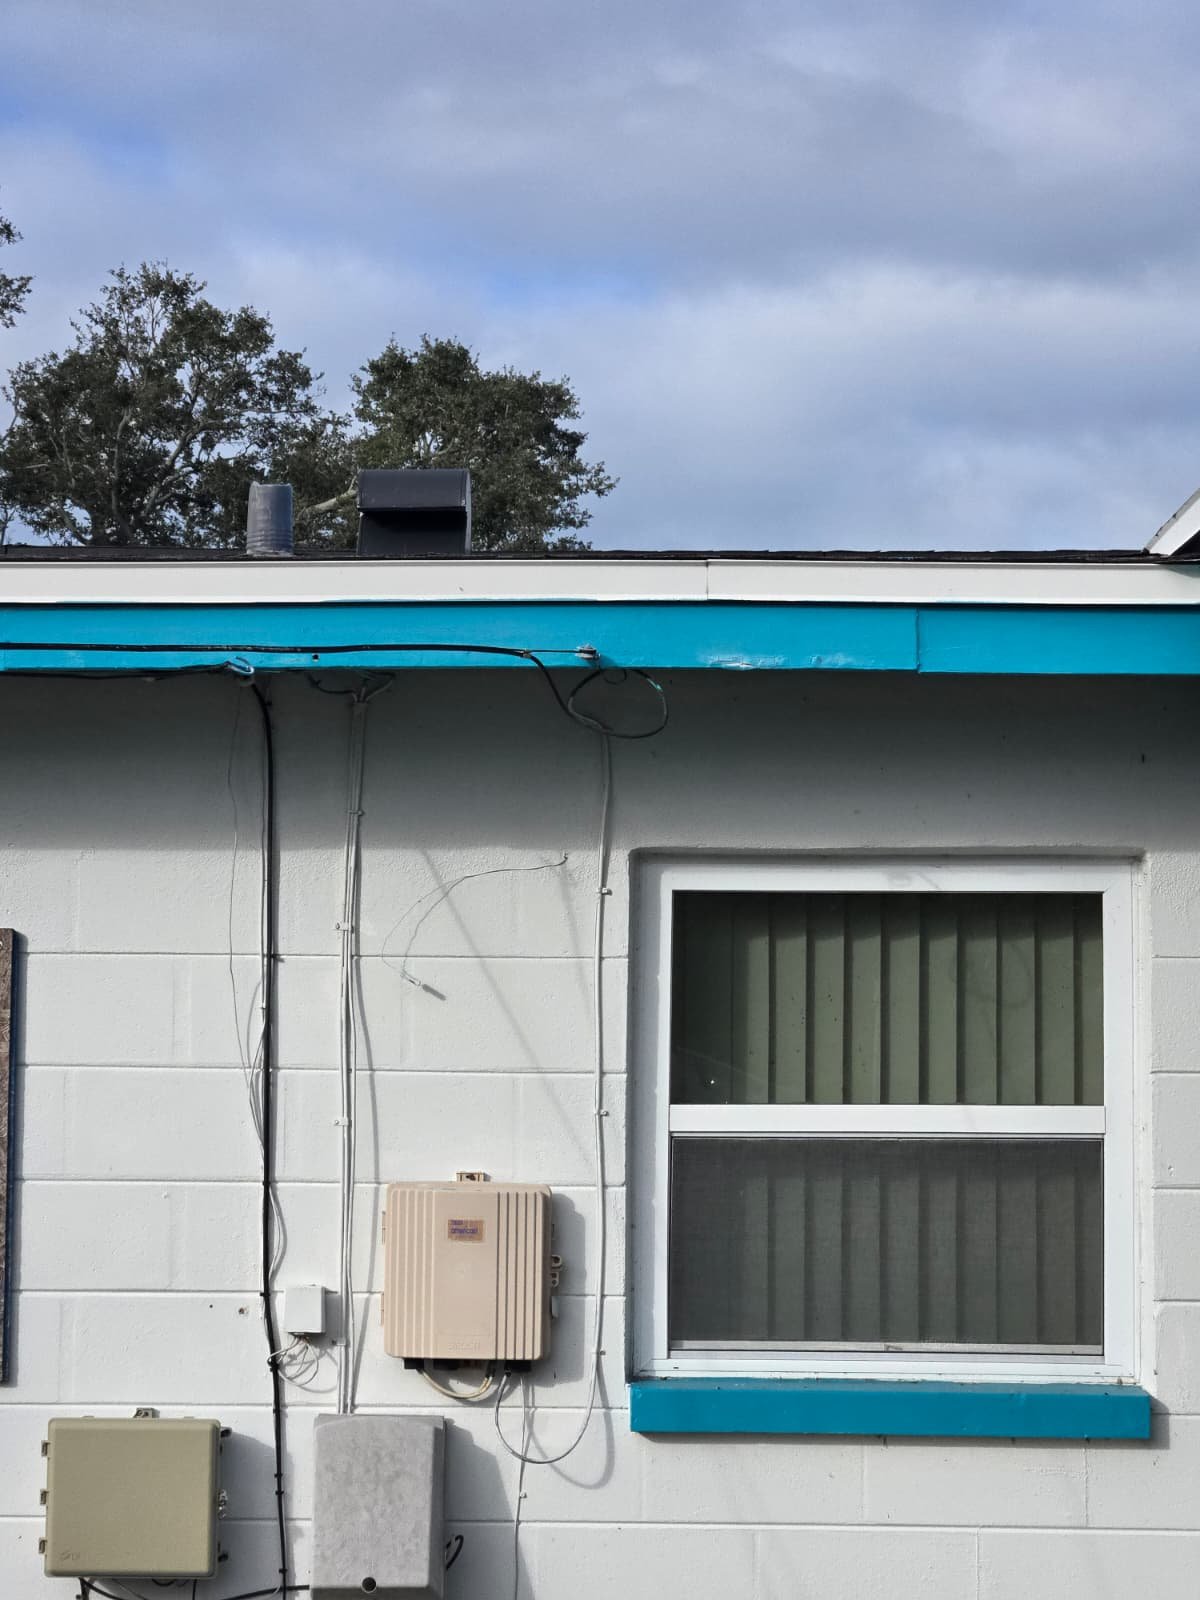
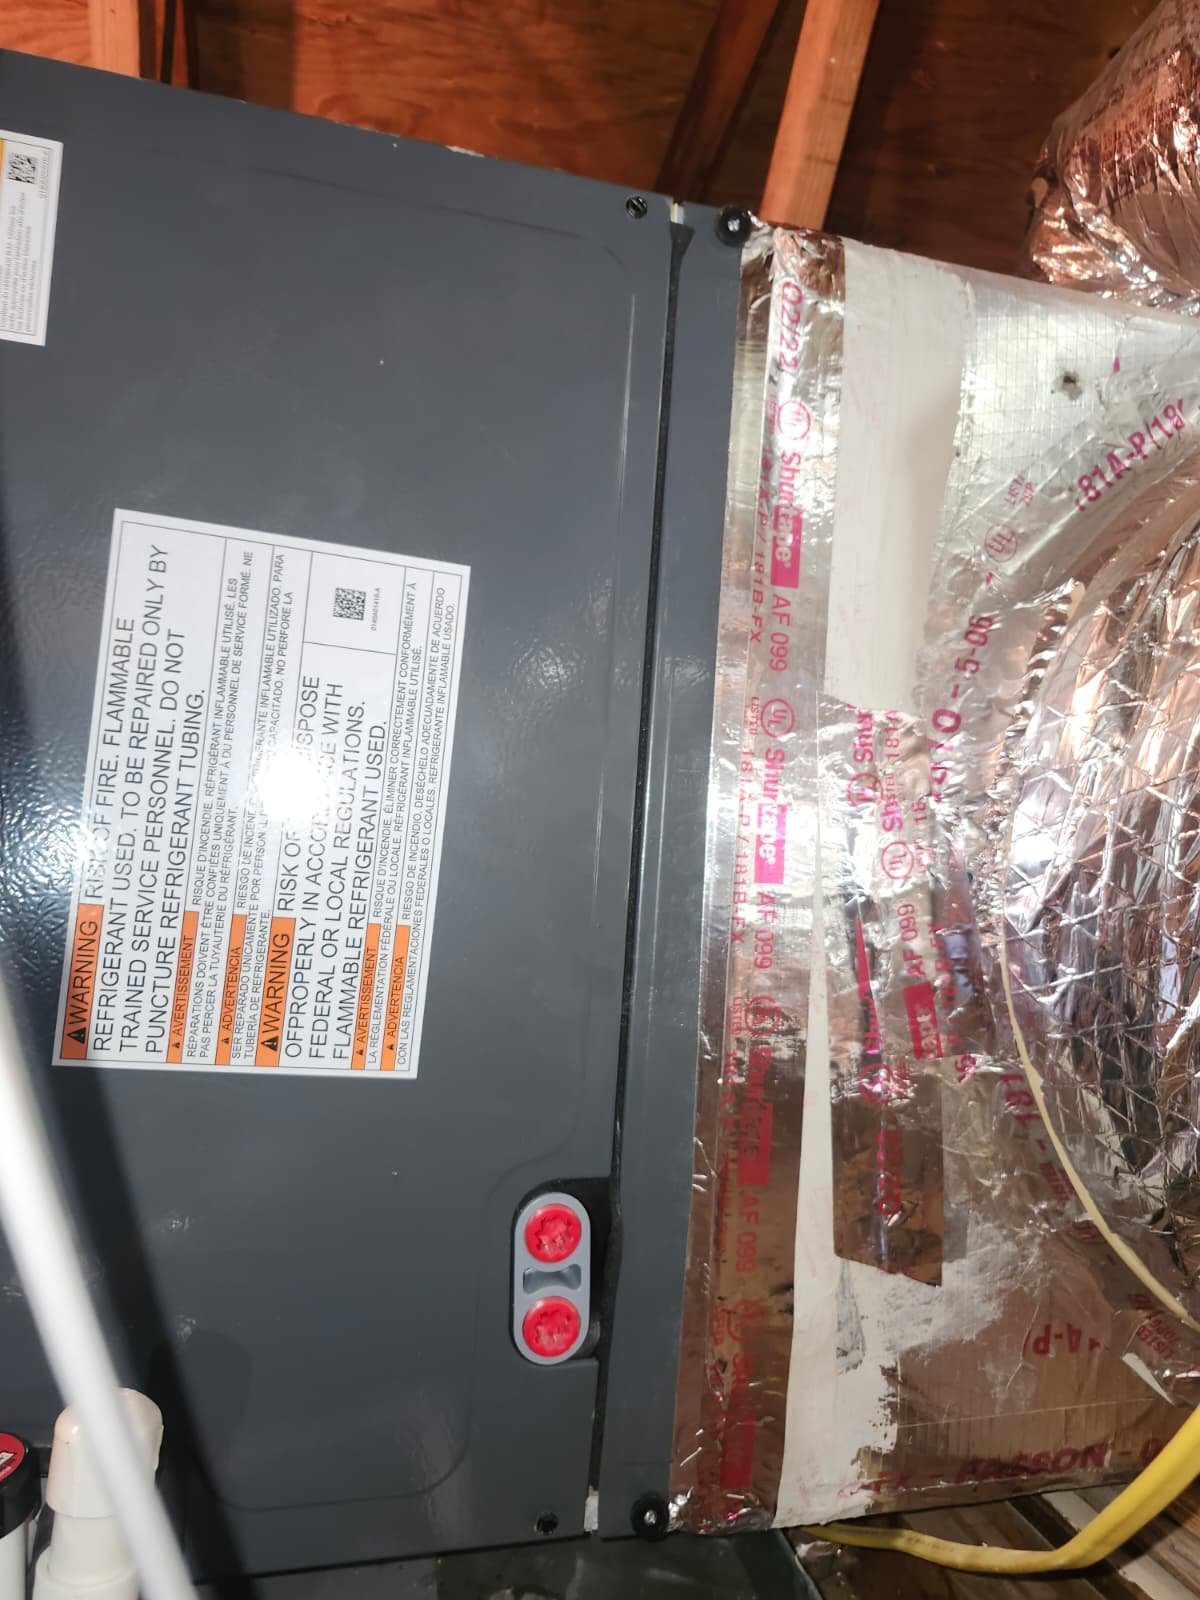
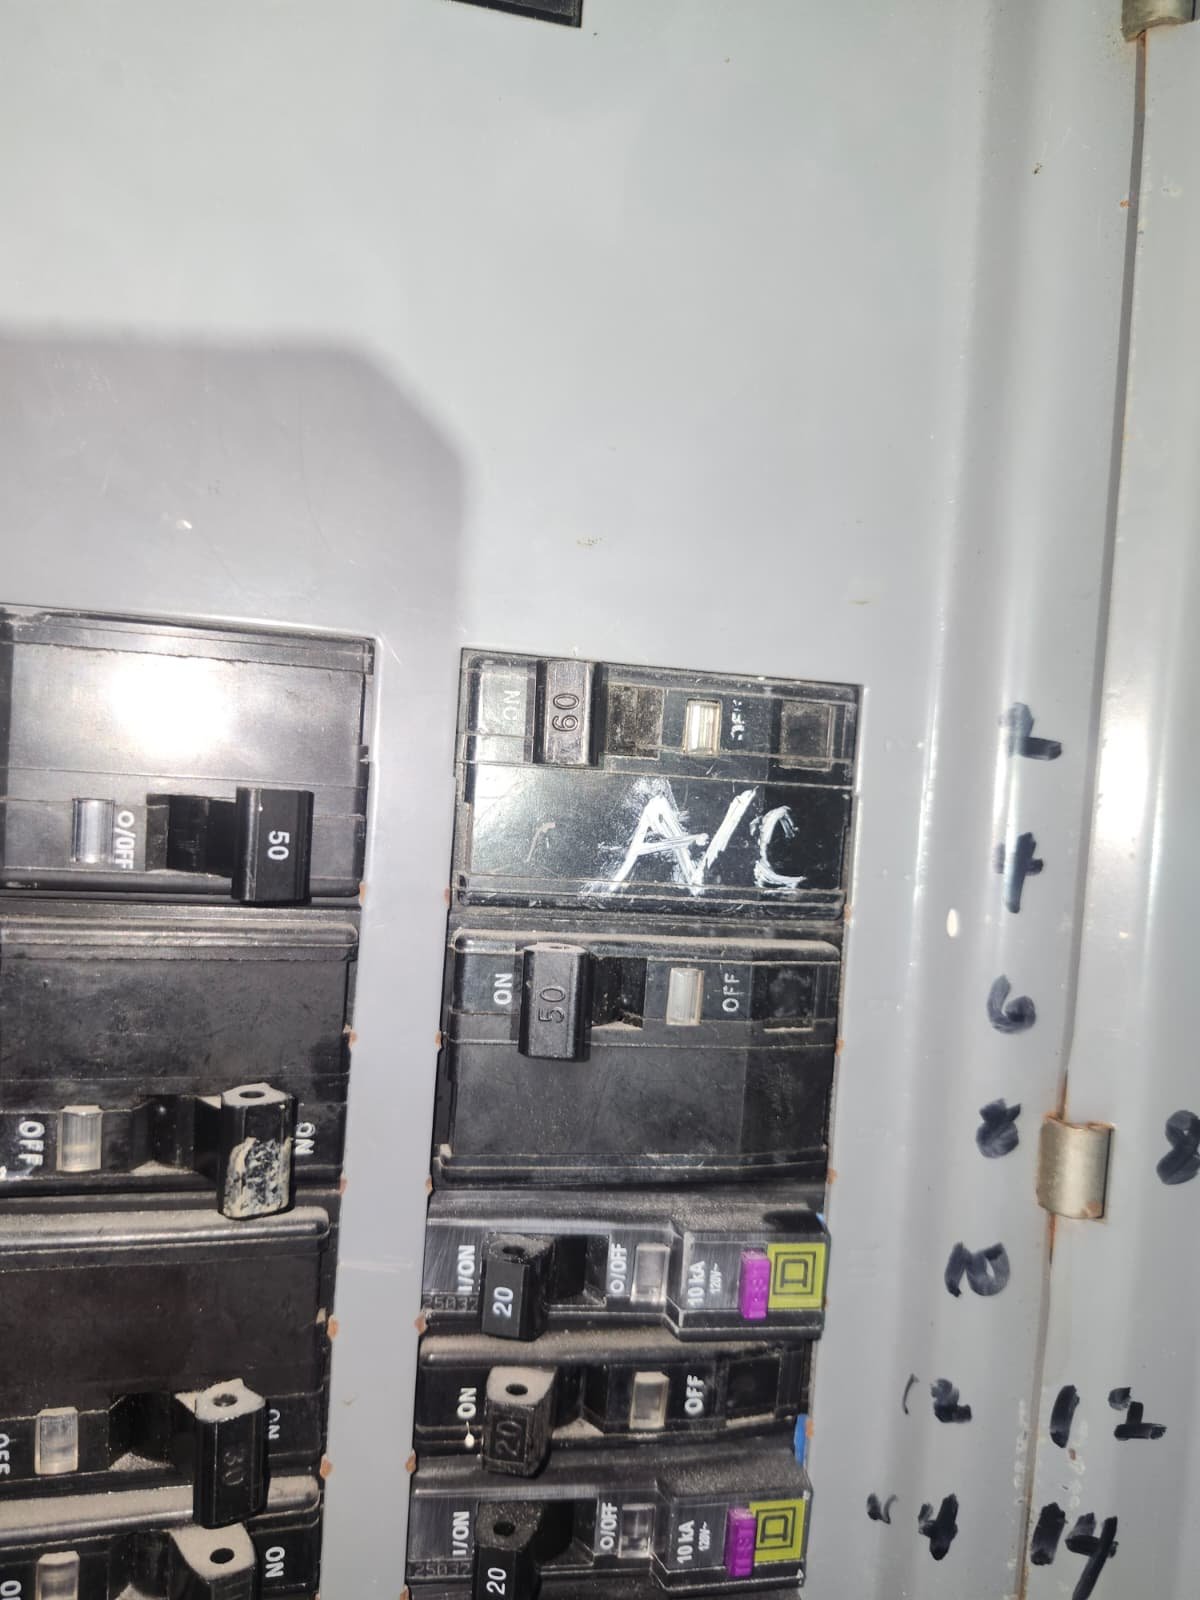
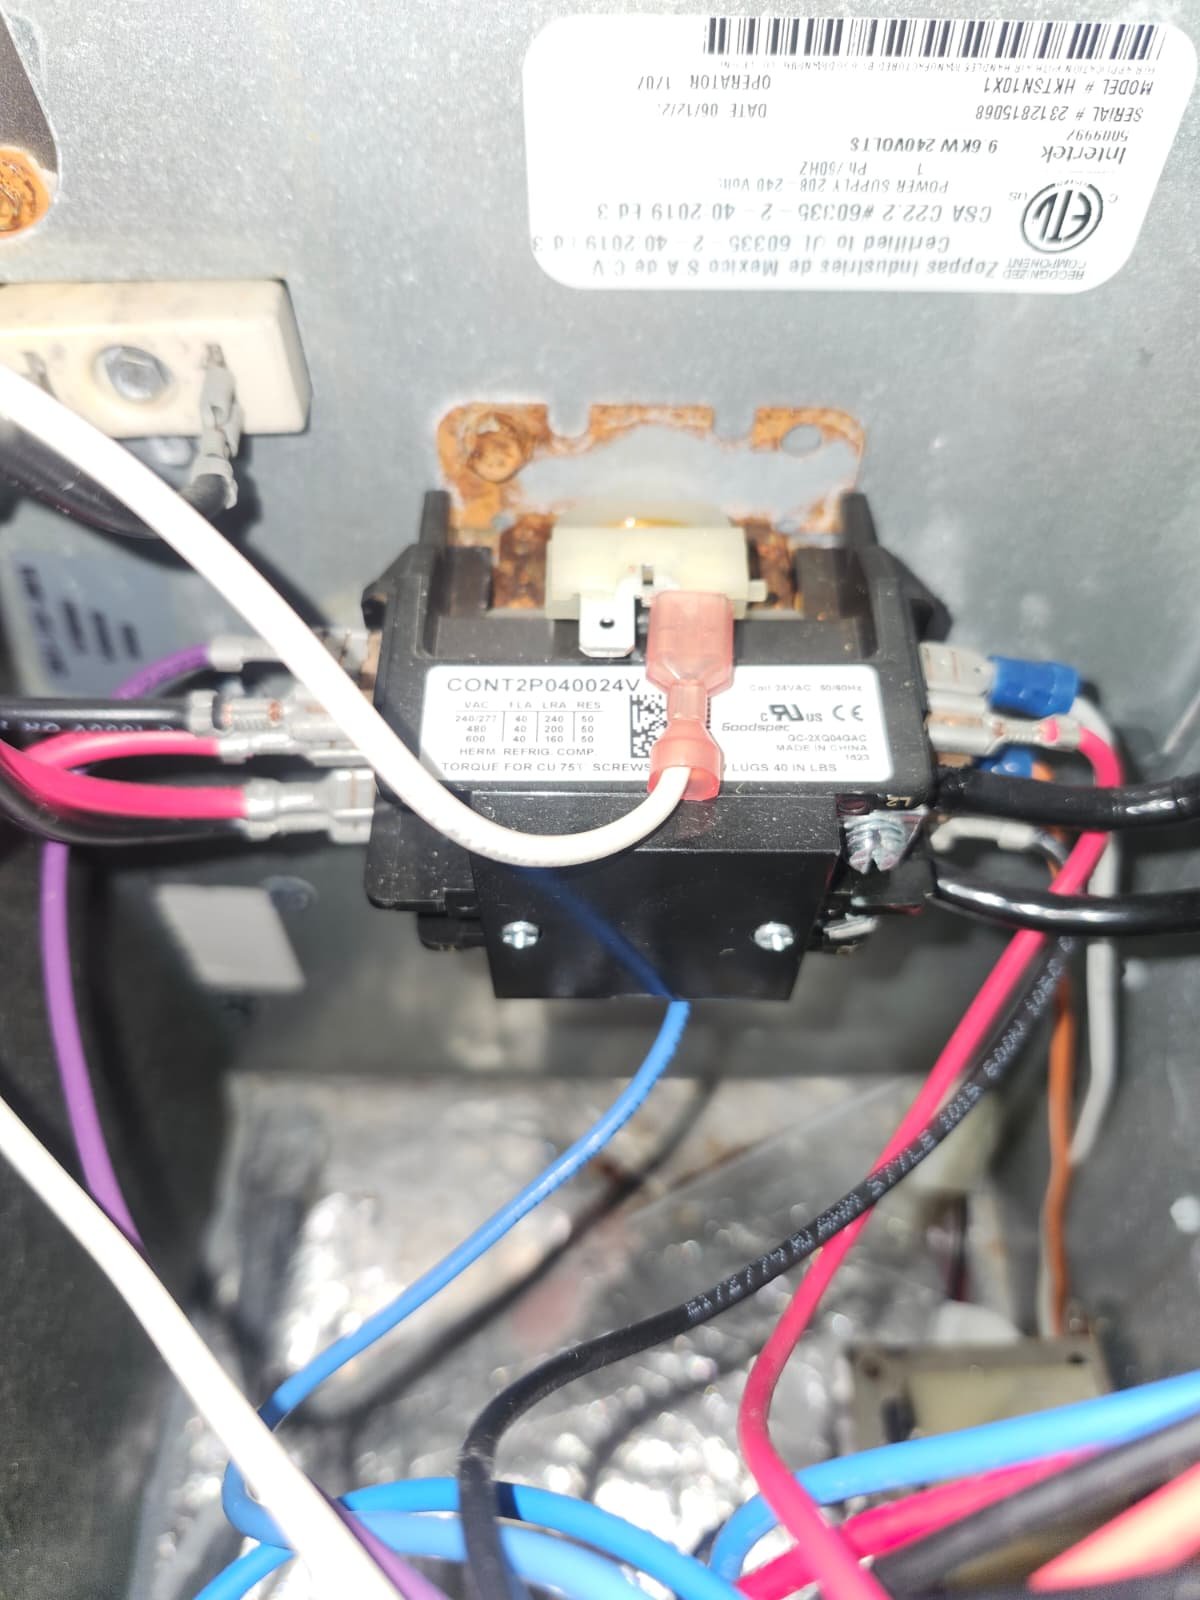
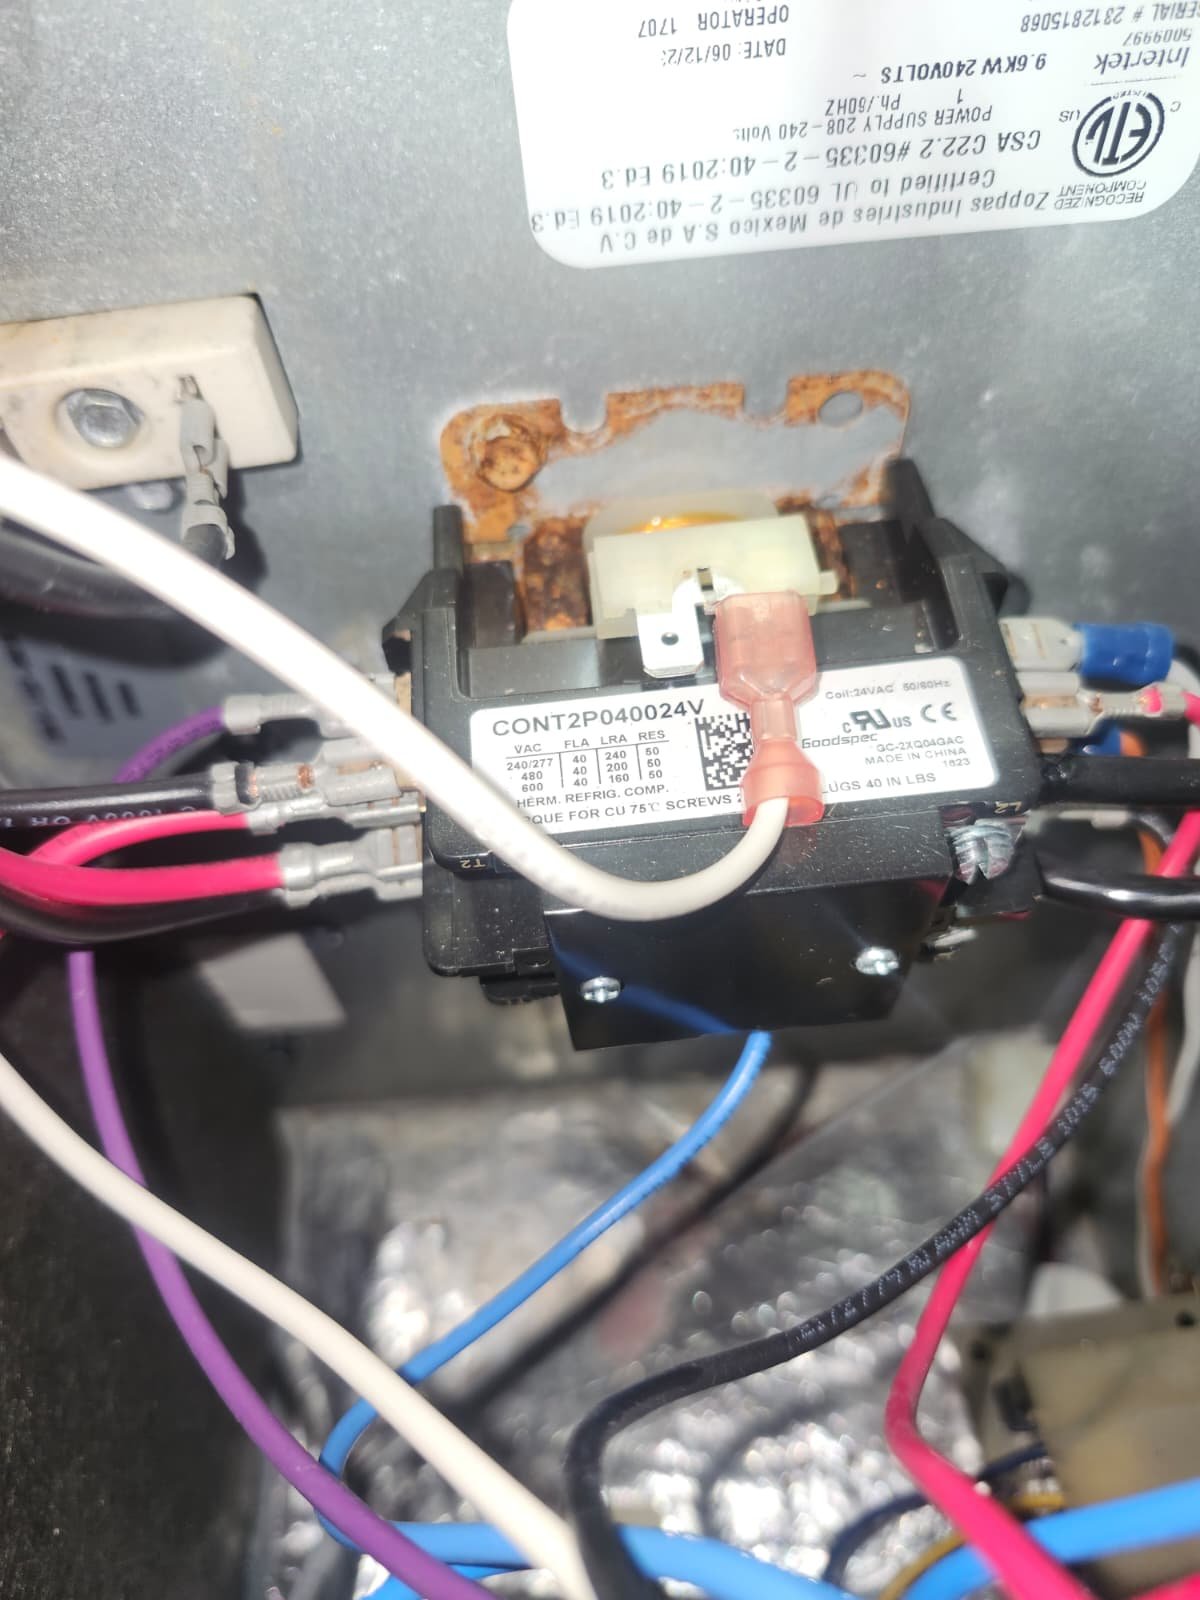
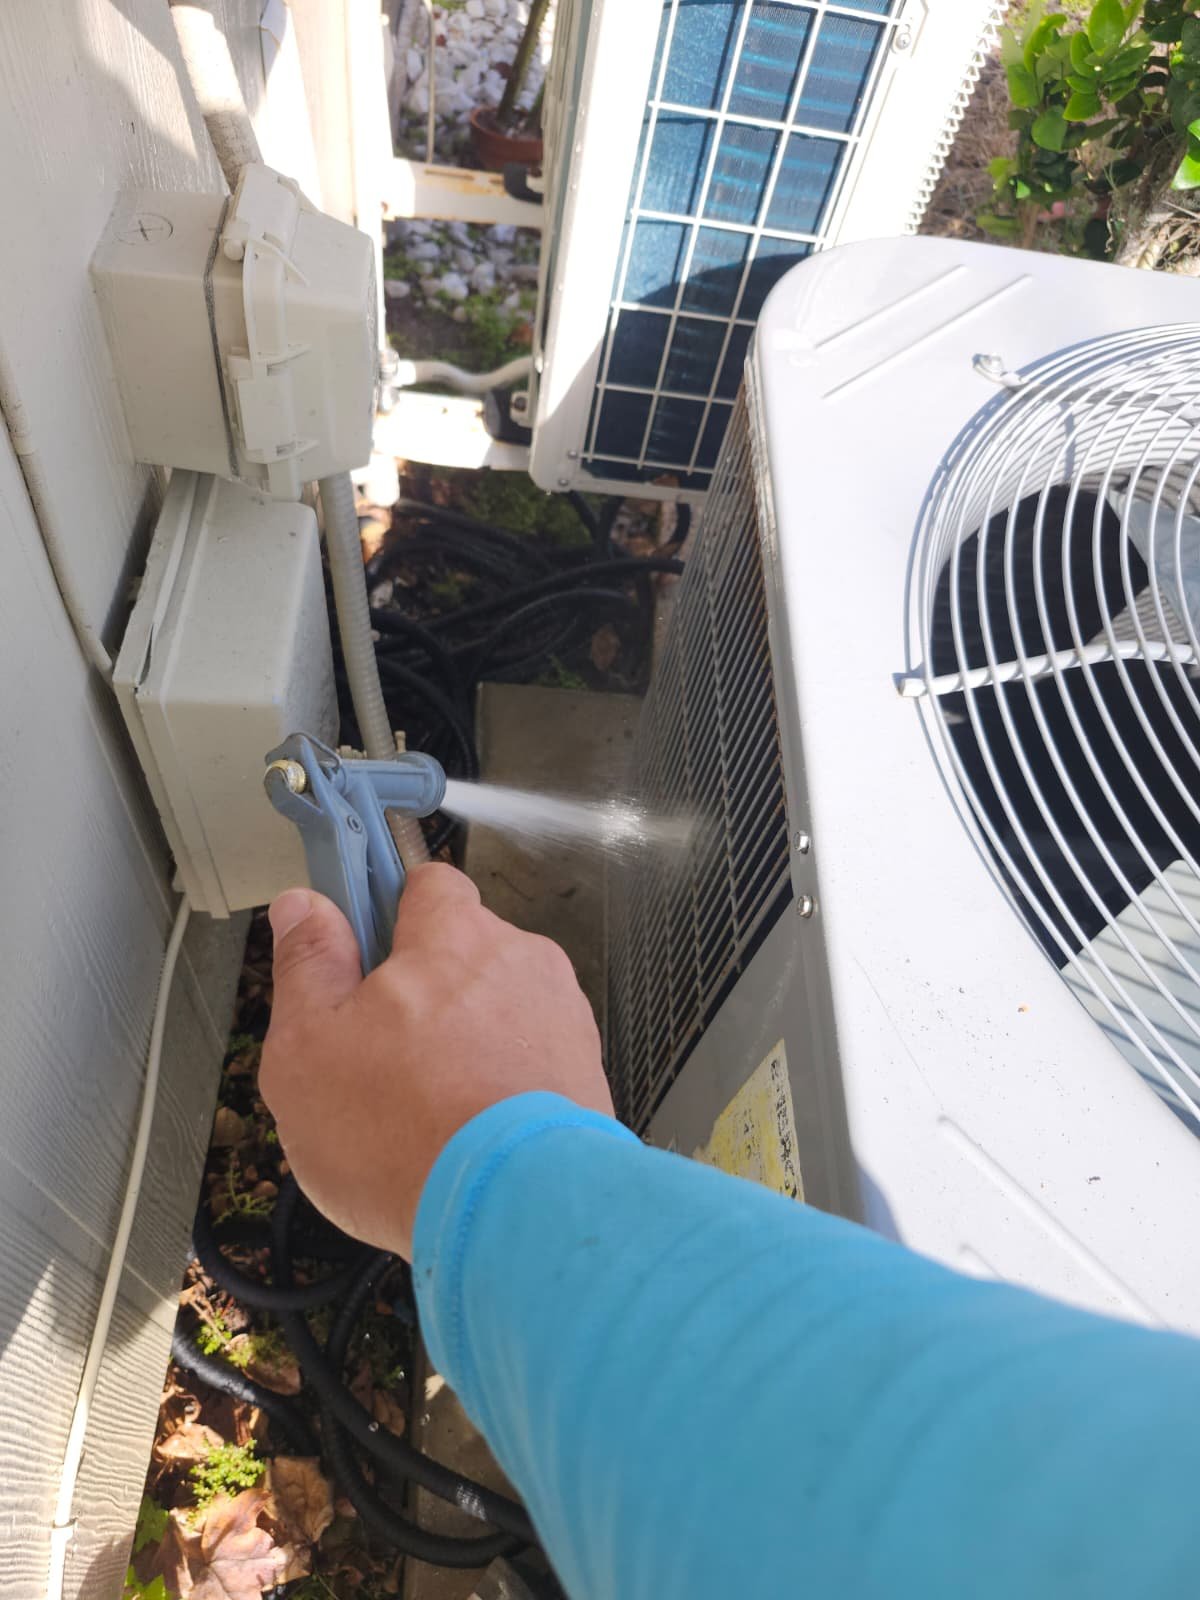
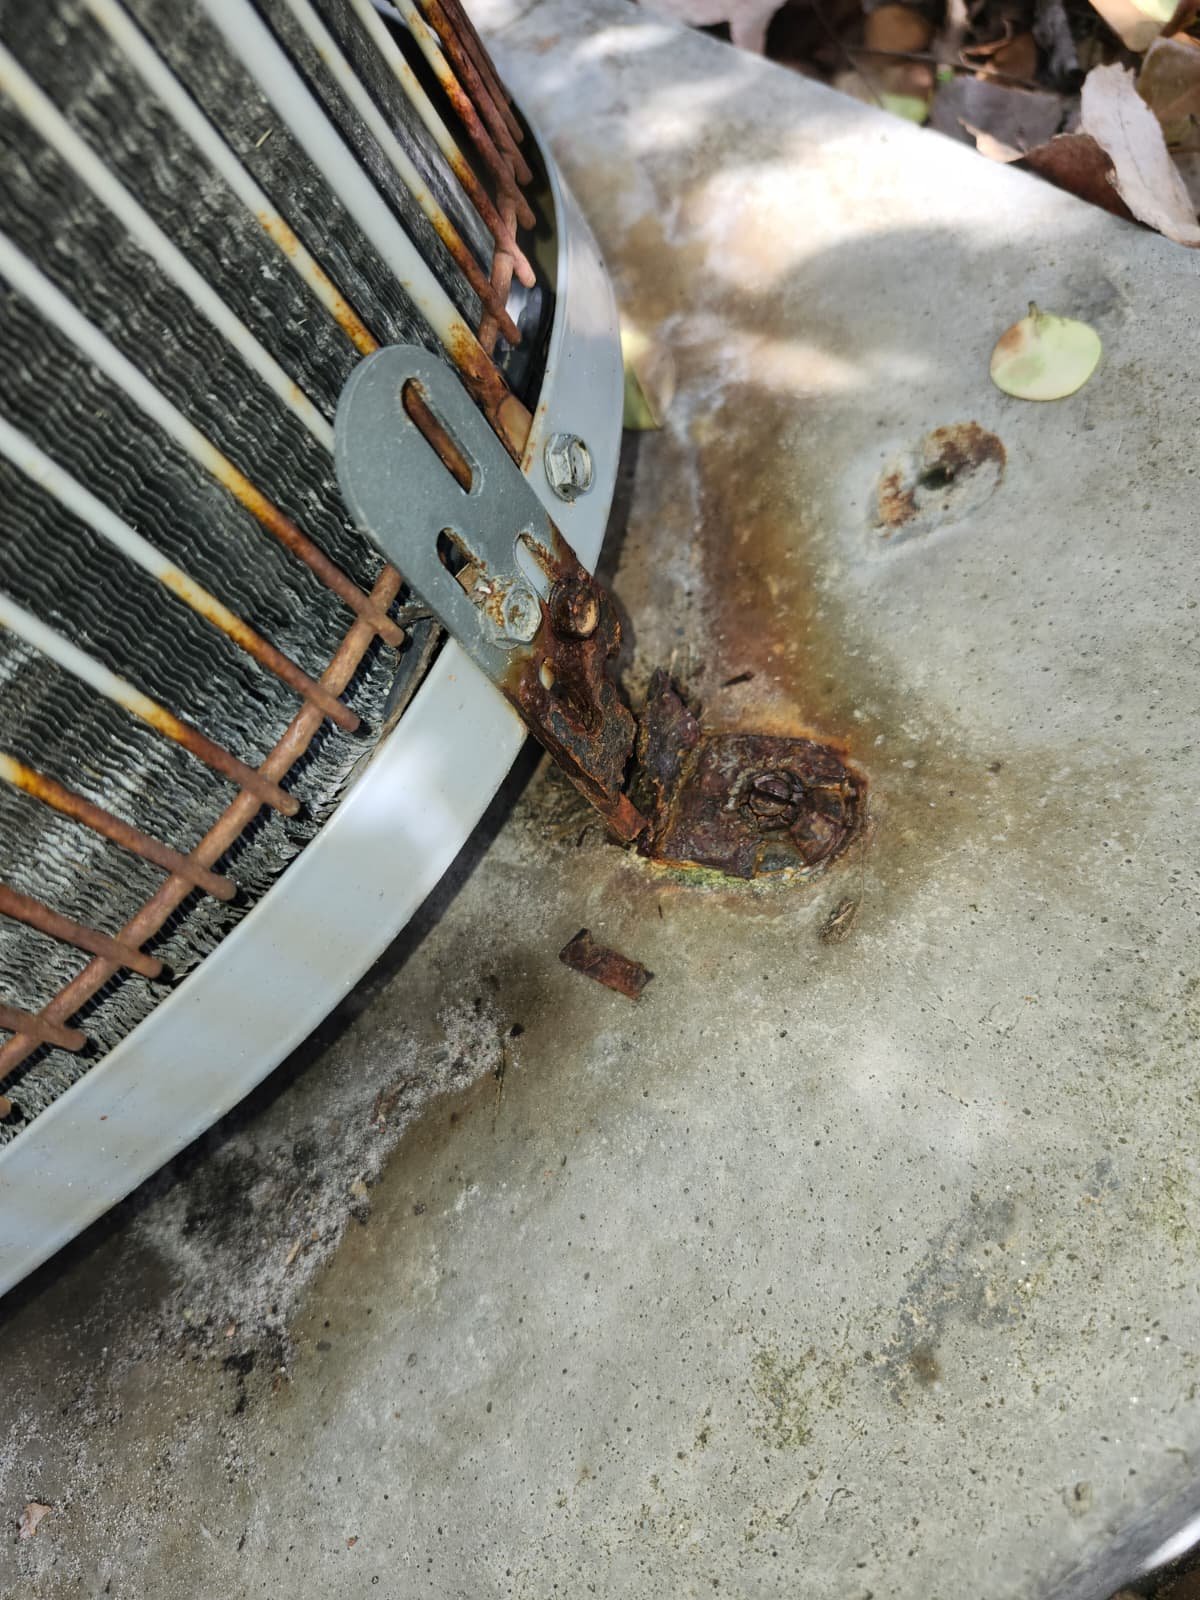
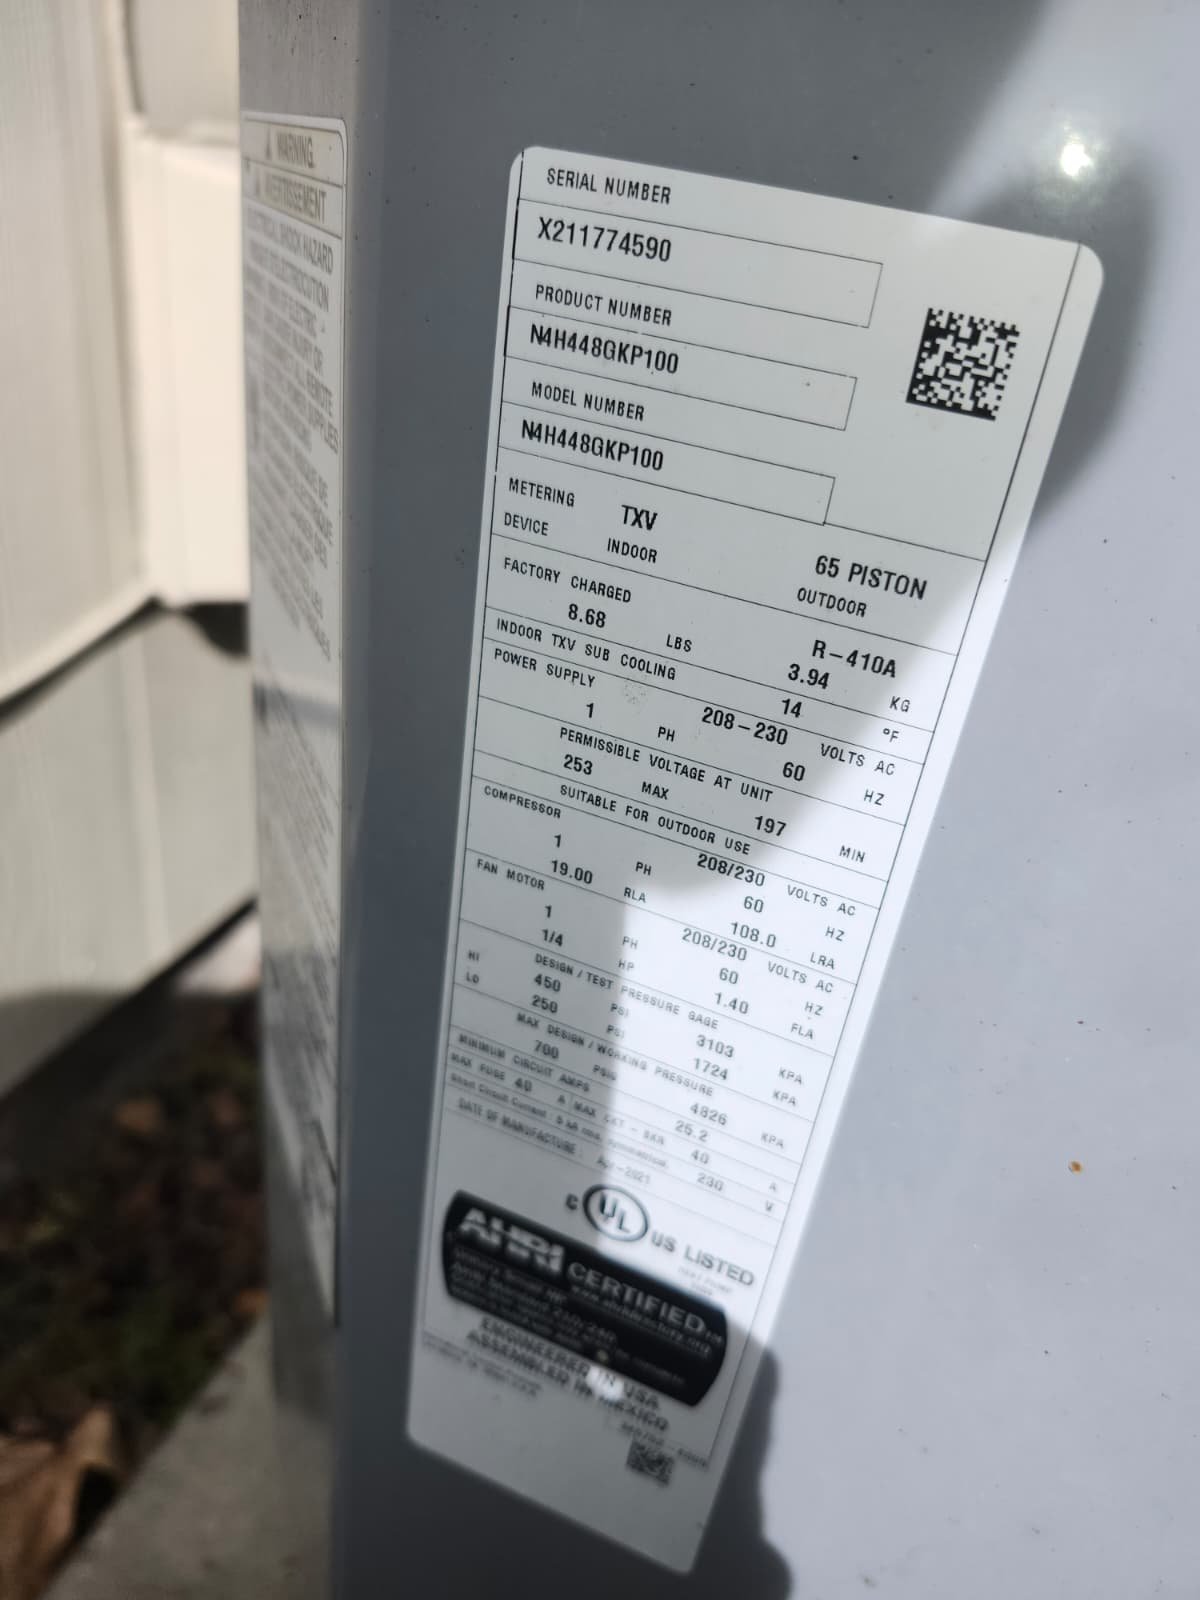
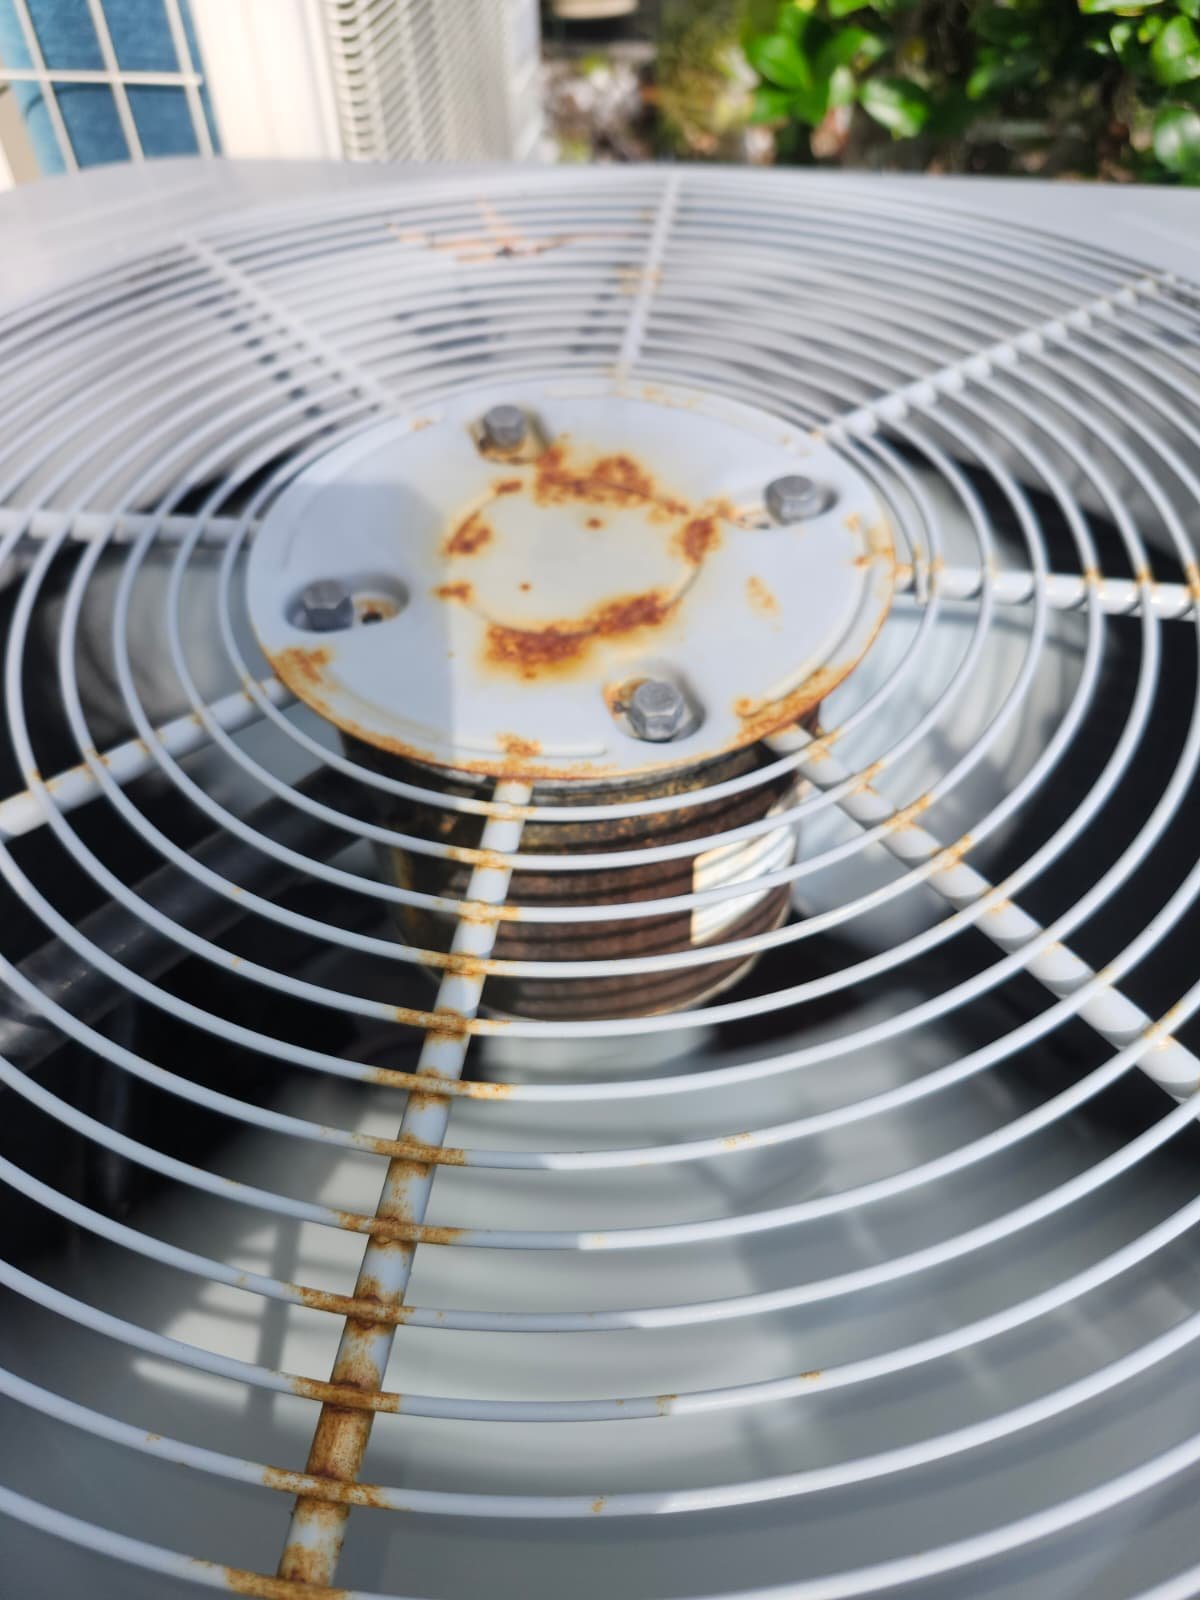
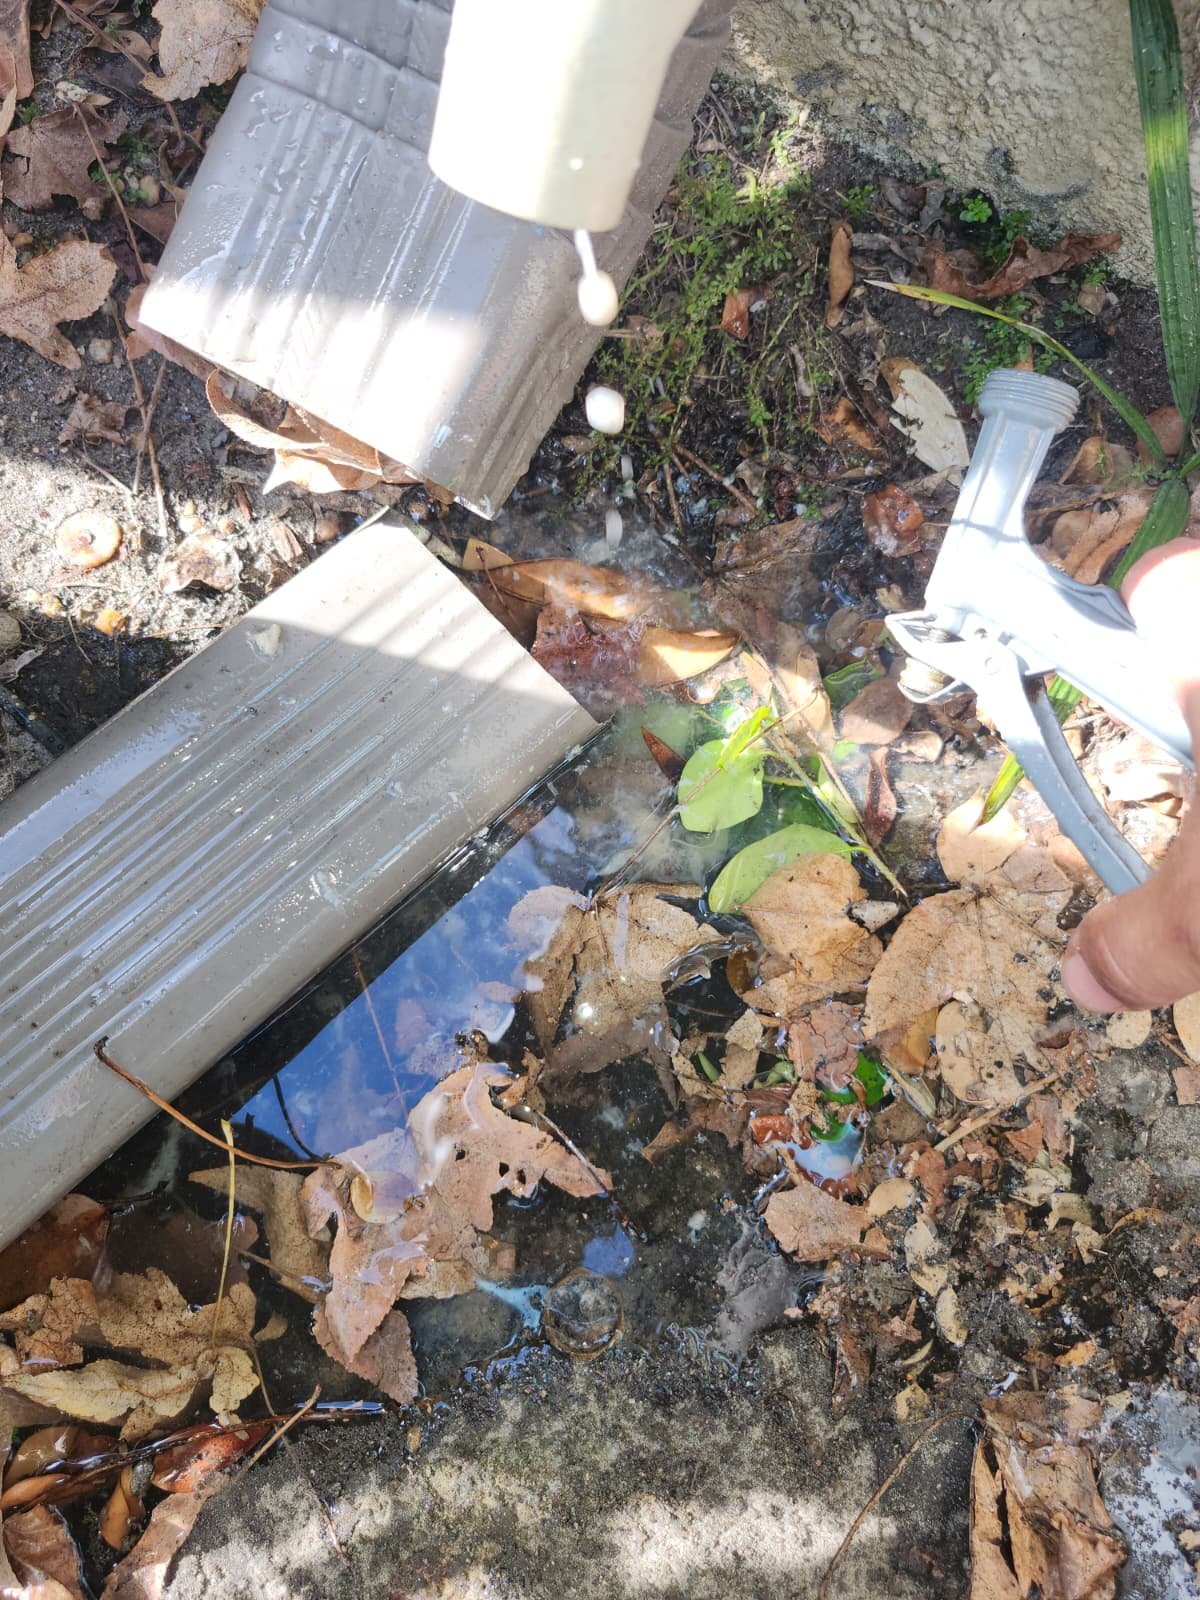
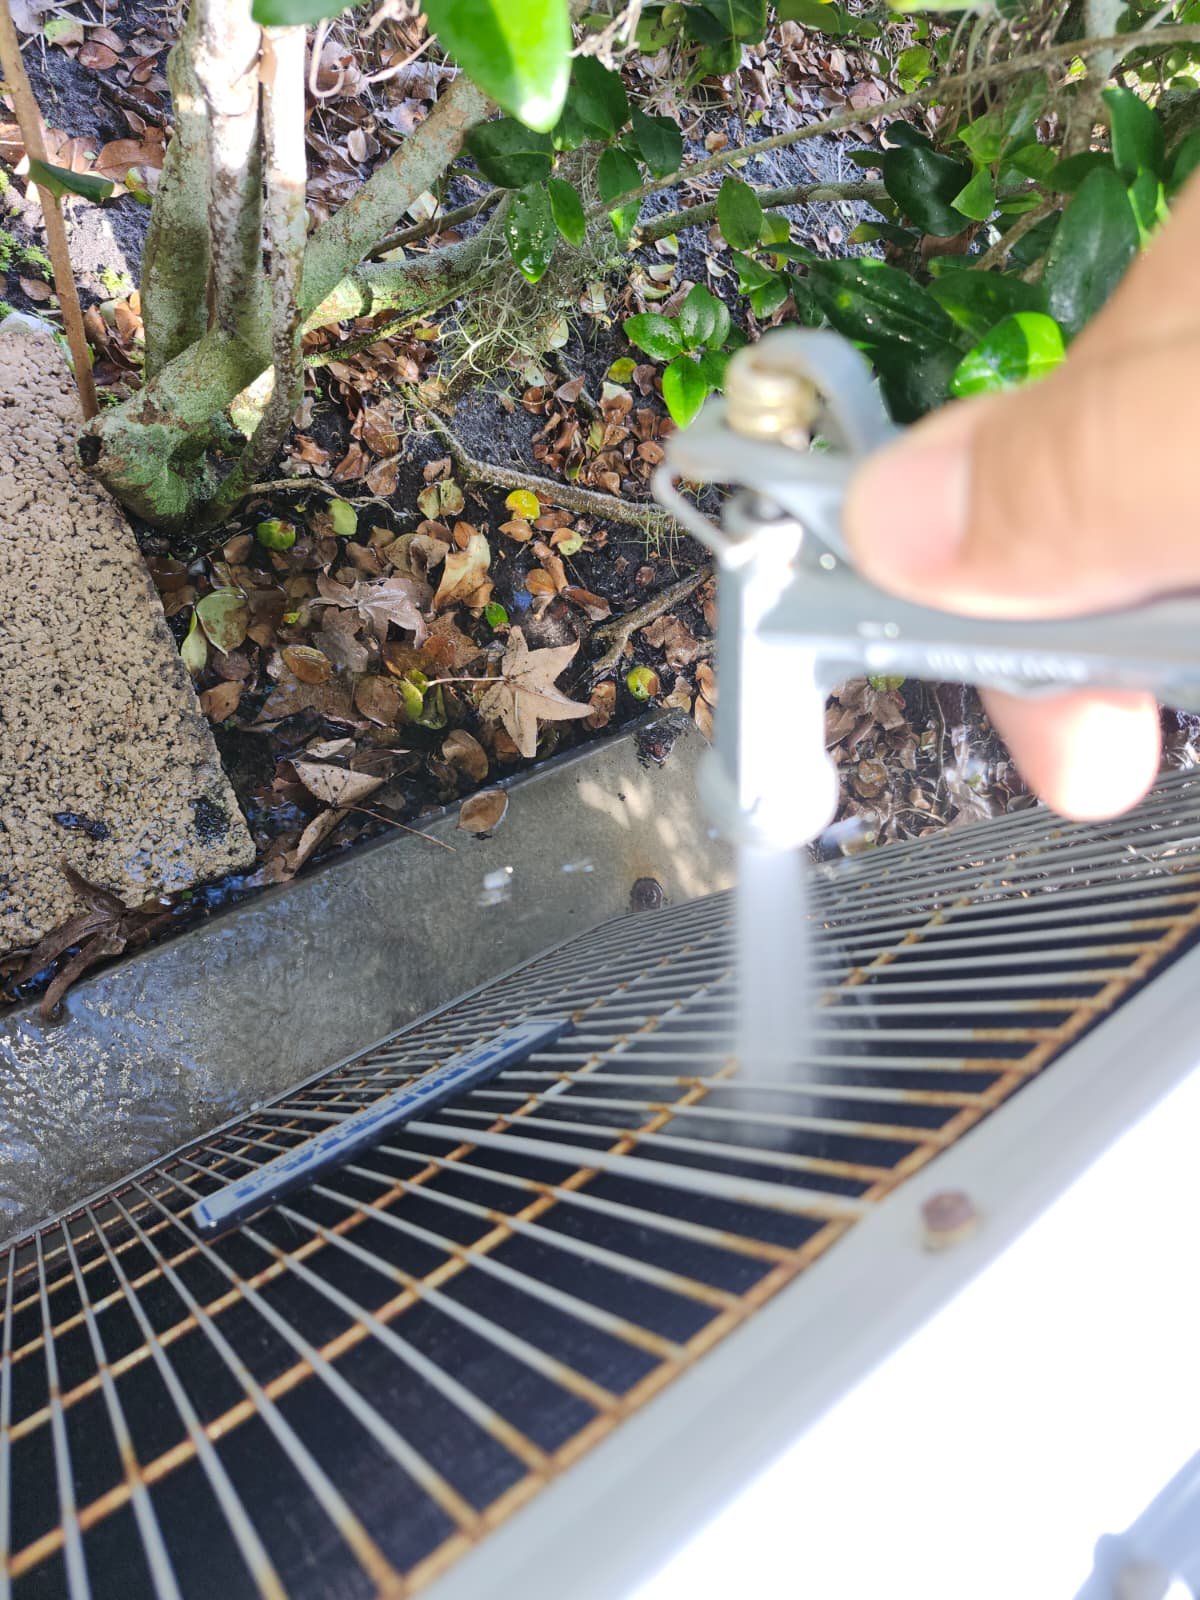
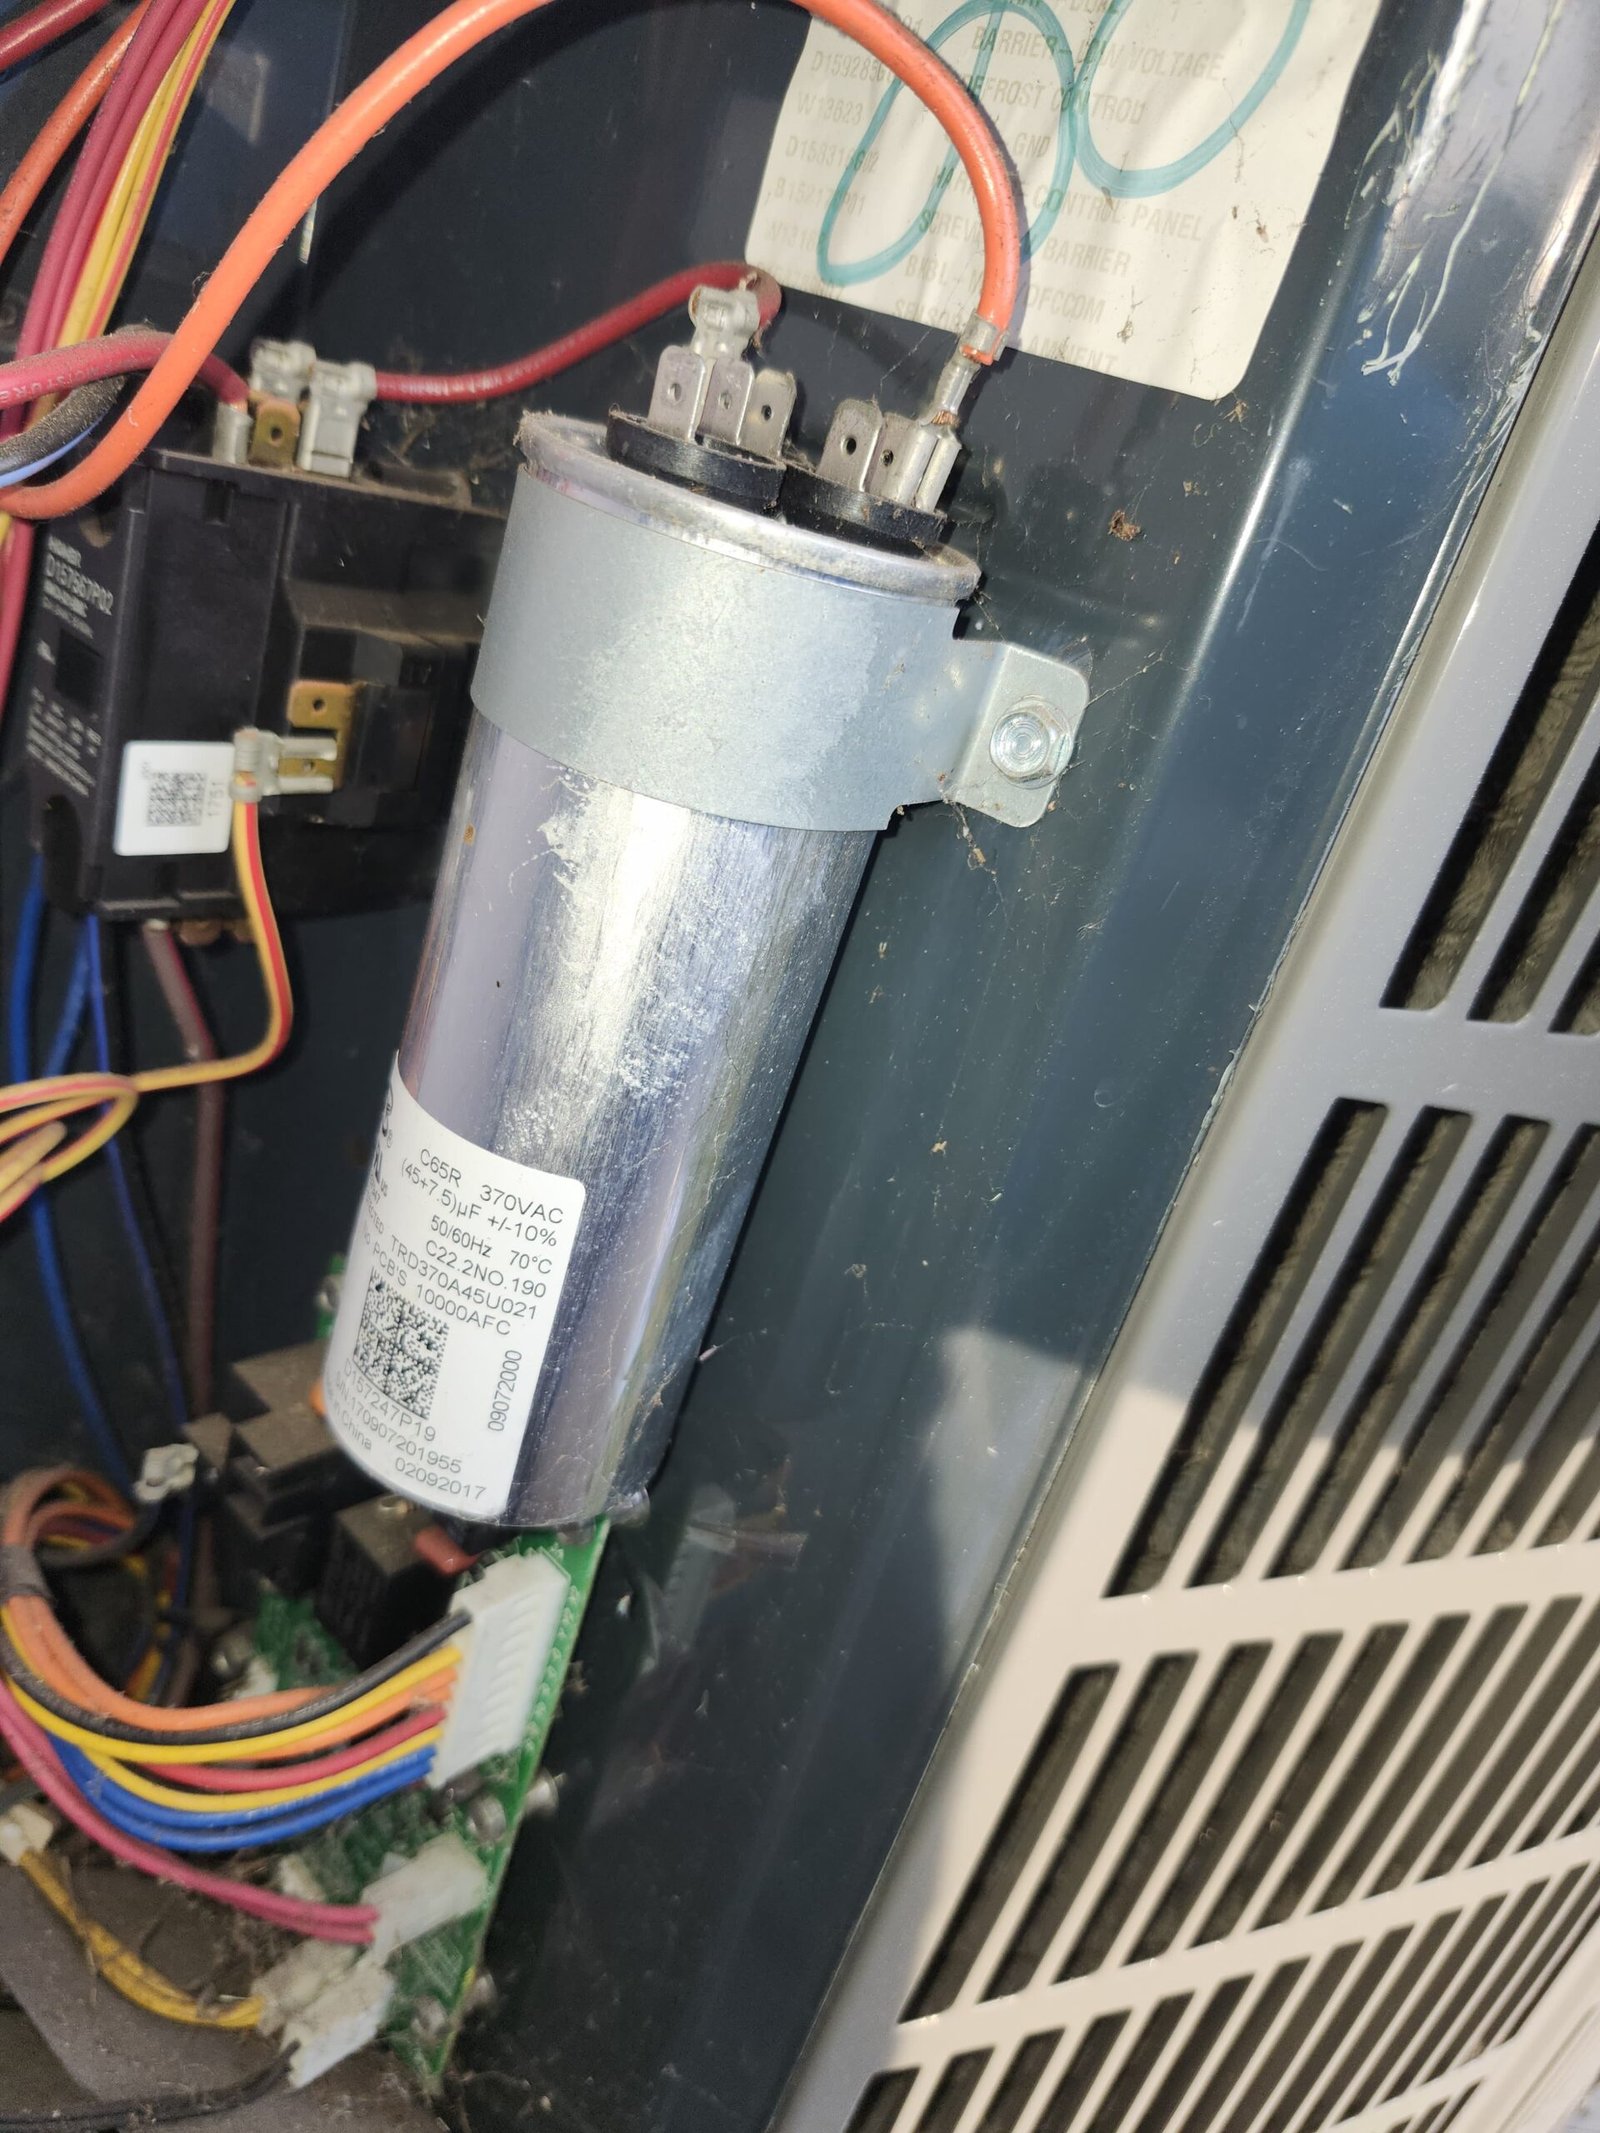
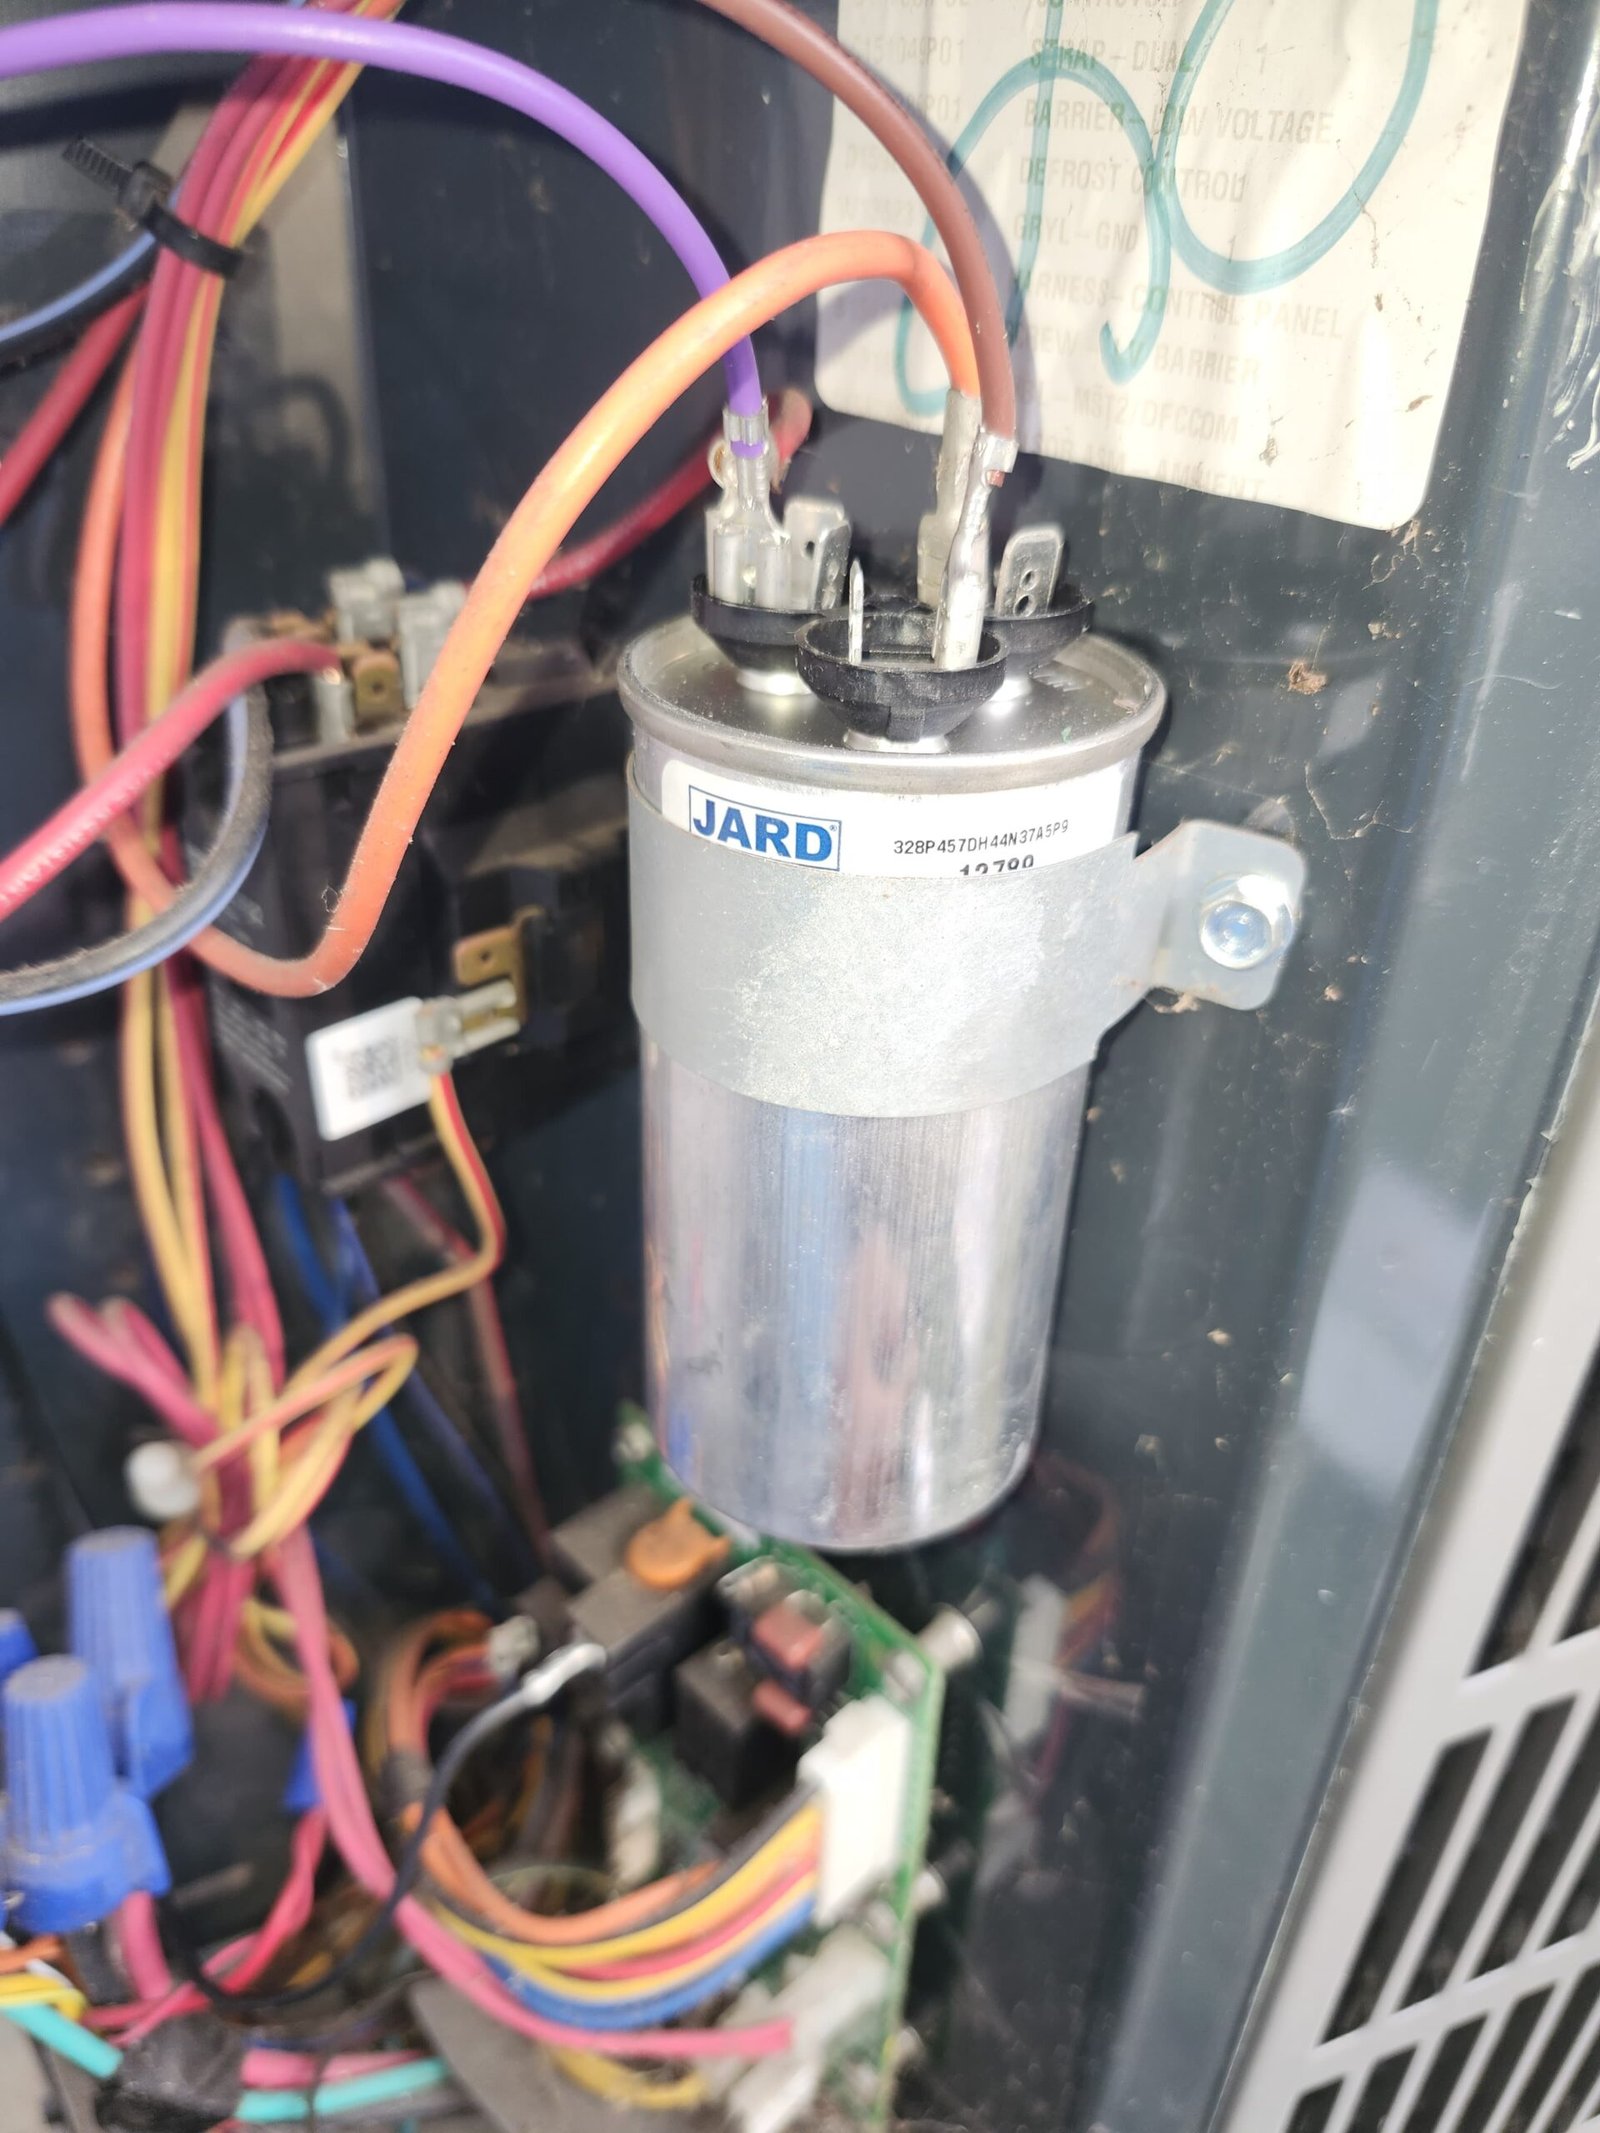
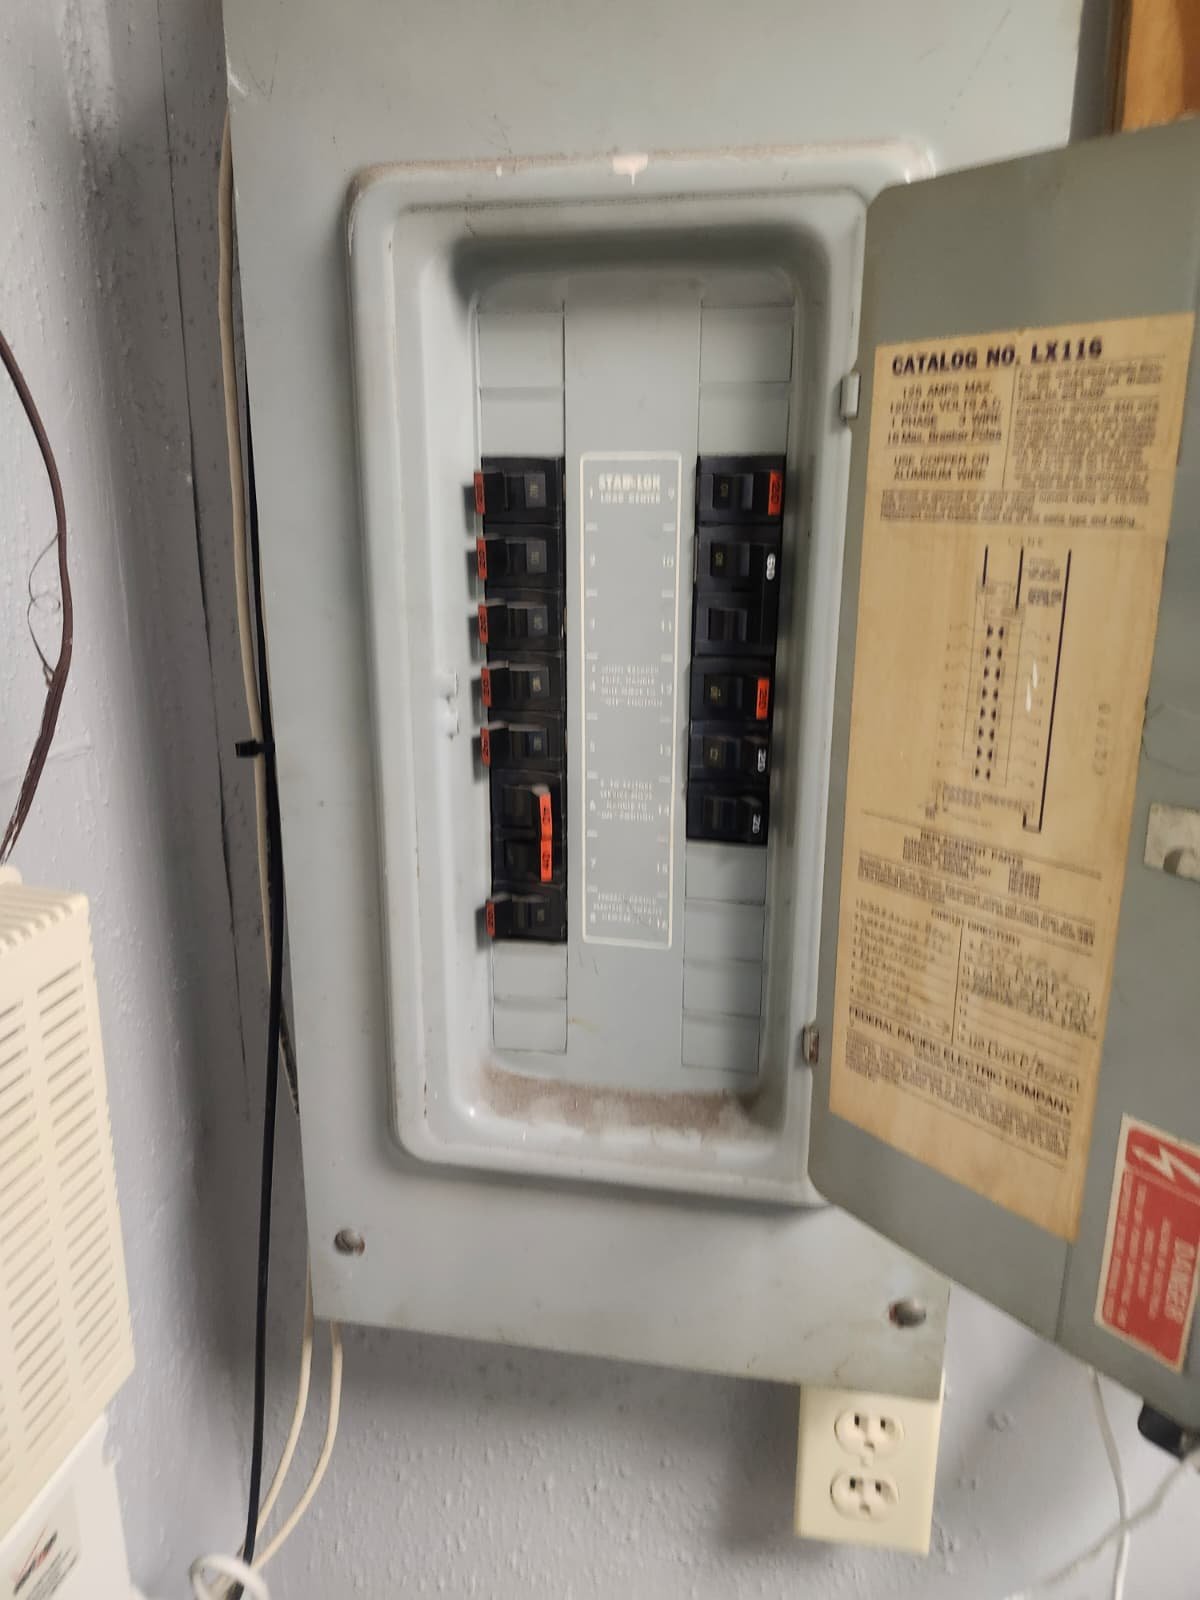
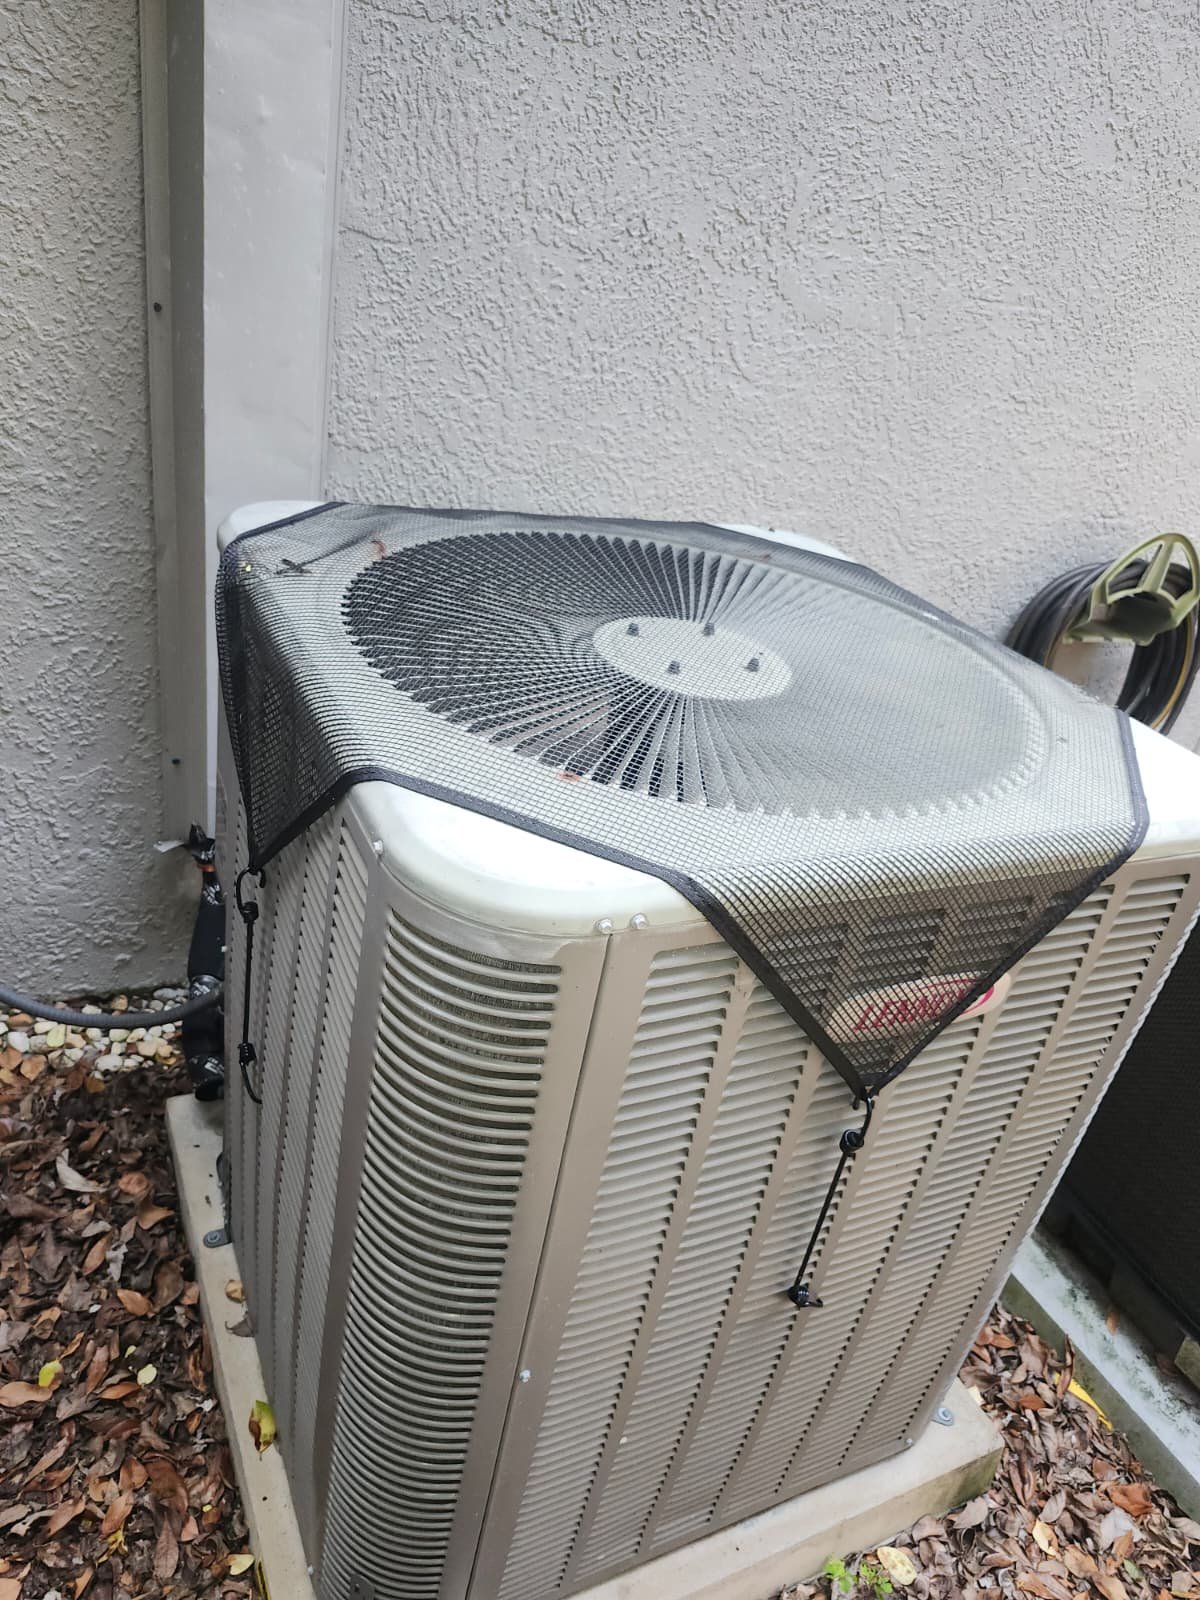
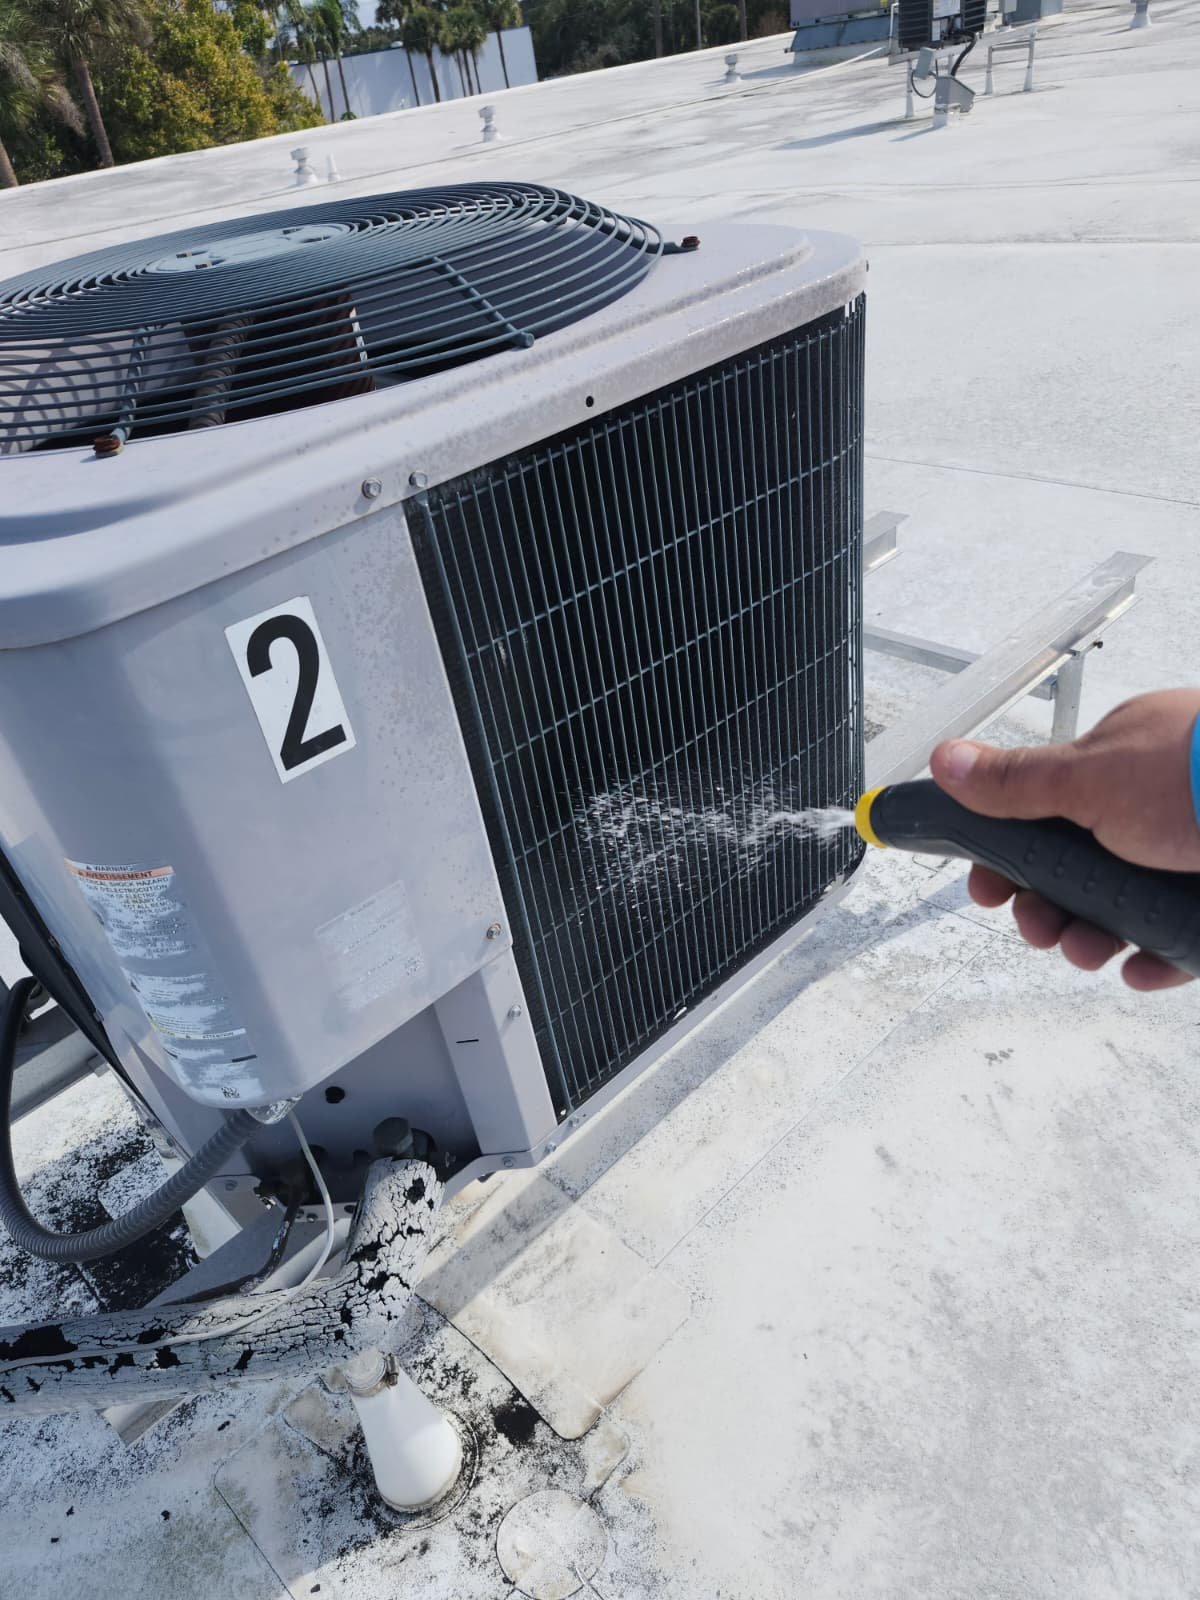
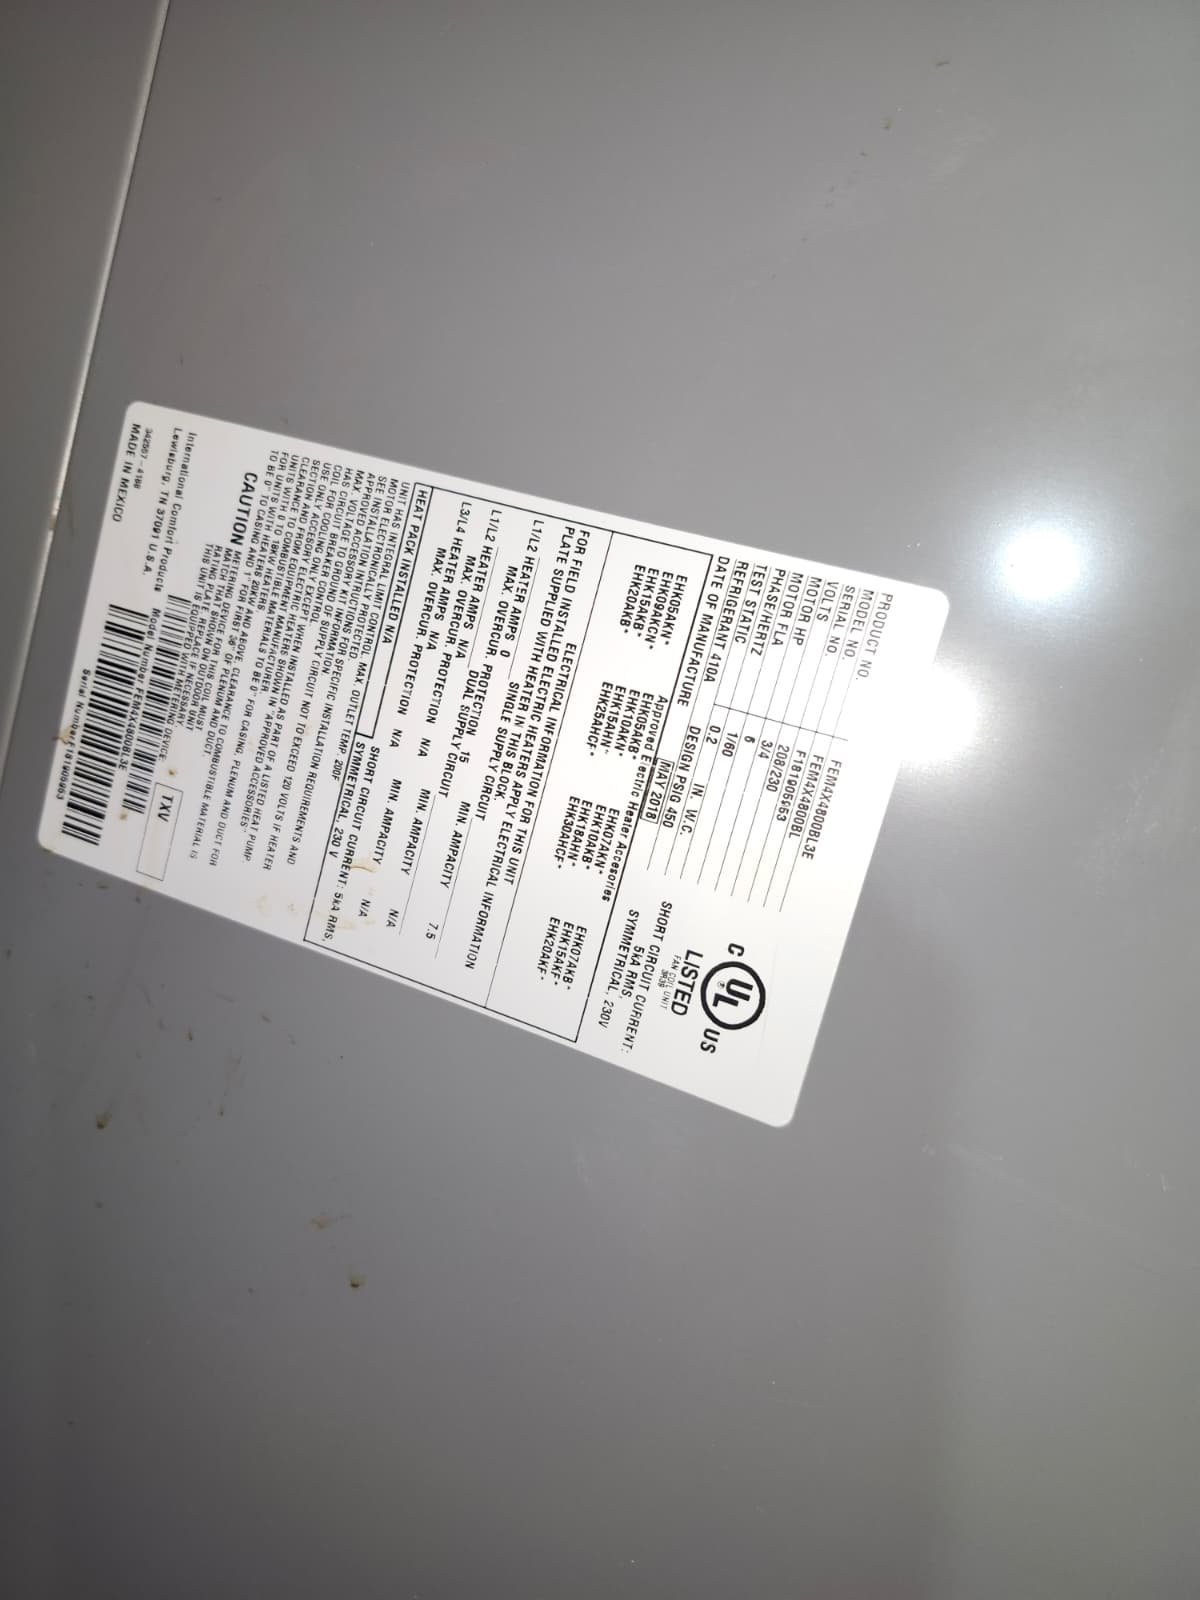
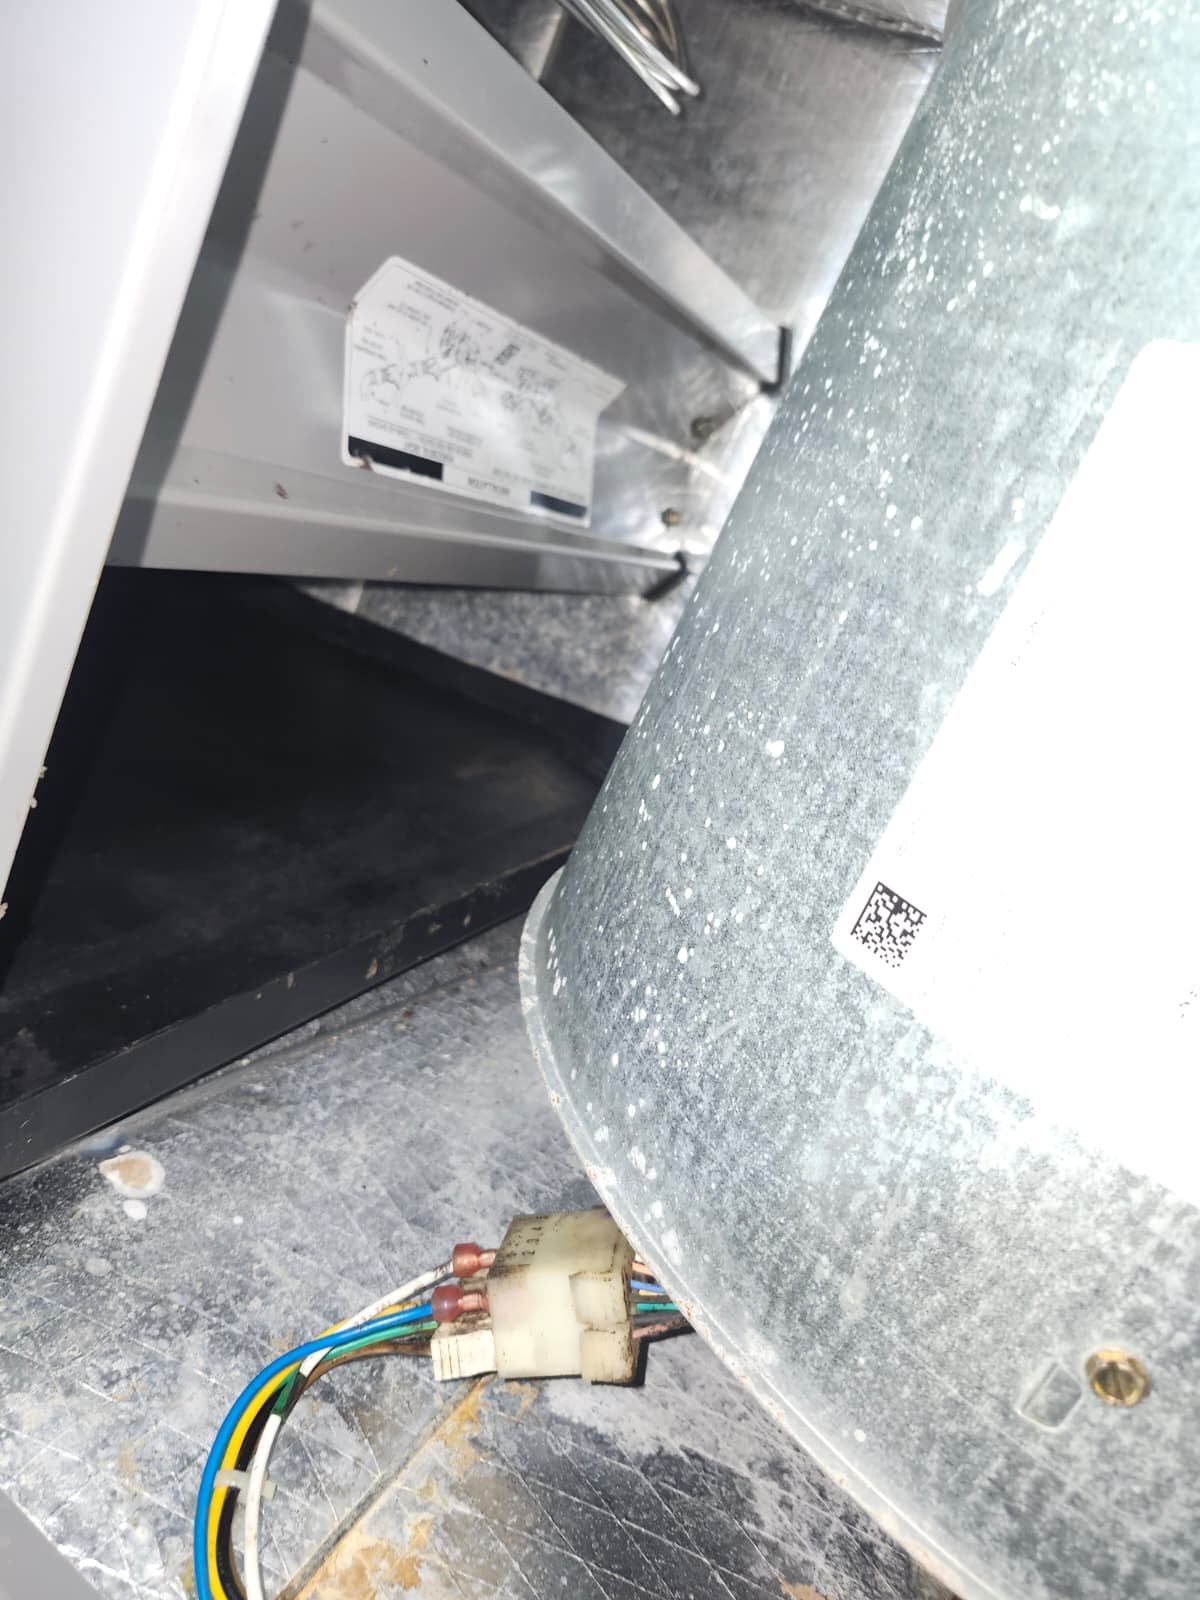
  • Visually inspected the indoor and outdoor units to look for any obvious signs of wear, damage, or corrosion that can develop over time in our humid environment.
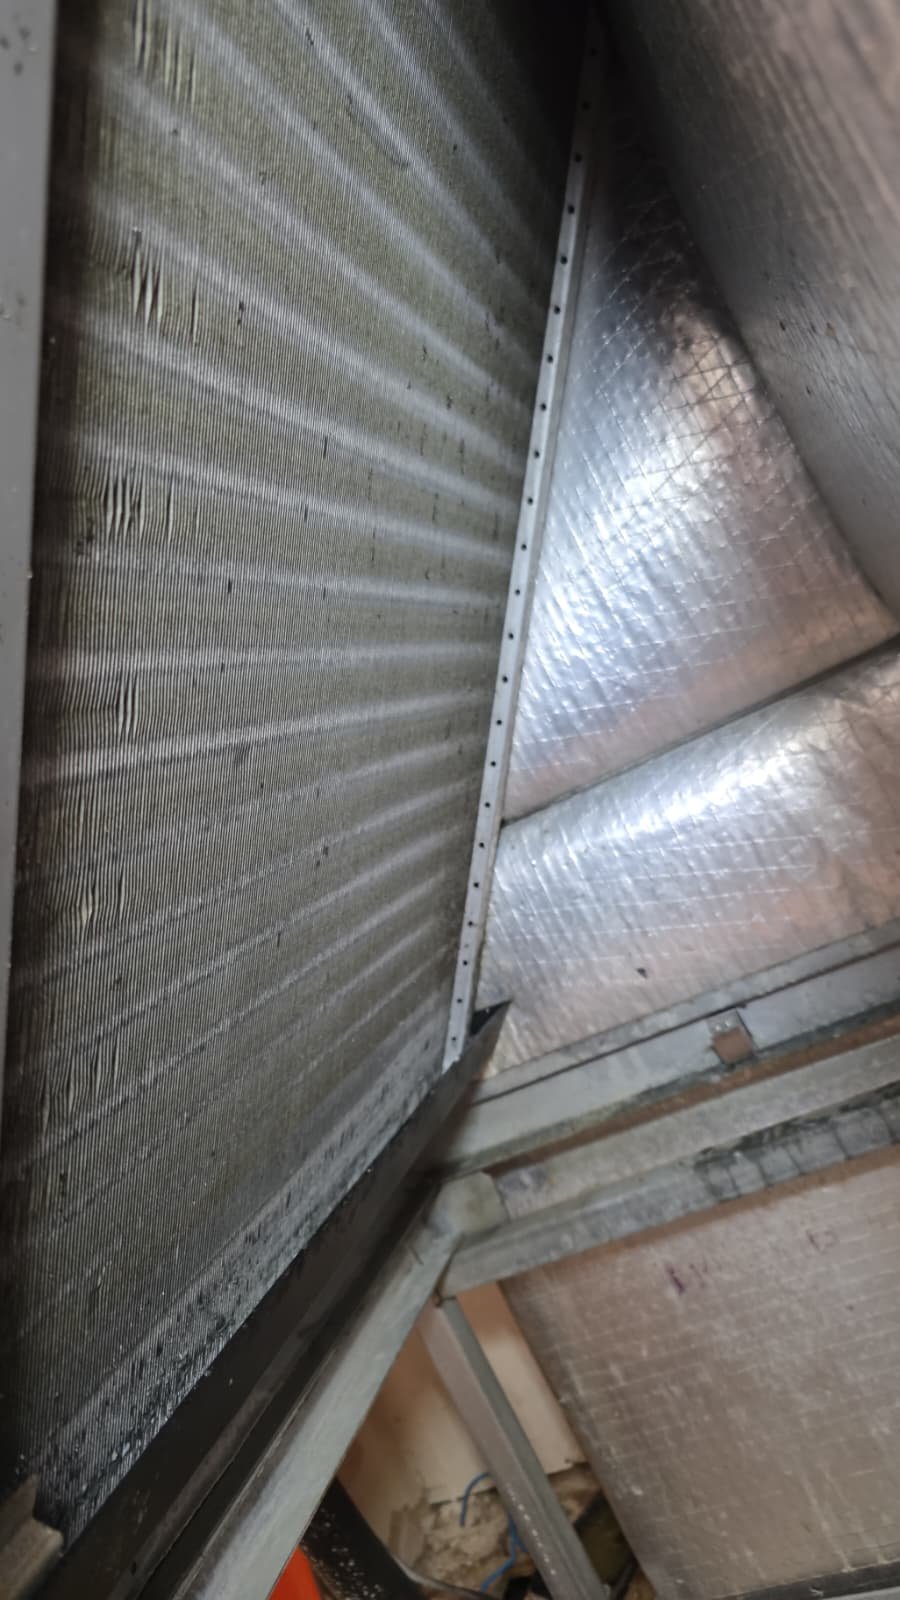
  • Checked the air filter to confirm its condition and ensure air could flow freely through the system.
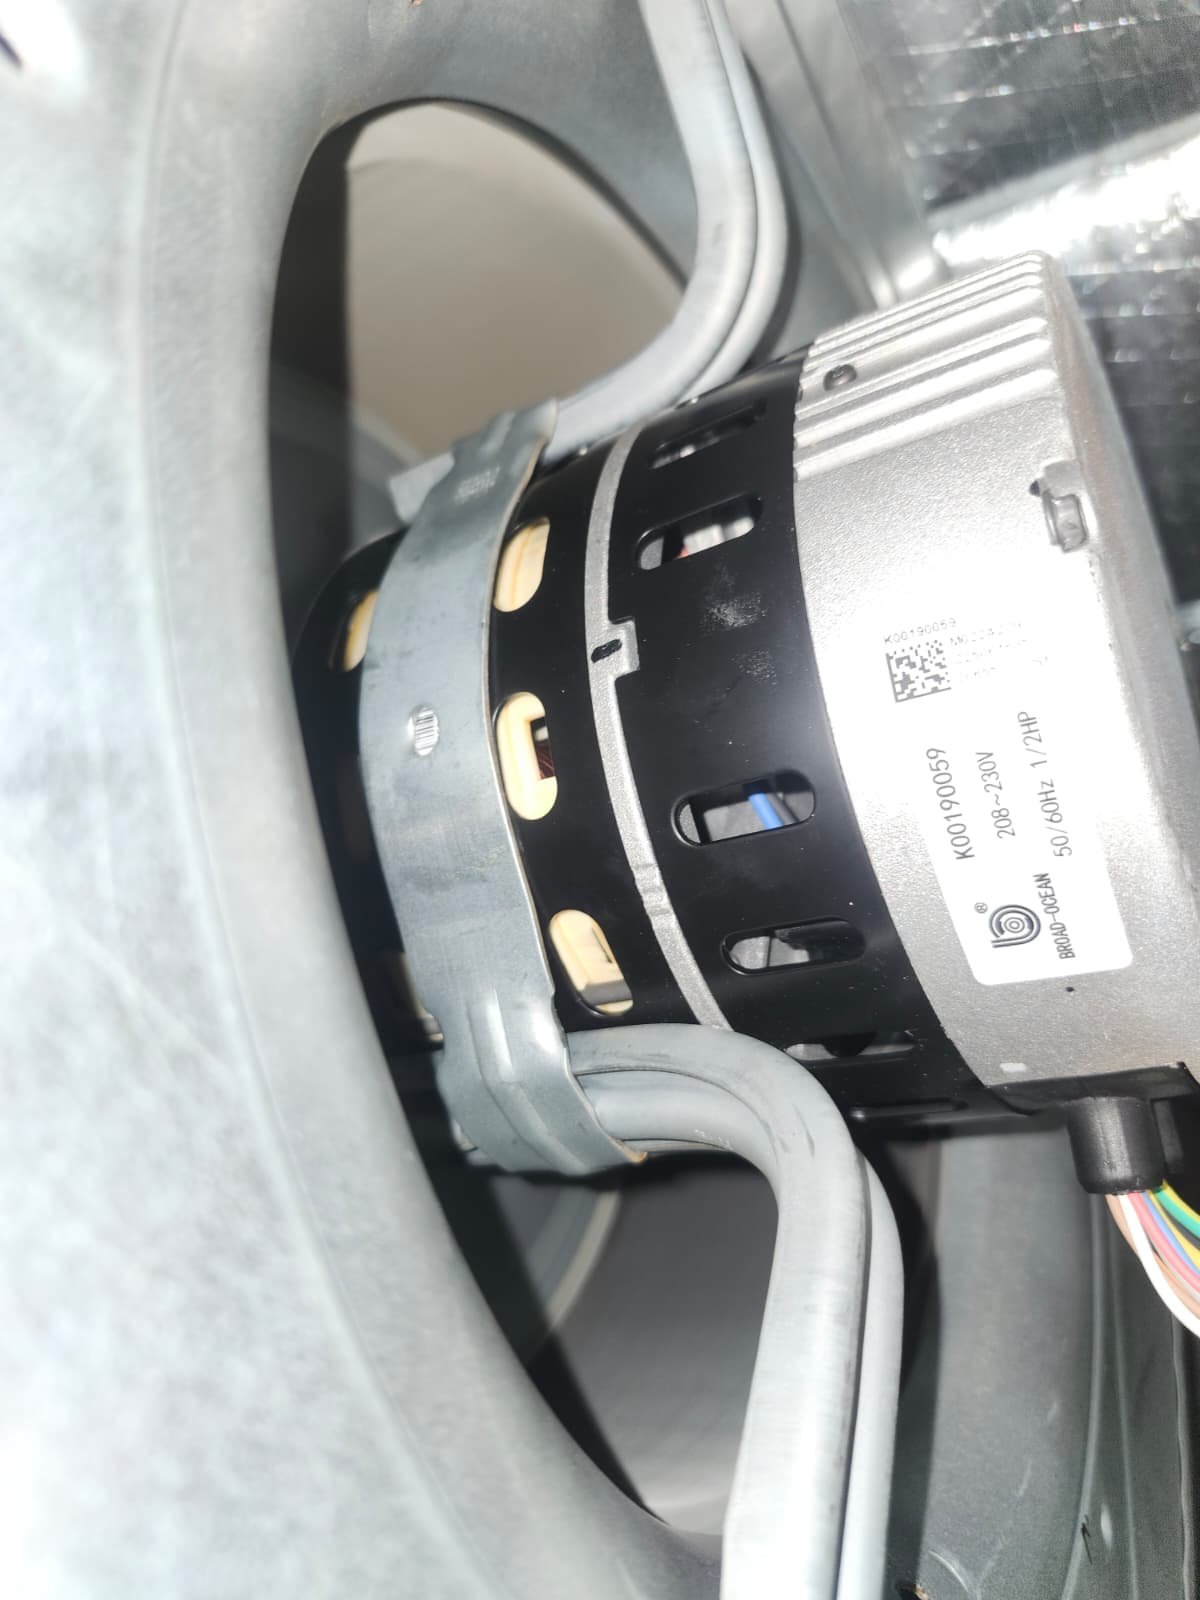
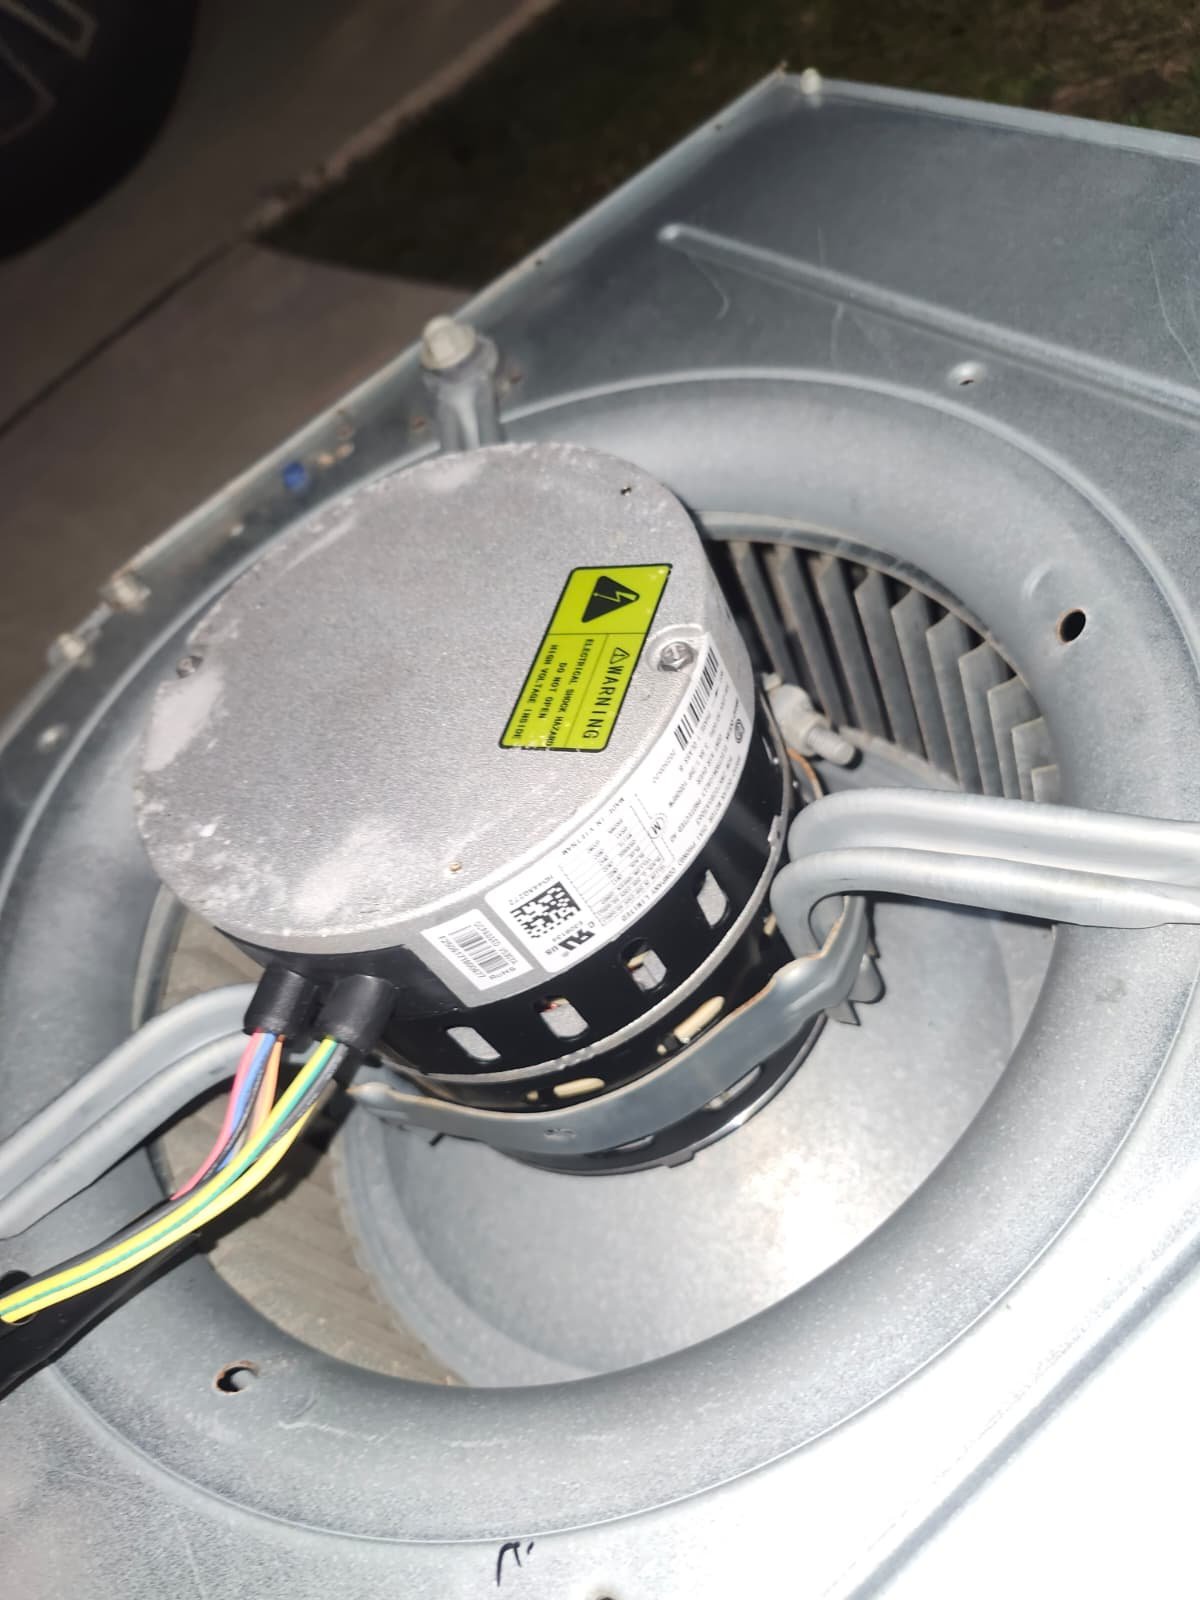
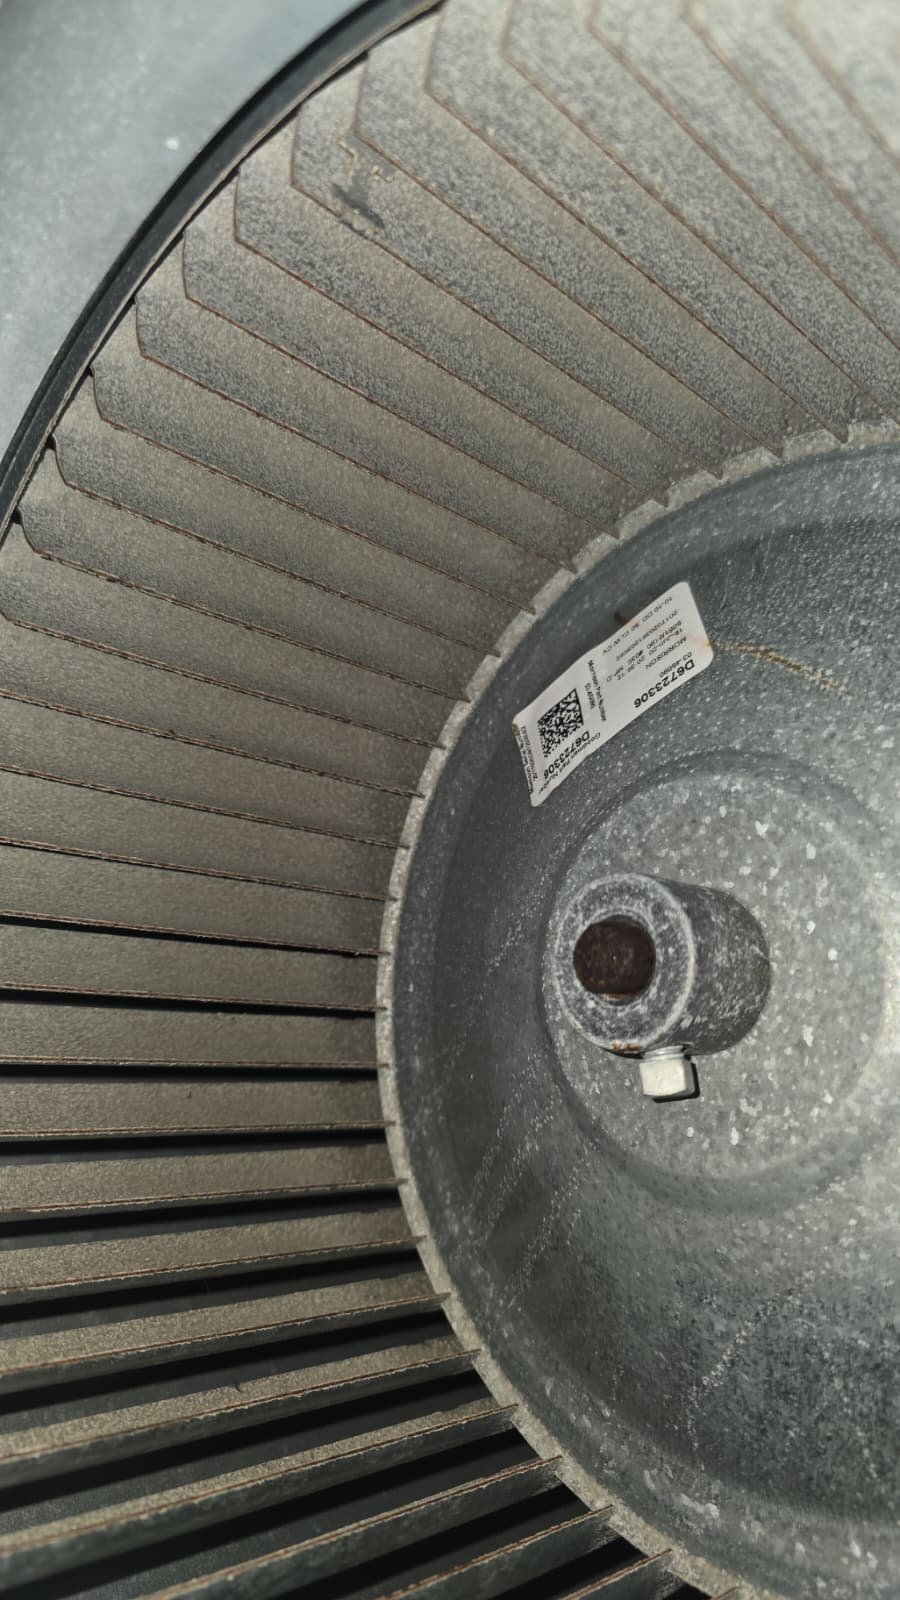
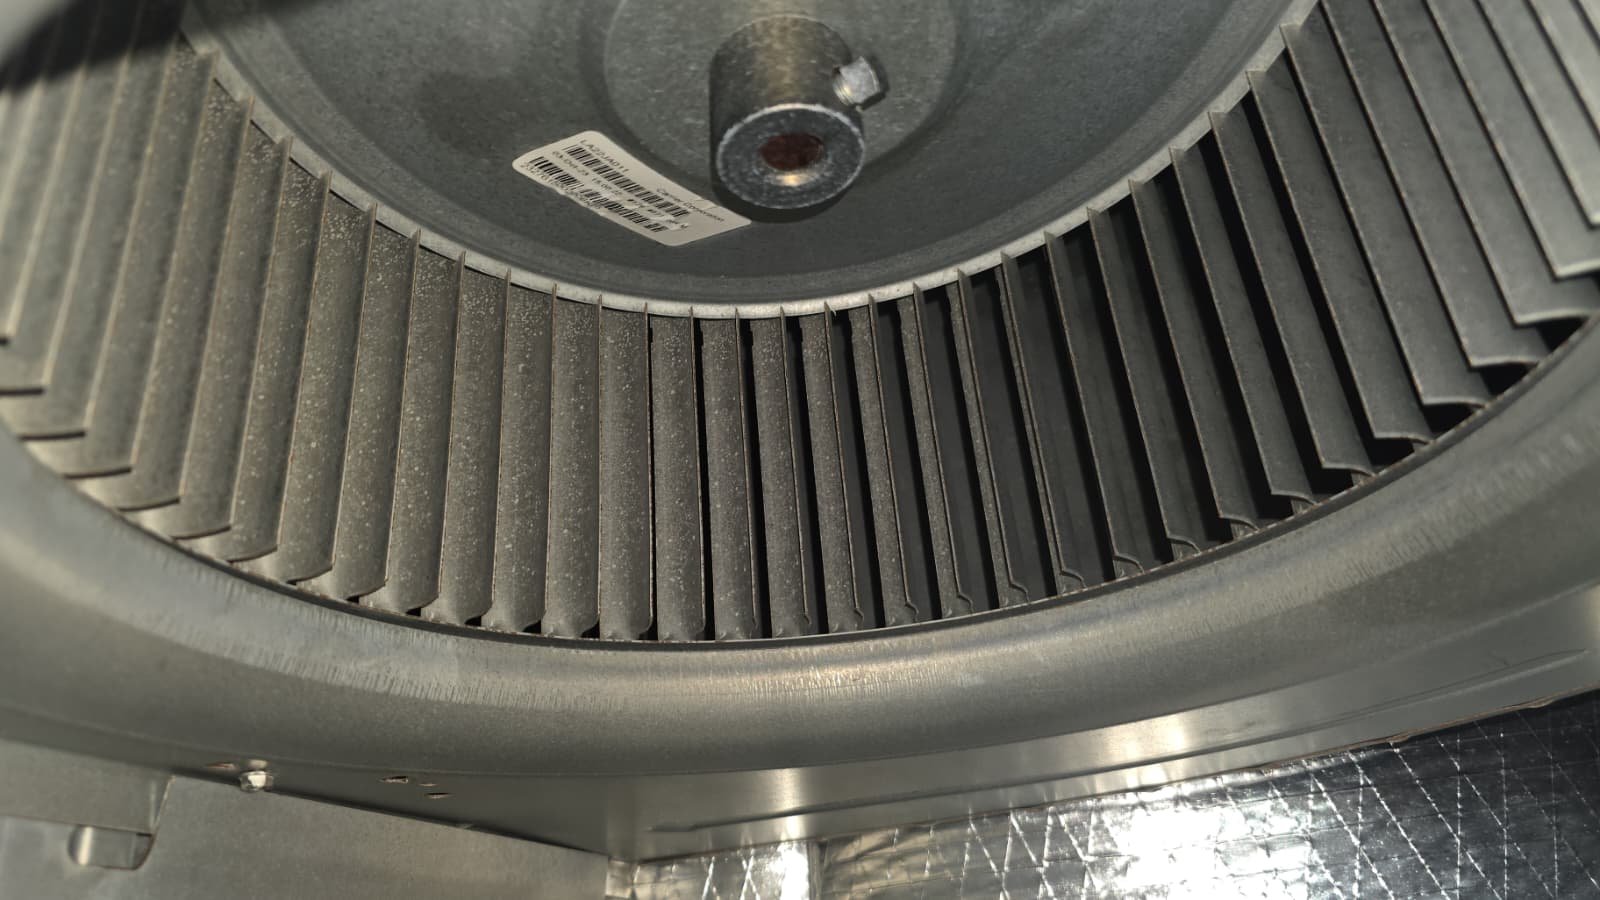
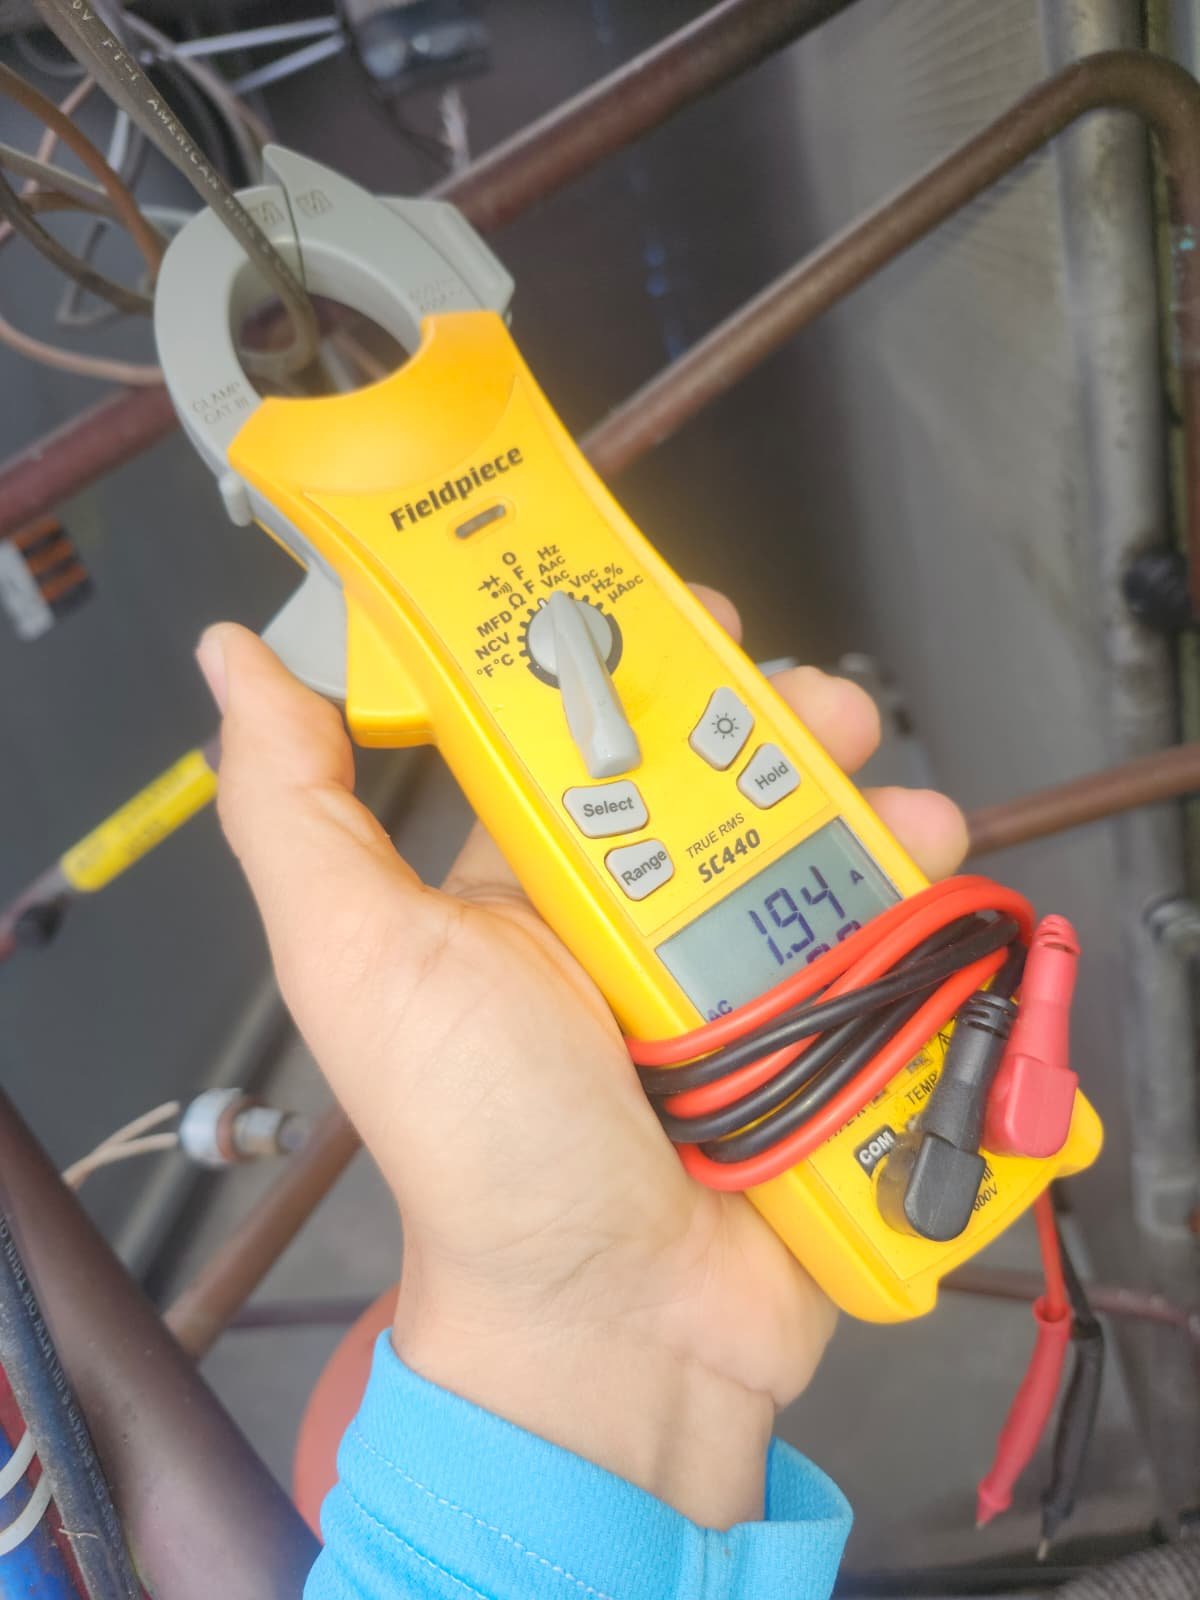
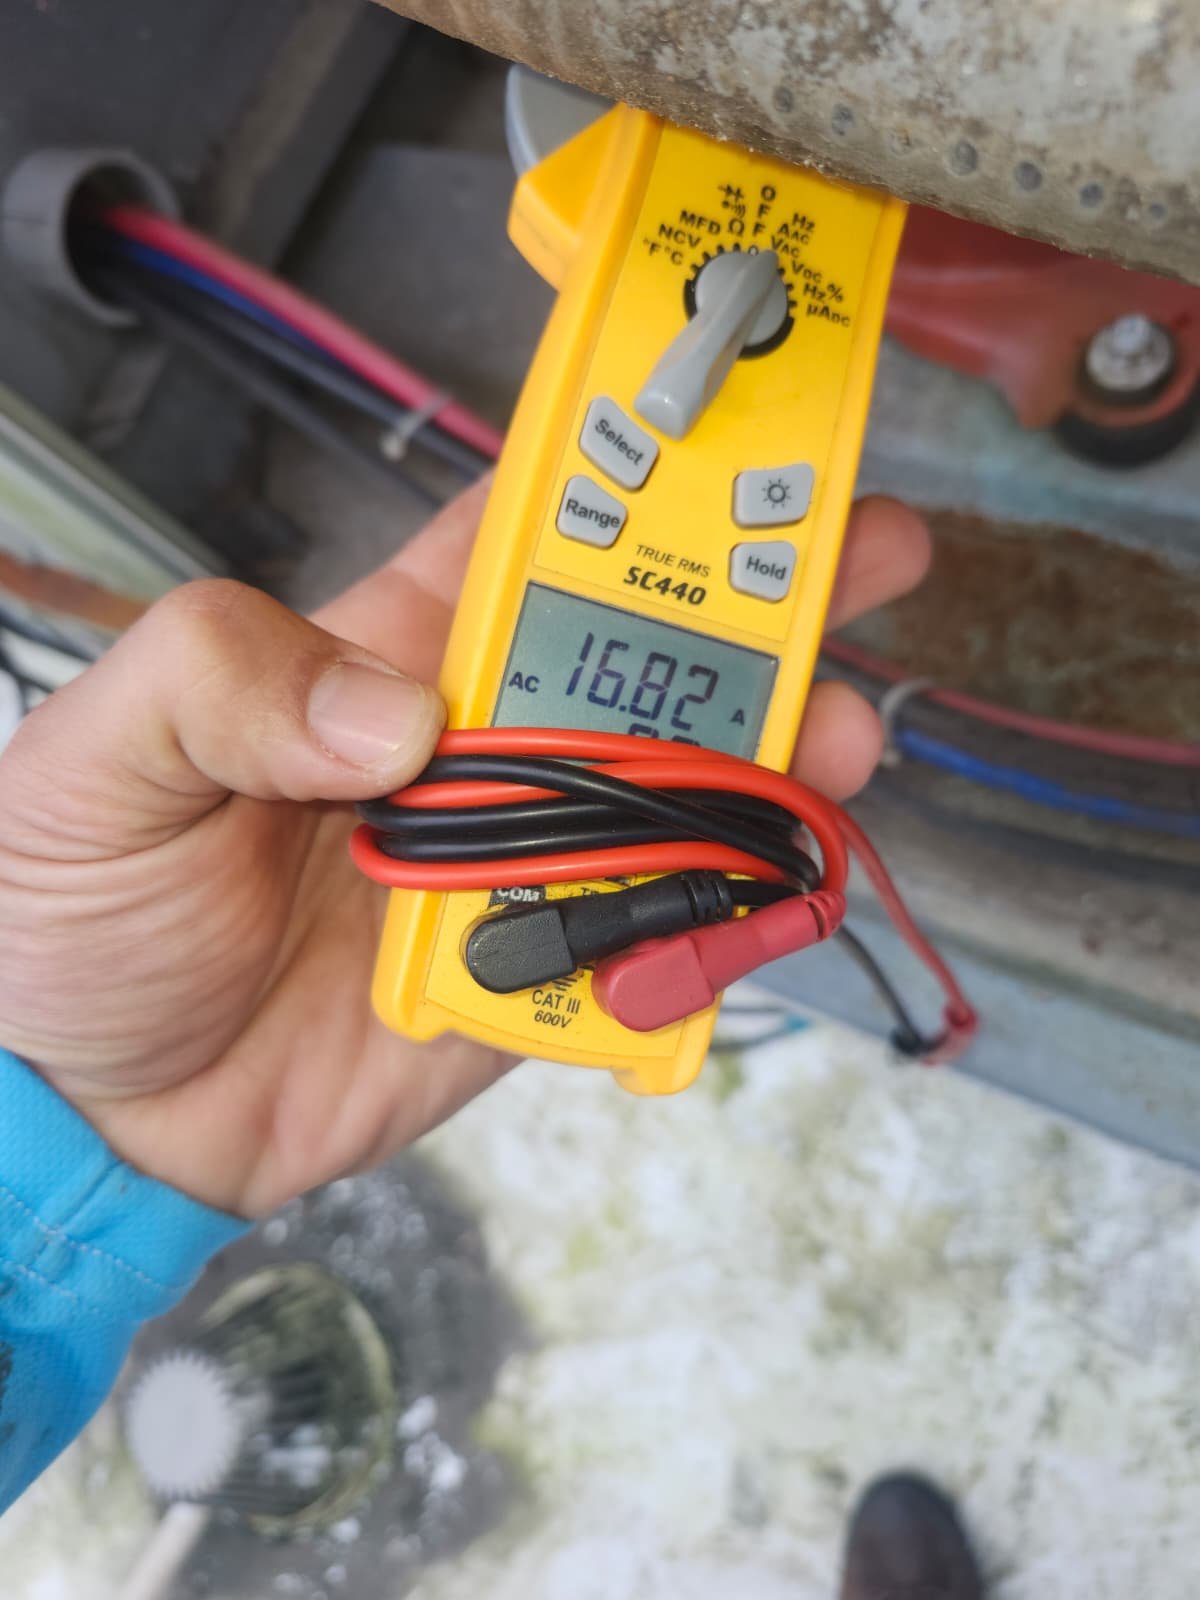
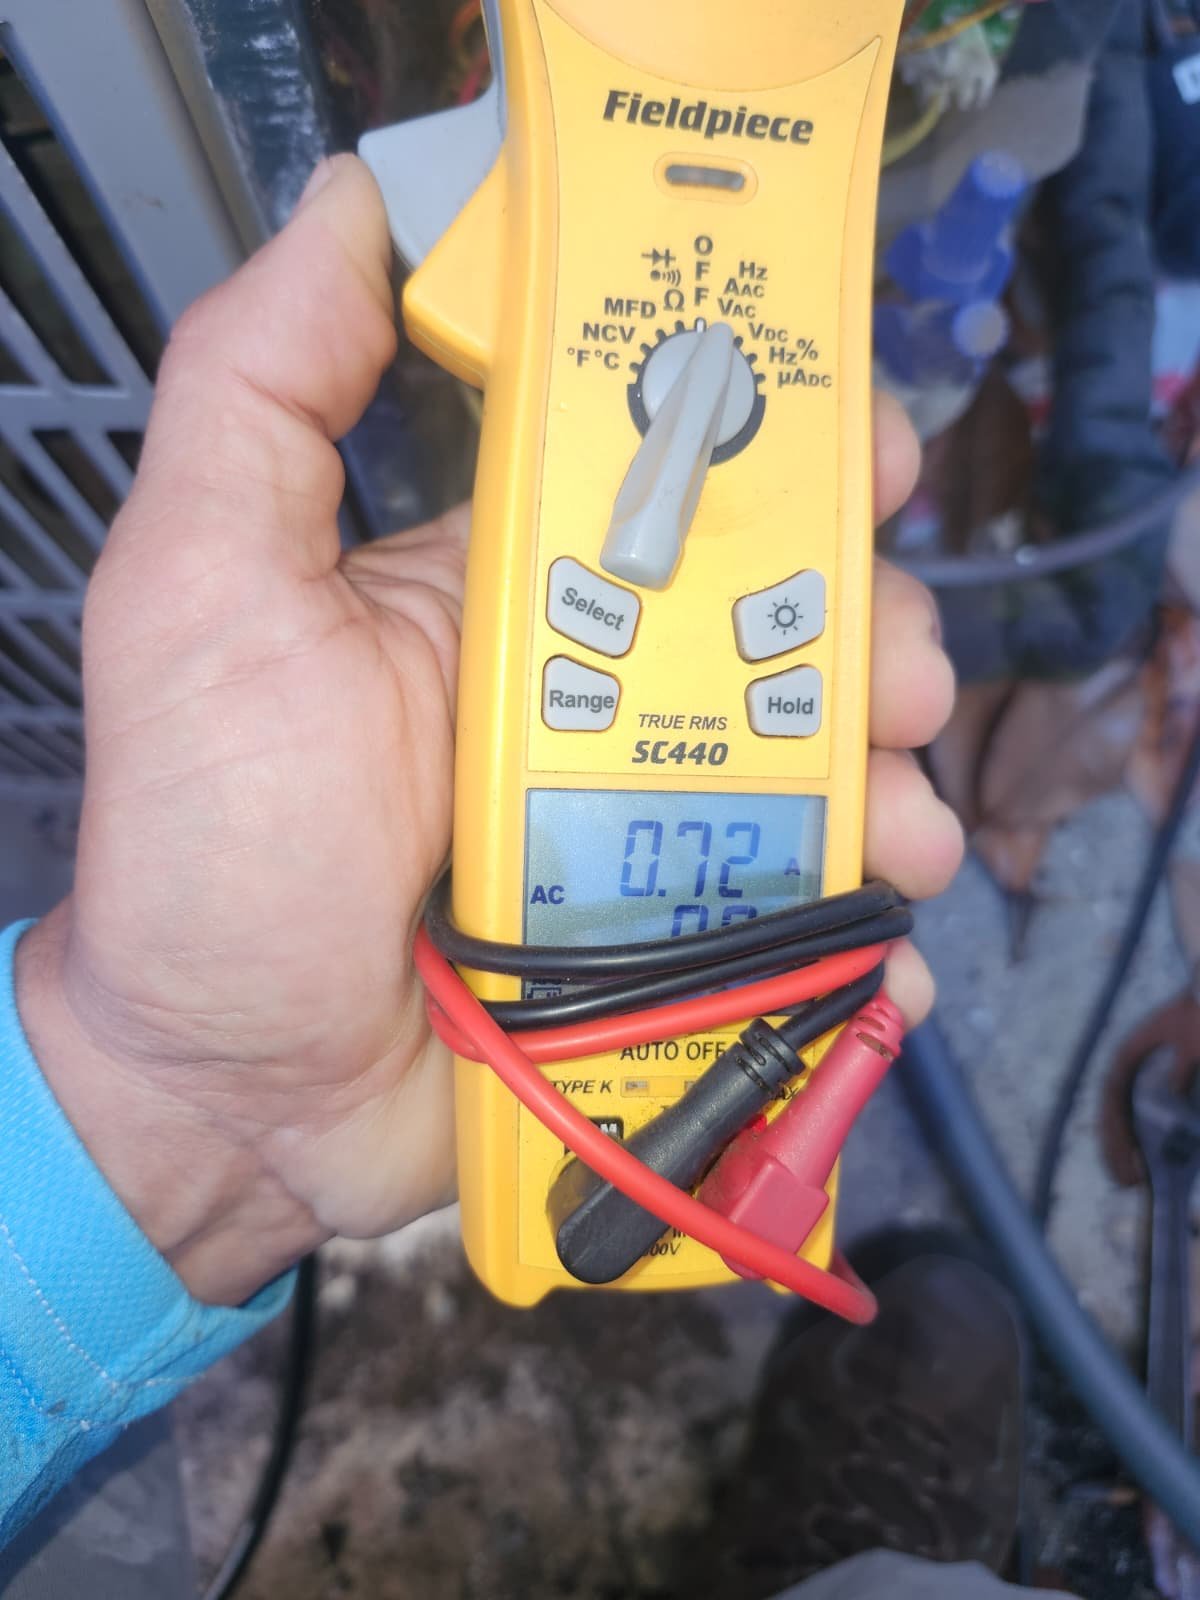
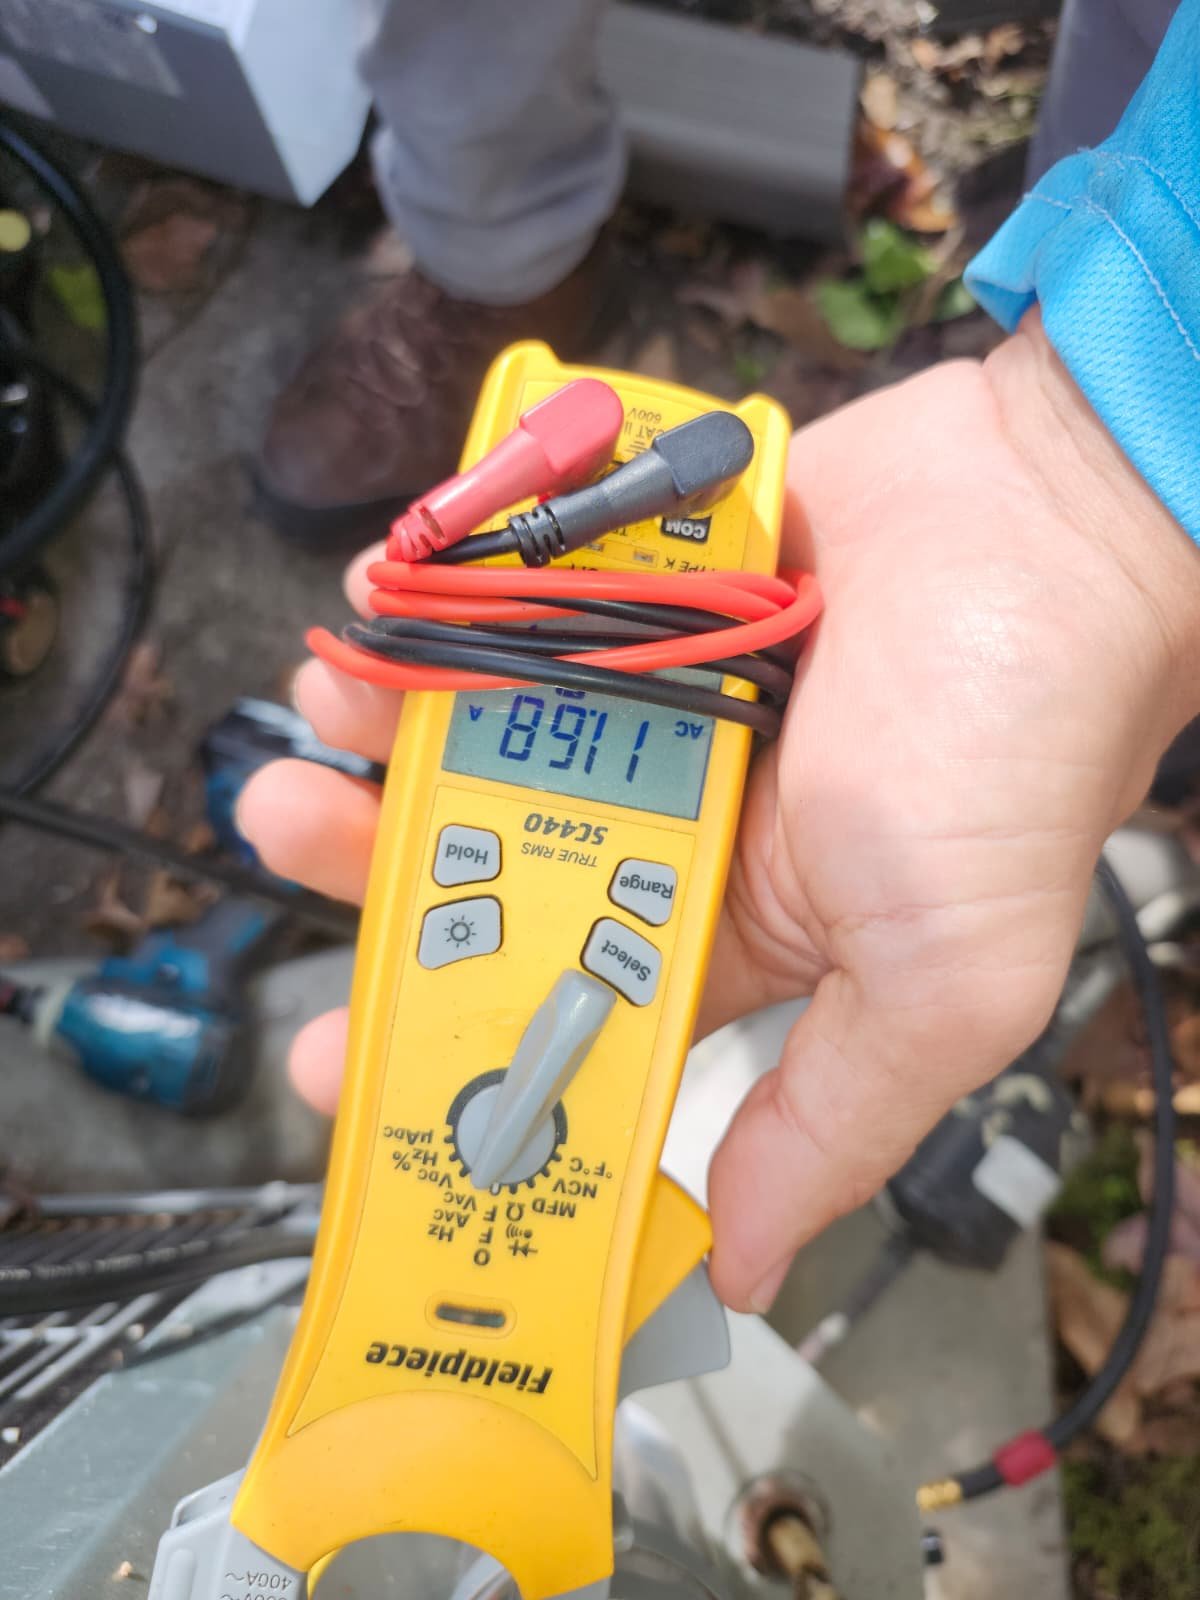
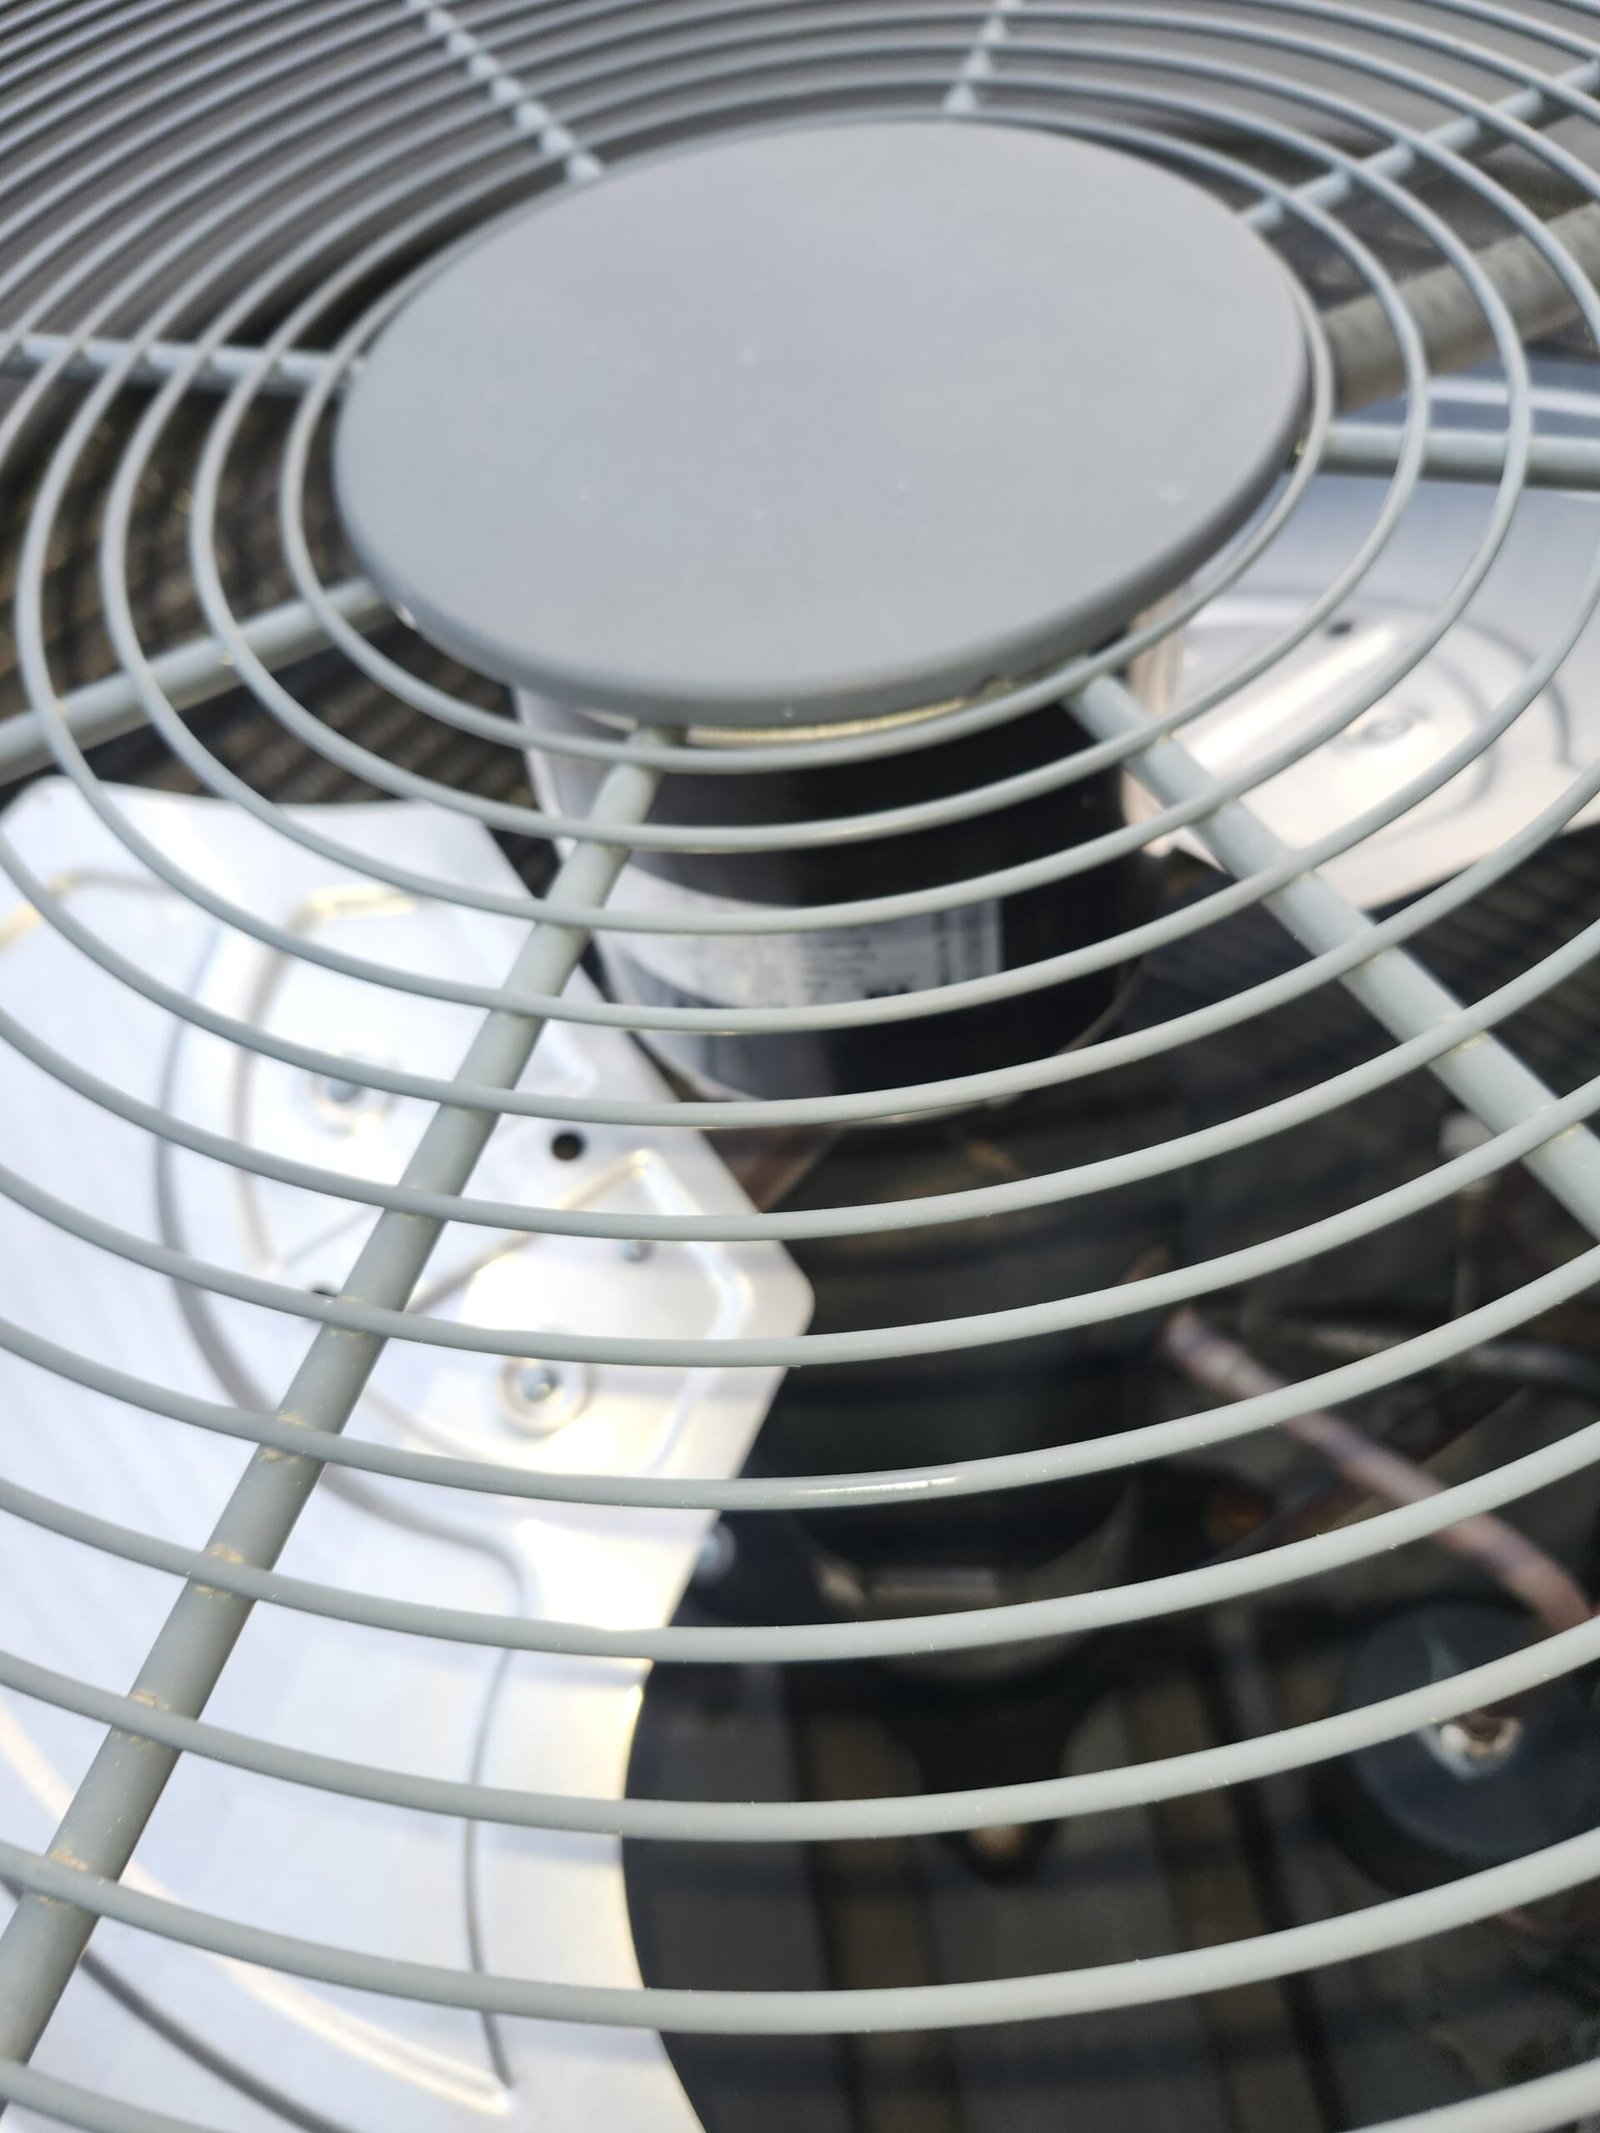
  • Listened for abnormal noises from fans and motors that might indicate developing mechanical issues.
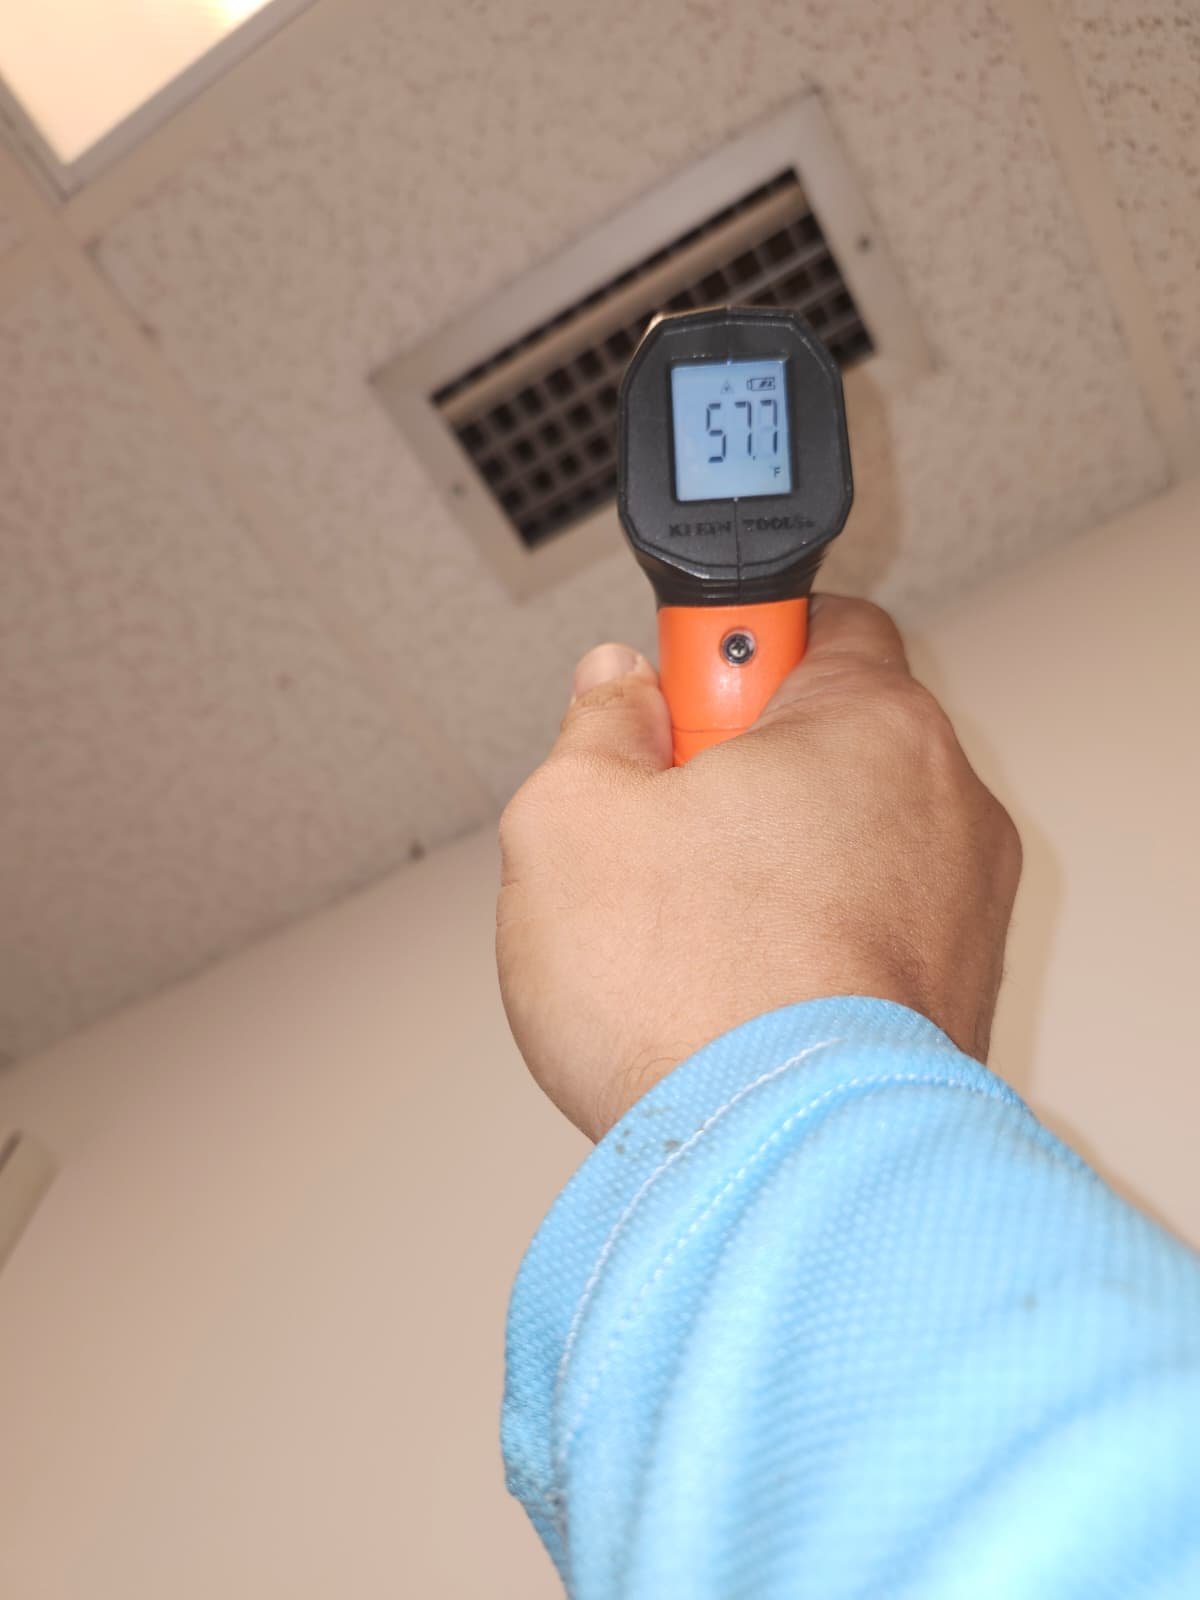
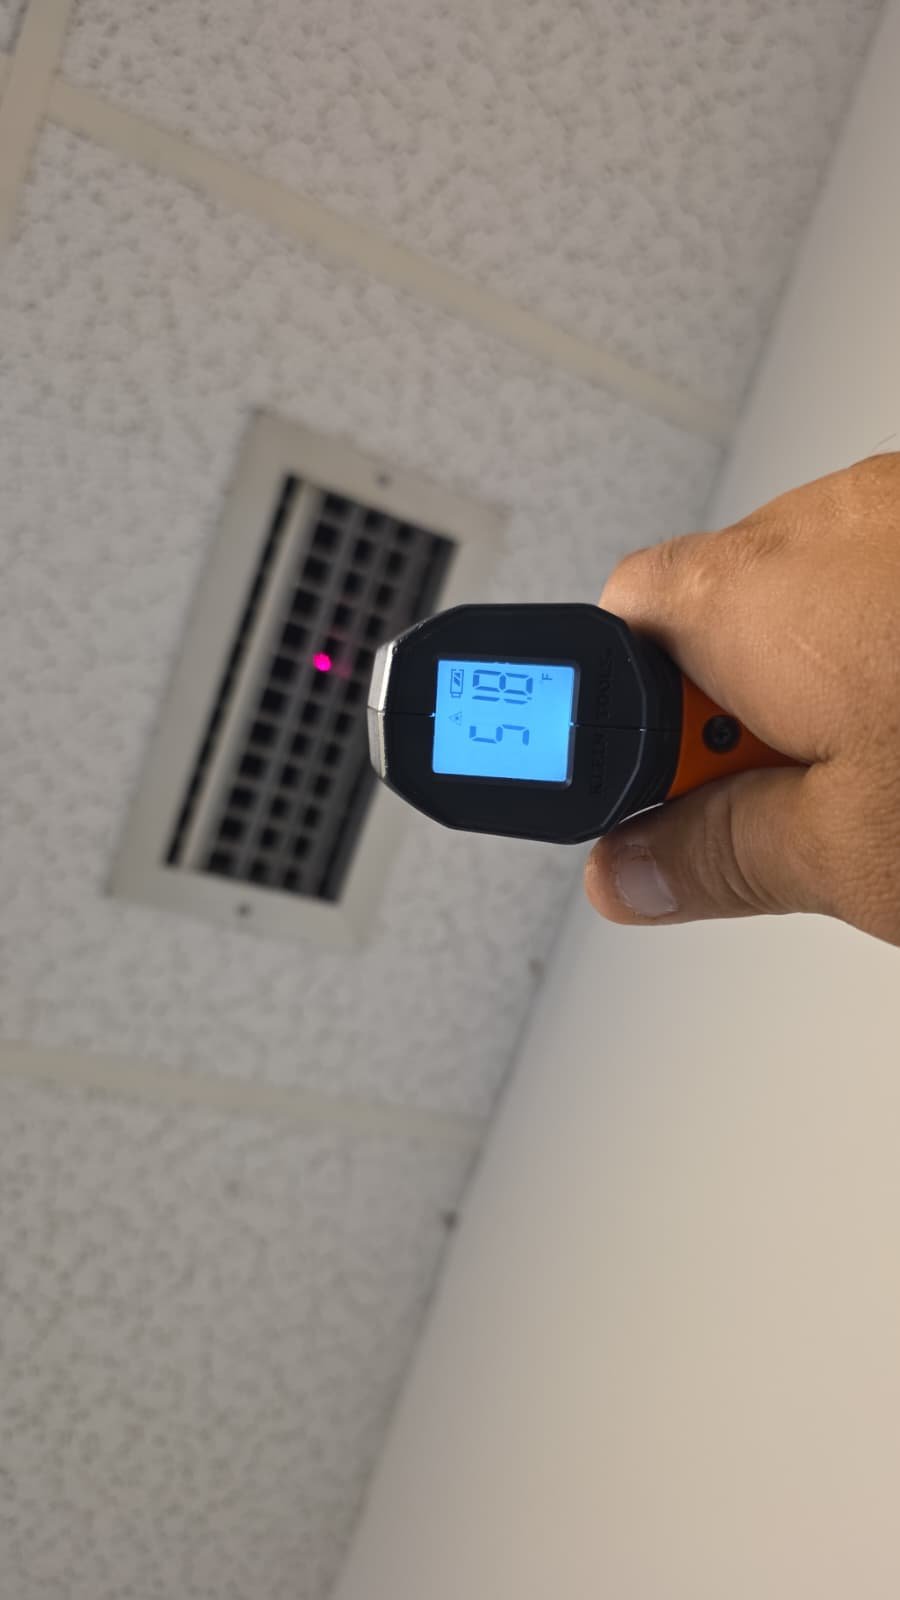
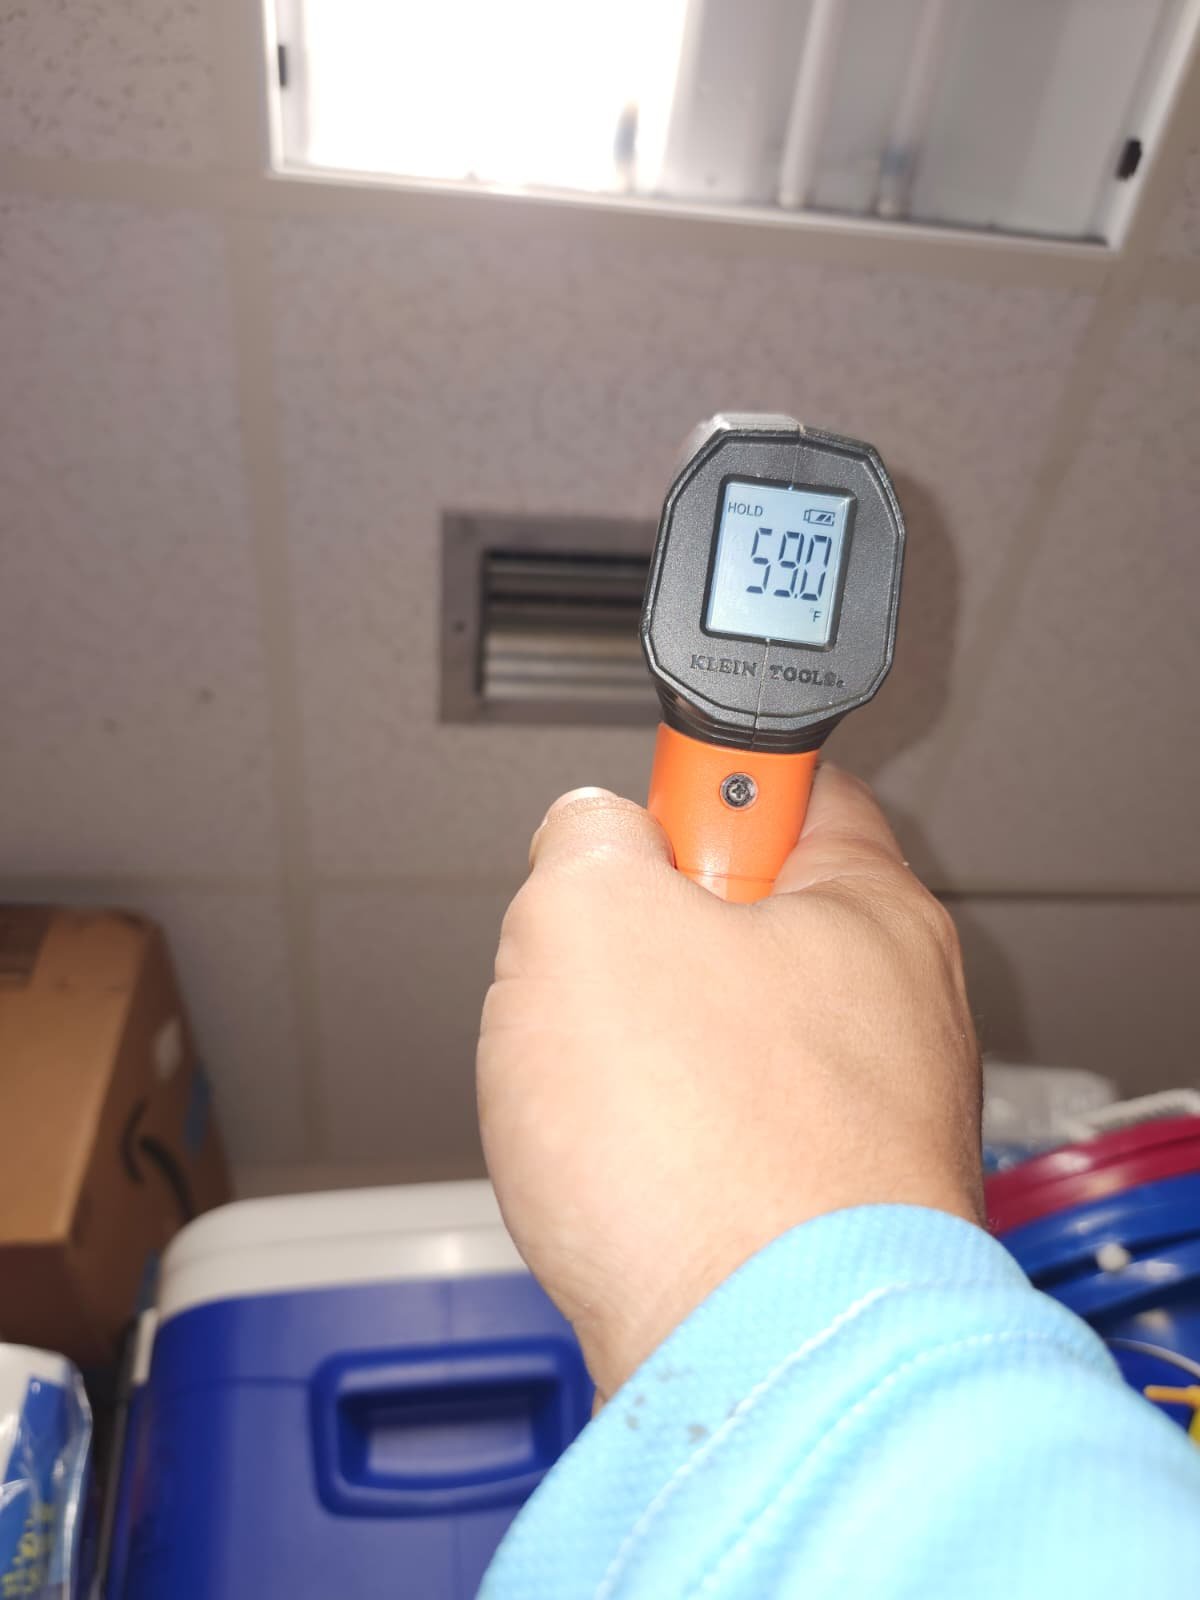
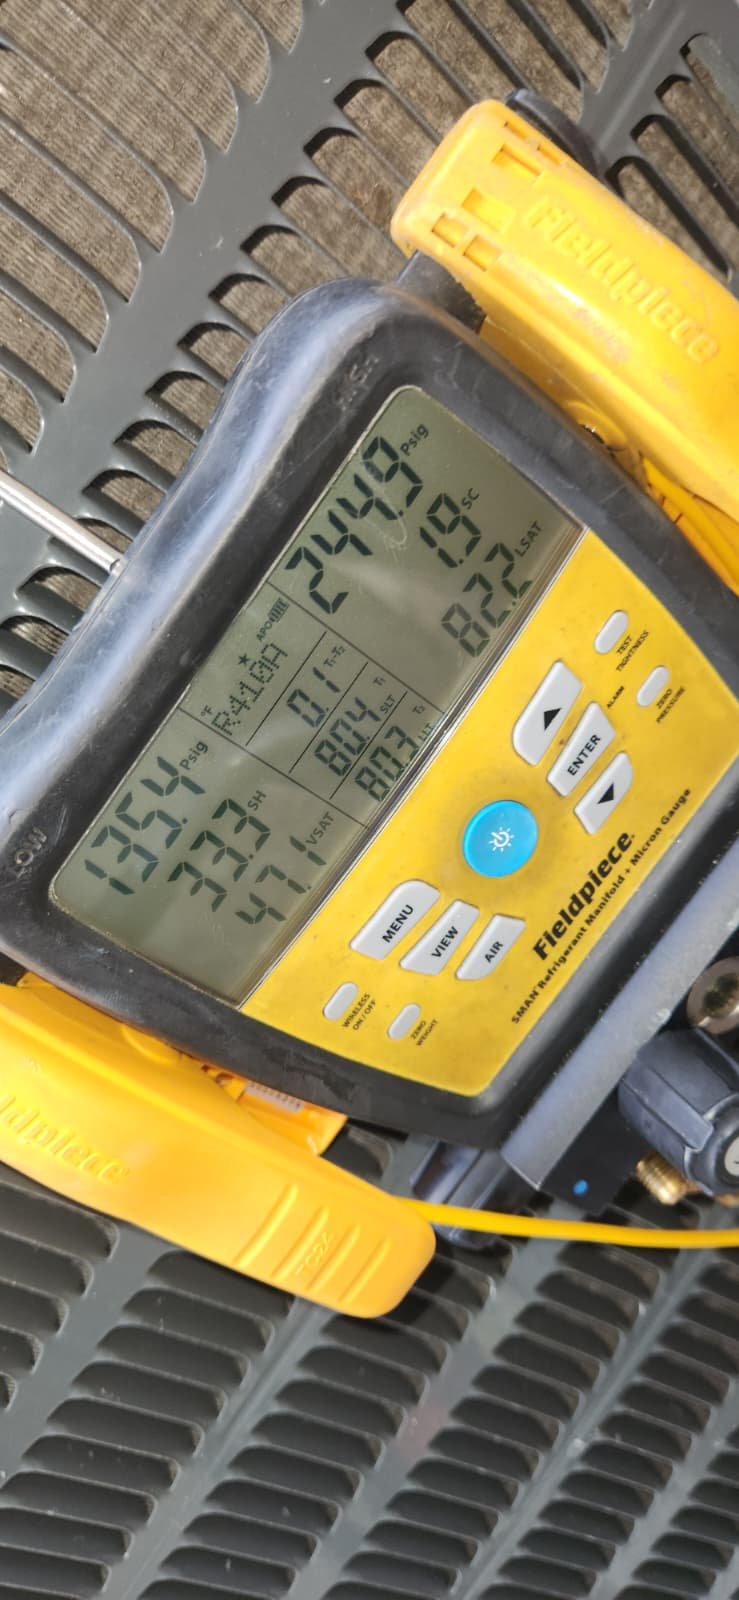
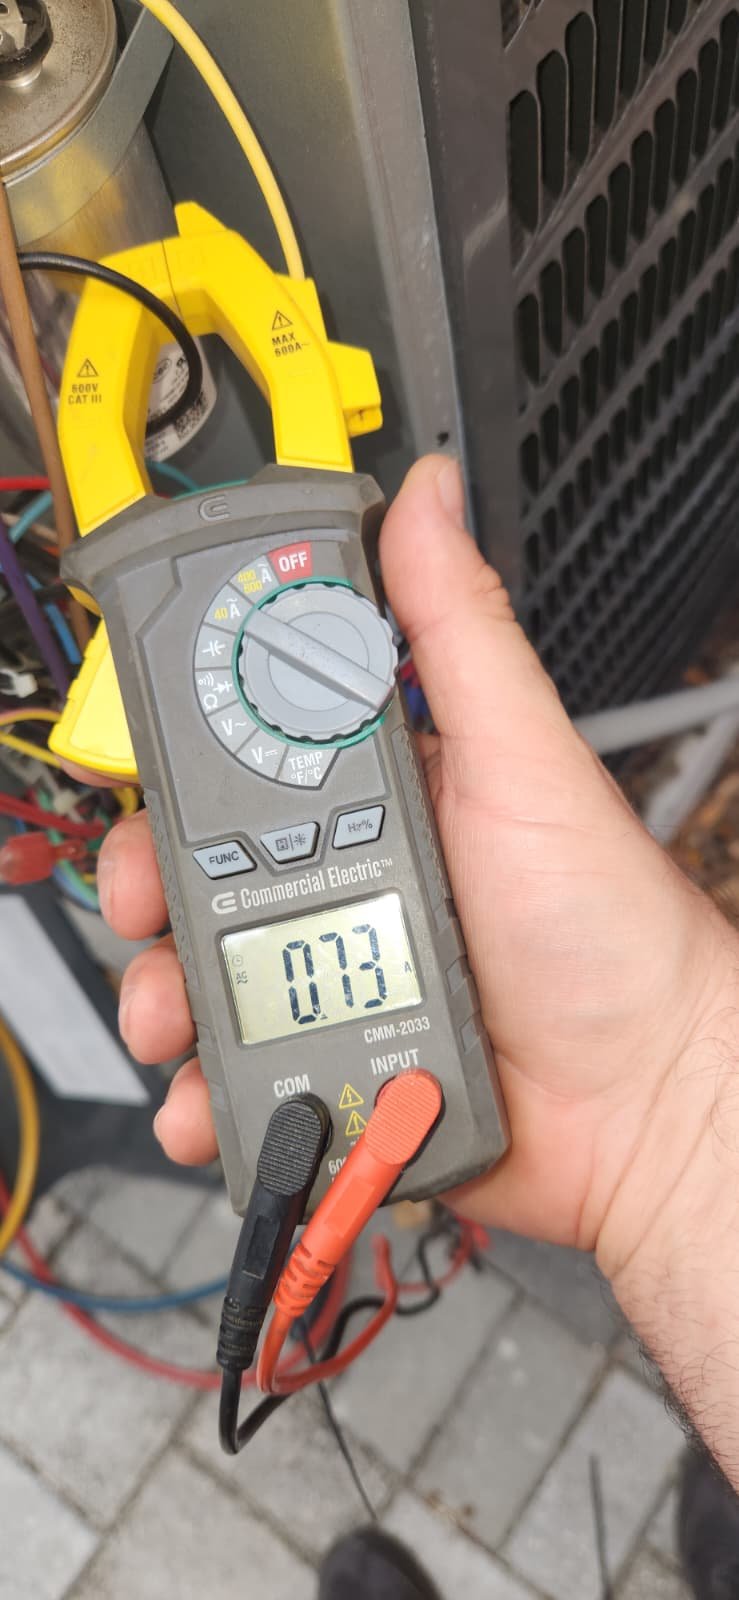
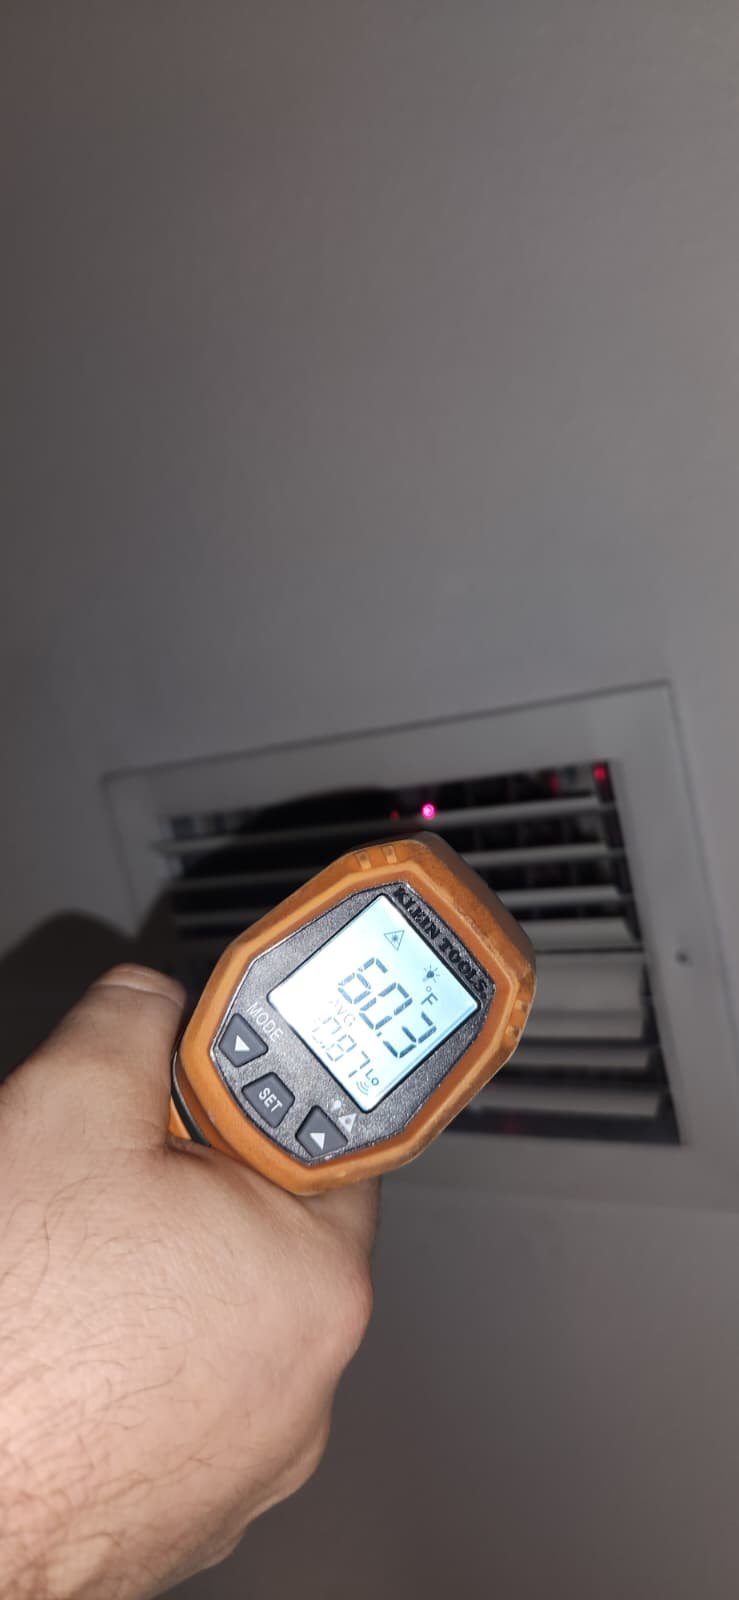
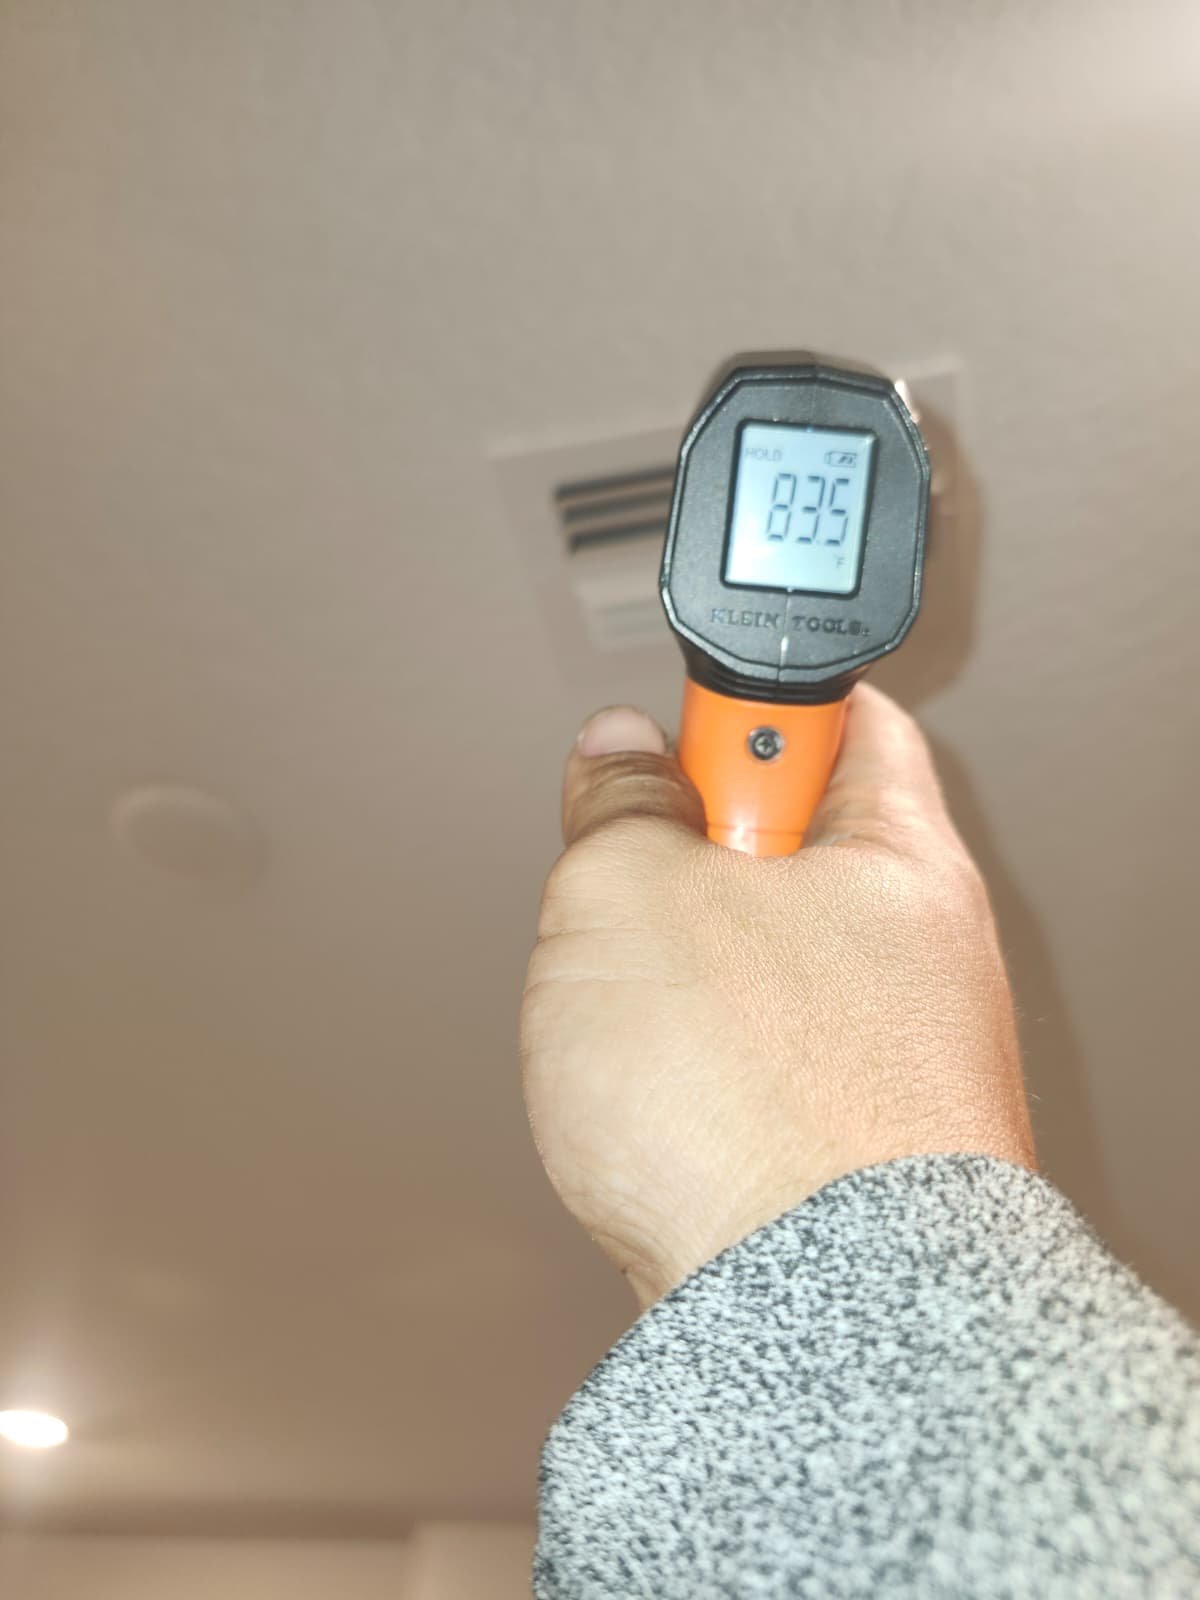
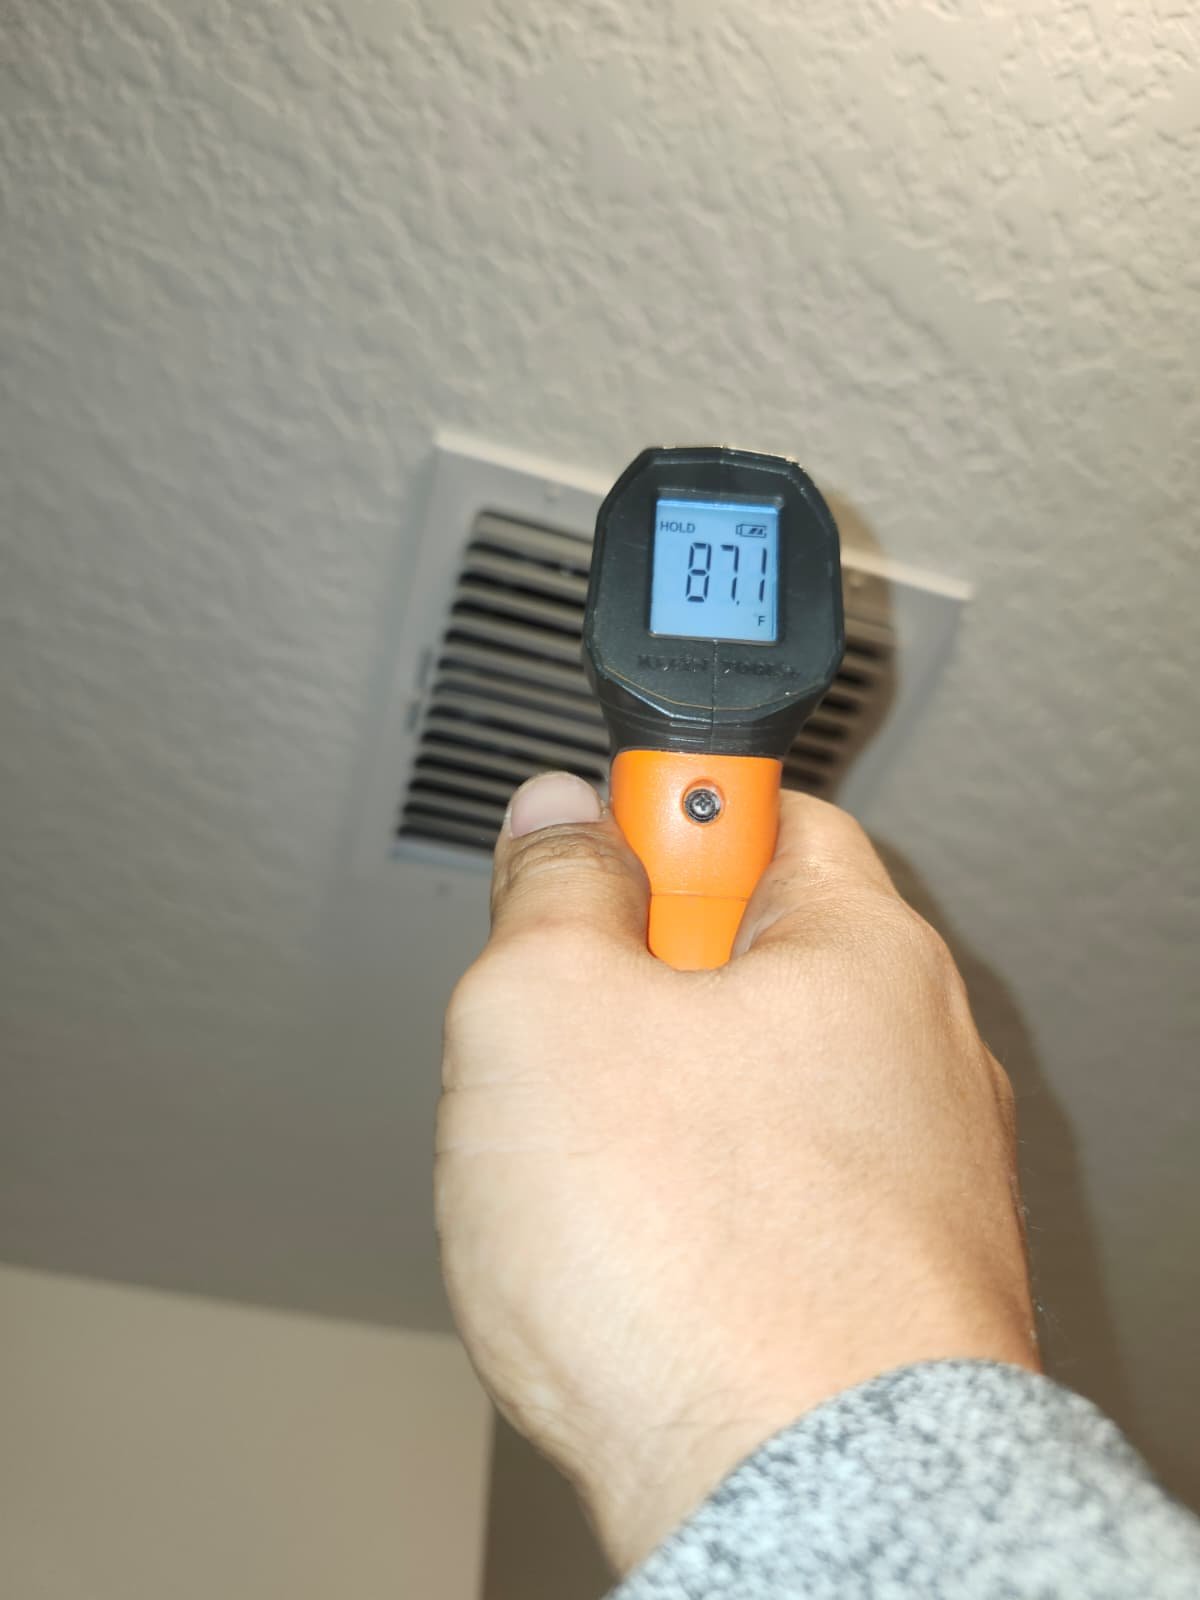
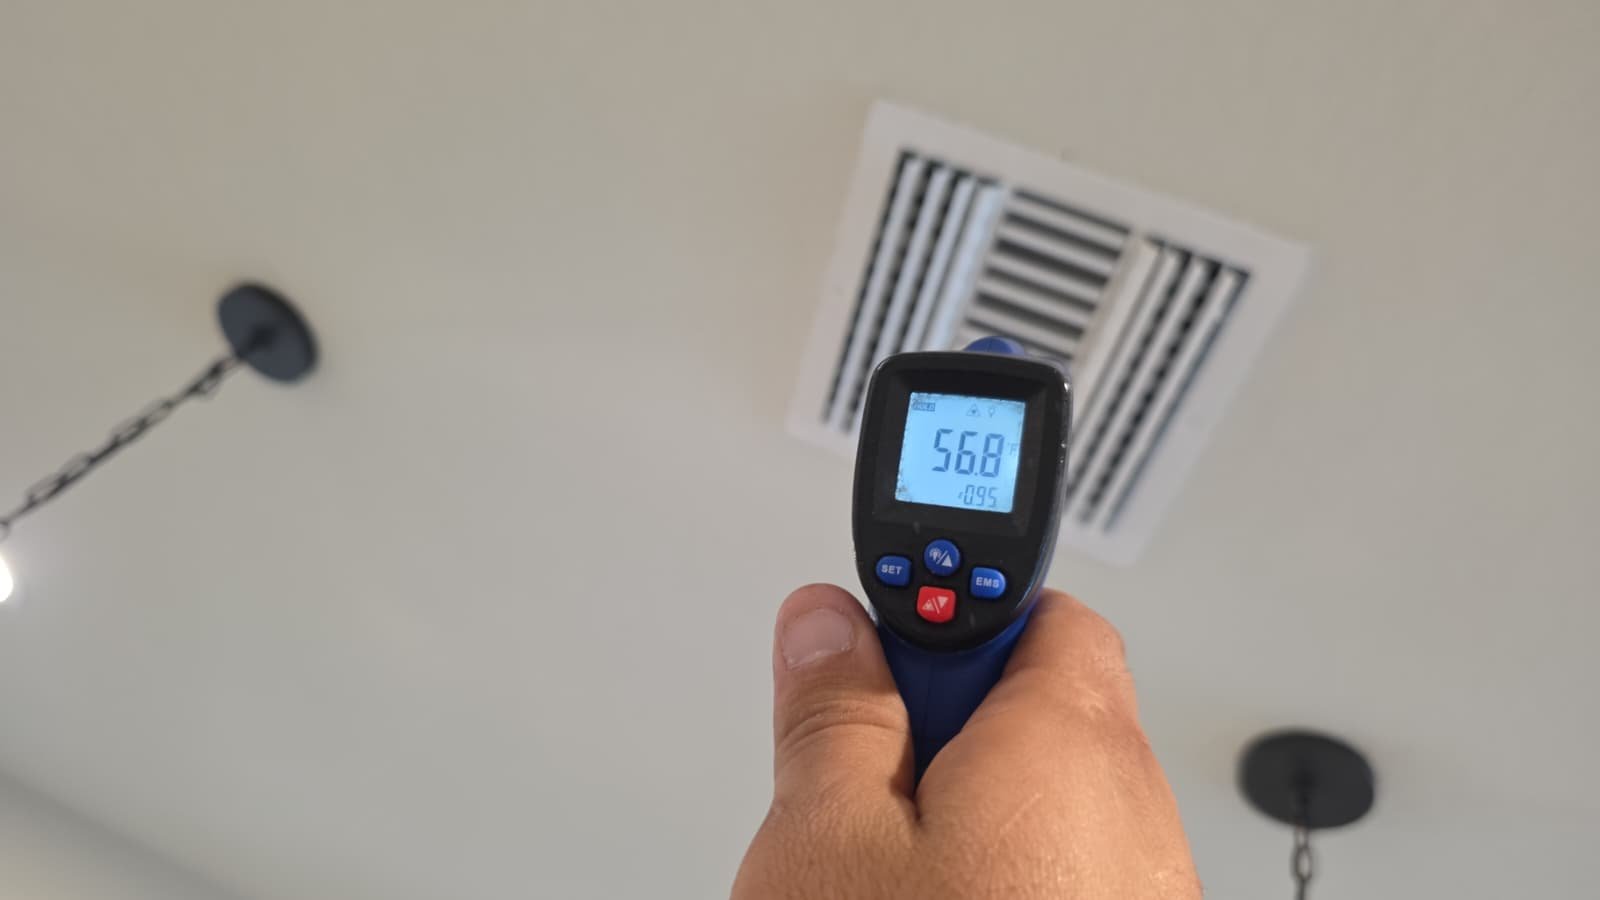
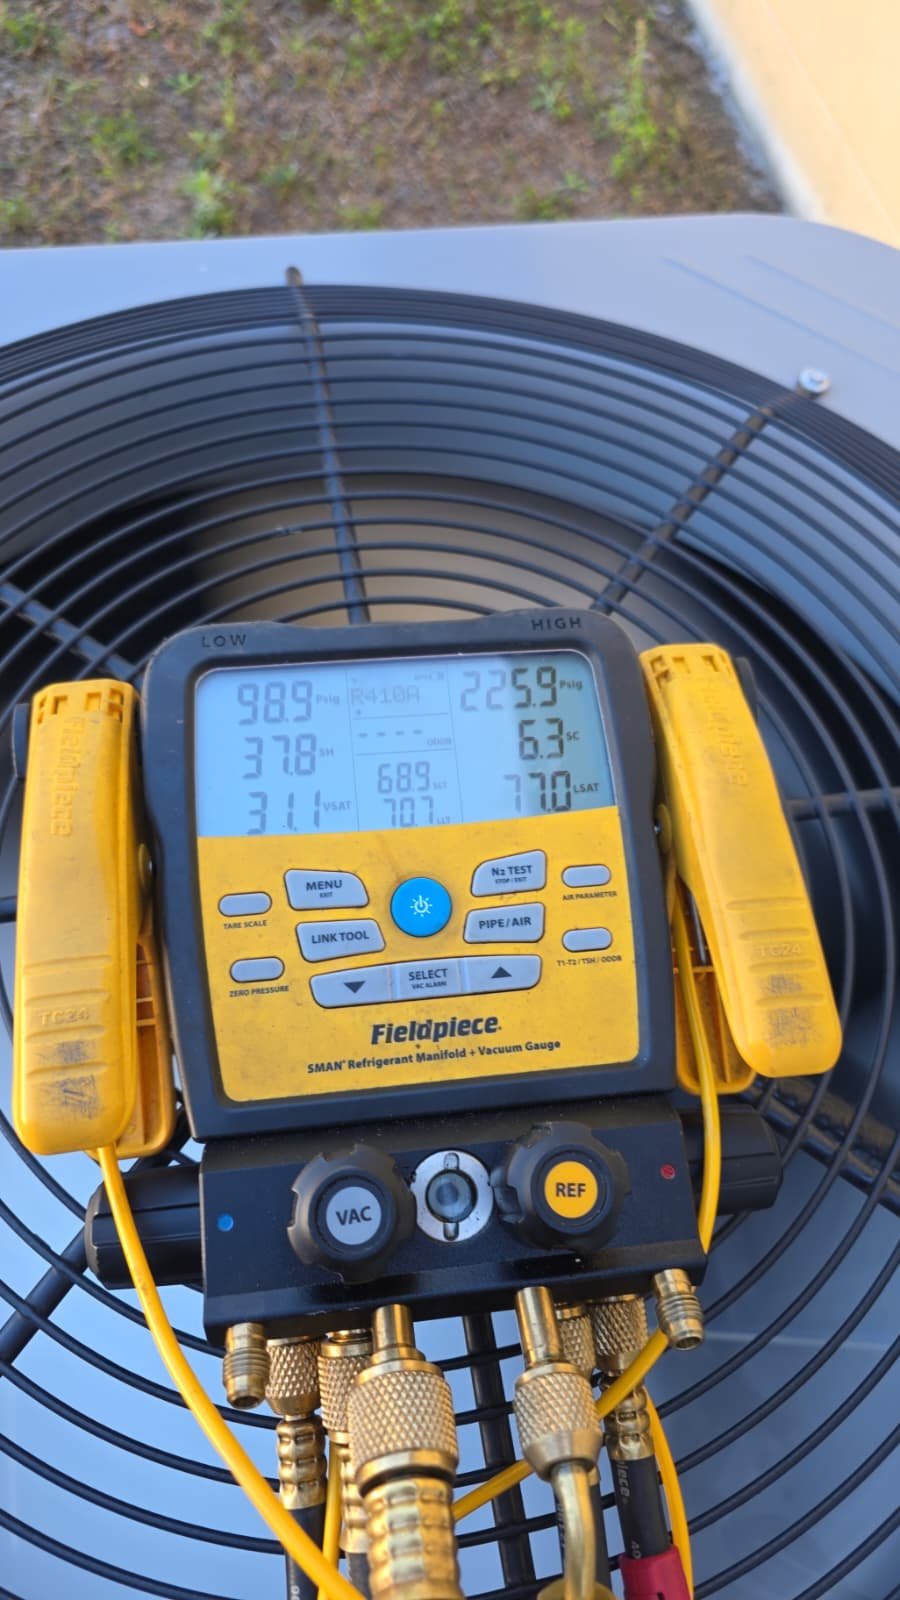
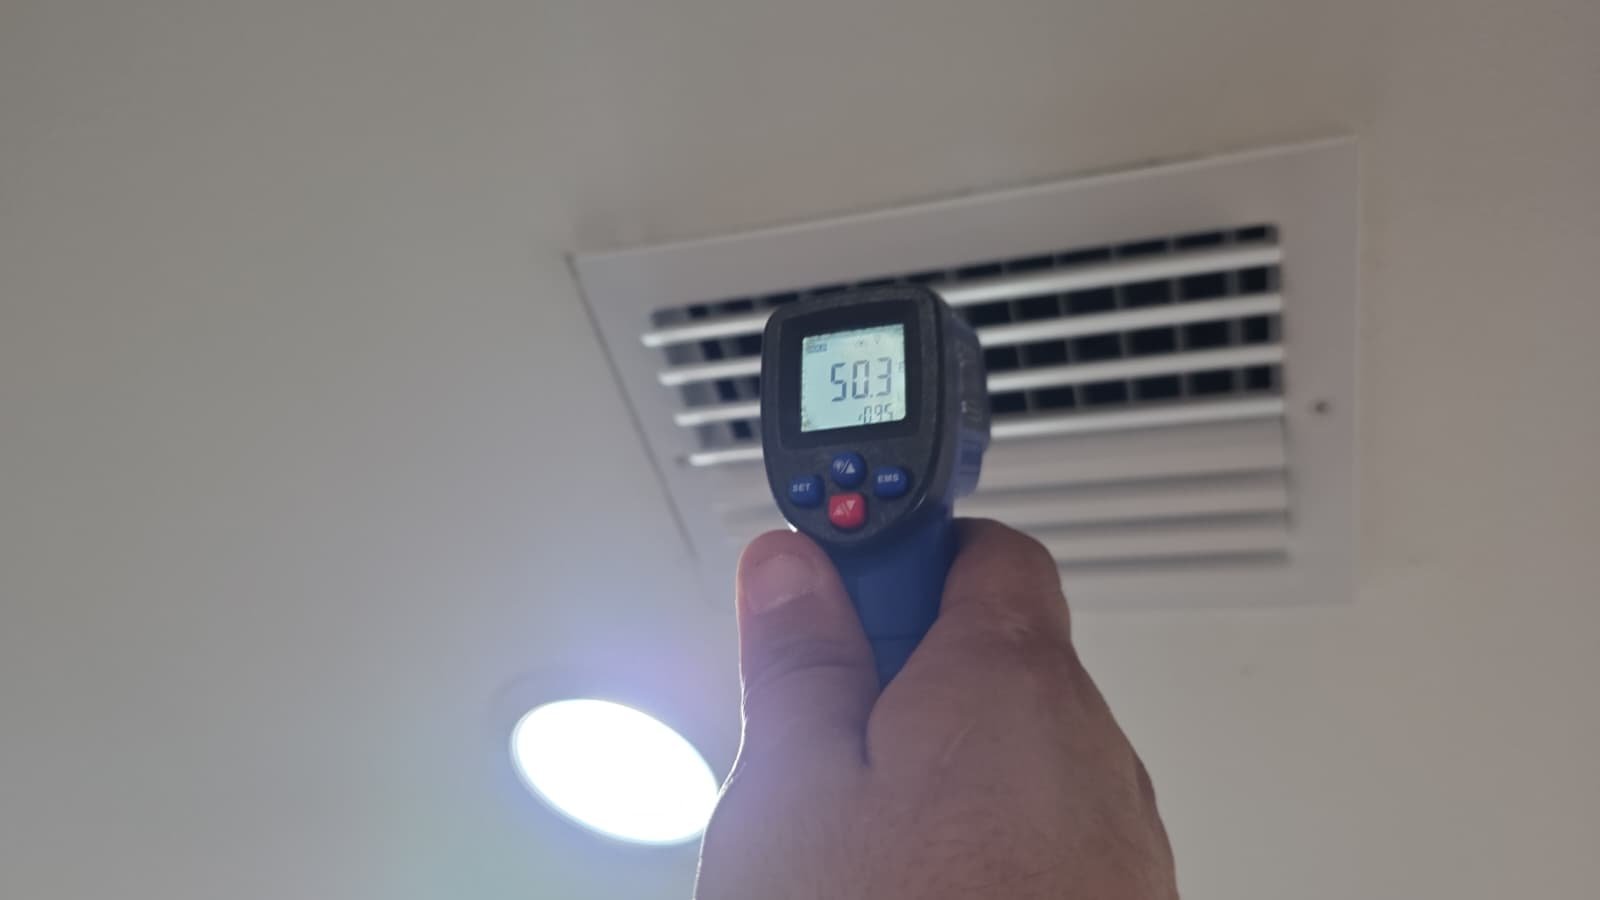
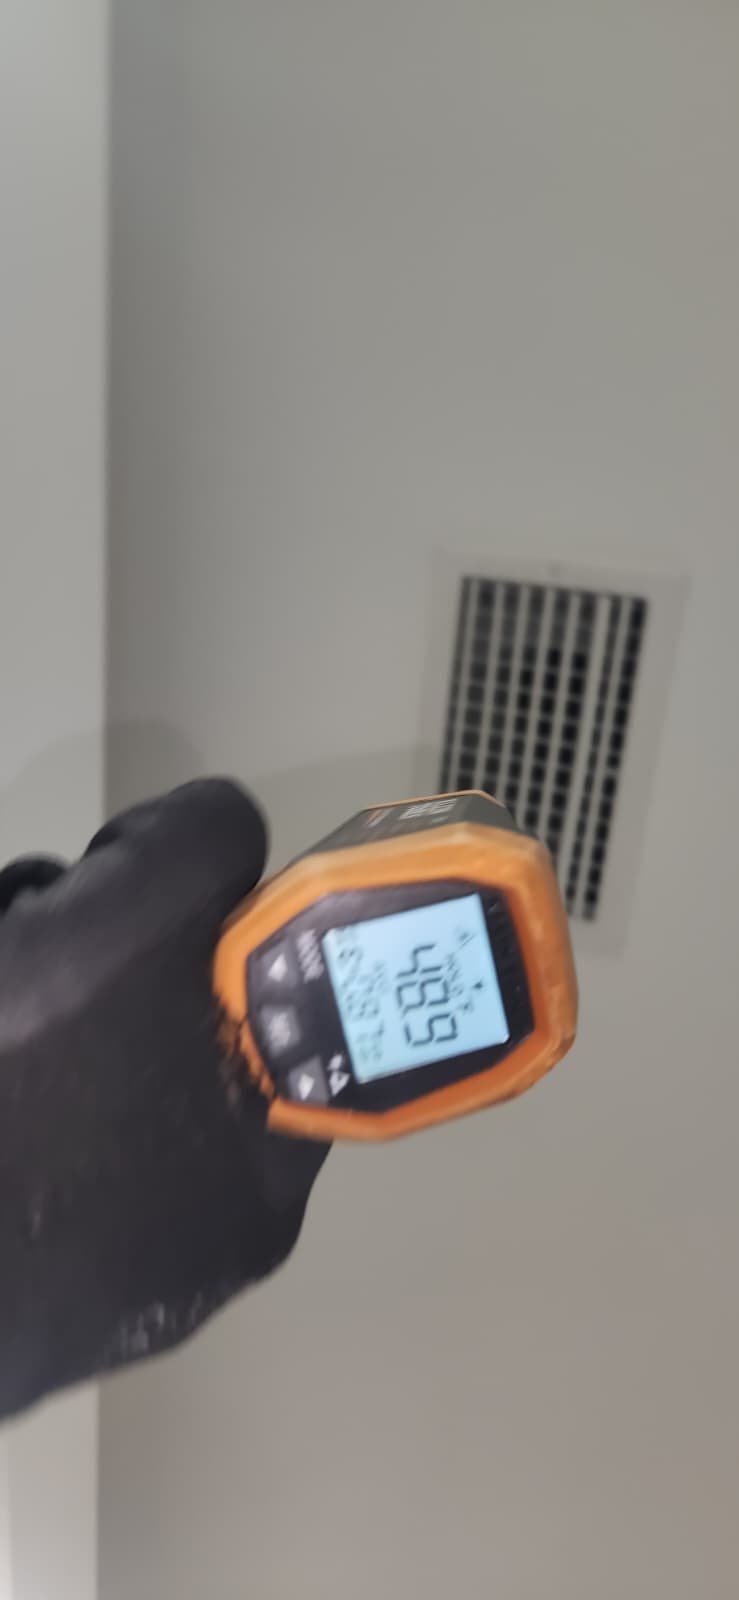
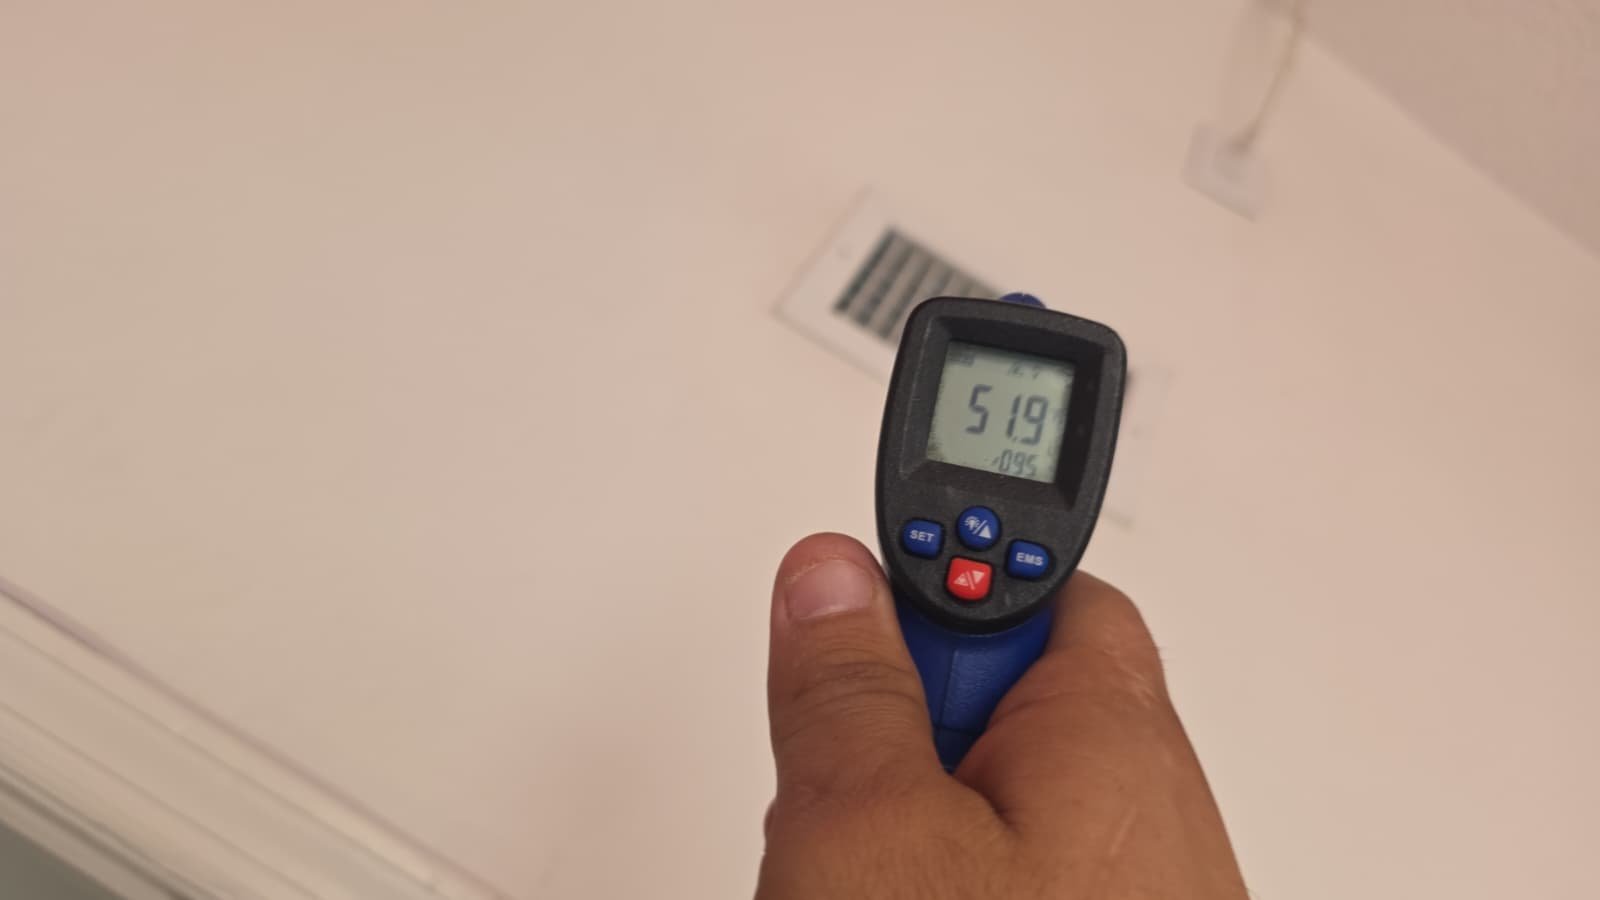
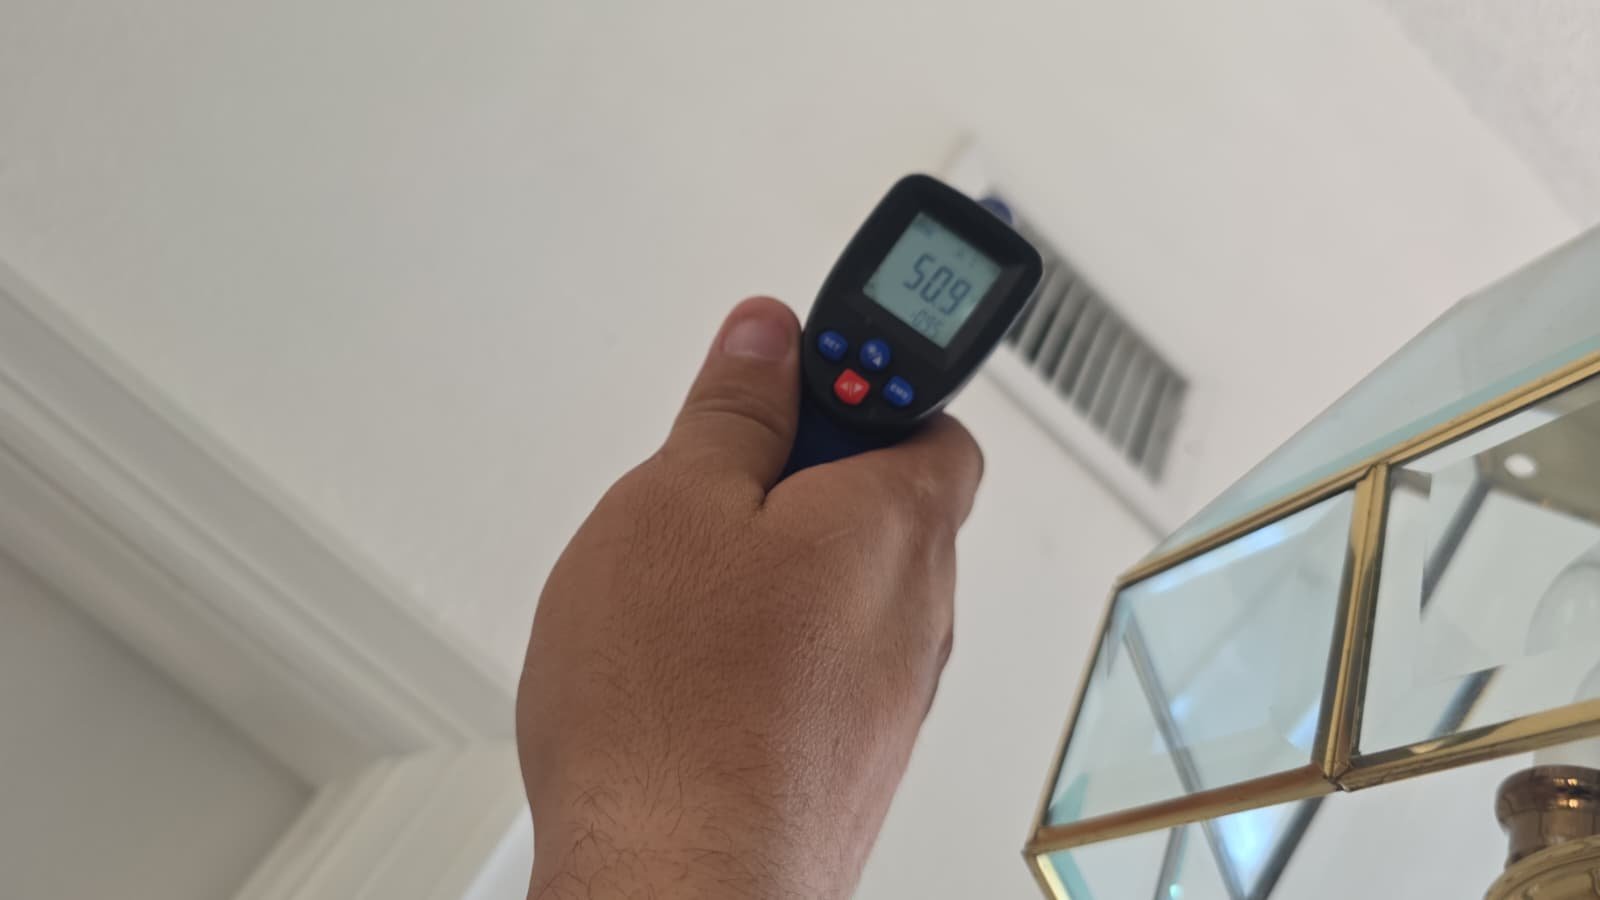
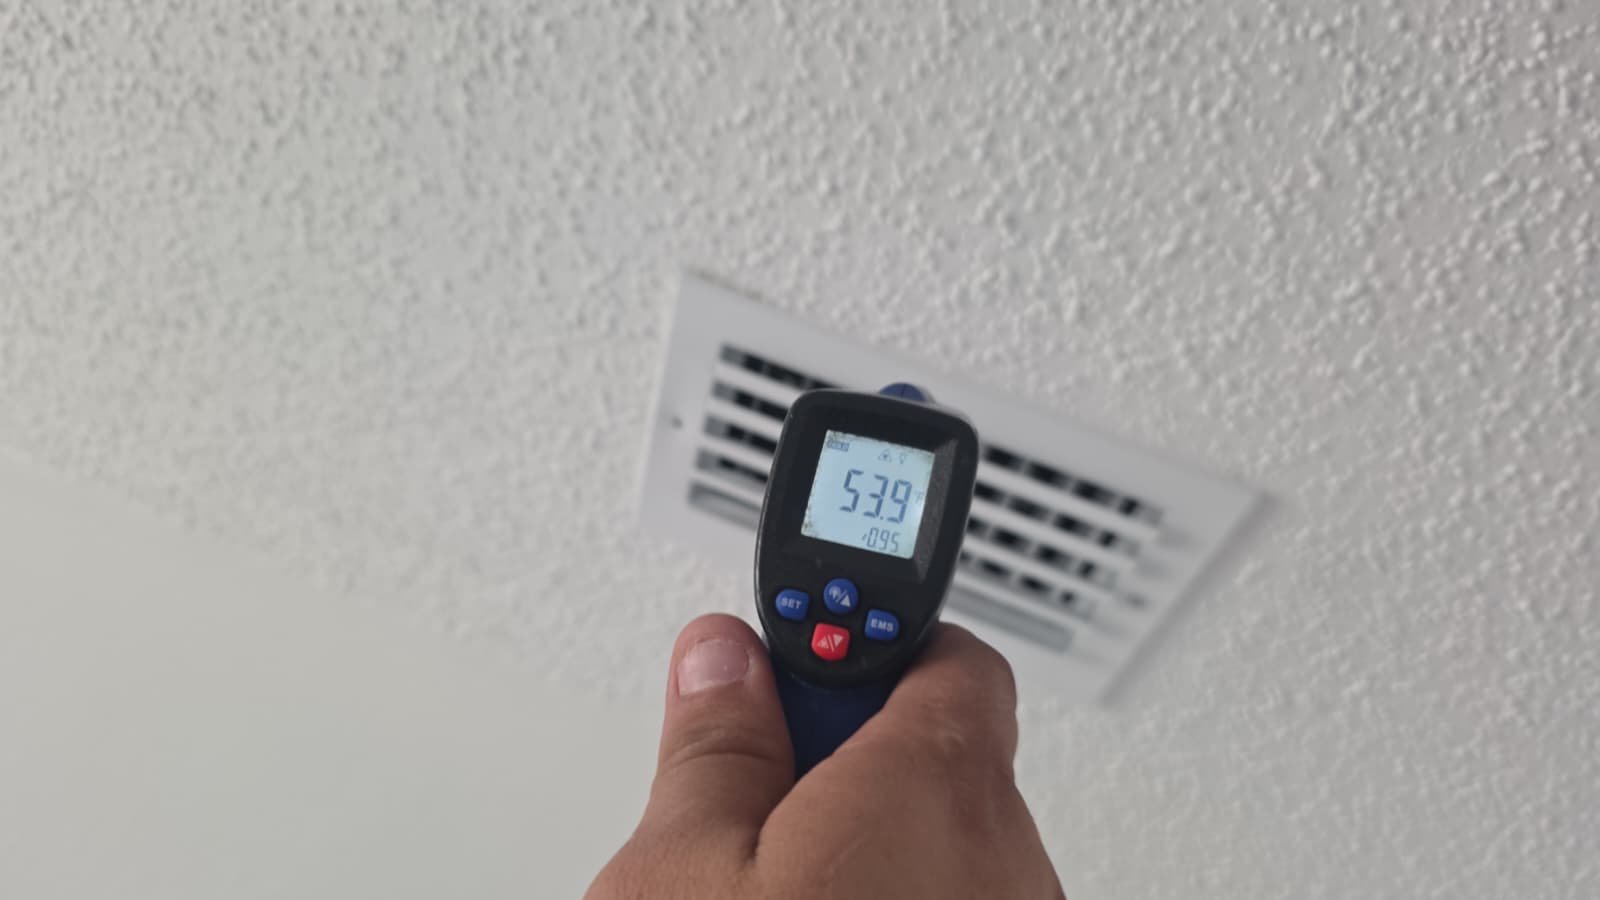
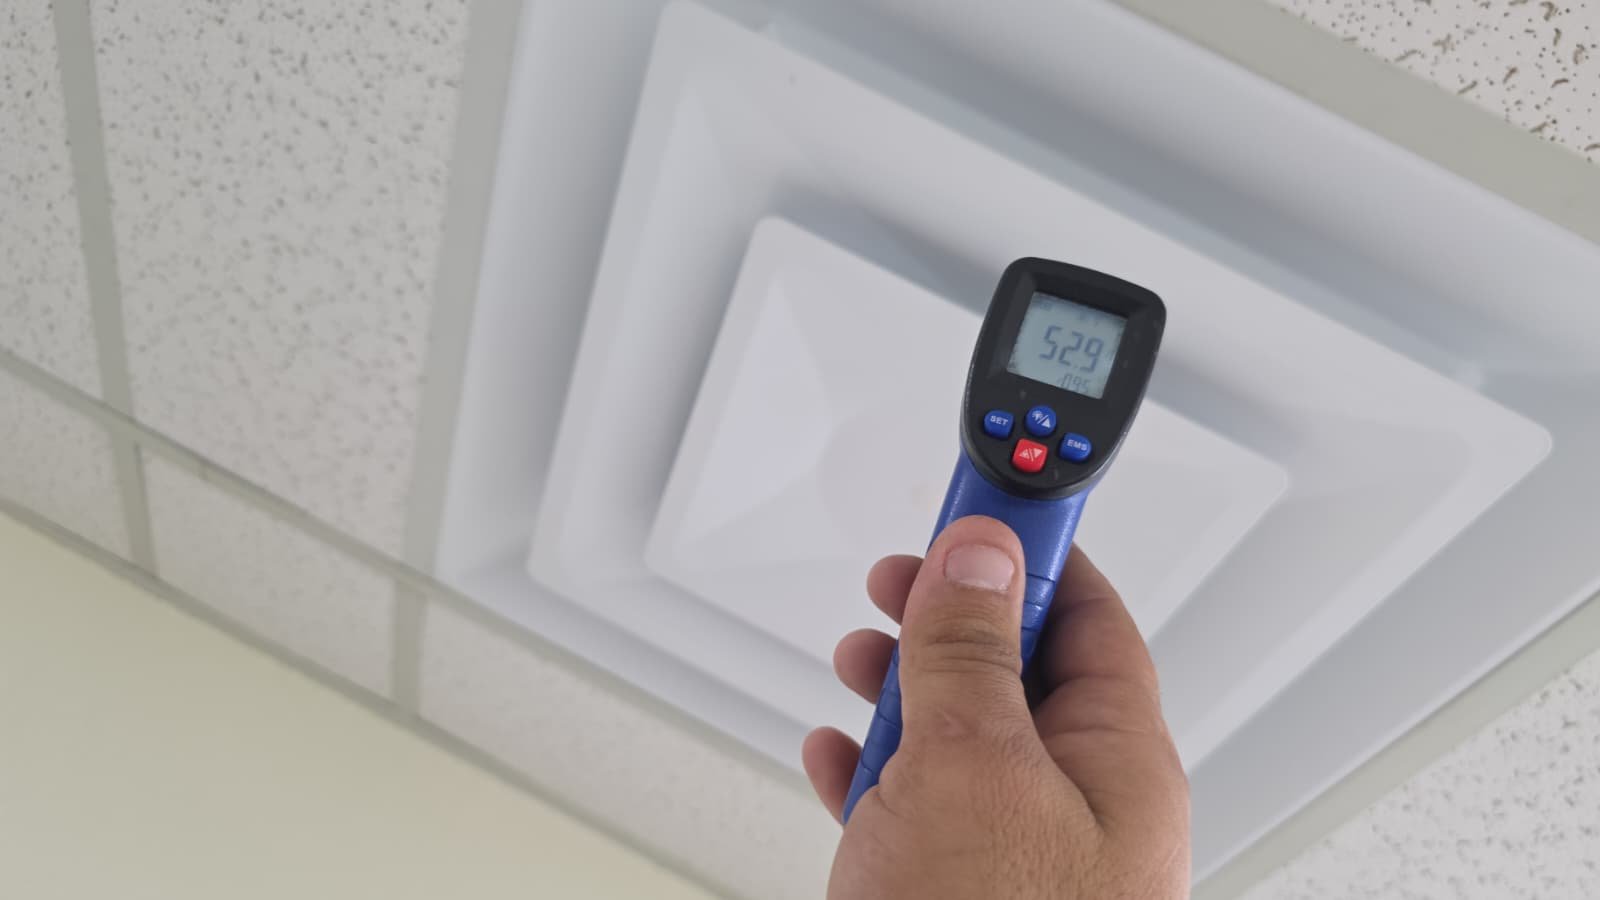
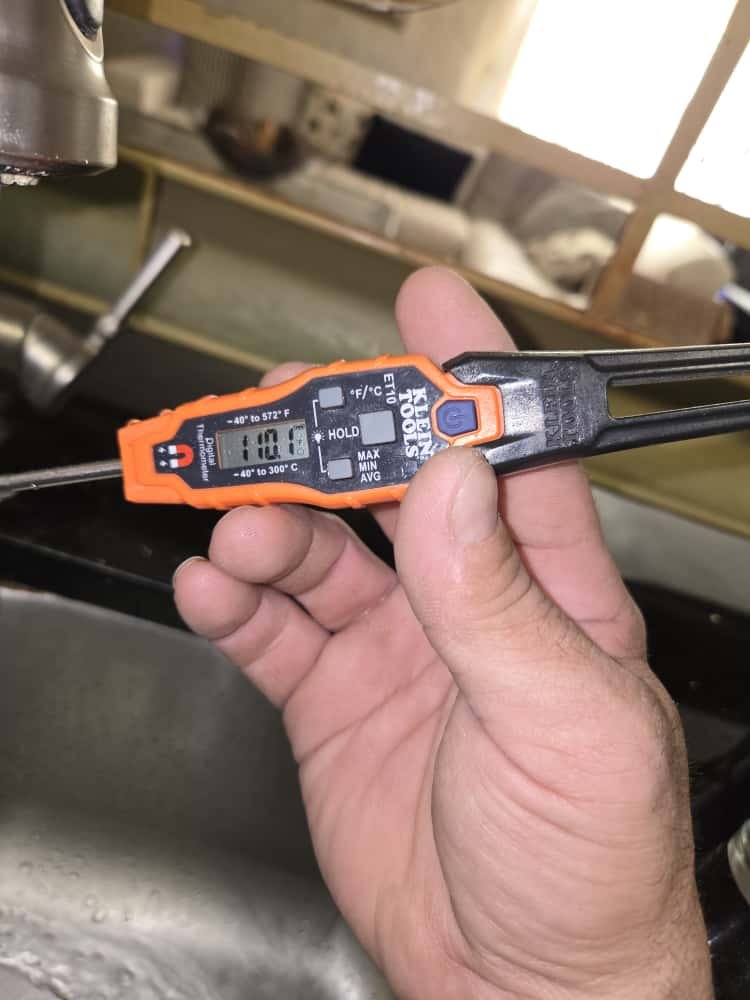
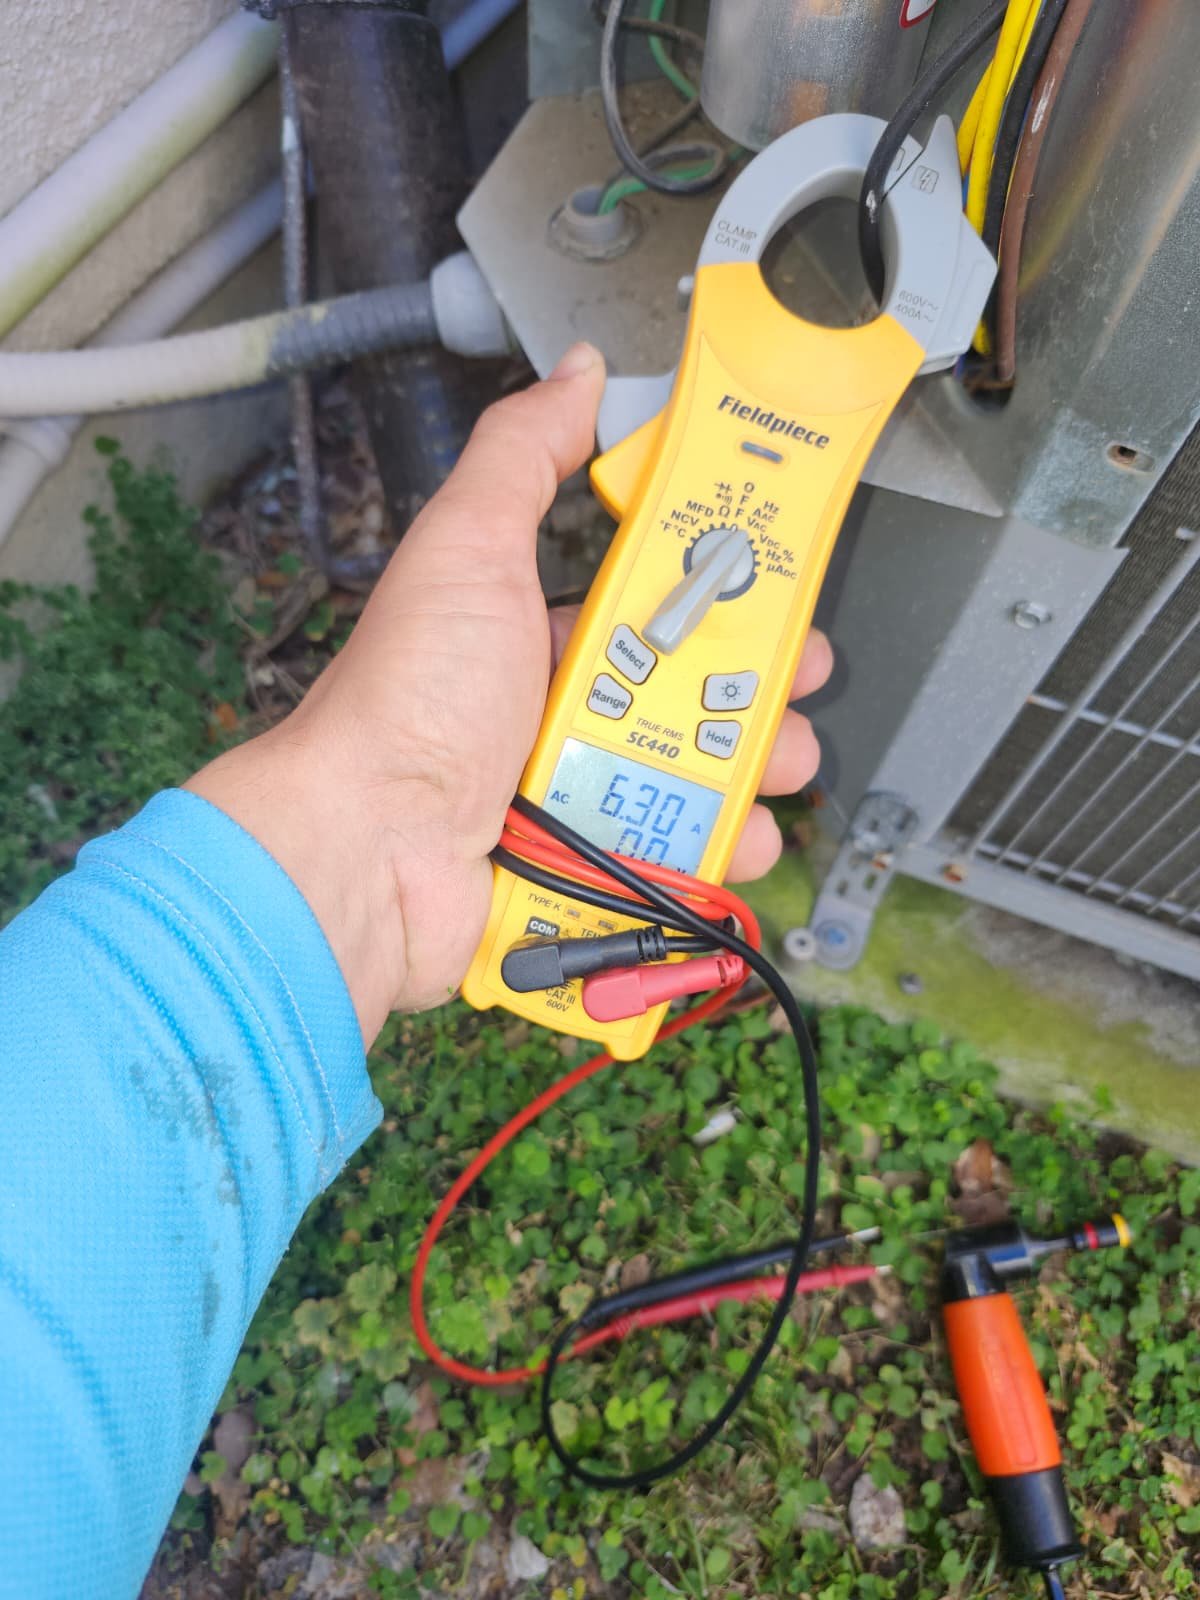
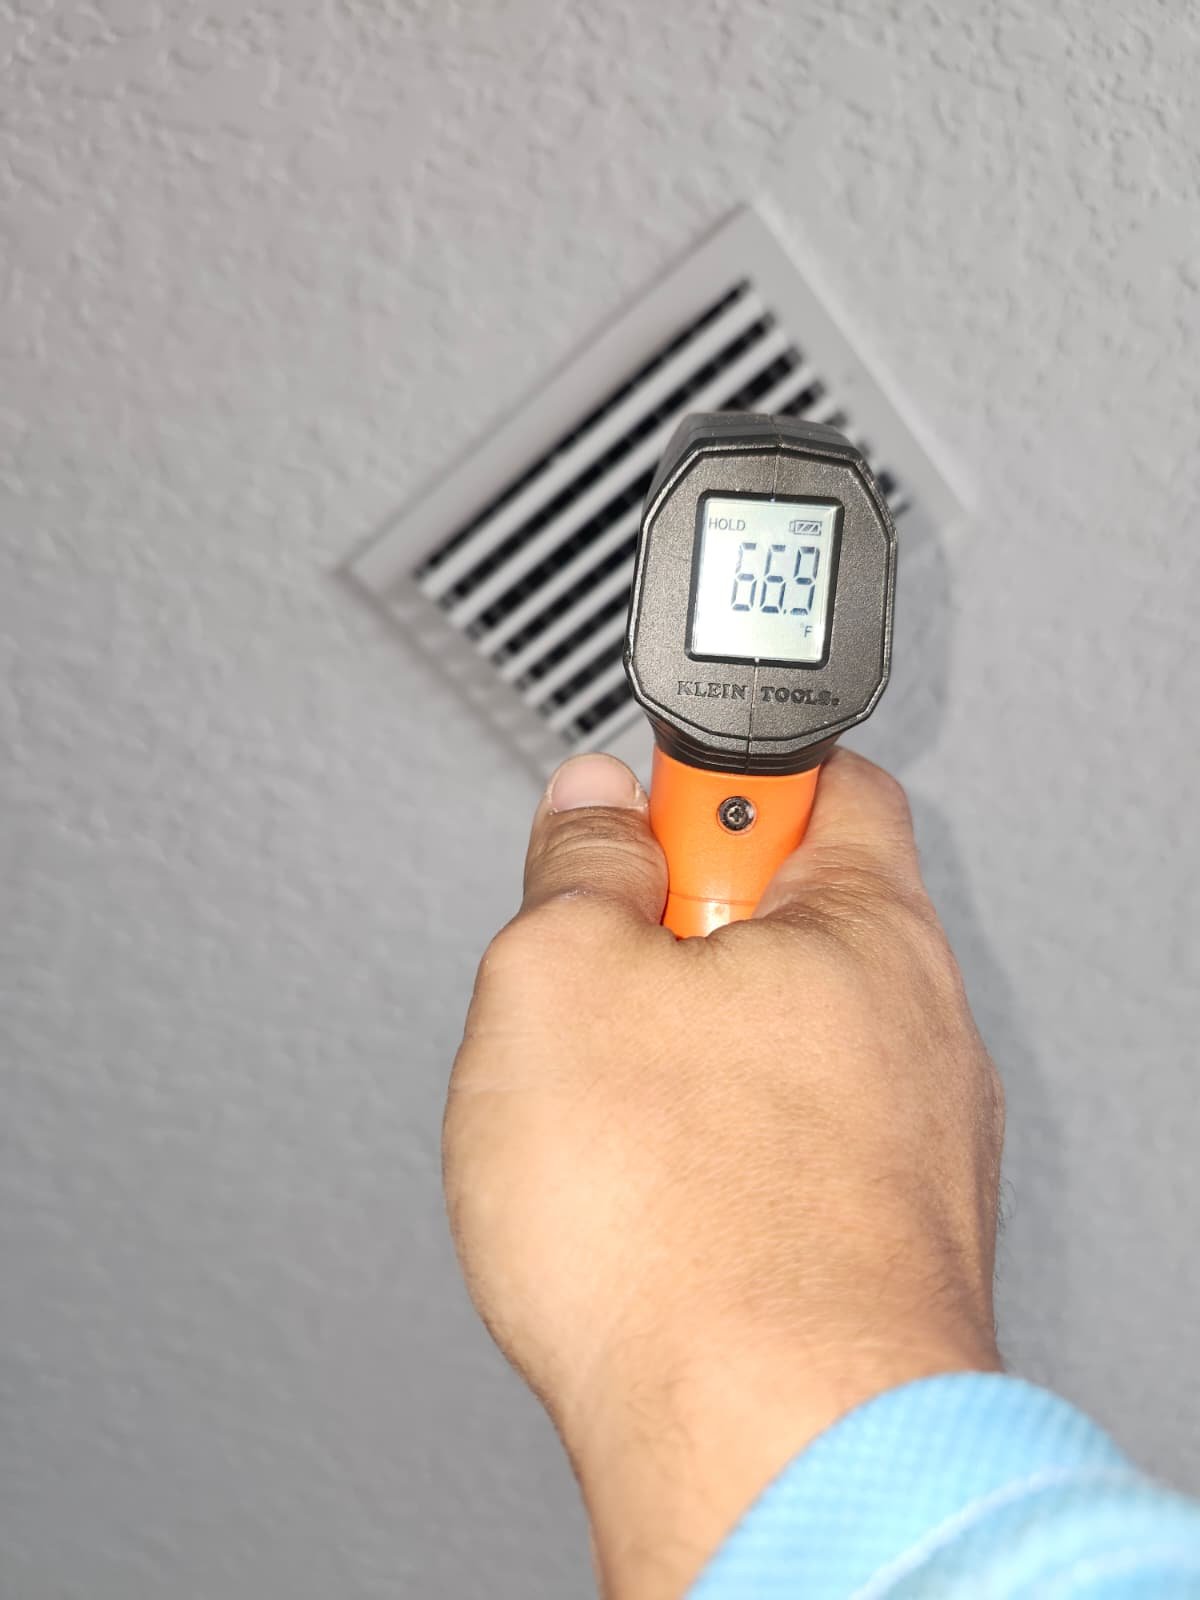
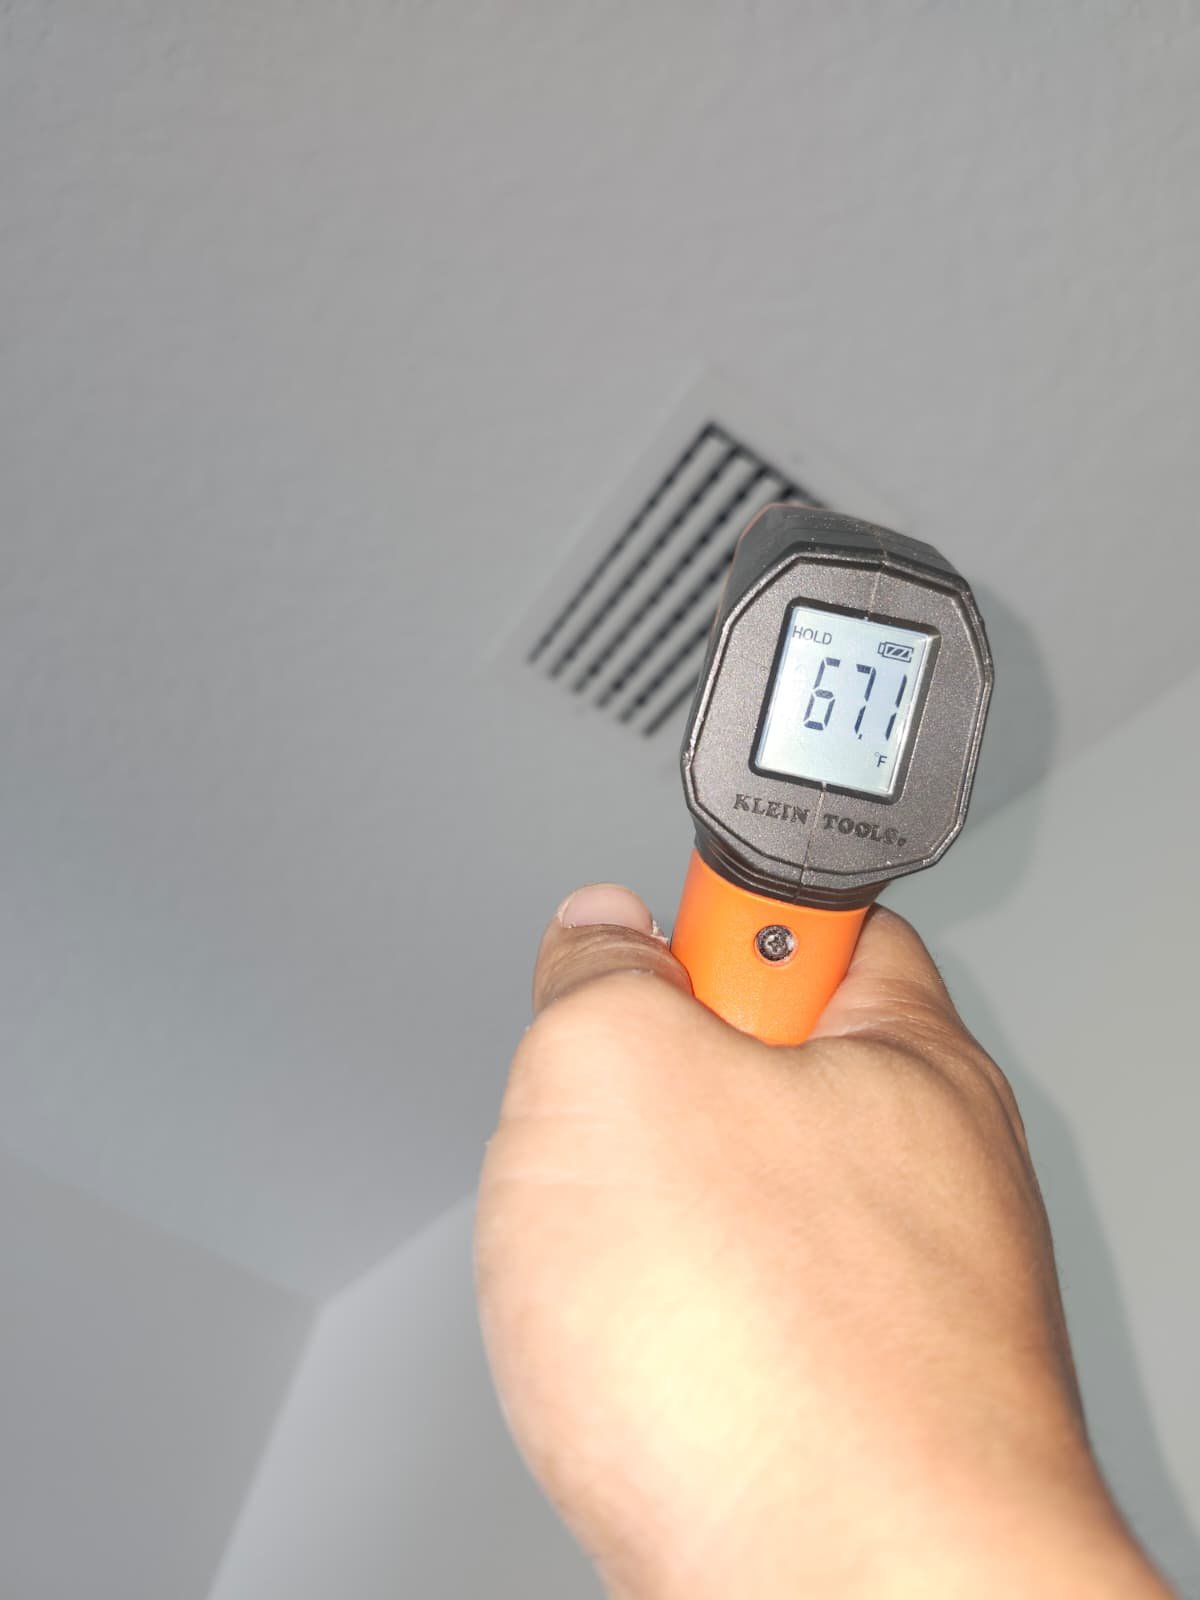
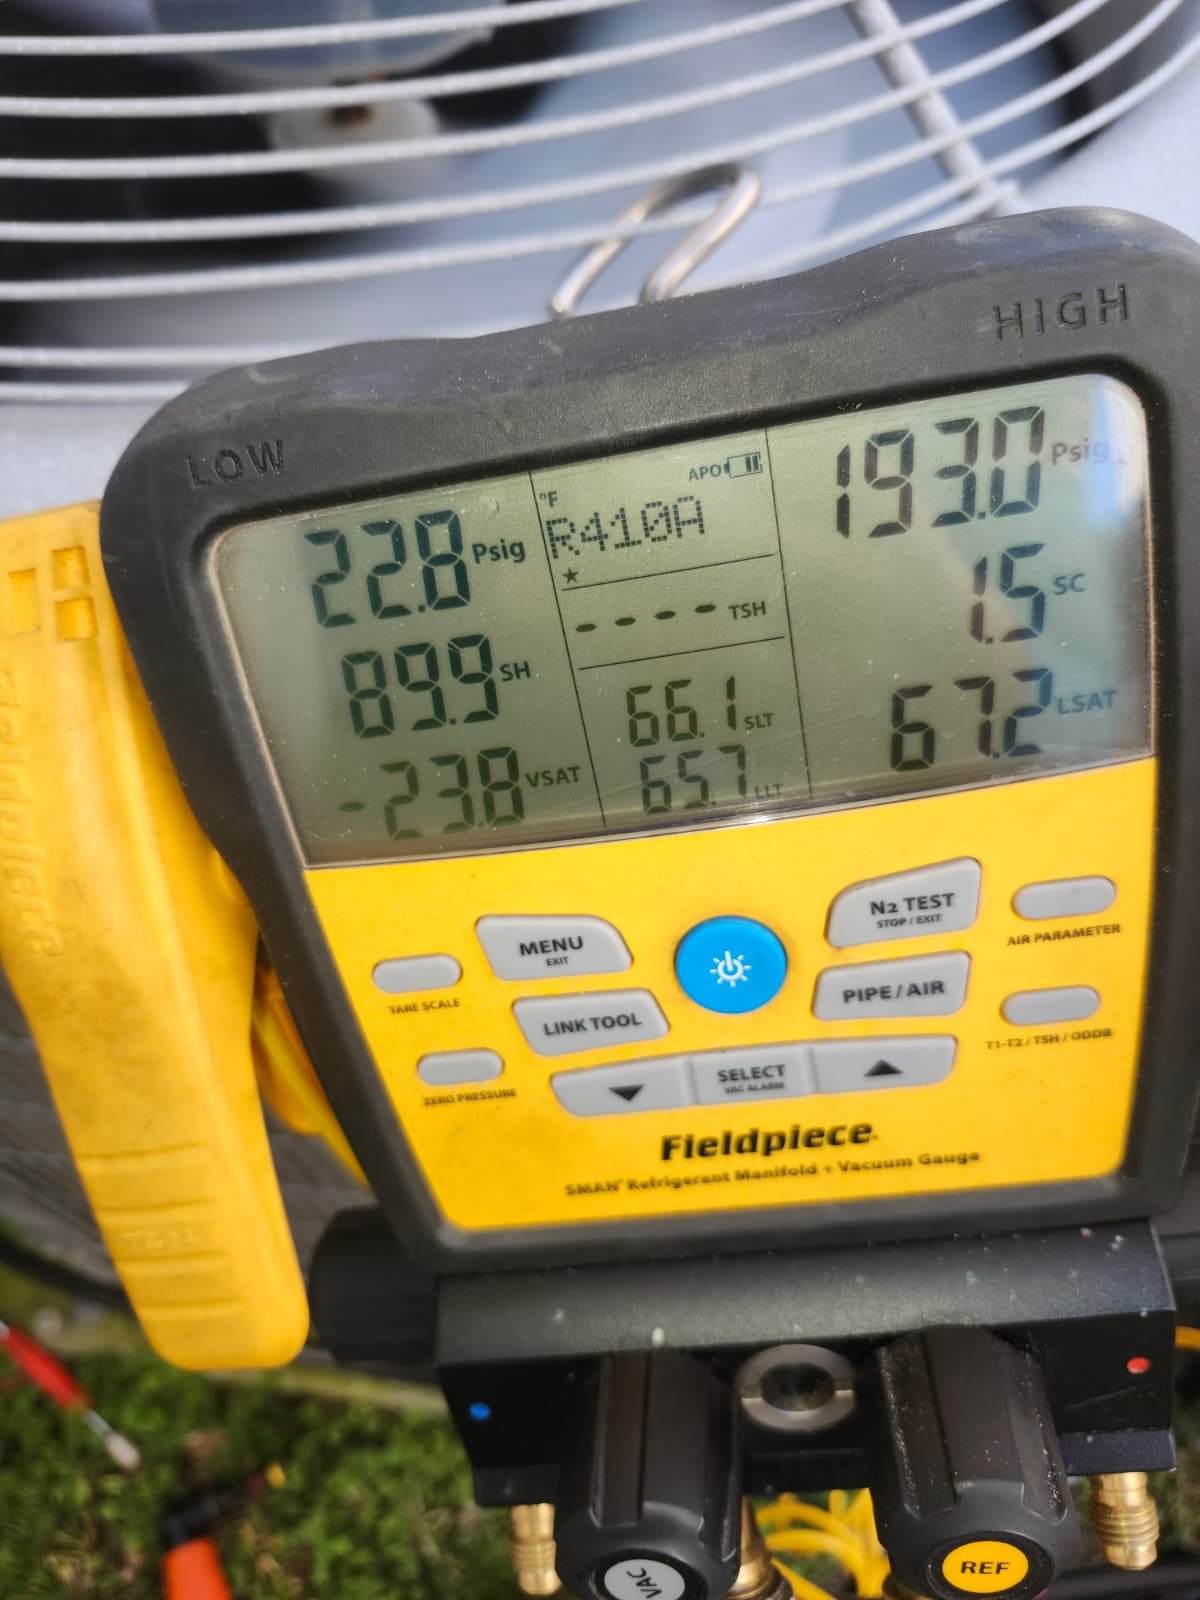
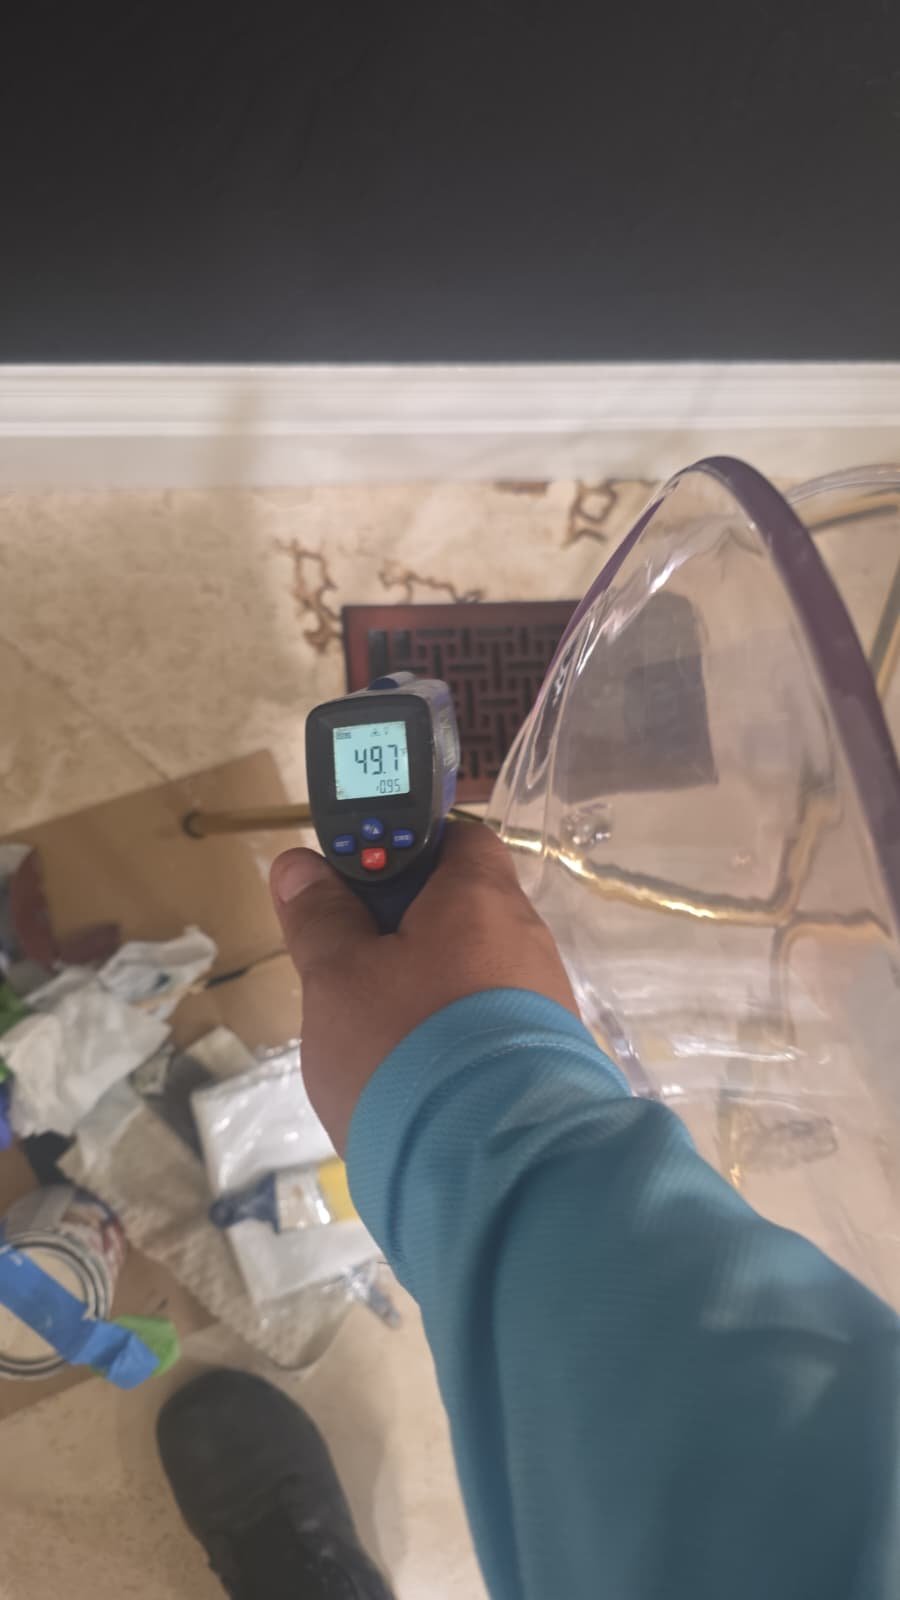
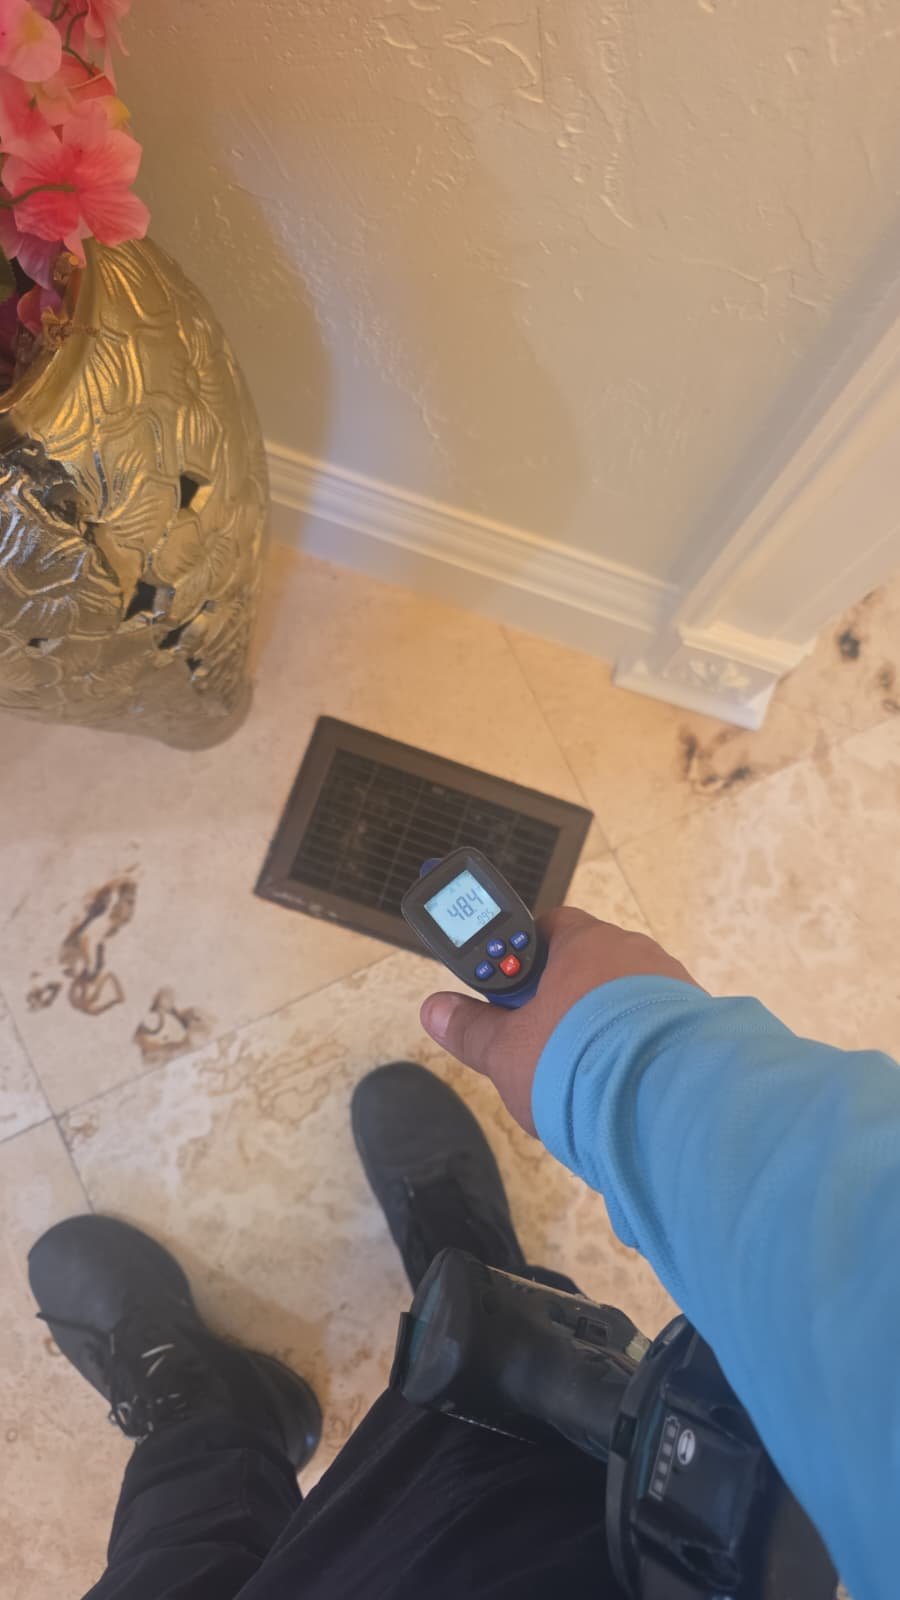
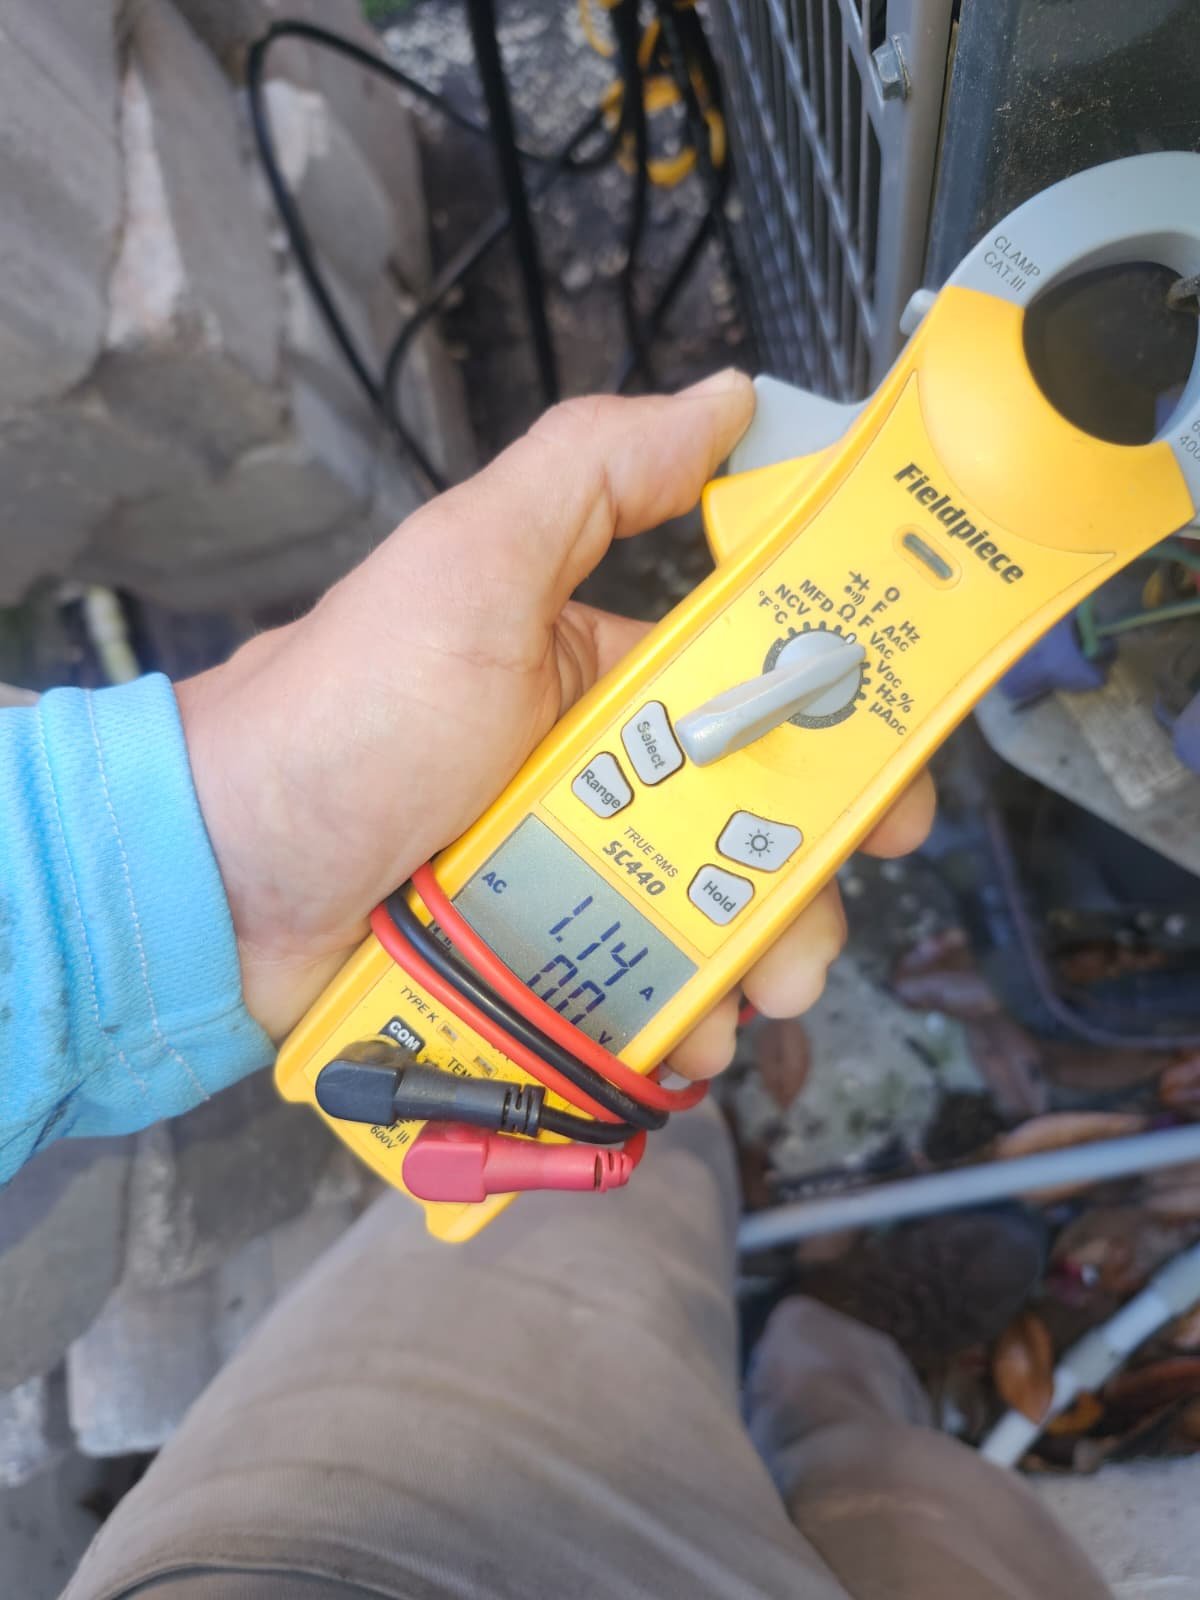
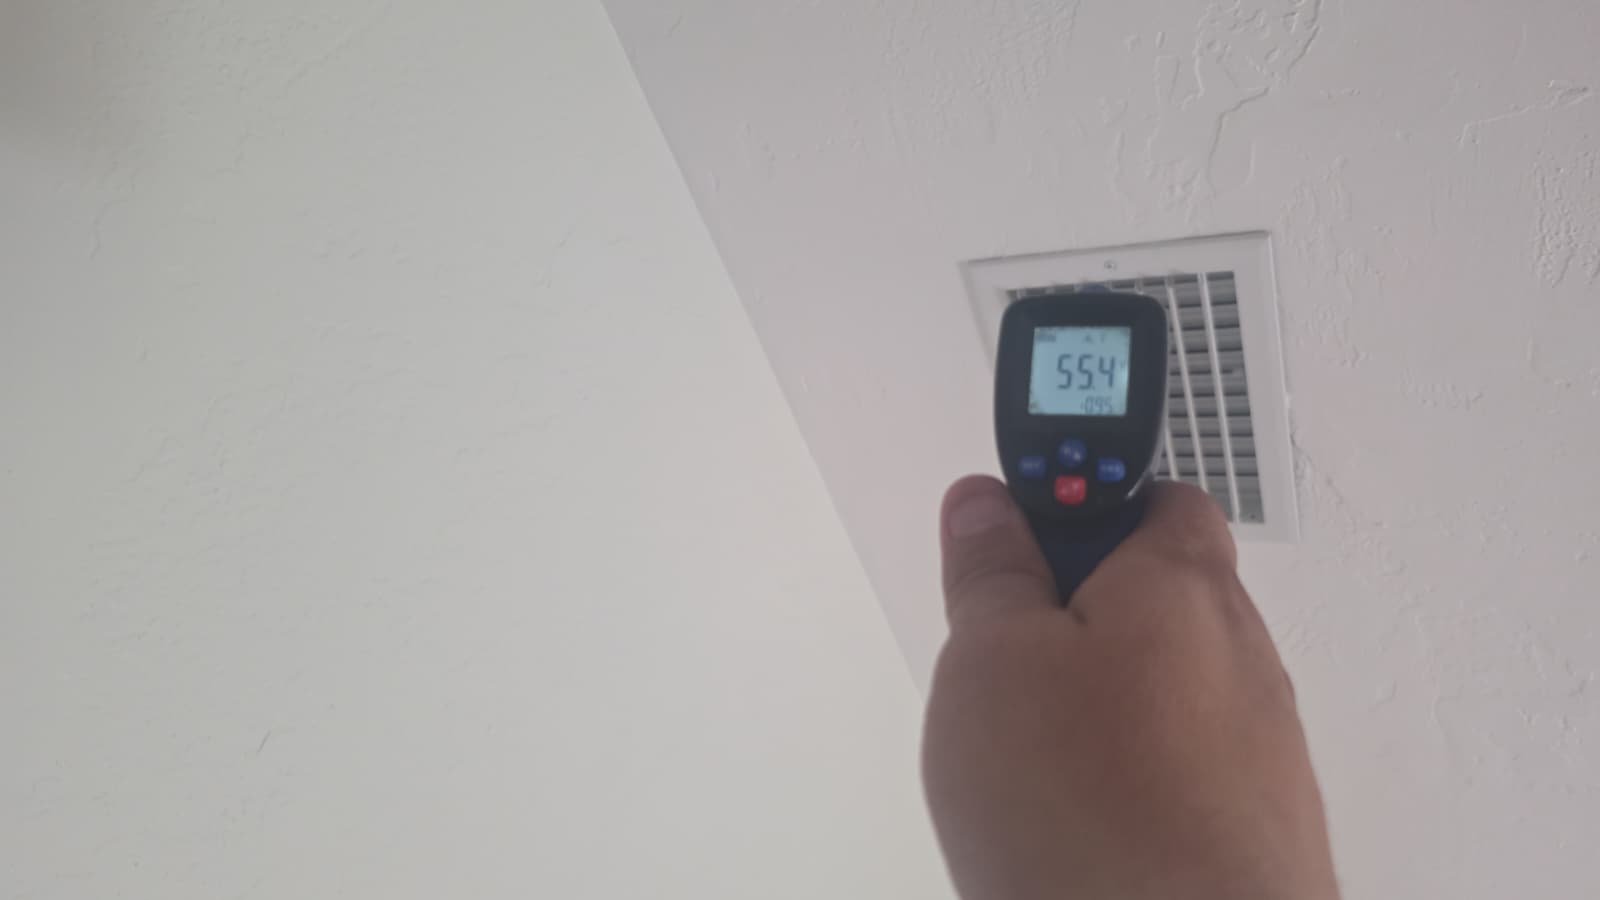
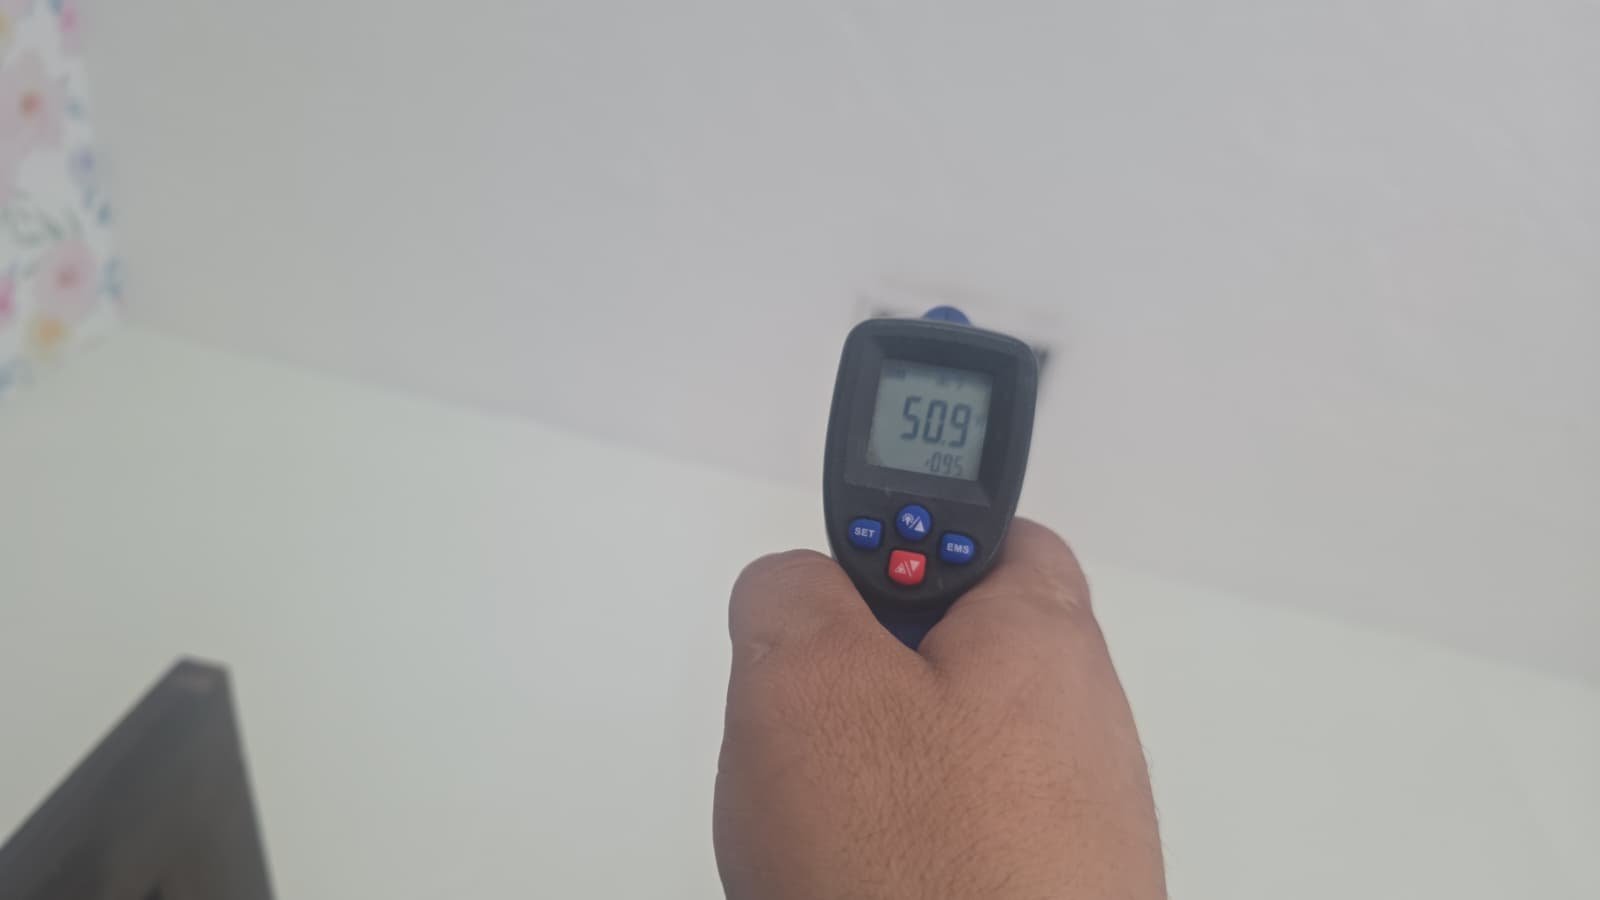
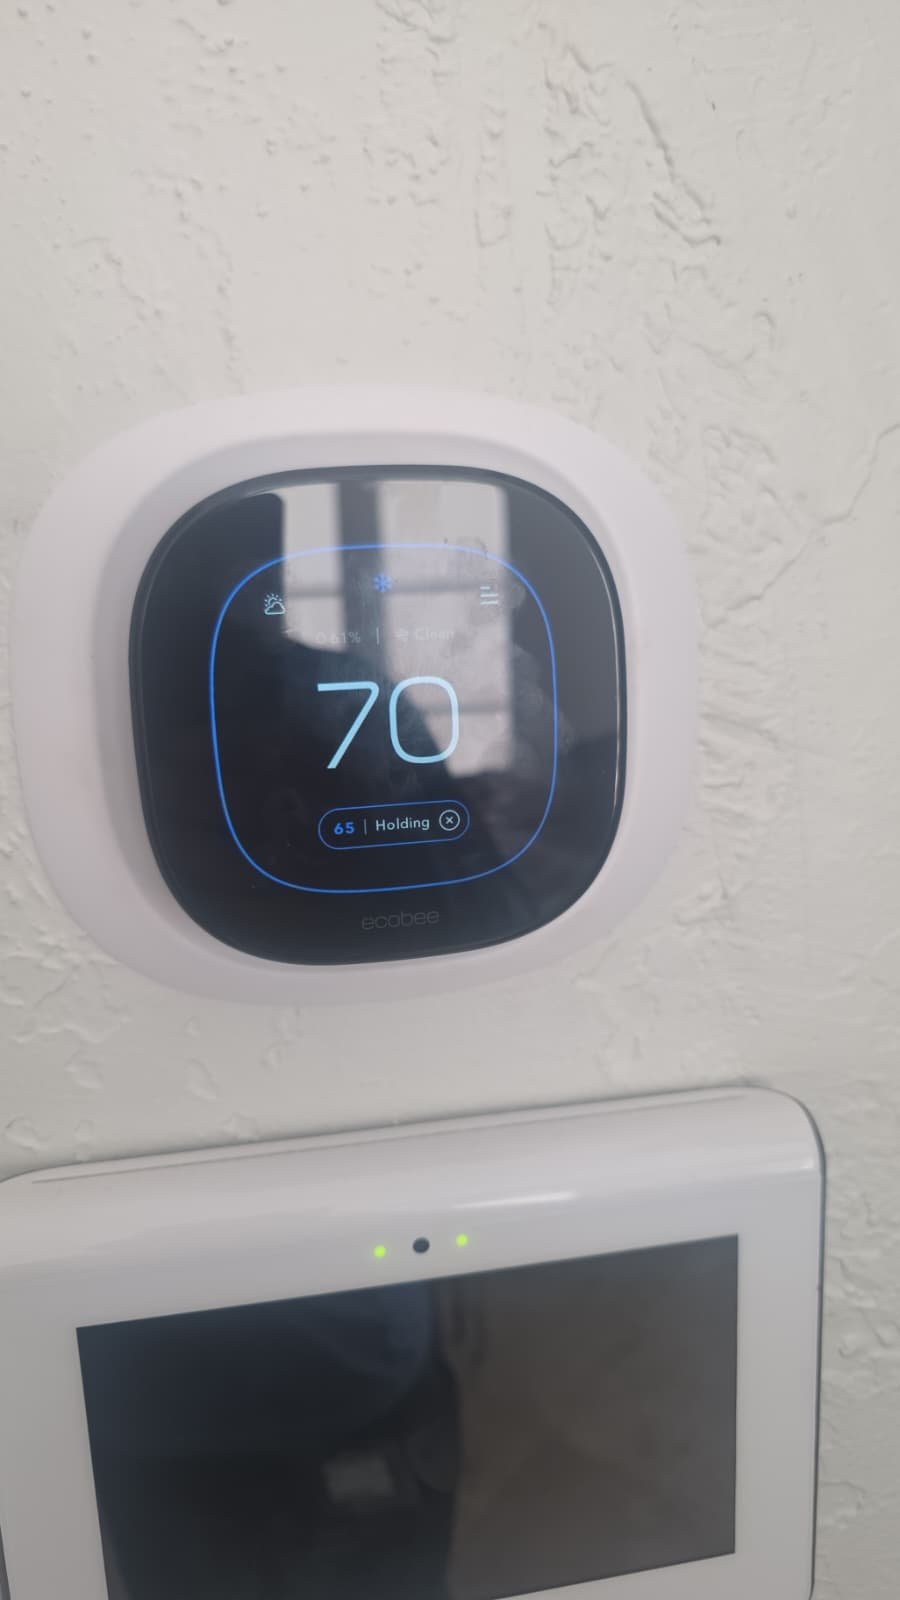
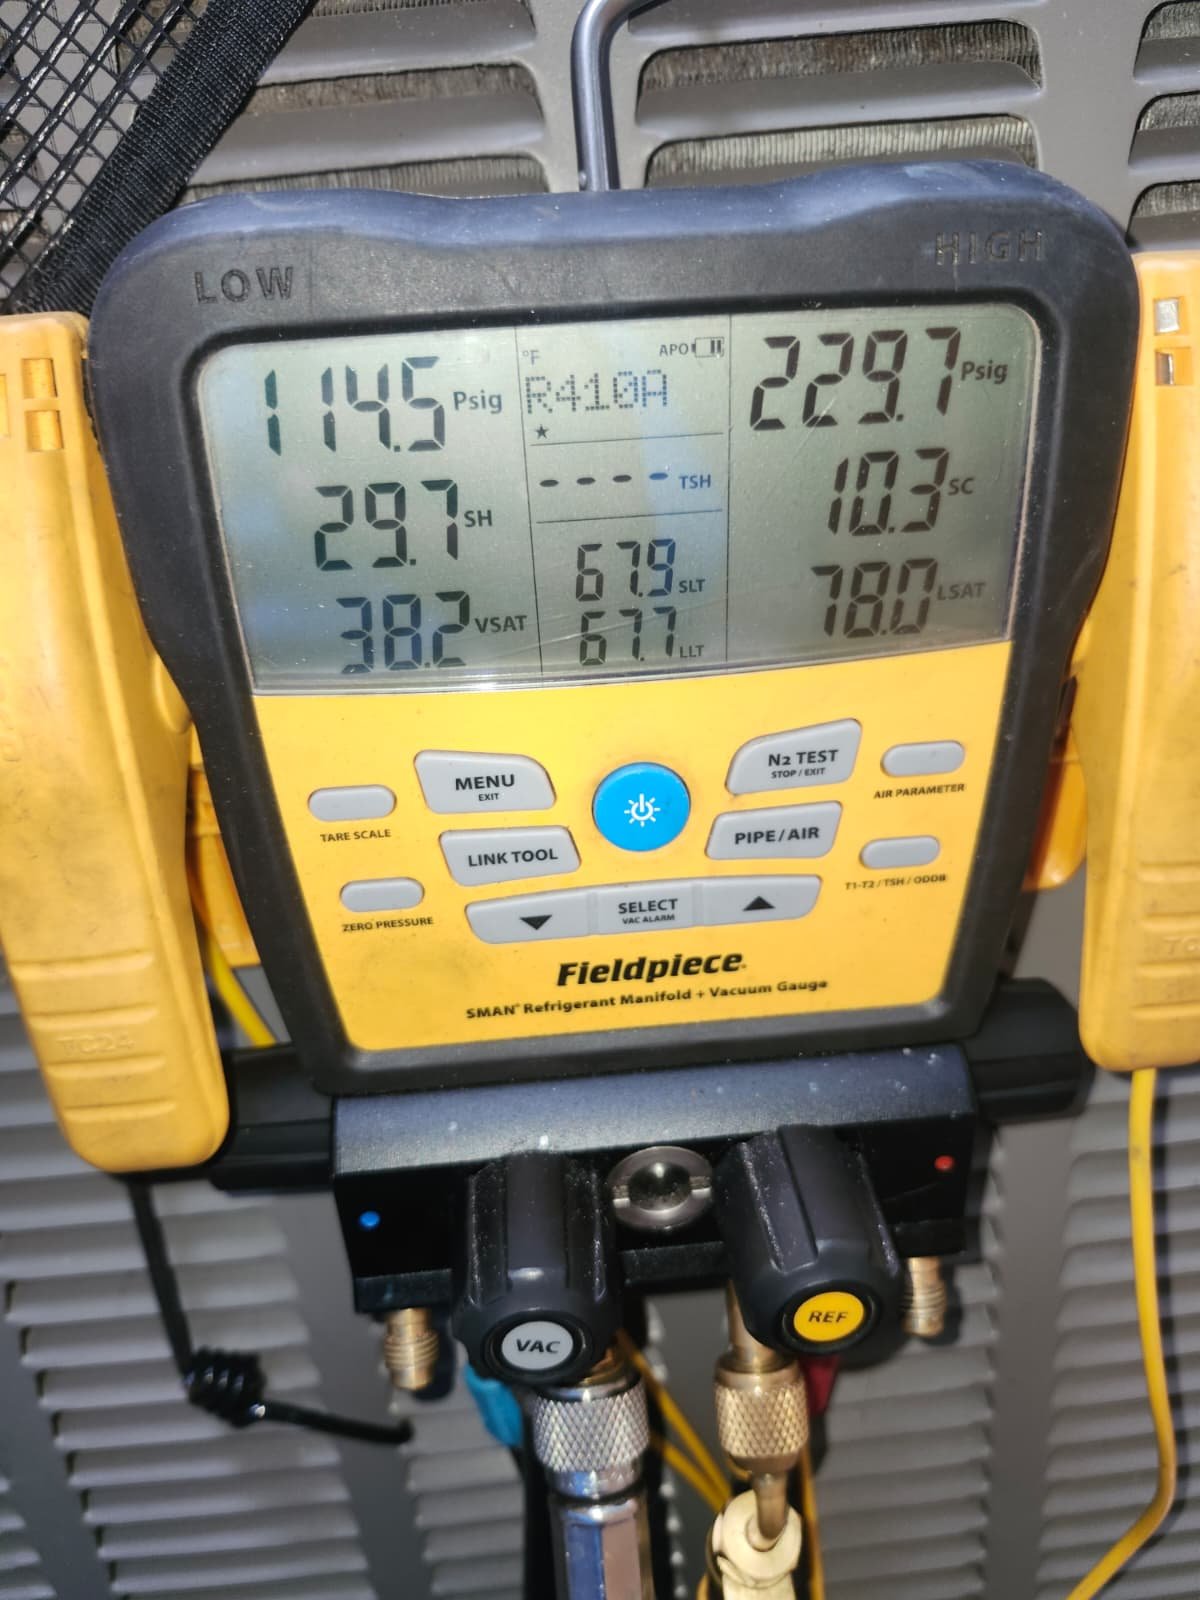
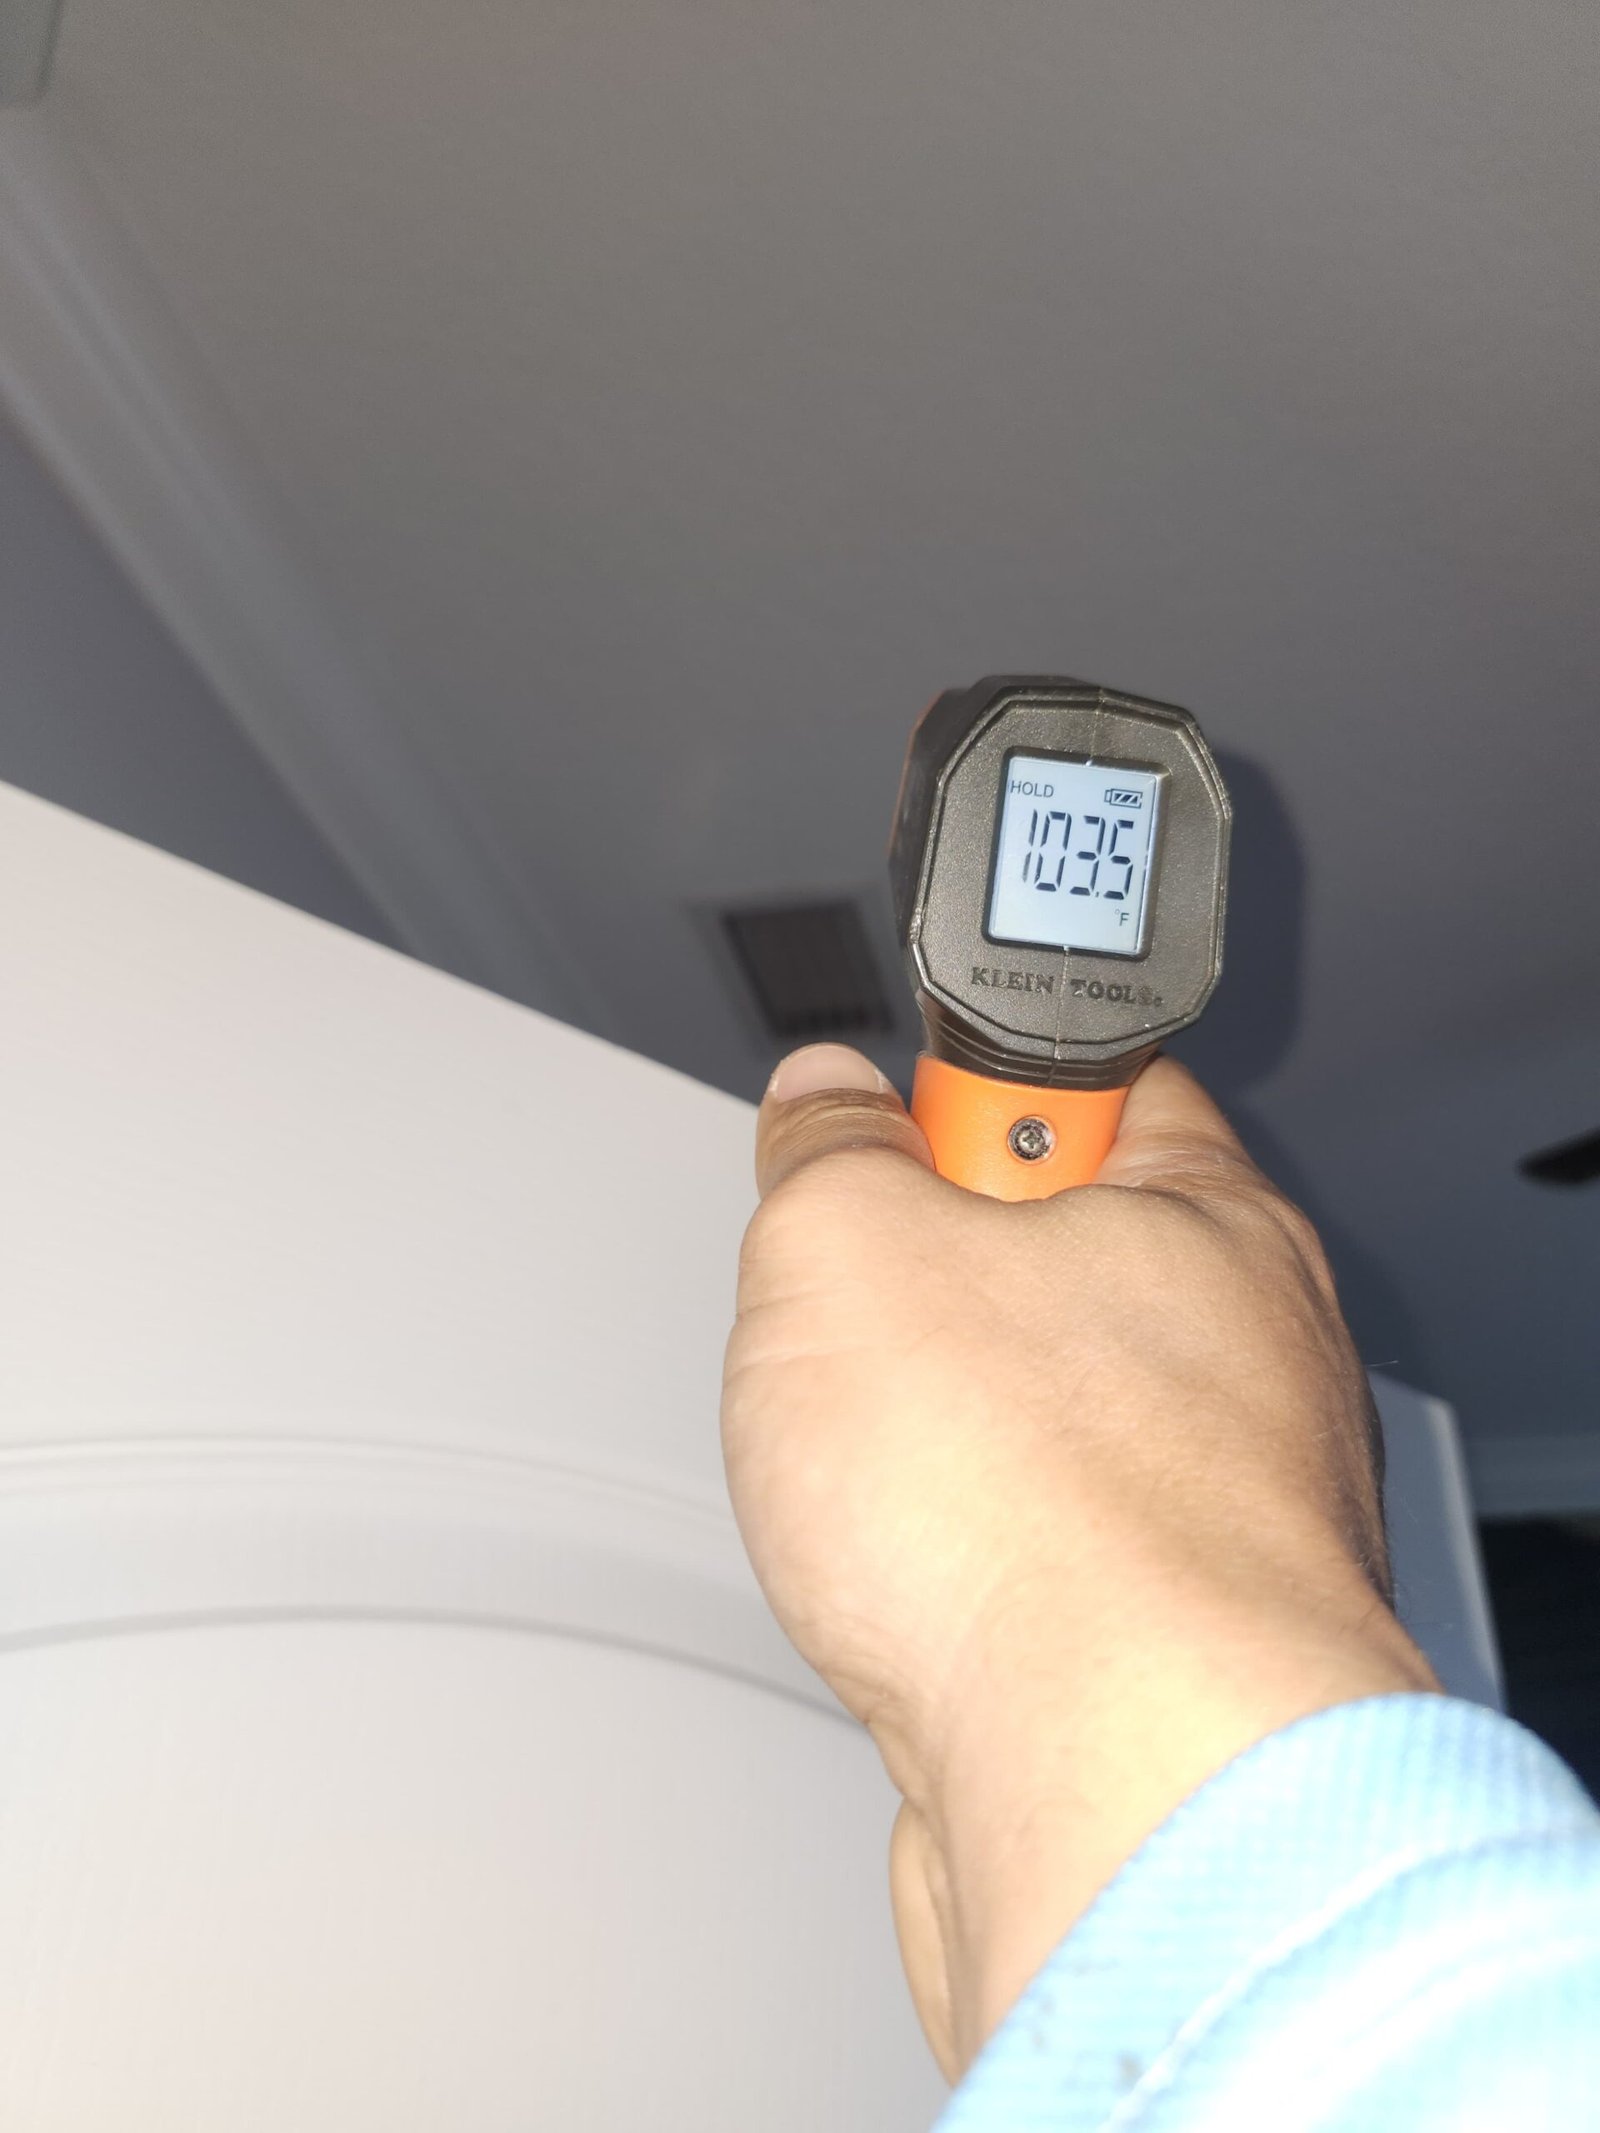
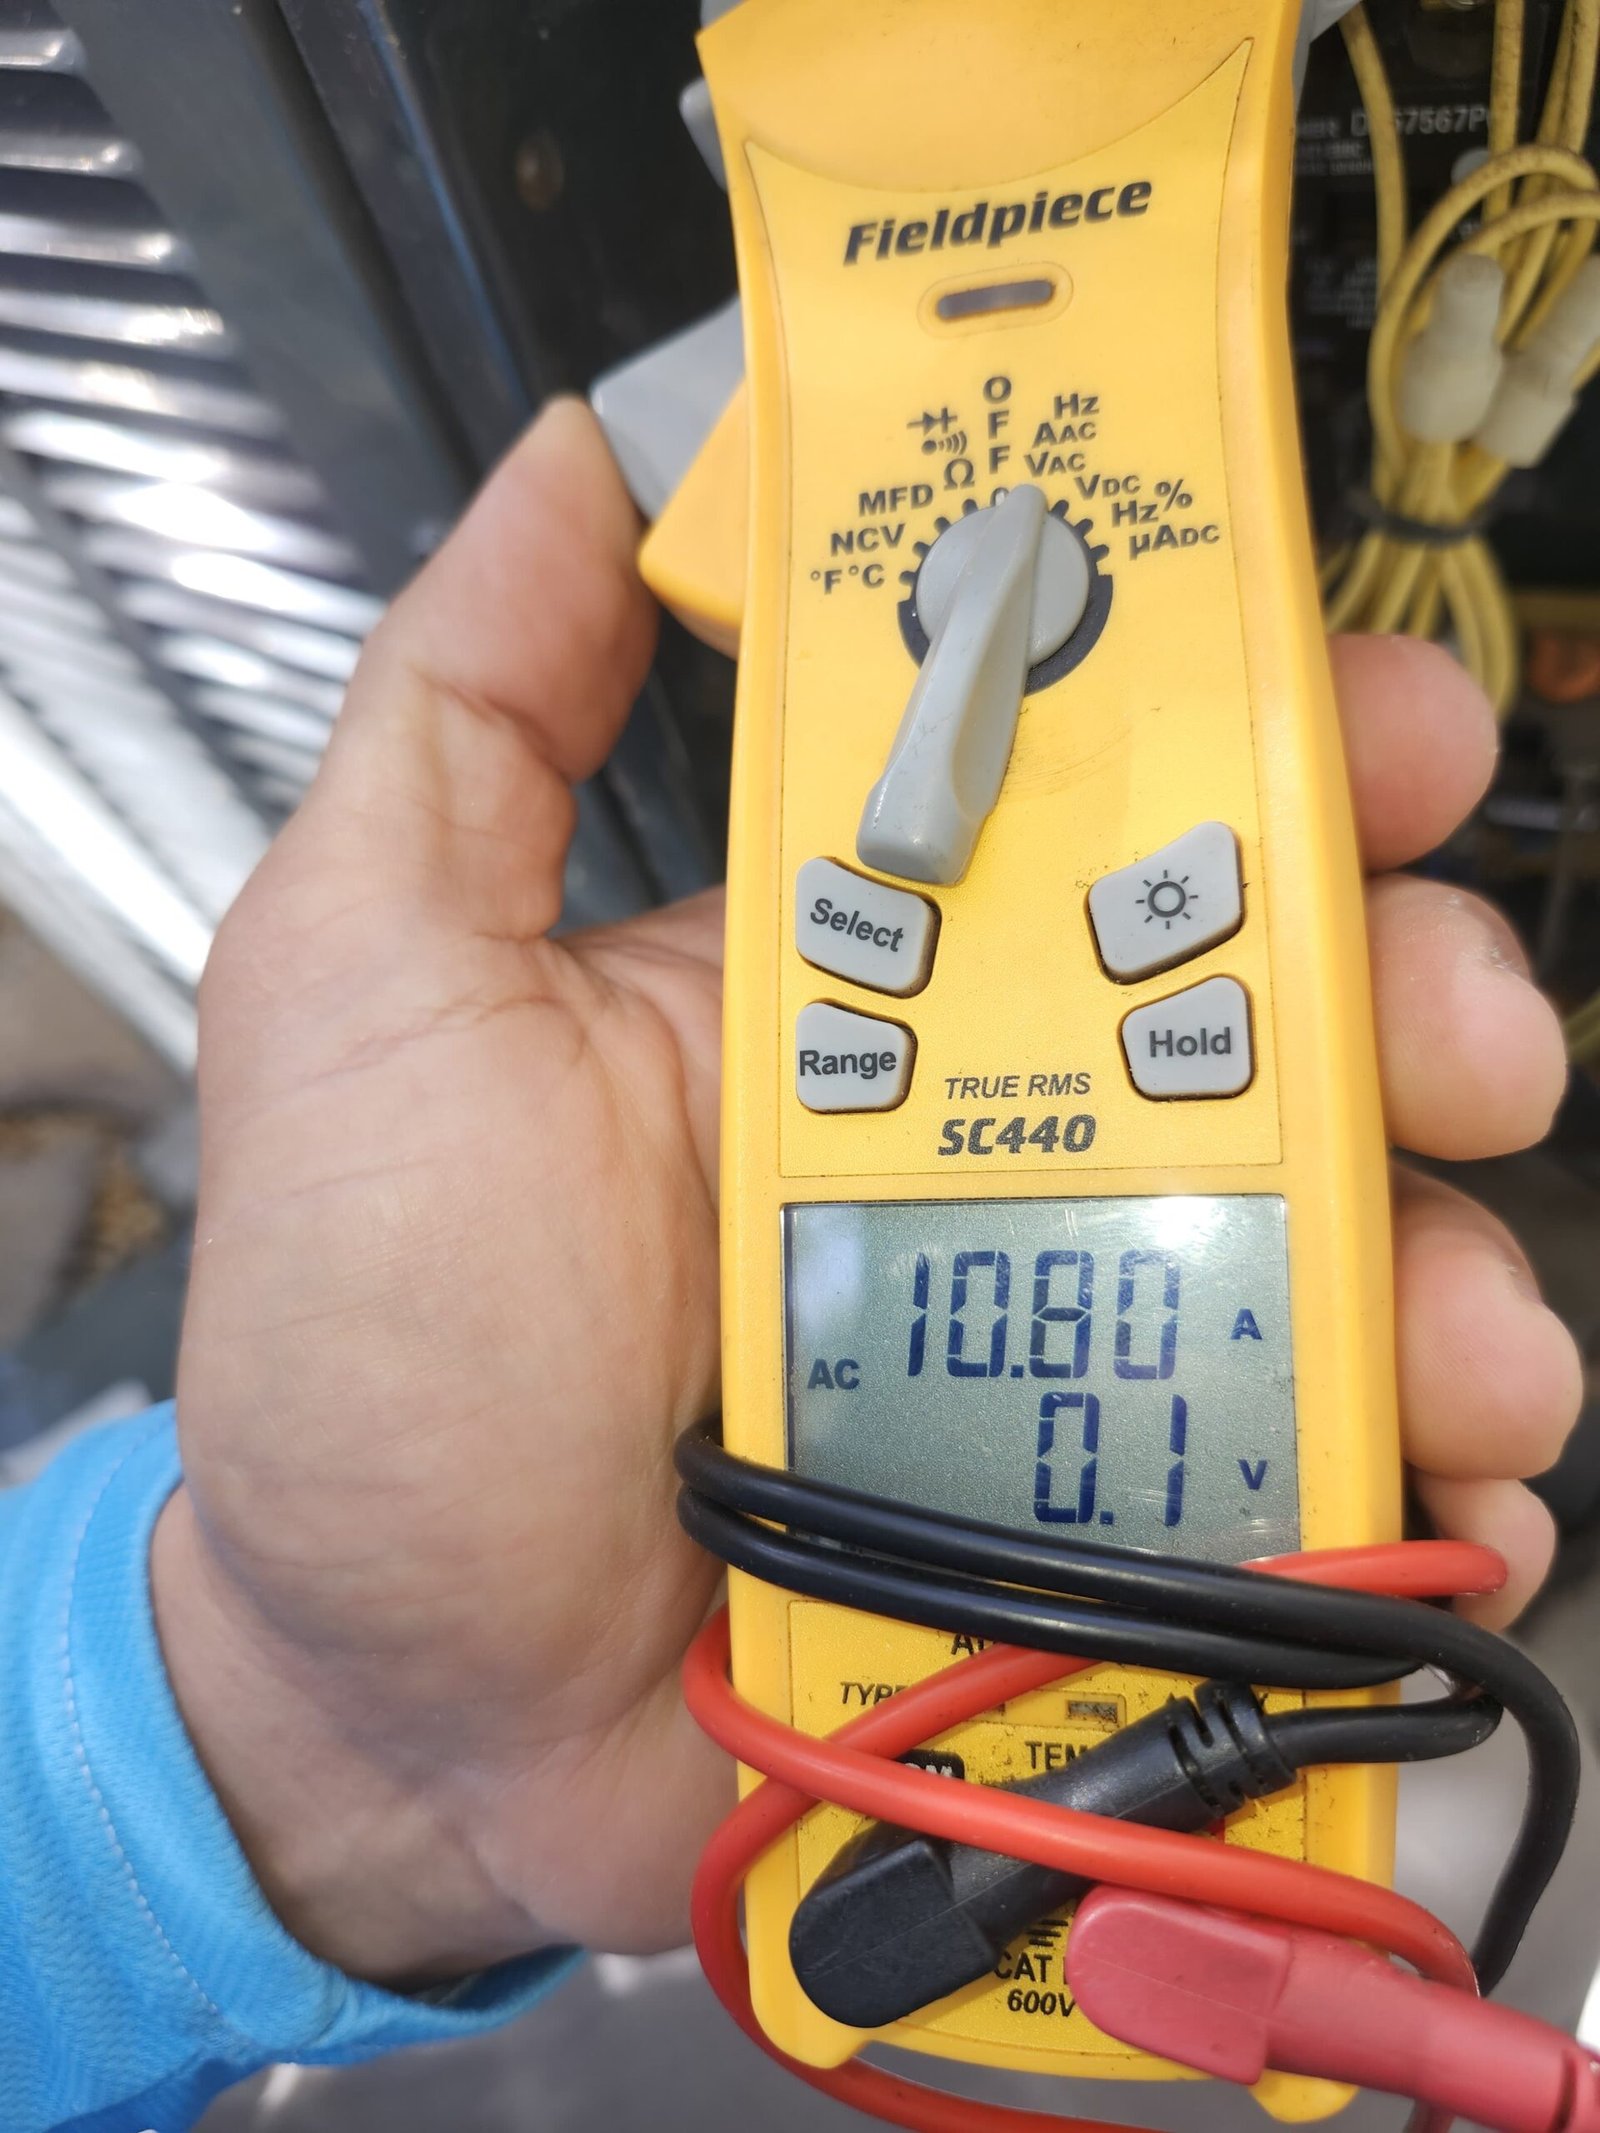
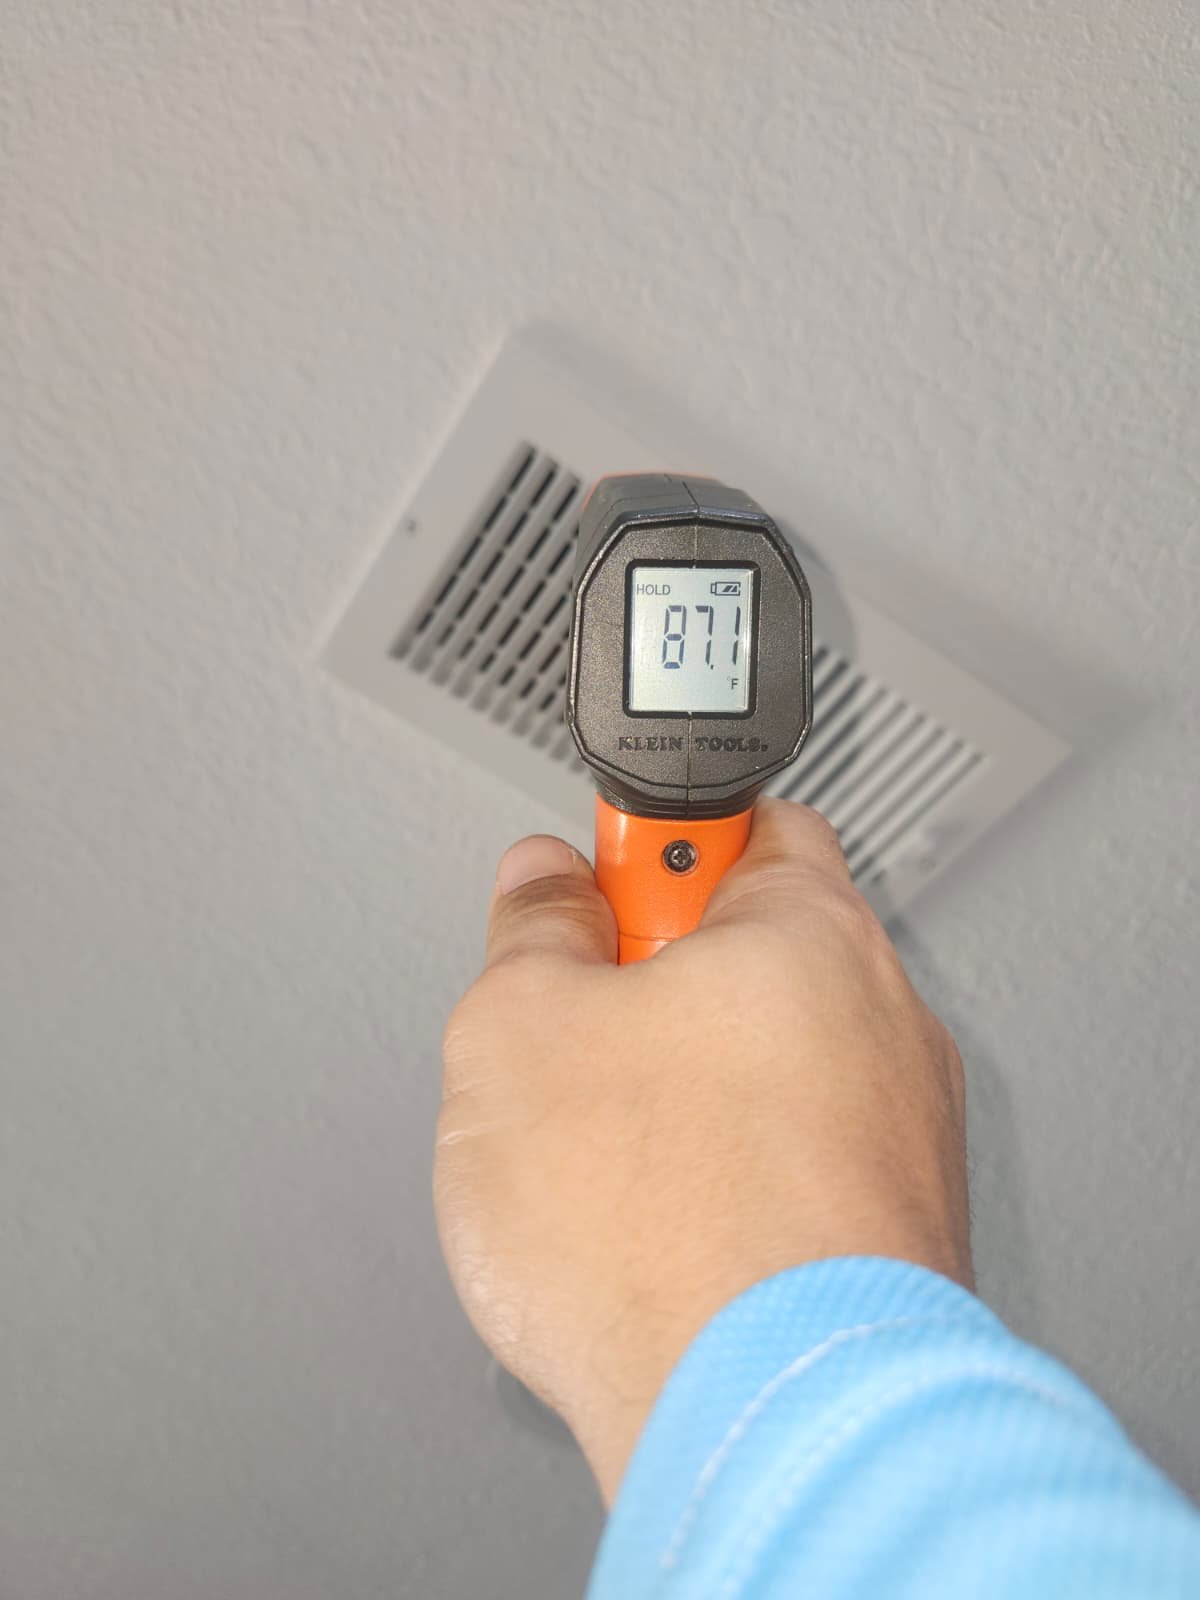
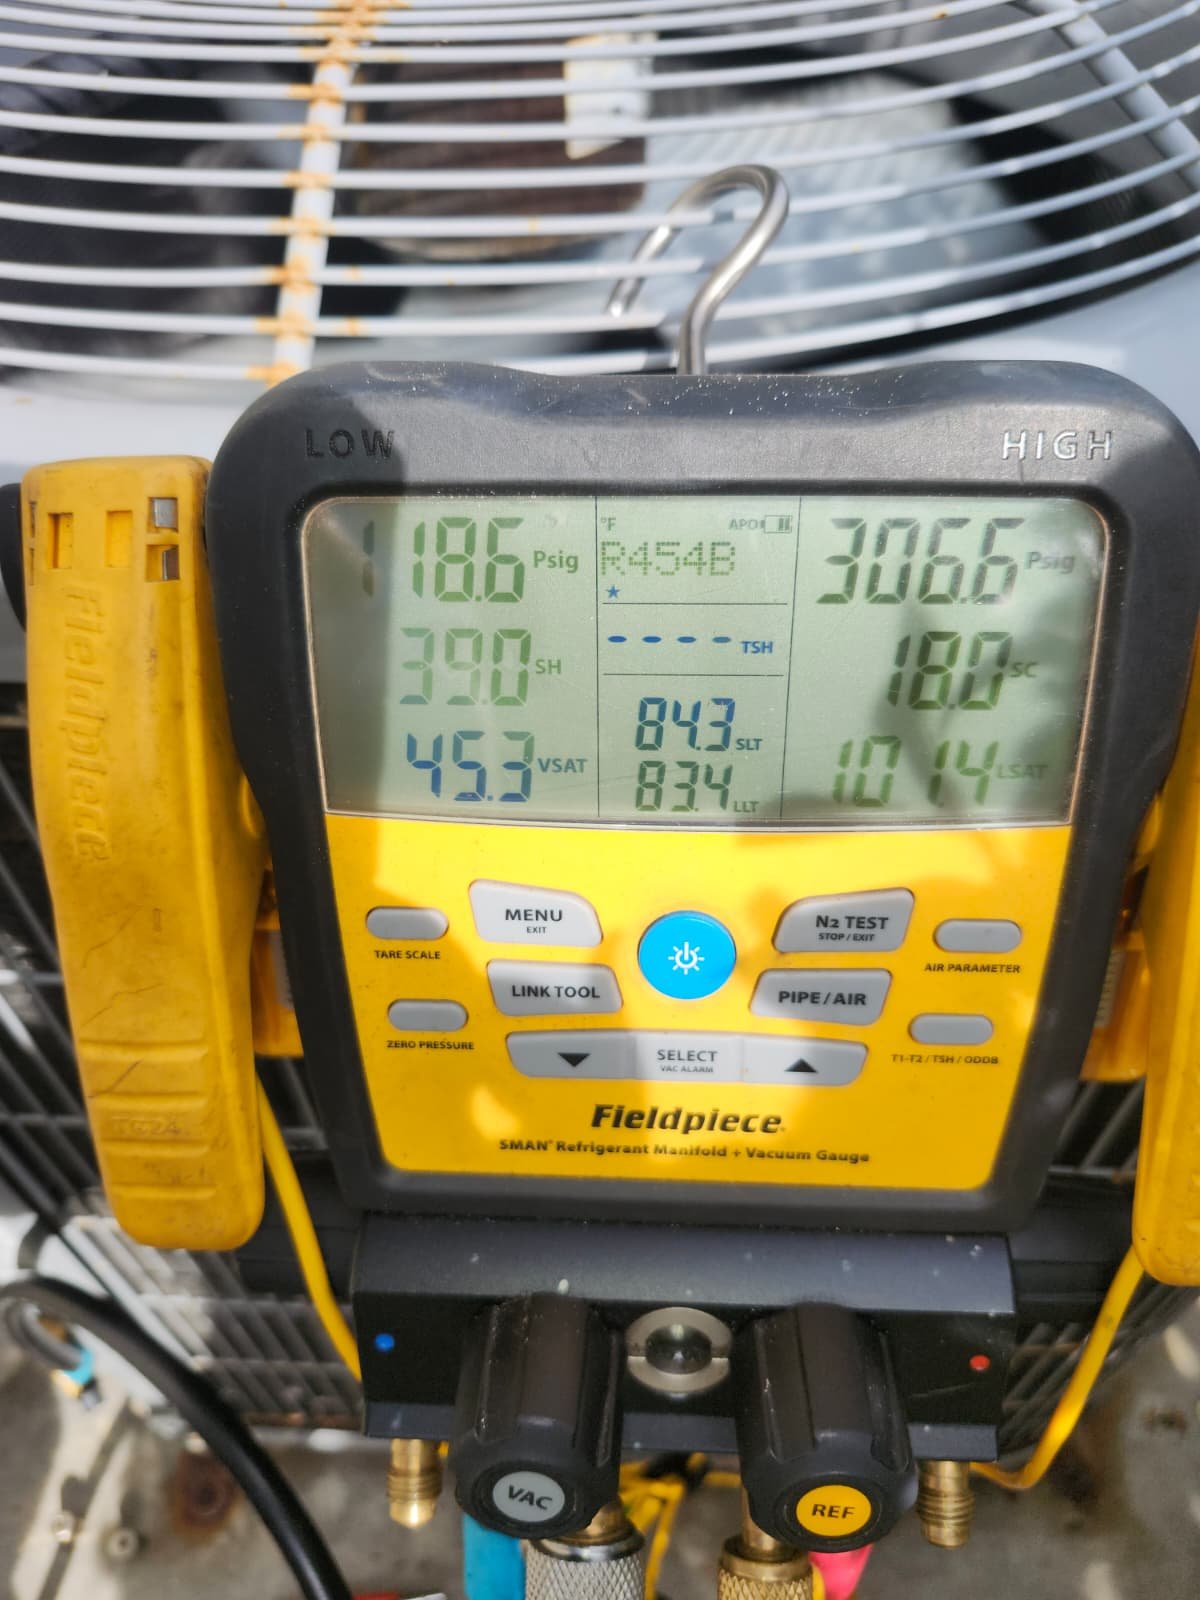
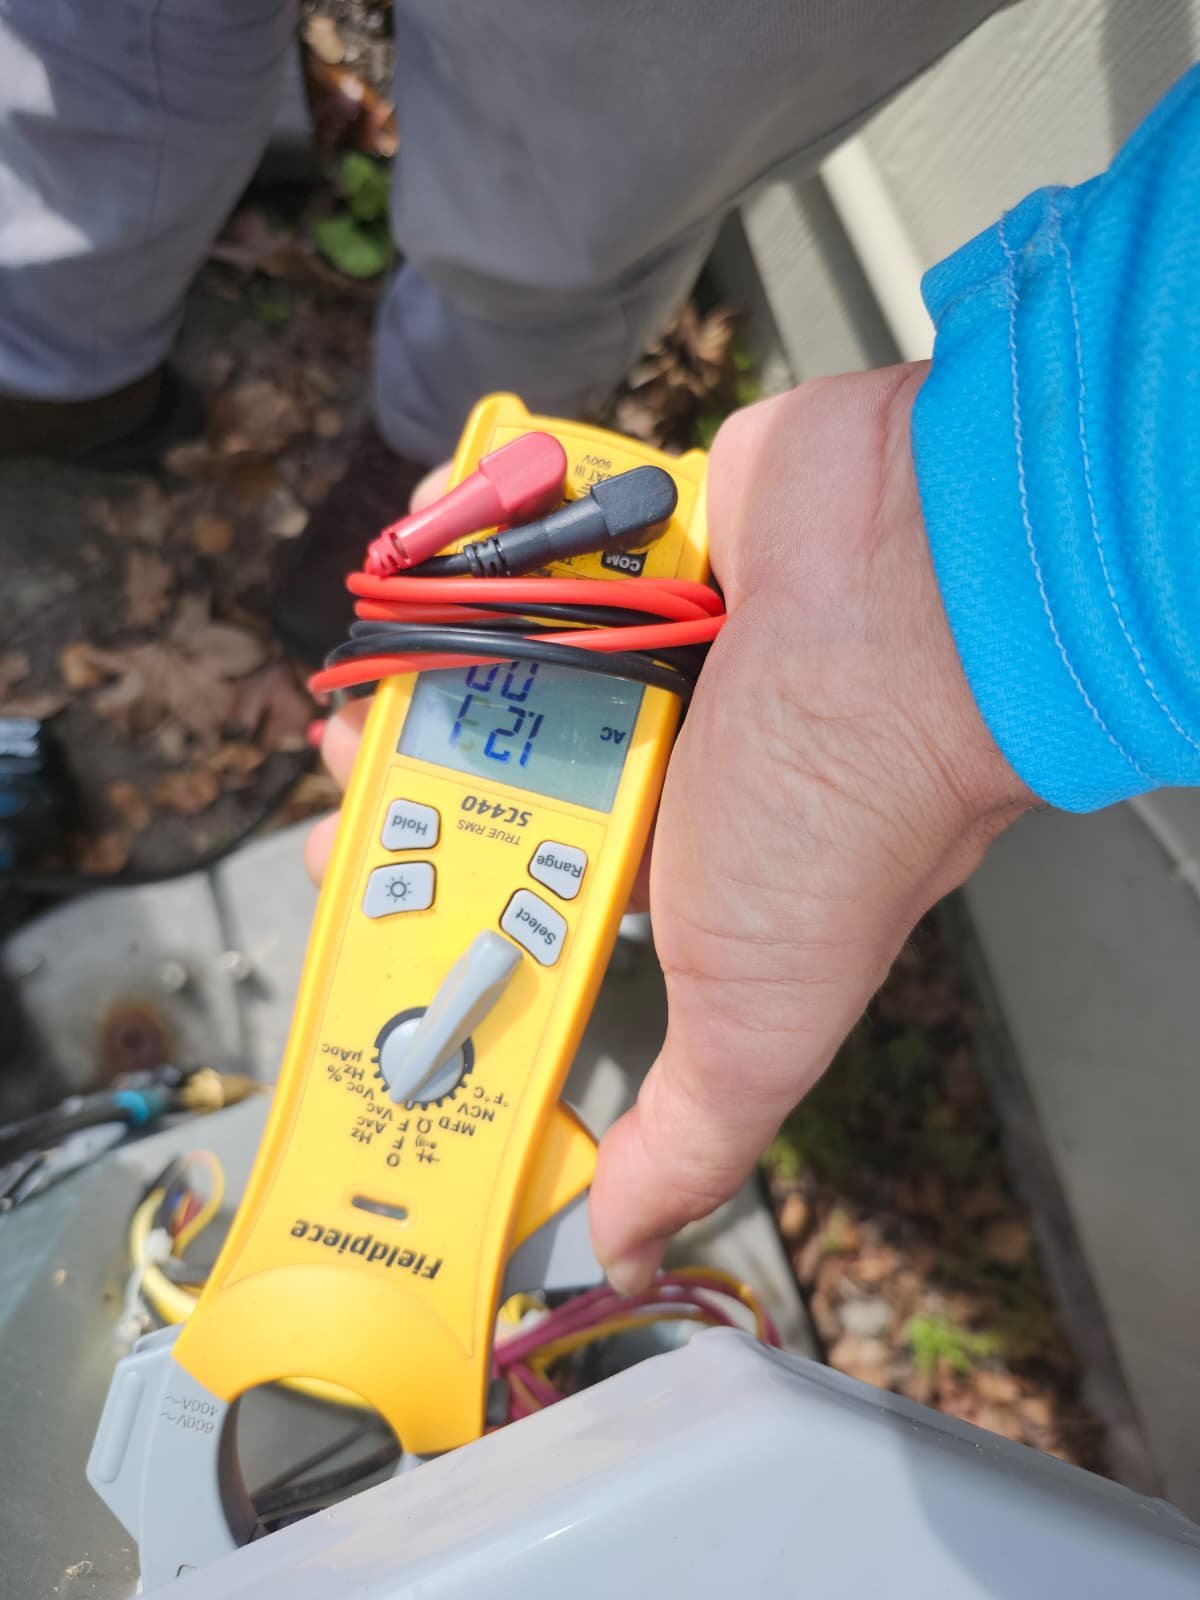
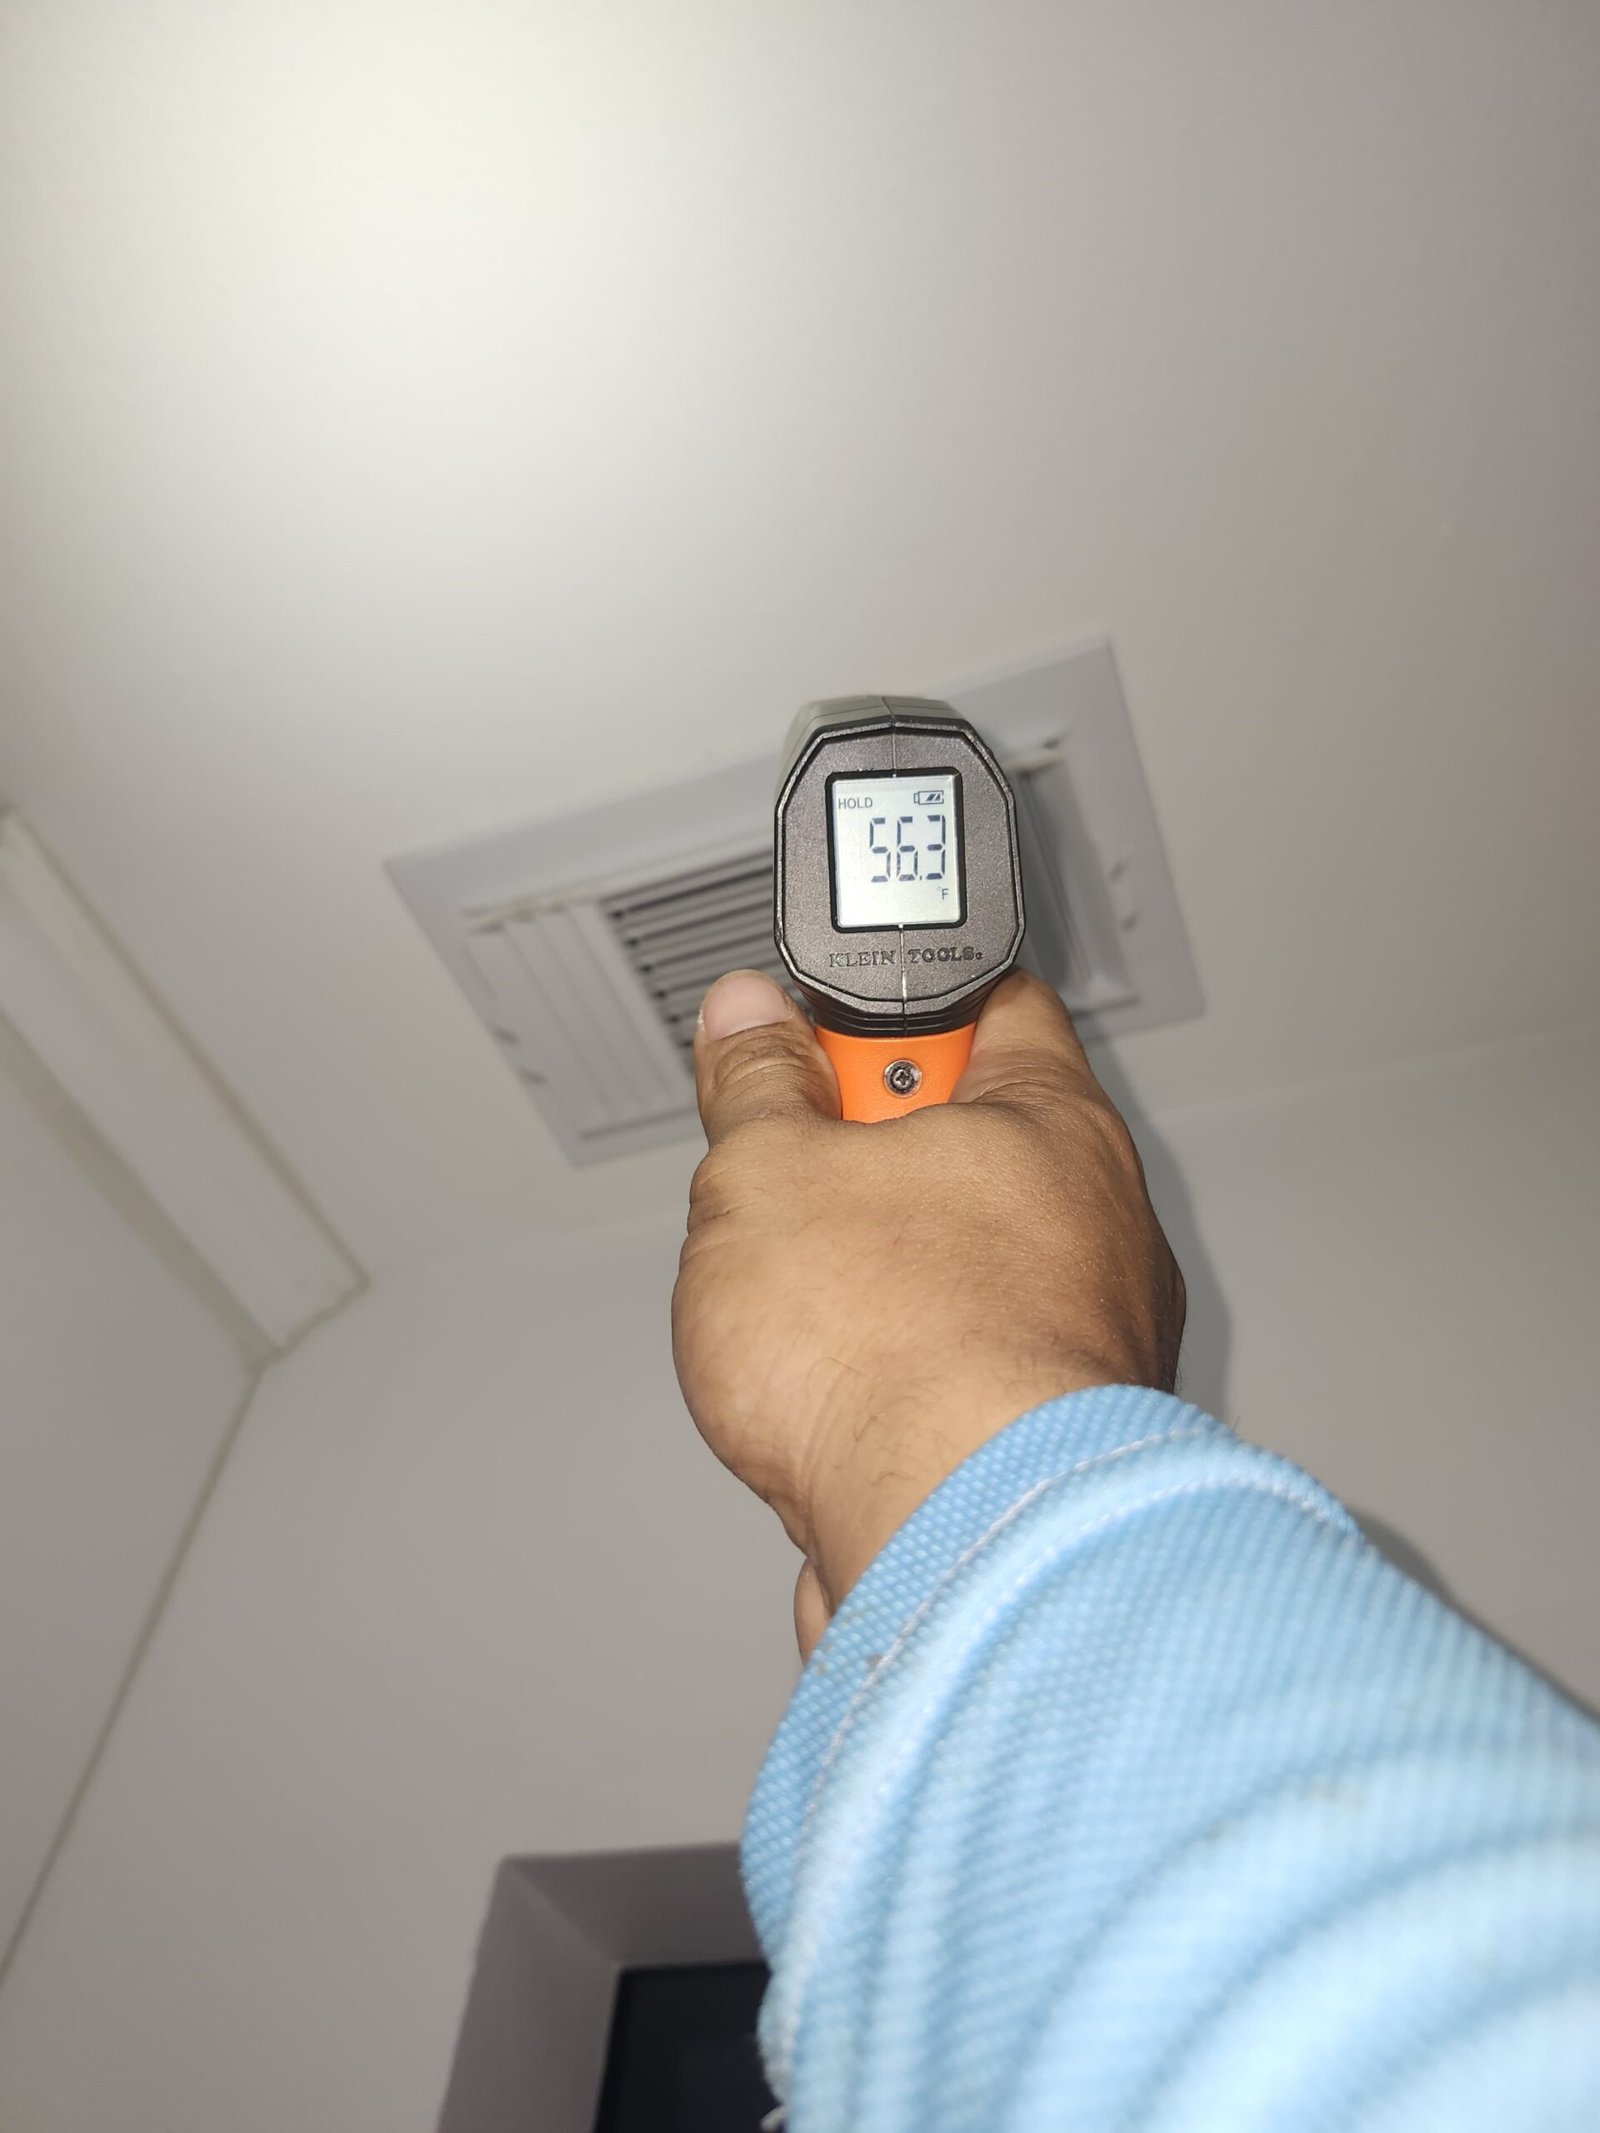
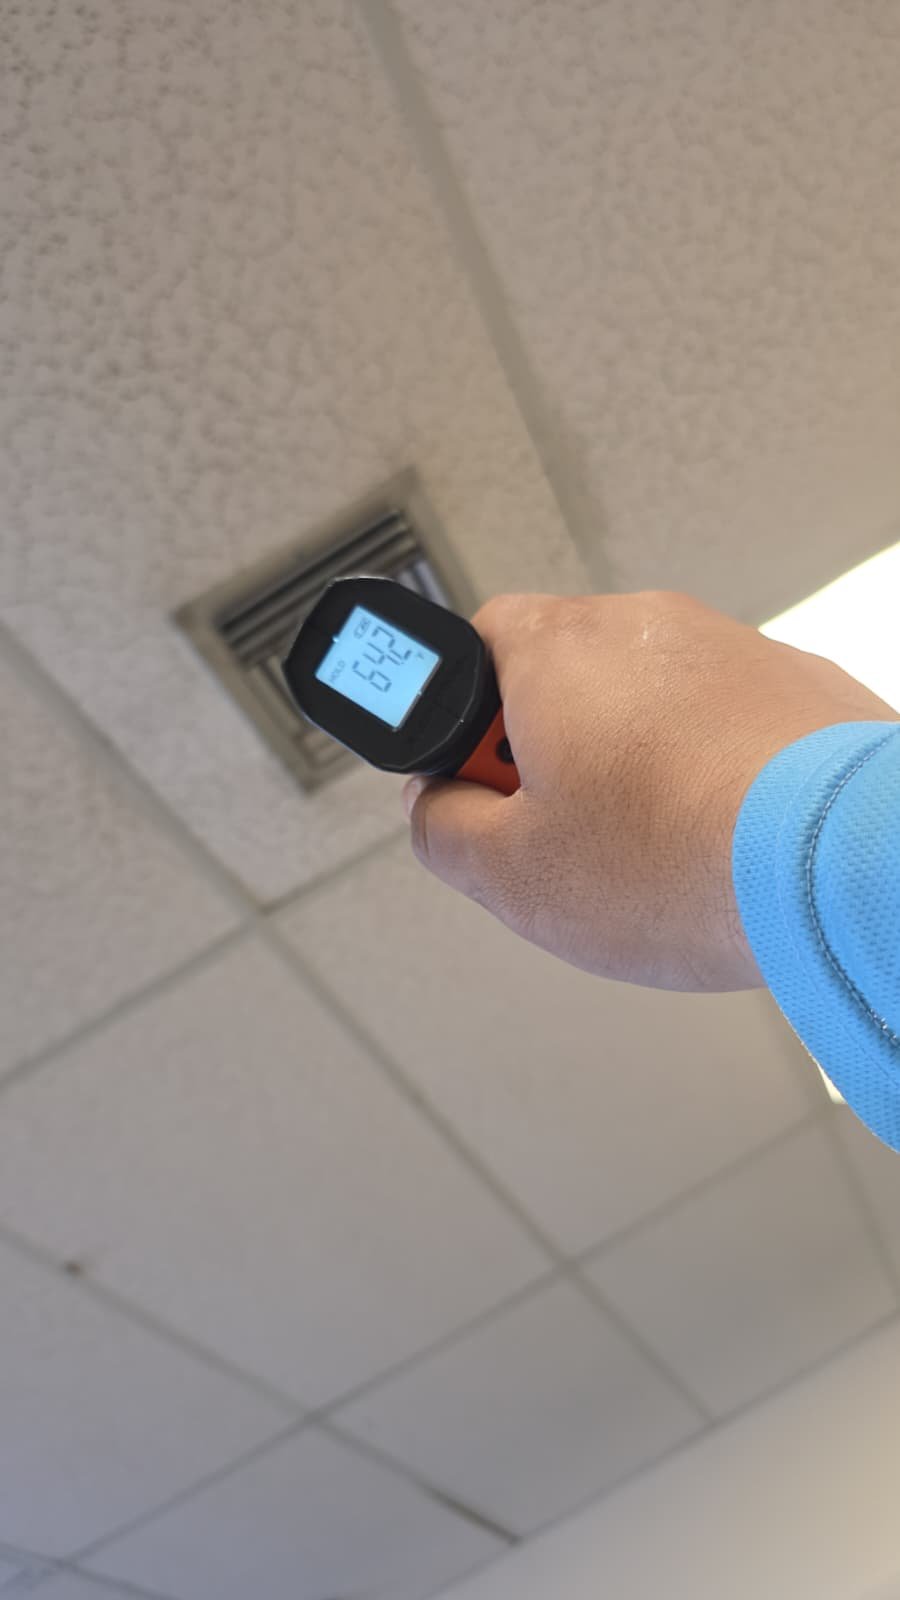
  • Verified overall operation by observing the system run through a normal cooling cycle after maintenance.

The findings were exactly what we like to see during a preventative appointment: the system was working properly, airflow was good once the filter was replaced, and there were no red flags requiring additional repair work at this time.

When we say, “the system is working properly,” we mean we’ve gone through a professional checklist appropriate for the system and confirmed that it is running as expected for current conditions—not just that it turns on and blows air.

Repair or Service Process

With any Pro Care Maintenance Plan visit in Tampa, FL 33634, our focus is on cleaning, inspection, and small adjustments that protect you from bigger problems later. Here’s how we approached this service call.

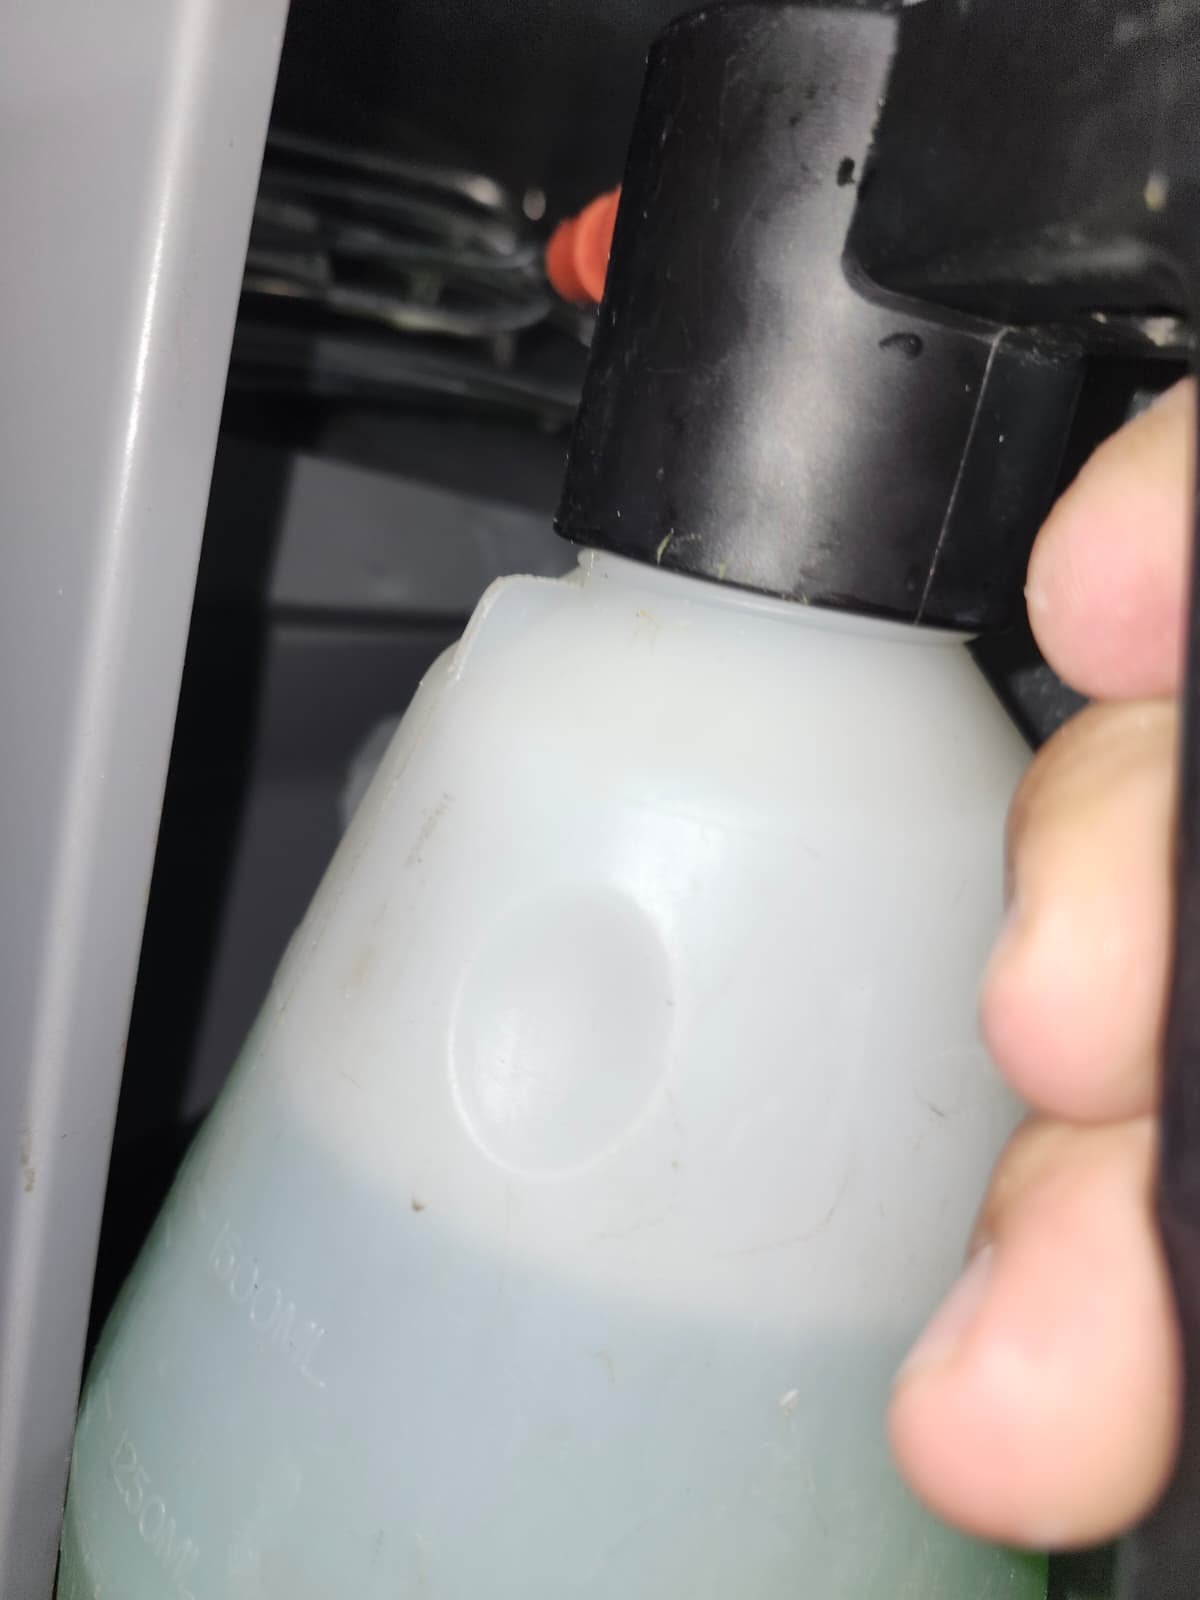
1. Set up safely and protect the home

Before touching the equipment, we made sure to protect the homeowner’s space. That includes wearing shoe covers where needed, being mindful of any furnishings near the air handler, and keeping tools organized so we’re not tracking debris through the home.

This may sound simple, but cleanliness and respect are part of the service. Nobody wants a “maintenance” visit that leaves dust and dirt behind.

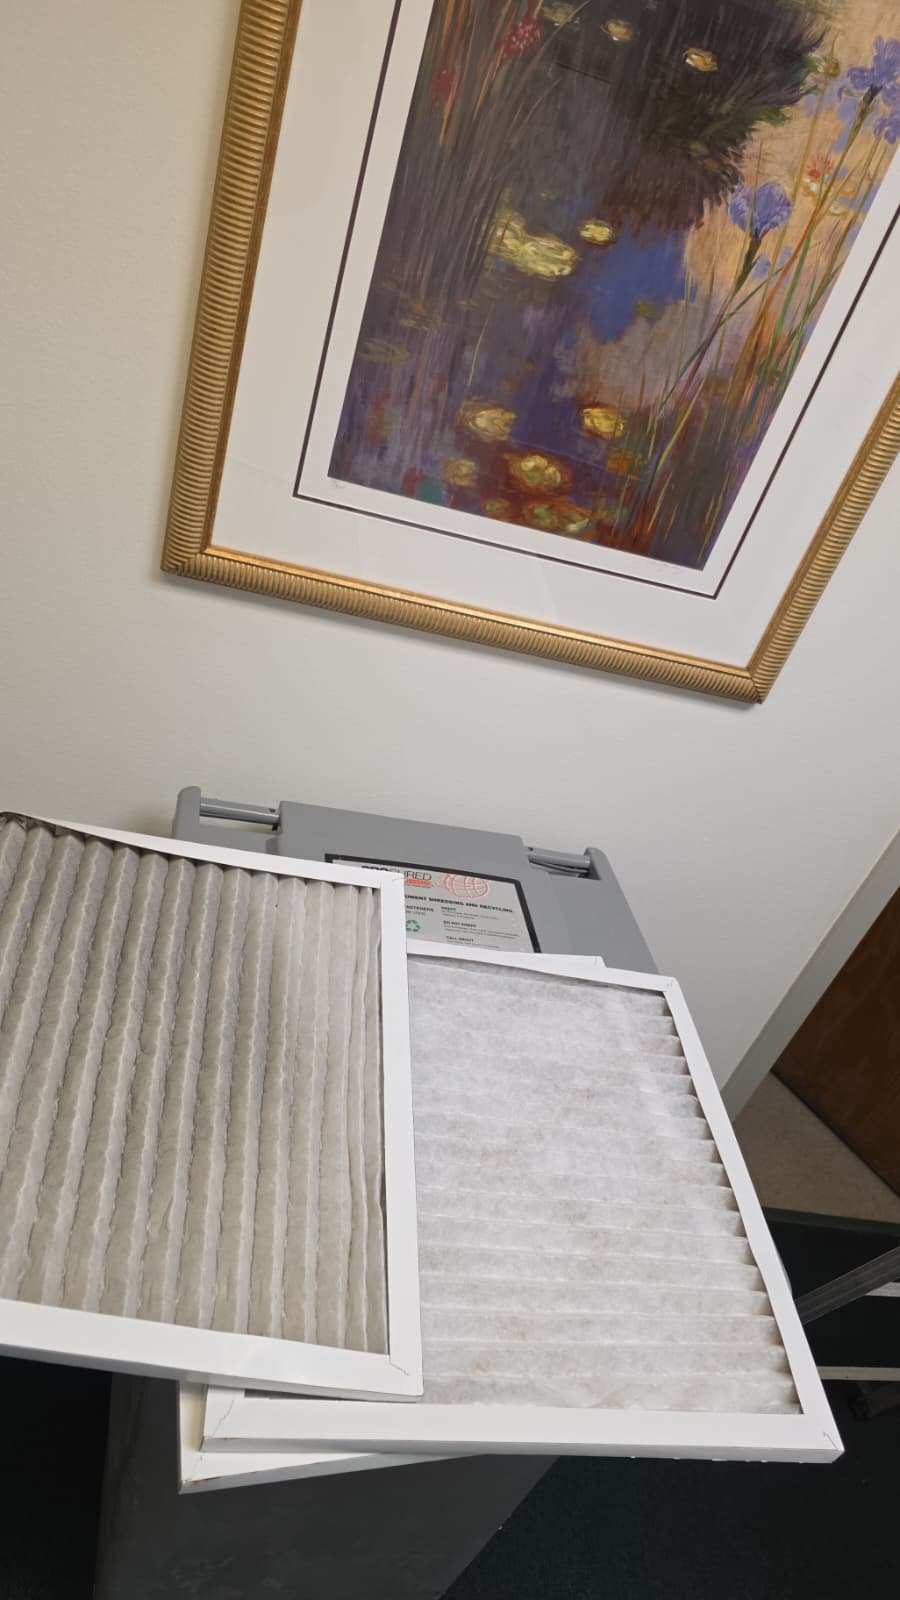
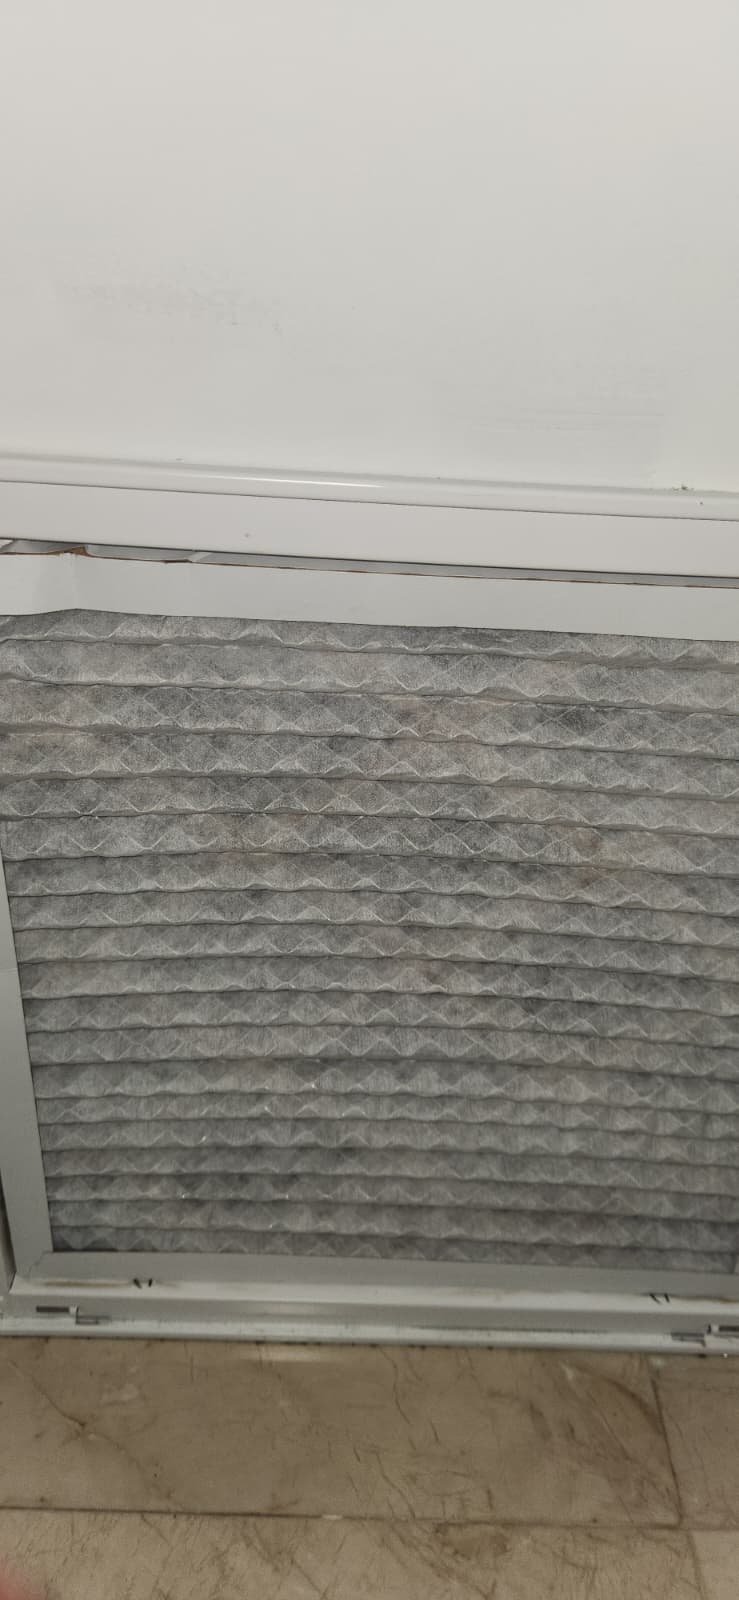
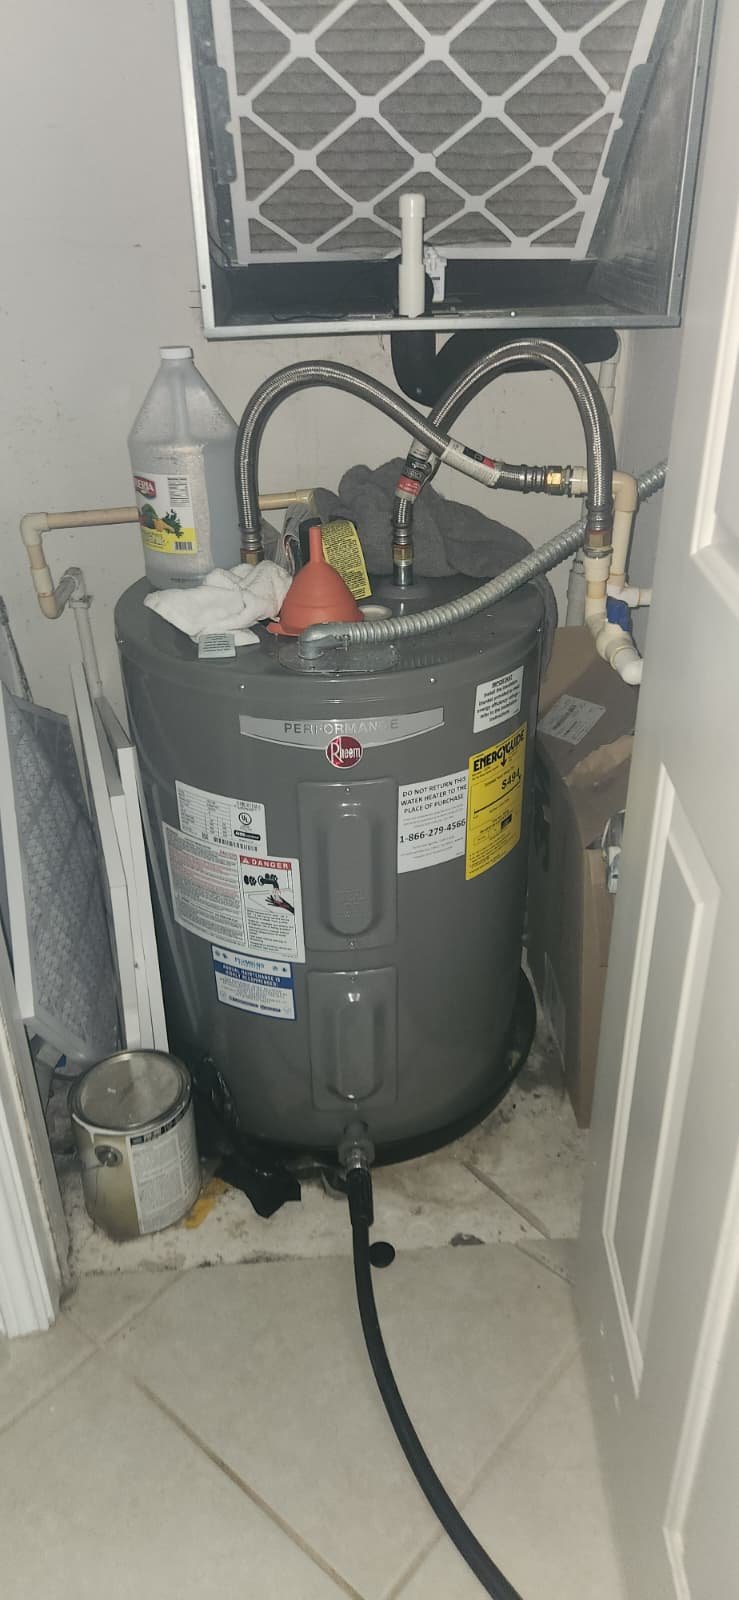
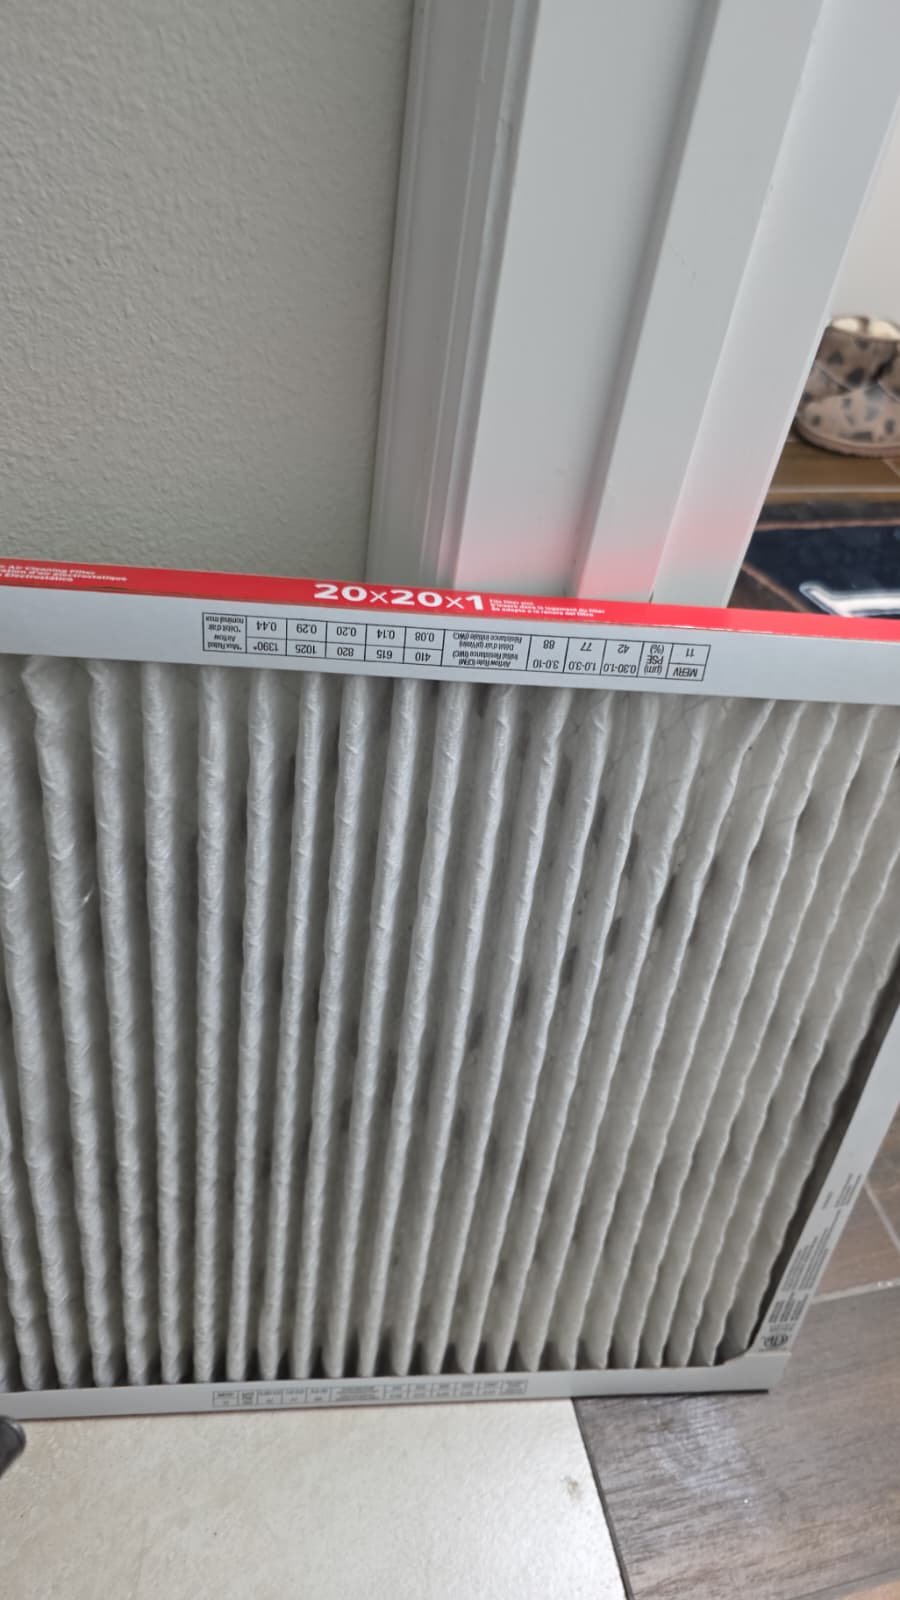
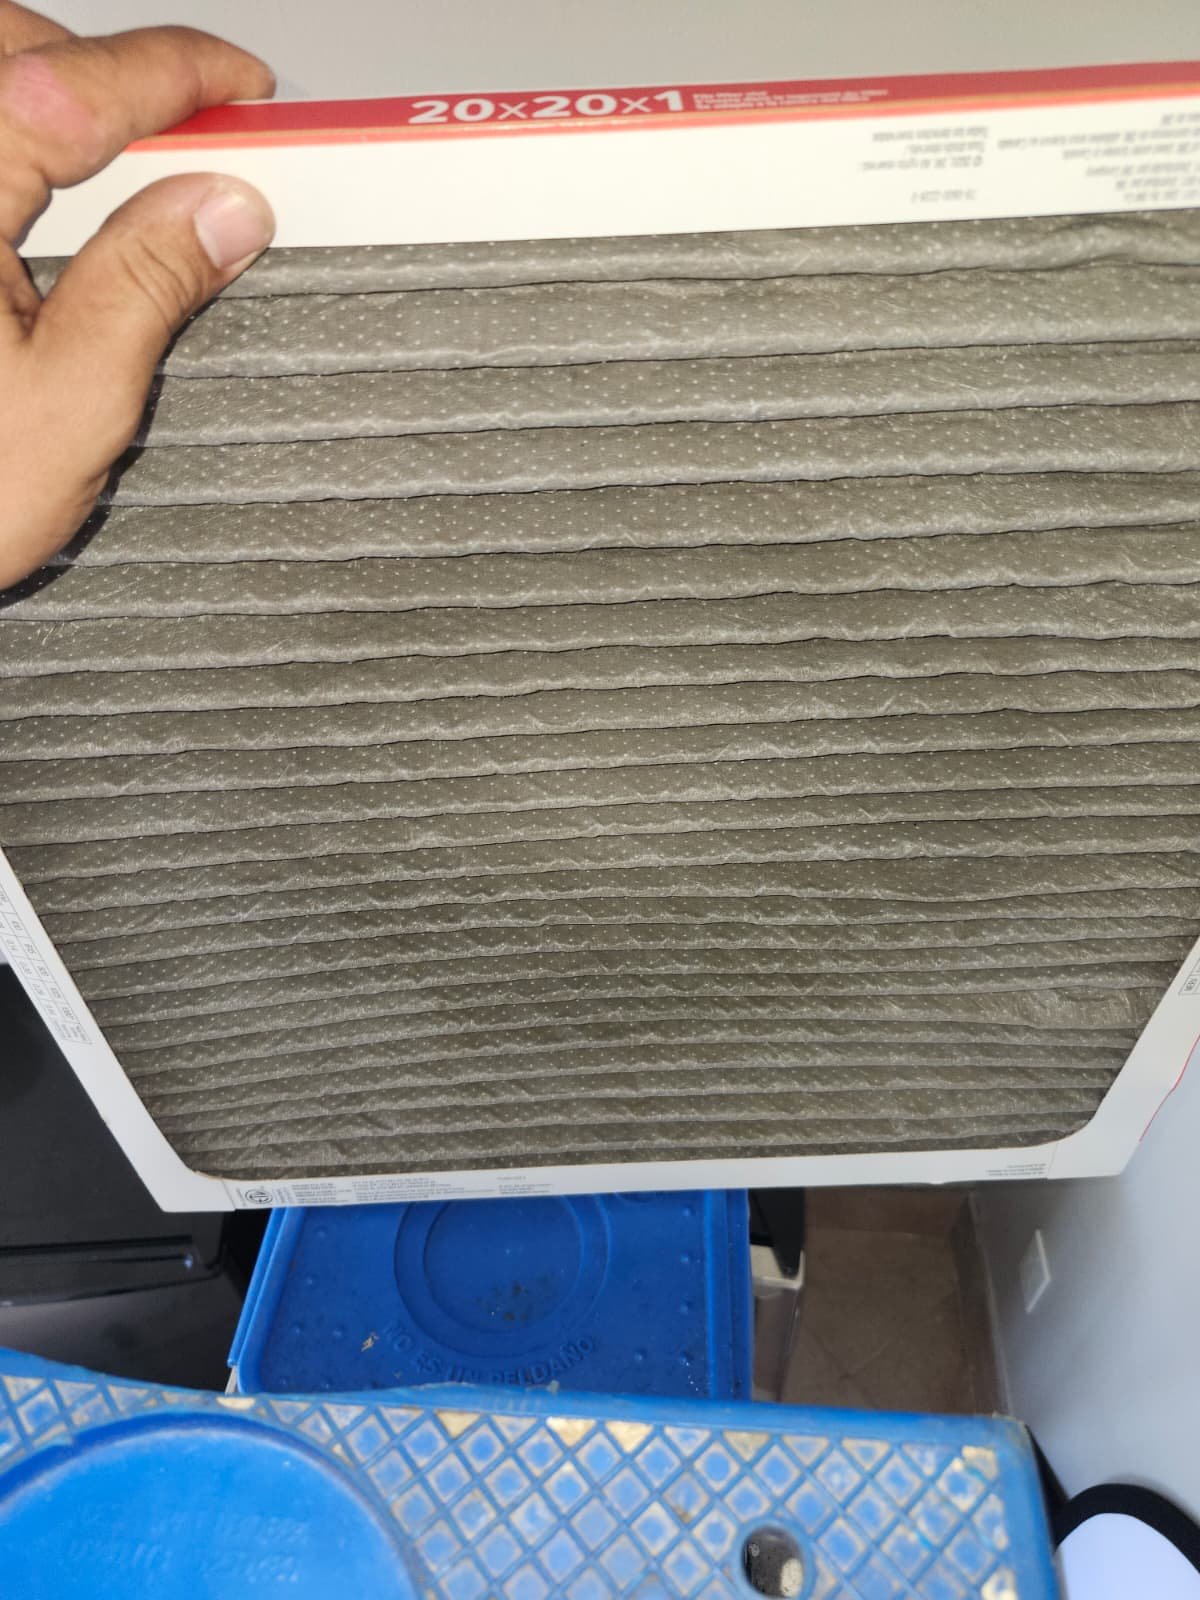
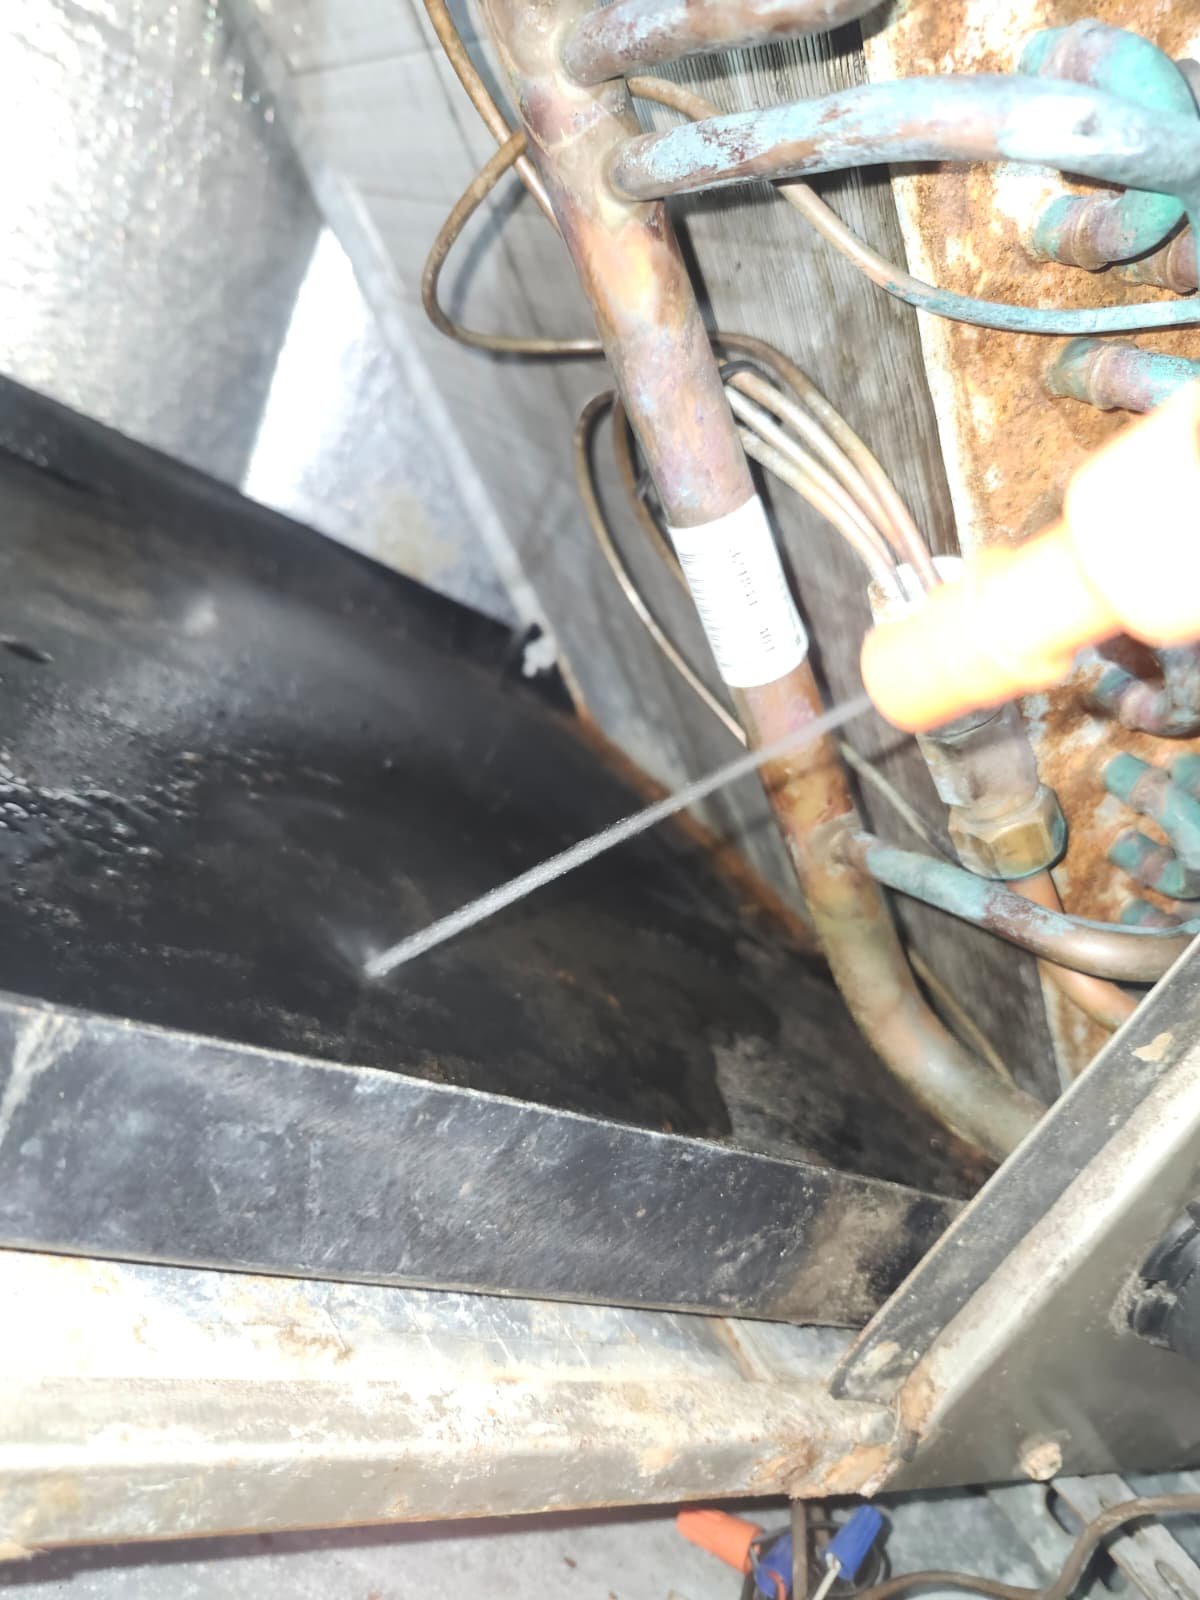
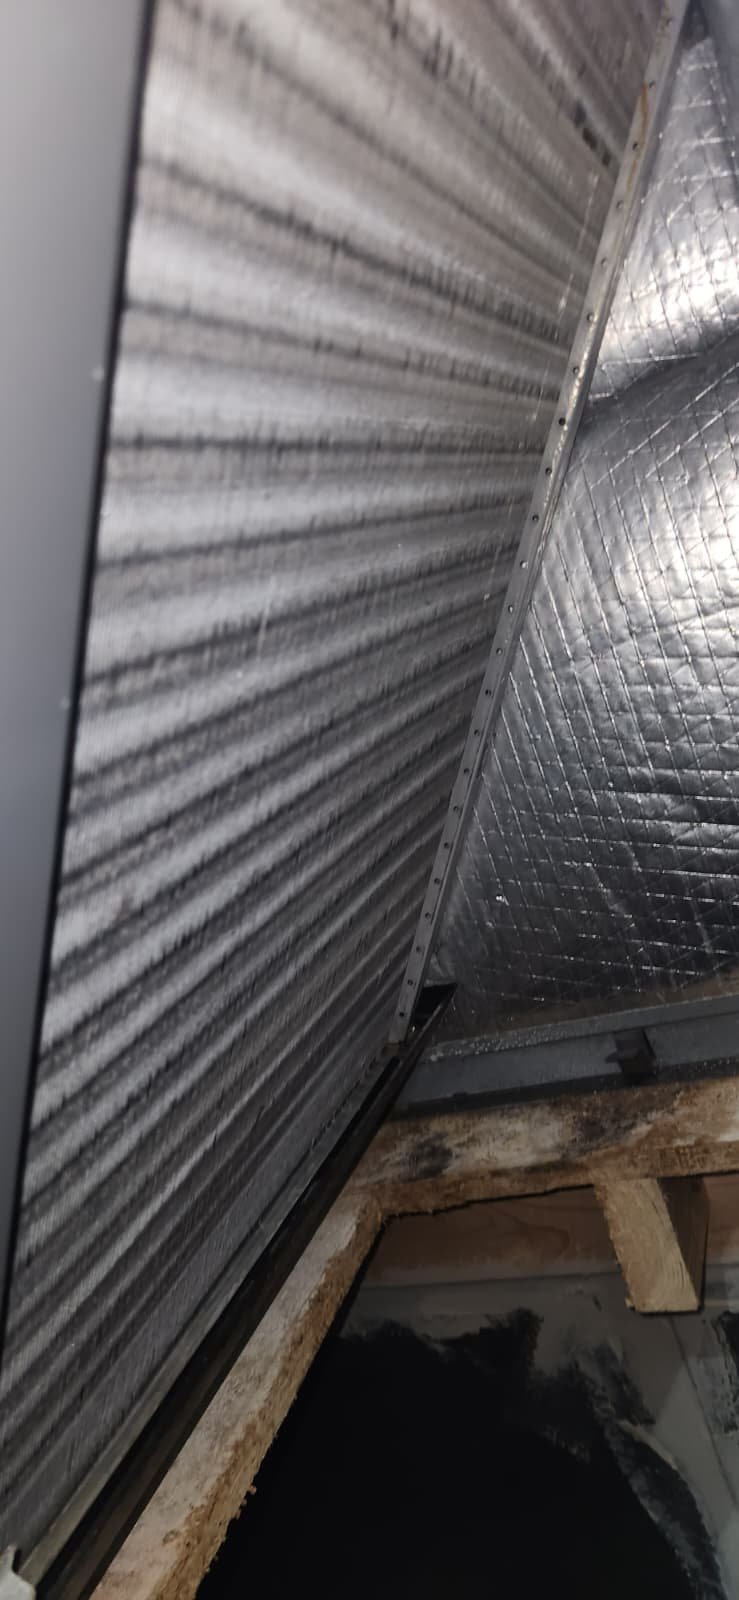
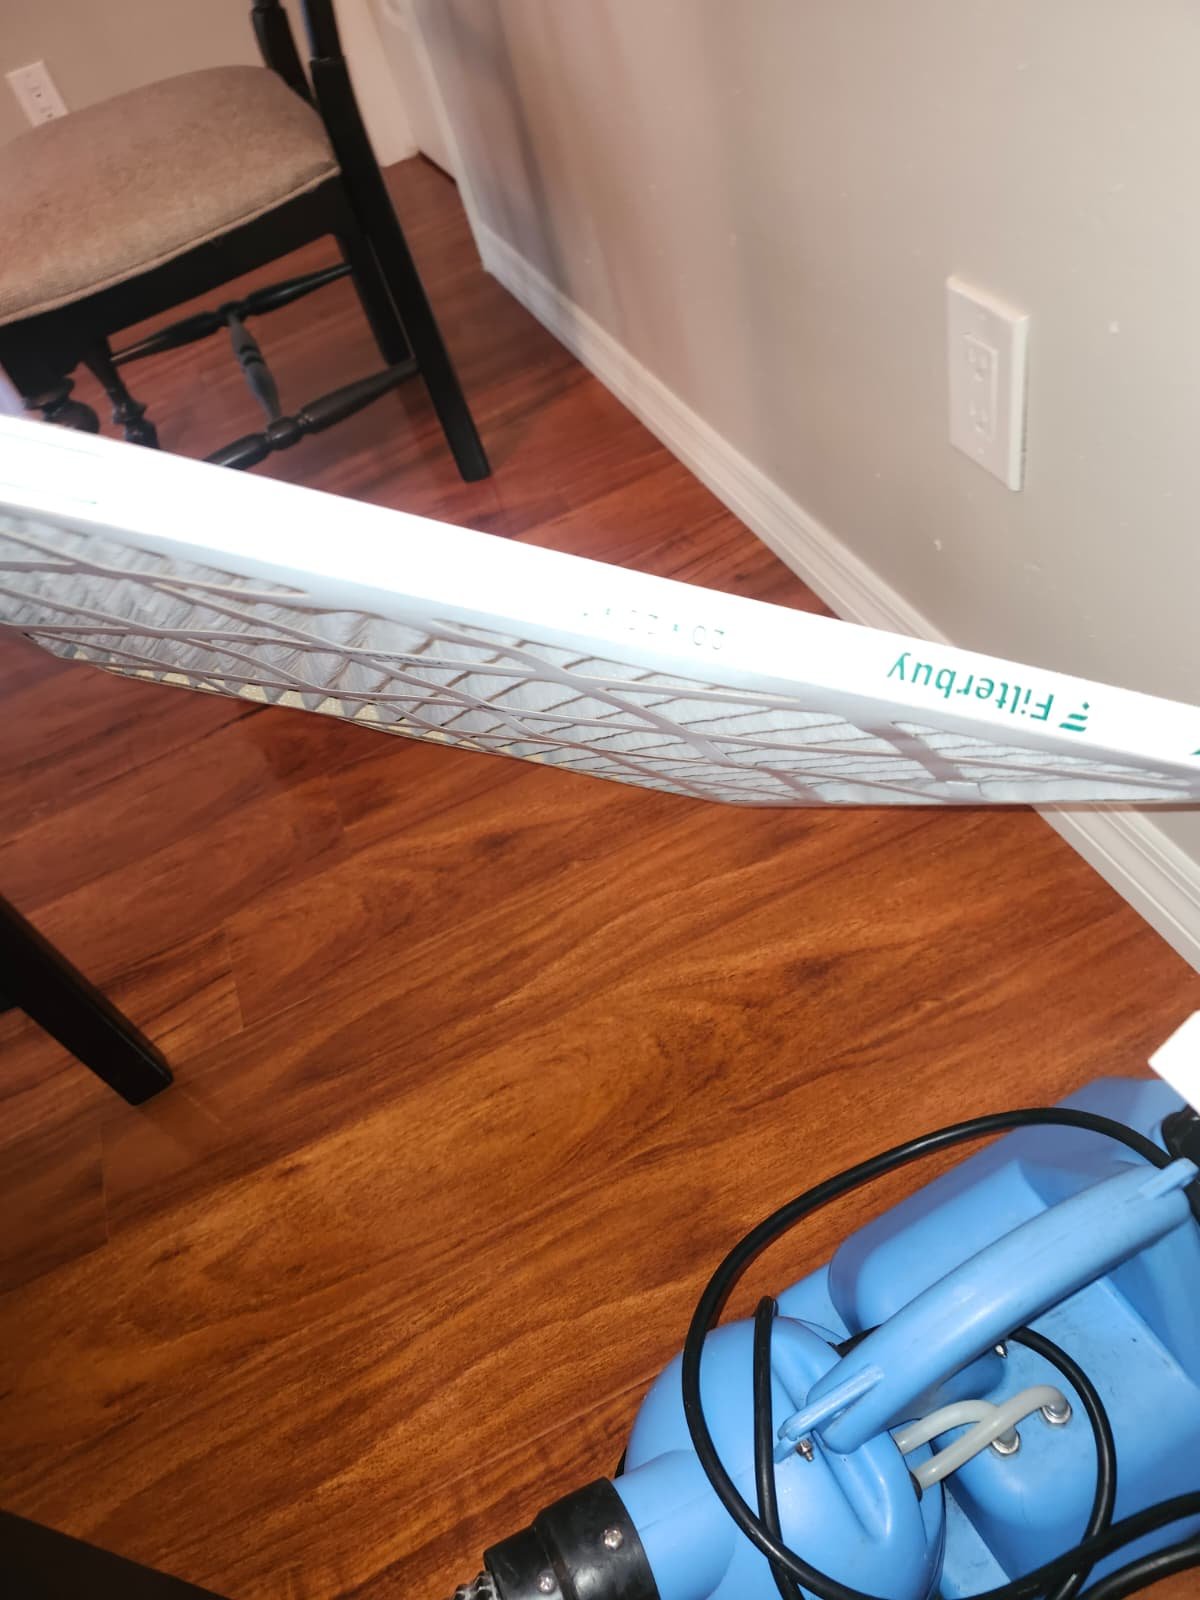
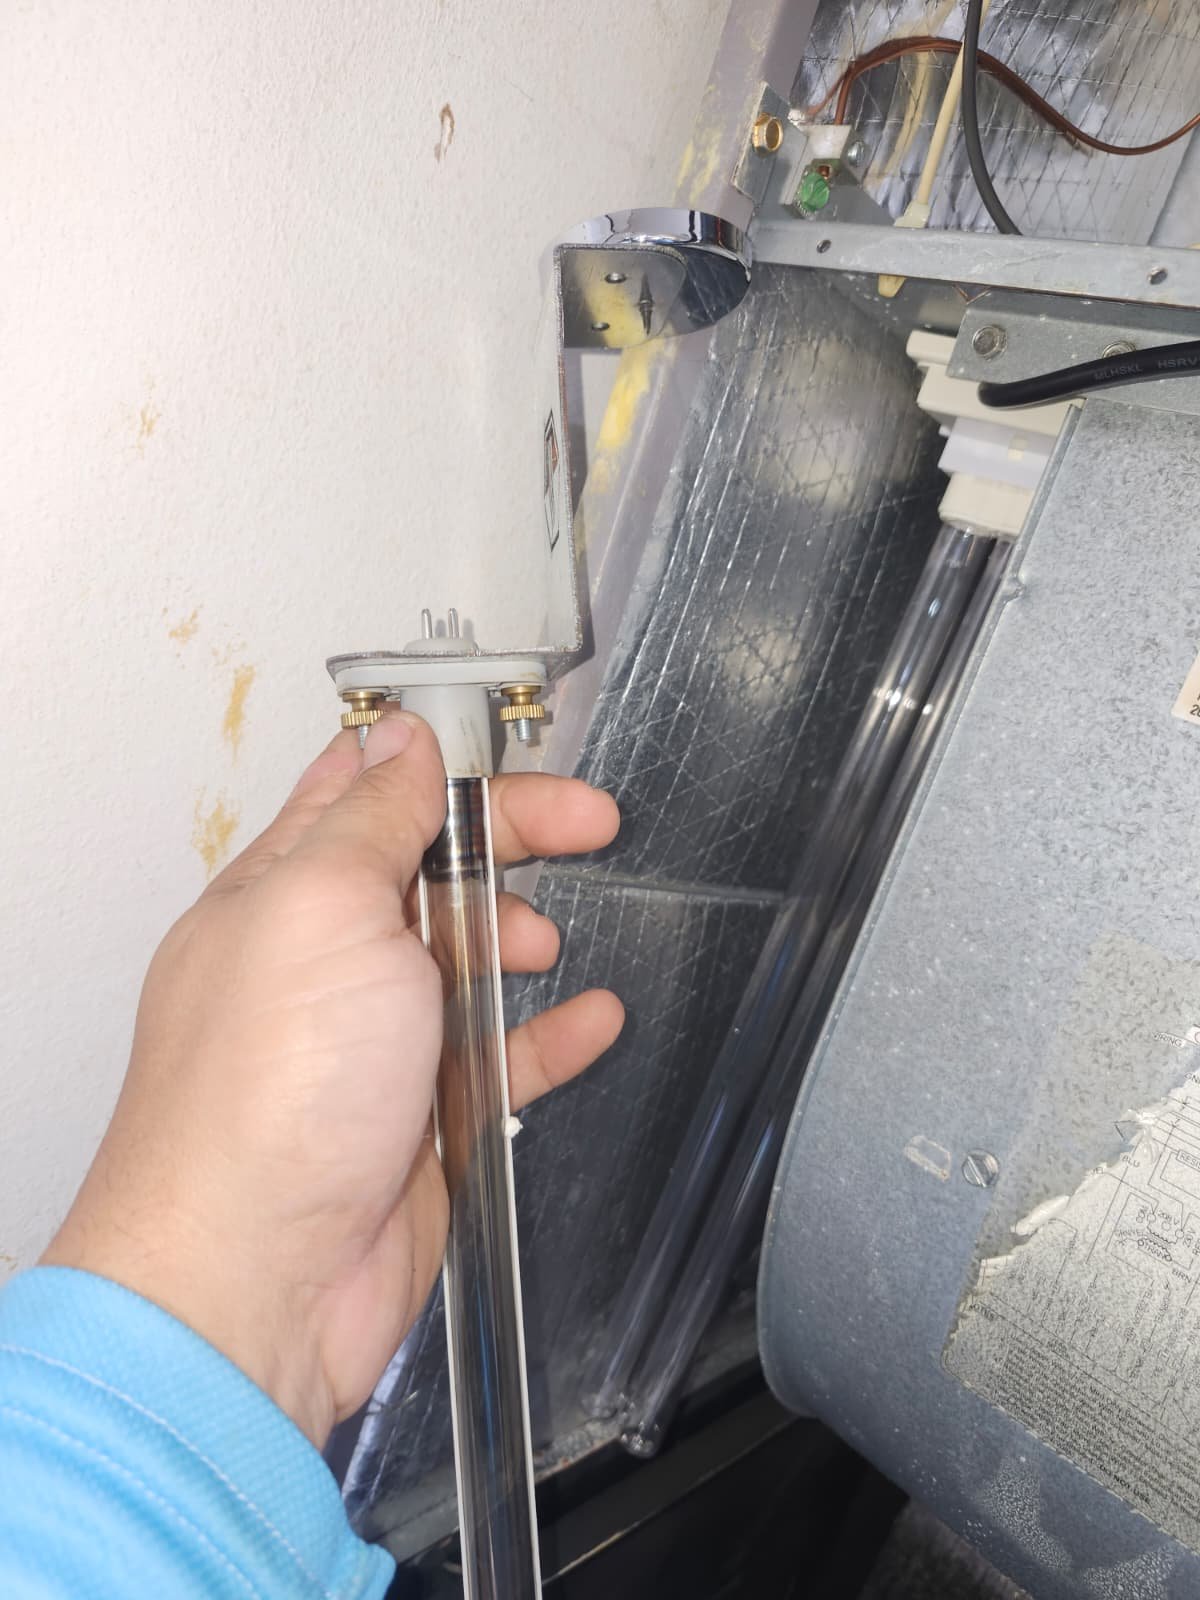
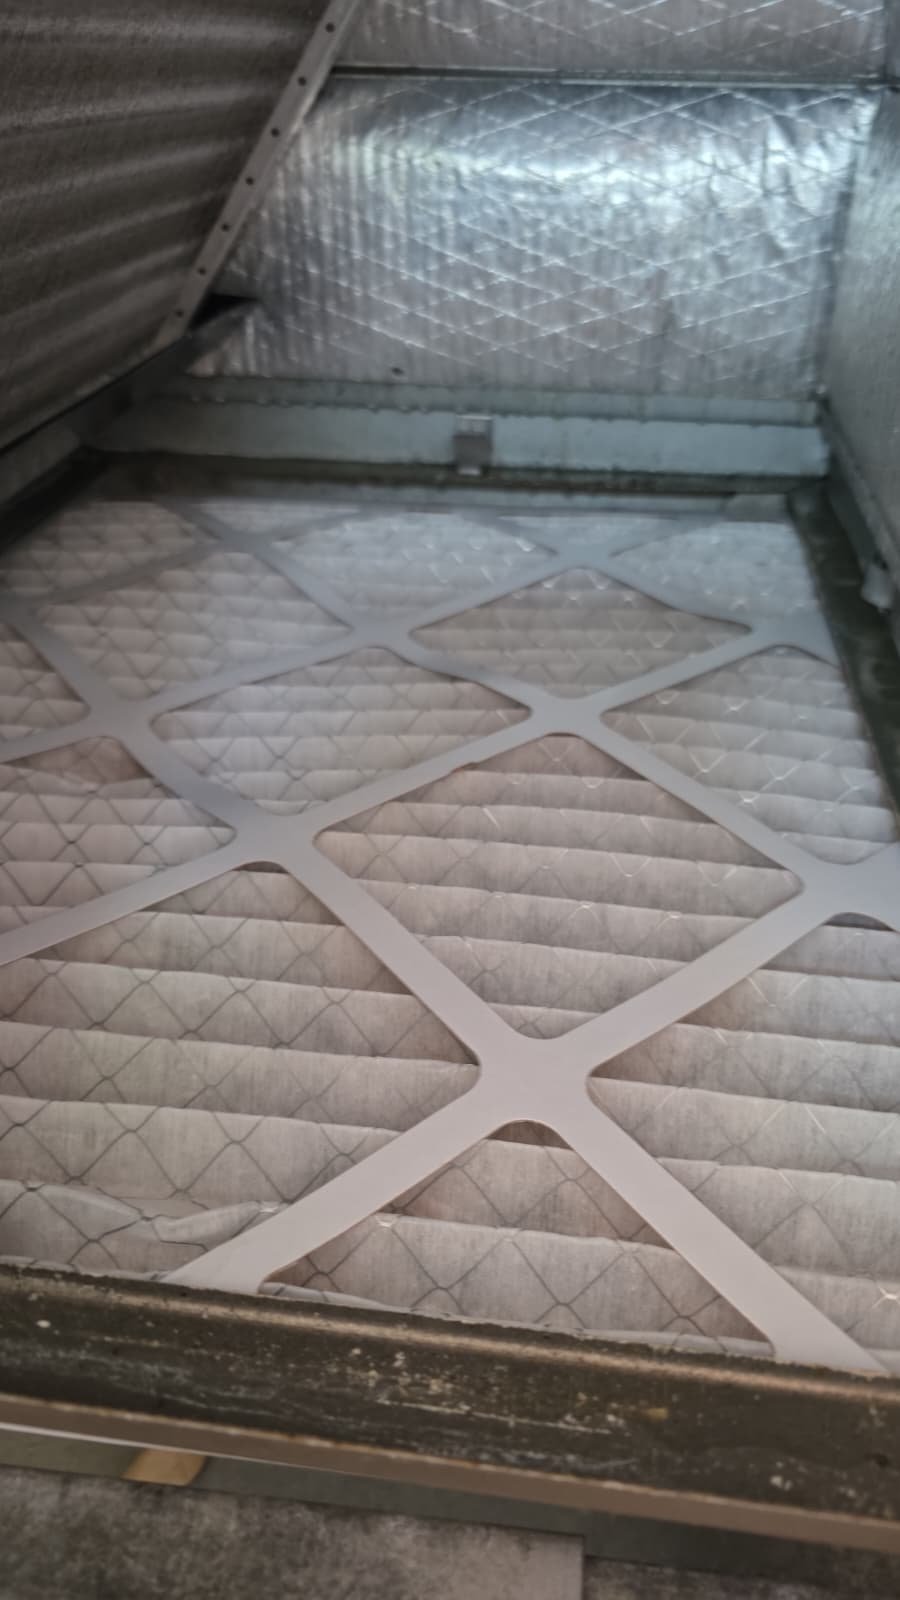
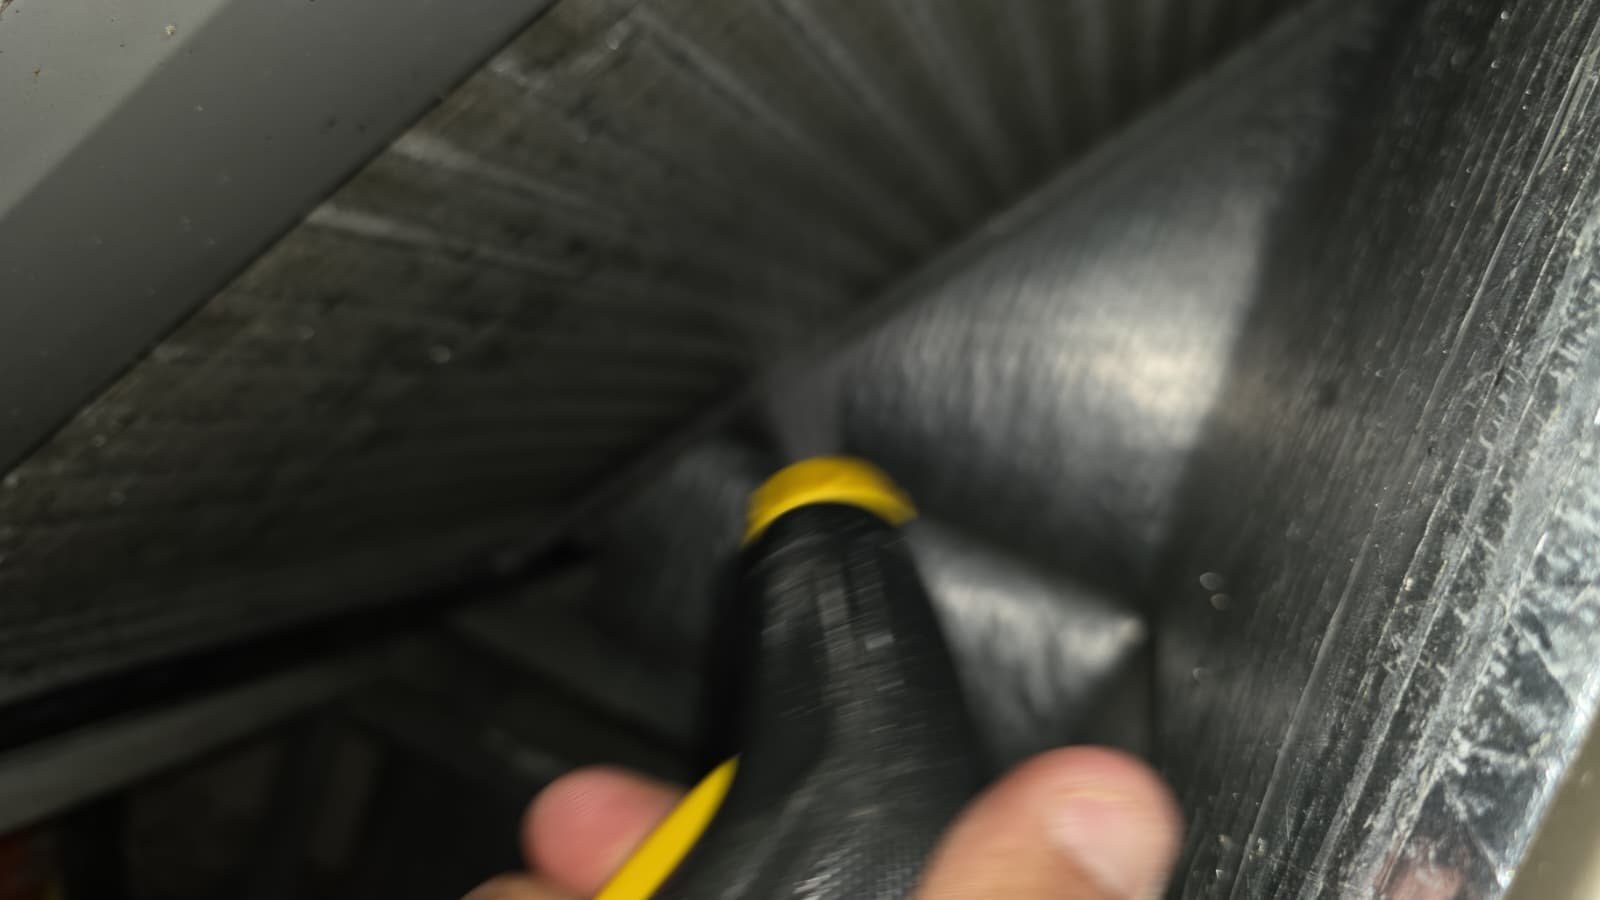
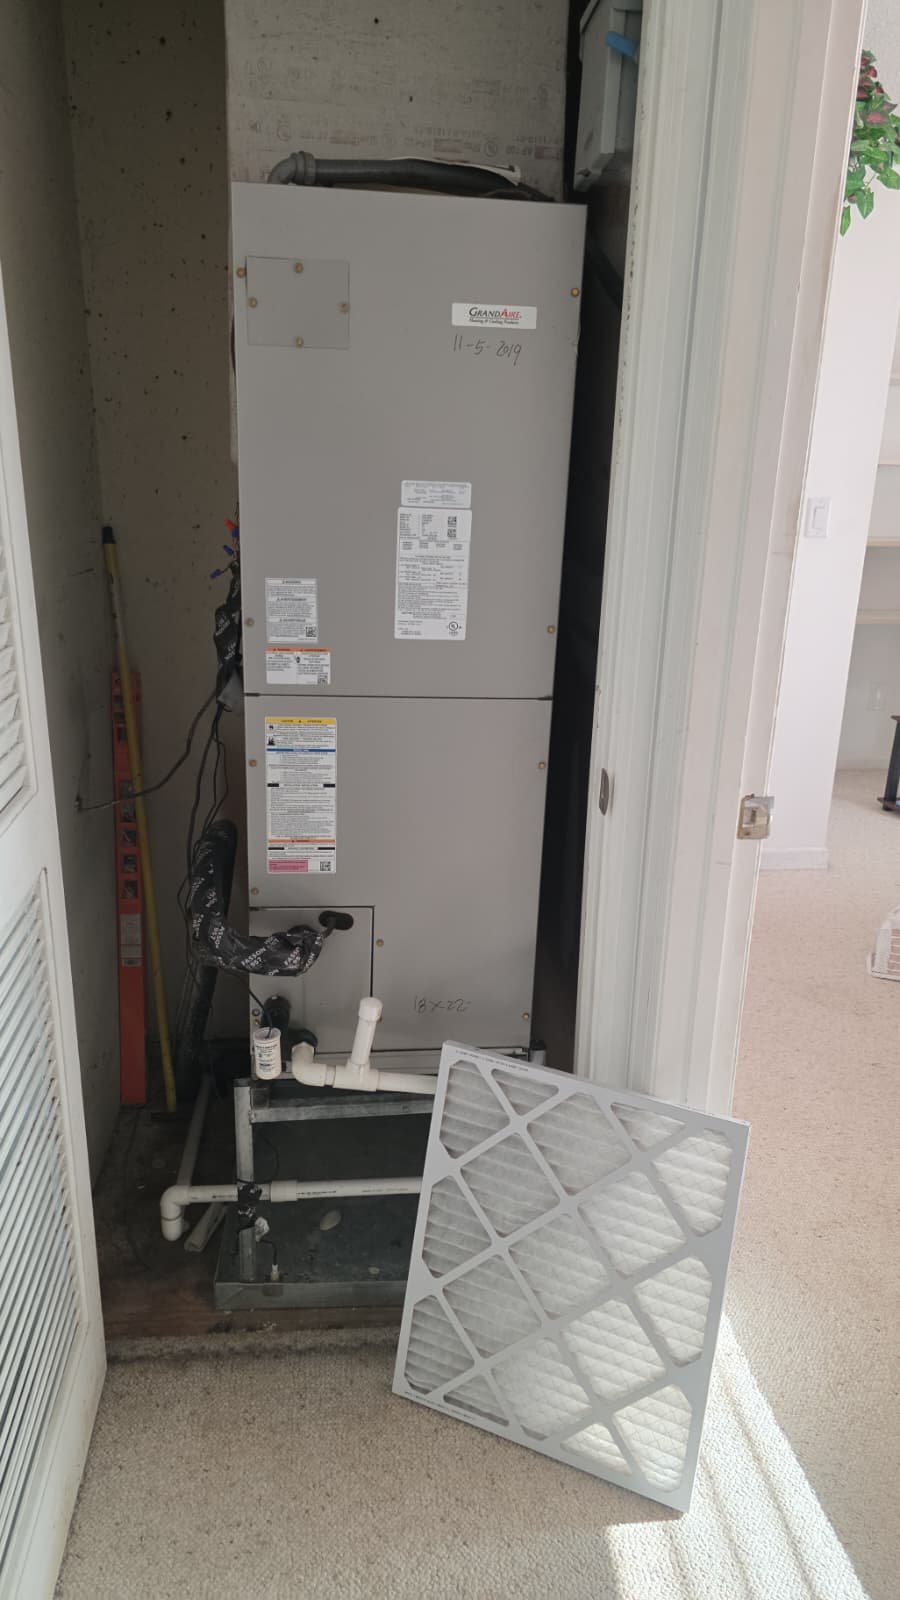
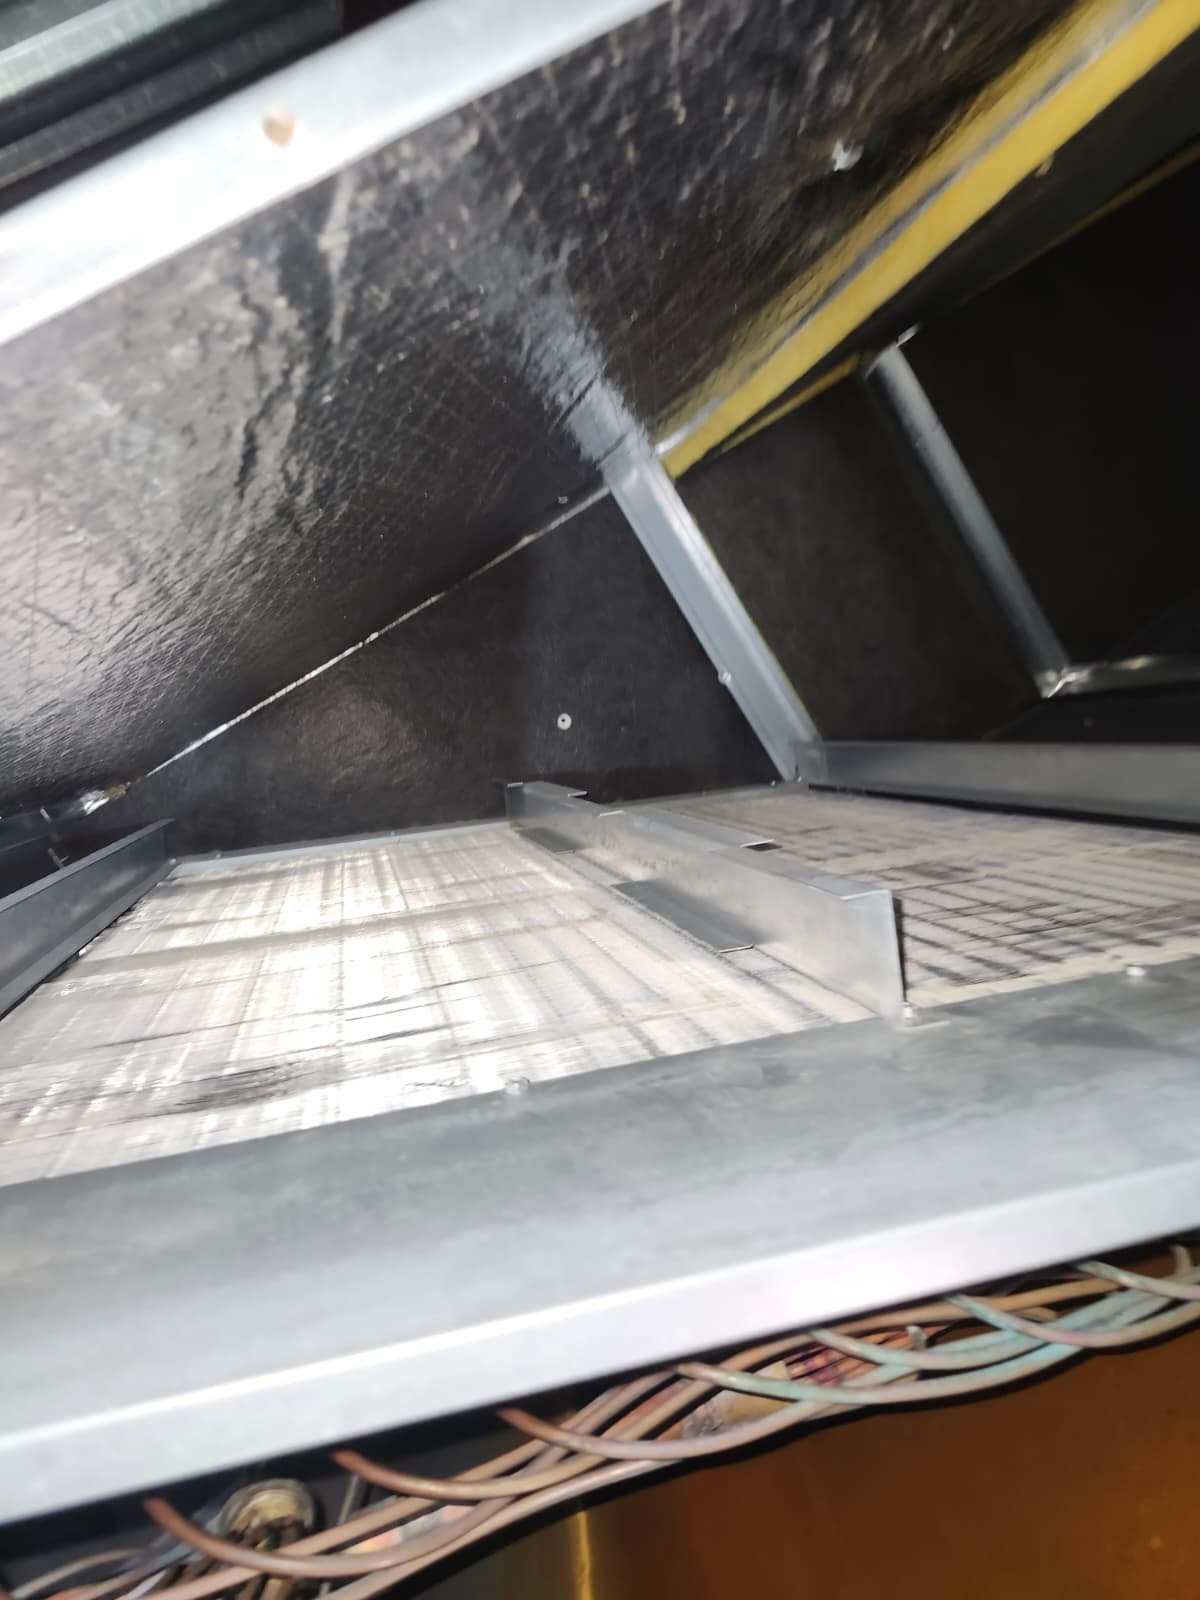
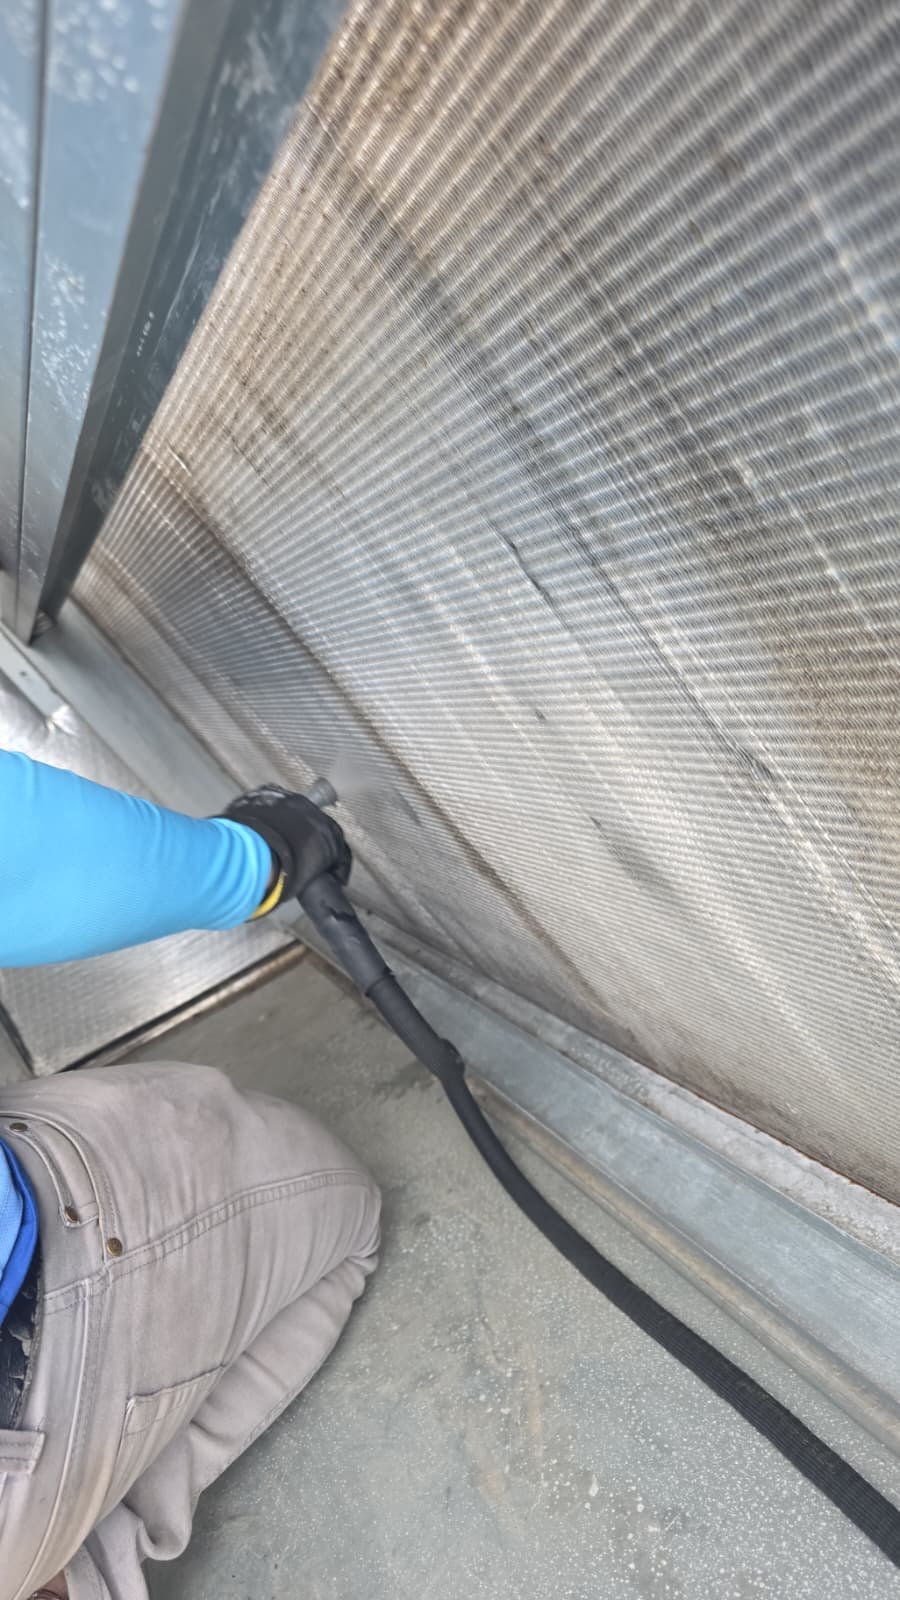
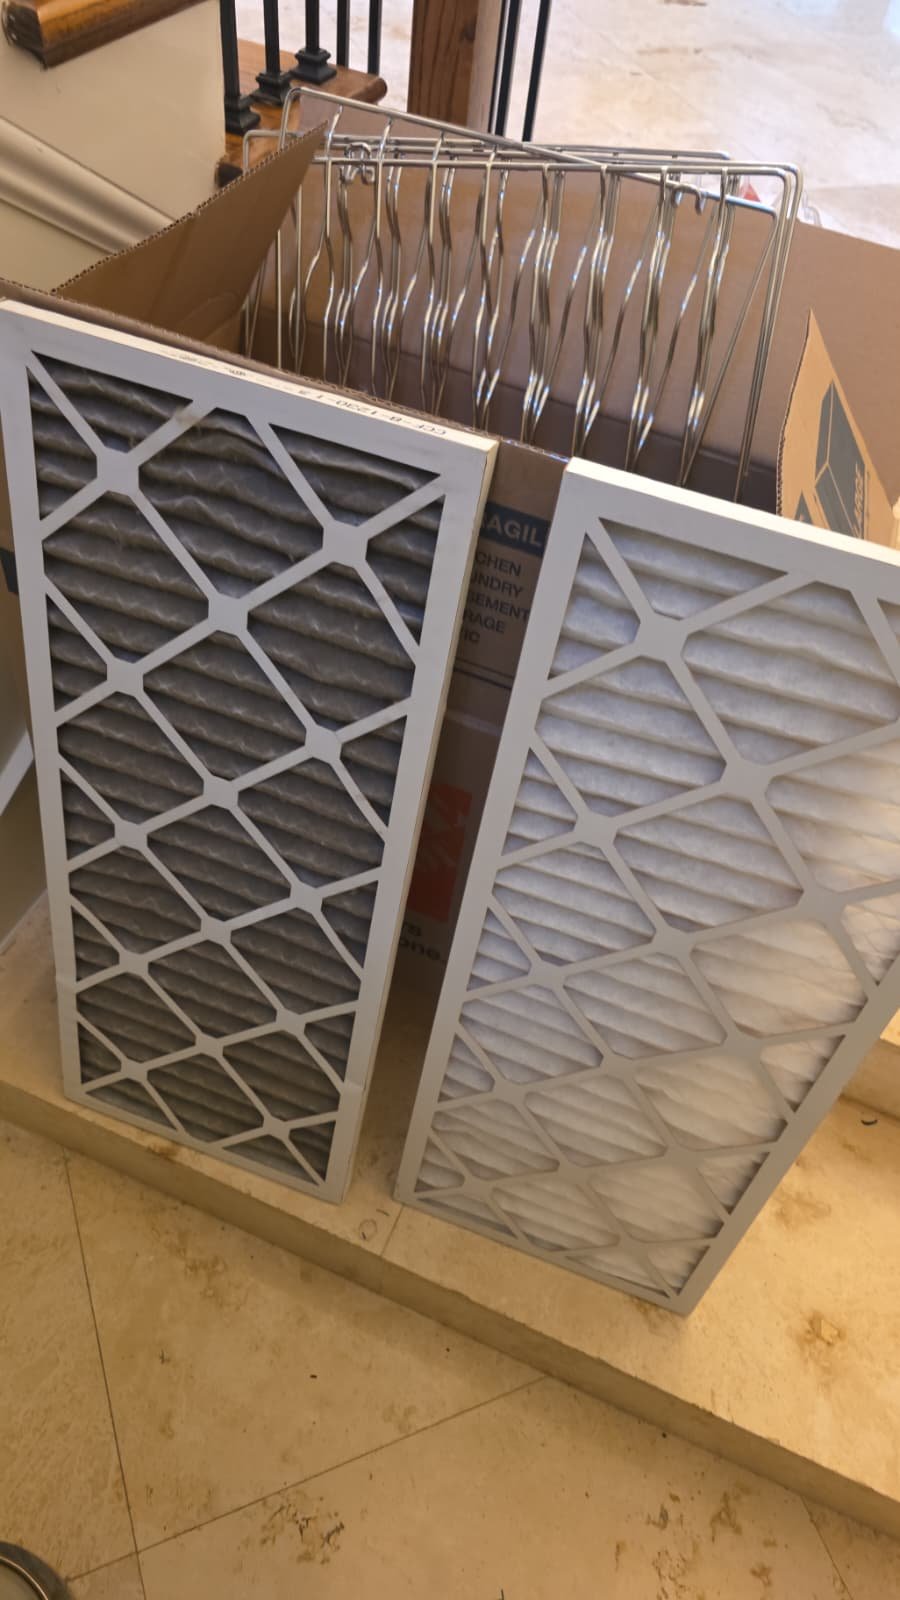
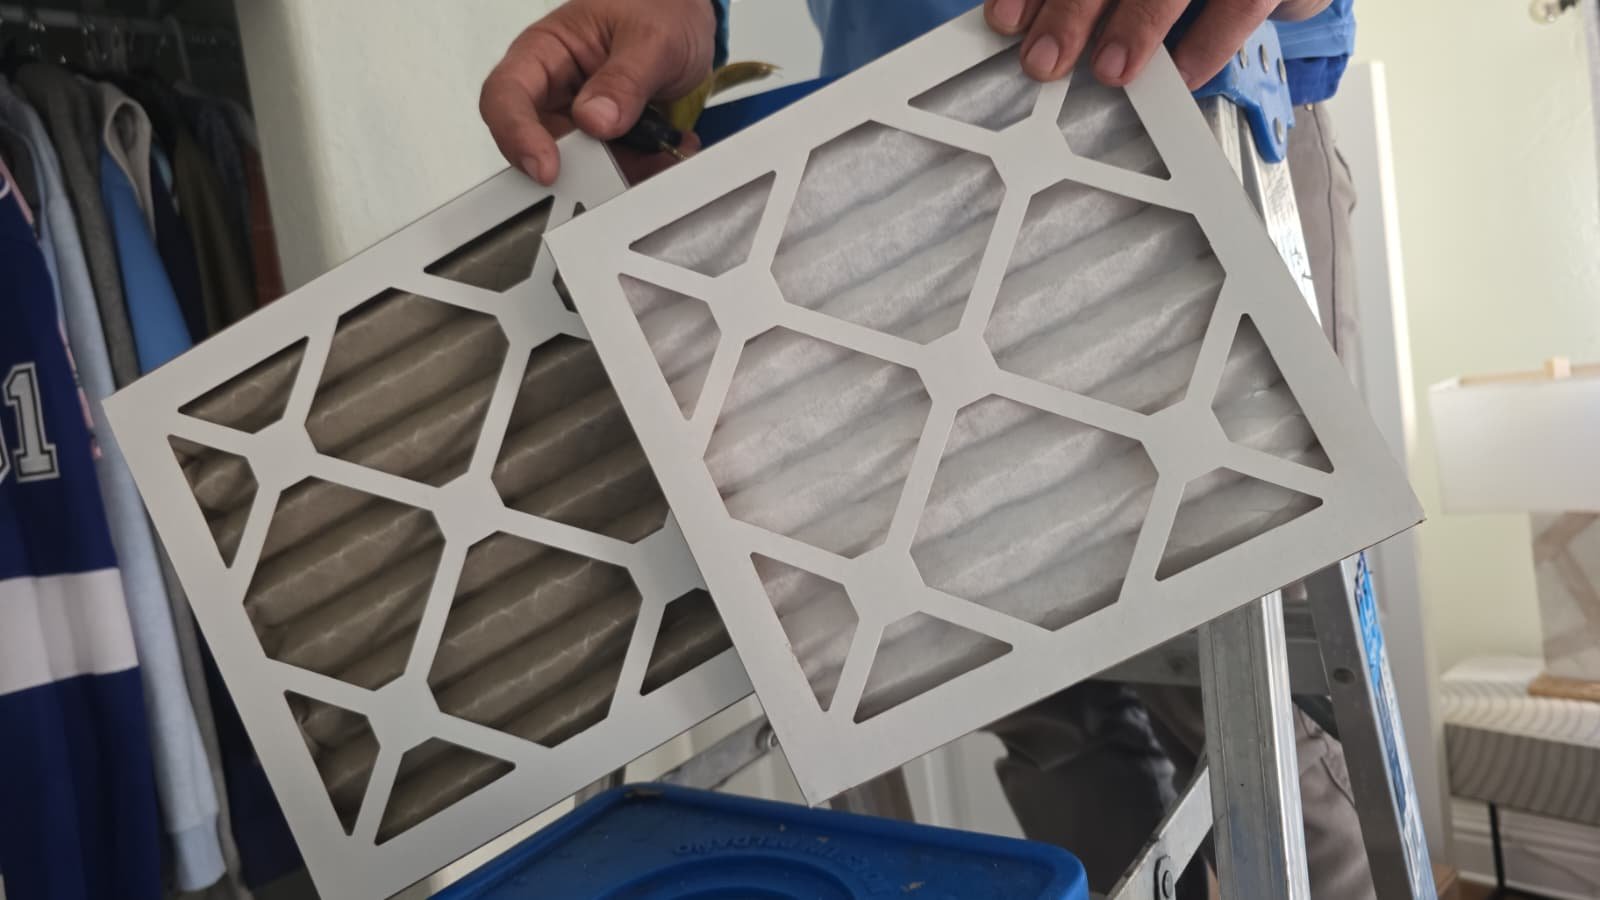
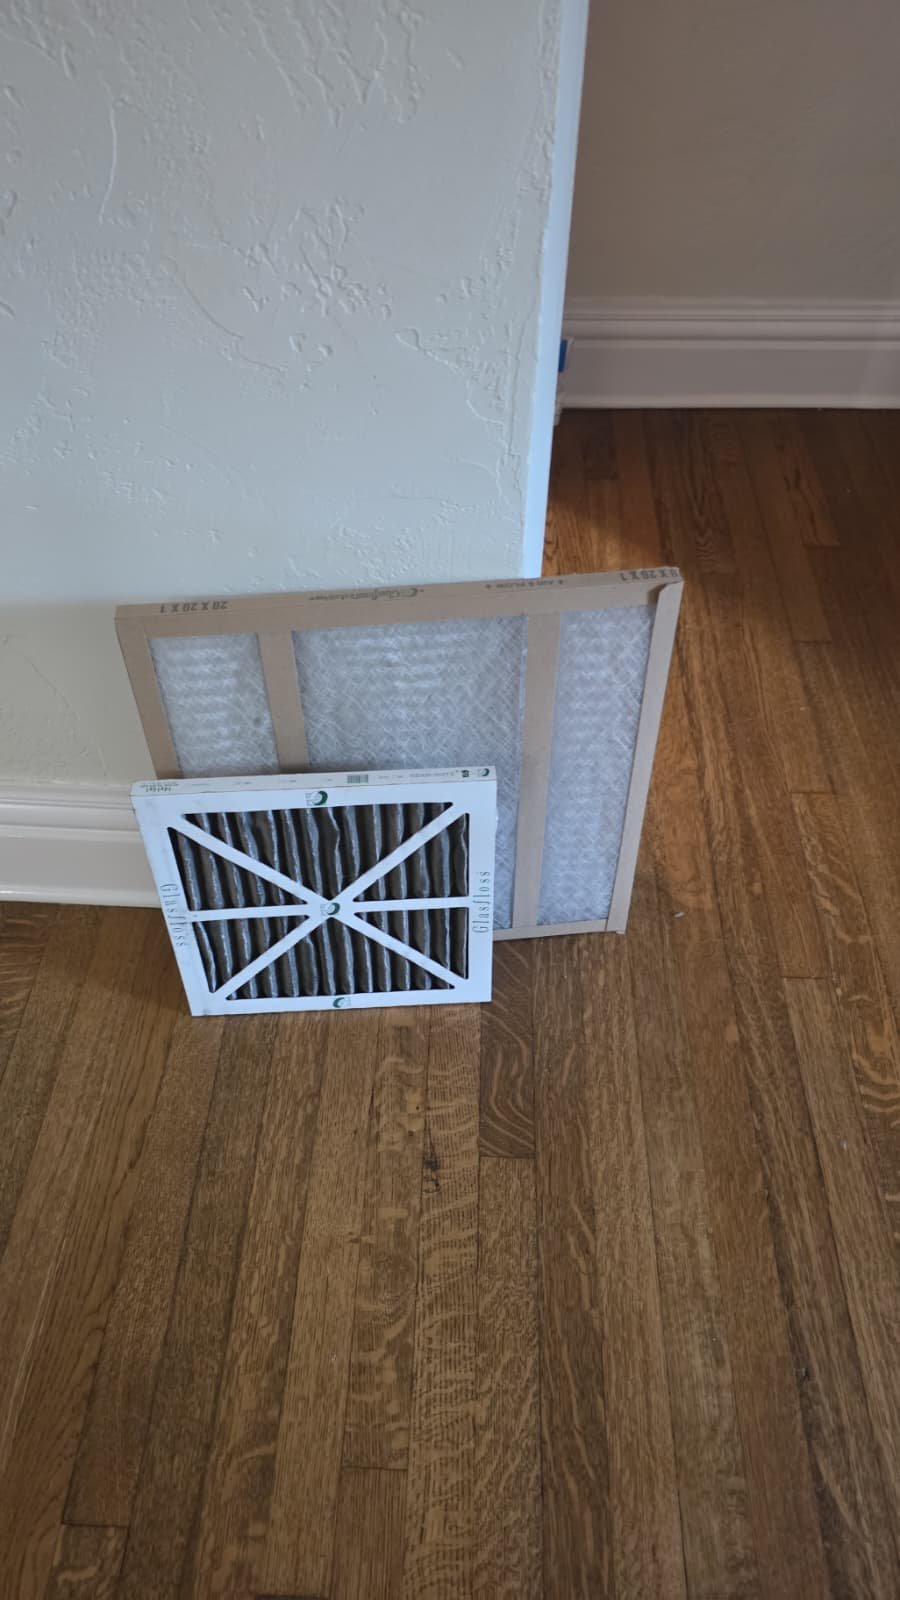
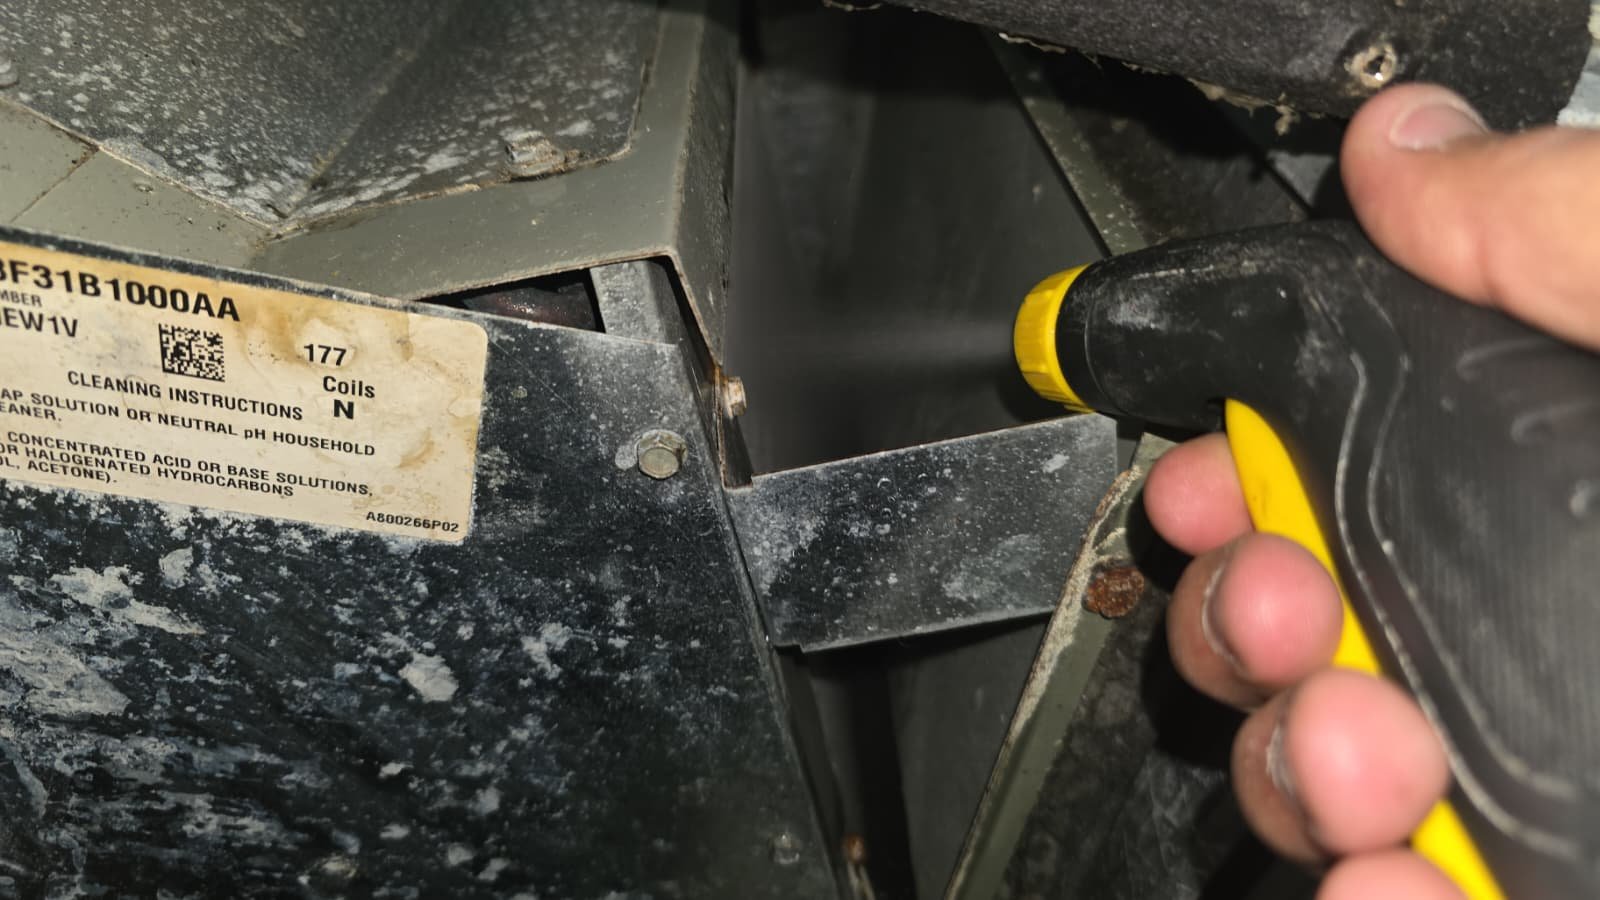
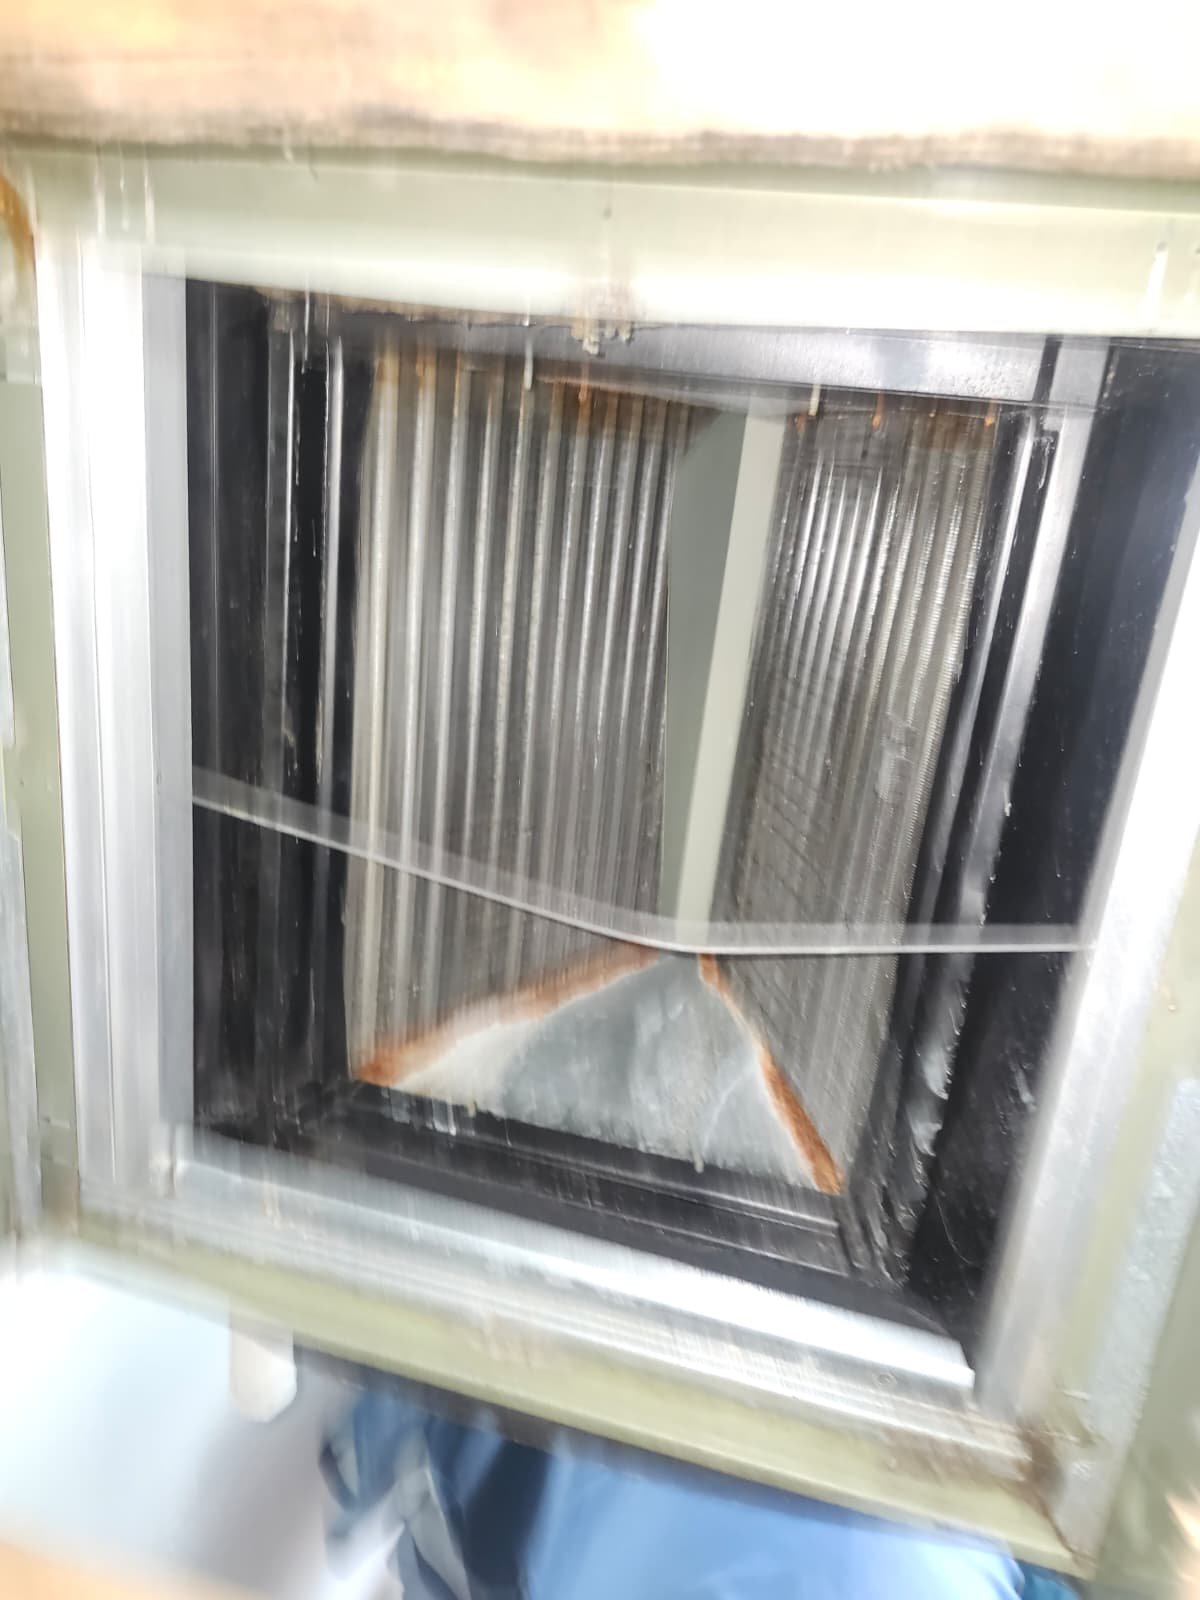
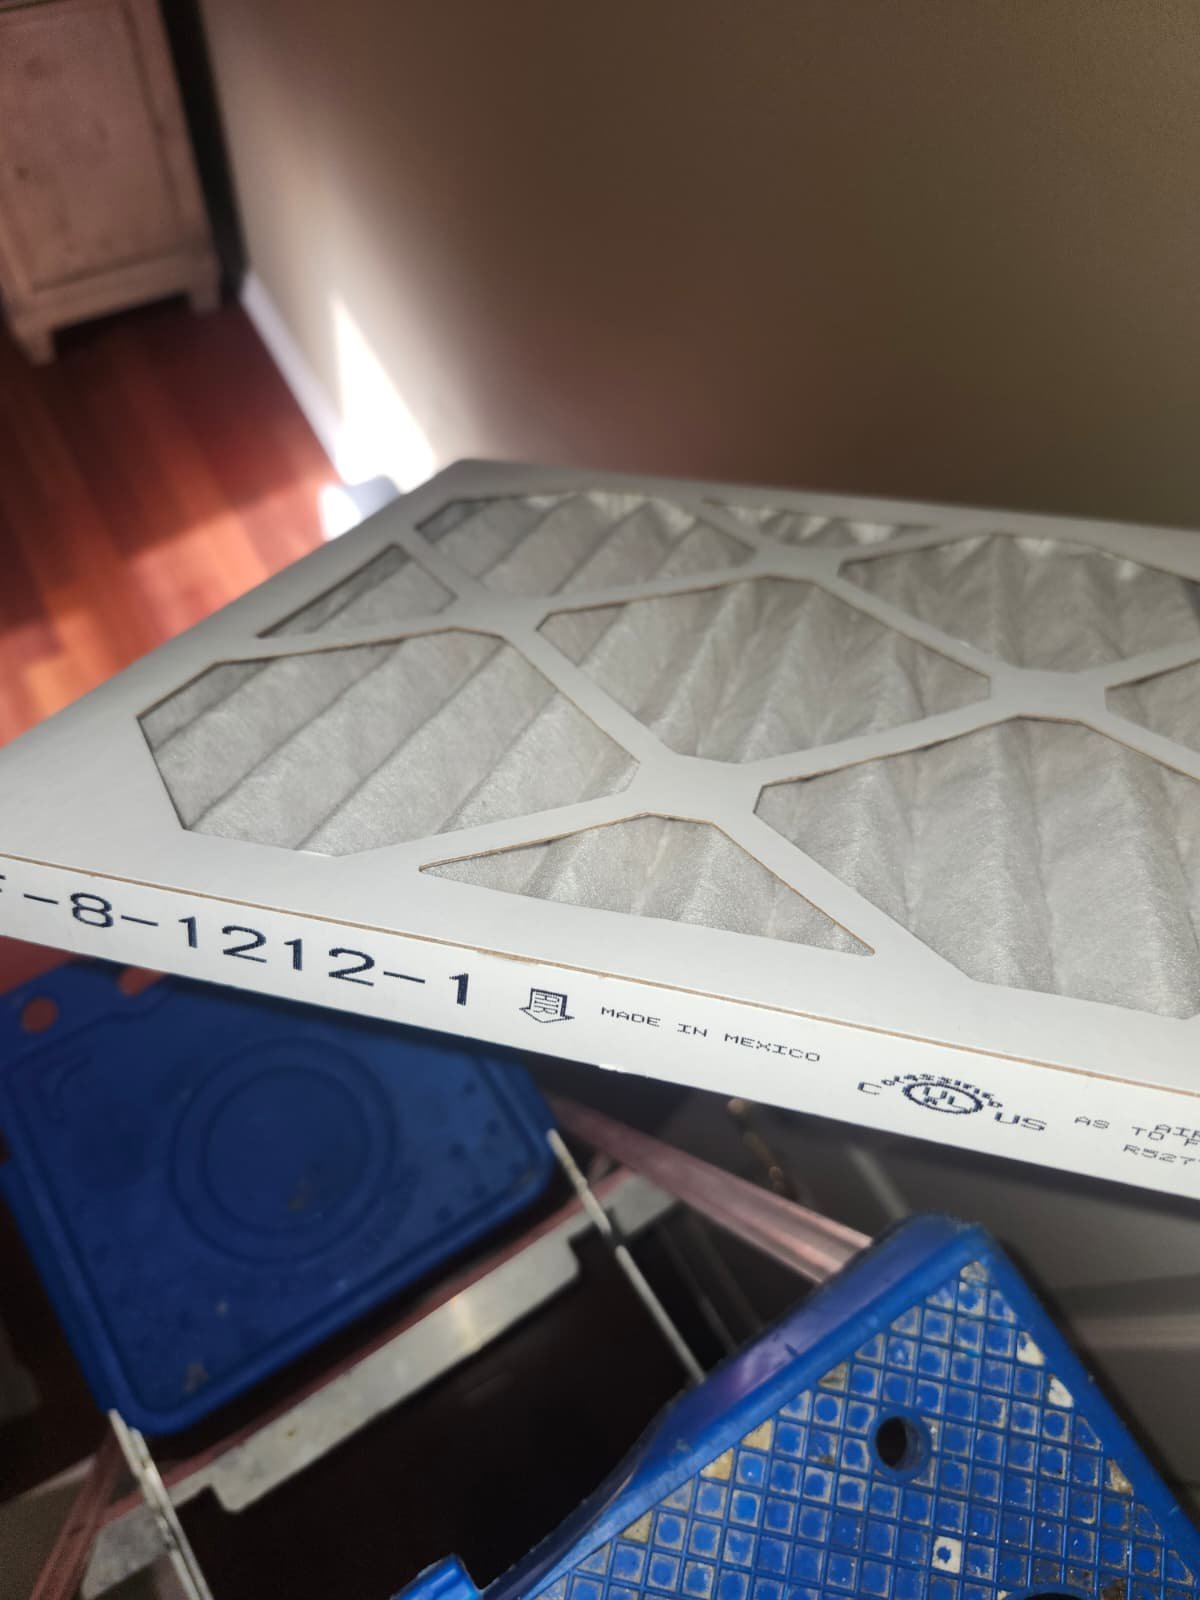
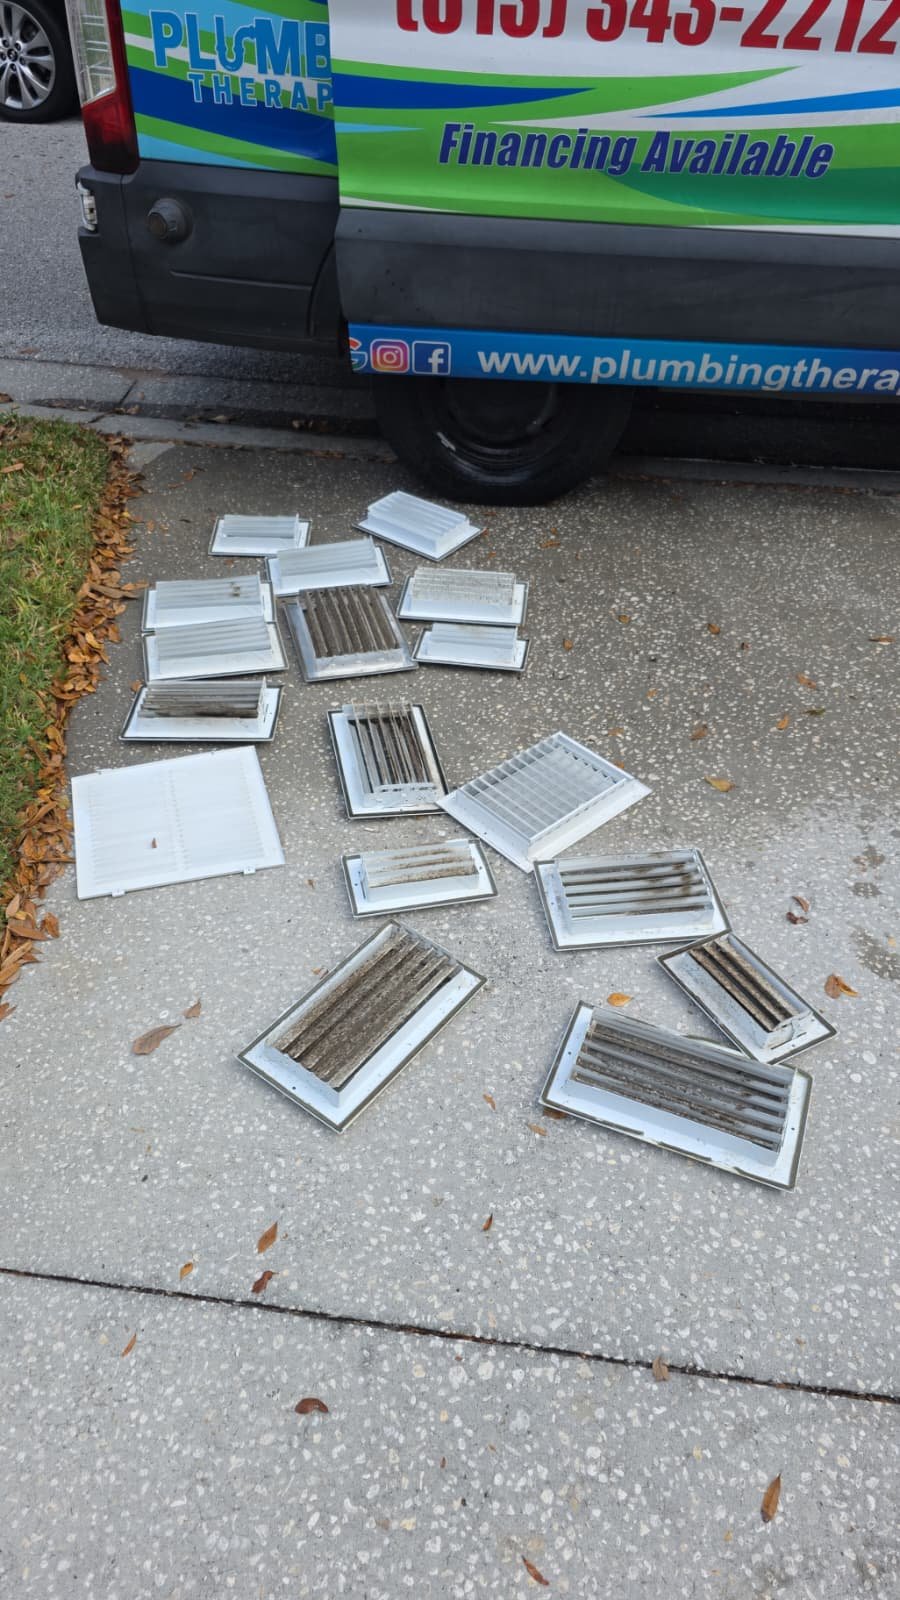
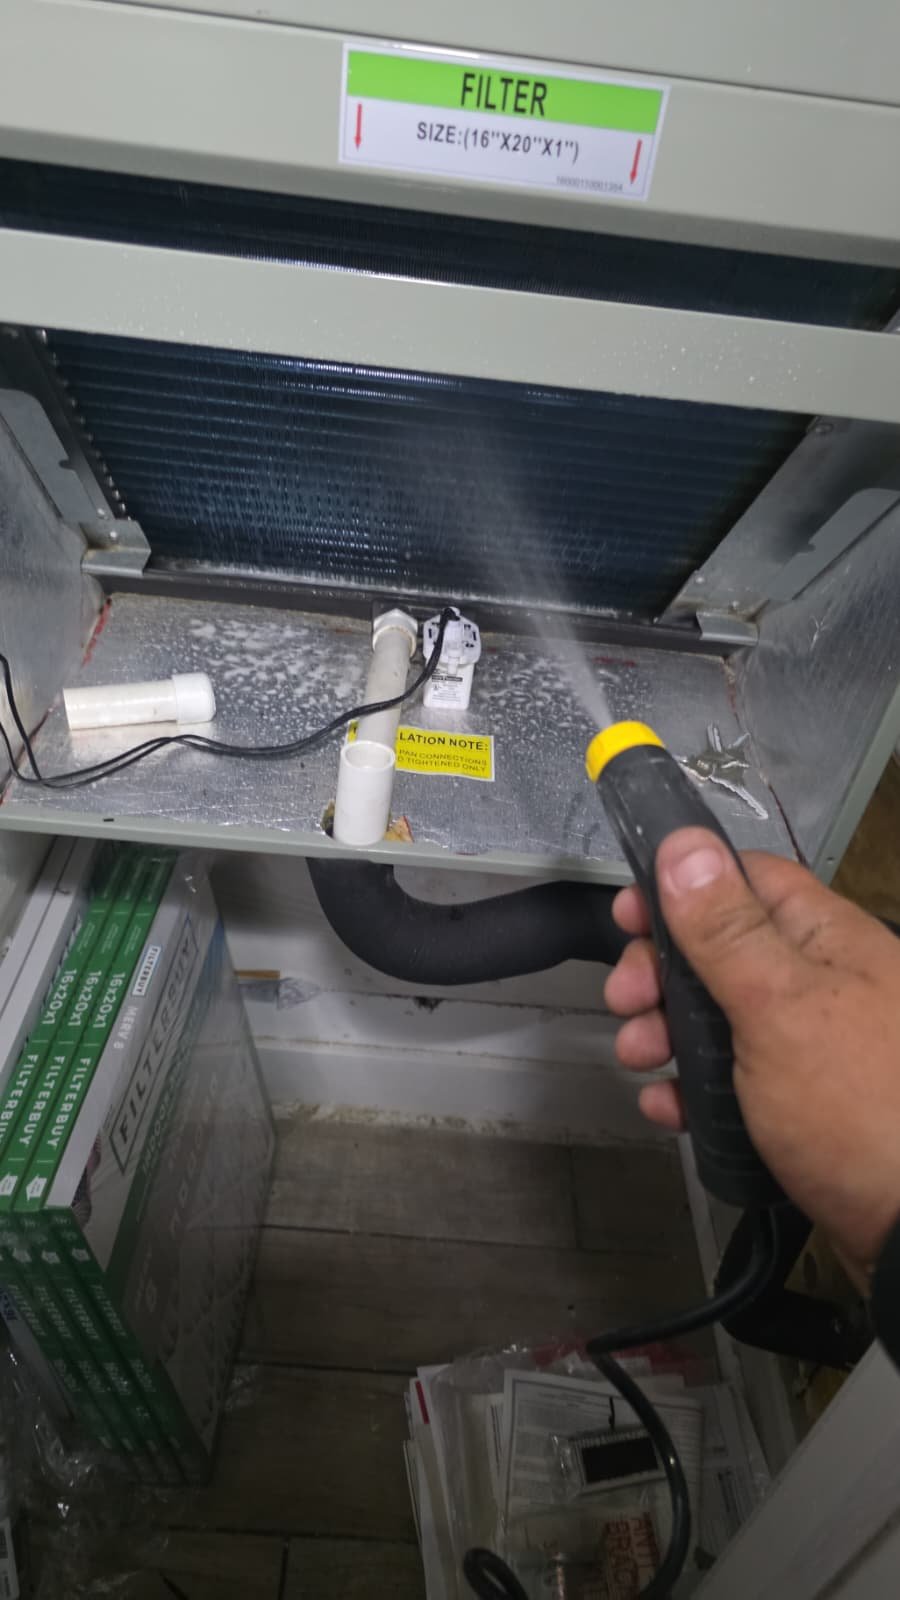
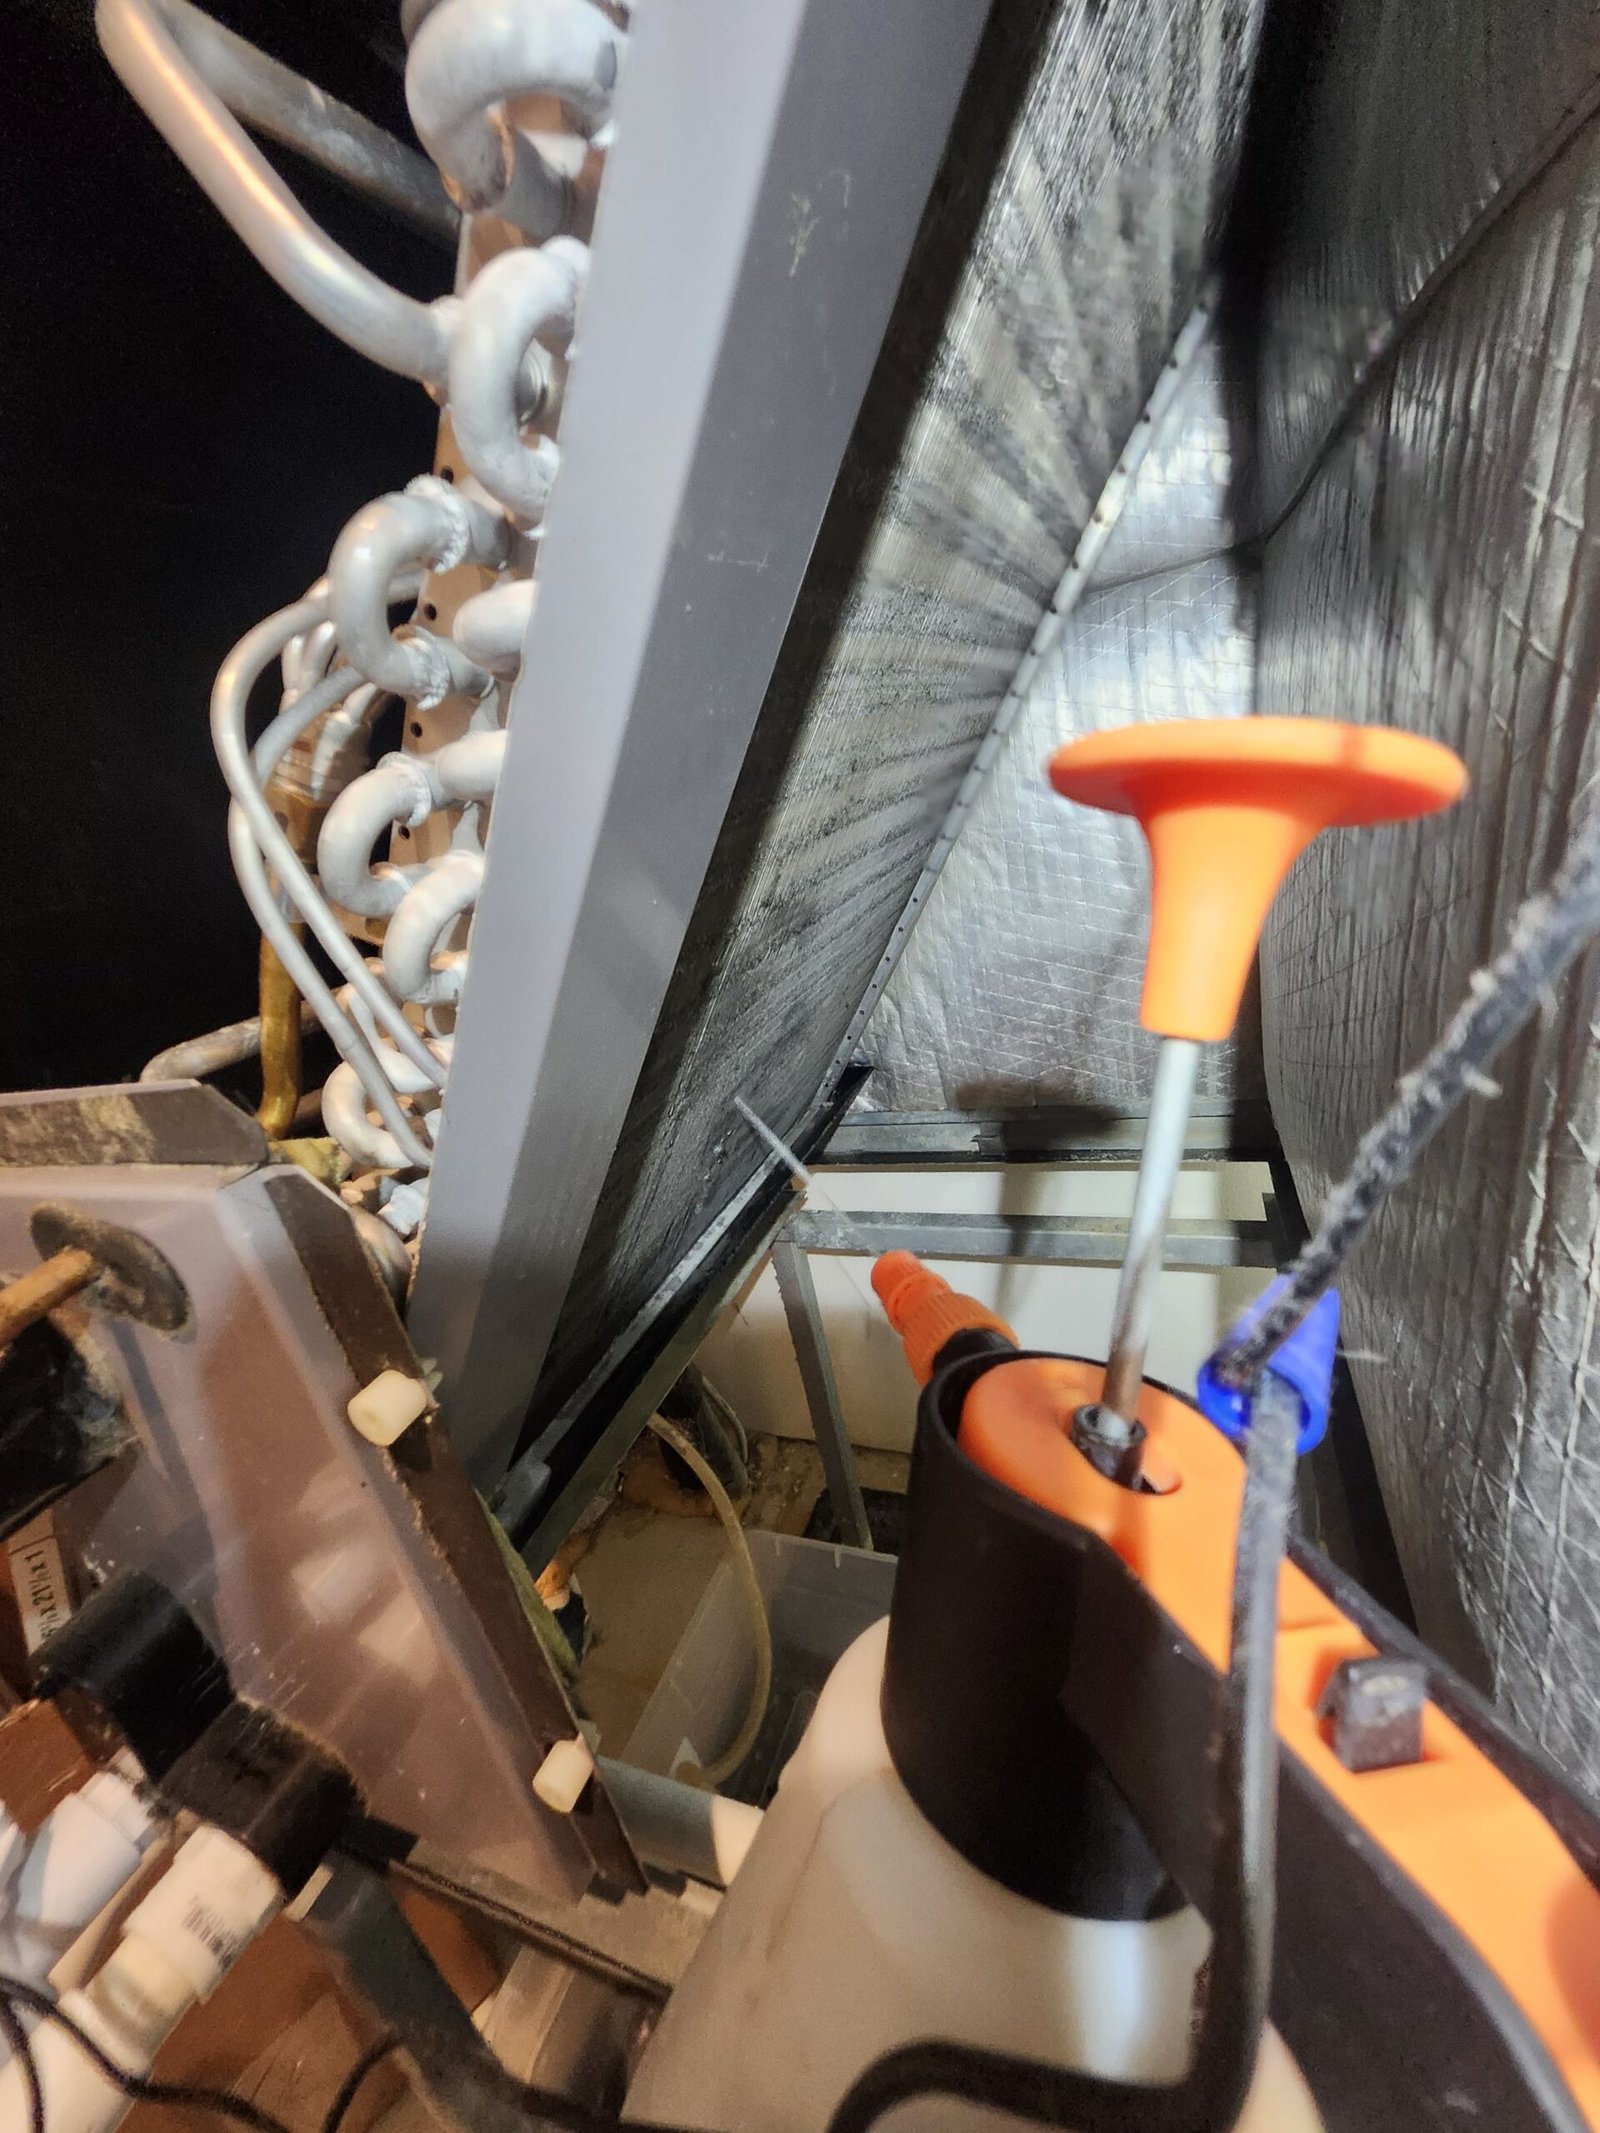
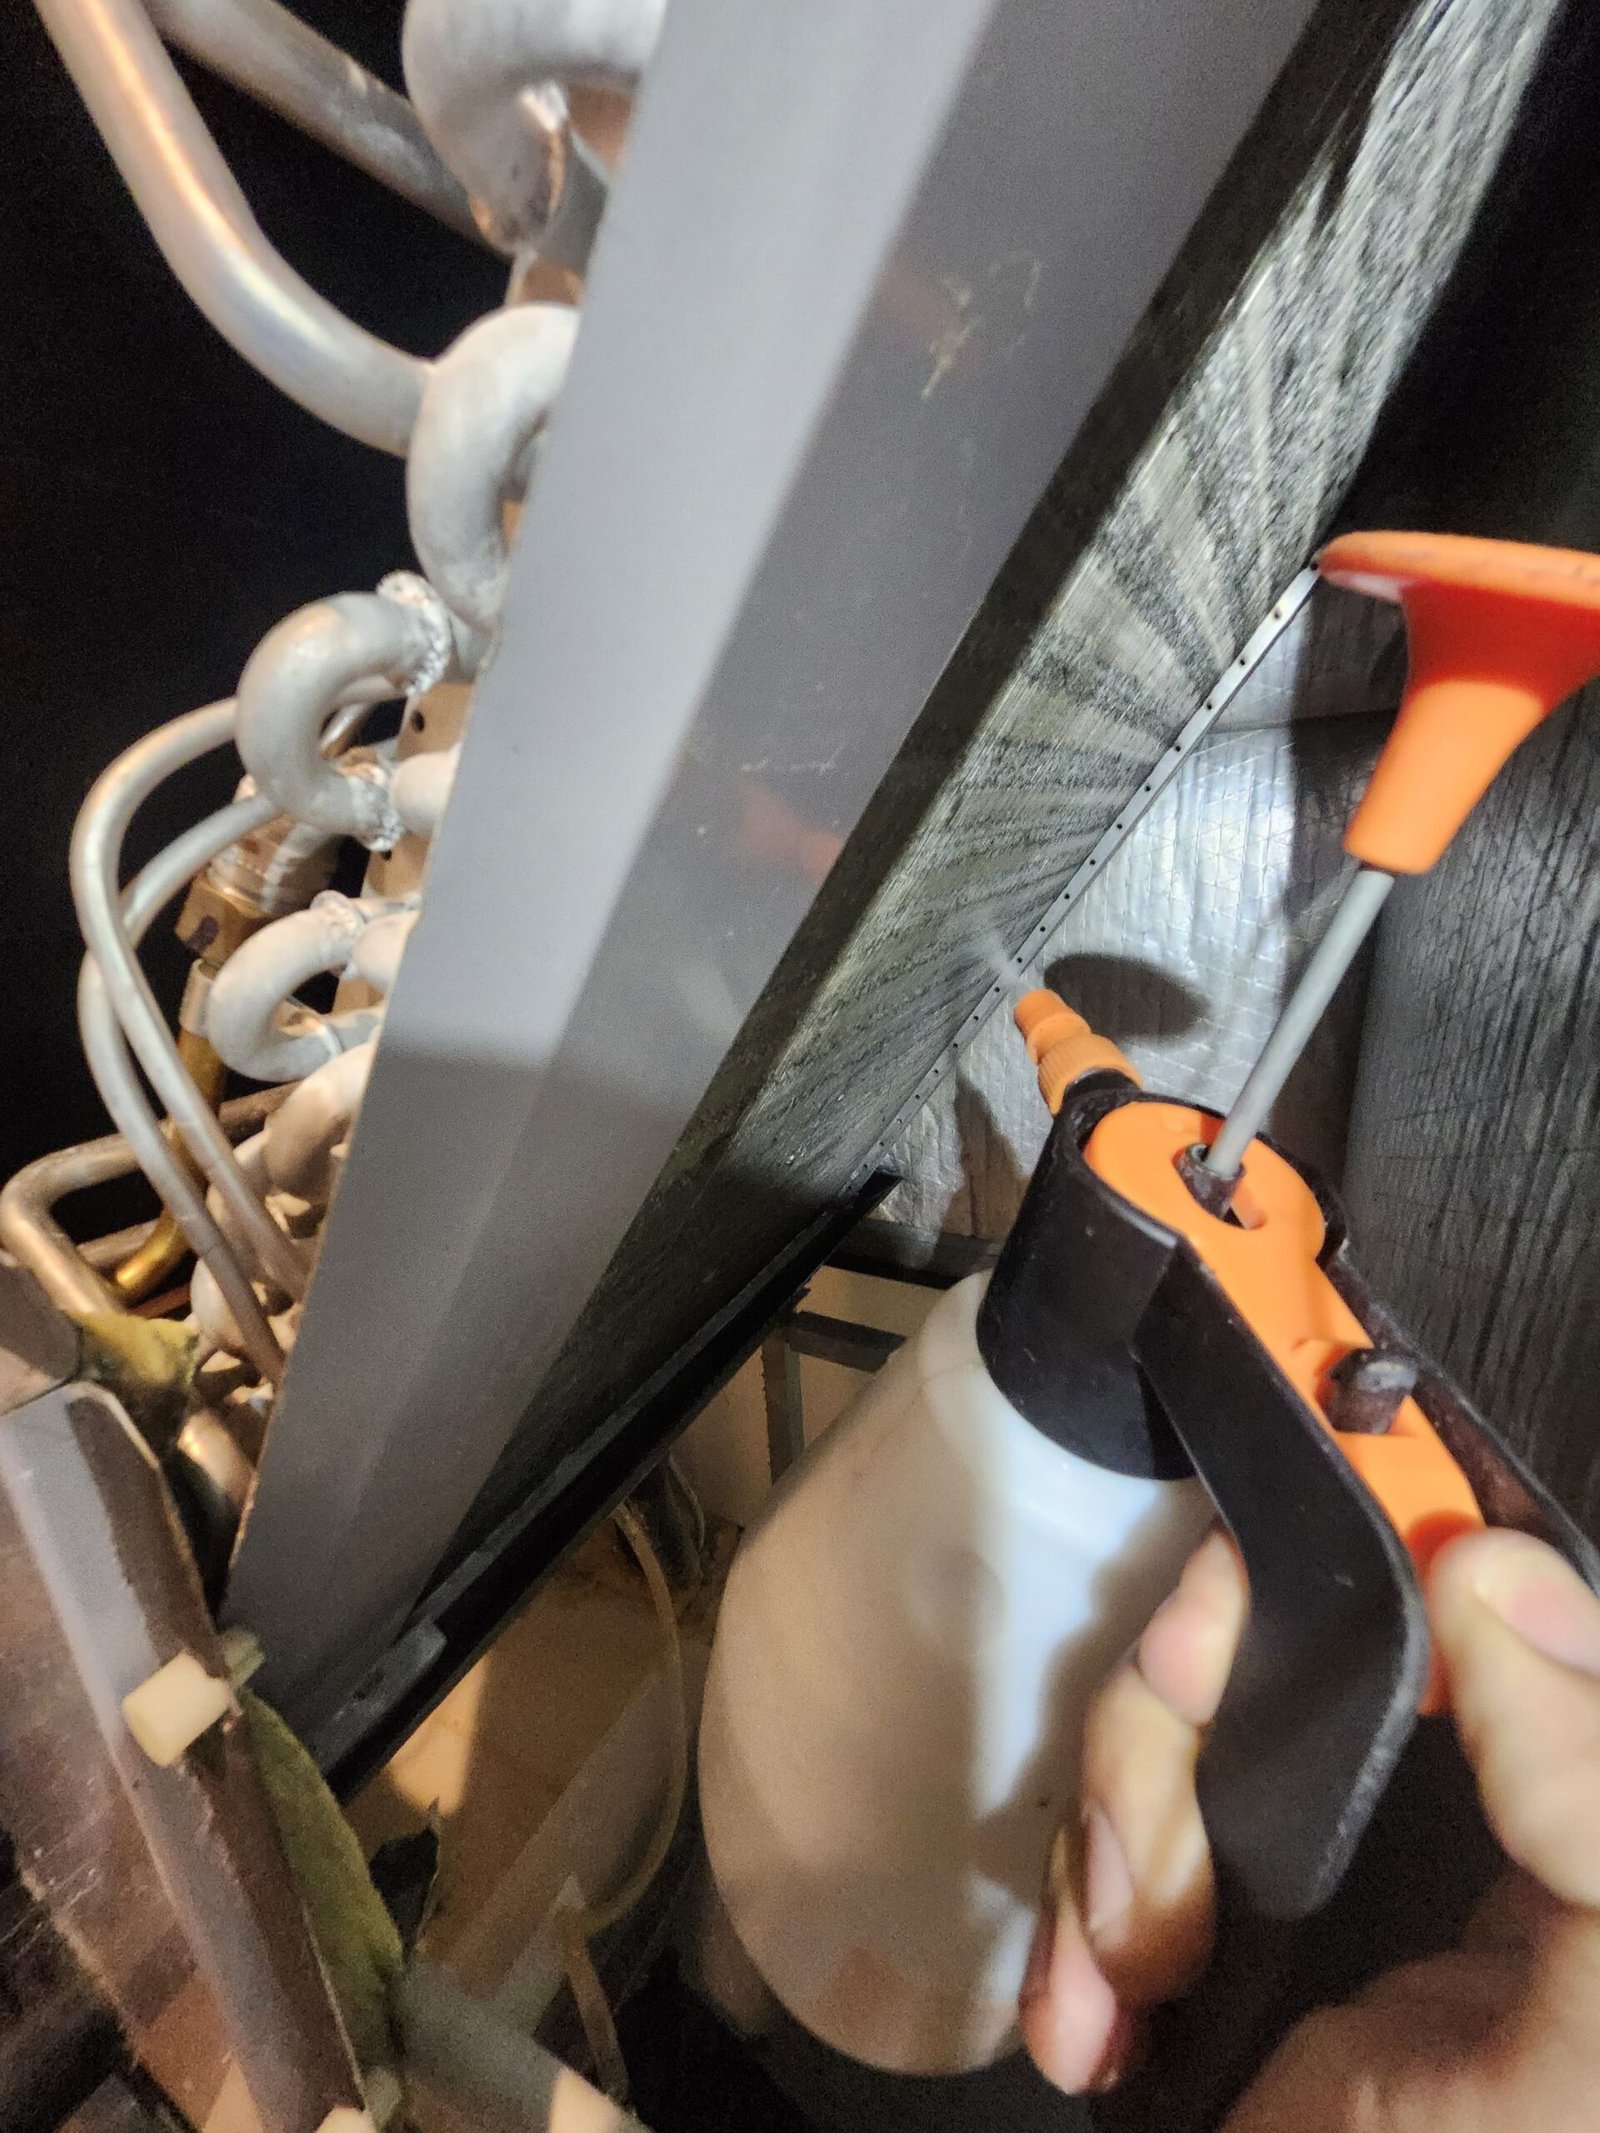
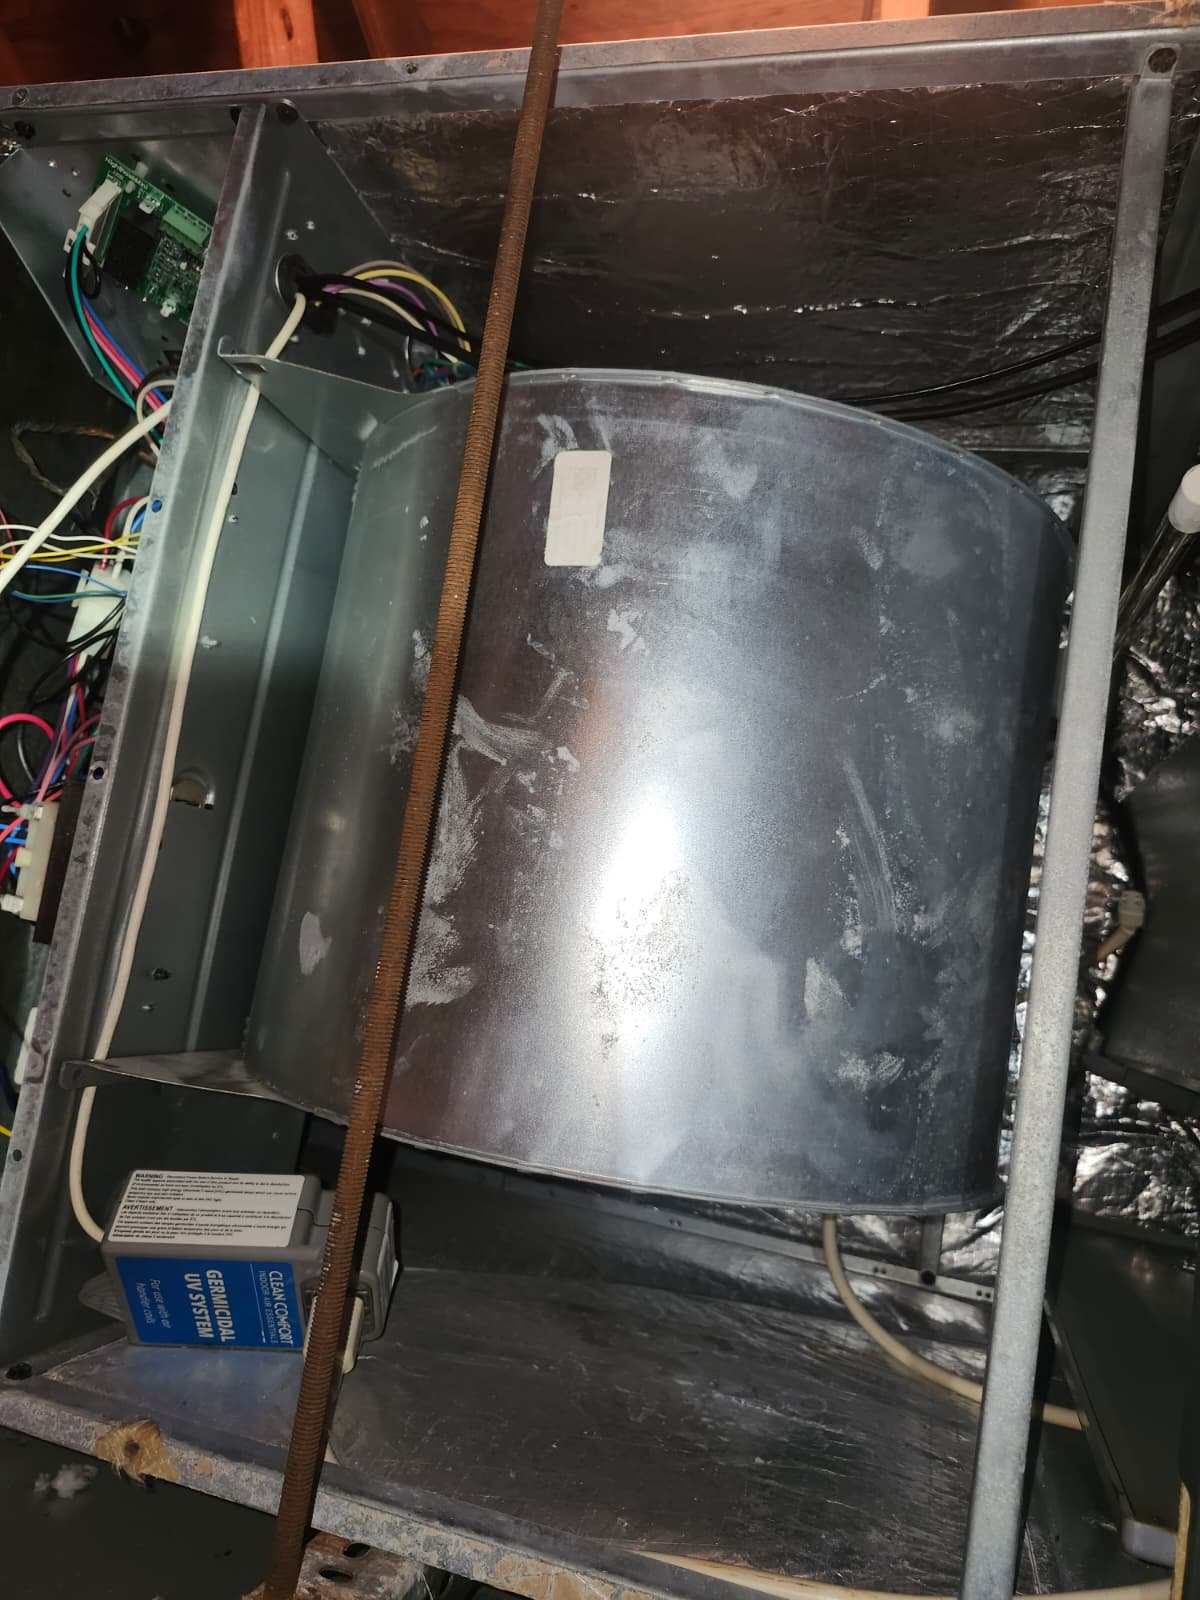
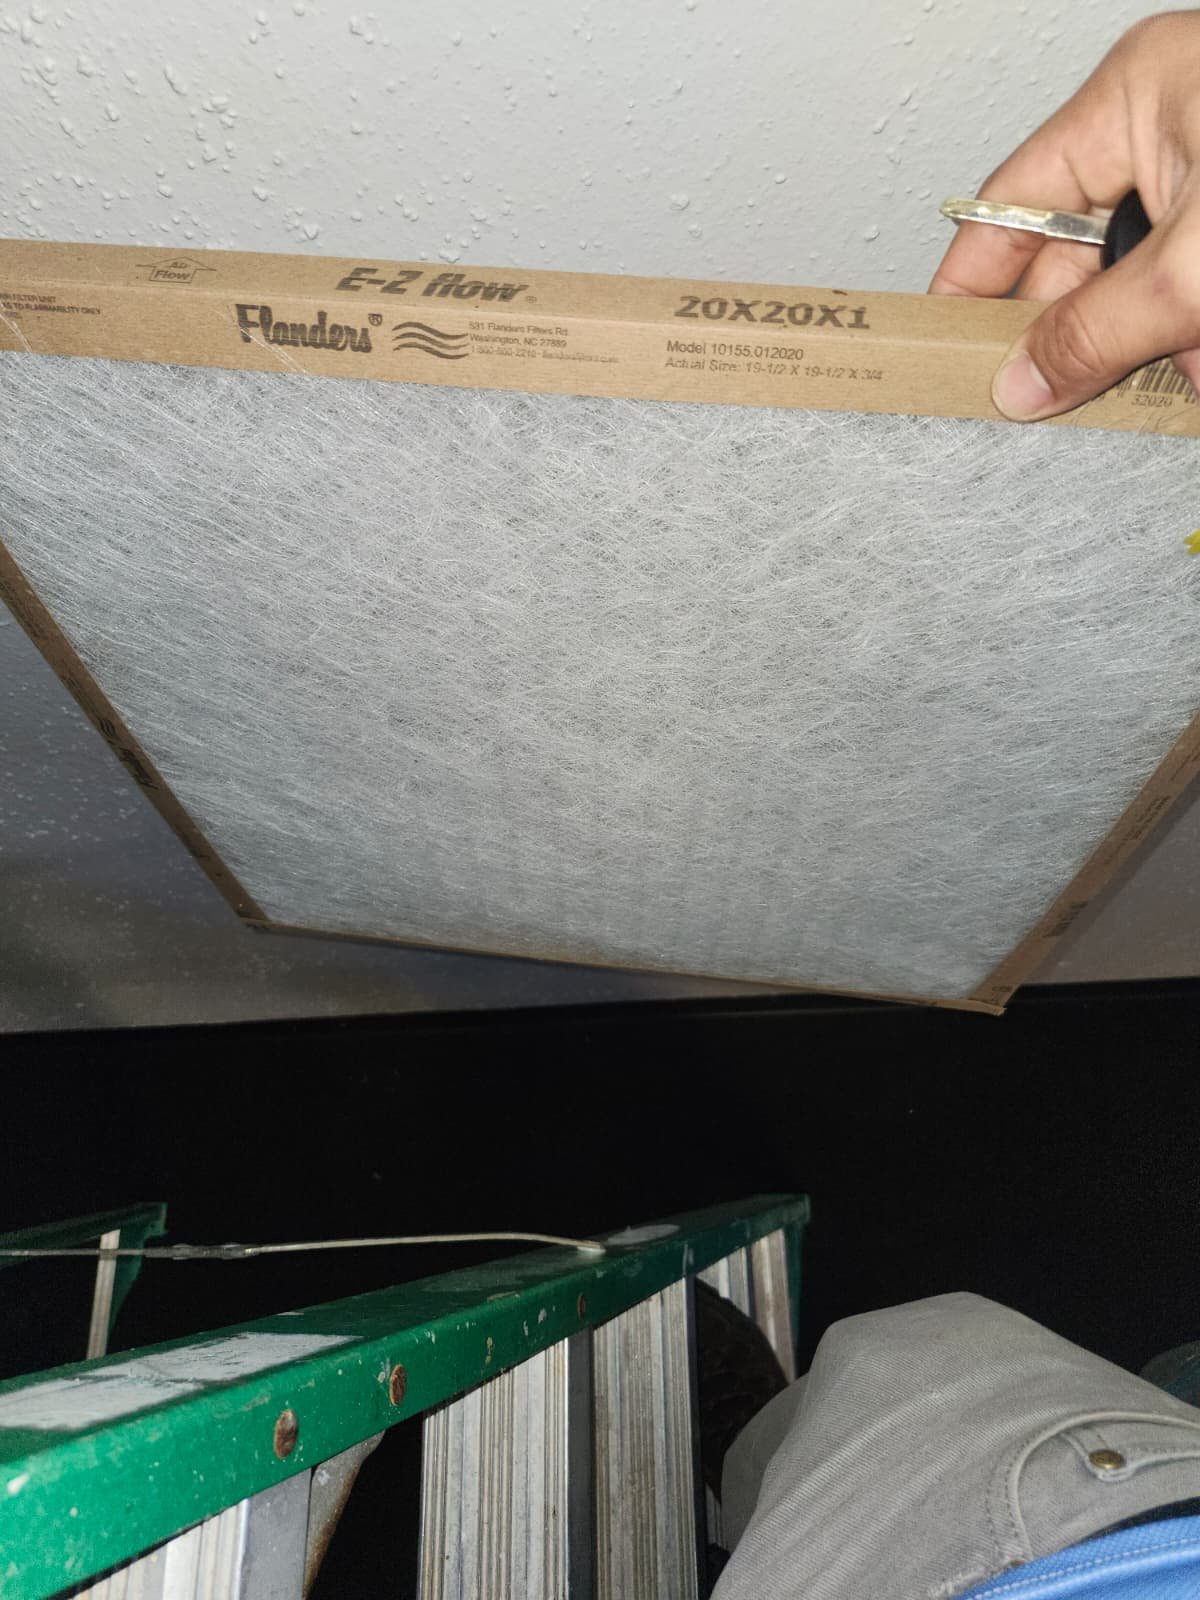
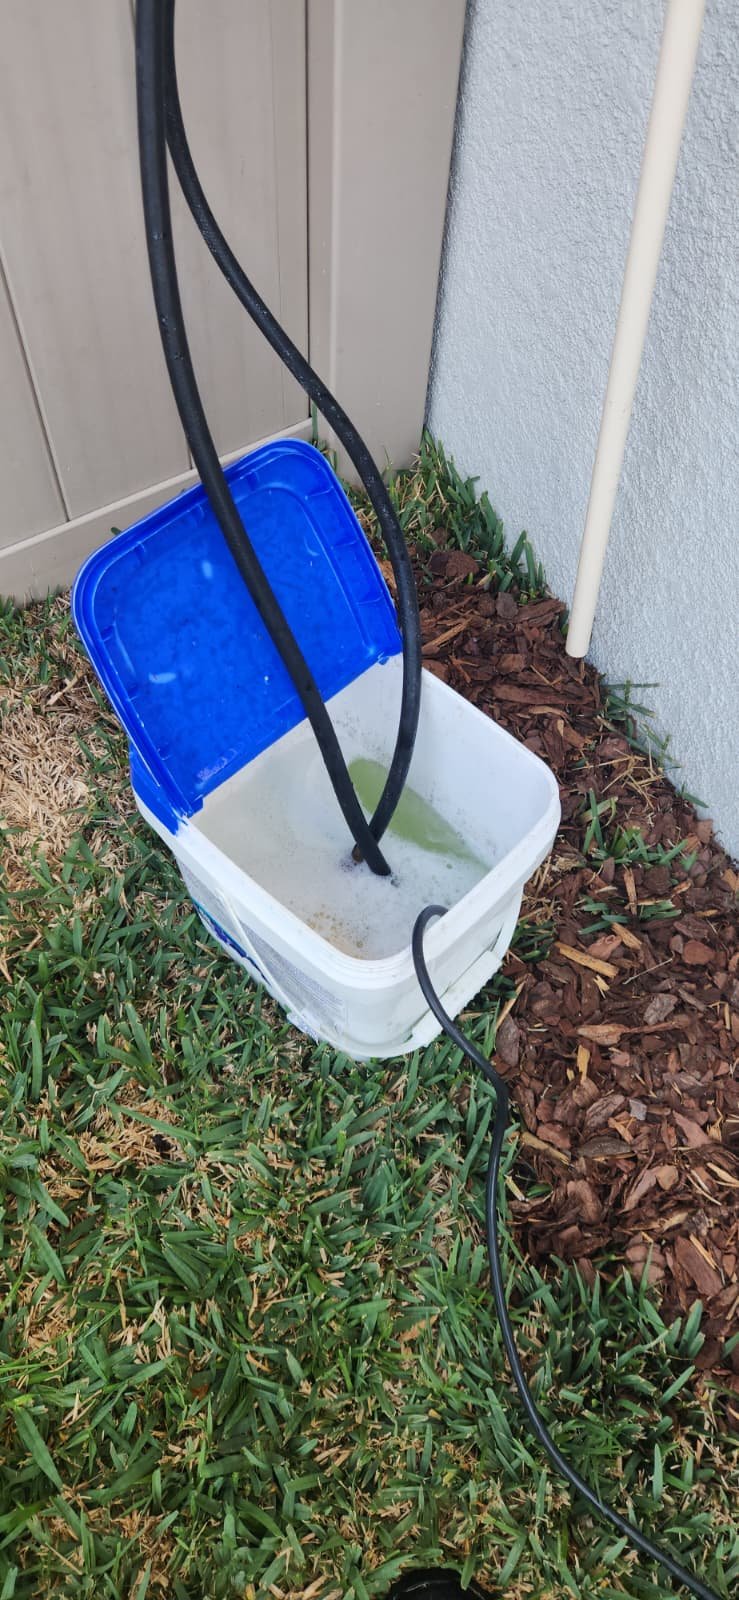
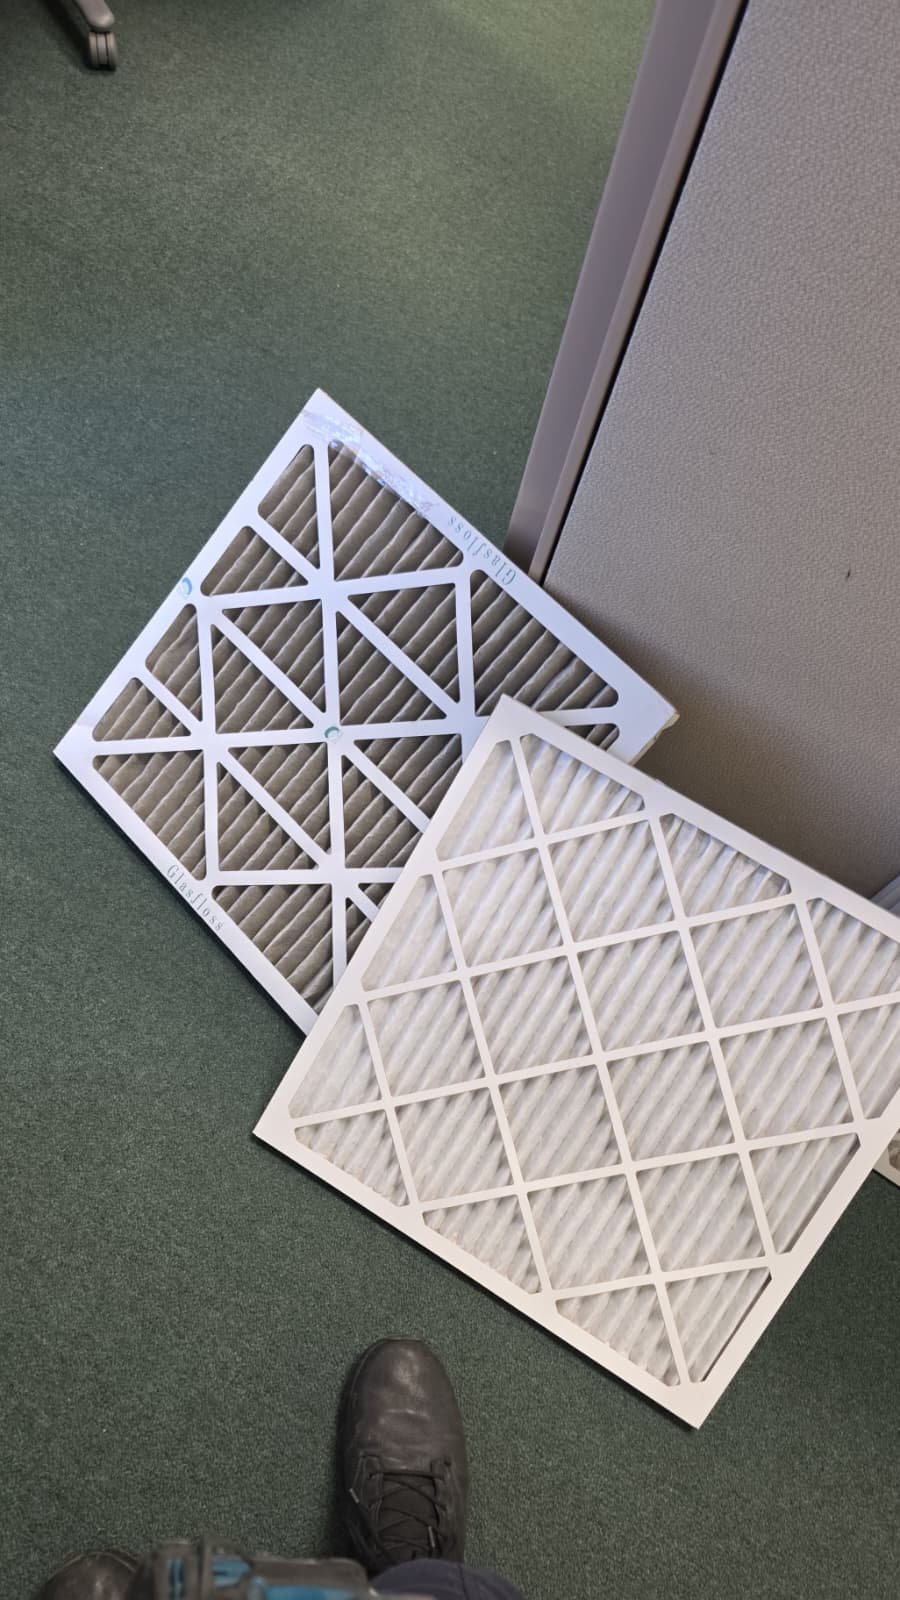
2. Inspect and replace the air filter

The air filter is one of the most important—and most overlooked—parts of any HVAC system in Tampa, FL. During this visit, we removed the existing filter, checked its condition, and replaced it as part of the maintenance service.

A clean filter helps with:

  • Airflow: It allows your system to move the right amount of air without straining.
  • Efficiency: The system doesn’t have to work as hard to push air through a clogged filter.
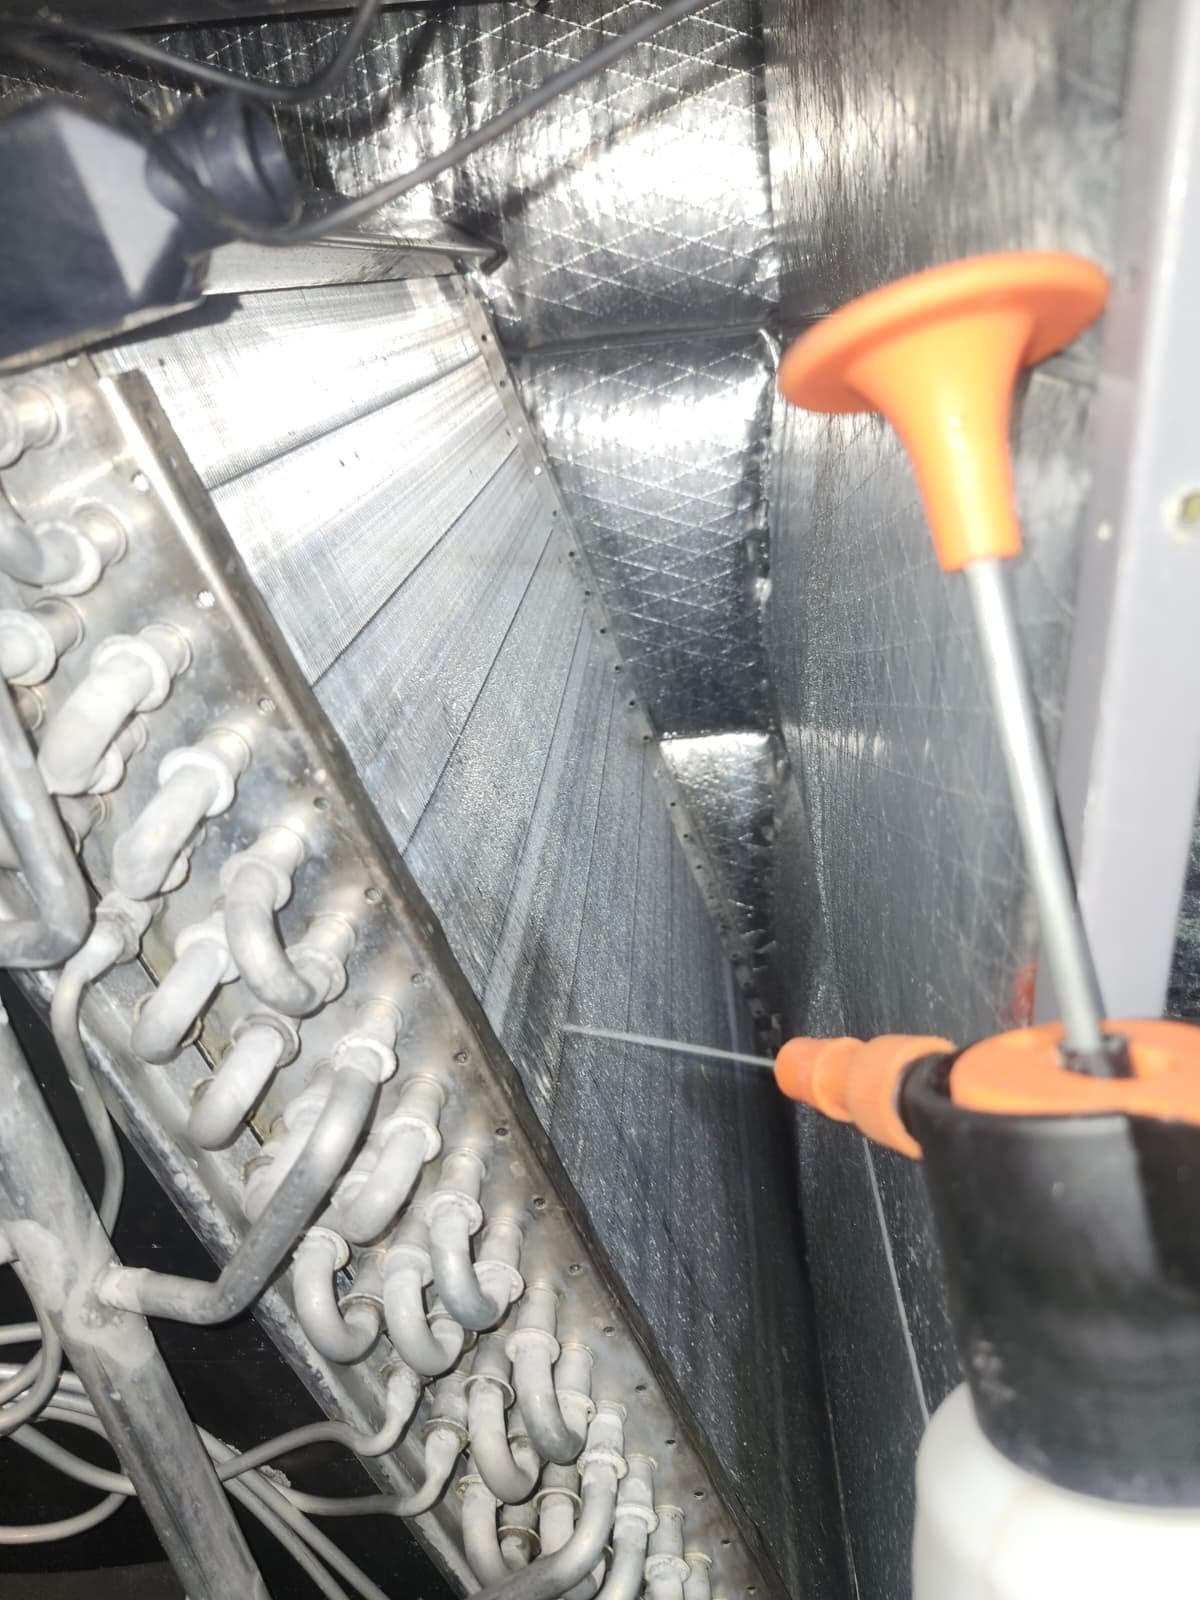
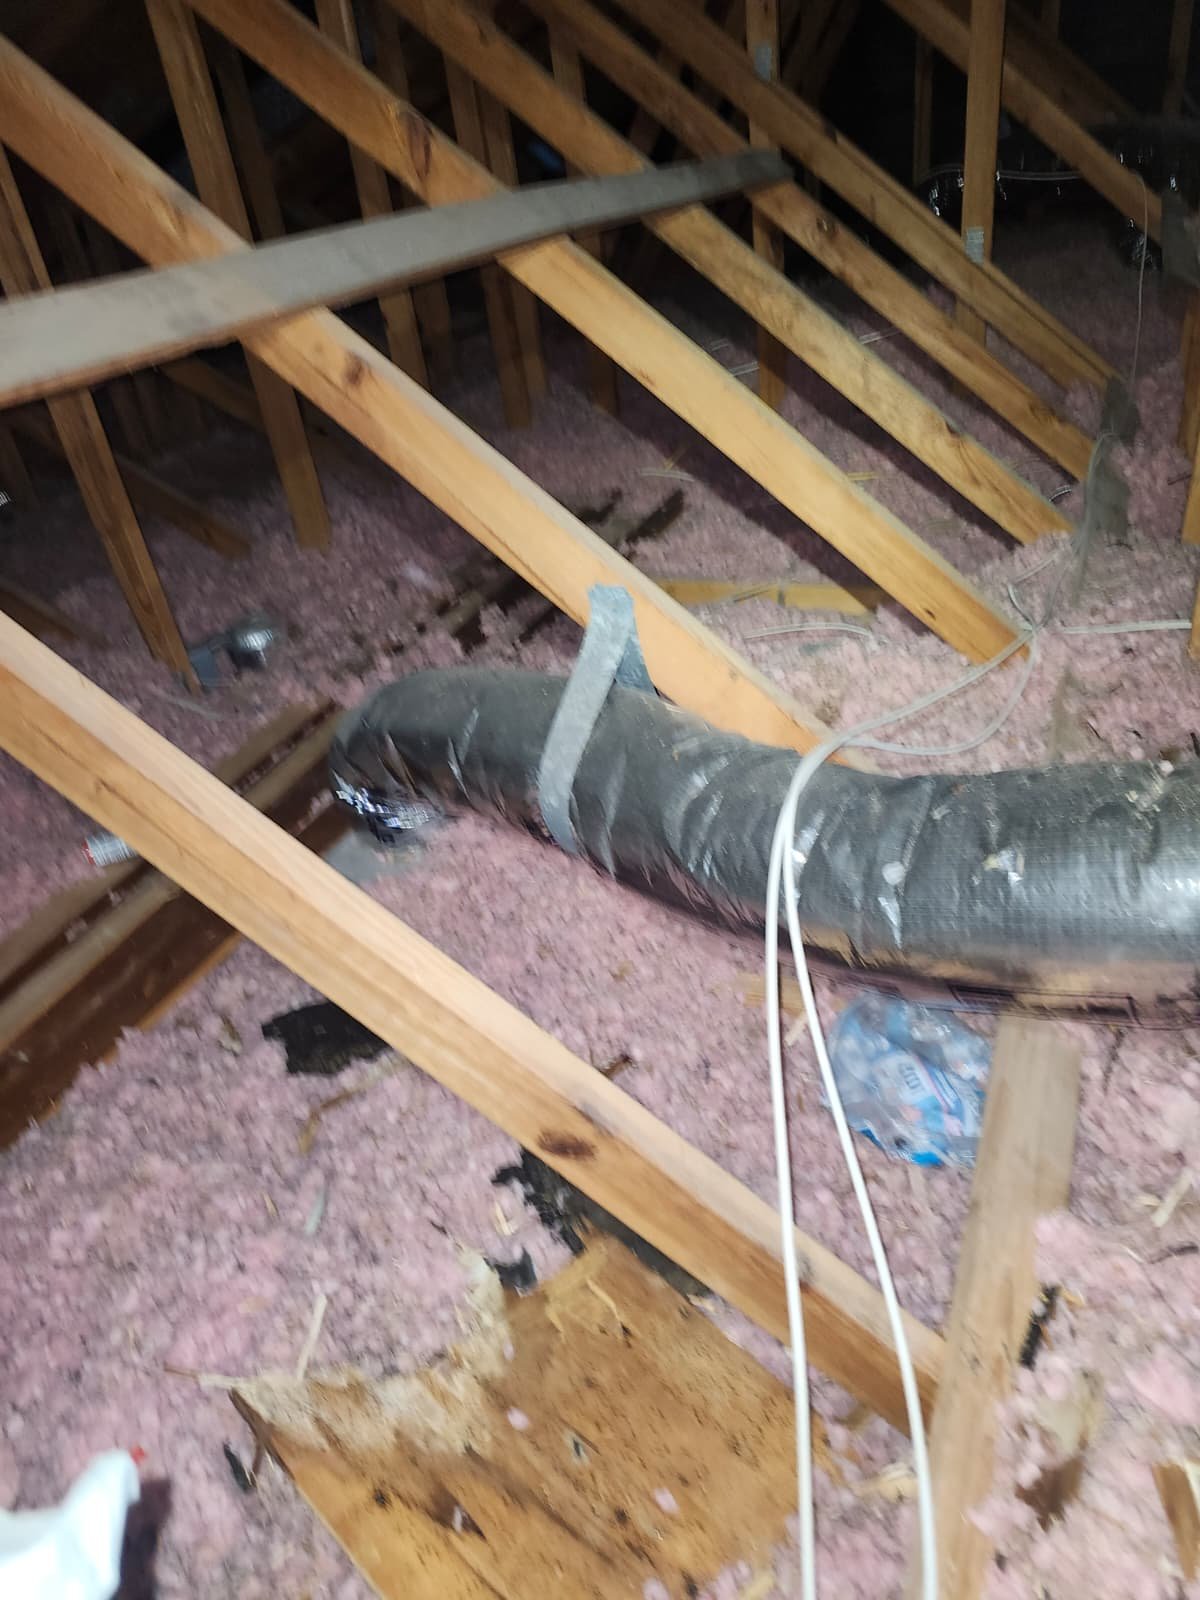
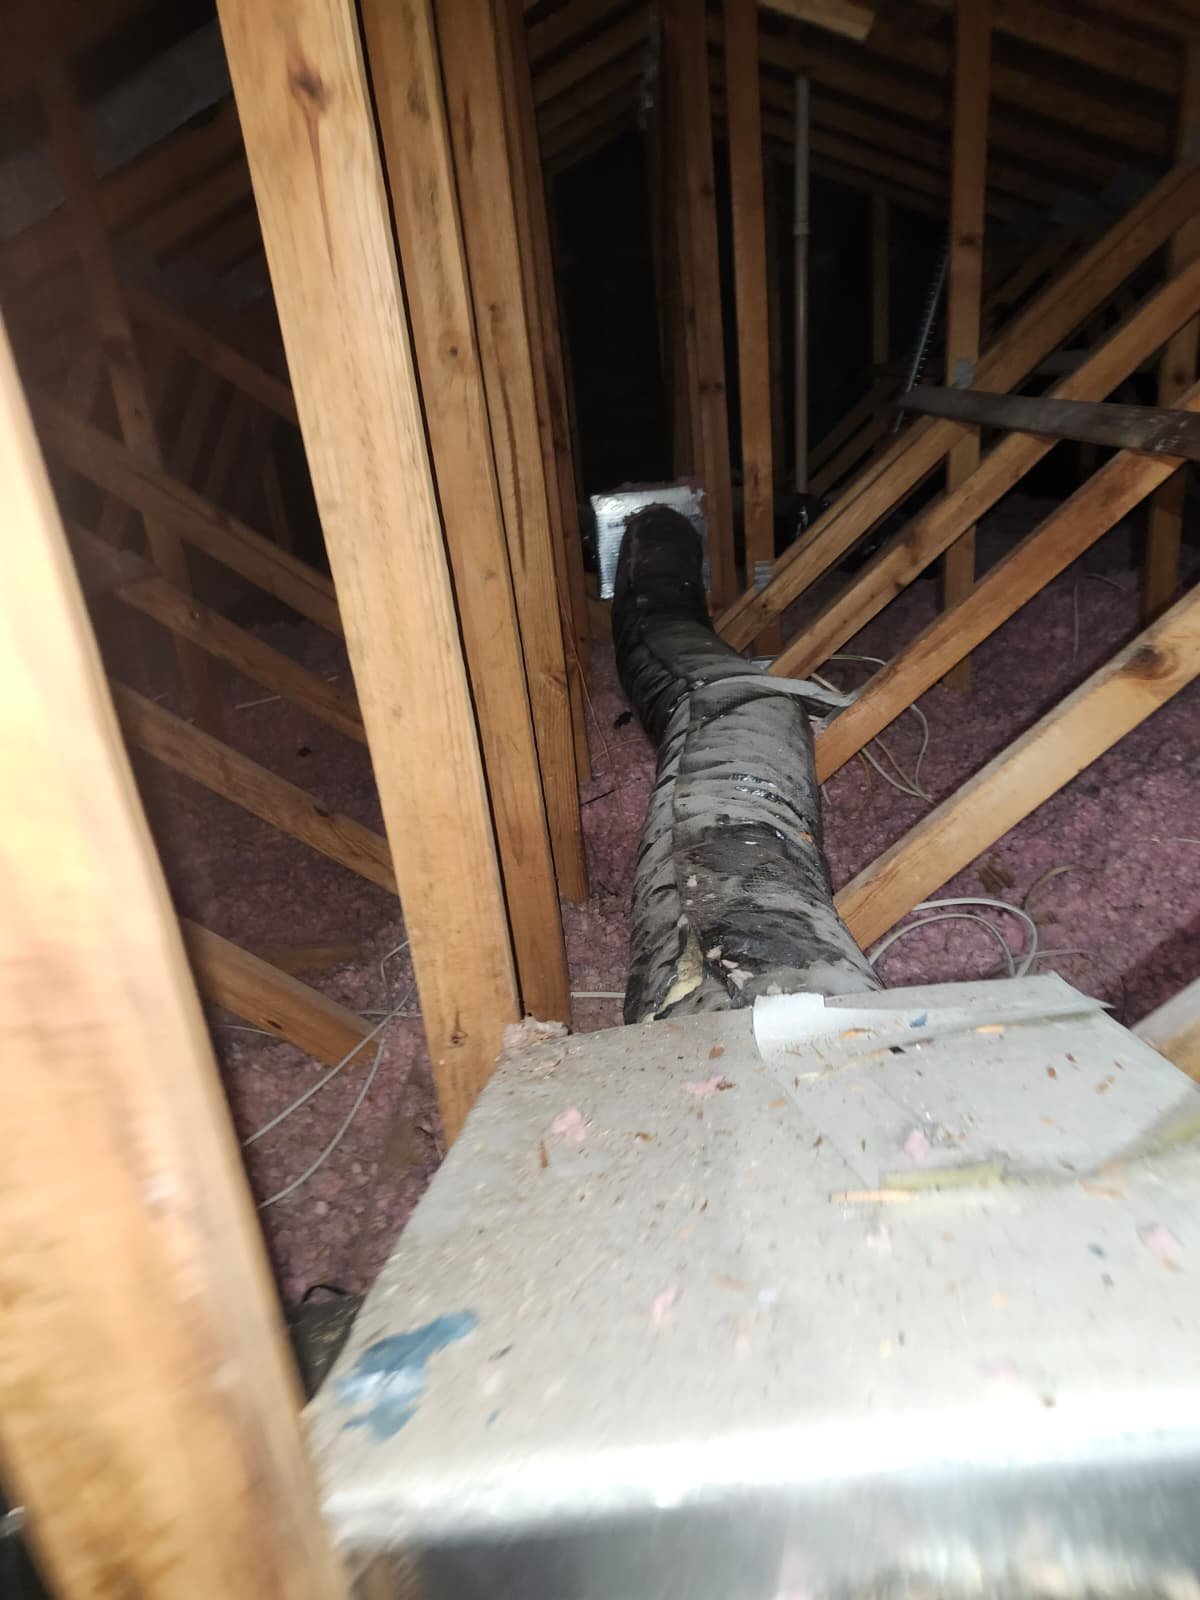
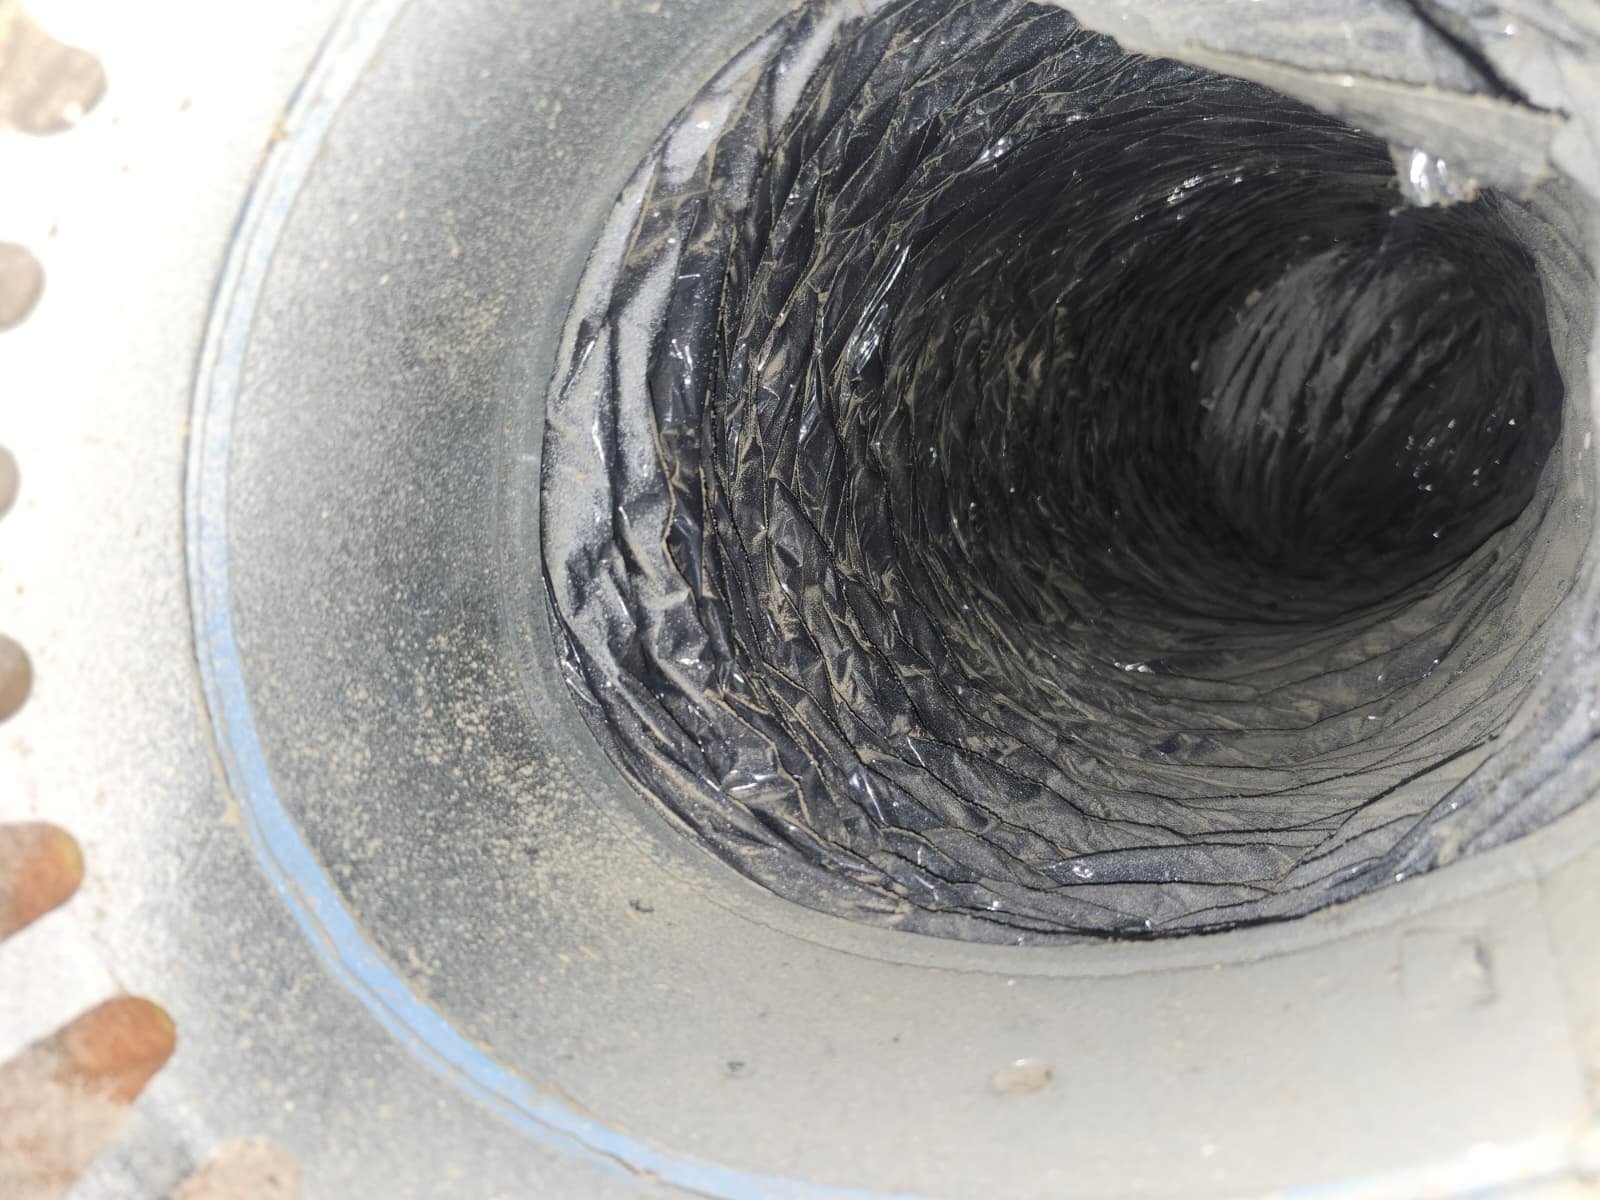
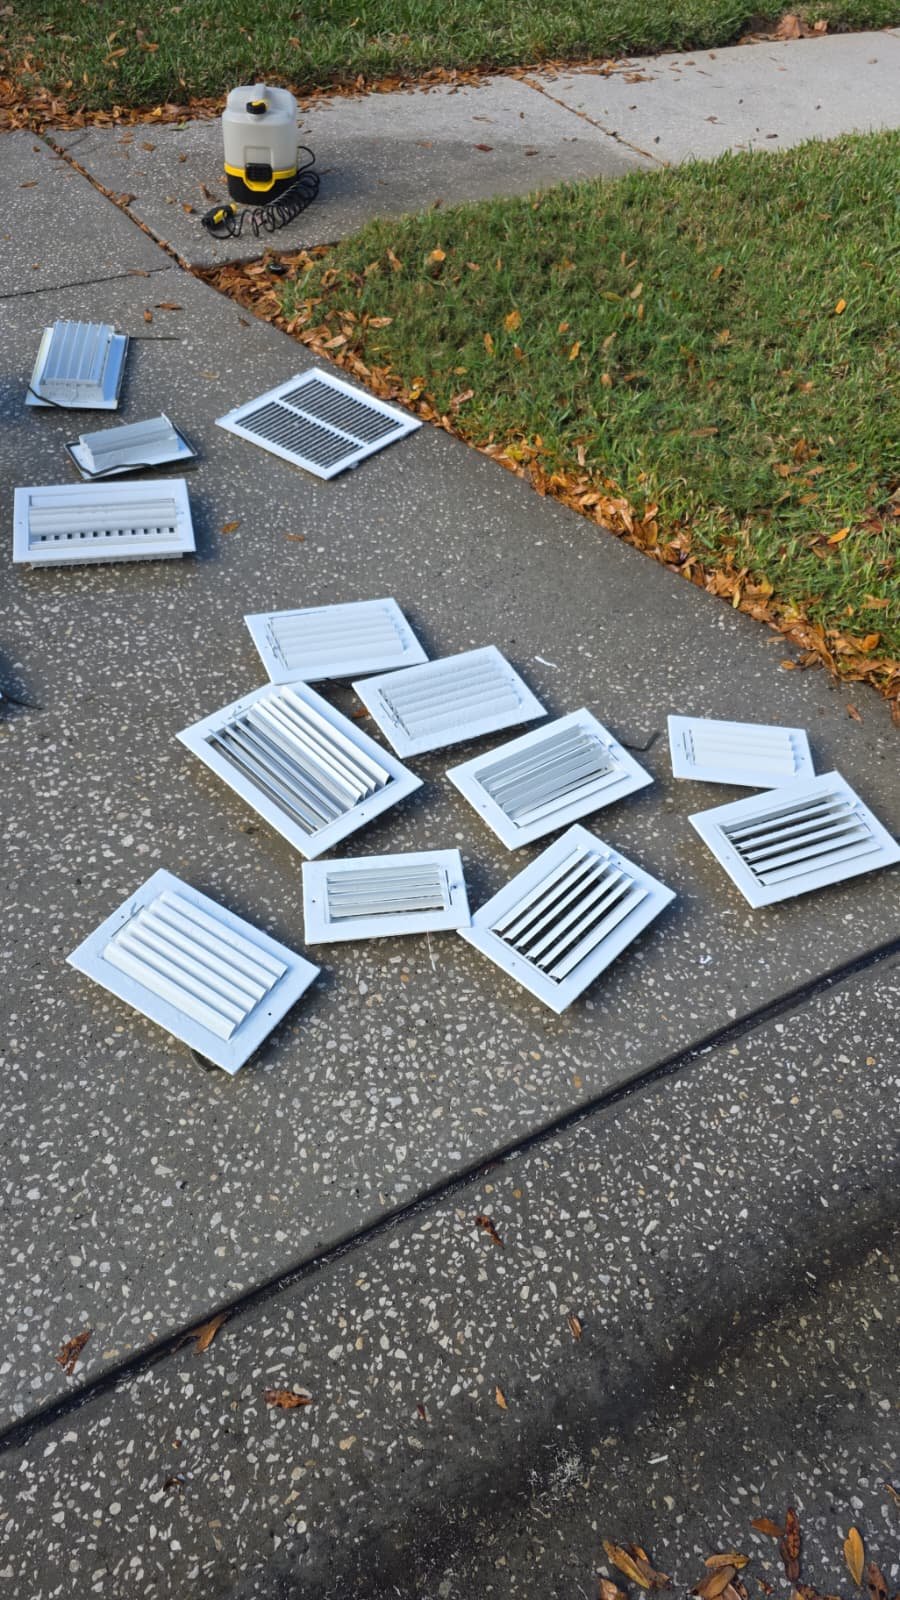
  • Dust control: It helps keep dust and debris from building up on coils and inside ductwork.

After the new filter was installed, we made sure it was properly seated and secured so air couldn’t bypass the filter around the edges.

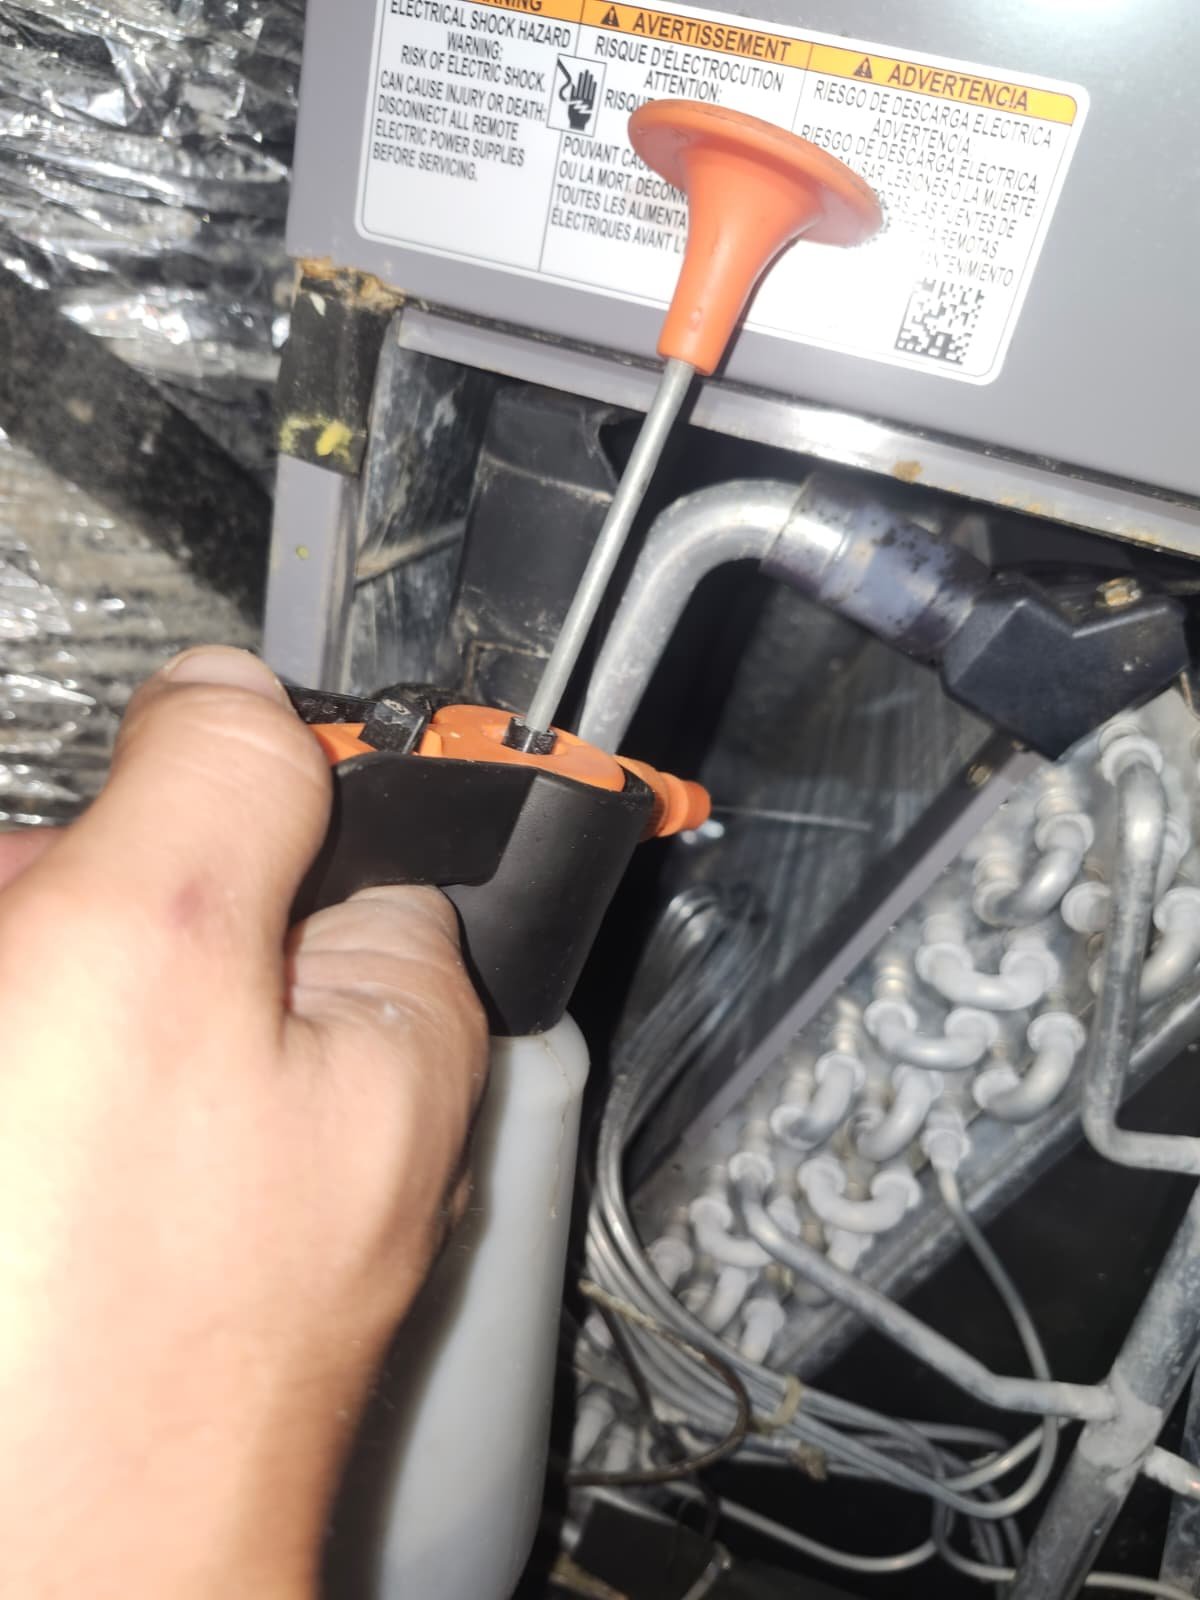
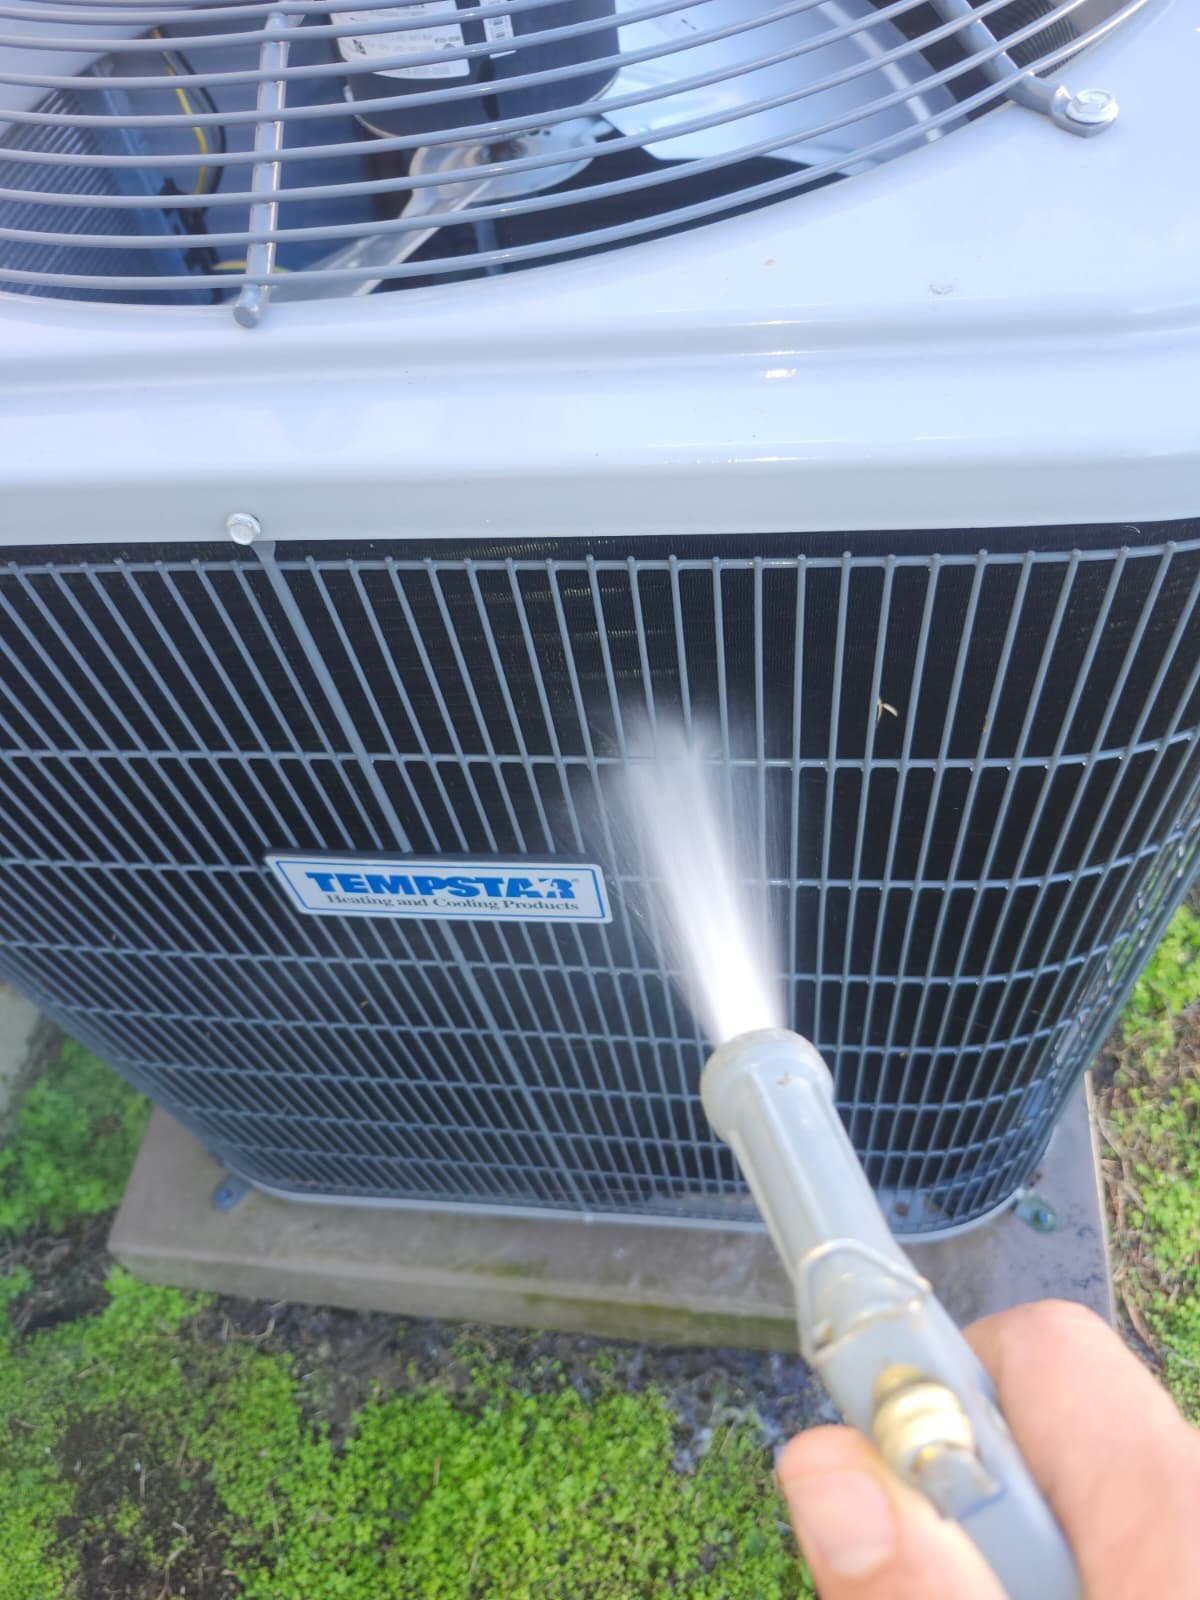
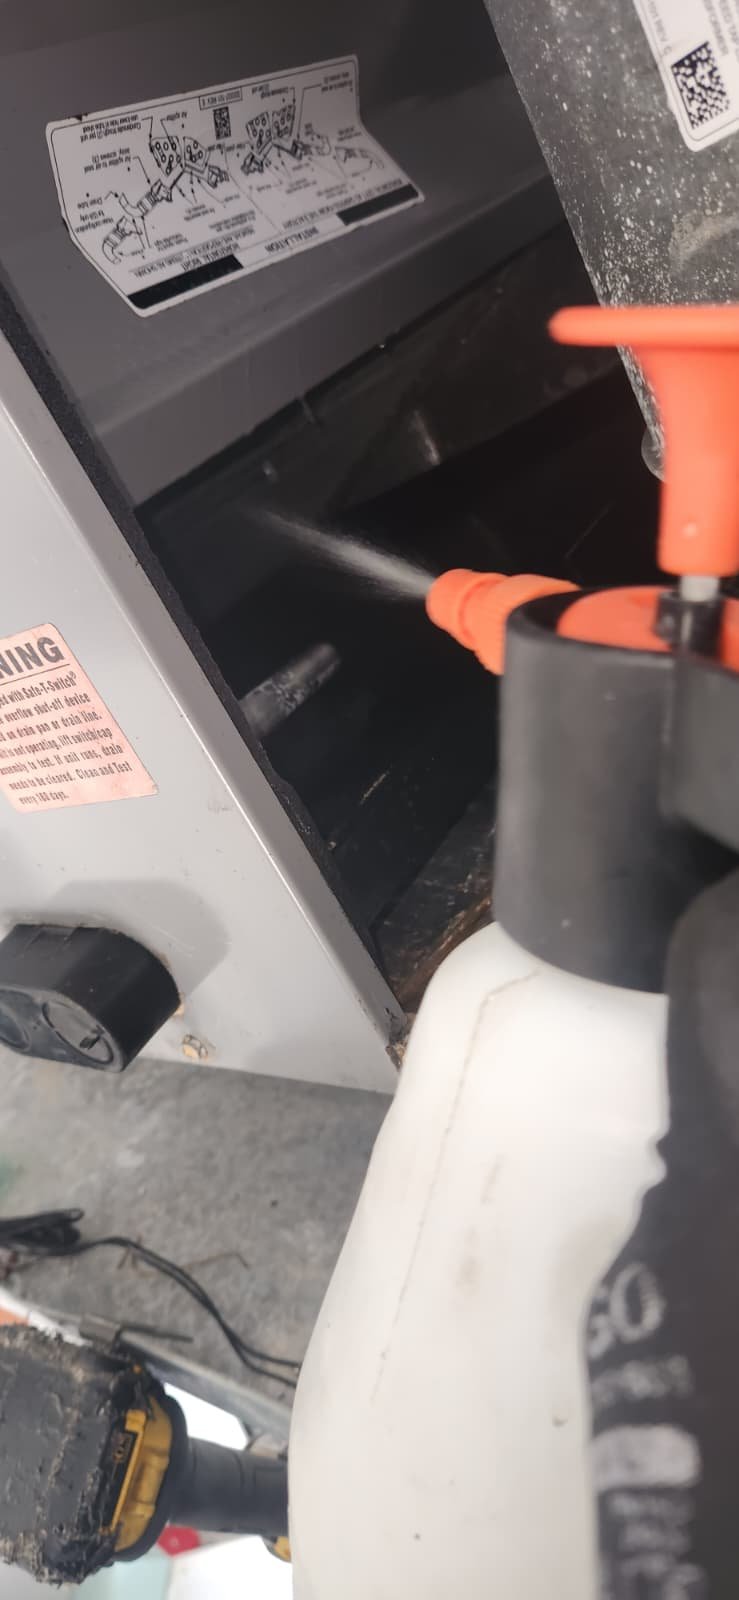
3. Complete routine maintenance checklist

Beyond the filter, our Pro Care Maintenance Plan includes a structured maintenance process tailored to Florida homes. While we don’t share every line item on the checklist in a blog, it focuses on the key components that affect comfort, reliability, and safety.

During this visit, we completed the maintenance and confirmed that everything tied to the plan was addressed. That includes checking for anything unusual that might warrant a recommendation for future service or upgrades.

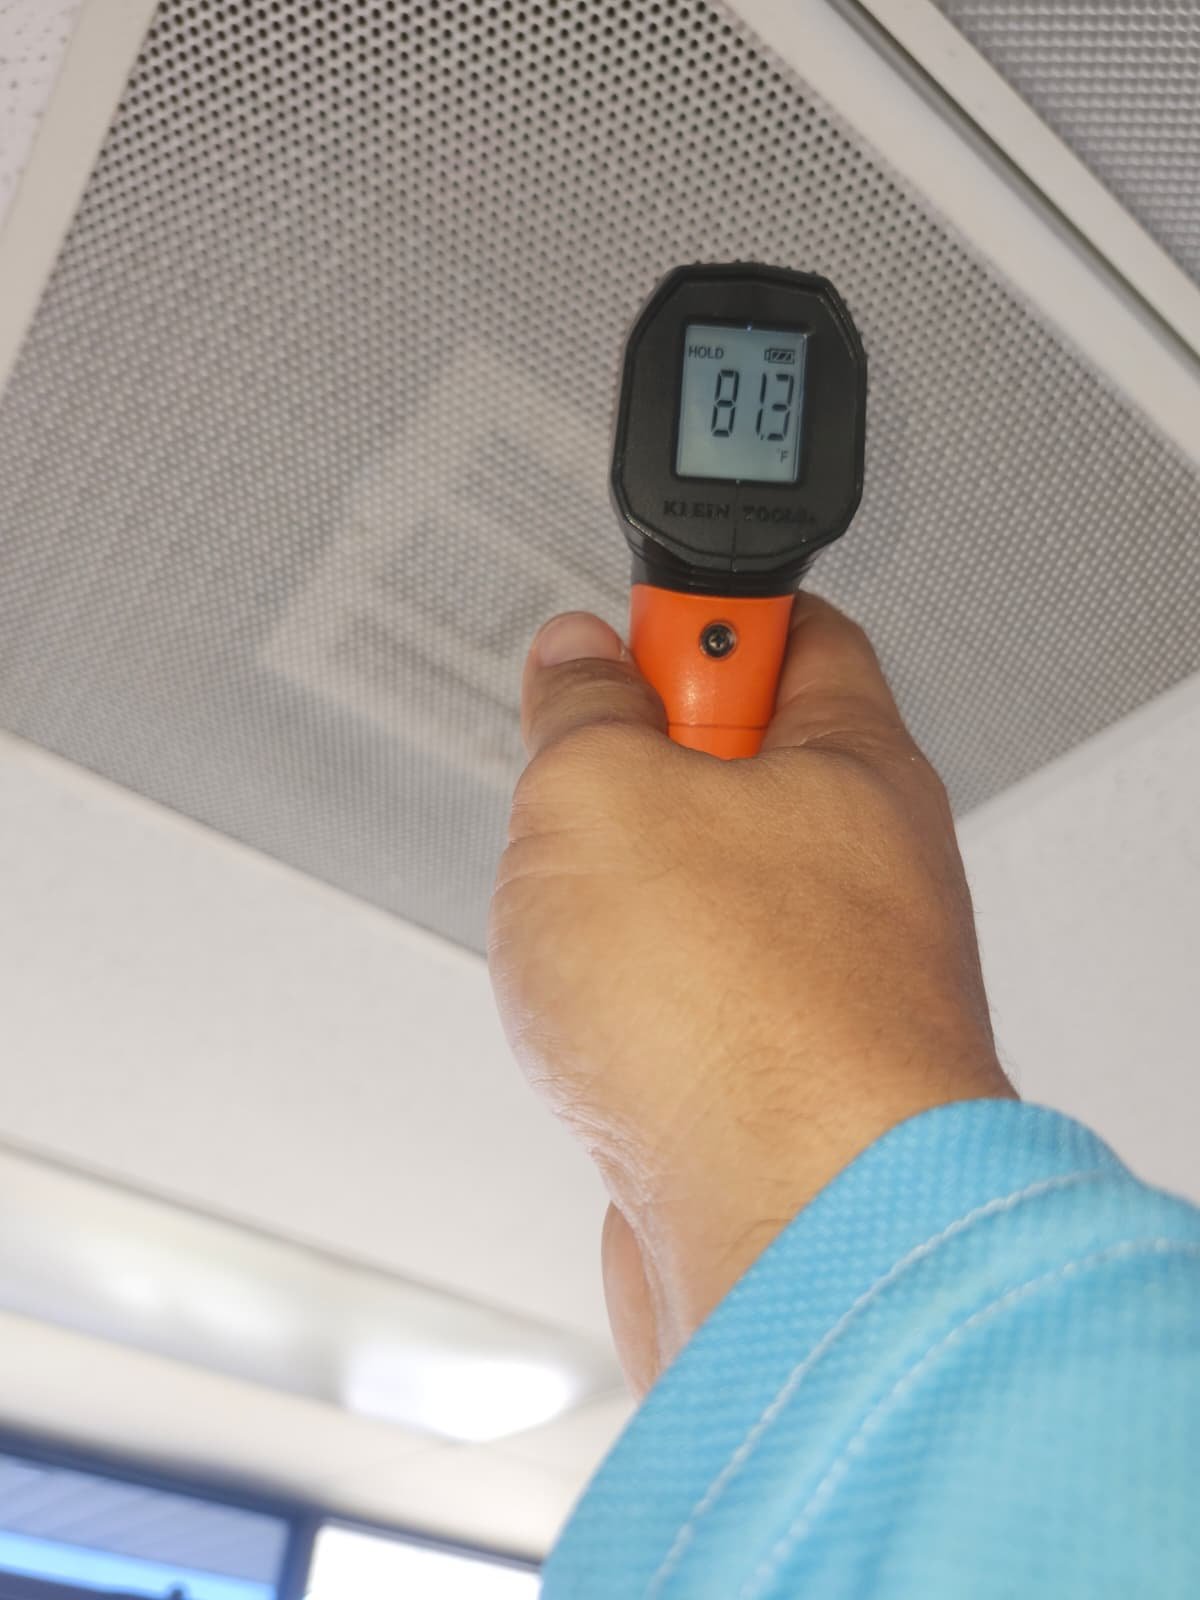
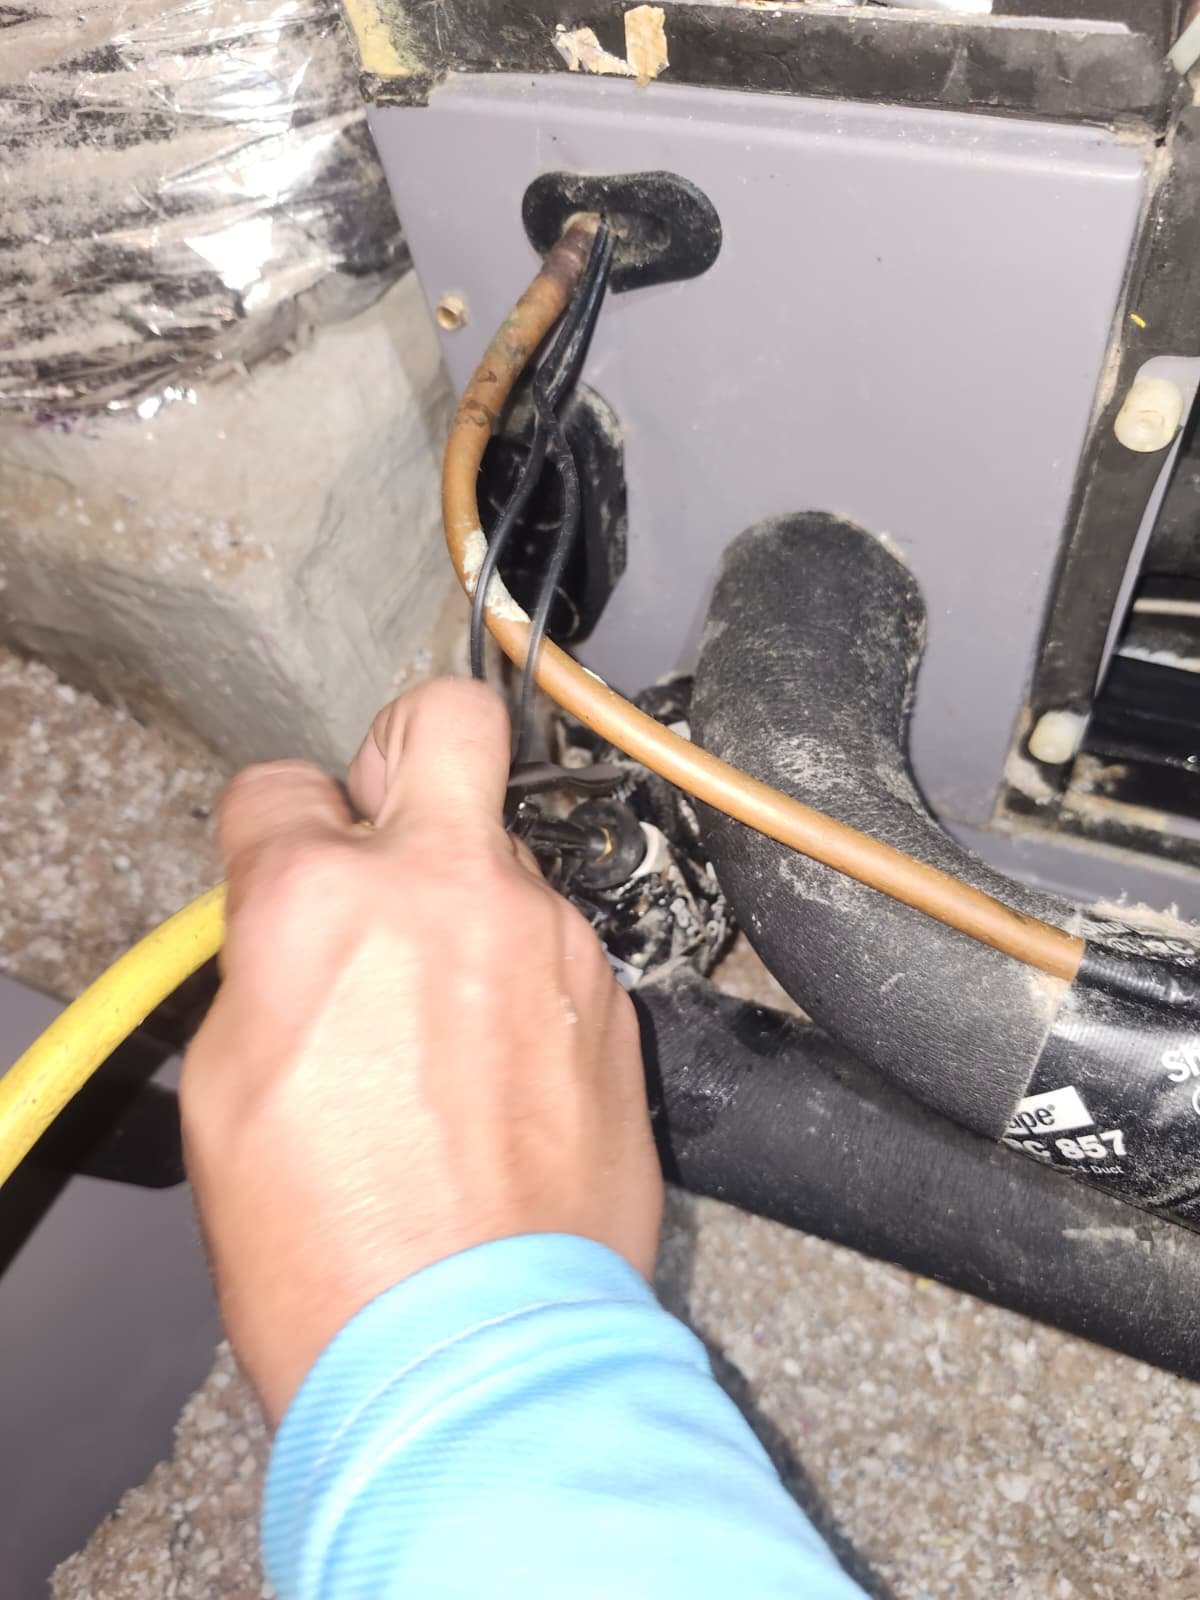
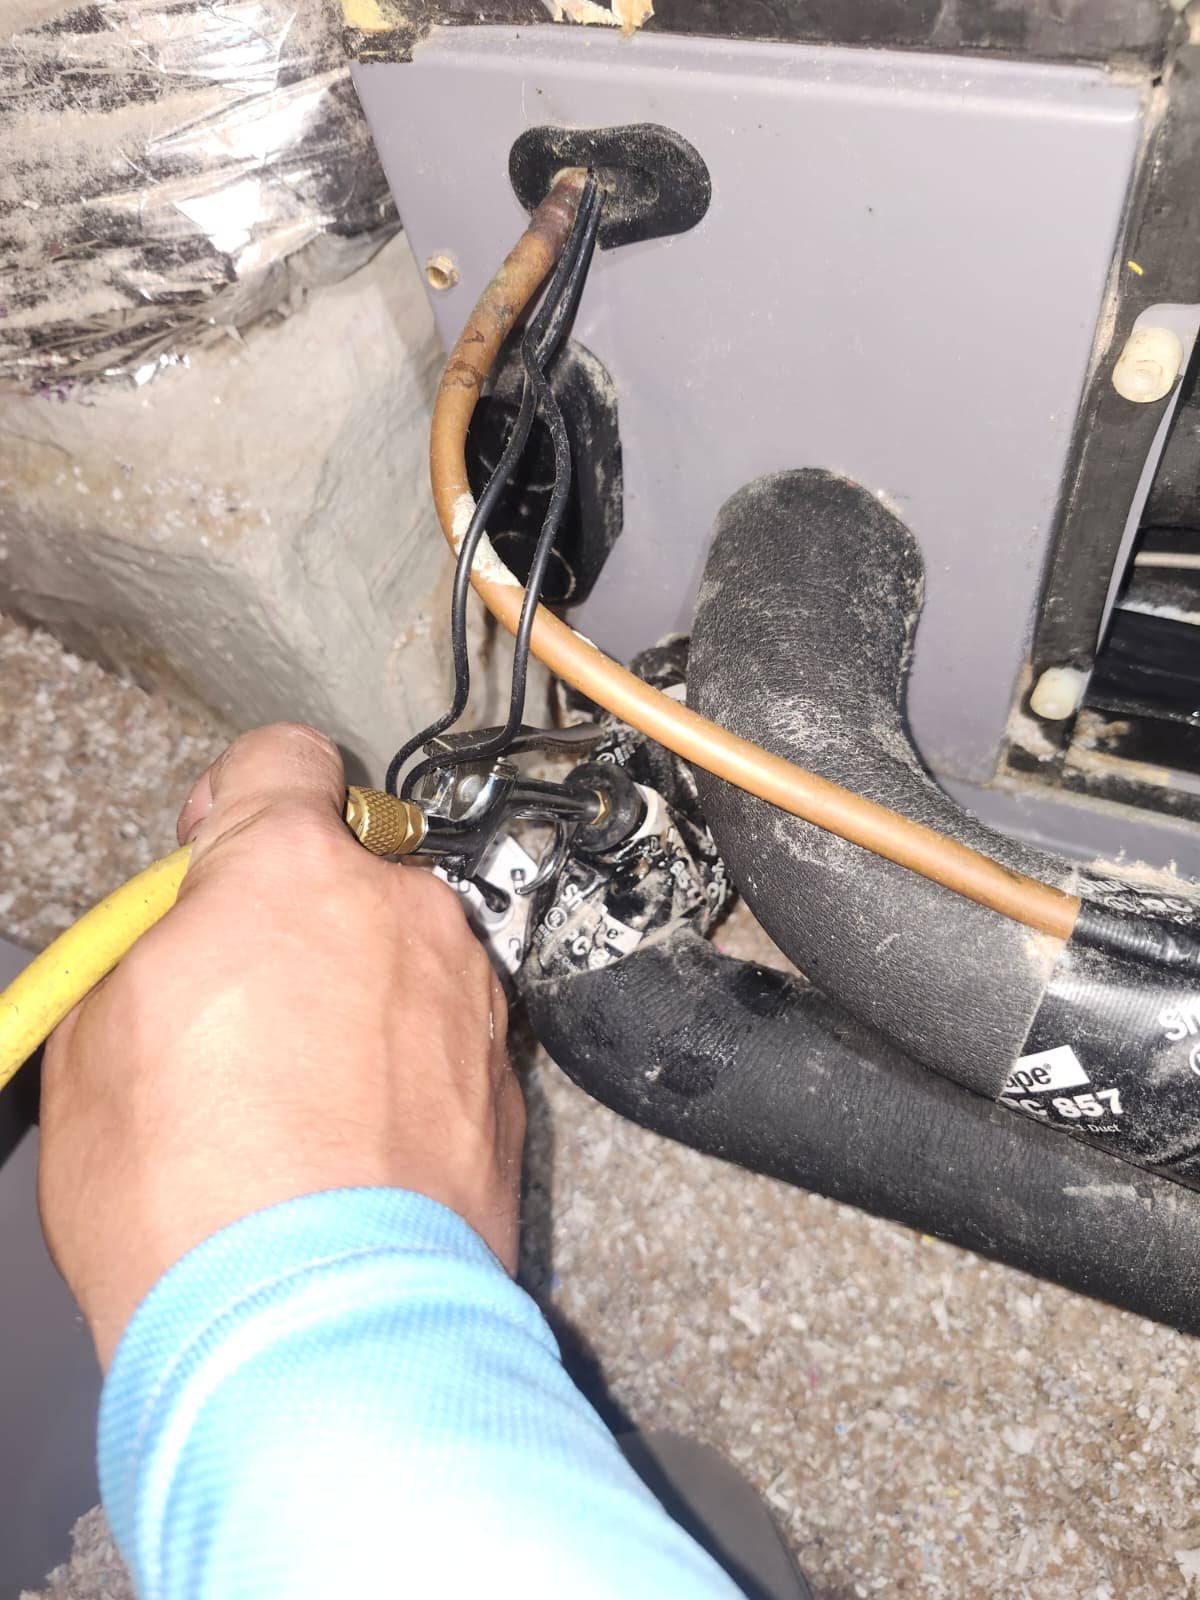
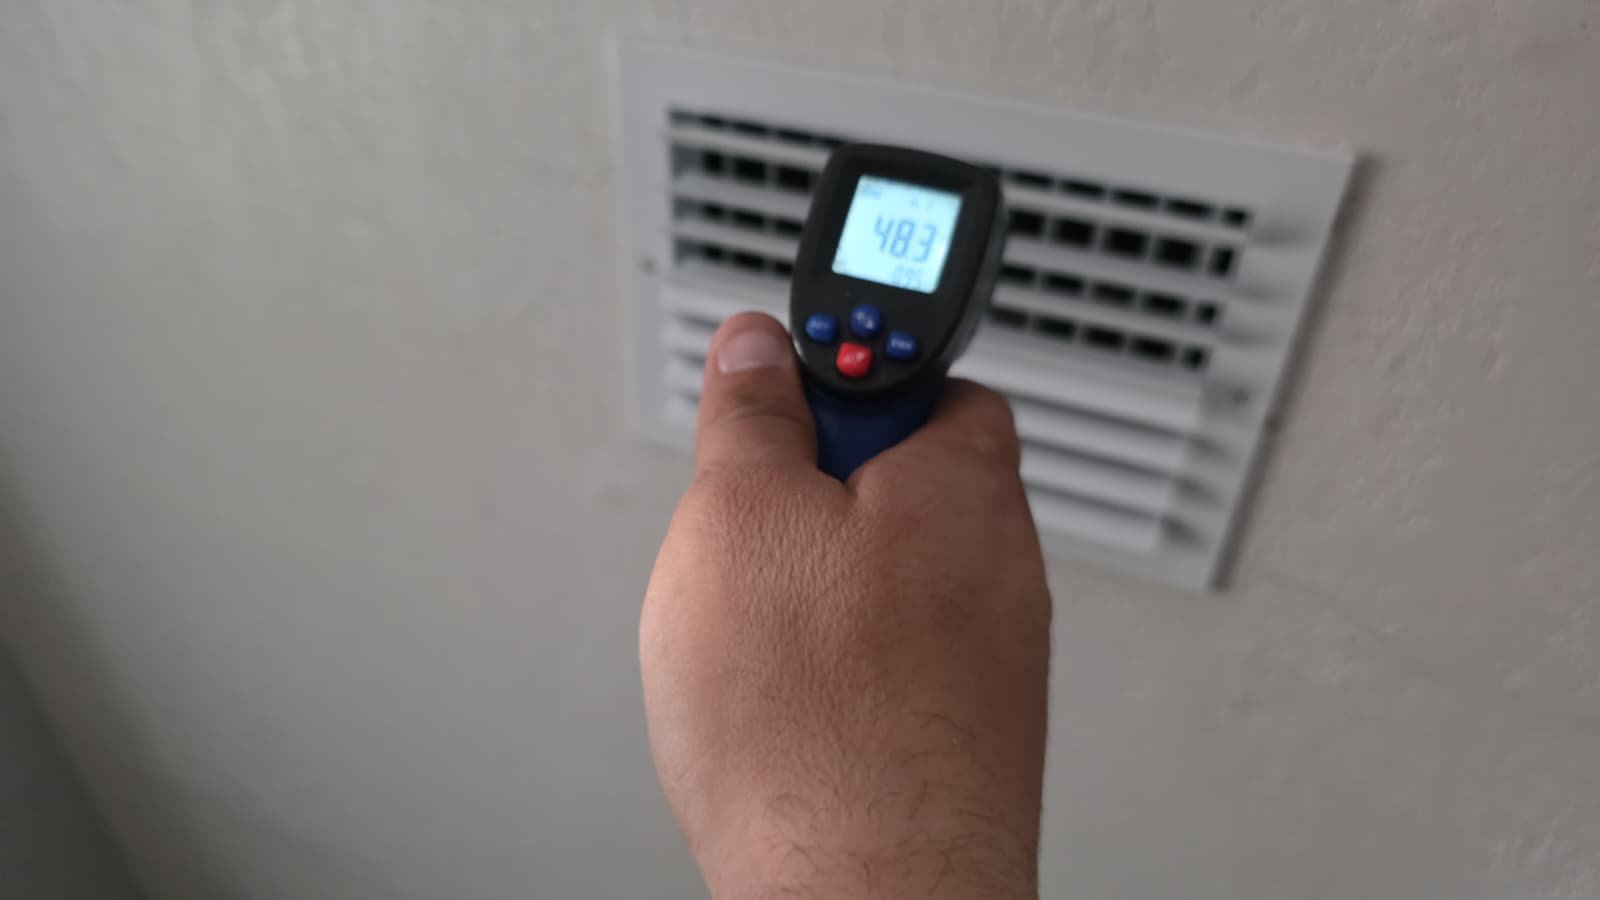
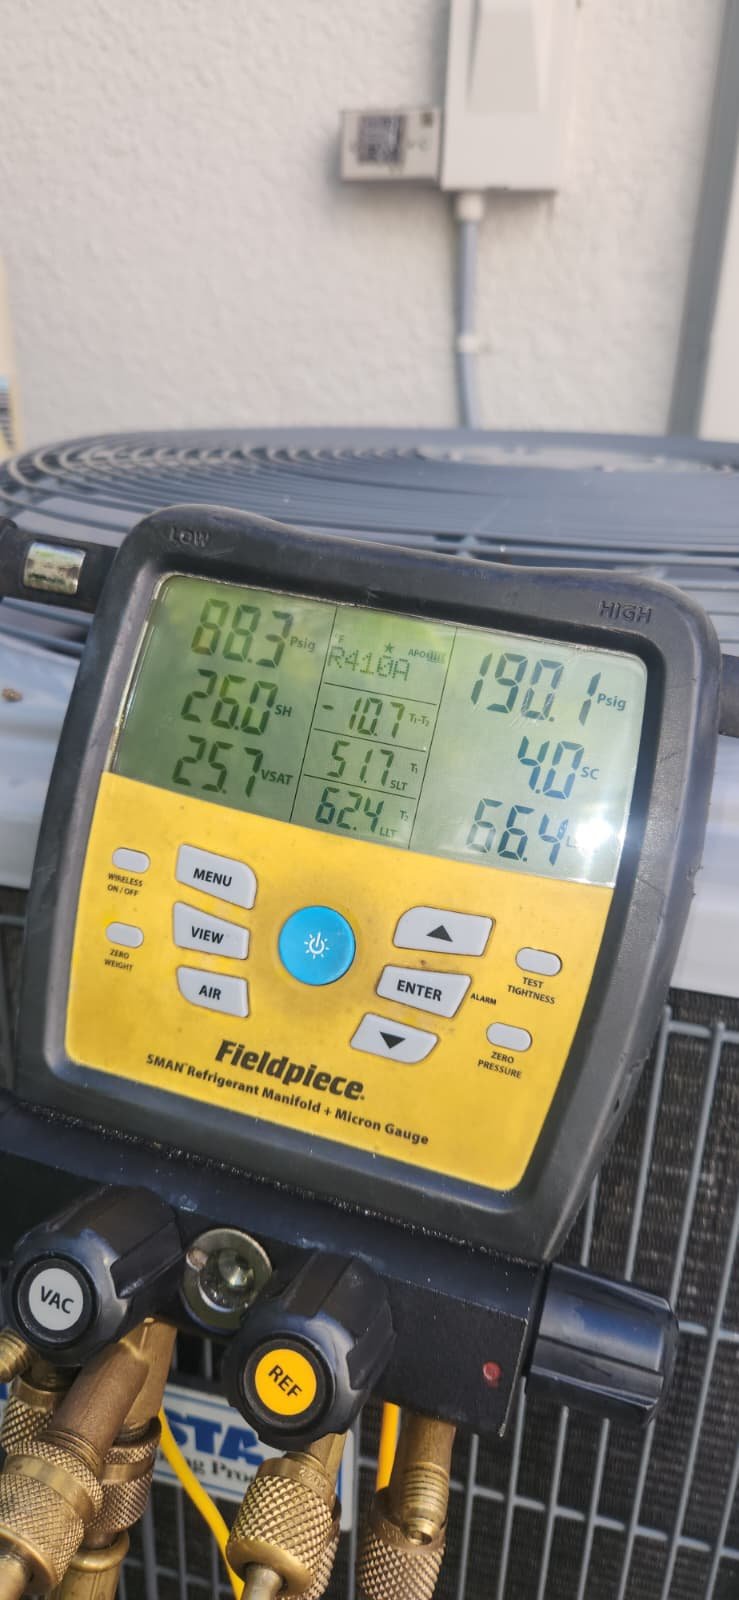
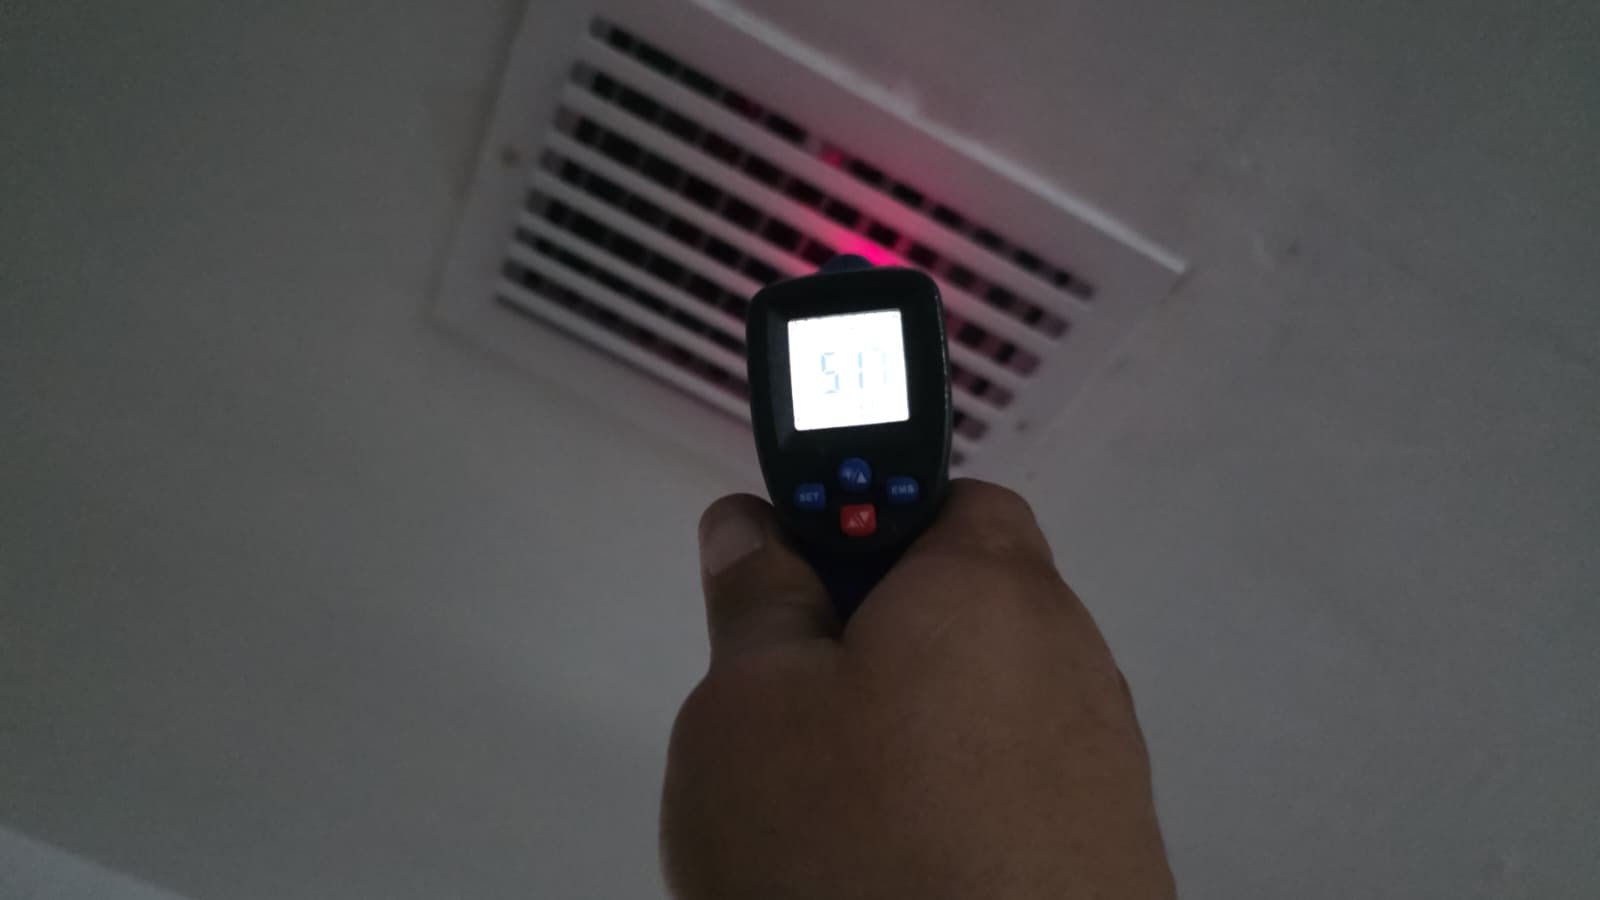
4. Run system and verify proper operation

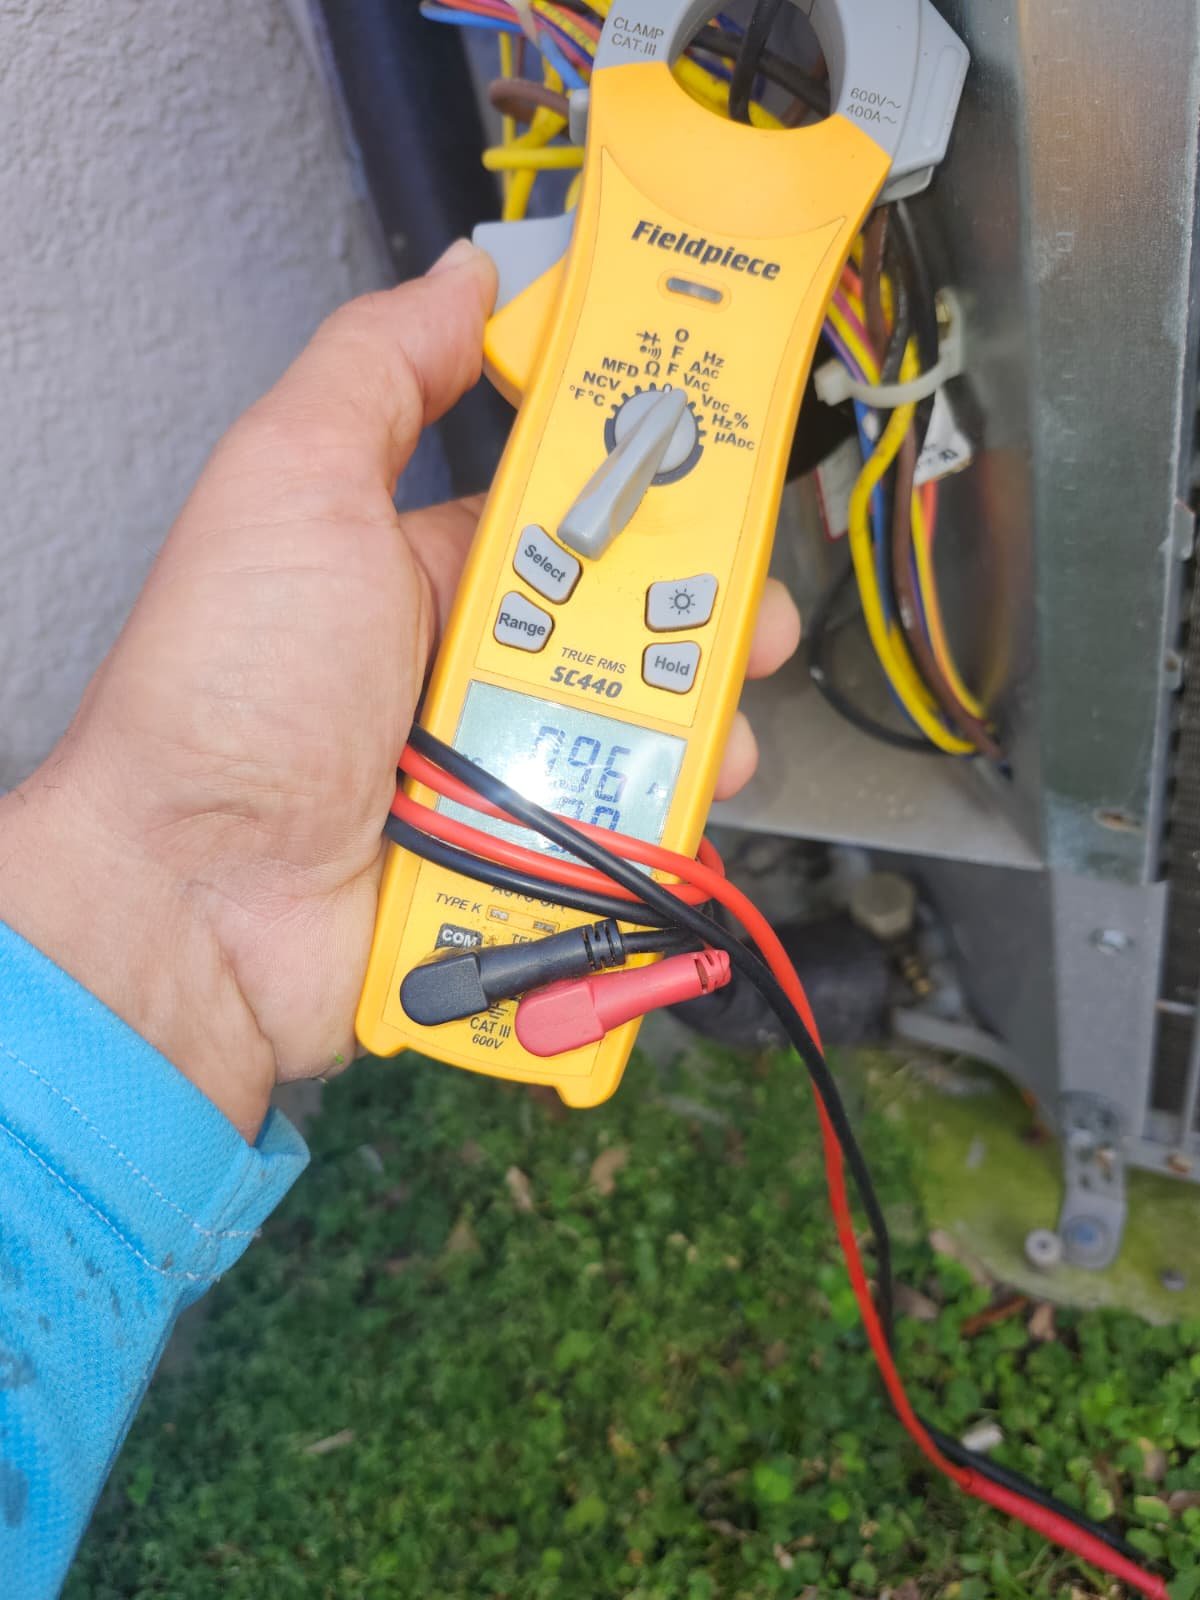
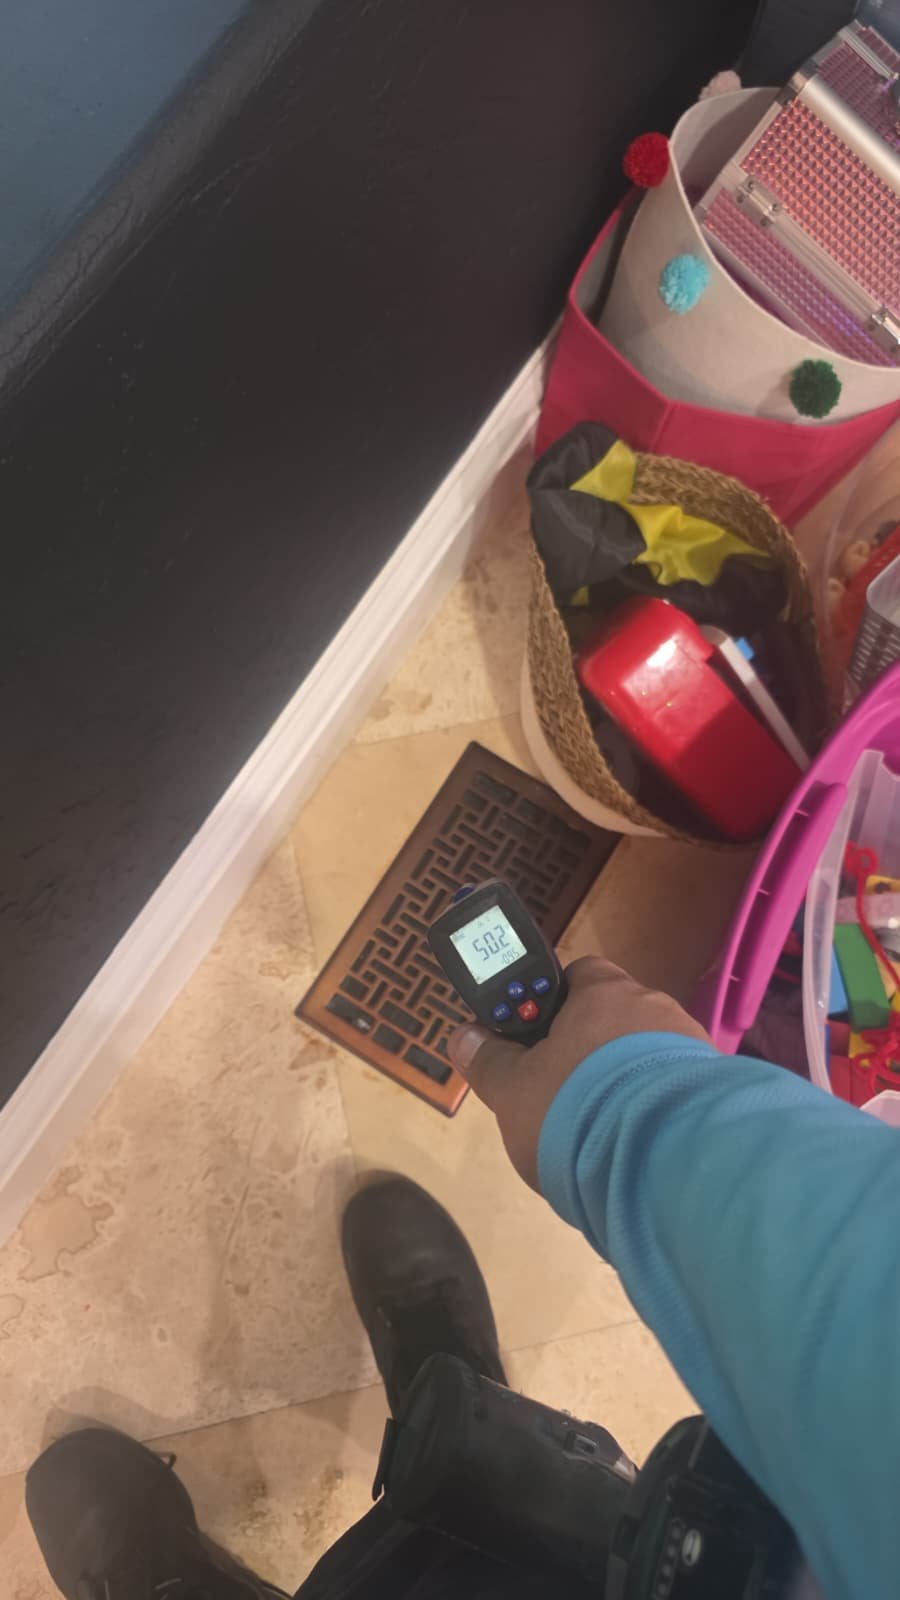
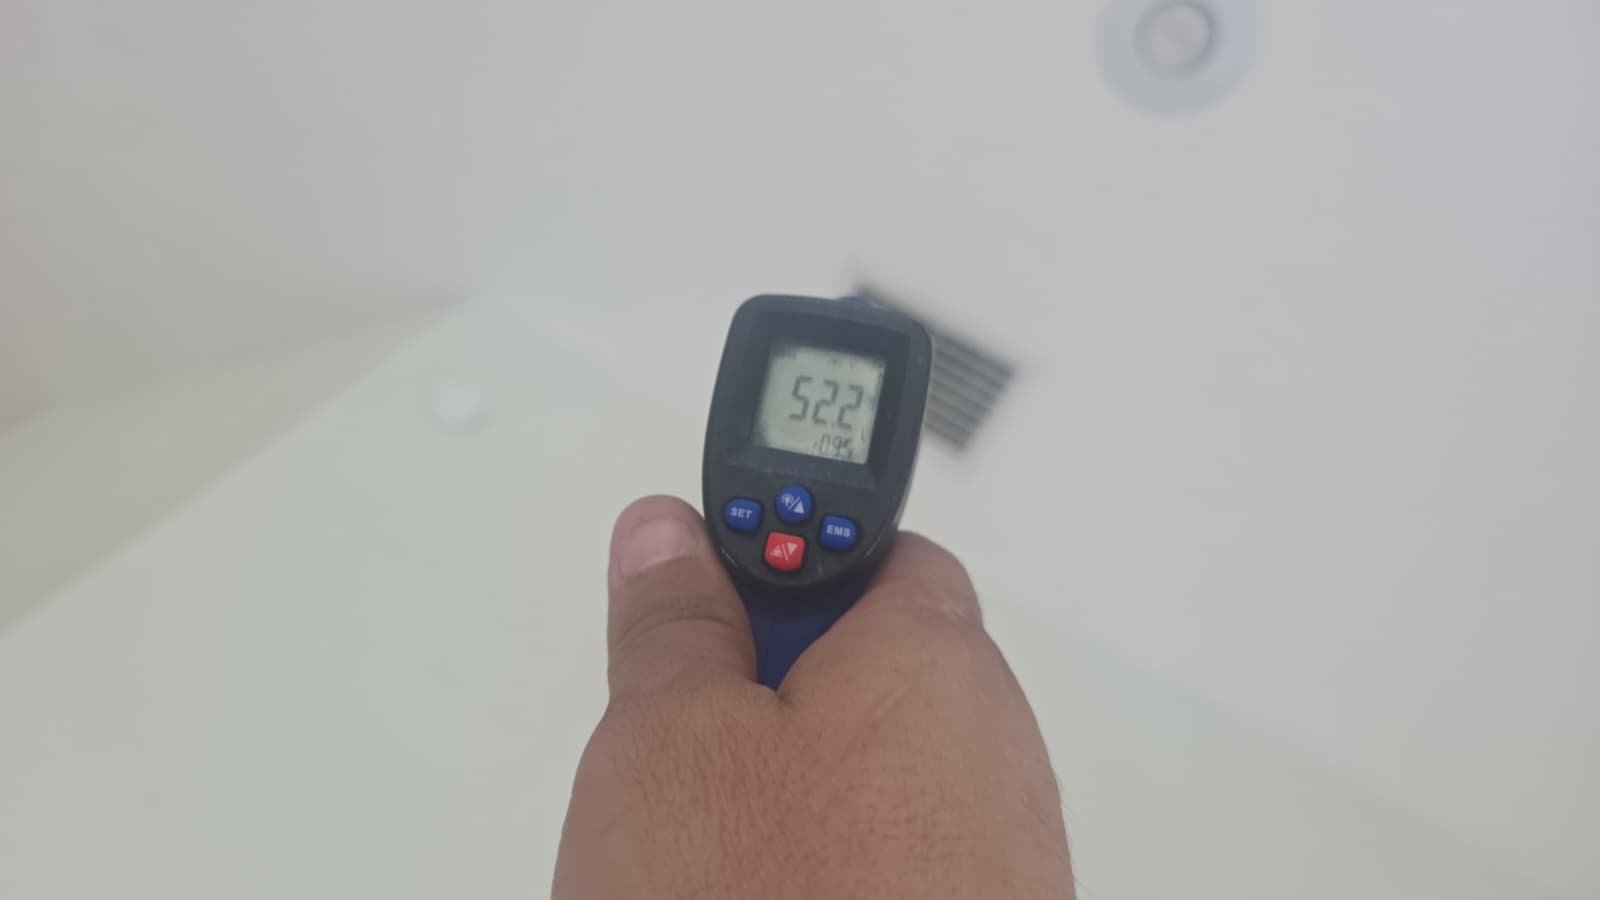
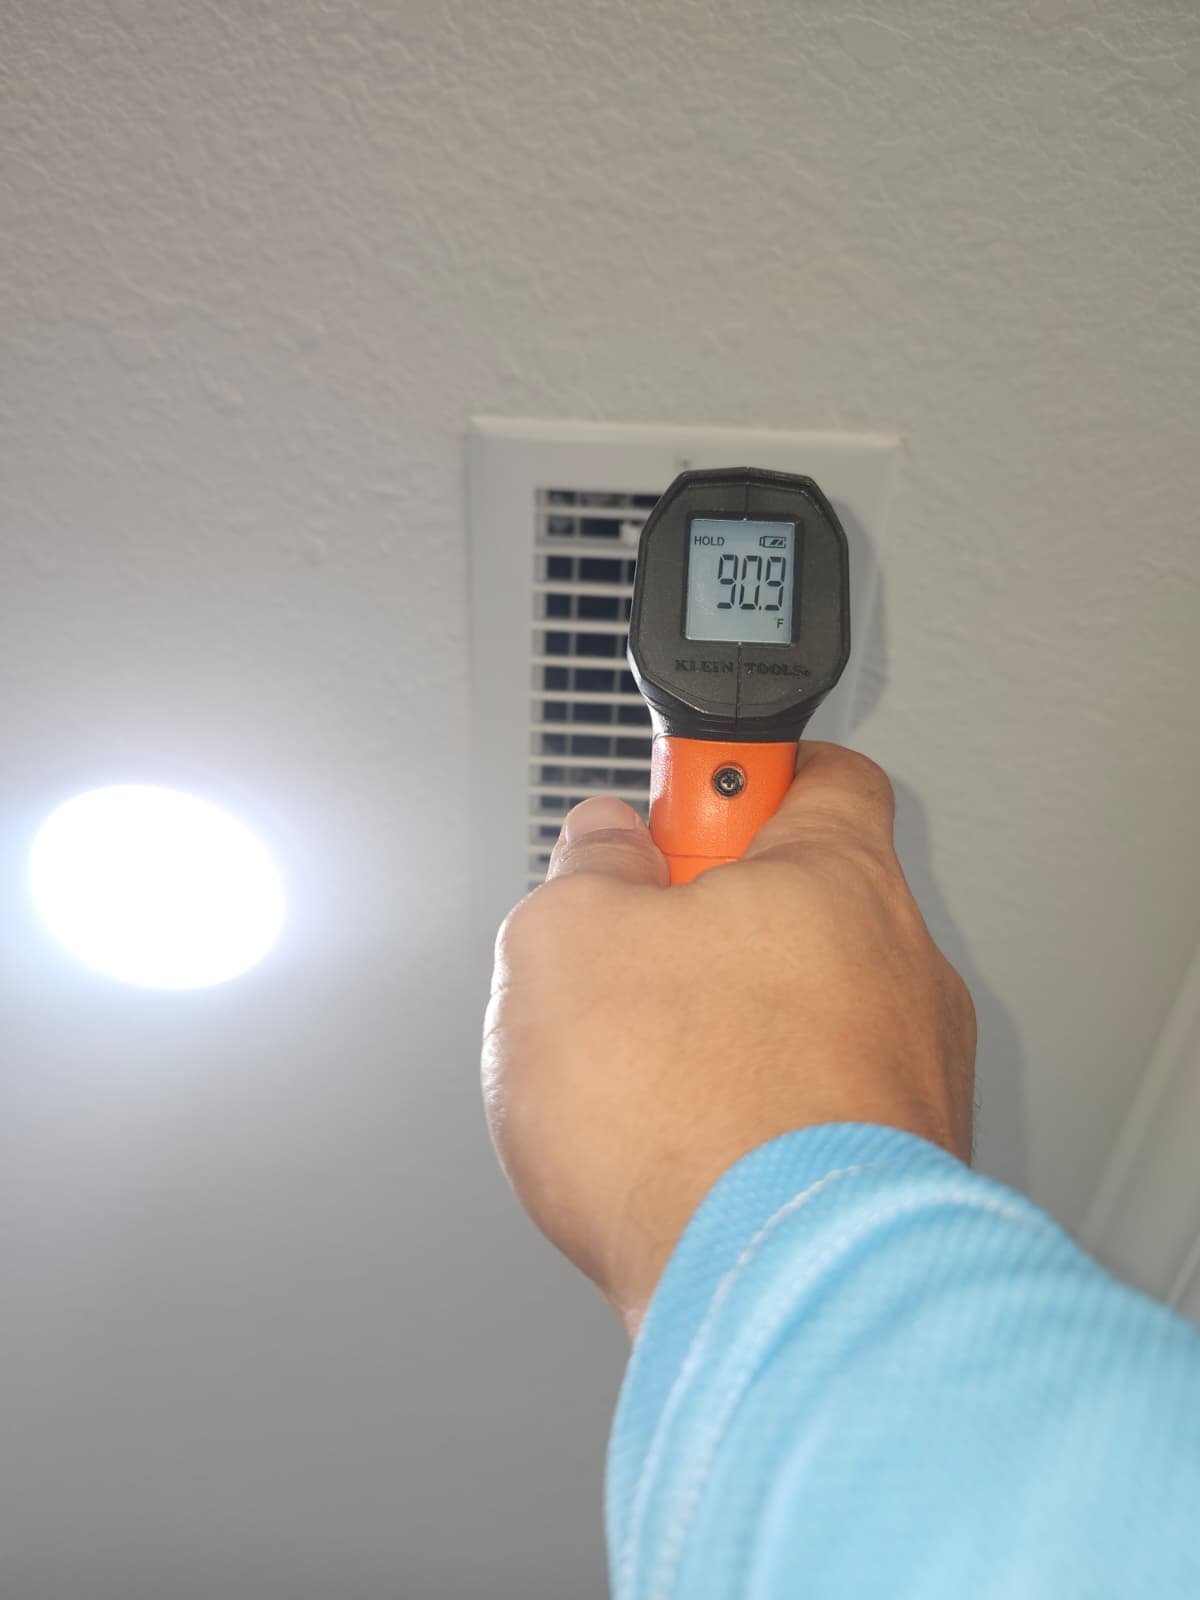
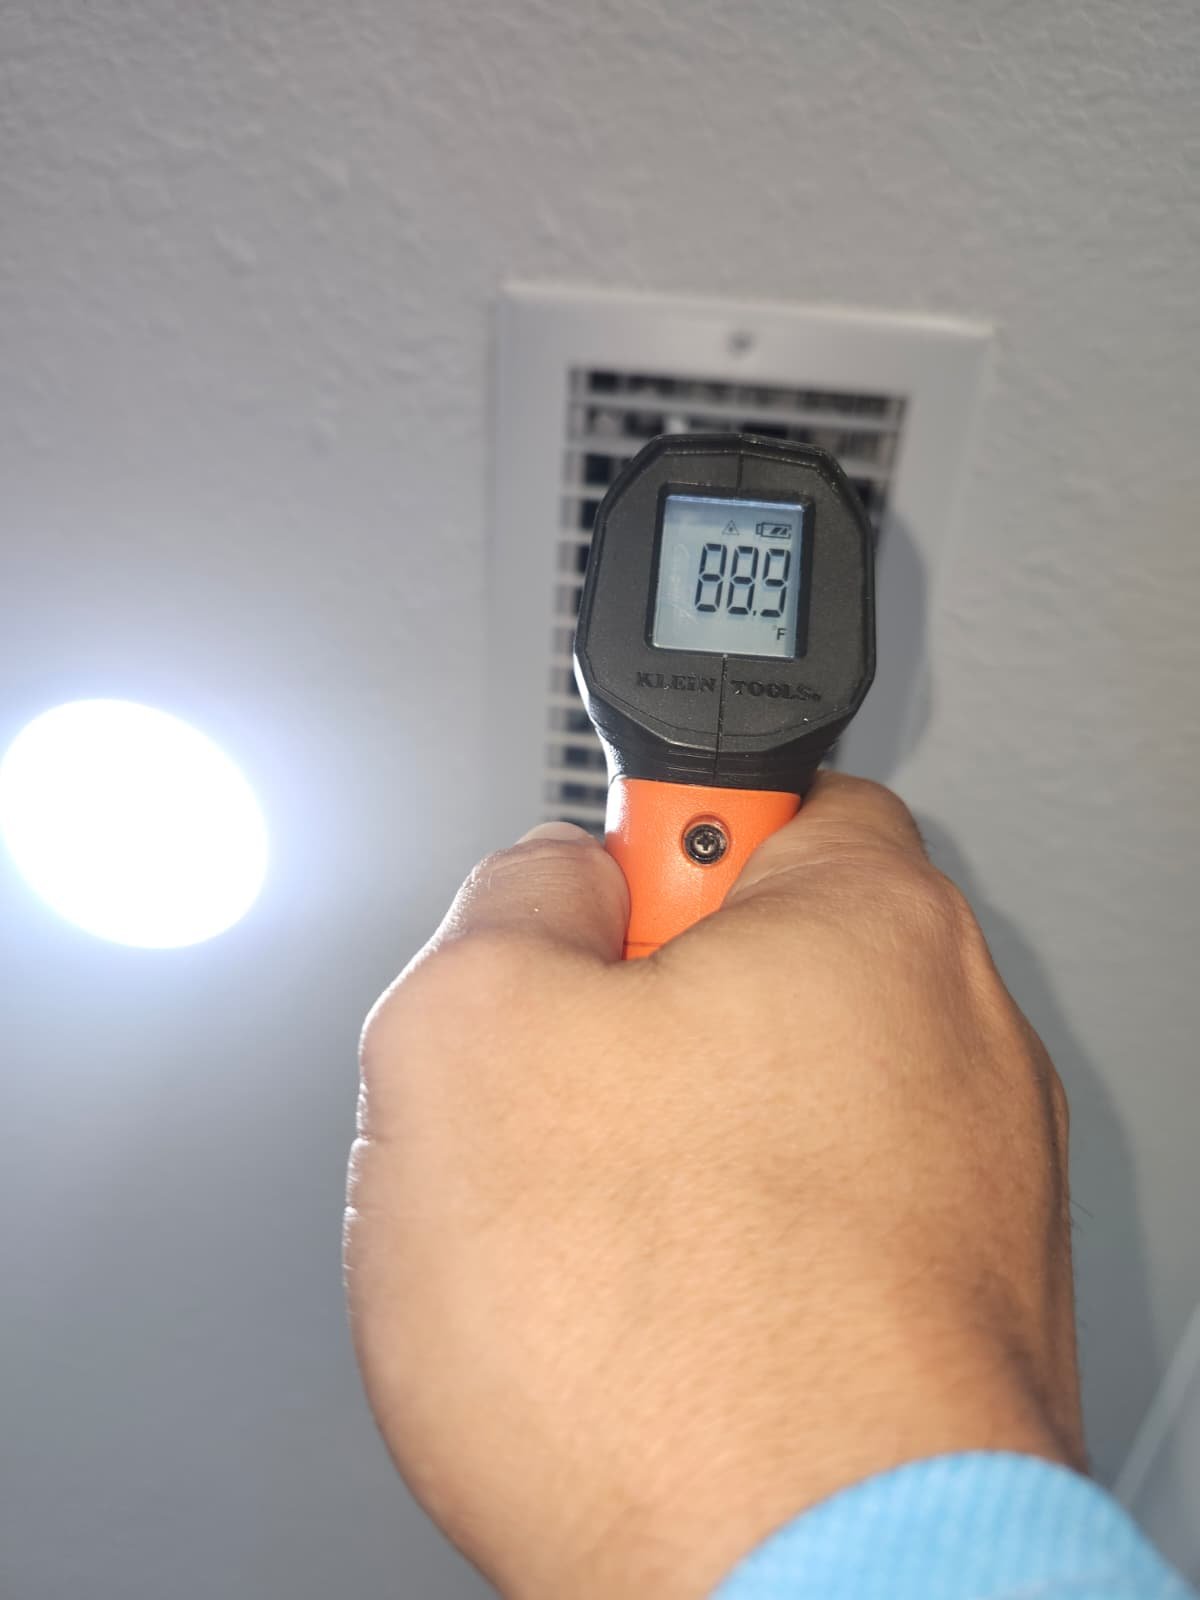
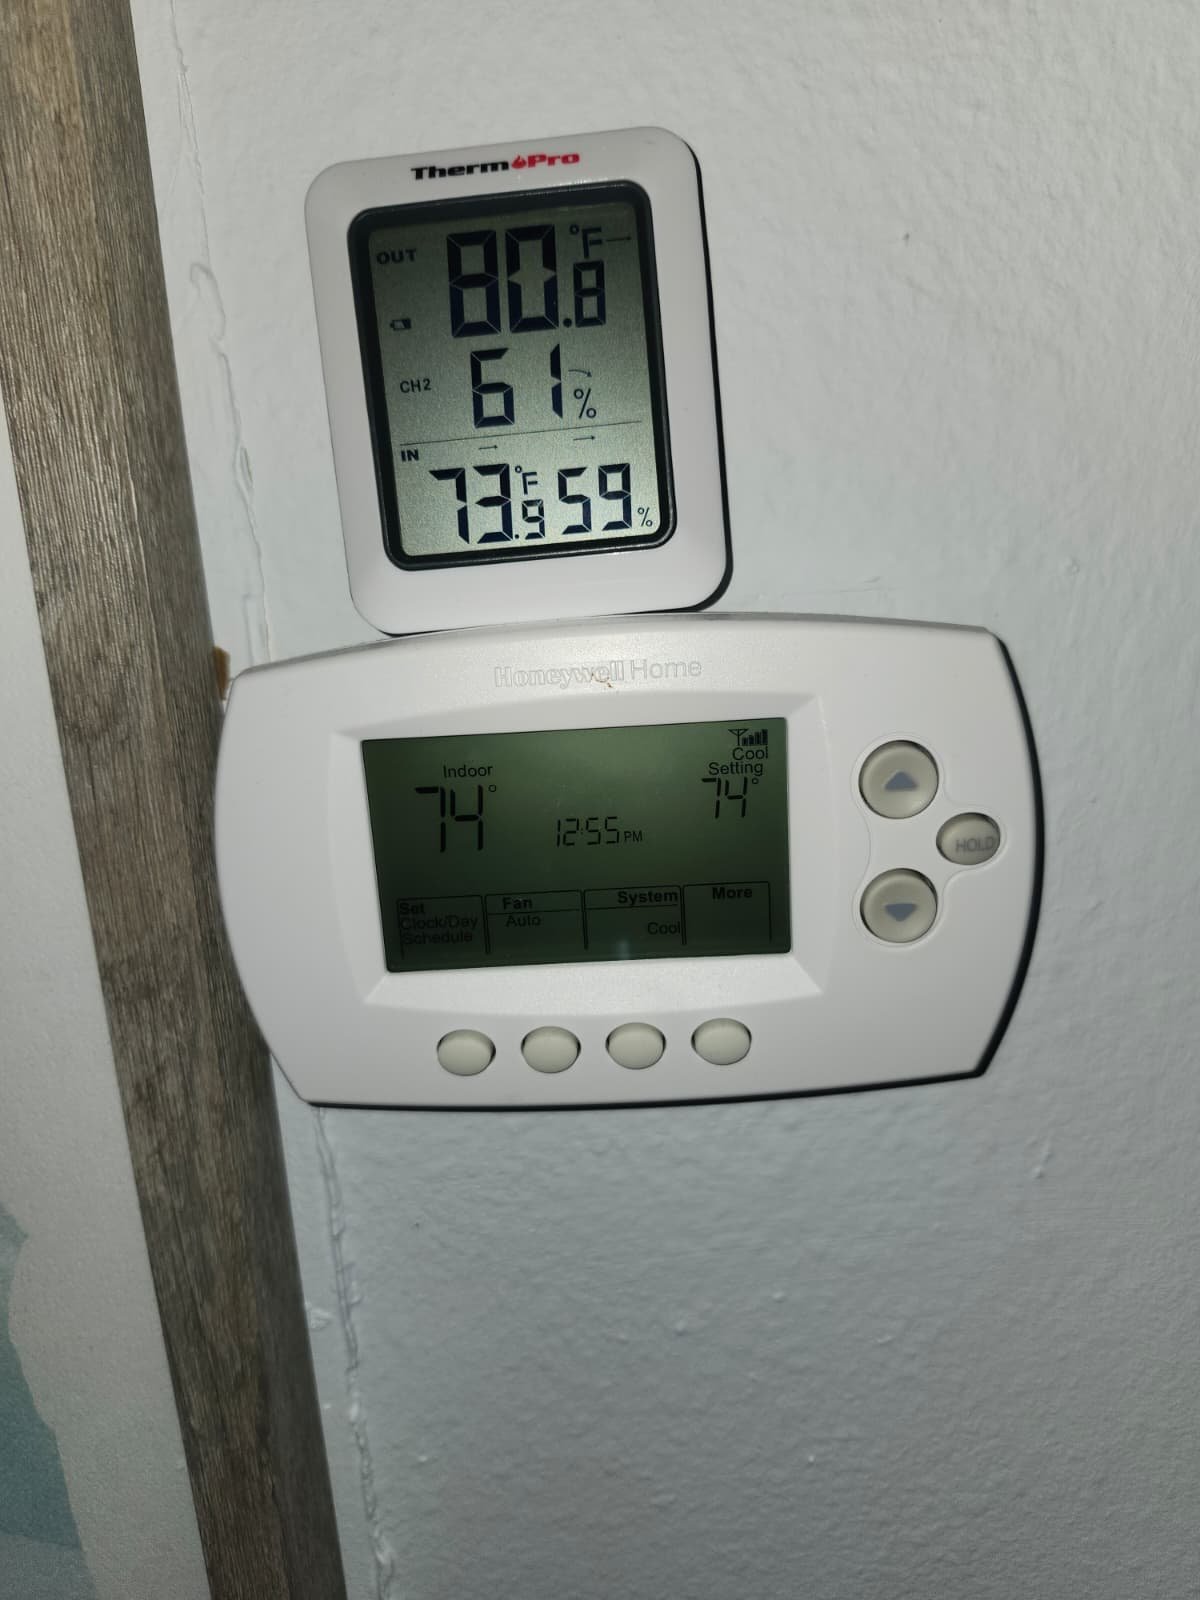
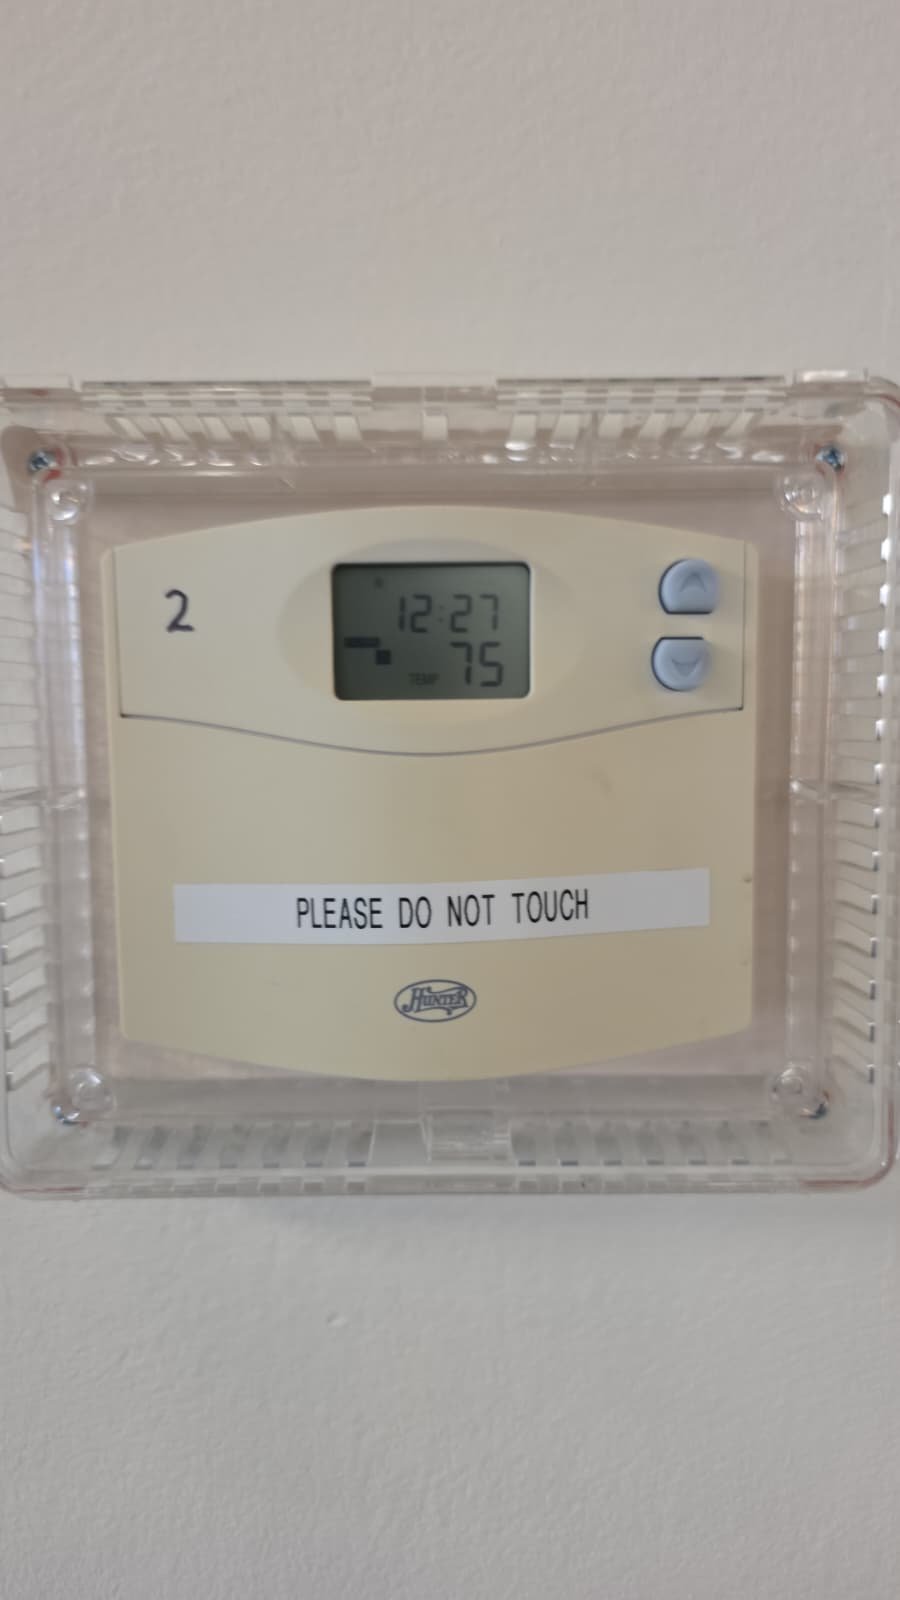
Once the maintenance tasks were completed and the filter was replaced, we cycled the system on and observed it running under normal operation. We were looking for smooth starts, steady airflow, and consistent performance.

After this final verification, we confirmed that the system was operating properly and ready to continue serving the home in Tampa, FL 33634.

5. Communicate findings with the homeowner

At the end of the visit, we summarized everything clearly:

  • The system is working properly.
  • Maintenance for this visit was completed successfully.
  • The air filter was replaced and is now clean.
  • No additional repairs were needed at this time.

That kind of straightforward communication is especially important with maintenance plans. You should always know what was done, what we saw, and what to watch for in the future.

Why This Fix (and Routine Maintenance) Works

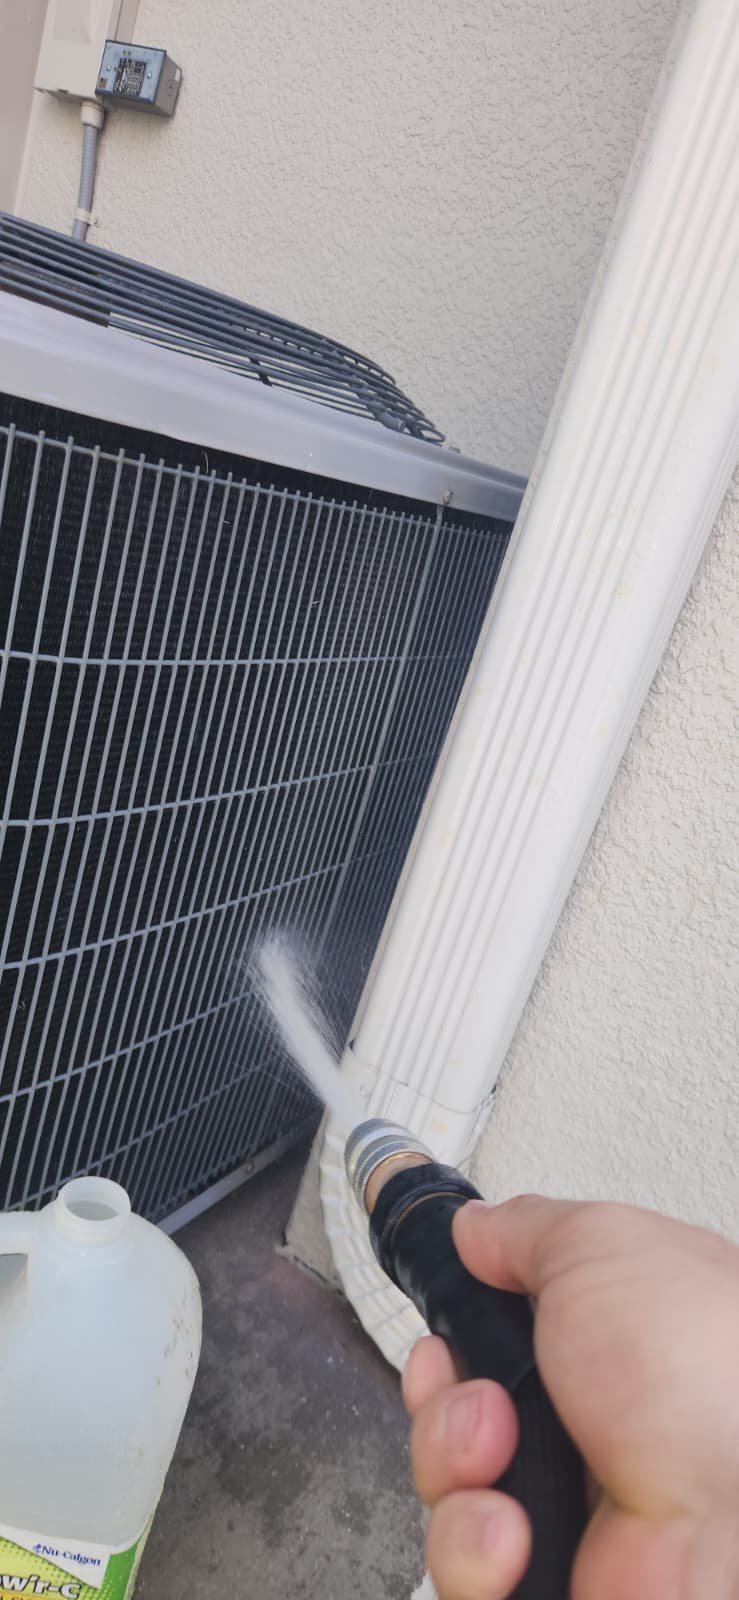
In Florida, your air conditioning system doesn’t get much of a break. Long run times, high humidity, and salt in the air all add up. A maintenance visit like this one in Tampa, FL 33634 works because it focuses on the fundamentals that keep an HVAC system healthy:

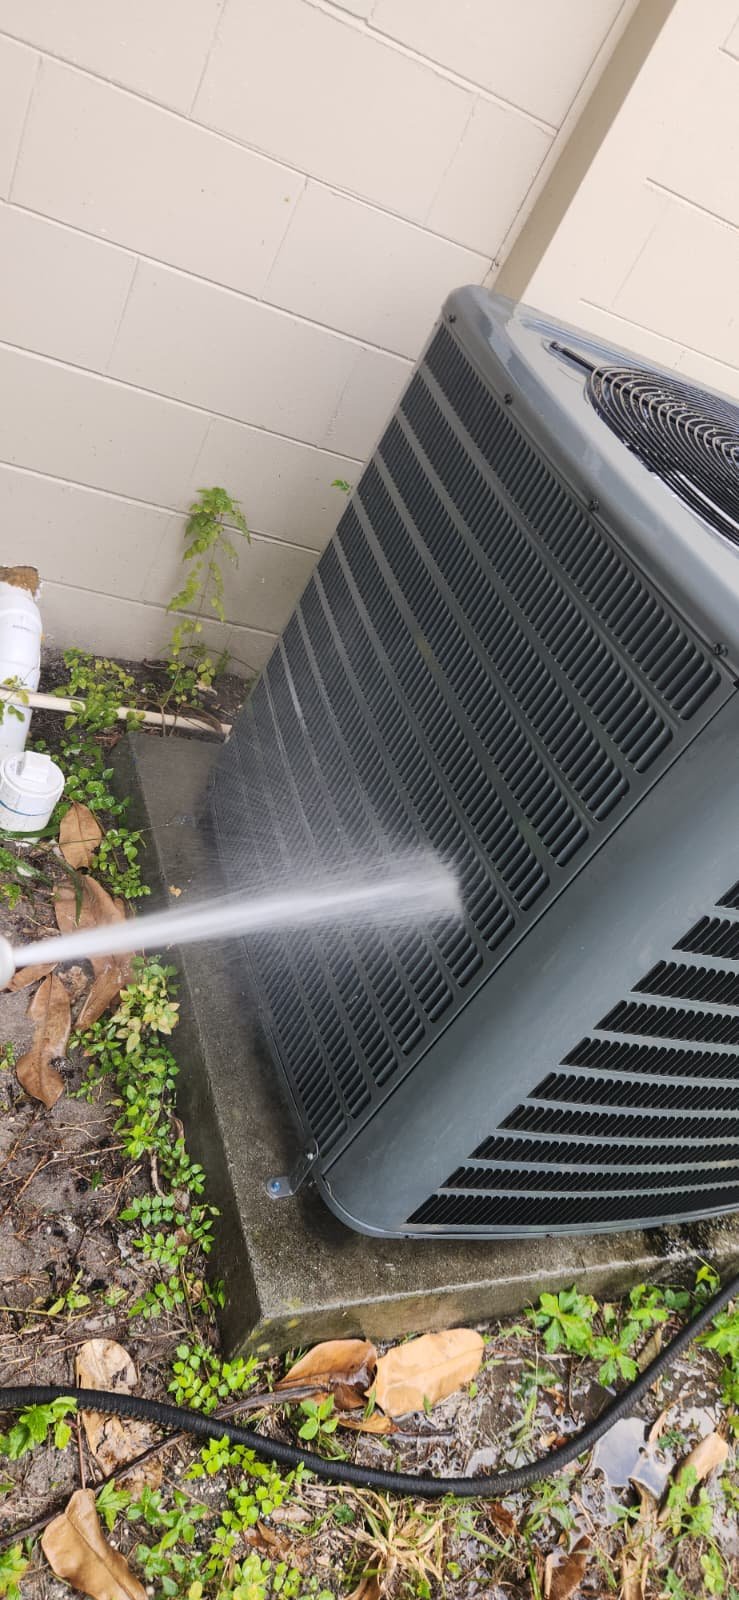
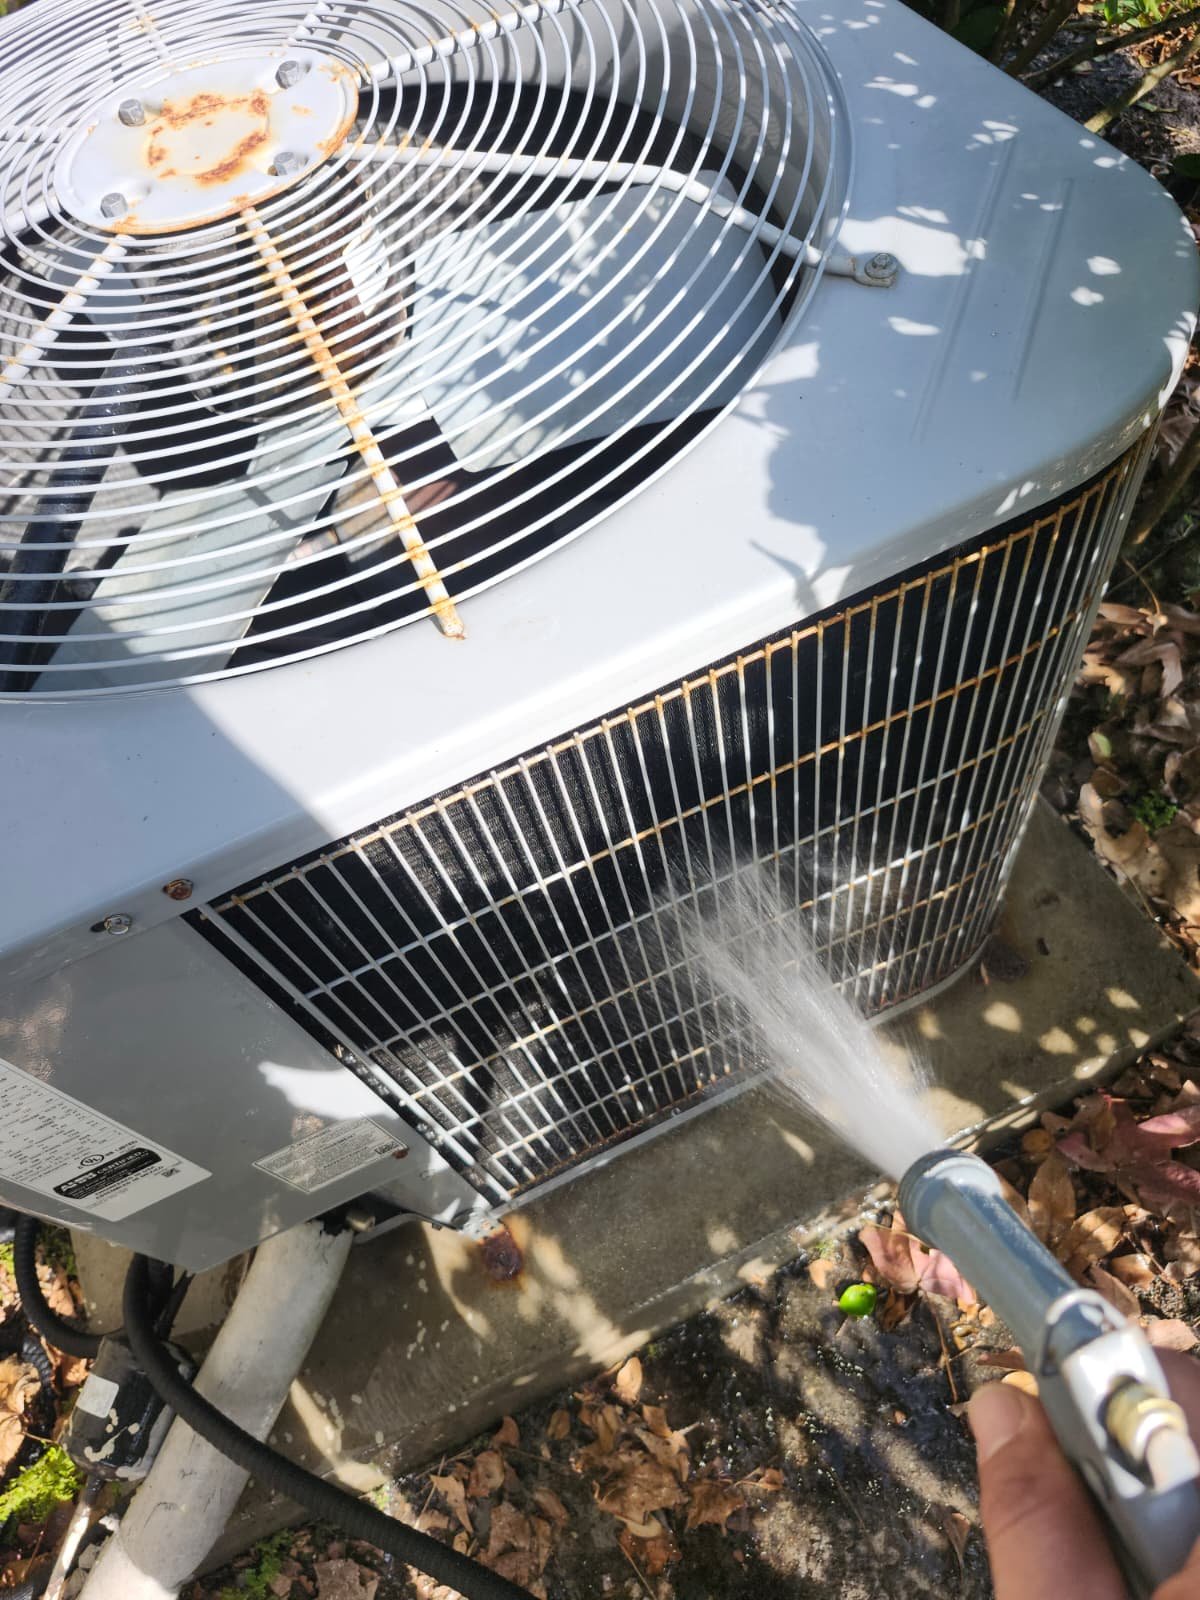
  • Airflow: A clean filter keeps resistance low so the blower can move air efficiently through your ductwork. When airflow is restricted, components can overheat or wear out faster.
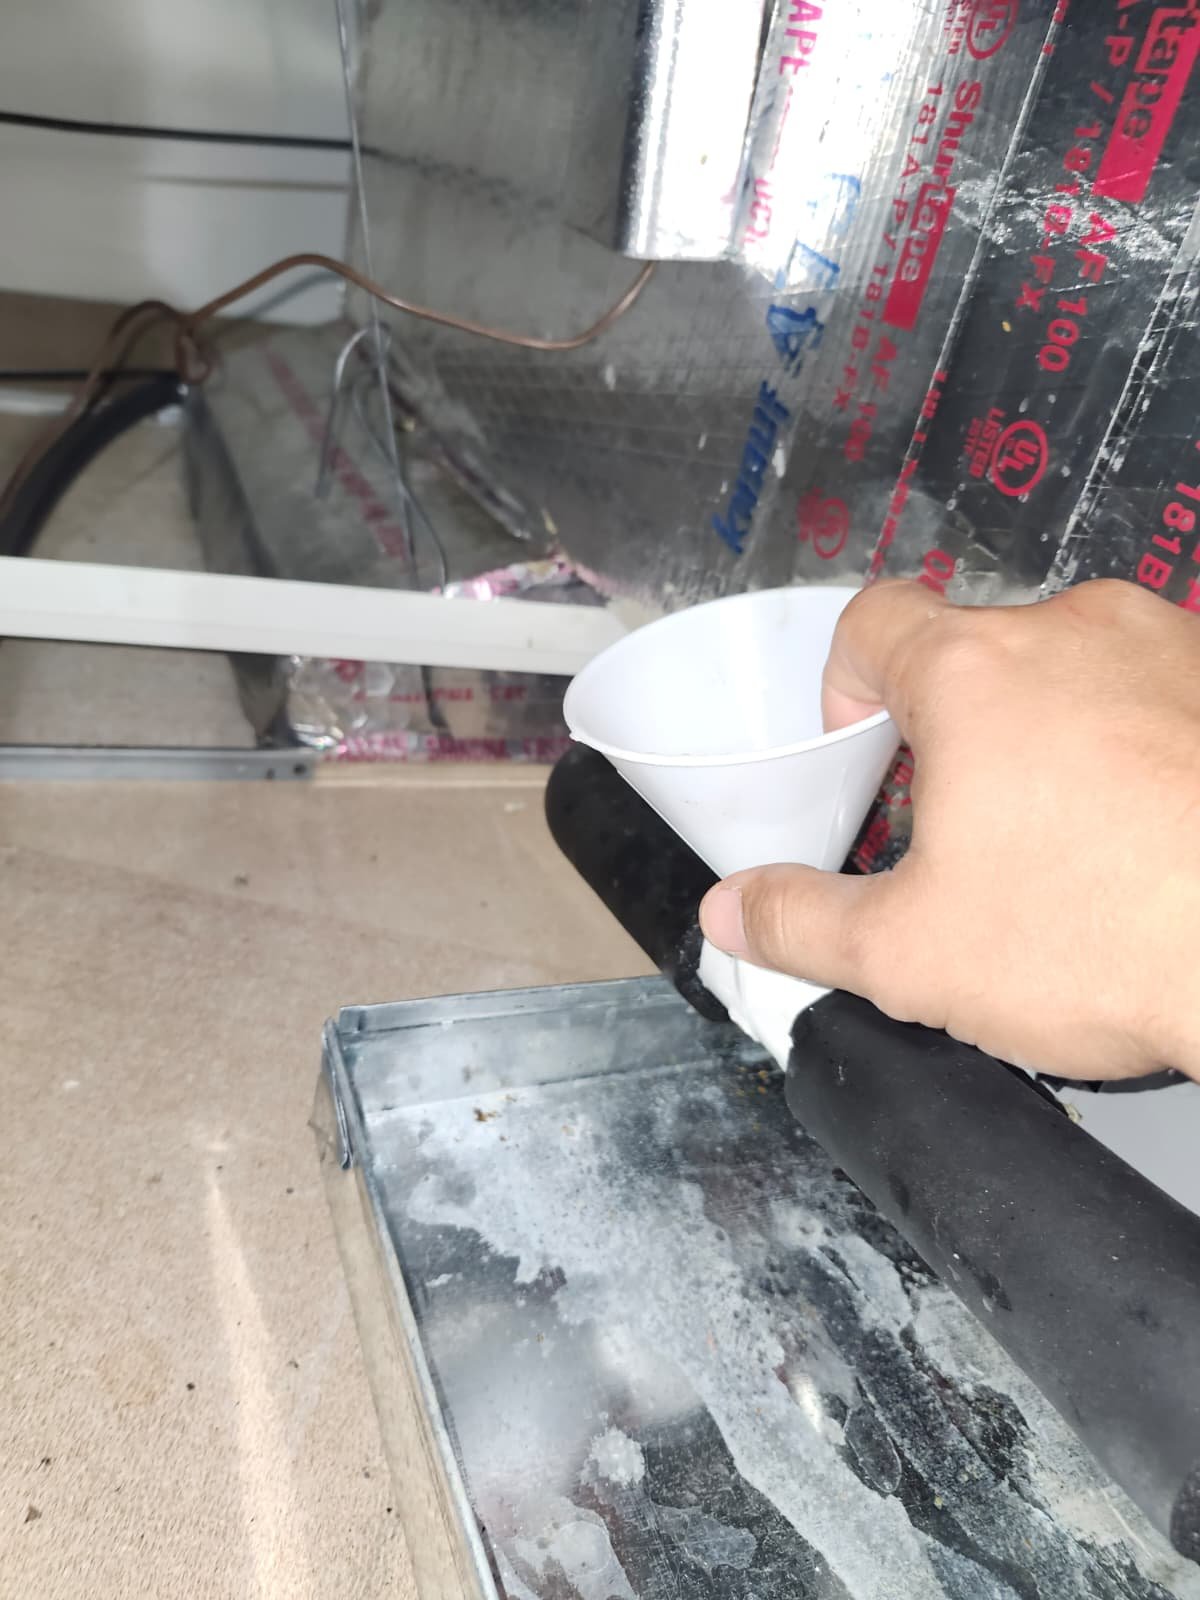
  • Cleanliness: Routine upkeep helps keep dirt and dust from building up inside the system. This supports more consistent temperatures and reduces unnecessary strain.
  • Early detection: By having a technician routinely inspect your system, small issues are more likely to be caught before they lead to no-cool calls in the middle of a hot Tampa afternoon.
  • Efficiency over time: A well-maintained system can run more efficiently than one that’s neglected, which may help keep energy use more reasonable as your equipment ages.

There wasn’t a “big repair” on this visit—and that’s the point. Maintenance plans are designed to keep your system out of crisis mode. When we can come into a home, complete our checklist, change the filter, and confidently say, “Everything is running properly,” that’s a win for the homeowner.

If you’d like to learn more about how regular tune-ups work, we also explain our approach on our AC maintenance services in Tampa page and go deeper into tune-ups on our AC tune-up in Tampa overview.

Pro Tips for Homeowners in Tampa

If you’re a homeowner in Tampa, FL 33634 (or anywhere in Tampa Bay), a few simple habits can make your HVAC system’s job much easier between professional visits.

1. Stay ahead on filter changes

In our climate, filters often need attention more frequently than homeowners expect. Pets, construction dust, and everyday life in a humid environment can clog filters quickly. Even with a maintenance plan, it’s smart to check your filter periodically and follow the replacement schedule we recommend for your home’s conditions.

2. Keep supply and return vents clear

Make sure furniture, rugs, or curtains aren’t blocking your vents or returns. Restricted airflow makes your system work harder and can lead to comfort issues in certain rooms. Good airflow is the foundation of efficient cooling in Tampa homes.

3. Watch for early signs of trouble

Even if your system is working properly today, it’s helpful to pay attention to changes, such as:

  • New noises from the indoor or outdoor unit
  • Rooms that feel more humid than usual
  • Uneven temperatures between areas of the home

If you notice changes, mention them at your next maintenance visit or schedule an additional checkup. Our AC repair services in Tampa are there for those times when something doesn’t feel right.

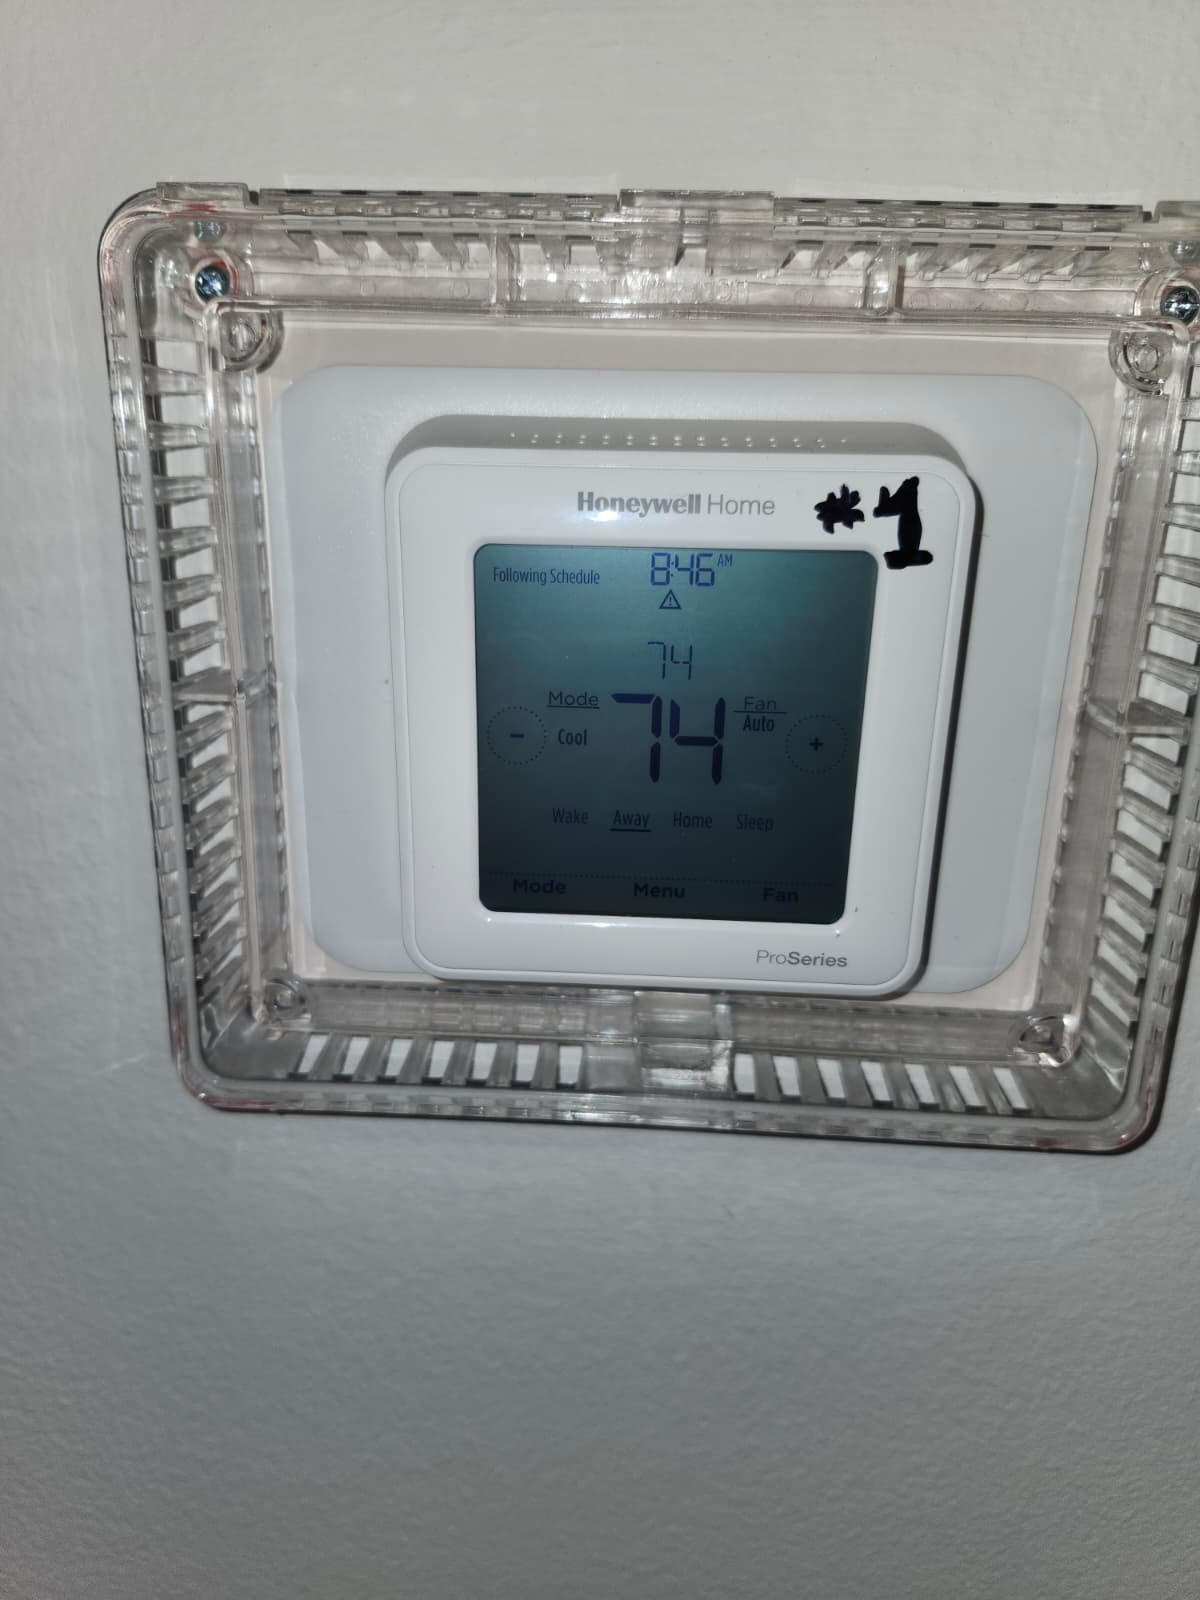
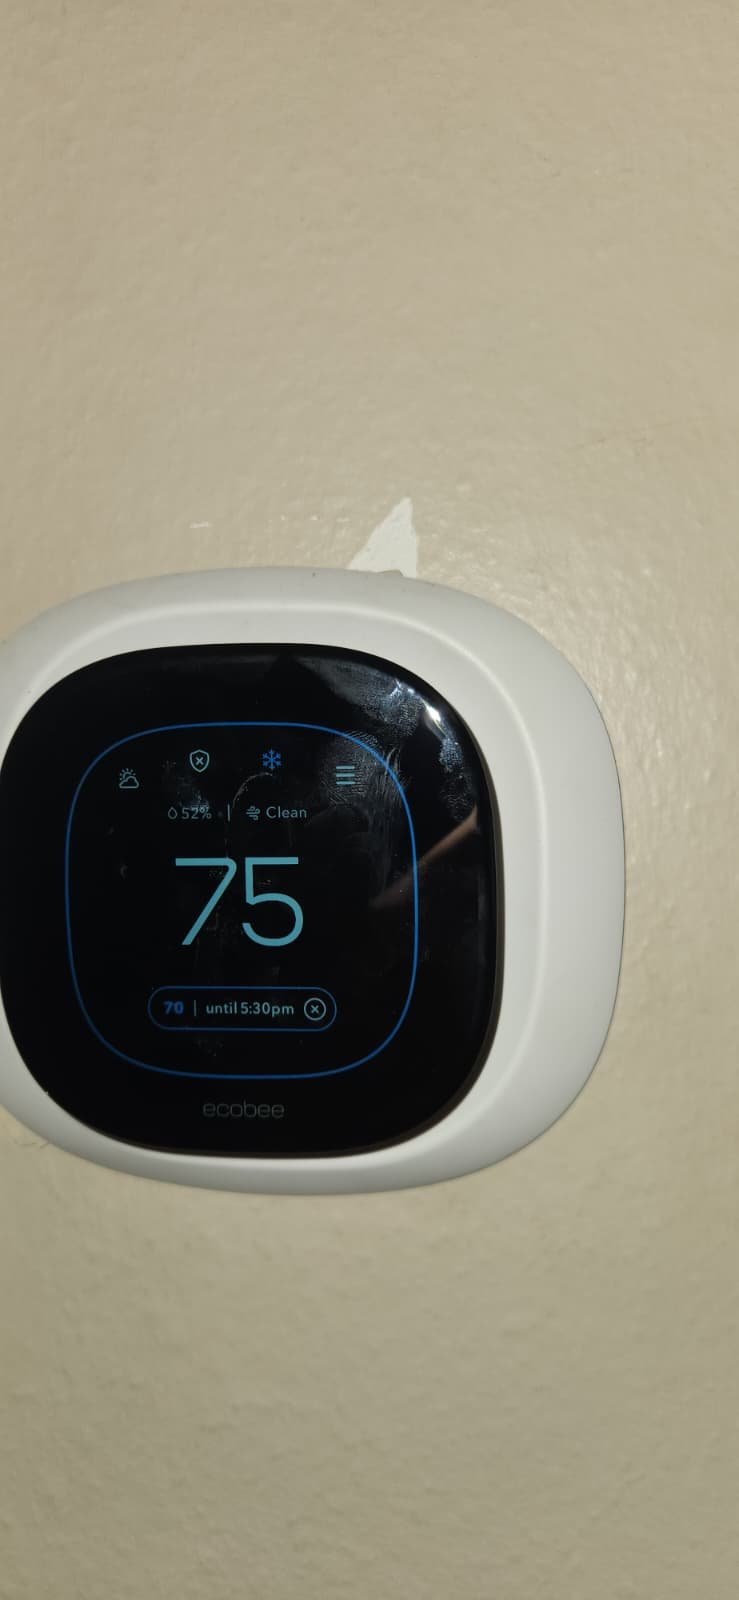
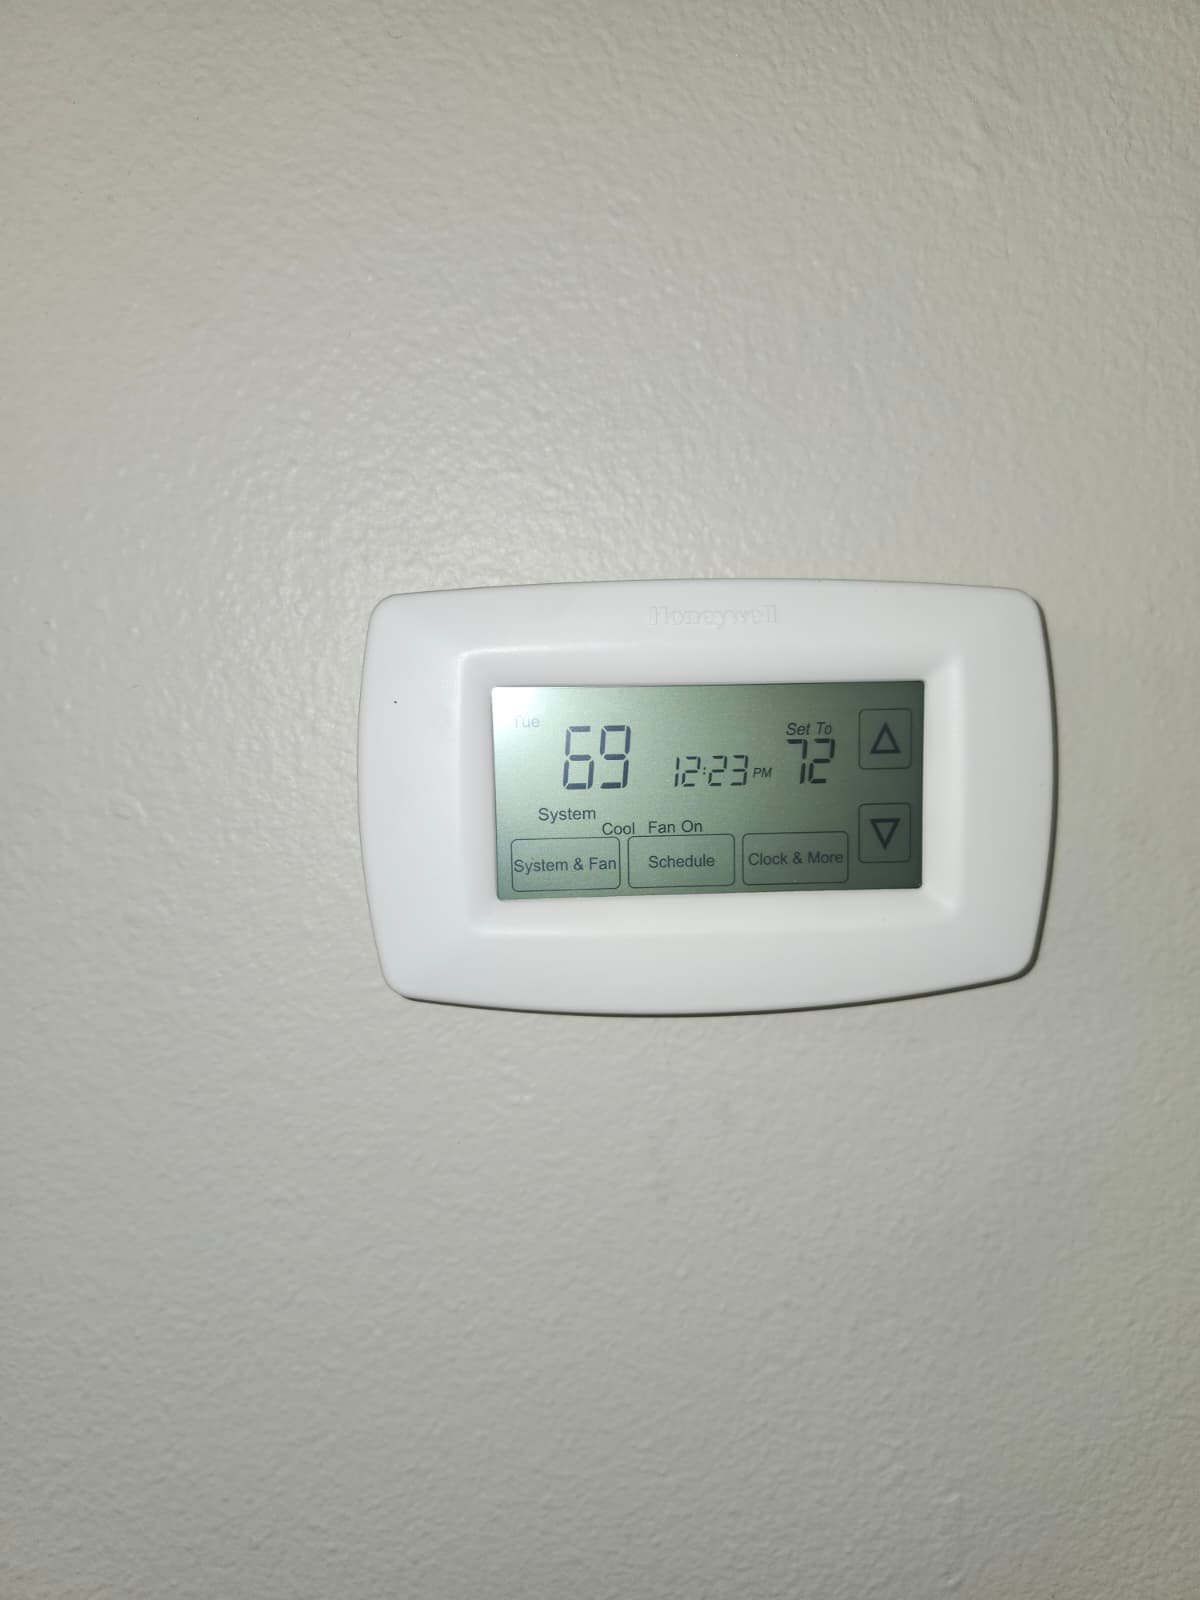
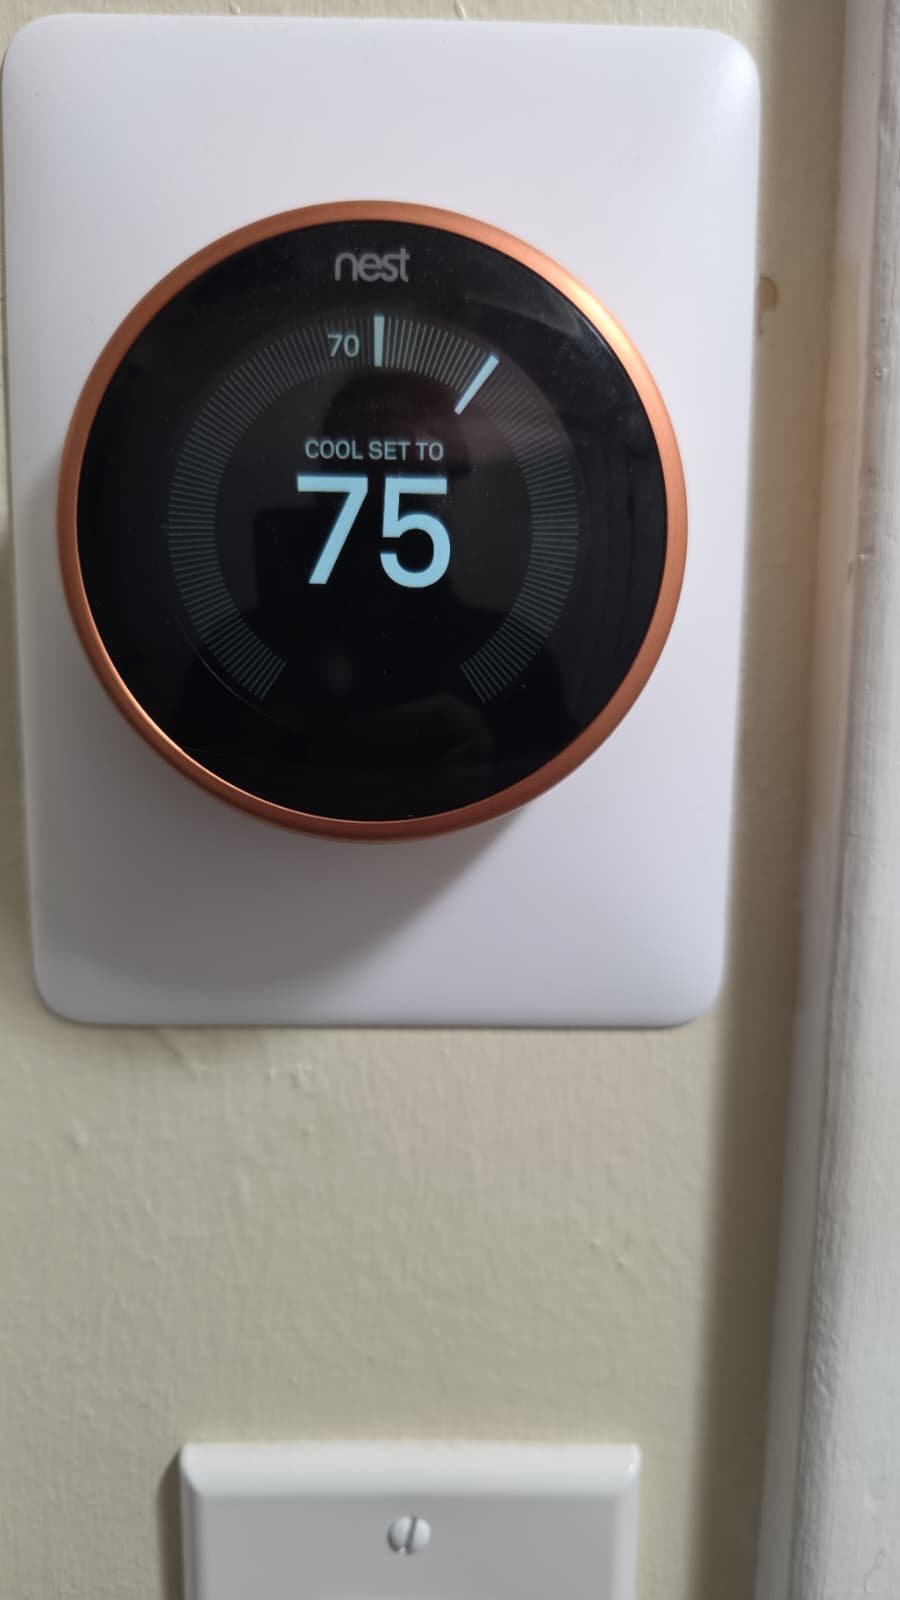
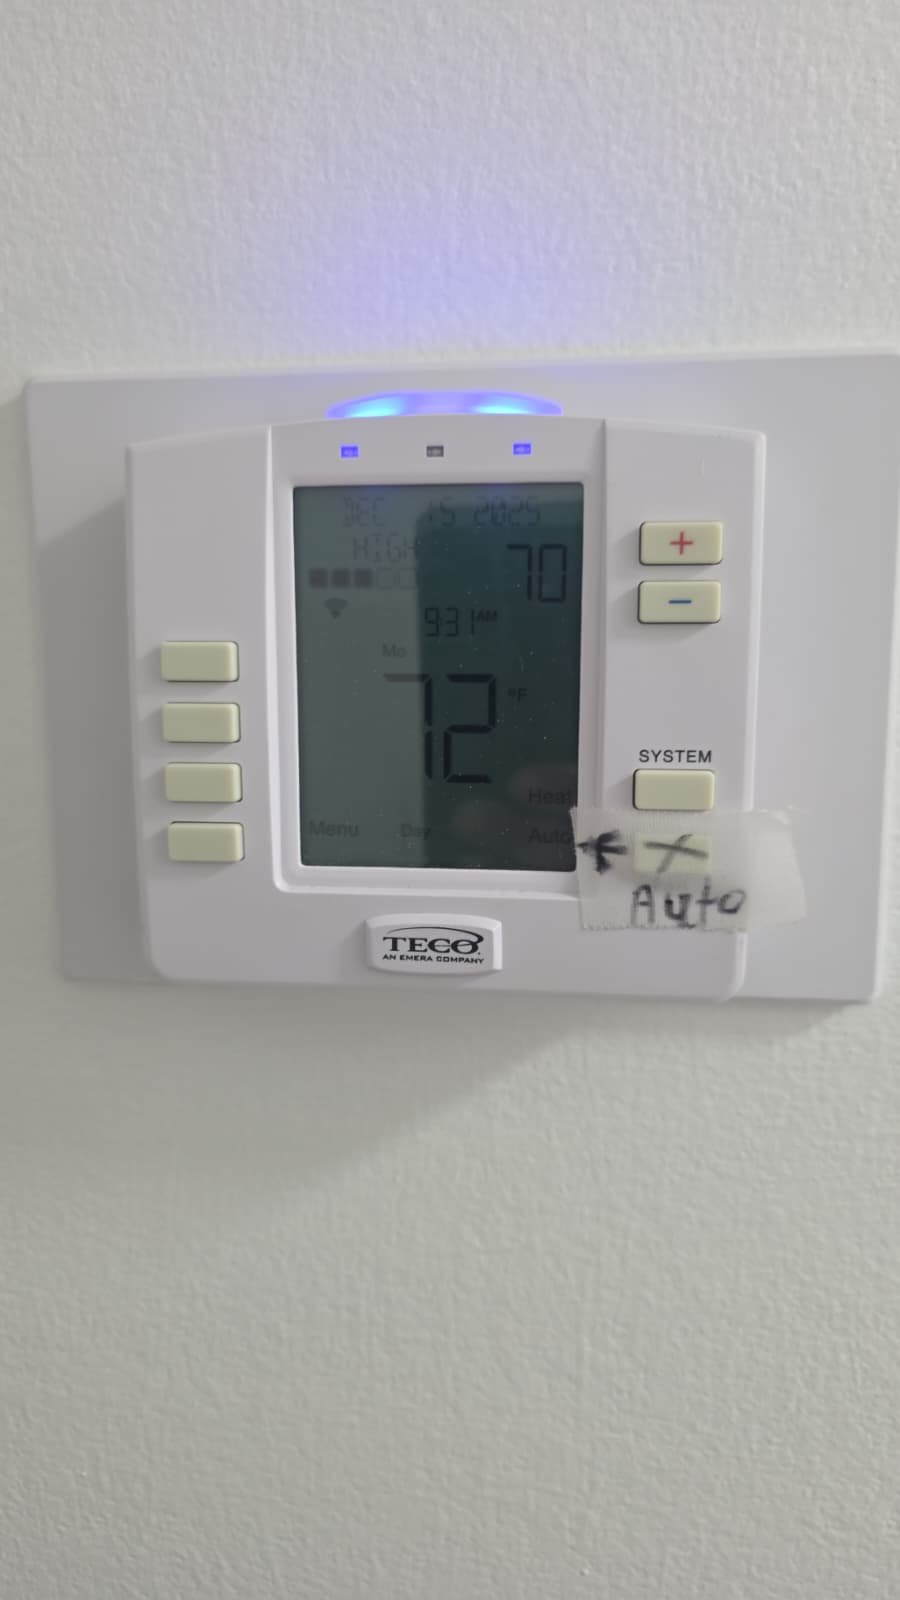
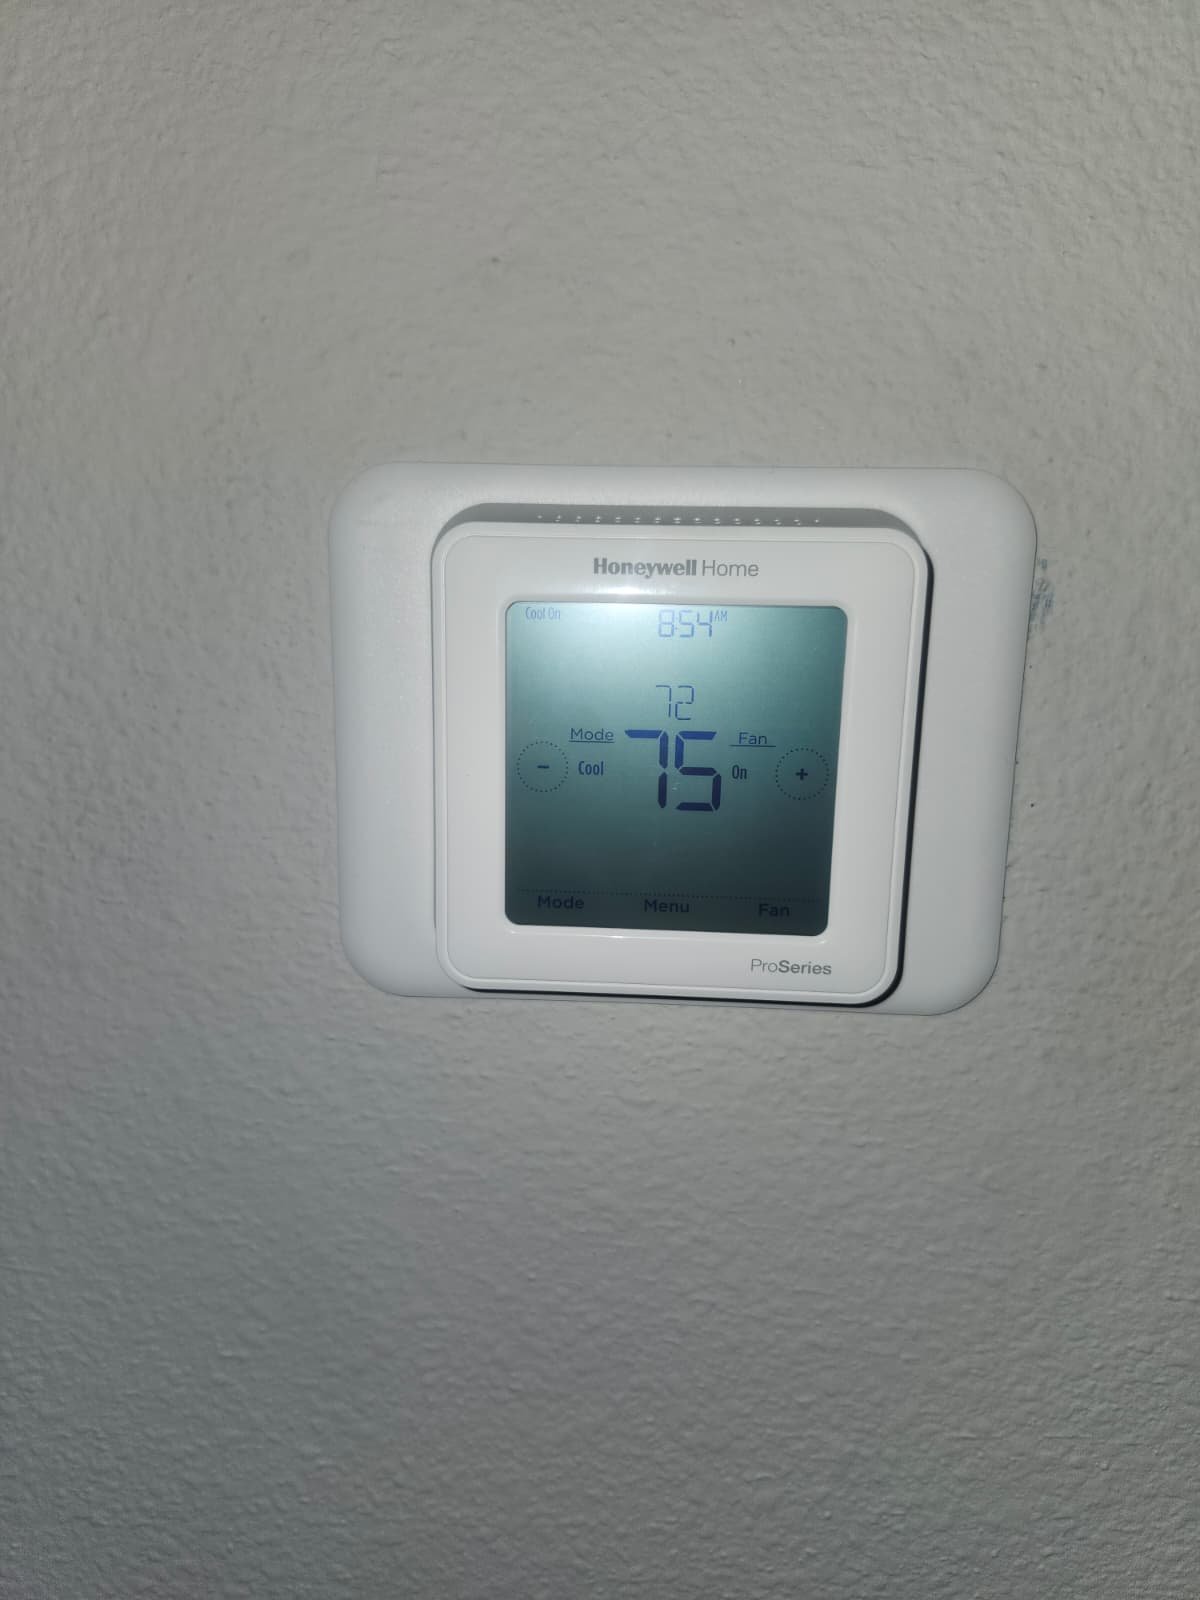
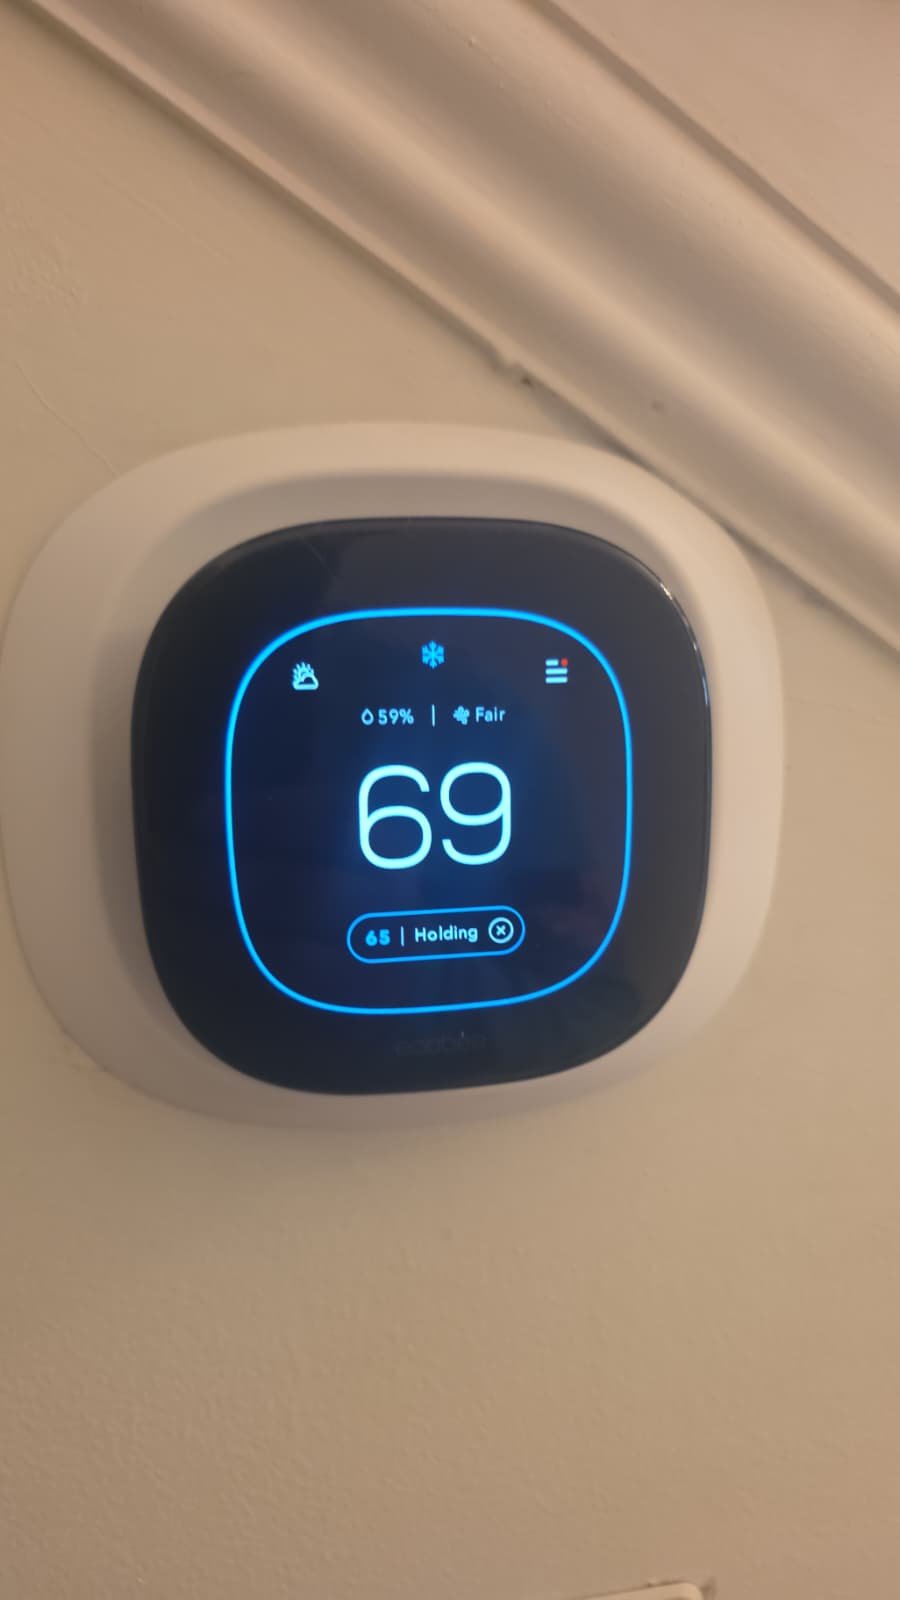
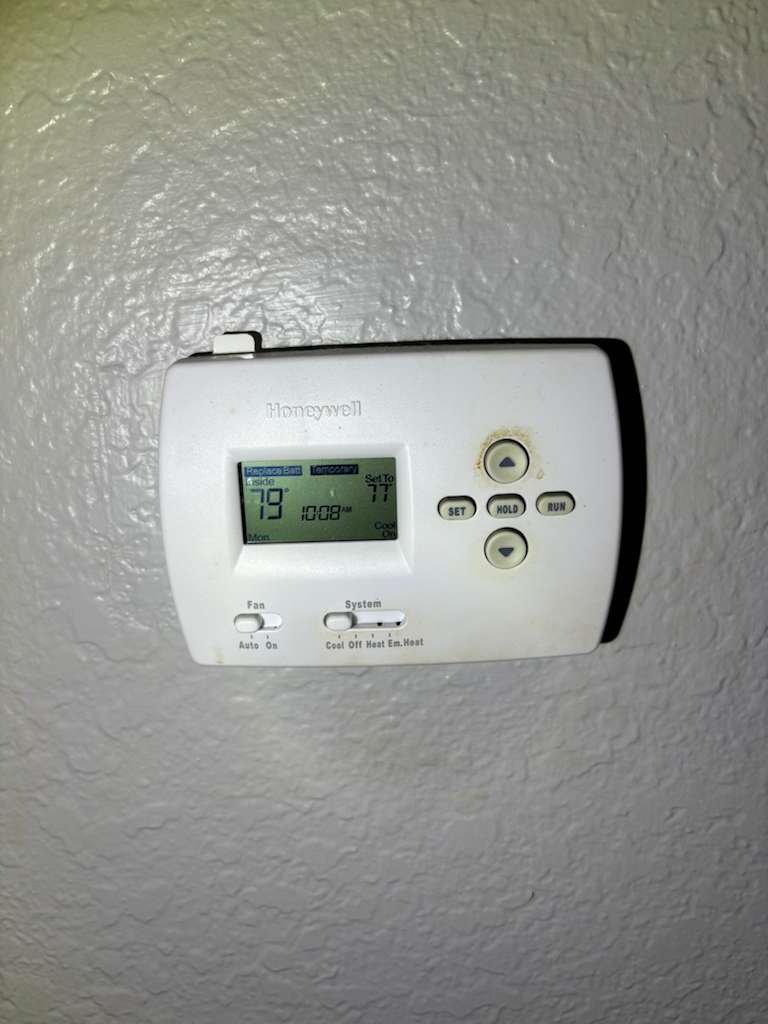
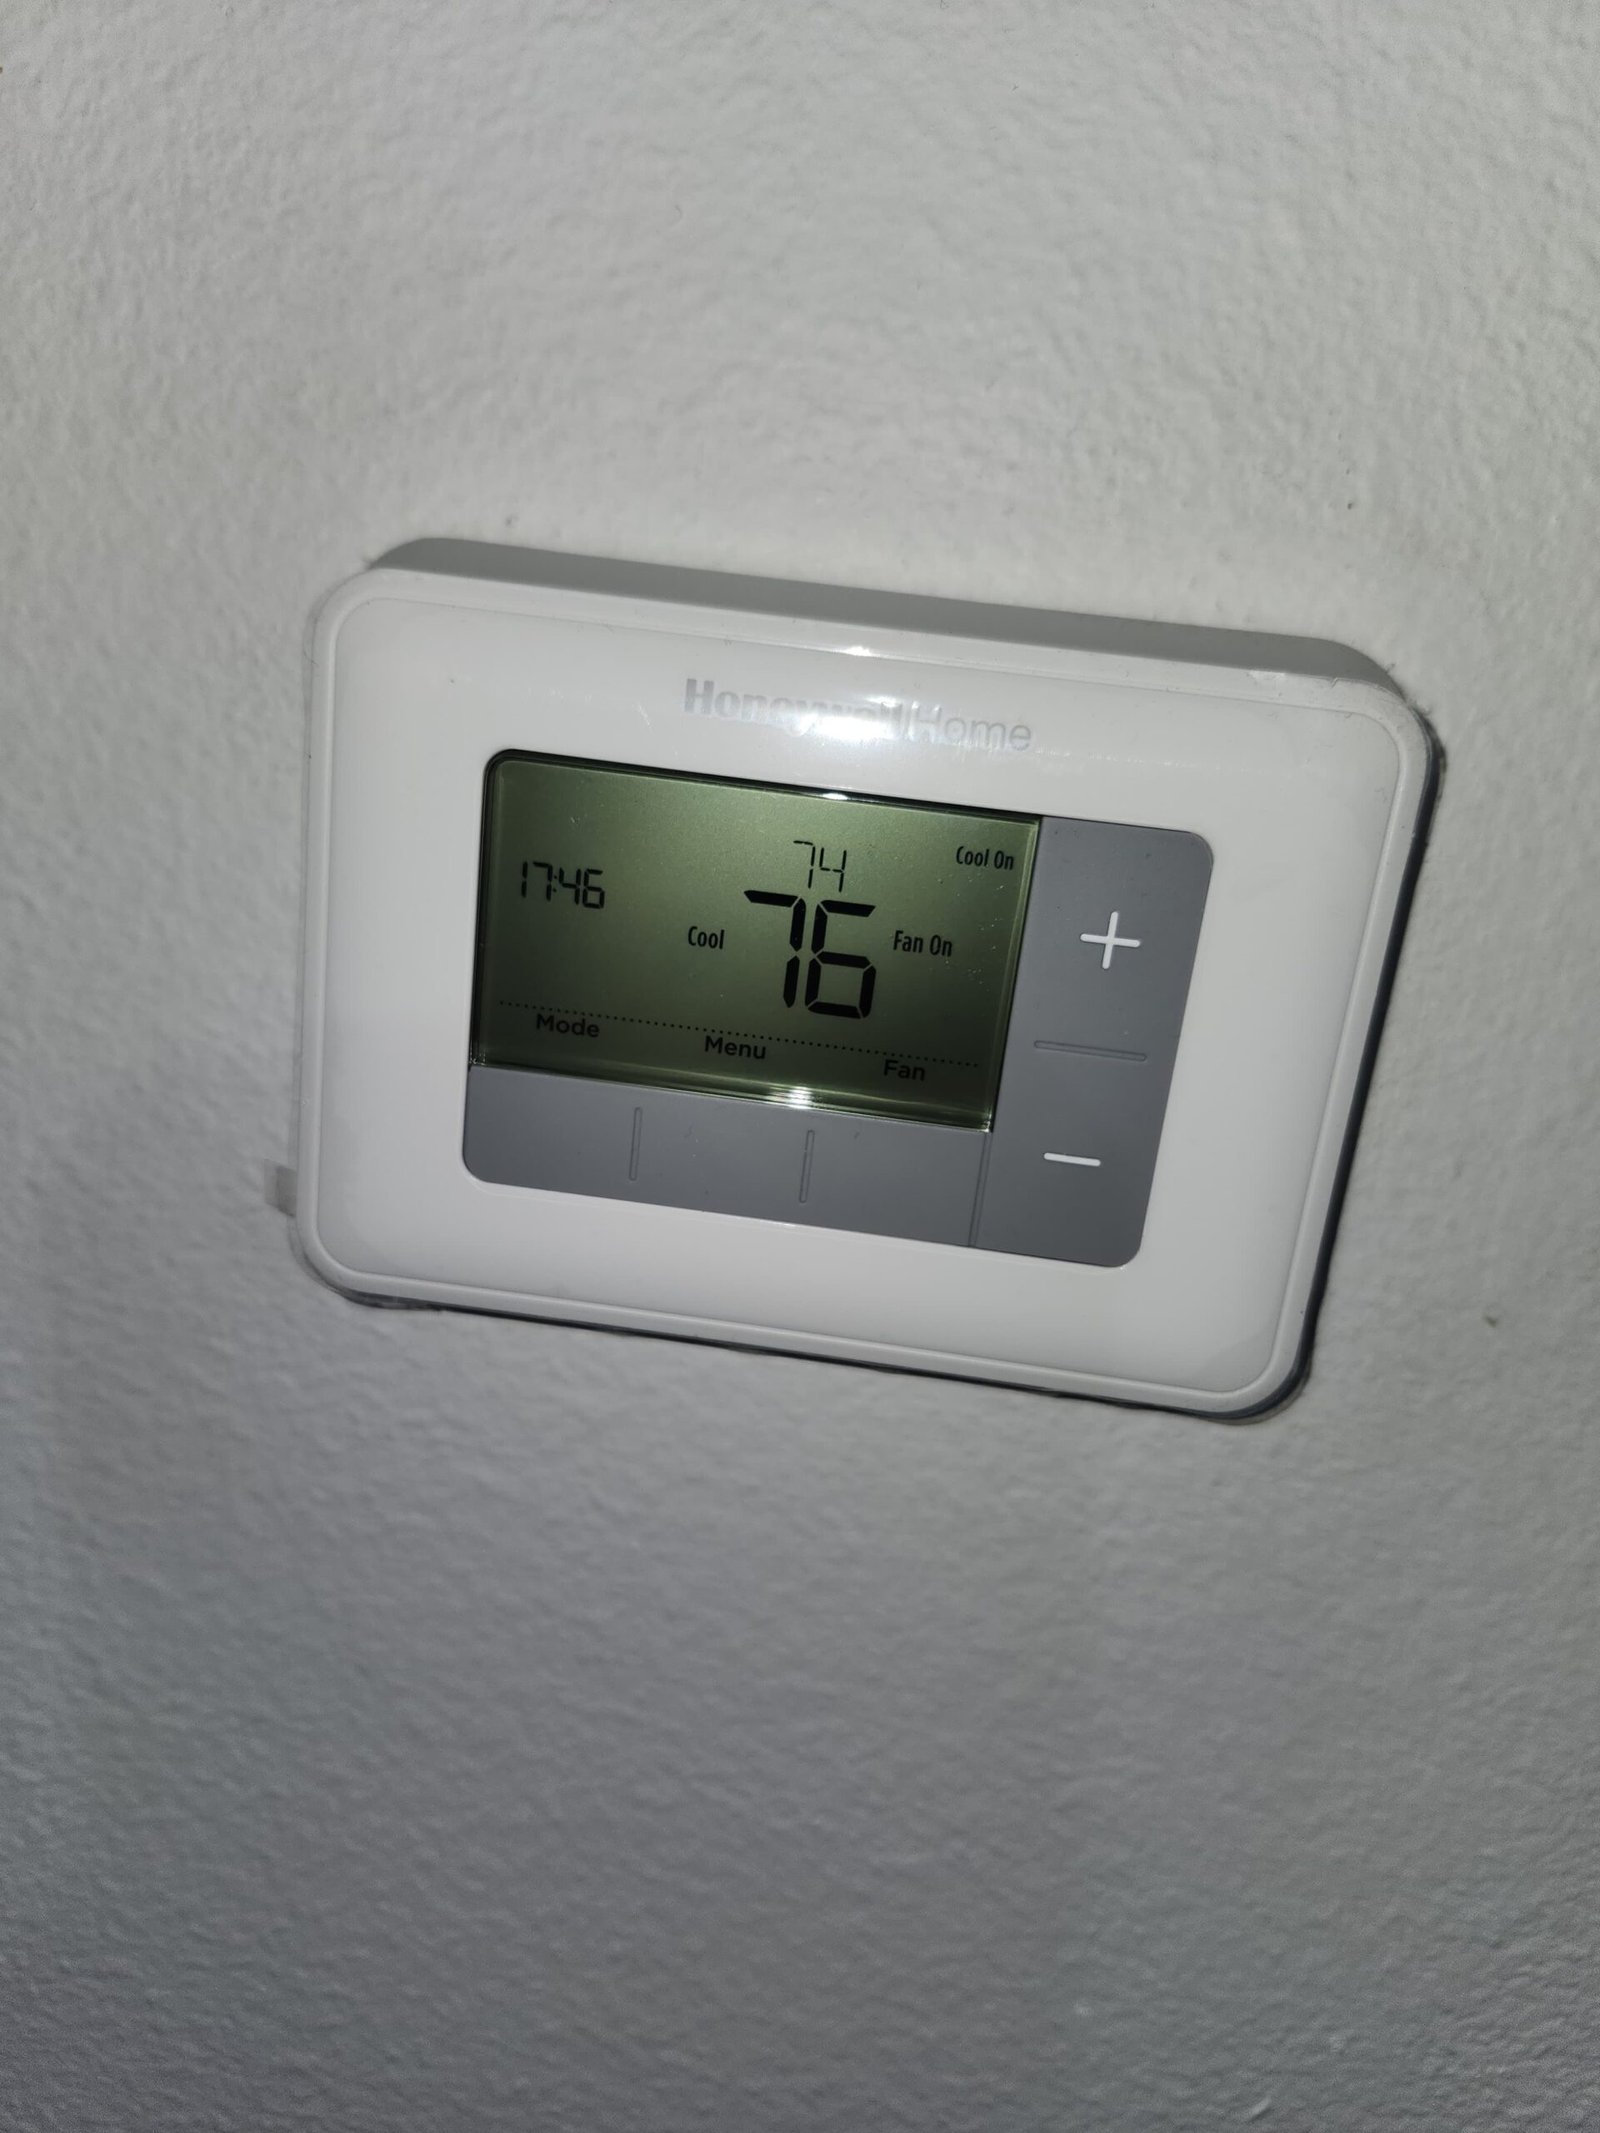
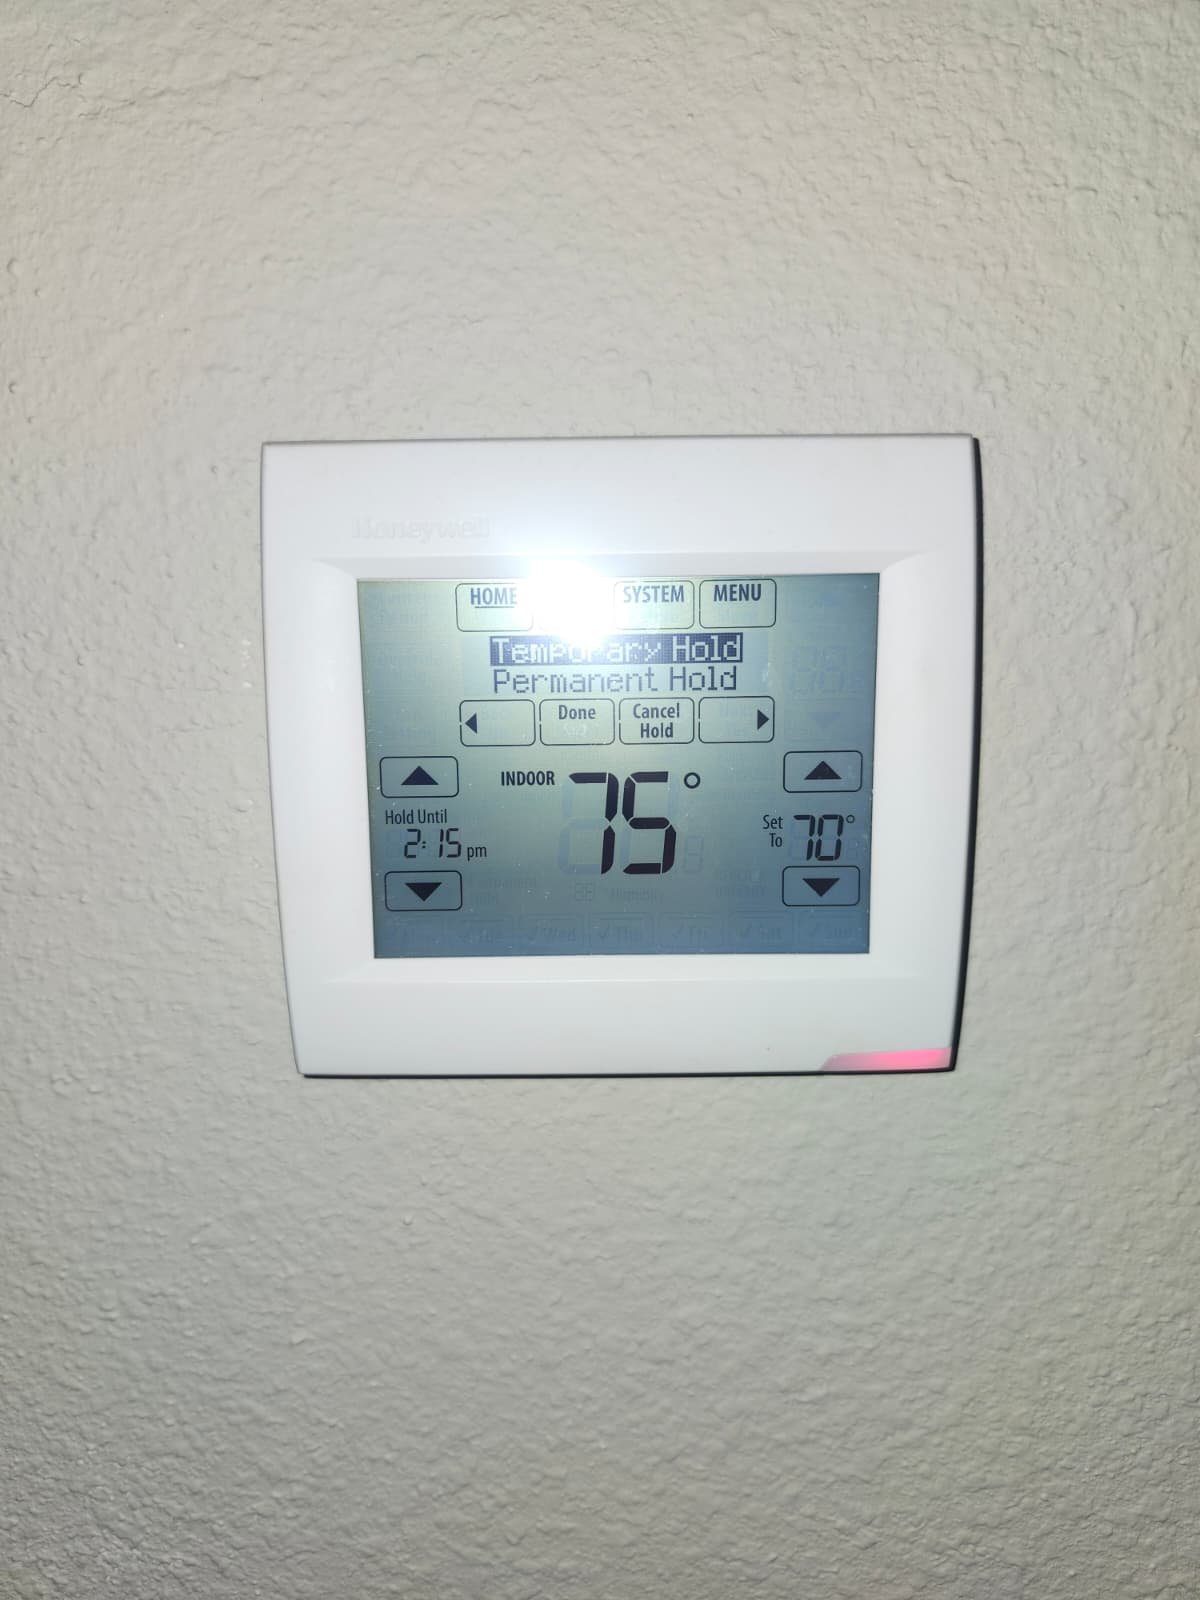
4. Use your thermostat wisely

Constantly adjusting the thermostat throughout the day can cause your system to short-cycle or run longer than needed. In the Tampa Bay area, a steady, reasonable setting often provides the best balance of comfort and efficiency. If you’re curious about smarter controls, we cover broader maintenance planning and benefits on our Therapy Maintenance Plans page and in our air conditioning maintenance guide for Tampa Bay.

5. Don’t wait for a breakdown to start a maintenance plan

The homeowner in this Tampa, FL 33634 case didn’t call because of a failure; they called us as part of a maintenance program that started long before anything went wrong. That’s the ideal scenario. If you’re not currently on a plan, it’s worth considering before the next major heatwave or before your system gets older and more vulnerable to issues.

FAQ: Maintenance Plan Visit in Tampa, FL 33634

What is a Pro Care Maintenance Plan visit?

A Pro Care Maintenance Plan visit is a scheduled appointment where we perform routine maintenance on your HVAC system. For this homeowner in Tampa, FL 33634, Visit #7 included a full maintenance check and filter replacement, with the system confirmed to be working properly afterward.

Do I need maintenance if my system is already working fine?

Yes. This visit is a good example: the system was working properly, but maintenance still mattered. Regular service helps keep it that way, reduces the risk of surprise breakdowns, and allows us to spot potential issues early.

What did you actually do during this visit?

On this Pro Care Maintenance Plan appointment, we completed our routine maintenance tasks for the system, replaced the air filter, inspected key components, and verified that the system was operating as expected after service.

How often should I schedule HVAC maintenance in Tampa?

In Tampa’s climate, most homeowners benefit from at least annual maintenance, and many choose to have their systems checked more than once a year. Our Pro Care Maintenance Plan is designed to keep your equipment on a consistent schedule so you don’t have to worry about remembering when it’s due.

Will you tell me if something is wrong during a maintenance plan visit?

Absolutely. If we notice anything unusual during a visit—wear on parts, airflow problems, or other concerns—we’ll explain what we found in clear language and talk through your options. On this particular Tampa, FL 33634 visit, there were no issues to report, and the system was working properly after maintenance.

Can I join a maintenance plan if my system is older?

Yes, many Tampa homeowners with older systems choose a maintenance plan specifically to keep them going as smoothly as possible. During enrollment, we’ll take a look at your system’s condition and recommend a plan that makes sense for its age and usage.

Why Choose Home Therapist for HVAC Maintenance in Tampa

At Home Therapist Cooling, Heating, and Plumbing, our goal is to make maintenance visits like this Tampa, FL 33634 appointment feel simple, clear, and reassuring. You shouldn’t have to guess what was done or worry about what comes next.

Here’s what you can expect from our team:

  • Licensed and professional technicians: Our techs are trained, experienced, and familiar with Tampa Bay homes and climate.
  • Transparent communication: We explain what we found, what we did, and what (if anything) we recommend going forward—no pressure, no scare tactics.
  • Clean and respectful work: We treat your home like it’s our own, from wearing shoe covers to cleaning up our work area before we leave.
  • Long-term reliability focus: Maintenance plans, like the Pro Care visit described here, are built around keeping your system running smoothly for the long haul, not just getting through one season.
  • Commitment to Tampa Bay homeowners: We live and work in this community, and we’re proud to support neighbors throughout Tampa and the surrounding area.

If you’d like to see more of what we do and how we interact with our community, you can find us on social media:

We’re also listed with several trusted local and national directories, so you can check our reviews and credentials:

Ready to Schedule HVAC Maintenance in Tampa, FL 33634?

If you live in Tampa, FL 33634 and want the same kind of steady, reliable care this homeowner receives, we’d be glad to help. Whether you’re interested in a single maintenance visit or a full Pro Care Maintenance Plan, our team will walk you through the options and help you choose what makes the most sense for your home.

Regular maintenance is one of the simplest ways to protect your comfort, your budget, and your peace of mind in our Florida climate. When you’re ready, reach out to Home Therapist Cooling, Heating, and Plumbing to schedule HVAC service in Tampa, FL 33634 and let our local team keep your system running the way it should.

Shower Valve Replacement and Access Panel Options in St. Petersburg, FL 33703

When a shower valve starts failing, it can turn a relaxing shower into a daily frustration. A homeowner in St. Petersburg, FL 33703 reached out to Home Therapist because two of their shower valves needed attention, and they already had replacement valve kits on hand. Our job was to provide a clean, professional installation, explain the options for future access, and be clear about what was and wasn’t included—especially when it came to drywall and tile.

In this visit, we inspected both shower areas, evaluated the existing valves, discussed access options with the homeowner, and prepared an estimate for replacing the two shower valve kits the customer provided. We also reviewed how an optional access panel could help with any future plumbing work behind the wall.

Case Recap

  • Location: Residential home in St. Petersburg, FL 33703
  • Concern: Two shower valves needing replacement with customer-supplied valve kits
  • Scope: Labor estimate to replace shower valves and, if desired, install an adjustable access panel
  • Access: Possible need to cut or chip sheetrock or tile to reach the valve bodies
  • Clarifications: Drywall and tile repair not included in plumbing scope
  • Outcome: Clear estimate, clear expectations, and a plan for reliable shower performance

Customer Problem

Our customer in St. Petersburg was dealing with shower valves that were no longer performing the way they should. Whether it’s difficulty controlling temperature, trouble shutting water off completely, or valves that just feel worn out, these are common reasons homeowners decide it’s time for a replacement.

In this case, the homeowner had already taken an important first step: they had purchased two shower valve kits and wanted a licensed plumber to handle the installation. They were looking for:

  • A professional evaluation of what it would take to access and replace both valves
  • Clear communication on what our plumbing work would include
  • Honesty about what is considered plumbing scope versus wall and tile repair

They also wanted to know if we could install new trim—such as the shower head, plate (escutcheon), and handle—if they chose to provide those parts as well, and whether they should consider an access panel for easier service in the future.

Inspection and Diagnosis

When we arrive at a home in St. Petersburg, FL 33703 for a shower valve issue, we start by understanding the layout and construction of the bathroom walls. Access is a big part of this type of plumbing work, especially in Florida homes where bathrooms may have a mix of tile and drywall, or older construction with limited behind-the-wall space.

For this estimate visit, we:

  • Located both showers and identified the valve positions in relation to surrounding walls
  • Checked what type of wall material was present—tile, sheetrock, or a combination
  • Reviewed the homeowner’s existing shower valve kits to confirm they were appropriate replacements for their fixtures
  • Discussed possible access points, including whether we could approach from the back side of the wall instead of cutting through finished tile

Because shower valves are buried behind walls, there’s no way to replace them from the front without some type of opening. Depending on the construction, that can mean:

  • Carefully cutting an opening in the drywall behind the shower
  • In some cases, cutting through tile if no better access exists

During this visit, we made sure the homeowner understood that if sheetrock or tile had to be cut, our scope would focus on the plumbing and any agreed-upon access panel installation—not full cosmetic repair of the wall.

Repair or Service Process

For homeowners in St. Petersburg, FL 33703 considering a shower valve replacement, here’s what a typical process looks like when we move forward with this type of estimate:

1. Planning Access to the Valve

The first and most important step is determining where to open the wall. We aim for a spot that:

  • Gives us full, safe access to the existing valve and piping
  • Minimizes damage to finished tile whenever possible
  • Provides a good location for an optional access panel

Often, that means cutting a section of sheetrock on the back side of the shower wall. We explain the approximate opening size and shape, and we’re very clear that we do not perform full drywall or tile repair as part of the plumbing work. This helps avoid surprises later.

2. Shutting Off Water and Removing the Old Valve

Once access is established, we safely shut off the water supply and begin removing the old shower valve. This step is all about control and protection:

  • We protect nearby surfaces and keep the work area as clean as possible.
  • We carefully disconnect the existing valve and any associated fittings.
  • We inspect the surrounding piping for any obvious signs of wear or damage.

3. Installing the Customer-Supplied Shower Valve Kits

In this St. Petersburg home, the homeowner already had two replacement valve kits. Our role is to provide the labor to install them correctly and safely. That includes:

  • Positioning the new valve body at the right depth and alignment for the trim
  • Making proper plumbing connections to existing hot and cold lines
  • Securing the valve so it won’t shift or twist inside the wall

If the homeowner also chooses to provide new trim—such as the shower head, handle, and trim plate—we can install those as part of the job. If the existing trim is still in good shape and compatible, it can often remain in place.

4. Testing and Adjustments

After installing the new valves, we restore the water supply and test operation. We verify:

  • Proper hot and cold orientation
  • Smooth handle movement
  • No visible leaks at accessible connections

We always confirm proper operation after our repairs or replacements. If adjustments are needed to improve handle alignment or flow, we make those before closing up the work area.

5. Optional Access Panel Installation

As part of the estimate, we also discussed installing an adjustable, spring-loaded plastic access panel. These are commonly available in sizes like 8″ x 8″ or 14″ x 14″ and can be a smart addition for homeowners in St. Petersburg who want easier access in the future without cutting into the wall again.

If the homeowner chooses this option, we:

  • Cut the opening to match the panel dimensions
  • Install the panel frame and door so it sits flush and closes securely
  • Make sure the opening provides clear access to the new valve

Installing an access panel is optional, but many Florida homeowners appreciate having a clean, finished access point instead of a wall that will later need full drywall and paint repairs.

6. Final Cleanup and Next Steps

At the end of every plumbing visit in St. Petersburg, FL 33703, we focus on leaving the area tidy. Any remaining cosmetic work—such as patching and finishing sheetrock or replacing tile—is left to the homeowner or a separate contractor, exactly as we explain up front.

We also walk the homeowner through what we did, what we tested, and what to watch for. That way, they understand the work and feel confident about their updated shower valves.

Why This Fix Works

A properly installed shower valve is all about control and safety. Here’s why this type of replacement is so effective for homeowners in St. Petersburg and across Tampa Bay:

  • Reliable water control: A new valve body and internal components provide smoother operation and more consistent temperature control, reducing surprises in the shower.
  • Reduced leak risk: Worn valves and connections can slowly seep inside the wall. Replacing the valve and checking connections helps prevent hidden water damage.
  • Better long-term access: Adding an access panel, when chosen, makes it much easier to service the valve later without opening up large sections of wall or tile again.

From a plumbing standpoint, we’re focused on solid, leak-free connections and correct alignment. When those fundamentals are in place, you get years of dependable use from your shower valve.

Pro Tips for Homeowners in St. Petersburg

Living in St. Petersburg, FL 33703 and the greater Tampa Bay area means your plumbing system deals with warm temperatures, humidity, and mineral content in the water. Here are some practical tips if you’re thinking about shower valve work or other plumbing updates:

  • Plan ahead for access: Any time you renovate a bathroom, consider where future access to valves and piping will come from. An access panel in a closet or hallway behind the shower can save a lot of mess later.
  • Keep parts together: If you purchase your own valve kits or trim, store all parts, instructions, and screws together in a labeled box. This makes it easier for your plumber to confirm everything is ready for installation.
  • Watch for early signs: Stiff handles, inconsistent temperatures, or difficulty shutting off the water completely are early flags that a shower valve may need attention.
  • Protect nearby finishes: Before any plumbing work, move towels, rugs, and personal items away from the work zone. We take care to protect your home, but clearing the area helps us work cleaner and faster.
  • Use licensed plumbers for hidden work: Anything behind the wall—like shower valves, repiping, or shut-off valves—should always be handled by a licensed professional familiar with local conditions in St. Petersburg and the Tampa Bay area.
  • Combine projects when possible: If you’re already opening walls, it may be a good time to discuss other plumbing concerns, such as aging shut-off valves or old galvanized lines, so you only open the wall once.

FAQ: Shower Valve Replacement in St. Petersburg, FL 33703

Do you supply the shower valve, or can I provide my own?

We can work with homeowner-supplied valve kits, like in this St. Petersburg project, or we can provide and install valves ourselves. When you provide the parts, our estimate typically covers labor only. We always make sure the valve is appropriate before proceeding.

Will you repair the drywall or tile after cutting into the wall?

No. Our scope focuses on the plumbing work. If sheetrock or tile needs to be cut to access the shower valve, we are not responsible for repairing or finishing the wall. That work can be handled by the homeowner or a separate contractor. We can, however, install an access panel if you request it.

What is an access panel, and do I really need one?

An access panel is a removable cover installed over an opening in the wall, typically made of plastic and spring-loaded for easy use. It allows future access to the shower valve without re-cutting the wall. It’s optional but often recommended, especially in homes around St. Petersburg where plumbing access can be tight.

Can you also replace the shower head, plate, and handle?

Yes, if you provide the new shower head, trim plate, and handle, we can install them during the valve replacement as part of the job. If the existing trim is still in good shape and works properly, it can usually remain in place.

How long does a typical shower valve replacement take?

The time depends on access and wall type. A straightforward replacement with good drywall access can often be completed the same day. More complex situations, or those involving tile cuts, may take longer. We’ll explain our expectations clearly before starting.

Do you handle other plumbing repairs in the Tampa Bay area?

Yes. In addition to shower valves, we handle a wide range of plumbing services for Tampa Bay homeowners, including leak repairs, fixture replacements, and larger projects like repiping. You can learn more about our plumbing repair options on our plumbing repair service page and our plumbing repair information for nearby communities.

Why Choose Home Therapist for Plumbing Work in Tampa Bay

When you invite a technician into your home in St. Petersburg, FL 33703, you deserve more than a quick fix. You deserve a licensed professional who treats your home with respect and keeps you fully informed every step of the way.

At Home Therapist Cooling, Heating, and Plumbing, we focus on:

  • Licensed, professional technicians: Our plumbers are trained to work safely behind walls, around finished surfaces, and within the specific conditions we see throughout Tampa Bay.
  • Transparent communication: We explain what we’re doing, what’s included, and what isn’t—such as drywall or tile repair—so you can plan accordingly.
  • Clean and respectful work: We protect your space, minimize dust and debris, and clean up our work area when we’re done.
  • Long-term reliability: We’re not just trying to get in and out; we’re looking to give you plumbing solutions that last, whether it’s a single shower valve or larger upgrades like whole-home repiping.
  • Commitment to Tampa Bay homeowners: We proudly serve St. Petersburg and surrounding communities, and our reputation matters to us.

If you’d like to see more of how we work and connect with us online, you can follow our updates and projects on Pinterest or join our community on Reddit. For homeowners who like to check credentials, you can also review our standing with the Better Business Bureau, our listing with the Tampa Bay Chamber of Commerce, and contractor details on BuildZoom.

For additional information about related plumbing services, feel free to explore our resources on requesting plumbing service estimates and the range of options covered on our drain cleaning services page.

Need Shower Valve Help in St. Petersburg, FL 33703?

If you’re noticing issues with your shower valves or planning a bathroom update in St. Petersburg, FL 33703, our team at Home Therapist is here to help. We’ll walk you through access options, explain what’s included in the plumbing scope, and provide clear, detailed estimates—whether you’re supplying your own valve kits or want us to provide everything.

Reach out today to schedule service or request an estimate for shower valve replacement, access panel installation, or other plumbing repairs in the St. Petersburg area. We’ll treat your home with care, keep you informed, and make sure your plumbing is working the way it should.

AC Drain Line Repair and Float Switch Recommendation in Tampa, FL 33634

When an air conditioner shuts down in a busy workplace, comfort isn’t the only concern—productivity and equipment can be affected too. That was the case for a commercial client in Tampa, FL 33634 who reached out to us at Home Therapist Cooling, Heating, and Plumbing because one of their AC units (Unit #12) had stopped working and the drain pan was filling with water.

In this visit, our technician inspected the system, cleared a clogged drain line, and recommended adding a primary float switch to help protect the business from future water damage and surprise shutdowns. Below, we’ll walk through exactly what we found, what we did, and why these steps matter for homeowners and businesses in Tampa, FL 33634.

Case Recap

If you like the short version, here’s a quick recap of this AC service in Tampa, FL 33634:

  • AC system (Unit #12) was not operating because the drain pan was filling with water.
  • The underlying cause was a clogged condensate drain line.
  • The system did not have a primary float switch to protect against drain pan overflow.
  • We performed a thorough drain line flush so the unit could operate again.
  • We recommended installing a primary float switch for added water damage protection.
  • We discussed noise concerns around water removal methods in a call center environment.

Customer Problem

The client contacted us to schedule maintenance for several AC units, but they had an urgent concern with one system in particular. They suspected it was Unit #12 and reported that the drain pan was filling with water and the AC would not turn on. Because this is a call center environment in Tampa, FL 33634, they needed the system back up and running quickly to keep the workspace comfortable and avoid disrupting their staff.

They also asked a very practical question: was there a way to remove the water from the drain pan without creating a lot of noise? In an office full of people on the phones, loud equipment can be a real issue. We explained that we typically use a vacuum method to clear water and debris from the drain line and pan, and that it can sound similar to a household vacuum cleaner. While it does create some noise, it’s the most effective and safe way to fully clear the blockage and restore proper drainage.

From previous records, we knew that multiple units at this property had received maintenance not long ago and were operating within normal parameters at that time. However, even with regular maintenance, Florida’s humidity and constant cooling demand can lead to unexpected issues—especially with condensate drainage.

Inspection and Diagnosis

When our technician arrived, the first step was to verify which system was having the issue and confirm the customer’s description. Once we were shown the affected unit, we began a systematic inspection focused on three main areas:

  • Drain pan condition: We checked for standing water and signs of overflow or staining.
  • Condensate drain line: We looked for blockages, buildup, or slow drainage.
  • Safety controls: We checked whether there was a float switch installed and how the system was set up to respond to a drainage issue.

Our technician confirmed that:

  • The AC system had shut down because the drain line was clogged.
  • The drain pan was filling with water and at risk of overflowing if the system continued to run.
  • The unit did not have a primary float switch in place to automatically shut the system off before overflow occurred.

This explained exactly what the customer was seeing: the unit was not cooling because the safety-related shutdown had occurred due to the clogged drain line and high water level in the pan.

Because we see a lot of similar issues across Tampa Bay, this diagnosis lines up with what we frequently explain in our other AC and drain-related guides, such as our overview of drain cleaning services and options and our resources on AC maintenance and cleaning specials in Tampa Bay.

Repair or Service Process

Once we confirmed the clogged drain line was the cause of the shutdown, we discussed the needed steps with the client. For this visit in Tampa, FL 33634, the immediate priority was to restore proper drainage and get the unit safely back in service.

1. Communicating the Findings

We started by clearly explaining what we had found:

  • The drain line was clogged.
  • The drain pan was filling with water.
  • The lack of a primary float switch increased the risk of future water overflow if another clog occurred.

We also reviewed their noise concerns and explained how the vacuum method works, so they knew what to expect during the clearing process. Clear communication is a core part of how we work at Home Therapist—we want our Tampa Bay customers to understand what’s happening and why, before we do anything.

2. Performing a Drain Line Flush

With approval, we performed a thorough drain line flush. This process is designed to remove the blockage and clear out built-up debris inside the line. When the line is clogged, condensate water has nowhere to go and backs up into the drain pan.

By flushing the line, we restore:

  • Proper water flow away from the air handler
  • Normal drain pan levels (no standing water)
  • The system’s ability to run without triggering a water-related shutdown

After the drain line was cleared, we confirmed that water was draining properly and that the pan was no longer filling. We also verified that the system was able to operate again after the blockage was removed.

3. Recommending a Primary Float Switch

Once the immediate problem was resolved, we discussed an important safety upgrade: installing a primary float switch. The unit currently did not have one, meaning that if the drain line ever clogs again, the pan can fill up with water before any automatic protection kicks in.

A primary float switch:

  • Monitors the water level in the drain pan.
  • Shuts the system off when it detects water at a unsafe level.
  • Helps prevent water from overflowing into ceilings, walls, or equipment areas.

In a call center or any commercial space in Tampa, FL 33634, avoiding water damage and surprise downtime is a big deal. We recommended installing the float switch so future clogs would trigger a controlled shutdown before water spills where it shouldn’t.

4. Talking About Future Maintenance

We also reviewed the importance of ongoing maintenance based on their previous service history. Regular checks help catch slow drainage or early signs of buildup before it becomes a complete blockage. For clients with multiple units, this can make a big difference in preventing comfort issues across the building.

If you’re interested in how we handle similar multi-unit or rooftop setups, we’ve shared more details in our rooftop HVAC system cleaning and maintenance project in Tampa, FL 33634 and our broader AC repairs, installs, and maintenance services overview.

Why This Fix Works

This type of AC problem is all about drainage and safety controls. Here’s what’s going on behind the scenes and why our approach works for homes and businesses in Tampa, FL 33634.

Condensate Drainage in Humid Florida

In Florida’s humidity, air conditioners pull a lot of moisture out of the air. That moisture collects on the indoor coil and drips into the drain pan, then flows out through the condensate drain line. Over time, that line can accumulate:

  • Algae and bio-growth
  • Dirt and dust washed off the coil
  • Other debris from the surrounding space

Once enough buildup collects, the line clogs, water backs up into the pan, and the system can shut down or overflow.

How Flushing the Drain Line Helps

Flushing the drain line physically removes the blockage and clears out that buildup so water can flow freely again. When drainage is restored:

  • The pan doesn’t fill up with standing water.
  • The system can run as intended.
  • There’s less chance of water leaks or microbial growth in the pan.

After a proper flush, we always check for normal drainage and confirm that the system is operating as expected.

The Role of a Primary Float Switch

A primary float switch is a simple but powerful layer of protection. It works like a safety valve for your drain pan. If the water level rises higher than it should, the float switch senses it and shuts the system off before water spills over.

In practical terms, that means:

  • Less risk of ceiling damage around indoor air handlers.
  • Less risk of water dripping onto office equipment or furnishings.
  • A clear signal that something’s wrong with drainage, so it can be addressed promptly.

For a busy call center or a homeowner in Tampa, a combination of regular maintenance, clear drain lines, and a properly installed float switch is one of the most effective ways to avoid surprise water damage from the AC system.

Pro Tips for Homeowners and Businesses in Tampa

Whether you’re managing a commercial space or a single-family home in Tampa, FL 33634, there are a few simple practices that can help keep your AC drainage system in good shape.

  • Schedule regular AC maintenance: In our climate, once-a-year service is a minimum. For heavier-use systems or buildings with many units, more frequent checks can be helpful. Routine visits give us a chance to spot slow drainage or early clogs.
  • Ask about your drain line setup: During your next maintenance visit, ask your technician to show you where the condensate line is and how it drains. Understanding your system makes it easier to recognize when something looks off.
  • Consider float switch protection: If your system doesn’t have a primary or secondary float switch, ask about adding one. It’s a relatively small upgrade that can prevent expensive water damage and downtime.
  • Watch for signs of drainage issues: Water stains near indoor units, musty smells around air handlers, or unexplained AC shutdowns can all point to drainage problems. Addressing them early can save a lot of hassle.
  • Keep return and supply areas clear: While airflow and drainage are separate systems, good airflow helps your AC run efficiently and condense moisture as expected. Avoid blocking returns and supply vents with furniture or storage.
  • Document service history: For properties with multiple units, keep simple records of which units were serviced and when. This helps prioritize inspections and spot patterns, especially in large buildings across Tampa Bay.

For more detail on how we handle cleaning and maintenance on other properties in the area, take a look at our air conditioner maintenance and cleaning project in Tampa, FL 33647. While every building is different, the core principles of good drainage and regular care are the same.

FAQ: AC Drain Line and Float Switch Issues

Why did my AC stop working when the drain pan filled with water?

Most modern systems have safety controls that either shut the system off or are designed to be wired with a float switch when water levels get too high. In this Tampa, FL 33634 project, the clogged drain line caused the pan to fill with water, which led to the system shutting down to avoid further problems. Clearing the drain restored normal operation.

Do I really need a float switch if my drain line is clear now?

Even after a proper drain line flush, future clogs can still occur—especially in Florida’s humid climate. A primary float switch is an extra layer of protection that shuts the system off before water overflows. It doesn’t replace maintenance, but it does help reduce the risk of water damage and unexpected downtime.

Is the drain line flush noisy? Will it disturb my office or home?

The vacuum method we use to clear drain lines can sound similar to a regular vacuum cleaner. It is noticeable, but it’s usually short-lived and is the most effective way to remove blockages and standing water. In this call center in Tampa, FL 33634, we explained what to expect so they could plan around the brief noise.

How often should my AC drain line be checked?

We recommend at least an annual inspection as part of routine AC maintenance. For buildings with many units or systems that run heavily throughout the year, more frequent checks may be appropriate. Regular inspections help catch slow drainage and buildup before it turns into a complete clog.

What should I do if I see water around my indoor AC unit?

If you notice water around an air handler or in the area where your AC is located, it’s best to shut the system off and call a licensed HVAC professional. Water can travel in hidden paths, and continuing to run the system can make the problem worse. A technician can determine whether it’s a clogged drain, a pan issue, or something else.

Can multiple units in the same building share the same problem?

Yes, especially in larger properties around Tampa Bay where several units are installed in similar conditions. If one system has a clogged drain or maintenance issue, it’s a good time to review the condition of the others as well. Keeping all units on a consistent maintenance plan helps avoid surprise breakdowns in different parts of the building.

Why Choose Home Therapist for AC Service in Tampa Bay

When you call Home Therapist Cooling, Heating, and Plumbing for HVAC service in Tampa, FL 33634, you’re getting more than a quick fix. Our focus is on long-term reliability, clear communication, and respect for your space—whether it’s a call center, office, or home.

Here’s what sets our team apart:

  • Licensed, professional technicians: Our techs are trained and licensed to work on a wide range of HVAC systems, from single-family homes to multi-unit commercial properties. We approach each job with a careful eye for safety and code compliance.
  • Transparent communication: We explain what we find, what we recommend, and why. In this Tampa project, we walked the client through the clogged drain line issue, the absence of a primary float switch, and the steps needed to fix and protect the system.
  • Clean and respectful work: We understand that your business or home needs to keep running while we work. That’s why we protect work areas, minimize disruption as much as possible, and clean up before we leave.
  • Focus on long-term reliability: We don’t just clear the immediate clog and walk away. Our recommendations—like adding a primary float switch and staying on top of maintenance—are aimed at preventing repeat problems.
  • Commitment to Tampa Bay homeowners and businesses: We live and work in this area, so we understand the specific demands that our heat, humidity, and year-round cooling needs place on AC systems. Our advice and service are tailored to local conditions.

If you’d like to dig deeper into how we structure our AC repair and maintenance options, our AC repairs, installs, and maintenance options guide is a great next read.

Need AC Drain or Float Switch Help in Tampa, FL 33634?

If you’re dealing with a full drain pan, water around your air handler, or an AC that won’t turn on, we’re here to help. Our Home Therapist technicians can inspect your system, clear clogged drain lines, and recommend safety upgrades like float switches to protect your property.

Whether you’re a homeowner or managing a busy workspace in Tampa, FL 33634, we’ll walk you through what we find, keep the work area as quiet and clean as possible, and verify proper operation before we leave. When you’re ready, reach out to schedule AC service and let our team get your comfort—and your peace of mind—back on track.

AC Maintenance Service in Tampa, FL 33634

When your home depends on multiple air conditioning systems to stay comfortable in the Tampa, FL 33634 heat, regular maintenance isn’t a luxury—it’s protection against breakdowns on the hottest days of the year. On this Pro Care Maintenance Plan visit, we helped a homeowner in Tampa, FL 33634 keep several AC units running smoothly, addressed concerns about a drain pan filling with water, and made sure all filters were replaced and systems were operating within normal parameters.

Case Recap

  • Location: Single-family home in Tampa, FL 33634
  • Service type: Pro Care Maintenance Plan, visit #7 for multiple AC units
  • Main concern: One AC had previously shut down because the drain pan filled with water
  • What we did: Completed full maintenance, verified proper operation, and replaced several air filters
  • Outcome: All inspected systems were operating within normal parameters with clean filters and proper drainage

Customer Problem

When the homeowner called our team, they wanted to schedule routine maintenance for several AC units covered under their Pro Care Maintenance Plan. At the same time, they shared a specific concern about one of the units.

They explained that a particular AC system had recently stopped turning on. The issue wasn’t with the thermostat or the power—this unit had a drain pan that was filling up with water. As the pan filled, the system's safety controls prevented the unit from running to avoid water damage and overflow. This is a common problem we see in humid areas like Tampa, especially when drain lines begin to clog.

Before this scheduled visit, our team had already checked that specific machine earlier in the week. For this Pro Care visit (#7), the homeowner wanted us to:

  • Perform routine maintenance on all covered units
  • Verify that the unit with the drain pan issue was now draining properly
  • Replace multiple filters of various sizes that were set aside for this visit

In a multi-system home like this one in Tampa, FL 33634, it’s especially important that every unit is clean, draining correctly, and able to share the cooling load. If one unit is down, the others have to work harder, which can shorten their lifespan.

Inspection and Diagnosis

On arrival, our technician walked through the homeowner’s concerns again in person, then began a full maintenance inspection across the units included in the Pro Care Maintenance Plan.

Here’s how we approached the visit:

  • Visual inspection of indoor and outdoor units: We started by looking for any obvious issues—water around air handlers, rust on drain pans, signs of biological growth, or panels that had been disturbed.
  • Focus on the previously affected unit: Since one AC had recently shut down due to a full drain pan, we paid close attention to that system’s drain pan and drain line path to confirm that the earlier visit’s work was still holding up.
  • Filter configuration check: With multiple filter sizes set aside (24x24x1, 18x30x1, 21x21x1, and 20x20x1), we verified which filters belonged to which returns so that each system would get the correct size and fit.
  • Operational check: We ran the systems through normal cooling cycles to confirm that they started correctly, ran quietly, and shut off as expected.

By the end of our inspection, we confirmed what was documented in the work summary: the systems we serviced were operating within normal parameters. The previously affected unit that had suffered from a full drain pan was now draining properly and able to run without triggering the safety shutoff.

For Tampa, FL 33634 homeowners, this kind of check is especially important because heavy humidity and near-constant AC use make drainage issues and dirty filters very common.

Repair and Service Process

This visit was part of an ongoing Pro Care Maintenance Plan, so the focus was on preventive work, cleaning, and verification rather than major repair. Here’s how we handled the service step by step.

1. Confirming the Previous Drain Pan Issue Was Resolved

The homeowner had already scheduled a separate visit earlier in the week for the unit whose drain pan was filling with water. During this Pro Care visit, we:

  • Visually inspected the drain pan for standing water
  • Checked that the water was flowing freely through the drain line
  • Verified that any safety float switches were not being triggered by residual water
  • Ran the unit in cooling mode long enough to ensure condensate flowed and drained correctly

This follow-up verification matters because even after a drain line is cleared, any remaining debris or buildup can cause a repeat problem. We confirmed that the unit was now running normally and that the earlier corrective work was still effective.

For homeowners dealing with similar drain issues, our dedicated drain line cleaning and flushing services are designed to handle stubborn clogs and help prevent repeat water backups.

2. Replacing Multiple Air Filters

The homeowner had several filter sizes ready for us at the office and on-site, including:

  • 24x24x1
  • 18x30x1
  • 21x21x1
  • 20x20x1

During this Pro Care Maintenance visit in Tampa, FL 33634, we carefully matched each filter size to the correct return grille or equipment location. Proper filter sizing is crucial—filters that are too small can let unfiltered air bypass the media, and filters that are too large can be jammed or bent, restricting airflow.

We removed the old filters, inspected the return areas for dust buildup, and installed the new filters securely with the airflow arrows pointing in the right direction. Clean filters reduce strain on the blower motor, help maintain even temperatures, and improve indoor air quality.

3. Checking System Operation Under Normal Load

With filters replaced and our visual inspection complete, we cycled each serviced system through normal operation:

  • Set thermostats to cooling and verified that the systems responded
  • Listened for unusual noises from indoor and outdoor units
  • Verified that cool air was delivered consistently from supply vents
  • Confirmed that condensate was draining without leakage or backup

We do not guess at performance—each system is run long enough for us to observe normal operation patterns. On this visit, all serviced units passed their checks, and we left them operating within normal parameters.

4. Communicating Results With the Homeowner

Before leaving, we reviewed our findings and actions with the homeowner. We explained:

  • That the systems we inspected were functioning as expected
  • That the previously problematic drain pan was no longer backing up
  • Which filters had been changed and where
  • What to watch for between visits, such as water near air handlers or unusually warm rooms

Clear communication is a key part of our Pro Care Maintenance Plan. We want homeowners in Tampa, FL 33634 to understand what's happening with their AC systems, not just that a technician was there.

If you're curious about how we handle scheduling and expectations for these types of visits, our guide on whether you need to be home for AC repairs, installs, or maintenance appointments walks through the process step by step.

Why This Fix and Maintenance Approach Works

The results of this visit came down to two main principles: proper drainage and unrestricted airflow.

Drainage: Keeping Water Where It Belongs

In our Tampa climate, AC systems pull a lot of moisture out of the air. That moisture condenses on the evaporator coil, drips into the drain pan, and flows out through a drain line. If that line gets partially or fully blocked, the water has nowhere to go and starts filling the pan.

Most modern systems include a safety float switch that shuts the unit off when the pan fills too high, preventing water from overflowing into ceilings, closets, or mechanical rooms. It’s a good safety feature, but it leaves the homeowner without cooling until the problem is resolved.

By confirming that this homeowner’s previously affected unit was now draining correctly, we ensured that:

  • Moisture from the air has a clear path out of the system
  • The drain pan won't easily fill and trigger a shutdown
  • The risk of water damage near the air handler is reduced

Airflow: Helping the System Breathe

Filters are the first line of defense against dust, debris, and airborne particles entering the system. When filters are dirty or poorly fitted, several problems can show up:

  • Reduced airflow, which can cause the evaporator coil to get too cold
  • Uneven temperatures, with some rooms feeling warmer than others
  • Higher energy use because the system has to work harder

By replacing all of the filters with correctly sized, clean ones, we helped restore free airflow. That supports lower energy bills, more stable temperatures, and less stress on components.

Preventive maintenance visits like this one in Tampa, FL 33634 combine these checks—drainage, airflow, and safe operation—so that small issues don’t grow into emergency breakdowns.

For a deeper look at how we handle AC system care, our overview of AC repairs, installs, and maintenance services explains what homeowners can expect when they call our team.

Pro Tips for Homeowners in Tampa

If you live in Tampa, FL 33634 or anywhere in Tampa Bay, here are a few practical steps you can take to help your AC systems run reliably between professional maintenance visits:

  • Check your filters monthly in peak season. With long run times and high humidity, filters can load up quickly. Even if the manufacturer says 60–90 days, take a quick look every 30 days during summer and replace when they look dirty.
  • Keep an eye on your drain areas. If your air handler is in a closet, attic, or garage, glance at the area occasionally. Water around the unit, rust streaks, or a musty smell can be early signs of a drainage issue.
  • Don’t ignore short cycling or hard starts. If your system is turning on and off rapidly or seems to struggle when starting, it's worth having it checked before it fails on a hot afternoon.
  • Protect outdoor units from debris. Keep plants, mulch, and stored items at least a couple of feet away from the outdoor condenser. Good airflow around the unit helps it reject heat efficiently.
  • Stick with a maintenance plan. In Florida’s climate, annual or semi-annual AC maintenance isn’t optional if you want long equipment life. Programs like our Pro Care Maintenance Plan make it easier to stay on schedule.
  • Ask questions during visits. When your technician is on-site, use that time. Ask about filter types, thermostat settings, or hot and cold spots. We’re there to help you understand your system, not just to work on it.

FAQ: AC Maintenance and Drain Issues

Why did my AC shut off when the drain pan filled with water?

Many systems have a safety float switch that shuts the unit down if the drain pan fills up. This prevents water from overflowing into ceilings, closets, or living spaces. In this Tampa, FL 33634 home, the system had shut down for that reason earlier in the week, and our team verified during this maintenance visit that the pan was now draining and the system could run normally.

How often should I replace my AC filters if I live in Tampa?

In our hot, humid climate, filters often need to be replaced more frequently than the packaging suggests, especially if the system runs a lot. Many Tampa homeowners do well checking filters monthly during the cooling season and replacing them whenever they look dirty. During this visit, we replaced multiple filters of different sizes to keep airflow healthy across all systems.

Is a maintenance plan really necessary if my AC seems to be working fine?

Even when everything "seems" fine, small issues like partially clogged drain lines, slowly dirtying filters, or loose electrical connections can wear on equipment. A Pro Care Maintenance Plan visit like the one we completed in Tampa, FL 33634 helps catch issues before they cause breakdowns, especially in homes with multiple systems.

What should I do if I see water near my air handler?

If you notice water on the floor or in the drain pan near your air handler, turn the system off and call for service. It may be a clogged drain line, a damaged pan, or another issue that needs attention before it causes damage. Our team can evaluate the situation and, when needed, provide professional drain line cleaning and related services.

Can I clean my AC drain line myself?

Some homeowners pour a small amount of approved cleaning solution into the drain line access as a light preventive step, but if you are seeing ongoing water backup, repeated float switch trips, or signs of mold, it’s better to have a professional address it. On Pro Care visits, we check drainage as part of the system evaluation and recommend further cleaning if needed.

Why Tampa Homeowners Choose Home Therapist

For homeowners in Tampa, FL 33634 and across Tampa Bay, choosing an HVAC company isn’t just about fixing one problem—it’s about finding a team you can trust in your home year after year.

Here’s what we focus on at Home Therapist Cooling, Heating, and Plumbing:

  • Licensed, professional technicians: Our techs are trained, experienced, and equipped to work safely on your HVAC and plumbing systems, whether it’s a full repair or a Pro Care Maintenance visit.
  • Transparent communication: We walk you through what we found, what we did, and what we recommend next. No rushed explanations, no hidden surprises.
  • Clean, respectful work: We treat your home as if it were our own—wearing appropriate protection where needed, cleaning up our work area, and being mindful of your schedule and privacy.
  • Long-term reliability: Our goal is to keep your systems running safely and efficiently, not just to clear one alarm or reset one switch. Maintenance visits like this one in Tampa, FL 33634 are part of that long-term approach.
  • Commitment to Tampa Bay homeowners: We live and work in this community, so we understand what Florida heat and humidity do to AC systems and plumbing, and we design our services around those realities.

If you’d like to see more of what we do, you can connect with us on social platforms and directories where our work and reputation are visible to the public:

  • Browse our project highlights and ideas on Pinterest.
  • See discussions and contributions from our team on Reddit.

For independent reassurance about our standing in the Tampa Bay area, you can also check out our profiles on trusted organizations and directories:

These resources give Tampa homeowners added confidence that they’re working with a licensed, reputable local company.

Need AC Maintenance in Tampa, FL 33634?

If you're in Tampa, FL 33634 and your AC is due for a checkup—or you’ve noticed signs like water near your air handler, musty odors, or filters that haven’t been changed in a while—our team is ready to help.

Whether you have one system or several, we can set up a maintenance plan that fits your home, confirm your equipment is operating within normal parameters, and help prevent surprise breakdowns in the middle of a Florida heatwave. If you’re also looking at future upgrades, our resources on air conditioner installation quotes in Tampa can help you understand what to expect when it’s time to replace a system.

Reach out to schedule your AC maintenance or to learn more about our Pro Care Maintenance Plan. We’ll take the time to listen, explain your options clearly, and keep your home comfortable and safe—season after season—here in Tampa, FL 33634.

Reversing Valve Solenoid Replacement in Tampa, FL 33612

When your heat pump stops switching reliably between heating and cooling, it can make your Tampa, FL 33612 home uncomfortable fast. One common culprit is a failing reversing valve solenoid. On this visit, our Home Therapist technician Alejandro helped a homeowner in Tampa get their system back to normal by replacing a worn solenoid and applying a member plan discount they were eligible for.

Below, we will walk through what the homeowner was experiencing, how we diagnosed the issue with the reversing valve solenoid, the steps we took to repair it, and what this kind of service means for long-term comfort in a Florida home.

Case Recap

  • Location: Single-family home in Tampa, FL 33612
  • Primary service: Reversing valve solenoid replacement on a heat pump system
  • Symptoms: System not switching modes properly, inconsistent comfort in the home
  • Diagnosis: Faulty solenoid on the reversing valve preventing reliable changeover
  • Solution: Removed the failed solenoid, installed a new one, and verified operation in both heating and cooling
  • Bonus: Applied a member plan discount to lower the out-of-pocket repair cost

Customer Problem: Unreliable Heating and Cooling in a Tampa Home

In a Florida climate like ours, many homes in Tampa, FL 33612 rely on heat pumps for both cooling in the summer and heating on those chilly mornings. A heat pump needs to switch smoothly between modes to keep the house comfortable year-round. When that mode change stops working correctly, you feel it quickly.

This homeowner noticed that:

  • The system did not always respond when switching from cooling to heating or back again at the thermostat.
  • Airflow felt normal, but the temperature coming from the vents did not match the selected mode.
  • Comfort around the home was inconsistent from room to room.

Because the system would sometimes work and sometimes not, it was especially frustrating. That kind of intermittent issue is very common with control components like solenoids and contactors. The homeowner reached out to our team at Home Therapist Cooling, Heating, and Plumbing to get a professional diagnosis and a reliable repair, not just a temporary workaround.

Inspection and Diagnosis: Zeroing In on the Reversing Valve Solenoid

When Alejandro arrived at the Tampa, FL 33612 home, the first step was to listen carefully to the homeowner’s description of the problem and review the recent system behavior. From there, he began a systematic inspection.

Our diagnostic approach on a case like this typically includes:

  • Confirming the thermostat is calling for the correct mode.
  • Checking that the outdoor unit is running when expected.
  • Listening for the normal sounds of the system shifting between heating and cooling.
  • Inspecting the reversing valve and its solenoid, which controls the direction of refrigerant flow.

The reversing valve is the component that allows a heat pump to move heat either into your home (heating) or out of it (cooling). The solenoid mounted on that valve is the electrical part that tells the valve when to change position.

In this Tampa system, Alejandro confirmed that:

  • The thermostat and general system controls were responding.
  • Airflow was present, but the system was not consistently switching modes.
  • The solenoid at the reversing valve was not reliably activating as it should.

Based on the symptoms and the visual and functional checks, the diagnosis was a failed or failing reversing valve solenoid. The homeowner approved replacement so we could restore dependable operation.

Repair Process: Replacing the Reversing Valve Solenoid

Once we identified the solenoid as the problem, the focus shifted to a clean, careful repair. Whenever we work on a heat pump in Tampa, FL 33612, we treat the equipment and the home with respect and follow a step-by-step process to avoid introducing new issues.

Here is how Alejandro handled this solenoid replacement:

1. Safely powering down and preparing the work area

Before touching any electrical components, we shut off power to the unit at the appropriate disconnect and verify that the system is de-energized. This protects both the equipment and our technician, and it also prevents accidental short circuits that could damage the control board or compressor.

2. Accessing the reversing valve assembly

The reversing valve and solenoid are located in the outdoor unit. Alejandro removed the necessary panels to reach the valve area, taking care not to disturb refrigerant lines or other sensitive components. We keep the work area organized so that screws, panels, and tools are all accounted for when we finish.

3. Removing the old solenoid

With access established, the existing solenoid was carefully disconnected. This typically involves:

  • Disconnecting the electrical leads to the solenoid.
  • Removing any retaining hardware or clips.
  • Sliding or lifting the solenoid off the valve body without stressing the tubing.

Care during removal helps avoid damage to the valve itself, which is a much more involved repair than replacing the solenoid.

4. Installing the new solenoid

The new solenoid was then installed in the correct orientation and seated firmly on the reversing valve. Electrical connections were reattached securely and checked for proper fit. A solid, clean connection ensures that the control signal from the system can reliably energize the solenoid whenever the thermostat calls for a mode change.

5. Restoring power and testing both heating and cooling modes

After reassembling the panels and confirming that everything was properly secured, Alejandro restored power to the unit and began functional testing. We do not just flip it on and leave:

  • We command the system into cooling mode and confirm that the reversing valve responds.
  • We then switch to heating mode and verify the same response in the opposite direction.
  • We check that airflow and general operation sound normal and that the home begins moving toward the desired temperature.

Only after confirming that the system was switching modes reliably again did we consider the repair complete. We explained the work performed to the homeowner and answered their questions before wrapping up.

6. Applying the member plan discount

This homeowner was part of our member plan, which provides discounts on qualifying repairs. The reversing valve solenoid replacement fell under that benefit, so we applied the member plan discount to reduce their final cost. We also reviewed what their membership includes and how it can help them stay ahead of future issues with regular maintenance.

Why This Fix Works: How the Reversing Valve Solenoid Affects Comfort

For many homeowners in Tampa, the reversing valve and its solenoid are “out of sight, out of mind”—until something goes wrong. Understanding the basic idea can make it clearer why this repair solved the problem.

A heat pump moves heat using refrigerant. The reversing valve is the traffic director: it decides which way that refrigerant flows. In cooling mode, it moves heat from inside your home to the outdoors. In heating mode, it does the opposite, bringing heat from outside into your home. The solenoid is the small but critical electrical component that tells the valve when to change directions.

When the solenoid fails or becomes unreliable:

  • The valve may stick in one position.
  • The system might not respond when you switch between heating and cooling.
  • You can experience lukewarm air or comfort that does not match your thermostat setting.

By replacing the faulty solenoid, we restored the control signal that allows the reversing valve to shift properly. In practical terms, that means the homeowner in Tampa, FL 33612 now has:

  • Reliable mode changes from heat to cool and back again.
  • Improved comfort throughout the living space.
  • Less strain on the system because it is operating as designed.

Pro Tips for Homeowners in Tampa

Heat pumps work hard in our Tampa climate. Here are some simple, practical tips to help avoid issues like this and keep your system running smoothly:

  • Change filters regularly. Dirty filters can strain your system and make any existing issue, including valve problems, show up faster. If you are unsure about the right type or schedule, our air filter installation and replacement services can help.
  • Keep the outdoor unit clear. Make sure plants, mulch, and debris are kept away from your outdoor unit. Good airflow around the unit supports proper refrigerant flow and helps the reversing valve work as intended.
  • Listen for changes. If your heat pump in Tampa, FL 33612 starts sounding different—louder, rattling, or short cycling—schedule a checkup before it becomes a bigger repair.
  • Don’t ignore comfort swings. If the system is not responding when you change from cooling to heating or vice versa, that is a sign something in the control chain, like the reversing valve solenoid, may need attention.
  • Consider routine maintenance. Regular tune-ups give us a chance to spot worn parts early. During a maintenance visit, we can also recommend services like air duct cleaning in Tampa or ductless mini-split options if they make sense for your home.
  • Use your membership. If you are part of our member plan, don’t hesitate to use your benefits. Discounts on repairs and regular checks can save you money and help prevent surprise breakdowns.

FAQ: Reversing Valve Solenoid Service in Tampa, FL 33612

What are the signs that my reversing valve solenoid might be failing?

Common signs include the system not switching reliably between heating and cooling, lukewarm air even though the thermostat is set correctly, or intermittent periods where the unit seems to run but the home does not reach the desired temperature. If you notice this in your Tampa, FL 33612 home, it is a good idea to have a technician inspect the system.

Is replacing the solenoid enough, or will I need a whole new reversing valve?

In many cases, the solenoid is the only part that needs replacement. The valve body itself can often remain in service if it is not damaged or leaking. During our inspection, we look at the full assembly and recommend only what is necessary. If just the solenoid is the problem, we replace that and leave the rest of the valve undisturbed.

Will this repair improve energy efficiency?

A properly working reversing valve and solenoid help your heat pump operate the way it was designed. That means fewer wasted run cycles and less time operating in the wrong mode. While the main benefit is comfort and reliability, this kind of repair can also help prevent unnecessary strain that could otherwise raise energy use over time.

How long does a reversing valve solenoid replacement usually take?

Most solenoid replacements can be completed in a single visit, typically within a few hours or less, depending on access and the specific equipment. We schedule enough time so that we can diagnose, replace the part if approved, and thoroughly test the system before we leave your Tampa home.

What does the member plan discount cover on this type of repair?

Our member plans are designed to lower the cost of qualifying repairs and provide ongoing maintenance benefits. For a service like a reversing valve solenoid replacement, an eligible member may receive a discounted repair rate, along with priority scheduling and other benefits. We always review your membership details before finalizing the invoice so you get the savings you are entitled to.

Can regular maintenance help prevent solenoid and valve issues?

Routine maintenance cannot guarantee that a part will never fail, but it does give us the chance to catch early signs of wear or inconsistent operation. During maintenance for homeowners in Tampa, FL 33612, we check system performance, listen for abnormal sounds, and look for control or electrical issues that could indicate a solenoid or similar component is starting to act up.

Why Choose Home Therapist for Heat Pump Repairs in Tampa

When something as important as your heat pump is acting up, you want a team you can trust in your Tampa, FL 33612 home. At Home Therapist Cooling, Heating, and Plumbing, we approach every visit as if we were working in our own homes.

Here is what you can expect from us:

  • Licensed, professional technicians. Our team is trained and licensed to work on modern HVAC systems and heat pumps, including components like reversing valves, control boards, and more.
  • Transparent communication. We explain what we find in clear, plain language and review options before moving forward. You will always know what we are doing and why.
  • Clean, respectful work. From your yard to your indoor spaces, we take care to protect your property, pick up after ourselves, and treat your home with respect.
  • Long-term reliability focus. We are not interested in quick, patchwork fixes. Our goal is to restore dependable comfort and help your system last as long as reasonably possible.
  • Commitment to Tampa Bay homeowners. We live and work in the same area we serve, and we understand the unique demands that Florida’s heat and humidity place on HVAC systems.

If you would like to learn more about who we are and the services we provide beyond heat pump repairs, you can explore our main site at Home Therapist Cooling, Heating, and Plumbing. We also share updates, tips, and project highlights on social media:

  • Connect with us on Facebook
  • See behind-the-scenes and comfort tips on Instagram
  • Watch short educational clips on TikTok

For added peace of mind, you can also see what others in the community say about us and how we show up as a trusted local contractor:

Need Help With Your Heat Pump in Tampa, FL 33612?

If your heat pump is not switching properly between heating and cooling, or you suspect an issue with your reversing valve or solenoid, our team is here to help. We have extensive experience with heat pump diagnostics and repairs for homeowners throughout Tampa, FL 33612 and the greater Tampa Bay area.

Whether you need a focused repair like a reversing valve solenoid replacement, routine maintenance, or want to explore options such as a new system or even a full air conditioner installation and repair solution, we will walk you through your choices clearly and calmly.

Contact Home Therapist Cooling, Heating, and Plumbing today to schedule service in Tampa, FL 33612. Our job is to make your home feel comfortable, safe, and well cared for—season after season.

AC Maintenance Visit on Elite Therapy Plan in Tampa, FL 33615

For a homeowner in Tampa, FL 33615, staying comfortable in our hot, humid climate depends on regular AC maintenance. On this visit, we came out for an Elite Therapy Plan service to check the cooling system, replace filters, and keep everything running smoothly. While the system itself was operating fine, we did run into a challenge: the air handler was partially blocked by a newly installed panel, which limited how thoroughly we could diagnose and service it. We also noted that this home is on one of our older plans and that duct sanitation would be a smart next step.

Case Recap

If you just want the quick version of this AC maintenance visit in Tampa, FL 33615, here’s what we found and did:

  • Performed Elite Therapy Plan maintenance on the home’s AC system.
  • Confirmed the system was running and cooling properly at the time of service.
  • Found the air handler access blocked by a panel the homeowner had installed.
  • Were only able to reach the unit through a small opening, limiting full diagnostics.
  • Verified filter needs (six 20x20x1 filters) and noted they are kept at our office.
  • Recommended duct sanitation as part of improving air quality and system cleanliness.

Customer Problem

This visit was part of an ongoing Elite Therapy Plan for the home’s AC system in Tampa, FL 33615. The homeowner wasn’t calling about a breakdown or major issue that day. Instead, the main goal was to stay ahead of problems with routine maintenance — especially important in Tampa Bay, where AC systems work almost year-round.

Over time, the homeowner had done some work around the air handler area, including installing a panel and removing the original air handler door. While this might have made sense from a space or aesthetic standpoint, it made it much harder for us to access the equipment. When we arrived, we found that the only way to reach the air handler was through a small opening underneath the unit.

From the customer’s perspective, the AC was cooling and there were no obvious comfort complaints. But part of the value of the Elite Therapy Plan is catching small issues before they become expensive repairs. That means our technicians need safe, clear access to the air handler, duct connections, and electrical components – not just a tiny opening.

In addition, this particular plan is one of our older Elite Therapy Plan versions. The system also has a history of needing cleaner ductwork, so duct sanitation was already on our radar as a beneficial service for this home in Tampa, FL 33615.

Inspection and Diagnosis

Even with the access challenges, we still followed our normal maintenance process as thoroughly as the conditions allowed. Here’s how we approached the visit:

1. System operation check
We started by running the AC system and verifying that it was cycling on and off and providing cooling to the home. This step helps confirm that, at a basic level, the equipment is functioning.

2. Visual inspection of accessible components
From the small opening below the air handler, we inspected what we could safely reach. Normally, we would open the main air handler panel or door and visually check:

  • Coils and internal surfaces for dirt or buildup.
  • Drainage points to look for clogs or standing water.
  • Wiring and connections for obvious damage or looseness.

Because the main door had been removed and replaced with a homeowner-installed panel, we were not able to access all the areas we usually inspect on a Tampa maintenance visit.

3. Filter needs and air quality considerations
We confirmed the system requires six 20x20x1 filters, which are kept at our office for this customer as part of our routine service. Clean filters are a simple but critical part of keeping airflow healthy and efficient. During our review, we also looked at the duct system condition as much as the limited access allowed and reaffirmed that duct sanitation would be beneficial.

4. Safety and limitations
We never force panels open or work in a way that could damage the equipment or surrounding structure. In this case, because the air handler was enclosed and modified, we documented that we could not complete a full internal diagnosis of the unit. The AC in this Tampa, FL 33615 home was working at the time of service, but we want the homeowner to know exactly what we could and could not check.

Repair or Service Process

Since this was a scheduled Elite Therapy Plan visit rather than a repair call, our focus was on maintenance tasks and documenting conditions clearly for the homeowner.

Step 1: Run and evaluate the system
We turned the system on and gave it time to run, watching for any obvious irregularities. We listened for unusual noises, checked that air was moving through the vents, and made sure the system wasn’t short cycling. From what we could observe, the AC was operating normally during the visit.

Step 2: Service through existing access
Using the small access point under the air handler, we performed what service we could reach safely. This included basic cleaning and visual checks of accessible components. While this is better than no maintenance at all, it’s not the same as having full panel access, and we were transparent about that with the homeowner.

Step 3: Confirm filter requirements
We verified that the system uses six 20x20x1 filters. Because we already stock these filters at our office for this plan, we can continue to provide them as part of ongoing maintenance. Clean filters help protect the air handler coils and blower from dust buildup, which is especially important in a high-use climate like Tampa Bay.

Step 4: Recommend duct sanitation
Based on the system’s age, plan history, and conditions, we recommended duct sanitation for this home in Tampa, FL 33615. Over time, dust and debris can settle inside ductwork, affecting both air quality and system efficiency. A professional duct sanitation service goes beyond routine filter changes to address buildup inside the duct system itself. For homeowners who want to learn more about this type of service, our air duct cleaning and sanitation page explains how we handle duct cleaning in the Tampa area.

Step 5: Document limitations and next steps
We documented that this property is on one of our older Elite Therapy Plans and that the air handler access is restricted. We explained to the homeowner that, while the system is currently running fine, we could not complete a full internal diagnosis due to the panel installation. For any future troubleshooting or deeper inspections, we would need improved access to the air handler.

Why This Fix (and Maintenance) Works

Even though we didn’t replace parts or perform a major repair on this visit, the maintenance we did still plays an important role in the long-term health of the system. AC systems in Tampa, FL 33615 work hard almost every day of the year. Regular checkups help catch issues early, before they turn into breakdowns during the hottest weeks of summer.

Here’s why the steps we took matter:

  • System operation checks help confirm that the major components are functioning as expected during the visit.
  • Filter verification ensures the correct size and quantity are on hand, so airflow stays strong and the blower and coil stay cleaner.
  • Duct sanitation recommendations address the cleanliness of the air path throughout the home, which can affect comfort and the amount of dust recirculating.
  • Clear documentation of access limits protects the homeowner and the equipment by making sure everyone understands what could and couldn’t be checked.

When access to the air handler is restored to a more standard configuration, we can perform a deeper internal inspection and cleaning. That combination – proper access, clean filters, and clean ducts – helps the AC run more reliably and efficiently in our Tampa Bay climate.

Pro Tips for Homeowners in Tampa

Whether you’re on an Elite Therapy Plan or just trying to take better care of your system, here are some practical tips for homeowners in Tampa, FL 33615:

1. Keep equipment accessible
If you add panels, shelving, or storage around your air handler or furnace, make sure a technician can still remove the main panel safely and see the entire unit. Limited access can prevent a full diagnosis and may hide early warning signs.

2. Protect your filters
Use the correct filter sizes and keep extras on hand if you change them yourself. If you’re on a plan where we supply and install filters, let us know if you make any changes to your return grille sizes so we can keep the right filters in stock for your home. Our air filter installation and service page explains how we help Tampa Bay homeowners choose and maintain proper filtration.

3. Consider duct cleaning or sanitation
With Florida’s humidity and continuous AC use, dust and particles can collect in ductwork over time. Scheduling duct sanitation can help improve the cleanliness of the air distribution system and support better airflow. You can learn more about how we handle these services on our air duct cleaning service page.

4. Don’t block supply and return vents
Furniture, boxes, or rugs over vents can choke airflow and make your system work harder. Walk through your home occasionally and make sure vents and returns are clear, especially in rooms that feel warmer or cooler than others.

5. Schedule maintenance before peak season
For Tampa homeowners, it’s a good idea to have your AC serviced before we hit the hottest part of the year. That way, any developing issues can be addressed before the system is under its heaviest load.

6. Add dryer vent care to your routine
While it’s not part of your AC system, a neglected dryer vent can create heat and airflow issues inside the home. We also offer dryer vent cleaning in Tampa, which can support both safety and comfort.

FAQ: AC Maintenance and Access Issues

What does an Elite Therapy Plan visit include?

An Elite Therapy Plan visit is a scheduled maintenance appointment where we inspect and service your HVAC system to the extent that it is safely accessible. We check system operation, review visible components, verify filter needs, and document any recommendations or limitations we encounter during the visit.

Why couldn’t you fully diagnose the air handler?

In this Tampa, FL 33615 home, the homeowner had installed a panel and removed the original air handler door. That modification left only a small opening underneath the unit. Because we could not safely access all internal components, we were limited to partial inspection and couldn’t perform a full diagnosis inside the air handler cabinet.

Is it safe to keep using my AC if access is limited?

If your system is running and cooling properly, it can continue to operate. However, limited access means we may not catch developing issues as early as we could with full access. We recommend restoring proper panel access so we can perform thorough maintenance and protect your equipment long-term.

Why do you recommend duct sanitation?

Over time, dust and debris can accumulate in ductwork, especially in busy, high-use systems like we see throughout Tampa Bay. Duct sanitation is recommended to clean the air path inside the ducts, support better air quality, and complement regular filter changes and equipment maintenance.

How often should filters be replaced?

Filter replacement frequency depends on the specific filter type, how often the system runs, and household factors such as pets or dust levels. During maintenance visits, we confirm filter sizes and condition and can recommend a schedule that fits your home’s needs. If we supply your filters through a plan, we make sure the correct filters are available for your system.

Can I change the area around my air handler?

You can make changes around your air handler, but it’s important to maintain safe, clear access to the equipment panels. If you plan to enclose or modify the area, let us know ahead of time so we can advise you on access requirements. Good access helps us fully inspect, clean, and service your system during future visits.

Why Choose Home Therapist

When you invite us into your home in Tampa, FL 33615, you’re trusting us with your comfort and your equipment. We take that seriously on every visit, whether it’s a quick Elite Therapy Plan maintenance or a more complex repair.

Licensed and professional technicians
Our technicians are licensed and trained to work safely on HVAC systems throughout Tampa Bay. We follow professional standards on every job, including situations like this one where access is limited and we must work carefully to avoid damage.

Transparent communication
We explain what we found, what we did, and where we were limited. If we can’t reach part of your system because of access issues, we tell you clearly, just as we did on this visit. That way, you can make informed decisions about any changes or additional work.

Clean and respectful work
We treat your home with respect, work neatly in tight spaces, and avoid forcing panels or structures that could cause damage. Our goal is always to leave your home as clean as we found it.

Focused on long-term reliability
Instead of just reacting when something breaks, we encourage regular maintenance, proper access, clean filters, and duct sanitation when appropriate. All of these support long-term system reliability for homeowners in Tampa, FL 33615 and across the Tampa Bay area.

Connected and trusted locally
If you’d like to get to know us better, you can follow our work and updates on social media and through local business organizations:

To learn more about our company and our approach, you can also visit our About Us page.

Need AC Maintenance in Tampa, FL 33615?

If you’re in Tampa, FL 33615 and your AC hasn’t had a checkup in a while, or if your equipment is hard to reach and you’re not sure how that affects maintenance, we can help. Our team at Home Therapist Cooling, Heating, and Plumbing will walk you through what needs to be done, explain any access concerns, and keep your comfort and safety at the center of every recommendation.

Whether you’re already on an Elite Therapy Plan or you’re thinking about getting regular maintenance set up for your home, reach out to schedule a visit. We’ll provide clear, honest feedback on your system and help you plan the right steps — from basic tune-ups to duct sanitation and beyond — so your AC is ready for Tampa Bay’s heat.

When you’re ready, contact Home Therapist to schedule your next maintenance visit in Tampa, FL 33615 and let our local team keep your home comfortable, clean, and cared for.

Blower Motor Replacement in Thonotosassa, FL 33592

When the blower motor in your air handler or furnace starts to fail, comfort in your home can change quickly. For a homeowner in Thonotosassa, FL 33592, that meant uneven cooling, poor airflow, and a system that simply wasn’t doing its job. Our Home Therapist technician, Jandiel, was called out to perform a blower motor replacement, handle the warranty processing fee required by the equipment supplier, and confirm that everything was running smoothly again.

In this case, the job involved labor-only replacement of the blower motor, with a possible new capacitor if needed, and a separate fee to process the manufacturer’s parts warranty. By the end of the visit, the system was operating as expected, and the homeowner had clear information on what we did, what was covered by warranty, and what to watch for going forward.

Case Recap

  • Location: Residential home in Thonotosassa, FL 33592
  • Service: Blower motor replacement (labor only) on an existing HVAC system
  • Additional work: Capacitor replacement if necessary for proper motor operation
  • Warranty handling fee: Required by the HVAC supplier to process parts warranty
  • Goal: Restore reliable airflow, improve comfort, and keep the system running smoothly

Customer Problem

When we’re called out for a blower motor issue in Thonotosassa, we usually hear a familiar list of concerns from the homeowner. Air is not moving well through the vents, some rooms feel warm and stuffy, or the system is running but it doesn’t feel like much is happening.

While the job record for this visit focused mainly on the work description rather than detailed symptoms, the type of service requested tells us a lot. A blower motor replacement is typically recommended when the indoor fan motor is no longer running properly, is making unusual noises, or has failed completely. Without a working blower motor, your air conditioner or heat pump can’t push conditioned air through the ductwork, so even if the outdoor unit is cooling, that comfort never reaches your living spaces.

The homeowner in Thonotosassa, FL 33592 scheduled us to:

  • Replace the failing blower motor (labor only)
  • Install a new capacitor if needed to support the new motor
  • Process a warranty handling fee required by the supplier for the covered parts

From a homeowner’s perspective, the biggest worries are usually cost, downtime, and whether the repair will last. Our job is to explain everything in plain language, handle the technical details, and leave the system running the way it should—without surprises.

Inspection and Diagnosis

Any time we’re involved in a blower motor replacement in a Tampa Bay area home, including Thonotosassa, we start by confirming the diagnosis and checking related components. Even when we’re scheduled for a specific repair, we don’t just swap parts and walk away. We want to be sure we’re solving the real problem.

On a blower motor call, a typical inspection includes:

  • Verifying that the blower motor is indeed failing or inoperative
  • Checking the condition of the blower wheel and housing for debris or damage
  • Inspecting the run capacitor that supports the motor (if used on that system)
  • Looking over electrical connections to the blower assembly and control board
  • Confirming that the air filter and return airflow aren’t excessively restricted

These checks matter because a blower motor rarely fails in isolation. For example, a weak or failed capacitor can prevent a new motor from starting correctly, and poor airflow from a clogged filter can overwork even a brand-new motor. We focus on the whole air-moving system, not just the single component, to help reduce the chance of repeat issues.

Once we confirm that the blower motor is the correct repair and that no additional underlying issues are present that would prevent the new motor from operating properly, we move on to the replacement process.

Repair or Service Process

Blower motor replacement is one of those jobs where careful, methodical work really pays off. In a home like this one in Thonotosassa, FL 33592, we take clear steps from start to finish so the homeowner knows exactly what was done and why.

1. Power Off and Safety Precautions

We begin by shutting off power to the system at the disconnect and/or breaker panel. This protects both the equipment and our technician, and it ensures your home stays safe during the repair. We also protect nearby flooring and surfaces in the work area to keep things clean.

2. Accessing the Blower Assembly

Next, we remove the access panels on the air handler or furnace to reach the blower assembly. The blower assembly typically includes the motor, blower wheel (or squirrel cage), and the housing.

We carefully disconnect wiring, document connections as needed, and unbolt or unclip the blower housing. At this stage, cleanliness matters—a dirty blower compartment can impact future performance, so we pay attention to dust and debris while we work.

3. Removing the Old Blower Motor

Once the blower assembly is out, we remove the old motor from the housing and blower wheel. This may involve loosening set screws, pulling the wheel off the shaft, and transferring any required brackets or mounting hardware.

We also take this opportunity to visually inspect the blower wheel for damage or heavy buildup. If the wheel is excessively dirty or out of balance, it can strain a new motor. Addressing that during the repair helps the new motor last longer.

4. Installing the New Blower Motor

The new blower motor is installed into the housing and properly aligned with the blower wheel. Correct alignment and secure mounting are important—any wobble or misalignment can cause noise, vibration, and premature wear.

We then reconnect the wiring according to the system’s design, ensuring all connections are secure and routed cleanly away from moving parts.

5. Capacitor Check and Replacement (If Needed)

The job description for this visit specifically mentioned a new capacitor “if needed.” A run capacitor helps the motor start and run efficiently. If testing or inspection shows that the existing capacitor is weak or failing, we replace it so the new motor has proper electrical support.

This step is crucial for reliability. Installing a new motor on a bad capacitor is like putting new tires on a car with bent wheels—the problem isn’t really solved.

6. Reassembly and Final Checks

After the motor and any necessary capacitor are in place, we reinstall the blower assembly into the air handler or furnace, secure the housing, and replace the access panels. We double-check all wiring and safety features before restoring power.

With the system powered back on, we:

  • Run the system through a normal cooling cycle
  • Confirm the blower starts and runs smoothly
  • Listen for unusual noises or vibration
  • Verify that air is moving properly through the supply vents

We do not list specific test numbers unless they are documented, but we always verify proper operation before we leave. The homeowner in Thonotosassa, FL 33592 could feel the difference in airflow and comfort once the blower motor was operating correctly again.

7. Warranty Handling Fee and Documentation

This job included a separate miscellaneous warranty handling fee. That fee comes from the supplier of the HVAC brand to process the warranty for the parts used. While the parts themselves may be covered under the manufacturer’s warranty, suppliers often charge an administrative fee to handle the claim, ship parts, and confirm paperwork.

We explain this to the homeowner in clear terms so they understand what is covered under warranty and what costs are related to labor and processing. That transparency is especially important for our neighbors in Thonotosassa and across Tampa Bay who want straightforward answers about their HVAC expenses.

Why This Fix Works

The blower motor is the heart of your indoor air movement. In a cooling-dominated climate like Thonotosassa and the greater Tampa Bay area, it runs a lot. When it fails or weakens, you may still hear the outdoor unit working, but you don’t get the cool air where you need it.

Replacing the blower motor restores the system’s ability to:

  • Push conditioned air evenly through your ductwork
  • Keep temperature more consistent from room to room
  • Support proper dehumidification by maintaining airflow across the evaporator coil
  • Protect the system by reducing strain on other components

When paired with a healthy capacitor and clean airflow (filters and ducts), the new motor can do its job efficiently. In simple terms: the outdoor unit cools the air, and the blower motor delivers that comfort throughout your home. Addressing the motor and related electrical components is the right approach when airflow is the bottleneck.

Pro Tips for Homeowners in Thonotosassa

For homeowners in Thonotosassa, FL 33592 and nearby Tampa Bay communities, workload on HVAC equipment is high because of our long cooling season and humidity. A few practical habits can help protect your blower motor and the rest of your system:

  • Change filters regularly. A clogged filter makes your blower motor work harder than it should. Follow your filter’s recommended schedule, and in our climate, monthly checks are a smart habit.
  • Keep return grilles clear. Avoid blocking returns with furniture, rugs, or large items. Restricted airflow can overheat the blower motor and reduce comfort.
  • Listen for new noises. If you start hearing grinding, squealing, or rattling from your indoor unit, schedule a visit before the motor fails completely.
  • Schedule routine maintenance. Regular HVAC tune-ups help keep motors, capacitors, and electrical connections in good shape. Our air conditioning maintenance guide for Tampa Bay homeowners explains what to expect.
  • Don’t ignore weak airflow. If the system runs but airflow feels weaker than usual, it’s worth a professional look. Our HVAC troubleshooting guide can help you decide when to call.
  • Plan ahead for Florida’s busy season. Schedule maintenance or non-emergency repairs before the peak of summer so your system is ready for heavy use. Articles like how often you should service your AC in Florida are a great resource.

FAQ: Blower Motor Replacement for Tampa Bay Homeowners

How do I know if my blower motor is the problem?

Common signs include weak or no airflow from your vents, the indoor unit making humming noises without the fan spinning, or the system shutting down shortly after starting. Because other issues can cause similar symptoms, it’s best to have a licensed technician confirm the diagnosis before replacing the motor.

Why was there a separate warranty handling fee on this job?

In this Thonotosassa, FL 33592 project, the warranty handling fee came from the HVAC supplier, not from us inventing an extra charge. Suppliers often charge a processing fee to handle the manufacturer’s warranty claim, ship parts, and complete the paperwork. We pass that along transparently so you know exactly what you’re paying for.

Is the capacitor always replaced with a new blower motor?

Not always, but it’s checked every time. If the capacitor that supports the blower motor is weak or failing, it can prevent the new motor from starting properly or running efficiently. When needed, we replace the capacitor as part of the same visit so the new motor can operate as it should.

How long does a blower motor replacement usually take?

Most residential blower motor replacements can be completed in a single visit, typically within a few hours. The exact time depends on equipment accessibility, how the unit is installed, and whether related issues need attention. Our goal is to restore comfort the same day whenever possible.

Will a new blower motor improve my energy bills?

A properly working blower motor helps your system run the way it was designed. While it’s not a standalone energy upgrade like a new high-efficiency system, restoring correct airflow can prevent the system from running longer than necessary and may help avoid wasted energy caused by poor circulation.

What can I do to help my new blower motor last longer?

Keep filters clean, avoid blocking vents and returns, and schedule regular maintenance. Our HVAC maintenance guide for homeowners offers a good overview of what to expect from routine service.

Why Choose Home Therapist for HVAC Service in Thonotosassa

When you need blower motor replacement or any HVAC service in Thonotosassa, FL 33592, you deserve a team that treats your home like their own. At Home Therapist Cooling, Heating, and Plumbing, we focus on clear communication, careful workmanship, and long-term reliability—not quick, confusing fixes.

Here’s what you can expect from us:

  • Licensed, professional technicians: Our team is trained, experienced, and familiar with the demands of Tampa Bay’s climate.
  • Transparent communication: We explain what we’re doing, why we’re doing it, and how costs break down, including labor, parts, and any warranty handling fees.
  • Clean and respectful work: We protect work areas, clean up after ourselves, and respect your schedule and your home.
  • Focus on long-term reliability: We look beyond the single failed part to catch potential issues early and help your system run better, longer.
  • Commitment to Tampa Bay homeowners: We live and work in this community, and we’re proud to serve homeowners throughout Tampa Bay, including Thonotosassa.

If you’d like to see more of what we do and how we serve our neighbors, you can find us on social and local platforms like Pinterest and Reddit, as well as home service directories such as HomeGuide.

For added peace of mind, you can also review our standing with trusted organizations, including our listing with the Better Business Bureau and the Tampa Bay Chamber of Commerce.

Need Blower Motor Service in Thonotosassa, FL 33592?

If your AC is running but you’re not getting the airflow or comfort you expect, we’re here to help. Whether you need a blower motor replacement, a capacitor check, or a full system evaluation, our team is ready to serve homeowners in Thonotosassa, FL 33592 and the surrounding Tampa Bay area.

Reach out to schedule a visit, and we’ll walk you through the process step by step—so you know what’s happening with your system, what it will take to fix it, and how we’ll protect your comfort moving forward.

Water Heater Flush and Inspection in Tampa, FL 33615

When you live in Tampa, FL 33615, hot water is something you count on every single day—showers, dishes, laundry, and cleaning all depend on it. So when we visit a homeowner for a plumbing appointment under our Premium Home Therapy Plan, our goal is simple: keep that hot water dependable, safe, and efficient before problems start.

On this visit, we completed a full water heater flush and inspection for a homeowner in Tampa, FL 33615. The system was working, but like any water heater in Florida’s hard-water conditions, it needed professional attention to stay that way. After our visit, everything was running properly, and the homeowner had peace of mind knowing their water heater was clean, checked, and ready for daily use.

Case Recap

Customer Problem: Staying Ahead of Water Heater Issues

In this case, the homeowner wasn’t calling us because of a major breakdown. Instead, they were being proactive. As part of their Premium Home Therapy Plan, they had a scheduled plumbing visit focused on water heater care and overall plumbing peace of mind.

Like many homeowners in Tampa, they understood a few key realities:

  • Florida water can contain minerals that build up inside water heaters over time.
  • Sediment buildup can lead to noisy operation, reduced efficiency, or even early failure.
  • Most water heater issues develop slowly and often go unnoticed until there’s no hot water.

They wanted to make sure their system was taken care of before it caused any disruption. No lukewarm showers, no surprise leaks, and no weekend emergencies—just steady, reliable hot water in their Tampa, FL 33615 home.

Because the homeowner is enrolled in a maintenance plan, this visit was scheduled, expected, and focused on prevention. Our job as their Home Therapist technician was to flush the tank, inspect all key components, and confirm that everything was in good working order.

Inspection and Diagnosis: What We Looked For

When we arrive for a water heater maintenance visit in Tampa, our process is structured and safety-focused. Even though the system seemed to be working fine, we never assume anything—we verify it.

On this plumbing visit, we started with a visual and safety inspection of the water heater and surrounding area:

  • Visual condition check: We looked for any signs of rust, corrosion, or moisture around the tank and connections.
  • Shutoff valves and piping: We checked that shutoff valves were accessible and that piping connections appeared secure.
  • Temperature and relief components: We inspected the temperature and pressure relief valve area for signs of past discharge or leaks.
  • Electrical or gas connections (as appropriate): We inspected visible connections for any obvious issues or safety concerns.

After confirming there were no immediate red flags, we moved into the performance-focused side of the visit:

  • We checked for any unusual noises, odors, or signs of overheating during operation.
  • We confirmed that hot water was being delivered consistently to the home.
  • We verified that the system appeared to be cycling and operating as expected.

The good news for this Tampa, FL 33615 homeowner: everything passed our inspection. That doesn’t mean we skip the flush—it means we use the flush as a way to keep the system in that good condition.

Repair and Service Process: How We Flushed and Protected the Water Heater

A water heater flush sounds simple, but it needs to be done carefully and in the right order to avoid damage, scalding risks, or unnecessary mess. Here’s how we handled this Premium Home Therapy Plan visit from start to finish.

1. Preparing the System Safely

Before we ever connect a hose or open a valve, we take steps to work safely and protect the home:

  • We confirmed the water heater type and setup so we could follow the correct procedure.
  • We ensured we had a safe place for the drained water to go, avoiding backsplash or flooding risks.
  • We reviewed shutoff points so we could quickly isolate the heater if needed.

Our technicians always treat Tampa homes as if they were our own. That means drop cloths where needed, careful routing of hoses, and constant attention to where water is flowing.

2. Draining and Flushing the Tank

Once prepared, we performed the actual water heater flush. In practical terms, that means:

  • Draining water from the tank through the drain valve.
  • Helping loosen and remove built-up sediment from the bottom of the tank.
  • Refreshing the interior with clean water to carry away remaining debris.

In Tampa, FL 33615 and the surrounding areas, mineral content and sediment can build up more quickly than many homeowners realize. Flushing the tank helps fight that buildup so the heater doesn’t have to work harder than it should to heat your water.

3. Double-Checking Components After the Flush

After the flush, we don’t just pack up and leave. We take a second pass to make sure everything is buttoned up and running as it should:

  • We checked that the drain valve was fully closed and not dripping.
  • We confirmed that the tank was refilling correctly and that there were no leaks at the connections.
  • We verified that the water heater came back online and was operating as expected.

This Tampa homeowner’s system responded exactly as we wanted it to. After the flush and inspection, the water heater was functioning properly, with no concerns observed.

4. Communicating Results with the Homeowner

One of the most important parts of any plumbing service in Tampa is the conversation at the end. We walked the homeowner through what we did, what we saw, and what to watch for between visits.

Because everything looked good, there were no repairs needed this time. We simply confirmed that the water heater was in solid shape and reinforced the value of continuing regular maintenance through their Premium Home Therapy Plan.

Why This Fix Works: The Science Behind a Water Heater Flush

A water heater flush isn’t just a routine task on our checklist—it directly impacts performance, energy use, and lifespan.

Here’s what’s happening inside your water heater over time, especially in a place like Tampa, FL 33615:

  • Sediment settles at the bottom of the tank. Minerals and debris in the water gradually create a layer on the bottom.
  • That sediment acts like insulation. The heating element or burner has to work harder to heat through that layer.
  • Extra strain means more wear and tear. The system can become noisier, less efficient, and more prone to early failure.

By flushing the tank, we help remove that sediment layer. The result is:

  • More direct and efficient heat transfer.
  • Reduced stress on components.
  • A better chance of getting full life out of the water heater.

Combined with a safety and condition inspection, a professional flush helps Tampa homeowners avoid surprise breakdowns and can support more stable hot water temperatures throughout the home.

If you’d like to dive deeper into how maintenance works across your plumbing, our plumbing services maintenance plans article explains how we structure ongoing care for your system.

Pro Tips for Homeowners in Tampa

We always like to leave our Tampa clients with a few practical tips they can use between visits. Here are some simple, low-stress ways to help your water heater and plumbing system last longer in Tampa, FL 33615:

  • Listen for new noises. If your water heater starts popping, rumbling, or making unusual sounds, it may be a sign of sediment buildup. Mention it at your next visit so we can take a closer look.
  • Keep the area around the heater clear. Avoid stacking boxes, cleaning supplies, or storage items right up against the tank. Good access and airflow help us inspect it properly and safely.
  • Know where your shutoff valves are. In case of a leak, being able to quickly shut off water to the heater can reduce damage while you wait for a plumber to arrive.
  • Watch for subtle changes. Longer wait times for hot water, fluctuating temperatures, or reduced hot water volume can all be early signs it’s time for a professional check.
  • Stay consistent with maintenance. Annual or plan-based visits, like this Premium Home Therapy Plan checkup, are one of the best ways to avoid plumbing emergencies in Tampa’s humid, high-demand climate.

If you’re curious about how often to plan maintenance for your system, our page on water heater maintenance scheduling and annual inspections offers a helpful overview tailored to Tampa Bay homes.

FAQ: Water Heater Maintenance Under a Home Therapy Plan

How often should I flush my water heater in Tampa, FL 33615?

The ideal frequency can depend on your water quality and usage, but many Tampa homeowners benefit from having their water heater professionally flushed about once a year as part of a planned maintenance visit. During those visits, we also inspect the system so we can catch potential issues early.

What are the signs that my water heater needs attention?

Common signs include popping or rumbling sounds from the tank, inconsistent water temperatures, reduced hot water volume, or visible moisture around the heater. Even if everything still seems to be working, regular maintenance like the flush and inspection we performed in Tampa, FL 33615 helps you stay ahead of these issues.

Is a maintenance plan really worth it if my water heater is working fine?

Yes—this visit is a good example. The water heater was working, but the flush and inspection helped keep it that way. A maintenance plan spreads out the cost of care, reduces the chance of surprise breakdowns, and gives you a professional set of eyes on your plumbing system on a regular schedule. Our water heater maintenance plans and promotions page goes into more detail on how that works.

Do you only service water heaters, or can you inspect the rest of my plumbing too?

We handle full plumbing inspections, not just water heaters. Many Tampa Bay homeowners combine water heater flushes with a broader plumbing checkup to make sure drains, fixtures, and visible piping are in good shape. For a deeper look at that kind of project, you can read about a whole-home plumbing inspection and water heater flush project in Tampa.

What happens if my water heater fails inspection during a visit?

If we find anything concerning during an inspection—like corrosion, leakage, or components that appear compromised—we’ll explain what we found, show you where possible, and discuss options. That may include repair or, in some cases, planning for replacement. When replacement is the better long-term option, resources like our water heater replacement services and invoices page can help you understand the process.

Why Tampa Homeowners Choose Home Therapist

When you invite a plumber into your home in Tampa, FL 33615, you’re trusting them with your comfort, safety, and time. We take that seriously.

Here’s what we focus on every visit:

  • Licensed, professional technicians: Our team is trained, licensed, and experienced with Florida plumbing systems, including both tank and tankless water heaters.
  • Transparent communication: We explain what we’re doing, why we’re doing it, and what we find—without pressure tactics or confusing jargon.
  • Clean, respectful work: We protect your floors, manage water carefully during flushes, and leave the work area tidy when we’re done.
  • Long-term reliability: Our Premium Home Therapy Plan and maintenance-focused visits are designed to keep systems running smoothly, not just patch problems.
  • Commitment to Tampa Bay homeowners: We live and work in this community, and we build relationships that last beyond a single service call.

If you’d like to see more about how we serve local homeowners, you can follow us on social channels like Pinterest or connect with us on Reddit. For added peace of mind, you can also review our standing with trusted organizations such as the Better Business Bureau and the Tampa Bay Chamber of Commerce.

Need Water Heater Service in Tampa, FL 33615?

If you’re in Tampa, FL 33615 and haven’t had your water heater flushed or inspected in a while, this is a good time to schedule a visit. Whether you’re already on a plan or you’re just starting to think about maintenance, we can tailor service to your home and hot water needs.

Our local Tampa Bay technicians are here to help you prevent problems before they disrupt your day, keep your plumbing system in good shape, and make sure you always have the hot water you depend on. Reach out to Home Therapist Cooling, Heating, and Plumbing to schedule your next plumbing or water heater service in Tampa, FL 33615.

Plumbing Inspection and Water Heater Replacement Recommendations in Palm Harbor, FL 34683

When we visit a home in Palm Harbor, FL 34683 for a plumbing inspection, our first priority is safety, followed closely by reliability and long-term peace of mind. On this visit, the homeowner asked us to take a close look at an aging water heater and check for any hidden plumbing issues that might be brewing behind the scenes.

During our visit, we confirmed that the water heater had reached the end of its serviceable life, found an active leak on the main shut-off valve, and identified a couple of non-standard flexible P-traps under sinks. We’ll walk you through exactly what we saw, why it matters for a home in Palm Harbor, and how we recommended moving forward to keep this property safe, dry, and comfortable.

Case Recap: Palm Harbor, FL 34683 Plumbing Visit

  • Performed a full plumbing inspection focused on an aging water heater and potential leaks.
  • Found a water heater that is significantly aged and no longer in safe, serviceable condition.
  • Identified an active leak at the building’s main shut-off valve, requiring a full building water shut-off for replacement.
  • Noted two flexible P-traps under sinks that, while currently functional, are non-standard and less durable long term.
  • Recommended replacing the water heater, repairing the leaking shut-off valve, and upgrading to rigid P-traps for better reliability.
  • Tested and verified overall system condition within safe diagnostic limits, without performing a risky flush on the old heater.

Customer Problem: Aging Water Heater and Leak Concerns

The homeowner in Palm Harbor, FL 34683 had a few very reasonable concerns: an older water heater that didn’t inspire much confidence and the possibility of small leaks that could turn into bigger problems later. In Florida’s climate, where water heaters and plumbing are under constant use, it’s smart to question equipment that’s getting up there in age.

They reached out through their Premium Home Therapy Plan to schedule a dedicated plumbing visit. The main goals were:

Like many multifamily or HOA-governed properties around Palm Harbor, this building’s plumbing also depends on a shared main shut-off. Any work on that valve needs to be coordinated carefully so neighbors aren’t unexpectedly left without water. The homeowner wanted to understand how that would work and what to expect.

Inspection and Diagnosis: What We Checked and Why

On a plumbing inspection like this, our approach is systematic. We don’t guess, and we don’t push unnecessary work. We focus on real conditions in front of us. For this home in Palm Harbor, FL 34683, the inspection centered around three key areas: the water heater, the main shut-off valve, and the under-sink drainage components.

Water Heater Assessment

We started at the water heater, since that was the homeowner’s primary concern. Our inspection included:

  • Visual inspection of the tank exterior for rust, corrosion, and previous leaks.
  • Checking the visible plumbing connections for signs of active dripping or staining.
  • Reviewing the general age and condition of the unit to judge remaining safe life.

Based on the condition and age, we determined the water heater was no longer in a safely serviceable state. It had moved from “aging but acceptable” into the territory where further stress—like a full flush or significant adjustment—could trigger a failure.

Because of that, we intentionally did not perform a flush. On very old units, flushing can stir up sediment and, in some cases, expose weak spots in the tank that were just barely holding. Instead of risking a sudden leak, we documented the condition and recommended replacement.

Main Shut-Off Valve Leak

Next, we inspected the main shut-off valve for the building. This valve is what allows you—or property management—to quickly shut down water in an emergency, or to perform major repairs safely.

Our technician found a small but active leak at this main shut-off. On the surface, it might not look urgent, but a leaking main valve is a concern for two reasons:

  • It can slowly cause water damage over time.
  • If you ever need to shut the water off quickly, you want that valve to be reliable and fully functional.

Because this is the primary building shut-off, replacing it will require planning a full building water shut-down. That’s standard for this type of work and something we coordinate carefully when the homeowner and HOA or management are ready.

Flexible P-Traps Under Sinks

Finally, we took a look under the sinks and found two flexible P-traps. These are accordion-style drain components you sometimes see in quick fixes or DIY repairs. While they were currently working, they are not considered standard long-term plumbing practice.

Flexible traps:

  • Have more ridges that can collect debris and lead to clogs.
  • Are generally less durable than rigid piping.
  • Can be more prone to leaks if bumped or stressed.

We documented their condition and recommended upgrading them to rigid trap assemblies when convenient. This isn’t an emergency issue in this case, but it is a smart reliability upgrade for any Palm Harbor homeowner planning ahead.

Repair and Service Recommendations: Step-by-Step Path Forward

For this plumbing visit in Palm Harbor, FL 34683, there were three clear recommended actions. We laid them out in simple terms for the homeowner so they could prioritize based on urgency, budget, and coordination with their building.

1. Replace the Aging Water Heater

The first and most important recommendation was to replace the existing water heater with a new, code-compliant unit. Once a tank reaches a certain age and condition, the question shifts from “Can we squeeze a little more life out of it?” to “How do we avoid an unexpected failure and potential water damage?”

Our replacement plan focused on:

  • Selecting an appropriately sized, code-compliant water heater.
  • Ensuring proper connections, shut-off valves, and safety components are installed.
  • Bringing the installation in line with current plumbing and safety standards.

For homeowners interested in exploring their options—tank vs. tankless, different energy types, and long-term operating costs—we also encourage reviewing our resources on water heater replacement options and how our team handles water heater installs.

2. Replace the Leaking Main Shut-Off Valve

The second recommendation was to replace the leaking main shut-off valve. Even though the leak was relatively small at the time of inspection, this is a critical component for both safety and control.

Here’s how that kind of project typically goes:

  • Coordinate with the homeowner, HOA, or building management to schedule a full building water shut-off at a convenient time.
  • Shut down the water safely and relieve pressure in the line.
  • Remove the old, leaking valve and install a new, properly rated shut-off in its place.
  • Restore water service and check thoroughly for leaks and proper operation.

This is the type of proactive repair that prevents bigger headaches later. A functioning main shut-off is essential in emergencies like major leaks, broken pipes, or water heater failures.

3. Upgrade Flexible P-Traps to Rigid Piping (Optional but Smart)

The third recommendation was more of a preventative upgrade. The flexible P-traps are currently working, but they are not ideal as a permanent solution. When the homeowner is ready, we can:

  • Remove the flexible traps under the affected sinks.
  • Install rigid, properly sized trap assemblies.
  • Confirm proper drainage and check for any signs of leakage.

Upgrading to rigid traps improves durability and makes future clogs less likely. For Palm Harbor homes where humidity and regular use can stress plumbing, these small upgrades can add up to fewer service calls down the road. Homeowners who want to stay ahead of issues like this often benefit from our plumbing maintenance plans and options.

Why These Fixes Work: The Plumbing Principles Behind the Recommendations

We never want recommendations to feel mysterious. Here’s the basic “why” behind each suggestion for this Palm Harbor, FL 34683 home.

Water Heater Replacement: Managing Age, Corrosion, and Risk

Traditional tank-style water heaters store gallons of hot water under pressure. Over time, minerals in the water and everyday use cause internal components to wear and the steel tank to corrode. Once a tank is significantly aged and shows signs it’s at the end of its life, pushing it harder with a flush or major repair can backfire.

Replacing the tank before a failure:

  • Reduces the risk of sudden leaks and water damage.
  • Improves efficiency compared to an older, scaled-up heater.
  • Brings safety valves, venting (if applicable), and connections up to current standards.

For more detailed guidance on what to expect, we’ve put together information on water heater maintenance plans and promotions and permitting requirements for water heater installs in our service area.

Main Shut-Off Valve: Control and Protection

The main shut-off valve is your master control for water entering the building. If it’s leaking, it’s telling you that internal seals and surfaces are wearing down. Left alone, the leak usually worsens—not improves.

By replacing the valve now, you’re:

  • Stopping existing leakage that can damage walls, floors, or building infrastructure.
  • Ensuring you can quickly stop water flow in a future emergency.
  • Reducing stress on older fittings that may be connected to the existing valve.

Rigid vs. Flexible P-Traps: Flow and Durability

A P-trap is designed to hold a small amount of water in its bend, which blocks sewer gases from coming back into your home. Rigid traps with smooth interiors do this very reliably. Flexible, accordion-style traps have many folds inside, which can:

  • Catch hair, grease, and debris more easily.
  • Make snaking or cleaning more difficult.
  • Wear out or crack more quickly over time.

By upgrading to rigid traps, you improve drainage flow, reduce future clog risk, and gain a stronger, more stable assembly under each sink.

Pro Tips for Homeowners in Palm Harbor

Whether you’re in a condo, townhome, or single-family house in Palm Harbor, FL 34683, a few simple habits can go a long way in extending the life of your plumbing system.

  • Keep an eye on your water heater age. If your tank is more than a decade old, especially in Florida’s humid climate, it’s worth having it professionally inspected and planning ahead for replacement.
  • Check under sinks a few times a year. Look for moisture, rust marks on shut-off valves, or flexible components that might be better off upgraded. Early detection is far cheaper than repairing water damage.
  • Know where your main shut-off is located. In many Palm Harbor buildings, this may be in a shared mechanical area. Make sure you know how to reach it and who to contact if you suspect a leak.
  • Avoid DIY flexible drain parts when possible. While they can be tempting quick fixes, ask for proper rigid traps when you’re doing any kitchen or bathroom updates.
  • Schedule periodic whole-home plumbing checkups. A thorough inspection every so often can catch small issues like slow valve leaks or aging fixtures before they become emergencies.
  • Leverage maintenance plans. Structured plans make it easier to stay on top of annual plumbing and water heater checks without having to remember to schedule each visit. Our team offers flexible plumbing maintenance options for Tampa Bay homeowners.

FAQ: Plumbing Inspection and Water Heater Concerns

Is it safe to flush a very old water heater?

Not always. On significantly aged water heaters, flushing can disturb sediment and expose weak spots in the tank, potentially leading to leaks or failure. In this Palm Harbor, FL 34683 visit, we specifically chose not to flush the heater because of its advanced age and condition. In cases like this, replacement is usually the safer and more reliable choice.

How urgent is a small leak on the main shut-off valve?

Even a small active leak at the main shut-off valve deserves attention. It may not be an emergency at the moment, but it won’t fix itself and can worsen over time. Addressing it now protects your home from gradual water damage and ensures that in a real emergency, the valve will operate correctly.

Are flexible P-traps under sinks a code violation?

Flexible P-traps are generally considered non-standard and are not recommended as a long-term solution. While they may function in the short term, they’re more prone to clogs and leaks compared to rigid traps. Our recommendation in this Palm Harbor home was to plan an upgrade to rigid assemblies for better long-term reliability.

Do I have to replace the water heater immediately?

If a water heater is significantly aged and no longer in a safely serviceable state, replacement should be planned as soon as reasonably possible. You may still have hot water today, but the risk of failure—often at inconvenient times—increases. We work with homeowners to schedule water heater replacement in a way that balances urgency, budget, and household needs.

Will replacing the main shut-off affect my neighbors?

In multi-unit buildings around Palm Harbor, replacing a main shut-off usually requires a coordinated water shut-down that can impact other units. We communicate clearly about timing, expected downtime, and the steps involved so that everyone affected can plan accordingly. Coordination with your HOA or building management is a normal part of this process.

Can Home Therapist help me plan and budget for future plumbing work?

Yes. Through our maintenance plans and structured service options, we can help you prioritize repairs—like water heater replacement, valve upgrades, and drain improvements—over time instead of all at once. This Palm Harbor, FL 34683 visit is a good example: we clearly separated urgent needs from smart-but-optional upgrades so the homeowner could plan with confidence.

Why Tampa Bay Homeowners Choose Home Therapist

When you invite us into your home, you’re trusting us with your comfort and safety. Our team of licensed, professional technicians treats that trust seriously on every plumbing visit in Palm Harbor and across Tampa Bay.

Here’s what you can expect when you work with Home Therapist Cooling, Heating, and Plumbing:

  • Licensed and professional technicians. We bring real-world experience and training to every water heater, valve, and drain we inspect or repair.
  • Transparent communication. We explain what we see in clear, plain English, lay out your options, and help you prioritize without pressure.
  • Clean and respectful work. We protect your home, clean up after ourselves, and treat your property as if it were our own.
  • Long-term reliability focus. Our recommendations—like replacing aging water heaters or upgrading flexible traps—are designed to reduce future surprises, not just fix today’s symptom.
  • Commitment to Tampa Bay homeowners. We live and work in this community, and we want homes in Palm Harbor, FL 34683 and the wider Tampa Bay area to be safe, comfortable, and well cared for.

If you’d like to see more of how we work and hear from other homeowners, you can connect with us on Facebook, follow us on Instagram, or watch our content on YouTube.

For added peace of mind, you can also review our standing with trusted organizations and directories, including our BBB profile and our listing with the Tampa Bay Chamber of Commerce. Many homeowners also find us through Google Maps when searching for local plumbing help.

Need Plumbing Help in Palm Harbor, FL 34683?

If you’re concerned about an aging water heater, a possible leak, or non-standard plumbing work in your home, you don’t have to guess at what to do next. Our team is here to provide a calm, professional assessment and a clear plan—just like we did for this homeowner in Palm Harbor, FL 34683.

Whether you need a full water heater replacement, a main shut-off valve repair, or just a thorough plumbing inspection, we’re ready to help you make informed, confident decisions about your home. Reach out to Home Therapist Cooling, Heating, and Plumbing to schedule your visit, and let our local Tampa Bay technicians take care of the details so you can focus on enjoying a safe, comfortable home.

Water Heater Maintenance and Plumbing Decisions in Tampa, FL 33625

For this visit, we were called out to help a homeowner in Tampa, FL 33625 with routine water heater maintenance. The original plan was simple: flush the water heater and possibly perform a full plumbing inspection. Once we arrived and evaluated the system, we determined that flushing this particular water heater could actually create more risk than benefit because of its age. Instead, we walked the homeowner through a safer, step-by-step plan to monitor the unit and decide when future plumbing services might be needed.

Case Recap

Customer Problem: Routine Maintenance with Some Big Questions

Our Tampa, FL 33625 homeowner had done exactly what we like to see: they scheduled service before anything major went wrong. The goal was to have the water heater flushed as part of routine maintenance. While setting up the appointment, they also asked whether a full plumbing inspection would be a good idea.

From the homeowner’s perspective, everything inside the home seemed to be working fine. Hot water was available, there were no obvious leaks, and no fixtures were acting up. This is a common situation for many homeowners in Tampa Bay — the system seems OK on the surface, but you want to stay ahead of potential problems.

The main concerns the homeowner had were:

  • Is it smart to flush a water heater that’s been in service for years?
  • Could maintenance actually cause problems with an older unit?
  • Is a full plumbing inspection worthwhile if nothing appears to be wrong?

Our job was to give an honest, clear answer based on what we saw at the home in Tampa, FL 33625, and based on our experience with water heaters in the local Florida climate.

Inspection and Diagnosis: Evaluating an Older Water Heater

When we arrived, our technician Adalberto started with a basic visual and informational check on the water heater rather than jumping straight into any flush or cleaning. Before we open valves, connect hoses, or move water through an older tank, we want to know exactly what we’re working with.

Here is what we focused on during the visit:

  • Manufacture date and age: We confirmed the water heater was manufactured in 2016, making it roughly 9 years old at the time of service.
  • General exterior condition: We looked for visible rust, corrosion at the fittings, and any signs of past or active leaks around the unit.
  • Current performance: We asked the homeowner about hot water availability, recovery time, and any noises or changes they may have noticed.
  • Plumbing system status: We discussed the option of a full plumbing inspection, but the homeowner reported that all fixtures, drains, and toilets were working normally.

Based on this initial assessment, the biggest factor was the age of the water heater. Flushing a newer tank is usually straightforward. Flushing an older tank, especially one that may have significant sediment buildup, can introduce additional risk.

Because we had not yet opened the tank or performed a full internal inspection, we also had to be upfront about diagnostic limitations: there could be hidden issues inside the water heater or in the home’s plumbing system that were not visible during this visit. That’s an important point for any homeowner in Tampa, FL 33625 to understand when deciding how aggressively to maintain an older system.

Repair or Service Process: Why We Recommended Not Flushing

After confirming the water heater was about 9 years old, we explained to the homeowner why we did not recommend a flush at this stage in the unit’s life. Sediment tends to settle and harden at the bottom of the tank over time, especially in areas with mineral content in the water. In an older tank, that sediment can sometimes act like a “plug.”

On a newer system, a flush helps clear out that buildup while components are still in good condition. On an older system, there’s a higher chance that:

  • Dislodged sediment can get trapped in small passages and valves inside the heater.
  • Moving that sediment can expose thin spots in the tank that have been quietly corroding.
  • A previously stable but weakened area may start to leak shortly after a flush.

Here’s how we approached the decision step-by-step:

  1. Explain the risk clearly: We told the homeowner that flushing a 9-year-old water heater can, in some cases, speed up the failure of a tank that’s already near the end of its normal service life.
  2. Discuss the homeowner’s priorities: We asked whether they were more focused on squeezing a bit more life out of the current tank, or whether they were ready to accept the risk of an earlier replacement.
  3. Recommend a conservative approach: Given that the unit was still working and not showing obvious external problems, we recommended not flushing the tank.
  4. Offer options for added peace of mind: We suggested monitoring the water heater for any signs of leakage or changes in performance and scheduling a future plumbing inspection if concerns arise.

The homeowner in Tampa, FL 33625 appreciated the transparency and ultimately chose not to proceed with either the flush or the optional whole-home plumbing inspection at this time. Our role was to support that decision with clear information, not to pressure them into a service they weren’t comfortable with.

For homeowners who want to take a more proactive approach, we do offer structured water heater maintenance plans and promotions and broader plumbing maintenance plan options that can be tailored to the age and condition of your equipment.

Why This Conservative Fix Works

With plumbing and water heaters, doing less can sometimes be the safest choice. At around 9 years old, many tank-style water heaters are already in the later half of their expected service life. In the Tampa Bay area’s warm, humid climate, tanks can experience added wear from both water quality and environmental conditions.

Here’s the basic principle behind our recommendation:

  • Water pressure and integrity: A tank with internal corrosion may be stable as long as the internal conditions don’t change much. Flushing alters those conditions suddenly, which can stress already-weakened metal.
  • Sediment movement: Sediment often accumulates at the bottom of the tank. In an older unit, this buildup may be extensive and hardened. A flush that breaks up this material can send it into valves or create turbulence that exposes thin spots.
  • Risk vs. reward: On a younger system, the reward of flushing (better efficiency, less noise, longer life) usually outweighs the risk. On a 9-year-old tank, the potential benefit becomes smaller while the risk of triggering a leak becomes higher.

By choosing not to flush, we prioritized the homeowner’s immediate safety and comfort. The system continues to operate as it has been, and the homeowner now knows exactly what to watch for. If any signs of leakage, rust, or performance issues appear, they can call us for a focused evaluation or a full whole-home plumbing inspection when the timing is right.

Pro Tips for Homeowners in Tampa, FL 33625

If you live in Tampa, FL 33625 or anywhere in the Tampa Bay area, here are some practical tips for managing an older water heater and your plumbing system in general:

  1. Know your water heater’s age. Look for the manufacture date on the label. Once your tank gets close to 8–10 years, it’s time to start thinking about replacement planning and weighing the risks of certain maintenance tasks like flushing.
  2. Check around the base regularly. Every month or so, take a quick look at the area around your water heater. Any pooling water, rust stains, or dampness is a sign to call for service promptly.
  3. Listen for changes. Popping or rumbling noises can indicate built-up sediment. On a younger tank, that might be a cue for maintenance. On an older one, it may be a signal that it’s time to evaluate replacement options instead of aggressive cleaning.
  4. Use your nose and eyes in humid months. Tampa’s humidity can make it hard to tell condensation from leaks. If you notice ongoing moisture, rust, or a metallic smell near the water heater, it’s worth having it checked.
  5. Schedule preventive plumbing inspections on your terms. Even if everything appears fine, a periodic plumbing inspection can catch hidden issues early. Our drain and line cleaning services and routine inspections are designed to be preventive, not just reactive.
  6. Plan ahead for replacement. Once your water heater is in that 8–10+ year range, start budgeting and exploring options instead of waiting for an emergency leak. That way, you can replace it on your own schedule rather than during an urgent situation.

FAQ: Water Heater Maintenance Choices for Older Systems

Is it always a bad idea to flush an older water heater?

Not always, but once a tank gets to the age of the unit we saw in Tampa, FL 33625 (around 9 years), the balance of risk versus benefit changes. Flushing can still be appropriate in some cases, but it has to be evaluated based on the specific tank’s condition, age, and history. In this visit, we recommended against flushing because the potential for causing leaks or internal damage was higher than the likely benefit.

What should I watch for if I decide not to flush my older water heater?

Keep an eye out for any water around the base of the heater, rust on the exterior, changes in hot water temperature or recovery time, or new noises coming from the tank. If you notice any of these signs, it’s a good idea to call for service so we can evaluate whether repair or replacement makes the most sense.

Is a plumbing inspection still worth it if everything seems to be working?

Yes, a plumbing inspection can be valuable even when there are no obvious symptoms. In this visit, the homeowner in Tampa, FL 33625 chose to decline the inspection because everything appeared fine and they were comfortable monitoring for now. But as a preventive tool, a whole-home plumbing inspection can help catch small issues before they turn into leaks, clogs, or water damage.

Can you check my water heater without doing a flush?

Absolutely. We can visually inspect your water heater, review its age and general condition, and discuss performance without performing a flush. From there, we’ll explain your options clearly — including leaving it as-is, planning for future replacement, or, in some cases, performing maintenance if the risk is low enough.

What are the limitations when no flush or inspection is performed?

When we don’t perform a flush or a full plumbing inspection, we can’t see inside the tank or inside your pipes. That means there may be hidden corrosion, sediment buildup, or early-stage issues that remain undetected. We’re always transparent about those diagnostic limitations so you understand that future service may be needed if problems develop later.

How often should I think about water heater maintenance in Tampa?

In general, it’s a good idea to have your water heater looked at every year or two, especially in our Tampa Bay climate. The exact maintenance approach depends on the unit’s age and condition. Newer systems benefit more from regular flushing and tune-ups, while older ones may require a more cautious strategy and a focus on planning for replacement.

Why Tampa Bay Homeowners Choose Home Therapist

When you invite us into your home in Tampa, FL 33625, you’re trusting us with your comfort, safety, and plumbing system. We take that seriously. Our team is made up of licensed, professional technicians who approach every visit with the same mindset we used on this call: explain the risks, lay out the options, and respect the homeowner’s decision.

Here’s what you can expect when you work with Home Therapist Cooling, Heating, and Plumbing:

  • Licensed, experienced technicians: We bring real-world plumbing and HVAC experience to every job, whether it’s a simple tune-up or a complex system evaluation.
  • Transparent communication: We explain what we see, what it means for your home, and what your options are — without pressure or scare tactics.
  • Clean, respectful work: We treat your home like our own. That means neat work areas, clear walkways, and respect for your schedule.
  • Long-term reliability: Our recommendations focus on what will keep your plumbing and HVAC systems reliable over the long run, not just what can be done today.
  • Commitment to Tampa Bay homeowners: We live and work in this community, so we build relationships that last beyond a single service call.

If you’d like to see more of what we do and how we serve families across Tampa Bay, you can follow us on social and review platforms like Pinterest and Reddit. For added peace of mind, you can also check our standing with trusted organizations such as the Better Business Bureau, the Tampa Bay Chamber of Commerce, and our customer reviews on ProvenExpert.

Need Water Heater or Plumbing Help in Tampa, FL 33625?

If you’re in Tampa, FL 33625 and you’re unsure whether to flush an older water heater, schedule a plumbing inspection, or start planning for replacement, we’re here to help. We’ll take the time to understand your system, explain what we find in plain English, and recommend the safest, most practical options for your home.

Whether you want to set up a proactive maintenance plan, explore ongoing plumbing services, or simply get a second opinion on your water heater, our local Tampa Bay team is ready to help you make a confident decision. Schedule your visit today and let Home Therapist Cooling, Heating, and Plumbing keep your home’s hot water and plumbing running the way it should.

Premium AC Maintenance and Compressor Inspection in Riverview, FL 33579

When your home in Riverview, FL 33579 depends on a single air conditioning system, any sign of strain or overheating can be stressful—especially in our hot, humid Florida climate. During a recent Premium Home Therapy Plan visit, we performed a scheduled maintenance on a 7-year-old system and uncovered several important issues: a compressor that was running too hot, slightly low system pressure, elevated fan amperage, and a visible stain on the evaporator coil.

In this visit, our goal was the same as always—keep the system running safely, efficiently, and reliably for the homeowner. We completed a full maintenance service, documented every finding, and made sure the system was operating as expected when we left, while also being transparent about what we observed so it can be monitored over time.

Case Recap

If you live in Riverview, FL 33579 and want a quick summary of what we did on this Premium Home Therapy Plan visit, here’s the short version:

  • Performed scheduled Premium Home Therapy Plan maintenance on a 7-year-old AC system.
  • Cleaned both coils and cleared the condensate drain line.
  • Completed a full system inspection as part of the maintenance service.
  • Found the compressor overheating, system pressure slightly low, and fan amperage elevated.
  • Observed a stain on the evaporator coil and checked for a refrigerant leak.
  • Found no visible or detectable refrigerant leaks at this visit but documented conditions for future reference.

Customer Problem: What the Homeowner Needed

This visit in Riverview, FL 33579 was a scheduled maintenance under our Premium Home Therapy Plan, not an emergency call. The homeowner wanted to stay ahead of problems, keep their 7-year-old system running reliably, and avoid sudden breakdowns—especially during peak heat.

Even when everything seems to be working, air conditioners in the Riverview area work incredibly hard because of the high humidity and long cooling season. That constant demand can strain critical components like the compressor and fan motors. Regular maintenance is one of the best ways to catch early warning signs before they turn into costly failures.

During this visit, our technician focused on:

  • Cleaning and inspecting the system thoroughly.
  • Checking for any signs of stress, overheating, or unusual wear.
  • Documenting any conditions that might point to future issues, such as stains on the coil or readings that are slightly outside normal range.

The homeowner’s priority was simple: keep the AC dependable and efficient so the home stays comfortable all year in Riverview without surprises.

Inspection and Diagnosis: What We Found

As part of the Premium Home Therapy Plan maintenance, we followed a structured inspection process. For homeowners in Riverview, FL 33579, this type of visit is designed to do more than just “check the box”—we want to understand how the entire system is behaving under real conditions.

Here’s what we inspected and why:

  • Coils: We inspected both the indoor evaporator coil and the outdoor condenser coil for dirt, debris, and buildup that can restrict heat transfer.
  • Drain line: We checked the condensate drain for clogs or slow drainage, which can cause water damage or system shutdowns.
  • Compressor operation: We evaluated how the compressor started and ran, including checking for signs of overheating or strain.
  • System pressure: We looked at operating pressures to see if the system was within its expected range.
  • Fan motor and amperage: We monitored the fan’s electrical draw (amperage) to see if it was working harder than normal.
  • Evaporator coil condition: We visually checked for stains, corrosion, or other unusual markings.

From that inspection, we documented these key findings:

  • Compressor overheating: The compressor was operating hotter than it should.
  • System pressure slightly low: Pressures were below the typical operating range, but not drastically.
  • Fan amperage elevated: The fan motor was drawing more electricity than usual, suggesting it was under extra load.
  • Stain on the evaporator coil: A stain was observed on the coil surface, which we documented for future reference.

Because slightly low pressure can sometimes be a sign of a minor refrigerant leak, we also performed a targeted refrigerant leak search. At this visit, we did not find any visible or detectable signs of a leak. Even so, we documented the condition carefully so that if anything changes in the future, there is a clear history.

Repair and Service Process: Step by Step

On a Premium Home Therapy Plan visit like this one in Riverview, FL 33579, our focus is both cleaning and diagnostics. Here’s how we approached the service:

1. Cleaning Both Coils

We started by cleaning both the indoor evaporator coil and the outdoor condenser coil. Over time, dust, pollen, and debris build up on these coils, especially in Florida’s humid and often dusty environment.

Why this matters:

  • Dirty coils can cause the compressor to run hotter than it should.
  • Restricted heat transfer forces the system to run longer to achieve the same cooling.
  • Longer runtimes and higher head pressures can shorten the life of the compressor and fan motors.

By restoring coil cleanliness, we help the system move heat more efficiently and reduce strain on key components.

2. Clearing and Cleaning the Drain Line

Next, we cleaned the condensate drain line. In Riverview’s humid climate, AC systems pull a lot of moisture from the air. That water has to go somewhere, and if the drain line becomes restricted, it can back up.

Keeping the drain line clear helps:

  • Prevent water damage around the air handler.
  • Avoid system shutdowns triggered by float switches.
  • Maintain clean, sanitary conditions inside the indoor unit area.

3. Full System Inspection

After cleaning, we performed a full system inspection. This is where we detected the overheating compressor, slightly low pressure, and elevated fan amperage. We also documented the stain on the evaporator coil.

Our technician carefully reviewed how each of these findings might be related:

  • An overheating compressor can be caused by limited heat transfer, low airflow, low refrigerant charge, or electrical stress.
  • Slightly low pressure can sometimes indicate reduced refrigerant or specific airflow or load conditions.
  • Elevated fan amperage can occur when the compressor is under stress, creating more load on the system as a whole.

4. Refrigerant Leak Search

Because system pressures were slightly low and we observed a coil stain, we performed a leak search at accessible points. At the time of this visit, we did not find any visible or detectable refrigerant leaks.

That does not mean a very small or slow leak can be completely ruled out, but it does mean that nothing obvious or measurable was present during this inspection. We recorded this clearly for the homeowner’s records so we can compare future readings and conditions if anything changes.

5. Final Checks and System Operation

After cleaning and inspection were complete, we re-verified the system’s operation. We checked that airflow was normal, the drain was flowing properly, and that the system was cooling the home as expected at the time we finished.

We also communicated our observations to the homeowner, explained what we found in plain language, and outlined what to watch for in the future (such as changes in cooling performance, unusual noises, or new water marks around the indoor unit).

Why This Fix and Approach Work

The work we performed on this Riverview, FL 33579 home focused on three key principles: heat transfer, airflow, and electrical load.

Here’s how they all connect:

  • Heat transfer: The compressor’s job is to move heat, not just run. Dirty coils or restricted airflow make that harder, which can cause overheating. Cleaning the coils improves heat transfer and helps keep compressor temperatures in a more normal range.
  • Airflow: Proper airflow across both the indoor and outdoor coils is essential. When airflow is good, refrigerant pressures and temperatures stay more stable, and the system doesn’t have to fight as hard to cool the home.
  • Electrical load: When components are under stress—like an overheated compressor—the entire system can draw more amperage. Elevated fan amps can be a sign that the system is working harder than it should, which we carefully monitor.

By addressing cleanliness first, inspecting all major components, and documenting findings like slightly low pressure and coil staining, we help protect the homeowner’s investment and give a clearer picture of how the system is aging. If a pattern develops in future visits, we’ll have the history needed to recommend the right long-term solution.

Pro Tips for Homeowners in Riverview

For homeowners in Riverview, FL 33579 and across Tampa Bay, a few practical habits can go a long way toward preventing compressor overheating and unexpected breakdowns:

  • Stay current with professional maintenance: Having your system professionally maintained at least once a year (often twice in Florida) helps catch issues like overheating and abnormal amperage before they become emergencies. Our AC repair and maintenance services are structured with that in mind.
  • Change air filters regularly: A clogged filter restricts airflow, making the system run hotter and longer. In our climate, monthly checks are a smart habit, especially during peak cooling season.
  • Keep outdoor units clear: Make sure plants, mulch, and debris are at least a couple of feet away from your outdoor condenser. Good airflow around that unit helps keep compressor temperatures in check.
  • Watch for subtle changes: If you notice rooms taking longer to cool, higher energy bills, or unusual noises, don’t wait. Early service can often prevent major component failures. Our AC service action guide can help you know when it’s time to call.
  • Consider a maintenance plan: Maintenance plans like our Premium Home Therapy Plan are designed for Florida homes that run AC almost year-round. They help keep visits on schedule and make it easier to track developing conditions over time. You can explore your AC maintenance and repair options with us.
  • Ask questions during visits: When we’re at your home, use that time to ask about your system’s age, condition, and what to expect in the next few years. Clear communication is part of how we help Riverview homeowners plan ahead.

FAQ: AC Maintenance and Compressor Concerns

Is a slightly low pressure reading always a sign of a refrigerant leak?

Not always. Slightly low pressure can be influenced by several factors, including load conditions, coil cleanliness, and system design. In this Riverview visit, we performed a refrigerant leak search and did not find any visible or detectable leaks at the time of service. Because of that, we documented the readings so they can be compared on future visits. If a leak develops or worsens, a pattern will typically start to appear.

What does an overheating compressor mean for my AC system?

An overheating compressor is a sign that the system is under stress. Causes can include reduced airflow, dirty coils, long run times in extreme heat, or refrigerant-related issues. If left unaddressed, continuous overheating can shorten compressor life. That’s why we focus on cleaning coils, checking airflow, monitoring electrical draw, and documenting conditions so we can act early if things change.

Why would fan amperage be elevated during normal operation?

Elevated fan amperage means the fan motor is using more electrical power than usual. This can happen when the system as a whole is under strain—for example, if the compressor is overheating or there is extra resistance in the airflow path. On this visit in Riverview, FL 33579, the elevated fan amperage likely related to the system operating under higher stress. We documented it and confirmed that, at the time of our visit, the system was still operating as expected.

What does a stain on the evaporator coil mean?

A stain on the evaporator coil can have different causes, such as past moisture patterns, minor corrosion, or environmental factors inside the air handler. It does not always mean there is an active leak, but it is important to note and watch. In this case, we documented the stain and performed a leak search, which did not show any visible or detectable leak at the time. Future inspections can compare to see if anything changes.

How often should I schedule AC maintenance in Riverview, FL?

In our Tampa Bay climate, many homeowners benefit from maintenance at least once a year, and often twice—once before peak summer and sometimes once before heavy usage in spring or fall. Programs like our Premium Home Therapy Plan help keep that schedule consistent. Regular maintenance can reduce the risk of overheating, improve efficiency, and extend system life.

What should I do if I suspect my compressor is starting to struggle?

If you notice longer run times, unusual noises, or reduced cooling, it’s best to schedule a professional visit. We’ll inspect components like the compressor, coils, and fan motors, and we’ll let you know exactly what we find. If you’re unsure whether it’s time to call, our resources on AC maintenance and cleaning services can help you decide.

Why Choose Home Therapist for Your Riverview Home

For homeowners in Riverview, FL 33579 and across Tampa Bay, you need more than just a quick fix—you need a team that treats your home like their own. At Home Therapist Cooling, Heating, and Plumbing, we approach every visit with the same priorities: safety, cleanliness, and long-term reliability.

Here’s what you can expect when you work with us:

  • Licensed, professional technicians: Our technicians are trained, licensed, and experienced with Florida’s demanding climate. We handle everything from routine maintenance to complex diagnostics, always with your comfort in mind.
  • Transparent communication: We explain what we find in clear, plain language. If something is uncertain or simply needs monitoring, we tell you that, too. No pressure, no scare tactics.
  • Clean and respectful work: We respect your home. That means tidy workspaces, careful attention to cleanliness, and treating your property like it’s our own.
  • Focus on long-term reliability: Our goal is not just to get your system running today, but to help you get the most life and value from it over time. That’s why we document findings and maintain a clear history of your system’s condition.
  • Commitment to Tampa Bay homeowners: We’re part of the local community, serving Riverview and the greater Tampa Bay area with dependable HVAC and plumbing services.

If you’d like to see more of how we work and stay connected, you can follow us on social media:

We’re also proud to be listed with reputable local and national organizations, reflecting our commitment to professionalism and trust:

Need AC Maintenance in Riverview, FL 33579?

If you’re in Riverview, FL 33579 and you’ve noticed your AC working harder, running longer, or just want peace of mind before the next heat wave, we’re here to help. Whether you’re interested in a one-time checkup or an ongoing maintenance plan, our team will walk you through your options and explain everything step by step.

Schedule your next AC maintenance or system evaluation with Home Therapist Cooling, Heating, and Plumbing, and let our local Tampa Bay technicians keep your home comfortable, efficient, and protected all year long.

Angle Valve and Water Line Installation in Lutz, FL 33559

When you are finishing a kitchen or bathroom remodel in Lutz, FL 33559, the last thing you want is a plumbing issue slowing everything down or putting your new cabinets at risk. On this visit, our technician Alejandro was called out to help a homeowner whose sinks and cabinets were already installed, but the angle valves and braided water lines had not been put in yet. Only temporary caps were in place, which is not a long-term solution.

In this project recap, we will walk you through what we found, how we handled the installation around finished cabinets, and what we did to make sure the plumbing is safe, accessible, and ready for years of use.

Case Recap

  • Location: Single-family home in Lutz, FL 33559
  • Situation: New cabinets and sinks already installed, but shutoff (angle) valves and water lines were missing
  • Condition on arrival: Water lines capped temporarily at the wall, no proper shutoff valves at the fixtures
  • Service provided: Installation of angle stop valves and braided water supply lines to the new sinks
  • Outcome: Safe, accessible shutoff points and leak-checked connections to protect the new cabinets and countertops

Customer Problem

The homeowner called us after noticing that, following cabinet and sink installation, the plumbing was not fully finished. The supply lines coming out of the wall were capped off, and there were no angle valves or braided water lines connecting the shutoff points to the faucets. In everyday terms, the water pipes were there, but there was no easy way to turn water off at the sink and no proper connection to the fixtures.

Because the cabinets and sinks were already set in place, the homeowner was understandably concerned about:

  • Making sure the work could be done without damaging the brand-new cabinets and finishes
  • Getting reliable shutoff valves in case of a future leak or faucet replacement
  • Ensuring everything was installed correctly the first time to avoid hidden drips that could damage wood and flooring

Our job as a plumbing team serving the Lutz, FL 33559 area is to come in calmly, assess the situation, and give a clear, straightforward path to a safe and clean installation around those new cabinets.

Inspection and Diagnosis

Even though this project sounds simple—just putting in valves and lines—it still requires a careful inspection. Any time we connect to existing plumbing inside finished walls and cabinets, we want to be absolutely sure everything is solid and leak-free.

Here is what Alejandro focused on during the inspection:

  • Checked the existing capped lines: Verified the pipes coming out of the wall were secure, properly positioned, and suitable for installing angle valves.
  • Reviewed cabinet and sink layout: Confirmed there was enough space to install the valves and braided lines without rubbing against wood, drawer hardware, or the sink basin.
  • Looked for any signs of prior leaks: Checked for discoloration, soft spots, or water staining inside the cabinets and around the wall penetrations.
  • Verified fixture locations: Confirmed the number of valves needed (typically hot and cold for each faucet) and matched them to the homeowner’s fixture setup.

Once we confirmed the existing capped stubs were in good shape and there was proper clearance under the sinks, we walked the homeowner through what we would be doing and how we would protect the cabinets during the installation. Clear communication is especially important on projects like this, where the finishes are already in place.

Repair and Installation Process

With the inspection complete and the plan agreed to, Alejandro moved carefully into the installation phase. Anytime we are working inside finished cabinetry for homeowners in Lutz, we treat that space as if it were our own—clean, organized, and protected.

1. Protecting the Work Area

Before touching any plumbing, we first protected the surrounding area:

  • Placed drop cloths or mats at the base of the cabinets
  • Used towels or pads inside the cabinets to catch any drips or debris
  • Laid out tools and materials in an organized way to minimize movement in and out of the home

This step might not seem like plumbing, but it is a big part of how we keep homes in Lutz, FL 33559 clean and damage-free during service.

2. Removing Temporary Caps

The capped lines were carefully loosened and removed. We always do this slowly, with a bucket or towel ready, in case any residual water is sitting in the lines. This gives us a clean, threaded connection to work with for the new angle valves.

3. Installing the Angle Valves

Next, Alejandro installed the new angle stop valves at each supply outlet. These are the small shutoff valves you see under sinks that let you turn off water to just that fixture without shutting down water to the whole house.

During this step, we:

  • Ensured each valve was oriented correctly for easy access and operation
  • Used appropriate sealing methods for the connection type to prevent leaks
  • Tightened the valves to a secure level without putting stress on the pipes coming out of the wall

Properly installed angle valves are critical for any sink in your home. They are your first line of defense if a faucet starts dripping, a supply line fails, or you need to swap out a fixture quickly.

4. Attaching Braided Water Lines

Once the valves were in place, we connected braided water supply lines from each angle valve up to the faucet connections. Braided lines are a common, reliable choice because they are flexible, durable, and designed to handle normal household water pressure when installed correctly.

During this step, Alejandro:

  • Selected the correct length of braided line to prevent kinks or sharp bends
  • Hand-tightened connections first, then snugged them carefully with the appropriate tools
  • Checked that the lines were not rubbing tightly against any cabinet edges or hardware

5. Restoring Water and Checking for Leaks

After the valves and braided lines were in place, it was time to slowly restore water to the lines and test everything. We always do this carefully:

  • Turned on the main or branch water supply gradually
  • Opened and closed each new angle valve to confirm smooth operation
  • Watched every connection point closely as the lines pressurized

We then ran water through the faucets and rechecked all fittings for any sign of seepage. Only once we were confident that everything was dry and tight did we clean up the workspace and review the finished setup with the homeowner.

Why This Fix Works

Angle valves and braided water lines might seem like small pieces in your plumbing system, but they play a big role in safety, convenience, and protecting your investment—especially in remodeled kitchens and bathrooms in Lutz, FL 33559.

Here is why this installation is so important:

  • Local shutoff control: With angle valves in place, you can isolate a single faucet if there is a leak or if you are replacing a fixture, instead of shutting down water to the entire home.
  • Pressure and movement handling: Quality braided lines are designed to handle normal household water pressure and everyday movement from opening cabinet doors or shifting items under the sink.
  • Leak prevention at the cabinet level: Properly installed valves and lines help keep small, slow drips from turning into major cabinet and flooring damage.
  • Serviceability: If you ever call for future plumbing service, having proper shutoffs and clean connections makes it easier and faster for a technician to help.

In short, this fix turns a temporary, unfinished setup into a safe, long-term solution that fits the way you actually use your sinks day to day.

Pro Tips for Homeowners in Lutz

Homes in Lutz and across the Tampa Bay area deal with high humidity, frequent use of kitchen and bathroom sinks, and sometimes older plumbing mixed with newer remodels. Here are some practical tips to keep your plumbing in good shape:

  • Open your cabinets occasionally: Every few weeks, take a quick look under your sinks. Run your fingers along the braided lines and valve connections to check for moisture.
  • Operate your shutoff valves twice a year: Gently turn the angle valves off and back on. This helps keep them from seizing up over time, especially in Florida’s humid climate.
  • Protect against under-sink clutter: Avoid packing heavy items tightly around your braided lines and valves. Overloaded cabinets can push or bend the plumbing connections.
  • Address small drips early: If you notice any dampness, staining, or a musty smell inside a cabinet, do not wait. Having a licensed plumber check it early is far cheaper than repairing water-damaged wood.
  • Plan ahead for larger plumbing needs: If you have older pipes or recurring issues, consider a full system review. Our team can look at everything from fixture shutoffs to larger projects like whole-home repiping when needed.

Taking these simple steps can go a long way toward preventing headaches and protecting your home in Lutz for the long term.

FAQ: Angle Valves and Braided Water Lines

Do I really need angle shutoff valves under my sinks?

Yes. Angle valves give you a quick way to shut off water to a single sink without affecting the rest of the home. They are especially important in finished spaces like kitchens and bathrooms, where a small leak can damage cabinets, flooring, and drywall. For homeowners in Lutz, FL 33559, having proper shutoffs is a simple way to gain peace of mind.

Are braided water lines better than rigid supply lines?

Braided lines are commonly used because they are flexible, durable, and easier to route around sink basins and cabinet structures. When installed correctly, they help reduce stress on connections and make it easier to service or replace fixtures in the future.

Will installing valves and lines damage my new cabinets?

When done carefully by a professional, installing angle valves and braided lines should not damage your cabinets. We protect the work area, use the right tools in tight spaces, and avoid unnecessary cutting or drilling. Our goal is to leave your cabinets in the same condition we found them—just with safer plumbing.

How often should I replace my braided water lines?

There is no single timeline that fits every home, but it is smart to visually inspect your lines regularly. If you notice bulging, rust at the fittings, or signs of wear, it is time to have them evaluated and possibly replaced. During other plumbing work, we can also give you feedback on the condition of your existing lines.

Can you help with other plumbing issues beyond under-sink valves?

Absolutely. In addition to small fixture connections like this project in Lutz, we handle a full range of plumbing services across Tampa Bay—from leak repairs to drain line cleaning and more involved work such as general plumbing repairs. Our team is equipped to help with both minor fixes and larger system concerns.

Why Choose Home Therapist for Plumbing in Tampa Bay

When you invite us into your home in Lutz, FL 33559, you are trusting us not only with your plumbing, but also with your cabinets, flooring, and peace of mind. We take that seriously.

Here is what you can expect from Home Therapist Cooling, Heating, and Plumbing:

  • Licensed, professional technicians: Our plumbers are trained to work in both new construction and finished spaces, taking care around cabinets, countertops, and flooring.
  • Transparent communication: We explain what we see, what we recommend, and why. You will know what we are doing before we start, and we will update you as we go.
  • Clean, respectful work: We protect your home, minimize mess, and clean up thoroughly when the job is done.
  • Focus on long-term reliability: We do not just stop at “good enough.” Our goal is plumbing that works reliably day after day in Florida’s demanding climate.
  • Commitment to Tampa Bay homeowners: We live and work in this community, and we are proud of the reputation we have built across the region.

If you would like to see more of how we work and stay connected with our team, you can follow us on social platforms like Pinterest and Reddit, or find us on Homeguide.

For added peace of mind, you can also review our standing with trusted organizations such as the Better Business Bureau and the Tampa Bay Chamber of Commerce. These profiles reflect our ongoing commitment to quality service and ethical business practices.

Schedule Plumbing Service in Lutz, FL 33559

If you are finishing a remodel, adding new cabinets and sinks, or simply want to be sure your under-sink valves and braided lines are safe and reliable, our team is ready to help. We regularly serve homeowners in Lutz, FL 33559 and throughout the Tampa Bay area with careful, professional plumbing service.

Whether you need simple angle valve installation, help with everyday plumbing repairs, or are considering larger projects like whole-home repiping, you can count on us for clear explanations, respectful service, and work that is built to last.

Reach out to Home Therapist Cooling, Heating, and Plumbing today to schedule your plumbing service in Lutz, FL 33559. We will take care of the details so you can enjoy your new kitchen or bathroom with confidence.

Sink P-Trap Replacement in Lutz, FL 33559

When the drain under a bathroom sink isn’t working the way it should, it can quickly turn a normal day into a frustrating one. For a homeowner in Lutz, FL 33559, that frustration showed up as an aging drain setup under two vanity sinks that needed attention. Our team at Home Therapist Cooling, Heating, and Plumbing was called in to replace the P-traps and make sure both sinks would drain reliably and safely again.

In this visit, I (Alejandro) replaced the P-traps on two bathroom vanity sinks, verified proper alignment and sealing, and checked for any signs of leaks or improper slope. By the time we wrapped up, both sinks were draining correctly, the new traps were secure, and the customer had peace of mind knowing the plumbing under the vanities was up to standard.

Case Recap

  • Location: Residential bathroom vanities in Lutz, FL 33559
  • Service: Level 1 sink drain P-trap replacement for two vanity sinks
  • Customer request: Install two new P-traps (“2 ptraps nuevos para dos vanity sinks”)
  • Work performed: Removed old assemblies, installed new P-traps, adjusted alignment, and tested for leaks and proper drainage
  • Outcome: Both sinks now drain smoothly with tight, updated connections and improved reliability

Customer Problem: Two Vanity Sinks with Aging Drain Connections

For many homeowners in Lutz, FL 33559, bathroom vanities see a lot of daily use—washing hands, brushing teeth, shaving, and more. Over time, the plumbing underneath can start to show its age. That was the situation here.

The homeowner wanted to proactively install two new P-traps for the vanity sinks. The existing traps and drain connections were older, and there was concern about ongoing reliability and the potential for leaks. Even if a sink is not visibly leaking yet, worn or poorly aligned traps, loose slip nuts, and old washers can easily turn into slow drips inside the cabinet.

Additionally, when homeowners update or adjust fixtures, it’s common to find that the current drain configuration isn’t ideal for the cabinet layout or sink height. In this bathroom, the focus was on getting both vanity drains set up correctly with fresh parts, tight seals, and a clean, professional finish.

Anytime we’re working on sink drains for homeowners in the Tampa Bay area, including communities like Lutz, FL 33559, we’re thinking about three things: preventing leaks, ensuring proper drainage, and making future maintenance as simple as possible. That’s exactly what we aimed to achieve with this double P-trap replacement.

Inspection and Diagnosis: Confirming What the Drains Needed

Before we replace anything, we take a few minutes to inspect the existing setup so we understand what we’re working with and what the homeowner truly needs.

On this visit, we:

There were no extreme conditions like severe corrosion or major water damage, which meant a Level 1 repair—focused on straightforward P-trap replacement—was appropriate. The traps and connections showed typical wear and were ready to be updated with new parts and seals.

We also talked through the homeowner’s goals: reliable drainage, clean-looking plumbing under the sinks, and peace of mind that the new setup was done correctly by a licensed professional. With that confirmed, we moved ahead with the replacements.

Repair Process: Step-by-Step P-Trap Replacement on Two Vanity Sinks

Even a “simple” plumbing task like replacing a P-trap can cause headaches if it’s done without care. Cross-threaded nuts, misaligned pipes, or improper slope can all lead to leaks or slow drainage. Our job is to handle those details so the homeowner doesn’t have to worry about them later.

Here’s how we handled the P-trap replacement for both vanity sinks in this Lutz, FL 33559 home:

1. Preparing the Work Area

We started by protecting the vanity interiors and surrounding area. That included placing a small catch pan or towel under the traps and making sure any stored items were moved out of the way. We always want to leave a bathroom as clean (or cleaner) than we found it.

2. Removing the Old P-Traps

Next, we carefully loosened the slip nuts holding the old P-traps in place. This is where experience matters—older plastic or metal parts can be brittle. The goal is to remove the trap without damaging the sink tailpiece or the wall drain connection.

Once the traps were removed, we allowed any residual water in the pipes to drain out into a small container, then wiped everything down so we were working on clean, dry connections.

3. Inspecting and Cleaning Connection Points

With the old traps out, we:

  • Checked the sink tailpieces for cracks or uneven edges
  • Looked at the wall stub-out for any damage or irregularities
  • Cleaned off old debris or buildup around the connection points

This step helps the new washers and slip nuts seat properly, which is key to preventing leaks and keeping everything tight over time.

4. Assembling and Installing the New P-Traps

We then assembled the new P-traps for each vanity sink, making sure all washers were correctly oriented and that the trap outlets were aligned with the wall drains.

For each sink, we:

  • Dry-fit the P-trap to confirm the alignment and length
  • Adjusted the trap arm so the slope favored proper drainage
  • Hand-tightened the slip nuts, then snugged them further without over-tightening

Proper alignment is essential. If the trap is forced into place at an angle, it can stress the connections and cause leaks later. We take the time to align everything so it sits naturally and securely.

5. Testing for Leaks and Proper Drainage

After installing the new P-traps, we turned on the water at each sink and ran it steadily while we watched every connection point. We checked:

  • The sink tailpiece-to-trap connection
  • The trap-to-trap-arm junction
  • The trap arm connection into the wall drain

We verified proper operation after the replacements and confirmed that both vanity sinks were draining normally with no visible leaks. Once we were satisfied, we wiped down the area, removed any tools or materials, and made sure the bathroom was ready for regular use again.

If you’re dealing with similar drain concerns or slow leaks under a sink, our licensed plumbing team can help. You can learn more about our plumbing expertise on our Home Therapist Cooling, Heating, and Plumbing website.

Why This P-Trap Fix Works

The P-trap under a sink does more than just look like a U-shaped piece of pipe. It’s a critical part of your home’s drainage system, and when it’s installed correctly, it solves several problems at once.

Here’s why replacing the P-traps was the right solution for this Lutz, FL 33559 home:

  • Water seal against sewer gas: The P-trap holds a small amount of water that acts as a barrier, preventing sewer gases from coming back up through the drain.
  • Catch point for debris: Hair, soap scum, and small debris often collect in the trap instead of traveling deeper into the plumbing system. This can help minimize clogs farther down the line.
  • Fresh seals and connections: New traps mean new washers and tight joints, which reduces the risk of slow leaks that can damage vanity cabinets and flooring.
  • Proper slope for reliable drainage: When the trap and trap arm are installed and aligned correctly, water drains smoothly instead of sitting in the pipe.

By installing new P-traps with proper alignment and secure fittings, we helped restore reliable drainage and protect the homeowner’s bathroom cabinets from potential leaks and musty odors.

Pro Tips for Homeowners in Lutz

Living in Lutz and the greater Tampa Bay area means you’re dealing with warm temperatures and high humidity most of the year. That environment can affect plumbing fixtures, cabinets, and the air in your home. Here are a few simple tips to keep your bathroom sinks and drains in good shape:

  • Check under your sinks a couple of times a year. Open the vanity doors and look for moisture, swelling wood, discoloration, or musty smells. Catching a drip early is much easier than dealing with water damage later.
  • Avoid harsh chemical drain cleaners. In our Tampa Bay climate, bathroom sinks often see a lot of hair and product buildup. Instead of dumping strong chemicals down the drain, consider gentle cleaning methods or have a professional handle more stubborn clogs.
  • Use strainers where possible. Small sink strainers can help catch hair and debris before it gets trapped in the P-trap. This can reduce the frequency of clogs and keep water flowing smoothly.
  • Watch for slow drainage. If your sink starts draining noticeably slower, that’s your early warning sign. Addressing it sooner often means a simpler fix and less strain on your plumbing.
  • Be mindful of cabinet ventilation. In humid areas like Lutz, FL 33559, a closed, damp cabinet can quickly grow mildew. If you’ve had a leak in the past, give the space time to dry thoroughly and consider leaving the doors open for a bit.
  • Schedule periodic plumbing checkups. A quick once-over of your home’s plumbing by a licensed professional can catch minor issues before they become bigger repairs. Our team at Home Therapist is always here to help with plumbing service and maintenance in the Tampa Bay area.

FAQ: P-Traps and Vanity Sink Drains

Do I really need a P-trap under my bathroom sink?

Yes. A P-trap is required for a proper sink drain. It holds a small amount of water that blocks sewer gases from coming back up into your bathroom. Without a correctly installed trap, you can end up with odors, drainage problems, and potential code issues.

How can I tell if my P-trap needs to be replaced?

Common signs include visible leaks under the sink, corrosion or cracking on the trap, strong sewer-like odors near the drain, or repeated clogs near the same fixture. If you see water stains or swelling inside the vanity cabinet, it may be time to have a professional inspect the trap and connections.

Is P-trap replacement a DIY project?

Some homeowners are comfortable tackling basic plumbing, but even a small misalignment or over-tightened slip nut can lead to slow leaks or poor drainage. For bathrooms you rely on every day, it’s often worth having a licensed plumber handle the replacement to ensure the trap is installed correctly and tested for leaks.

Why would I replace a P-trap if it isn’t leaking?

In some cases, like this job in Lutz, FL 33559, homeowners choose to replace traps proactively. If the existing trap is old, mismatched, or installed poorly, replacing it with a new, properly fitted unit can improve reliability, appearance, and long-term peace of mind.

Can a bad P-trap cause smells in my bathroom?

Yes. If a P-trap is cracked, not holding water, or installed incorrectly, it might not maintain the water seal that blocks sewer gases. That can lead to unpleasant odors in the bathroom. A properly installed, intact P-trap helps keep those smells out of your living space.

Do you service other plumbing issues besides sink drains?

We do. Home Therapist Cooling, Heating, and Plumbing provides a wide range of plumbing services—including leak inspections, drain issues, and other fixture repairs—for homeowners across the Tampa Bay area. You can learn more about our services by visiting our main website.

Why Choose Home Therapist for Plumbing Work in Tampa Bay

When you invite a plumber into your home, you’re trusting them not only with your plumbing system, but also with your comfort and your property. Our team at Home Therapist Cooling, Heating, and Plumbing takes that trust seriously, whether we’re replacing a simple P-trap in Lutz, FL 33559 or working on a larger plumbing project elsewhere in Tampa Bay.

Here’s what you can expect when you choose us:

  • Licensed, professional technicians: Our plumbers are fully trained and licensed to work on residential plumbing systems. We bring real-world experience to every job, from basic repairs to more complex projects.
  • Transparent communication: We explain what we find, what we recommend, and why. You’ll always know what work is being done and what it’s expected to accomplish.
  • Clean and respectful work: We protect your home, work neatly, and clean up when we’re done. Bathroom vanities, floors, and surrounding areas are left in good condition.
  • Long-term reliability focus: We don’t just aim for a quick fix. Our goal is to provide repairs and installations that hold up over time, reducing the chances of repeat issues.
  • Commitment to Tampa Bay homeowners: We’re proud to serve communities across the Tampa Bay area, including Lutz, and we stand behind the work we do in every home.

If you’d like to get a feel for who we are and how we work, you can find us on social media and through trusted local directories:

Need Sink Drain Help in Lutz, FL 33559?

If you’re noticing slow drainage, drips under your vanity, or aging plumbing under your sinks, it’s a good time to have a professional take a look. A proper P-trap replacement or drain adjustment can make a big difference in comfort and peace of mind—especially in a humid climate like ours in Lutz, FL 33559.

Our team at Home Therapist Cooling, Heating, and Plumbing is here to help with bathroom sink drains, P-trap replacements, and other plumbing needs throughout Tampa Bay. To learn more about our services or to schedule a visit, simply head over to our website and reach out. We’ll treat your home with care, explain your options clearly, and make sure your plumbing is working the way it should.

Commercial AC Maintenance and Replacement Planning in Tampa, FL 33634

When a commercial HVAC system starts aging, small issues can quietly build up in the background. That’s what we recently saw during a Premium Quarterly Service Agreement visit for a business in Tampa, FL 33634. Their rooftop system was still heating and cooling, but the unit was over 13 years old, showing heavy rust, and consuming more power than it should.

As part of our regular maintenance, we went through our full commercial checklist, confirmed the electric heat was operating at the time of the visit, and documented several concerns that point toward planning a full system replacement in the near future. Our goal with businesses across Tampa, FL 33634 is the same: keep you comfortable, avoid surprise breakdowns, and help you budget for upgrades before you’re stuck without AC.

Case Recap: Commercial HVAC Service in Tampa, FL 33634

Customer Problem: An Older Rooftop Unit Still Running, But Not Aging Well

The business owner in Tampa was part of our Premium Quarterly Service Agreement, which means we visit on a regular schedule to keep their commercial HVAC system cleaned, checked, and tuned up. On this visit, the system was technically doing its job: the electric heat came on, and the unit was heating as expected.

However, there were a few key concerns:

  • The system is approximately 13 years old, which is near or past the typical life expectancy for many rooftop commercial units in the Tampa Bay climate.
  • The condenser coil on the roof showed significant rust and wear.
  • Earlier this year, we had already replaced the blower motor due to failure or wear.
  • During this visit, we found the condenser fan motor was drawing more power than it should, a sign that it is working harder than normal.

From the customer’s point of view, this is a tricky stage: the building is still comfortable, but the system is using more energy and the risk of an inconvenient breakdown is increasing. Our job during commercial AC services in Tampa is to be transparent about what we see so owners can plan, instead of reacting in an emergency.

Inspection and Diagnosis: What We Checked and Why

On a Premium Quarterly Service Agreement visit, especially for a commercial client in a busy area like Tampa, FL 33634, we take a structured approach. Even when a system appears to be running, we’re looking for the early warning signs that can affect comfort, safety, and operating costs.

During this visit, we focused on several key areas:

  • Overall system operation: We verified that the unit turned on, responded to the thermostat, and delivered heat as expected at the time of service.
  • Electric heat function: We confirmed the electric heat system engaged and cycled properly during the visit.
  • Air movement: Since the blower motor had been replaced earlier in the year, we confirmed proper operation and listened for unusual noises or vibration.
  • Condenser section on the roof: We inspected the outdoor components, including the condenser coil and fan assembly, and documented visible rust on the coil.
  • Motor performance and power draw: We evaluated how hard the condenser fan motor was working and noted that it was consuming more power than it should.

The combination of age, rust on the condenser coil, prior blower motor replacement, and the overworking condenser fan motor led us to a clear diagnosis: the unit is functioning for now, but it is not operating efficiently and is likely to become increasingly unreliable.

Repair and Service Process: What We Did During This Visit

Even when we know a system is nearing the end of its useful life, it still deserves a thorough maintenance visit. For this Tampa, FL 33634 commercial client, we completed the scheduled quarterly service and then discussed long-term options.

Here’s how we approached the visit step by step:

1. Confirming System Operation

We started by running the system in heating mode, since the unit uses electric heat. We made sure the system responded to the thermostat, the blower engaged properly, and warm air was being delivered through the ducts. This ensures that, at the time of our visit, the business could continue normal operations without discomfort.

2. Visual and Mechanical Inspection

Next, we moved to a detailed visual check of both indoor and outdoor components. On the roof, we inspected the condenser coil and noted extensive rust. Rust is common in coastal and humid regions like Tampa Bay, but when it advances this far, it can weaken the coil surface and surrounding metal.

Inside the unit, we checked the blower compartment and verified that the recently replaced blower motor was operating as expected, with no abnormal noises or obvious issues.

3. Checking the Condenser Fan Motor

We then evaluated the condenser fan motor. Although it was still running, we identified that it was consuming more power than it should. In practical terms, that means the motor is under more strain than normal, which can drive up energy bills and increase the likelihood of a motor failure during heavy demand.

4. Completing the Maintenance Checklist

As part of our commercial AC maintenance in Tampa, we go through a structured checklist. This includes:

  • Inspecting electrical connections where accessible
  • Checking overall cleanliness and airflow paths
  • Confirming condensate drainage if applicable
  • Listening for abnormal sounds or vibration

All standard maintenance items were addressed so that the system left the visit operating as well as it reasonably could in its current condition. We verified proper operation at the end of the visit.

5. Discussing Findings and Replacement Recommendation

The most important part of the visit was the conversation with the client. We clearly explained:

  • The approximate age of the unit (around 13 years)
  • The extent of rust on the rooftop condenser coil
  • The fact that we had already replaced the blower motor this year
  • The current overworking of the condenser fan motor

Based on all of that, we recommended planning for a full unit replacement rather than continuing to invest in a series of motor and coil-related repairs. We emphasized that the system was still functioning at the time of service, but not efficiently, and that issues were likely to increase moving forward.

For many commercial clients in Tampa, FL 33634, this kind of proactive recommendation helps them budget and plan ahead instead of facing an emergency replacement in the middle of a busy workday.

Why This Fix and Recommendation Make Sense

On this visit, there wasn’t a single major “fix” performed; instead, the value came from thorough maintenance paired with honest, long-term planning.

Here’s why our approach works for commercial HVAC systems in Tampa:

  • Airflow and comfort: By keeping the blower side of the system maintained and confirming operation, we help ensure stable airflow throughout the space.
  • Electrical and motor health: Spotting a fan motor that is pulling more power than normal gives us an early warning sign, so we can alert the owner before it fails.
  • Energy efficiency: An older, rusted condenser coil and overworked fan motor almost always result in higher energy usage. Replacing the unit with a modern system usually brings better efficiency and lower operating costs.
  • Reliability: When you’ve already replaced one major component (like a blower motor) and see another one heading in the same direction, it’s often more cost-effective to look at full replacement rather than piecemeal repairs.

In the Tampa Bay climate, with high humidity and long cooling seasons, rooftop units face a lot of wear. Regular maintenance buys you time and visibility, while planned replacement helps avoid sudden downtime and rushed decisions.

When this client is ready, we can walk them through options for a new system and provide a professional AC installation in Tampa that’s sized and designed for their space and usage.

Pro Tips for Business Owners in Tampa

If you own or manage a commercial property in Tampa, FL 33634 or nearby, there are a few practical steps you can take to extend the life of your HVAC equipment and avoid surprises:

  • 1. Stay consistent with maintenance. Quarterly or at least biannual visits are especially important for rooftop units in Tampa’s heat and humidity. A plan like our Therapy Maintenance Plans helps catch issues early.
  • 2. Pay attention to age, not just performance. If your system is over 10–12 years old, start conversations about replacement even if it still seems fine. Age plus repeated repairs is often a sign it’s time to plan ahead.
  • 3. Watch your energy bills. A noticeable increase in energy costs without a change in usage can be a subtle sign that motors, coils, or other components are working harder than they should.
  • 4. Don’t ignore rust on rooftop equipment. In Florida, coastal air and frequent rain can accelerate corrosion. Heavy rust on coils and structural components can affect not only performance but also long-term reliability.
  • 5. Schedule inspections before peak seasons. For businesses in Tampa, FL 33634, it’s smart to schedule thorough checks before the hottest months. That way, you’re not discovering problems during your busiest or most uncomfortable days.
  • 6. Plan for capital improvements. Treat HVAC replacement like any other capital project. With enough lead time, we can help you compare options and avoid emergency decisions when equipment finally fails.

FAQ: Commercial HVAC Maintenance and Replacement in Tampa, FL 33634

How often should a commercial HVAC system be serviced in Tampa?

For most commercial properties in Tampa, FL 33634, quarterly maintenance is a solid schedule. The heat, humidity, and heavy cooling demand in our area put extra stress on rooftop units, so more frequent checks can extend equipment life and reduce unexpected breakdowns.

Is it worth repairing an older unit if it’s still running?

It depends on the age and repair history. In this case, the unit was around 13 years old, had already had a blower motor replaced, and showed signs that the condenser fan motor was overworking. When multiple major components start failing on an older system, it’s usually more cost-effective to plan for replacement instead of continuing to invest in repeated repairs.

What does rust on a rooftop condenser coil mean?

Rust is common in Florida’s climate, especially on rooftop units exposed to rain and salty air. Surface rust is expected, but extensive rust on a condenser coil can point to advanced wear. While the system may still run, efficiency and reliability can decline over time, and the risk of leaks or structural issues increases.

Why is my condenser fan motor using more power than normal?

When a condenser fan motor draws more power than it should, it’s often working harder due to age, internal wear, or increased mechanical resistance. That extra strain can shorten the motor’s life and raise energy bills. Catching this early allows us to discuss repair or replacement options before a sudden failure.

Can maintenance really prevent HVAC failures?

Maintenance can’t prevent every failure, but it significantly reduces the risk and often catches problems when they’re still small and manageable. For our commercial clients in Tampa, FL 33634, quarterly service lets us spot warning signs—like rising power draw or unusual noises—so owners have time to plan repairs or replacements on their schedule.

When should I start planning for a full HVAC replacement?

We typically suggest starting replacement conversations once a system passes 10–12 years of service, especially if you’ve already had major repairs. If we see compounding issues—such as rusted coils and overworked motors—we’ll be honest about the benefits of planning for a new system rather than waiting for a breakdown.

Why Choose Home Therapist for Commercial HVAC in Tampa Bay

When you invite us to service your commercial HVAC system in Tampa, FL 33634, you’re getting more than just a quick filter change. You’re getting a licensed, professional team that treats your business like our own.

Here’s what we focus on every visit:

  • Licensed and experienced technicians: Our techs work with commercial systems every day across Tampa Bay and understand how local heat, humidity, and rooftop conditions affect your equipment.
  • Transparent communication: We explain what we found, what’s working, what’s wearing out, and what we recommend next—so you can make informed decisions without pressure.
  • Clean, respectful work: We respect your property, your staff, and your customers. That means tidy work areas, clear communication about timing, and minimal disruption to your operations.
  • Long-term reliability: We’re not just trying to get you through today. Our maintenance plans and recommendations are built around long-term comfort, reliability, and predictable budgeting.
  • Commitment to Tampa Bay businesses: We’re a local company serving businesses throughout Tampa Bay, and we take pride in keeping our community’s offices, gyms, warehouses, and shops comfortable.

If you’d like to see what other customers say, you can find us on social media and trusted local directories:

  • Follow us on Facebook for updates and tips.
  • See project photos and stories on Instagram.
  • Watch behind-the-scenes clips on our TikTok channel.

For added peace of mind, you can also review our standing with trusted organizations:

Need Commercial HVAC Service in Tampa, FL 33634?

If you manage a business in Tampa, FL 33634 and aren’t sure how your HVAC system is holding up, we’re here to help. Whether you need a one-time checkup, a regular maintenance plan, or you’re starting to think about full replacement, our team will walk you through your options in plain language.

You can learn more about our commercial and maintenance options on our commercial AC services page, explore our AC tune-up services, or talk with us about the right maintenance schedule for your building.

When you’re ready, reach out to Home Therapist Cooling, Heating, and Plumbing to schedule commercial HVAC service in Tampa, FL 33634. We’ll make sure your system is cared for today and that you have a clear, realistic plan for tomorrow.

Bathtub and Sewer Drain Unclogging in Clearwater, FL 33756

When a bathtub stops draining the way it should, it can turn simple daily routines into a real hassle. That was the situation for a homeowner in Clearwater, FL 33756 who reached out to our team at Home Therapist Cooling, Heating, and Plumbing. Their tub drain had already been snaked once, but the water was still slow to leave the tub, and there were concerns about a deeper sewer drain issue.

In this visit, our technician Adalberto focused on getting the bathtub draining again and addressing the sewer line concerns in the most cost-effective and logical way: by re-snaking the line properly and using a cleanout access. From there, we discussed what to do if the problem turned out to be more than just a stubborn clog.

Below, we’ll walk through what we found, how we approached the job, and what homeowners in Clearwater can learn from this type of drain problem.

Case Recap

  • Location: Single-family home in Clearwater, FL 33756
  • Main issue: Bathtub not draining properly, likely tied into a sluggish sewer drain line
  • Previous attempt: Drain had been snaked up to about 24 feet, but the clog was still present
  • Our first step: Run the drain snake again and work the line thoroughly from a proper cleanout
  • Backup plan: If snaking did not fully clear the blockage, recommend deeper inspection for possible root intrusion, buildup, or structural sewer issues
  • Goal: Restore proper drainage and give the homeowner a clear plan for next steps if advanced repairs were needed

Customer Problem

By the time we were called out, the homeowner was frustrated with their bathtub drain. Even after having the line previously snaked, water was still slow to disappear. That’s a common sign that either:

  • The original clog wasn’t fully removed, or
  • There’s a deeper obstruction further down the sewer line

The homeowner in Clearwater, FL 33756 described the problem as an ongoing inconvenience. The tub would eventually drain, but not at a normal rate. That’s more than just an annoyance — when drains don’t clear properly, it can lead to standing water, soap scum buildup, and premature wear on plumbing fixtures.

They also wanted to avoid jumping straight into costly major sewer repairs unless they were truly necessary. That’s where a careful, step-by-step plumbing approach matters. Instead of guessing, we start with the most practical and affordable solution and build from there based on how the system responds.

Inspection and Diagnosis

On arrival, Adalberto’s first priority was to understand exactly how the bathtub tied into the home’s drain and sewer layout and what had already been done. Since the line had previously been snaked to around 24 feet, we knew there was at least some basic access and that the issue was persistent.

Our diagnostic process on this type of job typically includes:

  • Confirming which fixtures are affected (in this case, the bathtub and related sewer drain)
  • Checking for gurgling, backflow, or signs that other drains might also be slowing down
  • Locating and evaluating available cleanout access points
  • Reviewing any previous attempts, tools used, and how far the line was worked

In this Clearwater home, the symptoms matched a partial blockage more than a complete sewer backup: the tub would drain, but only after holding water for longer than normal. That pointed us toward a stubborn clog or buildup that hadn’t been fully broken up yet.

Based on the homeowner’s description and what we observed, the most sensible next step was to run the snake again, this time focusing on reaching and working past the previous 24-foot range and using a cleanout to attack the line more effectively.

Repair and Service Process

With the problem and history understood, Adalberto laid out a clear, two-stage plan for the homeowner: start with a thorough re-snaking of the drain, then reassess and recommend further diagnostic work only if needed.

1. Running the Snake Through the Cleanout

Access is everything when it comes to clearing clogged drains. For this visit in Clearwater, FL 33756, we used a cleanout to get the drain snake positioned properly into the sewer drain serving the bathtub. A cleanout typically provides a more direct route into the main line than working through a tub drain opening, which can have sharp turns and smaller diameter piping.

From that cleanout, we:

  • Fed the drain snake into the line, steadily and carefully
  • Worked the cable beyond the previously reported 24-foot distance
  • Stayed alert for resistance, changes in sound, or vibration that indicate obstructions
  • Backed up and re-ran sections to break up stubborn buildup if we encountered it

The goal with this process is to physically contact the clog, shred it, and push or pull debris through so that water can flow freely again. It’s a hands-on, feel-based job that relies on experience as much as tools.

2. Verifying Drain Performance

After snaking, we don’t just pack up and leave. We run water through the system and observe how it behaves. For a bathtub, that means filling the tub partway, opening the drain, and watching how quickly the water level drops. We also listen for unusual gurgling and check nearby fixtures for any signs of backup.

Once the line appeared to clear normally, we confirmed with the homeowner that the tub was draining as expected and explained what we had done and what to watch for over the next few days.

3. Planning for Deeper Inspection if Needed

In cases where snaking doesn’t fully solve the problem, we’re upfront about the next steps. For this Clearwater homeowner, we explained that if slow draining or backups persisted, the next phase would be a deeper inspection of the sewer line. That could include:

  • Camera inspection to visually inspect the inside of the pipe
  • Evaluating for root intrusion from trees or shrubs
  • Checking for heavy grease, scale, or soap buildup further down the line
  • Looking for pipe bellies, cracks, or structural problems

We also made it clear that removing a toilet, if ever required for better access, would be an additional cost. Keeping pricing transparent helps homeowners make informed decisions without surprise charges.

Why This Fix Works

Professional drain snaking is often the most cost-effective and logical first step for bathtub and sewer line issues in Clearwater, FL 33756. Here’s why it’s usually the right starting point:

  • Direct mechanical contact: A drain snake physically contacts the clog and breaks it apart. That’s more reliable than simple chemical drain cleaners, which often only partially dissolve buildup.
  • Extended reach: When we extend the snake well past 20+ feet, we’re able to reach clogs further down the line that simple homeowner tools can’t touch.
  • Protection for your pipes: When used correctly, a professional-grade snake clears the line without the harsh corrosive effects that repeated chemical cleaners can have on piping.
  • Step-by-step escalation: If snaking restores normal flow, you’ve solved the problem without expensive excavation or major sewer work. If it doesn’t, the system’s response tells us it’s time to investigate deeper issues.

In plumbing, we always want to balance effectiveness, cost, and long-term reliability. Starting with a thorough snaking from a cleanout checks all three boxes before moving on to more invasive repairs.

Pro Tips for Homeowners in Clearwater

Bathtub and sewer drain issues are common in older and newer homes across Clearwater, FL 33756, especially with our Florida humidity, frequent showers, and heavy use of drains year-round. Here are some practical tips to help reduce the risk of clogs and catch problems early:

  • Use hair catchers in tubs and showers. Hair is one of the most common contributors to slow drains. A simple strainer can prevent a lot of buildup over time.
  • Avoid flushing wipes or hygiene products. Even “flushable” wipes don’t break down like toilet paper and can contribute to clogs deeper in the sewer line.
  • Limit heavy grease and oils in drains. In our warm Florida climate, grease can stay liquid for a while, then cool and solidify further down the line, especially if it mixes with soap scum.
  • Watch for early warning signs. Gurgling sounds, occasional slow draining, or bad odors from drains in your Clearwater home can be an early signal to call for professional drain cleaning services before a full backup happens.
  • Consider periodic preventative cleaning. For homes with older piping, big trees nearby, or a history of clogs, scheduling periodic drain line cleaning and flushing can keep things flowing smoothly.
  • Know where your cleanouts are located. Being able to quickly show your plumber the cleanout locations on your Clearwater property can save diagnostic time and reduce labor costs.

FAQ: Bathtub and Sewer Drain Unclogging in Clearwater, FL 33756

Why did my bathtub still drain slowly even after it was snaked the first time?

In many cases, the initial snaking doesn’t fully remove the clog, or the blockage is further down the sewer line than the cable reached. In this Clearwater job, the line was previously snaked to about 24 feet, but the clog persisted, suggesting it either wasn’t completely broken up or was located deeper in the line. A thorough re-snaking from a good cleanout access can often reach and clear more of the obstruction.

When should I move from snaking to a deeper sewer inspection?

If a professional snaking doesn’t noticeably improve drainage or the problem returns quickly, it’s time to look deeper. That’s when we may recommend a camera inspection to check for roots, heavy buildup, or structural issues in the sewer line serving your Clearwater, FL 33756 home. We only recommend this step when the behavior of the system tells us it’s necessary.

Do you always have to remove the toilet to clear a sewer clog?

No. Whenever possible, we prefer to use existing cleanouts to access the sewer line. Removing a toilet is sometimes needed for better access, but it adds labor and cost. For this job, we used a cleanout to run the snake. If a toilet does need to be removed on a future visit, we explain that clearly in advance and outline the additional cost so there are no surprises.

Is chemical drain cleaner a good solution for slow tub drains?

Chemical drain cleaners can sometimes provide short-term relief, but they often don’t fully clear the clog and may be harsh on your pipes, finishes, and even your health if overused. For persistent or recurring slow drains in Clearwater, it’s safer and more effective to have a licensed plumber perform a proper mechanical cleaning with a snake or other professional tools.

How can I tell if the problem is just my bathtub or the whole sewer line?

If only the bathtub is slow but other fixtures in your Clearwater home are draining normally, the issue may be limited to that branch line. If you notice multiple fixtures backing up (for example, toilet, tub, and sinks), gurgling when flushing, or sewage odors, the main sewer line may be involved. During our visit, we always check how multiple fixtures are behaving to narrow down the problem.

Do you offer other plumbing services in addition to drain cleaning?

Yes. Home Therapist Cooling, Heating, and Plumbing provides a full range of plumbing services for homeowners across Tampa Bay, including plumbing maintenance plans, drain cleaning for common household drain issues, and more. We can help you address immediate problems and plan for long-term reliability.

Why Choose Home Therapist for Drain Problems in Clearwater

When you’re dealing with a slow or clogged bathtub drain in Clearwater, FL 33756, you want more than a quick, temporary fix. You want a licensed professional who will take the time to diagnose the issue correctly, explain your options, and respect your home.

At Home Therapist Cooling, Heating, and Plumbing, our team brings:

  • Licensed, professional technicians: Our plumbers are trained to handle everything from simple tub clogs to complex sewer line issues throughout Tampa Bay.
  • Clear, honest communication: We explain what we’re doing, why we’re doing it, and what it costs before we move forward. On this Clearwater job, that meant starting with a re-snake and outlining when deeper inspection might be needed.
  • Clean and respectful work: We treat your home like it’s our own, protecting surfaces, minimizing mess, and cleaning up after the job is done.
  • Focus on long-term reliability: We don’t just clear the immediate clog. We help you understand how to prevent future issues and when it makes sense to consider preventative services.
  • Commitment to Tampa Bay homeowners: We proudly serve Clearwater and surrounding communities with dependable plumbing and HVAC services.

If you’d like to see more about our work and what other homeowners are saying, you can visit us on Facebook, follow our updates and project highlights on Instagram, or check out our videos on YouTube.

For added peace of mind, you can also review our standing with trusted organizations and directories, including our Better Business Bureau profile and our listing with the Tampa Bay Chamber of Commerce. Many homeowners also find us through platforms like Google Maps, where they can quickly confirm our location and service area.

Need Help with a Slow Bathtub or Sewer Drain in Clearwater, FL 33756?

If your bathtub is draining slowly or you suspect a sewer drain issue in your Clearwater, FL 33756 home, we’re here to help. Whether you need a straightforward snaking from a cleanout or a deeper look at your sewer line, our team will walk you through each step calmly and clearly.

Homeowners across Tampa Bay trust Home Therapist Cooling, Heating, and Plumbing for prompt, professional drain cleaning services and reliable plumbing repairs. Reach out today to schedule a visit, restore proper drainage, and get your bathroom back to working the way it should.

We’re ready to help you feel comfortable and confident in your home’s plumbing again in Clearwater, FL 33756 and the surrounding Tampa Bay communities.

AC Maintenance Visit and UV Light Recommendation in Tampa, FL 33615

On a recent Premium Therapy Plan visit for a homeowner in Tampa, FL 33615, we stopped by for a routine AC maintenance appointment on a system we originally installed back in 2023. The system is running smoothly, keeping the home comfortable, and there were no major issues to report. During our inspection, we did notice some light organic growth starting around the blower cables, so we recommended installing a UV light to help prevent that from spreading and to better protect the home’s indoor air quality over time.

Case Recap: Routine AC Maintenance in Tampa, FL 33615

Customer Problem: Keeping a Newer AC System Healthy

This homeowner in Tampa, FL 33615 is on one of our older Premium Therapy maintenance plans, which means we come out regularly to take care of the system and keep an eye on anything that could cause trouble down the road. On this visit, there wasn’t a complaint like “no cooling” or strange noises. Instead, the main goal was simple: confirm the AC is performing well and catching any early signs of issues before they turn into costly repairs.

Because Tampa Bay homes deal with high heat and humidity most of the year, even newer systems can develop organic growth inside the air handler or duct system over time. Moist, dark areas around the blower and coils can become a place where that growth tries to take hold. That’s exactly why this homeowner values ongoing AC maintenance in Tampa — to stay ahead of those humid Florida conditions.

During this particular visit, the system was cooling well and the homeowner was comfortable. Their main concern was simply making sure everything continued to run efficiently and safely, and that indoor air quality stayed in good shape for the long term.

Inspection and Diagnosis: What We Checked and What We Found

As with every Premium Therapy Plan visit, we followed a structured inspection process. Our technician walked through the system step by step to make sure all major components were in good working order.

On this AC maintenance visit in Tampa, FL 33615, we focused on:

  • Outdoor unit check: Visual inspection of the condenser, fan, and surrounding area to confirm there was no visible damage or obstruction.
  • Indoor air handler inspection: Checking the blower section, electrical connections, and overall cleanliness of the cabinet.
  • Filter and airflow review: Making sure airflow through the system was not restricted by a clogged filter or obvious duct issues.
  • Drain and general moisture conditions: Looking for signs of standing water, blocked drain lines, or excessive moisture around the unit.

Everything essential to the cooling performance checked out well. The system the homeowner had us install in 2023 is still performing the way it should, which is exactly what we want to see on a maintenance visit.

The one thing we did notice was some organic growth beginning to form on the blower cables. It wasn’t severe, and it hadn’t yet turned into a major issue, but in our climate it’s something we take seriously. Where there’s persistent moisture and darkness, organic growth can continue to develop if nothing is done to control the environment.

Because this homeowner is on one of our older plan types that includes duct sanitation as a benefit, we also keep duct cleanliness and air quality at the front of our mind during each visit. Our recommendation in this case was focused on proactively managing growth inside the air handler with the help of a UV light.

Repair or Service Process: How We Handled This Maintenance Visit

On a plan visit like this in Tampa, FL 33615, our goal is to keep things simple, thorough, and respectful of the homeowner’s time and home. Here’s how we approached the visit from start to finish.

1. Confirming System Operation

First, we verified that the AC was running as expected. We listened for unusual sounds, checked that air was flowing from the registers, and confirmed that the thermostat was communicating correctly with the system. From a performance standpoint, the system was cooling the home properly.

2. Visual and Safety Checks

Next, we carried out a visual inspection around both the indoor and outdoor sections. Our technician looked for signs of:

  • Physical damage or loose components
  • Obvious electrical issues such as burnt wiring or loose connections
  • Excessive dust or debris buildup that might restrict airflow
  • Moisture, leaks, or anything that could impact safety or long-term reliability

These checks are a core part of every AC maintenance visit we perform in Tampa and across the Tampa Bay area. They help us catch small issues before they interrupt comfort.

3. Inspecting the Blower Area

When we opened the air handler cabinet, we took a closer look at the blower assembly and wiring. That’s where we saw the early signs of organic growth beginning on the blower cables. Again, it wasn’t extensive, but the presence of any growth is a sign that conditions are right for it to continue spreading over time.

We cleaned what we could and documented the condition so the homeowner would have a clear understanding of what we saw. We never want anyone in Tampa, FL 33615 to feel like work is happening behind closed doors; communication and transparency are a big part of how we operate.

4. Explaining the UV Light Recommendation

After completing the mechanical and visual checks, we walked the homeowner through our findings. Since the system was running well, the focus of the conversation was on air quality and long-term protection rather than an urgent repair.

We recommended installing a UV light inside the air handler as a preventative step to:

This is a common recommendation in our humid Tampa Bay climate, especially when we see the first signs of growth. For homeowners who want to learn more, we also share resources like our article on adding UV light to your air conditioner and our guide on planning for UV light installation.

5. Verifying Normal Operation Before We Left

Before wrapping up, we made sure everything was buttoned up, clean, and operating as it should. We closed the panels, checked that the system cycled on and off normally, and confirmed that the home was still comfortable. We left the homeowner with a clear explanation of the next steps if they decide to move forward with the UV light installation or additional duct treatments included in their plan.

Why This Fix (and Recommendation) Works

The AC system in this Tampa, FL 33615 home is relatively new and in good working order. In a case like this, the “fix” is really about prevention and protection, especially in a warm, humid climate like ours.

Organic growth inside an air handler tends to start where three conditions meet:

  • Moisture from normal cooling and condensation
  • Darkness inside the cabinet and ductwork
  • Surfaces that collect dust, dander, or other particles

A UV light is installed inside the unit in a location that continuously exposes the internal surfaces to ultraviolet light while the system operates. This helps in a few important ways:

  • Disrupting organic growth: UV energy can interfere with the ability of certain organisms to grow and spread on surfaces inside the unit.
  • Supporting cleaner components: When organic growth is controlled, coils and blower parts tend to stay cleaner, which can help maintain efficient airflow.
  • Helping indoor air quality: Controlling growth inside the equipment reduces the chance that particles break loose and travel through the duct system.

Preventive measures like UV lights pair well with regular maintenance. When you keep up with scheduled inspections, filter changes, and duct sanitation as needed, you give your AC system in Tampa, FL 33615 the best chance to run reliably and cleanly for years.

For homeowners who want a broader overview of how we approach service and follow-up when something does need attention, we also have a helpful guide on what to expect when your AC needs repairs or maintenance and another case study that walks through a full HVAC system and ductwork installation project in the Tampa area.

Pro Tips for Homeowners in Tampa

Whether your system is brand new or a few years old like this 2023 installation, a few simple habits can go a long way toward keeping your AC healthy in Tampa, FL 33615.

  • Stay consistent with maintenance visits. Our Tampa Bay climate is tough on HVAC systems. Having a professional check your equipment at least once or twice a year helps catch issues early, just like we did with the organic growth on this blower assembly.
  • Keep filters clean and sized correctly. A dirty or restrictive filter forces your system to work harder and can increase moisture and dust buildup inside the air handler. Follow the replacement schedule recommended for your specific filter type.
  • Watch for musty odors. If you notice a persistent musty smell when the AC runs, it may be a sign of growth inside the unit or ducts. Mention it when you schedule your next maintenance visit so we can investigate.
  • Manage indoor humidity. Tampa homes often benefit from keeping indoor humidity in a comfortable range with proper AC use and ventilation. Good humidity control reduces the conditions that allow organic growth to thrive.
  • Consider air quality upgrades. UV lights, improved filtration, and proper duct cleaning or sanitation can all support a cleaner system. These upgrades are especially helpful for households with allergies or respiratory sensitivities.
  • Keep the area around your equipment clear. Indoors, avoid stacking items around the air handler. Outdoors, keep plants, debris, and objects away from the condenser so air can move freely.

FAQ: AC Maintenance and UV Light for Tampa, FL 33615 Homes

Do I need AC maintenance if my system is only a couple of years old?

Yes. Even newer systems in Tampa, FL 33615 benefit from regular maintenance. In this case, the AC was installed in 2023 and was running well, but our visit still uncovered early organic growth on the blower cables. Catching that now allows us to recommend simple preventive steps before it becomes a bigger issue.

Is organic growth inside the air handler an emergency?

Light organic growth, like what we saw on this visit, is not usually an immediate emergency, but it is something we want to address. Our approach is to clean what we can, monitor the area, and recommend options like UV light and proper duct sanitation when appropriate so the issue doesn’t progress.

What does a UV light actually do for my AC system?

A UV light is installed inside the air handler to expose internal surfaces to ultraviolet energy. It helps control organic growth on surfaces within the unit, which can support cleaner components and better indoor air quality. It doesn’t replace filters or regular maintenance; it works alongside them.

How often should I schedule maintenance in Tampa, FL 33615?

For most homeowners in Tampa, we recommend at least one thorough AC maintenance visit per year, and often two (spring and fall) for homes that rely heavily on cooling. This homeowner is on a Premium Therapy Plan, which provides regular visits like this one so the system stays in top condition.

What’s the benefit of a maintenance plan versus one-time tune-ups?

A maintenance plan helps ensure you don’t forget about service and gives your technician a history of your system. Over several visits, we learn how your equipment behaves, what’s normal, and what’s changing. That allows us to make better, more personalized recommendations — like when we saw early organic growth and suggested a UV light for this Tampa, FL 33615 home.

Does duct sanitation really matter if my system is newer?

It can. Even in newer systems, ducts and internal surfaces can collect dust, dander, and moisture, especially in a humid area like Tampa Bay. Legacy plans that include duct sanitation are designed to support cleaner air and a healthier system. When combined with UV lighting and regular inspections, it creates a strong foundation for long-term comfort and reliability.

Why Tampa Bay Homeowners Choose Home Therapist

When we visit a home in Tampa, FL 33615 or anywhere in Tampa Bay, we treat it with the same care we’d want for our own families. That means:

  • Licensed, professional technicians: Your system is inspected and serviced by trained professionals who understand Florida’s climate and local home conditions.
  • Clear communication: We explain what we found, what we recommend, and why — without pressure or confusing jargon.
  • Clean, respectful work: We protect your home, clean up after ourselves, and leave everything in good order when we’re done.
  • Focus on long-term reliability: We’re not just trying to get you through today; we’re looking ahead to make sure your AC is dependable for the seasons to come.
  • Commitment to Tampa Bay homeowners: This is our community too, and we take pride in being a trusted neighbor for cooling, heating, and plumbing needs.

If you’d like to see more of what we do and how we care for systems across Tampa Bay, you can follow us on social platforms like Pinterest or connect with us on Reddit. Our reputation is also backed by organizations such as the Better Business Bureau, the Tampa Bay Chamber of Commerce, and independent review platforms like Proven Expert.

Need AC Maintenance in Tampa, FL 33615?

If you live in Tampa, FL 33615 and want your AC system to stay reliable, efficient, and clean, we’re here to help. Whether you’re interested in a one-time tune-up, a Premium Therapy-style maintenance plan, UV light installation, or help with duct sanitation, our local Tampa Bay team is ready to take care of you.

Reach out to schedule your next maintenance visit, and we’ll walk you through the same careful, step-by-step approach we used on this home — so you can stay comfortable and confident in your system all year long.

Premium HVAC Maintenance Plan Visit in Tampa, FL 33617

For a homeowner in Tampa, FL 33617, staying ahead of the Florida heat is all about prevention, not emergency calls. On this visit, we came out for a scheduled Premium Therapy Plan maintenance appointment and full system checkup. The goal was simple: keep a relatively new HVAC system running at its best, protect indoor air quality, and avoid surprise breakdowns during those hot Tampa afternoons.

During this visit, we performed a complete maintenance service under the Premium Therapy Plan, including thorough cleaning of the evaporator and condenser coils, clearing the condensate drain line, verifying UV light operation, and checking that all major components were running within normal operating ranges. By the time we wrapped up, the system was clean, tested in both cooling and heating modes, and confirmed to be in good operating condition.

Case Recap: Premium Therapy Plan Visit in Tampa

Here’s a quick overview of what we did for this Tampa, FL 33617 homeowner during Visit #4 of their Premium Therapy Plan:

  • Performed a full seasonal maintenance visit under the Premium Therapy Plan.
  • Thoroughly cleaned both evaporator and condenser coils.
  • Flushed and cleared the condensate drain line to help prevent backups.
  • Completed a full system inspection of pressures, motors, compressor, and controls.
  • Verified UV light operation and confirmed filters were clean.
  • Tested the system in both cooling and heating modes; no issues observed.

Customer Problem: Staying Ahead of Florida’s Heat

This homeowner in Tampa, FL 33617 wasn’t calling us because something was broken. They’re part of one of our older maintenance plans, which includes enhanced services like duct sanitation provisions, and they take their home’s comfort seriously. The goal of this visit was to stay proactive:

Rather than waiting for an AC failure in the middle of a humid Tampa afternoon, they wanted to make sure their roughly two-year-old system stayed clean, efficient, and reliable. As part of their Premium Therapy Plan, this was Visit #4, so we focused on a detailed tune-up and inspection to confirm everything was still operating the way it should.

From our end, we also keep an eye on plan details, like the duct sanitation benefits that come with some of the older plans. That way, when it’s time to schedule or revisit those services, we’re ready with accurate information for the homeowner.

Inspection and Diagnosis: What We Checked and Why

Even when a system seems to be running fine, a proper maintenance visit is much more than a quick filter change. On this service call in Tampa, FL 33617, we worked through a structured inspection so we could confidently say the system was in good operating condition.

Here’s what our technician walked through and why it matters:

  • Evaporator coil condition: We inspected the indoor coil for dirt, dust, and microbial buildup. A dirty coil reduces airflow, makes the system work harder, and can cause comfort issues and higher energy bills.
  • Condenser coil condition: Outside, we checked the condenser coil for debris, leaves, grass clippings, and road dust. A clean condenser is essential for proper heat rejection in our Florida climate.
  • Condensate drain line: We confirmed that the drain line was clear and flowing. Clogged drain lines can lead to water leaks, ceiling damage, or even system shutdowns.
  • System pressures: We confirmed that refrigerant pressures were within normal operating ranges for this system. Pressures that are too high or too low can be a sign of underlying issues.
  • Blower motor and fan motors: We checked that the blower motor and fan motors were operating correctly, with normal consumption and no signs of strain or unusual noise.
  • Compressor operation: We verified that the compressor started, ran, and shut down normally, with smooth operation.
  • UV light: The UV light was inspected for proper operation to help support better indoor air quality.
  • Air filters: We checked filters and found them clean, which is exactly what we like to see during a maintenance visit.

After inspections, we tested the system in both cooling and heating modes. In Tampa, FL 33617, the AC side usually works the hardest, but we also want to be sure the heat is ready for those cooler mornings. The system operated properly in each mode, and no issues were observed.

Repair and Service Process: Step-by-Step Maintenance

Because this was a Premium Therapy Plan maintenance visit, the focus was on cleaning, clearing, and confirming. Here’s how we approached the work on this two-year-old system.

1. Coil Cleaning for Better Efficiency

We started with the evaporator and condenser coils. Both were thoroughly cleaned as part of the plan. Cleaning the coils helps in several ways:

Clean evaporator coils allow better heat absorption inside the home, which improves comfort and reduces runtime. Clean condenser coils outside help the system release heat more effectively so the compressor doesn’t have to work as hard.

2. Clearing and Flushing the Drain Line

Next, we flushed and cleared the condensate drain line. In Tampa’s humid climate, air conditioners pull a lot of moisture out of the air. That moisture has to go somewhere, and if algae or debris builds up in the line, water can back up into the air handler or overflow the drain pan.

By flushing the line on this visit, we helped prevent future clogs and potential water damage. It’s a small step that can prevent a big mess later on.

3. Full System Performance Check

With the major cleaning taken care of, we moved into detailed testing:

  • Confirmed pressures were within normal range for this system.
  • Verified the blower motor, fan motors, and compressor were operating correctly.
  • Listened for unusual sounds and checked for signs of strain.
  • Reviewed overall system operation in both cooling and heating modes.

Because all operating parameters were within normal range, there were no repairs needed at this time. That’s exactly what we want to see on a system this age, especially with a homeowner who stays on top of their plan visits.

4. UV Light and Air Quality Checks

We also verified that the UV light installed on the system was working properly. UV lights are often used to help reduce microbial growth on coils and in certain parts of the HVAC system, which can support better indoor air quality when paired with regular maintenance and clean filters.

The UV light for this Tampa, FL 33617 home was functioning as expected, and filters were clean, so no additional adjustments were needed.

5. Plan Review and Future Considerations

Because this homeowner is on one of our older Premium Therapy Plans that includes duct sanitation benefits, we made note of those plan details in our job notes. Our goal is to keep the homeowner informed about what their plan covers and when it’s a good time to discuss services like duct sanitation, especially if they start to notice dust buildup or allergy concerns.

Why This Maintenance Visit Works So Well

This visit didn’t involve a major repair—and that’s the point. Regular maintenance keeps systems in the “no repair needed” category longer. Here’s why this type of service is so effective for homes in Tampa, FL 33617 and across Tampa Bay.

Clean coils = better heat transfer. When evaporator and condenser coils stay clean, the system can move heat more efficiently. In cooling mode, your system removes heat from inside your home and rejects it outside. Any dirt buildup on those coils acts like a blanket that blocks this process.

Clear drains = less risk of water damage. With our humidity, condensate production is high. A clear, flushed drain line reduces the chances of water backing up into the system or leaking into ceilings and walls.

Normal operating parameters = peace of mind. When pressures, motors, and compressors are all within normal operating ranges, it tells us the system is working as designed. That means less risk of surprise breakdowns and more predictable comfort.

UV and filtration checks = healthier air. Properly functioning UV lights, along with clean filters and optional services like duct sanitizing, help support better indoor air quality. That’s especially helpful for families dealing with allergies, pets, or the extra dust that can come from living in busy parts of Tampa.

Pro Tips for Homeowners in Tampa

If you’re a homeowner in Tampa, FL 33617 or nearby areas, here are a few practical tips to keep your HVAC system running like this one:

  • Stick to a maintenance schedule: Don’t wait for something to go wrong. Regular visits under a plan like our Therapy Maintenance Plans help catch issues early.
  • Change filters regularly: Even though this home’s filters were clean, that’s only because they’ve stayed on top of replacements. In our climate, monthly checks are a smart habit.
  • Keep the outdoor unit clear: Trim plants, remove leaves, and avoid stacking anything around the condenser. Good airflow outside helps your system cool more effectively.
  • Watch for drain line signs: If you notice water near the air handler, ceiling stains, or musty odors, it could be a drain line issue. A maintenance visit can usually catch this before it becomes serious.
  • Consider air quality add-ons: If you’re sensitive to dust or allergies, ask about UV lights, air duct sanitizing services, or indoor air quality solutions that fit your home.
  • Don’t skip tune-ups on newer systems: Even a two-year-old system, like the one in this Tampa, FL 33617 home, benefits from regular AC maintenance and inspections. It helps maintain your warranty and extend equipment life.

FAQ: Premium HVAC Maintenance in Tampa, FL 33617

Do I really need maintenance if my AC is only a couple of years old?

Yes. The system in this Tampa, FL 33617 home is about two years old and still received a full Premium Therapy Plan maintenance visit. Regular maintenance helps keep everything clean, confirms that operating parameters are normal, and protects against avoidable breakdowns as the system ages.

What’s included in a Premium Therapy Plan visit?

A visit like this typically includes a full system inspection, cleaning of evaporator and condenser coils, flushing of the condensate drain line, performance checks in both cooling and heating modes, and verification of components such as the blower motor, fan motors, compressor, and any installed UV lights. Plan details can vary slightly based on when the plan was started, so we always review your specific coverage.

How do you know everything is operating correctly?

We confirm that all operating parameters are within normal range and that the system starts, runs, and shuts down the way it should in both cooling and heating modes. For this homeowner, pressures, motor operation, compressor behavior, and UV light functionality were all normal, and no issues were observed during testing.

What is duct sanitation and how does it relate to older plans?

Some of our earlier maintenance plans include duct sanitation benefits. This service is focused on treating the ductwork to reduce microbial growth and improve overall cleanliness. During this visit, we documented that the homeowner is on one of those older plans so we can coordinate duct-related services appropriately based on their coverage and needs.

How often should Tampa homeowners schedule AC maintenance?

Most homes in Tampa, FL 33617 benefit from at least one professional maintenance visit per year, and many homeowners prefer twice-yearly checkups because of our long cooling season. If you’d like a deeper dive into maintenance timing, you can also read our detailed guides like the HVAC maintenance checklist and our AC tune-up service overview.

Why Choose Home Therapist for Your HVAC Maintenance

When you invite us into your home, you’re trusting us with your comfort, your air quality, and your property. We take that seriously—on every visit, from quick tune-ups to more involved repairs.

Licensed and professional technicians: Our team is fully licensed and trained to work on modern HVAC systems, UV lights, and indoor air quality products. We don’t cut corners, and we follow a clear maintenance process so nothing important gets overlooked.

Transparent communication: We explain what we’re doing, why we’re doing it, and what we find. In this Tampa, FL 33617 visit, we were clear that the system was in good operating condition, with no issues observed, and we documented plan details related to duct sanitation so the homeowner knows exactly what’s available to them.

Clean and respectful work: We treat your home like it’s our own. That means keeping our work area neat, being careful with your property, and leaving the space as clean as we found it once the maintenance visit is done.

Long-term reliability focus: Our Premium Therapy Plan and other maintenance options are designed to extend system life, reduce the risk of breakdowns, and maintain comfort in Tampa’s challenging climate. We’re not just fixing what’s broken—we’re helping prevent problems in the first place.

If you’d like to get a feel for how we work and how we treat customers across Tampa Bay, you can connect with us on social media:

For additional peace of mind, you can also see our standing with trusted local and national organizations:

Schedule Your HVAC Maintenance in Tampa, FL 33617

If you live in Tampa, FL 33617 and want your system to run as smoothly as the one in this case, we’re here to help. Whether you’re interested in a one-time tune-up, a Premium Therapy Plan, or additional services like UV light installation or UV system upgrades, our local Tampa Bay team is ready to take care of you.

Reach out to Home Therapist Cooling, Heating, and Plumbing to schedule your next HVAC maintenance visit in Tampa and keep your home comfortable, efficient, and prepared for the Florida heat and humidity.

Premium Home Therapy Plan Maintenance in Apollo Beach, FL 33572

During a recent Premium Home Therapy Plan visit for a homeowner in Apollo Beach, FL 33572, our technician performed routine maintenance on the home’s comfort systems and provided plumbing suggestions for future improvements. Regular tune-ups like this are designed to catch small issues early, keep equipment running efficiently, and help avoid uncomfortable breakdowns in the middle of our hot, humid Florida weather.

On this visit, we completed the scheduled maintenance, confirmed that the system was operating as expected at the end of our appointment, and noted a few plumbing items where upgrades or repairs would be beneficial. We’ll be following up with clear, written estimates so the homeowner can move forward when the timing is right.

Case Recap

Customer Problem: Staying Ahead of Issues, Not Waiting for Breakdowns

For this appointment, the homeowner in Apollo Beach wasn’t calling us because something had already failed. Instead, they were taking advantage of their Premium Home Therapy Plan to make sure their HVAC system stayed reliable and to keep an eye on their plumbing before problems showed up.

In our climate around Apollo Beach, FL 33572, air conditioning systems run hard for much of the year, and plumbing is constantly exposed to high humidity and mineral content in the water. Even if everything seems to be working fine, wear and tear can slowly build up. Dust, debris, algae growth in drains, and minor plumbing issues can all impact comfort, efficiency, and long-term reliability.

With this plan visit, the homeowner’s main concerns were straightforward:

  • Keep the AC running smoothly through Florida’s heat and humidity.
  • Avoid surprise breakdowns when the family needs cooling the most.
  • Get professional eyes on the plumbing and receive honest suggestions, not pressure.
  • Have one trusted local team they can call for both HVAC and plumbing in Apollo Beach.

Our technician approached this visit with those goals in mind: confirm everything is operating properly today and identify smart, future-focused plumbing improvements for tomorrow.

Inspection and Diagnosis

Even during a routine maintenance visit like this one in Apollo Beach, FL 33572, we follow a structured process. The idea is not just to “take a quick look” but to complete a thorough check so we can give the homeowner a confident update on the health of their systems.

On this Premium Home Therapy Plan visit, our inspection typically includes:

  • Visual inspection of indoor and outdoor HVAC equipment to look for signs of wear, corrosion, or damage.
  • Check of filters and accessible airflow paths to make sure the system can breathe properly.
  • Inspection of the condensate drainage path for clogs, algae buildup, or leaks that could lead to water damage.
  • Basic electrical and control checks to confirm that safeties and controls are operating as they should.
  • System start-up and run check to listen for unusual noises and verify that cooling is being delivered as expected.

Because this homeowner is also interested in the plumbing side of their plan, we also took the opportunity to look for visible plumbing concerns where practical—things like aging fixtures, exposed piping conditions, or areas where prior work might be due for an upgrade.

At the end of our inspection and diagnosis, we confirmed that the HVAC system was operating normally after the maintenance. We also documented several plumbing suggestions that would help improve reliability, prevent potential leaks, or modernize parts of the plumbing system over time.

Repair and Service Process During This Visit

Maintenance under the Premium Home Therapy Plan is more than a quick wipe-down. Each step is there to protect the system and keep the home comfortable and safe, especially in a coastal community like Apollo Beach.

Here’s how we typically approach a visit like this, and why it matters:

1. System Safety and Basic Operation Check

We start by confirming that the system powers on and responds correctly to the thermostat. This gives us a baseline: we know how the system behaves before we touch anything, which helps us identify changes or improvements after the maintenance is done.

2. Cleaning and Care of Key Components

Dust, dirt, and debris are the enemies of efficiency and longevity. On a scheduled plan visit in Apollo Beach, FL 33572, we commonly:

  • Clean or replace the air filter if it is part of the agreement or at the homeowner’s request.
  • Clean accessible areas of the indoor unit to reduce dust buildup.
  • Clear debris around the outdoor condenser to improve airflow around the unit.

This helps the system move air more freely, which reduces strain on the components and can support more stable comfort throughout the home.

3. Drainage and Moisture Management

In Florida’s humidity, proper condensate drainage is critical. We check the drainage path for signs of clogs or slow-draining lines and make sure that any safety switches tied to the drain are positioned correctly and able to protect the home from overflow.

By confirming drainage during this visit, we help the homeowner in Apollo Beach avoid water-related surprises like ceiling stains, wet floors, or mold-friendly moisture around the indoor unit.

4. Controls and Basic Electrical Checks

Next, we confirm that basic electrical connections and controls are in acceptable condition for ongoing operation. While we do not guess at values or quote numbers that were not measured, we do verify that everything we can see and safely access is operating as expected at the time of the visit.

5. Performance Check After Maintenance

When the maintenance steps are complete, we restart the system and observe operation. We listen for unusual noises, check air movement, and confirm that the system responds properly to thermostat changes. For this Apollo Beach homeowner, we verified proper operation after the work was done and confirmed that the system was running as expected.

6. Plumbing Suggestions and Future Planning

Because this was a Premium Home Therapy Plan visit that includes attention to plumbing, we also took note of areas where plumbing improvements would be beneficial in the near future. While we don’t pressure homeowners on the spot, we document:

  • Any fixtures or exposed piping that show early signs of wear.
  • Opportunities to improve reliability, such as proactive replacement of aging components.
  • Options for upgrades that could enhance convenience or water efficiency.

We then prepare clear, written estimates so the homeowner can review everything in their own time and decide what work to schedule next.

Why This Fix – and This Plan – Works

This particular visit didn’t involve a major repair; it focused on preventative maintenance under the Premium Home Therapy Plan and identifying plumbing needs before they turn into emergencies. The value comes from how HVAC and plumbing systems naturally age in a place like Apollo Beach, FL 33572.

Here’s why this approach works so well for local homeowners:

  • Airflow and efficiency: Clean filters, coils, and open outdoor clearances let your system move air without fighting against dust or debris. That means less strain and more consistent comfort.
  • Drainage and moisture control: By checking and maintaining condensate drains, we reduce the risk of leaks and moisture problems in the home, which are common in Florida’s climate.
  • Electrical and controls reliability: Periodic checks help catch loose connections or control issues before they cause intermittent failures.
  • Plumbing peace of mind: Identifying potential plumbing issues early often turns what could be a surprise emergency into a planned, budget-friendly project.
  • Consistent oversight: With repeated visits over the life of the system, our technicians become familiar with each home, which makes it easier to spot changes or trends that need attention.

In short, this Premium Home Therapy Plan visit in Apollo Beach was about protecting comfort and planning ahead—rather than waiting for something to break on the hottest or most inconvenient day of the year.

Pro Tips for Homeowners in Apollo Beach

If you’re a homeowner in Apollo Beach, FL 33572, here are some practical, low-stress steps you can take to support your HVAC and plumbing between professional visits:

  • Keep at least a couple of feet clear around your outdoor unit. Trim back bushes, move stored items, and avoid stacking anything against the unit. Good airflow helps your AC handle the heavy Florida workload more easily.
  • Check and change air filters regularly. In our climate, many homes benefit from checking filters monthly, especially during peak cooling season. A clean filter is one of the simplest ways to keep your system running smoothly.
  • Watch your drains and fixtures. Slow drains, occasional gurgling, or minor drips are early warning signs. Mention these during your next maintenance visit so we can address them before they become bigger plumbing problems.
  • Pay attention to humidity inside the home. If the air starts to feel sticky even when the temperature is cool, it may be a sign that your system needs attention. Bring this up during your maintenance appointment so we can investigate.
  • Know where your main water shut-off is. If a plumbing issue ever appears between plan visits, being able to shut off water quickly can reduce damage while you wait for service.
  • Consider scheduling annual water heater checkups. Regular attention to your water heater can extend its life and reduce the risk of leaks. For more details, you can review our article on water heater maintenance scheduling and annual inspections.

Related Services and Resources

Many Apollo Beach homeowners who choose a Premium Home Therapy Plan also want to understand their other options for keeping systems in top shape. If you’re exploring maintenance and repair services, you may find these resources helpful:

FAQ About Premium Home Therapy Plan Visits in Apollo Beach

How often should I schedule a Premium Home Therapy Plan visit?

Most homeowners in Apollo Beach benefit from regular planned visits based on their agreement, typically aligned with seasonal usage. These visits help keep your HVAC system ready for heavy summer demand and allow us to monitor plumbing conditions over time. We coordinate visit frequency with you so it fits your home and schedule.

What’s the main benefit of a plan visit if my system seems fine?

The biggest advantage is prevention. During a plan visit, we clean critical components, check airflow and drainage, and look for early warning signs in both HVAC and plumbing. Catching issues early often means lower repair costs, fewer surprises, and more consistent comfort in your Apollo Beach home.

Do you handle both HVAC and plumbing during the same appointment?

When your plan includes both HVAC and plumbing, we focus primarily on the scheduled maintenance scope while also keeping an eye out for visible plumbing concerns. If we see items that should be addressed, we document them and follow up with clear estimates so you can decide what to schedule next.

Will I be pressured to approve plumbing work right away?

No. Our role is to inform, not to pressure. For this Apollo Beach, FL 33572 visit, as with all our work, we completed the scheduled maintenance and then prepared plumbing suggestions to share as written estimates. You’re free to review everything and move forward only when you’re comfortable.

What if a problem is found during a maintenance visit?

If we discover something that needs attention during your Premium Home Therapy Plan visit, we’ll explain what we found in plain language, discuss options, and outline next steps. In many cases, we can schedule or perform repairs promptly, but we always communicate clearly before moving forward.

Can I add more services to my plan over time?

Yes. As your home’s needs change, we can adjust the services covered under your plan—whether that’s more detailed plumbing attention, additional HVAC equipment, or related comfort improvements. Our goal is to create a plan that fits your Apollo Beach home, not the other way around.

Why Choose Home Therapist for Your Apollo Beach Home

When you let someone into your home in Apollo Beach, FL 33572, you want a team that treats your space and your time with respect. At Home Therapist Cooling, Heating, and Plumbing, we approach every visit—whether it’s a Premium Home Therapy Plan checkup or a repair call—with the same mindset: do the job right, communicate clearly, and leave the home as clean as we found it.

Here are a few reasons homeowners across Tampa Bay and communities like Apollo Beach choose us:

  • Licensed and professional technicians: Our team is trained, experienced, and fully licensed for both HVAC and plumbing. We work carefully and methodically, not rushed.
  • Transparent communication: We explain what we’re doing, why we’re doing it, and what we recommend next—without jargon or surprises.
  • Clean and respectful work: We wear protective gear as needed, respect your flooring and furnishings, and clean up our work area when we’re done.
  • Long-term reliability focus: Our maintenance plans and repair recommendations are designed to protect your equipment and your home for the long run, not just get you through today.
  • Commitment to Tampa Bay homeowners: We’re local, and we stand behind our work throughout the greater Tampa Bay region, including Apollo Beach.

If you’d like to stay connected and see more of what we do, you can follow us on social channels like Pinterest or our Reddit profile for helpful tips and updates.

For added peace of mind, you can also review our standing with trusted organizations and directories. We’re listed with the Better Business Bureau, recognized by the Tampa Bay Chamber of Commerce, and reviewed on ProvenExpert so you can see feedback from other homeowners.

Schedule Your Next Visit in Apollo Beach, FL 33572

If you live in Apollo Beach, FL 33572 and want the same level of calm, professional care for your HVAC and plumbing, we’re here to help. Whether you’re interested in a Premium Home Therapy Plan, need a routine tune-up, or want a clear estimate for plumbing work, our local Tampa Bay technicians are ready to support you.

Reach out to schedule your next maintenance visit or to discuss a custom plan for your home. We’ll walk you through your options, answer your questions, and make sure your home’s comfort systems get the attentive care they deserve—without pressure, and always with your long-term comfort and safety in mind.

HVAC Maintenance Under Premium Home Therapy Plan in Apollo Beach, FL 33572

During a recent scheduled visit in Apollo Beach, FL 33572, we stopped by a homeowner on our Premium Home Therapy Plan to perform routine HVAC maintenance. This visit was focused on two central air conditioning systems that keep the home comfortable through our long Florida cooling season. The mini split system on the property had already been serviced on a previous visit, so this appointment was all about the main central units.

Like many homeowners in Apollo Beach, this customer wanted peace of mind that their systems were clean, running efficiently, and ready for the heat and humidity. Our technician, Alejandro, completed the full maintenance, confirmed both systems were operating properly, and noted a few suggestions to help improve performance and long-term reliability. We’ll be following up with detailed estimates so the homeowner can make informed decisions at their own pace.

Case Recap

  • Location: Routine HVAC maintenance in Apollo Beach, FL 33572 under our Premium Home Therapy Plan
  • Equipment: Two central air conditioning systems (mini split maintenance was previously completed)
  • Service: Scheduled maintenance visit as part of an ongoing plan visit series (Visit #4)
  • Work performed: Full inspection, cleaning, and operation check of both central units
  • Findings: Systems working at the time of service; several improvement suggestions identified
  • Next steps: We will send clear, itemized estimates for recommended upgrades or corrective work

Customer Problem

On this visit, the homeowner in Apollo Beach wasn’t calling us for a breakdown or emergency. Instead, the focus was preventive care. They’re enrolled in our Premium Home Therapy Plan, which means we come out on a regular schedule to service their HVAC systems before problems show up as no cooling, high power bills, or poor comfort.

In this case, the home has:

The customer’s main goals were simple but important:

  • Make sure both central systems are clean and running correctly
  • Catch any developing issues early, before they become expensive repairs
  • Extend the life of their equipment in the harsh Florida climate
  • Keep comfort consistent in every part of the home

Because this visit was part of Visit #4 under the Premium Home Therapy Plan, we already had some history with the equipment. That makes it easier for us to notice changes from one visit to the next and keep an eye on anything that may be slowly trending in the wrong direction.

Inspection and Diagnosis

Even when a system seems to be working fine, a thorough inspection is critical, especially in a place like Apollo Beach, FL 33572 where air conditioners work hard almost year-round. On this appointment, Alejandro focused on the two central units while keeping in mind that the mini split was already up to date on maintenance.

Here’s the type of inspection work we typically perform on a visit like this:

  • Visual inspection of indoor and outdoor units for obvious wear, corrosion, or damage
  • Checking air filters for cleanliness and proper fit
  • Inspecting the indoor coils and blower area for dirt buildup and airflow restrictions
  • Looking over the condensate drainage path to help reduce the risk of clogs and water leaks
  • Checking electrical connections for signs of looseness or overheating
  • Observing the start-up and run cycle of each unit to verify normal operation

Because there were no active comfort complaints or obvious system failures, this visit was more about confirming that everything was still in good shape and looking for opportunities to fine-tune performance. During the inspection, we confirmed that both central units were operating at the time of service. At the same time, we identified some areas that could be improved, which we’ll be addressing with written estimates.

We do not guess at model numbers, pressures, or any specific readings that are not documented. Instead, we focus on what we can verify: the systems were cooling, airflow appeared normal, and there were no immediate safety concerns during our tests.

Repair or Service Process

Because this was a scheduled maintenance visit and not an emergency repair, the work centered on cleaning, checking, and verifying the overall health of both central AC systems. Here’s how we typically walk through a visit like this for our Apollo Beach customers.

1. System Start-Up and Basic Verification

We start by running each system in cooling mode from the thermostat. This lets us:

  • Confirm that the thermostat is communicating properly with the equipment
  • Listen for any unusual noises during start-up
  • Check that both indoor and outdoor units come on as expected

Only after verifying that the basics are working do we move into deeper inspection and maintenance tasks.

2. Airflow and Filter Check

In Florida’s climate, good airflow is everything. Dirty filters, blocked returns, or restricted supply ducts can force your system to work harder, shorten equipment life, and reduce comfort. During this visit, we checked the condition of the filters and made sure air was moving freely through the supply and return grilles.

If filters are dirty or improperly sized, we’ll recommend the right replacements and a change-out schedule that fits the home and lifestyle, especially important in a humid area like Apollo Beach where systems run many hours per day.

3. Indoor Unit and Drainage Evaluation

The indoor portion of the system is where the heat and humidity are removed from your home’s air. Over time, dust, bio-growth, and debris can collect on the coil and inside the blower compartment. We examined the indoor sections of the two central units to look for buildup that could affect efficiency or cause musty odors.

We also checked the condensate drainage path. When a drain line clogs, it can lead to water around the air handler, ceiling damage, or safety switch trips. During maintenance, we always aim to reduce the risk of this by inspecting and, when needed, clearing or treating the drain system. On this visit, we confirmed that drainage was functioning as expected at the time of service.

4. Outdoor Unit Inspection

The outdoor units in Apollo Beach, FL 33572 face a tough environment: salt air, storms, lawn debris, and constant run time in hot months. We inspected the outdoor sections of both central systems for:

  • Debris around the unit that could block airflow
  • Visible damage to fins or panels
  • Signs of corrosion or wear on accessible components

Keeping the outdoor coil clear and the unit unobstructed helps the system reject heat more efficiently, which in turn supports better comfort and potentially lower energy use.

5. Electrical and Control Check

We inspected accessible electrical connections and control wiring for issues like loose connections, discoloration, or damaged insulation. Small electrical problems can become big ones if left unattended, so this is an important part of every maintenance visit.

We also observed the control sequence: whether the system responds correctly when the thermostat calls for cooling, whether it cycles off normally, and whether any obvious irregularities are present in the way the equipment is running.

6. Final Operation Check and Recommendations

Once cleaning and checks were completed, we ran the systems again to verify proper operation. Both central units were cooling the home at the time of our final check.

As we worked, we noted a few items where we saw room for improvement or preventive upgrades. Rather than rushing the homeowner into a decision on the spot, we documented these suggestions and will be sending clear estimates. That way, the homeowner can review each item, ask questions, and decide what fits their priorities and budget.

Why This Fix Works

Even though there was no single “breakdown” to fix on this visit, preventive maintenance is one of the most effective ways to keep HVAC systems running reliably in Apollo Beach.

Here’s why our approach works so well for Florida homes:

  • Airflow: Clean filters, clear returns, and open supply registers let your system move air without strain. When airflow is restricted, equipment can overheat or freeze, and comfort suffers.
  • Heat Transfer: Clean indoor and outdoor coils improve heat exchange. That means your system doesn’t have to run as long to hit the thermostat setpoint.
  • Drainage: In our humid climate, your system removes a lot of moisture. Ensuring proper drainage helps prevent water damage, odors, and nuisance shutdowns due to safety float switches.
  • Electrical Health: Tight, clean connections support reliable starts and reduce the risk of intermittent failures.
  • Early Detection: By seeing your equipment regularly under the Premium Home Therapy Plan, we can spot trends and wear before they turn into a hot house and an emergency call.

All of these pieces work together to keep the homeowner’s two central systems in Apollo Beach, FL 33572 running smoothly, especially during the long cooling season.

Pro Tips for Homeowners in Apollo Beach

Whether you’re on a maintenance plan or not, there are simple things you can do to help your HVAC equipment in Apollo Beach, FL 33572 last longer and perform better.

  • Stay on top of filter changes. In our humid, coastal climate, filters often need to be changed more frequently than the packaging suggests, especially if you have pets or allergies. A clean filter is one of the easiest ways to support system health.
  • Keep outdoor units clear. Trim plants and shrubs back at least a couple of feet around your outdoor units. Make sure grass clippings and mulch are not piled against the sides of the equipment.
  • Watch for changes in comfort or noise. If certain rooms start feeling warmer, or you notice new noises or vibrations, don’t ignore them. Small changes can be early signs of an issue that’s easier to fix now than later.
  • Use your thermostat wisely. Avoid constantly turning the thermostat way up and down. In Florida, gentle temperature adjustments and consistent settings tend to be gentler on your system and can help control humidity better.
  • Schedule regular maintenance before peak heat. Don’t wait for the hottest days of the year to think about your air conditioner. Having your systems checked in the spring or early summer gives you a better chance of smooth operation during peak season.
  • Include all systems in your plan. Just like this homeowner had their central units and mini split maintained on a schedule, make sure every piece of comfort equipment in your home gets attention, not just the main system.

FAQ: Premium Home Therapy Plan Visit in Apollo Beach, FL 33572

What was the main purpose of this visit?

This visit in Apollo Beach, FL 33572 was a scheduled maintenance appointment under our Premium Home Therapy Plan. The main goal was to inspect, clean where needed, and verify proper operation of the home’s two central air conditioning systems, and to identify any recommendations before problems develop.

Did you service the mini split system during this appointment?

No. The mini split system at this home had already received maintenance on a previous visit. This particular appointment focused on the two central AC units, which are also part of the home’s overall comfort system.

Were there any major problems found with the central units?

At the time of our maintenance visit, both central systems were operating. We did identify some areas where improvements or preventive work could be beneficial, and we will be sending estimates so the homeowner can review and decide on any next steps. There were no immediate shutdowns or system failures during our checks.

Why do I need maintenance if my AC seems to be working fine?

In a climate like Apollo Beach, equipment can be working hard while slowly developing issues that aren’t obvious yet. Regular maintenance helps keep coils and filters clean, drainage clear, and electrical components in good condition. That reduces the chances of surprise breakdowns, helps maintain comfort, and can support energy efficiency.

How often should my central AC be maintained in Apollo Beach?

For most homes in Apollo Beach, FL 33572, we recommend maintenance at least once a year for each cooling system, and in many cases twice a year due to the long run times and high humidity. A plan like the Premium Home Therapy Plan spaces those visits out so your systems get checked regularly without you having to remember to schedule.

Will I be pressured to approve repairs on the spot?

No. Our approach is to explain what we found, share options, and then provide clear, written estimates. Just like we did on this visit, we give homeowners time to review, ask questions, and make decisions without pressure.

Why Choose Home Therapist for HVAC Maintenance in Apollo Beach

For homeowners in Apollo Beach, FL 33572 and across Tampa Bay, having a team you trust in your home matters as much as the technical work itself. Here’s how we approach every visit under our Premium Home Therapy Plan and all of our service calls:

  • Licensed, professional technicians: Our technicians are trained, experienced, and focused on doing the job right the first time. We don’t cut corners on maintenance, because we know that’s what keeps systems reliable.
  • Transparent communication: We explain what we’re doing, what we find, and why we’re recommending any additional work. You’ll know what’s urgent, what’s optional, and what can wait.
  • Clean and respectful work: We treat your home in Apollo Beach as if it were our own. That means neat work areas, careful entry and exit, and respect for your time and schedule.
  • Long-term reliability focus: We’re not just trying to get your system through today. We’re looking at the big picture—how to keep your equipment running well season after season in Florida’s demanding climate.
  • Committed to Tampa Bay homeowners: We live and work in this community, and we take pride in keeping local families comfortable, safe, and informed about their HVAC systems.

Our Premium Home Therapy Plan visits, like this maintenance appointment in Apollo Beach, FL 33572, are designed to give you confidence that your systems are being looked after by a team that cares about the details.

Need HVAC Maintenance in Apollo Beach, FL 33572?

If you’re a homeowner in Apollo Beach, FL 33572 and you’d like the same level of care for your air conditioning systems, we’re ready to help. Whether you’re interested in a one-time tune-up or a comprehensive plan like our Premium Home Therapy Plan, we can tailor maintenance to your home, your equipment, and your comfort needs.

Reach out to schedule a visit, ask questions about your current system, or learn more about keeping both central units and mini splits running smoothly in our Florida climate. Our team at Home Therapist Cooling, Heating, and Plumbing is here to keep your home comfortable, reliable, and ready for whatever the Tampa Bay weather brings.

UV Light Air Treatment Installation in New Port Richey, FL 34654

For homeowners in New Port Richey, FL 34654, indoor air quality is a real concern, especially with our warm, humid Florida climate. On this visit, our Home Therapist technician installed a new UV light air treatment system for a local homeowner to help combat mold growth inside the air handler and improve overall air quality in the home. The project was approved verbally by the homeowner, and by the time we wrapped up, their HVAC system had an extra layer of protection working quietly around the clock.

Case Recap: UV Light Air Treatment in New Port Richey, FL 34654

  • Location: Single-family home in New Port Richey, FL 34654
  • Service: Installation of a new UV light air treatment system at the air handler
  • Goal: Help control mold and microbial growth on the evaporator coil and inside the air handler
  • Approach: Professional UV system placement, secure wiring, and operation check
  • Extras: Applied the customer’s Premium Therapy Plan discount as part of the visit
  • Outcome: UV light system running properly, giving the homeowner long-term air quality and system protection

The Customer’s Concern: Cleaner Air and a Protected AC System

In our Florida climate, especially in areas like New Port Richey, it doesn’t take long for moisture and warmth to create ideal conditions for mold inside an air handler. Even when the air conditioner seems to cool fine, there can still be concerns about what’s growing where we can’t see it.

This homeowner reached out to us because they wanted extra protection against:

  • Mold buildup on the evaporator coil
  • Microbial growth inside the air handler cabinet
  • Airborne germs and contaminants circulating through the ductwork

They were interested in a UV light solution that would work inside the air handler 24/7 without them needing to constantly think about it. They also participate in our Premium Therapy Plan, so they wanted to take advantage of their discount when installing the new UV air treatment system.

During our conversation, we explained how UV lights are designed to help control mold and certain microorganisms in the line of sight of the bulb and how that ties into better indoor air quality over time. Once the homeowner understood the benefits and options, they gave us verbal approval to move forward with the UV light air treatment installation.

Inspection and Diagnosis: Making Sure the System Is a Good Fit

Before installing any UV light system, we always confirm that the existing HVAC setup can safely and effectively accommodate the equipment. In this New Port Richey, FL home, our technician started with a focused inspection of the air handler and surrounding area.

We looked at:

  • Air handler condition: Checked for visible signs of mold, buildup, or damage around the coil and internal surfaces.
  • Access and mounting location: Identified a safe spot where the UV bulb could shine on critical components (like the coil area) without interfering with wiring, insulation, or structural parts.
  • Electrical access: Verified a proper power source to safely energize the UV light system in accordance with the manufacturer’s requirements.
  • Drainage and airflow: Confirmed that the existing system was draining and moving air normally, so we weren’t adding UV to an already failing setup.

We also confirmed that the UV light system selected was appropriate for this type of air handler. Different systems can have different mounting methods, bulb lengths, and power requirements, so making sure everything matches up is key to a clean, long-lasting installation.

Once we were satisfied that the air handler in this New Port Richey home was a good candidate and the homeowner approved verbally, we moved into the installation phase.

Step-by-Step: UV Light Air Treatment Installation

Installing a UV light air treatment system isn’t just about putting a bulb inside the air handler. It has to be positioned correctly, wired safely, and tested thoroughly. Here’s how we handled this project in New Port Richey, FL 34654.

1. Preparing the Work Area

We started by shutting off power to the air handler to work safely. Our technician laid down protective coverings where needed and made sure tools and materials were organized to minimize disruption inside the home.

We always treat Tampa Bay homes with care, so cleanliness and protection of the surrounding area is part of our standard process.

2. Selecting the UV Bulb Location

The goal with UV installation is to expose the right surfaces—especially the evaporator coil and nearby internal areas—to the UV light. We identified a location inside the air handler where the bulb would:

  • Have a clear line of sight to the coil surface
  • Be away from wiring harnesses and sensitive plastic components
  • Allow for future bulb replacement without major disassembly

Proper placement matters because UV works where it can “see.” If it’s blocked or aimed in the wrong direction, its effectiveness is reduced.

3. Mounting the UV System

After confirming the location, we mounted the UV fixture according to its design. This often involves securing a base or bracket to the air handler cabinet and carefully inserting the UV bulb into position. We also made sure any openings we created were sealed appropriately to avoid air leaks.

All mounting was done in a way that would allow the system to remain stable over time, even with normal vibration and operation of the blower.

4. Electrical Connections and Safety Checks

Next, we completed the electrical connections for the UV system, following the manufacturer’s guidelines. This step focuses on safety and reliability, ensuring the UV light receives the correct power and is protected appropriately.

Before restoring power, we double-checked:

  • All wire connections were secure and protected
  • No wiring was routed where it could be pinched or rubbed
  • Covers and panels were properly reinstalled

5. Power-Up and Operation Verification

Once everything was in place, we restored power and confirmed that the UV light came on as expected. Because UV light isn’t something you want to look at directly, we used proper caution while visually confirming operation.

We then ran the HVAC system to make sure it started up normally, with no unusual noises, no airflow issues, and no changes in performance caused by the new installation. We verified proper operation after the UV system was installed.

6. Applying the Premium Therapy Plan Discount and Final Walkthrough

As part of our visit, we applied the homeowner’s Premium Therapy Plan discount to this UV light installation. We also took a few minutes to explain:

  • How the UV system operates continuously to target mold and certain microorganisms on internal surfaces
  • What to expect over time in terms of coil cleanliness
  • When to consider bulb replacement to maintain effectiveness

We kept the explanation straightforward and in plain language so the homeowner in New Port Richey felt confident about what we installed and why.

Why This UV Light Fix Helps in New Port Richey Homes

UV light air treatment is not magic, but it is a well-established tool that can help keep certain parts of your HVAC system cleaner over time. In Florida, where humidity is high for much of the year, the evaporator coil is often wet while the AC is running. That moisture, combined with warmth and organic particles in the air, can encourage mold growth inside the air handler.

A properly installed UV light works by shining ultraviolet energy on the coil and nearby surfaces. Microorganisms that stay in that UV exposure zone can be disrupted or neutralized, which helps reduce mold buildup and can limit some types of bacteria and germs on those surfaces.

For homeowners in New Port Richey, FL 34654, that can mean:

  • Cleaner internal components over time
  • Less risk of musty odors from mold inside the air handler
  • HVAC components that don’t have to work through as much buildup

UV light is most effective as part of an overall indoor air quality and maintenance strategy. Regular filter changes and professional maintenance are still essential. If you’d like to learn more about how UV fits into a broader installation, our article on adding UV light for air conditioner installation in Tampa Bay is a great place to start.

Pro Tips for Homeowners in New Port Richey, FL

Whether you already have a UV light system or you’re considering one, here are some practical tips tailored to our New Port Richey and Tampa Bay climate:

1. Keep Up with Regular HVAC Maintenance

UV lights help with mold and microbial control on certain surfaces, but they don’t replace routine maintenance. Having your system professionally checked helps keep coils clean, drains clear, and components running efficiently. Our air conditioning maintenance guide for Tampa Bay breaks down what to expect from a quality maintenance visit.

2. Change Filters on Schedule

Even with UV treatment, a dirty air filter will still choke airflow and strain your equipment. In Florida, many homeowners benefit from checking filters monthly, especially during heavy cooling season. A clean filter supports both air quality and system performance.

3. Watch for Musty Odors or Visible Growth

If you notice persistent musty odors from your vents or see visible growth around the air handler, it’s worth having a licensed technician inspect the system. UV can help, but if there’s already heavy buildup or a drainage issue, those conditions need to be addressed directly.

4. Plan for UV Bulb Replacements

UV bulbs lose effectiveness over time, even if they still appear to be glowing. Follow the replacement interval recommended by the manufacturer so your system keeps doing its job. At Home Therapist, we can coordinate bulb replacement during routine maintenance visits to make it simple.

5. Consider a Whole-Home IAQ Strategy

For some homes in New Port Richey, combining UV lights with other solutions—such as proper filtration and regular maintenance—provides a more complete approach to air quality. To understand how your HVAC system affects indoor air, you may find our guide on the role of HVAC in indoor air quality especially helpful.

Frequently Asked Questions About UV Air Treatment Systems

Where is the UV light installed in my HVAC system?

In this New Port Richey, FL 34654 home, the UV light was installed inside the air handler cabinet in a position where it can shine on key internal surfaces, especially near the evaporator coil. That placement allows the UV energy to help control mold and microbial growth in the areas that tend to stay damp during normal cooling operation.

Does a UV light replace my regular air filter?

No. UV lights and air filters do different jobs. The filter captures dust and particles as air passes through, while the UV light shines on surfaces inside the air handler. You still need to replace your air filter regularly, even with a UV system installed.

Will a UV light fix existing mold problems?

A UV light is a great tool for ongoing control, but if there is already heavy mold buildup or an active moisture problem, those issues need to be corrected first. In this project, we ensured the air handler was suitable for UV installation and that there were no obvious unresolved failures before adding the UV system.

How long does a UV light installation take?

Most UV light installations can be completed in a single visit, assuming the air handler is accessible and in good condition. For this homeowner in New Port Richey, FL 34654, we were able to inspect, install, and verify operation in one trip.

Can I see or check the UV light myself?

UV energy can be harmful to eyes and skin, so you should never stare directly at the bulb or work around it with panels removed unless you are trained and using proper precautions. If you have concerns about whether your UV light is operating, it’s best to have a licensed technician confirm it safely during a service visit.

Is a UV light worth it in Florida’s climate?

For many Tampa Bay and New Port Richey homeowners, the constant humidity makes mold control a real challenge. A UV light, combined with good filtration and routine maintenance, can be a valuable part of keeping the inside of your air handler cleaner over time. Whether it’s the right choice for your home depends on your concerns, system setup, and budget.

Why Tampa Bay Homeowners Choose Home Therapist

As a licensed HVAC and plumbing company serving New Port Richey, FL 34654 and the greater Tampa Bay area, we treat every visit like we’re working in a neighbor’s home. This UV light installation is a good example of how we approach every job.

Here’s what you can expect when you call Home Therapist:

  • Licensed, professional technicians: Our team is trained to handle both HVAC and plumbing work safely, correctly, and in line with industry standards.
  • Clear, transparent communication: We explain what we’re recommending, why it matters, and what it will cost—before we proceed. In this case, we obtained verbal approval before installing the UV system.
  • Clean, respectful work: We protect the work area, handle your equipment carefully, and clean up after ourselves, so your New Port Richey home is left in good condition.
  • Focus on long-term reliability: Whether we’re installing a UV light, tuning up your AC, or planning a larger project, we’re always thinking about how to keep your system running reliably in Florida’s demanding climate.
  • Commitment to Tampa Bay homeowners: We live and work in this community and stand behind our work with honest recommendations and ongoing support.

If you’d like to see more of what we do and stay updated, you can follow us on our Pinterest page or connect with us on Reddit. For additional peace of mind, you can also review our standing with organizations like the Better Business Bureau, the Tampa Bay Chamber of Commerce, and our reviews on Proven Expert.

Closing: Need UV Light Air Treatment in New Port Richey, FL 34654?

If you’re concerned about mold inside your air handler or simply want to add another layer of protection to your HVAC system, a professionally installed UV light air treatment system can be a smart upgrade for your home in New Port Richey, FL 34654.

Our local Tampa Bay technicians can inspect your existing equipment, explain your options in clear terms, and handle a clean, safe installation. We can also help you build a broader maintenance plan to keep your air conditioner running reliably in Florida’s heat and humidity. For more on keeping your system in shape, you may also find our HVAC maintenance checklist for homeowners helpful.

When you’re ready, reach out to Home Therapist Cooling, Heating, and Plumbing to schedule UV light air treatment installation or other HVAC service in New Port Richey, FL 34654. We’ll take the time to understand your concerns, protect your home, and leave you with a system you can feel confident in.

Premium HVAC Maintenance Visit in New Port Richey, FL 34654

For homeowners in New Port Richey, FL 34654, staying ahead of Florida heat and humidity starts with consistent care for your air conditioning system. On this visit, we performed a scheduled Premium Therapy Plan maintenance (Visit #5) for a long-time member. The goal was simple: keep the system running smoothly, protect the equipment, and maintain clean, healthy airflow throughout the home.

During this visit, we completed a full maintenance check and duct sanitation service that is included with this older version of our Premium Therapy Plan. The system was operating fine when we arrived, and our job was to make sure it stayed that way by cleaning, inspecting, and tuning everything for reliable comfort.

Case Recap

  • Location: Routine HVAC maintenance for a homeowner in New Port Richey, FL 34654
  • Service: Premium Therapy Plan Visit #5 with included duct sanitation
  • System Status: Operating normally at arrival, no active breakdown or emergency
  • Work Performed: Full maintenance checklist, cleaning, safety checks, and duct sanitation
  • Outcome: System verified in good condition, airflow and cleanliness improved, ready for ongoing Florida weather
  • Benefit to Homeowner: Peace of mind, cleaner air, and reduced risk of unexpected AC issues

Customer Problem

This visit in New Port Richey wasn’t about a sudden failure; it was about prevention and comfort. The homeowner is enrolled in one of our older Premium Therapy Plans, which includes recurring maintenance visits and duct sanitation. They understand how hard an HVAC system has to work in our Florida climate, and they rely on these scheduled checkups so they don’t have to worry about surprise breakdowns.

By the time we arrived for Visit #5, the system was working fine. Cooling was adequate, and there were no specific complaints about noises, hot spots, or unusual odors. However, even a well-running system can quietly lose efficiency over time if it isn’t cleaned and inspected. Dust builds up on components, drain lines can start to form sludge, and ductwork can collect debris that impacts air quality.

The customer’s main goals were:

  • Keep the AC running reliably through long, hot, and humid New Port Richey summers
  • Protect their investment in the equipment
  • Maintain cleaner indoor air for their household
  • Take full advantage of the benefits included in their Premium Therapy Plan

Because this is one of our legacy plans that still includes duct sanitation, this was also a good opportunity to treat the ductwork and help reduce contaminants inside the air distribution system.

Inspection and Diagnosis

Even when everything appears to be working fine, a proper maintenance visit in New Port Richey, FL 34654 follows a thorough inspection process. We don’t rely on a quick glance or a quick temperature check at the thermostat. Instead, we walk systematically through the system so we can catch small issues before they turn into costly problems.

On this visit, our technician went through a structured inspection that included:

  • Indoor unit inspection: Checking the air handler, blower area, evaporator coil condition (visually where accessible), condensate drain, and safety components.
  • Filter and airflow review: Confirming that the filter was clean or replaced, and ensuring supply and return vents were unobstructed.
  • Thermostat and controls: Making sure the thermostat responded correctly and the system cycled on and off as expected.
  • Ductwork condition: Looking at accessible ductwork for signs of buildup, gaps, or other concerns prior to duct sanitation.
  • General system health: Listening for unusual noises, checking for vibrations, and confirming the system operated smoothly through a normal cycle.

Because the system was already running well, there were no major faults to track down. The purpose of this visit was to verify that everything was still in good shape and then perform the cleaning and duct sanitation that keep performance and air quality where they should be.

Repair or Service Process

Even when there is nothing “broken,” a scheduled maintenance and duct sanitation visit in New Port Richey serves a critical role. Here is how we approached this Premium Therapy Plan visit from start to finish.

1. Safety and System Check-In

We always start by confirming safe access and making sure the system responds properly before we begin. That way, we know exactly how it was operating when we arrived. The technician:

  • Verified that the system turned on and off from the thermostat
  • Listened for abnormal noises from the indoor and outdoor sections (if applicable)
  • Confirmed that air was moving well through the registers

This initial check confirmed that the system was functioning normally before any work began.

2. Filter and Airflow Review

Good airflow is one of the most important parts of HVAC performance, especially in the hot, humid conditions we see in New Port Richey, FL 34654. During this visit, we checked the air filter and confirmed that airflow was not being restricted by a clogged filter or blocked vents. If a filter is dirty, the system has to work harder, which can shorten its life and reduce comfort. As part of the maintenance, we ensured that the filter situation was addressed according to the plan and homeowner preferences.

3. Indoor Unit Cleaning and Maintenance

Next, we focused on the indoor equipment. This includes components that handle the air you breathe and the moisture removed from your home. The technician:

  • Inspected the indoor cabinet and blower area for dust buildup
  • Checked the evaporator coil area for visible dirt or restrictions where accessible
  • Reviewed the condensate drain setup to help reduce the risk of clogs and water leaks

Dirty components don’t just hurt efficiency; they can also affect comfort and, in some cases, lead to water damage if a drain backs up. Preventive cleaning and inspection significantly lowers that risk.

4. Duct Sanitation (Legacy Plan Benefit)

This homeowner’s Premium Therapy Plan is one of our older plans that includes duct sanitation. Over time, ductwork can accumulate dust and other particles from normal operation. While this isn’t always visible, it can affect both cleanliness and comfort inside the home.

As part of this visit in New Port Richey, we performed the duct sanitation included with their plan. While we won’t go into every technical detail, the goal of duct sanitation is straightforward:

  • Address contaminants that settle inside the duct system
  • Help the system deliver cleaner air through the home
  • Support better airflow by reducing buildup inside the duct runs

Because this is a planned service rather than a reaction to a specific air quality complaint, it helps maintain a cleaner baseline for the home over time.

5. Final Operation Check

After completing our cleaning and duct sanitation steps, we ran the system again to verify everything was operating as expected. We confirmed:

  • The system started and stopped correctly from the thermostat
  • Airflow felt normal and consistent at the registers
  • No unusual sounds or behavior appeared after the work

Once we were satisfied with the results, we reviewed our findings with the homeowner, explained what we did, and answered any questions about their plan and system condition.

Why This Fix Works

In this case, there wasn’t a single failed part to replace. Instead, the “fix” was all about maintenance and prevention. For homes in New Port Richey, FL 34654, this kind of visit is one of the most important things you can do for long-term HVAC reliability.

Here’s why this type of service is so effective:

  • Airflow Protection: Clean filters, clear ducts, and a clean blower allow air to move properly through the system. Good airflow keeps the equipment from straining and helps each room feel more comfortable.
  • Efficiency Support: When coils and ducts stay cleaner, the system doesn’t have to run as long or as hard to achieve the same level of comfort, which can reduce wear over time.
  • Moisture Management: Keeping drains and indoor components clean helps the system manage humidity better—a big deal in our Florida climate.
  • Air Quality Benefits: Duct sanitation doesn’t turn your HVAC into a medical-grade air purifier, but it does help reduce built-up debris in the air path, which supports a cleaner indoor environment.
  • Early Problem Detection: Regular eyes on the system make it more likely that small issues are caught and addressed before they become breakdowns.

By combining a full maintenance check with duct sanitation, this Premium Therapy Plan visit helped keep the system in strong shape and ready to handle the long cooling season in New Port Richey.

Pro Tips for Homeowners in New Port Richey

Whether you’re on a maintenance plan or not, there are a few simple habits that can help your HVAC system last longer and perform better in our local Florida conditions.

  • Change or clean your filter regularly. In the New Port Richey area, where AC systems run hard for much of the year, most homes benefit from checking filters every month and replacing them as needed. A clean filter is one of the easiest ways to protect your system.
  • Keep supply and return vents clear. Avoid placing furniture, curtains, or rugs over vents. Blocked vents can restrict airflow and make your system work harder than it should.
  • Watch for changes in airflow or comfort. If you notice rooms that suddenly feel warmer, weaker airflow, or longer run times, it’s worth having a professional look before the problem grows.
  • Schedule professional maintenance. At least once a year—often twice for heavy-use systems in New Port Richey, FL 34654—it’s smart to have a licensed technician perform a full inspection and cleaning.
  • Protect your drain line. While we handle detailed drain checks during maintenance, you can help by keeping the area around your indoor unit clear and notifying us quickly if you ever see water where it shouldn’t be.
  • Ask about the right plan for your system. Plans can vary. Some older plans, like this one, include duct sanitation; newer plans may be structured differently. A quick conversation can help match the plan to your home’s needs.

FAQ: Premium Maintenance and Duct Sanitation

What is the Premium Therapy Plan maintenance visit?

It’s a scheduled tune-up and inspection performed by a licensed technician. For this homeowner in New Port Richey, it included a full system check, cleaning, and duct sanitation as part of their legacy plan benefits. The goal is to keep the system running reliably and efficiently, not just fix it when it breaks.

Why do some plans include duct sanitation?

Some of our older Premium Therapy Plans were designed with duct sanitation built in as an added layer of protection for comfort and cleanliness. Duct sanitation helps address debris that can settle inside the duct system, supporting cleaner airflow through the home.

If my system is working fine, do I really need maintenance?

Yes. In New Port Richey, FL 34654, systems often run most of the year. Even if everything feels fine today, dust, humidity, and normal wear can slowly reduce efficiency and increase the chance of future problems. Maintenance helps catch issues early and keeps your system in better shape over the long term.

How often should I have my HVAC system serviced?

For most homes in the Tampa Bay and New Port Richey area, we recommend at least one professional maintenance visit per year, and many homeowners choose twice-yearly visits—especially if their system runs heavily or they have indoor air quality concerns.

What did you verify at the end of this visit?

After we completed the maintenance and duct sanitation, we confirmed that the system started and stopped correctly, that airflow felt normal, and that operation was smooth. We verified proper operation after the service so the homeowner could feel confident in their system’s performance.

Can I upgrade or change my maintenance plan?

Yes. Plan structures can change over time, and we can review your current setup and options with you. If you’re in New Port Richey or the surrounding Tampa Bay area, we can help you choose a plan that matches your system, usage, and comfort goals.

Why Choose Home Therapist

When you invite an HVAC company into your home in New Port Richey, you deserve more than a quick in-and-out visit. Our approach is to treat every maintenance appointment like this Premium Therapy Plan visit—with careful attention, clear communication, and respect for your home and time.

Here’s what you can expect from our team:

  • Licensed and professional technicians: Your system is serviced by trained, licensed professionals who understand how Florida’s climate affects HVAC performance.
  • Transparent communication: We explain what we’re doing, what we found, and what (if anything) we recommend next—in plain language, without pressure.
  • Clean and respectful work: We treat your home with care, work neatly, and clean up after ourselves so you’re left with comfort, not a mess.
  • Long-term reliability focus: Our goal isn’t just to get you through today. We focus on keeping your system dependable season after season, reducing surprises and stress.
  • Commitment to Tampa Bay homeowners: We live and work in this region, and we understand the demands that New Port Richey, FL 34654 weather puts on your HVAC system. Our recommendations are shaped by real local experience.

Whether you need a one-time tune-up or an ongoing maintenance plan, we’re here to help you stay comfortable and confident in your system.

Schedule HVAC Maintenance in New Port Richey, FL 34654

If you’re a homeowner in New Port Richey, FL 34654 and you’d like the same kind of thorough maintenance and care described in this visit, our team at Home Therapist is ready to help. We can perform a detailed inspection, clean and tune your system, and discuss plan options that fit your home and budget.

Reach out to schedule your HVAC maintenance or to ask questions about our therapy plans. We’ll take the time to understand your home, explain your options clearly, and keep your system prepared for the heat and humidity that come with living in the Tampa Bay area.

When your comfort is on the line, you don’t need to wait for a breakdown. A proactive visit—just like this Premium Therapy Plan maintenance in New Port Richey—can keep your system running smoothly and give you peace of mind all year long.

Premium AC Maintenance and Indoor Air Quality Evaluation in Tampa, FL 33618

During a recent visit to a homeowner in Tampa, FL 33618, we performed a full air conditioning maintenance under their Premium Home Therapy Plan. Tampa’s heat and humidity put a lot of stress on HVAC systems, so staying ahead of problems is one of the best ways to stay comfortable and avoid surprise breakdowns.

On this visit, we completed a thorough cleaning of both coils and the drain line, and we performed a complete system inspection. We also documented a slightly elevated fan motor amperage and noticed early signs of organic growth inside the air handler. The system is operating properly at this time, but we recommended improvements to indoor air quality, including a UV light and duct sanitation, to keep the home healthier and the equipment cleaner for the long term.

Case Recap

  • Location: A homeowner in Tampa, FL 33618 on a Premium Home Therapy Plan
  • Service performed: Full AC maintenance, coil cleaning, and drain line cleaning
  • System condition: Approximately 5 years old, operating but showing early wear and organic growth inside air handler
  • Findings: Slightly elevated fan motor amperage, documented for future reference
  • Recommendations: UV light installation and duct sanitation service to improve indoor air quality and limit organic growth
  • Outcome: System cleaned, inspected, and left running properly, with follow-up options provided to the homeowner

Customer Problem

For homeowners in Tampa, FL 33618, an air conditioner isn’t a luxury—it’s a necessity. This particular homeowner is enrolled in our Premium Home Therapy Plan, which means we visit regularly to clean, check, and tune up the system before issues turn into breakdowns.

On this visit, there was no active “no-cool” emergency. The homeowner wanted to stay ahead of problems and make sure their approximately 5-year-old system continued to run efficiently through the Tampa heat. They also wanted to keep their indoor air as clean as possible, especially with our high humidity that can encourage organic growth inside HVAC equipment.

Our job as their Home Therapist technician was to:

  • Perform the scheduled Premium Plan maintenance thoroughly
  • Clean critical components that affect efficiency and drainage
  • Inspect the entire system for early warning signs of wear or air quality issues
  • Explain any concerns clearly and calmly, with practical options

Because this was a maintenance visit in Tampa, FL 33618—not an emergency repair—we focused on prevention, documentation, and helpful recommendations that fit the home and system.

Inspection and Diagnosis

Our technician Barbaro started with a full system inspection according to the Premium Home Therapy Plan checklist. For an AC system in Tampa’s climate, we pay close attention to airflow, drainage, electrical components, and any signs of moisture-related issues inside the equipment.

During this visit we:

  • Visually inspected the outdoor unit and indoor air handler
  • Checked the evaporator and condenser coils for dirt and buildup
  • Verified that the drain line was clear and draining properly
  • Reviewed the condition of the blower assembly and fan motor
  • Looked for any early signs of organic growth (mold or mildew-type buildup) inside the air handler
  • Monitored the fan motor amperage to see how hard it was working

Two findings stood out:

Slightly Elevated Fan Motor Amperage

We noted that the fan motor amperage was slightly elevated compared to what we would typically expect for a similar system. It was not at a level that required immediate repair, and the system was operating normally. Still, we documented this in the customer’s file so we can track any trend over time and be proactive if it changes on future visits.

Early Signs of Organic Growth in the Air Handler

Inside the air handler, we saw early signs of organic growth starting to develop. In Tampa, FL 33618 and throughout the Tampa Bay area, our homes deal with high humidity nearly year-round, and the cool, damp environment inside an air handler can become a place where organic growth begins if not managed properly.

At this stage, it was early, but it was the right time to have a real conversation about indoor air quality options. That’s why we recommended a UV light and duct sanitation service to help treat the air and reduce buildup inside the system and ductwork.

Repair and Service Process

Because this was a planned maintenance under the Premium Home Therapy Plan, most of our work focused on cleaning and tune-up tasks that protect the system and keep it efficient.

1. Cleaning Both Coils

We thoroughly cleaned both the indoor evaporator coil and the outdoor condenser coil. Over time, dust, pollen, and other airborne particles cling to these coils. In a climate like Tampa, once humidity gets involved, that debris can stick more easily.

Cleaning the coils helps:

If you’d like a deeper overview of how we approach this on routine visits across Tampa Bay, our air conditioning maintenance guide for Tampa Bay homeowners explains what we typically inspect and clean.

2. Cleaning the Drain Line

The drain line’s job is to move condensation safely out of the air handler. If it clogs, you can end up with water backing up into the unit, water damage, or a system that shuts off on a safety switch.

We cleaned the drain line to help keep water flowing freely. This is especially important in Tampa, FL 33618, where AC systems remove a lot of moisture from the air. A clean drain line supports:

  • Reduced risk of water leaks
  • Less standing water around the air handler
  • Lower chance of organic growth related to trapped moisture

3. Documenting the Fan Motor Amperage

Instead of rushing into a repair that wasn’t needed, we took a measured, professional approach. The fan motor amperage was slightly high, but the system was running as expected. We carefully documented our readings and notes in the customer’s maintenance history so we can compare at the next visit.

This kind of trend tracking is one of the advantages of being on a plan like this. If anything changes—or if the amperage continues to climb—we’ll have a clear picture and can recommend repair or replacement before comfort is affected.

4. Evaluating Indoor Air Quality and Recommending UV and Duct Sanitation

Seeing early organic growth inside the air handler, we discussed indoor air quality options with the homeowner. Our recommendation was twofold:

  • Install a UV light in the air handler to help treat surfaces and the air that moves through the unit
  • Perform a duct sanitation service to help reduce buildup inside the ductwork

These recommendations are especially helpful for Tampa Bay homeowners who deal with persistent humidity. For those considering similar upgrades, we go into more detail about this in our article on adding a UV light to your AC system in Tampa Bay and in our overview of the role of HVAC systems in indoor air quality.

We also let this homeowner know we have a current promotion for these services, and we’ll work with their schedule after the 15th to firm up a date if they choose to move forward.

5. Final Operation Check

After the cleaning and inspection, we reassembled what we had opened and verified that the system was operating normally. We confirmed airflow and drainage, and we made sure everything was left neat and clean around the work area before wrapping up.

Why This Fix and Maintenance Work

This visit in Tampa, FL 33618 wasn’t about fixing a breakdown; it was about preventing one and keeping the home’s air cleaner and more comfortable. Here’s why the steps we took are so important.

Airflow and Heat Transfer

Clean coils allow air and refrigerant to exchange heat efficiently. When coils are dirty, the system has to work harder, which can raise amperage on motors and reduce comfort. Keeping these surfaces clean helps reduce strain on the entire system.

Drainage and Moisture Management

In our humid Florida climate, your AC pulls a lot of moisture from the air. That water has to go somewhere, and the drain system is designed to handle it. A clean, clear drain line keeps water moving away from the system, helping prevent water damage and the damp conditions that promote organic growth.

Monitoring Electrical Components Instead of Guessing

By documenting the slightly elevated fan motor amperage, we’re building a history for this system. If the motor begins to work harder over time, we’ll see the change and can recommend action based on facts—not guesswork. This is one of the strengths of having regular scheduled HVAC maintenance.

UV Light and Duct Sanitation for Air Quality

While no single solution can “fix” every indoor air quality concern, UV lighting and duct sanitation are proven tools in the right situations. UV lights are installed in strategic locations inside the air handler to help treat surfaces and the air that passes by. Duct sanitation aims to reduce contaminants that may be settled inside the ductwork itself.

Together with routine cleaning and filter changes, these services help keep the system cleaner on the inside, which supports better airflow, more consistent performance, and a fresher-feeling home—especially in a humid climate like Tampa, FL 33618.

Pro Tips for Homeowners in Tampa

If you live in Tampa, FL 33618 or elsewhere in the Tampa Bay area, here are some simple, practical steps to help protect your AC system and indoor air quality:

  • Change filters regularly. In our climate, filters often need to be replaced more frequently than the minimum recommendation, especially during heavy cooling months. A clean filter supports airflow and helps your maintenance visits go further.
  • Keep the outdoor unit clear. Make sure plants, mulch, and yard debris are at least a couple of feet away from the outdoor unit so it can breathe. Good airflow around the condenser helps the system run more efficiently.
  • Watch for water around the air handler. If you see water or dampness near your indoor unit or in the drain pan, call for service. Drain issues caught early are usually straightforward to resolve.
  • Pay attention to musty odors. A persistent musty smell when the AC runs can be a sign of moisture or organic growth in the system or ductwork. It’s worth having a professional inspection before it worsens.
  • Keep up with annual or semi-annual maintenance. Regular professional maintenance is one of the most cost-effective ways to extend the life of your system. Our guides on how often to service your AC in Florida and our broader HVAC maintenance checklist can help you plan ahead.
  • Ask about indoor air quality upgrades. If you or a family member has allergies or sensitivities, or if you’ve noticed organic growth in your system, options like UV lights, duct sanitation, and upgraded filtration can be worth discussing.

FAQ: AC Maintenance and Air Quality in Tampa, FL 33618

How often should I schedule AC maintenance in Tampa?

For most homes in Tampa, FL 33618, we recommend at least one professional maintenance visit per year, and often two—one before peak summer and another before heavy use in the shoulder seasons. Maintenance plans, like the Premium Home Therapy Plan used on this visit, help keep those appointments on track so your system is checked and cleaned regularly.

Is a slightly elevated fan motor amperage a serious problem?

Not necessarily. In this case, the fan motor amperage was slightly elevated but not at a level that required immediate repair. The system was operating properly. The important step is documentation and monitoring over time. If the readings continue to rise or if performance changes, we’ll have a clear history to support the right recommendation.

Why do I see organic growth in my air handler?

Our Tampa Bay climate is hot and humid, and your air handler is a cool, damp environment where condensation forms. Without regular cleaning and good moisture control, organic growth can begin on internal surfaces. That’s why we focus on coil cleaning, drain maintenance, and, when appropriate, indoor air quality upgrades like UV lights and duct sanitation.

What does duct sanitation involve?

Duct sanitation is a professional process aimed at reducing contaminants inside your ductwork. While the exact methods can vary, the goal is to treat internal surfaces so that dust, debris, and organic material are minimized. This service is often paired with system cleaning and air handler treatments to improve overall air quality in the home.

Will a UV light replace the need for maintenance?

No. A UV light is a helpful addition but not a substitute for professional maintenance. You still need regular cleaning of coils, drain lines, and other components, along with routine inspections. The UV system works alongside these services to help keep surfaces cleaner and support better indoor air quality over time.

Do I need to be home for maintenance visits like this?

In many cases, yes—especially if we need access to indoor equipment, thermostats, or filters. We work with your schedule to set a convenient time, like we did for this homeowner with a date after the 15th. If you’re unsure what access we’ll need, our office can walk you through the details when you schedule.

Why Choose Home Therapist for Your Tampa Bay Home

When you invite Home Therapist Cooling, Heating, and Plumbing into your home in Tampa, FL 33618, you’re trusting us with your comfort and safety. We take that seriously on every visit.

Our licensed professional technicians, like Barbaro on this job, follow detailed maintenance procedures and take the time to explain what we find in clear, plain language. We document system readings, note any developing trends, and give you honest recommendations—whether that means “you’re good to go” or “here are some options to improve comfort and air quality.”

We also understand that your home is your personal space. We work clean, wear appropriate protective gear where needed, and leave work areas as tidy as we found them. Our focus is not just on today’s visit but on long-term reliability, so your system is ready for another Tampa summer without unnecessary surprises.

If you’d like to see more of how we serve Tampa Bay homeowners, you can connect with us on social media:

  • Follow us on Facebook for updates and seasonal tips
  • See behind-the-scenes and job highlights on Instagram
  • Watch helpful videos and explanations on our YouTube channel

Home Therapist Cooling, Heating, and Plumbing is also recognized and listed with trusted organizations, reflecting our commitment to professionalism and local accountability:

Schedule Premium AC Service in Tampa, FL 33618

If you’re in Tampa, FL 33618 and want the same level of detailed care this homeowner received—coil cleaning, drain line maintenance, full system inspection, and clear recommendations for indoor air quality—our team at Home Therapist is ready to help.

Whether you’re already on a plan or you’re just starting to think about regular maintenance, we’ll walk you through your options at a comfortable pace, without pressure. Our goal is simple: keep your home cool, clean, and reliable through every Tampa season.

Contact Home Therapist Cooling, Heating, and Plumbing today to schedule your next AC maintenance visit in Tampa, FL 33618 and keep your system ready for whatever the Florida weather brings.

Blower Motor Replacement in Thonotosassa, FL 33592

When the blower motor in an air handler starts to fail, homeowners in Thonotosassa, FL 33592 usually notice the symptoms right away: weak airflow, hot and cold spots, or an AC that seems to run constantly without really cooling the home. On this visit, our Home Therapist technician was called out to replace a failing blower motor, make sure the system was properly supported with a compatible capacitor if needed, and process the manufacturer’s warranty in a clean, transparent way.

In the Florida heat, any downtime from your air conditioner is more than an inconvenience—it affects your comfort, sleep, and even your indoor air quality. Our goal on this job was simple: restore strong, reliable airflow for this Thonotosassa homeowner, protect the equipment with the correct components, and handle the warranty details so the customer didn’t have to chase paperwork or guess at costs.

Case Recap

  • Location: Single-family home in Thonotosassa, FL 33592
  • Service performed: Blower motor replacement (labor only)
  • Support component: New capacitor available and installed if required for proper operation
  • Warranty: Manufacturer warranty processing fee handled through our supplier
  • Pricing structure: Labor-only charge for installation, with parts covered or discounted through warranty
  • Outcome: Restored airflow, quieter operation, and an AC system ready for the Thonotosassa heat and humidity

Customer Problem: Weak Airflow and an Overworked AC

By the time we’re replacing a blower motor, most homeowners have already noticed something isn’t right with the system. While every visit is unique, the story is often similar for families in Thonotosassa and across Tampa Bay:

The AC runs, but it doesn’t feel like much air is coming out of the vents. Some rooms are stuffy while others are cooler. The indoor unit may start making unusual sounds—like squealing, grinding, or a loud humming on startup. In some cases, the system may shut down and try to restart repeatedly.

In this home in Thonotosassa, FL 33592, the solution prescribed was a full blower motor replacement. The job information specified that this visit covered the labor to remove the old blower motor and install the new one. Because blower motors and their capacitors work closely together, there was also a note to install a new capacitor if needed to properly support the new motor.

The homeowner also needed clarity around cost. The parts themselves were being handled under the manufacturer’s warranty, but there was a separate warranty handling fee from the HVAC brand’s supplier. Our job was to explain how that works, complete the replacement, and leave the system operating reliably again.

Inspection and Diagnosis: Confirming the Need for a New Blower Motor

Even when we arrive with instructions to replace a blower motor, we still perform a basic inspection to make sure the planned repair is the right repair. As licensed technicians serving Thonotosassa and the greater Tampa Bay area, we don’t just swap parts—we verify the root cause.

On a typical blower motor replacement visit, we will:

  • Inspect the indoor air handler cabinet for signs of overheating, debris, or moisture issues.
  • Visually check the blower wheel (fan) for damage, dirt buildup, or obstructions.
  • Listen for abnormal motor noises when the system attempts to start.
  • Check for signs that the motor is struggling to start, such as humming without the blower wheel spinning.
  • Evaluate the capacitor associated with the blower motor for swelling, leakage, or obvious damage.

Because this job was specifically written as a blower motor replacement with labor only, the diagnosis had already been made previously that the existing blower motor was failing or had failed. Our inspection helps confirm that the new motor is indeed warranted, that there are no immediate wiring or control concerns, and that the motor’s support components (like the capacitor) are in acceptable condition or need replacing.

Repair Process: Blower Motor Replacement and Capacitor Check

Replacing a blower motor inside a central air handler involves several careful steps. For homeowners in Thonotosassa, FL 33592, this work is all about restoring comfort while protecting the system from future problems. Here’s how we typically approach this type of job:

1. Power Off and Safety First

Before touching anything, we shut down power to the air handler at the breaker and at any service disconnect. This protects both the homeowner and the equipment. We verify that there is no power at the unit before continuing.

2. Accessing the Blower Assembly

The blower motor is mounted inside the blower housing, which also holds the blower wheel. We remove the service panel on the air handler, then slide or unbolt the entire blower assembly for easier access. This step also gives us a good view of the blower wheel and housing for cleaning or inspection.

3. Removing the Old Blower Motor

With the assembly accessible, we disconnect the wiring to the old motor, carefully noting the connections. We separate the blower wheel from the motor shaft and then remove the mounting hardware that holds the motor in place. The old motor is then removed from the housing.

4. Installing the New Blower Motor

Next, we install the new blower motor in the housing, align the blower wheel on the motor shaft, and make sure it spins smoothly without rubbing or wobbling. Proper alignment is important—it keeps the operation quieter and reduces strain on the new motor.

5. Capacitor Evaluation and Replacement (If Needed)

Many blower motors rely on a dedicated capacitor to help them start and run reliably. If the capacitor is weak, damaged, or not properly matched, it can shorten the life of the new motor or prevent it from starting at all.

On this Thonotosassa blower motor job, the work order specifically included a new capacitor (if needed). That means we checked the existing capacitor’s condition and replaced it when appropriate with a part that supports the new motor correctly. This protects the customer’s investment and helps ensure smooth operation.

6. Reassembly and Wiring

With the motor and blower wheel secured, we reinstall the blower assembly into the air handler and reconnect all wiring according to the manufacturer’s specifications. We also confirm that all panels and safety switches are properly reinstalled, since many modern air handlers include door switches that must be closed for the unit to run.

7. System Start-Up and Verification

Once everything is reassembled, we restore power to the system and start the air handler. We listen for abnormal noises, check for steady and consistent airflow at the vents, and ensure that the system cycles normally with the thermostat.

After a blower motor replacement, we always verify that:

  • The blower starts up reliably.
  • Airflow feels strong and even across the home compared to the earlier complaint.
  • The motor runs smoothly without excessive noise or vibration.

We do not guess at performance. We confirm that the system is running as expected before we leave.

Handling the Warranty Fee: Clear and Upfront

A key part of this job in Thonotosassa, FL 33592 was the miscellaneous warranty handling fee. Many HVAC manufacturers cover the cost of replacement parts under warranty, but they still require processing through an authorized supplier. That supplier charges a fee to handle the claim, shipping, and documentation.

The job description noted that this fee came directly from the supplier for the customer’s HVAC brand. Our role was to pass that fee along transparently and clearly explain what it covered. Labor for the blower motor replacement was billed separately, and the parts themselves were not charged to the homeowner beyond that supplier fee because they were processed under warranty.

We always make an effort to walk homeowners through this structure so that there are no surprises. If you live in Thonotosassa or anywhere in the Tampa Bay area, you should know exactly what you are paying for—labor, parts, and any third-party warranty fees—before we begin work.

Why This Fix Works: Restoring Airflow at the Source

The blower motor is the heart of the indoor side of your air conditioning system. The outdoor unit may be producing cold refrigerant, but without a functioning blower motor to push air across the evaporator coil and into your ductwork, you will never feel that cooling inside your home.

By replacing a failing or failed blower motor, we:

  • Restore consistent airflow across the evaporator coil, which improves cooling performance.
  • Help prevent icing on the coil that can occur when airflow is too low.
  • Reduce strain on the rest of the HVAC system, including the outdoor unit.
  • Improve comfort in each room by delivering the air your system is designed to move.

When needed, replacing the capacitor at the same time supports the new motor’s ability to start and run efficiently. A healthy motor and capacitor combination is especially important in the Florida climate, where systems cycle frequently during long, hot days. For homeowners in Thonotosassa, a properly functioning blower motor is one of the most important pieces of the comfort puzzle.

Pro Tips for Homeowners in Thonotosassa

If you live in Thonotosassa, FL 33592 or nearby Tampa Bay communities, here are a few simple ways to help your blower motor and entire HVAC system last longer and perform better:

  • Change your air filter regularly. A clogged filter restricts airflow, which forces the blower motor to work harder than it should. In our humid Florida environment, monthly filter checks are a good habit.
  • Keep supply and return vents open and unobstructed. Closing too many vents or blocking returns with furniture or rugs can reduce airflow and increase motor stress.
  • Schedule routine AC maintenance. A professional visit can catch early signs of blower issues, capacitor wear, and airflow restrictions. Our AC maintenance service is designed to keep systems running reliably through our long cooling season.
  • Pay attention to new noises. If your air handler begins to squeal, hum loudly, or rattle, it’s worth having it checked before a minor issue turns into a major repair.
  • Consider a seasonal tune-up before peak heat. Having your system inspected and tuned by a technician before summer ramps up is one of the best ways to avoid unexpected blower motor failures. Our AC tune-up visits are built around exactly that goal.
  • Ask about maintenance plans. If you’d like reminders and structured care for your system, our HVAC maintenance plans can spread out costs and keep your equipment on a predictable schedule.

FAQs About Blower Motor Replacement in Thonotosassa

Is blower motor replacement always a big job?

It’s a detailed job, but when done by a trained technician, it’s a routine part of HVAC service. We carefully remove the old motor, install the new one, and then test the system. For homeowners in Thonotosassa, our focus is on doing the work safely, cleanly, and correctly the first time.

Why was there a separate warranty handling fee?

The manufacturer may cover the cost of the replacement blower motor under warranty, but they typically work through a supplier who manages the claim. That supplier charges a fee for processing and shipping, which is what you see as the warranty handling fee. Labor and any non-warrantied items are billed separately so you can clearly see each part of the cost.

Do I always need a new capacitor with a new blower motor?

Not always, but it is common to evaluate the capacitor when installing a new motor. If the existing capacitor is weak, damaged, or not properly matched, replacing it can prevent premature failure of the new motor. On this job, a new capacitor was included if needed to support reliable operation.

How do I know if my blower motor is starting to fail?

Common signs include weak airflow, unusual humming or grinding noises from the air handler, or the system shutting off and trying to restart. If you notice these symptoms in your Thonotosassa home, it’s wise to schedule an AC repair visit so we can inspect the blower and related components.

Will replacing the blower motor improve my comfort?

Yes, if the motor was failing or not running correctly, replacing it can make a noticeable difference in airflow and comfort. You should feel more consistent air coming from your vents, and the system will be better able to keep up with the Florida heat once the blower is working properly again.

Can I run my AC if the blower motor is making noise?

We don’t recommend it. A noisy or struggling blower motor can fail completely, and in some cases, running it in that condition can put additional stress on other parts of the system. If you’re in Thonotosassa, it’s better to shut the system down and let a technician evaluate it.

Why Tampa Bay Homeowners Choose Home Therapist

When your blower motor fails in the middle of Florida’s heat and humidity, you need a team you can trust inside your home. At Home Therapist Cooling, Heating, and Plumbing, we approach every job in Thonotosassa, FL 33592 with the same commitment:

  • Licensed, professional technicians: Our team is trained to work on modern HVAC systems safely and correctly, whether we’re replacing a blower motor, diagnosing a capacitor issue, or performing routine maintenance.
  • Transparent communication: We explain what we found, what we recommend, and what it will cost—before the work begins. That includes clarifying manufacturer warranty coverage and any supplier handling fees.
  • Clean and respectful work: We treat your home like our own, protecting work areas and cleaning up when we’re done so all you notice is better comfort.
  • Long-term reliability: We’re not just swapping parts. We’re looking at the overall health of your system so that today’s repair also supports tomorrow’s performance.
  • Commitment to Tampa Bay homeowners: From Thonotosassa to the rest of the Tampa Bay region, we’re focused on keeping local families safe, comfortable, and informed about their HVAC systems.

If you’d like to see more of what we do and how we serve our community, you can connect with us on social media and through our local profiles:

We’re also proud to be recognized and listed with trusted local and national organizations:

Need Blower Motor or AC Service in Thonotosassa, FL 33592?

If your home in Thonotosassa, FL 33592 is dealing with weak airflow, strange noises from the air handler, or an AC that just can’t keep up, we’re here to help. Whether you need a blower motor replacement, a thorough inspection, or routine maintenance to prevent problems before they start, our local Tampa Bay technicians are ready to step in.

Reach out to Home Therapist Cooling, Heating, and Plumbing to schedule service, ask questions about warranty coverage, or plan a maintenance visit. We’ll walk you through your options calmly and clearly, so you can get your comfort back and feel confident about the work being done in your home.

AC Electrical Repair and Transformer Replacement in Tarpon Springs, FL 34689

When an air conditioner suddenly stops working in the middle of our Florida heat, it’s more than an inconvenience. For a homeowner in Tarpon Springs, FL 34689, that’s exactly what happened when an electrical issue inside the air handler and outdoor unit took their system offline. Our technician, Jandiel, was called out to diagnose the problem and get the cooling restored safely.

On this visit, we found that the air handler transformer and fuse had both been damaged by a low-voltage short on the thermostat wiring, and the outdoor condenser contactor also needed to be replaced. After carefully tracking down the short and replacing the failed components, we were able to bring the system back to normal operation and restore comfort to the home in Tarpon Springs, FL 34689.

Case Recap

  • Location: Single-family home in Tarpon Springs, FL 34689
  • Symptoms: AC not running due to electrical failure in the low-voltage circuit
  • Found: Burned air handler transformer and fuse caused by thermostat cable short
  • Additional issue: Worn/bad condenser contactor at the outdoor unit
  • Repairs: New air handler transformer, new fuse, and new condenser contactor installed
  • Outcome: Safe low-voltage circuit, reliable operation, and restored cooling for the homeowner

Customer Problem

By the time we were called out to this home in Tarpon Springs, the homeowner was understandably frustrated. The air conditioner simply wouldn’t run, and in our humid Florida climate that can make the house uncomfortable very quickly.

The immediate concern was simple: the system was dead. The thermostat wasn’t able to bring the system on, and there was no cooling coming from the vents. The homeowner just wanted to know three things:

  • What went wrong?
  • Is it safe?
  • How quickly can it be fixed?

From experience serving Tampa Bay and nearby areas like Tarpon Springs, we know that sudden system shutdowns like this are often related to electrical safety components doing their job. Transformers, fuses, and contactors are all designed to protect more expensive parts of the HVAC system when something goes wrong in the wiring.

Our job was to track down the root cause of the failure, not just swap parts. Replacing components without addressing the underlying short would only lead to repeat failures and more downtime for the homeowner in Tarpon Springs, FL 34689.

Inspection and Diagnosis

When we arrive at a home for an AC electrical issue, we follow a clear, step-by-step process to stay safe and be thorough. For this Tarpon Springs visit, that process focused heavily on the low-voltage side of the system—the part that includes the thermostat wiring, transformer, fuse, and contactor.

We began by confirming the basic symptoms: the indoor air handler and outdoor condenser were not responding to thermostat calls. From there, the diagnosis focused on:

  • Power to the air handler: Confirming that the main power supply and breaker were in good shape.
  • Low-voltage transformer: Checking the transformer responsible for stepping down voltage for the thermostat and controls.
  • Fuse protection: Inspecting the low-voltage fuse that protects the transformer and control circuit.
  • Thermostat wiring: Looking for signs of damage, rubbing, or a short circuit in the low-voltage cables.
  • Outdoor contactor: Evaluating the contactor at the condenser, which allows the outdoor unit to turn on when the thermostat calls for cooling.

During this inspection, we discovered that the original air handler transformer had burned out. This kind of failure is commonly the result of a low-voltage short. We also found that the low-voltage fuse had burned after the thermostat cables shorted. That told us two things:

  • A short in the thermostat wiring had caused the fuse to blow and the transformer to fail.
  • The protection device (the fuse) had reacted to the problem, but only after the transformer was already damaged.

At the outdoor unit, we found that the condenser contactor needed to be replaced as well. A worn or damaged contactor can prevent the outdoor unit from starting, even if the thermostat and indoor components are working.

By the end of the diagnostic process, we had a clear picture: the thermostat wiring short had taken out the low-voltage transformer and fuse, and a bad contactor at the condenser was contributing to the system not running. With the root cause identified, we could move forward with safe, lasting repairs for this home in Tarpon Springs, FL 34689.

Repair and Service Process

Once we knew what failed and why, we walked the homeowner through the recommended repairs and answered their questions. Our approach is always to explain in plain language what we’re doing and why, so there are no surprises.

1. Securing Power and Protecting the Home

Before touching any electrical components, we made sure all relevant power sources were safely turned off and verified. This protects both the system and everyone in the home. Electrical work, even on low-voltage circuits, must be taken seriously to avoid damage or injury.

2. Addressing the Low-Voltage Short

Because the previous transformer and fuse had burned due to a short in the low-voltage thermostat cables, we inspected the thermostat wiring to identify any visible issues—such as insulation damage, pinched wires, or contact with sharp metal edges.

Any time a transformer fails due to a short, it’s critical to correct the wiring problem before installing new parts. Otherwise, the new transformer and fuse are at risk of failing again. We ensured the thermostat wiring was safe, properly routed, and not making contact with anything that could cause a short.

3. Replacing the Air Handler Transformer

With the wiring addressed, we proceeded to replace the burned air handler transformer. The transformer’s job is to step down the incoming voltage to the lower level used by the thermostat and control circuit. When it fails, the entire control system can go offline.

We removed the damaged transformer, installed a new one, and made sure all connections were tight and clean. Proper mounting and wire management help prevent vibration-related issues and accidental shorts in the future.

4. Installing a New Low-Voltage Fuse

The fuse is the system’s safety valve for the low-voltage circuit. The previous fuse had burned after the thermostat cables shorted. Once the wiring was corrected and the new transformer was in place, we installed a new fuse designed to protect the circuit from future shorts.

This component may seem small, but it plays a big role in preventing more serious damage. A properly sized and installed fuse can help protect the transformer and controls if something goes wrong down the line.

5. Replacing the Condenser Contactor

Outside at the condenser, we removed the old contactor and installed a new one. The contactor is essentially an electrical switch that allows power to flow to the outdoor unit’s compressor and fan when the thermostat calls for cooling.

A worn, pitted, or failed contactor can keep the outdoor unit from starting at all, or cause it to start inconsistently. By replacing it, we helped ensure that when the thermostat in this Tarpon Springs home calls for cooling, the outdoor unit responds reliably.

6. System Testing and Safety Checks

After the transformer, fuse, and contactor were replaced and the thermostat wiring was secured, we restored power and carefully tested the system. We verified that:

  • The thermostat could properly signal the air handler and condenser.
  • The indoor blower and outdoor unit came on as expected.
  • The low-voltage circuit was operating without tripping the fuse.

We confirmed proper operation after the repairs and monitored the system to make sure everything ran smoothly. Once we were satisfied, we cleaned up our work area and reviewed what we had done with the homeowner, including recommendations to help avoid similar issues in the future.

For homeowners who want a broader understanding of AC repair options, we also have detailed resources such as our AC repairs, installs, and maintenance services overview and our AC repairs and maintenance options guide.

Why This Fix Works

The repairs on this Tarpon Springs, FL 34689 home focused on the heart of the control system: the low-voltage circuit. Here’s why the solution is effective and long-lasting when done correctly:

  • Transformer: The transformer provides the proper low voltage the thermostat and control board need. When a short occurs, the transformer can overheat and fail. Installing a new transformer, after eliminating the short, restores stable power to the controls.
  • Fuse: The low-voltage fuse is there to protect the transformer and wiring. If a short happens again, the fuse is designed to fail first, helping to prevent more expensive damage.
  • Thermostat wiring: Correcting the wiring issue prevents the kind of short that originally burned the transformer and fuse.
  • Contactor: The contactor ensures that the outdoor condenser receives power only when it is supposed to. A new, properly functioning contactor provides consistent starts and reduces the chance of intermittent cooling failures.

By addressing both the damaged components and the underlying cause—the thermostat cable short—we gave this homeowner in Tarpon Springs a reliable, safe AC system that should serve them well through our hot and humid seasons.

For homeowners across Tampa Bay who want to pair this type of repair with regular tune-ups, our AC maintenance and cleaning specials are designed to catch early signs of electrical wear and wiring issues before they become major breakdowns.

Pro Tips for Homeowners in Tarpon Springs

Living in Tarpon Springs, FL 34689 means dealing with high humidity, salt in the air, and long cooling seasons. All of that can put extra stress on your AC’s electrical and control components. Here are some practical, low-stress tips to help protect your system:

  • Schedule regular AC checkups: Annual professional maintenance gives a technician a chance to inspect electrical connections, test contactors, and look for early signs of wiring wear before it leads to blown fuses or transformers.
  • Protect thermostat wiring during renovations: If you’re painting, remodeling, or working near thermostat wires or the air handler, be careful not to pinch, cut, or pull on low-voltage cables. Small nicks in the insulation can lead to shorts later.
  • Keep the air handler area clear: Avoid storing boxes or tools against your air handler. Contact with sharp metal edges or door panels can damage cables over time.
  • Watch for intermittent behavior: If your system occasionally shuts off or fails to start but then works again later, mention it during a service visit. Those intermittent symptoms can be early warnings of contactor or control issues.
  • Use the thermostat normally: Rapidly turning the thermostat on and off, or switching quickly between heating and cooling, can stress contactors and controls. Give the system a few minutes between mode changes.
  • Consider a maintenance plan: For many homeowners in the greater Tampa Bay area, including Tarpon Springs, a maintenance plan helps ensure the system is checked routinely and keeps minor issues from turning into no-cool emergencies.

FAQ: AC Electrical Repairs in Tarpon Springs

Why did my air handler transformer burn out?

In this Tarpon Springs home, the transformer burned because of a short in the low-voltage thermostat wiring. When a short occurs, the transformer can overheat and fail. That’s why we always look for the root cause, such as damaged or pinched wires, before installing a new transformer.

Is it safe to keep resetting fuses on my AC?

If a low-voltage fuse keeps blowing, it usually means there is an underlying problem like a short or a wiring issue. Simply replacing the fuse over and over is not safe and can lead to more damage. It’s best to have a licensed technician diagnose the cause and correct it.

What does the condenser contactor do?

The contactor is an electrical switch in your outdoor unit. When your thermostat calls for cooling, the contactor closes and allows power to flow to the compressor and fan. If the contactor is worn or stuck, your outdoor unit may not start, even if everything else appears normal.

Can low-voltage problems damage other AC components?

They can. Shorts and repeated electrical stress on the low-voltage side can damage transformers, fuses, and even control boards. That’s why we focus on repairing both the damaged parts and the wiring conditions that caused the problem in the first place.

How can I reduce the chances of a similar issue at my home?

Routine maintenance, careful handling of thermostat wiring, and prompt attention to odd system behavior all help. Having a professional inspect your system yearly is one of the best ways to catch electrical wear early, especially in high-demand areas like Tarpon Springs, FL 34689.

Do I need to replace my whole AC system if a transformer or contactor fails?

Not necessarily. In many cases, replacing failed components like transformers, fuses, and contactors is enough to restore normal operation. A full system replacement is typically considered when the equipment is older or has multiple major issues, not just a single electrical component failure.

Why Choose Home Therapist for AC Electrical Repairs

When something electrical fails in your AC system, you want a team that takes safety and long-term reliability seriously. At Home Therapist Cooling, Heating, and Plumbing, our licensed technicians are trained to handle these issues carefully and thoroughly for homeowners in Tarpon Springs and throughout Tampa Bay.

Here’s what you can expect when you call us:

  • Licensed, professional technicians: We work with high standards for safety, training, and craftsmanship on every visit.
  • Transparent communication: We explain what we find, what needs to be done, and why—no pressure, no confusing jargon.
  • Clean and respectful work: We treat your home like our own, keep work areas tidy, and clean up before we leave.
  • Long-term reliability focus: We don’t just swap parts; we look for root causes so you’re less likely to face repeat breakdowns.
  • Commitment to Tampa Bay homeowners: We live and work in this community, and we stand behind the work we do in Tarpon Springs, FL 34689 and across the region.

If you’d like to see more of how we serve local homeowners, you can follow us on Pinterest or connect with us on Reddit where we share helpful tips and updates.

For added peace of mind, you can also review our profiles with trusted organizations, including our listing with the Better Business Bureau and our presence with the Tampa Bay Chamber of Commerce. These platforms help reflect our ongoing commitment to quality service and accountability.

Need AC Electrical Repair in Tarpon Springs, FL 34689?

If your AC has suddenly stopped working, is blowing fuses, or just isn’t responding to the thermostat, we’re here to help. Our team at Home Therapist Cooling, Heating, and Plumbing can inspect your system, track down electrical issues, and make the necessary repairs so you can get back to a cool, comfortable home.

Whether you’re dealing with a burned transformer, a blown fuse, a bad contactor, or another electrical concern, we’ll diagnose the problem carefully and explain your options clearly. If you’re in Tarpon Springs, FL 34689 or the surrounding Tampa Bay area, reACh out to schedule your AC service and let us take care of the details so you don’t have to.

When your comfort is on the line, you deserve a calm, professional team on your side—and that’s exactly what we bring to every job.

Premium AC Maintenance Plan Service in Tampa, FL 33626

For a homeowner in Tampa, FL 33626, staying ahead of our long, hot cooling season is a smart move. On this visit, we completed a scheduled Premium Home Therapy maintenance service on an air conditioning system that was about a year old. The goal was simple: keep the system clean, efficient, and reliable before problems had a chance to start.

During this Premium Home Therapy Plan visit, we cleaned both coils, cleared the AC drain line, replaced the air filter, and performed a full operational inspection. By the time we wrapped up, the system was running within normal parameters and ready to handle the Tampa heat without stress.

Case Recap

Customer Problem

This visit in Tampa, FL 33626 wasn’t about an emergency breakdown; it was about prevention and peace of mind. The homeowner wanted to protect their investment in a relatively new air conditioning system and make sure it was ready for heavy use as our Florida temperatures and humidity stay high for much of the year.

Even when a system is only about a year old, Tampa’s heat, salt air, and humidity can start to work against it. Dust builds up on coils, algae grows in the drain line, and air filters can clog faster than many people expect. The homeowner enrolled in a Premium Home Therapy Plan so they wouldn’t have to guess when maintenance was due or worry about hidden issues causing higher bills or premature wear.

On this visit, there were no reports of strange noises, warm air, or leaks. The concern was more long-term: keep the system running efficiently, avoid surprise repairs, and make sure the comfort inside the home stayed consistent through the season.

Inspection and Diagnosis

Even on a routine maintenance appointment, we treat every system in Tampa, FL 33626 and across Tampa Bay with the same careful approach. Before we start cleaning, we like to understand how the system is performing as-is. That way, we can catch any early warning signs.

Here’s how we approached the inspection on this visit:

  • Visual system check: We inspected the indoor air handler and outdoor condenser for obvious signs of wear, corrosion, loose wiring, or damage.
  • Coils condition: We examined both the indoor evaporator coil and the outdoor condenser coil for dust, debris, and buildup that could restrict heat transfer.
  • Drain line status: We checked the condensate drain line for restrictions or signs of slow drainage, which is a common issue in humid Tampa homes.
  • Air filter condition: We inspected the existing filter to see how dirty it was and confirm it was the proper size and type for the system.
  • Operational check: With the system running, we assessed overall operation, including how the blower, compressor, and fan were performing.

During our performance checks, we confirmed that:

  • System pressures were within normal range.
  • Blower electrical consumption was normal.
  • Compressor electrical consumption was normal.
  • Fan electrical consumption was normal.

In plain terms, this AC system in Tampa, FL 33626 was operating properly at the time of our visit. There were no red flags in how it was running, which is exactly what you want to see during a preventive maintenance check. With that confirmed, we moved on to the cleaning and tune-up steps that keep it that way.

Repair or Service Process

The Premium Home Therapy Plan visit on this home focused on cleaning, protection, and verification. Here’s what we did and why each step matters for comfort and reliability.

1. Cleaning Both Coils

Your AC has two primary coils: the indoor evaporator coil and the outdoor condenser coil. Even in just a year of operation in Tampa’s climate, both can collect dust, pollen, and other debris.

On this visit, we carefully cleaned both coils. The goal is to restore and maintain good heat transfer. When coils are clean:

  • The system doesn’t have to run as long to reach the thermostat setpoint.
  • Energy use is kept in check, which helps control your power bill.
  • Components experience less strain, which can extend their life.

2. Cleaning the Condensate Drain Line

In Tampa, FL 33626 and the surrounding area, our humidity means your AC is constantly pulling moisture out of the air. That water has to go somewhere, and that’s where the condensate drain line comes in.

Over time, algae, slime, and debris can build up inside the drain line, slowing or stopping flow. If it clogs completely, you can end up with:

  • Water backing up into the air handler
  • Ceiling or wall damage in some homes
  • System shutdown if you have a float switch installed

As part of this maintenance visit, we cleaned the drain line to help prevent these issues. This simple step is one of the most important parts of AC maintenance in our humid Florida climate.

3. Air Filter Replacement

Next, we replaced the air filter with a fresh one. Even with a newer system, a dirty filter can quickly lead to restricted airflow, higher energy use, and uneven comfort.

By installing a clean filter, we helped keep airflow strong and allowed the system to move air efficiently through the home. That supports both comfort and air quality, which matters in a place like Tampa where homes are usually closed up with the AC running most of the year.

4. Final System Operation Check

Once cleaning and filter replacement were complete, we ran the system again to confirm proper operation. We checked that:

  • The system started and stopped as expected.
  • Airflow from the supply registers felt consistent.
  • Condensate was draining properly.
  • The equipment continued to operate within normal parameters.

At the end of the visit, we verified that the system was in good working condition and operating efficiently. For this homeowner in Tampa, FL 33626, that meant they could move forward with confidence that their one-year-old system was being properly cared for.

Why This Fix (and Maintenance) Works

This appointment wasn’t about replacing parts or chasing a breakdown. It was about supporting the core principles that make an AC system work well: airflow, heat transfer, and drainage.

Airflow: A clean filter and clean coils keep air moving freely through the system. When airflow is restricted, components have to work harder, temperatures inside the equipment can climb, and efficiency drops.

Heat transfer: Your AC can only remove heat from your home effectively if the coils are clean. Dirt and buildup act like insulation, blocking the exchange of heat. Cleaning the coils restores this process so the system can cool more effectively with less run time.

Drainage: In Tampa, we see a lot of issues tied to clogged condensate lines. Keeping the drain line clear allows the system to remove humidity without backing water up into your home or shutting the system down unexpectedly.

When all three of these—airflow, heat transfer, and drainage—are working as they should, your AC system runs smoother, uses energy more efficiently, and is less likely to surprise you with a mid-season failure. That’s the main benefit of a structured maintenance plan for homeowners in Tampa, FL 33626 and across Tampa Bay.

Pro Tips for Homeowners in Tampa

If you live in Tampa, FL 33626 or nearby, here are some simple, practical steps you can take between professional maintenance visits to help your system stay healthy:

  • Check your air filter regularly: In our climate, filters often need to be changed more frequently than the packaging suggests. A quick visual check once a month is a good habit.
  • Keep the outdoor unit clear: Make sure plants, mulch, and debris are at least a couple of feet away from the outdoor condenser. Good air circulation around the unit is essential.
  • Watch for changes in comfort: If you notice certain rooms getting warmer, airflow feeling weaker, or the system running longer than usual, it’s worth having it checked before it turns into a breakdown.
  • Use your thermostat wisely: Constantly changing the temperature can cause unnecessary cycling. Setting a comfortable, steady temperature helps your system operate more consistently.
  • Keep return and supply vents open: Closing off too many vents can disrupt airflow balance and put extra strain on your system.
  • Stay on a maintenance schedule: Regular visits, like this Premium Home Therapy Plan service, are one of the best ways to protect your equipment and avoid surprise issues during our hottest months.

If you’d like more detail on how routine visits work, our overview of AC repair, installation, and maintenance services is a helpful resource for Tampa Bay homeowners.

FAQ: Premium AC Maintenance Visits

How often should I schedule AC maintenance in Tampa, FL 33626?

For homes in Tampa, we recommend at least one thorough maintenance visit per year, and many homeowners prefer twice a year because of how hard systems work here. A Premium Home Therapy Plan helps you stay on schedule without having to remember dates.

My system is only a year old. Do I really need a maintenance plan?

Yes. Even newer systems benefit from professional cleaning and inspection. As we saw on this job, a one-year-old system in Tampa still needs coil and drain line cleaning to prevent efficiency loss and future issues. Regular maintenance also helps protect your warranty in many cases.

What’s included in a Premium Home Therapy Plan visit?

While details can be tailored to your system, a typical visit includes coil cleaning, drain line cleaning, air filter replacement, and a full operational inspection to verify that components are running within normal parameters. We then confirm proper operation before we leave.

Can maintenance help lower my energy bills?

Maintenance can’t change your electric rates, but it can help your system run closer to its intended efficiency. Clean coils, a clean filter, and clear drainage all reduce strain and unnecessary run time, which can help control energy use over the season.

What if you find a problem during a maintenance visit?

If we spot an issue during a scheduled visit, we’ll explain what we found, walk you through your options, and provide clear pricing before any repair work is done. Our focus is on transparent communication so you can make an informed decision.

How do I know if a maintenance plan is right for my home?

If you want fewer surprises, more predictable comfort, and a system that’s cared for on a schedule instead of only when it breaks, a plan can be a good fit. Our AC maintenance and service options page explains how we structure plans for Tampa Bay homeowners.

Why Choose Home Therapist

When you invite someone into your home in Tampa, FL 33626, you want a team that respects your time, your space, and your comfort. That’s how we approach every Premium Home Therapy Plan visit.

Licensed and professional technicians: Our technicians are trained, licensed, and experienced with Florida homes and Tampa Bay weather. We’re comfortable working on both newer and older systems, and we treat each visit with the same attention to detail.

Transparent communication: We explain what we’re doing, why we’re doing it, and what we find—without pressure or technical jargon. At the end of this visit, for example, we confirmed that the system was operating properly and within normal parameters so the homeowner knew exactly where things stood.

Clean and respectful work: We work carefully around your home, protect the areas we access, and clean up after ourselves. Your home should look as good when we leave as it did when we arrived, just with a healthier AC system.

Long-term reliability focus: We’re not just chasing quick fixes. We build maintenance plans and service recommendations around helping your system last longer and run more reliably through our demanding Tampa seasons. For more on savings and specials, you can review our AC maintenance and cleaning specials in Tampa Bay.

Committed to Tampa Bay homeowners: Home Therapist Cooling, Heating, and Plumbing is deeply rooted in the Tampa Bay community. You can see how we show up locally through our profiles and reviews on trusted platforms like the Tampa Bay Chamber of Commerce and the Better Business Bureau, as well as our Google business listing.

If you’d like to get a feel for our day-to-day work and tips we share with homeowners, you can also connect with us on social platforms:

We’re here to keep Tampa Bay homes comfortable, safe, and prepared for the heat.

Schedule Your Next AC Maintenance in Tampa, FL 33626

If you’re in Tampa, FL 33626 and want your AC system to run as smoothly as the one we serviced on this visit, we’re ready to help. Whether your system is brand new or has a few years behind it, a structured maintenance plan can make a real difference in comfort and reliability.

Reach out to Home Therapist Cooling, Heating, and Plumbing to schedule your next maintenance visit or to talk through our Premium Home Therapy Plan options. Our local Tampa Bay technicians will walk you through the process, answer your questions, and help you choose the level of service that fits your home.

Your AC doesn’t need to be acting up before you give it some attention. A little care now can help you avoid bigger problems later—and keep your home in Tampa, FL 33626 comfortable when you need it most.

To explore more about our AC and HVAC services for Hillsborough County homeowners, you can also visit our page on HVAC and plumbing services in Hillsborough County and learn how we support the broader Tampa Bay area.

Whole-Home Plumbing Inspection and Water Heater Flush in Land O’ Lakes, FL 34638

For a homeowner in Land O’ Lakes, FL 34638, we recently completed a full plumbing inspection and routine water heater flush as part of their Premium Home Therapy Plan. In the Florida heat and humidity, dependable plumbing isn’t a luxury—it’s peace of mind. Our goal on this visit was simple: verify that everything behind the walls and under the fixtures was working properly, flush sediment from the water heater, and catch any small risks before they ever became a leak, a flood, or an emergency call.

On this visit, we confirmed that all visible plumbing components were operating correctly and successfully flushed the water heater. We also noted one important opportunity for long-term protection: the home was using plastic angle valves, which are working now but are not ideal for long-term reliability. We recommended upgrading those to metal valves for better durability and fewer surprises down the road.

Case Recap

Customer Problem

When we arrived at this home in Land O’ Lakes, the homeowner wasn’t dealing with an active leak or a flooded bathroom—and that’s exactly how they wanted to keep it. They enrolled in our Premium Home Therapy Plan specifically to stay ahead of problems. For this visit, they requested two things:

First, a full plumbing inspection so they could feel confident that hidden issues weren’t building up behind walls or under sinks. Second, a routine water heater flush to help extend the life of their system and maintain good hot water performance.

Like many homeowners in the Tampa Bay area, they understood that our Florida water quality and year-round usage can be tough on water heaters, shutoff valves, and supply lines. Instead of waiting for a small part to fail at the worst possible time, they wanted a licensed professional to go through the home carefully and give honest feedback on what looked solid and what might need attention in the future.

Inspection and Diagnosis

During a Premium Home Therapy Plan plumbing visit like this one in Land O’ Lakes, FL 34638, we move through the home systematically. Even when everything appears to be running fine, a detailed inspection can reveal early warning signs that aren’t obvious to the eye.

Here’s how we approached this inspection:

  • Visual inspection of exposed plumbing: We checked accessible supply lines, shutoff valves (angle stops), and drain connections for signs of corrosion, wear, or prior leaks.
  • Fixture review: Sinks, toilets, and other fixtures were inspected for slow drips, loose connections, or water staining that could indicate hidden issues.
  • Water heater evaluation: We examined the water heater for visible signs of rust, moisture, or irregularities and verified that it was suitable for a flush at this time.
  • Safety and reliability scan: We looked for materials or installation choices that are more prone to fail over time, even if they’re working in the moment.

At the time of service, all visible plumbing was functioning properly. There were no active leaks, no obvious pressure issues, and no concerns that required an emergency repair. However, as we moved through the home, we noted that the shutoff valves under fixtures (angle valves) were plastic.

Plastic angle valves are fairly common in many homes, but from a long-term reliability standpoint, they aren’t the best material choice. While they were working correctly during the inspection, experience tells us they are more likely to become brittle, crack, or leak over the years—especially with regular use or pressure fluctuations.

Because the homeowner in Land O’ Lakes was focused on preventing future problems, we made sure to highlight this as an important opportunity for an upgrade rather than waiting until a valve failed unexpectedly.

Water Heater Flush and Plumbing Service Process

After completing our initial inspection and confirming that it was safe to proceed, we flushed the water heater as requested under the Premium Home Therapy Plan. While we don’t publish specific measurements for each visit, our process is consistent and focused on safety and performance.

Here’s how that process typically looks for homeowners in Land O’ Lakes and the greater Tampa Bay area:

1. Preparing the water heater for maintenance

We start by safely shutting down the system according to manufacturer guidelines—power or gas supply, and cold water feed as appropriate for the unit. This step protects both the equipment and the home during the flush. We also verify that the drain location we’re using can safely handle the discharged water.

2. Connecting to the drain and flushing sediment

Once the system is prepared, we connect a hose to the water heater’s drain valve and begin flushing water from the tank. Over time, minerals and sediment in Florida water can settle at the bottom of the tank. Flushing helps remove this buildup, which can otherwise reduce efficiency and put extra stress on the heater.

On this Land O’ Lakes, FL 34638 visit, the water heater flush was performed successfully and without issue. After flushing, we closed everything up carefully and confirmed that the unit returned to normal operation.

3. Reviewing angle valves and shutoffs

During the plumbing inspection portion, we took a closer look at the angle valves under sinks and other fixtures. These small shutoff valves are important—they allow you or a technician to turn off water to a single fixture without shutting down the main supply to the whole house.

In this home, those valves were plastic. That’s not a problem today, but it does mean they’re more vulnerable to wear and cracking as time goes on. We didn’t find any active leaks from these valves, but our technician documented the material and provided a clear recommendation to upgrade to metal valves for better long-term peace of mind.

4. Communicating findings and recommendations

At the end of the visit, we walked the homeowner through exactly what we saw: a plumbing system that’s currently performing well, a water heater that has been flushed and is operating as expected, and a set of plastic angle valves that are working now but not ideal for the long haul.

We explained that replacing these valves with metal alternatives is a relatively quick, preventative update that could help prevent future leaks or water damage, especially given our local water conditions and pressure fluctuations common in parts of Tampa Bay.

Because this service visit was part of our Premium Home Therapy Plan, we also reminded the homeowner that being proactive like this is exactly what the plan is designed for—staying ahead of issues rather than waiting for a surprise leak in the middle of a busy week.

Why This Fix (and Recommendation) Works

The heart of this visit in Land O’ Lakes, FL 34638 was preventive care: flushing the water heater and identifying a small weakness in the plumbing system before it turned into a big problem.

Water heater flushing: protecting efficiency and lifespan

Over time, sediment from your water supply settles at the bottom of the water heater tank. In Florida, where water can carry a noticeable mineral load, that buildup can:

  • Reduce heating efficiency
  • Make the unit work harder than it needs to
  • Contribute to uneven water temperatures or noises from the tank

By flushing the tank regularly, we help keep the burner or heating elements from working against that buildup. This can support better performance and help the system last closer to its expected lifespan.

If you’d like to learn more about how we handle water heater work beyond routine flushes, you can explore our water heater installation services in Tampa as well as our detailed resources on water heater maintenance services.

Upgrading plastic angle valves: quieter risk, bigger benefit

Angle valves may not look like much, but they’re a key part of your plumbing system. Plastic versions are more prone to:

  • Becoming brittle with age
  • Cracking from stress or over-tightening
  • Failing when exposed to pressure changes

Metal angle valves are far more robust. They handle everyday use better, tolerate pressure fluctuations more reliably, and are generally considered a better long-term option. Replacing plastic valves with metal ones doesn’t dramatically change how your plumbing works day-to-day, but it significantly reduces the chance of a sudden leak under a sink or behind a toilet.

For a homeowner in Land O’ Lakes who wants to avoid surprise water damage, this small upgrade aligns perfectly with the spirit of our Premium Home Therapy Plan—thoughtful, preventive care instead of crisis management.

Pro Tips for Homeowners in Land O’ Lakes

If you’re a homeowner in Land O’ Lakes, FL 34638 or nearby Tampa Bay communities, here are a few simple ways to stay ahead of plumbing issues in our climate:

  • Schedule annual plumbing checkups: Our humidity and year-round usage are tough on plumbing. Having a full inspection once a year can catch small issues before they become emergency calls.
  • Flush your water heater regularly: Depending on your water quality and usage, a yearly flush is often a smart idea. This helps control sediment buildup and supports more consistent hot water.
  • Know where your main shutoff is: In the event of a leak, knowing exactly where and how to shut off your water can drastically limit damage. If you’re not sure, ask your plumber to point it out during a visit.
  • Check under sinks occasionally: Every month or so, take a quick look under your kitchen and bathroom sinks. Look for moisture, discoloration, or musty smells—all early signs that something may be starting to leak.
  • Consider proactive valve upgrades: If your home has older or plastic angle valves, discuss upgrading them with a licensed plumber. It’s a modest project that can prevent a lot of headache later.
  • Use your membership benefits: If you’re part of a plan like our Premium Home Therapy Plan, take full advantage of your scheduled visits. They’re designed to keep your home comfortable and your systems reliable all year in the Tampa Bay climate.

For more on ongoing care and budget-friendly upkeep, we also share information about plumbing maintenance plans and options that can help families in Land O’ Lakes and surrounding areas plan ahead.

FAQ: Plumbing Inspection and Water Heater Flush in Land O’ Lakes

How often should I have my plumbing inspected?

For most homeowners in Land O’ Lakes and the greater Tampa Bay area, a full plumbing inspection once a year is a good target. It’s frequent enough to catch slow-developing issues, but not so often that it becomes a burden. If your home is older or you’ve had recurring issues, you may benefit from more frequent checkups under a maintenance plan.

Is a water heater flush really necessary if everything seems fine?

Even if your hot water seems normal, sediment can still be building up inside the tank. Flushing doesn’t fix every problem, but it’s a simple, preventive step that can support better efficiency and help the heater last closer to its expected lifespan—especially with the mineral content we see in Florida water.

What are angle valves and why should I care about them?

Angle valves are the small shutoff valves usually found under sinks and toilets. They let you shut off water to a single fixture without turning off the entire home. If these valves fail, they can leak or even release a surprising amount of water. Choosing durable metal valves instead of plastic ones lowers that risk and makes your plumbing more resilient.

Do I need to replace my plastic angle valves right away?

If your plastic angle valves are working and not leaking, it isn’t an emergency. However, if you value peace of mind and want to reduce your risk of surprise leaks, planning a proactive replacement with metal valves is a smart move. During a visit, we can walk you through how many valves you have and what a phased upgrade might look like.

What does a Premium Home Therapy Plan visit include for plumbing?

A plumbing visit under our Premium Home Therapy Plan typically includes a thorough inspection of visible plumbing, checks of key fixtures, and agreed-upon routine maintenance such as a water heater flush (when appropriate). We focus on finding early warning signs and giving you clear, honest recommendations, like we did for this home in Land O’ Lakes, FL 34638.

Can Home Therapist help with other plumbing issues if something goes wrong later?

Yes. In addition to inspections and maintenance visits, we handle a wide range of plumbing services across Tampa Bay—from leak repairs to fixture replacements and more. You can see examples of our broader plumbing options on our Land O’ Lakes HVAC and plumbing services page and our other plumbing services overview.

Why Choose Home Therapist for Plumbing in Land O’ Lakes

When you invite someone into your home to work on your plumbing, you’re trusting them with more than pipes and valves—you’re trusting them with your comfort, your time, and your property. Our team at Home Therapist Cooling, Heating, and Plumbing takes that seriously on every visit in Land O’ Lakes, FL 34638 and throughout Tampa Bay.

  • Licensed, professional technicians: Our plumbers are trained, licensed professionals who treat your home like their own. We focus on doing the job correctly, not just quickly.
  • Clear, transparent communication: We explain what we find in plain language, walk you through your options, and never pressure you into work you don’t need.
  • Clean and respectful work: From shoe covers to careful cleanup, we do our best to leave your home as clean as we found it once the work is done.
  • Long-term reliability: We look beyond today’s visit and think about how to keep your plumbing system reliable for years—like recommending metal angle valves instead of waiting for plastic ones to fail.
  • Commitment to Tampa Bay homeowners: We live and work in this community, and we design our maintenance plans and services around what homes here actually need.

If you’d like to see a bit more of who we are and how we serve families across Tampa Bay, you can connect with us on social media. We share updates, educational tips, and behind-the-scenes looks at our work on Facebook, Instagram, and TikTok.

For added peace of mind, you can also review our standing with trusted organizations. Home Therapist Cooling, Heating, and Plumbing is listed with the Better Business Bureau, recognized by the Tampa Bay Chamber of Commerce, and featured on our Google business profile so you can see real-world feedback from local homeowners.

Schedule Plumbing Service in Land O’ Lakes, FL 34638

If you live in Land O’ Lakes, FL 34638 and want the same kind of thorough plumbing inspection and water heater flush described here, our team is ready to help. Whether you’re interested in a one-time visit or ongoing protection through a plan like our Premium Home Therapy Plan, we’ll walk you through your options calmly and clearly.

Reach out to Home Therapist Cooling, Heating, and Plumbing to schedule your plumbing service or inspection. Our local Tampa Bay technicians know the homes, the water, and the climate here, and we’re committed to keeping your plumbing system reliable, efficient, and ready for whatever Florida throws your way.

AC Maintenance Under Elite Home Therapy Plan in Tampa, FL 33629

When you live in Tampa, FL 33629, a dependable air conditioning system isn’t a luxury—it’s part of staying comfortable and healthy in our heat and humidity. During a recent visit for a homeowner on our Elite Home Therapy Plan, we serviced two relatively new AC systems to keep them running smoothly before small issues could turn into big problems. Both units were thoroughly inspected, cleaned, and tested, and by the time we left, everything was operating as it should with strong cooling and proper airflow.

Case Recap

  • Location: Residential home in Tampa, FL 33629
  • Service type: Scheduled AC maintenance under the Elite Home Therapy Plan
  • Equipment: Two central AC systems, approximately two years old
  • Work performed: Full system check, coil cleaning, drain line cleaning, and duct sanitation
  • Outcome: Both systems operating properly with normal electrical consumption and a healthy temperature differential
  • Follow-up reminder: Customer advised to keep the thermostat fan set to Auto for best performance

Customer Problem

In this Tampa home, both AC systems were still relatively new—around two years old—but the homeowner understands that our Florida climate is tough on cooling equipment. Even newer systems benefit from regular maintenance, especially with the long cooling seasons we see in Tampa, FL 33629.

The homeowner is enrolled in our Elite Home Therapy Plan, which means we schedule regular professional maintenance to stay ahead of problems. For this visit, the request was simple: perform the scheduled tune-up on both systems, check that everything is working correctly, and make sure the home stays comfortable and energy-efficient.

Because this appointment involved two systems, we also coordinated timing with the homeowner so the visit would start after 9 a.m. That way, the work fit their schedule while still allowing us enough time to go through a complete, detailed maintenance routine on both AC units.

Inspection and Diagnosis

Our technician arrived after 9 a.m. as requested and started with a full system evaluation on each AC unit. Even when a system seems to be running fine, a detailed inspection can reveal early signs of wear, airflow issues, or drainage problems—things that can quietly reduce comfort or efficiency over time.

Here’s what we focused on during the inspection:

  • Overall system operation: We confirmed each system started up properly, cycled correctly, and responded to the thermostat as expected.
  • Electrical performance: We checked fan, blower, and compressor amp draw to ensure the motors and compressor weren’t working harder than they should.
  • Refrigerant-side performance: We verified that system pressures were within normal operating range for these units.
  • Temperature differential: We confirmed there was a good temperature difference between return air and supply air, which is a key indicator that the system is actually removing heat and cooling the home effectively.
  • Airflow and duct condition: We observed airflow at the registers and inspected accessible ductwork areas as part of the sanitation process.

The good news for this Tampa homeowner was that both systems passed the key performance checks: normal amp consumption, system pressures within normal range, and a healthy temperature differential. That told us the equipment was in good condition. From there, our focus shifted to preventive maintenance—cleaning and care steps that keep it that way.

Repair or Service Process

Because this visit was part of the Elite Home Therapy Plan, our work followed a structured maintenance checklist tailored to the needs of Florida homes and the specific equipment on site. Here’s how we approached the service on each system.

1. Full System Check

We began with a complete system check on each AC unit. This includes observing startup, checking controls, and reviewing basic safety and performance items. Even newer systems can develop loose connections or minor control issues over time, so this step is about confirming everything works as intended.

By verifying proper operation first, we can spot anything unusual before diving into the cleaning work. In this case, both systems operated normally, so we proceeded with preventive maintenance.

2. Coil Cleaning

Next, we cleaned the coils on both systems. Over time, even with good filtration, dust, lint, and outdoor debris can build up on coils. In our humid Tampa Bay climate, that buildup can:

  • Reduce cooling efficiency
  • Make the system run longer to reach the set temperature
  • Increase wear on components

We carefully cleaned the coils to restore proper heat transfer. Clean coils help the system move heat in and out of your home more efficiently, which supports both comfort and energy savings for homeowners in Tampa, FL 33629.

3. Drain Line Cleaning

AC systems pull a lot of moisture out of the air, especially in Florida. That moisture drains away through a condensate drain line, and over time, algae, dust, and sludge can restrict or clog that line. When that happens, you can end up with water backing up, pan overflows, or safety shutoffs.

As part of this Elite Home Therapy Plan visit, we cleaned the drain line for each system. This helps:

  • Reduce the risk of water leaks and ceiling damage
  • Prevent nuisance shutdowns due to a clogged drain
  • Maintain proper humidity management inside the home

We also verified that the condensate was draining properly after cleaning, so the homeowner could feel confident about the system’s drainage for the upcoming cooling cycles.

4. Duct Sanitation

Part of this maintenance appointment included duct sanitation. Over time, dust and airborne particles can accumulate in ductwork and on internal surfaces. In a warm, humid environment like Tampa, this can contribute to musty odors and reduced indoor air quality.

Our duct sanitation step helps reduce the buildup of contaminants within the duct system. While it’s not a full duct replacement or deep mechanical cleaning, this sanitation service is an important component of routine maintenance to help keep the air in the home fresher and cleaner.

5. Thermostat and Fan Setting Reminder

To finish the visit, we confirmed the systems were operating correctly and then reviewed thermostat settings with the homeowner. One important reminder we shared was to keep the fan setting on Auto starting the following day.

Keeping the fan on Auto allows the system’s blower to run only when the AC is actively cooling. This typically:

  • Helps maintain better humidity control
  • Reduces unnecessary electrical use
  • Prevents warm, humid air from being pushed through the ductwork when the system isn’t actively cooling

It’s a simple setting, but it makes a noticeable difference in comfort for many homeowners in Tampa, FL 33629.

Why This Fix Works

In this case, there was no major repair required; the systems were already in good shape. What we did was protect that good performance through thorough preventive maintenance. Here’s why these steps matter so much in our area.

Clean coils improve heat transfer. Your air conditioner works by absorbing heat inside your home and releasing it outside. When coils are clean, that heat moves more efficiently. When they’re dirty, the system has to work longer and harder to achieve the same cooling, which can drive up energy bills and shorten the life of key components.

Clear drain lines protect your home and your equipment. With the humidity we see across Tampa Bay, AC systems produce a steady stream of condensate. A blocked drain can lead to leaks, ceiling damage, or safety switches shutting the system down altogether. Regular drain cleaning greatly reduces that risk.

Duct sanitation supports indoor air quality. While it doesn’t replace full duct cleaning when that’s needed, sanitation steps help cut down on buildup and keep the air moving through cleaner pathways, which is especially valuable for families with allergies or sensitivities.

By combining these tasks with a full system check—verifying pressures are within range, confirming normal amp consumption, and checking temperature differential—we help ensure the AC runs smoothly, efficiently, and reliably for homeowners in Tampa, FL 33629.

Pro Tips for Homeowners in Tampa

Here are a few practical tips based on what we see every day providing HVAC service across Tampa and the rest of Tampa Bay.

  • Stay consistent with maintenance: Our climate puts extra hours on your AC. Staying on a plan like the Elite Home Therapy Plan helps catch small issues early and keeps performance steady.
  • Use the Auto fan setting: As we reminded this homeowner, keeping the fan on Auto usually gives better humidity control than running the fan constantly, especially during muggy Tampa summers.
  • Watch for drain line symptoms: If you notice water around the air handler, a musty smell near the unit, or the system shutting off unexpectedly, a clogged drain line could be the cause. Regular cleaning, like we completed on this visit, is the best prevention.
  • Keep supply and return vents clear: Avoid blocking vents with furniture, rugs, or curtains. Good airflow is essential for efficiency and for maintaining even temperatures throughout your home.
  • Listen for changes: If your system suddenly gets louder, struggles to keep up, or cycles on and off more often than usual, it’s worth having a professional take a look before it turns into a breakdown.
  • Plan ahead for peak season: In Tampa, the busiest times are when the first big heat waves hit. Scheduling maintenance ahead of those spikes helps ensure your system is ready when you need it most.

FAQ: Elite Plan AC Maintenance in Tampa, FL 33629

How often should I schedule AC maintenance for my Tampa home?

For most homeowners in Tampa, FL 33629, we recommend at least one thorough maintenance visit per year for each system, with some homes benefiting from twice-a-year visits due to high usage. This case was part of an ongoing Elite Home Therapy Plan, which keeps service visits consistent and organized.

What’s included in an Elite Home Therapy Plan visit?

While specifics can vary by system, a typical Elite Plan visit includes a full system check, coil cleaning, drain line cleaning, basic duct sanitation steps, and performance verification. In this recent visit, we performed all of those tasks on two separate AC units and confirmed both were operating properly afterward.

Do I need to be home during maintenance?

We do recommend that someone be home, especially if we need access to thermostats, indoor equipment areas, or filters. We also like to review our findings with you and go over any recommendations in person. If you’re curious about how scheduling works, our article on whether you need to be home for AC repairs or maintenance can help answer common questions.

Why is the fan setting on my thermostat so important?

The fan setting affects both comfort and efficiency. In this Tampa home, we reminded the customer to keep the fan on Auto starting the next day. Auto mode typically gives better humidity control, uses less energy, and avoids pushing warm, humid air through the ducts when the system isn’t cooling.

What happens if I skip regular maintenance on a newer system?

Even newer systems can suffer from dirty coils, clogged drain lines, and reduced airflow if they’re not maintained. In our climate, skipping maintenance can shorten equipment life and lead to higher energy bills. This homeowner in Tampa, FL 33629 chose to stay on top of care through the Elite Home Therapy Plan, which is exactly how we recommend protecting your investment.

Are drain line cleanings really necessary every year?

With Tampa’s humidity, yes, they’re very important. Condensate drains carry a steady stream of moisture, and that moist environment can quickly grow algae and buildup. Regular cleaning, like we performed here, significantly lowers the risk of backups and water damage. You can learn more about this topic in our dedicated guide to drain line cleaning and flushing services.

Why Choose Home Therapist for AC Maintenance in Tampa

When you invite us into your home, you’re trusting us with your comfort and your property. We take that seriously, whether we’re performing a full installation or a routine Elite Home Therapy Plan visit like this one in Tampa, FL 33629.

Here’s what you can expect from our team:

  • Licensed and professional technicians: Our technicians are trained, experienced, and stay up to date on best practices for modern HVAC systems in Florida’s climate.
  • Transparent communication: We explain what we’re doing, why we’re doing it, and what we find—without pressure or confusing jargon. In this home, we clearly reviewed system performance, cleaning steps, and thermostat settings with the homeowner.
  • Clean and respectful work: We treat your home as if it were our own, working carefully around your space and cleaning up after ourselves when the job is done.
  • Long-term reliability focus: Preventive maintenance is all about avoiding surprises. By combining coil cleaning, drain line care, and system checks, we help your equipment last longer and run more efficiently.
  • Commitment to Tampa Bay homeowners: We’re local, and we understand what Tampa Bay heat and humidity do to HVAC systems. Our services and maintenance plans are built with this region in mind.

If you’d like to see more of what we do and how we serve the community, you can follow us on social platforms like Pinterest or connect with us on Reddit. For added peace of mind, you can also review our standing with trusted organizations such as the Better Business Bureau, the Tampa Bay Chamber of Commerce, and our customer feedback on ProvenExpert.

For more about maintenance, repairs, and tune-ups, you can also explore our resources on AC repairs, installs, and maintenance services, as well as examples of our air conditioning projects in the Tampa Bay area, and our broader HVAC and plumbing services across Hillsborough County.

Schedule Your AC Maintenance in Tampa, FL 33629

If you’re a homeowner in Tampa, FL 33629 and you’d like the same level of care this customer receives under our Elite Home Therapy Plan, we’re here to help. Whether you have one system or several, we can set up a maintenance schedule that keeps your home comfortable, protects your equipment, and reduces the chances of inconvenient breakdowns.

Reach out to Home Therapist Cooling, Heating, and Plumbing to schedule your next AC maintenance visit. We’ll arrive on time, walk you through what we’re doing, and leave you with systems that have been carefully inspected, cleaned, and tested—so you can stay comfortable in Tampa’s heat with confidence.

Elite Home Therapy Plan HVAC Maintenance in Tampa, FL 33629

For a homeowner in Tampa, FL 33629, staying comfortable through our long cooling season means keeping the air conditioning system cleaned, checked, and tuned up on a regular basis. On this Elite Home Therapy Plan visit, our technician Barbaro came out for the homeowner’s third scheduled service, making sure their system stayed reliable, efficient, and ready for the Florida heat.

There wasn’t a major breakdown or emergency this time—and that’s exactly the point of a maintenance plan. With our Elite Home Therapy Plan, we aim to catch small issues before they become big problems, extend equipment life, and keep energy bills in check. On this visit, we focused on a thorough inspection, cleaning, and system check to confirm everything was operating as it should.

Case Recap

  • Location: Routine HVAC maintenance for a homeowner in Tampa, FL 33629
  • Service type: Elite Home Therapy Plan visit #3
  • Tech on site: Barbaro from Home Therapist Cooling, Heating, and Plumbing
  • Goal: Prevent problems, maintain comfort, and check system health before peak demand
  • Outcome: System inspected, cleaned where needed, and verified for proper operation

Customer Problem: Staying Ahead of the Tampa Heat

Even when everything seems to be working fine, homeowners in Tampa, FL 33629 know the heat and humidity can push an air conditioning system to its limits. In this case, the homeowner wasn’t calling us because the AC had failed. Instead, they wanted to stay on top of their Elite Home Therapy Plan and make sure the system was ready for the long, hot months ahead.

Some of the concerns we commonly hear from homeowners in this part of Tampa include:

  • “My system is working, but I don’t want a surprise breakdown in the middle of summer.”
  • “My energy bills seem high—could my AC be working harder than it should?”
  • “I just want peace of mind that everything has been checked by a professional.”

This visit under the Elite Home Therapy Plan was focused on exactly that kind of peace of mind. The goal was to have a licensed technician take a careful look at the equipment, address any developing issues, and make recommendations so the homeowner can plan ahead instead of reacting to emergencies.

Inspection and Diagnosis: What We Look For on an Elite Plan Visit

On a maintenance visit like this in Tampa, FL 33629, we move through the system in a logical order so nothing gets overlooked. Even when we don’t have a specific complaint like “no cooling” or “strange noise,” we inspect the same core areas because that’s where most issues start.

During an Elite Home Therapy Plan visit, a typical checklist includes:

  • Visual inspection of indoor and outdoor units
  • Listening for unusual noises from motors, fans, or compressors
  • Checking for visible signs of wear, corrosion, or damage
  • Verifying that airflow is not obviously restricted at the filter or vents
  • Confirming the system cycles on and off as expected from the thermostat

From there, we go deeper based on what we see and hear. On this visit, our technician focused on confirming that:

  • There were no obvious electrical issues at accessible connections
  • The condensate drainage path was clear and not showing signs of backup
  • The outdoor unit had reasonable clearance from debris and vegetation
  • The indoor components were generally clean and operating as expected

Because this was a routine Elite Home Therapy Plan visit, not an emergency repair, our aim was to identify any developing issues rather than track down a single active failure. When we finish an inspection like this, we always share what we saw with the homeowner—what looks good, what might need attention later, and what should be addressed sooner rather than later.

Repair and Service Process: Step-by-Step Preventive Care

Preventive maintenance is less about one big “fix” and more about many careful, smaller actions that keep your system in good shape. For this Elite Home Therapy Plan visit in Tampa, FL 33629, our technician worked through a structured series of tasks designed to protect system performance and reliability.

Here’s how that process typically looks:

1. System Start-Up and Basic Operation Check

We begin by running the system from the thermostat to make sure it responds properly. This confirms that basic controls are working and that the indoor and outdoor units are communicating the way they should. We listen for anything out of the ordinary and verify that air is moving through the home’s vents.

2. Indoor Unit Inspection

Inside the home, we visually inspect accessible components of the air handler or furnace/air handler combination. On an Elite plan visit, this typically includes:

  • Checking for abnormal noises or vibrations
  • Looking for signs of water around the unit that could indicate drainage concerns
  • Confirming the filter area is accessible so the homeowner can replace filters regularly

If we see dust buildup or anything that could impact indoor air quality or airflow, we’ll let the homeowner know and discuss options for cleaning and maintenance.

3. Condensate Drainage Review

In Tampa’s humid climate, condensate drainage is essential. When warm, moist indoor air passes across the cold evaporator coil, water condenses and must be safely carried away. During an Elite Home Therapy Plan visit, we check that the drain path is clear and not showing obvious signs of blockage or overflow risk.

Keeping this part of the system clear helps prevent water damage around the unit and reduces the risk of a float switch shutting the system down unexpectedly.

4. Outdoor Unit Inspection

Outside, we inspect the condenser unit. We look for:

  • Debris, leaves, or grass clippings around the unit
  • Objects or plants too close to the sides or top of the unit
  • Visible damage to panels or fan guards

If necessary, we gently clear away obstructions and advise the homeowner about maintaining adequate clearance so the unit can breathe. Restricted airflow at the outdoor unit can make the system work harder and run hotter than it should.

5. Electrical and Control Check (Visual and Basic Access)

We also perform a basic check of accessible electrical components and control wiring. We’re looking for obvious signs of overheating, loose wires, corrosion, or damage that could lead to intermittent operation or system failure down the line. If we see anything concerning, we’ll recommend next steps before it becomes a sudden outage.

6. System Performance Confirmation

Once the inspection and cleaning steps are complete, we run the system again to confirm proper operation. We’re looking for stable operation, consistent airflow, and normal cycling behavior. If everything checks out, we review our findings with the homeowner and answer any questions about the system or the Elite Home Therapy Plan going forward.

At the end of this Tampa, FL 33629 visit, the system was operating as expected and there were no urgent repair needs. That’s exactly what we want to see on a planned maintenance appointment.

Why This Preventive Approach Works

Routine visits under the Elite Home Therapy Plan are built around proven HVAC fundamentals: airflow, drainage, and electrical reliability. That mix covers the majority of issues we see in homes across Tampa Bay.

Here’s why this type of visit makes a difference:

  • Airflow: When air can move freely through filters, coils, and ductwork, the system doesn’t have to work as hard. This usually helps with comfort, energy use, and equipment life.
  • Drainage: In our Florida humidity, the AC system pulls a lot of moisture out of the air. Keeping the drain path clear helps prevent water damage and unexpected shutdowns caused by safety switches.
  • Electrical safety and control: Many failures start with loose, corroded, or stressed electrical connections. Regularly looking at accessible components can reveal early warning signs before they turn into a loss of cooling.

By visiting this home in Tampa, FL 33629 as part of the Elite Home Therapy Plan, we helped the homeowner reduce the chance of surprise breakdowns, especially during the highest-demand parts of the year when the system is under the most strain.

Pro Tips for Homeowners in Tampa

Based on what we see every day in Tampa and across the Bay area, here are a few simple, practical steps homeowners can take between Elite Home Therapy Plan visits:

  • Change your filters regularly. In our humid, often dusty environment, filters can load up faster than you think. Check them monthly and replace as needed so your system can breathe.
  • Keep the outdoor unit clear. Trim plants and shrubs back so there’s breathing room around the condenser. Avoid stacking items on or against the unit.
  • Watch for drainage signs. If you see water around the indoor unit, staining near the air handler, or an overfull drain pan, call for service. Catching a drainage issue early can help prevent damage.
  • Use your thermostat wisely. In Tampa, setting the thermostat too low for long periods can overwork the system. Aim for a comfortable, steady temperature instead of constant large swings.
  • Pay attention to new sounds or smells. If your system suddenly sounds different or you notice unusual odors when it runs, it’s worth having a technician take a look before the issue grows.
  • Stay on schedule with maintenance. Sticking with your Elite Home Therapy Plan visits—like this homeowner in Tampa, FL 33629—helps keep your system in good shape and gives you a chance to ask questions before problems arise.

FAQ: Elite Home Therapy Plan Visits in Tampa, FL 33629

How often should my HVAC system be serviced under a plan like this?

Most systems in the Tampa area benefit from at least one thorough cooling-focused maintenance visit per year, and many homeowners choose additional visits to stay ahead of wear and tear. The Elite Home Therapy Plan is designed to keep you on a regular schedule so your system is checked before peak seasons.

What’s the benefit of a maintenance plan if my AC seems to be working fine?

The biggest benefit is prevention. Regular visits allow us to spot early signs of wear, airflow restrictions, or drainage problems before they become breakdowns. That means fewer surprises, more consistent comfort, and a better chance of extending your equipment’s life.

Will you tell me if you find something that needs repair during a visit?

Yes. If we see anything during your Elite Home Therapy Plan visit that needs attention, we’ll explain what we found in plain language, discuss your options, and answer any questions before moving forward. We believe in transparent communication so you can make informed decisions.

Do you clean the system during these visits?

As part of an Elite Home Therapy Plan visit, we address basic cleaning and clearing tasks that support airflow and drainage, and we’ll let you know if more in-depth cleaning is recommended. Any recommendations are based on what we actually see on your specific system.

Can a maintenance plan help with my energy bills?

While every home is different, a well-maintained system typically runs more efficiently than one that’s neglected. By keeping airflow and drainage in good shape and addressing developing issues early, maintenance can help your system avoid unnecessary strain, which often supports more stable energy usage over time.

Is this type of service only for older systems?

No. Newer systems in Tampa, FL 33629 still benefit from regular professional maintenance. In many cases, manufacturers expect routine service as part of keeping warranties valid, and maintenance helps newer equipment stay efficient as it ages.

Why Choose Home Therapist for Your Tampa HVAC Maintenance

When you invite someone into your home to service your AC system, you want to know they’ll treat your space and your time with respect. That’s been our focus with every Elite Home Therapy Plan visit we perform in Tampa, FL 33629 and throughout Tampa Bay.

Here’s what you can expect from Home Therapist Cooling, Heating, and Plumbing:

  • Licensed, professional technicians: Our team is trained and licensed to work on residential HVAC systems, and we take ongoing education seriously so we stay current with modern equipment.
  • Transparent communication: We explain what we’re doing, what we find, and why any recommendations are being made, using straightforward, homeowner-friendly language.
  • Clean, respectful work: We treat your home like it’s our own—working cleanly, being careful with your property, and leaving the work area tidy when we’re done.
  • Long-term reliability focus: We’re not just looking for today’s quick fix. Our Elite Home Therapy Plan visits are designed to support the long-term health of your system.
  • Committed to Tampa Bay homeowners: We live and work in the same climate you do, so we understand the demands that Florida heat and humidity put on your HVAC system.

If you’d like to see more about how we serve the community, you can connect with us on our official social and local profiles and review platforms. These profiles highlight feedback from Tampa Bay homeowners and show our ongoing commitment to quality service.

Schedule Your Next Elite Home Therapy Visit in Tampa, FL 33629

If you’re in Tampa, FL 33629 and want the same kind of steady, preventive care this homeowner receives, our Elite Home Therapy Plan is a simple way to stay ahead of the heat. Whether your system is new or has a few seasons behind it, regular professional visits help protect your comfort, your equipment, and your peace of mind.

When you’re ready, reach out to schedule your next maintenance visit. We’ll send a professional technician, walk you through what we’re doing, and make sure your system is prepared for our demanding Tampa Bay weather—calmly, clearly, and with your comfort as the top priority.

Water Heater Inspection Correction in Tampa, FL 33647

When your new water heater doesn’t pass inspection, it can be frustrating and a little stressful—especially when you’re just trying to keep hot water running smoothly in your Tampa, FL 33647 home. In this case, our Home Therapist technician Alejandro returned to a recent water heater installation to address the specific issue the inspector found with the discharge piping and the required air gap.

In the story below, we’ll walk through what the inspector called out, what we checked, and how a careful adjustment to the piping brought the installation up to standard so the homeowner could move forward with confidence.

Case Recap

A homeowner in Tampa, FL 33647 recently had a new water heater installed. When the city inspector came by, the installation did not pass because of how the discharge piping from the water heater’s safety valve was terminated. The inspector required a proper air gap between the outlet of the heater and the flood level of the receiving fixture.

Our technician, Alejandro, returned to the property, evaluated the discharge piping, and made a simple but important correction by trimming and adjusting a small section of pipe to create the correct air gap. After the adjustment, the installation was ready for re-inspection and safe long-term operation.

Customer Problem

From the homeowner’s perspective, things were pretty simple: the old water heater had been replaced, but the new unit didn’t “pass.” That can raise a lot of questions:

  • Is my water heater safe?
  • Will this delay my final approval from the city?
  • Is this going to mean more work and more mess?

The written inspection note focused on the discharge piping for the water heater. Specifically, the inspector wanted a vertical air space between the end of the heater’s discharge outlet and the flood-level rim of the receiving fixture. The note explained that this air space has to be at least a certain minimum distance, which is often tied to the size of the outlet.

In plain terms, the water heater’s safety discharge line was too close or not properly separated from the receiving drain point. Even though the heater itself was working fine, this small detail was enough to fail the inspection. In Tampa, FL and across Florida, inspectors are very careful with water heater safety details like this, because they protect your home from backflow risks and help ensure the safety features on your heater can do their job.

Our goal was to take care of this quickly and cleanly, without putting the homeowner through any extra hassle—and without compromising the original installation.

Inspection and Diagnosis

When Alejandro returned to the property, he started by reviewing the inspector’s note and then visually inspecting the entire water heater installation. Even though the main callout was the discharge piping, it’s always a good idea to quickly re-check the surrounding work while we’re there.

Here’s what we focused on:

  • Discharge pipe routing: Confirming where the temperature and pressure relief (T&P) valve discharge line was running and where it terminated.
  • Vertical air gap: Measuring the space between the end of the discharge outlet and the flood rim of the receiving fixture or receptor.
  • Clear path for drainage: Making sure that if the T&P valve ever opened, water would be able to discharge freely without obstruction.
  • General connections: A quick visual confirmation that fittings, joints, and supports were still secure and in good condition since the original installation.

It became clear that the only correction needed to satisfy the inspection was to adjust the length and position of the discharge pipe so the air gap matched what the inspector described. No major rework was required—just a careful modification to a small section of pipe.

Repair or Service Process

Because we were correcting an existing installation, our focus was on precision and cleanliness. We wanted to touch as little as possible while still fully addressing the inspector’s concern.

The steps our technician followed included:

1. Confirming the Required Air Gap

First, Alejandro reviewed the inspection note to confirm exactly what the inspector wanted to see in terms of the vertical separation between the discharge outlet and the flood level of the receiving fixture. While we don’t quote specific code measurements in our reports, we always make sure our work follows the local requirements in Tampa, FL.

2. Measuring the Existing Pipe

Next, he measured the existing discharge pipe to see how far it extended and how that compared to the required air gap. This is a small detail, but with safety piping, a half-inch here or there can make the difference between passing and failing inspection.

3. Trimming the Pipe

The note from the field said, “cortaramos un pequeño pedazo de pipe”—to cut a small piece of pipe. That’s exactly what was needed: a careful, clean cut on the discharge line to adjust its termination point. This made the discharge outlet sit higher above the receiving fixture, opening up the air gap the inspector asked for.

Throughout the process, we protected nearby surfaces, collected any shavings, and kept the work area tidy. Even minor corrections deserve the same level of care as a full installation.

4. Deburring and Re-Checking Alignment

After trimming, the cut end was cleaned and deburred. Any sharp edges or debris can interfere with drainage or, over time, contribute to corrosion or buildup. We then confirmed that the pipe still drained in the right direction and that its alignment was smooth and unobstructed.

5. Verifying the Air Gap and Flow Path

Once the new pipe length was set, Alejandro re-measured the air gap and double-checked the path where water would flow if the T&P valve opened. The goal is simple: if the safety valve ever needs to release pressure, water should discharge freely, safely, and visibly, without any chance of backing up into the system.

With this small but important adjustment made, the water heater installation was ready for re-inspection and long-term operation.

Why This Fix Works

The heart of this correction is the concept of an air gap. An air gap is a vertical, physical space between the end of a discharge or drain pipe and the flood level of a fixture or receptor. That open space is what helps protect your plumbing and drinking water from backflow contamination.

On a water heater, especially around the temperature and pressure relief system, the discharge piping has to be set up so that:

  • The safety valve can release pressure if needed.
  • The discharged water has a safe place to go.
  • There’s a clear separation between your water heater and any drain or fixture that could flood.

By trimming the pipe and restoring the correct air gap, we helped ensure that:

  • The installation meets local inspection standards in Tampa, FL.
  • The safety components on the water heater can operate properly.
  • The homeowner can move forward without worrying about hidden plumbing issues tied to the inspection.

This type of work also reinforces the value of regular water heater checkups. If you’d like to understand more about how we support ongoing water heater care, you can read about our water heater maintenance scheduling and annual inspections and how they help prevent small issues from turning into bigger problems.

Pro Tips for Homeowners in Tampa, FL

Even though this visit was focused on an inspection item, there are a few practical tips we always like to share with Tampa-area homeowners about water heaters and plumbing safety:

1. Don’t Ignore Inspection Notes

If your water heater doesn’t pass inspection, it’s not just a paperwork issue. Those notes are usually tied to safety, drainage, or structural concerns. Address them promptly, and don’t hesitate to ask your technician to walk you through what needs to be corrected.

2. Keep an Eye on the Area Around the Heater

In Tampa’s humid climate, small leaks or slow drips can cause damage quickly. Every so often, look around your heater for signs of moisture, rust, or staining—especially near the discharge line and the floor. If you see anything unusual, call a licensed plumber.

3. Schedule Regular Water Heater Checkups

Even a newer heater benefits from periodic inspection. Our team offers guidance on annual water heater maintenance for Tampa homeowners so you can plan ahead and keep everything operating safely.

4. Know Where Your Shutoffs Are

Every homeowner in Tampa, FL should know how to turn off water to the heater and to the home. In an emergency, shutting water off quickly can protect your home from significant water damage while you wait for a technician.

5. Plan Ahead for Replacement and Budgeting

Water heaters don’t last forever, and planning ahead can make replacement less stressful. If you’re thinking about long-term options, our article on monthly water heater maintenance payments can help explain how some homeowners spread out costs and care over time.

6. Use Licensed, Local Professionals

Florida has its own codes and inspection practices, and Tampa, FL is no exception. Working with a licensed local company means your installation is done with these details in mind from day one, reducing surprises at inspection.

FAQ: Water Heater Inspection Corrections in Tampa, FL

Why did my new water heater fail inspection?

There are many reasons a water heater might not pass, but in this case the issue was the discharge piping and air gap. Even when the heater itself is installed correctly, details like how the safety discharge line is terminated can cause a fail if they don’t match local standards.

Is it safe to use my water heater if it didn’t pass inspection?

Safety depends on the specific issue the inspector found. Some items are more urgent than others. If your heater didn’t pass inspection in Tampa, FL, it’s best to review the note and talk directly with a licensed technician. We can explain what the note means and whether you should limit use until corrections are made.

What is a discharge pipe air gap on a water heater?

The air gap is a vertical space between the end of the water heater’s discharge piping and the flood level of the receiving fixture. That gap helps prevent wastewater from flowing backward into the system and ensures the safety valve can release water properly if needed.

Will fixing an inspection item require replacing my water heater?

Not usually. Many inspection corrections, like the one in this Tampa, FL 33647 home, involve adjusting piping, supports, or drainage. We only recommend replacement if the heater itself is damaged, failing, or unsafe in a way that can’t be resolved with repairs.

How messy is this kind of correction?

Most discharge piping corrections are minimally invasive. We typically trim or adjust a small section of pipe, clean up any debris, and verify operation. Our technicians protect the area and leave the workspace as clean as possible when the job is done.

Can I avoid inspection problems with future plumbing work?

Planning with a licensed contractor from the start is the best way to avoid surprises. If you’re considering broader plumbing projects, our guide on requesting plumbing service estimates can give you a feel for how we plan and price work in advance.

Why Choose Home Therapist for Water Heater Service in Tampa Bay

At Home Therapist Cooling, Heating, and Plumbing, we know that even a small inspection note can feel like a big headache. Our job is to take that stress off your shoulders and make sure your system is safe, reliable, and compliant.

  • Licensed and professional technicians: Our local Tampa Bay team understands Florida’s plumbing codes and inspection practices. We approach every installation and correction with safety first.
  • Transparent communication: We explain what the inspector found, what we recommend, and why. You’ll always know what’s being done and what it means for your home.
  • Clean and respectful work: Whether we’re installing a full system or trimming a short section of pipe, we treat your home with care and leave the area clean when we’re done.
  • Focused on long-term reliability: Our goal is not just to get you past inspection today, but to help your water heater and plumbing system serve you reliably for years.
  • Committed to Tampa Bay homeowners: We’re proud to be part of the local community, with a track record you can verify through independent organizations like the Better Business Bureau and the Tampa Bay Chamber of Commerce.

If you’d like to see more of our day-to-day work and tips, connect with us on our Facebook page or follow us on Instagram for updates from our Tampa Bay HVAC and plumbing team.

Need Water Heater Help in Tampa, FL 33647?

If your water heater didn’t pass inspection, or if you’re noticing anything unusual—noises, inconsistent hot water, or signs of moisture—our local Tampa, FL team is here to help. We’ll carefully review the situation, explain your options in plain language, and make the corrections needed to keep your home safe and comfortable.

Contact Home Therapist Cooling, Heating, and Plumbing today to schedule water heater service or inspection corrections in Tampa, FL 33647. We’ll take care of the details so you can get back to enjoying reliable hot water with confidence.

Water Heater Discharge Pipe Correction in Tampa, FL 33647

When a water heater installation in Tampa, FL 33647 doesn’t pass inspection, it can be frustrating and a little stressful for any homeowner. You’ve invested in new equipment, and now you’re being told something isn’t quite right with the plumbing. In this case, the issue came down to a detail that’s easy to overlook but very important for safety: the discharge piping and air gap for the water heater drain.

In this article, we’ll walk you through what we found at this Tampa home, why the inspector flagged the installation, how we corrected the discharge piping, and what that means for long-term safety and peace of mind. We’ll also share a few practical tips for other homeowners in Tampa and across the Tampa Bay area so you can avoid similar headaches.

Case Recap

A homeowner in Tampa, FL had a new water heater installed but was told the installation did not pass inspection. The concern was with the discharge pipe from the water heater where it drained into a nearby plumbing fixture. There wasn’t enough vertical air gap between the end of the discharge pipe and the flood rim of the fixture below it. Our technician returned, adjusted the piping by cutting a small section to provide the proper separation, verified the layout, and prepared the installation to be re-inspected.

Customer Problem

From the homeowner’s point of view, the problem was simple but stressful: the water heater installation failed inspection. There were no leaks, no loss of hot water, and the equipment itself was working, but they received notice that the discharge arrangement didn’t meet requirements.

Specifically, the inspector noted that the discharge pipe from the water heater needed a proper vertical air gap above the receiving fixture. The instructions were clear: the space between the bottom end of the discharge outlet and the flood-level rim of the fixture had to be a certain minimum distance, usually based on the size of the opening. Because this gap wasn’t sufficient, the installation was flagged.

For the homeowner, this raised understandable questions:

  • Is my water heater unsafe?
  • What exactly does this air gap do?
  • Is this a big repair or just a small adjustment?

Our job as local plumbing professionals in Tampa was to answer those questions in clear terms and make the correction as cleanly and quickly as possible.

Inspection and Diagnosis

When our technician returned to the property in Tampa, FL 33647, the first step was to carefully review the existing water heater installation and the discharge piping the inspector mentioned. Even small details around a water heater can have a big impact on safety and compliance, so we walk through a simple checklist:

  • Confirm the route of the discharge pipe from the water heater to the receiving fixture or drain.
  • Check how far the tip of the discharge pipe extends into or over the fixture.
  • Measure the vertical distance between the end of the pipe and the flood-level rim of the fixture.
  • Look for any potential cross-connection or backflow risk between the potable water system and drainage.

In this case, the main issue lined up exactly with the inspector’s note: the discharge pipe extended too close to the fixture below. The air gap – that open space between where the water leaves the discharge pipe and where it could spill into the fixture – was not tall enough.

That lack of separation is more than a paperwork problem; it’s there to prevent dirty or contaminated water from ever being able to flow backward and contact the water heater’s discharge outlet. Even if it seems like a low-risk situation, plumbing codes are written to protect against worst-case scenarios, especially in areas like Tampa Bay where heavy rains, high humidity, and occasional drainage backups can put extra stress on plumbing systems.

Repair or Service Process

The good news for this homeowner in Tampa was that the fix was straightforward. This wasn’t a full re-pipe or a major remodel. It was a precise adjustment to get the discharge piping into proper configuration so the installation could pass inspection and perform safely.

Here’s how we handled it step by step:

1. Review the Existing Layout

We confirmed how the discharge pipe was currently installed, how it was supported, and where it terminated. We also made sure there were no other concerns, such as stress on fittings, unsupported segments of pipe, or any signs of leaks.

2. Measure the Air Gap

Next, we measured the vertical distance from the very tip of the discharge pipe down to the flood-level rim of the receiving fixture. This number is important because the required air gap is usually set as a multiple of the discharge opening size. In this installation, the measured gap wasn’t sufficient, which matched the inspector’s note.

3. Plan the Adjustment

Our technician determined that the simplest and cleanest solution would be to shorten the discharge pipe slightly. By cutting off a small section of pipe, we could increase the vertical separation without changing the rest of the installation or creating unnecessary joints or bends.

4. Cut and Refinish the Discharge Pipe

We carefully cut a small piece off the bottom of the discharge pipe, ensuring the cut was clean and square. Any time we trim pipe, we also smooth the edges to remove burrs or rough spots. This keeps the opening clean and helps water discharge evenly without catching debris.

5. Verify the New Air Gap

After trimming, we re-measured the distance between the pipe outlet and the flood rim of the fixture. The new measurement provided the proper air gap, giving enough clearance to prevent any potential backflow contact while still allowing the pipe to discharge safely into the fixture.

6. Final Visual Check and Operation Check

Finally, we performed a general visual inspection around the water heater and tested the discharge line. That includes:

  • Making sure the pipe is solidly supported and not under tension.
  • Confirming that the discharge path is clear and directed safely.
  • Checking for any signs of leaks or drips at nearby joints or connections.

Once we were satisfied, we documented the correction so the homeowner would be ready for a follow-up inspection.

For other plumbing concerns beyond a single pipe adjustment, our team also handles more involved work like whole-home repiping in Tampa and upgrades like water filtration installation. Whatever the scale of the job, the process is the same: understand the problem, fix it correctly, and leave the home clean and safe.

Why This Fix Works

It helps to understand why an air gap on a discharge pipe matters so much. A water heater’s discharge line is there to safely handle water released by a temperature and pressure relief valve or other protective devices. That water must be able to flow freely out of the system without any chance of drawing contamination back in.

The air gap is a simple but powerful principle in plumbing:

  • Breaks the connection: By keeping the end of the pipe physically above the fixture, there’s no direct contact between the potable side and any used or standing water.
  • Prevents back-siphoning: If the fixture below were ever to back up or flood, the gap keeps that water from being able to travel back up into the discharge line.
  • Protects the rest of the system: This separation helps protect not just the water heater, but also the broader plumbing system from potential contamination.

In a humid, storm-prone area like Tampa Bay, it’s especially important to guard against drainage issues and backups. That’s why local plumbing installations need these types of safeguards.

By simply trimming the discharge pipe to create a proper air gap, we restored that protection. The water heater can now discharge safely while staying separated from any potential standing water in the receiving fixture.

If you ever need more than a minor correction, we also handle general plumbing repairs for homeowners around Tampa Bay, including projects like those highlighted in our Tampa plumbing service reviews and regional work such as plumbing repair in Brandon.

Pro Tips for Homeowners in Tampa, FL

Here are a few practical tips to help Tampa homeowners avoid inspection issues and protect their plumbing systems:

1. Take Photos After Any New Install

After a new water heater or plumbing fixture is installed, take clear photos of the piping and connections before walls or access panels are closed up. If an inspector flags something, those photos can help your plumber quickly understand what needs to be adjusted.

2. Keep Clearance Around Your Water Heater

In Tampa’s humid climate, water heaters need good air circulation. Avoid stacking boxes, paint cans, or stored items tightly around the unit or its piping. Clear access makes inspections smoother and helps us spot small issues before they turn into leaks.

3. Watch for Any Signs of Drips or Rust

Check periodically around the base of your water heater and along visible piping. Even a small drip, stain, or rust mark is worth a closer look. Catching minor issues early can prevent water damage and help ensure you’re ready for future inspections.

4. Don’t Adjust Safety Piping Yourself

It can be tempting to shorten or extend a pipe on your own, but discharge piping and relief lines serve a safety function. In Tampa and the surrounding communities, it’s best to let a licensed plumber handle any changes so your system stays both safe and compliant.

5. Schedule Periodic Plumbing Checkups

Just like air conditioning systems in Tampa Bay need regular maintenance, your plumbing benefits from periodic checkups too. A quick visit from a professional can catch issues with water heaters, shutoff valves, and drainage before they become big problems or cause inspection failures.

FAQ: Water Heater Discharge and Inspection Issues

Why did my water heater installation fail inspection?

In many cases, it’s not the water heater itself but the details around it – such as discharge piping, air gaps, clearances, or drain routing. In this Tampa home, the issue was that the discharge pipe didn’t have enough vertical air gap above the receiving fixture.

What is a water heater discharge air gap?

An air gap is a vertical open space between the end of a discharge pipe and the flood-level rim of the fixture below. It ensures that any water coming out of the discharge line cannot be drawn back into the plumbing system, even if the fixture or drain below backs up.

Is this kind of correction a big job?

Not usually. For this homeowner in Tampa, FL 33647, the correction involved trimming a small section of pipe to create the proper separation. While each installation is different, many air-gap corrections are relatively quick for a licensed plumber to complete.

Will my water heater still work while I’m waiting for re-inspection?

If the equipment is otherwise installed correctly and your plumber confirms safe operation, you can typically continue using your water heater. We always verify that the unit is operating safely after any adjustments and before we leave the property.

How can I avoid failing inspection in the future?

Work with a licensed, experienced plumbing company familiar with Tampa Bay requirements, keep your equipment accessible for inspection, and schedule repairs or adjustments promptly if something is flagged. Clear communication between you, your contractor, and the inspector makes the process smoother.

Why Choose Home Therapist for Plumbing in Tampa Bay

At Home Therapist Cooling, Heating, and Plumbing, we treat every installation and correction with the same care we’d want in our own homes. For homeowners across Tampa, Temple Terrace, New Tampa, and the wider Tampa Bay area, that means:

  • Licensed, professional technicians: Our plumbers are trained to handle everything from small discharge pipe adjustments to full repiping and filtration upgrades.
  • Clear, calm communication: We explain what the inspector flagged, what we found, and exactly what we’re doing to correct it – in plain language.
  • Clean and respectful work: We protect your home, work neatly, and clean up after ourselves so you’re not left with a mess.
  • Long-term reliability: Even on a simple job like trimming a discharge pipe, we think about how the system will perform over time in Tampa’s climate.
  • Commitment to Tampa Bay homeowners: We’re a local team, active in the community and focused on building long-term relationships through honest, dependable service.

If you’d like to see what other homeowners say about us, you can find us on platforms like Facebook and Instagram, or check our reviews and ratings through trusted organizations:

Need Water Heater or Plumbing Help in Tampa, FL?

If your water heater installation in Tampa, FL 33647 has failed inspection, or if you’re noticing anything unusual with your plumbing, our local Tampa Bay team is here to help. Whether it’s a simple discharge pipe adjustment, a leak concern, or a larger project, we’ll walk you through the situation, explain your options, and complete the work with care.

Contact Home Therapist Cooling, Heating, and Plumbing today to schedule water heater or plumbing service in Tampa, Florida. We’ll help get your system back on track so you can get back to enjoying reliable hot water and a safe, comfortable home.

Sewer Drain Unclogging and Cleanout Service in Seffner, FL

When a main sewer drain backs up in a home in Seffner, FL 33584, it can bring your whole day to a stop. Toilets may gurgle, tubs can fill with dirty water, and you quickly start worrying about damage and bad odors. Our job as your local Tampa Bay plumbing team is to step in calmly, find the blockage, and get everything flowing again as safely and cleanly as possible.

On this visit, we were called out for a sewer drain unclogging. The homeowner was dealing with a stubborn backup and needed a professional to run a drain snake through the line. We also discussed the importance of having a proper outdoor cleanout, and how installing one can make future maintenance easier and less invasive.

Below, we’ll walk through what was going on in this Seffner home, how we diagnosed the problem, the steps we took to clear the sewer line, and why adding or upgrading a cleanout can save time, money, and stress for homeowners across Seffner and the greater Tampa Bay area.

Case Recap

For readers who like the quick version, here’s a short recap of this plumbing visit in Seffner, FL:

  • The homeowner was experiencing a main sewer drain backup affecting multiple fixtures.
  • We accessed the plumbing through an existing cleanout and ran a professional-grade snake through the line.
  • The clog was cleared through the cleanout, avoiding the need to remove any toilets.
  • We walked the homeowner through why a properly located, accessible cleanout is so important for long-term maintenance.
  • We confirmed normal drainage and advised the customer on signs to watch for that might point to future issues.

If you’re dealing with similar sewer or drain issues, our local plumbing repair services near Seffner are designed to restore your home’s comfort quickly and safely.

Customer Problem

From the homeowner’s perspective, the problem was simple but serious: wastewater wasn’t leaving the home the way it should. They had signs of a main line blockage, such as slow flushing toilets and drains acting up at the same time. In a place like Seffner, FL, where many homes see heavy use during weekends and holidays, this kind of backup can escalate quickly.

The homeowner reached out looking specifically for sewer drain unclogging. They understood that sometimes a toilet has to be removed to access the line, but they preferred, if possible, to avoid that extra disruption, cost, and mess. Our goal was to use the cleanout outside to access the sewer line, run a professional drain snake, and clear the line from there.

They also asked about a cleanout installation. Not every home in the Seffner and Hillsborough County area has a properly placed, easy-to-access cleanout, especially older homes or homes that have been modified over the years. Without one, every clog becomes more complicated to address.

Because sewer and drain problems can point to bigger plumbing concerns, we also talked with the homeowner about their overall plumbing system and what they’d noticed recently. This kind of conversation helps us decide whether a single clog clearing is likely enough, or whether more extensive repairs or even whole-home repiping might be something to plan for down the road.

Inspection and Diagnosis

When we arrived, our first job was to calmly assess the situation. With sewer backups, we always start by confirming where the blockage is likely located and how far it might extend. For this Seffner home, we focused on a few key checks:

  • Visual inspection of fixtures: We looked at toilets, tub/shower drains, and sinks to verify which fixtures were affected. When multiple fixtures show signs of trouble at the same time, it usually points to a main line blockage.
  • Locating and checking the cleanout: We identified the existing cleanout outside the home. A cleanout is a capped access point that lets us enter the sewer line directly with our tools, instead of working through a toilet or other fixture.
  • Planning the snaking route: Once we confirmed the cleanout location and orientation, we set up our equipment so we could run the snake in the correct direction toward the street connection, where clogs often form.

Because we had a usable cleanout, we could avoid removing the toilet. Toilet removal is sometimes necessary when there is no cleanout or when the cleanout is not in the right position or is damaged, but in this case we were able to work through the existing access point. That saved time and kept the work contained mainly outdoors.

For homeowners in Seffner and across Hillsborough County, having an accessible cleanout is one of the best ways to make sure clogs can be dealt with quickly and cleanly. If we don’t find one, or if it’s not usable, we may recommend installing a proper cleanout as a long-term improvement. Our Hillsborough County plumbing services include these kinds of upgrades to make future maintenance much easier.

Repair and Service Process

With the diagnosis complete and the cleanout located, we moved on to the main part of the job: clearing the sewer drain and making sure everything was flowing properly before we wrapped up.

1. Preparing the Work Area

Even for an outdoor cleanout job, we treat the space with respect. We laid out our equipment carefully, kept hoses and cables organized, and explained to the homeowner where we’d be working and what to expect. This helps keep everyone safe and minimizes the chance of tracking dirt or debris into the home.

2. Running the Snake Through the Cleanout

Next, we set up our professional drain snake and began feeding it through the cleanout. The goal here is to physically break through or grab onto whatever is blocking the sewer line.

As we work the snake through the pipe, we can often feel changes in resistance. That gives us clues about what we’re dealing with—a hard blockage like a foreign object, softer buildup from grease or waste, or a combination of both. We move slowly and deliberately to avoid damaging the pipe while still being firm enough to clear the blockage.

3. Clearing the Blockage

Once we reached the obstruction, we worked the snake back and forth to break it up and push it down the line. In many cases, including this Seffner job, that’s enough to restore normal flow. Sometimes we’ll run the snake multiple times to be sure the clog is fully cleared, not just punctured in one small spot.

4. Flushing and Functional Testing

After we finished snaking the line, we used water from inside the home to confirm that everything was draining properly. We checked:

  • Toilets for strong, complete flushes
  • Sinks and tubs for steady, consistent drainage
  • Any signs of gurgling or backup returning

We don’t leave until we’ve verified normal operation. For this home in Seffner, everything returned to proper flow after the snake work was complete.

5. Discussing Cleanout Installation and Future Access

The job scope also included discussion of installing a cleanout. Even when there is an existing access point, it’s important that it is located correctly, sized properly, and in good condition. A well-installed cleanout:

  • Makes future clogs faster and less expensive to clear
  • Reduces the need to remove toilets or cut into pipes
  • Helps protect your yard and landscaping from unnecessary digging

We explained to the homeowner what’s involved in a cleanout installation, when it might be recommended, and how it fits into the bigger picture of keeping their plumbing system healthy. In some homes, especially older ones or those that have had additions over time, we may also talk about long-term solutions like more extensive plumbing repairs or upgrades if clogs become a recurring issue.

Why This Fix Works

For a main sewer drain clog, the solution we used in this Seffner home works because it addresses the problem right where it lives: inside the pipe.

A sewer line is essentially a highway for all the wastewater leaving your home. Over time, things like grease, wipes, hygiene products, and even structural issues can create choke points. When that happens, waste can’t move smoothly toward the city sewer or septic system, and it backs up into the home.

Snaking the line through a cleanout helps in a few key ways:

  • Direct access: By using the cleanout, we enter the pipe in a straight, accessible section, which allows our tools to travel farther and work more effectively.
  • Mechanical cleaning: The snake doesn’t just poke a hole; it scrubs and breaks up buildup along sections of the pipe, creating a more open path for water and waste.
  • Less disruption: We can often avoid going through fixtures like toilets, which keeps the work area cleaner and minimizes the risk of damage to finishes inside the home.

For many homeowners in Seffner and greater Tampa Bay, this combination of direct access and mechanical cleaning is the most efficient way to restore normal drainage, especially when the problem is localized to the main line rather than the entire plumbing system.

Pro Tips for Homeowners in Seffner, FL

To help reduce the chances of another sewer backup, here are some practical tips tailored for homeowners in Seffner, FL and the surrounding Tampa Bay area:

  1. Watch what goes down the drain. Avoid flushing wipes (even if they say “flushable”), paper towels, and feminine products. In the kitchen, let grease cool and throw it in the trash instead of washing it down the sink.
  2. Be mindful of Florida’s tree roots. In our humid climate, tree roots seek out moisture and can find their way into older sewer lines. If you have large trees near your sewer route, consider periodic professional inspections.
  3. Schedule maintenance after big gatherings. Extra guests mean extra strain on your plumbing. After holidays or parties, pay attention to slow drains, gurgling, or odors—these can be early warnings of a developing clog.
  4. Know where your cleanout is. Take a moment to locate your sewer cleanout in the yard and keep it accessible. Don’t bury it under mulch, concrete, or landscaping. Quick access can make a big difference when there’s a problem.
  5. Address repeat clogs promptly. If you’re calling for sewer drain unclogging more than once in a short period, it might be time to look at deeper solutions such as pipe repair or repiping. Our team can help you plan those upgrades if needed.
  6. Consider your whole plumbing system. In older homes around Seffner, advanced corrosion or outdated materials may contribute to frequent clogs. Services like whole-home repiping in the Tampa area can provide a long-term reset when repairs become constant.

FAQ: Sewer Drain Unclogging in Seffner, FL

Do you always need to remove the toilet to unclog a sewer line?

No. When a proper cleanout is available and accessible, we can usually run our equipment directly through that access point, as we did for this home in Seffner, FL. Toilet removal is reserved for situations where there is no usable cleanout or where we need a different access angle.

What is a sewer cleanout and why is it important?

A sewer cleanout is a capped pipe that provides direct access to your main sewer line. It’s important because it lets us clear clogs and inspect the line without tearing into walls or removing fixtures. For Tampa Bay and Seffner homeowners, a good cleanout can significantly reduce the time and cost of dealing with future backups.

How do I know if my main sewer line is clogged?

Common signs of a main line clog include multiple fixtures backing up at once, toilets that gurgle when other drains are used, water coming up in tubs or showers when toilets are flushed, and strong sewer odors. If you notice any of these in your Seffner home, it’s best to call a licensed plumber promptly.

Is snaking the line a permanent fix?

Snaking is an effective way to clear an existing clog and restore drainage, but it doesn’t change the condition of the pipe itself. If the problem is due to aging pipes, root intrusion, or collapsed sections, additional repair or replacement may be needed over time. We’ll always be honest about what we see and what we recommend.

Can regular maintenance help prevent sewer clogs?

Yes. Being careful with what goes down your drains, scheduling periodic professional checks if you have an older system, and addressing small issues early all help reduce the risk of major backups. Our plumbing services throughout Hillsborough County are set up to help you stay ahead of these problems.

Why Choose Home Therapist for Sewer and Drain Service

When you invite someone to work on your sewer line, you’re trusting them with the most essential parts of your home’s plumbing. At Home Therapist Cooling, Heating, and Plumbing, we take that responsibility seriously—whether we’re on a large repiping project or a focused sewer unclogging in Seffner, FL.

Here’s what you can expect when you work with our team:

  • Licensed, professional technicians: Our plumbers are trained to handle everything from routine clogs to complex system issues, following current best practices for safety and reliability.
  • Clear, honest communication: We explain what we find, what your options are, and what’s included in the work—before we start. If additional steps like toilet removal or cleanout installation are needed, we walk you through the reasons and the costs.
  • Clean and respectful work: We treat your home and property as if they were our own, keeping work areas organized and cleaning up thoroughly before we leave.
  • Long-term reliability: Our goal isn’t just to get you through today’s clog; it’s to help you avoid preventable problems down the road with thoughtful recommendations and quality workmanship.

If you’d like to learn more about who we are and the full range of services we offer in Tampa Bay, our main site and service pages, such as our Hillsborough County HVAC and plumbing services, are a good place to start.

We also invite you to connect with us on social media and through trusted local organizations to see reviews, project highlights, and community involvement:

Need Sewer Drain Help in Seffner, FL?

If you’re in Seffner, FL 33584 or anywhere nearby in Hillsborough County and you’re noticing slow drains, gurgling toilets, or sewage backing up, don’t wait for it to get worse. Our local Tampa Bay plumbing team is ready to help with professional sewer drain unclogging, cleanout installation, and other plumbing services tailored to your home.

Reach out to Home Therapist Cooling, Heating, and Plumbing today to schedule service in Seffner. We’ll take the time to explain what’s going on, clear the problem safely, and help you plan for a more reliable plumbing system in the future.

Drain Cleaning and Main Line Clean-Out Options in Seffner, FL

When one bathroom works fine but another stays backed up even after the septic tank has been pumped, it can be frustrating and a little worrying. That was the situation for a homeowner in Seffner, FL 33584 who called Home Therapist Cooling, Heating, and Plumbing for help with a suspected main drain issue.

In this visit, our plumbing technician carefully inspected the drainage system, identified a likely main line obstruction, and explained why a professional drain cleaning and a new outdoor clean-out would be the safest way forward. In this article, we’ll walk through what we found, what we recommended, and how homeowners in Seffner and across Tampa Bay can stay ahead of similar plumbing problems.

Case Recap

A homeowner in Seffner, FL had recently had their septic tank pumped because it was full. After that service, one bathroom began draining normally again, but the other bathroom remained clogged. They asked us to come out and check the plumbing to see what was going on.

After inspecting the situation, our technician found strong signs of a blockage in the main drainage line serving the home. We also found that the system did not have an accessible exterior clean-out, which makes safe and thorough main line cleaning more difficult. We recommended two key options: professionally snaking the main line to clear the obstruction, and installing an exterior clean-out so the system can be serviced correctly now and in the future.

Customer Problem: One Bathroom Still Clogged After Septic Pump-Out

From the homeowner’s perspective, the issue seemed simple at first: the septic tank was full, so they had it drained. That’s a good first step. But after the pump-out, the symptoms didn’t completely go away.

As the customer explained to us in Spanish, they had a full septic tank that was recently emptied. After that work, one of the bathrooms started working well again, but the other bathroom stayed clogged. Toilets and drains in that bathroom were still slow or backed up, and they wanted us to take a closer look at the plumbing side of things.

When you’re in a home in Seffner, FL and one bathroom drains fine while another stays backed up, it usually points to something more specific than just a full septic tank. It often means:

  • A partial obstruction in the main drain line
  • A blockage in a branch line serving a particular bathroom
  • Build-up in the line that wasn’t resolved by the septic pump-out

The homeowner did the right thing by calling a licensed local plumbing company after the septic work was done. The tank is only one part of the system—everything inside and under the home needs proper flow to keep bathrooms and fixtures working reliably.

Inspection and Diagnosis: Tracking the Drainage Problem

When we arrived, our focus was to separate what had already been addressed by the septic company from what still needed attention in the home’s plumbing.

Our technician started by speaking with the homeowner to fully understand what had been done and what was still happening, including:

  • Confirming that the septic tank had already been pumped
  • Identifying which fixtures were working normally and which were not
  • Noting that one bathroom was functioning well while another remained clogged

From there, we evaluated the drain system layout and looked for an exterior clean-out. A clean-out is a capped access point that allows us to safely insert drain cleaning equipment into the main line from outside the home. In this case, we found that the home did not have an accessible clean-out for proper main line service.

Based on the symptoms—one good bathroom, one still clogged, and a recently pumped septic tank—our technician concluded that the main drain line was likely obstructed. Without a clean-out, we have limited safe access for professional equipment, and it’s harder to fully diagnose what’s happening deeper in the line.

For situations like this in Seffner and the broader Tampa Bay area, our team often recommends a combination of services similar to what we describe in our drain cleaning and cleanout location services guide, tailored to each specific home.

Repair and Service Options We Recommended

Once we understood the likely cause—a blockage in the main drainage line and no outdoor clean-out—we walked the homeowner through two recommended options. Our goal is always to be clear, direct, and practical about what will restore normal use and protect the home long term.

1. Run a Professional Drain Snake in the Main Line

The first option is to run a professional-grade drain snake through the main line. Snaking the line is often the most direct way to restore proper drainage and relieve a current clog.

When we perform drain line cleaning and flushing services, we typically:

  • Use appropriate access points to reach the main line
  • Carefully run a snake or cable through the pipe to break up blockages
  • Flush the line to help move loosened debris through to the septic or sewer

In this particular Seffner home, clearing the main line would be the fastest way to see if the bathroom that’s still clogged can be restored to normal use without more invasive work.

2. Install an Exterior Clean-Out for Future Access

The second recommendation was to install an exterior clean-out. A clean-out is a small, capped pipe that ties into the main drain and comes up to ground level somewhere outside the home. It serves as a safe, direct access point for:

  • Drain snakes and cleaning equipment
  • Diagnostic cameras (if needed later)
  • Future maintenance without going through indoor fixtures

For homeowners in Seffner, FL and throughout Tampa Bay, adding an exterior clean-out has big long-term benefits. It makes every future drain service faster, safer for your home, and often less expensive because we’re not working through difficult or awkward access points.

We also explained an important limitation to the homeowner: until we run the snake and, if needed, use inspection tools through a proper access point, we can’t fully confirm whether there are deeper issues such as root intrusion, pipe damage, or sections of pipe that may eventually need replacement. The first step is always to clear and evaluate.

Why This Fix Works: Restoring Flow and Protecting the Drain System

Drain and sewer systems rely on gravity and open, unobstructed pathways. When a line is partially blocked—by grease, wipes, paper, roots, scale, or construction debris—wastewater doesn’t move the way it should. Instead of flowing smoothly to the septic tank or city sewer connection, it slows, backs up, and puts extra strain on certain fixtures.

In this Seffner home, the fact that one bathroom worked and another didn’t pointed to a flow problem in the line layout. Snaking the main line addresses the most likely cause:

  • Breaking up or dislodging the obstruction
  • Allowing normal gravity flow to resume
  • Reducing backpressure on toilets and drains

Installing an exterior clean-out adds the second piece: long-term protection. It gives us a reliable way to maintain the line, check its condition, and respond quickly if the homeowner ever notices slow drains again. This is especially important in Florida, where tree roots, sandy soil, and high groundwater can all affect plumbing over time.

Our team talks more about the importance of clear, accessible lines in our article on the role of drain cleaning in Tampa Bay homes, but the principle is simple: good flow equals comfort, cleanliness, and less risk of messy backups.

Pro Tips for Homeowners in Seffner, FL

Whether you’re on a septic system or city sewer in Seffner, a few habits can go a long way toward keeping your drains clear and your bathrooms working smoothly.

1. Don’t Flush Wipes—Even “Flushable” Ones

Many of the main line clogs we see around Seffner and the Tampa Bay area involve wipes. Even when labeled “flushable,” they don’t break down like toilet paper and can pile up in your pipes. Keep a small covered trash can near the toilet for wipes and similar items.

2. Space Out Heavy Water Use After a Septic Pump-Out

After your septic tank is pumped, it’s a good idea to avoid running multiple large water loads at once (laundry, long showers, dishwasher) for a short period. This gives the system time to normalize and makes it easier to notice if a specific bathroom or drain is still struggling, like in this Seffner case.

3. Schedule Preventive Drain Cleaning

If you’ve had repeated slow drains or backups, talk to us about preventive maintenance. Our team offers plumbing services maintenance options that can help catch issues early and reduce the chances of a surprise backup.

4. Pay Attention to Changes in Multiple Fixtures

If a toilet, shower, and sink in the same area all start draining slowly, it’s often more than just a minor clog. That’s a good time to call a local Tampa Bay plumbing professional to evaluate the main line before it turns into a major backup.

5. Call When One Bathroom Acts Differently From the Others

Just like in this Seffner, FL home, having one bathroom behave differently can be a useful clue. If one side of the house is fine and the other side has problems, there may be a partial blockage or layout issue that needs attention. Don’t ignore it—early service is usually simpler and more affordable.

6. Use a Trusted Local Pro for Toilet and Drain Issues

Toilets are often the first place you’ll notice a main line problem. If plunging isn’t improving things, especially after a septic pump-out, it’s time for a professional evaluation like the ones we describe in our guide on scheduling plumbing services for toilet issues.

FAQ: Main Drain and Bathroom Clog Issues in Seffner, FL

Why is one bathroom still clogged after my septic tank was pumped?

If only one bathroom stays clogged while others work fine after a pump-out, the problem is usually in the plumbing lines, not the tank. There may be a blockage in the main or branch line that needs professional drain cleaning.

What is a main line clean-out and why don’t I have one?

A clean-out is an access pipe that lets plumbers reach your main drain from outside the home. Some older properties in Seffner, FL and around Tampa Bay were built without easily accessible clean-outs. Installing one now makes every future repair safer and more efficient.

Will snaking the line damage my pipes?

When done by a trained professional using the right equipment, snaking is a standard, safe method of clearing clogs. We choose cable sizes and techniques based on the type and condition of the line, and we verify proper operation after the work.

Can you tell if tree roots or broken pipes are causing the clog?

In many cases, we can get a good idea after we clear the line and, if appropriate, follow up with further inspection. Until the line is opened up with a snake and proper access, it’s difficult to accurately diagnose root intrusion or structural damage.

How quickly should I call if a bathroom stays clogged?

If plunging doesn’t help and especially if other drains near that bathroom also slow down, you should reach out to a local Tampa Bay plumber soon. Early service reduces the risk of messy backups and more extensive repairs.

Do you service other areas around Seffner, FL?

Yes, Home Therapist Cooling, Heating, and Plumbing serves Seffner and many surrounding Tampa Bay communities. Our goal is to provide prompt, reliable plumbing and HVAC service wherever our neighbors need us in the area.

Why Choose Home Therapist for Plumbing in Tampa Bay

When you invite us into your home, you’re trusting us with your comfort and your property. We take that seriously.

  • Licensed, professional technicians: Our plumbing and HVAC technicians are trained, experienced, and familiar with how Florida’s soil, humidity, and weather affect your systems.
  • Clear, honest communication: We explain what we find in plain language, talk through your options, and are upfront about any limitations until further diagnostics are completed.
  • Clean and respectful work: We treat your Seffner home as if it were our own—using protective gear where appropriate, keeping work areas tidy, and cleaning up before we leave.
  • Long-term reliability: Instead of quick, short-term fixes, we focus on solutions—like adding a clean-out—that make future maintenance easier and help protect your home from repeated issues.

If you’d like to see more of what we do and how we serve Tampa Bay, you can find us on community and review platforms such as our Pinterest page and our Reddit profile. You can also review our standing with trusted organizations like the Better Business Bureau and the Tampa Bay Chamber of Commerce.

Need Drain Cleaning Help in Seffner, FL?

If you’re dealing with a stubbornly clogged bathroom, repeated slow drains, or questions after a septic tank pump-out in Seffner, FL 33584, our local team is here to help. We’ll inspect your system, explain what we find, and recommend practical options—whether that’s snaking the main line, installing a clean-out, or planning additional diagnostics if needed.

Contact Home Therapist Cooling, Heating, and Plumbing today to schedule professional drain cleaning or plumbing service in Seffner or anywhere in the Tampa Bay area. We’ll work to restore your home’s comfort and keep your plumbing flowing the way it should.

Elite AC Maintenance and Duct Sanitation in Sun City Center, FL

When you live in a place like Sun City Center, FL 33573, your air conditioner works almost year-round. That constant use is exactly why ongoing maintenance—and a good maintenance plan—make such a big difference in comfort, air quality, and long-term system health.

On this visit, our Home Therapist technician came out for a scheduled Elite Therapy Plan appointment on a roughly two-year-old AC system. We performed a full maintenance check, completed a duct sanitation service, and supplied the homeowner with fresh filters as part of their plan benefits. The good news: everything was operating correctly, and no repairs were needed.

In this article, we’ll walk through what we did during this visit in Sun City Center, why these steps matter, and how regular AC maintenance and duct sanitation help Tampa Bay homeowners stay comfortable and breathe cleaner air.

Case Recap

This visit was part of our Elite Therapy Plan—Visit #4 on a two-year-old air conditioning system in Sun City Center, Florida. The homeowner wasn’t reporting any specific problems; this was a scheduled maintenance appointment to stay ahead of issues before they start.

During the visit, we:

By the end of the visit, the system was running properly, airflow looked good, and no further action was needed. The homeowner can move into the next season with confidence.

Customer Problem

For this particular Sun City Center visit, there wasn’t an emergency or obvious breakdown. Instead, the homeowner was focused on staying proactive. Their AC system is still fairly new—about two years old—and they wanted to protect that investment and keep their indoor air as clean as possible.

Common concerns we hear from homeowners in Sun City Center and across Tampa Bay sound like this:

  • “I don’t want my system breaking down in the middle of summer.”
  • “Is my AC working harder than it should?”
  • “The air feels a little stale—could it be the ducts?”
  • “How do I know my filters and air quality are where they should be?”

Even when everything seems fine at the thermostat, components can drift out of ideal operating ranges over time, ducts can collect buildup, and filters can be forgotten until there’s a problem. That’s exactly what our Therapy Maintenance Plans are designed to prevent.

Inspection and Diagnosis

On a maintenance visit like this in Sun City Center, our first job is to verify that the system is operating safely and efficiently, and that there are no hidden issues developing.

Our technician started with a full system evaluation, which included:

  • Visual inspection of indoor and outdoor units to confirm there were no obvious signs of wear, corrosion, or damage.
  • Checking overall system operation—how the system started up, ran, and cycled off.
  • Reviewing system pressures and energy consumption to make sure they were within normal operating behavior for this particular setup.
  • Inspecting the fan and blower assemblies for proper rotation, balance, and sound.
  • Confirming compressor operation so the heart of the cooling system was running smoothly.
  • Inspecting air filters for cleanliness, correct size, and proper seating.

Rather than assuming everything is fine because the home feels cool, we methodically work through the system. The idea is to catch small issues before they lead to breakdowns or costly repairs. On this Sun City Center maintenance visit, all the system components were functioning as they should. That’s exactly the outcome we want to see during a routine visit.

Because this homeowner is part of our Elite Therapy Plan, we also focus on long-term comfort and cleanliness, not just whether the AC turns on. That’s where duct sanitation and filter management come in.

Repair or Service Process

Even though no repairs were needed, there was still important work to do to keep the system in top shape for the Tampa Bay climate. Here’s how we approached the service step by step.

1. Full Elite Therapy Plan Maintenance Check

As part of our AC maintenance services in Tampa and surrounding areas like Sun City Center, we follow a consistent process on each maintenance visit. For this Elite Therapy Plan appointment, our technician:

  • Verified proper system operation from thermostat call to shutdown.
  • Listened for unusual sounds from the fan, blower, or compressor.
  • Checked that system pressures and energy draw were behaving normally for this installation.
  • Confirmed that airflow through the system felt steady and balanced at the registers.

These steps help us ensure the system isn’t straining, short-cycling, or showing signs of wear that might not be obvious to the homeowner.

2. Duct Sanitation Service

Florida’s humidity and long cooling seasons mean your ductwork is constantly moving air. Over time, that air can carry dust and other particles that settle inside the ducts. For this Elite Plan visit in Sun City Center, part of the job was to complete the duct sanitation service included with the homeowner’s plan.

Our air duct sanitizing services are designed to help reduce buildup inside the ductwork and support cleaner air traveling through the system. The process helps:

While duct sanitation is not the same as a full duct replacement or repair, it’s an important maintenance step that helps keep the airways of your AC system cleaner over time.

3. Filter Inspection and Filter Supply

The technician inspected the existing filters and confirmed they were clean and properly installed. Clean filters are one of the easiest and most effective ways to protect your AC system and improve your indoor air comfort.

As part of this homeowner’s Elite Therapy Plan, they receive additional replacement filters. On this visit, we provided six (6) filters of the correct size so they’d have what they need between professional tune-ups.

This simple step means the homeowner doesn’t have to guess at filter size or scramble to find the right replacement at the store. They can just swap in a fresh filter on schedule and know it’s the correct match for their system.

4. Final Operation Check

After the sanitation work and filter verification, we performed a final operational check. We confirmed that:

With all of that complete, we were comfortable letting the homeowner know that their system in Sun City Center was operating correctly and that no additional action was required at that time.

Why This Fix (and Maintenance) Works

Even though we didn’t have to “fix” a broken component on this visit, the work we did plays a big role in preventing problems. Here’s why it matters for homeowners in Sun City Center and the greater Tampa Bay area.

Protecting Airflow

Your AC system depends on steady, unrestricted airflow. When filters are dirty or ductwork is heavily contaminated, the blower has to work harder to move air. Over time, that added strain can shorten the life of motors and other components.

By keeping filters clean and ducts sanitized, we help maintain smoother airflow, which supports:

  • More consistent temperatures in your home.
  • Less strain on your blower motor and other moving parts.
  • Better comfort at the same thermostat setting.

Supporting Indoor Air Quality

In a warm, humid area like Sun City Center, windows tend to stay closed while the AC runs. That means most of the air you breathe is recirculated through the system. Duct sanitation and proper filtration work together to support cleaner, fresher air in your home.

Extending System Life

Routine visits under a plan like our Elite Therapy Plan and our AC tune-up services give us a chance to spot issues early—before they become major failures. Even when everything looks good, those checkups build a history of how your system normally behaves, making it easier to see when something starts to drift down the road.

Pro Tips for Homeowners in Sun City Center, FL

Based on what we see every day across Tampa Bay, here are some simple, practical tips to keep your system in good shape:

  1. Check your filter regularly. Even if you’re on a maintenance plan and we supply filters, make it a habit to inspect your filter visually. If it looks dark or clogged, it’s time to replace it.
  2. Keep supply and return vents clear. In Sun City Center homes, furniture, rugs, or curtains often end up covering vents. Make sure vents have a few inches of clearance so air can move freely.
  3. Pay attention to changes in sound. Your system will have a normal sound you get used to. If it suddenly gets louder, rattly, or starts making new noises, schedule a checkup before it turns into a bigger issue.
  4. Don’t ignore mild comfort issues. If certain rooms stay warmer, or the air feels more humid than usual, that’s a sign to have your system or ductwork evaluated. Small comfort problems can be early warnings.
  5. Consider periodic duct services. In our Florida climate, ducts handle a lot of run-time. Pairing regular AC maintenance with occasional duct sanitation can help support cleaner air and more efficient operation.
  6. Use your maintenance plan. If you’re on an Elite or Therapy Plan, take advantage of your scheduled visits and plan benefits. Those appointments are designed to keep your Sun City Center home comfortable and your system protected.

FAQ: Elite Maintenance and Duct Sanitation in Sun City Center

Do I need maintenance if my AC is only a couple of years old?

Yes. Even a newer system in Sun City Center, FL works hard almost year-round. Regular maintenance helps keep it running efficiently, protects your warranty requirements, and gives us a chance to catch small issues early—before they turn into breakdowns.

What happens during an Elite Therapy Plan visit?

On an Elite Therapy Plan visit, we perform a thorough system inspection, check overall operation, verify airflow and key components, and complete any services included in your specific plan, such as duct sanitation or filter supply. The goal is to keep you ahead of problems instead of reacting to emergencies.

Why is duct sanitation important in Florida?

In the Tampa Bay area, including Sun City Center, your AC runs a lot and your ducts handle constant airflow. Duct sanitation helps reduce buildup inside the ductwork and supports cleaner, fresher air moving through your home, especially when combined with proper filtration and other air quality solutions.

How often should I change my filters if I’m on a maintenance plan?

The ideal schedule depends on your home, filter type, and usage, but a maintenance plan doesn’t replace filter changes between visits. That’s why plans like our Elite Therapy Plan may include extra filters—so you can change them on a regular schedule recommended by your technician.

What are the benefits of an AC maintenance plan for Sun City Center homeowners?

A maintenance plan helps you stay on top of regular tune-ups, keeps your system running efficiently, and gives you priority access to a trusted local team. For Sun City Center homeowners, that means more reliable cooling, better comfort, and fewer surprises when the weather is at its hottest.

Why Choose Home Therapist for Your AC in Tampa Bay

When you invite us into your home in Sun City Center or anywhere in Tampa Bay, we treat your system like it’s our own. Our focus is always on your comfort and peace of mind.

  • Licensed, professional technicians: Our team is trained, experienced, and familiar with how HVAC systems behave in the Florida climate.
  • Clear, honest communication: We explain what we’re doing, what we’re seeing, and what (if anything) needs attention—no surprises, no pressure.
  • Clean, respectful work: We protect your home, clean up after ourselves, and handle your equipment with care.
  • Long-term reliability focus: Our maintenance plans and tune-ups are built around preventing issues and extending the life of your system, not just fixing problems when they happen.
  • Committed to Tampa Bay homeowners: We live and work in this community and stand behind our work, whether it’s a full system install or a routine maintenance visit.

If you’d like to see what other homeowners are saying, you can visit our social pages and profiles, including our Facebook community and Instagram updates. You can also find us on Google Maps, check our standing with the Better Business Bureau, or see our listing with the Tampa Bay Chamber of Commerce.

Schedule AC Maintenance in Sun City Center, FL

If you’re in Sun City Center, FL 33573 and want the same level of care this homeowner received—full system maintenance, attention to air quality, and clear communication—we’re here to help.

Whether you’re interested in an AC maintenance visit, a detailed AC tune-up, or exploring our Therapy Maintenance Plans, our local Tampa Bay team is ready to keep your home comfortable and your system running smoothly.

Reach out to Home Therapist today to schedule your next AC maintenance visit in Sun City Center and give your home the therapy it needs—before the next heat wave arrives.

Premium AC Maintenance and Air Quality Concerns in Palm Harbor, FL

When a homeowner in Palm Harbor, FL 34684 invited us out for their Premium Quarterly Service Agreement visit, the main goal was simple: keep the home comfortable and the system reliable before the real heat and humidity roll in. During this visit, we completed the scheduled AC maintenance, but we also uncovered some important air quality and airflow issues that needed attention.

Even though we couldn’t fully test the system due to the current thermostat setting, we were able to perform a thorough inspection. Along the way we found organic growth on the blower and wiring, rust on the air handler, and rodent damage on the return ductwork. All of these can quietly affect comfort, efficiency, and the air you breathe.

In this case study, we’ll walk you through what we saw, what it means for a home in Palm Harbor, and the next steps we recommended to protect both comfort and indoor air quality.

Case Recap

During a Premium Quarterly Service Agreement visit in Palm Harbor, FL, our technician completed routine AC maintenance but also found:

  • Organic growth on the blower assembly and wiring, suggesting poor indoor air quality.
  • Rust forming on the air handler cabinet.
  • Rodent damage on the return ductwork that may be restricting airflow and pulling in unconditioned air.
  • Only six of nine 20x20x1 filters had been replaced; we installed the six filters that were available on site.

We recommended a deep blower cleaning, disinfecting affected components, replacing the damaged return ductwork, addressing the rodent intrusion, and considering AC replacement in the near future since the system is about 13 years old.

Customer Problem

For this homeowner in Palm Harbor, getting on a Premium Quarterly Service Agreement was about peace of mind. In our coastal Tampa Bay climate, air conditioners work hard almost year-round. Small issues can turn into big, uncomfortable problems if they aren’t caught early.

Coming into this visit, there weren’t any major comfort complaints written in the job notes, but the homeowner wanted to make sure their system was operating safely and efficiently. Their concerns focused on:

  • Keeping the AC running reliably through long, hot stretches.
  • Maintaining good indoor air quality for the household.
  • Avoiding unexpected breakdowns and high repair costs.

With a 13-year-old system in a humid environment like Palm Harbor, FL, it’s very common for internal components to show wear, biological growth, and corrosion. The purpose of this maintenance visit was to stay ahead of those issues before they affected comfort or caused damage.

Inspection and Diagnosis

During any Premium Quarterly Service Agreement visit, we follow a detailed process to check the health of the HVAC system. Even though we couldn’t fully test cooling performance because of the thermostat setting at the time of the visit, we were still able to visually inspect and evaluate the internal components.

On this visit in Palm Harbor, our technician focused on several key areas:

  • Blower assembly and wiring: We inspected the blower wheel, housing, and nearby wiring for dust buildup, moisture, and any signs of organic growth.
  • Air handler cabinet: We checked for rust, leaks, and general cabinet condition, all of which can hint at moisture problems or aging equipment.
  • Return ductwork: We examined accessible duct sections for physical damage, gaps, and signs of rodent activity.
  • Air filters: We verified the size, quantity, and condition of the filters and replaced what was available.

Here’s what we found:

  • Organic growth on blower and wiring: Significant organic growth was visible on the blower components and some wiring inside the air handler. This often points to high humidity inside the system, dust buildup, and possibly limited previous cleaning.
  • Rust on the air handler: Rust spots had started to form, which can be a normal sign of age in our Florida climate, but still something to keep an eye on.
  • Rodent damage on return ductwork: The return ductwork showed damage likely caused by rodents such as rats or squirrels. This can restrict airflow and may allow attic or crawlspace air to be pulled into the system.
  • Filter replacement: This system requires nine 20x20x1 filters. Six filters were available on site, and we replaced those six. Three additional filters will still need to be installed.

Because the system could not be fully tested under normal operating conditions, we did not force the equipment to run outside what was safe or reasonable. Instead, we documented our findings and focused on the visible issues that clearly needed to be addressed.

Homeowners throughout Tampa Bay who want a deeper overview of what our maintenance visits include can review our AC repair and maintenance services overview and our AC maintenance options.

Repair or Service Process

On this particular Palm Harbor, FL visit, we completed what could safely and effectively be done during a scheduled maintenance appointment, then laid out a clear plan for follow-up work.

1. Completing the routine maintenance steps

Within the limits of the thermostat setting and homeowner preferences, we:

  • Visually inspected the air handler, blower, and easily accessible ductwork.
  • Verified that key electrical connections and wiring were intact, aside from the areas affected by organic growth.
  • Replaced six of the nine required 20x20x1 filters using the filters provided on site.

Swapping out those six filters immediately helped reduce dust and debris recirculating through the home. Once all nine filters are replaced, the system will be better protected from particulate buildup that can feed organic growth and limit airflow.

2. Documenting organic growth and contamination

Because we identified significant organic growth on the blower and wiring, we recommended a follow-up visit for a deeper cleaning. This type of work goes beyond a standard tune-up and requires removing the blower assembly from the air handler.

The recommended follow-up steps include:

  • Removing the blower assembly for thorough cleaning.
  • Carefully cleaning and disinfecting affected wiring and nearby components.
  • Inspecting for any additional contamination once the blower is out of the cabinet.

This approach helps ensure that we are not just wiping around the problem but truly removing buildup from the parts that move air through the entire home.

3. Addressing rust on the air handler

The rust we found on the air handler is a sign the system has been working in a humid environment for many years. While light rust doesn’t necessarily mean an immediate failure, it is a reminder that the unit is aging.

During our discussion with the homeowner, we were transparent that the system is approximately 13 years old. At that age, it is wise to start considering replacement options before a major breakdown occurs, especially in a climate like Palm Harbor where you depend on cooling for much of the year.

For homeowners wanting to understand what goes into a replacement quote, our article on air conditioner installation quotes in Tampa, FL is a helpful resource.

4. Evaluating and planning ductwork repairs

The rodent damage we saw on the return ductwork is more than just a cosmetic problem. Damaged return ducts can:

  • Reduce the amount of air returning to the system, forcing the blower to work harder.
  • Pull hot, humid, or dusty air from attics or other unconditioned spaces.
  • Increase energy bills as the system runs longer to make up for lost or unconditioned air.

Our recommendation was to replace the damaged return duct section and to make sure any access points used by rodents are properly sealed or addressed by a pest control professional. In some homes, duct repairs are straightforward; in others, access is trickier. We always discuss the options and access conditions with the homeowner so there are no surprises.

If you’re curious what a duct and system upgrade can look like, you can review a recent ductwork and air conditioning installation project in Holiday, FL that we completed.

5. Next steps and homeowner decisions

At the end of the visit, we summarized our findings and recommendations for the Palm Harbor homeowner:

  • Schedule a deep cleaning of the blower assembly and disinfect affected wiring and components.
  • Plan for replacement of the damaged return ductwork.
  • Work with a pest control professional to resolve any ongoing rodent issues.
  • Consider AC replacement in the near future, given the system’s age and current condition.

Our role is to provide clear options, not pressure. The homeowner can choose to address these items in stages, and we’re here to help prioritize what should come first based on comfort, safety, and budget.

Why This Fix Works

The recommendations we made for this Palm Harbor, FL home are all tied to core principles of how an HVAC system should operate: clean airflow, safe electrical components, and sealed ductwork.

Clean blower and wiring for better air and efficiency

The blower is the heart of your air circulation. When organic growth and debris build up on the blower wheel and surrounding wiring, several issues can appear over time:

  • Reduced airflow due to extra weight and drag on the blower wheel.
  • More dust and particles recirculating through the home.
  • Potential moisture and contamination around electrical components.

Deep cleaning the blower and disinfecting affected wiring helps restore proper airflow and reduces the amount of contaminants passing through the system. It’s a step up from normal maintenance and is especially important in Florida’s humid climate.

Sealed and undamaged return ducts for healthy circulation

Return ducts are responsible for pulling air from your home back to the air handler. When rodents chew through these ducts, you can end up with:

  • Unfiltered air being pulled in from hot attics or crawlspaces.
  • Possible odors or particles entering the system from those spaces.
  • Uneven temperatures and longer run times.

Replacing the damaged ductwork and addressing the source of rodent intrusion restores proper airflow pathways and helps keep the system drawing air only from the living spaces, where it belongs.

Regular maintenance for long-term reliability

Premium Quarterly Service Agreement visits, like the one completed in this Palm Harbor home, are designed to catch exactly these sorts of issues before they lead to breakdowns. Regular filter changes, visual inspections, and detailed cleaning keep the system running more smoothly and can help extend its usable life.

To learn more about our seasonal tune-ups and specials for Tampa Bay homeowners, visit our page on AC maintenance and cleaning specials.

Pro Tips for Homeowners in Palm Harbor, FL

For homeowners in Palm Harbor and the surrounding Tampa Bay area, here are a few practical tips to keep your system cleaner, safer, and more reliable:

  1. Stay on top of filter changes. If your system uses multiple filters like this one (nine 20x20x1 filters), create a reminder to replace all of them on the same schedule. Partial filter changes are better than none, but full replacement gives you the best protection against dust and organic growth.
  2. Watch for signs of rodents. If you hear scratching in the attic or see droppings near ductwork, have a pest control professional take a look. Sealing entry points early can prevent the kind of duct damage we saw in this Palm Harbor home.
  3. Schedule routine AC maintenance. With our hot, humid summers, skipping maintenance in Palm Harbor, FL can shorten the life of your equipment. Quarterly or semi-annual visits help keep the blower, coil, and drain system cleaner and more efficient.
  4. Address musty smells quickly. A persistent musty or “dirty sock” smell when the AC starts up can indicate organic growth inside the system. Don’t ignore it—ask a licensed HVAC technician to inspect the blower and air handler.
  5. Plan ahead for replACement. Once your AC system crosses the 10–12 year mark in Tampa Bay’s climate, it’s wise to start talking about replacement options so you’re not rushed into a decision after a breakdown.
  6. Keep the area around the air handler clear. Give your indoor unit plenty of space so your technician can access panels, remove the blower, and perform a thorough cleaning when needed.

FAQ: Quarterly AC Maintenance and Air Quality Concerns

How often should I schedule AC maintenance in Palm Harbor, FL?

In our climate, we generally recommend at least annual maintenance, and many homeowners choose semi-annual or quarterly visits, especially if they have pets, allergies, or older equipment. This homeowner opted for a Premium Quarterly Service Agreement to stay ahead of wear and tear.

Is organic growth inside my air handler dangerous?

Organic growth inside the blower area is a sign that moisture and dust are building up. While we don’t make medical claims, we do know that cleaning and disinfecting those components improves system cleanliness and can help reduce what circulates through your ductwork. The key is to have it professionally addressed rather than just sprayed or wiped from the outside.

Can rodent-damaged ductwork really affect my comfort?

Yes. Damaged return ducts can pull in hot, humid, and dusty air from attics or other unconditioned spaces. That can lead to higher utility bills, uneven temperatures, and extra strain on the AC system. In this Palm Harbor home, replacing the damaged duct section is an important part of restoring proper airflow.

Why couldn’t you fully test the system during this visit?

The system could not be fully tested because of the thermostat setting at the time of the visit. We will never operate equipment outside safe or reasonable conditions just to complete a checklist. Instead, we focus on what can be safely inspected, then recommend any needed follow-up testing.

When should I consider replacing a 13-year-old AC unit?

Once a system reaches around 13 years—especially in a high-demand area like Palm Harbor, FL—it’s smart to start planning for replacement. If you’re seeing repeated repairs, corrosion, or significant air quality issues, we can help you compare the cost of ongoing fixes with the benefits of a new, more efficient system.

Does a maintenance agreement cover blower deep cleaning and duct replacement?

Routine maintenance plans typically cover inspections, basic cleaning, and adjustments. Deep blower cleanings and duct replacements are usually additional services because they require more time, materials, and sometimes special access. We always explain what’s included and provide clear pricing for any extra work.

Why Choose Home Therapist for AC Maintenance in Tampa Bay

Our team at Home Therapist Cooling, Heating, and Plumbing takes pride in treating every home as if it were our own. For homeowners in Palm Harbor and across Tampa Bay, that means:

  • Licensed and professional technicians: Our technicians are trained to spot issues like organic growth, rust, and duct damage—not just rush through a quick filter change.
  • Transparent communication: We explain what we see in plain language, outline your options, and prioritize based on safety, comfort, and budget. You stay in control of the decisions.
  • Clean, respectful work: We take care around your home, keep our work area as tidy as possible, and treat your property with respect from start to finish.
  • Focus on long-term reliability: Whether we’re replacing filters, cleaning blowers, or advising on replacement, our goal is to keep your system dependable through Tampa Bay’s toughest weather.
  • Local commitment to Tampa Bay homeowners: As an established local contractor, we’re proud to be listed with organizations like the Better Business Bureau and the Tampa Bay Chamber of Commerce, and to be visible on platforms like Bing Maps.

If you’d like to see more of our work and homeowner education, you can also follow us on Pinterest or connect with us on Reddit. You can also find us as a trusted provider on HomeGuide.

Schedule Your AC Maintenance in Palm Harbor, FL

If you live in Palm Harbor, FL 34684 or anywhere in the Tampa Bay area and you’re concerned about air quality, aging equipment, or possible duct damage, we’re here to help. Whether you need a one-time tune-up, a Premium Quarterly Service Agreement, or a conversation about replacing an older system, our local technicians will walk you through every step.

ContACt Home Therapist Cooling, Heating, and Plumbing today to schedule your next AC maintenance visit in Palm Harbor, FL and give your home the comfort and care it deserves.

Premium AC Maintenance and Blower Belt Repair in Palm Harbor, FL

When your home in Palm Harbor, FL 34684 isn’t getting enough cool air to certain rooms, it can be frustrating—especially in our Florida heat and humidity. On this visit, we were out for a Premium Quarterly Service Agreement appointment, and the homeowner mentioned that one area of the home was getting little to no airflow.

During this maintenance visit, we found a severely worn and loose blower belt, an older air handler with a rusting coil, and a system that had been programmed not to cool below 70°F, which limited how far we could push testing on the outdoor unit. In this article, we’ll walk you through what we discovered, what we recommended, and how a simple part like a blower belt can make a big difference in comfort for Palm Harbor homeowners.

Case Recap

On this Premium Quarterly Service Agreement visit in Palm Harbor, FL, our technician inspected a roughly 12-year-old air handler after the homeowner reported poor airflow to a specific area of the home. We found the blower belt extremely worn and loose, which can keep the blower from moving enough air through the ductwork. The air handler coil also showed rust, a normal sign of age in our coastal Florida environment.

Because the thermostat was set not to cool below 70°F, the outdoor condenser could not be fully tested under normal operating conditions. Our primary recommendation was to replace the worn blower belt and then monitor system operation and airflow after the repair.

Customer Problem: Not Enough Airflow to Parts of the Home

The main concern in this Palm Harbor home was simple: one area was getting little to no air from the AC system. That usually shows up as:

  • Rooms that stay warmer than the rest of the house
  • Longer run times for the system trying to catch up
  • Uneven comfort from one room to the next

When we arrived for the scheduled maintenance, the homeowner shared that this issue had been ongoing and that they signed up for a premium maintenance plan to keep an eye on the system and catch problems early. Our goal on every visit is the same: listen carefully, investigate thoroughly, and explain what we find in clear, honest terms.

Because this was part of a Therapy Maintenance Plan, we already had a structure for the visit: a full system check, cleaning where appropriate, and a look for any developing issues that could affect comfort or reliability for homeowners here in Palm Harbor and across Tampa Bay.

Inspection and Diagnosis

On a visit like this, we always start with the basics: airflow, equipment condition, and controls. Here’s how we approached the diagnosis.

Listening to the Homeowner

Before we touch any equipment, we ask questions:

  • Which rooms feel uncomfortable?
  • Is the issue constant or does it come and go?
  • Have you noticed unusual noises or vibrations?
  • Has the thermostat schedule or settings changed recently?

In this Palm Harbor home, the issue was consistent: that one area rarely received enough air, no matter how long the system ran.

Checking the Air Handler and Blower Section

Since the complaint was about airflow, we focused heavily on the indoor air handler. Inside the blower compartment we found a key issue: the blower belt was extremely worn and loose. On belt-driven blower systems, the belt connects the motor to the blower wheel. If it’s loose or deteriorated, the blower can slip or spin too slowly, which cuts down on the amount of air the system can push through the ducts.

We also inspected the coil and overall cabinet condition. The coil showed rust, which is common as equipment approaches and passes the 10-year mark, especially in Florida’s humid environment. Rust alone doesn’t always mean immediate failure, but it is a sign we need to keep a close eye on the system during future visits.

Outdoor Condenser Limitations

Normally, on a complete AC maintenance visit, we want to see the system operate under real cooling demand. In this case, the thermostat was configured not to cool below 70°F. That meant the system shut off before we could perform a full, extended diagnostic on the outdoor condenser in true operating conditions.

Rather than forcing changes that the homeowner wasn’t comfortable with, we focused on what we could clearly verify: the mechanical condition of the indoor unit, especially the blower section that directly affects airflow to the home.

Ruling Out Other Common Causes

When a homeowner in Palm Harbor reports poor airflow, we also keep other possibilities in mind, such as:

  • Duct leaks or crushed sections of ductwork
  • Closed or blocked supply registers
  • Dirty filters or restrictions at the return grille
  • Zoning or damper issues, if the system is zoned

On this visit, the most obvious and urgent issue was the blower belt condition. It was loose enough that it could clearly impact airflow throughout the home, so that became the primary focus of our recommendation.

Repair and Service Process

Because this was a Premium Quarterly Service Agreement visit, we followed a structured maintenance process and then added specific steps for the blower belt issue.

1. Standard Maintenance Checks

Every premium maintenance appointment includes a set of core tasks designed to keep the system running smoothly. While the exact checklist can vary depending on equipment type and condition, common steps include:

  • Checking and replacing or cleaning air filters as needed
  • Inspecting the blower compartment for dust buildup and wear
  • Visually checking electrical connections for obvious issues
  • Inspecting the coil surface for dirt, corrosion, or damage
  • Confirming that the thermostat is operating and calling for cooling correctly

These routine tasks are part of why many Palm Harbor homeowners choose ongoing AC tune-up services rather than waiting for something to break.

2. Blower Belt Evaluation

Once we opened the blower section on this system, the condition of the belt stood out immediately. It was extremely worn and loose. A belt in this state can:

  • Slip on the pulley instead of turning the blower wheel at full speed
  • Vibrate or squeal, especially on startup
  • Eventually break, leaving the home with no airflow at all

We measured belt tension and visually inspected for cracks, glazing, or frayed edges. The combination of looseness and wear supported what the homeowner was experiencing: some areas of the home were simply not getting the air they should.

3. Coil and System Age Review

The rust on the air handler coil told us the system is aging—approximately 12 years old. That doesn’t mean the system must be replaced today, but it does highlight the importance of regular maintenance for homeowners in Palm Harbor, FL, where AC systems work hard almost year-round.

We noted the coil condition and system age for future visits, so we can keep monitoring performance and help the homeowner plan ahead when it’s time to consider repair versus AC replacement options.

4. Thermostat Settings and Operating Limits

Because the thermostat was set not to cool below 70°F, the system cycled off before we could test the outdoor condenser extensively under strong cooling demand. We respected the homeowner’s preference and worked within that limit, while explaining that deeper diagnostics may be needed later if airflow issues continue after the blower belt is addressed.

5. Clear, Simple Recommendations

After the inspection, we provided straightforward recommendations:

  • Replace the worn blower belt (recommended). This is the most direct way to restore proper blower speed and help improve airflow throughout the home.
  • Monitor system operation after belt replacement. Once the belt is replaced and properly tensioned, we can better evaluate overall performance, including how well the outdoor unit and duct system support even cooling.
  • Continue regular maintenance. With an older system and visible rust on the coil, staying on track with maintenance is especially important for homeowners in Palm Harbor and the greater Tampa Bay area.

Why This Fix Works: The Role of the Blower Belt in Airflow

In a belt-driven blower system, the belt functions like the chain on a bicycle. The motor is doing the work, but without a healthy belt, that power never fully reaches the blower wheel. When the belt is loose or worn, the blower does not move enough air.

Here’s what that means for your home in Palm Harbor, FL:

  • Less airflow at the vents. Even if the air coming off the coil is cold, not enough of it reaches your rooms.
  • Uneven temperatures. Areas farther from the air handler or with longer duct runs feel it first—they get the least air.
  • Longer run times. The thermostat senses that the home isn’t cooling down fast enough, so the system runs longer, which can add wear and tear over time.

By replacing a worn blower belt and setting the proper tension, we restore the intended relationship between the motor speed and the blower speed. That helps the system deliver the airflow it was designed for. In many homes, that single step makes a noticeable difference in comfort.

If we also discover duct damage or restrictions, we can address those too. For example, our team frequently performs air duct repair services across Tampa Bay when airflow problems point to leaks, crushed ducts, or disconnected runs.

Pro Tips for Homeowners in Palm Harbor, FL

Here are a few practical ways Palm Harbor homeowners can help keep their AC systems running smoothly and avoid airflow surprises:

  1. Change filters regularly. In Florida’s high pollen and dust environment, most homes need filter changes more often than once a season. A clogged filter can cut airflow just like a worn belt.
  2. Listen for changes in fan noise. If you notice new squealing, chirping, or a softer-than-normal whoosh from your vents, that could be an early sign of blower belt wear or other airflow issues.
  3. Keep supply and return vents open and clear. Avoid closing too many vents in unused rooms and keep furniture, rugs, or curtains from blocking registers. Restricted vents can make uneven airflow worse.
  4. Use reasonable thermostat setpoints. Extremely low setpoints can strain older systems, while restrictions that prevent cooling below a certain temperature may limit how thoroughly your system can be tested during maintenance. If you’re unsure, we can help you find a good balance for your Palm Harbor home.
  5. Schedule routine maintenance. Enrolling in a maintenance plan keeps your system on a regular schedule so belts, coils, and other components are inspected before they fail. Our premium plans are built around the needs of Tampa Bay’s climate.
  6. Keep an eye on system age. Once your system passes 10 years, it’s wise to plan ahead. Regular maintenance can extend life, but we’ll also keep you informed when it makes sense to start budgeting for replacement.

FAQs About This Palm Harbor AC Maintenance Visit

Why did you recommend replacing the blower belt?

The blower belt was extremely worn and loose. In that condition, it can’t reliably transfer power from the motor to the blower wheel, which reduces airflow and can eventually lead to a complete loss of airflow if the belt fails. Replacing it is a straightforward, preventative fix.

Can a loose blower belt really cause low airflow in just one area?

Yes. A loose or slipping belt reduces overall airflow. Rooms at the end of the duct runs or farther from the air handler often show the problem first. You may notice one area staying warmer even while other areas feel closer to normal.

Does rust on the coil mean I need to replace my AC right away?

Not necessarily. Some surface rust is common on older equipment, especially in our humid Palm Harbor and Tampa Bay climate. Rust is a sign that we should monitor the system more closely, but it does not automatically mean immediate replacement. We focus on performance, safety, and reliability when discussing next steps.

Why couldn’t you fully test the outdoor unit?

The thermostat was configured not to cool below 70°F. Because of that limit, the system cycled off before we could perform extended testing under heavier cooling demand. We still performed visual checks and basic operation checks, but a deeper diagnostic may be scheduled later if needed.

What does a Premium Quarterly Service Agreement include?

Premium maintenance agreements are designed to keep your system operating reliably with regular checkups throughout the year. Visits typically include inspection of the air handler and outdoor unit, filter checks, basic cleaning, and a review of any developing issues like worn belts or aging components. It’s a structured way to protect your comfort in Palm Harbor, FL and across Tampa Bay.

How often should I have maintenance done on my AC system?

For most homes in the Palm Harbor and Tampa Bay area, we recommend at least one comprehensive maintenance visit per year, with many homeowners choosing spring and fall visits to stay ahead of heavy cooling seasons. Maintenance plans make this easy by setting a consistent schedule.

Why Choose Home Therapist for Your Palm Harbor Home

When you invite our team into your home, you’re trusting us with your comfort and safety. We take that seriously.

  • Licensed, experienced technicians. Our local Tampa Bay HVAC technicians work with all types of systems—from newer high-efficiency units to older belt-driven air handlers like the one we inspected in this Palm Harbor home.
  • Transparent communication. We explain what we find in plain English, show you problem areas when possible, and outline options without pressure. Our goal is to help you make informed decisions.
  • Clean and respectful work. We treat your home as if it were our own—using drop cloths where needed, cleaning up after ourselves, and maintaining a professional, courteous presence from arrival to departure.
  • Long-term reliability focus. We don’t just fix what’s broken. We look for emerging issues that could affect comfort or cause surprise breakdowns down the road, and we build maintenance around preventing those problems.
  • Connected to the community. Home Therapist Cooling, Heating, and Plumbing is proud to be listed with trusted organizations like the Better Business Bureau and the Tampa Bay Chamber of Commerce, and to share helpful tips and project highlights on our Facebook page and Instagram account.

Ready to Restore Comfortable Airflow in Your Palm Harbor, FL Home?

If you’re noticing weak airflow, uneven cooling, or rooms that never seem to get comfortable, it may be time for a thorough AC maintenance visit. Whether it’s a worn blower belt, duct issue, or another hidden problem, our team is ready to help.

Homeowners in Palm Harbor, FL and throughout Tampa Bay can count on us for careful inspections, honest recommendations, and clean, professional work. Schedule your next maintenance visit or AC tune-up today and give your home the therapy it needs.

To get started, simply reach out to our team and we’ll help you find a convenient appointment time for your Palm Harbor home.

Range Hood Exhaust Duct Installation in Tampa, FL

When you cook in a Florida kitchen, especially here in Tampa, FL 33611, you want the steam, smoke, and cooking odors to go outside, not linger over your stove and in your living room. That is exactly why a proper, code-compliant exhaust duct for your range hood or over-the-range microwave is so important.

On this visit, our Home Therapist technician Alejandro helped a homeowner in Tampa who needed the ductwork installed to connect their kitchen range exhaust to the outdoors, as required by code. We made sure the new duct was safely routed, properly sealed, and sized to help their exhaust system actually do its job.

Below, we will walk you through what the homeowner was dealing with, how we approached the inspection, the steps we took to install the new duct, and what this means for long-term comfort and safety in a Tampa Bay home.

Case Recap: Bringing a Kitchen Exhaust Up to Standard

In simple terms, this project was all about giving the range hood a proper “exit path” to the outside of the home. The homeowner had an exhaust connection at the range/microwave, but the ductwork that carries air out of the house either was not in place yet or needed to be brought up to current code requirements.

We installed the duct required by code from the kitchen range exhaust connection to an exterior termination point, making sure it was safely routed, well-supported, and sealed. After installation, we verified that the fan could move air freely and that no exhaust was being pushed back into the home.

Customer Problem: A Range Hood That Couldn’t Really Exhaust

For many homeowners in Tampa, range hoods and over-the-range microwaves can be a little confusing. It is common to see appliances installed before the ductwork is correctly run to the outside. That can leave you with a fan that makes noise but does not effectively remove cooking byproducts from the home.

In this Tampa kitchen, the homeowner needed the exhaust duct system set up correctly so that:

  • The range or microwave could vent outdoors instead of recirculating air back into the kitchen.
  • The installation would comply with local building code requirements.
  • Future cooking – especially frying and high-heat cooking – wouldn’t fill the home with smoke and lingering grease odors.

Without a proper exhaust duct, several issues can show up over time:

  • Persistent cooking odors spreading to bedrooms and living areas.
  • Grease film building up on cabinets and walls near the range.
  • Extra humidity in the kitchen adding to the already high Tampa Bay moisture levels.

The homeowner’s goal was straightforward: make sure this new or updated kitchen exhaust setup worked correctly, safely, and in a way that would pass inspection and support day-to-day comfort.

Inspection and Diagnosis: Planning the Best Duct Route

Before we ever cut into a wall or ceiling, we take time to understand the home’s layout and how the exhaust duct can be routed safely and efficiently from the range to the outdoors.

On this visit in Tampa, FL 33611, our technician Alejandro walked through a few key checks:

  • Location of the range or microwave: We confirmed exactly where the exhaust outlet was and what options we had for going up through the ceiling, out through an exterior wall, or through a soffit, depending on existing construction.
  • Available pathways: We looked for any framing, plumbing, or electrical that might interfere with a clean, direct duct path.
  • Duct size and type: We selected appropriate duct material and sizing to support effective airflow and align with typical code requirements for this kind of installation.
  • Termination point: We identified a good location for the duct to exit the home where it would be protected from weather and properly vented away from windows and doors.

This planning stage is important because a range hood exhaust is only as good as the duct behind it. Long, twisted, or undersized ducts can make a fan seem weak, noisy, or ineffective. A clean, well-planned run helps the exhaust system perform as it should.

For many homeowners across Tampa Bay, this is also a good time for us to discuss overall indoor air quality. Services like air duct cleaning in Tampa and proper air filter installation and repair can work together with a good kitchen exhaust system to keep your home’s air fresher and more comfortable.

Repair or Service Process: Step-by-Step Exhaust Duct Installation

Once we had a clear plan, we moved into the actual installation of the exhaust duct. Here is how we typically handle this type of work for homeowners in Tampa, FL:

1. Protecting the Home and Work Area

We started by protecting the kitchen. That includes laying down drop cloths where needed, taking care around cabinets and countertops, and keeping tools and materials organized. Part of our job as your Home Therapist is to treat your kitchen like it is our own.

2. Preparing the Exhaust Connection

At the range or over-the-range microwave, we confirmed the exhaust outlet was correctly oriented for ducted operation. Depending on the appliance, that can mean:

  • Verifying it is set for venting to the outside, not just recirculating.
  • Installing or adjusting an adapter or collar where the duct will attach.

We made sure the connection point was secure and ready to accept the new duct without air leaks or strain on the appliance.

3. Running the Duct to the Exterior

Next, we installed the actual ductwork from the exhaust connection to the chosen exit point on the outside of the home. The specific path depends on the structure, but our priorities remain the same:

  • Keep the duct run as short and straight as practical.
  • Avoid unnecessary bends that could reduce airflow.
  • Support the duct so it does not sag or pull on the hood or microwave.

In Tampa Bay’s humid climate, it is also important that ductwork is installed to minimize the risk of condensation pooling inside the run. Proper slope and secure connections help with that.

4. Installing the Exterior Vent Hood

At the outside wall or roof, we installed an exterior vent hood designed for range exhaust. This piece allows air to exit the home while helping to keep rain, pests, and debris from coming in.

The exterior hood typically includes a damper that opens when the fan is running and closes when it is off. That helps limit drafts and moisture from blowing back through the duct when the system is not in use.

5. Sealing and Securing All Connections

Air leaks in an exhaust duct reduce performance and can pull unwanted moisture or particles into hidden spaces. We carefully sealed all joints and connections using appropriate materials for this type of system.

We also checked that all hangers and supports were secure so that the duct will stay in place over time, even with vibration from the fan turning on and off.

6. Functional Check and Final Cleanup

After installation, we turned on the range hood or microwave exhaust and confirmed that:

  • Air was moving freely through the duct to the exterior vent.
  • There were no obvious vibrations, rattles, or loose sections.
  • Air was not escaping into the home at any connection along the way.

Once we were satisfied with operation, we cleaned up the work area so the kitchen was ready for normal use again.

For some homeowners in Tampa, a project like this can go hand-in-hand with other maintenance, such as dryer vent cleaning or other duct-related services. When we are in your home, we are always happy to let you know if we see anything else that may need attention in the near future.

Why This Fix Works: Moving Heat, Moisture, and Odors Out of the Home

A properly installed range hood exhaust duct is more than just a metal tube in the wall. It is an airflow system that protects your kitchen and your comfort.

Here is what this installation accomplishes for a Tampa, FL homeowner:

  • Removes excess moisture: Boiling, simmering, and dish prep all add humidity. In our already humid Tampa Bay climate, that extra moisture can lead to sticky, uncomfortable kitchens and extra strain on your air conditioning system.
  • Reduces grease and odor buildup: By exhausting smoke and vapors outside, less grease ends up on cabinets and ceilings. That keeps surfaces cleaner and helps the kitchen smell fresher.
  • Improves air quality: A well-functioning range hood helps remove combustion byproducts from gas cooking and airborne particles from frying or searing.
  • Supports code and safety: Having a ducted exhaust, installed the right way, is part of keeping the home safe and compliant with modern construction standards.

Just like a central AC system needs properly designed ductwork to deliver cool air efficiently, your kitchen exhaust needs a clear, well-sized path to move air out of the home. With the duct now in place and properly installed, this homeowner’s range hood can finally do its intended job.

If you ever have questions about airflow, ventilation, or how your HVAC system and kitchen exhaust work together, our team can walk you through options during a visit or when you contact us through our online contact page.

Pro Tips for Homeowners in Tampa, FL

Whether you are in Tampa, FL 33611 or anywhere else in the Tampa Bay area, here are some practical ways to get the most out of your kitchen exhaust and home ventilation:

  • Use the fan early: Turn on your range hood or microwave exhaust as soon as you start cooking, not just when smoke appears. This gives it a head start on moving moisture and odors out.
  • Keep the filters clean: Wash or replace your hood filters regularly, especially if you cook with oil often. A clogged filter reduces airflow and makes the fan work harder.
  • Check the exterior vent: A few times a year, visually check the outside vent hood for lint, grease buildup, or obstructions like leaves or nests.
  • Watch for lingering odors: If smells are hanging around long after cooking, it may be a sign the duct is blocked, damaged, or not sized correctly. That is a good reason to call in a professional.
  • Pair with whole-home air care: Good kitchen exhaust is one piece of the puzzle. Regular HVAC maintenance and services like air duct cleaning help keep indoor air fresher across the whole home.
  • Mind the Tampa humidity: In summer, use your exhaust fan whenever boiling water or cooking for long periods. It helps your AC system by reducing the moisture load inside your home.

FAQ: Range Hood Exhaust Ducts for Tampa Homeowners

Does every range hood in Tampa need to vent outside?

Some hoods and over-the-range microwaves can be set up to recirculate air through filters instead of venting outside. However, when a ducted system is installed or required, that duct must be properly connected and routed outdoors to work as intended and to meet code requirements. In this project, our role was specifically to install the duct required for the kitchen exhaust to vent outside.

How do I know if my range hood is really exhausting air?

You can usually feel air coming out of the exterior vent when the fan is running. Inside, you should notice less lingering smoke and odor during and after cooking. If you are unsure, our technicians can inspect the hood, filters, and ductwork to confirm everything is connected and operating correctly.

Can bad ductwork make my kitchen fan noisy?

Yes, poor duct design can increase noise. Long, undersized, or sharply bent ducts can cause the fan to struggle, which sometimes sounds louder inside the kitchen. A clean, properly sized duct run often allows the fan to move air more quietly and efficiently.

How often should I have my kitchen exhaust system looked at?

Most homeowners do not need a formal inspection every year, but it is wise to keep an eye on performance. If you notice reduced airflow, louder operation, or more lingering smoke and odors, it is a good time to have the system checked. When we are already at your home for HVAC service in Tampa, we can often take a quick look at the hood and ductwork for obvious issues.

Is there anything I should avoid doing with my range hood?

Avoid blocking the filters or using the space above the hood to store items that can interfere with airflow. Do not tape over vents or dampers. And if you are planning a kitchen remodel, talk with a professional before moving the range to make sure there is a good path for the exhaust duct.

Why Choose Home Therapist for Ventilation and HVAC Service

When you invite our team into your Tampa home, we know you are trusting us with your comfort and safety. Here is what you can expect from Home Therapist Cooling, Heating, and Plumbing:

  • Licensed, professional technicians: Our technicians are trained to handle ventilation, ductwork, and HVAC systems with care and attention to detail. Alejandro treated this Tampa kitchen as if it were his own, and that is how we approach every job.
  • Transparent communication: We explain what we find, what we recommend, and why. For this project, that meant walking the homeowner through the path of the new duct and how it would improve their kitchen’s exhaust performance.
  • Clean, respectful work: From drop cloths to final cleanup, we do our best to leave your home as neat as we found it—just with better comfort and ventilation.
  • Long-term reliability: We are not just focused on today’s visit. We think about how your system will perform over time in Tampa Bay’s heat and humidity, and we install and service equipment accordingly.
  • Commitment to Tampa Bay homeowners: We are proud to serve neighborhoods throughout Tampa and the surrounding communities with honest, dependable HVAC and ventilation services.

If you would like to see what other homeowners are saying about us, you can find our team on platforms such as Facebook and Instagram. For added peace of mind, you can also review our standing with trusted organizations like the Better Business Bureau and the Tampa Bay Chamber of Commerce.

Need Kitchen Exhaust or HVAC Help in Tampa, FL?

If your range hood or over-the-range microwave does not seem to be doing its job, or if you are planning a remodel and want to make sure your new kitchen is properly ventilated, our local Tampa Bay HVAC technicians are ready to help.

Whether it is a new range hood exhaust duct, duct cleaning, or broader HVAC service in Tampa, FL 33611, you can count on Home Therapist Cooling, Heating, and Plumbing for honest guidance and careful workmanship.

Reach out today to schedule service in Tampa through our online contact page, and let us give your home the therapy it needs—starting right in the kitchen.

Range Hood Exhaust Duct Installation in Tampa, FL 33611

When your kitchen fills with smoke or cooking odors that just won’t go away, it makes the whole home uncomfortable. That was the situation for a homeowner in Tampa, FL 33611 who needed a proper exhaust duct installed for their kitchen range hood. Our Home Therapist technician, Alejandro, was called out to install the ductwork required by code from the range hood to the exterior of the home.

In this article, we’ll walk through what we found, how we approached the range hood exhaust duct installation, and what Tampa homeowners should know about safe, effective kitchen ventilation.

Case Recap

A homeowner in Tampa, FL 33611 needed a correctly sized and routed duct to connect their kitchen range or microwave hood to the outside of the house. The existing setup did not meet current code requirements for exhausting cooking contaminants outdoors. We evaluated the kitchen layout, planned a path for the new duct, installed the range hood exhaust duct, sealed and supported it properly, and then confirmed that the system was venting outside as intended. By the end of the visit, the homeowner had a safer, more comfortable kitchen with improved ventilation.

Customer Problem

In many Tampa Bay homes, especially older ones or remodeled kitchens, the range hood may be recirculating air through simple filters instead of truly venting it outside. That often leads to:

  • Lingering cooking smells that spread through the house
  • Visible smoke or steam that hangs around longer than it should
  • Grease buildup on cabinets and nearby surfaces
  • Extra heat and humidity trapped in the kitchen

This homeowner in Tampa, FL 33611 wanted a proper solution that met code and actually exhausted the air outside. The job scope was clear: install the duct required by code from the exhaust connection of the kitchen range or microwave to the exterior of the home. That meant no shortcuts, no venting into the attic, and no stopping in a wall cavity. Everything needed to be continuous, sealed, and terminated correctly outdoors.

On top of comfort and convenience, the homeowner wanted peace of mind. Proper exhaust helps carry away moisture, smoke, and combustion byproducts from cooking. In our humid Florida climate, that’s especially important to help avoid extra moisture where it doesn’t belong.

Inspection and Diagnosis

Before we ever start cutting holes or running duct, we spend time understanding the layout of the home and the existing ventilation path. For this Tampa, FL 33611 project, our inspection process included:

  • Evaluating the existing range or microwave hood: Verifying the exhaust outlet location, size, and direction of discharge.
  • Checking the cabinet and wall space above the appliance: Looking for obstructions, framing, or electrical/plumbing lines that might affect duct routing.
  • Reviewing the attic or ceiling space (if accessible): Planning a straight, efficient path toward an exterior wall or roof exit.
  • Identifying a proper termination point: An exterior wall or roof location where we can safely and cleanly discharge air outdoors, away from windows and soffit intakes.

We also verify that the planned duct diameter matches the hood manufacturer’s requirements. Undersized or overly long ducts can restrict airflow and make the fan noisy and ineffective. Our goal is always to balance performance, code compliance, and the homeowner’s budget.

For homeowners who want to understand more about how ductwork affects comfort, we’ve put together project examples like our ductwork installation for an HVAC system project in Tampa and a ductwork replacement case in Tampa, FL 33611. While those are focused on air conditioning, the same principles of proper sizing, routing, and sealing apply to kitchen exhaust ductwork as well.

Repair or Service Process

Once we had a clear plan, Alejandro walked the homeowner through the steps, answered questions, and confirmed that the proposed route and exterior termination made sense for their kitchen and home layout. Then we moved into the installation phase.

1. Preparing the Work Area

We treat every Tampa home like it’s our own. Before any cutting or drilling, we:

  • Covered nearby counters and appliances to catch dust and debris
  • Protected flooring in the work path from the entry door to the kitchen
  • Verified power was safely managed around the appliance area

Keeping the work area clean and organized helps reduce stress for the homeowner and makes it easier to complete the job efficiently.

2. Marking and Cutting for the Duct Path

Next, we carefully marked the duct path from the hood’s exhaust outlet through the cabinet and wall or ceiling space. This step is critical. Accurate measurements help avoid unnecessary holes or damage to finished surfaces.

Depending on the home’s construction, this can involve cutting through:

  • Cabinet tops or sides
  • Drywall or plaster ceilings
  • Exterior wall sheathing and siding, if wall-vented

Each cut is made with control and dust containment in mind. We aim to minimize disruption while still providing full access for a durable duct installation.

3. Installing the Range Hood Exhaust Duct

With the openings in place, we installed the duct from the range hood’s exhaust connection toward the exterior. This included:

  • Using appropriate duct materials: Rigid metal duct is commonly used for kitchen exhaust because it’s durable, easier to clean, and provides smoother airflow than many flex options.
  • Keeping the path as straight as possible: Every turn adds resistance, so we reduce elbows and unnecessary changes in direction.
  • Securing the duct: Proper supports keep the duct from sagging or shifting over time.

All joints were sealed with approved methods to help prevent air leaks. Loose or leaky connections can reduce performance and allow moisture and grease-laden air to escape into wall or attic spaces, which we want to avoid.

4. Exterior Termination and Weather Protection

At the exterior wall or roof, we installed a vent termination designed for range exhaust. This typically includes:

  • A hood or cap that directs air away from the wall
  • A backdraft damper to help reduce outside air from coming back in
  • A weather-resistant cover to protect the opening from rain and pests

We sealed around the exterior penetration to help prevent water intrusion and to maintain the look of the home’s exterior. For Tampa homeowners, where we see frequent storms and high humidity, careful exterior sealing is especially important.

5. Testing and Clean-Up

Once the duct was fully installed, we powered up the range or microwave hood and performed a functional test:

  • Confirmed air was flowing strongly through the new duct
  • Checked that air was exhausting outdoors at the termination point
  • Listened for unusual noise or vibration that might indicate a restriction

After confirming proper operation, we cleaned the work area, wiped down surfaces we had touched, and removed any debris and protective coverings. Before leaving, we walked the homeowner through what we did and explained how to operate and care for the new exhaust system.

Why This Fix Works

A proper range hood exhaust duct installation makes a big difference in everyday comfort and long-term home health, especially in a warm, humid place like Tampa, FL.

The key principles behind this fix are:

  • Airflow: A correctly sized and routed duct lets the fan move air efficiently, removing smoke, steam, and cooking odors.
  • Ventilation: Exhausting to the outdoors (instead of into the attic or just recirculating) helps carry away moisture and contaminants rather than trapping them inside.
  • Building protection: Sealed, metal duct reduces the chance of moisture or grease collecting in wall cavities, which can damage materials over time.
  • Code compliance: Following current code requirements supports safety, performance, and future home value.

Just like with whole-home duct systems and HVAC, the details matter. If you’d like to see how air movement and duct design affect indoor conditions, our article on the role of HVAC in your home’s air quality is a good resource, along with our HVAC maintenance checklist for homeowners.

Pro Tips for Homeowners in Tampa, FL

If you’re in Tampa, FL or anywhere in the Tampa Bay area and you rely on your kitchen daily, here are some practical tips to get the most from your range hood and ductwork:

1. Always Run the Hood While Cooking

Turn the exhaust fan on at the start of cooking, especially when frying or boiling. Let it run a few minutes after you’re done to clear lingering steam and odors.

2. Use the Correct Fan Speed

Lower speeds can be fine for simmering, but for high-heat cooking, you’ll get better performance at higher speeds. If the fan is very loud even on low, it might be a sign of restricted airflow or duct issues.

3. Clean or Replace Filters Regularly

Even with an exterior duct, grease filters in the hood need cleaning. In Florida’s humid climate, dirty filters can get sticky fast. Check them monthly and clean or replace as recommended by the manufacturer.

4. Watch for Moisture or Staining

If you notice moisture on nearby walls or cabinets, or staining around the hood or ceiling above, it may indicate a duct leak or poor installation. Have it inspected before it leads to bigger issues.

5. Plan Ductwork Carefully During Kitchen Remodels

If you’re remodeling a kitchen in Tampa, FL 33611 or nearby, it’s smart to think about exhaust duct routing early in the design. Planning ahead can reduce drywall repairs, unexpected framing conflicts, and extra costs later.

6. Schedule Professional Help When Needed

Range hood duct installation can involve electrical, framing, and exterior work. A licensed, experienced technician can help you avoid problems like venting into the attic, using the wrong materials, or undersizing the duct.

FAQ: Range Hood Exhaust Ducts in Tampa, FL 33611

Do I really need to vent my range hood outside?

For most full kitchen ranges, exhausting outdoors is strongly recommended and often required by code. Recirculating only filters some grease and odors; it does not effectively remove moisture or combustion byproducts. An exterior vent gives you better air quality and comfort, especially in humid Tampa.

Can I vent the range hood into the attic instead of outside?

No, range hoods should not vent into an attic or closed space. That can allow moisture, grease, and odors to build up where they don’t belong. A proper installation includes a continuous duct from the hood to an approved exterior termination.

Why is my range hood so loud?

A very noisy hood can be caused by restrictive ductwork, too many sharp turns, an undersized duct, or a partially blocked termination. During an inspection, we can check the duct path, connections, and exterior vent to see if improvements are needed.

How often should I have my range hood and duct inspected?

For most Tampa homeowners, a quick visual check a few times a year is helpful. If you cook frequently, consider having a professional take a closer look every few years or whenever you notice changes in airflow, increased noise, or visible staining around the hood.

Can you handle both ductwork and other HVAC needs at the same visit?

In many cases, yes. If you’re already scheduling service for ductwork or ventilation in Tampa, FL, we can also look at related HVAC concerns during the same appointment when possible. Just mention all your concerns when you schedule so we can plan enough time.

Why Choose Home Therapist for Duct and Ventilation Work

When you invite someone into your home, you want to know they’ll treat it with care. At Home Therapist Cooling, Heating, and Plumbing, our local Tampa Bay technicians focus on more than just getting the job done—we focus on how you feel during and after the work.

  • Licensed, professional technicians: Our team is trained to handle HVAC, ductwork, and ventilation projects correctly and safely.
  • Transparent communication: We explain what we’re doing, why it matters, and what your options are before we move forward.
  • Clean and respectful work: We protect your home, pick up after ourselves, and keep disruption to a minimum.
  • Long-term reliability: We focus on proper materials, correct routing, and sealed connections so your range hood exhaust system keeps working the way it should.
  • Commitment to Tampa Bay homeowners: We live and work in the same communities we serve, including neighborhoods throughout Tampa, FL 33611 and surrounding areas.

If you’d like to see more of what we do, you can connect with us on our Facebook page, follow our projects and tips on Instagram, or watch helpful videos on our YouTube channel. For additional peace of mind, you can also view our standing with organizations like the Better Business Bureau and the Tampa Bay Chamber of Commerce.

Need Range Hood Duct Help in Tampa, FL 33611?

If your kitchen fills with smoke, your range hood doesn’t seem to pull much air, or you’re not sure whether your system is vented outdoors, we’re here to help. Our local Tampa Bay HVAC and ventilation technicians can inspect your current setup, explain what’s going on in clear terms, and complete a code-compliant range hood exhaust duct installation or correction if needed.

If you’re a homeowner in Tampa, FL 33611 or the surrounding Tampa Bay area, contact Home Therapist Cooling, Heating, and Plumbing to schedule service. We’ll take the time to understand your home, your kitchen, and your comfort goals—and then deliver the therapy your home needs.

Creating Clean, Safe Access to Hidden Home Systems in Wesley Chapel, FL

Creating Clean, Safe Access to Hidden Home Systems in Wesley Chapel, FL

When something goes wrong behind a wall or ceiling, homeowners in Wesley Chapel, FL 33545 often worry about two things right away: finding the problem and putting everything back together neatly. On this recent visit, our Home Therapist technician, Adalberto, was called to a home in Wesley Chapel to carefully cut the sheetrock, inspect a hidden issue, and provide a clean, long-term access solution with a spring-loaded plastic access panel. Before we left, the homeowner also chose to protect their system with our Premium Therapy Plan for ongoing comfort and peace of mind.

In this article, we’ll walk through what prompted the visit, how we carefully opened and inspected the area, why a professional access panel installation matters for safety and future service, and how a maintenance plan supports homeowners in Wesley Chapel and the greater Tampa Bay area.

The Homeowner’s Concern: Something Is Wrong Behind the Wall

By the time we arrived at the Wesley Chapel home, the homeowner already knew that the issue wasn’t out in the open. The problem—whether it was related to plumbing, AC drain lines, or another hidden component—was somewhere behind the sheetrock, where they couldn’t see or safely reach it.

From our conversation at the door, the concerns were clear:

  • They suspected a hidden problem behind the wall or ceiling.
  • They wanted the area opened carefully so it wouldn’t turn into a bigger repair project than necessary.
  • They were worried about how the opening would look afterward and how future technicians would access the same area without more damage.
  • They wanted to make sure the work was done safely and cleanly, especially with dust and debris inside an occupied home.

Hidden issues are common in homes across Wesley Chapel and Tampa Bay. Many of your most important systems—like air conditioning lines, condensate drains, plumbing pipes, and electrical runs—are tucked away behind sheetrock. When something goes wrong, the right approach is a controlled, professional opening and a plan for clean ongoing access.

Inspection & Diagnosis: Opening the Wall the Right Way

Any time we need to access what’s behind sheetrock in a Wesley Chapel home, we take a methodical approach. Adalberto’s priority was to open just enough of the wall or ceiling to safely inspect the area while keeping the home as clean and undisturbed as possible.

Here’s how he proceeded:

1. Preparing the Work Area

  • Protecting nearby surfaces: Before cutting, Adalberto prepared the area by moving or covering nearby belongings where practical and protecting floors to catch dust and debris.
  • Locating the likely trouble spot: Based on the homeowner’s description and visible clues (such as the location of HVAC components, possible moisture signs, or utility layouts), he identified the most appropriate section of sheetrock to open.

2. Careful Sheetrock Cutting for Inspection

  • Measured opening: Adalberto marked a clean, square opening sized to match a standard adjustable spring-loaded plastic access panel—in this case, in the 8" x 8" or 14" x 14" range, depending on the layout. This ensures the opening would be easy to finish and re-cover.
  • Controlled cuts: Using appropriate tools, he cut the sheetrock in a way that minimized vibration and cracking to surrounding areas, avoiding unnecessary damage.
  • Safe removal of the panel: The piece of sheetrock was removed carefully and kept intact so the homeowner could choose to reuse it if desired.

We always explain to homeowners that while we can remove the panel and make a clean opening, we do not perform painting or texturing. Our responsibility is to safely expose the work area and provide a clean access solution. The homeowner is responsible for any cosmetic finishing, painting, or matching texture afterward.

3. Inspecting the Exposed Area

Once the opening was made, Adalberto inspected the area behind the sheetrock. Depending on the home’s layout, that can include:

  • AC condensate drain lines and connections
  • Refrigerant lines and insulation
  • Plumbing supply lines and drain pipes
  • Electrical junction boxes or control wires

The goal of this level-one repair visit in Wesley Chapel was to see the underlying issue clearly, confirm what was happening behind the wall, and ensure the homeowner understood what we saw so they could make informed decisions about next steps.

Step-by-Step: Installing a Clean, Spring-Loaded Access Panel

After cutting and inspecting the area, the next step was to make sure this homeowner wouldn’t face the same disruption again just to reach the same spot. That’s where the adjustable spring-loaded plastic access panel comes in.

1. Sizing the Opening

Our adjustable access panels come in common sizes like 8" x 8" and 14" x 14", which are large enough for most service work while still looking neat and unobtrusive. Adalberto ensured the cut opening matched one of these standard sizes so the panel would sit properly and cover the edges cleanly.

2. Preparing the Edges

He checked the cut edges of the sheetrock for any loose material and cleaned up the perimeter so the panel frame could sit flush. This attention to detail is what keeps the access panel sitting flat against the surface and helps it blend in once the surrounding area is painted or finished.

3. Installing the Spring-Loaded Plastic Panel

With the opening prepared, Adalberto installed the spring-loaded plastic access panel:

  • The frame was placed into the cutout, aligned level and square.
  • The spring-loaded door was checked to ensure it opened and closed smoothly for future service visits.
  • Edges were inspected again to make sure there were no gaps that could impact appearance or allow debris from the cavity to escape.

The result is a professional-looking, removable panel that allows technicians—and the homeowner, when appropriate—to access the same area quickly, without another round of cutting, dust, and disruption.

4. Clarifying Responsibilities and Next Steps

As with any sheetrock opening we make in homes around Wesley Chapel and Tampa Bay, Adalberto clearly explained:

  • We can put the old piece of sheetrock back in place temporarily if the homeowner prefers, but we do not perform paint or texture work.
  • Any cosmetic patching, mudding, sanding, texture, and painting is the homeowner’s responsibility or can be handled by a drywall/painting professional.
  • The installed access panel is designed to be finished around and painted to match the wall or ceiling if the homeowner chooses.

This transparency is important to us. We want every homeowner in Wesley Chapel, FL to know exactly what we’re doing, what’s included, and what needs follow-up from another trade if they want a fully finished look.

Why an Access Panel Is a Smart Long-Term Fix

Installing a spring-loaded plastic access panel might seem like a small detail, but it solves several long-term problems for homeowners in Wesley Chapel and throughout Tampa Bay.

1. Faster, Cleaner Service in the Future

Many HVAC and plumbing issues—especially AC drain clogs, refrigerant leaks, or pipe concerns—can recur or require routine checks. Without an access panel, each visit can mean:

  • Cutting new sheetrock
  • More dust and debris in your home
  • Repeated cosmetic repairs

With a properly sized access panel, a technician can simply open the door, inspect, clean, or service the component, and close it again—all in a fraction of the time.

2. Protecting Critical Systems

Hidden components behind sheetrock often include:

  • Condensate drain lines that can clog in Florida’s humid climate
  • Plumbing that can show early signs of leaks
  • Control wiring that may need troubleshooting

Easy access means issues can be caught and resolved earlier, which can help prevent water damage, mold growth, or extended AC downtime in the heat of a Wesley Chapel summer.

3. Neater Appearance Compared to Open Holes

Instead of an open cut in the wall or ceiling, a plastic access panel provides a clean, finished-looking cover. Once the surrounding area is painted or blended, many homeowners barely notice it. It’s a practical compromise between aesthetics and serviceability.

Supporting Comfort with a Premium Therapy Plan

During this visit, the homeowner also chose to enroll in our Premium Therapy Plan. That decision is especially smart for homes in Wesley Chapel, where AC systems and related components work hard almost year-round.

Our Premium Therapy Plan is designed to keep your system running smoothly with scheduled maintenance and member benefits. You can learn more about what’s included on our Therapy maintenance plans page.

For many homeowners, pairing a new access panel with a maintenance plan is the ideal combination: we’ve created safe, clean access to the hidden area, and we’ll be back on a regular schedule to check and maintain the system that lives there.

How This Fix Fits Into Your Home’s Bigger Picture

From a technical standpoint, an access panel doesn’t change how your AC or plumbing works—it changes how easily and safely it can be maintained.

In Florida, and especially in communities like Wesley Chapel, your home’s systems are under constant load:

  • Air conditioning runs for long hours in high heat and humidity.
  • Condensate drains carry large amounts of moisture that can cause clogs or algae buildup.
  • Plumbing and drainage work hard to keep up with daily use.

When key components are hidden behind walls with no access, small issues can quietly become big repairs. By creating a controlled opening and installing a durable access panel, we:

  • Allow regular inspection of condensate lines, drains, or piping.
  • Make it easier to perform routine cleaning or flushing.
  • Reduce the time and disruption needed for future diagnostics.

Combine this with scheduled maintenance—like our AC maintenance services in the Tampa area—and you dramatically lower the chance of surprise breakdowns, water damage, or mid-summer AC failures.

Pro Tips for Homeowners in Wesley Chapel, FL

Whether you’re in Wesley Chapel, Tampa, Land O’ Lakes, or nearby communities, these tips can help you stay ahead of hidden issues behind your walls:

1. Don’t Ignore Subtle Signs

If you notice faint stains, musty odors, or unusually warm or cool spots on a wall or ceiling, don’t wait. Hidden leaks or sweating lines can get worse quickly in our humid climate. A quick visit from a local Tampa Bay HVAC or plumbing professional can save you from larger repairs later.

2. Ask About Access When You Schedule Service

When you call for HVAC service in Wesley Chapel, ask whether a technician will need to open walls or ceilings. If they do, discuss options for installing an access panel at the same time so you’re not repeating the process on future visits.

3. Consider Access Panels for Known Problem Areas

If you’ve had repeated issues with a particular drain line, plumbing connection, or hidden junction, a simple access panel can make every future repair and inspection much easier and cleaner.

4. Pair Access with Regular Maintenance

Once you have an access panel installed, make use of it. Enroll in a maintenance plan like our Premium Therapy Plan so that trained technicians regularly inspect and clean those hidden components. That combination is especially valuable in neighborhoods across Wesley Chapel, where AC systems run hard most of the year.

5. Keep Records of Hidden System Locations

Make a simple sketch or note of where access panels and key hidden components are located. This is helpful for you, for future service providers, and even for future buyers if you ever sell your home. Organized information can speed up diagnostics and reduce labor costs.

Why Wesley Chapel Homeowners Choose Home Therapist

At Home Therapist Cooling, Heating, and Plumbing, we know that inviting someone to cut into your walls or ceilings is a big deal. Our team treats every Wesley Chapel home as if it were our own, with a focus on:

  • Licensed, highly trained technicians: Our team understands how HVAC and plumbing systems run throughout Tampa Bay homes and knows where hidden components typically live.
  • Clean, careful work: From floor protection to controlled cutting, we minimize dust and disruption while we access the area we need to see.
  • Clear, honest communication: We explain what we’re doing, what we find, and what is—and isn’t—covered, including your responsibility for paint and texture work.
  • Long-term reliability: We look beyond today’s visit and recommend solutions like access panels and maintenance plans to make future service easier and more affordable.
  • Local commitment: We proudly serve Wesley Chapel and the greater Tampa Bay area, from local neighborhoods to landmarks like Wesley Chapel, FL itself, nearby Tampa Premium Outlets, and The Shops at Wiregrass.

If you’d like to understand more about how we approach system care, you can also read our in-depth guide to HVAC maintenance for homeowners or review our AC repair services in the Tampa area.

Need Hidden Access or Maintenance Help in Wesley Chapel?

If you suspect a hidden issue behind a wall or ceiling, or you’ve been told that a technician needs to cut sheetrock to reach a component, you don’t have to handle it alone. Our local Tampa Bay HVAC and plumbing technicians can:

  • Carefully open the area for inspection
  • Install a clean, spring-loaded access panel in standard sizes like 8" x 8" or 14" x 14"
  • Explain exactly what we find and what your options are
  • Help you protect your system with a maintenance plan tailored to your home

To schedule HVAC or plumbing service in Wesley Chapel, FL or nearby communities, reach out through our contact page or give us a call. Our team is ready to provide the therapy your home needs—with careful workmanship, clear communication, and a focus on your long-term comfort and peace of mind.

Bathroom Plumbing Upgrades & Future Water Heater Plans in St. Petersburg, FL

Bathroom Plumbing Upgrades & Future Water Heater Plans in St. Petersburg, FL

In an older home in St. Petersburg, FL 33703, one of our Home Therapist plumbers, Adalberto, was called in to help a homeowner get ready for a major bathroom refresh. Between new toilets, new vanities, faucets, and a future water heater upgrade, this project touched almost every part of the home’s plumbing system.

Our job was to make sure everything behind the walls and under the fixtures would be safe, code-compliant, and ready for years of reliable use in St. Petersburg’s hot, humid climate. Along the way, we walked the homeowner through options for a new water heater, including how an expansion tank and electrical work would factor into the final plan.

Below we’ll break down the homeowner’s concerns, how we approached the inspection and estimate, and what St. Petersburg homeowners should know when planning similar plumbing upgrades.

Customer Problem: Getting the Bathroom Ready for New Fixtures

The homeowner in St. Petersburg was in the middle of a remodel and wanted to tackle several plumbing items in stages. The immediate goals were:

  • Install two new toilets (one supplied by Home Therapist, one supplied by the customer)
  • Prepare plumbing for new bathroom vanities
  • Replace faucets and P-traps at select sinks
  • Address aging angle valves that may not shut off reliably

In the next phase, the homeowner also wanted to:

  • Install a new water heater (tank or tankless – still to be decided)
  • Add a 2-gallon expansion tank if a traditional tank-style water heater is chosen
  • Finish additional kitchen plumbing once the new cabinets are installed

That’s a lot of moving parts, and it’s very typical for remodeling projects in St. Petersburg and across Tampa Bay. When you’re changing cabinets, vanities, and fixtures, the original plumbing often sits too high or too low, or the materials are simply worn out from decades of use and high local water pressure.

The homeowner’s biggest concerns were:

  • Making sure everything would fit properly once the new vanities and toilets were in place
  • Avoiding leaks from old angle valves, P-traps, or toilet flanges
  • Staying ahead of potential code issues with the new water heater and expansion tank
  • Keeping the project organized so it could be done in phases without surprises

Inspection & Diagnosis: Understanding the Full Plumbing Picture

Before we give any estimate or start work, we take time to understand the full plumbing system. At this St. Petersburg home, Adalberto focused on several key areas.

1. Toilets & Toilet Flanges

We began by examining the existing toilets and the toilet flanges that anchor them to the floor. Common issues we looked for included:

  • Cracked or broken flanges that can cause wobbly toilets and leaks
  • Corroded closet bolts that won’t hold the toilet securely
  • Signs of past leaks around the base of the toilet (stains, soft flooring, odors)

Because the homeowner was planning to replace the toilets, we also noted that if we discovered a damaged flange during installation, it would need to be replaced on the spot for safety and to prevent future leaks.

2. Angle Valves & Supply Connections

Angle valves (also called shut-off valves) sit behind toilets and under sinks. They allow you to shut off water to one fixture without cutting water to the entire home. Over time, especially in coastal areas like St. Petersburg, these valves can:

  • Corrode or seize up
  • Leak from the stem or compression joints
  • Fail to fully close, making repairs difficult

We checked each angle valve that would be involved in the remodel to see whether it could be safely reused or if it should be replaced during the other plumbing work.

3. P-Traps & Sink Drains

Next, we inspected the sink drains and P-traps that connect the sinks to the home’s drain system. We looked for:

The homeowner had requested a P-trap replacement for at least one sink, especially in the kitchen area, to match the new cabinetry layout and ensure a clean, leak-free installation.

4. Bathroom Vanity Water and Drain Lines

One of the bigger challenges at this St. Petersburg home was that the existing hot, cold, and drain lines for the bathroom sinks were set too high on the wall. With standard-height vanities coming in, the current locations would interfere with the back of the cabinets and could prevent proper trap and drain alignment.

To address this, we planned to:

  • Open the drywall behind the vanities
  • Lower the water lines and drain lines to match the new vanity height
  • Leave the drywall repair to the homeowner or their contractor, per our standard policy

5. Water Heater & Expansion Tank Planning

The homeowner had not yet chosen between a traditional tank water heater and a tankless unit. That decision affects:

  • Whether a 2-gallon expansion tank will be part of the final installation
  • Whether electrical upgrades will be needed (especially for a tankless system)
  • The final layout of water lines and any condensate or venting requirements

Our estimate for this St. Petersburg project was based on a traditional tank water heater, with labor only for the installation. The customer would provide the water heater and drain pan, while we would supply the connections and accessories. If the homeowner ultimately chooses a tankless model, we clearly noted that an electrician will be needed for the electrical work, and a separate estimate would be provided if Home Therapist handles that portion.

Step-by-Step: How We Planned the Plumbing Work

With the inspection complete, we outlined a clear, step-by-step process so the homeowner knew what to expect at each phase.

1. Toilet Replacement & Flange Repair

For the two toilets being installed in St. Petersburg, we planned to:

  • Shut off water using the existing or newly replaced angle valves
  • Remove the old toilets carefully to avoid damaging flooring
  • Inspect the toilet flanges for cracks, missing pieces, or corrosion
  • Replace any damaged flanges with new, properly glued flanges
  • Set the new toilets with fresh wax rings or appropriate seals
  • Secure the toilets to the floor and test for stability and leaks

One toilet was to be supplied by Home Therapist, while the other was a customer-supplied Glacier Bay toilet. We always install customer-provided fixtures with the same attention to detail as our own, but we’re careful to explain that the manufacturer’s warranty on the fixture itself remains with the product brand.

2. Faucet & Angle Valve Replacement

The homeowner also needed select faucets replaced, including shower and sink faucets. For those fixtures, our process is:

  • Shut off water at the local angle valves or main shutoff
  • Remove the old faucet and clean the mounting surface
  • Install the customer-provided faucet, following manufacturer specifications
  • Replace any failing angle valves while the area is already open
  • Turn water back on and test for smooth operation and leaks

In St. Petersburg, where many homes have older plumbing or mixed materials, pairing faucet replacement with fresh angle valves is an easy way to improve reliability and reduce the chance of future leaks behind cabinets and vanities.

3. P-Trap & Sink Drain Replacement

For the kitchen and bathroom sinks, we planned to replace aging P-traps and adjust the drains to work with the new cabinetry. This included:

  • Removing old trap assemblies and any corroded piping
  • Installing new P-traps and fittings with proper slope
  • Ensuring all slip joints are tight but not over-tightened
  • Running water to test for leaks and proper drainage

4. Relocating Vanity Water & Drain Lines

To match the height of new standard vanities in this St. Petersburg bathroom, we would:

  • Open drywall behind each vanity location
  • Cut and lower existing drain lines and water lines
  • Secure new pipe positions to framing
  • Cap and test lines for leaks
  • Leave the walls ready for the homeowner’s drywall contractor to repair

We’re always transparent that Home Therapist does not perform drywall, stucco, tile, or concrete repair after opening access holes. That work is left to the homeowner’s preferred tradesperson to keep the project clean and efficient.

5. Future Water Heater & Expansion Tank Installation

For the future water heater in St. Petersburg, we outlined a labor-only installation plan:

  • The homeowner will provide the new water heater and drain pan
  • We will provide water line connections, valves, and necessary accessories
  • If a traditional tank water heater is chosen, we will install a 2-gallon expansion tank sized for up to a 50-gallon heater
  • If a tankless water heater is chosen instead, the expansion tank will be removed from the estimate
  • Electrical work for a tankless system will be handled by the homeowner’s licensed electrician or by Home Therapist under a separate estimate

Why These Plumbing Fixes Work

Everything we recommended for this St. Petersburg home is based on solid plumbing principles and local code requirements.

Toilet Flanges & Seals

A toilet’s flange connects the toilet to the drain pipe and anchors it to the floor. When a flange is cracked, too low, or otherwise damaged, you can get:

  • Slow leaks that damage subflooring
  • Odors from sewer gases
  • A wobbly toilet that stresses the wax ring and fasteners

Replacing a damaged flange and using the right seal restores a tight, sanitary connection that can last for decades.

P-Traps & Drainage

P-traps hold a small amount of water to block sewer gases from entering the home. When traps are corroded, poorly sloped, or assembled incorrectly, you can see:

  • Leaks under sinks
  • Slow drainage and gurgling
  • Unpleasant smells

New, correctly installed P-traps keep drainage smooth and maintain a proper water seal against sewer gas.

Angle Valves & Fixture Safety

Reliable shut-off valves are essential for any home in St. Petersburg. When a faucet, toilet, or appliance needs service, being able to quickly stop water at that one fixture prevents major water damage. Replacing old or stuck valves is a simple way to improve safety and peace of mind.

Water Heater Expansion Tank

On a closed plumbing system, pressure can spike when hot water is created and has nowhere to expand. A properly sized expansion tank:

  • Absorbs excess pressure when water heats up
  • Helps keep system pressure below 80 psi
  • Extends the life of your water heater, valves, and appliances

That’s why many local codes now require expansion tanks on traditional tank water heaters. It’s a small component that protects the entire system.

Pro Tips for Homeowners in St. Petersburg, FL

If you’re planning a bathroom or kitchen update in St. Petersburg or elsewhere in Tampa Bay, here are some practical tips from our plumbing team:

  1. Plan plumbing before you order cabinets and vanities. Take measurements of existing water and drain line heights. If they’re too high for standard vanities, budget for lowering them before installation.
  2. Replace old angle valves during remodels. When walls are open or cabinets are removed, it’s the perfect time to upgrade shut-off valves rather than waiting for a leak later.
  3. Decide on tank vs. tankless early. In St. Petersburg, tankless water heaters can be a great choice, but they often need electrical upgrades and different venting. Knowing your choice up front makes for a smoother project.
  4. Check your water pressure. High water pressure is common in parts of Tampa Bay and can wear out fixtures faster. Ask your plumber to check pressure and recommend a pressure-reducing valve or expansion tank if needed.
  5. Use licensed professionals for gas and electrical work. Whether it’s a tank or tankless water heater, always rely on licensed trades to handle any gas or electrical components safely and to code.
  6. Protect against coastal corrosion. St. Petersburg’s coastal air can be tough on metal parts. Using quality materials and scheduling periodic inspections can prevent surprises down the road.

Why St. Petersburg Homeowners Choose Home Therapist

At Home Therapist, we treat every plumbing project—big or small—as an opportunity to make your home safer, more comfortable, and easier to live in. For this St. Petersburg, FL homeowner, that meant:

  • Clear communication about what was found and what might be discovered during toilet and vanity work
  • Transparent, itemized estimates for toilets, faucets, P-traps, valve replacements, and water heater labor
  • Professional, clean workmanship that respects your home and remodel schedule
  • Planning ahead for future phases instead of treating each visit as a one-off repair

Our licensed plumbers serve homeowners across Tampa Bay with services like toilet installation and repair, faucet replacement and repair, sink and P-trap services, and water heater installation. For more complex projects, we also provide other plumbing services throughout Tampa to keep your system running smoothly.

Whether you’re in St. Petersburg, nearby Treasure Island, or elsewhere in Pinellas County, our team understands the specific challenges of our coastal climate and local building styles. We’re here to help you upgrade your plumbing one step at a time.

Helpful Resources for St. Petersburg Homeowners

If you’re planning your own remodel or plumbing upgrade, you may also find these local resources useful:

Need Plumbing Help in St. Petersburg, FL?

If you’re getting ready to install new toilets, vanities, faucets, or a water heater in St. Petersburg, FL, it pays to have a plumbing team that plans ahead with you. From simple toilet swaps to full bathroom plumbing relocations and water heater upgrades, we’ll walk you through every step and keep you informed.

Schedule your visit with our local Tampa Bay plumbing technicians today to talk about toilet replacement, water heater installation options, or any other plumbing repair or remodel work in St. Petersburg and the surrounding areas.

Home Therapist is here to provide the therapy your home needs—one careful, professional plumbing upgrade at a time.

Choosing the Right 50-Gallon Electric Water Heater in Riverview, FL

Choosing the Right 50-Gallon Electric Water Heater in Riverview, FL

When the hot water in your Riverview, FL home becomes unreliable, everyday tasks like showering, washing dishes, and doing laundry suddenly turn into a hassle. That is exactly why a homeowner in Riverview, FL 33579 reached out to Home Therapist online for help selecting a new electric water heater.

Our team walked the homeowner through a value-focused option: a 50-gallon tall Rheem electric water heater (Performance 6-year series) with a solid manufacturer warranty and our own labor warranty on top. In this article, we will unpack what this type of water heater offers, why it is a strong fit for many Tampa Bay households, and what you can expect from a professional, code-compliant installation by our local plumbing technicians.

The Homeowner's Situation: Uncertain Hot Water in a Busy Riverview Home

This Riverview homeowner requested an estimate online (“Cliente pidio este estimado online”). That usually means one of a few things is going on:

  • Hot water is running out too quickly during showers.
  • The existing water heater is older, rusty, or showing signs of leaking.
  • Energy bills are creeping up and the water heater is suspected to be part of the problem.
  • The homeowner wants to replace the water heater proactively before a failure.

In the Riverview and greater Tampa Bay area, many homes rely on electric water heaters. Over time, sediment buildup, worn heating elements, failing thermostats, or simple age can lead to:

  • Inconsistent water temperature.
  • Longer recovery times between showers.
  • Rusty or discolored hot water.
  • Small leaks around the base of the tank.

Our role at Home Therapist is to listen first, then guide the homeowner toward a solution that balances comfort, cost, and long-term reliability. In this case, a 50-gallon tall electric unit made sense for a typical family-size household in Hillsborough County.

The Recommended Water Heater: Rheem 50-Gallon Tall, Performance 6-Year

For this Riverview estimate, we specified a value water heater with the following key details:

  • Brand: Rheem
  • Capacity: 50 gallons
  • Wattage: 4,500 watts
  • Size: Tall, approximately 61 5/8 inches high by 20 1/4 inches in diameter
  • Series: Performance 6-Year
  • Model: XE50T06ST45U1 (or similar; model numbers may vary)

The warranty coverage is an important part of the value:

  • 6-year manufacturer warranty on parts from Rheem.
  • 2-year labor warranty provided by Home Therapist Plumbing.

For homeowners in Riverview, a 50-gallon electric tank is often a comfortable size for a typical household, giving enough capacity for morning showers, dishwashing, and laundry without constant hot water shortages. The 4,500-watt elements help the tank recover faster after heavy use, which matters on busy days.

How Our Technicians Approach a Water Heater Replacement in Riverview

Every home is a little different, so before we perform a replacement, our local plumbing technician reviews the existing setup to make sure the new unit will be safe, efficient, and up to code. For a standard electric water heater replacement in the Riverview, FL area, our process typically includes:

1. Initial Assessment

When we arrive at a home in Riverview, we start by inspecting the existing water heater and surrounding area:

  • Confirming tank size, height clearance, and space for a tall unit.
  • Checking the electrical supply (breaker size, wiring condition, disconnect).
  • Inspecting hot and cold water lines for corrosion or leaks.
  • Reviewing the drain pan and nearby drainage options.
  • Verifying the temperature and pressure (T&P) relief valve discharge path.

This helps us confirm that a 50-gallon tall configuration is appropriate and that we can connect the new Rheem unit safely.

2. Safety and Shutoff

Before any work begins, we protect the home and secure the system:

  • Shutting off the electrical power to the existing water heater at the breaker panel.
  • Turning off water supply lines to prevent unexpected leaks.
  • Protecting nearby flooring and walls from water spills.

Safety is a core part of how we work across all of our plumbing repair in Riverview, whether it is a water heater, a burst pipe, or a leaking fixture.

3. Removing the Old Water Heater

If this were a full replacement visit, the next steps would normally include:

  • Draining the existing tank via the drain valve and hose connection.
  • Disconnecting electrical wiring and safely capping conductors during the changeout.
  • Disconnecting hot and cold water lines and the T&P discharge line.
  • Removing the old unit from the drain pan and carefully moving it out of the home.

We handle all hauling and disposal, so the homeowner does not have to worry about moving a heavy, old tank through their Riverview house or garage.

4. Installing the New Rheem 50-Gallon Tall Electric Water Heater

Once the old unit is out of the way, our plumbing technician sets the new Rheem tank in place and begins connecting all components. On a typical installation, we include:

  • Drain pan: Properly sized and positioned beneath the tank to help protect floors if there is a leak.
  • Discharge line: Connected to the T&P relief valve and routed to an approved termination point, so excess pressure or temperature can be relieved safely.
  • Service valve: A shutoff valve on the cold water supply line for easier future servicing.
  • Hot water line insulation: Insulating the hot water line leaving the tank to help retain heat, improve efficiency, and reduce standby losses.

We then reconnect the electrical wiring, confirming tight, safe connections and verifying that the breaker, wiring size, and heater wattage are appropriately matched.

5. Filling, Testing, and Commissioning

With plumbing and electrical connections complete, we:

  • Fill the tank fully with water and bleed air from the hot water lines at nearby fixtures.
  • Check for leaks at all connections, valves, and around the tank.
  • Restore power at the breaker and verify proper operation of the heating elements.
  • Set the thermostat to a safe, efficient temperature (often around 120°F for most families).

Finally, we walk the homeowner through basic operation, warranty details, and what to watch for in the future. Many of our customers in Riverview appreciate having a clear, simple explanation of their new equipment and how to get the most from it.

Why This 50-Gallon Electric Water Heater Setup Works

A water heater is more than just a big metal tank. Understanding the basics helps homeowners in Riverview make smart decisions about their plumbing systems.

The Basics of Electric Water Heating

An electric water heater uses one or two heating elements inside the tank to warm stored water. Thermostats monitor the water temperature and switch the elements on and off as needed. Here is why the 4,500-watt Rheem 50-gallon model is a solid choice:

  • Right-sized capacity: 50 gallons is large enough for a small to medium-size family without being excessive for most Riverview homes.
  • Steady hot water: With proper sizing and wattage, the tank can recover between showers and allow for back-to-back usage with fewer temperature dips.
  • Efficient operation: Insulated tank walls and insulated hot water lines reduce heat loss, so the elements do not have to run as frequently.

Safety and Pressure Relief

The T&P relief valve and discharge line protect your home by giving excess pressure and temperature a safe escape path. The drain pan adds another layer of protection by catching small leaks before they can damage surrounding areas.

In a humid climate like the Tampa Bay region, where garages and closets can see big swings in temperature, these protections are especially important. Proper installation helps prevent issues like:

  • Water damage to floors and walls.
  • Corrosion from standing water around the base of the tank.
  • Unsafe pressure buildup inside the tank.

Practical Tips for Water Heaters in Riverview, FL

Whether you choose a Rheem 50-gallon electric unit or another style of water heater, there are a few simple habits that can help it last longer and perform better in Riverview's warm, humid climate near the Alafia River and Tampa Bay.

  1. Check around the tank monthly. Take a quick look at the base of the water heater and the drain pan. If you notice rust, pooling water, or moisture that was not there before, call for service before a small issue becomes a leak.
  2. Keep the area around the heater clear. Do not stack boxes, paint cans, or household items tight against the tank. Good airflow and easy access help prevent corrosion and make servicing safer and faster.
  3. Mind your thermostat setting. For many Riverview families, 120°F is a good balance between comfort, energy efficiency, and safety. Hotter is not always better and can increase scald risk and energy use.
  4. Watch for changes in hot water performance. If you suddenly run out of hot water faster than usual or notice fluctuating temperatures, it could be a failing heating element or thermostat. A quick visit from our team can often prevent a full breakdown.
  5. Schedule periodic checkups. Including your water heater when you schedule other plumbing services in the Tampa area helps catch issues early and keep your system running smoothly.
  6. Plan ahead for replacement. Most tank-type water heaters last 8–12 years. If yours is getting close to that range, it is smart to talk about replacement options before you have an emergency.

Why Riverview Homeowners Trust Home Therapist

At Home Therapist Cooling, Heating, and Plumbing, we treat every water heater estimate and installation in Riverview the way we would handle it in our own homes. That means:

  • Licensed, experienced technicians: Our plumbers know local codes, manufacturer specs, and best practices for electric water heaters in Hillsborough County.
  • Transparent recommendations: We clearly explain the pros and cons of different water heater options so you can choose what truly fits your home and budget.
  • Clean, respectful work: We protect your floors, clean up our work area, and haul away old equipment so you are not left with a mess.
  • Strong warranties: The combination of the manufacturer's 6-year parts warranty and our 2-year labor warranty gives you extra peace of mind.
  • Local commitment: We are proud to serve Riverview and the broader Tampa Bay area, from everyday repairs to true emergencies. For urgent issues, our emergency plumbing services are here to help.

Because water heaters tie directly into your home's plumbing and electrical systems, having a reliable, local team matters. We want every homeowner we serve in Riverview, Tampa, and nearby communities to feel confident that their hot water is safe and dependable.

Thinking About a New Water Heater in Riverview? Here's Your Next Step.

If your current water heater is old, unreliable, or showing signs of leakage, now is a smart time to explore your options. A properly sized, professionally installed 50-gallon electric water heater can restore comfort, improve efficiency, and help you avoid surprise breakdowns.

Home Therapist's local plumbing professionals can:

  • Review your home's hot water needs.
  • Explain the differences between value, mid-range, and premium water heater options.
  • Provide a clear, written estimate with all materials and labor spelled out.
  • Schedule installation at a time that works for your household.

Whether you are right in Riverview, elsewhere in Hillsborough County, or across the Tampa Bay area, we are ready to help. You can start with an online estimate request, just like this homeowner did, or speak directly with our friendly team.

To learn more about how we handle water-related issues, you can also explore our dedicated page for water pipe repair in Tampa or reach out through our contact page to schedule service.

When you need honest, dependable plumbing help and water heater service in Riverview, FL, Home Therapist is here to provide the therapy your home needs—one safe, reliable hot shower at a time.

Virtual Estimate for Labor-Only Water Heater Installation in St. Petersburg, FL

When your water heater is on its last leg, you don’t just want anyone handling the replacement. You want a local plumbing team that explains everything clearly, respects your budget, and treats your home like their own. That was the case for a homeowner in St. Petersburg, FL 33703, who reached out to Home Therapist for a virtual estimate on a 40-gallon water heater installation.

In this case, the customer planned to provide the new water heater and drain pan and needed a professional, labor-only install. Our technician Adalberto walked through the scope of work, potential extra costs, and even adjusted the discount when the customer requested a change.

Below, we’ll walk through the customer’s goals, how we structure a labor-only water heater installation in the St. Petersburg area, and what homeowners can expect from our licensed Tampa Bay plumbing team.

Understanding the Customer’s Request in St. Petersburg, FL

This visit started as a virtual estimate. The homeowner in St. Petersburg wanted to install a 40-gallon water heater they were purchasing on their own. They were comfortable buying the unit and drain pan but wanted a qualified plumber to handle all of the connections and ensure everything was safe and up to code.

During the initial discussion, we clarified a few key points:

  • The customer would provide the 40-gallon water heater and the drain pan.
  • Home Therapist would provide the water line connections, fittings, and accessories necessary to complete the installation.
  • Any existing piping or shut-off valves that were damaged, outdated, or not compatible would be discussed and priced before performing any additional work.
  • Structural repairs (sheetrock, stucco, concrete, tile, etc.) would not be included in the plumbing scope.

Initially, the customer was offered a 5% discount on the labor portion of the work. After some discussion, they requested a 10% discount, and we adjusted the estimate accordingly. Our goal is always to find a fair middle ground while maintaining the quality and safety standards required for plumbing work in St. Petersburg and throughout Tampa Bay.

Customer Problem: Replacing a Water Heater the Right Way

From a homeowner’s perspective, replacing a water heater can feel simple: remove the old tank, hook up the new one, and you’re done. In reality, there are several safety and code considerations that make professional installation important, especially in homes around St. Petersburg, FL, where older plumbing and mixed construction styles are common.

For this customer, the main concerns were:

  • Getting a safe, code-compliant installation for their new 40-gallon water heater.
  • Understanding exactly what was included in a labor-only job, since they were providing the equipment.
  • Clarifying potential extra costs for piping or shut-off valves if anything needed replacement.
  • Having a clear, written estimate up front, with a discount applied fairly.

In older or heavily used systems, we often find:

  • Corroded or seized shut-off valves that no longer turn properly.
  • Rusty or improperly sized connections at the hot and cold water lines.
  • Improper drain pan or lack of a proper drain path.
  • Potential issues with venting or electrical supply, depending on the type of heater.

Because this was a virtual estimate, our technician relied on a detailed conversation, photos or videos provided by the customer, and our experience installing similar water heaters across St. Petersburg, Tampa, and nearby areas.

Inspection & Diagnosis: What We Plan for in a Labor-Only Install

Even for a labor-only job in St. Petersburg, FL, we approach every water heater installation with a thorough checklist. Once on site, a Home Therapist plumber would:

  • Verify the new water heater: Confirm capacity (40 gallons), fuel or power type, location, and any manufacturer requirements.
  • Inspect the existing plumbing connections: Check hot and cold water lines, existing shut-off valve, and any flexible connectors.
  • Review the drain pan setup: Ensure the customer-provided drain pan is correctly sized and that there is a proper drain route or approved overflow solution.
  • Check for corrosion or leaks: Look for rusted fittings, signs of previous leaks, and deteriorated joints that might not safely reconnect to a new heater.
  • Confirm accessibility and clearances: Verify that the heater location meets clearance requirements and allows proper servicing.

During a visit like this in St. Petersburg, we also take note of safety items such as:

  • Condition and routing of the temperature and pressure (T&P) relief valve discharge line.
  • Proper bonding and grounding if applicable.
  • Secure support for the heater, especially in garages or raised platforms.

The virtual estimate sets expectations; the on-site inspection confirms what we’re working with and whether any additional repairs are necessary.

Step-by-Step: How We Install a Customer-Provided Water Heater

Although every home in St. Petersburg, FL is a little different, our general process for a customer-provided, 40-gallon water heater installation follows a consistent, safety-focused workflow.

1. Shut Down and Make the Area Safe

We begin by turning off the power or gas to the existing water heater and closing the main water supply or dedicated shut-off valve. This helps protect both the home and our technician.

2. Drain and Disconnect the Old Unit

The existing heater is drained through a hose to a suitable drain location. Once depressurized, we carefully disconnect the hot and cold water lines, T&P relief line, and other necessary connections. If any valves or fittings are found to be in poor condition, we pause and review options and pricing with the homeowner before moving forward.

3. Assess and Update Piping or Valves as Needed

If a shut-off valve or section of pipe is leaking, corroded, or not compatible with the new heater, we recommend replacing it. As we explained in the estimate for this St. Petersburg project, any needed replacements are priced and approved in advance. No surprises, no unauthorized work.

4. Position the New 40-Gallon Heater and Drain Pan

The customer-provided water heater and drain pan are set in place. We ensure that:

  • The pan is properly centered and level.
  • The heater sits securely and meets manufacturer clearance requirements.
  • There is a clear path for the T&P discharge line and any drain piping.

5. Install Water Line Connections and Accessories

This is where our labor-only role comes in. We supply the water line connections, fittings, and accessories required to safely connect the new water heater into the home's existing plumbing system. That typically includes:

  • New flexible or rigid connections to match the heater’s inlets.
  • Appropriate fittings and adapters.
  • Any necessary support hardware to stabilize piping.

Everything is installed with an eye toward minimizing future leaks and making future maintenance easier.

6. Connect T&P Relief and Verify Drain Path

The temperature and pressure relief valve is a critical safety component. We ensure the discharge line is correctly connected and directed to an approved termination point. In humid coastal cities like St. Petersburg, where corrosion can be an issue, it’s especially important that this line is solid, secure, and able to carry hot water safely away from people and property in the event of a release.

7. Restore Power/Water and Test the System

With all piping secure, we slowly restore water to the system, purge air from the lines, and check each joint for leaks. Once we’re confident in the plumbing work, we restore power or gas and allow the heater to start warming water.

We finish by:

  • Double-checking for drips or weeps at every connection.
  • Confirming that the unit cycles on correctly.
  • Reviewing basic operation and safety tips with the homeowner.

8. Clean-Up and Final Walkthrough

We leave the space as clean as we found it, removing old fittings, packaging, and debris. During the final walkthrough, we remind the homeowner that we do not perform sheetrock, concrete, stucco, tile, or similar structural repairs. If any access holes were required to run piping, those are the homeowner’s responsibility to patch afterward, as clearly stated in the estimate.

Why This Approach Works for St. Petersburg Homeowners

Water heaters are simple in theory but unforgiving when something is installed incorrectly. The principles behind our process are based on:

  • Water pressure control: Properly sized, leak-free connections prevent sudden bursts or slow drips that can damage nearby walls and floors.
  • Thermal expansion and safety: As water heats, it expands. The T&P valve and discharge line protect the tank from overpressure and help avoid dangerous failures.
  • Corrosion management: In coastal regions like St. Petersburg and the surrounding Tampa Bay area, salt air and humidity accelerate corrosion. Replacing compromised valves and fittings during installation helps extend the life of the system.
  • Code compliance: Local plumbing codes exist to protect both health and property. A professional installation ensures venting, clearance, and discharge paths meet local standards.

Even when a customer provides the water heater, having a trained, licensed plumber handle the connections and testing ensures the system can operate safely every day.

Pro Tips for Water Heater Owners in St. Petersburg, FL

If you're a homeowner in St. Petersburg or elsewhere in the Tampa Bay area, here are some practical tips to get the most out of your water heater:

  1. Check around your heater monthly: Look for damp spots, rust streaks, or a metallic smell. Early signs of leaks are easier and cheaper to handle.
  2. Know where your shut-off is: Make sure you know how to close the water shut-off valve to the heater. In an emergency, this can prevent major water damage.
  3. Consider local water quality: Many areas around St. Petersburg have mineral-heavy water. Flushing your tank periodically (if recommended by the manufacturer) can help reduce sediment buildup.
  4. Watch for corrosion on valves and fittings: In humid, coastal climates, metal parts can rust faster. If you see green, white, or rust-colored buildup on fittings, it's time to have a plumber take a look.
  5. Schedule professional installs: Even if you buy the heater yourself, have a licensed local plumber perform the installation. It's safer and can help protect your warranty.
  6. Plan your replacement: If your water heater is over 10 years old, start planning for replacement rather than waiting for a failure. Our guide on exploring water heater replacement options is a helpful starting point.

Why St. Petersburg Homeowners Choose Home Therapist

At Home Therapist, we treat plumbing work as both a technical job and a customer-care responsibility. For homeowners in St. Petersburg, FL and across Tampa Bay, that means:

  • Licensed, experienced technicians: Our plumbers handle water heater replacements and installs every week and understand the specific challenges of homes in our coastal climate.
  • Clear, upfront estimates: As we did for this 40-gallon water heater installation, we outline what's included, what's not, and how discounts are applied before any work starts.
  • Transparent options for additional work: If pipes or valves need replacement, we talk through pricing in advance. No hidden costs, no surprise line items.
  • Respect for your home: We work cleanly, protect surrounding areas, and leave the workspace tidy when we’re done.
  • Local focus: We’re part of the Tampa Bay community, serving homeowners from St. Petersburg and Clearwater to Tampa and beyond. That means we know local codes, weather patterns, and common plumbing issues.

If you'd like to better understand our full process, you can learn more about our water heater replacement services and installation process, or review how we handle water heater installs in the Tampa, FL area.

Ready to Schedule Your Water Heater Install in St. Petersburg, FL?

Whether you're in St. Petersburg, FL, another part of Pinellas County, or anywhere in the greater Tampa Bay area, you don’t have to guess your way through a water heater replacement. Our team can provide a clear estimate, explain your options, and complete a professional installation that puts safety and reliability first.

To get started, you can contact us directly through our plumbing services contact page, or explore our resources on scheduling water heater installs for optimal service availability so you can plan ahead.

If you're nearby landmarks like the St. Pete Pier or exploring Tampa Bay's waterfront areas, you're still within our service area. When your water heater starts showing its age, Home Therapist is here with the therapy your home needs – from straightforward virtual estimates to clean, careful installations.

Planning Sewer, Water Line, and Shower Valve Replacement in Lutz, FL 33559

Planning Sewer, Water Line, and Shower Valve Replacement in Lutz, FL 33559

When your home in Lutz, FL 33559 starts showing signs of plumbing problems, it can feel stressful fast. Slow drains, aging pipes, and a finicky shower valve don’t just affect comfort – they can put your home at risk for leaks and water damage if they’re not handled correctly.

Recently, our Home Therapist plumbing team helped a homeowner in Lutz review and update an estimate for multiple plumbing projects: sewer drain line replacement, new water line runs, a shower valve replacement, and related valve work. The customer also qualified for a military discount, so it was important that everything was quoted clearly and correctly.

In this article, we’ll walk through how we structured the estimate, what each part of the job actually means for a homeowner, and how careful planning helps avoid surprises once the work starts.

Customer Situation: Getting the Right Plumbing Work Approved

Our customer in Lutz reached out because they needed more than just a small plumbing repair. The home was due for:

  • New sewer drain piping in certain areas
  • New water supply lines run in specific sections
  • A shower valve replacement
  • An angle stop (angle valve) replacement while we were already working

Like many homeowners around Lutz and the greater Tampa Bay area, they wanted to be sure they were approving the right scope of work and fully understood the pricing. Our internal note for this visit was:

“Se manda estimado nuevamente porque el cliente quiere hacer los dos estimados y por error aprobó la opción #1 del reporte.”

In plain English: the estimate needed to be resent because the customer actually wanted to move forward with both options, but accidentally approved only option #1 in the report.

So our technician Adalberto’s main job at this stage wasn’t just physical plumbing work. It was to clarify the options, make sure all required line items were included, and ensure the customer could confidently move ahead with the exact work they needed.

Breaking Down the Plumbing Work in Lutz, FL

The estimate for this Lutz home included several distinct tasks. Each one plays a different role in the overall health of the plumbing system.

1. Base Cost for Pipe Replacement

The first line item was a base cost to replace water or sewer pipes. This is a standard charge that covers the setup and core labor for pipe replacement work. It’s important because:

  • It accounts for mobilizing to the home and preparing the work area
  • It ties together additional per-foot pricing for specific pipe runs
  • It helps keep the per-foot prices accurate and fair

In this estimate, the note made it very clear that a specific “Pipe Replacement Base Costs” line for $249 had to be added whenever sewer or water lines were being run. That clarity ensures the customer in Lutz sees the full picture of the total job instead of only the per-foot charges.

2. Sewer Drain Line Replacement with PVC

The next major item was sewage drain line replacement with PVC, priced on a per-foot basis. This is the pipe that carries wastewater out of the home toward the main sewer or septic system.

The description was very clear about what this portion of the work did and did not include:

  • Included: Laying new PVC drain pipe along the planned route
  • Not included: Digging trenches, cutting concrete, or any other accessory work

For many homes in Lutz, especially those built decades ago, sewer lines may be made from older materials that are more prone to root intrusion, shifting, or cracking. Replacing sections with PVC is often the right long-term solution. By separating the per-foot pipe charge from the excavation work, we can give homeowners an honest, transparent price for each phase.

For larger projects that move toward a full repipe, we may also discuss options like whole-home repiping services in Tampa so homeowners understand all possible long-term solutions.

3. Water Supply Line Replacement or Installation

The estimate also included running new CPVC, PVC, or PEX water lines. These are the pipes that carry clean water to fixtures like sinks, showers, and toilets.

Again, the notes were very specific:

  • Included: Laying new water pipe along the planned route
  • Not included: Digging trenches, cutting concrete, or patching surfaces

In Lutz and the surrounding Tampa Bay area, we often recommend PEX or CPVC for new water lines. Both handle our warm, humid climate well and resist many of the problems that older galvanized or polybutylene lines can develop over time. For more complex projects, we sometimes refer customers to our dedicated water pipe replacement services in Tampa so they can see how this work fits into a larger repiping strategy.

4. Angle Valve (Angle Stop) Replacement

The estimate also included a Level 1 angle valve replacement while doing other work. Angle valves, sometimes called angle stops, are the small shut-off valves usually found under sinks or behind toilets.

Replacing these while we already have the water shut off and tools on-site is often the most cost-effective approach. It helps:

  • Prevent future leaks from old, corroded valves
  • Give the homeowner a reliable shut-off if they ever need to turn water off to a single fixture
  • Avoid an extra service visit down the road

5. Shower Valve Installation and Replacement

The last major component of this estimate was a Level 2 shower valve installation/replacement. The shower valve is the device inside the wall that controls water flow and temperature to the showerhead.

The description spelled out a few important points:

  • We can replace the head, plate, and handle if the customer provides them and wants us to install them.
  • If the existing trim still works and looks acceptable, it can usually remain in place.
  • The pricing is for labor only and does not include the cost of the parts.
  • If sheetrock or tile must be cut to access the valve, we are not responsible for patching or repairs to those finishes.

That last point is especially important in homes around Lutz and Tampa Bay, where tile showers are common. We’re always careful and as precise as possible when accessing a shower valve, but we also want homeowners to understand that wall repair is a separate trade and cost. Being upfront protects the customer from surprise expenses.

6. Military Discount

This estimate also included a military discount. We’re proud to serve many active-duty service members and veterans throughout Lutz, Land O’ Lakes, and the greater Tampa Bay region. When a customer qualifies, we make sure that discount is clearly applied and reflected in the final numbers so they can see exactly how much they’re saving.

Inspection and Planning: How We Build a Clear Plumbing Estimate

Before any pipe is replaced, Adalberto took time to confirm the details for this Lutz project. That planning helps prevent change orders and helps the homeowner stay in control.

During this stage, our technician typically:

  • Reviews the original report and any previously approved options
  • Walks the home to confirm which lines need replacement
  • Identifies where access will be needed (walls, flooring, yard, etc.)
  • Checks for visible signs of leaks, corrosion, or improper past repairs
  • Confirms pipe material options (CPVC, PVC, PEX) based on local codes and the home’s layout
  • Clarifies who will handle trenching, concrete cutting, or drywall/tile repair if needed

In this case, the big step was making sure that both sets of work the customer wanted were actually listed, with the correct base cost and per-foot items for both sewer and water piping. That way, when the homeowner in Lutz signed off, there was no confusion about which options were being approved.

Why These Plumbing Fixes Work

All of these tasks work together to protect the home’s plumbing system and the homeowner’s peace of mind.

Drainage: Keeping Wastewater Moving Safely

Replacing sewer drain lines with properly sloped PVC pipe ensures wastewater flows smoothly by gravity out of the home. Older lines in the Lutz area can sag, crack, or collect debris, which leads to backups and foul odors. New PVC, properly sized and installed, resists corrosion and root intrusion much better than many older materials.

Water Pressure and Supply

New water supply lines made from CPVC, PVC, or PEX improve:

  • Reliability: Fewer leaks and pinholes over time
  • Water quality: Reduced risk of rust and sediment from corroding metal pipes
  • Pressure consistency: Fewer hidden restrictions inside old, scale-filled lines

This is especially valuable in our warm and sometimes corrosive coastal-influenced environment around Tampa Bay.

Control and Safety via Valves

Angle valves and shower valves are all about control – control of water flow, temperature, and shut-off options. New valves:

  • Make it easier to isolate a single fixture during future maintenance
  • Reduce the risk of sudden leaks from worn-out internal parts
  • Improve comfort by keeping shower temperatures steady and predictable

Pro Tips for Homeowners in Lutz, FL

If you’re in Lutz or nearby communities like Land O’ Lakes or Wesley Chapel, here are some practical tips for planning similar plumbing work:

  1. Ask for clear separation of labor and materials. Just like this estimate did for the shower valve and pipe work, it’s helpful to see what you’re paying for labor versus parts. That makes it easier to compare options or supply your own fixtures.
  2. Confirm what’s included in pipe replacement. In many projects, laying the pipe is just one part of the work. Be sure you know whether trenching, concrete cutting, and wall or tile repair are included – or separate.
  3. Plan around humidity and soil conditions. Our hot, humid climate and local soils around Lutz can be tough on older pipes. During your consultation, ask which pipe materials perform best long-term in this area.
  4. Protect finished spaces. If walls or tile need to be opened, consider scheduling a follow-up with a drywall or tile professional so repairs happen soon after the plumbing is complete.
  5. Take advantage of military or seasonal discounts. If you’re active duty, a veteran, or a qualifying family member, let your plumbing contractor know up front so any discounts can be built into your estimate.
  6. Schedule a full plumbing checkup periodically. Especially in older homes near Lutz and North Tampa, a routine inspection like the ones described in our whole-home plumbing inspection project in Tampa can catch issues before they become emergencies.

Why Homeowners in Lutz Choose Home Therapist

Homeowners in Lutz, FL have plenty of options for plumbing help, but our customers tell us they appreciate a few specific things about working with Home Therapist:

  • Licensed, experienced plumbers: Our technicians handle everything from small valve repairs to full repipes across Tampa Bay.
  • Clear, honest estimates: We separate base costs, per-foot charges, and labor-only work so you understand exactly what you’re approving.
  • Respect for your home: We protect work areas, clean up thoroughly, and communicate clearly about any surfaces that will need follow-up repair.
  • Focus on long-term reliability: Wherever possible, we aim for solutions that reduce the chance of future emergencies, not just quick fixes.
  • Local knowledge: We work on homes all over Lutz, Tampa, and surrounding areas, so we understand local water conditions, soil, and building styles – from newer developments to established neighborhoods near places like downtown Lutz and the greater Tampa Bay area.
  • Full plumbing support: From pipe replacement to fixtures and emergency calls, our team handles a wide variety of needs. You can see more about this on our other plumbing services page.

For larger or more urgent problems, homeowners also rely on our emergency plumbing services in Tampa when something can’t wait.

Ready to Plan Your Plumbing Project in Lutz?

If you’re in Lutz, FL 33559 and you’re facing aging pipes, drain issues, or shower valve problems, you don’t have to tackle it alone. Our local Tampa Bay plumbing team can walk you through your options just like we did for this homeowner – with clear line items, transparent pricing, and respect for your budget and your time.

Whether you need targeted pipe replacement, a new shower valve, or are exploring a larger repiping project, we’re here to help. To get started, schedule a visit with our team and we’ll build a plan that fits your home, from basic pipe replacement to more comprehensive solutions like whole-home repiping in Tampa.

Contact Home Therapist today for dependable, professional plumbing repair and installation services in Lutz and across the Tampa Bay area.

Evaporator Coil & TXV Replacement in Tampa, FL 33629: Fixing an AC That Wouldn’t Stop Running

Evaporator Coil & TXV Replacement in Tampa, FL 33629: Fixing an AC That Wouldn’t Stop Running

In Tampa, FL 33629, a homeowner on our maintenance plan called us because one of her air conditioning systems just couldn’t keep up with the heat. The system ran almost nonstop on warmer days and still wasn’t keeping the home as cool as it should.

During a scheduled tune-up, our Home Therapist technician Jandiel found a low-refrigerant condition caused by a leak in the evaporator coil inside the air handler. We also identified the need to replace the TXV (thermal expansion valve), flush the refrigerant lines, replace the filter dryer, and recharge the system correctly with R410A.

Below is a step-by-step look at what went wrong, how we diagnosed it, and how we repaired the system to restore safe, efficient cooling for this Tampa home.

Customer Problem: AC Running Constantly but Not Cooling Well

The homeowner in Tampa, FL reached out to us under her service plan because she noticed one particular system (System #2) behaving differently:

  • The system seemed to run almost all the time on hot days.
  • Even with long run times, some areas of the home still felt warm or unevenly cooled.
  • She suspected something was off, even though the system was still technically “working.”

When we arrived for her routine maintenance visit, she explained these concerns and mentioned that it had been going on for a while. This type of symptom is common in Tampa Bay homes when:

  • The system is low on refrigerant due to a leak.
  • Coils are dirty or damaged.
  • There’s a restriction in the refrigerant metering device, such as a TXV or piston.

Our job was to determine which of these issues (or combination of issues) was actually affecting her system and to protect the rest of the equipment—especially the compressor—from long-term damage.

Inspection & Diagnosis: Finding the Hidden Refrigerant Leak

Our technician performed a careful, step-by-step inspection of the system in this Tampa home. Here’s how we approached the diagnosis:

1. Visual Inspection of the Air Handler and Coil

We started at the air handler, where the evaporator coil is located. Right away, we noticed signs that the system had struggled recently:

  • The filter was heavily soaked, which often indicates past freezing and thawing of the coil.
  • There were signs of moisture around the air handler area from previous ice melt.

A frozen evaporator coil is often a clue that refrigerant levels are low or airflow is restricted. In this case, it lined up with the homeowner’s report that the system ran constantly yet couldn’t keep up.

2. Refrigerant Level and System Performance Checks

Next, we checked system pressures and superheat/subcooling to evaluate refrigerant charge and performance. Readings showed that the unit was operating with low refrigerant levels, confirming a real loss of refrigerant—not just a minor adjustment issue.

When a system in Tampa, FL is low on refrigerant, that usually means one thing: there is a leak somewhere in the refrigerant circuit. Simply adding more refrigerant without addressing the leak is not a real fix; it only delays the problem and increases operating costs.

3. Examining the Evaporator Coil and TXV

We focused on the evaporator coil inside the air handler because:

  • The symptoms and frozen-coil evidence pointed in that direction.
  • This is a common leak point on many residential systems.

Through testing and inspection, we identified a leak in the evaporator coil. At the same time, the system’s TXV (thermal expansion valve) was not metering refrigerant properly, contributing to poor cooling and efficiency.

4. Electrical and Component Health Check

We also checked the fan motor and other key components. The fan motor was already drawing slightly elevated energy usage. If the system continued running low on refrigerant, the compressor and other parts could have been damaged as well.

Continuing to use an AC in these conditions in a hot, humid climate like Tampa doesn’t just waste energy—it puts the entire system at risk.

5. Warranty and System History

This system was still under manufacturer warranty through 2029, even though the registration was in a previous homeowner’s name. We confirmed that the warranty could still be honored, just as it had been previously when a blower motor was replaced under warranty.

We coordinated ordering a new evaporator coil under warranty. The coil lead time was estimated at 7–14 business days, while the TXV was already available for installation.

Step-by-Step Repair: Coil, TXV, Dryer, Flush & Recharge

Once the replacement parts were available, we scheduled the work as early in the day as possible to fit the homeowner’s schedule in Tampa, FL 33629. Before starting, we clearly reviewed the scope of work, costs that would be covered by warranty, and items that would be billed separately (such as refrigerant and some accessories).

1. Safely Recovering and Pumping Down the Refrigerant

Because we would be opening the refrigerant circuit, we first pumped down the existing R410A to the condenser side to safely capture the remaining refrigerant. This is critical for:

  • Environmental responsibility.
  • Technician safety.
  • Preventing air and moisture from being introduced into the system.

2. Removing the Old Evaporator Coil

With the system safely pumped down, we removed the old evaporator coil from the air handler. This included:

  • Disconnecting refrigerant lines at the coil.
  • Carefully removing the coil assembly.
  • Preparing the cabinet for the new coil installation.

We protected the surrounding area to keep the home clean and avoided any unnecessary disturbance to the air handler cabinet or ductwork.

3. Installing the New Evaporator Coil (Under Warranty)

We installed the new air handler coil, ensuring it was properly positioned and secured. Then we:

  • Soldered the refrigerant connections with clean, professional joints.
  • Inspected all new joints and connections visually before testing.
  • Prepared the system for leak testing.

The cost of the new coil itself was covered under the manufacturer’s warranty; our invoice reflected only the labor and associated materials not covered by warranty.

4. TXV Replacement

Next, we replaced the TXV (thermal expansion valve), which controls how much refrigerant flows into the evaporator coil. This step involved:

  • Pumping down any remaining gas as needed.
  • Removing the old TXV and installing the new, properly sized TXV.
  • Making and soldering new connections where required.
  • Checking all soldered joints for leaks.

A properly functioning TXV helps the system maintain stable pressures and temperatures, leading to more consistent comfort and better efficiency—especially important for homeowners in Tampa’s hot, humid climate.

5. Dryer Filter Replacement and Copper Line Flush

We also addressed the refrigerant circuit’s cleanliness and flow by:

  • Flushing the copper lines with R11 and nitrogen to clear any blockage or contaminants.
  • Replacing the filter dryer, which removes moisture and debris from the refrigerant.
  • Cleaning or replacing the piston where applicable.

These steps are crucial after a coil replacement to ensure that the new components aren’t immediately exposed to old contaminants, which can shorten equipment life and cause restrictions.

6. Deep Vacuum and Leak Check

With new components in place, we performed a deep vacuum on the system to remove air and moisture from the lines and coils. Then we:

  • Checked all soldered connections for leaks using proper testing procedures.
  • Verified that the system held vacuum and pressure before adding new refrigerant.

This step is one of the most important parts of any professional AC repair in Tampa: it protects the compressor, reduces acid formation in the refrigerant, and helps the system run more reliably.

7. Recharging with R410A and Final Testing

Because we opened the system and replaced the coil and TXV, all of the refrigerant needed to be replaced. We charged the system with the correct amount of R410A—over 3 pounds in this case—and then:

  • Checked operating pressures, superheat, and subcooling.
  • Verified that the system was cooling properly at the registers.
  • Confirmed that the air handler and outdoor unit were working together as designed.

We also monitored the fan motor’s energy usage again and confirmed that the overall system was operating more normally now that the refrigerant charge and components were corrected.

Why This Fix Works: The Refrigeration Cycle in Plain English

For homeowners in Tampa, FL, it helps to understand why these repairs make such a big difference in comfort and energy bills.

The Role of the Evaporator Coil

The evaporator coil inside your air handler is where the refrigerant absorbs heat from your indoor air. When refrigerant leaks from this coil:

  • The system can no longer absorb enough heat.
  • The coil can freeze over because of low pressure and very low temperatures.
  • The AC has to run much longer to achieve the same result—if it can at all.

Replacing the leaking coil restores the system’s ability to absorb heat efficiently and eliminates the ongoing refrigerant loss.

The Role of the TXV

The TXV (thermal expansion valve) meters how much refrigerant flows into the evaporator coil. If it’s not working correctly, you might see:

  • Poor temperature control.
  • High energy usage.
  • Unstable pressures and frequent freezing or short cycling.

Installing a properly functioning TXV stabilizes the system, helping your AC maintain ideal pressures and temperatures for efficient operation in Tampa’s demanding climate.

Why Flushing, Dryers, and Vacuuming Matter

Moisture, debris, or old contaminants inside the refrigerant lines can lead to:

  • Blockages in the TXV or capillary tubes.
  • Acid formation that damages internal components.
  • Reduced system life and more frequent breakdowns.

By flushing the copper lines, replacing the filter dryer, and pulling a deep vacuum, we give the system a clean internal environment—like starting fresh with a clean slate.

Pro Tips for Homeowners in Tampa, FL

If you live in Tampa, FL or nearby areas like Hyde Park or Bayshore Boulevard, here are some practical tips to help keep your AC running smoothly:

  1. Pay attention to run time. If your system runs for very long periods and still struggles to cool, don’t ignore it. That can be an early sign of a refrigerant leak or airflow problem.
  2. Check your filter monthly. In Tampa’s hot, humid climate, filters can clog quickly. A soaked or extremely dirty filter can be a sign of previous coil freezing and thawing.
  3. Schedule regular tune-ups. Professional air conditioner tune-up services in Tampa, FL help catch low refrigerant, weak components, and airflow issues before they lead to major repairs.
  4. Don’t just “top off” refrigerant. If you’re adding more than about 1–2 pounds of refrigerant, there’s almost always a leak. Ask your technician to locate and address the cause instead of simply refilling.
  5. Protect your warranty. Keep records of previous repairs and warranty coverage. As in this Tampa project, we were able to honor a manufacturer’s warranty even though the system was registered under a previous homeowner.
  6. Use a trusted local HVAC partner. Having a long-term relationship with a local Tampa Bay HVAC company means faster diagnosis, honest recommendations, and better system history tracking.

Why Choose Home Therapist for AC Repairs in Tampa Bay

At Home Therapist Cooling, Heating, and Plumbing, we treat every AC repair in Tampa as if we were working on our own home. For this homeowner in Tampa, FL 33629, that meant:

  • Listening carefully to her concerns about run time and comfort.
  • Performing a thorough, step-by-step diagnosis instead of guessing.
  • Leveraging her existing warranty to reduce costs where possible.
  • Explaining each recommended repair in plain language before proceeding.
  • Working around her schedule and making sure payment and paperwork were handled smoothly.

Our licensed technicians follow best practices for safety, cleanliness, and system reliability. We don’t believe in quick, temporary fixes. Instead, we focus on long-term solutions that protect your compressor, coils, and other components—especially in a demanding climate like Tampa Bay’s.

If you’d like to understand what to expect when your AC is not cooling, you can explore our guide on air conditioner repair services in Tampa, FL. For broader repair and installation options across the Tampa Bay area, visit our page on air conditioner installation and repair services in Tampa Bay.

We also offer clear, upfront information about ongoing protection through our plans. If you want to understand how maintenance plans can help you avoid major breakdowns and manage costs over time, you can read our resource on AC maintenance plans and service costs.

Need AC Service in Tampa, FL 33629?

If your air conditioner in Tampa, FL is running constantly, not cooling well, or you suspect a refrigerant leak, it’s important to address it sooner rather than later. Ignoring these signs can lead to compressor damage, higher electric bills, and uncomfortable rooms—especially during our long, humid summers.

Home Therapist Cooling, Heating, and Plumbing is here to help with professional, transparent HVAC service in Tampa and throughout the Tampa Bay area. Whether you need coil replacement, TXV repair, refrigerant leak diagnosis, or a simple tune-up, our local team is ready to step in.

Contact us today to schedule AC repairs, installs, or maintenance services in Tampa, FL, and get the therapy your home needs—from a team that puts your comfort, safety, and peace of mind first.

For more about Tampa, FL and its neighborhoods, you can explore the city on Wikipedia or see nearby areas like Hyde Park in Tampa and scenic Bayshore Boulevard.

Virtual Estimate for a 40-Gallon Electric Water Heater in St. Petersburg, FL: What Homeowners Should Know

Virtual Estimate for a 40-Gallon Electric Water Heater in St. Petersburg, FL: What Homeowners Should Know

Hot water is one of those comforts you don’t appreciate until something goes wrong. For a homeowner in St. Petersburg, FL 33703, it was time to plan ahead and get a quote for a new 40-gallon electric water heater. Instead of waiting for a full breakdown, she reached out to our team at Home Therapist Cooling, Heating, and Plumbing for a virtual estimate.

Our technician Alejandro reviewed the details, recommended a reliable Rheem 40-gallon tall electric water heater, and walked the homeowner through important safety considerations, including the condition of the existing stand under the tank. We also applied a special 10% discount to help make the project more affordable.

In this article, we’ll walk you through what the homeowner asked for, what we saw from the information provided, how we approached the estimate, and what homeowners in St. Petersburg should know before replacing their own electric water heater.

Customer Problem: Planning a 40-Gallon Electric Water Heater Replacement

The homeowner in St. Petersburg contacted us with a simple, practical request: she wanted a price for replacing her existing electric water heater with a new 40-gallon unit. She preferred to start with a virtual estimate rather than an in-person visit.

From her request and our internal notes, here’s what we knew:

  • The customer specifically asked for a quote on a 40-gallon electric water heater.
  • This estimate was prepared virtually, based on information and photos rather than a full on-site inspection.
  • Our office authorized a 10% discount for the replacement.
  • We could see that the existing water heater was installed on a base or stand that appeared loose or unstable.

During our conversation, we clearly explained that the base underneath the current water heater was not in ideal condition and that, for best safety and stability, we recommended installing a proper water heater stand. However, the homeowner preferred to have the new heater set in the same location, and she confirmed that she understood the situation.

Because this was a virtual estimate, we also emphasized that additional costs could arise once we were on-site and could inspect the full setup in person. We promised that no extra work would be performed without her approval.

Inspection & Diagnosis: How a Virtual Water Heater Estimate Works

With a virtual estimate, we don’t physically touch the system yet—but we still follow a structured process to protect the homeowner’s safety and budget. For this St. Petersburg plumbing project, Alejandro walked through several key checks using the information and images provided.

Here are the main things we consider during a virtual water heater estimate in St. Petersburg, FL:

  • Tank size and type: The customer requested a 40-gallon, tall, electric water heater, which is a common size for many homes in the Tampa Bay area.
  • Brand and model suggestion: We recommended a Rheem 40-gallon tall electric water heater – Model XE40T06ST45U1 or equivalent – with 4500 watts, approximately 63 5/8" high and 23" in diameter.
  • Existing location and stand: From the information we received, the current water heater was set on a base that was described as loose. That raised a structural and safety concern.
  • Plumbing connections: We evaluated, as best as possible from the photos and description, where the cold and hot lines, discharge line, and electrical connections were located.
  • Drain and pan requirements: We considered where a drain pan and discharge line should run, especially important in homes in St. Petersburg where water damage can be costly.

Because this was not an on-site visit yet, we were very clear about potential unknowns:

  • Hidden corrosion on piping or valves
  • Electrical issues at the breaker or disconnect
  • Code updates since the last installation
  • Any structural issues with the surrounding area

We made sure the homeowner understood that no additional work would be performed without her explicit approval once we arrived in person and confirmed all details.

Recommended Water Heater and Included Materials

For this St. Petersburg, FL home, we recommended a Rheem 40-gallon tall electric water heater with the following general specifications:

  • Brand: Rheem
  • Capacity: 40 gallons
  • Wattage: 4500 watts
  • Size: Tall, approximately 63 5/8" high by 23" in diameter
  • Model: XE40T06ST45U1 (or a similar Rheem model as available)

We also outlined the warranties that come with this water heater installation:

  • 6-year parts warranty provided by the manufacturer (Rheem)
  • 2-year labor warranty provided by Plumbing Therapist / Home Therapist

The warranty start date would be the actual day of installation. We always explain that specific model numbers can vary slightly due to supply conditions, but any substitutions would be equivalent in performance and warranty.

To give the homeowner a clear picture, we also listed the core materials and accessories that would be included in the installation:

  • Hot water line insulation – helps reduce heat loss and improves efficiency.
  • Service valve – allows the water heater to be isolated for future maintenance or repairs.
  • Drain pan – helps protect the surrounding area from leaks, especially important in indoor or finished spaces.
  • Discharge line – a safe outlet for the temperature and pressure relief (T&P) valve, directing water to an approved drain point.

For homeowners comparing options, resources like our article on exploring water heater replacement options can be helpful when deciding between a standard tank and a tankless water heater in the St. Petersburg and greater Tampa Bay area.

Step-by-Step: How the Future Installation Would Be Performed

Even though this particular visit was a virtual estimate, we always walk homeowners through what the actual installation day will look like. That way, when we arrive at the home in St. Petersburg, FL, there are no surprises.

Here’s how our team would typically complete a 40-gallon electric water heater replacement:

  1. On-site confirmation and safety check
    When we arrive, we verify all the details from the virtual estimate:

    • Confirm the size and location of the existing water heater
    • Inspect the stand or base for stability
    • Check for clear access to the electrical disconnect and plumbing valves
    • Look for any visible leaks, corrosion, or code issues

    If anything differs from the virtual estimate, we explain it clearly, review any price adjustments, and only proceed with the homeowner’s approval.

  2. Power and water shutoff
    For safety, we turn off the electrical breaker feeding the water heater and shut off the cold water supply. This is essential for protecting both the home and our technicians.
  3. Drain and remove the old water heater
    We attach a hose to the drain valve and safely drain the tank. Once empty, we disconnect the electrical wiring, water lines, and T&P discharge line, then remove the old heater. We take care to protect flooring and surrounding finishes.
  4. Addressing the stand or base
    In this St. Petersburg project, we recommended a proper water heater stand because the existing base appeared loose. The homeowner chose to keep the heater in the same location and acknowledged the condition of the base.

    Our team’s approach is to:

    • Re-inspect the stand or base on site
    • Explain any concerns about stability or code compliance
    • Offer options, including installing or reinforcing a proper stand if needed

    Ultimately, we want the installation to be as safe and long-lasting as possible, and we communicate our recommendations clearly.

  5. Setting the new Rheem 40-gallon water heater
    Once the area is ready, we set the new Rheem electric water heater in place, making sure it is level, properly supported, and oriented for easy access to the service panel and valves.
  6. Plumbing connections and accessories
    We connect the cold and hot water lines, install the new service valve, add the drain pan, and run the T&P discharge line to an approved termination point. Hot water lines are insulated to improve efficiency, which can matter in humid, air-conditioned homes around St. Petersburg.
  7. Electrical reconnection
    Our technician reconnects the electrical wiring according to code, verifies the breaker size, and ensures secure, safe connections inside the junction box on top of the unit.
  8. Filling, purging air, and test run
    We open the cold water supply, purge air from the lines by opening hot water faucets, and then restore power at the breaker. After the tank begins heating, we check for leaks, confirm proper operation, and verify that the T&P valve is functioning correctly.
  9. Cleanup and walkthrough
    Our technicians clean up the work area, haul away the old water heater (if requested), and walk the homeowner through:

    • How to shut off the water and power in an emergency
    • What to expect as the new heater reaches temperature
    • Warranty details and recommended maintenance

For a deeper dive into the way we schedule and plan these projects in Tampa Bay, you can read our article on scheduling water heater installs for optimal service availability.

Why This Water Heater Solution Works for St. Petersburg Homes

An electric tank-style water heater is a straightforward and reliable solution for many homes in St. Petersburg, FL. Here’s why the recommended setup works well:

  • Consistent hot water supply: A 40-gallon tank is a good match for many small to mid-sized households, providing enough hot water for showers, laundry, and dishwashing when sized correctly.
  • Simple electrical design: A 4500-watt electric element system is common and generally easy to maintain. As long as the electrical panel and wiring are properly sized, it offers steady, predictable performance.
  • Safe pressure management: The temperature and pressure relief valve and discharge line are critical safety components. They protect your home by releasing pressure safely if the tank overheats or over-pressurizes.
  • Protection against leaks: A properly installed drain pan and discharge line help contain and redirect small leaks, especially important for interior or elevated installations often found in St. Petersburg homes.
  • Energy efficiency basics: Insulating hot water lines and ensuring tight plumbing connections help reduce heat loss and wasted water, which matters in the long run on your utility bills.

The main concern in this particular case was the loose base or stand. A water heater full of water is very heavy. If the stand is unstable, it can:

  • Shift or tilt, stressing the plumbing and electrical connections
  • Increase the risk of leaks or damage to surrounding finishes
  • Potentially become a safety hazard in extreme cases

That’s why we recommended a proper stand and made sure the homeowner understood the trade-off before making her choice. Our role is not just to install equipment, but to explain the why behind our recommendations, so homeowners in St. Petersburg can make informed decisions.

Pro Tips for Homeowners in St. Petersburg, FL Considering a Water Heater Replacement

If you’re a homeowner in St. Petersburg or anywhere in the Tampa Bay area, here are some practical tips before you replace your water heater:

  1. Know your current tank size and fuel type
    Check the label on your existing water heater for gallons, voltage, and wattage (or gas type if applicable). Having this ready makes any virtual estimate smoother.
  2. Take clear photos of the whole area
    For virtual estimates, send photos that show:

    • The full water heater from a few steps back
    • The base or stand it sits on
    • Nearby walls, drains, and electrical or gas connections

    This helps your plumber catch potential issues before installation day.

  3. Ask about local code requirements
    Cities like St. Petersburg, Florida and surrounding areas have specific plumbing and electrical codes. Make sure your contractor is familiar with Tampa Bay requirements for drain pans, discharge lines, and seismic or structural supports where applicable.
  4. Consider your home’s humidity and corrosion risk
    St. Petersburg’s coastal, humid climate can accelerate corrosion on metal components. Ask your plumber about best practices for protecting valves, fittings, and pans in this environment.
  5. Plan ahead for maintenance
    Flushing your water heater and inspecting valves regularly can extend its life. Our article on water heater maintenance plans and promotions explains what a good maintenance routine looks like.
  6. Budget with a little cushion
    As with this homeowner’s virtual estimate in St. Petersburg, it’s wise to allow a bit of budget flexibility for hidden issues discovered on site, such as failing shutoff valves, corroded fittings, or an unsafe stand that truly needs replacement.

Why Choose Home Therapist for Water Heater Service in Tampa Bay

At Home Therapist Cooling, Heating, and Plumbing, our goal is simple: treat your home with the same care we’d want for our own. Whether we’re providing a virtual estimate in St. Petersburg, FL or a full installation in another Tampa Bay neighborhood, our approach is consistent.

Here’s what you can expect when you work with our team:

  • Licensed, experienced plumbers: Our technicians are trained to handle water heater installations safely and according to local codes in St. Petersburg and throughout Tampa Bay.
  • Clear, honest communication: In this project, we were upfront about the loose base and the potential need for a proper stand. We never proceed with extra work without your approval.
  • Respect for your home: From protecting floors during removal to cleaning up after installation, we treat your space with care.
  • Strong warranties and support: With manufacturer parts coverage and our own labor warranty, you’re not left alone after the install.
  • Local knowledge: We know the unique conditions of the Tampa Bay area—from high humidity to coastal corrosion—and we factor that into every recommendation.

If you’d like to understand more about how we handle similar projects across the region, you can read about water heater installs in Tampa, FL and how Home Therapist can help, or our guide to water heater replacement processes for different properties.

Ready to Schedule Your Water Heater Estimate in St. Petersburg, FL?

If you’re noticing inconsistent hot water, an aging tank, or visible rust around your current water heater, it may be time to plan a replacement. Just like this homeowner in St. Petersburg, FL 33703, you can start with a virtual estimate and then schedule an on-site visit when you’re ready.

Our local Tampa Bay plumbing team is here to:

  • Review your current system
  • Recommend the right size and type of water heater
  • Explain all costs clearly before any work begins
  • Install your new unit safely, cleanly, and efficiently

To learn more about your options or to request a quote, reach out to Home Therapist for water heater service in St. Petersburg, FL and surrounding Tampa Bay communities. We’ll give you the clear, compassionate guidance—and the professional installation—your home deserves.

Need to explore options first? You can also learn how email estimates for water heater replacements work and decide what feels best for your schedule.

When you’re ready, we’re here to provide the therapy your home needs, one water heater at a time.

Quarterly Commercial AC Maintenance for a Medical Office in Brandon, FL

Quarterly Commercial AC Maintenance for a Medical Office in Brandon, FL

When you run a medical office in Brandon, FL, reliable air conditioning isn't a luxury—it's part of patient care. Recently, our Home Therapist team visited a healthcare facility in Brandon under a quarterly service agreement to maintain their rooftop package AC units. With multiple 10-year-old systems serving exam rooms, offices, and waiting areas, staying ahead of breakdowns is critical for comfort, safety, and peace of mind.

During this visit, our technician Barbaro completed routine maintenance on four package units, evaluated an additional system that was already out of service, and documented some early warning signs: slightly low refrigerant pressures on one unit in the colder weather and higher-than-ideal fan energy consumption due to system age. Everything was cleaned, tuned, and left operating, but we also made a plan with the office to monitor these systems closely as the Brandon heat returns.

The Customer's Situation: Keeping Patients Comfortable in Brandon, FL

This visit took place at a medical office group in Brandon, FL 33511. The building relies on five rooftop package units to keep the facility at a steady, comfortable temperature for patients and staff. At the time of our visit:

  • One package unit was already out of service and not in use.
  • The remaining four rooftop systems were actively cooling and heating different zones of the building.
  • All operating units were installed around 2015, making them about 10 years old.

The office team wasn't calling about a total loss of cooling. Instead, they wanted to honor their quarterly service agreement and make sure their aging equipment continued to run through seasonal changes. In a medical environment, even a minor AC issue can quickly turn into hot exam rooms, uncomfortable waiting areas, and potential impacts on sensitive equipment.

They also understood the reality: once HVAC systems get close to the 10-year mark—especially here in the Brandon and greater Tampa Bay climate—wear and tear accelerates. Components like fan motors, capacitors, and compressors can fail with little warning if they aren't inspected and maintained regularly.

Inspection & Diagnosis: What We Checked on the Rooftop Units

Barbaro started with a full inspection of the four active package units. For a commercial AC maintenance visit like this in Brandon, FL, our process is methodical and safety-focused.

1. Visual and Safety Checks

First, we verify that it's safe to work on the equipment and that nothing obvious is putting the system—or the building—at risk. That included:

  • Inspecting electrical panels, disconnects, and wiring for damage or overheating.
  • Checking for oil stains, corrosion, or physical damage around compressors and refrigerant lines.
  • Confirming panels and access doors were secure and weather-tight.
  • Ensuring clear access to each unit on the roof and verifying stable mounting.

In this Brandon medical office, the systems were structurally sound with no immediate safety hazards. However, age-related wear on components was clearly a factor to keep an eye on.

2. Filter and Airflow Evaluation

Airflow is critical to both comfort and system longevity, especially when you're conditioning multiple zones in a healthcare facility. Our technician:

  • Removed and replaced the air filters on all four operating units.
  • Visually checked return and supply areas for blockages or debris.
  • Confirmed that indoor airflow appeared strong and balanced relative to the unit size.

Dirty or restrictive filters can quickly strain older blower motors. By replacing the filters every three months under this maintenance plan, we help protect both energy efficiency and equipment life for commercial properties in Brandon.

3. Refrigerant Pressures and Operating Conditions

Next, Barbaro connected gauges to measure refrigerant pressures and evaluate how each system was operating relative to the outdoor temperature. Because it was a colder day in Brandon, the readings had to be interpreted with that in mind.

Here's what we found:

  • Package unit #1: Pressures were slightly low for the current operating conditions. No visible refrigerant leaks were found, and there were no oil stains or obvious damage to the coils or lines.
  • Other active units: Pressures were within expected ranges for the outdoor temperature.

In cooler weather, refrigerant readings can look a bit deceptive—pressures naturally run lower than they would on a hot summer day in Brandon. That's why we documented the slightly low pressures on unit #1 and recommended a more in-depth leak check once the weather warms up and the system is working harder.

4. Electrical and Fan Performance

Because these systems are around 10 years old, fan motors and other electrical components are a primary concern. Barbaro:

  • Measured fan motor amp draws and compared them to the manufacturer's specifications.
  • Inspected contactors, capacitors, and visible connections for wear or overheating.
  • Listened for abnormal noises from motors or bearings that might signal upcoming failure.

Results showed that fan consumption was on the higher side, which is common for older equipment that's been working through many Brandon summers. Nothing was at the point of imminent failure, but the readings reinforced why this office's quarterly maintenance schedule is so important.

Step-by-Step Service: What We Did During This Quarterly Visit

With the initial diagnostics complete, we moved through the full maintenance checklist. The goal for this medical office in Brandon, FL was simple: keep all operating systems running as efficiently and reliably as possible while documenting any future risks.

1. Filter Replacement

We replaced the filters on all four active package units. Fresh filters help:

  • Improve indoor air quality for patients and staff.
  • Reduce strain on blower motors, which is especially important on older units.
  • Maintain even temperatures in exam rooms, offices, and waiting areas.

For high-use commercial spaces in Brandon, we strongly recommend keeping filter changes on a 3-month rotation—which this office is doing through their service agreement.

2. Coil Cleaning

Dirty coils make your system work harder than it needs to, raising energy bills and shortening equipment life. Barbaro cleaned both the accessible indoor and outdoor coils on the package units, removing:

  • Dirt and dust buildup from everyday use.
  • Pollen and outdoor debris that accumulate on rooftop units in the Tampa Bay area.

Clean coils allow for proper heat transfer, which is essential for efficient cooling and heating—especially when those Brandon summer temperatures climb.

3. System Operation Check

After cleaning and basic maintenance, we cycled each unit through heating or cooling (as appropriate for the day) to verify:

  • Proper start-up without hesitation or unusual noises.
  • Stable operation without rapid cycling on and off.
  • Reasonable temperature split between return and supply air.

All active units responded properly. The office was able to continue normal operations with no comfort interruptions.

4. Documenting Age-Related Risks

Because all five systems are roughly a decade old, we made sure the building decision-makers understood the reality:

  • Any major component—fan motors, compressors, or controls—could potentially fail at any time simply due to age.
  • Fan energy usage is already trending higher, which can impact the building's utility costs.
  • The slightly low refrigerant readings on unit #1 may indicate a very small leak that only becomes obvious under higher load in hot weather.

Our role isn't just to fix immediate problems; it's to help Brandon business owners plan for what's next, whether that means budgeting for repairs, planning for future AC replacement, or simply staying on top of quarterly maintenance.

Why This Approach Works for Commercial AC Systems

The work we did at this Brandon medical office may sound basic—filters, coil cleaning, inspection—but it's built on solid HVAC principles that directly affect reliability and comfort.

1. Airflow and Filtration

Every HVAC system, especially a rooftop package unit, depends on proper airflow. When filters are clogged or coils are dirty:

  • The blower has to work harder, which raises amp draw and accelerates motor wear.
  • Indoor comfort suffers, with rooms that feel stuffy or unevenly conditioned.
  • The system can overheat or freeze, leading to nuisance shutdowns.

By changing filters and cleaning coils on a regular schedule, we protect both energy efficiency and component life for commercial buildings across Brandon and the Tampa Bay area.

2. Refrigerant Pressures and the Refrigeration Cycle

Refrigerant is the "carrier" of heat in an AC system. Pressures that are too low can mean:

  • A small leak somewhere in the system.
  • Incorrect charge.
  • Operating conditions (like cold outdoor temperatures) affecting readings.

On this visit, the slightly low pressures in cool weather didn't immediately point to a severe problem, but they were enough to warrant monitoring in hotter months. In Brandon's summer, those same systems will run longer and harder, making subtle issues much more obvious—and more impactful.

3. Electrical Load and Aging Components

Older fan motors and compressors often draw more current as they age. That doesn't always mean they're about to fail, but it does tell us they're working harder than they did when new. Tracking these trends through quarterly maintenance lets us:

For a medical office, this kind of planning is key—you don't want your AC to fail in the middle of a busy day when the Brandon humidity is high and your schedule is full.

Pro Tips for Commercial Property Owners in Brandon, FL

If you manage a medical office, retail space, or commercial building in Brandon, FL or the Tampa Bay area, here are some practical tips to keep your HVAC systems running as smoothly as possible:

  1. Commit to a regular maintenance plan. Quarterly visits—like the one at this Brandon medical office—are ideal for buildings with rooftop units that run nearly year-round. A maintenance plan helps catch small issues before they turn into urgent service calls. You can learn more about our scheduled visits on our Therapy Maintenance Plans page.
  2. Replace filters more often in high-traffic spaces. Medical offices, daycares, and busy businesses create more dust and particles. Ask your HVAC partner how often your specific filters should be changed to protect indoor air quality.
  3. Pay attention to "minor" comfort changes. Rooms that are consistently warmer or cooler than others, musty smells, or new fan noises are often early warning signs. Addressing them early is almost always less expensive than waiting for a full breakdown.
  4. Plan ahead for 10+ year-old systems. In Brandon's climate, 10 years is often the point where commercial AC systems start needing more frequent repairs. Talk with your HVAC contractor about long-term budgeting and when it may be smarter to invest in a new system instead of another major repair. Our commercial AC services team can help you compare your options.
  5. Schedule maintenance before peak season. Aim for thorough inspections in spring and fall, so your systems are ready for both Brandon's summer heat and our occasional winter cold snaps. This is when issues like low refrigerant or weak fan motors are easiest to catch under controlled conditions.
  6. Choose a contractor familiar with Tampa Bay's climate. Humidity, salt in the air, and long cooling seasons are hard on rooftop equipment. A local team that regularly serves Brandon, Riverview, and the greater Tampa area will know what to watch for on your specific equipment.

Why Brandon Businesses Choose Home Therapist

At Home Therapist Cooling, Heating, and Plumbing, we treat your building like it were our own workspace. For commercial AC maintenance in Brandon, FL, that means:

  • Licensed, experienced technicians who work on commercial rooftop units and package systems every day.
  • Clear, plain-English communication about what we found, what we fixed, and what to watch for in the future.
  • Respect for your operations, patients, and staff, with careful scheduling and clean, professional work.
  • Focus on long-term reliability, not just quick fixes. We help you plan for aging systems and future replacements, not just today's visit.
  • Local commitment to Tampa Bay, including Brandon, Riverview, Valrico, and nearby communities.

Whether you're responsible for a single office suite or a full medical building, our team can tailor a maintenance schedule that fits your hours, your budget, and your comfort needs. From routine quarterly tune-ups to full system upgrades, we're here to keep your space comfortable and safe.

Need Reliable Commercial AC Maintenance in Brandon, FL?

If you manage a medical office, clinic, or business in Brandon, FL and want the same level of steady, preventive care for your HVAC systems, our team is ready to help. We provide AC maintenance services, commercial AC solutions, and long-term maintenance plans designed for Tampa Bay's climate.

Brandon is a fast-growing community just east of Tampa, known for its busy medical corridors, shopping centers, and neighborhoods near hubs like Brandon, Florida and landmarks such as the Westfield Brandon area and nearby regional hospitals. Keeping your building comfortable is part of serving that community well.

When you're ready for dependable, professional HVAC service from local Tampa Bay technicians, reach out to Home Therapist. We'll help you keep patients, staff, and visitors comfortable in every season.

Schedule your commercial HVAC service in Brandon today by contacting our team through our website or phone. We'll take care of the systems so you can focus on taking care of people.

Quarterly Commercial HVAC Maintenance for a Medical Office in Brandon, FL 33511

Quarterly Commercial HVAC Maintenance for a Medical Office in Brandon, FL 33511

Keeping patients and staff comfortable is critical in any medical office, especially here in Brandon, FL, where heat and humidity are part of everyday life. On a recent quarterly service visit for a medical practice in Brandon, our Home Therapist team performed routine maintenance on multiple rooftop package units, documented a potential refrigerant issue on one system, and confirmed that all other operational units were running safely for the season.

This visit was part of an ongoing maintenance agreement, which is especially important for older commercial HVAC equipment. The building has five package units in total. One system is currently out of service, and we completed thorough maintenance on the remaining four. Most of the equipment was installed around 2015, which puts these systems at about 10 years old—right at the age where consistent care makes the difference between a few more years of reliable operation and frequent breakdowns.

Below is a clear breakdown of what the medical office was experiencing, what our technician found, and how regular commercial HVAC maintenance in Brandon, FL protects comfort, safety, and budget for businesses.

Customer Problem: Aging Rooftop Units and Reliability Concerns

The medical office team relies on these rooftop package units to keep exam rooms, waiting areas, and offices comfortable for patients and staff all day long. Because their systems are about a decade old, they enrolled in a quarterly service agreement so that any developing issues can be caught early—ideally before they affect business hours.

Going into this visit, the main concerns were:

  • All systems are aging (around 10 years old), so the risk of unexpected failures is growing.
  • One package unit is already out of service and is not currently being used.
  • The staff wants reassurance that the remaining units are safe, efficient, and ready to handle changing seasonal temperatures.
  • They also need help managing filter changes and keeping the equipment clean to support indoor air quality for patients.

In a medical setting, even slight comfort issues—such as rooms that are too warm, too cold, or have poor air movement—can impact patient experience. That makes proactive commercial HVAC service in Brandon, FL especially important for healthcare offices.

Inspection & Diagnosis: What Our Technician Checked

Our technician, Barbaro, arrived on site with the filters and tools needed for a full quarterly check of the operational rooftop package units. During this visit, we focused on four active systems while noting the condition of the offline unit.

The inspection included:

  • Visual inspection of each rooftop package unit for physical damage, corrosion, and signs of leaks.
  • Refrigerant pressure checks appropriate to the cooler outdoor temperatures on the day of service.
  • Fan motor and blower checks, including listening for noise and observing start-up behavior.
  • Filter replacement using the correct size (20x25x2) as part of their ongoing maintenance plan.
  • Coil cleaning on the accessible coils to restore proper heat transfer and airflow.
  • Electrical and safety checks to verify connections, controls, and general operating safety.

During the inspection, we found a few noteworthy items:

  • Package Unit #1: Refrigerant pressures were slightly low for the current outdoor conditions. Because it was a cooler day, pressures naturally read lower than they would in peak summer, but these readings suggested there might be a small leak developing. No visible oil staining or obvious leak points were observed at this time.
  • All operating units: Fan energy consumption is on the higher side, which is consistent with aging fan motors and bearings on older equipment. Nothing was failing at the moment, but the amp draw and age mean that fan components could fail unpredictably.
  • Filters and coils: Filters were due for replacement, and coils showed the normal level of buildup you’d expect between quarterly maintenance visits. Nothing extreme, but enough to warrant a good cleaning to support airflow and efficiency.

We also paid attention to safety risks that can develop in older rooftop equipment, such as exposed wiring, fan blade wear, and drain issues. On this visit, there were no immediate safety hazards, but the age and fan consumption data confirmed that this Brandon medical office is right to maintain a steady maintenance schedule.

Step-by-Step Service Process on the Brandon, FL Rooftop Units

Commercial HVAC maintenance in Brandon, FL has to account for heavy use, high humidity, and frequent start-stop cycles throughout long business days. Here’s how we approached this quarterly visit at the medical office:

1. Confirm Unit Status and Access

We verified site access using the provided gate code and coordinated with the office staff so that we could work without interrupting operations. Once on the roof, we confirmed that four of the five package units were in active service and one was intentionally out of operation.

2. Replace Air Filters

The office uses 20x25x2 filters across the units. As part of their agreement, our team ensures they have the correct quantity staged on site and coordinates the remaining filters through a local supplier when needed. During this visit, we:

  • Replaced dirty or partially loaded filters with fresh 20x25x2 filters.
  • Verified proper filter fit to prevent bypass, which can send unfiltered air and dust into the coils and duct system.
  • Documented how many filters remained on site so future visits are properly stocked.

Clean filters are one of the simplest ways to protect airflow, comfort, and indoor air quality—especially in a medical setting where patients with respiratory or immune sensitivities are present.

3. Clean Coils

Both evaporator and condenser coils need to transfer heat efficiently for the system to do its job. Over time, dust, pollen, and debris coat these coil surfaces, especially in a humid climate like the Tampa Bay area.

During this Brandon, FL maintenance visit, we:

  • Removed surface debris from outdoor coil surfaces.
  • Cleaned coils to restore better heat transfer and reduce equipment strain.
  • Visually checked for bent fins or physical damage that could disrupt airflow.

4. Check Refrigerant Pressures and Operating Conditions

Refrigerant pressures must be interpreted in context—outdoor temperature, indoor load, and system design all matter. Our technician measured pressures on the operating package units and noted:

  • Most systems showed pressures consistent with their age and current weather.
  • Package unit #1 showed slightly low pressures compared with expected values for the day’s conditions.

Because it was relatively cool outside, a small deviation can be hard to confirm as an actual leak. We did not see clear visual evidence of a leak (such as oil residue around joints or fittings), so we documented the readings and recommended re-checking when Brandon temperatures are higher and the system is under heavier cooling load. Warmer weather makes refrigerant behavior easier to interpret and makes subtle leaks more obvious during testing.

5. Evaluate Fan Motors and Electrical Components

The technician measured fan power consumption and observed that fan energy draw is on the higher side, which is not unusual for 10-year-old commercial equipment. While all fans were running at the time of service, the higher amp draw tells us that components are aging and could fail without much warning.

We also:

  • Checked visible electrical connections for looseness or overheating.
  • Verified that controls and safeties were operating as intended.
  • Listened for bearing noise, vibration, or unusual start-up behavior.

At the end of these checks, we were comfortable leaving all four active systems in service, with clear notes for the building’s decision-maker about their age and risk profile.

6. Document Findings and Next Steps

After completing maintenance, we provided a clear report for the office, including:

Why This Maintenance Approach Works for Aging Commercial Systems

For businesses in Brandon and across the Tampa Bay area, properly maintaining older rooftop package units is all about balancing comfort, risk, and budget. Here’s why the approach we took at this medical office makes sense.

1. Airflow and Filtration

Every air conditioning system depends on steady airflow to move heat. Dirty filters restrict that airflow, forcing blowers and fan motors to work harder and raising compressor temperatures. Over time, this can cause overheating, limit switches to trip, and premature motor or compressor failure.

By regularly replacing filters and cleaning coils, we:

  • Keep static pressure (airflow resistance) under control.
  • Help fan motors run at lower stress and lower amp draw.
  • Support better indoor air quality, which is particularly important in a medical environment.

2. Refrigerant Circuit Health

The refrigeration cycle in a package unit relies on the correct refrigerant charge. Too little refrigerant usually means there’s a leak somewhere, and it leads to:

However, pressures always need to be read in context. In cool weather, even a properly charged system can show lower readings. That’s why we documented the slightly low pressures on unit #1 and recommended follow-up diagnostics during warmer weather in Brandon, FL, when the system will run longer and give clearer data. This approach avoids guesswork, unnecessary refrigerant additions, and potential misdiagnosis.

3. Managing Wear on 10-Year-Old Equipment

At around 10 years old, many commercial HVAC systems are in the second half of their expected service life. Components like fan motors, contactors, and capacitors accumulate wear. Regular maintenance doesn’t stop aging, but it does:

For this Brandon medical office, quarterly visits give the practice a clearer picture of their rooftop equipment so they’re not surprised by avoidable breakdowns on a busy clinic day.

Pro Tips for Brandon, FL Business Owners with Rooftop Units

Whether you manage a medical office, retail store, or professional building in Brandon, FL, your rooftop units work hard in our hot, humid climate. Here are several practical tips to keep them running reliably:

  1. Stick to a quarterly maintenance schedule. In Florida’s climate, commercial systems run more than most. Quarterly filter changes, coil checks, and inspections—like the plan this medical office uses—can significantly reduce breakdowns. If you don’t have a plan yet, consider exploring our HVAC Therapy Maintenance Plans.
  2. Plan for aging equipment before it fails. Once your rooftop units reach 10–12 years old, start having budget conversations about phased replacements or major repairs. Our commercial AC services can help you evaluate options without pressure.
  3. Watch for comfort changes inside the building. Hot spots, uneven temperatures, or new noise from the ducts can be early signs of fan or refrigerant problems. Reporting these changes early helps us diagnose issues before they shut down a system.
  4. Keep roof access secure but clear. For buildings in areas like Brandon and nearby Tampa, make sure roof hatches, access ladders, and gate codes are up to date so technicians can reach equipment safely and on time.
  5. Document service history. A log of maintenance visits, repairs, and component replacements helps you and your HVAC provider make smarter decisions about when to repair, when to upgrade, and how to manage warranties. If you ever need records, we can help compile them from our system.
  6. Consider system cleaning before peak summer. Scheduling coil cleaning and tune-ups before the hottest months arrive in the Tampa Bay area gives your units the best chance to handle long cooling days without tripping safeties or losing capacity. You can learn more about preventive tasks in our regular HVAC maintenance guide.

Why Businesses in Brandon Choose Home Therapist

At Home Therapist Cooling, Heating, and Plumbing, we understand how important comfort and reliability are for professional spaces and medical offices in Brandon, FL and across Tampa Bay. When you partner with our team, you get:

  • Licensed, experienced technicians who work on commercial rooftop units every day.
  • Clear, plain-English communication about what we found, what’s urgent, and what can be monitored over time.
  • Respect for your business operations—we coordinate access, work safely around staff and patients, and leave the work area clean.
  • A focus on long-term reliability, not quick, short-lived fixes. We’ll tell you when a repair makes sense and when it’s time to start planning for replacement.
  • Local knowledge of Brandon and Tampa Bay conditions, from our high humidity to the way rooftop equipment weathers in our coastal-influenced climate.

We provide comprehensive HVAC and plumbing support throughout the area, including HVAC and plumbing services in Brandon, system tune-ups, and ongoing maintenance. For other types of properties and needs, you can also explore our AC maintenance services in Tampa and our broader HVAC and plumbing solutions around Tampa Bay.

Need Commercial HVAC Maintenance in Brandon, FL?

If you manage a medical office, clinic, or commercial building in Brandon, FL 33511, reliable HVAC is not optional—it’s essential. Whether you’re dealing with aging rooftop units, uneven temperatures, or you simply want to get ahead of the next cooling season, our local Tampa Bay HVAC technicians are here to help.

We can design a quarterly maintenance plan that fits your building, your budget, and your schedule, just like we did for this medical office. From filter management and coil cleaning to refrigerant diagnostics and planning for future replacements, we keep you informed every step of the way.

To schedule commercial HVAC service in Brandon or nearby areas, contact Home Therapist today. We’ll give your building the same careful, transparent care we provided on this project—so your patients, customers, and team stay comfortable all year long.

Curious about how proactive maintenance projects look in other parts of the Tampa Bay area? You can also read about a recent air conditioning system cleaning and maintenance project in Riverview, FL for more real-world examples.

For more context about our region and climate, you can explore Brandon, Florida and nearby Tampa, or see what’s happening around local landmarks like area shopping destinations and medical corridors on Google Maps for Brandon, FL 33511. Wherever your business is in Tampa Bay, Home Therapist is ready with the therapy your building’s HVAC system needs.

Planning a Full Bathroom Plumbing Upgrade in St. Petersburg, FL 33703

Planning a Full Bathroom Plumbing Upgrade in St. Petersburg, FL 33703

When you’re updating bathrooms and a kitchen in an older home, the plumbing behind the walls matters just as much as the finishes you can see. Recently, our Home Therapist team helped a homeowner on Shore Acres Blvd NE in St. Petersburg, FL 33703 plan a full bathroom plumbing upgrade, including new toilets, new vanities, faucet replacements, and a future water heater installation.

Like many homeowners in the Tampa Bay area, this customer wanted to modernize the space, improve comfort, and make sure everything was set up safely and up to code before the new cabinetry and fixtures went in. Our technician Adalberto walked through the project step by step, explained what we found, and laid out a clear path forward.

Below we’ll walk you through how we approached this project in St. Petersburg—from the toilet and vanity work to the water heater planning—so you can see what to expect if you’re considering similar plumbing services in your own Tampa Bay home.

The Customer’s Plumbing Concerns

The homeowner was in the middle of a remodel and wanted to tackle several plumbing upgrades around the house. Their goals were straightforward:

  • Install two new toilets (one supplied by Home Therapist and one supplied by the customer).
  • Install a new bathroom vanity and relocate the water and drain lines so they would work with a standard-height cabinet.
  • Replace several faucets and sink P-traps for better reliability and appearance.
  • Plan ahead for a new water heater, still deciding between a traditional tank and a tankless model.

Because the project involved multiple areas of the home, the customer wanted a clear estimate for the initial work and a plan to complete the remaining tasks later—once cabinetry and other finishes were installed.

In the bathrooms, they were especially concerned about:

  • Existing toilets that were older and less efficient.
  • Uncertain condition of the toilet flanges and shutoff (angle) valves.
  • Bathroom sink water and drain lines sitting too high on the wall, which would interfere with the new vanity installation.

On the water heater side, they wanted to understand the differences between a standard tank-style unit and a tankless system, and how each would affect plumbing, electrical work, and permitting in St. Petersburg, FL.

Inspection & Diagnosis: What We Checked

Before starting any work, our technician performed a thorough visual inspection of the bathrooms and the existing plumbing layout. For a project like this in St. Petersburg, we focus on both current issues and future remodel plans so our work doesn’t have to be redone later.

Here’s what we looked at in detail:

1. Existing Toilets and Flanges

  • Toilet condition: Checked for rocking, leaks around the base, and slow flushing that might indicate hidden problems.
  • Flange integrity: Inspected the toilet flanges (the ring that connects the toilet to the drain pipe) for cracks, corrosion, or improper height.
  • Angle valves and water supply: Verified that shutoff valves could be turned off and on reliably, and checked for signs of corrosion or slow seepage.

2. Bathroom Vanity Plumbing

  • Drain height: Confirmed that the existing drain line for the bathroom sinks was set too high on the wall. For a standard vanity height, this would interfere with the P-trap and cause improper slope or even standing water in the drain.
  • Water line height: Verified that hot and cold water supply lines were also mounted too high, which could cause clearance issues inside the new cabinet.
  • Wall access: Determined where we would need to open drywall to adjust pipe elevations safely.

3. Faucet, P-Trap, and Angle Valve Conditions

  • Faucets: Checked existing bathroom faucets for leaks, corrosion, and overall functionality. Since the customer was supplying new faucets, we ensured compatibility with the sinks and existing connections.
  • P-traps: Reviewed existing sink P-traps for rust, mineral buildup, and improper slope that could contribute to slow drainage or odors.
  • Angle valves in the kitchen: Noted that kitchen angle valves and several P-traps and connections in the kitchen area would be addressed later, after new cabinets were installed.

4. Water Heater Planning

The customer was still deciding between a traditional tank-style water heater and a tankless unit. That decision affects not just the plumbing, but also electrical requirements and local code compliance in Pinellas County.

We discussed:

  • Tank-style water heater: A straightforward replacement, with labor-only installation since the customer would supply the unit and drain pan.
  • Tankless water heater: A more complex project requiring electrical upgrades, a separate estimate for the electrical portion, and changes to the estimate such as removing the expansion tank line item.
  • Expansion tank: Explained the purpose of a 2-gallon expansion tank on closed water systems up to 50 gallons, and how it helps manage pressure spikes from thermal expansion.

By the end of the inspection, we had a clear picture: toilets and a vanity could be addressed first, with kitchen and water heater work scheduled later when the homeowner was ready.

Step-by-Step Plumbing Work in the St. Petersburg Home

For a multi-stage project like this, our goal is to group work logically so the homeowner sees progress without disrupting other contractors or future plans. Here’s how we approached the service steps.

1. Installing New Toilets

The homeowner planned to install two new toilets: one supplied by Home Therapist and one supplied by the customer (a Glacier Bay model from a local retailer). We:

  • Shut off water to each toilet and carefully removed the existing fixtures.
  • Inspected the exposed flanges for cracks, rust, and height issues.
  • Checked wax ring condition and surrounding subfloor for moisture damage.
  • Confirmed that angle valves and water supply lines were in safe working condition.

Where needed, the estimate included full toilet flange replacement while we were already doing the toilet replacement. This involved:

  • Removing the old flange.
  • Preparing and cleaning the waste pipe connection.
  • Gluing and securing a new flange at the correct height relative to the finished floor.

New toilets were then set with fresh wax rings or suitable seals, leveled carefully, and secured so there is no rocking that could damage the flange or cause leaks.

2. Relocating Vanity Water and Drain Lines

Next, we addressed the bathroom vanity plumbing in this St. Petersburg home. Because the existing lines were too high, a new standard-height vanity would not connect properly without future issues.

Our process included:

  • Marking the new elevation for the drain and water lines based on the chosen vanity height.
  • Opening the drywall to access the piping behind the wall (with clear communication that drywall repair is the homeowner’s responsibility after plumbing is complete).
  • Lowering the drain connection to the correct height and ensuring proper slope to the main drain.
  • Lowering the hot and cold water lines to align with standard faucet and supply line positions inside the new vanity.
  • Securing all new piping, testing for leaks, and ensuring shutoff valves are easy to reach once the vanity is installed.

This relocation work ensures the new vanity can be installed smoothly, without awkward pipe angles or risky bends that can lead to slow drains or leaks later on.

3. Faucet Replacement and P-Trap Work

The homeowner provided new faucets, and we included labor to install them. Our work covered:

  • Removing old faucets and cleaning up the sink deck or countertop.
  • Installing the new faucet assemblies, including gaskets and seals, to prevent leaks.
  • Connecting water supply lines and checking for drips at all joints.

We also planned P-trap replacements where necessary, especially at the bathroom sinks. Replacing older or corroded P-traps with properly sized, correctly sloped traps helps:

  • Maintain a reliable water seal that blocks sewer gases.
  • Reduce chances of recurring clogs.
  • Improve overall drainage performance.

Kitchen P-traps and angle valves were noted to be completed in a later phase, once the new kitchen cabinets are installed.

4. Planning for Water Heater and Expansion Tank

While the water heater work is scheduled for later, we built a detailed plan into the estimate so the homeowner knows exactly what to expect. For a traditional tank water heater (supplied by the customer), our scope will include:

  • Setting the customer-supplied water heater in place over a customer-supplied drain pan.
  • Connecting hot and cold water lines and ensuring proper shutoff valve placement.
  • Installing a 2-gallon expansion tank sized for water heaters up to 50 gallons, as required by most local codes for closed water systems.
  • Testing for leaks and verifying proper operation.

If the customer decides instead on a tankless water heater:

  • The expansion tank line item will be removed from the estimate, since it is not needed in the same way for tankless systems.
  • Electrical work will be required, and we will either coordinate with the homeowner’s licensed electrician or provide a separate estimate for the electrical scope if they choose to have us handle that portion.

We are always clear about one important detail: if we must open any sheetrock, concrete, stucco, tile, or similar materials to run new pipes, surface repair is the homeowner’s responsibility after plumbing work is complete. This keeps the project transparent and allows the homeowner to coordinate finish work with their preferred contractor.

Why These Plumbing Fixes Work

The solutions we recommended and planned for this St. Petersburg home are based on a few key plumbing principles: proper drainage, safe water pressure, and accessible shutoffs.

Toilet Flanges and Seals

A toilet needs a solid, level connection to the drain line. A damaged or low flange can cause rocking, which breaks the wax seal and lets water leak onto the floor. Over time, that can rot subflooring and create hidden water damage.

By replacing damaged flanges and installing toilets correctly, we restore:

  • Watertight seals between the toilet and the drain.
  • Correct toilet height and stability.
  • Protection for the flooring and structure beneath.

Proper Drain and Water Line Heights

Bathroom vanity drains and water lines need to sit at the right height so the P-trap can maintain its water seal and fittings aren’t forced into awkward positions. When lines are too high:

  • The P-trap may not slope properly, causing standing water or slow drainage.
  • Connections may be under strain, increasing the risk of leaks.

By lowering these lines into the standard range for a new vanity, we set the system up for long-term reliability and easier future maintenance.

P-Traps and Sewer Gas Protection

The P-trap is the U-shaped section of pipe under a sink. It holds water, which creates a barrier that blocks sewer gases from coming back into your home. When P-traps are corroded, cracked, or installed improperly, that barrier can fail.

Replacing old traps with properly sized, correctly sloped ones:

  • Helps prevent odors.
  • Reduces gurgling and slow drainage.
  • Makes future clog removal easier and safer.

Expansion Tanks and Water Heater Safety

On a closed water system, when water heats up inside a tank-style water heater, it expands. If that pressure has nowhere to go, it stresses pipes, valves, and fixtures. Over time, this shortens the lifespan of your plumbing system and can cause leaks or premature water heater failure.

An expansion tank absorbs that extra pressure, protecting:

  • Your water heater tank.
  • Appliances connected to the water system.
  • Valves, fittings, and pipe joints throughout the home.

That’s why most local codes around Tampa Bay now require expansion tanks on residential closed systems with tank-style water heaters.

Pro Tips for Homeowners in St. Petersburg, FL

If you’re remodeling a bathroom or planning new plumbing work in St. Petersburg or elsewhere in Pinellas County, here are a few practical tips:

  1. Plan plumbing around your vanity and cabinet choices. Before we start work, share cabinet heights, sink types, and faucet styles with your plumber. This helps ensure water and drain lines are placed correctly the first time.
  2. Don’t ignore slow or rocking toilets. In our humid coastal climate near Tampa Bay, small leaks can quickly damage flooring and subflooring. If a toilet wobbles or you see staining around the base, have it checked before a remodel.
  3. Consider your long-term hot water needs. Tankless water heaters can be a great fit for some St. Petersburg homes, but they often require electrical upgrades. Talk with a licensed plumber and electrician before deciding, and review resources like water heater replacement options to understand what’s involved.
  4. Schedule plumbing work before final finishes. It’s easier—and more cost effective—to open drywall or adjust piping before paint, cabinets, and tile are finished. Coordinate your timeline so rough plumbing comes before the final trim work.
  5. Watch your water pressure. If your water pressure regularly runs above 80 psi, it can be hard on pipes and fixtures. Ask your plumber about pressure-reducing valves and expansion tanks to protect your system.

Why St. Petersburg Homeowners Choose Home Therapist

At Home Therapist Cooling, Heating, and Plumbing, we understand that a remodel or major plumbing update can feel overwhelming. Our job is to take that pressure off you by:

  • Sending licensed, experienced technicians who know local codes in Pinellas County and the broader Tampa Bay area.
  • Providing clear, written estimates that separate labor from customer-supplied materials.
  • Explaining what we found and why we recommend each repair, in plain language.
  • Focusing on cleanliness and respect for your home—from protecting floors to minimizing wall openings whenever safely possible.
  • Planning work in logical phases so you can coordinate with cabinet installers, electricians, and other trades without surprises.

Whether you need help with a single bathroom issue or a full-home plumbing update, our local Tampa Bay plumbing technicians are here to guide you from consultation to completion. For more information about our plumbing capabilities throughout the region, explore our plumbing repair services in Pinellas County and sink installation and repair services in Tampa Bay.

Ready to Upgrade Your Bathroom Plumbing in St. Petersburg?

If you’re planning new toilets, vanities, or a water heater replacement in St. Petersburg, FL, you don’t have to figure it out alone. Our team can:

  • Review your remodel plans and cabinet layouts.
  • Inspect existing plumbing and identify any hidden issues.
  • Provide clear options for tank or tankless water heaters, including scheduling and permitting considerations.
  • Coordinate phases of work around your contractor’s timeline.

To see what scheduling looks like and how early planning helps, you can also learn about early scheduling for toilet installation services in Tampa Bay or review how we handle water heater installs in the Tampa area.

When you’re ready, reach out to Home Therapist for professional plumbing service in St. Petersburg, FL and across the Tampa Bay region. We’ll treat your home with the same care and attention we gave this Shore Acres project—and give your plumbing the therapy it needs to keep your family comfortable and safe.


Local note: St. Petersburg is known for its beautiful waterfront neighborhoods and coastal humidity. That combination makes reliable, code-compliant plumbing especially important. If you’re near areas like downtown St. Petersburg, Shore Acres, or along the greater Tampa Bay shoreline, thoughtful planning today can prevent costly repairs tomorrow. You can learn more about the city itself on resources like St. Petersburg, Florida or explore the wider region around Tampa Bay and local landmarks and neighborhoods as you plan your next home improvement project.

Labor-Only 40-Gallon Water Heater Installation Estimate in St. Petersburg, FL 33703

Labor-Only 40-Gallon Water Heater Installation Estimate in St. Petersburg, FL 33703

Recently, our Home Therapist plumbing team prepared a virtual estimate for a homeowner off Dr. M.L.K. Jr St N in St. Petersburg, FL 33703. The customer wanted to install a new 40-gallon water heater they were planning to purchase themselves and asked us to provide a clear, labor-only installation price with a discount applied.

In the Tampa Bay area, hot water is more than a comfort—it is part of everyday life, from showers after the beach to laundry after the rain. So when it is time to update a water heater, homeowners in St. Petersburg need straightforward pricing, safe installation, and honest expectations about what is included and what is not.

Below, we will walk through the customer’s request, how we structure a labor-only water heater installation, what our licensed technician Adalberto will be looking for on site, and how we protect your home while keeping costs transparent.

Understanding the Customer’s Request

This visit began as a virtual estimate. The homeowner contacted us in Spanish and explained that they wanted to install a 40-gallon water heater they would purchase themselves. Initially, we offered a 5% discount on the labor portion of the job, but the homeowner asked if we could extend that to 10%. We adjusted the estimate to reflect the 10% discount on labor, while keeping the scope of work and responsibilities crystal clear.

Here is what the homeowner in St. Petersburg, FL was asking for:

  • Customer-supplied water heater: A standard 40-gallon tank-type unit to be provided by the homeowner.
  • Customer-supplied drain pan: The homeowner would also provide the drain pan, which is required in many installations to help protect surrounding areas from minor leaks.
  • Labor-only installation: Our team would handle removal of the old heater (if present), installation of the new one, and all necessary plumbing connections, but the equipment itself would not be on our invoice.

Because this was a virtual estimate, our goal was to explain everything the right way the first time: what is included in the labor, what might require extra materials, and what falls outside of plumbing work (such as drywall or concrete repair).

What We Plan to Check During the On-Site Visit

Even when a customer provides the water heater, the safety and performance of the system still depend on the plumbing and installation conditions at the home. When Adalberto arrives at the St. Petersburg property, he will carefully inspect the existing setup before starting any work.

Typical checks include:

  • Existing water heater location: Verifying clearance, accessibility, ventilation (if gas-fired), and compliance with current code requirements where applicable.
  • Cold and hot water piping: Inspecting the supply and outlet lines for corrosion, improper materials, or past makeshift repairs that need correction.
  • Shut-off valve condition: Confirming that the main water shut-off valve at the heater operates properly and does not leak. If it is seized or heavily corroded, replacement may be recommended.
  • Drain pan and drain route: Confirming that the customer-supplied pan fits the new heater and that a proper drain line connection is available or feasible.
  • Pressure relief valve discharge: Ensuring that the temperature and pressure relief (T&P) valve can discharge safely to an appropriate location.
  • Venting (for gas units): If the water heater is gas, we will inspect the venting system, gas connections, and combustion air needs for safety and code compliance.
  • Electrical supply (for electric units): Confirming that the electrical supply, breaker size, and wiring are correct for the new heater, even though we are not replacing the panel as part of this estimate.

One important part of the estimate is transparency about potential additional work. As noted in the job description, if we arrive and find that any pipe connected to the water heater—or the shut-off valve itself—needs to be replaced, we will stop, explain the issue, and provide pricing before doing anything extra. No surprises and no work without your approval.

Step-by-Step Plan for the Labor-Only Water Heater Installation

The installation process at this St. Petersburg, FL home will follow the same professional standards we apply across Tampa Bay, whether the heater is supplied by us or provided by the customer.

1. Verify Equipment and Site Conditions

First, Adalberto will confirm that the 40-gallon water heater and customer-supplied drain pan are appropriate for the space and compatible with the home’s plumbing, gas, or electrical setup. If anything appears unsafe or mismatched, he will explain the concern and discuss options before moving forward.

2. Safely Disconnect and Remove the Old Unit

If there is an existing water heater, we will:

  • Shut off water at the local shut-off valve and, if necessary, the main house supply.
  • Turn off power at the breaker (for electric) or shut off the gas supply (for gas).
  • Drain the existing water heater in a controlled manner to reduce mess and protect floors and walls.
  • Disconnect the hot and cold water lines, T&P discharge line, and—if applicable—gas or electrical connections.
  • Carefully remove the old unit from the home.

Our plumbers take extra care to protect flooring and surrounding finishes. However, if we need to open up sheetrock, concrete, stucco, tile, or similar materials to run pipes, we always explain in advance that we do not perform the finish repair work. That remains the homeowner’s responsibility, as clearly stated in this estimate.

3. Set the New 40-Gallon Heater and Drain Pan

Next, we will place the customer-supplied drain pan and set the new 40-gallon water heater in position. We make sure:

  • The unit is level and properly supported.
  • Clearances meet manufacturer recommendations.
  • The pan is correctly aligned with the drain route where applicable.

4. Install New Water Line Connections and Accessories

As part of this labor-only installation, Home Therapist provides the necessary water line connections and standard accessories needed to properly hook up the heater. This may include flexible connectors, fittings, and other plumbing materials needed to transition from the existing piping to the new heater.

If we discover deteriorated or non-compliant piping or valves, we will:

5. Connect T&P Valve and Drain Lines

The temperature and pressure relief valve is a critical safety component on any water heater. We will:

  • Verify that the T&P valve is installed correctly on the new heater.
  • Run or reconnect the discharge line to a safe termination point, following local plumbing codes.
  • Ensure the line is not capped or obstructed in any way.

6. Restore Power or Gas and Test Operation

Once all plumbing connections are complete, we will:

  • Slowly fill the tank and bleed air from the hot water lines.
  • Check all connections for leaks.
  • Restore power at the breaker for electric models or reopen gas supply for gas models.
  • Confirm burner ignition or element operation and verify the thermostat setting.

Before we leave, the technician will review basic operation with the homeowner and go over any maintenance recommendations specific to water heaters in humid, coastal areas like St. Petersburg and greater Tampa Bay.

Why This Approach Keeps St. Petersburg Homes Safe and Comfortable

Water heaters are simple in concept but critical to home safety and comfort. The tank stores water and either heats it with gas burners or electric elements, controlled by a thermostat. If pressure or temperature inside the tank gets too high, the T&P valve is designed to release water and pressure safely.

Our installation process focuses on three main principles:

1. Reliable Water Pressure and Flow

By inspecting and, when needed, correcting the cold and hot water piping and shut-off valves, we help ensure that your 40-gallon water heater supplies steady hot water without strain on the plumbing system. Properly sized connections and leak-free valves reduce the risk of future drips, bursts, or pressure issues.

2. Safe Temperature and Pressure Management

The T&P valve is a key safety device. A poor installation—such as a capped discharge line—can create a dangerous situation if the heater ever overheats or over-pressurizes. Our licensed plumbers make sure that:

  • The T&P valve is installed according to manufacturer guidelines.
  • The discharge line can safely carry any released water away from people and property.

3. Long-Term Durability in a Coastal Climate

St. Petersburg’s coastal, humid environment can accelerate corrosion on metal fittings and pipes. By using appropriate materials for connections and carefully checking existing piping, we help reduce the risk of early failure and unexpected leaks. Our process is designed to extend the life of your new 40-gallon water heater and keep your home protected.

If you want a deeper dive into how our team approaches installs across Tampa Bay, you can explore our water heater install services in the Tampa area and read more about how water heater replacement projects are planned and priced.

Pro Tips for Water Heater Projects in St. Petersburg, FL

Whether you are in St. Petersburg, Tampa, or another nearby Gulf Coast city, here are a few practical tips when planning a water heater installation:

  1. Match the heater to your household size and habits. A 40-gallon tank is a good fit for many small to medium households, but heavy shower use, large tubs, or multiple occupants may call for a larger tank or a different style. Articles like our guide to electric vs. tankless water heaters can help you compare options.
  2. Consider corrosion and coastal air. In St. Petersburg and along Tampa Bay, salty air can be tough on metal parts. Ask about corrosion-resistant fittings and make sure your drain pan and connections are in good shape, especially if your heater is in an attic or finished space.
  3. Schedule installs around your routine. Think about your family’s schedule—mornings, evenings, or weekends—and plan the installation window to minimize disruption. Our post on scheduling water heater installs for optimal service offers helpful guidance.
  4. Plan for maintenance from day one. Regular flushing and inspection extend tank life and help maintain efficiency. For Tampa Bay homeowners, our water heater maintenance plans can keep you on track without the guesswork.
  5. Know what is—and is not—included. If you are providing your own heater, make sure you understand clearly what your plumber is supplying (connections, accessories, disposal of the old unit) and what falls under homeowner responsibility, such as drywall repair or painting.

For more planning ideas, you might also find it useful to read our article on when age and sediment make water heater replacement necessary.

Why Tampa Bay Homeowners Choose Home Therapist

Homeowners in St. Petersburg and across the Tampa Bay area have plenty of choices for plumbing service. Our goal at Home Therapist Cooling, Heating, and Plumbing is to stand out for the right reasons:

  • Licensed, experienced technicians: Professionals like Adalberto bring years of hands-on plumbing experience into every home we visit.
  • Transparent estimates and discounts: In this St. Petersburg project, we documented a clear labor-only price and honored the homeowner’s request to adjust the discount from 5% to 10%—all before any work is scheduled.
  • Clear communication in your language: Whether the conversation is in English or Spanish, we take the time to explain what we see, what we recommend, and why.
  • Respect for your home: We protect work areas, control water during drain-down, and keep the site tidy. We are always upfront that structural or cosmetic repairs (sheetrock, concrete, stucco, tile, etc.) are not part of the plumbing scope.
  • Commitment to local communities: From neighborhoods off Dr. M.L.K. Jr St N in St. Petersburg to downtown Tampa and beyond, we understand how Gulf Coast weather, humidity, and older housing stock affect plumbing systems.

If you want to get to know the city where we are working, you can learn more about St. Petersburg, Florida or explore nearby spots like St. Pete Pier. Our team spends a lot of time on routes like Dr. M.L.K. Jr St N in St. Petersburg, FL, helping homeowners keep hot water and plumbing working safely.

Ready to Plan Your Water Heater Installation in St. Petersburg, FL?

If you are in St. Petersburg, FL 33703 or anywhere in the Tampa Bay area and planning to install a new water heater—whether we supply the equipment or you do—we are here to help you through each step. Our team will:

  • Review your existing setup and listen to your concerns.
  • Provide a clear, written estimate before work begins.
  • Explain any recommended upgrades or code-related changes.
  • Complete the installation with safety, cleanliness, and long-term reliability in mind.

To schedule a water heater installation or request a detailed, labor-only estimate for your home in St. Petersburg or nearby Tampa Bay communities, contact Home Therapist Cooling, Heating, and Plumbing today. We will make sure your new water heater is installed the right way—so your home gets the reliable hot water comfort it deserves.

Zone Damper Replacement and Full AC Tune-Up in Lutz, FL 33558

Zone Damper Replacement and Full AC Tune-Up in Lutz, FL 33558

When your home in Lutz, FL isn’t cooling evenly, it can be frustrating—especially in our hot, humid Tampa Bay weather. One of our Home Therapist technicians, Barbaro, recently visited a home off Long Lake Ranch Blvd in Lutz, FL 33558 to solve an uncomfortable zoning issue and complete a full air conditioning tune-up.

This visit started with questions about a zoning control board and a faulty damper. By the time we were done, the home’s airflow was balanced again, the system was cleaned and tuned, and the customer had peace of mind knowing which parts were really under warranty and which ones genuinely needed replacement.

Customer Problem: Uneven Comfort and Zoning Concerns in Lutz

The homeowner, Kevin, had been experiencing inconsistent temperatures in different areas of the house. In a zoned HVAC system, each zone should receive the right amount of airflow when that area calls for cooling or heating. When that doesn’t happen, you might notice:

When this job was first scheduled, our office notes focused on previous plumbing work at this property in Lutz, and the initial estimate included both a zoning control board and a damper. The concern was that the control board might be failing, and that a zone damper wasn’t opening and closing properly.

For a homeowner in Lutz, FL, that kind of uncertainty—“Is it the board, the damper, or both?”—can make it hard to know what you really need to approve and what should be covered under warranty. Our goal on every visit is to clear up that confusion with a thorough inspection and straightforward explanation.

Inspection & Diagnosis: Checking the Zoning System the Right Way

On site in Lutz, our technician took the time to step back, carefully review the history of previous visits, and then physically inspect the system instead of just trusting old notes. That’s critical whenever zoning or controls are involved.

Here’s how we approached the diagnosis:

1. Reviewing System History and Warranty

  • Checked previous service history to see what had already been done at this property.
  • Verified which components were under warranty and how that applied to the control board.
  • Confirmed that the board cost used in the estimate (a Honeywell HZ221K model) was tied to a part that was thought to be needed—but might not actually be failing.

2. Inspecting the Zoning Control Board

  • Visually inspected the existing zone board for burn marks, loose connections, or obvious damage.
  • Confirmed power to the board and proper signals being sent to the dampers when each zone called for cooling.
  • Verified that the existing board was functioning correctly, meaning there was no need to replace it at this time.

Even though we had done the research on a compatible replacement (including checking the Honeywell model HZ221K that was available instead of the specific backordered version), the real-world testing in this Lutz home showed the board itself was operating normally.

3. Inspecting the Zone Damper

  • Located the problem zone damper in the ductwork. This home uses a standard zone damper on a #12 duct.
  • Tested whether the damper was opening and closing fully when that zone called for air.
  • Identified that the damper, not the board, was the true failure point—sticking or not moving correctly and limiting airflow to its zone.

This is a common scenario we see during AC repair visits in the Tampa Bay area: the symptoms can look like a control problem, but once you test all the parts, the real issue is mechanical—like a stuck damper.

4. Overall System Health Check

Because the homeowner in Lutz had also requested a full system tune-up, we didn’t stop at the zoning equipment. We inspected:

  • Indoor evaporator coil condition
  • Outdoor condenser coil
  • Refrigerant pressures and performance
  • Drain line condition
  • Electrical connections, capacitors, relays, and disconnect
  • Thermostat operation and settings

This broader look helps us catch early issues and confirm that the zoning repair will work hand-in-hand with the rest of the system for reliable comfort in Lutz’s long cooling season.

Step-by-Step: Zone Damper Replacement and Full AC Tune-Up

Once we confirmed the board was functioning and the damper was the primary problem, we adjusted the work plan. Transparency was important here: the portion related to the board was placed under warranty, and we made it clear that we were not replacing that board because it wasn’t actually damaged.

Here’s what we did at the home in Lutz, FL:

1. Zone Damper Replacement

  • Confirmed the proper size: a zone damper for a #12 duct, matching the home’s existing ductwork.
  • Used the Honeywell-style zone damper that had already been delivered to our office for this job.
  • Removed the failing damper, taking care not to damage the ductwork or insulation.
  • Installed the new damper, ensuring a tight fit, proper orientation, and secure connections.
  • Wired or connected the new damper to the existing zone board per manufacturer guidelines.
  • Tested operation by calling for each zone individually and confirming that the damper fully opened and fully closed as expected.

This correct damper replacement restores the zoning system’s ability to direct air where it’s needed in the Lutz home, instead of allowing a stuck damper to starve a zone of airflow.

2. Clarifying Board Warranty vs. Actual Work

  • Explained to the homeowner that while the control board appeared on the original estimate, it did not actually need replacement.
  • Let the homeowner know that if any future issue arises with that board under applicable warranty, we would address it appropriately.
  • Adjusted the scope so that the cost of the board was not being charged as a replacement at this time.

For homeowners in Lutz and greater Tampa Bay, this is how we prefer to work: if a part doesn’t need to be replaced, we don’t replace it. Our role is to protect your comfort and your budget.

3. Full AC Tune-Up for Better Performance

With the zoning back in proper working order, Barbaro completed a comprehensive tune-up on the system. Our AC tune-up services for Tampa Bay homes are designed to keep the system clean, efficient, and reliable.

The tune-up at this Lutz property included:

  • Acid wash and sanitize the evaporator coil – Helps remove buildup and biological growth that can restrict airflow and affect indoor air quality.
  • Acid wash and sanitize the condenser coil – Clears away dirt and debris so the outdoor unit can release heat more efficiently.
  • Flush and sanitize the system’s drain line (with a 60-day guarantee on the drain line service) – Reduces the risk of water backup, leaks, and ceiling damage, which are common concerns in humid areas like Lutz, FL.
  • Inspect refrigerant levels & pressures – Confirms that the system is operating within proper ranges to cool the home without overworking the compressor.
  • Check & adjust the thermostat – Ensures the thermostat is calibrated and communicating correctly with the zoning system.
  • Tighten wiring, contacts, capacitors & relays – A safety and reliability step that helps prevent electrical failures.
  • Tighten outdoor disconnect – Makes sure the disconnect is secure and safe.
  • Tighten condenser fan motor & blades – Reduces vibration and noise and supports longer motor life.
  • Inspect compressor at startup – Checks for hard starts, unusual noise, or signs of stress on the system.
  • Filter replacement – We replace the air filter when provided by the client, or we can supply one at an additional cost depending on size and quantity.

At the end of the tune-up, the homeowner received recommendations for any future maintenance or repair items to watch for—nothing pressure-based, just transparent guidance.

Why This Fix Works: Understanding Zoning and Airflow

To understand why replacing the damper and tuning the system made such a difference in this Lutz, FL home, it helps to look at how a zoning system operates.

In a zoned HVAC system:

  • The zone board is like the traffic controller, taking thermostat signals from each zone and telling dampers when to open or close.
  • The zone dampers are the moving parts inside the ducts that actually regulate where the air goes.
  • The main AC system (indoor and outdoor units) produces the cooled or heated air and pushes it into the ductwork.

If the board sends the right signal but the damper doesn’t move, that zone won’t get the air it needs. The rest of the house may feel fine, but one area will stay uncomfortable. Over time, the system can also run longer trying to satisfy a thermostat in a starved zone, which can raise utility bills.

By confirming that the board in this Lutz home was working and replacing only the faulty damper, we restored:

  • Balanced airflow between zones
  • More even temperatures throughout the house
  • Better efficiency, since the system isn’t fighting against stuck dampers

The full tune-up layered on top of that by improving coil cleanliness, drainage, and electrical reliability—key factors for any home in the Tampa Bay area, where long cooling seasons and high humidity put constant stress on HVAC systems.

Pro Tips for Homeowners in Lutz, FL

If you live in Lutz or nearby communities, here are a few practical steps to keep your zoned AC system running smoothly:

  1. Pay attention to room-to-room differences. If one area is consistently warmer or cooler, don’t ignore it. It might be a zoning or airflow issue, not just a thermostat setting.
  2. Change your filters regularly. With our local pollen, dust, and humidity, a dirty filter can quickly strain your system and impact every zone. Most Lutz homes do well with filter changes every 1–3 months, depending on usage and pets.
  3. Schedule annual tune-ups. A professional tune-up—like the one we performed on this home in Lutz, FL 33558—helps prevent drain clogs, coil buildup, and electrical problems before they turn into emergency calls.
  4. Listen for changes in airflow or noise. If you hear rushing air in some vents and hardly anything in others, or if a new rattling or humming appears, that can be an early sign of damper or duct issues.
  5. Keep outdoor equipment clear. Make sure your condenser has at least a couple of feet of clear space around it. Leaves, grass clippings, and plants can build up and force the system to work harder in our hot Lutz summers.
  6. Ask about your zoning layout. If you’re not sure how your home is zoned, we’re happy to walk you through it during a visit. Knowing which thermostat controls which area helps you catch problems sooner.

To see another example of how regular maintenance helps Lutz homeowners, take a look at this system tune-up and cleaning project in Lutz, FL 33548.

Why Choose Home Therapist for HVAC Service in Lutz, FL?

At Home Therapist Cooling, Heating, and Plumbing, our focus is simple: honest recommendations, careful work, and lasting comfort for Tampa Bay homeowners.

For this Lutz project, that meant:

  • Taking time to re-check the history and not just rely on old notes.
  • Confirming the control board was working and choosing not to replace it unnecessarily.
  • Replacing the actual failing component—the zone damper—with the correct size and type.
  • Completing a thorough tune-up instead of a quick once-over.
  • Communicating clearly about what was under warranty and what work was actually being done.

Our licensed technicians work throughout the Lutz, FL and greater Tampa Bay area, from residential communities like Long Lake Ranch to other nearby neighborhoods. We emphasize:

  • Professional, respectful service inside your home
  • Clean work practices to protect your property
  • Safety-focused inspections and repairs
  • Long-term reliability instead of quick, short-sighted fixes

Whether you need zoning help in Lutz, a full AC maintenance visit in Tampa, or complete air conditioner installation and repair services in the Tampa Bay area, we treat your home with the same care we’d want for our own.

Need Zoning Help or an AC Tune-Up in Lutz, FL?

If you’re noticing uneven temperatures, weak airflow in certain rooms, or it’s just been a while since your last tune-up, we’re here to help. Our team regularly serves homeowners in Lutz, FL 33558 and nearby areas, and we’re familiar with the specific demands that our hot, humid climate places on HVAC systems.

Whether you’re near Long Lake Ranch Blvd, closer to downtown Lutz, or elsewhere around the Lutz, FL area, you can count on us for clear communication, honest recommendations, and careful workmanship.

Ready to schedule your HVAC service in Lutz? Contact Home Therapist Cooling, Heating, and Plumbing today to book a zone damper repair, system tune-up, or full HVAC inspection. We’ll make sure your home gets the comfort—and the care—it deserves.

Transparent, Labor-Only Water Heater Installation in St. Petersburg, FL

Transparent, Labor-Only Water Heater Installation in St. Petersburg, FL

When your water heater is aging or unreliable, it creates daily stress — cold showers, worrying about leaks, and wondering what the real cost of replacement will be. A homeowner in St. Petersburg, FL 33703 reached out to Home Therapist Cooling, Heating, and Plumbing because they wanted a clear, labor-only estimate to install a new 40-gallon water heater they planned to purchase themselves.

Our plumbing technician, Adalberto, completed a virtual estimate that outlined how the installation would work, what was included in our labor, what might be extra, and how we could honor the customer’s request for a larger discount. This kind of straightforward guidance is exactly what our plumbing team provides for homeowners throughout St. Petersburg and the greater Tampa Bay area.

Customer Problem: A 40-Gallon Water Heater Replacement on a Budget

The homeowner knew they needed to replace their water heater and had already decided to buy their own 40-gallon unit. That can be a smart move for some homeowners in St. Petersburg, FL, especially when they’re comfortable shopping for equipment themselves.

However, they still had several important concerns:

  • They wanted a licensed plumber to install the new water heater safely and up to code.
  • They needed clarity on what was included in the labor cost and what wasn’t.
  • They wanted to understand if any existing piping or shut-off valves might need to be replaced.
  • They were trying to stay within a specific budget and requested a 10% discount on the labor.

Initially, our team offered a 5% discount on the labor, but after listening to the homeowner’s situation and budget goals, we adjusted the estimate to the requested 10% discount. Our goal is always to balance safety, quality, and fairness when providing plumbing services in St. Petersburg and the Tampa Bay region.

Virtual Inspection & Diagnostic Considerations

Because this was a virtual estimate, our technician couldn’t physically inspect the water heater or the surrounding plumbing yet. Instead, Adalberto used detailed questions, photos, and a clear scope of work to define what the labor-only installation would cover and what potential extras could come up on-site.

Here’s how we approached it:

1. Clarifying What the Customer Will Provide

The homeowner in St. Petersburg planned to supply:

  • The new 40-gallon water heater
  • The drain pan for the unit

Providing your own equipment can work well when the model is appropriate for your home, your hot water demand, and your local building codes. For homeowners considering this approach, resources like what to consider before a water heater replacement can be very helpful during the planning phase.

2. Defining What Home Therapist Will Provide

Our estimate explained that Home Therapist would provide the professional labor and standard connection materials, including:

  • Disconnecting the old water heater (if still in place)
  • Positioning the new 40-gallon water heater in the existing location
  • Connecting the hot and cold water lines to the new unit
  • Installing or reconnecting the temperature and pressure (T&P) relief line, as applicable
  • Ensuring proper drain pan connection if a drain is present

Any unusual or code-specific upgrades (for example, adding a new shut-off valve, replacing corroded piping, or modifying venting on certain types of heaters) would be priced separately after on-site evaluation, with the homeowner’s approval before any additional work.

3. Checking for Possible Issues with Piping and Valves

In our written estimate, we clearly stated that upon arrival, if our technician finds that:

  • Any pipe connected to the water heater is damaged, corroded, or improperly sized, or
  • The shut-off valve is leaking, seized, or not functioning correctly,

we would inform the homeowner first and provide updated pricing before performing any additional work. This protects the customer from surprise charges and ensures they remain in control of decisions throughout the installation.

4. Outlining What Is Not Included

For many homes in St. Petersburg and across Tampa Bay, water heater installations can require cutting access in walls, ceilings, or other finished surfaces. Our estimate made it clear:

  • We do not repair sheetrock, concrete, stucco, tile, or similar finishes.
  • If we must create an opening to run pipes or make safe connections, it is the homeowner’s responsibility to arrange for cosmetic repair afterward.

This level of transparency is essential for trust. We handle the plumbing system safely and correctly; the homeowner or their contractor can handle any cosmetic restoration.

Step-by-Step: How the Labor-Only Water Heater Installation Would Proceed

Once the homeowner decides to move forward and schedules the installation, here’s how a typical labor-only 40-gallon water heater installation in a St. Petersburg home would unfold with Home Therapist:

1. On-Site Evaluation and Safety Check

Adalberto or another licensed plumber would arrive at the home in St. Petersburg, FL and start by:

  • Confirming the location and type of the existing water heater
  • Shutting off water and, if applicable, gas or electrical power to the unit
  • Inspecting the shut-off valve, flex lines, and connections for visible wear, corrosion, or leaks

If we discover that any pipes or valves must be replaced for safety or code-compliance, we explain the findings, provide pricing, and get approval before proceeding.

2. Draining and Removing the Old Water Heater

Next, we:

  • Drain the existing water heater safely
  • Disconnect the water lines, T&P line, and energy connections
  • Remove the old tank and place it in an appropriate area for homeowner disposal or arrange removal if that service is selected

This step protects floors and nearby finishes from water damage and gives us a clean work area.

3. Positioning the New 40-Gallon Water Heater

With the space cleared, we:

  • Set the customer-provided drain pan in position
  • Place the new 40-gallon water heater in the pan
  • Confirm that clearances and orientation are acceptable for safe operation and service access

Local factors like St. Petersburg’s humidity and the potential for minor flooding in some areas mean proper drain pan placement is especially important for long-term peace of mind.

4. Reconnecting Water Lines and Safety Components

Our technician then installs or reconnects:

  • Cold water supply line with a functioning shut-off valve
  • Hot water outlet line, sized correctly for the system
  • T&P relief valve discharge piping, routed to a safe termination point
  • Any necessary dielectric unions or code-mandated fittings

These details might seem small, but they’re critical for preventing leaks, corrosion, and unsafe pressure buildup over time.

5. Restoring Power or Gas and Testing the System

Finally, once the water heater is filled and purged of air, we:

  • Restore power (for electric models) or gas (for gas models)
  • Set the thermostat to a safe, efficient temperature
  • Check for leaks at every connection point
  • Verify that hot water is flowing properly to fixtures

Before we leave, we review basic operation and answer any questions so the homeowner feels confident with their new system.

Why This Approach Works: The Plumbing Principles Behind the Project

A water heater seems simple on the surface, but there are several key plumbing principles at play:

1. Water Pressure and Flow

Hot and cold lines must be properly sized and securely connected so that water pressure remains stable throughout the home. Poor connections or undersized piping can cause:

  • Uneven hot water distribution
  • Annoying pressure changes when multiple fixtures are running
  • Increased wear on valves and fixtures

Our focus on quality connections ensures reliable flow to showers, sinks, and appliances.

2. Temperature and Pressure Safety

Every modern water heater in St. Petersburg and beyond is equipped with a temperature and pressure (T&P) relief valve. This valve prevents dangerous pressure buildup if the water overheats or expands too much.

Proper installation requires:

  • A correctly installed T&P valve on the tank
  • A discharge pipe routed to a safe location
  • No caps, valves, or restrictions on that discharge line

We take this seriously because it’s a critical line of defense against catastrophic tank failure.

3. Corrosion Prevention and Longevity

In coastal and humid areas like St. Petersburg, FL, corrosion is always a concern. Using appropriate fittings — such as dielectric unions where copper meets steel — and verifying that the drain pan and any drains are correctly set up can significantly extend the life of the water heater and surrounding piping.

For homeowners who want a deeper dive into how replacements work and what to expect, we offer educational resources such as water heater replacements explained and how water heater replacement services and invoices are structured.

Pro Tips for Homeowners in St. Petersburg, FL

If you’re planning a water heater installation or replacement in St. Petersburg or nearby Tampa Bay communities, here are some practical tips from our plumbing team:

  1. Choose the right size for your household. A 40-gallon water heater can be ideal for many small to medium households, but larger families or homes with multiple showers may benefit from a higher capacity or a high-recovery model. Always match the tank size to your hot water demand.
  2. Consider local water quality and maintenance needs. The Tampa Bay area can have mineral content that encourages sediment buildup. Flushing your water heater annually can help maintain efficiency and prolong its life. If you’re unsure how often to service or check your system, pair your replacement with a maintenance plan.
  3. Verify that your equipment meets local codes. Whether you buy a water heater yourself or through a contractor, confirm that it’s sized and configured for your home and local requirements. Our guide on what to consider before a water heater replacement can help you avoid costly missteps.
  4. Plan for drainage and leak protection. In humid, storm-prone areas like St. Petersburg, a properly installed drain pan and discharge line are essential. They help protect floors, walls, and nearby belongings if the tank ever leaks.
  5. Work with a licensed, local plumber. Water heaters combine hot water, pressure, and (often) gas or high-voltage electricity. Hiring a licensed local professional helps ensure safe installation and code compliance. If you’re comparing companies or estimates, our article on how to get a quote for water heater replacements can walk you through what to look for.
  6. Think long-term, not just upfront price. Discounts, like the 10% we applied for this St. Petersburg homeowner, are helpful, but the most important factors are safe installation, proper sizing, and future repair/maintenance support.

Why Homeowners in Tampa Bay Choose Home Therapist

At Home Therapist Cooling, Heating, and Plumbing, we approach every project — from a full HVAC replacement to a labor-only water heater installation — with the same steady, careful mindset.

Here’s what sets our team apart for plumbing and water heater work in St. Petersburg, FL and the surrounding Tampa Bay area:

  • Licensed, experienced technicians: Our plumbers, like Adalberto, are trained to work safely with water, gas, and electrical connections in accordance with local codes.
  • Clear, upfront communication: We define what’s included in our labor, explain what might be extra, and secure approval before performing any additional work.
  • Respect for your home: From protecting floors to cleaning up after the job, we treat your property with the same care we’d want in our own homes.
  • Flexible solutions: Whether you provide your own water heater or prefer us to handle the equipment selection, we adjust our approach to your needs and budget.
  • Educational support: Our blog includes resources that explain the role of professional plumbers in Tampa Bay, such as a homeowner’s guide to the role of a plumber, so you understand what’s being done and why.
  • Commitment to local communities: We live and work in the same region you do, from St. Petersburg to Tampa and beyond, and we understand the unique demands our climate and infrastructure place on plumbing systems.

Ready to Schedule Water Heater Service in St. Petersburg, FL?

If you’re planning a water heater replacement or need a labor-only installation for a unit you’ve already purchased, our team is here to help. We’ll walk you through the estimate, explain what’s included, and outline any potential additional costs before we step foot on site.

Whether you’re near downtown St. Petersburg, enjoying the waterfront around Vinoy Park, or elsewhere in the Tampa Bay area, Home Therapist can provide the reliable, code-compliant water heater installation your home needs.

Contact Home Therapist Cooling, Heating, and Plumbing today to schedule water heater installation or plumbing service in St. Petersburg, FL or anywhere in the greater Tampa Bay region. Let us provide the clear, professional guidance and careful workmanship your home deserves — the therapy your home needs, delivered with honesty and care.

For directions to our service area or to get a feel for the city we proudly serve, you can explore St. Petersburg, FL or see the broader Tampa Bay area that we call home.

Shower Valve Replacement and Access Panel Installation in Clearwater, FL 33759

When your shower starts acting up, it can quickly turn daily routines into a frustrating experience. That was the case for a homeowner in Clearwater, FL 33759 who reached out to Home Therapist for help with a failing shower valve. Our plumbing technician, Adalberto, was assigned to the job and provided a careful, professional solution: a new Moen shower valve installation, along with a clean, spring-loaded plastic access panel to make future service easier.

In this walkthrough, we’ll explain what was going wrong, how we diagnosed the issue, and the step-by-step work we performed to restore safe, reliable shower use for this Clearwater home. If you’re dealing with similar problems, this gives a clear picture of what to expect from a professional shower valve replacement in the Tampa Bay area.

Understanding the Customer’s Shower Problem

The homeowner in Clearwater had a shower that was no longer performing the way it should. While every case is a bit different, common symptoms that lead to a shower valve replacement include:

  • Difficulty controlling water temperature
  • Sudden swings from hot to cold
  • Low or inconsistent water pressure at the shower head
  • Drips or leaks from the shower head, even when turned off
  • A handle that feels loose, sticks, or turns too far

In this Clearwater, FL 33759 home, the existing shower valve had reached the point where repair was no longer the best long-term solution. The homeowner wanted reliability and peace of mind, not a temporary band-aid.

The specific scope of work for this visit included:

  • Level 2 shower valve repair with full shower valve replacement
  • Installation of a new Moen shower valve body
  • Replacement or re-use of trim (shower head, plate, and handle) depending on the homeowner’s choice and supplied parts
  • Installation of an adjustable, spring-loaded plastic access panel to cover the new service opening behind the shower
  • Application of a 15% discount on the labor cost

Because the valve body is inside the wall, this type of work can require cutting into drywall or tile to access the plumbing. As we’re always transparent with our customers, we clearly note that while we handle the plumbing and install a neat access panel, we are not responsible for patching finished sheetrock or tile beyond that panel area.

Inspection and Diagnosis in a Clearwater Bathroom

Before any parts are removed, our technician takes time to evaluate the plumbing system and confirm that a valve replacement is the right call. In this Clearwater home, Adalberto followed a step-by-step diagnostic process:

1. Initial conversation with the homeowner

Adalberto first spoke with the homeowner to understand the history of the problem:

  • How long the temperature or pressure issues had been happening
  • Whether the problem was getting worse over time
  • Any recent work done on the bathroom or water lines

This helps rule out issues like temporary municipal water changes or other non-valve concerns.

2. Visual inspection of the shower area

Next, he carefully inspected the visible parts of the shower in this Clearwater, FL 33759 bathroom:

  • Checked the current handle and trim for excessive wear, looseness, or damage
  • Looked for signs of moisture or staining around the wall that could indicate hidden leaks
  • Observed how the water responded when the handle was turned from cold to hot

3. Functional testing

Adalberto then ran the shower to see how the valve was performing:

  • Measured how quickly the water reached a stable temperature
  • Listened for unusual sounds that might point to partial obstructions or worn internal components
  • Shut the water off to see if the shower head continued to drip

4. Confirming the need for a new valve

Based on the behavior of the shower valve and its age, along with the homeowner’s desire for a lasting fix, a full shower valve replacement was recommended. To ensure the right fit and quality, a compatible Moen shower valve was ordered from a local supplier, with an estimated availability time of Thursday evening to Friday morning.

With the diagnosis confirmed, the next step was planning a clean, safe installation that would protect the home and make future service simpler for this Clearwater homeowner.

Step-by-Step Shower Valve Replacement & Access Panel Installation

When the new Moen valve was ready, Adalberto returned to complete the installation. Here’s how that process typically looks for a bathroom in Clearwater or anywhere in the Tampa Bay area.

1. Protecting the work area

We start by protecting the bathroom surfaces:

  • Placing drop cloths or mats to shield the floor
  • Keeping tools organized to avoid unnecessary mess
  • Ensuring any nearby fixtures or finishes are not scratched or damaged

Cleanliness and respect for the home are especially important in smaller bathrooms often found in Clearwater condos and single-family homes.

2. Shutting off the water safely

Before opening the wall or disconnecting any plumbing, Adalberto shut off the water supply to the shower (and, if needed, the main water supply to the home). This prevents accidental leaks and keeps the workspace safe and dry.

3. Gaining access to the existing valve

Because shower valves sit behind tile or fiberglass walls, we often need to create an access opening from the back side of the wall (typically in a closet or adjacent room). For this Clearwater, FL 33759 project:

  • An opening was carefully measured and cut to reach the existing valve
  • The cut was planned to match an adjustable plastic access panel size (commonly 8″ x 8″ or 14″ x 14″)
  • Care was taken to avoid cutting into electrical lines or other hidden services

4. Removing the old shower valve

Once access was available, the old valve assembly was disconnected from the hot and cold water lines and the shower riser pipe. Depending on the original installation, this may involve copper, PEX, or CPVC connections. The old valve body was completely removed so the new Moen valve could be installed according to manufacturer specifications.

5. Installing the new Moen shower valve

With the wall open and the old parts removed, Adalberto installed the new Moen valve:

  • Positioned the valve at the correct depth so the trim would sit flush once the shower wall plate was installed
  • Secured the valve to framing for long-term stability
  • Reconnected hot and cold water lines, along with the shower riser
  • Verified that all joints were properly sealed and tightened

Moen valves are known for their reliability and consistent temperature control, which makes them an excellent choice for Clearwater homeowners who want fewer surprises in the shower.

6. Testing for leaks and proper operation

Before closing anything up, we always perform a thorough test:

  • Slowly turned the water back on and inspected all connections for leaks
  • Ran the shower to verify strong, even water flow
  • Checked that the valve properly balanced hot and cold water to help prevent sudden temperature swings

7. Trim, handle, and shower head considerations

For this project in Clearwater, the labor covered the valve replacement and allowed for reusing existing trim or installing new trim if the homeowner provided it. In many cases:

  • If the homeowner supplies a new Moen trim kit (head, plate, and handle), we install those components for a finished, updated look.
  • If the existing trim is in good shape and compatible with the new valve, we can leave it in place to keep costs down.

This flexible approach lets Clearwater homeowners decide where to invest—full visual upgrade, or primarily functional improvement.

8. Installing the adjustable plastic access panel

One of the most valuable parts of this project was the addition of a spring-loaded plastic access panel. After confirming no leaks and proper operation:

  • The cutout behind the shower was cleaned up for a neat fit
  • An appropriately sized access panel (either 8″ x 8″ or 14″ x 14″) was chosen
  • The panel was installed so it sits flush and can be easily opened in the future

This access panel provides a clean, finished look while protecting the opening. It also makes any future maintenance much simpler—no more cutting into drywall just to reach the shower valve.

9. Final clean-up and homeowner walkthrough

Adalberto wrapped up by cleaning the work area, removing debris, and walking the homeowner through the new setup:

  • Explained how the new Moen valve works
  • Reviewed what the access panel is for and how it opens
  • Answered any questions about long-term care and what to watch for

A 15% labor discount was applied as quoted, and the homeowner in Clearwater, FL 33759 was left with a safer, more reliable shower system.

Why This Shower Valve Fix Works

A properly installed modern shower valve does more than just turn water on and off. It plays a big role in comfort and safety, especially in humid, warm climates like Clearwater and the greater Tampa Bay area.

1. Improved temperature control

Modern Moen valves are designed to balance hot and cold water pressure. When someone else in the home flushes a toilet or starts a faucet, the valve helps minimize sudden spikes of hot or cold water. This is especially important in busy households and multi-bathroom homes throughout Clearwater.

2. Reduced leak risk inside the wall

Old valves can develop internal leaks that you can’t see. Those slow drips inside the wall can lead to:

  • Hidden water damage
  • Mold or mildew growth
  • Swollen drywall or soft spots around the shower

By replacing the aging valve and pressure-testing the new connections, we greatly reduce the risk of hidden leaks, which is crucial in Florida’s already humid environment.

3. Easier future maintenance with an access panel

Without an access panel, even a small future adjustment can require cutting into the wall again. The spring-loaded plastic access panel installed in this Clearwater bathroom makes it simple to:

  • Inspect the valve and connections
  • Service or replace internal cartridges
  • Check for leaks during future remodels or plumbing upgrades

That means lower disruption and lower long-term costs for the homeowner.

Pro Tips for Clearwater, FL Homeowners with Showers

Whether you live near the heart of Clearwater or in nearby neighborhoods around the 33759 area, these tips can help extend the life of your shower plumbing:

  1. Watch for early signs of valve trouble. If your shower starts taking longer to warm up, the handle becomes hard to turn, or you notice occasional temperature swings, don’t ignore it. Early inspection can prevent water damage and bigger repairs.
  2. Check walls near the shower for soft spots or discoloration. Gently press on walls and baseboards around your tub or shower. Any softness, bubbling paint, or staining can indicate a slow leak behind the surface.
  3. Use your access panel periodically. If you already have an access panel like the Clearwater homeowner in this project, open it once or twice a year and take a quick look inside for moisture or corrosion.
  4. Maintain consistent water pressure. Sudden high-pressure spikes can stress valves and connections. If you notice unusually strong or weak pressure throughout your home, consider scheduling an evaluation with our team.
  5. Plan ahead for bathroom upgrades. If you’re thinking about updating your shower trim or tile, that can be a great time to also replace the valve behind the wall. This helps keep your bathroom in sync—both the visible and hidden parts.
  6. Schedule periodic plumbing checkups. Clearwater’s coastal environment can be tough on plumbing over time. A routine visit from our local Tampa Bay plumbers can help spot issues early. You can learn more about options on our ongoing plumbing maintenance plans page.

Why Clearwater Homeowners Choose Home Therapist

At Home Therapist Cooling, Heating, and Plumbing, we treat every bathroom, kitchen, and utility room as if it were in our own homes. For this shower valve replacement in Clearwater, FL 33759, that meant:

  • Assigning a skilled, licensed plumber like Adalberto to diagnose and perform the work
  • Communicating clearly about the need to cut drywall, and offering a clean, spring-loaded access panel solution
  • Respecting the home with drop cloths, organization, and full clean-up
  • Providing honest options around reusing existing trim versus installing homeowner-supplied parts
  • Delivering the quoted work with a 15% labor discount as promised

If you’d like to see how similar projects look in other Tampa Bay homes, you can read about another shower valve and handle replacement project in Riverview. For more extensive shower work, such as relocations or larger remodels, our team also offers comprehensive shower installation and repair services in Tampa Bay and even professional shower installation and relocation support when layout changes are needed.

Throughout Clearwater, from neighborhoods close to the 33759 area to shopping hubs like the Countryside area of Clearwater, homeowners trust us to keep their plumbing systems safe, reliable, and easy to maintain.

Need Shower Valve or Bathroom Plumbing Help in Clearwater?

If your shower in Clearwater, FL isn’t working like it used to—whether it’s temperature swings, constant dripping, or a handle that feels worn out—our local Tampa Bay plumbing team is here to help.

We can:

  • Diagnose valve and trim issues
  • Replace aging shower valves with quality brands like Moen
  • Install clean, adjustable access panels for smarter future maintenance
  • Review your entire bathroom plumbing system for hidden concerns

To schedule professional shower valve replacement or other plumbing repair in Clearwater or anywhere in the Tampa Bay area, reach out to Home Therapist Cooling, Heating, and Plumbing today. We’ll walk you through your options, provide clear pricing, and deliver the steady, reliable service your home deserves.

Planning Pipe Replacement and Shower Valve Upgrades in Lutz, FL 33559

Planning Pipe Replacement and Shower Valve Upgrades in Lutz, FL 33559

When plumbing problems start stacking up in a home, it can feel overwhelming fast. That was the situation for a homeowner in Lutz, FL 33559 who reached out to Home Therapist Cooling, Heating, and Plumbing for help with pipe replacement and a shower valve upgrade. Our local Tampa Bay plumbing technician, Adalberto, worked with this homeowner to build a clear, accurate estimate that covered both projects and honored a military discount.

In this article, we’ll walk through how we approach planning sewer and water line replacement, angle valve replacement, and a new shower valve installation for homeowners in Lutz and across the Tampa Bay area. Even though this visit was focused on updated estimates rather than same-day repairs, the process we followed is the same one we use on every plumbing project: listen carefully, inspect thoroughly, explain clearly, and plan for long-term reliability.

The Homeowner’s Plumbing Concerns in Lutz, FL

The homeowner in Lutz already had two estimates from us but realized they wanted to move forward with both options together. In the process, one estimate was approved by mistake, so they reached back out asking us to re-send a combined estimate that included:

  • Base costs for pipe replacement
  • Sewage drain line replacement (priced per foot)
  • Water supply line replacement (priced per foot)
  • Angle valve replacement while other work is being done
  • Shower valve installation/replacement
  • A military discount

For a homeowner, it’s easy to feel unsure about what’s really needed when multiple plumbing issues show up at once. Between potential sewer line concerns, aging water lines, and a worn shower valve, this Lutz home needed a plan that made sense both technically and financially.

Common concerns we hear from homeowners in Lutz and greater Tampa Bay in situations like this include:

  • “Do I really need to replace these pipes, or can they be repaired?”
  • “What exactly am I paying for?” — especially when work is priced per foot
  • “Will my water need to be shut off for a long time?”
  • “Can you do the shower work at the same time, so I don’t have to open the walls twice?”

Our job is to take all of that stress and turn it into a step-by-step plan that’s easy to understand and easy to move forward with.

Inspection & Diagnosis: How We Plan Pipe and Shower Work

On a project like this in Lutz, FL, our first priority is to understand the condition of the existing plumbing system. Even when we’re revising an estimate, we build the plan around a careful inspection. A typical evaluation for this type of job includes:

1. Evaluating Existing Drain and Sewer Lines

For sewage drain line replacement, our plumbers look at:

  • Visible drain piping: under sinks, in access panels, and at cleanouts
  • Signs of past leaks: staining, corrosion, patch repairs, or makeshift fixes
  • Drain performance: how fast fixtures drain, whether there’s gurgling or frequent clogs

For more complex situations, we may recommend a camera inspection to see inside the sewer line and confirm the condition of the piping. That helps determine how many feet of pipe actually need to be replaced, and whether the problem is localized or more widespread. For more details on how we handle these types of projects in the Tampa Bay area, you can read our blog on drain replacement, installation, and repair.

2. Assessing the Water Supply Lines

For water supply line replacement, we look for:

  • Pipe material: older galvanized, copper, CPVC, PVC, or PEX
  • Corrosion or discoloration: especially on older metal pipes
  • Evidence of previous leaks: water marks, repairs, or replaced sections
  • Water pressure issues: drops in pressure, noisy pipes, or slow fixtures

In the Lutz area, where heat and humidity are constant factors, older plumbing can deteriorate faster, especially in attics, garages, and exterior walls. Planning a water line upgrade with modern materials such as CPVC or PEX helps reduce future leak risks and improve reliability.

3. Inspecting Angle Valves

Angle valves (the small shut-off valves under sinks and toilets) are easy to overlook until they fail. During our plumbing inspection, we typically:

  • Check each valve for proper operation and leaks
  • Note any valves that are frozen, corroded, or weeping at the stem
  • Recommend replacement of problem valves, especially while other work is being done

Replacing angle valves while we’re already working on the system can save a Lutz homeowner time and money compared to coming back later for a separate repair.

4. Assessing the Shower Valve

Shower valves are the control center of a shower — they mix hot and cold water and set the pressure. When a shower valve is worn, you may notice:

  • Difficulty adjusting temperature
  • Sudden temperature swings
  • Leaking behind the wall or from the handle
  • Poor water pressure at the shower head

For this Lutz homeowner, we planned a full shower valve replacement, with the option to have us install a new head, trim plate, and handle if the homeowner provides them. If the existing trim is in good shape, we can often leave it in place as long as it works with the new valve.

Building a Clear, Honest Plumbing Estimate in Lutz

Once we understand what needs to be done, we put together a line-by-line estimate. For this Lutz, FL project, the estimate included:

  • Pipe Replacement Base Cost: a fixed base charge for setting up, accessing, and replacing water or sewer pipes
  • Sewage Drain Line Replacement: priced per foot to lay new PVC piping
  • Water Supply Line Replacement: priced per foot to run new CPVC, PVC, or PEX water lines
  • Angle Valve Replacement: a level 1 repair performed efficiently while other work is ongoing
  • Shower Valve Installation/Replacement: labor-only pricing for removing and installing a new shower valve
  • Military Discount: to honor the homeowner’s service with fair, respectful pricing

We’re very clear about what’s included and what isn’t. For example, the per-foot charges for laying new sewer and water lines in Lutz cover only the installation of the piping itself. They do not include:

We spell this out in the estimate so there are no surprises. If a homeowner needs help coordinating trenching or concrete work in Lutz or nearby areas, we can discuss options and timing, but we want to be transparent about which pieces are part of our scope and which are not.

Step-by-Step: How the Planned Plumbing Work Would Be Performed

Even though this visit was focused on revising the estimate, the work itself follows a clear sequence. Here’s how a combined pipe replacement and shower valve project typically proceeds for our customers in Lutz, FL.

1. Preparation and Safety

Before any plumbing work begins, our team:

  • Shuts off the water supply safely
  • Protects floors and work areas with drop cloths
  • Identifies key access points for piping and the shower valve
  • Reviews the plan with the homeowner one more time, including which walls or access panels may be opened

We treat every home in Lutz as if it were our own, focusing on cleanliness and minimizing disruption as much as possible.

2. Sewer and Drain Line Replacement

With any trenching or access already prepared, we then:

  • Remove old or damaged drain piping as needed
  • Lay new PVC sewer and drain lines according to code
  • Ensure proper slope for reliable drainage and to prevent standing waste water
  • Secure all connections and test for leaks

Once the new piping is in place, we perform flow tests to confirm that drains in the home are working smoothly before closing any access points.

3. Water Supply Line Replacement

Next, we address the water lines. Depending on the layout of the Lutz home and the homeowner’s preferences, we may use CPVC, PVC, or PEX for the new supply lines. The process typically includes:

  • Isolating and removing outdated or leaking sections of water piping
  • Running new properly-sized water lines to fixtures and manifolds
  • Installing secure, code-compliant fittings and supports
  • Slowly re-pressurizing the system and checking for leaks at every connection

Our goal is to give the homeowner reliable water pressure and reduce future risk of hidden leaks, which are a common problem in the high-humidity, high-temperature environment around Lutz and Tampa Bay.

4. Angle Valve Replacement While On Site

While the system is already drained and accessible, we replace any failing or suspect angle valves. Doing this during a larger plumbing project in Lutz is more efficient than scheduling a separate visit later. We:

  • Remove old, corroded, or frozen angle valves
  • Install new, high-quality shut-off valves at key fixtures
  • Test each valve to ensure it opens and closes smoothly and seals completely

These small components make a big difference during future maintenance and emergencies, giving the homeowner more control over specific fixtures without shutting down the entire house.

5. Shower Valve Installation or Replacement

Finally, we turn to the shower valve. For a full replacement, we typically:

  • Shut off water and open an access area behind the shower if needed
  • Remove the existing valve body and related connections
  • Install the new shower valve, properly aligned and secured
  • Reconnect hot and cold supply lines and test for leaks
  • Set temperature limits for scald protection, when applicable

If the homeowner in Lutz provides new trim — shower head, plate, and handle — we can install those as part of the same visit. If not, and if the existing trim is compatible and in good shape, we can leave it in place. Any sheetrock or tile that needs to be cut for access is discussed ahead of time, and we’re transparent that wall or tile repair is not included in the plumbing scope.

Why These Plumbing Fixes Work

Each part of this planned project in Lutz, FL supports the same overall goal: a safe, efficient, and reliable plumbing system.

1. Sewer and Drain Line Replacement

Drain lines and sewer pipes rely on gravity and proper slope to move wastewater away from the home. When pipes sag, crack, or clog repeatedly, you can end up with:

  • Slow drains
  • Frequent backups
  • Odors in the home or yard

Replacing these pipes with properly sized and sloped PVC restores smooth flow and greatly reduces the chances of future blockages. In the clay-rich soils around Lutz and the greater Tampa area, correct installation helps resist shifting and root intrusion.

2. Water Supply Line Replacement

Water supply piping is under pressure 24/7. Older materials or poorly installed lines are more likely to develop pinhole leaks, bursts, or corrosion that discolors water. By updating water lines with modern piping, we:

  • Improve reliability and reduce leak risk
  • Help stabilize water pressure throughout the home
  • Support better performance from fixtures and appliances

This is especially important in hot attics and wall cavities in Lutz homes, where extreme temperatures can stress older plumbing.

3. Angle Valve Replacement

Shut-off (angle) valves are a small but critical safety feature. When they work properly, you can quickly isolate a sink or toilet during a leak, preventing water damage and giving you time to call for help. Replacing old valves during a larger project creates a safer home and makes any future repairs faster and cleaner.

4. Shower Valve Replacement

The shower valve controls water temperature and mixing. A properly installed modern valve:

  • Helps maintain a consistent, comfortable temperature
  • Reduces the risk of sudden scalding or freezing
  • Protects against internal leaks that can damage walls and framing

For homeowners in Lutz and throughout Tampa Bay, a new shower valve is both a comfort upgrade and a safeguard against hidden water damage.

Pro Tips for Lutz, FL Homeowners Planning Plumbing Work

If you live in Lutz, FL or nearby areas of Tampa Bay and are considering pipe replacement or shower upgrades, here are some practical tips:

  1. Address recurring clogs early. If the same drain backs up again and again, it may signal a deeper issue with your sewer line. Don’t wait for a full backup — have a licensed plumber inspect the line and discuss options. You can learn more about what to watch for in our article on how to know when your drain needs replacement.
  2. Take advantage of combined work. If you’re already planning water line or sewer work, ask about adding small repairs — like angle valve replacements — during the same visit. It often saves money and reduces disruption.
  3. Plan around weather and access. In Lutz, heavy summer showers and high humidity can complicate outdoor trenching and yard work. Try to schedule major exterior plumbing work during drier stretches when possible.
  4. Ask for clear per-foot pricing. When a plumber prices work per foot, make sure you understand how many feet are being replaced, what materials are used, and what’s included (and not included) in that price.
  5. Protect pipes in hot spaces. Attics, garages, and exterior walls in Lutz can get extremely hot. If you have plumbing in these areas, ask your plumber about materials and insulation options that hold up better to heat.
  6. Choose licensed, local experts. Local knowledge matters. A plumber who regularly works in Lutz and the Tampa Bay area understands our soil conditions, water quality, and building styles, which makes for better long-term solutions.

Why Lutz and Tampa Bay Homeowners Choose Home Therapist

At Home Therapist Cooling, Heating, and Plumbing, we know plumbing work isn’t just about pipes — it’s about your comfort, your schedule, and your peace of mind. Whether we’re updating an estimate or replacing an entire section of piping, our team brings the same level of care and professionalism to every project in Lutz, FL and throughout Tampa Bay.

Here’s what you can expect when you work with us:

  • Licensed, experienced technicians: Our plumbers are trained, licensed, and familiar with local codes and conditions.
  • Clear, detailed estimates: We break down base costs, per-foot pricing, and labor-only items, so you know exactly what you’re paying for.
  • Respect for your home: We protect work areas, communicate before opening walls, and clean up after ourselves.
  • Safety and long-term reliability: From shut-off valves to sewer piping, we prioritize solutions that reduce future risks.
  • Flexible plumbing services: Whether you need water pipe repair, full water pipe replacement, or other plumbing services in Tampa and Lutz, we tailor the work to your needs.
  • Support for our military community: We’re proud to offer military discounts as a small way to say thank you for your service.

If you’d like to see how we handle a similar shower project nearby, take a look at our shower valve and handle replacement project in Riverview, FL.

Need Plumbing Help in Lutz, FL? We’re Here for You.

Lutz, FL may be known for its quiet neighborhoods and easy access to Tampa, but homeowners here deal with the same tough plumbing conditions as the rest of the Tampa Bay region — heat, humidity, and aging infrastructure. Whether you live near the heart of Lutz, Florida or closer to the Tampa city line, you deserve plumbing that works the way it should.

If you’re concerned about your sewer line, water lines, shower valve, or shut-off valves, don’t wait for a major leak or backup. Our local Tampa Bay plumbing technicians are ready to help you plan the right repair or replacement, with clear estimates and respectful service from start to finish.

To schedule plumbing service or request an updated estimate in Lutz, FL 33559 or nearby communities, reach out to Home Therapist Cooling, Heating, and Plumbing today. Whether you need emergency help, routine repairs, or a full piping upgrade, we provide the therapy your home needs — with the steady, professional care your family deserves.

If you’re outside Lutz but still in the Tampa Bay area, you can explore more about our emergency plumbing services in Tampa, or simply search for Home Therapist on Google Maps for Lutz, FL 33559 or in the greater Tampa Bay area to see where we serve.

Evaporator Coil & TXV Replacement in Tampa, FL 33629: Fixing a Hard-Working AC the Right Way

When your air conditioner in Tampa, FL has to work overtime just to keep your home comfortable, there’s almost always a reason hiding inside the system. At a home in Tampa, FL 33629, one of our Home Therapist technicians was called out for a routine maintenance visit that quickly turned into a deeper repair: an evaporator coil replacement, a TXV replacement, a line flush, and a refrigerant recharge.

The homeowner had noticed that one of her systems was struggling to keep up on hot days and seemed to run constantly. In a place as warm and humid as South Tampa, that’s not just inconvenient — it’s a sign something inside the system is off. During this visit, our technician carefully tracked the problem to a leaking evaporator coil and a stressed refrigerant circuit, then walked the homeowner through clear options to protect her equipment and restore reliable cooling.

Below is a straightforward breakdown of what was going wrong, how we diagnosed it, and how we repaired it so the home can stay comfortable and efficient through Tampa’s long cooling season.

Customer Problem: An AC That Never Catches a Break

Our customer, Erica, scheduled a routine maintenance visit under her service plan. Once our technician arrived at her Tampa home, she mentioned a specific concern: System #2 wasn’t cooling like it used to. On warmer days, it ran almost nonstop and still didn’t feel like it was catching up.

From the homeowner’s perspective, the symptoms were:

  • AC running nearly continuously during hot afternoons
  • Rooms not cooling down as quickly as before
  • A sense that the system was “tired” or overworked

In Tampa’s climate, where air conditioners often run most of the year, it’s easy to assume this is just normal wear and tear. But continuous runtime with poor cooling is usually a red flag. It often points to issues like:

  • Low refrigerant from a leak
  • Airflow restrictions
  • Failing components like the TXV (Thermal Expansion Valve) or coil

Because this equipment is a 3-ton, vertical heat pump system and the home is in a warm, coastal environment, letting the problem continue could mean higher utility bills and damage to expensive components, especially the compressor.

Inspection & Diagnosis: Tracking Down a Hidden Refrigerant Leak

Our technician, Jandiel, started with a complete inspection of System #2. Even though this visit began as routine HVAC service in Tampa, FL, the symptoms pointed us toward a possible refrigerant issue. We worked methodically to confirm or rule that out.

Here’s what we checked and found:

  • Visual inspection of the air handler and evaporator coil
    We opened the air handler to look for any obvious signs of frost, ice buildup, or past water damage from freezing and thawing. The air filter was heavily soaked, which typically happens when a coil has frozen and then melted.
  • Refrigerant level and pressure checks
    We measured system pressures and superheat/subcooling to see how the refrigerant circuit was performing. Readings indicated the system was running low on refrigerant, consistent with the homeowner’s experience of poor cooling and long run times.
  • Evaporator coil condition
    Further testing revealed that the evaporator coil inside the air handler was leaking. This is where the low refrigerant was coming from. In Tampa homes, evaporator coils can fail early due to constant runtime, humidity, and sometimes corrosion.
  • Fan motor and electrical usage
    We checked amp draws on the fan motor and other components. The fan motor was already showing slightly elevated energy usage, a sign it was working harder than it should.

We also verified the system’s warranty status. Even though the equipment warranty was under a previous homeowner’s name, it’s valid until 2029 and can still be honored. That’s important for keeping replacement costs under control when larger components like coils need to be swapped out.

By the time the diagnostic was complete, we had a clear picture:

  • The evaporator coil inside the air handler was leaking refrigerant.
  • The system had likely frozen at some point, soaking the filter as it thawed.
  • Running the AC in this condition risked compressor damage and higher power bills.

From there, we sat down with the homeowner and recommended a repair plan that addressed the root cause, not just the symptom.

Step-by-Step Repair: Coil, TXV, Dryer & Refrigerant Circuit Restoration

To protect the system and restore efficient cooling for this Tampa home, we recommended and performed a combination of repairs:

  • Evaporator coil replacement
  • TXV (Thermal Expansion Valve) replacement
  • Filter dryer replacement and copper line flushing
  • System evacuation and refrigerant recharge with R410A

1. Evaporator Coil Replacement

The evaporator coil is the indoor coil inside the air handler that absorbs heat from your home’s air. Because this coil was leaking, replacing it was the only reliable, long-term solution.

Our process included:

  • Recovering and pumping down refrigerant
    Before opening the system, we pumped the existing refrigerant down into the condenser to avoid venting it into the atmosphere and to work safely.
  • Removing the old coil
    We carefully disconnected the leaking air handler coil and removed it from the unit.
  • Installing the new coil (under warranty)
    The new air handler coil was installed as a warranty replacement. Warranty coverage is a key part of what keeps long-term ownership costs manageable for homeowners in Tampa Bay.
  • Soldering and leak checks
    All new connections were properly soldered and then tested for leaks. This step is critical: there’s no point installing a new coil if a bad connection lets refrigerant escape.
  • Vacuuming the system
    We pulled a deep vacuum on the system to remove moisture and air. Any non-condensable gases left in the system can cause performance issues and internal corrosion.

The replacement coil for this project was on order and scheduled to arrive within 7–14 business days. The TXV was already available, so work could be staged to minimize downtime.

2. TXV (Thermal Expansion Valve) Replacement

The TXV controls how much refrigerant flows into the evaporator coil, matching the refrigerant flow to the system’s cooling load. With a leaking coil and low refrigerant situation, this is a good time to replace the TXV as well to ensure proper control.

Here’s what we did:

  • Pumped down remaining refrigerant to the condenser to safely isolate the indoor section.
  • Removed the old TXV from the refrigerant circuit.
  • Installed the new TXV according to manufacturer specifications.
  • Soldered connections and leak-checked to make sure there were no new leaks introduced at the valve.
  • Evacuated the system again to ensure a clean, dry system before recharging.

By pairing the coil and TXV replacement, we help this Tampa heat pump system run more reliably and efficiently once it’s back online.

3. Filter Dryer Replacement & Copper Line Flush

Any time we open the refrigerant circuit, we take the opportunity to protect it from future blockages and moisture. For this system, we:

  • Pumped down the refrigerant to the condenser for safe work on the lines.
  • Flushed the copper lines using R11 and nitrogen to clear any potential blockages or contaminants.
  • Replaced the filter dryer, which is a key protective component that removes moisture and debris from the refrigerant.
  • Cleaned or replaced the piston as needed to ensure unrestricted, properly metered flow.
  • Performed another vacuum and leak check to verify the entire system was tight and clean.

This step protects sensitive components like the compressor, coil, and TXV from sludge, acids, or moisture that can form when a system has been running with a leak.

4. R410A Refrigerant Recharge

Because the evaporator coil was leaking, it wasn’t enough to simply “top off” the refrigerant. All the refrigerant in the system had to be properly recovered, and the system had to be recharged from scratch after the repair.

Once the system was sealed and evacuated:

  • We added more than 3 pounds of R410A refrigerant, as required by the manufacturer’s charge guidelines for a 3-ton system.
  • We monitored pressures, temperatures, and superheat/subcooling to confirm correct charge levels.
  • We verified that the system cycled and cooled properly without freezing or short-cycling.

It’s important for Tampa homeowners to understand that needing more than 2 pounds of refrigerant is often a sign of a leak. Simply refilling without finding and repairing the leak is like inflating a tire with a nail still in it — it may work for a bit, but the problem always comes back.

Why This Fix Works: Protecting the Refrigeration Cycle

Air conditioning systems in Tampa Bay are built around a closed refrigeration cycle. When everything is sealed and balanced, refrigerant moves heat from inside your home to the outside unit efficiently and quietly. Leaks in that closed loop break the entire balance.

Here’s why the approach we took is so effective:

  • Replacing the evaporator coil stops the leak at its source
    Instead of repeatedly adding refrigerant, we eliminated the component that was allowing refrigerant to escape.
  • Installing a new TXV restores precise refrigerant control
    The TXV regulates how much liquid refrigerant enters the evaporator coil. When it’s working properly with a correctly charged system, you get stable cooling without freezing coils or poor performance.
  • Flushing lines and replacing the filter dryer protects the compressor
    Contaminants, acids, and moisture inside the lines shorten equipment life. Cleaning the lines and installing a fresh dryer protects the entire system long-term.
  • Evacuating and recharging with the correct amount of R410A restores efficiency
    A properly charged system runs cooler, cycles on and off as it should, and uses less energy. That matters for electric bills in Tampa, where AC usage is year-round.

Done together, these steps help ensure the heat pump can keep this Tampa home comfortable without overworking the compressor or driving up monthly energy costs.

Pro Tips for Homeowners in Tampa, FL 33629

Living in South Tampa, neighborhoods near places like Bayshore Boulevard and Palma Ceia, means your AC works almost nonstop. Here are some practical tips to keep your system healthier for longer:

  1. Don’t ignore long runtimes or weak cooling.
    If your AC in Tampa runs constantly and still doesn’t feel cool enough, schedule an inspection. It may be a refrigerant issue, airflow restriction, or failing component.
  2. Watch for signs of freezing.
    Wet or soggy air filters, ice on refrigerant lines, or water under the air handler are all clues that your evaporator coil may be freezing and thawing. That’s not normal and should be checked.
  3. Schedule regular tune-ups.
    With our climate, air conditioner tune-up services in Tampa, FL are best done at least once a year. Routine maintenance catches problems early and keeps your warranty in good standing.
  4. Take refrigerant leaks seriously.
    If you’ve had to add Freon (R410A) more than once, there’s almost always a leak. Instead of constant refills, have a technician find and fix the source. You can also learn the key signs of refrigerant leaks to catch them sooner.
  5. Use your warranty benefits.
    Many systems installed in Tampa Bay carry long parts warranties. Even if ownership has changed hands, it may still be honored, just like this system’s warranty through 2029.
  6. Consider a maintenance plan.
    A plan like our Value Therapy Plan helps you stay on top of inspections, cleanings, and adjustments. That’s especially helpful in humid coastal air that can accelerate wear on coils and electrical components.

Why Tampa Homeowners Choose Home Therapist

When something is off with your HVAC system in Tampa, you don’t just want a fast fix — you want the right fix. Here’s how our team approaches every call:

  • Licensed, experienced technicians who know how Florida’s heat and humidity stress AC systems.
  • Clear communication in plain language so you understand what we found, what we recommend, and why.
  • Warranty-aware repairs that respect manufacturer guidelines and protect your long-term investment.
  • Attention to cleanliness and safety, from protecting your home to handling refrigerant and electrical components properly.
  • Options, not pressure — whether it’s repair vs. replacement, part upgrades, or maintenance plans, we present choices so you can decide what’s best for your home and budget.

If you’d like to dive deeper into how we handle cooling problems, you can read more about our air conditioner installation and repair services in the Tampa Bay area and what to expect from our AC repair services when your system is not cooling. For long-term care, we also offer AC maintenance plans with clearly explained costs and seasonal air conditioner tune-up services in Tampa, FL.

We’re proud to serve homeowners across Tampa Bay, from South Tampa and Hyde Park to neighborhoods near landmarks like Bayshore Boulevard and Downtown Tampa, keeping homes comfortable and systems running safely.

Need Reliable AC Repair in Tampa, FL 33629?

If your air conditioner is running non-stop, not cooling well, or you suspect a refrigerant leak in your Tampa home, it’s a good time to have a professional take a closer look. Addressing issues early can protect your compressor, lower your electric bills, and help avoid emergency breakdowns during our hottest months.

Home Therapist offers honest, thorough AC repair services in Tampa and the surrounding Bay area, with technicians who treat your home like their own and explain every step along the way.

Schedule your air conditioning service in Tampa, FL 33629 today, and give your system the therapy it needs to keep your home cool, efficient, and comfortable all year long.

Plumbing Estimate Visit in Valrico, FL: Toilet, Shower, and Kitchen Fixture Concerns

Plumbing Estimate Visit in Valrico, FL: Toilet, Shower, and Kitchen Fixture Concerns

Recently, our Home Therapist plumbing team visited a home in Valrico, FL 33596 to review several plumbing concerns: a toilet that needed parts replaced, a shower that needed better support for the shower head, and a kitchen faucet that wasn’t working the way the homeowner wanted. This visit was scheduled under our “Plumbing – Free Diagnosis if Hired” service, which includes a modest service call fee that’s waived or discounted if we’re chosen to complete the work.

In this case, the homeowner decided to hold off on diagnostics and repairs until getting a second opinion. We fully respected that decision. Even though no hands-on testing or repair work was performed, there’s still a lot other Valrico and Tampa Bay homeowners can learn from this kind of visit—especially about how estimates, options, and service call fees really work.

1. The Customer’s Plumbing Concerns

Our technician Alejandro visited the Valrico home to talk through a list of plumbing issues the homeowner had been noticing around the house. Before we even pick up a wrench, we always start by listening. Here’s what the homeowner shared.

Toilet concerns

The homeowner wanted to replace a toilet part related to the water supply inside the tank—most likely the fill valve, based on her description of “where the water comes in.” She already had a replacement part on hand and wanted a professional to install it and verify that everything was working correctly.

Shower concerns

She also wanted a solution to better support the shower head. That usually means installing or adjusting a bracket or support arm so the shower head sits at a comfortable height and doesn’t sag or wobble. Proper support protects both the wall and the plumbing connection behind it.

Kitchen sink and faucet concerns

In the kitchen, the homeowner reported issues with the sink faucet and mentioned an aerator concern. Aerators can clog, wear out, or fail over time, especially in areas with hard water. Our technician discussed that, based on what he was seeing and the symptoms she described, a more complete solution might be needed—possibly replacing a valve or the faucet assembly to restore reliable performance.

At this stage, everything was still in the “conversation” phase. To provide firm pricing, warranties, and long-term solutions, our next step would normally be a full diagnostic evaluation of each fixture.

2. Understanding the Service Call & Why Diagnostics Matter

This visit was booked under our standard plumbing service call structure:

This small fee allows a licensed technician to travel to the home, listen carefully, visually inspect accessible components, and, when authorized, perform professional diagnostics. That may include:

  • Checking water pressure and shutoff valves
  • Inspecting visible supply lines and connections
  • Testing toilet fill and flush cycles
  • Inspecting the faucet body, aerator, and under-sink valves
  • Evaluating the shower arm, support, and wall penetration

Those steps are what let us give accurate pricing and dependable recommendations. Without them, we can only speak in general terms and cannot confirm the exact condition of parts or the best long-term fix.

3. What Our Technician Could and Could Not Do on This Visit

When Alejandro arrived at the Valrico home, he walked through each of the concerns with the homeowner. However, before he began any hands-on diagnostics or disassembly, she decided to wait for another plumber who was scheduled to visit for a second opinion.

Because of that choice, the scope of our visit was limited to discussion only. That means:

  • No detailed testing of the toilet, shower, or kitchen faucet was performed.
  • No parts were removed or installed, even though the homeowner had a toilet part on site.
  • No pressure testing, leak checks, or valve inspections were completed.

We always respect a homeowner’s decision to pause or gather more information. At the same time, we’re careful to be transparent about what that means. Without further inspection or testing:

  • We cannot confirm which specific components are failing.
  • We cannot responsibly quote exact repair costs or warranties.
  • We cannot document the system’s condition for future reference.

For homeowners in Valrico and across Hillsborough County, this is an important takeaway: estimates based on a quick look and verbal description alone are usually just that—estimates. Solid, reliable recommendations require solid, reliable diagnostics.

4. How We Would Normally Approach These Plumbing Issues

Even though this visit did not move forward into active service, it’s helpful to walk through how our team typically handles similar issues in Valrico, FL homes. This can give you a clear sense of what to expect if you authorize full diagnostics and repairs.

Step 1: Toilet inspection and fill valve or toilet replacement

For a toilet with suspected fill valve problems, we would usually:

  • Shut off the water at the toilet supply valve.
  • Remove the tank lid and inspect internal components (fill valve, flapper, float, and supply line).
  • Check for signs of wear, mineral buildup, or improper adjustment.
  • If the fill valve is to be replaced, remove the old one, install the homeowner’s part (if appropriate) or a new part we supply, then adjust it to the manufacturer’s specs.
  • Turn the water back on, test several flushes, and confirm water level, fill time, and shutoff operation.

If the toilet itself is older, cracked, or inefficient, we may recommend a full toilet replacement instead of just swapping parts. For homeowners across Tampa Bay, we offer professional toilet installation and repair services—learn more about our toilet installation and repair in Tampa Bay.

Step 2: Shower head support and bracket solutions

For a shower head that needs better support, our technician would typically:

  • Inspect the existing shower arm, escutcheon, and wall surface for movement or looseness.
  • Check for signs of moisture damage around the penetration point.
  • Discuss options with the homeowner: replacing the shower arm, adding a new bracket, or upgrading to a different style of shower fixture.
  • Install the new support or bracket, ensuring it’s firmly anchored and sealed.
  • Test the shower head to confirm it holds position and does not leak at the connection.

Good support here isn’t just about comfort. It also reduces stress on the plumbing behind the wall, which is crucial in humid, high-use bathrooms common throughout Valrico and the Tampa Bay area.

Step 3: Kitchen faucet, aerator, and valve evaluation

In the kitchen, a simple aerator issue can sometimes be resolved with a quick cleaning or replacement. But in many Tampa Bay homes, especially where water quality or older fixtures are factors, our technicians often find deeper issues such as:

  • Worn internal faucet cartridges
  • Deteriorated under-sink shutoff valves
  • Corroded threads or fittings
  • Low pressure from partially blocked supply lines

Our usual process would be to:

  • Inspect the faucet body and handles for leaks or stiffness.
  • Remove and inspect the aerator for debris and mineral buildup.
  • Check under-sink valves and supply lines for corrosion, leaks, or restricted flow.
  • Recommend either targeted component replacement or a full faucet upgrade, depending on age and condition.

We provide dedicated faucet installation and repair services in Tampa and offer sink installation and repair across Tampa Bay when fixtures are too far gone to justify piecemeal fixes.

5. Why These Fixes Work: Plumbing Basics for Tampa Bay Homeowners

All three of these fixtures—the toilet, shower, and kitchen sink—are tied to the same basic plumbing principles:

  • Water pressure and control: Valves, cartridges, and fill mechanisms control the flow and pressure of water. When they wear out, you get inconsistent flow, strange noises, or leaks.
  • Sealing and support: Components like gaskets, threads, brackets, and wall anchors keep water where it belongs. If they’re loose or deteriorated, small issues can turn into leaks and water damage.
  • Drainage and venting: While this visit focused more on supply-side issues, every fixture also depends on proper drainage to avoid backups, odors, and standing water.

Replacing a fill valve, securing a shower head, or upgrading a kitchen faucet isn’t just about appearances. It’s about restoring proper water control and preventing wear and tear on the rest of your plumbing system. Over time, that can save Valrico homeowners significant money on water bills and avoid damage to walls, cabinets, and flooring.

6. Pro Tips for Homeowners in Valrico, FL

Whether you’re in Valrico, Brandon, or anywhere else in the Tampa Bay area, here are some practical tips to keep your bathroom and kitchen plumbing in better shape:

  1. Listen for running water in toilets. If you hear a toilet running or refilling when no one has used it, the fill valve or flapper may be failing. Catching this early prevents high water bills and unnecessary strain on your system.
  2. Check under sinks a few times a year. In our humid Florida climate, small leaks under kitchen or bathroom sinks can quickly lead to musty odors, swelling cabinets, and mold. A simple visual check with a flashlight can reveal early signs of trouble.
  3. Don’t ignore a loose shower head. A wobbly shower arm can signal loose fittings or compromised support behind the wall. Addressing it sooner can help prevent more extensive wall damage later, especially in homes near Valrico’s many older neighborhoods.
  4. Know where your shutoff valves are. Make sure you can quickly locate and operate the shutoff valves at your toilets, sinks, and main water supply. This is especially important in areas like Valrico, where afternoon storms and power outages can complicate emergency situations.
  5. Be cautious with DIY part swaps. If you’ve purchased a toilet part or faucet on your own, it may or may not be the ideal match for your current setup. A short, professional visit can confirm compatibility and protect you from leaks or mismatched connections.
  6. Schedule a whole-home plumbing checkup periodically. An occasional full inspection can uncover small issues—like that aging toilet valve or corroded shutoff—before they become big problems. For more on what’s included, you can read our blog about whole-house plumbing inspections.

7. Why Tampa Bay Homeowners Choose Home Therapist

At Home Therapist Cooling, Heating, and Plumbing, we know it’s a big decision to invite a technician into your home and to decide who you trust with your plumbing system. That’s why we focus on:

  • Licensed, experienced technicians: Our team is trained to handle everything from simple toilet repairs to full plumbing upgrades with care and precision.
  • Transparent service call structure: Our modest service call fee is clearly explained up front and is waived or discounted when you hire us to complete recommended work.
  • Clear communication: We explain what we see in plain language and outline your options without pressure—whether you live in Valrico, Tampa, or elsewhere in Hillsborough County.
  • Clean, respectful work: We protect your home, clean up after ourselves, and treat your space as if it were our own.
  • Focus on long-term reliability: We don’t just put a bandage on problems. We aim for repairs and replacements that hold up in Florida’s heat, humidity, and water conditions.

Our commitment extends across the region, from Valrico to Tampa and beyond. You can see more about our broader plumbing offerings on our other plumbing services page and our Hillsborough County plumbing repair services.

8. Ready to Schedule Plumbing Service in Valrico, FL?

If you’re dealing with toilet issues, a loose or sagging shower head, or a kitchen faucet that just isn’t working right in Valrico, FL, we’re here to help. Our local plumbers serve Valrico and nearby communities every day, providing thorough diagnostics and clear options so you can make the best choice for your home.

Whether you’re near the heart of Valrico, closer to Brandon, or heading out toward Lithia Springs Park, our team is just a call away. We’ll explain the service call fee up front, perform a professional evaluation when you’re ready, and apply that fee toward the work if you choose to move forward with us.

Schedule your plumbing repair or fixture replacement today and give your home the therapy it needs—from toilet repairs to faucet upgrades, our local Tampa Bay plumbers are ready to restore comfort, safety, and peace of mind.

To learn more about faucet upgrades and sink solutions before we arrive, you can also review our faucet installation and repair services in Tampa and our sink installation and repair options in Tampa Bay.

Plumbing Inspection and Water Heater Flush for a Home in Tampa, FL 33618

For homeowners in Tampa, FL, reliable plumbing is more than just convenience – it is comfort, safety, and peace of mind. Recently, one of our Premium Home Therapy Plan members in Tampa, FL 33618 invited our team out for a scheduled plumbing inspection and water heater flush. What started as a routine maintenance visit turned into a helpful checkup that confirmed everything was running well, with one important recommendation to keep the home protected.

In this article, we will walk through what our technician found, how we handled the water heater flush, what a whole-home plumbing inspection includes, and why a single worn faucet is worth addressing before it turns into a leak.

Customer Problem: A Routine Visit With Preventive Goals

Because this homeowner is part of our Premium Home Therapy Plan, this visit was not about an urgent leak or a flooded floor. Instead, it was a proactive checkup – the kind of care that helps Tampa homeowners avoid those stressful emergencies altogether.

The homeowner scheduled:

  • A complete water heater flush
  • A full plumbing inspection throughout the home

There were no major complaints, no cold showers, and no visible leaks. The goal was simple: make sure everything in the home’s plumbing system was operating correctly and catch any small issues early.

In Tampa, where our water can be on the harder side and the humidity is high, sediment build-up in water heaters and slow, hidden leaks are very common. So even when everything seems “fine,” these routine visits are one of the best investments a homeowner can make to keep their system running smoothly and efficiently.

Inspection & Diagnosis: What We Checked in This Tampa Home

Our technician, Adalberto, started with a clear plan for this service visit in Tampa, FL 33618. During a Premium Home Therapy Plan plumbing visit like this, we focus on both the water heater and the overall plumbing system, looking for any current problems or early warning signs.

Water Heater Evaluation

Before flushing the water heater, we first made sure it was operating safely and correctly. That typically includes:

  • Visually inspecting the tank for rust, corrosion, or signs of past leaks
  • Confirming there were no active leaks at the connections or valves
  • Listening for popping or rumbling, which often indicates heavy sediment
  • Checking water temperature at fixtures to ensure consistent hot water delivery

In this case, the water heater was operating properly. There were no signs of active leaks, and the unit was heating water as expected. That allowed us to move forward with the scheduled flush as a preventive maintenance step, not a repair.

Whole-Home Plumbing Inspection

Next, we performed a full plumbing inspection, going room by room through the home in Tampa. That kind of inspection often includes:

  • Inspecting visible supply lines for corrosion, kinks, or damage
  • Checking shut-off valves to ensure they open and close properly
  • Looking under sinks for slow leaks, drips, or water staining
  • Testing toilets for proper flushing, refilling, and silent operation
  • Running faucets and showers to check water pressure and flow
  • Listening for unusual noises in the plumbing system

Across the home, everything appeared to be in good condition with solid water pressure and no active leak issues. However, one faucet showed clear signs of wear and was not performing the way it should.

The Faucet Issue We Found

During inspection, Adalberto identified a single faucet that needed attention. While it was still functioning, it showed signs of wear and potential malfunction. Common issues we see with older or worn faucets in Tampa homes include:

  • Intermittent dripping that does not fully stop, even when closed
  • Stiff or loose handles that do not control flow smoothly
  • Uneven water flow caused by internal wear or debris
  • Corrosion or mineral buildup around the spout and connections

Even though this faucet was not causing a major problem yet, it was clearly a good candidate for replacement before it turned into a water-wasting leak or caused damage to the surrounding cabinet or countertop.

Step-by-Step: Water Heater Flush and Plumbing Service

With the inspection complete and the system looking generally healthy, we focused on performing the scheduled water heater flush and then reviewing options for the worn faucet. Here is how that process typically works for a Tampa plumbing visit like this.

1. Preparing the Water Heater for Flushing

The first step is to safely prepare the water heater. For a standard tank-style water heater, that often includes:

  • Confirming power or gas is safely managed according to the unit type
  • Shutting off the cold-water supply to the water heater
  • Connecting a drain hose to the drain valve at the bottom of the tank
  • Routing the hose to a safe drain location outdoors or to a floor drain

Safety and cleanliness matter to us. We always make sure the draining location is appropriate and that we protect the home’s floors and nearby surfaces during this process.

2. Flushing Sediment From the Tank

After preparation, we open the drain valve and allow water to flow out of the tank. In many Tampa Bay homes, the water at first will appear cloudy or contain sediment. That is the mineral and debris build-up that can collect at the bottom of the tank over time.

We let water run until it flows clear. This step:

  • Removes sediment that can reduce heating efficiency
  • Helps prevent hot spots on the tank bottom that can weaken the metal
  • Can reduce popping or banging sounds some homeowners hear

Once the water runs clear, we carefully close the drain, refill the tank, and bring the system back to normal operation, confirming that everything is functioning as it should.

3. Final Plumbing Checks Around the Home

With the water heater flush complete, we return to the plumbing system as a whole. In this Tampa home, that included:

  • Verifying hot water delivery at key fixtures once the tank refilled
  • Re-checking inspected areas for any missed leaks or drips
  • Ensuring water pressure remained steady across the home

Everything checked out well. The water heater continued to operate properly, and the plumbing system looked healthy overall.

4. Discussing Faucet Replacement Options

The only notable finding during this visit was the worn faucet. Rather than waiting for it to fail or start leaking, we recommended a proactive replacement.

We always take time to explain options clearly, such as:

  • Replacing the faucet with a similar style for a simple, low-disruption swap
  • Upgrading to a more efficient or modern faucet if the homeowner prefers
  • Reviewing finish and style options to match the existing bathroom or kitchen

In a membership visit like this, the goal is long-term reliability, not just a quick patch. Replacing a worn faucet now helps protect the home from water damage and ongoing drips later.

Why This Maintenance Visit Matters for Tampa Homeowners

It might be tempting to skip routine plumbing inspections and water heater flushes if nothing seems obviously wrong. But in a place like Tampa – with warm weather most of the year, higher mineral content in some water supplies, and constant demand on hot water systems – regular maintenance truly pays off.

How a Water Heater Flush Helps

Water heaters work by heating water in a tank and keeping it ready for use. Over time, minerals and debris in the water settle to the bottom of the tank and form sediment. If this buildup is not removed, it can:

  • Make the heater work harder to heat water through the sediment layer
  • Increase energy use and utility costs
  • Cause rumbling or popping noises as bubbles move through the sediment
  • Contribute to premature wear on the tank bottom

By regularly flushing the tank, we help maintain efficient heat transfer and reduce strain on the system. For homeowners in Tampa and the surrounding communities, that means better performance and potentially fewer breakdowns.

Why a Small Faucet Issue Is Worth Addressing

A single worn faucet may not seem urgent. But from a plumbing standpoint, it is like a warning light on a dashboard. Faucets are control points for your plumbing system. When they start to fail, you can see:

  • Persistent dripping – wasting water and increasing bills
  • Sudden leaks that can damage cabinets, countertops, or flooring
  • Inconsistent temperature or flow that makes daily use frustrating

Replacing a failing faucet with a properly functioning one restores control and reliability. It also helps maintain balanced water pressure and flow across the rest of the home. That is why we recommended replacing the faulty faucet in this Tampa home before it became a bigger issue.

Pro Tips for Plumbing Maintenance in Tampa, FL

Whether you live in Tampa, Carrollwood, or another nearby neighborhood, a few simple habits can go a long way toward keeping your plumbing and water heater in good shape.

  1. Schedule regular water heater maintenance. In the Tampa Bay climate, aim for a professional water heater inspection and flush about once a year, especially if you notice popping sounds or slower hot water delivery.
  2. Check under sinks monthly. Take a quick look under kitchen and bathroom sinks for moisture, discoloration, or musty smells. Catching a slow drip early can prevent cabinet damage.
  3. Watch your water bill. An unexplained increase can be an early sign of a hidden leak or a running toilet. If something seems off, it is worth having a licensed plumber take a closer look.
  4. Clean faucet aerators. Mineral buildup at the tip of faucets can reduce flow and create uneven spray. Carefully removing and cleaning aerators a couple of times a year is especially helpful in the Tampa area.
  5. Know where your main shut-off is. In case of a sudden leak, knowing how to turn off water to the home – and making sure the valve still operates – can save you from a lot of damage.
  6. Consider a maintenance plan. Memberships like our plumbing maintenance plans can help homeowners in Tampa stay ahead of problems with scheduled inspections, water heater flushes, and priority service.

Why Tampa Homeowners Trust Home Therapist

When we come into a home in Tampa, FL 33618, or anywhere in the Tampa Bay area, our goal is simple: treat the home like our own and leave the system better than we found it. For this Premium Home Therapy Plan member, that meant a clean, professional water heater flush, a thorough plumbing inspection, and an honest recommendation about a worn faucet.

Homeowners choose Home Therapist for plumbing and water heater service in Tampa because:

  • Our technicians are licensed and experienced. We bring real-world expertise to every visit, whether it is a simple inspection or a complex repair.
  • We communicate clearly. We explain what we find in plain language and walk through options without pressure.
  • We focus on safety and cleanliness. From water heater work to faucet replacement, we protect your home and clean up our workspace before we leave.
  • We prioritize long-term reliability. Routine visits, like this plumbing inspection and water heater flush in Tampa, are designed to keep systems healthy, not just patch problems.
  • We are local to the Tampa Bay area. We understand the demands that our climate, water quality, and year-round usage place on plumbing systems.

Related Services and Resources

If you are considering a similar visit for your home, you may find these services and articles helpful:

To get a better feel for the Tampa community we serve, many homeowners like to learn more about the city itself through resources such as the Tampa, Florida overview, exploring nearby family attractions like Busch Gardens Tampa Bay, or checking out local neighborhoods near Carrollwood in North Tampa.

Schedule Plumbing Service in Tampa, FL

If you are in Tampa, FL 33618 or anywhere in the Tampa Bay area and you are not sure when your water heater was last flushed or when your plumbing was last inspected, this is a good time to schedule a visit. Routine care like the inspection and water heater flush we performed at this Tampa home can help prevent surprise leaks, improve efficiency, and extend the life of your system.

Whether you need a full plumbing inspection, a water heater flush, or a faucet replacement, our local Tampa Bay plumbing technicians are here to help. Contact Home Therapist today to schedule plumbing service in Tampa or nearby communities and give your home the therapy it needs.

Elite HVAC Maintenance for a Multi-System Home in Tampa, FL 33609

Elite HVAC Maintenance for a Multi-System Home in Tampa, FL 33609

Keeping one air conditioner healthy through a Tampa summer is hard enough. Keeping four HVAC systems running smoothly in a larger home near South Tampa takes a different level of planning and care. On this Elite Therapy Plan visit in Tampa, FL 33609, our Home Therapist technician provided a full multi-system tune-up, duct sanitation, and whole-home filter replacement to protect comfort, efficiency, and indoor air quality all year long.

The homeowner had already invested in our Elite Therapy Plan, and this was Visit #3 on their schedule. During this appointment, we:

  • Performed a complete inspection and service on all four HVAC systems
  • Cleaned and treated each system's condensate drain line
  • Sanitized the ductwork to help with dust and allergens
  • Replaced a full set of air filters throughout the home
  • Identified a slightly elevated fan energy draw on one system that we'll continue to monitor

If you're a homeowner in Tampa, FL with more than one AC system, this project is a good example of the kind of proactive care that keeps your house comfortable without surprise breakdowns.

Understanding the Homeowner's Situation

This property in Tampa, FL 33609 has four separate HVAC systems, which is common in larger homes and multi-story layouts around South Tampa and areas like Hyde Park and Beach Park. Multiple systems give better zoning and comfort, but they also mean more components to maintain.

Our customer enrolled in the Elite Therapy Plan because they wanted:

  • Consistent, reliable cooling in every part of the home
  • Cleaner air for family and guests
  • Lower risk of major repairs in the middle of peak Tampa heat
  • Professional eyes on newer and older equipment working together

Between the humid climate, nearby coastal air, and year-round AC use, equipment in Tampa works harder than in many other parts of the country. For this visit, our technician arrived prepared with the full list of replacement filters requested in advance, including various sizes for different returns throughout the home, to make sure the entire property was properly filtered.

One of the four systems is relatively new, with an air handler installed in 2023 paired with a 2018 condenser. The homeowner wanted to be sure this newer system stayed in top shape while the older components were monitored closely for efficiency and wear.

Inspection & Diagnosis: What We Checked

On an Elite Therapy Plan visit, our goal is to go beyond a quick check. We perform a detailed, step-by-step evaluation of each HVAC system. At this Tampa home, our technician worked through all four systems with a consistent process.

System-by-System Evaluation

For each HVAC system in the home, we:

  • Visually inspected the air handler and condenser for signs of corrosion, damage, or leaks
  • Checked electrical connections and components for safety and secure terminations
  • Measured system operating pressures and compared them to manufacturer guidelines
  • Verified temperature split between supply and return air to ensure proper cooling performance
  • Listened for unusual noises from fans, motors, and compressors
  • Confirmed proper thermostat communication and system cycling

On System 1 (Air Handler Year 2023, Condenser Year 2018), we noted something important:

  • System pressures: Within acceptable range
  • Overall operation: Cooling properly
  • Fan energy consumption: Higher than normal

That elevated fan draw tells us the blower motor is working harder than we would expect. While the system is still operating correctly, this type of observation is exactly why routine maintenance matters. Addressing or monitoring issues early can prevent a sudden failure.

Indoor Air Quality and Drainage Checks

In addition to mechanical checks, we focused strongly on cleanliness and moisture control inside the home, which is critical in the humid Tampa Bay climate. Our technician:

  • Inspected each condensate drain for clogs, algae buildup, or standing water
  • Evaluated duct cleanliness and potential microbial growth indicators
  • Confirmed that existing whole-home filtration was correctly sized and installed

Because this home is on our Elite plan, we included duct sanitation and whole-home filter replacement as part of the visit, adding another layer of protection for both equipment and indoor air.

Step-by-Step Elite Therapy Plan Service

Once the inspection was completed, our Home Therapist technician in Tampa moved into the maintenance portion of the visit. With four systems on site, planning and organization are key to getting everything done correctly and efficiently.

1. Filter Management and Replacement

Before arriving, our team made sure to pick up the full list of required filters from our office, based on the homeowner's needs. This included multiple sizes to match each return grille and system, with one remaining 12x30x1 filter to be completed later. At the home, we:

  • Located every return and equipment filter location
  • Verified each filter size matched the duct and grille opening
  • Replaced old, restrictive filters with fresh, properly rated filters
  • Ensured airflow arrows were pointing in the correct direction

For a large home in Tampa, FL, filter management is one of the simplest but most powerful ways to protect both comfort and energy bills. Clean filters reduce strain on blower motors and improve air quality for everyone in the home.

2. Drain Line Service on All Four Systems

Next, we turned our attention to the condensate drain lines. In Tampa Bay, AC systems pull a tremendous amount of moisture out of the air. If those drain lines clog, you can end up with water damage, ceiling stains, or even system shutdowns.

For each HVAC system, we:

  • Flushed the drain line to help clear algae and debris
  • Checked drain slope and support where accessible
  • Confirmed proper draining at the termination point
  • Verified any float switches or safety shutoffs were operational

This preventative care is especially important for multi-story homes or condos around Tampa, FL 33609, where air handlers are often located in attics or closets over finished spaces.

3. Duct Sanitation for Healthier Air

With four systems feeding different zones of the house, ductwork cleanliness becomes even more important. During this Elite visit, we performed duct sanitation to help reduce dust, odors, and microbial growth inside the HVAC distribution system.

Our process included:

  • Treating the duct interior with an appropriate EPA-registered sanitizer where applicable
  • Focusing on supply trunks and key branches that carry most of the airflow
  • Being mindful of occupant safety and product ventilation requirements

For many homeowners in Tampa, this step complements standard maintenance and supports a healthier, more comfortable living environment, especially for family members with allergies or respiratory concerns.

4. System Performance Check and Documentation

After maintenance was completed on each unit, we circled back to confirm performance. Our technician:

  • Re-checked temperature splits to confirm improved airflow and cooling
  • Listened for any post-maintenance noise changes
  • Verified that all access panels were sealed correctly
  • Cleaned up the work areas, leaving the home as tidy as we found it

We also documented the elevated fan draw on System 1, noted that system pressures and overall operation remained within range, and ensured that this detail would be tracked on future visits if the homeowner chooses to address it proactively.

Why This Maintenance Approach Works

Everything we did on this Tampa project ties back to a few core HVAC principles: airflow, refrigeration, drainage, and cleanliness.

Airflow and Fan Energy Use

HVAC systems are designed around a specific airflow range. If filters are clogged, ducts are dirty, or components are out of spec, the blower motor has to work harder to move the same amount of air. That can show up as:

  • Higher fan energy consumption (as we observed on System 1)
  • Uneven temperatures room to room
  • Higher utility bills
  • Shorter blower motor and capacitor life

By keeping filters fresh, ducts clean, and drain lines clear, we support smoother airflow and reduce the load on the system. Monitoring elevated fan draw early can prevent that motor from failing during peak summer when you need cooling the most.

Refrigeration Cycle and System Pressures

System pressures within the acceptable range tell us that the refrigeration cycle is operating properly: refrigerant is absorbing heat indoors and rejecting it outside as designed. When pressures drift too high or too low, it can indicate low refrigerant charge, airflow issues, or failing components.

On this home's 2018 condenser paired with the newer 2023 air handler, healthy pressures are a sign that the components are still working well together, especially valuable in the hot, long cooling season in Tampa.

Drainage and Humidity Control

In Tampa Bay's humid climate, each AC system removes a lot of moisture from the air. That condensation has to go somewhere, and if the drain line is restricted, the water backs up. Routine drain service:

  • Prevents water damage and overflow
  • Reduces musty odors around the air handler
  • Helps the system dehumidify more effectively

For multi-system homes, that's four opportunities for water-related issues unless you stay ahead of them with maintenance.

Clean Ducts, Cleaner Home

Duct sanitation supports the work your filters are already doing. While filters catch particles as air passes through, ducts can hold onto dust and microbial growth over time. Cleaning and sanitizing ducts where appropriate:

  • Helps reduce circulating dust and allergens
  • Supports better-smelling indoor air
  • Pairs well with high-quality whole-home filters

For Tampa families who keep windows closed much of the year because of heat and humidity, indoor air quality depends heavily on how well the HVAC system is maintained.

Pro Tips for Homeowners in Tampa, FL with Multiple HVAC Systems

If you have two, three, or even four systems like this home in Tampa, FL 33609, a few habits can go a long way toward protecting your comfort and budget.

  1. Label Your Filters by Location
    Use a marker to note which filter size belongs to which return (for example, "Upstairs hallway" or "Master suite"). In multi-system homes, this prevents mix-ups and helps you or your technician swap filters quickly and correctly.
  2. Set Calendar Reminders for Filter Changes
    In Tampa's climate, many homes benefit from filter changes every 1–2 months, especially during peak summer. Set a recurring reminder so it doesn't get forgotten during busy seasons.
  3. Watch for Early Fan Trouble Signs
    If you notice whistling vents, hot and cold spots, or your system running longer than usual, it may be an airflow or fan issue. Early attention can prevent a breakdown when temperatures are in the 90s.
  4. Check Drain Lines Before Storm Season
    With heavy summer rains and high humidity, keeping condensate drains flowing is critical. If you see water pooling around your indoor unit, call a local Tampa Bay HVAC technician before it becomes a bigger problem.
  5. Use a Maintenance Plan for Multi-System Homes
    When you have several systems, coordinating separate tune-ups can get complicated. A structured plan like our Elite Therapy Plan keeps everything on schedule and documented.
  6. Know Where Your Systems Are Located
    Whether they're in the attic, closets, or garage, knowing where each air handler and thermostat is located makes it easier to communicate with your technician and spot issues early.

Why Tampa Homeowners Choose Home Therapist

At Home Therapist Cooling, Heating, and Plumbing, we treat every visit like a house call for your home's comfort. For homeowners in Tampa Bay, especially those with multiple systems, that means:

  • Licensed, experienced technicians who understand how Florida's heat and humidity stress your equipment
  • Clear, plain-English explanations of what we find and what it means for your home
  • Transparent recommendations focused on long-term reliability, not unnecessary upsells
  • Clean, respectful work habits—we treat your home like it's our own
  • Thoughtful maintenance plans designed for busy families and multi-system properties

If you're comparing options for AC repairs, installs, and maintenance in Tampa Bay, we're here to make the process straightforward and stress-free. You can also explore our current AC maintenance and cleaning specials in Tampa Bay to see what fits your home and budget.

Learn More About HVAC Care for Your Tampa Home

Want to better understand what your system needs and when? These resources are a helpful next step:

For a sense of how quickly weather can change the load on your system, take a look at local conditions around popular spots like International Plaza in Tampa or the nearby Westshore area. The same heat and humidity you feel outside is what your HVAC system is working against every day.

Schedule Elite HVAC Maintenance in Tampa, FL

If you have multiple HVAC systems in Tampa, FL 33609 or anywhere in the Tampa Bay area, professional maintenance isn't a luxury—it's what keeps your home comfortable and your equipment reliable.

Whether you're interested in an Elite Therapy Plan visit like this homeowner, or you simply need a thorough tune-up on one system, our local Tampa Bay HVAC technicians are ready to help.

Ready for the therapy your home needs? Contact Home Therapist Cooling, Heating, and Plumbing today to schedule AC repair and maintenance services in Tampa and keep your systems running strong through every season.

Elite AC Maintenance for Aging Systems in Tampa, FL 33609

When you live in Tampa, FL 33609, your air conditioning isn’t a luxury—it’s survival. So when a homeowner in South Tampa with multiple older AC systems started worrying about energy use, air quality, and reliability, our team at Home Therapist stepped in with an Elite Therapy Plan maintenance visit to get everything checked, cleaned, and documented.

During this scheduled visit, our technician Barbaro inspected all four systems, including a 2008 package unit (System 4) that had clear signs of age and organic growth. While the systems were still running, they were no longer operating as efficiently as they should, and the homeowner needed honest guidance on what to do next.

Below, we’ll walk through what we found, the maintenance we completed, and how we helped this Tampa homeowner balance today’s comfort with smart planning for future AC replacement.

Customer Problem: Multiple Older AC Systems in a Tampa Home

This Tampa homeowner had four AC systems serving different parts of the home. On the surface, everything was still cooling, but they had a few growing concerns:

  • Energy bills creeping up, especially during Tampa’s hot, humid summers
  • Musty odors at times when the system started up
  • Worry about reliability with several systems 15+ years old
  • A desire to stay ahead of any breakdowns with regular, professional maintenance

System 4, a 2008 package unit, was of particular concern. The homeowner knew it was older, and they wanted to make sure it was safe, clean, and not wasting energy or spreading contaminants through the ductwork.

They enrolled in our Elite Therapy Plan to keep all four systems on a regular maintenance schedule. This was Visit #3 under that plan—an opportunity to check how the systems were aging and to catch issues early.

Inspection & Diagnosis: What We Found on Site

On arrival at the home in Tampa, FL 33609, our technician started with a full evaluation of each system, with special attention on the 2008 package unit.

Here’s what we checked and found:

1. System Pressures & Overall Operation

We connected our gauges and verified:

  • Refrigerant pressures were within acceptable ranges
  • The compressor was starting and running properly
  • Electrical components were operating without obvious faults

This told us that, from a refrigeration standpoint, the system was still functioning as designed, without an immediate leak or major failure.

2. Fan Performance & Energy Consumption

Next, we evaluated the fan motor and airflow. What we observed:

  • The fan energy consumption was higher than we’d like to see for a system this size
  • The blower had to work harder than normal—often a sign of restriction or age-related wear

Higher fan energy use often translates directly into higher power bills for homeowners in Tampa, especially when systems run nearly year-round.

3. Organic Growth & Cleanliness

The most concerning finding on System 4 was cleanliness. The AC cabinet and components had significant organic growth—likely due to:

  • Warm, humid Tampa air
  • Condensation forming on coils and internal surfaces
  • Age and lack of deep cleaning before enrolling in the Elite Therapy Plan

Organic growth doesn’t just look bad; it can contribute to musty odors, reduced airflow, coil inefficiency, and degraded indoor air quality.

4. Whole-Home Condition Across All 4 Systems

Because this homeowner has four separate systems, we performed a full Elite Plan maintenance on each unit, not just the 2008 package system. Overall, we documented:

  • All systems were still cooling the home
  • None of the systems were performing at peak efficiency
  • Systems 2, 3, and 4 were all 15+ years old and showing clear signs of age

From a safety standpoint, everything was operating, but from an efficiency and long-term reliability standpoint, these systems are nearing the end of their practical lifespan.

Step-by-Step Maintenance: Elite Therapy Plan Visit in Tampa

Once we completed our diagnostics, we moved into a thorough maintenance process on all four systems. The goal was to clean, tune, and protect each unit so the homeowner could get the most remaining life out of their equipment while planning for future upgrades.

1. Coil Cleaning on All Systems

We carefully cleaned the coils on all four units. For Tampa homeowners, this step is critical because:

  • Dirty coils can’t transfer heat efficiently, forcing the system to run longer
  • Organic buildup can trap moisture and dust, feeding further growth
  • Clean coils reduce strain on the compressor and help lower energy use

By restoring cleaner coil surfaces, we improved heat exchange and helped each system cool more effectively.

2. Drain Line Cleaning & Service

Next, we cleaned and serviced each system’s condensate drain line. In humid places like Tampa, clogged or partially blocked drains are extremely common and can lead to:

  • Water backing up into the air handler
  • Ceiling or wall damage
  • System shutdowns if a float switch is activated

By flushing and treating these drain lines, we helped protect the home from water damage and minimized the risk of emergency calls later in the season.

3. Duct Sanitation for Cleaner Air

Given the amount of organic growth in the system, we performed duct sanitation to help reduce contaminants being circulated through the home. This step is especially valuable for:

  • Allergy-sensitive family members
  • Homes with pets
  • Older systems with previous moisture or cleanliness issues

Duct sanitation doesn’t replace full duct cleaning or repair, but it does help sanitize the air path and works hand-in-hand with regular filter changes and coil cleaning to support better indoor air quality.

If you’re curious about how duct care fits into your comfort, you can also read our guide on the role of your HVAC system in indoor air quality.

4. Filter Replacement Throughout the Home

We replaced all home filters across the four systems. Clean filters:

  • Help improve airflow and reduce fan energy consumption
  • Capture dust and particulates before they reach coils and ductwork
  • Support better indoor air quality and comfort

For a busy household in Tampa, staying consistent with filter changes is one of the easiest and most cost-effective ways to extend equipment life.

5. Documentation & Recommendations

After completing the Elite Therapy Plan visit, we documented all findings and clearly explained the situation to the homeowner. Our key recommendations were:

  • Monitor Systems 2 and 3 for any pressure-related performance changes
  • Begin planning for the future replacement of Systems 2, 3, and 4, all 15+ years old
  • Continue with routine maintenance to preserve performance and reliability in the meantime

We also let the homeowner know that we would be sending estimates for replacement options so they can budget and plan ahead—no pressure, no surprise sales, just honest information.

Why This Maintenance Matters for Aging AC Systems

Even though these systems are older, the work we performed still delivers meaningful benefits for this Tampa homeowner. Here’s why.

Airflow & Fan Energy Use

When coils and filters are dirty, the fan has to work harder to move air. This means:

  • Higher electric bills
  • More stress on fan motors
  • Uneven cooling in different parts of the home

By cleaning coils and replacing filters, we reduced airflow resistance. Lower resistance means the fan can move the same amount of air with less power and less wear.

Refrigeration Cycle Efficiency

AC systems cool your home by transferring heat from indoors to outdoors through the refrigerant cycle. Dirty coils act like a blanket, trapping heat and preventing efficient transfer.

Cleaner coils let the refrigerant absorb and release heat more effectively, helping the system:

Drainage & Humidity Control

In Tampa’s humid climate, your AC is constantly pulling moisture from the air. That moisture needs somewhere to go, and that’s where the condensate drain comes in.

Keeping the drain line clear:

  • Prevents backups and water damage
  • Helps the system manage indoor humidity effectively
  • Protects safety controls like float switches from nuisance trips

Indoor Air Quality & Organic Growth

Organic growth inside an air handler or duct system can contribute to odors and lower air quality. Duct sanitation, coil cleaning, and consistent filter changes all work together to reduce the conditions that allow growth to thrive.

This is especially important for older homes and older systems, where years of moisture and dust accumulation can create a perfect environment for growth if not addressed.

Pro Tips for Homeowners in Tampa, FL

Whether you’re in South Tampa, near Hyde Park Village, or closer to downtown, these tips can help you get more out of your AC systems:

1. Plan Ahead for Replacement Around 12–15 Years

In the Tampa Bay climate, many systems start to show significant wear around the 12–15 year mark, especially if they haven’t had consistent maintenance. If your system is approaching that age, start budgeting now. Our HVAC replacement checklist for homeowners is a great place to begin.

2. Stay Consistent With Maintenance

Annual or semi-annual maintenance is one of the best investments you can make in your comfort. A plan like our Elite Therapy Plan helps you stay on schedule without having to remember to call. You can learn more about staying on top of tune-ups in our overview of AC tune-up services in Tampa.

3. Replace Filters More Often During Peak Season

In summer, Florida homes often need filter replacements every 30–60 days, especially if you have pets or allergies. Clean filters support both comfort and efficiency.

4. Watch for Subtle Changes in Performance

If you notice rooms taking longer to cool, rising energy bills, or unusual noises, don’t wait for a full breakdown. Small issues can often be addressed quickly before they become major repairs. Our article on what to expect when your AC is not cooling can help you understand what’s normal and what isn’t.

5. Think in Terms of Total Cost, Not Just Repair Cost

With an older system, sometimes a series of frequent repairs can quickly add up. At a certain point, it can be more cost-effective to invest in a new, high-efficiency unit. Our guide on why and when to upgrade your HVAC system walks through the key factors to consider.

6. Protect Your Comfort in Humid Months

From late spring through fall, high humidity in Tampa can make even normal temperatures feel uncomfortable. Properly sized, well-maintained equipment is essential for keeping humidity under control, especially in multi-system homes like this one near West Swann Avenue.

Why Choose Home Therapist for HVAC Service in Tampa Bay

At Home Therapist, we treat every maintenance visit like a full check-in on your home’s comfort and safety—not just a quick filter change.

When you schedule AC service in Tampa with us, you can expect:

  • Licensed, experienced technicians who know the demands of the Tampa Bay climate
  • Clear, plain-English explanations of what we find and what it means for you
  • No-pressure recommendations—we give you options and let you decide the timing
  • Clean, respectful work in and around your home
  • Focus on long-term reliability, not just short-term fixes

Whether you’re maintaining older systems like this homeowner or planning a full upgrade, we can help you compare options, understand ballpark pricing, and plan your next steps. You can explore our air conditioner installation and repair services in the Tampa Bay area or review how our maintenance plans work in more detail in our guide to AC maintenance plans in Tampa.

Need Reliable AC Maintenance or Replacement in Tampa, FL?

If your home in Tampa, FL 33609 or nearby neighborhoods is running on older AC equipment, you don’t have to wait for a breakdown. An Elite Therapy Plan visit—just like this one near West Swann Avenue—can help you:

  • Clean and tune your existing systems
  • Document current performance and condition
  • Make a smart, step-by-step plan for future replacement

Whether you’re near Hyde Park, downtown Tampa, or closer to the Westshore business district, our local Tampa Bay HVAC technicians are here to help keep your home comfortable and safe.

Ready to schedule AC maintenance, duct sanitation, or a consultation on replacing aging units? Contact Home Therapist today to book your next HVAC service in Tampa and give your home the therapy it needs.

For more homeowner guidance, you can also check out our air conditioning maintenance guide for Tampa Bay to better understand how to care for your system year-round.

Elite Therapy Plan Visit in Tampa, FL 33609: Addressing Organic Growth and Low System Pressures

When your air conditioning system in Tampa, FL 33609 has to battle our long, hot, humid summers, even small issues can quietly build into bigger problems. During a recent Elite Therapy Plan visit at a South Tampa home near W Swann Ave, our Home Therapist technician, Barbaro, uncovered a few important concerns: organic growth inside the air handler, low system pressures, and a fan motor drawing more energy than it should. On top of that, the air handler itself was approaching the end of its typical lifespan.

This visit was part of the homeowner’s Elite Therapy Plan, and it gave us a chance to catch these issues early, explain what they meant in plain language, and help the homeowner plan the next smart steps for their comfort, safety, and budget.

Understanding the Homeowner’s Situation in Tampa, FL 33609

In South Tampa, air conditioning isn’t a luxury—it’s a necessity. The homeowner had invested in our Elite Therapy Plan through The AC Therapist to make sure their system was inspected regularly and any concerns were spotted early. This visit was Visit #3 on their plan and focused on what we call “System 3”:

  • Air handler year: 2007
  • Condenser year: 2018

That means the indoor unit had been working hard for well over a decade in Tampa’s heat and humidity. While the outdoor condenser was relatively newer, the older air handler was starting to show normal signs of age and wear you’d expect in a climate like ours.

From conversations with the homeowner and the conditions in the home, the main concerns were:

  • Keeping the home consistently cool without big temperature swings
  • Worry about indoor air quality, especially with Tampa’s humidity
  • Managing energy bills, which had slowly been creeping up

The homeowner did the right thing by sticking with regular maintenance. Plans like our AC tune-up services in Tampa are designed exactly for this type of situation—catching issues before they become urgent breakdowns.

Inspection & Diagnosis: What We Found During the Elite Therapy Plan Visit

Barbaro performed a full inspection of System 3 as part of the Elite Therapy Plan visit. Our goal was simple: check performance, safety, and efficiency, and give the homeowner a clear picture of what’s happening inside their system.

Step 1: Visual Inspection of the Air Handler

The first concern we noted was the presence of organic growth inside the air handler. In Tampa’s humid environment, this is a common risk—especially with older air handlers. We carefully inspected:

  • Evaporator coil surface and surrounding cabinet
  • Blower compartment and fan assembly
  • Interior insulation and access panels

Organic growth can affect indoor air quality and, over time, contribute to musty odors or allergy-like symptoms for sensitive occupants. It can also indicate that moisture is lingering inside the unit longer than it should.

Step 2: Checking Refrigerant Pressures

Next, Barbaro connected gauges to measure the system pressures. The readings showed that pressures were lower than ideal for this system and the current outdoor conditions. Low pressures can mean several things, including:

  • Reduced refrigerant charge
  • Restricted airflow across the indoor coil
  • Metering device or coil performance issues

In this case, the low pressures lined up with the age of the air handler and the other symptoms we were seeing: reduced efficiency and an overworked fan.

Step 3: Measuring Fan Energy Consumption

We also tested the blower fan’s energy consumption. The fan was drawing more power than we’d expect for normal operation. High fan energy use can point to:

  • Worn motor bearings or components
  • Imbalanced or dirty blower wheel
  • Airflow restrictions making the fan work harder

In older air handlers, these issues tend to appear as the unit approaches the end of its typical life. That’s exactly what we saw here in this Tampa, FL 33609 home.

Step 4: Evaluating System Age and Remaining Life

Based on the inspection and performance numbers, we noted plainly for the homeowner that the air handler is nearing the end of its typical lifespan. While it was still operating, the signs of reduced efficiency and mechanical stress were already present.

For context, in a hot and humid area like Tampa, Florida, air handlers can experience more wear than in milder climates, especially if earlier in their life they didn’t receive consistent professional maintenance.

Step-by-Step Service: How We Addressed the Issues

On every Elite Therapy Plan visit, our focus is to stabilize performance, protect the system, and give clear guidance—never to scare or pressure anyone into decisions. Here’s how we approached this system in Tampa, FL 33609.

1. Documenting and Explaining the Organic Growth

We carefully documented the areas of organic growth inside the air handler and discussed them with the homeowner. We explained:

  • Where the growth was located
  • How humidity and condensation can contribute to it
  • What options exist for cleaning and ongoing prevention

For many homeowners in Tampa, solutions may include professional cleaning, improved filtration, and in some cases, additional air quality products. We discussed options without pushing, so the homeowner could decide what fit their comfort level and budget.

2. Verifying System Operation With Low Pressures

With low system pressures noted, we continued to monitor how the system was cooling. We confirmed the unit was still providing cooling but with signs of reduced efficiency. We explained that operating for long periods in this condition can strain components and increase energy use.

We also discussed that if cooling performance worsens—rooms not reaching set temperature, long run times, or ice forming on the lines—that would be a strong sign to schedule a dedicated AC repair visit in Tampa so we can fully isolate the cause of the low pressures.

3. Assessing the High Fan Energy Consumption

For the overworking blower fan, we measured its power draw and compared it to typical ranges. We then checked:

  • Condition of the blower wheel
  • General cleanliness around the fan housing
  • Return and supply airflow paths

We confirmed that the motor was using more energy than ideal and explained to the homeowner that this is often an early sign of a component approaching failure. While the fan was still running on this visit, it gave the homeowner a chance to think ahead instead of being surprised by a sudden breakdown on a hot Tampa afternoon.

4. Reviewing Replacement vs. Repair Planning

Because the air handler is from 2007, we talked honestly about future planning. At this age, it often makes sense to weigh ongoing repair costs and energy use against the benefits of replacing the air handler—or, in some cases, the entire system—with a newer, more efficient setup.

We pointed the homeowner to resources like our air conditioner installation and repair services in the Tampa Bay area to help them understand options, typical processes, and what to expect if they choose to upgrade down the road.

5. Providing Clear, Written Notes

Finally, we made sure the homeowner left this Elite Therapy Plan visit with clear documentation of:

  • The age and condition of their air handler and condenser
  • Locations of organic growth and why it matters
  • Low pressure readings and what to watch for
  • High fan energy consumption and the likely implications

This gives them a helpful reference if they decide to move forward with repairs, deep cleaning, air quality upgrades, or eventual system replacement.

Why These Findings Matter: The HVAC Principles Behind the Visit

To make good decisions about your AC system in Tampa, it helps to understand what’s happening behind the scenes. The issues we found in this South Tampa home all connect back to a few key HVAC principles.

1. Airflow and Energy Use

Your air handler’s blower moves air across the evaporator coil and through your ductwork. If the blower is working harder than it should—due to age, wear, or airflow restrictions—it pulls more energy. That’s why we track fan energy consumption carefully.

Over time, this means:

  • Higher monthly energy bills
  • More stress on the blower motor
  • Increased likelihood of failure during heavy use

2. Refrigeration Cycle and Low Pressures

Your AC system cools your home by moving heat from inside to outside. When pressures are too low, the system can struggle to carry enough heat away. That often translates to:

  • Longer run times
  • Less stable indoor temperatures
  • More wear on the compressor over time

In a climate like Tampa’s, where systems run many months of the year, catching and correcting low-pressure issues early can add years of life to your equipment.

3. Moisture, Organic Growth, and Air Quality

Cold evaporator coils naturally produce condensation. If that moisture doesn’t drain away efficiently, or if conditions inside the air handler stay damp, organic growth can develop on internal surfaces.

For homeowners in Tampa, where humidity is high nearly year-round, managing this moisture is especially important. Regular maintenance, proper drainage, and sometimes additional strategies—such as enhanced filtration or UV treatments—can help keep your system cleaner and your indoor air healthier. Our article on air conditioning maintenance in Tampa Bay dives deeper into how routine care supports better air quality.

Pro Tips for Homeowners in Tampa, FL 33609

If you live in areas like South Tampa, Hyde Park, or Palma Ceia near W Swann Ave, your AC system faces intense humidity and heat almost year-round. Here are a few practical tips to protect your comfort and your equipment:

  • Schedule consistent maintenance. In Tampa, an annual or semi-annual professional checkup isn’t optional—it’s how you catch issues like low pressures or organic growth before they lead to breakdowns. Consider a plan similar to the Elite Therapy Plan to stay ahead.
  • Pay attention to subtle changes. Longer cooling cycles, higher bills, or slightly warmer rooms can be early signs of efficiency issues, especially in older air handlers. Don’t ignore them; a quick inspection now can prevent a no-cool emergency later.
  • Keep filters clean and sized correctly. A dirty or overly restrictive filter makes your blower work harder, just like we saw with the high fan energy consumption in this Tampa home. Check filters monthly and use quality, manufacturer-recommended options.
  • Watch for musty or “damp” odors. If you notice a persistent musty smell when the AC runs, it may point to organic growth inside the air handler or ductwork. Mention it during your next maintenance visit so we can inspect targeted areas.
  • Plan ahead for older equipment. If your air handler is over 12–15 years old, especially in our climate, start preparing for repair or replacement decisions. Our resources—like the HVAC maintenance guide for homeowners—can help you budget and plan without stress.
  • Use trusted local resources. Tampa has unique climate and salt-air challenges, especially closer to the bay. When in doubt, lean on local experts and sources tailored to our area rather than generic national advice.

Why Tampa Bay Homeowners Choose Home Therapist

At Home Therapist Cooling, Heating, and Plumbing, our approach is simple: we treat your home like it’s our own, and we talk to you like family. On this Elite Therapy Plan visit in Tampa, FL 33609, our job was not just to note low pressures and organic growth—it was to make sure the homeowner understood what those findings meant in real-life terms.

When you call our local Tampa Bay HVAC technicians, you can expect:

  • Licensed, experienced professionals. Our technicians are trained to work safely, cleanly, and respectfully in your home.
  • Clear communication. We explain our findings in plain English—no technical fog, no pressure tactics.
  • Focus on long-term reliability. We don’t just get your AC running today; we think about how to keep it running as efficiently and safely as possible in our demanding climate.
  • Respect for your space. From shoe covers to tidy work areas, we take cleanliness seriously during every visit.
  • Tailored recommendations. Whether you need a tune-up, targeted repair, or it’s time to consider a new system, we help you compare your options calmly and confidently.

Our team services Tampa and the greater Tampa Bay area, from neighborhoods near Hyde Park and Palma Ceia to Carrollwood, Brandon, Riverview, and beyond. Wherever you are in the region, we’re ready to help your home feel comfortable again.

Ready to Schedule HVAC Service in Tampa, FL?

If your AC system is older, if you’ve noticed musty odors, or if your energy bills have been creeping up, it may be time for a professional checkup like the one we performed at this home in Tampa, FL 33609.

Whether you’re interested in an ongoing maintenance plan, a one-time tune-up, or you’re starting to think about repair or replacement, our team is here to guide you. Explore our air conditioner tune-up services in Tampa or learn what to expect from professional AC repair in Tampa, then reach out to schedule your visit.

Home Therapist Cooling, Heating, and Plumbing provides the therapy your home needs—so you can stay comfortable, safe, and confident in your HVAC system all year long in Tampa Bay.

Elite Therapy Plan Visit in Tampa, FL: Addressing Organic Growth and Low Pressures on an Older Air Handler

Elite Therapy Plan Visit in Tampa, FL: Organic Growth & Low Pressures on an Older Air Handler

During a recent Elite Therapy Plan visit at a home in Tampa, FL 33609, our Home Therapist technician was called out for a routine maintenance check on a two-part AC system: a 2008 air handler paired with a 2018 outdoor condenser. What was supposed to be a simple visit turned into an important conversation about indoor air quality, system efficiency, and planning ahead for aging HVAC equipment in Tampa’s heat and humidity.

On this visit, our technician discovered organic growth inside the air handler and slightly low system pressures. While the system was still operating, these are early warning signs Tampa homeowners should not ignore.

In this case study, we’ll walk through what was going on in the home, what we inspected, what we found, and how we helped the homeowner understand both immediate needs and long-term options for their comfort and safety.

The Customer’s Situation: An Older Air Handler in Tampa’s Humid Climate

This home in Tampa, FL 33609 is served by what we’d call a “mixed-age” system:

The homeowner is enrolled in our Elite Therapy Plan, so this was a scheduled Visit #3—part of a regular maintenance program designed to keep Tampa Bay AC systems clean, efficient, and reliable.

While the homeowner wasn’t calling for a breakdown, they were aware the air handler was getting older and wanted reassurance that everything was still safe, efficient, and ready for the longer cooling season. With our climate and proximity to the bay, high humidity in areas like South Tampa can be tough on older equipment, especially indoor units that handle moisture and airflow all day, nearly year-round.

During the visit, our technician confirmed a few key concerns:

  • Presence of organic growth inside the air handler
  • Slightly low system pressures during operation
  • An indoor unit that is simply past its prime in terms of age and efficiency

None of this meant the system had to be replaced immediately, but it did mean the homeowner needed clear, honest information so they could make smart decisions over the next few seasons.

Inspection & Diagnosis: What Our Technician Checked

To get a complete picture of the AC system’s health, our technician in Tampa followed a structured diagnostic process. On an Elite Therapy Plan visit like this, we don’t just wipe surfaces and leave; we evaluate performance, safety, and long-term reliability.

1. Visual Inspection of the Air Handler

The indoor air handler is where conditioned air is pushed through the home. Because it handles both moisture and airflow, it’s a common place for organic growth to appear when conditions are right.

Our technician inspected:

  • Cabinet interior for visible organic growth
  • Evaporator coil surfaces
  • Blower wheel and blower compartment
  • Drain pan and nearby surfaces for moisture buildup

During this inspection, we confirmed organic growth was present inside the air handler. This is not uncommon in older air handlers in Tampa, but it does affect air quality and efficiency and should be addressed.

2. Refrigerant Pressure Readings

Next, our technician connected gauges to check system operating pressures. Refrigerant pressures tell us a lot about how well the AC is transferring heat, how the coil is behaving, and whether the system is charged appropriately.

The readings showed that system pressures were slightly low. However, an important detail here is that the visit took place during cooler outdoor temperatures, which naturally lowers pressures compared to a hot summer day.

Instead of jumping straight to conclusions about a leak or pushing for unnecessary work, we explained:

  • Cooler outdoor temperatures can cause pressures to run a bit lower than normal.
  • The current readings did not indicate a severe problem, but they are worth monitoring over time.
  • Any changes in comfort, run times, or cooling performance should be reported so we can re-test under different conditions.

3. General System Condition & Age

The air handler—at about 15 years old—is at or beyond the typical expected service life for many units in the Tampa Bay area. The condenser, at around seven years old, is in better shape age-wise, but the indoor unit usually sets the tone for overall comfort, airflow, and cleanliness.

Our technician discussed with the homeowner that, given the age of the air handler, it’s reasonable to expect:

  • Reduced efficiency compared to modern equipment
  • Higher risk of breakdowns during heavy use
  • More frequent need for cleaning to manage organic growth and maintain air quality

Rather than pressure the homeowner into a replacement, we focused on clear information: what’s working, what’s aging, and what to watch for.

Step-by-Step Service Process During the Elite Therapy Plan Visit

On this Elite Therapy Plan visit in Tampa, our goal was to keep the system running as safely and efficiently as possible while giving the homeowner a realistic picture of the future.

1. Thorough System Checkup

Our technician performed a full operational check, including:

  • Starting and running the system from the thermostat
  • Verifying that the blower and condenser fans operated properly
  • Listening for unusual noises or vibration
  • Confirming airflow from supply vents inside the home

This step ensures the system is performing its basic job: moving air, transferring heat, and responding correctly to thermostat calls.

2. Identifying and Documenting Organic Growth

Once organic growth was confirmed inside the air handler, we documented where it was located and the overall extent. We discussed options with the homeowner, which typically include:

  • Cleaning and treating affected surfaces (as appropriate for the system)
  • Improving filtration and maintenance frequency
  • Considering additional air quality solutions, such as UV lights or upgraded filtration

Because every home and budget is different, we focused on what would give the best balance of cleaner air and long-term value for this particular Tampa homeowner.

3. Measuring and Explaining Refrigerant Pressures

With slightly low pressures observed, the technician noted:

  • The exact readings during the visit
  • The outdoor temperature at the time of testing
  • How system performance compared to homeowner expectations

Instead of overselling a recharge or assuming a leak, we explained that under cooler Tampa weather, readings can appear lower than what we’d see on a 95°F afternoon. We emphasized the importance of:

  • Monitoring comfort levels and run time as temperatures rise
  • Calling us if rooms begin to feel warmer than normal or if the system runs non-stop
  • Using future Elite Therapy Plan visits to track trends in system performance

4. Honest Conversation About Age and Future Planning

The most valuable part of many visits is the conversation. Our technician spoke with the homeowner about realistic expectations for a 15-year-old air handler in Tampa’s climate:

  • More frequent cleaning to manage organic growth and keep air flowing freely
  • Higher energy use compared to a newer, high-efficiency system
  • Increased chance of component failure—especially during peak summer demand

We didn’t insist they replace it today. Instead, we recommended they start planning, gathering information, and budgeting ahead of time. Resources like our HVAC replacement checklist for homeowners and our guide on why and when to upgrade your HVAC system can help Tampa Bay residents make informed decisions before an emergency happens.

Why This Approach Works: Airflow, Refrigeration, and Air Quality Basics

Understanding a few basics can help Tampa homeowners see why our approach on this Elite Therapy Plan visit was the right one.

Airflow and Organic Growth

The air handler’s job is to pull warm, humid air from the home, pass it over a cold coil, and send cooled, dehumidified air back into your living spaces. If organic growth starts to build inside the cabinet or on components, it can:

  • Restrict airflow
  • Reduce efficiency and cooling capacity
  • Contribute to musty odors or air quality concerns

Regular maintenance, cleaning, and sometimes strategic upgrades—like advanced filtration or UV treatment—help keep air moving freely and more cleanly. Our article on the role of HVAC in indoor air quality goes deeper into how your system affects what you breathe every day.

Refrigeration Cycle and Pressures

Your AC system uses refrigerant to move heat from inside your home to the outdoors. Pressures in the system must stay within a specific range to maintain proper temperature differences and reliable performance.

However, refrigerant pressures are temperature-dependent. On a cool day in Tampa, pressures will naturally be lower than they would be on a hot July afternoon. That’s why we balance the readings against:

  • Outdoor temperature
  • System design and age
  • Overall performance and comfort

This careful approach keeps us from overreacting to a moment-in-time reading while still flagging issues that may need attention in the near future.

System Age and Reliability

In Tampa Bay, our AC systems work harder than in many parts of the country. Salt in the air near the bay, high humidity, and long cooling seasons all add up. A 15+ year-old air handler has already provided a lot of service life.

While age alone doesn’t mean a system must be replaced today, it does mean:

  • Parts are more likely to fail under stress
  • Energy bills may be higher than necessary
  • Comfort may not keep up as well during the hottest months

That’s why we emphasize planning, not panic. Our guide to choosing an HVAC system in Tampa Bay can help homeowners compare options when they’re ready.

Pro Tips for Tampa, FL Homeowners with Older Air Handlers

If you live in Tampa—especially neighborhoods near South Tampa, Palma Ceia, Hyde Park, or the Westshore area—you’re dealing with a lot of heat, humidity, and sometimes salty air. Here are some practical tips for keeping an older system running as smoothly as possible:

  1. Stay consistent with maintenance. Enrolling in a plan like our Elite Therapy Plan helps catch issues like organic growth or low pressures early. To see what thorough maintenance looks like, explore our HVAC maintenance guide for homeowners.
  2. Watch for changes in comfort. If certain rooms around Tampa’s hotter west-facing exposures start feeling warmer, or if you notice the system running longer than usual, call us sooner rather than later.
  3. Use high-quality filters and change them regularly. Our humidity and outdoor air can carry more particulates into your system. A good filter, replaced on schedule, helps protect an older air handler from buildup.
  4. Consider air quality upgrades. In humid areas near Bayshore Boulevard and throughout central Tampa, organic growth is common. UV lights, enhanced filtration, and regular cleanings can make a significant difference.
  5. Plan ahead for replacement. If your air handler is 12–15 years old or more, start researching options now. Articles like our guide to AC installation quotes in Tampa and our breakdown of why schedule HVAC maintenance can help you prepare.
  6. Stay aware of local conditions. Tampa’s coastal environment, especially near areas you’d find on local guides or maps, can accelerate wear on equipment. Regular inspections and early planning put you in control instead of reacting to a surprise breakdown.

Why Tampa Bay Homeowners Choose Home Therapist

At Home Therapist Cooling, Heating, and Plumbing, our goal isn’t just to fix machines—it’s to take care of people’s homes in a calm, professional, and transparent way.

Homeowners across Tampa Bay, from downtown to neighborhoods near major landmarks and shopping districts, trust our local HVAC technicians because we:

  • Provide licensed, highly trained technicians who understand Florida’s unique climate and building styles
  • Communicate clearly about what we find, what’s urgent, and what can be monitored over time
  • Offer maintenance plans like our Elite Therapy Plan to keep systems running safely and efficiently
  • Prioritize cleanliness in your home and respect for your time and schedule
  • Focus on long-term reliability rather than quick, short-term fixes

If you’d like to understand what’s included in a good AC maintenance routine, you can also review our HVAC maintenance checklist and tips for homeowners or see a similar AC cleaning and maintenance project we completed in Riverview, FL.

Need Help with an Older Air Handler or Organic Growth in Tampa, FL?

If your air handler is 10–15 years old or more, or if you’re noticing musty smells, visible organic growth, or uneven cooling, it may be time for a thorough checkup. Our local Tampa Bay HVAC technicians can inspect your system, explain what’s going on in plain language, and help you decide whether cleaning, repairs, or a planned replacement makes the most sense.

Whether you’re in Tampa, FL 33609 or a nearby community in the greater Tampa Bay area, we’re here to provide steady, honest, and professional HVAC service—without pressure or scare tactics.

Ready to schedule AC maintenance, an Elite Therapy Plan visit, or an inspection of your older air handler in Tampa? Reach out to Home Therapist Cooling, Heating, and Plumbing today to get the therapy your home needs.

Premium Therapy Plan HVAC Maintenance Visit in Largo, FL: How Routine Care Protects Your Comfort

Premium Therapy Plan HVAC Maintenance Visit in Largo, FL: How Routine Care Protects Your Comfort

When you live in Largo, FL, you depend on your air conditioning almost year-round. That’s exactly why one of our Premium Therapy Plan members scheduled their regular maintenance visit with our technician Alejandro. During this visit at a home in Largo, FL 33774, we completed a full HVAC maintenance service, verified that everything was running safely, and helped the homeowner lock in long-term comfort and efficiency.

Instead of waiting for a breakdown on a hot, humid afternoon, this homeowner chose preventive care. Our Premium Therapy Plan helps homeowners in the Tampa Bay area stay ahead of problems, save on repairs, and keep their systems running as efficiently as possible.

Below, we’ll walk through what this visit involved, what we look for during a Premium Therapy Plan appointment, and how routine HVAC service in Largo, FL protects your comfort and your wallet.

Understanding the Homeowner’s Goal

For this Premium Therapy Plan maintenance visit (Visit #4), the homeowner’s goals were simple and very common for our Largo and Tampa Bay customers:

  • Make sure the AC is ready for heavy use in our Florida heat and humidity
  • Catch any early signs of wear before they turn into an expensive repair
  • Keep electric bills under control by keeping the system efficient
  • Protect the home from issues like clogged drains, frozen coils, or poor airflow

Because this visit was part of a Premium Therapy Plan, the homeowner also enjoyed discounted pricing and the peace of mind that their system is getting regular, professional attention on a set schedule.

Customer Problem: Why Preventive Maintenance Matters in Largo, FL

Even when a system seems to be running “fine,” Florida’s climate is tough on HVAC equipment. In Largo and across Tampa Bay, we see the same pattern over and over:

  • High humidity puts extra load on the system as it works to remove moisture from the air.
  • Salt in the air from nearby coastal areas can speed up corrosion.
  • Almost year-round cooling means parts get far more run-time than in many other states.

For this homeowner in Largo, there wasn’t a major complaint or obvious breakdown. Instead, their concern was the uncertainty that comes with running a hardworking AC system every day: “Is everything okay in there?”

Without routine checks, issues like the following can sneak up on homeowners:

  • Slowly dropping refrigerant levels that eventually lead to warm air and frozen coils
  • Dirty coils or clogged filters that cause high utility bills and weak airflow
  • Clogged condensate drains that can overflow and cause water damage
  • Loose electrical connections that can cause intermittent operation or safety risks

Our Premium Therapy Plan is designed to remove that uncertainty. Instead of reacting to problems, we go looking for them before they interrupt your comfort.

Inspection & Diagnosis: What Our Technician Checked

During this Premium Therapy Plan maintenance visit in Largo, FL, technician Alejandro followed our detailed HVAC inspection process. Even though this was a routine visit, we treat every maintenance appointment with the same care and attention we would give to a repair call.

Here’s an overview of what we typically inspect during a Premium Therapy Plan visit:

1. System Start-Up & Overall Operation

Alejandro began by confirming that the system started properly, cycled on and off correctly, and responded to the thermostat as it should. This helps us catch:

  • Thermostat mis-calibration or wiring issues
  • Short cycling (turning on and off too quickly)
  • Unusual noises or vibrations from the outdoor or indoor unit

2. Airflow and Filter Condition

Good airflow is essential, especially in warm, humid locations like Largo and coastal Pinellas County. Alejandro checked:

If the filter is dirty or the wrong size, it can choke airflow and quickly reduce system efficiency. During Premium Therapy Plan visits, we always coach homeowners on filter replacement schedules tailored to Florida’s conditions.

3. Electrical and Safety Components

Next, Alejandro inspected key electrical connections and safety-related components. This typically includes:

  • Tightening electrical connections and inspecting for overheating or wear
  • Checking contactors, capacitors, and relays for proper operation
  • Verifying that safety switches and controls are functioning correctly

Loose connections can lead to intermittent failures or even equipment damage. Catching these early is a big part of why planned maintenance is so valuable for homeowners in Largo and surrounding Tampa Bay cities.

4. Refrigerant Circuit and Coils

Even though this was a maintenance visit and not a repair call, Alejandro still evaluated the refrigerant circuit and coil condition within the scope of standard maintenance. That includes:

  • Inspecting the outdoor condenser coil for dirt, debris, or damage
  • Visually checking the indoor evaporator coil where accessible
  • Listening for signs of abnormal compressor operation

A dirty coil acts like a blanket over your system’s ability to release or absorb heat, forcing it to work much harder than necessary.

5. Condensate Drainage and Moisture Control

In Largo’s humid climate, the AC system removes a lot of moisture from the air. That water has to go somewhere safe. During this Premium Therapy Plan visit, Alejandro checked:

Clogged drains are one of the most common causes of water damage around air handlers in Florida, so this step is critical for local homeowners.

6. System Performance and Temperature Split

To confirm that the system was cooling properly, Alejandro measured the temperature of the air going into the system and the air coming out of the supply vents. This “temperature split” helps us quickly see whether the system is removing enough heat from the air.

By the end of the inspection, the system was operating within expected ranges, and the Premium Therapy Plan maintenance visit was successfully completed.

Step-by-Step: How We Completed This Premium Therapy Plan Visit

After inspection, Alejandro moved into the cleaning, adjustment, and tune-up phase of the appointment. While every system is unique, here’s what a typical Premium Therapy Plan maintenance visit in Largo, FL looks like:

1. Filter and Return Air Check

He verified that the air filter was clean and properly installed, and that the return air pathways were clear of obstructions (furniture, rugs, or stored items). A clean filter:

  • Reduces strain on the blower motor
  • Improves indoor air quality
  • Helps keep coils cleaner for longer

2. Indoor Unit Cleaning and Adjustment

Within standard maintenance scope, Alejandro:

  • Cleaned accessible areas of the air handler cabinet
  • Checked the blower wheel for dirt buildup
  • Inspected insulation and panels for gaps or damage

This helps reduce noise, prevent air leaks, and maintain even temperatures throughout the home.

3. Outdoor Condenser Care

Outside the Largo home, Alejandro inspected and cleaned the condenser area:

  • Removed leaves and debris around the unit to improve airflow
  • Visually inspected the coil fins
  • Verified that the fan was running smoothly and without unusual noise

Keeping the outdoor unit clear is especially important in neighborhoods with trees, landscaping, or lawn services that can blow debris toward the condenser.

4. Electrical Tightening and Component Check

Alejandro tightened accessible electrical connections and checked the condition of contactors and capacitors within normal maintenance practices. This type of preventive attention:

  • Reduces the risk of sudden no-cool calls
  • Helps components last closer to their full design life
  • Supports safe operation under heavy summer loads

5. Condensate Drain and Pan Cleaning

He cleared and flushed the condensate drain line as needed and inspected the drain pan for buildup or signs of past overflow. In humid areas like Largo and greater Tampa Bay, this step is just as important as checking the refrigerant circuit.

6. Final System Test and Homeowner Review

Once the maintenance tasks were complete, Alejandro restarted the system and allowed it to run through a full cooling cycle. He confirmed:

  • Stable temperature split
  • Normal noise levels
  • Proper thermostat operation

Then he walked the homeowner through what he checked, what he cleaned or adjusted, and any recommendations for filters or future care. Transparency is a big part of how we do business at Home Therapist Cooling, Heating, and Plumbing.

Why This Kind of Maintenance Visit Works

Premium Therapy Plan visits are built around the core principles of how air conditioning systems work, especially in a climate like Largo, FL:

1. Airflow is the Foundation

Your system can only cool the air it can move. When filters are clogged or ducts are blocked, airflow drops. That puts stress on:

  • Blower motors (leading to overheating and failure)
  • Evaporator coils (which can freeze if airflow is too low)
  • Compressors (which run longer and hotter to keep up)

By keeping filters clean and ducts clear, maintenance helps protect all of these components.

2. Refrigeration Works Best with Clean Coils

Your HVAC system moves heat from inside your home to the outside using the refrigeration cycle. Dirty indoor or outdoor coils act like insulation, making heat transfer harder. The result is:

  • Longer run times
  • Higher electric bills
  • More wear on motors and the compressor

Regular cleaning and inspections keep heat transfer efficient, which is especially important during long cooling seasons in Tampa Bay.

3. Moisture Management Prevents Damage

As warm, humid air in Largo passes over the cold indoor coil, moisture condenses and drains away. If that drain is clogged, water backs up and can overflow into ceilings, closets, or mechanical spaces. Maintenance reduces that risk by keeping the drain line clear and verifying any float switches are functional.

4. Electrical Integrity Supports Reliability

High-demand equipment like AC systems rely on solid electrical connections. Vibrations, heat, and time can all loosen connections. Tightening them and inspecting components during routine maintenance helps prevent:

  • Intermittent operation
  • Nuisance breaker trips
  • Premature failure of motors, contactors, and capacitors

Pro Tips for Homeowners in Largo, FL

If you’re a homeowner in Largo or anywhere in the Tampa Bay area, here are a few practical steps you can take between professional visits:

  1. Check your filter every 30 days. In Florida’s climate, many homes need filter changes every 30–60 days, especially if you have pets, allergies, or run your system continuously.
  2. Keep 2–3 feet of clearance around your outdoor unit. Trim plants, remove leaves, and avoid stacking lawn items near the condenser. Good airflow reduces strain on your system.
  3. Watch your utility bills. A sudden jump in your electric bill, without a change in weather or usage, can be an early sign that your system needs attention.
  4. Pour a little vinegar down the condensate drain (if accessible). A small amount of distilled white vinegar occasionally can help reduce algae buildup, a common issue in humid cities like Largo and Tampa.
  5. Use a reasonable thermostat setting. For most Tampa Bay homes, settings in the 74–78°F range balance comfort and efficiency. Extreme settings put extra stress on the system.
  6. Schedule professional maintenance at least once a year. Twice a year is even better for systems that run year-round. Maintenance plans like our Premium Therapy Plan make that easy and predictable.

Why Largo Homeowners Choose Home Therapist

Homeowners in Largo, FL and across Tampa Bay trust Home Therapist Cooling, Heating, and Plumbing because we combine technical skill with a calm, professional approach to every visit.

When you invite us into your home, you can expect:

  • Licensed, experienced technicians who are trained for Florida’s specific climate and building styles.
  • Clear, plain-English communication about what we found, what we did, and what we recommend.
  • No pressure, no scare tactics—just honest guidance focused on safety, comfort, and long-term value.
  • Respect for your home, including shoe covers, tidy work areas, and careful cleanup.
  • Local commitment to the communities we serve across the Tampa Bay area, from Largo and Clearwater to Tampa and surrounding neighborhoods.

If you’d like to read more about the types of services we offer, you can explore our overview of AC repairs, installs, and maintenance services. For homeowners interested in additional savings and routine care, our AC maintenance and cleaning options in Tampa Bay explain how regular service can extend the life of your equipment.

If you’re curious about DIY-friendly tasks versus what to leave to a pro, our educational resources like the HVAC maintenance guide for homeowners offer more detail on day-to-day system care.

Serving Largo, FL and the Wider Tampa Bay Community

Largo is at the heart of Pinellas County, close to beautiful spots like Indian Rocks Beach and a short drive from downtown Clearwater and Tampa. Our climate and coastal environment are a big part of why local AC systems need a little extra attention.

Whether you’re in a single-family home, a townhouse, or a condo, the demands on your HVAC system are similar: long cooling seasons, high humidity, and frequent use. That’s where a structured maintenance plan, like our Premium Therapy Plan, makes life easier. You stay comfortable, we stay on top of the details.

Schedule HVAC Maintenance in Largo, FL with Home Therapist

If it’s been a while since your last tune-up—or if you’ve never had a professional maintenance visit—now is a great time to get your system checked. Our local Tampa Bay HVAC technicians can help you:

  • Reduce the risk of surprise breakdowns
  • Improve energy efficiency and comfort
  • Extend the life of your system with regular care

Whether you’re interested in a one-time visit or a full maintenance plan like the Premium Therapy Plan, we’re here to help.

Contact Home Therapist Cooling, Heating, and Plumbing today to schedule HVAC maintenance in Largo, FL or anywhere in the Tampa Bay area. Let our team provide the therapy your home needs—so you can relax, knowing your comfort system is ready for whatever Florida weather brings.

Understanding HVAC Inspection Fees and Discounts in Tampa, FL

Understanding HVAC Inspection Fees and Discounts in Tampa, FL

Recently, our Home Therapist Cooling, Heating, and Plumbing team visited a home in Tampa, FL 33611 for an HVAC inspection and payment review. The homeowner was mainly looking for clarity: what exactly does an inspection fee cover, and how do our discounts and options work when future repairs or maintenance are needed?

In a place like Tampa—where the air conditioner works hard almost year-round—knowing what you’re paying for during an inspection is just as important as fixing any issues we find. During this visit, our technician Richard focused on a thorough system check, clear communication about costs, and a simple review of savings options available to the homeowner.

Below, we’ll walk through what an HVAC inspection fee really covers, how we approach diagnostics, and how we help homeowners in Tampa Bay understand and maximize available discounts.

The Homeowner’s Main Concern: Clarity and Peace of Mind

For this Tampa homeowner, there wasn’t a dramatic breakdown or a flooded floor. Instead, there was a very reasonable question: “If I’m paying an inspection fee, what exactly am I getting, and how can I save money on future work?”

That’s something we hear often in South Tampa, especially around neighborhoods near Ballast Point and the surrounding areas. People depend on their air conditioning every single day, and they want to know that each service visit has a clear purpose and real value.

During this visit in Tampa, FL 33611, our technician Richard focused on:

Even when we don’t find a major failure, a structured inspection gives the homeowner peace of mind and a clear picture of what to expect going forward. That’s especially valuable in Tampa’s heat and humidity, where a surprise breakdown can be more than just an inconvenience.

Step-by-Step: How Our Technician Approached the Inspection in Tampa, FL

During this visit, Richard treated the inspection the same way he would handle a complex repair: carefully, methodically, and with the homeowner’s comfort at the center of every decision. Here’s how a typical inspection fee visit works for HVAC service in Tampa.

1. Initial Conversation and Comfort Check

Richard began with a simple conversation. Even if there are no obvious issues, we always ask:

  • Have you noticed any rooms that feel warmer or cooler than others?
  • Has the system been cycling on and off more than usual?
  • Have your energy bills been higher than expected lately?
  • Any unusual noises or smells when the AC or heat runs?

These questions help our Tampa Bay HVAC technicians narrow in on underlying comfort or efficiency problems that might not yet be a full-blown breakdown.

2. Thermostat and System Controls

Next, he checked the thermostat settings and basic system controls. This often includes:

  • Verifying the thermostat is set correctly for cooling or heating mode
  • Confirming temperature readings are accurate and reasonable
  • Checking that the system responds properly when calling for cooling or heating

In Florida homes, small thermostat issues can create big comfort complaints. During an inspection, we make sure the “brain” of the system is doing its job.

3. Airflow and Filter Condition

Richard then moved on to airflow. In a typical Tampa home, dust, pet hair, and humidity can quickly clog filters and reduce airflow. During an inspection, we commonly:

Even if the inspection fee visit doesn’t include a full duct cleaning or major repair, noting these conditions helps the homeowner plan and prioritize future improvements. For more detailed projects, we often recommend solutions like the upgrades described in our HVAC ductwork installation and airflow improvement project in Tampa.

4. Equipment Health and Visual Checks

Richard performed a visual inspection of the indoor and (when accessible) outdoor units, looking for:

  • Signs of corrosion, rust, or past water damage
  • Blocked or dirty coils
  • Loose wiring or components that might pose safety concerns
  • Unusual vibration or noise when the system is running

In an area like Tampa, near the coast and exposed to salt air and humidity, equipment aging and corrosion are common. Not every finding requires immediate repair, but we document and explain what we see so the homeowner can make a plan.

5. Explaining the Findings and the Inspection Fee

Once the basic checks were done, Richard sat down with the homeowner to walk through what he found. This is where the inspection fee really shows its value. The fee isn’t just to “show up”—it covers:

  • Professional time on site, including testing, measuring, and documenting
  • The use of specialized tools and diagnostic equipment
  • The expertise needed to recognize early warning signs
  • Clear, straightforward advice based on our findings

Even when the system is operating reasonably well, homeowners in Tampa, FL benefit from knowing whether they’re in good shape for the upcoming summer, or if they should budget for future work. That’s the kind of insight an inspection fee appointment provides.

Reviewing Discounts and Savings Options

The second part of this visit focused on reviewing a discount. We understand that HVAC service in Tampa can be a significant investment, and we want our neighbors to feel confident they’re getting fair, transparent pricing.

During the discount review, Richard covered:

  • How any existing promotions or discounts applied to this visit
  • What future savings might be available for maintenance or repairs
  • How maintenance can prevent large, surprise repair expenses

We never pressure homeowners into additional work during an inspection visit. Instead, we focus on education: what’s urgent, what can wait, and how to use discounts wisely. For those who want to plan ahead, we often point them to resources like our HVAC maintenance checklist for homeowners and our guide on why regular HVAC maintenance matters in Tampa Bay.

Why This Kind of Inspection Visit Matters for Tampa Homeowners

On the surface, an “inspection payment fee” might sound like a minor administrative detail. In reality, it represents a structured, professional evaluation of your home’s comfort system. Here’s why that matters so much in Tampa, FL and the surrounding Tampa Bay areas.

1. Catching Problems Before They Become Emergencies

HVAC systems rarely go from perfect to failed overnight. They usually give us clues first:

  • Longer run times to maintain the same temperature
  • Uneven cooling or hot spots in certain rooms
  • Rattling, buzzing, or grinding sounds
  • Slightly higher electric bills month after month

An inspection gives a trained technician the time and structure to look for those clues. When we can address a small issue during a planned visit, we often help homeowners avoid larger, emergency repairs in the peak of summer.

2. Optimizing Energy Efficiency in Humid Tampa Weather

In Tampa’s hot, humid climate, your air conditioner does two jobs: cool the air and remove humidity. When airflow is restricted, refrigerant levels are off, or components are dirty, the system has to work harder—and you pay for that on your electric bill.

By inspecting key components and explaining what we see, we help homeowners decide when it’s time for maintenance like coil cleaning, duct improvements, or even planning for a future upgrade. For those considering next steps, our article on air conditioning maintenance in Tampa Bay is a helpful resource.

3. Protecting Comfort in a City that Depends on AC

In Tampa, FL, a comfortable home isn’t a luxury—it’s a basic need. Whether you’re near downtown, along Bayshore Boulevard, or closer to MacDill Air Force Base, your AC system is running many months of the year. A structured inspection helps ensure your family can rely on that comfort when it matters most.

How HVAC Inspections Work: The Underlying Principles

Behind every inspection and diagnostic fee is a set of technical principles. We don’t just “look around”—we apply what we know about airflow, refrigeration, and electrical control logic to your specific system.

Airflow

For your system to cool properly, it needs the right amount of air moving across the indoor coil. A dirty filter, blocked returns, or undersized ductwork can all choke airflow. When that happens, you might notice:

  • Weak airflow from vents
  • Uneven temperatures between rooms
  • Coils icing up or shutting down

By checking filters, vents, and basic duct conditions during an inspection, our Tampa HVAC technicians can spot airflow problems early.

Refrigeration Cycle

Inside your AC system, refrigerant is constantly moving heat from inside your home to the outside. If refrigerant charge is off, coils are dirty, or airflow is restricted, the system has to run longer to cool your home—costing you money and wearing components out faster.

While not every inspection fee visit includes in-depth refrigerant work, our technicians are always looking for signs that the refrigeration cycle might not be operating as efficiently as it should.

Electrical and Safety

Your HVAC system relies on a sequence of electrical signals—thermostat calls, relays, contactors, and safety switches. During an inspection, we pay close attention to:

  • Loose electrical connections
  • Burn marks or overheating around components
  • Unusual system behavior when starting or stopping

These checks help protect not just your comfort, but also your safety and the long-term reliability of your equipment.

Pro Tips for Homeowners in Tampa, FL 33611

If you live in Tampa, especially in areas like South Tampa or near Ballast Point Park, your HVAC system faces long run times, high humidity, and coastal air. Here are some practical tips to get the most out of your inspection fee and keep your system running smoothly:

1. Schedule Inspections Before Peak Summer

Try to schedule your HVAC inspection in early spring, before temperatures really climb. This gives you time to address any issues we find before your system is running full-time in Tampa’s summer heat.

2. Replace Filters Regularly

In a humid, dusty environment like Tampa Bay, many homes need filter changes every 1–2 months, especially if you have pets. A clean filter is one of the easiest and most affordable ways to protect airflow and system health.

3. Keep Outdoor Units Clear

Make sure your outdoor unit has at least 2–3 feet of clearance on all sides. Trim back bushes, remove leaves, and avoid stacking items nearby. Restricted airflow outside can raise your energy use and shorten equipment life.

4. Listen and Look for Early Signs

If you notice unusual sounds, short cycling, warm rooms, or a steady rise in your power bill, don’t wait for a full breakdown. Calling for an inspection visit early often turns a potential emergency into a manageable, planned repair. Our guide on basic HVAC troubleshooting steps for homeowners can help you understand what you’re seeing—and when it’s time to bring in a pro.

5. Ask About Maintenance Options and Discounts

During any inspection fee visit in Tampa, FL, take a few minutes to ask about maintenance options, discounts, or seasonal promotions. A small investment in regular maintenance can often extend the life of your system and reduce your total repair costs over time.

Why Tampa Bay Homeowners Choose Home Therapist

At Home Therapist Cooling, Heating, and Plumbing, we know that allowing a technician into your home is a big decision. Our goal is to earn your trust every step of the way—starting with the very first inspection fee visit.

Here’s what homeowners throughout Tampa Bay appreciate about working with our team:

  • Licensed, experienced technicians: Our techs are trained, certified, and experienced with the specific demands of Florida’s climate.
  • Clear communication: We explain what we’re doing, what we found, and what your options are—without pressure or confusing jargon.
  • Clean, respectful work: We treat your home with care, wear protective gear when needed, and clean up our work areas.
  • Safety and reliability first: Whether we’re performing a simple inspection or complex repair, your family’s comfort and safety always come first.
  • Local commitment: We’re proud to serve Tampa, FL and the entire Tampa Bay area, from everyday inspections to major projects and system upgrades.

If you’re deciding when or how to schedule your next visit, you can also explore our content on finding reliable air conditioning service near you and ballpark estimates for AC repair and installation in Tampa Bay. These resources can help you get a sense of what to expect when planning future work.

Need HVAC Service or an Inspection Fee Explained in Tampa, FL?

If you live in Tampa, FL 33611 or anywhere in the greater Tampa Bay area and you’re unsure what an HVAC inspection fee covers—or you just want a professional set of eyes on your system—our team at Home Therapist is here to help.

We’ll:

  • Perform a thorough, structured inspection of your system
  • Explain exactly what we found in plain, honest language
  • Review any applicable discounts or savings options with you
  • Help you prioritize next steps based on comfort, safety, and budget

When you’re ready, reach out to schedule HVAC service in Tampa or nearby communities. We’ll bring the same calm, careful approach we used at this Tampa home—so you can feel confident about both your comfort and your costs.

Hydro Jet Sewer Line Cleaning and Camera Inspection in Tampa, FL 33603

Hydro Jet Sewer Line Cleaning and Camera Inspection in Tampa, FL 33603

When a main sewer line starts backing up in a Tampa, FL home, it can turn into a stressful situation fast. Slow drains, gurgling toilets, or wastewater threatening to back up into the house aren’t just inconvenient—they’re a real comfort and sanitation concern. At a home in Tampa, FL 33603, our team was called in to tackle a stubborn main line clog with professional hydro jetting and a full sewer camera inspection.

In this visit, our technician Adalberto uncovered a main sewer line that was packed with paper and badly restricted. By carefully accessing the line, using a high-pressure hydro jet, and then verifying everything with a sewer camera, we were able to restore proper flow and give the homeowner clear answers about the condition of their plumbing system.

Below, we’ll walk through what was going wrong, how we diagnosed the problem, and the step-by-step process we used to fix it—so homeowners in Tampa and across the Tampa Bay area know what to expect from a professional sewer cleaning service.

The Customer’s Sewer Problem in Tampa, FL 33603

From the homeowner’s perspective, it usually starts with small annoyances: toilets that don’t flush quite right, tubs and showers that drain slowly, or occasional gurgling sounds from drains. Over time, those minor symptoms can build into a full main-line blockage.

At this Tampa home, the main sewer line had become full of paper. That kind of clog can develop gradually as:

  • Toilet paper and other paper products build up in low spots or partially restricted sections of the pipe
  • Older pipes with rough interior surfaces catch debris more easily
  • Insufficient water volume or low-flow fixtures don’t push waste completely through the line
  • Existing partial blockages trap additional material and make the problem worse

The result is a sewer line that can no longer carry waste away efficiently. This can lead to:

  • Slow drains in multiple fixtures at the same time
  • Toilets that need multiple flushes
  • Gurgling noises or bubbling in nearby drains when a toilet is flushed
  • Backups at the lowest drain in the home if the blockage becomes severe

The homeowner knew something wasn’t right and wanted the problem fixed properly—not just a quick temporary clear. That’s why our team was called in to perform a thorough hydro jet sewer drain unclogging and a detailed camera inspection of the line.

Inspection & Diagnosis: Finding the Real Cause of the Clog

Whenever we respond to a sewer clog in Tampa, FL, we start with careful diagnostics. Our goal is simple: identify what is causing the blockage and where it’s located, so we can fix it in the most effective and least invasive way possible.

For this home, our technician followed a clear diagnostic process:

1. Evaluating Symptoms and Access Points

Adalberto first confirmed the symptoms with the homeowner and checked how many fixtures were affected. Because multiple drains were involved and the main line was clearly impacted, we focused on the building sewer line rather than just individual branch lines.

We then looked for existing cleanouts or access points. Sometimes, a home in an older Tampa neighborhood doesn’t have an ideal cleanout location on the main line. In those cases, we may need to dig a small trench outside to access the pipe properly for hydro jetting.

2. Planning for Safe Access to the Sewer Line

On this project, we needed to dig outside to create a trench and gain proper access to the main sewer line for hydro jet cleaning. Our technician planned the dig path carefully to:

  • Avoid utilities and existing structures
  • Minimize disturbance to landscaping as much as possible
  • Provide a clean and direct access point for both the hydro jet hose and camera equipment

If cutting pipe or adding a new cleanout becomes necessary, that work is treated as a separate scope so the homeowner has full transparency about costs and options.

3. Using a Sewer Camera Inspection

Once access is available, a sewer camera inspection becomes a powerful tool. Video camera plumbing inspections allow us to visually confirm the exact cause of a problem instead of guessing. During this step, we:

  • Feed the camera through the main sewer line
  • Watch real-time video to pinpoint clogs, obstructions, or damaged sections
  • Measure distances so we know exactly where issues are located
  • Document the condition of the pipe interior for the homeowner’s records

In this Tampa, FL 33603 home, the camera confirmed that the main sewer line was heavily impacted by paper and related debris. The good news: the obstruction appeared to be primarily soft, removable material, making it a great candidate for hydro jetting rather than immediate pipe replacement.

Camera inspections can also reveal other issues, such as root intrusions, sagging (belly) in the line, cracks, or items accidentally flushed, like jewelry or small objects. Even when we’re called for a simple clog, we often discover early warning signs that can help homeowners avoid bigger emergencies later.

Step-by-Step: How We Performed the Hydro Jet Sewer Drain Unclogging

After confirming the cause of the blockage, we moved into the service phase. Hydro jetting is a powerful but precise way to clear a main sewer line when used by trained, licensed plumbers.

1. Preparing the Work Area

Our first priority is always safety and cleanliness. At this Tampa home, we:

  • Marked the dig area and carefully opened a trench to access the sewer pipe
  • Set up equipment in a way that protected the home and yard as much as possible
  • Confirmed that the access point was secure and suitable for hydro jetting

By working from an exterior access point, we reduce the risk of bringing debris into the home and keep the mess outside where it can be managed and cleaned up more easily.

2. Hydro Jetting the Main Sewer Line

With access open and the blockage location identified, Adalberto connected our hydro jet machine to the line. Hydro jetting uses a specialized hose with nozzles that spray high-pressure water both forward and backward, allowing us to:

  • Break up heavy paper and waste buildup
  • Flush debris downstream and out of the line
  • Scrub the interior walls of the pipe much more thoroughly than a basic cable snake

The pressure is carefully controlled so we can clear the blockage without damaging the pipe. Our technician slowly worked the hydro jet through the main sewer line, focusing extra time wherever the camera had shown the heaviest buildup.

3. Verifying the Clear with a Follow-Up Camera Inspection

Once the hydro jet process was complete, we didn’t just assume everything was fine—we verified it. Using the sewer camera again, we:

  • Re-inspected the full length of the main sewer line
  • Confirmed that the paper and debris had been completely cleared
  • Checked for any remaining obstructions or signs of pipe damage

This step is crucial. It gives both our team and the homeowner confidence that the sewer line is truly clear and functioning as it should. It also creates a visual record that can be very helpful if the homeowner ever needs future repairs or wants to plan for long-term pipe replacement.

4. Restoring the Area and Reviewing Results with the Homeowner

After the plumbing work is complete, we restore the area we accessed as neatly as possible. We also walk the homeowner through:

  • What we found in the line
  • What we did to fix it
  • Any concerns we noticed about the pipe condition
  • Preventive tips to help reduce future clogs

Clear, honest communication is a big part of how we operate in Tampa Bay homes. Our goal is that you’ll never be left wondering what was done or why.

Why Hydro Jetting and Camera Inspection Are So Effective

For main sewer line problems in Tampa, FL, hydro jetting combined with camera inspection is one of the most effective and homeowner-friendly solutions available.

1. Understanding How Your Sewer Line Works

Every drain in your home—sinks, tubs, showers, toilets—connects to a main sewer line that carries wastewater out to the city sewer system. When that main line becomes constricted or blocked, you may see issues in multiple fixtures throughout the house.

Over time, normal use can create buildup on the walls of the pipe, especially if:

  • The line has small sags where water and debris settle
  • Foreign objects or excessive paper products are flushed
  • Grease or wipes are introduced into the system

That buildup narrows the usable diameter of the pipe, reducing how much water and waste can flow through at once.

2. Why Hydro Jetting Works

Hydro jetting uses high-pressure water to restore the interior of the pipe closer to its original condition. Instead of just punching a small hole in the clog (as some basic augers do), the hydro jet:

  • Breaks soft obstructions like paper into small, movable pieces
  • Flushes those pieces completely out of the line
  • Removes built-up residue on the pipe walls

This results in better long-term flow and fewer repeat clogs when compared with a quick, surface-level clearing.

3. Why Camera Inspections Matter

The video camera inspection is equally important. It allows us to:

  • See if there are cracks, separations, or intruding roots
  • Confirm that clogs were truly cleared, not just pushed further down
  • Check for sections of pipe that may need repair or replacement later

Instead of guessing, you get clear, visual proof of the condition of your sewer line. That’s especially valuable in older Tampa neighborhoods, where homes may have pipes that have been in the ground for decades.

Pro Tips for Homeowners in Tampa, FL to Avoid Sewer Line Clogs

Living in the Tampa Bay area comes with unique plumbing challenges—high groundwater, heavy summer rains, and older underground infrastructure in many neighborhoods. Here are a few practical tips to help keep your main sewer line flowing smoothly:

  1. Be selective about what gets flushed. Only flush toilet paper and human waste. Avoid flushing wipes (even “flushable” ones), paper towels, feminine products, and hygiene items. These are common culprits in main line clogs around Tampa.
  2. Limit heavy paper usage during gatherings. If you’re hosting guests near places like downtown Tampa or the Tampa Riverwalk, remind everyone to go easy on toilet paper and never flush wipes. A little prevention goes a long way.
  3. Schedule preventive drain cleaning. If you’ve had more than one main line clog, consider professional drain cleaning every year or two. Our drain cleaning services and options can help keep lines clear before an emergency occurs.
  4. Know where your cleanout is located. If you’re not sure where your main sewer cleanout is, ask during your next service visit. Being able to access the line quickly can save time and reduce costs if a clog happens.
  5. Watch for early warning signs. Recurring slow drains, frequent toilet plunging, or gurgling noises are all early indicators of a developing sewer problem. Addressing it early is usually easier and less disruptive.
  6. Consider a full camera inspection if you’ve had repeat issues. For homes in established Tampa neighborhoods like Seminole Heights and nearby areas, a one-time camera inspection can help you understand your sewer line’s true condition and plan ahead.

Why Tampa Homeowners Choose Home Therapist for Sewer and Drain Work

When you’re dealing with a sewer line backup, you want more than just a quick fix. You want a team that treats your home with respect, clearly explains what’s going on, and focuses on long-term reliability—not band-aid solutions.

Homeowners across Tampa Bay trust Home Therapist Cooling, Heating, and Plumbing because:

  • Our technicians are licensed and experienced. We handle complex drain and sewer issues every week, from hydro jetting to camera inspections and more.
  • We communicate in plain English. We’ll show you what we see, explain your options, and never pressure you into work you don’t need.
  • We focus on cleanliness and respect for your home. From digging trenches carefully to cleaning up after the job, we treat your property like it’s our own.
  • We think long term. If we see signs that your sewer line might need future work, we’ll share that information so you can plan ahead—whether that’s more frequent cleaning or discussing replacement options.
  • We’re local to Tampa Bay. We understand the soil, the weather, and the common plumbing setups in the area. That local knowledge helps us diagnose and solve problems more efficiently.

Beyond this specific hydro jet job, we also offer a full range of plumbing services, from plumbing maintenance plans and options to drain line cleaning and flushing services and drain cleaning services and estimates for Tampa homeowners.

Related Reading: Understanding Common Drain Line Issues

If you’ve experienced slow drains or recurring clogs in your home, you may find this helpful: our blog on drain cleaning for common drain line issues in homeowner units goes deeper into the everyday causes of drain problems and what you can do to prevent them.

Between that resource and our on-site camera inspection reports, our goal is to give Tampa homeowners clear, trustworthy information about their plumbing systems.

Need Hydro Jetting or a Sewer Camera Inspection in Tampa, FL?

If you’re noticing slow drains, frequent toilet backups, or gurgling sounds in your Tampa, FL home, it may be time to look beyond quick DIY fixes. Professional hydro jetting and a sewer camera inspection can save you from repeated clogs and unexpected sewage backups.

Whether you’re in Tampa, FL 33603, another Tampa neighborhood, or elsewhere in the Tampa Bay area, our local team is ready to help. We’ll arrive prepared, diagnose the issue thoroughly, and walk you through clear options—so you can get your home back to normal as quickly and safely as possible.

Schedule your hydro jet sewer cleaning or sewer camera inspection today and let our Tampa Bay plumbing experts provide the therapy your home needs.

To learn more about our full range of drain and sewer solutions, visit our page on drain cleaning services and options at Home Therapist Cooling, Heating, and Plumbing.

Air Duct Cleaning & Premium Therapy Plan Benefits for a Lutz, FL Home

Air Duct Cleaning & Premium Therapy Plan Benefits for a Lutz, FL Home

In Lutz, FL 33558, clean indoor air is a big deal. Between the Tampa Bay humidity, year-round AC use, and everyday dust and allergens, ductwork can collect a lot of buildup. For this homeowner in Lutz, our team at Home Therapist provided our Value Air Duct Cleaning Package and paired it with our Premium Therapy Plan for long-term system care.

In this visit, our technician Barbaro focused on carefully cleaning each vent and duct run, improving airflow and indoor air quality, and setting the home up for ongoing HVAC maintenance. Below, we'll walk through what the homeowner was experiencing, what we inspected, how the cleaning works, and how a maintenance plan helps families in Lutz and across Tampa Bay breathe easier.

Customer Problem: Stale Air and Dusty Vents in a Lutz Home

The homeowner in Lutz reached out to us because they wanted cleaner, fresher air throughout the house. Over time, supply vents had started to look dusty, and the air in certain rooms felt stuffy, even when the air conditioner was running.

They chose our Value Air Duct Cleaning Package, which includes:

  • Removing each vent grille around the home
  • Cleaning vents with a professional air duct cleaning machine
  • Cleaning from the vent opening into the duct run
  • Dusting off the vent covers before reinstallation

Because this is a busy household in the Lutz and Tampa Bay area, they were especially interested in reducing dust and allergens and improving overall comfort. Florida's long cooling season means their AC runs hard most of the year, so anything that helps the system breathe easier is a real benefit.

Along with duct cleaning, the homeowner also opted into our Premium Therapy Plan, a maintenance plan from The AC Therapist designed to keep the system running smoothly with regular, professional checkups.

Inspection & Diagnosis: What We Looked For

Before starting any cleaning, our technician walked through the home, looked over the vents, and confirmed expectations with the homeowner. For this type of HVAC service in Lutz, FL, we focus on both cleanliness and safety.

Here's what we checked:

  • Visible dust and buildup on vent covers: Vents with visible dust are a clear sign the system could benefit from a cleaning. In this Lutz home, several vents showed a noticeable layer of dust.
  • Airflow from each supply vent: We checked how strongly air was blowing from different vents. Inconsistent airflow can sometimes point to restriction or debris inside the duct runs.
  • Condition of vent grilles: Some older vents can be fragile; we always inspect for cracks or wear before removing them.
  • Accessibility of vents: We made note of vents above furniture or appliances and discussed with the homeowner that some light dust might fall during cleaning.
  • Age and condition of ductwork (as far as visible): Older ducts can be more susceptible to damage during cleaning, so we always warn homeowners in advance and work gently and carefully.

We also explained a few important notes to the homeowner, which are part of this Value Air Duct Cleaning Package:

  • Pricing is per vent, based on cleaning every vent in the home.
  • The special price is valid only when all ducts are being cleaned, with a minimum of 12 vents.
  • There is a possibility that some dust particles may fall onto nearby furniture or surfaces during the cleaning. We cover and wipe as much as possible, but a little post-cleaning dusting is normal.
  • Older duct systems are at higher risk for damage when any cleaning is performed. We advise homeowners of this risk before we begin.

Once everything was reviewed and approved, Barbaro got started on the step-by-step air duct cleaning in this Lutz home.

Step-by-Step: How We Performed the Air Duct Cleaning

Professional duct cleaning shouldn't feel mysterious or risky. Our goal is to be transparent, gentle with your home, and thorough with your system.

1. Protecting the Home and Preparing the Work Area

First, we prepared the home for work:

  • Identified all supply vents throughout the house
  • Cleared the immediate area near vents where possible
  • Brought in our air duct cleaning machine and necessary tools

In a typical Lutz, FL home, the AC is running much of the day, so we coordinate our cleaning steps with the system operation to keep the home as comfortable as possible during the visit.

2. Removing and Cleaning Each Vent Cover

Next, Barbaro carefully removed each vent grille, one by one. This step is important because:

  • It lets us clean the inside of the duct starting at the vent opening.
  • It allows us to fully dust and wipe down the vent cover itself.

We then used our cleaning tools to remove dust and debris from the vent covers. Cleaner vents not only look better, they also help reduce dust being blown back into the room.

3. Cleaning Into the Duct Runs from Each Vent

With the vent covers removed, we used our duct cleaning machine to clean from the vent opening into the ductwork. Working from each vent location, we carefully passed our tools inside to loosen and capture:

  • Accumulated dust
  • Light debris
  • General buildup from everyday use

Because this was a whole-home package, every vent around the home in Lutz was addressed, which helps keep airflow consistent from room to room.

4. Reinstalling Vents and Light Cleanup

After cleaning each duct run from the vent side, we:

  • Reinstalled the clean, dusted vent grilles
  • Wiped around the vent openings where needed
  • Checked that each vent was securely fastened

As we explain to all homeowners, a small amount of dust can escape during cleaning and land on furniture or nearby surfaces. We clean up what we can, but we also recommend a light wipe-down of surfaces after any duct cleaning in Lutz or elsewhere in Tampa Bay.

5. Pairing the Cleaning with Our Premium Therapy Plan

In addition to the duct cleaning, the homeowner chose our Premium Therapy Plan from The AC Therapist. While the duct cleaning handles the dust inside ductwork, the Therapy Plan focuses on keeping the air conditioning system itself in top shape through scheduled professional maintenance.

Our blog on changing or adjusting your AC maintenance plan in Tampa explains how choosing the right plan can help fit your home's needs and budget. For a homeowner in Lutz, this kind of plan offers peace of mind, especially given how heavily local systems run in our climate.

Why This Fix Works: The Science Behind Cleaner Ducts and Better Airflow

This project in Lutz combined two powerful strategies: duct cleaning and a maintenance plan. Here's why that combination works so well.

Cleaner Ducts Support Healthier Indoor Air

Your duct system is the pathway that delivers conditioned air from the air handler to every room. Over time, dust and particles can settle along that path. When the system turns on, some of that material can be stirred up and pushed back into your living space.

By cleaning from each vent into the ductwork, we help reduce:

  • Dust blown into rooms
  • Light allergens and debris
  • Minor obstructions near the vent ends of the ducts

That doesn't turn your duct system into a hospital-grade clean room, but for a typical Lutz household, it can noticeably freshen the air, especially when paired with good filtration and regular AC maintenance.

If you'd like to see another real-world example of how this type of work improves homes, take a look at our air duct cleaning project in Zephyrhills, FL and our air duct cleaning service project in Tampa, FL 33618.

Better Airflow Means Less Strain on Your AC

Airflow is the lifeblood of your HVAC system. When ducts and vents are cleaner and less restricted, air can move more freely. That supports:

  • More even temperatures from room to room
  • Reduced strain on the blower motor
  • Potentially improved energy efficiency over time

In a climate like Lutz and greater Tampa Bay, where systems run many months of the year, maintaining good airflow can make a noticeable difference in comfort and long-term reliability.

Maintenance Plans Protect Your Investment

While duct cleaning focuses on the distribution side, our Premium Therapy Plan focuses on the equipment itself. Regular maintenance visits allow us to:

  • Inspect and clean components like the blower wheel and evaporator coil
  • Check refrigerant levels and electrical connections
  • Identify minor issues before they turn into breakdowns

Our article on the role of HVAC in air quality explains how a well-maintained system works together with your ducts and filters to keep air cleaner and more comfortable.

Pro Tips for Homeowners in Lutz, FL

Whether you're in Lutz, Tampa, Wesley Chapel, or any nearby community, these simple steps can help you get more from your HVAC system and ductwork:

  1. Change filters on a regular schedule. In our humid, dusty Gulf Coast climate, many homes need monthly filter changes during peak cooling season. A clean filter reduces debris entering your ducts and equipment.
  2. Keep vents open and unblocked. Avoid closing too many vents or placing furniture directly over them. Restricted vents can increase pressure in the ducts and make your system work harder.
  3. Dust and vacuum around vents. Gently vacuum vent grilles and the surrounding area every few weeks. That simple habit can cut down on what gets pulled into the system.
  4. Schedule regular AC maintenance. An ongoing plan—like our Premium Therapy Plan—keeps your system tuned, helps prevent surprises, and supports better indoor air quality. For more guidance, see our HVAC maintenance checklist for homeowners and our air conditioning maintenance guide for Tampa Bay.
  5. Watch for hot and cold spots. If certain rooms in your Lutz home feel consistently uncomfortable, it can signal airflow or duct issues. The sooner we check it, the easier it is to correct.
  6. Consider add-ons if allergies are a concern. Depending on your home, options like UV lights and higher-grade filters may help. Our article on HVAC and indoor air quality offers a helpful overview.

Lutz is a wonderful place to live, with its blend of suburban neighborhoods and easy access to greater Tampa Bay, but our heat and humidity can be tough on HVAC equipment. Staying a step ahead with clean ducts and regular service really pays off over time.

Why Tampa Bay Homeowners Choose Home Therapist

For this Lutz, FL homeowner, choosing Home Therapist wasn't just about a one-time cleaning; it was about having a long-term partner for comfort and system health. Here's what we bring to every job in Lutz and the surrounding Tampa Bay area:

  • Licensed, experienced technicians: Professionals like Barbaro are trained to work carefully around your ductwork and equipment, always respecting your home and time.
  • Transparent communication: We clearly explain what's included in packages like the Value Air Duct Cleaning Package, including any pricing conditions, minimum vent counts, and risks for older systems.
  • Respect for your home: We know duct cleaning can stir up some dust. We prepare you ahead of time, protect surfaces where we can, and clean up after ourselves.
  • Focus on long-term reliability: Our Premium Therapy Plan and other maintenance offerings are designed to keep your AC running smoothly, not just fix it when it breaks.
  • Commitment to Tampa Bay communities: From Lutz and Land O' Lakes to Tampa and beyond, Home Therapist is proud to serve our neighbors across the region with honest, dependable HVAC service.

If you'd like to see how we handle other local projects, you can also read about our blower wheel cleaning and air duct cleaning project in Zephyrhills, FL and our system tune-up and cleaning project in Lutz, FL 33548.

Learn More About Lutz and the Tampa Bay Area

Lutz is a growing community in north Hillsborough County, with easy access to Tampa and nearby destinations. If you're new to the area or just curious, you might enjoy:

Understanding our local climate and environment helps explain why HVAC systems here work as hard as they do—and why maintenance, duct cleanliness, and good filtration are so important.

Need Air Duct Cleaning or HVAC Maintenance in Lutz, FL?

If you're noticing dusty vents, stale air, or uneven cooling in your Lutz home, our team at Home Therapist is here to help. Whether you're interested in a focused duct cleaning package or a full maintenance plan like our Premium Therapy Plan, we'll walk you through your options in clear, simple terms.

Homeowners across Tampa Bay trust us for:

Reach out today to schedule air duct cleaning and HVAC service in Lutz, FL or any nearby Tampa Bay community. We'll bring the same careful, professional approach we used in this project—and give your home the therapy it needs to stay comfortable, efficient, and healthy.

Air Duct Cleaning and Indoor Air Quality Service in Lutz, FL 33558

When the air inside your home doesn’t feel as fresh as it should, dust and buildup inside the ductwork are often part of the story. At a home in Lutz, FL 33558, our Home Therapist team was called in to perform a full air vent and duct cleaning and to explore an ongoing maintenance plan for long-term comfort and protection.

In the Tampa Bay area, where we run our air conditioning almost year-round, clean ducts and a well-maintained system make a huge difference in both comfort and health. For this Lutz homeowner, we focused on our Value Air Duct Cleaning Package and discussed our Premium Therapy Plan to make sure the system stays cleaner and more efficient in the future.

Customer Problem: Stale Air and Dusty Vents in a Lutz Home

Our customer in Lutz, FL reached out because they wanted cleaner, fresher air throughout the home and were concerned about dust building up on and around their vents. With Florida’s high humidity, homes in Lutz and nearby communities like Lutz and Tampa can easily accumulate dust, dander, and other particles inside the duct system over time.

The homeowner’s main concerns were:

  • Visible dust on the supply vents
  • A general feeling that the air wasn’t as clean or fresh as it should be
  • Wanting to address indoor air quality proactively before allergy season ramps up

They chose our Value Air Duct Cleaning Package, which focuses on cleaning every vent throughout the home using our professional duct cleaning equipment, and dusting off the air vents themselves. We also talked with them about a discounted Premium Therapy Plan from The AC Therapist so they could keep their HVAC system well maintained going forward.

Inspection & Diagnosis: What We Checked First

Before we start any duct cleaning job in Lutz or anywhere in Tampa Bay, we take time to inspect the system and set clear expectations with the homeowner. At this home, our technician Barbaro walked through the property and checked:

  • Number and location of vents: To confirm that all vents would be cleaned and that the home met the minimum required vent count for the Value package pricing.
  • Condition of the vents and registers: Looking for visible dust buildup, rust, or signs of moisture or staining around grills.
  • Accessibility of each vent: Making sure we could safely remove and re-install each vent cover without damaging walls or ceilings.
  • Age and condition of ductwork (as visible from registers and returns): Older ducts can be more fragile; we always warn homeowners that there is a small risk of damage when disturbing older materials.

We also reviewed a few important points with the homeowner prior to starting:

  • Pricing is per vent, and the Value package pricing requires cleaning all ducts with a minimum number of vents.
  • Some dust may fall on nearby furniture or surfaces during the process. We do our best to clean up, but a light wipe-down afterwards is sometimes needed.
  • Older ducts may be more susceptible to damage during any cleaning process, and we make this clear up front so there are no surprises.

Once everything was understood and approved, our technician prepared the duct cleaning machine and got started.

Step-by-Step: How We Performed the Air Duct Cleaning

The Value Air Duct Cleaning Package our team provides for homeowners in Lutz, FL is focused, efficient, and designed to make a noticeable improvement in cleanliness around the vents. Here’s how the process at this home unfolded.

1. Protecting the Home and Work Areas

Before we removed any vents, we walked through the home again, confirming access to each room and setting expectations for the time frame. In this case, the customer knew we’d arrive between 8 and 11 a.m. and be wrapped up early afternoon.

We then:

  • Placed drop cloths or towels where appropriate when removing vents overhead, especially in high-traffic rooms.
  • Made sure our duct cleaning machine and hoses were staged safely out of the main walking paths.
  • Reviewed any special furniture or items the homeowner wanted us to be extra careful around.

2. Removing Each Vent Cover

Our technician carefully removed every vent cover throughout the house, one by one. During this step, we:

  • Checked the screws and mounting hardware, tightening or straightening as needed.
  • Looked into each duct opening for visible debris or signs of damage.
  • Set the vent covers aside for detailed dusting and cleaning.

In many Tampa Bay homes, especially in Lutz and the surrounding area, this is where we see the most visible buildup: dust clinging to the vent blades and surrounding trim.

3. Cleaning Inside the Duct Openings

With the vents removed, we used our professional Air Duct Cleaning machine to clean from each vent opening into the duct. This process is designed to:

  • Loosen accumulated dust and particles inside the ducts near the vents.
  • Extract dust and light debris to help improve local airflow.
  • Reduce the amount of dust that blows directly into rooms when the AC runs.

This specific package focuses on cleaning from the vent inward; it’s a targeted service aimed at the surfaces closest to your living spaces, where dust is most noticeable.

4. Dusting and Cleaning the Vent Covers

Next, we cleaned each vent cover thoroughly. This is one of the most visible improvements homeowners see after service. We:

  • Dusted and wiped down every vent grille.
  • Removed loose debris stuck between blades.
  • Ensured the visible surfaces that you see every day looked refreshed and cleaner.

For a Lutz home dealing with regular pollen, pet hair, or fine dust, this step alone makes the vents look dramatically better.

5. Reinstalling Vents and Final Walkthrough

Once ducts were cleaned from the vent openings and the covers were dusted, we reinstalled each vent, checked alignment, and tightened the screws. Then, our technician performed a final walkthrough with the homeowner, confirming:

  • All vents were reinstalled correctly.
  • No tools or debris were left behind.
  • The homeowner understood what was completed and what to expect over the next few days of system operation.

We also went over some light cleaning the homeowner might want to do on surfaces near the vents in case any dust settled during the process.

Adding the Premium Therapy Plan: Long-Term Protection for Lutz Homeowners

Alongside the duct and vent cleaning, we discussed a Premium Therapy Plan from The AC Therapist with this Lutz homeowner. In Florida’s climate, having a structured maintenance plan is one of the best ways to keep your HVAC system operating reliably.

With a Premium Therapy Plan, homeowners in Lutz and throughout Tampa Bay can expect benefits such as:

  • Scheduled AC tune-ups to keep the system running efficiently.
  • Proactive inspections that can catch small issues before they become major breakdowns.
  • Potential discounts on additional services and repairs.
  • Peace of mind knowing a licensed local HVAC team is watching over the system.

If you’d like to see how our maintenance options work, you can explore our overview of AC repairs, installs, and maintenance services and our seasonal AC maintenance and cleaning specials in Tampa Bay.

Why This Air Duct Cleaning Approach Works

Airflow and indoor air quality are closely connected. In a typical central AC system in Lutz, FL, your air handler pulls warm, humid air from inside your home, cools and dehumidifies it, then pushes that conditioned air back through ducts to each vent.

Over time, dust, dander, and fine debris can settle:

  • On the inner surfaces of ducts
  • On and around vent grills
  • Near joints and transitions where air flow changes direction

When we clean from the vent inward and thoroughly dust the vents themselves, we’re addressing the first point of contact with the air that you actually breathe in each room. This helps by:

  • Reducing visible dust: Clean vents stop blowing accumulated dust back into the room every time the AC cycles on.
  • Supporting airflow: Less obstruction at the vents means the system can push air more freely into each space.
  • Helping with odors and stuffiness: Removing light debris and buildup near the vents can reduce that “stale” smell some homeowners notice.

While deeper, full-system duct cleaning and duct repairs are sometimes needed for older systems, many Tampa Bay homeowners see a noticeable improvement from targeted cleaning at the vents, especially when combined with regular AC maintenance and filter changes. For examples of larger projects, you can see an air duct cleaning project in Zephyrhills, FL or a more extensive air duct repair and replacement project in Tampa.

Pro Tips for Homeowners in Lutz, FL

Lutz and the greater Tampa Bay area have a unique combination of heat, humidity, and near-constant AC use. Here are a few simple habits that can help keep your air cleaner between professional services:

1. Change Your Filters Regularly

Because your AC runs so often in Lutz, filters can load up quickly. For most homes, we recommend checking filters every 30 days during peak cooling season and replacing them as needed. A clean filter supports better airflow and keeps dust from building up in ducts and vents.

2. Keep Supply and Return Vents Unblocked

Avoid placing large furniture or heavy drapes directly over vents. In many Lutz homes, we see sofas or cabinets pushed tight against vents, which restricts airflow and can contribute to uneven cooling and dust buildup around those areas.

3. Use Your Thermostat Wisely

Running your AC too cold can cause long runtimes and extra strain on the system. A moderate, steady setting—combined with ceiling fans—often keeps Tampa Bay homes comfortable without overworking the unit. That steadier operation can also help keep humidity more controlled inside the ducts.

4. Watch for Signs of Excess Moisture

If you notice condensation around vents, staining on ceilings, or musty smells, it’s worth having a professional look at your system. Florida’s humidity can create conditions for microbial growth if moisture sits in or around your ducts.

5. Schedule Routine HVAC Maintenance

Regular tune-ups are one of the best investments for homeowners in Lutz, FL. A thorough AC checkup includes cleaning key components, checking refrigerant levels, inspecting the drain line, and verifying safe electrical operation. Our local Tampa Bay HVAC technicians can walk you through what’s included in our AC repairs, installs, and maintenance options so you can choose what fits your home best.

Why Homeowners in Tampa Bay Choose Home Therapist

Our approach is simple: treat every home like it’s our own and communicate clearly from start to finish. For this Lutz, FL air duct cleaning visit, that meant confirming timing, explaining the work in plain language, and respecting the homeowner’s schedule and space.

When you work with Home Therapist for HVAC service in Lutz or anywhere in Tampa Bay, you can count on:

  • Licensed, experienced technicians: Our team understands the specific challenges of cooling homes in the Tampa Bay climate, from Lutz to Land O’ Lakes to downtown Tampa.
  • Transparent expectations and pricing: We explain what’s included, how pricing works, and what limitations or risks exist, especially with older ductwork.
  • Clean, respectful work: We take care with your furniture, flooring, and belongings, and we leave your home as tidy as we can when we’re done.
  • Focus on long-term reliability: Services like the Premium Therapy Plan are designed to protect your comfort, not just fix today’s problem.
  • Commitment to local homeowners: We live and work right here in the Tampa Bay area, from Lutz to neighborhoods around Tampa Premium Outlets and beyond.

If you’re curious about how our services fit together—cleaning, repairs, installs, and maintenance—our quick guide to AC repairs, installs, and maintenance services is a helpful place to start.

Ready for Cleaner Air in Your Lutz, FL Home?

If you’re noticing dusty vents, stale air, or buildup around your registers, it may be time for professional air duct cleaning in Lutz, FL. Our Home Therapist team can walk you through options—from focused vent and duct cleaning packages to deeper duct services and maintenance plans tailored to Tampa Bay homes.

Whether you live in Lutz, near central Tampa, or elsewhere around the Tampa Bay area, we’re here to provide the therapy your home needs—carefully, professionally, and with your comfort at the center of every visit.

To schedule air duct cleaning, indoor air quality service, or an HVAC maintenance plan in Lutz, FL, contact Home Therapist today and let our local technicians help you breathe a little easier at home.

Air Duct Cleaning & Ongoing HVAC Care for a Home in Lutz, FL 33558

Air Duct Cleaning & Ongoing HVAC Care for a Home in Lutz, FL 33558

Indoor air quality is a big concern for many families in Lutz, FL — especially with our long cooling season and high humidity. A homeowner in the Lutz, FL 33558 area reached out to Home Therapist for professional air duct cleaning to help their home feel fresher and cleaner. During the visit, our technician also helped them enroll in our Premium Therapy Plan for ongoing HVAC care at a discounted rate.

In this article, we’ll walk through what the Value Air Duct Cleaning Package included, how we protected the home while we worked, what homeowners in Lutz can realistically expect from duct cleaning, and why pairing air duct cleaning with an HVAC maintenance plan is such a smart move for comfort and long-term reliability.

1. The Homeowner’s Concern: Fresher, Cleaner Air in a Busy Lutz Household

Our customer, whom we’ll call Sandy, contacted us looking for cleaner air and less dust around the home. Like many homeowners in Lutz, FL, she wanted to:

  • Reduce the dust that seemed to settle quickly on furniture and surfaces
  • Improve the overall freshness of the air moving through the vents
  • Take care of the HVAC system before the next stretch of hot, humid weather

She chose our Value Air Duct Cleaning Package, which focuses on vent-by-vent cleaning using our professional air duct cleaning machine. The scope of work was very clear:

  • Remove every supply vent cover throughout the home
  • Clean each vent and the duct directly behind it
  • Wipe and dust the vent registers before reinstallation

Because the home had enough vents to qualify, we were able to offer the special per-vent pricing that is only available when all ducts in the home are cleaned with a minimum of 12 vents. The homeowner approved the visit by message and chose a morning time slot, knowing we would arrive between 8 a.m. and 11 a.m. and wrap up in the early afternoon.

This family also understood that older duct systems can sometimes be fragile. We always explain up front that while we take great care, older ductwork can be susceptible to damage during any type of cleaning or repair. We’re transparent about that reality so our customers can make informed decisions with no surprises.

2. Inspection & Diagnosis: What We Check Before Cleaning Air Ducts

Before we begin any air duct cleaning in Lutz, FL, our technician walks through the home and performs a basic visual inspection. For this job, our technician Barbaro carefully checked:

  • Vent locations and count — to confirm the number of vents and ensure all were accessible so the customer could take full advantage of the Value Package pricing.
  • Condition of vent registers — looking for rust, damage, or heavy buildup that might require extra attention.
  • Visible duct openings — checking inside the duct openings behind each vent for signs of significant dust, debris, or microbial growth.
  • Signs of duct age or fragility — noting any older duct material that might be more sensitive to agitation or suction.

We also talk through expectations and comfort levels with the homeowner. For example, we explain that:

  • A thorough vent-by-vent cleaning can dramatically reduce visible dust buildup inside registers and near the openings of ducts.
  • Some dust can be dislodged during the process and may temporarily land on nearby furniture and appliances.
  • We do our best to clean up after ourselves, but there can still be a small amount of follow-up dusting needed by the homeowner once everything settles.

During this visit in Lutz, FL 33558, we confirmed that the vents were good candidates for cleaning and that the homeowner understood all pricing, limitations, and expectations before we started.

3. Step-by-Step: How We Performed the Value Air Duct Cleaning Package in Lutz, FL

Air duct cleaning doesn’t have to be disruptive when it’s done methodically and respectfully. Here’s how we handled this project to protect the home and maximize results.

Step 1: Preparing the Home and Work Areas

We began by walking through the home in Lutz with the homeowner, pointing out each vent we would be working on. Our technician:

  • Laid out basic floor protection in areas where tools or vent covers would be placed
  • Gathered a vent count to confirm the final per-vent pricing
  • Explained again that some dust might fall during the process and that we would clean what we reasonably could before leaving

This up-front communication helps homeowners feel comfortable and avoids surprises as we move room to room.

Step 2: Removing and Cleaning Each Vent Register

Next, we removed every vent cover throughout the home. Each register was:

  • Unscrewed or unclipped carefully to avoid damaging paint or drywall
  • Cleaned and dusted using appropriate tools to remove visible buildup
  • Set aside in an organized way so that every vent went back to its original location

This is a simple but important step. Dirty or clogged vent covers can restrict airflow and recirculate dust every time the air conditioner or heater runs.

Step 3: Cleaning the Duct Openings with Our Air Duct Cleaning Machine

With the registers removed, we used our professional duct cleaning machine to clean from the vent opening into the duct. The goal here is to:

  • Remove loose dust and debris that has built up along the first portion of the ducts
  • Improve airflow at the supply points where conditioned air enters each room
  • Help reduce the amount of dust being pushed into the living spaces

Because this was a Value Air Duct Cleaning Package, the focus was on thorough cleaning from each vent inward using our equipment, rather than an intensive whole-system duct remediation. It’s a strong, budget-conscious step toward better indoor air quality in Lutz homes that already have functioning ductwork.

Step 4: Reinstalling and Dusting Off Vent Covers

After cleaning the ducts at each vent location, we:

  • Reinstalled every vent register securely
  • Wiped down the outside surface of each vent
  • Did a quick touch-up sweep or wipe in each area where dust may have settled during the process

Our goal is always to leave a home in Lutz, FL looking at least as tidy as when we arrived, if not better. We also encourage homeowners to do a light follow-up dusting later that day or the next, just to catch any particles that may settle after we’re done.

Step 5: Setting Up the Premium Therapy Plan for Ongoing AC Care

Once the duct cleaning work was complete, our technician discussed long-term HVAC care with the homeowner. After reviewing the options, the homeowner decided to enroll in our Premium Therapy Plan at a discounted rate.

This plan helps Lutz homeowners by:

We processed payment by check, confirmed the plan details, and ensured the homeowner knew how to reach us if any questions came up after the visit. This kind of ongoing relationship is exactly what our Therapy Maintenance Plans are designed for.

4. Why This Air Duct Cleaning Approach Works for Lutz, FL Homes

The Value Air Duct Cleaning Package is built around a simple principle: air has to move freely and cleanly through your vents to keep your home comfortable and healthy.

In a typical central air system, your air conditioner or heat pump pulls warm, humid air from the home, cools or heats it, and then pushes it back through the duct system. Over time, dust, pet dander, and other particles can settle near the vent openings, especially in areas where airflow slows down or where vents aren’t cleaned regularly.

By removing and cleaning each vent cover and using a dedicated duct cleaning machine at every opening, we:

  • Improve airflow at the supply vents, which can help rooms reach their set temperatures more consistently.
  • Reduce dust recirculation from visible buildup near the vents.
  • Support better indoor air quality when combined with good filtration and regular AC maintenance.

For homeowners who want to go even further, services like advanced air filtration solutions, air duct sanitizing, or broader indoor air quality improvements can be added depending on the home’s needs.

It’s also worth noting that Lutz is part of the Tampa Bay region, where humidity is high for much of the year. According to Lutz, Florida’s climate profile, the warm, moist environment can encourage dust and allergens to cling to surfaces. That’s one reason local Tampa Bay HVAC technicians pay so much attention to clean vents, good filtration, and drainage.

5. How the Premium Therapy Plan Protects HVAC Systems in Lutz

Duct cleaning addresses a major part of the airflow path, but the HVAC equipment itself also needs routine care. That’s where our Premium Therapy Plan comes in.

When a Lutz homeowner signs up for a plan like this, they’re essentially giving their system regular “checkups.” On each visit, we focus on things like:

Consistent AC maintenance in the Tampa area helps:

  • Prevent unexpected breakdowns during peak heat
  • Maintain efficiency, which can help keep energy bills more stable
  • Extend the usable life of the equipment

Pairing vent-level duct cleaning with a maintenance plan gives homeowners in Lutz, FL 33558 a well-rounded strategy: cleaner air coming from the vents, and a well-maintained system producing that conditioned air in the first place.

6. Practical Pro Tips for Homeowners in Lutz, FL

If you live in Lutz or anywhere in the Tampa Bay area, here are some straightforward tips to keep your HVAC system and indoor air in good shape between professional visits:

  1. Change your air filter regularly. In a humid climate like ours, most homes benefit from changing filters every 1–2 months, especially if you have pets or allergies. A clean filter keeps dust out of the ducts and helps the system breathe easier.
  2. Keep vents open and unblocked. Avoid closing too many vents or covering them with furniture or rugs. Restricted airflow can create hot and cold spots and put extra strain on your air conditioner.
  3. Dust vent covers during routine cleaning. When you’re dusting furniture, take a moment to gently dust or vacuum vent registers. It’s a small step that reduces how much ends up in your duct openings.
  4. Watch for changes in airflow or comfort. If certain rooms in your Lutz home suddenly feel warmer, cooler, or stuffier than usual, that’s a sign to call for an HVAC checkup.
  5. Schedule regular maintenance before peak seasons. Aim to schedule your AC or heat pump tune-ups before the hottest months. Preventive service is much easier than emergency repairs during a heat wave.
  6. Consider additional air quality solutions if needed. If allergies, asthma, or sensitivities are a concern, talk to us about enhanced filtration, duct sanitizing, or other targeted indoor air quality services designed for Tampa Bay homes.

For more examples of real-world duct projects in our area, you can also read our case study on an air duct cleaning project in Zephyrhills, FL. The climate challenges are very similar to what we see in Lutz.

7. Why Lutz Homeowners Choose Home Therapist

At Home Therapist, we approach every job like this one in Lutz, FL with the same priorities: safety, cleanliness, and long-term comfort for your family. Here’s what sets our team apart for HVAC and indoor air quality service in the Tampa Bay area:

  • Licensed, experienced technicians who understand how Florida’s heat and humidity affect your system and ductwork.
  • Clear, honest communication before, during, and after every visit. We explain pricing, limitations, and expectations up front, including potential risks with older ducts.
  • Respect for your home — from basic floor protection to cleaning up our work areas before we leave.
  • Focus on prevention through programs like our Therapy Maintenance Plans, so you’re not just reacting to problems after they happen.
  • Commitment to Tampa Bay communities, from Lutz to Tampa, Land O’ Lakes, and beyond. We work and live in the same region you do, near local destinations like Tampa Premium Outlets and the broader Tampa Bay area.

Whether we’re cleaning vents, tuning up your AC, or designing a full indoor air quality solution, we treat your home with the same care we’d want for our own.

8. Need Air Duct Cleaning or HVAC Maintenance in Lutz, FL?

If you’re noticing dusty vents, uneven airflow, or just want your home’s air to feel fresher, we’re here to help. Our team at Home Therapist provides professional HVAC service and air duct cleaning for homeowners in Lutz, FL 33558 and throughout the Tampa Bay area.

We can tailor a plan that fits your home, whether you’re interested in a straightforward vent cleaning, enhanced filtration, duct sanitizing, or a full AC maintenance program.

Ready to breathe easier? Contact Home Therapist today to schedule HVAC or air duct service in Lutz, FL, and let our local Tampa Bay HVAC technicians give your home the therapy it needs.

Premium Therapy Plan HVAC Maintenance Visit in Port Richey, FL 34668

Premium Therapy Plan HVAC Maintenance Visit in Port Richey, FL 34668

Florida summers in Port Richey are no joke, and when your air conditioner is working hard almost year-round, maintenance is not a luxury—it is a necessity. On this visit, our Home Therapist technician Barbaro performed a scheduled Premium Therapy Plan service at a home in Port Richey, FL 34668. The goal was simple: make sure the AC system was clean, safe, and running as efficiently as possible before the next long stretch of heat and humidity.

During this visit, the system checked out very well for its age. There were no active failures or alarming readings, but our thorough inspection and cleaning helped protect the homeowner from the kind of surprise breakdowns that often happen during peak heat. Below, we will walk through what the homeowner was experiencing, what we inspected, the maintenance we completed, and how this type of plan helps extend system life and comfort for Port Richey homeowners.

Customer Problem: Staying Ahead of Breakdowns in Port Richey, FL

This appointment was Visit #3 under our Premium Therapy Plan for this home in Port Richey, FL. The homeowner was not calling because something was obviously broken—instead, they wanted to stay ahead of problems. That is exactly how a maintenance plan should work.

Like many homes in coastal Pasco County, this system runs heavily through our long hot season, with humidity and salt in the air putting extra stress on components. Even when everything seems to be working, there can be hidden issues:

  • Dirt and debris buildup on coils and in blower compartments that slowly reduce efficiency
  • Electrical connections that loosen over time with vibration and thermal expansion
  • Fan motors and compressors pulling more power than they should as they age
  • Refrigerant pressures drifting out of the ideal range due to minor losses or temperature swings

Our Premium Therapy Plan is designed for homeowners in Port Richey and across the Tampa Bay area who want predictable comfort, fewer surprises, and the peace of mind that a licensed professional is regularly checking their system. On this visit, Barbaro’s job was to confirm everything was operating safely and efficiently and to complete the full list of Premium Plan maintenance tasks.

Inspection & Diagnosis: Verifying Safe, Efficient Operation

Even during routine HVAC maintenance in Port Richey, FL, we treat each visit like a detailed checkup. Barbaro started with a full system evaluation before any cleaning or adjustments. That way, we can compare “before” and “after” performance and spot early warning signs.

Here is how the inspection unfolded:

1. Visual and Safety Check

  • Inspected the indoor air handler and outdoor unit cabinet for signs of rust, corrosion, or physical damage
  • Checked wiring, electrical panels, and disconnects for discoloration, loose connections, or overheating
  • Verified that safety panels and covers were properly secured
  • Confirmed the area around the equipment was clear and accessible for safe operation and service

Nothing in this step raised any red flags. The system was in respectable condition for its age, with no visible safety issues.

2. Electrical and Mechanical Measurements

Next, Barbaro took readings that tell us how hard the system is working. For this Premium Therapy Plan visit, we focused on three key electrical draws:

  • Compressor consumption: Measured and confirmed it was within the expected range for this particular unit.
  • Blower motor consumption: Verified that amperage draw was normal, indicating the motor was not strained or binding.
  • Fan motor consumption: Checked the outdoor fan motor draw and confirmed it matched manufacturer expectations.

All electrical consumption readings were within the normal range, which tells us the motors are not overworking and there are no immediate signs of premature wear.

3. Refrigerant Pressures and System Performance

Barbaro then monitored system pressures and overall operation:

  • Measured suction and discharge pressures to confirm they were in a normal, stable range
  • Observed system cycling to ensure smooth startup and shutdown
  • Checked for unusual noises or vibrations during operation

Pressures were normal and stable, which is a strong indication that the refrigerant charge is appropriate and that the system is transferring heat efficiently. There were no signs of short cycling, hard starts, or noise that might suggest compressor wear.

4. Functional Testing

Before moving on to detailed cleaning, Barbaro performed functional tests to see how the system behaved under normal operation:

  • Confirmed thermostat communication and response
  • Verified that the system reached and maintained the set temperature
  • Checked airflow at supply vents to ensure consistent distribution throughout the home

With everything passing these checks, Barbaro moved on to the full maintenance checklist included in the Premium Therapy Plan.

Step-by-Step Premium Therapy Plan Service

One major benefit of our Premium Therapy Plan for homeowners in Port Richey and throughout the Tampa Bay area is that it is not just a quick visual check. It is a thorough maintenance process designed to clean, tighten, calibrate, and test the system end to end.

1. Deep Cleaning of Internal Components

Dust, pet hair, and Florida’s high humidity can quickly take a toll on AC components. Barbaro performed a careful cleaning of key indoor and outdoor parts:

This type of deep cleaning helps the system cool more effectively while reducing strain on the compressor and blower motor.

2. Verification and Tightening of Connections

Over time, vibration and temperature changes can loosen screws, terminals, and brackets. As part of the Premium Therapy Plan service:

  • Electrical terminals were checked and tightened where needed
  • Mounting hardware and brackets were inspected to confirm components were secure
  • Visible wiring was checked for wear, rubbing, or insulation damage

Solid electrical and mechanical connections reduce the risk of nuisance trips, intermittent issues, and sudden failures during peak heat.

3. Preventive Replacement of Plan-Covered Consumables

Barbaro replaced consumable items covered by the Premium Therapy Plan according to the schedule. Typical plan items include filters and other wear-and-tear components that should be updated regularly to keep the system healthy.

By replacing these components proactively instead of waiting for a failure, the homeowner stays ahead of air quality problems, efficiency loss, and avoidable repairs.

4. System Calibration

After cleaning and replacing the plan-covered parts, Barbaro moved into calibration. This is where we fine-tune how the system behaves:

  • Confirmed thermostat settings and calibration so displayed temperatures match actual room conditions
  • Verified correct system staging and fan operation
  • Ensured control boards and safety switches were responding properly

For homeowners in Port Richey relying on their systems day and night, proper calibration helps maintain steady comfort and limit unnecessary cycling that shortens equipment lifespan.

5. Post-Maintenance Functional Testing

We never finish a maintenance visit without verifying the outcome. After completing all Premium Therapy Plan tasks, Barbaro re-ran the system and confirmed:

  • Compressor, blower, and fan motor consumption remained within expected ranges
  • System pressures were still normal and stable after cleaning and adjustments
  • The unit started smoothly, cooled consistently, and shut off correctly at the set temperature

With everything passing final checks, the visit concluded with the system operating correctly, safely, and efficiently. No additional interventions beyond normal scheduled maintenance were required.

Why This Type of Maintenance Works So Well

The reason this Premium Therapy Plan visit in Port Richey, FL is so effective comes back to a few fundamental HVAC principles:

1. Airflow and Heat Transfer

Your AC system removes heat from indoor air and rejects it outdoors. For that to work efficiently, two things must be in good shape: airflow and coil cleanliness.

  • Clean coils allow refrigerant to absorb and release heat properly.
  • Clean blower components and filters ensure enough air moves across the coils.

When dirt blocks these surfaces or airflow is restricted, the system has to run longer and harder to reach the same temperature. Proper cleaning restores that heat transfer and protects the compressor from unnecessary strain.

2. Electrical Health and Motor Protection

Motors and compressors draw a specific amount of power when they are healthy and properly loaded. When we measure compressor, blower, and fan consumption and compare those numbers to expected ranges, we are effectively checking the “heartbeat” of the system.

  • If amperage is too high, the motor may be strained or the system may be dirty or misconfigured.
  • If amperage is unstable, there may be electrical issues or failing components.

By confirming normal consumption during this visit, Barbaro verified that major components were not being over-stressed and were likely to continue operating reliably.

3. Refrigerant Pressures and the Refrigeration Cycle

Refrigerant must change pressure and temperature as it moves through the system to absorb heat indoors and release it outdoors. Normal, stable pressures indicate that the system is properly charged and that major components—like the compressor and expansion device—are performing well.

When pressures are out of range, it can signal low refrigerant, airflow issues, or a failing component. In this case, stable pressures confirmed that the system was operating within design parameters.

Pro Tips for Homeowners in Port Richey, FL

If you live in Port Richey, FL or nearby areas like New Port Richey and Hudson, here are a few practical ways to keep your AC running smoothly between professional visits:

  1. Change filters regularly. In our humid Gulf Coast climate, most homes should check filters every 30 days and replace them as needed. A clean filter is one of the easiest ways to protect your system.
  2. Keep outdoor units clear. Trim back plants and remove leaves or debris from around the condenser. Give it at least 2–3 feet of clearance on all sides so it can breathe.
  3. Watch your power bills. A sudden jump in your electric bill in Port Richey can be an early sign your system is losing efficiency, even if it still feels cool inside.
  4. Listen for new noises. Rattles, grinding sounds, or loud buzzing that were not there before are reasons to call a professional before something fails.
  5. Schedule maintenance before peak heat. Getting your tune-up done in spring or early summer helps you avoid breakdowns during the hottest days when systems in Pasco County are under maximum stress.
  6. Consider a maintenance plan. A plan like our Premium Therapy Plan locks in routine visits and can help you budget for care rather than dealing with surprise emergency calls.

Why Choose Home Therapist for HVAC Maintenance in Port Richey and Tampa Bay

At Home Therapist Cooling, Heating, and Plumbing, we approach every maintenance visit the way Barbaro handled this one in Port Richey—thoroughly, carefully, and with your long-term comfort in mind.

Here is what sets us apart for HVAC service in the Tampa Bay and Port Richey area:

  • Licensed, experienced technicians: Our team is trained to check not just “Is it running?” but “Is it running right and safely?”
  • Clear communication: We explain what we found in plain English, share readings and results, and let you know what can wait and what should not.
  • Focus on long-term reliability: Plans like our Premium Therapy Plan are built to extend system life, reduce breakdowns, and keep comfort consistent.
  • Clean, respectful work: We treat every home in Port Richey the way we would want our own homes treated—clean work areas, careful handling of equipment, and secure access when we leave.
  • Local Tampa Bay commitment: We understand how the climate in Port Richey, Tampa, and the surrounding Gulf Coast communities affects HVAC systems, from humidity to salt exposure near places like Werner-Boyce Salt Springs State Park.

If you want to explore your options for ongoing care, you can read more about AC maintenance and cleaning specials in Tampa Bay or review our AC repair, install, and maintenance options.

Helpful Resources for Tampa Bay Homeowners

For homeowners who like to learn more about caring for their systems, we have put together several guides and resources:

Need Reliable HVAC Maintenance in Port Richey, FL?

If you live in Port Richey, FL 34668 or nearby communities and want your AC to run like the system we serviced on this visit—clean, efficient, and within safe operating ranges—we are here to help.

Whether you are interested in a one-time tune-up or a comprehensive plan like our Premium Therapy Plan, our local Tampa Bay HVAC technicians can tailor a solution to your home and budget. To learn more about our maintenance options, you can explore our AC maintenance services or request an appointment through our HVAC maintenance resources.

When you are ready, contact Home Therapist Cooling, Heating, and Plumbing to schedule HVAC service in Port Richey or anywhere in the Tampa Bay area. We will provide the steady, professional care your home’s comfort system needs—so you can stay cool and comfortable all year long.

Water Heater Flush & Whole-Home Plumbing Check for a Value Home Therapy Plan Member in Riverview, FL

Staying ahead of plumbing problems is one of the best things a homeowner can do to protect their home, especially in a fast-growing community like Riverview, FL 33579. As part of a scheduled visit under our Value Home Therapy Plan, our Home Therapist plumbing technician Richard arrived at a home in Riverview to perform a water heater flush and a full plumbing inspection.

For this homeowner, the visit wasn’t about an emergency or a major leak. It was about keeping hot water reliable, pipes healthy, and bills under control. During this appointment, we focused on preventative care: flushing the water heater, checking visible plumbing, and verifying that everything was operating safely and efficiently.

Below, we’ll walk through what brought us out to the home, what we inspected, how we completed the water heater flush, and why this kind of maintenance is especially important for homeowners in Riverview and across the Tampa Bay area.

The Customer’s Goal: Stay Ahead of Plumbing Problems in Riverview, FL

For this Visit #2 Plumbing Visit, the homeowner in Riverview had a clear expectation: a timely, thorough service window and a careful check of their plumbing system. They requested a specific arrival time between 10–11 a.m., and our technician Richard stayed firm on that schedule so they could plan their day with confidence.

As part of their Value Home Therapy Plan, this visit focused on two main priorities:

  • Performing a water heater flush to clear sediment and help extend the unit’s life
  • Completing a whole-home plumbing inspection to look for early signs of leaks, corrosion, or performance issues

In Riverview and nearby areas, water quality and sediment can be tougher on water heaters and plumbing lines than many homeowners realize. Over time, this can mean:

  • Longer wait times for hot water
  • Unusual noises from the water heater
  • Higher energy bills as the system works harder
  • Hidden leaks that only show up once damage has started

By scheduling this routine visit, the homeowner was essentially asking: “Is everything working safely, and what can we do now to prevent expensive problems later?” That’s exactly what our plumbing technician set out to confirm.

Inspection & Diagnosis: What We Checked During the Plumbing Visit

Every maintenance visit under our Value Home Therapy Plan in Riverview, FL follows a structured process. Even when there’s no obvious problem, we treat the home as if we’re looking for the earliest clues of future issues. During this visit, our technician Richard focused on a few key areas.

1. Initial Walkthrough & Safety Check

Before touching any valves or equipment, we:

In homes around Riverview, especially in planned communities and developments, water heaters are often in garages, closets, or utility spaces. These areas can get hot and humid, which makes routine visual checks even more important for long-term safety.

2. Whole-Home Plumbing Inspection

With safety confirmed, we moved through a structured home plumbing check. While exact details vary by home, our inspection during a visit like this typically includes:

  • Fixtures: Inspecting faucets, showers, and hose bibs for drips, corrosion, or weak water pressure
  • Toilets: Checking for running toilets, slow fills, and loose or worn components that can waste water
  • Visible piping: Looking at accessible pipes under sinks, at the water heater, and near appliances for corrosion, leaks, or mineral buildup
  • Drain performance: Noting any slow drains or gurgling sounds that might indicate early drain line buildup
  • Main shutoff awareness: Confirming the location and condition of the home’s main water shutoff so the homeowner can act quickly in an emergency

For homeowners in Riverview, FL, this type of inspection is especially valuable because our local clay soils, humidity, and sometimes high water pressure can all influence how plumbing wears over time. Catching a small drip or loose connection today is much easier than tearing out damaged drywall later.

3. Water Heater Condition Check

Before performing the flush, we also assessed the general condition of the water heater:

  • Looked for rust on the tank or connections
  • Checked for any water staining or moisture around the base
  • Verified that the venting (for gas units) was clear and properly connected
  • Confirmed the temperature setting was within a safe range

Once the inspection confirmed that the unit was in serviceable condition and safe to work on, we moved ahead with the planned water heater flush.

Step-by-Step: How We Performed the Water Heater Flush & Service

A proper water heater flush is more than just attaching a hose and opening a valve. Done correctly, it helps remove sediment, protect the tank, and support more consistent hot water delivery. For this Riverview visit, our process included the following steps.

1. Preparing the Water Heater

We started by safely preparing the unit:

  • Turned off power or gas to the water heater, depending on the type
  • Closed the cold-water supply valve to stop new water from entering the tank
  • Connected a drain hose to the water heater’s drain valve and routed it to a safe discharge location

This setup ensures that once we open the drain valve, the water and sediment leave the tank in a controlled, safe way.

2. Draining the Tank

With everything in place, we:

  • Opened the hot water side of a nearby faucet to relieve pressure and allow air into the system
  • Opened the water heater’s drain valve to begin emptying the tank
  • Monitored the water flow, watching for sediment, discoloration, or debris coming from the drain hose

In areas like Riverview and greater Hillsborough County, sediment buildup is common due to minerals in the water. Over time, this accumulation can sit at the bottom of the tank, insulating the water from the heating element or burner and forcing the system to work harder.

3. Flushing to Clear Sediment

Once most of the water was drained, we began the actual flush:

  • Briefly turned the cold-water supply back on to stir up remaining sediment
  • Allowed the mixture of fresh water and loosened sediment to flow out through the drain hose
  • Repeated this process until the water ran clear

We continued this cycle until we were confident that the majority of loose sediment had been removed from the tank, helping to restore better heat transfer and more consistent hot water performance.

4. Refilling, Restarting & Final Checks

After flushing:

  • We closed the drain valve and turned the cold-water supply back on fully
  • Left a hot faucet open to purge air from the lines until water ran steadily
  • Once the tank was full, we restored power or gas to the unit
  • Verified proper operation and checked for any leaks at the connections and drain valve

Before leaving, we also reviewed the results of the plumbing inspection and water heater flush with the homeowner, explaining what we saw and any simple steps they could take between visits to maintain performance.

Why This Maintenance Matters: The Science Behind a Water Heater Flush

Many homeowners in Riverview, FL ask a fair question: “Does a water heater flush really make a difference?” The short answer is yes—and it comes down to how water heaters work and how sediment affects them.

Sediment and Heat Transfer

Water heaters rely on efficient heat transfer to warm the water. In a tank-style unit, sediment (sand, minerals, and debris) naturally settles to the bottom of the tank. Over time, that layer acts like a blanket between the heat source and the water.

When sediment builds up, the water heater must run longer and harder to deliver the same temperature water. This can lead to:

  • Higher energy bills
  • Overheating of components
  • Popping or rumbling noises as water bubbles through sediment
  • Shorter water heater lifespan

Pressure, Temperature, and Safety

The water heater’s temperature and pressure (T&P) relief valve is a critical safety component. While we don’t force it to operate during every maintenance visit, inspecting this area and the tank condition helps us catch warning signs early.

If a water heater is neglected for too long, extreme sediment buildup, unchecked temperature settings, or corroded components can increase the risk of leaks or, in worst cases, tank failure. Regular flushes and inspections help keep everything operating within safe, expected limits.

Why It’s Especially Important in Riverview, FL

In communities around Riverview, FL, a combination of local water quality, warm temperatures, and high year-round usage means water heaters rarely get a break. Preventative care like this appointment supports:

  • More consistent hot water for showers, laundry, and dishes
  • Reduced strain on the heater, which can extend its useful life
  • More predictable utility bills
  • Fewer surprises from leaks or sudden failures

Pro Tips for Homeowners in Riverview, FL

Whether you’re in Riverview or elsewhere in the Tampa Bay area, a few simple habits can go a long way toward protecting your plumbing system and water heater.

1. Schedule Annual Water Heater Maintenance

Most homes in Riverview benefit from a yearly water heater flush and inspection. Our Value Home Therapy Plan is designed to make that simple and predictable. You can also learn more about water heater maintenance services offered by Home Therapist to understand what’s included.

2. Know Where Your Main Shutoff Is

Take a few minutes to locate your home’s main water shutoff valve. If a pipe bursts or a fixture fails, turning off the water quickly can limit damage. Our team is always happy to point this out during a visit.

3. Don’t Ignore Small Changes

In Riverview’s climate, small plumbing symptoms can turn into larger problems if they’re ignored. Call for service if you notice:

  • New rattling or popping noises from the water heater
  • Hot water that suddenly runs out faster than before
  • Rusty, discolored, or sandy water
  • Unexplained increases in your water bill

4. Protect Drains from Build-Up

Be cautious about what goes down your drains and toilets. Even small amounts of grease or wipes labeled “flushable” can lead to clogs over time. For more targeted advice, you can read our blog on key drain inspection tips every Tampa homeowner needs.

5. Take Advantage of Maintenance Plans

Membership options like our Value Home Therapy Plan are designed to keep your plumbing and HVAC systems on a regular schedule. If you’d like a deeper overview of what’s available, visit our page on plumbing services, maintenance plans, and options.

Why Homeowners in Riverview Trust Home Therapist

When you open your door to a service professional, you’re trusting them with more than your equipment—you’re trusting them with your home and your peace of mind. At Home Therapist Cooling, Heating, and Plumbing, we don’t take that lightly.

Here’s what we focus on during every plumbing visit in Riverview, FL:

  • Licensed, experienced technicians: Our local Tampa Bay plumbing team is trained to work carefully, safely, and thoroughly on every visit.
  • Respect for your schedule: We honor arrival windows, like this 10–11 a.m. appointment in Riverview, so you’re not left waiting all day.
  • Clear communication: We explain what we’re doing, why we’re doing it, and what we find—without upsell pressure or confusing jargon.
  • Clean, careful work: We treat your property as if it were our own, using drop cloths and cleanup practices to leave the space tidy.
  • Focus on long-term reliability: Our goal is not just to fix what’s urgent today, but to help you avoid surprise breakdowns tomorrow.

We also provide dedicated plumbing repair services tailored to your area. If you ever need more than routine maintenance, you can learn about our plumbing repair services in Riverview and see how we support local homeowners.

For homeowners curious about how similar projects look in practice, we’ve also documented a whole-home plumbing inspection and water heater flush project in Tampa, FL that walks through another real-world example.

Plan Your Next Plumbing Check in Riverview, FL

Riverview continues to grow, and as the community expands around spots like the Alafia River and major corridors into Tampa Bay, local plumbing systems are working harder than ever. A simple, scheduled visit like this water heater flush and plumbing inspection can pay off in fewer emergencies, a longer-lasting water heater, and more predictable monthly bills.

If you’re a homeowner in Riverview, FL 33579 or a nearby Tampa Bay community and you’d like the same kind of careful, scheduled plumbing care, our team is ready to help. Whether you’re interested in routine maintenance under a plan or need targeted plumbing repair in Hillsborough County, we’ll walk you through your options, answer questions, and keep the process straightforward.

To schedule a water heater flush, whole-home plumbing inspection, or to ask about our Value Home Therapy Plan in Riverview, FL, contact Home Therapist Cooling, Heating, and Plumbing today. We’ll provide the therapy your home needs—one careful visit at a time.

Condenser Fan Motor Replacement in Riverview, FL: Restoring Cool Comfort for a Local Home

Condenser Fan Motor Replacement in Riverview, FL: Restoring Cool Comfort for a Local Home

When your air conditioner struggles in the middle of a hot Riverview, FL afternoon, it’s more than just an inconvenience — it’s uncomfortable, stressful, and can even be unsafe for vulnerable family members. That’s exactly what a homeowner in Riverview, FL 33578 was facing when their outdoor AC unit started showing signs of trouble. Our Home Therapist technician, Barbaro, was called out to diagnose the issue and get the system safely cooling again.

After a careful inspection, we identified a failing condenser fan motor and an aging capacitor. We replaced the old parts with a 1075 RPM universal condenser fan motor backed by a one-year warranty, and installed a new matching capacitor as needed. This brought the system back to stable, reliable operation — just in time for more Florida heat.

If you’re a homeowner in Riverview or the greater Tampa Bay area and your outdoor AC unit is making unusual noises, running hot, or not cooling well, this story will walk you through what likely happens during a professional air conditioner repair visit in Tampa Bay, and why a condenser fan motor replacement can be such an important fix.

The Homeowner’s Problem: An Outdoor Unit Struggling in the Heat

In Riverview, FL, we see long stretches of hot, humid weather. When your AC is running almost nonstop, small issues in the outdoor unit (the condenser) can turn into bigger problems quickly. While the internal notes for this visit focused mostly on administrative details, the scope of work tells us a clear story about the system’s symptoms.

When a condenser fan motor is failing, homeowners often notice:

  • The outdoor unit running very hot to the touch
  • A loud humming sound from the condenser, but the fan blades not spinning
  • The AC running but the home not cooling well
  • Occasional tripping of the breaker
  • Fan blades that start spinning only if nudged with a stick (never something a homeowner should do themselves)

In a neighborhood like the Hidden Water area of Riverview, these symptoms usually appear on the hottest days, when your system is working its hardest. Ignoring them can lead to more damage, including risks to the compressor — one of the most expensive parts of your AC system.

To protect the homeowner’s comfort and their long-term equipment investment, our technician moved quickly to determine exactly what had failed and how to fix it safely.

Inspection & Diagnosis: How We Traced the Issue to the Fan Motor and Capacitor

When Barbaro arrived at the Riverview home, the first priority was safety — for the homeowner, the property, and the equipment. From there, he followed a methodical diagnostic process that we use for AC repair across the Tampa Bay area.

1. Initial Safety and Visual Check

Before touching any components, our technician:

  • Turned off power at the disconnect and confirmed it was off
  • Removed the condenser’s access panel to visually inspect wiring, the fan motor, and the capacitor
  • Looked for signs of overheating, burnt wiring, oil leaks, rust, or physical damage

In Florida’s humid climate, outdoor units in Riverview and Tampa Bay often show accelerated wear, especially on moving parts like motors and on electrical components like capacitors.

2. Functional Test of the Condenser Fan Motor

With appropriate safety measures and tools, Barbaro verified:

  • Whether the fan was attempting to start when the thermostat called for cooling
  • If the motor windings showed proper resistance values
  • Any grinding or resistance in the motor shaft when turned by hand (with power off)

The testing confirmed that the existing condenser fan motor was failing and could no longer reliably start and run under load.

3. Testing the Capacitor

Because the job description included a new capacitor (as needed), Barbaro also tested the existing capacitor with a meter to measure its microfarad (µF) rating and compare it to the manufacturer’s specifications.

Capacitors in our area often fail prematurely due to heat and voltage fluctuations. If the measured value drifts too far below spec, the motor struggles to start, overheats, and can burn out. That’s why replacing the capacitor along with the motor is often the most reliable choice for homeowners in Riverview, FL.

4. Confirming the Best Repair Option

Once the failed components were identified, Barbaro confirmed that a 1075 RPM universal condenser fan motor with a one-year warranty and a properly matched capacitor were the best fit for this system. This allowed us to restore cooling quickly without waiting days for a special-order part, which is critical in the Riverview and Tampa Bay climate.

For homeowners who want a deeper dive into what to expect during these visits, our detailed guide on AC repair services when your system is not cooling explains the process step by step.

Step-by-Step: How We Replaced the 1075 RPM Universal Condenser Fan Motor

With the diagnosis complete and the homeowner’s approval, our technician moved forward with the repair. Here’s how a typical condenser fan motor replacement looks in a Riverview-area home.

1. Power Off and System Protection

Before any work began, Barbaro:

  • Shut off power at the outdoor disconnect and confirmed it with a meter
  • Protected the work area to avoid damage to landscaping and the home exterior
  • Ensured all tools and parts were organized to minimize time with the system down

Safety and cleanliness are central to how we operate, whether we’re in Riverview, Tampa, or elsewhere in the Tampa Bay area.

2. Removing the Old Fan Motor

Next, the technician:

  • Disconnected the wiring from the old motor and capacitor, labeling as needed
  • Removed the top grille assembly with the fan blade attached
  • Carefully detached the fan blade from the old motor shaft
  • Removed the failed motor from the fan shroud or mounting bracket

This step requires care; bent fan blades or damaged wiring can create new problems, so we always proceed methodically.

3. Installing the New 1075 RPM Universal Motor

Once the old motor was out, Barbaro prepared and installed the new universal condenser fan motor:

  • Verified the motor’s specifications, including horsepower, voltage, and 1075 RPM speed
  • Adjusted mounting brackets or studs so the new motor sat at the correct depth in the shroud
  • Reinstalled the fan blade at the right height and orientation for proper airflow
  • Secured all fasteners to prevent vibration and noise

Even small positioning changes can affect how well your system moves air across the condenser coil, which impacts both efficiency and the life of your compressor.

4. Replacing the Capacitor (As Needed)

Given the age and condition of the existing capacitor, a new properly sized capacitor was installed. This step helps:

  • Ensure reliable motor start-up
  • Reduce strain on the new motor
  • Lower the risk of another sudden breakdown during peak Riverview heat

Replacing both parts together is often the most cost-effective and dependable approach for AC repair in the Tampa Bay area.

5. Wiring, Testing, and Final Checks

With the new motor and capacitor in place, Barbaro:

  • Completed all electrical connections according to manufacturer guidelines
  • Double-checked wiring for tightness and proper routing
  • Restored power and started the system
  • Verified that the fan started smoothly and ran in the correct direction
  • Listened for unusual sounds and checked for abnormal vibration

He also confirmed that the condenser coil was getting strong, even airflow and that the outdoor unit’s temperature and pressures remained in a safe operating range.

For a similar real-world example, you can read about our condenser motor replacement project on a rooftop unit in Tampa, FL.

Why This Fix Works: The Science Behind the Condenser Fan Motor

Your air conditioner is based on the refrigeration cycle. The indoor unit absorbs heat from the air inside your home, and the outdoor unit (the condenser) releases that heat to the outside air. The condenser fan motor plays a crucial role in that process.

Here’s what happens when the fan is working properly:

  • The compressor pumps hot, high-pressure refrigerant into the condenser coil.
  • The condenser fan pulls outdoor air across that coil.
  • As the air moves over the coil, it carries away heat from the refrigerant.
  • The refrigerant cools down and condenses back into a liquid, ready to return indoors and absorb more heat.

If the fan motor fails or runs weakly, especially in a place like Riverview, FL where outdoor temperatures and humidity stay high, the condenser can’t release heat effectively. That leads to:

  • Elevated system pressures
  • Hotter outdoor unit temperatures
  • Higher strain on the compressor
  • Reduced cooling capacity inside the home

By installing a properly sized 1075 RPM condenser fan motor and a healthy capacitor, we restore the airflow your system needs to reject heat efficiently. This not only brings your home back to a comfortable temperature — it also helps protect your compressor and extend the life of the entire HVAC system.

If you’d like to understand this cycle in more detail and how it connects to other common repairs, our homeowners’ HVAC troubleshooting guide for Tampa Bay is a great resource.

Pro Tips for Homeowners in Riverview, FL to Protect Their AC System

Between the heat coming off Tampa Bay and our high humidity, AC systems around Riverview work extremely hard. Here are some practical steps you can take to help your condenser fan motor — and the rest of your system — last longer:

1. Keep the Outdoor Unit Clear

Trim back shrubs, grass, and plants at least 2–3 feet around your condenser. In Riverview, fast-growing vegetation and wind-blown debris can block airflow and force the fan to work harder than it should.

2. Rinse the Condenser Coil Gently

About once or twice a year, with power off, use a garden hose on a light setting to rinse dust, pollen, and grass clippings off the coil from the inside out. This helps the new fan motor move air across a cleaner surface, improving efficiency.

3. Schedule Regular Professional Maintenance

Routine maintenance gives a technician the chance to check your capacitor values, fan motor amps, and overall system health before something fails. Our air conditioner tune-up services in Tampa Bay are designed to catch early warning signs and keep your system running reliably through the Riverview summer.

4. Watch for Early Warning Signs

If you hear unusual humming, notice the outdoor unit running without the fan spinning, or feel that your home is staying warm even though the system is running, shut the system off and call a professional. Catching a failing fan motor early can save your compressor.

5. Protect Your System from Power Surges

Thunderstorms are common around Riverview and the Alafia River area. Consider whole-home surge protection or dedicated surge protection for your HVAC equipment to reduce stress on motors and capacitors during voltage spikes.

6. Don’t Ignore Hot Spots Indoors

If some rooms stay warmer than others, it might be a duct or airflow issue rather than just the condenser. Our blog on what to do when your AC isn’t cooling certain areas can help you understand when it’s time for a checkup.

Why Tampa Bay Homeowners Choose Home Therapist

Whether we’re working on a condenser fan motor in Riverview, a rooftop unit in Tampa, or a full system in another Tampa Bay neighborhood, our approach stays the same: we treat your home like it’s our own.

When you call Home Therapist for HVAC service in Riverview, FL, you can expect:

We’re proud to serve Riverview, Tampa, and the surrounding Tampa Bay communities. Whether you live near the Alafia River, commute into Tampa, or are new to the area, we’re here to provide reliable AC repair and installation services across the Tampa Bay region.

Need AC Service in Riverview, FL? We’re Here to Help.

If your outdoor unit is making strange noises, running hot, or not cooling your home the way it used to, don’t wait for a complete breakdown — especially in our Riverview climate. A failing condenser fan motor or capacitor can often be addressed quickly and affordably when caught early.

Home Therapist provides prompt, professional HVAC service in Riverview, FL and the greater Tampa Bay area, from condenser fan motor replacements to full system diagnostics and maintenance. We’ll walk you through what we find, help you understand your options, and restore your comfort with the therapy your home needs.

Ready to schedule service? Contact us today to book your AC repair or maintenance visit in Riverview, FL 33578 or anywhere in the Tampa Bay region.

To learn more about our city and region, you can also explore local resources like Riverview, Florida, Tampa Bay, or the nearby Alafia River — and when the Florida heat kicks in, remember that Home Therapist is just a call away.

Condenser Fan Motor Replacement and Maintenance Plan in Tampa, FL 33606

Condenser Fan Motor Replacement and Elite Therapy Plan in Tampa, FL 33606

When your AC struggles in the middle of a warm, humid afternoon in Tampa, FL 33606, it doesn’t take long for the whole home to feel uncomfortable. Recently, our Home Therapist Cooling, Heating, and Plumbing technician, Jandiel, visited a homeowner near S Willow Ave in Tampa to resolve an outdoor unit issue and help protect the system with an ongoing maintenance plan.

This visit combined two important services: replacing a failing 825 RPM universal condenser fan motor (with a matching capacitor as needed) and enrolling the homeowner in our Elite Therapy maintenance plan. Together, these steps restored cooling performance, reduced the risk of future breakdowns, and set this Tampa home up for more reliable comfort year-round.

What Was Going Wrong at This Tampa Home

The homeowner had noticed that the air conditioning system was not keeping up the way it used to. Common signs that often lead to a visit like this in Tampa include:

  • Warm air coming from the vents, even when the thermostat is set low
  • Longer run times with little improvement in comfort
  • Unusual noises from the outdoor unit (buzzing, humming, or squealing)
  • The outdoor fan blade not spinning, or starting slowly

In many cases, especially in our Tampa Bay climate, a struggling outdoor condenser fan motor is to blame. When that motor can’t spin the fan properly at the correct speed, the system can’t release heat efficiently. That can lead to higher pressures inside the system, excess strain on the compressor, and, if ignored, a much more expensive failure.

The homeowner wanted a solution that would restore comfort quickly but also protect the system from ongoing wear and tear. That’s exactly what we focused on during this visit in Tampa, FL 33606.

Inspection and Diagnosis: How We Tracked Down the Problem

Our technician, Jandiel, began with a thorough inspection of the outdoor condenser unit. Even when a fan motor seems like the obvious culprit, we never skip proper diagnostics. We want to confirm the true source of the issue and rule out safety concerns.

On a visit like this in Tampa, our inspection typically includes:

  • Visual inspection of the condenser unit: Checking fan blades, wiring, motor housing, mounting hardware, and any signs of overheating or burnt insulation.
  • Testing the fan motor operation: Observing whether the fan starts up on its own, needs a “push” to get going, runs slowly, or stops intermittently.
  • Electrical checks: Measuring voltage to the motor and testing the associated capacitor to ensure the motor is receiving proper power and start assistance.
  • Listening for abnormal sounds: Grinding, squealing, or humming that often indicates worn bearings or a motor that is locked up.
  • Evaluating system pressures and temperatures: Making sure the refrigeration circuit isn’t operating at unsafe pressures due to poor heat rejection.

From these checks, it was clear that the condenser fan motor was failing and needed replacement. The capacitor, which helps the motor start and run efficiently, was also evaluated, and a new capacitor was installed as needed to properly match the new universal motor.

Most importantly, we confirmed there were no immediate electrical safety hazards and that the compressor had not yet been damaged from overheating. Catching the fan motor issue at this stage is a big win—it prevents more serious and expensive damage down the road.

Step-by-Step: 825 RPM Universal Condenser Fan Motor Replacement

Once the diagnosis was complete, we walked the homeowner through the recommended repair: installing a new 825 RPM universal condenser fan motor and a compatible capacitor. Here’s how that process typically unfolds for our HVAC service in Tampa, FL.

1. Power Off and Safety First

Before touching any components, our technician shut off power at the disconnect near the condenser and verified there was no live voltage. In Tampa’s humid environment, safety is especially important because moisture and electricity can be a dangerous combination.

2. Removing the Old Fan Motor

Next, we carefully removed the top fan grille assembly and detached the old motor from the fan blade and mounting bracket. We took note of the wiring configuration, routing, and rotation direction so the new motor could be installed correctly. Any brittle or damaged wiring was addressed as needed for a safe, reliable connection.

3. Installing the New Universal Motor

We installed a new universal condenser fan motor rated at 825 RPM, matched to the system’s specifications. A universal motor is designed to replace a wide range of OEM motors while still maintaining proper performance. Key steps included:

  • Mounting the new motor securely in place
  • Reinstalling the fan blade at the correct depth and orientation
  • Ensuring proper fan rotation direction for effective airflow

The new motor includes a one-year warranty, giving this Tampa homeowner added peace of mind.

4. Replacing and Matching the Capacitor (As Needed)

A failing or weak capacitor can quickly damage a new motor. That’s why, as part of this job, we checked and replaced the capacitor as needed. The new capacitor was sized to match the motor’s electrical requirements, helping the motor start smoothly and run at its intended speed.

5. Wiring, Securing, and Double-Checking

After mounting the motor and capacitor, we completed and tightened all electrical connections, used appropriate wire connectors, and routed wiring away from sharp edges and moving parts. Then we reinstalled the fan grille and ensured all panels were properly secured.

6. System Start-Up and Performance Check

With everything in place, we restored power to the unit and started the system. Our technician verified:

  • The condenser fan started promptly and reached full speed
  • Air was being discharged strongly and in the correct direction
  • System pressures and temperatures were back in a normal range
  • The compressor was running smoothly without excessive noise or cycling

By the end of the visit, the home in Tampa, FL 33606 was cooling consistently again, and the outdoor unit was operating smoothly.

Adding the Elite Therapy Plan: Protection for Tampa Homeowners

Along with the motor replacement, this homeowner chose to enroll in our Elite Therapy Plan. In our hot and humid Tampa Bay region, regular maintenance is one of the best ways to extend system life and avoid surprise breakdowns.

The Elite Therapy Plan is designed to help with:

For this Tampa homeowner, pairing the new condenser fan motor with an ongoing maintenance plan meant solving today’s problem and reducing the chance of tomorrow’s emergency.

Why This Fix Works: The Role of the Condenser Fan Motor

Your air conditioner works by moving heat from inside your home to outside. The condenser unit—the big metal box outside—releases that heat into the outdoor air. The condenser fan motor is critical to this process.

Here’s what’s happening behind the scenes:

  • The refrigerant carries heat from inside your home to the outdoor condenser coil.
  • The condenser fan pulls outside air through that coil and blows warm air out the top or side of the unit.
  • If the fan doesn’t run at the correct speed, the coil can’t get rid of heat efficiently.

When the fan slows down or stops:

  • Pressures inside the system rise
  • The compressor works harder and runs hotter
  • Cooling capacity drops, so the home feels warmer
  • Energy use increases, so bills go up

By installing a properly sized 825 RPM motor and a matched capacitor, we restored the correct airflow across the condenser coil. This allows the refrigerant to release heat efficiently, protects the compressor from overheating, and brings the system back to normal operation.

Regular maintenance through something like our Elite Therapy Plan further supports this process by catching early signs of wear on motors, capacitors, and other components before they fail during a heat wave in Tampa.

Pro Tips for Homeowners in Tampa, FL 33606

Living in Tampa, especially near areas like the Tampa, FL urban core and the waterfront, means your HVAC system faces extra strain from heat, humidity, and salty air. Here are some practical tips to help protect your system:

  1. Look and listen to your outdoor unit monthly. If you notice the fan not spinning, starting slowly, or making unusual noises, turn the system off and call a professional before more damage occurs.
  2. Rinse debris from the condenser coil. Gently hose off grass clippings, leaves, and dust from the outside of the unit a few times a year. Avoid high pressure, which can bend the fins.
  3. Keep at least 2–3 feet of clearance. Trim back bushes, plants, and yard items around the unit so air can flow freely. This is especially important in tighter neighborhoods near downtown Tampa and Hyde Park.
  4. Change filters regularly. In our humid climate, most homes benefit from checking filters every 30 days and changing them as needed to maintain good airflow and indoor air quality.
  5. Schedule professional tune-ups. Before the peak of summer, book professional AC tune-ups in Tampa so a technician can inspect electrical components, motors, capacitors, and safety controls.
  6. Consider a maintenance plan. An ongoing plan, like our AC maintenance plans for Tampa Bay homeowners, helps ensure you don’t forget these important visits.

Why Tampa Bay Homeowners Choose Home Therapist

At Home Therapist Cooling, Heating, and Plumbing, we treat every service call like we’re caring for our own home. For this condenser fan motor replacement and Elite Therapy Plan enrollment in Tampa, FL 33606, our focus stayed on safety, clarity, and long-term comfort.

Homeowners across Tampa Bay trust us because we offer:

  • Licensed, experienced technicians: Our team is trained to diagnose issues correctly the first time and explain them in plain language.
  • Transparent communication: We explain what we found, what we recommend, and why—no pressure, no scare tactics.
  • Clean, respectful work: We protect your property, clean up our workspace, and treat your home like it’s our own.
  • Focus on long-term reliability: We don’t just swap parts; we look at the whole system and suggest maintenance or upgrades when they truly make sense.
  • Commitment to the Tampa Bay community: From neighborhoods around the University of Tampa to families enjoying the Tampa Riverwalk, we’re here to keep local homes comfortable and safe.

If you’d like to see how we handle similar projects, you can also read about another condenser motor replacement project in Tampa and what was involved.

Need Condenser Fan Motor Service or AC Maintenance in Tampa, FL?

If your outdoor AC unit is making strange sounds, the fan isn’t spinning, or your home just isn’t cooling like it should, don’t wait for a full breakdown. Our local Tampa Bay HVAC technicians are ready to help.

We provide:

Schedule your service today to get reliable, honest AC repair services in Tampa and learn more about our maintenance plans for Tampa Bay homeowners. Whether you’re in Tampa, FL 33606 or anywhere nearby in the Tampa Bay area, Home Therapist Cooling, Heating, and Plumbing is here to provide the therapy your home needs.

Sewer Camera Inspection and Plumbing Maintenance Plan in Largo, FL 33778

Slow drains, recurring clogs, and mystery plumbing issues can quickly turn into a stressful situation for any homeowner. At a home in Largo, FL 33778, our team was called in to perform a sewer camera inspection and help the homeowner get ahead of future plumbing problems with an ongoing maintenance plan.

If you live in Largo, Florida, you know how important it is to keep your drains and sewer line in good shape. Between tree roots, older pipes, and heavy seasonal rains, plumbing systems in this area can be put under a lot of stress. Our goal on this visit was to give the homeowner clear answers, real peace of mind, and a proactive path forward.

Customer Problem: What Was Happening at the Home

Our client in Largo reached out because of concerns about the condition of their sewer and drain lines. While there wasn’t an active emergency during this visit, there had been enough signs in the past—slow drains and worrying about possible blockages—that they wanted a professional, thorough look inside their plumbing system.

They didn’t just want another quick drain clearing. They wanted to understand what was really going on behind the walls and under the yard, and whether there were any hidden issues that could lead to a messy backup or an expensive repair later.

That’s exactly what a sewer video camera inspection is designed to do. Instead of guessing or relying only on surface symptoms, we can visually inspect the inside of the pipes and see what’s actually causing ongoing drain concerns.

Why a Sewer Camera Inspection Is So Helpful

Traditional plumbing work often involves a lot of detective work. We listen to your description, test fixtures, and use tools like augers or jetters to clear clogs. But without seeing inside the line, you’re still relying on experience and educated guesses. A sewer camera inspection adds a huge layer of certainty.

During a sewer camera inspection, we feed a small, specialized waterproof camera into the drain or sewer line. The camera sends live video back to a monitor, so our technician can see exactly what’s happening inside the pipe. This allows us to:

  • Locate blockages and buildup in the line
  • Identify cracks, breaks, or collapsed sections of pipe
  • Spot tree root intrusion and heavy grease deposits
  • Find low spots (bellies) where water and debris collect
  • Confirm whether the line is clear after a cleaning

In some cases, camera inspections even help find accidentally flushed items like jewelry or small valuables. While that wasn’t the main concern in this particular Largo home, it’s a nice additional benefit of this technology.

For homeowners who have dealt with repeated clogs or slow drains, a camera inspection can be the difference between trying one quick fix after another and actually solving the root cause of the problem.

Our Inspection & Diagnosis Process at the Largo, FL Home

On this visit, our technician Adalberto arrived at the home in Largo, FL 33778 prepared for a full sewer camera inspection. Even though the job notes didn’t reflect an active emergency, our standard process is thorough so we don’t miss anything important.

1. Talking With the Homeowner

We always start by listening. We ask questions such as:

  • Which fixtures have given you trouble in the past—sinks, tubs, toilets?
  • Do the problems happen all over the house or in certain areas?
  • Have you had any previous repairs or drain cleanings on this line?
  • Have you ever had sewage backing up into a tub, shower, or floor drain?

Even if the symptoms are mild today, the history helps us know where to start and what to look for during the inspection.

2. Accessing the Right Cleanout

Next, we locate the best entry point to run the camera. That may be a main cleanout outside the home, a cleanout in a utility area, or another access point depending on the layout of the plumbing system. Proper access helps us reach as much of the main sewer line as possible.

3. Running the Sewer Camera

With the camera set up, we slowly feed it into the line while watching the live video feed. As the camera travels through the pipe, we look for:

  • Standing water that could indicate a low spot or partial blockage
  • Buildup on the pipe walls from grease, soap, or scale
  • Roots entering through joints or small cracks
  • Sections of pipe that look damaged, misaligned, or corroded

The camera equipment also allows us to measure distance, so if we do find a concern, we can note how far it is from the access point. That information makes any future repair or drain line cleaning and flushing much more accurate and efficient.

4. Explaining the Findings

Once we complete the inspection, we review what we saw with the homeowner in plain language. Instead of telling you, “You probably have a clog somewhere,” we can say something like, “At about 42 feet out, there’s a low spot in the pipe where debris tends to collect,” or, “There is noticeable scale buildup along this section, which can lead to repeated slow draining.”

That transparency is important to us. When you understand what’s going on inside your pipes, it’s much easier to make informed decisions about next steps. Sometimes the best move is a professional drain cleaning; other times, it might be monitoring, minor repairs, or planning ahead for a larger project before it becomes an emergency.

Adding Long-Term Protection: Value Therapy Plan for Plumbing

In addition to the sewer camera inspection, this homeowner in Largo chose to enroll in our Value Therapy Plan, our ongoing home care program. While each plan is customized, the purpose is the same: to help you stay ahead of breakdowns, clogs, and leaks through regular, professional maintenance.

Just like you might schedule regular checkups for your HVAC system, your plumbing benefits from the same proactive approach. Our plumbing maintenance options work hand in hand with what we find during inspections like this one.

We offer dedicated plumbing maintenance plans and service options designed to keep fixtures, drains, and water lines in good working order. You can learn more about how these plans work on our plumbing services maintenance plans and options page.

How a Maintenance Plan Helps After a Sewer Camera Inspection

Here’s why pairing a sewer camera inspection with an ongoing maintenance plan makes so much sense, especially for homes in Largo, FL:

  • Monitoring known trouble spots: If the camera shows areas of buildup or minor root intrusion, we can put those sections on our watch list and revisit them during future maintenance visits.
  • Scheduling preventive drain cleaning: Instead of waiting for a full backup, we can plan periodic cleaning based on what we saw in the line. For more on this, see our blog on monthly drain cleaning recommendations for homeowners.
  • Coordinating plumbing with other home systems: Many homeowners bundle HVAC and plumbing care together so the whole home is covered, not just one system.
  • Reducing surprise costs: Early detection of pipe damage, corrosion, or root issues gives you time to plan financially instead of facing a sudden, major expense.

In this case, the camera inspection gave our team a clear baseline of the home’s sewer line condition. The Value Therapy Plan will help ensure that any early signs of trouble are addressed before they turn into stressful emergencies.

Why This Type of Plumbing Service Matters in Largo, FL

Largo, Florida is a beautiful community in Pinellas County, known for its nearby beaches, parks, and warm climate. Like many parts of the Tampa Bay area, homes in Largo can be impacted by shifting soils, tree growth, and heavy rains, all of which can affect underground plumbing lines. You can learn more about the city itself on Largo's Wikipedia page or see where it sits in the region on Google Maps.

All of these local factors make it especially smart to invest in professional plumbing inspections and preventive maintenance. When we perform sewer camera inspections and drain services in Largo, some of the most common things we watch for include:

  • Tree roots: Mature trees add shade and beauty, but roots naturally seek out water and may find their way into small cracks or joints in sewer lines.
  • Older piping materials: Some older homes still have clay, cast iron, or other materials that can crack, corrode, or shift over time.
  • Ground settling and heavy rain: Changes in soil conditions can cause pipes to sag or shift, creating low spots where debris collects.

A camera inspection turns these unknowns into knowns. Instead of wondering what might be happening underground, you get a clear assessment and a plan.

What Could Happen Without a Sewer Camera Inspection

It’s easy to put off plumbing diagnostics when things "seem mostly fine." But recurring slow drains, gurgling sounds, or occasional backups are often early warning signs of a larger issue. Without a proper inspection, here’s what can happen over time:

  • Frequent clogs: You may find yourself calling repeatedly for basic drain clearing because the underlying cause—such as a damaged pipe or heavy scale buildup—never gets addressed.
  • Sewage backups: A complete blockage in the main sewer line can cause wastewater to back up into tubs, showers, or floor drains, leading to unsanitary conditions and potential property damage.
  • Hidden leaks and erosion: Cracks or breaks in underground pipes can leak wastewater into the surrounding soil, potentially causing erosion, sinkholes, or foundation concerns over time.
  • Unexpected major repairs: Waiting until a line fully fails can turn a manageable repair into a large, urgent excavation or replacement project.

By choosing a sewer camera inspection, this Largo homeowner took an important step toward preventing those kinds of surprises. Combined with their Value Therapy Plan, they now have both insight and a long-term strategy.

Tips to Prevent Drain and Sewer Problems in Largo Homes

Whether you're in Largo, FL 33778 or anywhere in the Tampa Bay area, there are a few simple habits that can go a long way toward keeping your drains healthy between professional visits.

Everyday Habits

  • Watch what goes down the kitchen sink: Avoid pouring grease, oils, and large food scraps down the drain. Even with a garbage disposal, grease and fat can harden inside pipes and cause stubborn buildup.
  • Use drain strainers: Strainers in sinks, tubs, and showers help catch hair, food, and debris before they reach the pipes.
  • Only flush human waste and toilet paper: Wipes (even “flushable” ones), paper towels, feminine products, cotton swabs, and other items can easily cause clogs in the main line.

Seasonal and Preventive Steps

These simple steps, combined with a professional sewer camera inspection when needed, can greatly reduce the odds of a sudden plumbing emergency.

Why Choose Home Therapist for Plumbing and Sewer Inspections in Largo, FL?

When you invite a plumbing company into your home, you're trusting them with your comfort, your property, and your peace of mind. Our team takes that responsibility seriously. For this Largo, FL 33778 project—and every project—we focus on:

  • Clear communication: We explain what we're doing, what we see, and what it means in straightforward language. No scare tactics, no unnecessary upsells.
  • Thorough diagnostics: Tools like sewer cameras help us provide accurate recommendations instead of guesswork.
  • Options, not pressure: Whether you need a one-time service, routine maintenance, or a long-term plan, we lay out your options so you can decide what's best for your home and budget.
  • Local expertise: We work on plumbing and HVAC systems across Largo and the greater Tampa Bay area, so we understand the local conditions that affect your home.

From detailed camera inspections to drain line cleaning and flushing services and ongoing plumbing maintenance plans, we're here to help keep your home running smoothly year-round. #HomeTherapist #TheTherapyYourHomeNeeds

Need Sewer Camera Inspection or Plumbing Help in Largo, FL?

If you're dealing with slow drains, recurring clogs, or just uncertainty about the condition of your sewer line, a video camera inspection can give you the clarity you need. Our team at Home Therapist Cooling, Heating, and Plumbing is here to help homeowners in Largo, FL and the surrounding Tampa Bay area understand what's really happening inside their plumbing system.

Call Home Therapist or visit our website to schedule a sewer camera inspection, discuss our Value Therapy Plans, or ask questions about your specific situation. We'll walk you through your options and help you choose the right level of care for your home.

Your home deserves attentive, thoughtful care—not just quick fixes. We're here to provide exactly that.

Slow drains, recurring clogs, and mystery plumbing issues can quickly turn into a stressful situation for any homeowner. At a home in Largo, FL 33778, our team was called in to perform a sewer camera inspection and help the homeowner get ahead of future plumbing problems with an ongoing maintenance plan.

If you live in Largo, Florida, you know how important it is to keep your drains and sewer line in good shape. Between tree roots, older pipes, and heavy seasonal rains, plumbing systems in this area can be put under a lot of stress. Our goal on this visit was to give the homeowner clear answers, real peace of mind, and a proactive path forward.

Customer Problem: What Was Happening at the Home

Our client in Largo reached out because of concerns about the condition of their sewer and drain lines. While there wasn’t an active emergency during this visit, there had been enough signs in the past—slow drains and worrying about possible blockages—that they wanted a professional, thorough look inside their plumbing system.

They didn’t just want another quick drain clearing. They wanted to understand what was really going on behind the walls and under the yard, and whether there were any hidden issues that could lead to a messy backup or an expensive repair later.

That’s exactly what a sewer video camera inspection is designed to do. Instead of guessing or relying only on surface symptoms, we can visually inspect the inside of the pipes and see what’s actually causing ongoing drain concerns.

Why a Sewer Camera Inspection Is So Helpful

Traditional plumbing work often involves a lot of detective work. We listen to your description, test fixtures, and use tools like augers or jetters to clear clogs. But without seeing inside the line, you’re still relying on experience and educated guesses. A sewer camera inspection adds a huge layer of certainty.

During a sewer camera inspection, we feed a small, specialized waterproof camera into the drain or sewer line. The camera sends live video back to a monitor, so our technician can see exactly what’s happening inside the pipe. This allows us to:

  • Locate blockages and buildup in the line
  • Identify cracks, breaks, or collapsed sections of pipe
  • Spot tree root intrusion and heavy grease deposits
  • Find low spots (bellies) where water and debris collect
  • Confirm whether the line is clear after a cleaning

In some cases, camera inspections even help find accidentally flushed items like jewelry or small valuables. While that wasn’t the main concern in this particular Largo home, it’s a nice additional benefit of this technology.

For homeowners who have dealt with repeated clogs or slow drains, a camera inspection can be the difference between trying one quick fix after another and actually solving the root cause of the problem.

Our Inspection & Diagnosis Process at the Largo, FL Home

On this visit, our technician Adalberto arrived at the home in Largo, FL 33778 prepared for a full sewer camera inspection. Even though the job notes didn’t reflect an active emergency, our standard process is thorough so we don’t miss anything important.

1. Talking With the Homeowner

We always start by listening. We ask questions such as:

  • Which fixtures have given you trouble in the past—sinks, tubs, toilets?
  • Do the problems happen all over the house or in certain areas?
  • Have you had any previous repairs or drain cleanings on this line?
  • Have you ever had sewage backing up into a tub, shower, or floor drain?

Even if the symptoms are mild today, the history helps us know where to start and what to look for during the inspection.

2. Accessing the Right Cleanout

Next, we locate the best entry point to run the camera. That may be a main cleanout outside the home, a cleanout in a utility area, or another access point depending on the layout of the plumbing system. Proper access helps us reach as much of the main sewer line as possible.

3. Running the Sewer Camera

With the camera set up, we slowly feed it into the line while watching the live video feed. As the camera travels through the pipe, we look for:

  • Standing water that could indicate a low spot or partial blockage
  • Buildup on the pipe walls from grease, soap, or scale
  • Roots entering through joints or small cracks
  • Sections of pipe that look damaged, misaligned, or corroded

The camera equipment also allows us to measure distance, so if we do find a concern, we can note how far it is from the access point. That information makes any future repair or drain line cleaning and flushing much more accurate and efficient.

4. Explaining the Findings

Once we complete the inspection, we review what we saw with the homeowner in plain language. Instead of telling you, “You probably have a clog somewhere,” we can say something like, “At about 42 feet out, there’s a low spot in the pipe where debris tends to collect,” or, “There is noticeable scale buildup along this section, which can lead to repeated slow draining.”

That transparency is important to us. When you understand what’s going on inside your pipes, it’s much easier to make informed decisions about next steps. Sometimes the best move is a professional drain cleaning; other times, it might be monitoring, minor repairs, or planning ahead for a larger project before it becomes an emergency.

Adding Long-Term Protection: Value Therapy Plan for Plumbing

In addition to the sewer camera inspection, this homeowner in Largo chose to enroll in our Value Therapy Plan, our ongoing home care program. While each plan is customized, the purpose is the same: to help you stay ahead of breakdowns, clogs, and leaks through regular, professional maintenance.

Just like you might schedule regular checkups for your HVAC system, your plumbing benefits from the same proactive approach. Our plumbing maintenance options work hand in hand with what we find during inspections like this one.

We offer dedicated plumbing maintenance plans and service options designed to keep fixtures, drains, and water lines in good working order. You can learn more about how these plans work on our plumbing services maintenance plans and options page.

How a Maintenance Plan Helps After a Sewer Camera Inspection

Here’s why pairing a sewer camera inspection with an ongoing maintenance plan makes so much sense, especially for homes in Largo, FL:

  • Monitoring known trouble spots: If the camera shows areas of buildup or minor root intrusion, we can put those sections on our watch list and revisit them during future maintenance visits.
  • Scheduling preventive drain cleaning: Instead of waiting for a full backup, we can plan periodic cleaning based on what we saw in the line. For more on this, see our blog on monthly drain cleaning recommendations for homeowners.
  • Coordinating plumbing with other home systems: Many homeowners bundle HVAC and plumbing care together so the whole home is covered, not just one system.
  • Reducing surprise costs: Early detection of pipe damage, corrosion, or root issues gives you time to plan financially instead of facing a sudden, major expense.

In this case, the camera inspection gave our team a clear baseline of the home’s sewer line condition. The Value Therapy Plan will help ensure that any early signs of trouble are addressed before they turn into stressful emergencies.

Why This Type of Plumbing Service Matters in Largo, FL

Largo, Florida is a beautiful community in Pinellas County, known for its nearby beaches, parks, and warm climate. Like many parts of the Tampa Bay area, homes in Largo can be impacted by shifting soils, tree growth, and heavy rains, all of which can affect underground plumbing lines. You can learn more about the city itself on Largo's Wikipedia page or see where it sits in the region on Google Maps.

All of these local factors make it especially smart to invest in professional plumbing inspections and preventive maintenance. When we perform sewer camera inspections and drain services in Largo, some of the most common things we watch for include:

  • Tree roots: Mature trees add shade and beauty, but roots naturally seek out water and may find their way into small cracks or joints in sewer lines.
  • Older piping materials: Some older homes still have clay, cast iron, or other materials that can crack, corrode, or shift over time.
  • Ground settling and heavy rain: Changes in soil conditions can cause pipes to sag or shift, creating low spots where debris collects.

A camera inspection turns these unknowns into knowns. Instead of wondering what might be happening underground, you get a clear assessment and a plan.

What Could Happen Without a Sewer Camera Inspection

It’s easy to put off plumbing diagnostics when things "seem mostly fine." But recurring slow drains, gurgling sounds, or occasional backups are often early warning signs of a larger issue. Without a proper inspection, here’s what can happen over time:

  • Frequent clogs: You may find yourself calling repeatedly for basic drain clearing because the underlying cause—such as a damaged pipe or heavy scale buildup—never gets addressed.
  • Sewage backups: A complete blockage in the main sewer line can cause wastewater to back up into tubs, showers, or floor drains, leading to unsanitary conditions and potential property damage.
  • Hidden leaks and erosion: Cracks or breaks in underground pipes can leak wastewater into the surrounding soil, potentially causing erosion, sinkholes, or foundation concerns over time.
  • Unexpected major repairs: Waiting until a line fully fails can turn a manageable repair into a large, urgent excavation or replacement project.

By choosing a sewer camera inspection, this Largo homeowner took an important step toward preventing those kinds of surprises. Combined with their Value Therapy Plan, they now have both insight and a long-term strategy.

Tips to Prevent Drain and Sewer Problems in Largo Homes

Whether you're in Largo, FL 33778 or anywhere in the Tampa Bay area, there are a few simple habits that can go a long way toward keeping your drains healthy between professional visits.

Everyday Habits

  • Watch what goes down the kitchen sink: Avoid pouring grease, oils, and large food scraps down the drain. Even with a garbage disposal, grease and fat can harden inside pipes and cause stubborn buildup.
  • Use drain strainers: Strainers in sinks, tubs, and showers help catch hair, food, and debris before they reach the pipes.
  • Only flush human waste and toilet paper: Wipes (even “flushable” ones), paper towels, feminine products, cotton swabs, and other items can easily cause clogs in the main line.

Seasonal and Preventive Steps

  • Schedule periodic professional drain cleaning: Especially if you've had issues before, regular cleaning can help keep lines clear. Our team has outlined what to expect on our guide to drain cleaning services in the Tampa area.
  • Consider a whole-home plumbing checkup: A full inspection can reveal slow leaks, aging fixtures, and other concerns before they cause damage. See a real-world example in our whole-home plumbing inspection and water heater flush project.
  • Stay alert to early signs: Gurgling drains, frequent plunging, or sewer odors are all hints that it's time to call in a professional.

These simple steps, combined with a professional sewer camera inspection when needed, can greatly reduce the odds of a sudden plumbing emergency.

Why Choose Home Therapist for Plumbing and Sewer Inspections in Largo, FL?

When you invite a plumbing company into your home, you're trusting them with your comfort, your property, and your peace of mind. Our team takes that responsibility seriously. For this Largo, FL 33778 project—and every project—we focus on:

  • Clear communication: We explain what we're doing, what we see, and what it means in straightforward language. No scare tactics, no unnecessary upsells.
  • Thorough diagnostics: Tools like sewer cameras help us provide accurate recommendations instead of guesswork.
  • Options, not pressure: Whether you need a one-time service, routine maintenance, or a long-term plan, we lay out your options so you can decide what's best for your home and budget.
  • Local expertise: We work on plumbing and HVAC systems across Largo and the greater Tampa Bay area, so we understand the local conditions that affect your home.

From detailed camera inspections to drain line cleaning and flushing services and ongoing plumbing maintenance plans, we're here to help keep your home running smoothly year-round. #HomeTherapist #TheTherapyYourHomeNeeds

Need Sewer Camera Inspection or Plumbing Help in Largo, FL?

If you're dealing with slow drains, recurring clogs, or just uncertainty about the condition of your sewer line, a video camera inspection can give you the clarity you need. Our team at Home Therapist Cooling, Heating, and Plumbing is here to help homeowners in Largo, FL and the surrounding Tampa Bay area understand what's really happening inside their plumbing system.

Call Home Therapist or visit our website to schedule a sewer camera inspection, discuss our Value Therapy Plans, or ask questions about your specific situation. We'll walk you through your options and help you choose the right level of care for your home.

Your home deserves attentive, thoughtful care—not just quick fixes. We're here to provide exactly that.

Premium AC Maintenance Visit in Tampa, FL 33626: Low Pressures on a Cold Day

If you live in Tampa, you know how important it is for your AC to be reliable when the heat returns. Routine air conditioning maintenance in Tampa Bay is one of the best ways to protect that comfort and avoid surprise breakdowns.

Customer Problem: What Was Happening at the Home

This client is enrolled in our Premium Therapy Plan, which means we see their system regularly across the year. For this visit (their fifth under the plan), they asked us to come out after a particularly busy period at work, once things slowed down after December 7. That flexibility is one of the benefits of being on a maintenance plan—our team works around your schedule.

There wasn’t an emergency or obvious failure. The system was still heating and cooling when needed, and there were no reports of strange noises, leaks, or bad odors. Our client simply wanted to stay on top of maintenance so the equipment would last and keep running efficiently, especially with Tampa’s long cooling season right around the corner.

Still, even on a routine visit, our job is to look deeper than what you can see or feel at the thermostat. That’s where our Premium Therapy inspection process comes in.

Our Inspection & Diagnosis Process

During this Premium Therapy Plan visit, our technician Barbaro followed a structured maintenance checklist designed for Tampa-area homes. On a job like this, we focus on three big questions:

Checking Electrical and Mechanical Health

First, we checked the core components of the system—compressor, outdoor fan motor, and indoor blower motor. We measured amperage (how much electrical current each component is drawing) and compared those readings to manufacturer specifications.

The good news: all amperages were within normal ranges. That told us the motors and compressor weren’t overworking or struggling, which is often one of the first signs of a developing problem.

Measuring System Pressures on a Cold Day

Next, we checked refrigerant pressures. On this visit, we noted that the pressures were slightly lower than what we would expect under typical Tampa weather conditions. However, the home and the outdoor environment were both unusually cold at the time of service.

This is important context. Refrigerant pressures are directly tied to temperature. On very cold days, you can see lower readings that don’t necessarily mean you have a leak or a low refrigerant charge. Instead of reacting immediately and adding refrigerant—which could actually be harmful in this situation—we did what any careful technician should do:

  • Reviewed the weather and indoor conditions.
  • Confirmed the system was otherwise running normally.
  • Documented the readings clearly in the client’s maintenance report.
  • Recommended re-checking pressures at a future visit during more typical temperatures.

Because the system was only about four years old and there were no performance complaints, this measured approach was the most responsible course of action.

Visual Inspection and Safety Checks

In addition to electrical and refrigerant checks, we performed a general visual inspection of the indoor air handler and outdoor condenser. We checked for:

  • Signs of oil or refrigerant stains (which can indicate leaks).
  • Corrosion on wiring or terminals.
  • Loose panels, screws, or connections.
  • Visible microbial growth or heavy dust on coils.
  • Restricted airflow around the outdoor unit.

None of these red flags were present. That allowed us to proceed with the full cleaning portion of the Premium Therapy Plan service with confidence.

Step-by-Step: How We Performed the Premium Maintenance

The main scope of this visit in Tampa, FL 33626 was to complete a full maintenance per the client’s Premium Therapy Plan agreement. That includes detailed cleaning and preventative care for both the indoor and outdoor sections of the HVAC system.

1. Cleaning the Outdoor Condenser Unit

The outdoor unit is constantly exposed to the elements—grass clippings, leaves, dust, and debris from landscaping. Over time, that buildup restricts airflow and forces the system to work harder.

On this visit, our team:

Regular outdoor unit cleaning is one of the simplest ways to improve efficiency and reduce run times. It also helps reduce strain on the compressor, which is one of the most expensive parts to replace.

2. Cleaning the Indoor Air Handler

The indoor unit (air handler or furnace) is where your home’s air actually passes through the system and across the evaporator coil. Dust, pet dander, and everyday household contaminants can build up here.

As part of the Premium Plan visit, we:

A cleaner air handler helps your system cool more effectively and can support better indoor air quality. For homeowners interested in air quality improvements, we often recommend pairing routine maintenance with upgrades like filtration or UV lights. You can learn more in our article on the role of HVAC in indoor air quality.

3. Flushing the Condensate Drain Line

Florida homes are especially vulnerable to clogged AC drain lines because of our long cooling season and high humidity. Algae and debris can build up in the condensate line, eventually causing backups and water leaks.

On this Tampa maintenance visit, we fully flushed the drain line to help prevent future clogs. This step is critical because:

  • A clogged line can cause water to back up into the air handler.
  • Overflow can damage ceilings, walls, and flooring.
  • Moisture problems can lead to microbial growth and odors.

Flushing the line and confirming proper drainage is a standard part of our Premium Therapy Plan service. It’s one of those small, preventative tasks that can save homeowners a big headache later.

4. Final Operational Check

After cleaning and clearing the system, we restored power and performed a final operational check. We made sure:

Because of the cold conditions, we noted again that pressures were slightly low and documented our recommendation to recheck on a future visit when the weather is more representative of normal cooling conditions in Tampa.

Why We Didn’t Rush to Add Refrigerant

Homeowners sometimes expect that low pressure readings automatically mean, “You must be low on refrigerant.” That’s not always true—especially on a very cold day.

On this Premium Therapy Plan visit in Tampa, FL 33626, the system was:

  • Relatively new (around four years old).
  • Operating without performance complaints.
  • Showing normal amperage on compressor and fans.
  • Free of visible oil stains or other signs of leaks.

In that context, adding refrigerant just to “chase” a pressure reading would not be responsible. Overcharging a system can hurt performance, increase energy use, and even damage the compressor.

Instead, our recommendation was simple and honest: monitor it. During a future maintenance visit in warmer weather, we’ll take new readings and compare them to this baseline. If pressures are still off when conditions are normal, then we’ll have strong evidence to investigate further. That’s the difference between guesswork and real diagnosis.

If you’re interested in how we approach ongoing care for systems like this, our guide on regular HVAC maintenance for Tampa homeowners is a great place to start.

What Could Have Happened Without Regular Maintenance?

This visit might sound routine—and that’s exactly the point. By having us out regularly as part of our Premium Therapy Plan, this Tampa homeowner is avoiding a lot of the surprises that happen when AC systems are ignored.

Without regular maintenance, you might see:

  • Clogged drain lines leading to ceiling leaks, drywall damage, or mold.
  • Dirty coils causing higher electric bills and poor cooling performance.
  • Unnoticed electrical issues that could damage expensive parts over time.
  • Shortened system lifespan because the equipment has to work harder than it should.

In a climate like Tampa’s, where AC systems run heavily for much of the year, skipping maintenance is a bit like driving your car for years without changing the oil. It may seem fine at first—until it suddenly isn’t.

If you’re not currently on a plan, you can explore how our maintenance options work and what they cover in our article on AC maintenance plans in Tampa.

Tips to Keep Your AC Healthy Between Visits in Tampa, FL

Even if you’re on a professional maintenance plan like this homeowner in Tampa, there are simple things you can do between visits to help your system run smoothly.

1. Change or Clean Your Air Filter Regularly

For most Tampa homes, we recommend checking your air filter every 30 days and replacing it at least every 60–90 days, depending on the type of filter, pets, and dust levels. A clean filter:

2. Keep the Outdoor Unit Clear

Try to maintain 2–3 feet of clear space around your outdoor condenser. Trim back shrubs, remove leaf piles, and avoid stacking items against the unit. Good airflow outside is just as important as it is inside.

3. Watch for Early Warning Signs

Call for service if you notice:

  • Water around your indoor unit or near the air handler.
  • Unusual noises like grinding, squealing, or loud buzzing.
  • Hot and cold spots that don’t improve after filter changes.
  • Sudden spikes in your electric bill without a clear reason.

Addressing issues early often means simpler, less expensive repairs and less down time for your AC.

4. Stick to a Regular Maintenance Schedule

In Florida, most systems benefit from at least one professional tune-up per year, often two. Our article on how often you should service your AC in Florida explains why our climate puts extra demands on HVAC equipment.

Why This Tampa Homeowner Chose a Premium Therapy Plan

This client’s experience is a good example of how a maintenance plan can simplify home ownership. With our Premium Therapy Plan, they get:

Because we’ve seen this system multiple times now, we know its history. That helps us make better decisions when something looks a little unusual—like those slightly low pressures on a cold day—without jumping straight to expensive or unnecessary work.

For homeowners who like predictability and consistency, our maintenance options are designed to be straightforward and transparent. You can also review our broader guide to HVAC maintenance for homeowners for more details on what to expect from visits like this.

Living in Tampa, FL 33626: Why AC Maintenance Matters

The Westchase and Tampa, FL 33626 area is a great place to live, with convenient access to amenities, parks, and attractions throughout Tampa Bay. But anyone who lives here knows that when summer hits, a reliable AC system isn’t a luxury—it’s a necessity.

According to Tampa, Florida weather data, our region sees long stretches of hot, humid conditions each year. That means air conditioners are under heavy load for much of the year, especially in newer residential communities in the 33626 area. Regular maintenance helps systems handle that workload without constant breakdowns.

If you’re curious where we serve or want to get a sense of our service area, you can zoom in around Tampa on Google Maps for Tampa, FL 33626. We regularly help homeowners throughout Westchase and nearby neighborhoods keep their systems clean and reliable.

Why Choose Home Therapist for HVAC Maintenance in Tampa, FL?

When you invite our team into your home, we know you’re trusting us with the comfort and safety of your family. On this Premium Therapy Plan visit in Tampa, we focused on:

  • Clear communication: Explaining what we found and why we recommended monitoring instead of refilling refrigerant.
  • Thorough workmanship: Cleaning indoor and outdoor units, flushing the drain line, and checking electrical and mechanical components.
  • Long-term thinking: Documenting readings now so we can compare them on future visits.

We bring the same approach to every job, whether it’s a routine tune-up, a complex repair, or a new installation. For more examples of our real-world maintenance work, you can read about another AC cleaning and maintenance project in Riverview, FL.

Our goal is always to give you the information you need to make good decisions about your home’s comfort systems—without pressure, gimmicks, or scare tactics.

Need AC Maintenance or a Premium Plan in Tampa, FL 33626?

If you’re in the Tampa, FL 33626 or Westchase area and want the same level of care this homeowner received, our team at Home Therapist Cooling, Heating, and Plumbing is here to help. Whether you’re interested in a one-time tune-up or an ongoing Premium Therapy Plan, we can walk you through your options and schedule a visit that fits your calendar.

Call Home Therapist or visit our website to schedule AC maintenance, discuss our maintenance plans, or ask questions about your current system. We’re happy to explain everything in plain language so you always feel confident about the work being done in your home. #HomeTherapist #TheTherapyYourHomeNeeds

In the Westchase area of Tampa, FL 33626, one of our Premium Therapy Plan clients scheduled a routine maintenance visit for their four-year-old air conditioning system. Even though everything seemed mostly fine, our technician noticed slightly low system pressures on a very cold day. Instead of rushing to add refrigerant or recommend unnecessary repairs, we took a careful, data-driven approach and focused on thorough cleaning and proper documentation for future visits.

If you live in Tampa, you know how important it is for your AC to be reliable when the heat returns. Routine air conditioning maintenance in Tampa Bay is one of the best ways to protect that comfort and avoid surprise breakdowns.

Customer Problem: What Was Happening at the Home

This client is enrolled in our Premium Therapy Plan, which means we see their system regularly across the year. For this visit (their fifth under the plan), they asked us to come out after a particularly busy period at work, once things slowed down after December 7. That flexibility is one of the benefits of being on a maintenance plan—our team works around your schedule.

There wasn’t an emergency or obvious failure. The system was still heating and cooling when needed, and there were no reports of strange noises, leaks, or bad odors. Our client simply wanted to stay on top of maintenance so the equipment would last and keep running efficiently, especially with Tampa’s long cooling season right around the corner.

Still, even on a routine visit, our job is to look deeper than what you can see or feel at the thermostat. That’s where our Premium Therapy inspection process comes in.

Our Inspection & Diagnosis Process

During this Premium Therapy Plan visit, our technician Barbaro followed a structured maintenance checklist designed for Tampa-area homes. On a job like this, we focus on three big questions:

  • Is the system operating safely?
  • Is the system operating efficiently?
  • Are there any early warning signs we should document for the future?

Checking Electrical and Mechanical Health

First, we checked the core components of the system—compressor, outdoor fan motor, and indoor blower motor. We measured amperage (how much electrical current each component is drawing) and compared those readings to manufacturer specifications.

The good news: all amperages were within normal ranges. That told us the motors and compressor weren’t overworking or struggling, which is often one of the first signs of a developing problem.

Measuring System Pressures on a Cold Day

Next, we checked refrigerant pressures. On this visit, we noted that the pressures were slightly lower than what we would expect under typical Tampa weather conditions. However, the home and the outdoor environment were both unusually cold at the time of service.

This is important context. Refrigerant pressures are directly tied to temperature. On very cold days, you can see lower readings that don’t necessarily mean you have a leak or a low refrigerant charge. Instead of reacting immediately and adding refrigerant—which could actually be harmful in this situation—we did what any careful technician should do:

  • Reviewed the weather and indoor conditions.
  • Confirmed the system was otherwise running normally.
  • Documented the readings clearly in the client’s maintenance report.
  • Recommended re-checking pressures at a future visit during more typical temperatures.

Because the system was only about four years old and there were no performance complaints, this measured approach was the most responsible course of action.

Visual Inspection and Safety Checks

In addition to electrical and refrigerant checks, we performed a general visual inspection of the indoor air handler and outdoor condenser. We checked for:

  • Signs of oil or refrigerant stains (which can indicate leaks).
  • Corrosion on wiring or terminals.
  • Loose panels, screws, or connections.
  • Visible microbial growth or heavy dust on coils.
  • Restricted airflow around the outdoor unit.

None of these red flags were present. That allowed us to proceed with the full cleaning portion of the Premium Therapy Plan service with confidence.

Step-by-Step: How We Performed the Premium Maintenance

The main scope of this visit in Tampa, FL 33626 was to complete a full maintenance per the client’s Premium Therapy Plan agreement. That includes detailed cleaning and preventative care for both the indoor and outdoor sections of the HVAC system.

1. Cleaning the Outdoor Condenser Unit

The outdoor unit is constantly exposed to the elements—grass clippings, leaves, dust, and debris from landscaping. Over time, that buildup restricts airflow and forces the system to work harder.

On this visit, our team:

  • Shut off power to the unit for safety.
  • Removed debris from around and on top of the condenser.
  • Inspected the coil fins for damage and dirt buildup.
  • Performed a thorough cleaning of the condenser coil.
  • Verified that the fan blades and motor were clean and secure.

Regular outdoor unit cleaning is one of the simplest ways to improve efficiency and reduce run times. It also helps reduce strain on the compressor, which is one of the most expensive parts to replace.

2. Cleaning the Indoor Air Handler

The indoor unit (air handler or furnace) is where your home’s air actually passes through the system and across the evaporator coil. Dust, pet dander, and everyday household contaminants can build up here.

As part of the Premium Plan visit, we:

  • Inspected the evaporator coil for dirt and buildup.
  • Cleaned accessible components to promote better airflow and heat transfer.
  • Checked the blower wheel and housing for dust accumulation.
  • Verified that panels were sealing properly to avoid air leaks.

A cleaner air handler helps your system cool more effectively and can support better indoor air quality. For homeowners interested in air quality improvements, we often recommend pairing routine maintenance with upgrades like filtration or UV lights. You can learn more in our article on the role of HVAC in indoor air quality.

3. Flushing the Condensate Drain Line

Florida homes are especially vulnerable to clogged AC drain lines because of our long cooling season and high humidity. Algae and debris can build up in the condensate line, eventually causing backups and water leaks.

On this Tampa maintenance visit, we fully flushed the drain line to help prevent future clogs. This step is critical because:

  • A clogged line can cause water to back up into the air handler.
  • Overflow can damage ceilings, walls, and flooring.
  • Moisture problems can lead to microbial growth and odors.

Flushing the line and confirming proper drainage is a standard part of our Premium Therapy Plan service. It’s one of those small, preventative tasks that can save homeowners a big headache later.

4. Final Operational Check

After cleaning and clearing the system, we restored power and performed a final operational check. We made sure:

  • The system started up smoothly.
  • The blower and condenser fan were running normally.
  • Airflow felt strong at the registers.
  • The thermostat responded correctly to setpoint changes.

Because of the cold conditions, we noted again that pressures were slightly low and documented our recommendation to recheck on a future visit when the weather is more representative of normal cooling conditions in Tampa.

Why We Didn’t Rush to Add Refrigerant

Homeowners sometimes expect that low pressure readings automatically mean, “You must be low on refrigerant.” That’s not always true—especially on a very cold day.

On this Premium Therapy Plan visit in Tampa, FL 33626, the system was:

  • Relatively new (around four years old).
  • Operating without performance complaints.
  • Showing normal amperage on compressor and fans.
  • Free of visible oil stains or other signs of leaks.

In that context, adding refrigerant just to “chase” a pressure reading would not be responsible. Overcharging a system can hurt performance, increase energy use, and even damage the compressor.

Instead, our recommendation was simple and honest: monitor it. During a future maintenance visit in warmer weather, we’ll take new readings and compare them to this baseline. If pressures are still off when conditions are normal, then we’ll have strong evidence to investigate further. That’s the difference between guesswork and real diagnosis.

If you’re interested in how we approach ongoing care for systems like this, our guide on regular HVAC maintenance for Tampa homeowners is a great place to start.

What Could Have Happened Without Regular Maintenance?

This visit might sound routine—and that’s exactly the point. By having us out regularly as part of our Premium Therapy Plan, this Tampa homeowner is avoiding a lot of the surprises that happen when AC systems are ignored.

Without regular maintenance, you might see:

  • Clogged drain lines leading to ceiling leaks, drywall damage, or mold.
  • Dirty coils causing higher electric bills and poor cooling performance.
  • Unnoticed electrical issues that could damage expensive parts over time.
  • Shortened system lifespan because the equipment has to work harder than it should.

In a climate like Tampa’s, where AC systems run heavily for much of the year, skipping maintenance is a bit like driving your car for years without changing the oil. It may seem fine at first—until it suddenly isn’t.

If you’re not currently on a plan, you can explore how our maintenance options work and what they cover in our article on AC maintenance plans in Tampa.

Tips to Keep Your AC Healthy Between Visits in Tampa, FL

Even if you’re on a professional maintenance plan like this homeowner in Tampa, there are simple things you can do between visits to help your system run smoothly.

1. Change or Clean Your Air Filter Regularly

For most Tampa homes, we recommend checking your air filter every 30 days and replacing it at least every 60–90 days, depending on the type of filter, pets, and dust levels. A clean filter:

2. Keep the Outdoor Unit Clear

Try to maintain 2–3 feet of clear space around your outdoor condenser. Trim back shrubs, remove leaf piles, and avoid stacking items against the unit. Good airflow outside is just as important as it is inside.

3. Watch for Early Warning Signs

Call for service if you notice:

  • Water around your indoor unit or near the air handler.
  • Unusual noises like grinding, squealing, or loud buzzing.
  • Hot and cold spots that don’t improve after filter changes.
  • Sudden spikes in your electric bill without a clear reason.

Addressing issues early often means simpler, less expensive repairs and less down time for your AC.

4. Stick to a Regular Maintenance Schedule

In Florida, most systems benefit from at least one professional tune-up per year, often two. Our article on how often you should service your AC in Florida explains why our climate puts extra demands on HVAC equipment.

Why This Tampa Homeowner Chose a Premium Therapy Plan

This client’s experience is a good example of how a maintenance plan can simplify home ownership. With our Premium Therapy Plan, they get:

  • Scheduled visits during times that work around their busy schedule.
  • Thorough cleaning of both indoor and outdoor units.
  • Drain line flushing to help prevent leaks and water damage.
  • Documented system readings to track performance over time.
  • Peace of mind that a professional is keeping an eye on their system.

Because we’ve seen this system multiple times now, we know its history. That helps us make better decisions when something looks a little unusual—like those slightly low pressures on a cold day—without jumping straight to expensive or unnecessary work.

For homeowners who like predictability and consistency, our maintenance options are designed to be straightforward and transparent. You can also review our broader guide to HVAC maintenance for homeowners for more details on what to expect from visits like this.

Living in Tampa, FL 33626: Why AC Maintenance Matters

The Westchase and Tampa, FL 33626 area is a great place to live, with convenient access to amenities, parks, and attractions throughout Tampa Bay. But anyone who lives here knows that when summer hits, a reliable AC system isn’t a luxury—it’s a necessity.

According to Tampa, Florida weather data, our region sees long stretches of hot, humid conditions each year. That means air conditioners are under heavy load for much of the year, especially in newer residential communities in the 33626 area. Regular maintenance helps systems handle that workload without constant breakdowns.

If you’re curious where we serve or want to get a sense of our service area, you can zoom in around Tampa on Google Maps for Tampa, FL 33626. We regularly help homeowners throughout Westchase and nearby neighborhoods keep their systems clean and reliable.

Why Choose Home Therapist for HVAC Maintenance in Tampa, FL?

When you invite our team into your home, we know you’re trusting us with the comfort and safety of your family. On this Premium Therapy Plan visit in Tampa, we focused on:

  • Clear communication: Explaining what we found and why we recommended monitoring instead of refilling refrigerant.
  • Thorough workmanship: Cleaning indoor and outdoor units, flushing the drain line, and checking electrical and mechanical components.
  • Long-term thinking: Documenting readings now so we can compare them on future visits.

We bring the same approach to every job, whether it’s a routine tune-up, a complex repair, or a new installation. For more examples of our real-world maintenance work, you can read about another AC cleaning and maintenance project in Riverview, FL.

Our goal is always to give you the information you need to make good decisions about your home’s comfort systems—without pressure, gimmicks, or scare tactics.

Need AC Maintenance or a Premium Plan in Tampa, FL 33626?

If you’re in the Tampa, FL 33626 or Westchase area and want the same level of care this homeowner received, our team at Home Therapist Cooling, Heating, and Plumbing is here to help. Whether you’re interested in a one-time tune-up or an ongoing Premium Therapy Plan, we can walk you through your options and schedule a visit that fits your calendar.

Call Home Therapist or visit our website to schedule AC maintenance, discuss our maintenance plans, or ask questions about your current system. We’re happy to explain everything in plain language so you always feel confident about the work being done in your home. #HomeTherapist #TheTherapyYourHomeNeeds

Premium Plumbing Home Therapy Plan Visit in Land O’ Lakes, FL 34638

For homeowners in Land O’ Lakes, FL 34638, a small plumbing issue can quickly turn into a big headache if it goes unnoticed. That’s exactly why our Premium Home Therapy Plan exists—to catch problems early, keep your home comfortable, and help you avoid surprise emergencies. On this job, our team visited a plan member’s home in Land O’ Lakes for their second scheduled plumbing visit as part of their ongoing maintenance plan.

Because this client is actually a neighbor of our technician, they specifically requested that he handle this visit. That personal trust means a lot to us, and we treat every home with that same neighborly care—whether we live next door or across town.

Customer Problem: Staying Ahead of Plumbing Issues in Land O’ Lakes

Unlike an emergency call where something is already leaking or backing up, this visit was part of a planned plumbing maintenance program—our Premium Home Therapy Plan. The homeowner wanted:

  • Peace of mind that everything in the plumbing system was working properly
  • Professional eyes on pipes, fixtures, and the water heater before problems appear
  • To build a long-term relationship with a trusted technician who knows their home

In Land O’ Lakes and the greater Tampa Bay area, plumbing systems work hard. We have high humidity, heavy afternoon storms, and mineral content in the water that can take a toll on pipes, faucets, and water heaters over time. Regular inspections can make a big difference in avoiding leaks, clogs, and early equipment failure.

Our Premium Home Therapy Plan is designed for exactly this kind of proactive care. It’s similar in concept to the plumbing maintenance options we explain on our plumbing services maintenance plans page, giving homeowners a structured, predictable way to keep their homes protected.

What Happens During a Premium Home Therapy Plan Plumbing Visit?

During this second plumbing visit under the plan, our technician followed a detailed checklist focused on the most common areas where issues start. While exact conditions vary from home to home, a typical Premium Home Therapy Plan plumbing visit in Land O’ Lakes, FL includes:

  • Visual inspection of accessible plumbing lines for signs of corrosion, leaks, or improper support
  • Check of all visible shut-off valves to ensure they operate and are not seeping around the stems
  • Inspection of faucets and fixtures in kitchens, bathrooms, and laundry areas for drips, loose handles, or weak flow
  • Toilet checks for running water, slow fill, or wobbling that might indicate flange or wax ring issues
  • Drain checks aimed at identifying slow drains that may be at risk of clogging
  • Water heater assessment, including looking for rust, leaks, unusual noises, or outdated safety components
  • Brief water pressure check to see if the home is in a healthy range

Over time, these consistent checkups can help us spot patterns. For example, a sink that was just a little slow last visit but slower now might be a sign that the line is starting to build up debris and could benefit from a more thorough cleaning, such as our drain line cleaning and flushing services.

Our Inspection & Diagnosis Process

Even on a maintenance plan visit with no active emergency, we approach the home systematically. Here’s how our team typically handles a Premium Home Therapy plumbing visit in a Land O’ Lakes home:

1. Listening to the Homeowner

We always start by asking a few simple questions:

  • Have you noticed any slow drains, gurgling, or sewer smells?
  • Any faucets that drip occasionally or are hard to shut off?
  • Any recent changes in hot water performance or temperature?
  • Have you seen any damp spots, stains, or unusual sounds in walls or ceilings?

In this case, there were no urgent issues reported. The homeowner mainly wanted to make sure everything was on track and that the plumbing system was aging gracefully. That’s exactly what a plan like the Premium Home Therapy Plan is designed to support.

2. Walking the Home and Inspecting Fixtures

Our technician then moved room by room, checking:

  • Kitchen sink and dishwasher connections for leaks, corrosion, or improper hoses
  • Bathroom sinks, tubs, and showers for flow, drainage, and caulking around fixtures
  • Laundry areas for secure washer hoses and any signs of moisture around connections

Small drips and loose fittings often start here and can easily go unnoticed until damage occurs. By catching them while they’re minor, we can recommend simple repairs instead of waiting until there’s drywall damage or mold growth.

3. Checking the Toilets

Toilets can waste a surprising amount of water if they’re constantly running or not sealing properly. During the visit, we typically:

  • Listen for continuous or intermittent running
  • Check inside the tank for worn flappers and components
  • Test stability at the base to ensure the toilet isn’t rocking
  • Look for small leaks or signs of water damage around the base

Even if no repairs are done that day, we document any concerns and keep an eye on them during future visits, much like what we describe in our full-house plumbing inspection services content.

4. Evaluating Drains and Venting

Next, we pay attention to drainage and venting. In Land O’ Lakes and the surrounding Tampa Bay area, drains can be affected by:

  • Grease buildup in kitchen lines
  • Hair and soap scum in bathroom drains
  • Foreign objects or wipes in toilet lines
  • Improper venting leading to gurgling or slow drainage

We run water, listen for gurgling, and check how quickly fixtures drain. If we find anything concerning, we may recommend professional cleaning like the services described in our drain cleaning for common drain line issues blog.

5. Inspecting the Water Heater

The water heater is one of the most important parts of the plumbing system, especially for comfort and efficiency. As part of a Premium Home Therapy Plan visit, our technician will typically:

  • Look for rust, corrosion, or water staining on or around the tank
  • Check the temperature setting for safety and efficiency
  • Listen for popping or rumbling sounds that can indicate sediment buildup
  • Verify that the pressure relief valve and other safety features look intact

For many homeowners, we also recommend periodic flushing and maintenance, similar to what we outline in our water heater maintenance plans. Regular attention here can dramatically extend the life of the equipment.

Why Preventive Plumbing Visits Matter in Land O’ Lakes, FL

Living in Land O’ Lakes, FL means enjoying beautiful lakes, growing neighborhoods, and easy access to the Tampa Bay area. You can even see more about the area on Google Maps or learn about nearby Tampa on Wikipedia. But the same climate that makes this area attractive can be hard on homes.

High humidity, frequent summer storms, and temperature swings can cause:

Without regular checkups, a pinhole leak inside a wall or a slow drip under a cabinet can turn into damaged flooring, swelling baseboards, or even mold growth. Preventive visits under a plan like the Premium Home Therapy Plan give our team a chance to catch early warning signs and help homeowners make smart, timely decisions before they’re forced into an emergency repair.

Step-by-Step: How a Plan Visit Helps Protect This Home

On this particular Premium Home Therapy Plan visit in Land O’ Lakes, our process looked something like this from start to finish:

  • Arrival and greeting: Our technician arrived at the scheduled time, greeted the homeowner, and confirmed that this visit was part of their plan and that there were no urgent issues.
  • Initial walkthrough: We asked about any recent noise, smells, or changes in water performance and toured the main plumbing areas of the home.
  • Fixture-by-fixture check: The tech inspected sinks, faucets, tubs, showers, and toilets, running water and checking for subtle signs of trouble.
  • Water heater inspection: We visually inspected the water heater, checked for leaks or corrosion, and discussed the age and expected lifespan of the unit.
  • Drain performance check: We tested how quickly sinks and tubs drained and listened for gurgling or bubbling noises in the lines.
  • Safety and shut-off review: We located and checked key shut-off valves so the homeowner understands where to go in an emergency.
  • Recommendations and education: We wrapped up with a clear, homeowner-friendly summary of what we saw and any recommendations for future maintenance or repairs.

Even when everything looks good, this kind of structured visit builds a baseline. On future visits, we can compare conditions and notice changes sooner, which is part of the value of ongoing monthly plumbing service plans.

What If This Kind of Maintenance Is Skipped?

It’s easy to put plumbing out of mind when everything seems to be working. But here’s what can happen over time when preventive visits are skipped:

  • Hidden leaks grow: Small, slow leaks behind walls, under sinks, or at valves can go unnoticed until they’ve caused staining, rot, or mold.
  • Drains suddenly clog: What starts as a slightly slow drain can eventually become a full blockage, leaving you with backed-up sinks or tubs at the worst time.
  • Water heater failure: Sediment accumulation and neglected safety components can shorten water heater life or even create hazardous conditions.
  • Increased water bills: Running toilets and dripping faucets quietly waste water and money month after month.

By contrast, regular checkups under a Premium Home Therapy Plan give you a better chance to:

  • Schedule repairs at convenient times
  • Budget for replacements before a failure
  • Keep your home in better shape for resale value
  • Enjoy peace of mind knowing a professional is keeping an eye on things

Tips to Keep Your Plumbing Healthy Between Visits

Even with a professional plan in place, there are simple things homeowners in Land O’ Lakes, FL can do between visits to help keep plumbing systems running smoothly:

  • Use strainers in sinks and showers: Catch hair, food scraps, and other debris before they reach your drains.
  • Avoid flushing wipes or hygiene products: Even “flushable” wipes can build up in lines over time.
  • Periodically open and close shut-off valves: Gently operate sink and toilet valves so they don’t seize up when you need them most.
  • Watch for subtle changes: Pay attention to any persistent smells, new noises, or small stains that could signal a hidden issue.
  • Know where your main shut-off is: In case of a sudden leak, being able to shut off water quickly can limit damage.

If you ever notice something concerning between scheduled plan visits, you don’t have to wait. Our team can come out to evaluate the situation, whether it’s a slow drain, an unusual noise, or a leak you’re worried about.

Why This Land O’ Lakes Homeowner Chose a Premium Home Therapy Plan

For this neighbor in Land O’ Lakes, FL 34638, the choice to enroll in our Premium Home Therapy Plan—and to continue with visit #2—came down to three main reasons:

We aim to build that same level of trust with every client, whether they’ve known our team for years or are meeting us for the first time.

Why Choose Home Therapist for Plumbing in Land O’ Lakes, FL?

If you’re looking for reliable plumbing services in Land O’ Lakes, FL or the broader Tampa Bay area, our team at Home Therapist Cooling, Heating, and Plumbing is here to help. We combine honest communication with careful, detail-oriented work so you always know what’s happening in your home.

Homeowners choose us because we:

Whether you need a full inspection, a one-time repair, or want to learn more about ongoing plans like this Premium Home Therapy Plan, our team is ready to answer your questions. We also share educational resources on our website, including blogs about plumbing inspections and other common questions homeowners have.

Considering a Plumbing Maintenance Plan for Your Home?

If you live in Land O’ Lakes, FL or nearby communities and like the idea of a trusted technician checking in on your plumbing regularly, a maintenance plan could be a great fit. It’s especially helpful if:

  • Your home is more than a few years old
  • You’ve had leaks or clogs in the past
  • You want to protect new renovations or flooring
  • You simply prefer to be proactive rather than reactive

Just like getting regular checkups with a doctor, a plumbing plan doesn’t guarantee you’ll never have an issue—but it does give you a better chance of catching things early and making smarter decisions about repairs and replacements.

Need Plumbing Help in Land O’ Lakes, FL 34638?

If you’re in Land O’ Lakes, FL 34638 or the surrounding Tampa Bay area and want a professional to look over your Plumbing, our team at Home Therapist Cooling, Heating, and Plumbing is here to help. Whether you’re interested in a one-time inspection, a repair, or a Premium Home Therapy Plan-style maintenance program, we’ll walk you through your options and answer all your questions.

Call Home Therapist or visit our website to schedule your plumbing visit. We’ll treat your home with the same care and respect we bring to every neighbor’s house. #HomeTherapist #TheTherapyYourHomeNeeds

For homeowners in Land O’ Lakes, FL 34638, a small plumbing issue can quickly turn into a big headache if it goes unnoticed. That’s exactly why our Premium Home Therapy Plan exists—to catch problems early, keep your home comfortable, and help you avoid surprise emergencies. On this job, our team visited a plan member’s home in Land O’ Lakes for their second scheduled plumbing visit as part of their ongoing maintenance plan.

Because this client is actually a neighbor of our technician, they specifically requested that he handle this visit. That personal trust means a lot to us, and we treat every home with that same neighborly care—whether we live next door or across town.

Customer Problem: Staying Ahead of Plumbing Issues in Land O’ Lakes

Unlike an emergency call where something is already leaking or backing up, this visit was part of a planned plumbing maintenance program—our Premium Home Therapy Plan. The homeowner wanted:

  • Peace of mind that everything in the plumbing system was working properly
  • Professional eyes on pipes, fixtures, and the water heater before problems appear
  • To build a long-term relationship with a trusted technician who knows their home

In Land O’ Lakes and the greater Tampa Bay area, plumbing systems work hard. We have high humidity, heavy afternoon storms, and mineral content in the water that can take a toll on pipes, faucets, and water heaters over time. Regular inspections can make a big difference in avoiding leaks, clogs, and early equipment failure.

Our Premium Home Therapy Plan is designed for exactly this kind of proactive care. It’s similar in concept to the plumbing maintenance options we explain on our plumbing services maintenance plans page, giving homeowners a structured, predictable way to keep their homes protected.

What Happens During a Premium Home Therapy Plan Plumbing Visit?

During this second plumbing visit under the plan, our technician followed a detailed checklist focused on the most common areas where issues start. While exact conditions vary from home to home, a typical Premium Home Therapy Plan plumbing visit in Land O’ Lakes, FL includes:

  • Visual inspection of accessible plumbing lines for signs of corrosion, leaks, or improper support
  • Check of all visible shut-off valves to ensure they operate and are not seeping around the stems
  • Inspection of faucets and fixtures in kitchens, bathrooms, and laundry areas for drips, loose handles, or weak flow
  • Toilet checks for running water, slow fill, or wobbling that might indicate flange or wax ring issues
  • Drain checks aimed at identifying slow drains that may be at risk of clogging
  • Water heater assessment, including looking for rust, leaks, unusual noises, or outdated safety components
  • Brief water pressure check to see if the home is in a healthy range

Over time, these consistent checkups can help us spot patterns. For example, a sink that was just a little slow last visit but slower now might be a sign that the line is starting to build up debris and could benefit from a more thorough cleaning, such as our drain line cleaning and flushing services.

Our Inspection & Diagnosis Process

Even on a maintenance plan visit with no active emergency, we approach the home systematically. Here’s how our team typically handles a Premium Home Therapy plumbing visit in a Land O’ Lakes home:

1. Listening to the Homeowner

We always start by asking a few simple questions:

  • Have you noticed any slow drains, gurgling, or sewer smells?
  • Any faucets that drip occasionally or are hard to shut off?
  • Any recent changes in hot water performance or temperature?
  • Have you seen any damp spots, stains, or unusual sounds in walls or ceilings?

In this case, there were no urgent issues reported. The homeowner mainly wanted to make sure everything was on track and that the plumbing system was aging gracefully. That’s exactly what a plan like the Premium Home Therapy Plan is designed to support.

2. Walking the Home and Inspecting Fixtures

Our technician then moved room by room, checking:

  • Kitchen sink and dishwasher connections for leaks, corrosion, or improper hoses
  • Bathroom sinks, tubs, and showers for flow, drainage, and caulking around fixtures
  • Laundry areas for secure washer hoses and any signs of moisture around connections

Small drips and loose fittings often start here and can easily go unnoticed until damage occurs. By catching them while they’re minor, we can recommend simple repairs instead of waiting until there’s drywall damage or mold growth.

3. Checking the Toilets

Toilets can waste a surprising amount of water if they’re constantly running or not sealing properly. During the visit, we typically:

  • Listen for continuous or intermittent running
  • Check inside the tank for worn flappers and components
  • Test stability at the base to ensure the toilet isn’t rocking
  • Look for small leaks or signs of water damage around the base

Even if no repairs are done that day, we document any concerns and keep an eye on them during future visits, much like what we describe in our full-house plumbing inspection services content.

4. Evaluating Drains and Venting

Next, we pay attention to drainage and venting. In Land O’ Lakes and the surrounding Tampa Bay area, drains can be affected by:

  • Grease buildup in kitchen lines
  • Hair and soap scum in bathroom drains
  • Foreign objects or wipes in toilet lines
  • Improper venting leading to gurgling or slow drainage

We run water, listen for gurgling, and check how quickly fixtures drain. If we find anything concerning, we may recommend professional cleaning like the services described in our drain cleaning for common drain line issues blog.

5. Inspecting the Water Heater

The water heater is one of the most important parts of the plumbing system, especially for comfort and efficiency. As part of a Premium Home Therapy Plan visit, our technician will typically:

  • Look for rust, corrosion, or water staining on or around the tank
  • Check the temperature setting for safety and efficiency
  • Listen for popping or rumbling sounds that can indicate sediment buildup
  • Verify that the pressure relief valve and other safety features look intact

For many homeowners, we also recommend periodic flushing and maintenance, similar to what we outline in our water heater maintenance plans. Regular attention here can dramatically extend the life of the equipment.

Why Preventive Plumbing Visits Matter in Land O’ Lakes, FL

Living in Land O’ Lakes, FL means enjoying beautiful lakes, growing neighborhoods, and easy access to the Tampa Bay area. You can even see more about the area on Google Maps or learn about nearby Tampa on Wikipedia. But the same climate that makes this area attractive can be hard on homes.

High humidity, frequent summer storms, and temperature swings can cause:

  • Faster corrosion of exposed metal parts
  • Shifting soils that may impact buried lines
  • Extra stress on water heaters and fixtures

Without regular checkups, a pinhole leak inside a wall or a slow drip under a cabinet can turn into damaged flooring, swelling baseboards, or even mold growth. Preventive visits under a plan like the Premium Home Therapy Plan give our team a chance to catch early warning signs and help homeowners make smart, timely decisions before they’re forced into an emergency repair.

Step-by-Step: How a Plan Visit Helps Protect This Home

On this particular Premium Home Therapy Plan visit in Land O’ Lakes, our process looked something like this from start to finish:

  • Arrival and greeting: Our technician arrived at the scheduled time, greeted the homeowner, and confirmed that this visit was part of their plan and that there were no urgent issues.
  • Initial walkthrough: We asked about any recent noise, smells, or changes in water performance and toured the main plumbing areas of the home.
  • Fixture-by-fixture check: The tech inspected sinks, faucets, tubs, showers, and toilets, running water and checking for subtle signs of trouble.
  • Water heater inspection: We visually inspected the water heater, checked for leaks or corrosion, and discussed the age and expected lifespan of the unit.
  • Drain performance check: We tested how quickly sinks and tubs drained and listened for gurgling or bubbling noises in the lines.
  • Safety and shut-off review: We located and checked key shut-off valves so the homeowner understands where to go in an emergency.
  • Recommendations and education: We wrapped up with a clear, homeowner-friendly summary of what we saw and any recommendations for future maintenance or repairs.

Even when everything looks good, this kind of structured visit builds a baseline. On future visits, we can compare conditions and notice changes sooner, which is part of the value of ongoing monthly plumbing service plans.

What If This Kind of Maintenance Is Skipped?

It’s easy to put plumbing out of mind when everything seems to be working. But here’s what can happen over time when preventive visits are skipped:

  • Hidden leaks grow: Small, slow leaks behind walls, under sinks, or at valves can go unnoticed until they’ve caused staining, rot, or mold.
  • Drains suddenly clog: What starts as a slightly slow drain can eventually become a full blockage, leaving you with backed-up sinks or tubs at the worst time.
  • Water heater failure: Sediment accumulation and neglected safety components can shorten water heater life or even create hazardous conditions.
  • Increased water bills: Running toilets and dripping faucets quietly waste water and money month after month.

By contrast, regular checkups under a Premium Home Therapy Plan give you a better chance to:

  • Schedule repairs at convenient times
  • Budget for replacements before a failure
  • Keep your home in better shape for resale value
  • Enjoy peace of mind knowing a professional is keeping an eye on things

Tips to Keep Your Plumbing Healthy Between Visits

Even with a professional plan in place, there are simple things homeowners in Land O’ Lakes, FL can do between visits to help keep plumbing systems running smoothly:

  • Use strainers in sinks and showers: Catch hair, food scraps, and other debris before they reach your drains.
  • Avoid flushing wipes or hygiene products: Even “flushable” wipes can build up in lines over time.
  • Periodically open and close shut-off valves: Gently operate sink and toilet valves so they don’t seize up when you need them most.
  • Watch for subtle changes: Pay attention to any persistent smells, new noises, or small stains that could signal a hidden issue.
  • Know where your main shut-off is: In case of a sudden leak, being able to shut off water quickly can limit damage.

If you ever notice something concerning between scheduled plan visits, you don’t have to wait. Our team can come out to evaluate the situation, whether it’s a slow drain, an unusual noise, or a leak you’re worried about.

Why This Land O’ Lakes Homeowner Chose a Premium Home Therapy Plan

For this neighbor in Land O’ Lakes, FL 34638, the choice to enroll in our Premium Home Therapy Plan—and to continue with visit #2—came down to three main reasons:

  • Trust: Having a technician they know personally, and a company that stands behind the work.
  • Consistency: Knowing that plumbing, just like HVAC systems, needs regular attention to perform reliably.
  • Prevention: Wanting to avoid the stress of waking up to a leak or a clogged main drain.

We aim to build that same level of trust with every client, whether they’ve known our team for years or are meeting us for the first time.

Why Choose Home Therapist for Plumbing in Land O’ Lakes, FL?

If you’re looking for reliable plumbing services in Land O’ Lakes, FL or the broader Tampa Bay area, our team at Home Therapist Cooling, Heating, and Plumbing is here to help. We combine honest communication with careful, detail-oriented work so you always know what’s happening in your home.

Homeowners choose us because we:

  • Offer structured maintenance options similar to our plumbing service plans for the Tampa Bay area
  • Provide clear explanations in plain English—no confusing jargon
  • Document what we see so you can track your system’s condition over time
  • Handle both plumbing and HVAC, so your home comfort is managed holistically

Whether you need a full inspection, a one-time repair, or want to learn more about ongoing plans like this Premium Home Therapy Plan, our team is ready to answer your questions. We also share educational resources on our website, including blogs about plumbing inspections and other common questions homeowners have.

Considering a Plumbing Maintenance Plan for Your Home?

If you live in Land O’ Lakes, FL or nearby communities and like the idea of a trusted technician checking in on your plumbing regularly, a maintenance plan could be a great fit. It’s especially helpful if:

  • Your home is more than a few years old
  • You’ve had leaks or clogs in the past
  • You want to protect new renovations or flooring
  • You simply prefer to be proactive rather than reactive

Just like getting regular checkups with a doctor, a plumbing plan doesn’t guarantee you’ll never have an issue—but it does give you a better chance of catching things early and making smarter decisions about repairs and replacements.

Need Plumbing Help in Land O’ Lakes, FL 34638?

If you’re in Land O’ Lakes, FL 34638 or the surrounding Tampa Bay area and want a professional to look over your plumbing, our team at Home Therapist Cooling, Heating, and Plumbing is here to help. Whether you’re interested in a one-time inspection, a repair, or a Premium Home Therapy Plan-style maintenance program, we’ll walk you through your options and answer all your questions.

Call Home Therapist or visit our website to schedule your plumbing visit. We’ll treat your home with the same care and respect we bring to every neighbor’s house. #HomeTherapist #TheTherapyYourHomeNeeds

Mechanical Permit Renewal for HVAC Work in Tampa, FL 33611

When you think about HVAC or plumbing work at home, you probably think about equipment, comfort, and hot or cold air — not paperwork. But in cities like Tampa, FL, permits and inspections are a huge part of doing things the right way. In this case study, we walk through how our team helped a homeowner in the 33611 area of South Tampa renew an existing mechanical trade permit for HVAC work and get their project back on track.

If you've ever had a project stall because of permits or inspections, you know how stressful it can be. Our goal is to take that stress off the homeowner's shoulders, handle the technical details, and make sure everything is done safely and according to Tampa's building codes.

Customer Problem: A Mechanical Permit That Needed Renewal

Our client in Tampa, FL 33611 reached out because there was an existing mechanical trade permit on their property that needed to be renewed. The work itself was either already done or previously started, but the permitting side of things still needed attention. Instead of new repairs or installation work, they specifically needed professional help with:

  • Renewing an existing mechanical trade permit with the City of Tampa.
  • Coordinating with the city for any inspections that might still be required.
  • Understanding what would happen if the inspector requested corrections.

In other words, this visit wasn't about replacing an air conditioner or installing new ductwork. It was strictly a labor-only service to handle the permit renewal and any small, simple corrections that could be done as a courtesy during the process.

What Is a Mechanical Trade Permit in Tampa, FL?

For homeowners in Tampa and across Hillsborough County, a mechanical trade permit usually applies to HVAC-related work, such as:

The mechanical permit is issued by the local building department and is required so the city can review and inspect the work. This protects you as a homeowner by making sure:

  • The equipment is installed safely
  • The work follows Florida Building Code and local Tampa ordinances
  • Your home's value and insurance standing are protected

In many cases, your contractor pulls the permit and schedules inspections for you. But sometimes life happens: projects change contractors, permits expire, or inspections are missed. That's where a permit renewal comes in.

Our Scope on This Project: Labor Only, No Repairs Included

On this particular job in Tampa, FL 33611, the work order clearly outlined the scope:

  • Renew existing mechanical trade permit.
  • No repairs are included. Any corrections the city might require would be quoted separately, unless they were very minor issues we could reasonably address as a courtesy.
  • City permit fees are not included. The homeowner would pay those fees separately once the City of Tampa determined the amount.

This structure is common for homeowners who already have mechanical work in place but need help cleaning up the permitting side of things. Our role is to:

  • Review the existing permit status
  • Submit paperwork or online applications for renewal
  • Coordinate or prepare for inspections
  • Advise the homeowner on what to expect if corrections are required

By keeping the job strictly labor-only for permitting, the homeowner gets clarity and control: if additional repairs or corrections are needed, they receive a separate quote before any work is done.

Our Inspection & Documentation Review Process

Even when a visit is focused on a permit and not on physical repairs, our technician still approaches the job with a full professional mindset. Here's how we typically handle a mechanical permit renewal in Tampa, FL:

1. Reviewing the Existing Permit

Our technician starts by confirming details on the existing mechanical permit, such as:

  • Permit number and original issue date
  • Type of mechanical work covered (AC replacement, ductwork, etc.)
  • Which inspections (if any) have been passed or remain open
  • Whether the permit is expired, about to expire, or just needs a status update

This helps us understand exactly what the City of Tampa will expect before closing out or renewing the permit.

2. Visual Walkthrough of the Mechanical System

While the job does not include formal repairs, our technician will usually perform a basic visual walkthrough of the areas covered by the permit. This may include looking at:

  • The outdoor condenser unit
  • The indoor air handler or furnace area
  • Any recently changed ductwork or registers
  • Electrical disconnects and condensate drain routing

The goal isn't to perform a full diagnostic, but to identify any obvious code-related issues that might lead an inspector to call for corrections. That way, we can brief the homeowner in advance rather than leaving them surprised after an inspection.

3. Paperwork, Timelines, and City Requirements

Next, our team helps the homeowner understand the steps and timelines associated with the permit renewal, such as:

  • Completing or updating permit application information
  • Submitting the renewal request to the City of Tampa
  • Estimating when the city might assess and post the permit fees
  • Coordinating any necessary inspections

We make it clear that the city's fees are separate from our labor charges. Once the City of Tampa determines the permit fee, the homeowner pays that amount directly or as part of the standard permitting process.

Step-by-Step: How We Helped Renew the Mechanical Permit

Although every home is a little different, the general process we followed for this mechanical permit renewal in Tampa, FL 33611 looked like this:

Step 1: Confirm Property and Permit Details

We verified the property address in South Tampa and matched it to the existing mechanical permit information in the city system. This ensures no mix-ups between past projects or old permits.

Step 2: Clarify the Homeowner's Goals

Our technician made sure we fully understood what the homeowner needed:

  • They did not want new equipment installed during this visit.
  • They needed the existing mechanical permit renewed or brought back into good standing.
  • They wanted to know what would happen if the city inspector requested corrections.

Once the expectations were clear, we moved ahead with the permitting process.

Step 3: Begin the Permit Renewal Process

We then initiated the mechanical trade permit renewal with the City of Tampa. Depending on how the original permit was filed, this can include:

  • Submitting updated contractor information (if a contractor has changed)
  • Requesting reinstatement or renewal of an expired or nearly expired permit
  • Scheduling or re-scheduling required mechanical inspections

If the homeowner had any documents from the original project, such as old inspection notices, we reviewed those as part of the process.

Step 4: Discussing Possible Corrections

Because no repairs were included in the original scope, it was important to explain how corrections would be handled. We told the homeowner:

  • If the city inspector finds small, simple issues (for example, a missing label or an easily adjusted support) that we can safely address on the spot, we may take care of them as a courtesy during our permitted scope of work.
  • If the inspector requires more significant corrections, we will prepare a separate, detailed quote that the homeowner can review and approve before any additional work begins.

This transparency gives the homeowner peace of mind: they understand that we won't perform surprise repairs or add unexpected charges without their knowledge.

Step 5: Next Steps After Renewal

Once the renewal is in motion and any inspections are scheduled, we provide the homeowner with a clear expectation of next steps, including:

  • How to track the permit status
  • What to expect during the mechanical inspection
  • How they will be notified about city-assessed permit fees
  • How to contact us if they receive a correction notice

Our team stays available to answer questions and help close the loop on the project, even though this particular job did not include new installation or repair labor.

Why Mechanical Permits & Inspections Matter for Tampa Homeowners

In a climate like Tampa, where air conditioning is almost a necessity, it can be tempting to focus only on getting cool air back as quickly as possible. But the permitting and inspection process exists for good reasons:

  • Safety: Properly installed HVAC equipment is critical for electrical safety, condensation management, and indoor air quality.
  • Code compliance: Meeting the Florida Building Code and local Tampa requirements helps avoid future issues during insurance claims or home sales.
  • Resale value: Unpermitted or improperly permitted work can delay a sale or force costly last-minute corrections.
  • Peace of mind: A closed permit with passed inspections gives you confidence that your system was installed correctly.

For a deeper look at permit requirements on the plumbing side, you can read our blog on permit requirements for toilet installation and repair services in Tampa Bay. The principles are very similar to what we follow for HVAC mechanical permits.

What If the Inspector Calls for Corrections?

One of the biggest worries homeowners have is, “What if the inspector fails my inspection?” If you're in Tampa, FL and dealing with a mechanical permit, here's how we typically handle that situation:

  • We review the correction list with you. Our team takes the time to explain what the inspector noted, in plain language.
  • We separate minor items from major issues. Some corrections are small, like adding a strap or adjusting clearance. Others involve more involved work.
  • We provide a clear quote for needed repairs. You'll know what it will take to bring the work to code before you commit.
  • We schedule the work and re-inspection. Once the corrections are made, we help you get back on the inspection schedule.

Remember, in this particular job, our signed scope did not include repairs up front. But we always plan ahead for the possibility that the city will request corrections, and we explain that process from the start.

Tips to Avoid Permit Headaches for Future HVAC Projects in Tampa

Whether you're in South Tampa (33611) or anywhere in the greater Tampa Bay area, here are a few ways to avoid permit-related stress on your next HVAC or plumbing project:

  • Work with licensed contractors only. Always confirm that your contractor is properly licensed for HVAC and plumbing work in Florida.
  • Ask about permits before the job starts. Make sure it's clear who is pulling the permit and how inspections will be handled.
  • Keep copies of your paperwork. Save permit numbers, inspection results, and contractor invoices in one place.
  • Don't ignore inspection notices. If you get a notice that an inspection is required or failed, address it promptly.
  • Schedule regular maintenance. Keeping your system in good shape with routine HVAC tune-ups can help prevent surprise issues from popping up during inspections.

If you're planning a new AC installation, it's also helpful to read about your options ahead of time. Our page on AC installation services in Tampa explains how we approach system selection, sizing, and code-compliant installation.

Why Choose Home Therapist for Permits, HVAC, and Plumbing in Tampa, FL?

At Home Therapist Cooling, Heating, and Plumbing, we know that homeowners don't wake up excited to think about mechanical permits or building codes. You'd much rather enjoy a comfortable home and trust that everything behind the scenes is being handled correctly.

When you work with our team in Tampa, FL, you get:

  • Licensed, experienced technicians who understand both the technical side of HVAC and the requirements of local inspectors.
  • Clear communication about what is and isn't included in your project, including when a job is labor-only for permits.
  • Upfront guidance on permits and inspections so you're not left guessing about the process.
  • Full-service options if you decide you'd like us to handle repairs, replacements, or upgrades beyond the permit work.

We provide a wide range of HVAC and plumbing services in Tampa and nearby communities, from heating installation and replacement to water heater projects, drain work, and whole-home inspections. If you're not sure where to start, our FAQ page is a great place to get answers to common questions about permits, warranties, and scheduling.

About Tampa, FL 33611: Local Context Matters

Mechanical permits and inspections are always handled at the local level, so it's important to work with a team that knows the area. The 33611 ZIP code in Tampa covers a portion of South Tampa along the bay, near well-known spots like Bayshore Boulevard and Ballast Point Park.

If you're curious about the broader history and geography of Tampa, you can explore more on Wikipedia's Tampa, Florida page or see the area on Google Maps for Tampa, FL 33611. Understanding the local climate, flood zones, and neighborhood layouts can all play a role in how HVAC and plumbing systems are designed and permitted.

When to Call Us About a Mechanical Permit in Tampa

You don't have to wait until a permit is in trouble to reach out. It's a good idea to contact us if:

We're happy to look into the details, explain your options, and help build a simple plan to move forward.

Need Help with HVAC Permits or Inspections in Tampa, FL?

Whether you're dealing with a mechanical permit renewal like this homeowner in Tampa, FL 33611, or planning a brand-new system, our team is here to help. We combine hands-on technical expertise with a solid understanding of local permitting requirements, so you don't have to manage it alone.

Call Home Therapist or visit our website to schedule a visit, ask questions about your permit, or discuss your HVAC and plumbing needs. We're ready to provide #HomeTherapist service and #TheTherapyYourHomeNeeds, from the equipment in your home to the paperwork at City Hall.

When you think about HVAC or plumbing work at home, you probably think about equipment, comfort, and hot or cold air — not paperwork. But in cities like Tampa, FL, permits and inspections are a huge part of doing things the right way. In this case study, we walk through how our team helped a homeowner in the 33611 area of South Tampa renew an existing mechanical trade permit for HVAC work and get their project back on track.

If you've ever had a project stall because of permits or inspections, you know how stressful it can be. Our goal is to take that stress off the homeowner's shoulders, handle the technical details, and make sure everything is done safely and according to Tampa's building codes.

Customer Problem: A Mechanical Permit That Needed Renewal

Our client in Tampa, FL 33611 reached out because there was an existing mechanical trade permit on their property that needed to be renewed. The work itself was either already done or previously started, but the permitting side of things still needed attention. Instead of new repairs or installation work, they specifically needed professional help with:

  • Renewing an existing mechanical trade permit with the City of Tampa.
  • Coordinating with the city for any inspections that might still be required.
  • Understanding what would happen if the inspector requested corrections.

In other words, this visit wasn't about replacing an air conditioner or installing new ductwork. It was strictly a labor-only service to handle the permit renewal and any small, simple corrections that could be done as a courtesy during the process.

What Is a Mechanical Trade Permit in Tampa, FL?

For homeowners in Tampa and across Hillsborough County, a mechanical trade permit usually applies to HVAC-related work, such as:

  • Installing or replacing central air conditioning systems
  • Upgrading furnaces or air handlers
  • Adding or modifying ductwork and ventilation
  • Installing mini-splits or other mechanical systems

The mechanical permit is issued by the local building department and is required so the city can review and inspect the work. This protects you as a homeowner by making sure:

  • The equipment is installed safely
  • The work follows Florida Building Code and local Tampa ordinances
  • Your home's value and insurance standing are protected

In many cases, your contractor pulls the permit and schedules inspections for you. But sometimes life happens: projects change contractors, permits expire, or inspections are missed. That's where a permit renewal comes in.

Our Scope on This Project: Labor Only, No Repairs Included

On this particular job in Tampa, FL 33611, the work order clearly outlined the scope:

  • Renew existing mechanical trade permit.
  • No repairs are included. Any corrections the city might require would be quoted separately, unless they were very minor issues we could reasonably address as a courtesy.
  • City permit fees are not included. The homeowner would pay those fees separately once the City of Tampa determined the amount.

This structure is common for homeowners who already have mechanical work in place but need help cleaning up the permitting side of things. Our role is to:

  • Review the existing permit status
  • Submit paperwork or online applications for renewal
  • Coordinate or prepare for inspections
  • Advise the homeowner on what to expect if corrections are required

By keeping the job strictly labor-only for permitting, the homeowner gets clarity and control: if additional repairs or corrections are needed, they receive a separate quote before any work is done.

Our Inspection & Documentation Review Process

Even when a visit is focused on a permit and not on physical repairs, our technician still approaches the job with a full professional mindset. Here's how we typically handle a mechanical permit renewal in Tampa, FL:

1. Reviewing the Existing Permit

Our technician starts by confirming details on the existing mechanical permit, such as:

  • Permit number and original issue date
  • Type of mechanical work covered (AC replacement, ductwork, etc.)
  • Which inspections (if any) have been passed or remain open
  • Whether the permit is expired, about to expire, or just needs a status update

This helps us understand exactly what the City of Tampa will expect before closing out or renewing the permit.

2. Visual Walkthrough of the Mechanical System

While the job does not include formal repairs, our technician will usually perform a basic visual walkthrough of the areas covered by the permit. This may include looking at:

  • The outdoor condenser unit
  • The indoor air handler or furnace area
  • Any recently changed ductwork or registers
  • Electrical disconnects and condensate drain routing

The goal isn't to perform a full diagnostic, but to identify any obvious code-related issues that might lead an inspector to call for corrections. That way, we can brief the homeowner in advance rather than leaving them surprised after an inspection.

3. Paperwork, Timelines, and City Requirements

Next, our team helps the homeowner understand the steps and timelines associated with the permit renewal, such as:

  • Completing or updating permit application information
  • Submitting the renewal request to the City of Tampa
  • Estimating when the city might assess and post the permit fees
  • Coordinating any necessary inspections

We make it clear that the city's fees are separate from our labor charges. Once the City of Tampa determines the permit fee, the homeowner pays that amount directly or as part of the standard permitting process.

Step-by-Step: How We Helped Renew the Mechanical Permit

Although every home is a little different, the general process we followed for this mechanical permit renewal in Tampa, FL 33611 looked like this:

Step 1: Confirm Property and Permit Details

We verified the property address in South Tampa and matched it to the existing mechanical permit information in the city system. This ensures no mix-ups between past projects or old permits.

Step 2: Clarify the Homeowner's Goals

Our technician made sure we fully understood what the homeowner needed:

  • They did not want new equipment installed during this visit.
  • They needed the existing mechanical permit renewed or brought back into good standing.
  • They wanted to know what would happen if the city inspector requested corrections.

Once the expectations were clear, we moved ahead with the permitting process.

Step 3: Begin the Permit Renewal Process

We then initiated the mechanical trade permit renewal with the City of Tampa. Depending on how the original permit was filed, this can include:

  • Submitting updated contractor information (if a contractor has changed)
  • Requesting reinstatement or renewal of an expired or nearly expired permit
  • Scheduling or re-scheduling required mechanical inspections

If the homeowner had any documents from the original project, such as old inspection notices, we reviewed those as part of the process.

Step 4: Discussing Possible Corrections

Because no repairs were included in the original scope, it was important to explain how corrections would be handled. We told the homeowner:

  • If the city inspector finds small, simple issues (for example, a missing label or an easily adjusted support) that we can safely address on the spot, we may take care of them as a courtesy during our permitted scope of work.
  • If the inspector requires more significant corrections, we will prepare a separate, detailed quote that the homeowner can review and approve before any additional work begins.

This transparency gives the homeowner peace of mind: they understand that we won't perform surprise repairs or add unexpected charges without their knowledge.

Step 5: Next Steps After Renewal

Once the renewal is in motion and any inspections are scheduled, we provide the homeowner with a clear expectation of next steps, including:

  • How to track the permit status
  • What to expect during the mechanical inspection
  • How they will be notified about city-assessed permit fees
  • How to contact us if they receive a correction notice

Our team stays available to answer questions and help close the loop on the project, even though this particular job did not include new installation or repair labor.

Why Mechanical Permits & Inspections Matter for Tampa Homeowners

In a climate like Tampa, where air conditioning is almost a necessity, it can be tempting to focus only on getting cool air back as quickly as possible. But the permitting and inspection process exists for good reasons:

  • Safety: Properly installed HVAC equipment is critical for electrical safety, condensation management, and indoor air quality.
  • Code compliance: Meeting the Florida Building Code and local Tampa requirements helps avoid future issues during insurance claims or home sales.
  • Resale value: Unpermitted or improperly permitted work can delay a sale or force costly last-minute corrections.
  • Peace of mind: A closed permit with passed inspections gives you confidence that your system was installed correctly.

For a deeper look at permit requirements on the plumbing side, you can read our blog on permit requirements for toilet installation and repair services in Tampa Bay. The principles are very similar to what we follow for HVAC mechanical permits.

What If the Inspector Calls for Corrections?

One of the biggest worries homeowners have is, “What if the inspector fails my inspection?” If you're in Tampa, FL and dealing with a mechanical permit, here's how we typically handle that situation:

  • We review the correction list with you. Our team takes the time to explain what the inspector noted, in plain language.
  • We separate minor items from major issues. Some corrections are small, like adding a strap or adjusting clearance. Others involve more involved work.
  • We provide a clear quote for needed repairs. You'll know what it will take to bring the work to code before you commit.
  • We schedule the work and re-inspection. Once the corrections are made, we help you get back on the inspection schedule.

Remember, in this particular job, our signed scope did not include repairs up front. But we always plan ahead for the possibility that the city will request corrections, and we explain that process from the start.

Tips to Avoid Permit Headaches for Future HVAC Projects in Tampa

Whether you're in South Tampa (33611) or anywhere in the greater Tampa Bay area, here are a few ways to avoid permit-related stress on your next HVAC or plumbing project:

  • Work with licensed contractors only. Always confirm that your contractor is properly licensed for HVAC and plumbing work in Florida.
  • Ask about permits before the job starts. Make sure it's clear who is pulling the permit and how inspections will be handled.
  • Keep copies of your paperwork. Save permit numbers, inspection results, and contractor invoices in one place.
  • Don't ignore inspection notices. If you get a notice that an inspection is required or failed, address it promptly.
  • Schedule regular maintenance. Keeping your system in good shape with routine HVAC tune-ups can help prevent surprise issues from popping up during inspections.

If you're planning a new AC installation, it's also helpful to read about your options ahead of time. Our page on AC installation services in Tampa explains how we approach system selection, sizing, and code-compliant installation.

Why Choose Home Therapist for Permits, HVAC, and Plumbing in Tampa, FL?

At Home Therapist Cooling, Heating, and Plumbing, we know that homeowners don't wake up excited to think about mechanical permits or building codes. You'd much rather enjoy a comfortable home and trust that everything behind the scenes is being handled correctly.

When you work with our team in Tampa, FL, you get:

  • Licensed, experienced technicians who understand both the technical side of HVAC and the requirements of local inspectors.
  • Clear communication about what is and isn't included in your project, including when a job is labor-only for permits.
  • Upfront guidance on permits and inspections so you're not left guessing about the process.
  • Full-service options if you decide you'd like us to handle repairs, replacements, or upgrades beyond the permit work.

We provide a wide range of HVAC and plumbing services in Tampa and nearby communities, from heating installation and replacement to water heater projects, drain work, and whole-home inspections. If you're not sure where to start, our FAQ page is a great place to get answers to common questions about permits, warranties, and scheduling.

About Tampa, FL 33611: Local Context Matters

Mechanical permits and inspections are always handled at the local level, so it's important to work with a team that knows the area. The 33611 ZIP code in Tampa covers a portion of South Tampa along the bay, near well-known spots like Bayshore Boulevard and Ballast Point Park.

If you're curious about the broader history and geography of Tampa, you can explore more on Wikipedia's Tampa, Florida page or see the area on Google Maps for Tampa, FL 33611. Understanding the local climate, flood zones, and neighborhood layouts can all play a role in how HVAC and plumbing systems are designed and permitted.

When to Call Us About a Mechanical Permit in Tampa

You don't have to wait until a permit is in trouble to reach out. It's a good idea to contact us if:

  • You're planning a new AC or heating installation and want to be sure permits are handled correctly.
  • You received a notice about an open or expired mechanical permit on your property.
  • A real estate transaction uncovered old, incomplete, or unpermitted HVAC work.
  • You're unsure whether past work on your home was permitted or inspected properly.

We're happy to look into the details, explain your options, and help build a simple plan to move forward.

Need Help with HVAC Permits or Inspections in Tampa, FL?

Whether you're dealing with a mechanical permit renewal like this homeowner in Tampa, FL 33611, or planning a brand-new system, our team is here to help. We combine hands-on technical expertise with a solid understanding of local permitting requirements, so you don't have to manage it alone.

Call Home Therapist or visit our website to schedule a visit, ask questions about your permit, or discuss your HVAC and plumbing needs. We're ready to provide #HomeTherapist service and #TheTherapyYourHomeNeeds, from the equipment in your home to the paperwork at City Hall.

Premium Home Therapy Plan Maintenance Visit in San Antonio, FL 33576

For this visit, our team headed out to a rental home in San Antonio, FL 33576 for a Premium Home Therapy Plan maintenance appointment. The property owner doesn’t live nearby and relies on us to keep the home’s HVAC system running smoothly for their tenants. Regular maintenance is especially important in Florida’s heat, where a surprise breakdown can quickly turn into a major comfort issue for everyone living there.

In this case study, we’ll walk through what a Premium Home Therapy Plan visit looks like, how we take care of rental properties for out-of-town owners, and why consistent maintenance is one of the best investments you can make in your HVAC system in San Antonio, FL and the greater Tampa Bay area.

Customer Problem: What Was Happening at the Home

The owner of this San Antonio, FL home enrolled the property in our Premium Home Therapy Plan. According to the notes, this was the first time we visited this specific location, even though the owner already trusts our team for other properties. They don’t live in Tampa or in San Antonio, but they rent this home out and needed a dependable company to:

  • Keep the air conditioning system clean and efficient for their tenants
  • Catch small issues before they turn into major repairs
  • Provide clear communication and documentation after each visit

Florida rentals see a lot of use from day-to-day living, and AC systems often run almost nonstop during the warmer months. In a place like San Antonio, Florida, where humidity and heat are a constant factor, skipping maintenance means:

  • Higher electric bills for tenants
  • Increased wear and tear on equipment
  • More frequent breakdowns and emergency calls
  • Shorter system life span

The owner wanted peace of mind: a trusted team visiting the property on schedule, taking photos, documenting system condition, and letting them know if anything needed attention.

What Is the Premium Home Therapy Plan?

Our Premium Home Therapy Plan is a step up from a basic tune-up. It’s a structured maintenance plan that includes:

If you’d like to see how our plans are set up, you can learn more on our Therapy Maintenance Plans page. For homeowners and landlords in Pasco County and the Tampa Bay area, this kind of plan helps keep both comfort and budget under control.

Our Inspection & Diagnosis Process at This San Antonio, FL Home

For this first-time visit under the Premium Home Therapy Plan, our technician Alejandro started by introducing himself to the tenants, explaining what he would be doing, and confirming any concerns they might have noticed. Even when there isn’t an obvious problem, we still ask questions like:

  • Has the AC been keeping up on the hottest days?
  • Any unusual noises, smells, or water around the indoor unit?
  • Any rooms that feel warmer or more humid than others?

From there, we follow a structured inspection process that typically includes:

1. Thermostat and Basic Operation Check

We start at the thermostat and the basic operation of the system:

  • Confirming the thermostat is set up correctly and responding
  • Verifying the system goes into cooling mode properly
  • Listening for any unusual startup noises from the air handler or condenser

2. Indoor Unit (Air Handler) Inspection

At the indoor section of the system, we typically check:

In rental homes, we often see filters that go too long between changes, simply because different tenants may not be sure what schedule to follow. As part of a Premium Home Therapy Plan visit, we always document the filter condition and, when possible, recommend or perform a filter change to protect the system.

3. Outdoor Condenser Inspection

Outside, Alejandro inspected the condenser unit, which is exposed to weather, landscaping debris, and Florida’s humidity. During a typical plan visit in San Antonio, FL, we will:

Keeping this area clear helps the system release heat efficiently. A dirty or blocked condenser coil can easily increase energy use and reduce cooling capacity, which is the last thing a tenant wants to deal with during the summer.

4. System Performance and Safety Checks

Finally, we look at how the whole system is performing, not just individual parts. On a Premium Home Therapy Plan visit, this often includes:

  • Measuring temperature differences between supply and return air
  • Checking for proper airflow at multiple vents
  • Looking for visible duct leaks around accessible areas
  • Verifying the system is draining condensation properly
  • Checking any accessible safety switches and wiring

For landlords and property managers, our goal is to reduce surprise calls by catching developing issues at this stage, when they’re often easier and more affordable to handle.

Step-by-Step: What We Did During This Premium Plan Visit

On this San Antonio, FL 33576 visit, Alejandro followed our Premium Home Therapy Plan checklist from start to finish. Here’s a homeowner-friendly breakdown of what that typically involves:

Step 1: Communicate with Tenants and Confirm Access

Because the owner doesn’t live locally, tenant cooperation is important. Our team coordinated the visit time, arrived on schedule, and clearly explained what work would be done, about how long it would take, and whether the system would need to be off briefly during certain checks.

Step 2: Protect the Home and Work Cleanly

We treat a rental home the same way we treat an owner-occupied one. That means wearing shoe covers where needed, laying down drop cloths if we’re working in tight spaces, and cleaning up after ourselves so tenants don’t feel like they’ve had a construction crew in the house.

Step 3: Thorough Indoor System Maintenance

At the air handler, our Premium Home Therapy Plan work typically includes:

In humid climates like San Antonio and the wider Tampa Bay region, drain issues are especially common. A clogged condensate line can cause water to back up and leak, potentially damaging ceilings, floors, or air handler closets. Cleaning and treating that line during maintenance is one of the simplest ways to prevent an insurance headache later.

Step 4: Outdoor Condenser Cleaning and Checks

Outside, Alejandro checked the refrigerant lines and insulation, cleared any loose debris from around the unit, and inspected the condenser coil. When coils are dirty, we recommend coil cleaning to restore performance and help lower energy use.

We also verify that the unit is mounted stable and level, wiring is properly secured, and there are no obvious signs of animal or insect damage inside the panel area.

Step 5: System Testing and Final Readings

Once cleaning and checks are complete, we restart the system and confirm:

  • Cool air is coming from the vents consistently
  • The thermostat is cycling the system correctly
  • The temperature split between return and supply is within an acceptable range
  • No new noises or vibrations have appeared during operation

Our technician then documents system condition and any recommendations for the owner, such as:

  • Filter change schedule for the tenants
  • Potential future upgrades (like smart thermostats or improved filtration)
  • Any parts showing early signs of wear that we should monitor

All of this goes into the service history for the home so that future visits build on what we already know about the equipment.

Why This Type of Maintenance Visit Matters

Premium maintenance may sound like a nice extra, but in reality, it solves a lot of very real problems for homeowners and landlords in San Antonio, FL and the rest of Pasco County.

1. Fewer Emergency Breakdowns

Many no-cool calls we see in the summer could have been prevented by simple maintenance: a clogged drain line, a neglected filter, or an overworked outdoor unit. By catching these issues on a routine visit under a plan like this, you reduce the chance of your tenants calling in a panic on a weekend or in the middle of a heat wave.

2. Lower Energy Bills

A clean, well-maintained system doesn’t have to work as hard to keep the home at the set temperature. That can mean lower electric bills for your tenants, which often translates into happier, longer-term occupants and fewer complaints.

3. Longer System Life

HVAC systems are a major investment. Routine tune-ups and maintenance, such as those offered through our AC maintenance services and AC tune-up visits, help extend the life of your equipment by reducing wear and tear. That’s especially important in a rental, where the system may see more hours of run time every day.

4. Better Documentation for Remote Owners

Because this owner doesn’t live in Tampa Bay or San Antonio, FL, they rely on honest feedback and clear documentation. With each Premium Home Therapy Plan visit, we:

  • Record what we checked and cleaned
  • Note any parts that may need future attention
  • Provide feedback that can be shared with property managers or tenants

That way, even from a distance, the owner knows their investment is being taken care of professionally.

What Could Happen Without Regular Maintenance?

Skipping routine maintenance might not cause immediate failure, but over time it almost always leads to problems like:

  • Frozen coils from restricted airflow due to dirty filters or coils
  • Water leaks from clogged condensate lines or overflowing drain pans
  • Compressor damage from overheated or overworked outdoor units
  • Uneven temperatures and hot spots in different rooms
  • Higher utility bills as the system struggles to keep up

In a rental home, those issues can quickly turn into frustrated tenants, emergency repair costs, and potential property damage. A Premium Home Therapy Plan visit is about preventing those headaches before they show up.

Tips to Keep Your AC Running Smoothly in San Antonio, FL

Whether you’re a homeowner or a landlord with rental properties in San Antonio, FL 33576, here are a few simple steps that make a big difference between plan visits:

  • Change or clean filters regularly: Most homes need a filter change every 1–3 months, depending on filter type, pets, and occupancy.
  • Keep vents unblocked: Make sure furniture, rugs, or boxes aren’t covering supply or return vents.
  • Keep 2–3 feet clear around the outdoor unit: Trim plants, remove leaves, and avoid stacking items around the condenser.
  • Watch for water: If you see water near your indoor unit or hear dripping where you haven’t before, call for service.
  • Listen for changes: New noises, rattles, or grinding sounds should always be checked out.

If you’re curious about how often to schedule maintenance or how our plans work compared to one-time tune-ups, we’ve put together more information in our article on changing or adjusting your AC maintenance plan.

Why Choose Home Therapist for HVAC Maintenance in San Antonio, FL?

San Antonio, FL may be a smaller community compared to Tampa, but the weather is just as demanding on HVAC systems. Located in Pasco County, this area experiences the same long cooling season, heavy humidity, and frequent storms that wear down equipment.

Homeowners and landlords in this area choose our team because we:

  • Specialize in Florida homes: We understand the local climate and typical system issues around Tampa Bay and Pasco County.
  • Offer transparent service: We clearly explain what we’re doing, why it matters, and what we find.
  • Work well with tenants: We’re respectful, clean, and focused on minimizing disruption in the home.
  • Provide full-service support: From AC repairs, installs, and maintenance to plumbing services, we’re equipped to support your home as a whole.

If you’re managing a property remotely, you need a partner you can trust to look after your HVAC system, communicate clearly, and step in quickly if tenants report a problem. That’s exactly what our Premium Home Therapy Plan is designed to do.

Serving Owners and Tenants Across the Tampa Bay Area

Although this particular visit was in San Antonio, FL 33576, our team serves a wide part of the Tampa Bay region. Many of our clients own multiple properties in nearby communities such as Wesley Chapel, Zephyrhills, and other parts of Pasco County. They appreciate having one company to call for both HVAC and plumbing support, with consistent standards and familiar technicians.

Our goal during every visit is simple: protect the comfort and safety of the people living in the home, and protect the investment of the person who owns it. Whether you’re down the street or in another city entirely, we want you to feel confident that your home is in good hands. #HomeTherapist #TheTherapyYourHomeNeeds

Thinking About a Maintenance Plan for Your Home in San Antonio, FL?

If you own a home or rental property in San Antonio, FL or the surrounding Tampa Bay area, a maintenance plan can be one of the easiest ways to avoid surprise breakdowns and big repair bills. Our Premium Home Therapy Plan is designed to keep your system clean, efficient, and ready for Florida’s heat.

To learn more about our maintenance options, visit our Therapy Maintenance Plans page or explore our AC maintenance services in the Tampa area. You can also check out our other case studies, like our AC cleaning and maintenance project in Riverview, FL, to see how ongoing maintenance helps homeowners across the region.

Need HVAC Help in San Antonio, FL? Call Home Therapist

Whether you’re a local homeowner or a landlord managing a rental property from out of town, our team is here to help with reliable HVAC and plumbing service in San Antonio, FL and throughout Tampa Bay.

If it’s been more than a year since your last AC maintenance visit, or if you’re interested in the peace of mind that comes with a Premium Home Therapy Plan, reach out to us. Call Home Therapist or visit our website to schedule your next appointment and give your home the therapy it deserves.

For this visit, our team headed out to a rental home in San Antonio, FL 33576 for a Premium Home Therapy Plan maintenance appointment. The property owner doesn’t live nearby and relies on us to keep the home’s HVAC system running smoothly for their tenants. Regular maintenance is especially important in Florida’s heat, where a surprise breakdown can quickly turn into a major comfort issue for everyone living there.

In this case study, we’ll walk through what a Premium Home Therapy Plan visit looks like, how we take care of rental properties for out-of-town owners, and why consistent maintenance is one of the best investments you can make in your HVAC system in San Antonio, FL and the greater Tampa Bay area.

Customer Problem: What Was Happening at the Home

The owner of this San Antonio, FL home enrolled the property in our Premium Home Therapy Plan. According to the notes, this was the first time we visited this specific location, even though the owner already trusts our team for other properties. They don’t live in Tampa or in San Antonio, but they rent this home out and needed a dependable company to:

  • Keep the air conditioning system clean and efficient for their tenants
  • Catch small issues before they turn into major repairs
  • Provide clear communication and documentation after each visit

Florida rentals see a lot of use from day-to-day living, and AC systems often run almost nonstop during the warmer months. In a place like San Antonio, Florida, where humidity and heat are a constant factor, skipping maintenance means:

  • Higher electric bills for tenants
  • Increased wear and tear on equipment
  • More frequent breakdowns and emergency calls
  • Shorter system life span

The owner wanted peace of mind: a trusted team visiting the property on schedule, taking photos, documenting system condition, and letting them know if anything needed attention.

What Is the Premium Home Therapy Plan?

Our Premium Home Therapy Plan is a step up from a basic tune-up. It’s a structured maintenance plan that includes:

  • Regularly scheduled AC maintenance visits
  • Thorough cleaning of key components
  • System performance checks and safety checks
  • Priority service and plan-specific benefits

If you’d like to see how our plans are set up, you can learn more on our Therapy Maintenance Plans page. For homeowners and landlords in Pasco County and the Tampa Bay area, this kind of plan helps keep both comfort and budget under control.

Our Inspection & Diagnosis Process at This San Antonio, FL Home

For this first-time visit under the Premium Home Therapy Plan, our technician Alejandro started by introducing himself to the tenants, explaining what he would be doing, and confirming any concerns they might have noticed. Even when there isn’t an obvious problem, we still ask questions like:

  • Has the AC been keeping up on the hottest days?
  • Any unusual noises, smells, or water around the indoor unit?
  • Any rooms that feel warmer or more humid than others?

From there, we follow a structured inspection process that typically includes:

1. Thermostat and Basic Operation Check

We start at the thermostat and the basic operation of the system:

  • Confirming the thermostat is set up correctly and responding
  • Verifying the system goes into cooling mode properly
  • Listening for any unusual startup noises from the air handler or condenser

2. Indoor Unit (Air Handler) Inspection

At the indoor section of the system, we typically check:

  • Condition and cleanliness of the air filter
  • Evaporator coil cleanliness and access
  • Blower motor operation and cleanliness
  • Drain pan and condensate line for clogs or signs of overflow
  • Electrical connections and safety components

In rental homes, we often see filters that go too long between changes, simply because different tenants may not be sure what schedule to follow. As part of a Premium Home Therapy Plan visit, we always document the filter condition and, when possible, recommend or perform a filter change to protect the system.

3. Outdoor Condenser Inspection

Outside, Alejandro inspected the condenser unit, which is exposed to weather, landscaping debris, and Florida’s humidity. During a typical plan visit in San Antonio, FL, we will:

  • Inspect the condenser coil for dirt, grass, and debris
  • Check the fan motor and blade for proper operation
  • Verify refrigerant lines are properly insulated
  • Check electrical components, contactor, and capacitor condition
  • Listen for any unusual vibrations or buzzing

Keeping this area clear helps the system release heat efficiently. A dirty or blocked condenser coil can easily increase energy use and reduce cooling capacity, which is the last thing a tenant wants to deal with during the summer.

4. System Performance and Safety Checks

Finally, we look at how the whole system is performing, not just individual parts. On a Premium Home Therapy Plan visit, this often includes:

  • Measuring temperature differences between supply and return air
  • Checking for proper airflow at multiple vents
  • Looking for visible duct leaks around accessible areas
  • Verifying the system is draining condensation properly
  • Checking any accessible safety switches and wiring

For landlords and property managers, our goal is to reduce surprise calls by catching developing issues at this stage, when they’re often easier and more affordable to handle.

Step-by-Step: What We Did During This Premium Plan Visit

On this San Antonio, FL 33576 visit, Alejandro followed our Premium Home Therapy Plan checklist from start to finish. Here’s a homeowner-friendly breakdown of what that typically involves:

Step 1: Communicate with Tenants and Confirm Access

Because the owner doesn’t live locally, tenant cooperation is important. Our team coordinated the visit time, arrived on schedule, and clearly explained what work would be done, about how long it would take, and whether the system would need to be off briefly during certain checks.

Step 2: Protect the Home and Work Cleanly

We treat a rental home the same way we treat an owner-occupied one. That means wearing shoe covers where needed, laying down drop cloths if we’re working in tight spaces, and cleaning up after ourselves so tenants don’t feel like they’ve had a construction crew in the house.

Step 3: Thorough Indoor System Maintenance

At the air handler, our Premium Home Therapy Plan work typically includes:

  • Inspecting and documenting filter condition, with replacement if needed and approved
  • Cleaning or gently brushing accessible areas around the evaporator coil (as appropriate)
  • Checking the blower wheel for dust buildup
  • Inspecting the drain pan and clearing the condensate drain line if we see slow drainage
  • Visually checking electrical connections for signs of overheating or corrosion

In humid climates like San Antonio and the wider Tampa Bay region, drain issues are especially common. A clogged condensate line can cause water to back up and leak, potentially damaging ceilings, floors, or air handler closets. Cleaning and treating that line during maintenance is one of the simplest ways to prevent an insurance headache later.

Step 4: Outdoor Condenser Cleaning and Checks

Outside, Alejandro checked the refrigerant lines and insulation, cleared any loose debris from around the unit, and inspected the condenser coil. When coils are dirty, we recommend coil cleaning to restore performance and help lower energy use.

We also verify that the unit is mounted stable and level, wiring is properly secured, and there are no obvious signs of animal or insect damage inside the panel area.

Step 5: System Testing and Final Readings

Once cleaning and checks are complete, we restart the system and confirm:

  • Cool air is coming from the vents consistently
  • The thermostat is cycling the system correctly
  • The temperature split between return and supply is within an acceptable range
  • No new noises or vibrations have appeared during operation

Our technician then documents system condition and any recommendations for the owner, such as:

  • Filter change schedule for the tenants
  • Potential future upgrades (like smart thermostats or improved filtration)
  • Any parts showing early signs of wear that we should monitor

All of this goes into the service history for the home so that future visits build on what we already know about the equipment.

Why This Type of Maintenance Visit Matters

Premium maintenance may sound like a nice extra, but in reality, it solves a lot of very real problems for homeowners and landlords in San Antonio, FL and the rest of Pasco County.

1. Fewer Emergency Breakdowns

Many no-cool calls we see in the summer could have been prevented by simple maintenance: a clogged drain line, a neglected filter, or an overworked outdoor unit. By catching these issues on a routine visit under a plan like this, you reduce the chance of your tenants calling in a panic on a weekend or in the middle of a heat wave.

2. Lower Energy Bills

A clean, well-maintained system doesn’t have to work as hard to keep the home at the set temperature. That can mean lower electric bills for your tenants, which often translates into happier, longer-term occupants and fewer complaints.

3. Longer System Life

HVAC systems are a major investment. Routine tune-ups and maintenance, such as those offered through our AC maintenance services and AC tune-up visits, help extend the life of your equipment by reducing wear and tear. That’s especially important in a rental, where the system may see more hours of run time every day.

4. Better Documentation for Remote Owners

Because this owner doesn’t live in Tampa Bay or San Antonio, FL, they rely on honest feedback and clear documentation. With each Premium Home Therapy Plan visit, we:

  • Record what we checked and cleaned
  • Note any parts that may need future attention
  • Provide feedback that can be shared with property managers or tenants

That way, even from a distance, the owner knows their investment is being taken care of professionally.

What Could Happen Without Regular Maintenance?

Skipping routine maintenance might not cause immediate failure, but over time it almost always leads to problems like:

  • Frozen coils from restricted airflow due to dirty filters or coils
  • Water leaks from clogged condensate lines or overflowing drain pans
  • Compressor damage from overheated or overworked outdoor units
  • Uneven temperatures and hot spots in different rooms
  • Higher utility bills as the system struggles to keep up

In a rental home, those issues can quickly turn into frustrated tenants, emergency repair costs, and potential property damage. A Premium Home Therapy Plan visit is about preventing those headaches before they show up.

Tips to Keep Your AC Running Smoothly in San Antonio, FL

Whether you’re a homeowner or a landlord with rental properties in San Antonio, FL 33576, here are a few simple steps that make a big difference between plan visits:

  • Change or clean filters regularly: Most homes need a filter change every 1–3 months, depending on filter type, pets, and occupancy.
  • Keep vents unblocked: Make sure furniture, rugs, or boxes aren’t covering supply or return vents.
  • Keep 2–3 feet clear around the outdoor unit: Trim plants, remove leaves, and avoid stacking items around the condenser.
  • Watch for water: If you see water near your indoor unit or hear dripping where you haven’t before, call for service.
  • Listen for changes: New noises, rattles, or grinding sounds should always be checked out.

If you’re curious about how often to schedule maintenance or how our plans work compared to one-time tune-ups, we’ve put together more information in our article on changing or adjusting your AC maintenance plan.

Why Choose Home Therapist for HVAC Maintenance in San Antonio, FL?

San Antonio, FL may be a smaller community compared to Tampa, but the weather is just as demanding on HVAC systems. Located in Pasco County, this area experiences the same long cooling season, heavy humidity, and frequent storms that wear down equipment.

Homeowners and landlords in this area choose our team because we:

  • Specialize in Florida homes: We understand the local climate and typical system issues around Tampa Bay and Pasco County.
  • Offer transparent service: We clearly explain what we’re doing, why it matters, and what we find.
  • Work well with tenants: We’re respectful, clean, and focused on minimizing disruption in the home.
  • Provide full-service support: From AC repairs, installs, and maintenance to plumbing services, we’re equipped to support your home as a whole.

If you’re managing a property remotely, you need a partner you can trust to look after your HVAC system, communicate clearly, and step in quickly if tenants report a problem. That’s exactly what our Premium Home Therapy Plan is designed to do.

Serving Owners and Tenants Across the Tampa Bay Area

Although this particular visit was in San Antonio, FL 33576, our team serves a wide part of the Tampa Bay region. Many of our clients own multiple properties in nearby communities such as Wesley Chapel, Zephyrhills, and other parts of Pasco County. They appreciate having one company to call for both HVAC and plumbing support, with consistent standards and familiar technicians.

Our goal during every visit is simple: protect the comfort and safety of the people living in the home, and protect the investment of the person who owns it. Whether you’re down the street or in another city entirely, we want you to feel confident that your home is in good hands. #HomeTherapist #TheTherapyYourHomeNeeds

Thinking About a Maintenance Plan for Your Home in San Antonio, FL?

If you own a home or rental property in San Antonio, FL or the surrounding Tampa Bay area, a maintenance plan can be one of the easiest ways to avoid surprise breakdowns and big repair bills. Our Premium Home Therapy Plan is designed to keep your system clean, efficient, and ready for Florida’s heat.

To learn more about our maintenance options, visit our Therapy Maintenance Plans page or explore our AC maintenance services in the Tampa area. You can also check out our other case studies, like our AC cleaning and maintenance project in Riverview, FL, to see how ongoing maintenance helps homeowners across the region.

Need HVAC Help in San Antonio, FL? Call Home Therapist

Whether you’re a local homeowner or a landlord managing a rental property from out of town, our team is here to help with reliable HVAC and plumbing service in San Antonio, FL and throughout Tampa Bay.

If it’s been more than a year since your last AC maintenance visit, or if you’re interested in the peace of mind that comes with a Premium Home Therapy Plan, reach out to us. Call Home Therapist or visit our website to schedule your next appointment and give your home the therapy it deserves.

Outdoor Hose Bib Replacement at a Home in Ruskin, FL 33570

When an outdoor faucet starts leaking or barely delivers water, it can turn simple chores like watering the lawn or washing the car into a frustrating mess. At a home in Ruskin, FL 33570, our plumbing team at Home Therapist Cooling, Heating, and Plumbing was called out to take care of a worn-out hose bib (also called a garden faucet). The homeowner needed a reliable, long-term solution, not just another temporary patch.

In this case study, we’ll walk through what was happening at the home, how we approached the hose bib replacement, and what homeowners in Ruskin and throughout the Tampa Bay area should know about outdoor faucet repairs and maintenance.

Customer Problem: What Was Happening at the Home

The client in Ruskin reached out because their outdoor faucet was no longer working the way it should. Although the internal notes simply confirm that the estimate was resent and approved, in our experience there are a few common reasons homeowners call us about hose bibs:

  • Constant dripping from the spout, even when the handle is fully closed
  • Water spraying from behind the faucet, at the wall connection
  • Difficulty turning the handle on or off
  • Very low water flow from the garden hose
  • Signs of water staining, mold, or soft spots on the wall near the faucet

Any of these symptoms can point to a worn-out hose bib, a failed washer, corrosion inside the valve, or a problem with the pipe feeding the faucet. In Florida’s humid, coastal environment, outdoor fixtures are constantly exposed to sun, rain, and mineral-rich water, so it’s normal for them to wear out over time.

Because the client approved the repair estimate, we scheduled our plumber to perform a Level 1 hose bib replacement. This type of repair focuses on safely removing the old outdoor faucet and installing a new, properly sealed unit.

Our Hose Bib Inspection & Diagnosis Process

When our technician arrived at the Ruskin home, the first step was a quick but thorough inspection. For a hose bib replacement, we typically look at several key areas:

  • Condition of the existing hose bib: Is it visibly corroded, cracked, or loose?
  • Leak source: Is the leak coming from the spout, the handle, or the wall connection?
  • Wall and structure around the faucet: Is it stucco, block, brick, siding, or another material?
  • Water shutoff options: Is there a local shutoff for that line, or do we need to use the main shutoff for the home?
  • Pipe material and routing: Copper, CPVC, PEX, or galvanized, and how it’s tied into the home’s plumbing system.

These details help us determine whether a straightforward hose bib swap will be enough, or whether we’ll need to open a small access hole in the wall or block to reach and replace the connection behind the faucet. As we explain to all our clients up front, sometimes the only way to do a safe, lasting replacement is to get to the connection behind the wall. In that case, we handle the plumbing work and leave any concrete, stucco, or wall patching to the appropriate trade afterward.

In Ruskin, especially in communities near the water and around Little Manatee River, we see a lot of block and stucco exteriors. Outdoor plumbing penetrations in these walls must be handled carefully to prevent hidden leaks that could damage the structure over time.

Step-by-Step: How We Replaced the Hose Bib

Every home is a little different, but the core steps of a hose bib replacement in Ruskin, FL look something like this:

1. Shutting Off the Water Safely

We start by shutting off water to the line that supplies the outdoor faucet. Depending on the plumbing layout, this might be:

  • A dedicated shutoff valve near the hose bib
  • A nearby branch shutoff in a utility room or garage
  • The main water shutoff for the home if no local isolation valve exists

After closing the appropriate valve, we open the hose bib and sometimes a nearby indoor faucet to relieve pressure and drain any remaining water in the line.

2. Evaluating the Connection Behind the Wall

Once the water is off, we gently remove the existing hose bib. This tells us a lot about what’s going on behind the wall:

  • We check the threads and connection point for corrosion or damage.
  • We confirm whether the faucet screws into an elbow or is soldered/bonded to the pipe.
  • We look for movement in the pipe, which could indicate a loose or unsupported connection inside the wall.

If the connection is accessible and in good condition, we can often replace the hose bib directly without opening the wall. However, if the connection is badly corroded, cracked, or recessed too far into the block or stucco, we sometimes need to create a small access opening to safely replace the fitting and ensure there are no hidden leaks.

As our estimate description clearly states, when an access hole is required in block or concrete, we handle the plumbing portion only and do not patch the concrete or stucco afterward. This keeps pricing transparent and ensures the right trade (such as a mason or stucco specialist) can restore the wall’s finish to match the home.

3. Removing the Old Hose Bib

With everything exposed and safe, we remove the old hose bib using the appropriate tools. This might involve:

  • Unscrewing a threaded faucet from a female adapter
  • Cutting out a damaged section of copper or CPVC pipe
  • Cleaning old solder or adhesive from the connection

We take care to avoid twisting or stressing the pipe inside the wall, which could cause a new leak further up the line.

4. Installing the New Hose Bib or Garden Faucet

Next, we install a new, high-quality hose bib built to handle outdoor conditions. Depending on the setup, this can include:

  • Threading the new hose bib into a secure fitting with fresh thread sealant or tape
  • Using appropriate fittings for copper, CPVC, or PEX connections
  • Ensuring the faucet is properly supported and sits snugly against the wall
  • Adding a proper seal where the faucet meets the exterior surface to reduce the chance of water intrusion

Our goal is to give the homeowner a faucet that feels solid when you turn it, doesn’t wobble at the wall, and delivers reliable water flow for years of everyday use.

5. Testing the New Installation for Leaks

Once the new hose bib is in place, we carefully turn the water back on and test the system:

  • We check for leaks at the connection behind the wall (if accessible) and at the visible exterior joint.
  • We verify that the faucet shuts off properly without dripping.
  • We confirm that water flow and pressure to the garden hose meet expectations.

If everything looks good, we walk the homeowner through what we did and what to watch for in the future. Transparency and communication are a big part of how we do plumbing repairs in Ruskin and the greater Tampa Bay area.

Why a Professional Hose Bib Replacement Matters

It’s easy to underestimate an outdoor faucet. After all, it’s a simple fixture you use for watering plants or rinsing the driveway. But when a hose bib fails, it can lead to some expensive problems if it’s not handled correctly:

  • Hidden wall leaks: A slow leak inside a block or stucco wall can cause moisture intrusion, mold growth, and structural damage over time.
  • Higher water bills: Even a small drip at the hose bib can waste hundreds of gallons of water per month.
  • Foundation issues: Constant water pooling near the foundation can weaken soil and promote settling.
  • Attracting pests: Damp areas around the exterior wall can attract insects and other pests.

By addressing the worn or leaking hose bib properly—and inspecting the connection behind the wall when needed—we help protect both the plumbing system and the structure of the home.

For homeowners who want a more comprehensive look at their plumbing, we often recommend pairing repairs like this with a whole-home plumbing inspection. It’s a great way to catch small issues before they become big headaches.

What Could Have Happened If the Hose Bib Wasn’t Replaced?

Choosing to replace a failing outdoor faucet isn’t just about convenience; it’s about preventing future damage. If the homeowner in Ruskin had delayed this hose bib replacement, they might have eventually faced:

  • Progressive leaks that started small and gradually worsened over months or years.
  • Water-damaged stucco or siding, requiring more extensive exterior repairs.
  • Moisture inside the wall cavity, potentially leading to mold or mildew.
  • Rust or corrosion spreading to other nearby fittings in the plumbing system.

In the humid Gulf Coast climate, staying ahead of leaks and deteriorating fixtures is one of the best ways to keep your home in good shape. That’s why plumbing repair in Ruskin, FL is about more than just fixing what’s visibly broken—it’s about protecting the whole system.

Tips to Care for Outdoor Faucets in Ruskin, FL

Whether you’re right in Ruskin or elsewhere in the Tampa Bay area, a little attention to your hose bibs can go a long way. Here are some practical tips:

  • Check for drips regularly: After shutting the faucet off, wait a minute and see if it continues to drip. If it does, it may need service.
  • Look at the wall around the faucet: Stains, soft spots, or peeling paint near the faucet can be signs of a hidden leak.
  • Don’t over-tighten the handle: Cranking down as hard as you can can actually wear out the internal parts faster.
  • Use a quality hose and washer: If water sprays where the garden hose attaches, the issue might be the hose gasket, not the faucet.
  • Know where your shutoff is: Before an emergency happens, locate your home’s main water shutoff so you can respond quickly to any leak.
  • Schedule a periodic plumbing checkup: Consider a plumbing maintenance plan to keep an eye on fixtures, supply lines, and water heaters.

For homeowners who are unsure whether a problem is “big enough” to call a plumber, we always say: if water is going where it shouldn’t, or you’re losing sleep over it, it’s worth having a professional take a look.

Plumbing Repair Services for Ruskin and the Tampa Bay Area

Although this particular visit focused on a single hose bib replacement, our team provides a wide range of plumbing repair services in Hillsborough County, including Ruskin and the surrounding communities. That includes:

If you’re planning a larger plumbing project or just want to understand your options, our guide on how to get started with plumbing services is a helpful resource.

Living in Ruskin, FL: Why Plumbing Upkeep Matters

Ruskin, FL is a beautiful community along the eastern shore of Tampa Bay, known for its access to the water, proximity to parks like Little Manatee River State Park, and easy trips to attractions throughout Hillsborough County. You can learn more about the area on Ruskin’s Wikipedia page or explore the area map on Google Maps.

With our warm, humid climate and frequent storms, plumbing systems around Tampa Bay work a little harder than in some other parts of the country. That means:

  • Outdoor fixtures like hose bibs are exposed to sun, salt-tinged air, and heavy rain.
  • Soil movement and settling can put extra stress on buried plumbing lines.
  • Mineral content in the water can contribute to internal wear in faucets and valves.

Staying on top of minor issues—like a leaky hose bib—helps protect your home from bigger repairs down the road.

Why This Homeowner Chose Home Therapist

From the job notes, we know the homeowner reviewed and approved our estimate before we returned to complete the hose bib replacement. That’s important to us: we never want a client to feel surprised about what we’re doing or why.

Homeowners in Ruskin and throughout the Tampa Bay area often choose Home Therapist Cooling, Heating, and Plumbing because we:

  • Explain the problem in plain language instead of using confusing jargon.
  • Provide clear estimates before starting work, so you know what to expect.
  • Offer options when possible, whether it’s repair versus replacement or doing work in phases.
  • Respect your home by working cleanly and communicating about any access we need, such as opening a small section of block or wall.
  • Stand behind our workmanship and are available if you have questions after the job is done.

For many of our clients, it’s not just about fixing a leak—it’s about having a trusted team they can call whenever something in the home doesn’t feel right.

When to Call a Plumber for a Hose Bib Issue

If you’re in Ruskin, FL or elsewhere in the Tampa Bay region and you notice any of the following, it’s a good time to give us a call:

  • A hose bib that constantly drips or won’t shut off fully
  • Water leaking from behind the faucet where it meets the wall
  • A sudden drop in water flow at one outdoor faucet only
  • Visible rust, green corrosion, or cracking around the faucet body
  • Unexplained dampness or staining on the interior wall opposite the hose bib

Sometimes the solution is as simple as replacing an internal washer. Other times, like at this Ruskin home, a full hose bib replacement is the safest path. Our job is to inspect, explain, and help you make the decision that fits your home and your comfort level.

Need Hose Bib Replacement or Plumbing Repair in Ruskin, FL?

Outdoor faucets may be small, but they play a big role in day-to-day life, from keeping your landscaping healthy to helping you enjoy time outside with family. When something’s not right, you deserve a straightforward answer and a lasting fix.

If you’re dealing with a leaking, loose, or unreliable hose bib in Ruskin, FL 33570—or any plumbing issue in your Home—our team at Home Therapist Cooling, Heating, and Plumbing is here to help. We serve homeowners across the Tampa Bay area with honest recommendations and professional repairs.

Call Home Therapist or visit our website to schedule service, request an estimate, or learn more about our plumbing repair and maintenance options. We’ll walk you through what’s going on, what your options are, and what we recommend based on the condition of your system. #HomeTherapist #TheTherapyYourHomeNeeds

When an outdoor faucet starts leaking or barely delivers water, it can turn simple chores like watering the lawn or washing the car into a frustrating mess. At a home in Ruskin, FL 33570, our plumbing team at Home Therapist Cooling, Heating, and Plumbing was called out to take care of a worn-out hose bib (also called a garden faucet). The homeowner needed a reliable, long-term solution, not just another temporary patch.

In this case study, we’ll walk through what was happening at the home, how we approached the hose bib replacement, and what homeowners in Ruskin and throughout the Tampa Bay area should know about outdoor faucet repairs and maintenance.

Customer Problem: What Was Happening at the Home

The client in Ruskin reached out because their outdoor faucet was no longer working the way it should. Although the internal notes simply confirm that the estimate was resent and approved, in our experience there are a few common reasons homeowners call us about hose bibs:

  • Constant dripping from the spout, even when the handle is fully closed
  • Water spraying from behind the faucet, at the wall connection
  • Difficulty turning the handle on or off
  • Very low water flow from the garden hose
  • Signs of water staining, mold, or soft spots on the wall near the faucet

Any of these symptoms can point to a worn-out hose bib, a failed washer, corrosion inside the valve, or a problem with the pipe feeding the faucet. In Florida’s humid, coastal environment, outdoor fixtures are constantly exposed to sun, rain, and mineral-rich water, so it’s normal for them to wear out over time.

Because the client approved the repair estimate, we scheduled our plumber to perform a Level 1 hose bib replacement. This type of repair focuses on safely removing the old outdoor faucet and installing a new, properly sealed unit.

Our Hose Bib Inspection & Diagnosis Process

When our technician arrived at the Ruskin home, the first step was a quick but thorough inspection. For a hose bib replacement, we typically look at several key areas:

  • Condition of the existing hose bib: Is it visibly corroded, cracked, or loose?
  • Leak source: Is the leak coming from the spout, the handle, or the wall connection?
  • Wall and structure around the faucet: Is it stucco, block, brick, siding, or another material?
  • Water shutoff options: Is there a local shutoff for that line, or do we need to use the main shutoff for the home?
  • Pipe material and routing: Copper, CPVC, PEX, or galvanized, and how it’s tied into the home’s plumbing system.

These details help us determine whether a straightforward hose bib swap will be enough, or whether we’ll need to open a small access hole in the wall or block to reach and replace the connection behind the faucet. As we explain to all our clients up front, sometimes the only way to do a safe, lasting replacement is to get to the connection behind the wall. In that case, we handle the plumbing work and leave any concrete, stucco, or wall patching to the appropriate trade afterward.

In Ruskin, especially in communities near the water and around Little Manatee River, we see a lot of block and stucco exteriors. Outdoor plumbing penetrations in these walls must be handled carefully to prevent hidden leaks that could damage the structure over time.

Step-by-Step: How We Replaced the Hose Bib

Every home is a little different, but the core steps of a hose bib replacement in Ruskin, FL look something like this:

1. Shutting Off the Water Safely

We start by shutting off water to the line that supplies the outdoor faucet. Depending on the plumbing layout, this might be:

  • A dedicated shutoff valve near the hose bib
  • A nearby branch shutoff in a utility room or garage
  • The main water shutoff for the home if no local isolation valve exists

After closing the appropriate valve, we open the hose bib and sometimes a nearby indoor faucet to relieve pressure and drain any remaining water in the line.

2. Evaluating the Connection Behind the Wall

Once the water is off, we gently remove the existing hose bib. This tells us a lot about what’s going on behind the wall:

  • We check the threads and connection point for corrosion or damage.
  • We confirm whether the faucet screws into an elbow or is soldered/bonded to the pipe.
  • We look for movement in the pipe, which could indicate a loose or unsupported connection inside the wall.

If the connection is accessible and in good condition, we can often replace the hose bib directly without opening the wall. However, if the connection is badly corroded, cracked, or recessed too far into the block or stucco, we sometimes need to create a small access opening to safely replace the fitting and ensure there are no hidden leaks.

As our estimate description clearly states, when an access hole is required in block or concrete, we handle the plumbing portion only and do not patch the concrete or stucco afterward. This keeps pricing transparent and ensures the right trade (such as a mason or stucco specialist) can restore the wall’s finish to match the home.

3. Removing the Old Hose Bib

With everything exposed and safe, we remove the old hose bib using the appropriate tools. This might involve:

  • Unscrewing a threaded faucet from a female adapter
  • Cutting out a damaged section of copper or CPVC pipe
  • Cleaning old solder or adhesive from the connection

We take care to avoid twisting or stressing the pipe inside the wall, which could cause a new leak further up the line.

4. Installing the New Hose Bib or Garden Faucet

Next, we install a new, high-quality hose bib built to handle outdoor conditions. Depending on the setup, this can include:

  • Threading the new hose bib into a secure fitting with fresh thread sealant or tape
  • Using appropriate fittings for copper, CPVC, or PEX connections
  • Ensuring the faucet is properly supported and sits snugly against the wall
  • Adding a proper seal where the faucet meets the exterior surface to reduce the chance of water intrusion

Our goal is to give the homeowner a faucet that feels solid when you turn it, doesn’t wobble at the wall, and delivers reliable water flow for years of everyday use.

5. Testing the New Installation for Leaks

Once the new hose bib is in place, we carefully turn the water back on and test the system:

  • We check for leaks at the connection behind the wall (if accessible) and at the visible exterior joint.
  • We verify that the faucet shuts off properly without dripping.
  • We confirm that water flow and pressure to the garden hose meet expectations.

If everything looks good, we walk the homeowner through what we did and what to watch for in the future. Transparency and communication are a big part of how we do plumbing repairs in Ruskin and the greater Tampa Bay area.

Why a Professional Hose Bib Replacement Matters

It’s easy to underestimate an outdoor faucet. After all, it’s a simple fixture you use for watering plants or rinsing the driveway. But when a hose bib fails, it can lead to some expensive problems if it’s not handled correctly:

  • Hidden wall leaks: A slow leak inside a block or stucco wall can cause moisture intrusion, mold growth, and structural damage over time.
  • Higher water bills: Even a small drip at the hose bib can waste hundreds of gallons of water per month.
  • Foundation issues: Constant water pooling near the foundation can weaken soil and promote settling.
  • Attracting pests: Damp areas around the exterior wall can attract insects and other pests.

By addressing the worn or leaking hose bib properly—and inspecting the connection behind the wall when needed—we help protect both the plumbing system and the structure of the home.

For homeowners who want a more comprehensive look at their plumbing, we often recommend pairing repairs like this with a whole-home plumbing inspection. It’s a great way to catch small issues before they become big headaches.

What Could Have Happened If the Hose Bib Wasn’t Replaced?

Choosing to replace a failing outdoor faucet isn’t just about convenience; it’s about preventing future damage. If the homeowner in Ruskin had delayed this hose bib replacement, they might have eventually faced:

  • Progressive leaks that started small and gradually worsened over months or years.
  • Water-damaged stucco or siding, requiring more extensive exterior repairs.
  • Moisture inside the wall cavity, potentially leading to mold or mildew.
  • Rust or corrosion spreading to other nearby fittings in the plumbing system.

In the humid Gulf Coast climate, staying ahead of leaks and deteriorating fixtures is one of the best ways to keep your home in good shape. That’s why plumbing repair in Ruskin, FL is about more than just fixing what’s visibly broken—it’s about protecting the whole system.

Tips to Care for Outdoor Faucets in Ruskin, FL

Whether you’re right in Ruskin or elsewhere in the Tampa Bay area, a little attention to your hose bibs can go a long way. Here are some practical tips:

  • Check for drips regularly: After shutting the faucet off, wait a minute and see if it continues to drip. If it does, it may need service.
  • Look at the wall around the faucet: Stains, soft spots, or peeling paint near the faucet can be signs of a hidden leak.
  • Don’t over-tighten the handle: Cranking down as hard as you can can actually wear out the internal parts faster.
  • Use a quality hose and washer: If water sprays where the garden hose attaches, the issue might be the hose gasket, not the faucet.
  • Know where your shutoff is: Before an emergency happens, locate your home’s main water shutoff so you can respond quickly to any leak.
  • Schedule a periodic plumbing checkup: Consider a plumbing maintenance plan to keep an eye on fixtures, supply lines, and water heaters.

For homeowners who are unsure whether a problem is “big enough” to call a plumber, we always say: if water is going where it shouldn’t, or you’re losing sleep over it, it’s worth having a professional take a look.

Plumbing Repair Services for Ruskin and the Tampa Bay Area

Although this particular visit focused on a single hose bib replacement, our team provides a wide range of plumbing repair services in Hillsborough County, including Ruskin and the surrounding communities. That includes:

If you’re planning a larger plumbing project or just want to understand your options, our guide on how to get started with plumbing services is a helpful resource.

Living in Ruskin, FL: Why Plumbing Upkeep Matters

Ruskin, FL is a beautiful community along the eastern shore of Tampa Bay, known for its access to the water, proximity to parks like Little Manatee River State Park, and easy trips to attractions throughout Hillsborough County. You can learn more about the area on Ruskin’s Wikipedia page or explore the area map on Google Maps.

With our warm, humid climate and frequent storms, plumbing systems around Tampa Bay work a little harder than in some other parts of the country. That means:

  • Outdoor fixtures like hose bibs are exposed to sun, salt-tinged air, and heavy rain.
  • Soil movement and settling can put extra stress on buried plumbing lines.
  • Mineral content in the water can contribute to internal wear in faucets and valves.

Staying on top of minor issues—like a leaky hose bib—helps protect your home from bigger repairs down the road.

Why This Homeowner Chose Home Therapist

From the job notes, we know the homeowner reviewed and approved our estimate before we returned to complete the hose bib replacement. That’s important to us: we never want a client to feel surprised about what we’re doing or why.

Homeowners in Ruskin and throughout the Tampa Bay area often choose Home Therapist Cooling, Heating, and Plumbing because we:

  • Explain the problem in plain language instead of using confusing jargon.
  • Provide clear estimates before starting work, so you know what to expect.
  • Offer options when possible, whether it’s repair versus replacement or doing work in phases.
  • Respect your home by working cleanly and communicating about any access we need, such as opening a small section of block or wall.
  • Stand behind our workmanship and are available if you have questions after the job is done.

For many of our clients, it’s not just about fixing a leak—it’s about having a trusted team they can call whenever something in the home doesn’t feel right.

When to Call a Plumber for a Hose Bib Issue

If you’re in Ruskin, FL or elsewhere in the Tampa Bay region and you notice any of the following, it’s a good time to give us a call:

  • A hose bib that constantly drips or won’t shut off fully
  • Water leaking from behind the faucet where it meets the wall
  • A sudden drop in water flow at one outdoor faucet only
  • Visible rust, green corrosion, or cracking around the faucet body
  • Unexplained dampness or staining on the interior wall opposite the hose bib

Sometimes the solution is as simple as replacing an internal washer. Other times, like at this Ruskin home, a full hose bib replacement is the safest path. Our job is to inspect, explain, and help you make the decision that fits your home and your comfort level.

Need Hose Bib Replacement or Plumbing Repair in Ruskin, FL?

Outdoor faucets may be small, but they play a big role in day-to-day life, from keeping your landscaping healthy to helping you enjoy time outside with family. When something’s not right, you deserve a straightforward answer and a lasting fix.

If you’re dealing with a leaking, loose, or unreliable hose bib in Ruskin, FL 33570—or any plumbing issue in your home—our team at Home Therapist Cooling, Heating, and Plumbing is here to help. We serve homeowners across the Tampa Bay area with honest recommendations and professional repairs.

Call Home Therapist or visit our website to schedule service, request an estimate, or learn more about our plumbing repair and maintenance options. We’ll walk you through what’s going on, what your options are, and what we recommend based on the condition of your system. #HomeTherapist #TheTherapyYourHomeNeeds

Outdoor Hose Bib Replacement at a Home in Ruskin, FL 33570

Outdoor plumbing leaks can sneak up on homeowners, especially around hose bibs and garden faucets that get heavy use in the Florida heat. At a home in Ruskin, FL 33570, our team was called out to handle a hose bib replacement that needed a careful, professional approach. The homeowner wanted the leak resolved correctly and safely, and to understand what might be involved if the line behind the wall had issues.

In this article, we’ll walk through what was going on at this Ruskin home, how our technician Adalberto diagnosed the problem, and the steps we took to replace the outdoor hose bib. We’ll also share some practical tips for caring for outdoor faucets in the Ruskin area, and when it’s time to call in a licensed plumber.

Customer Problem: What Was Happening at the Home

Our client in Ruskin reached out after dealing with problems at their outdoor hose bib (also known as a garden faucet or spigot). They had received a prior report and, after reviewing it, decided to move forward with the recommended repair. Our office resent the estimate, the client approved it, and we scheduled a visit with our technician, Adalberto.

While every home is a little different, outdoor hose bib issues in Ruskin, FL often look like one or more of the following:

  • Water dripping from the spout even when the handle is fully closed
  • Moisture or active leaks around the base of the faucet where it meets the wall
  • Water stains, soft spots, or mold inside the wall behind the hose bib
  • Low pressure or inconsistent flow when using the garden hose

Left alone, a small drip can become costly. Outdoor leaks can drive up your water bill, damage siding or stucco, and in some cases allow water to travel into the wall cavity where it can cause rot, structural damage, or mold growth.

Our Inspection & Diagnosis Process

When we arrive for any plumbing job in Ruskin, our goal is not just to swap parts, but to understand the full picture. For this visit, Adalberto started with a focused inspection of the hose bib area and the plumbing serving it.

Step 1: Listening to the Homeowner

We always begin by asking the homeowner to describe what they’ve seen and for how long it’s been happening. That helps us understand whether this is a long-term slow leak, a recent issue, or part of a bigger pattern with the home’s plumbing.

In this case, the homeowner already had a report and estimate, so they were familiar with the recommendation for a hose bib replacement. They mainly wanted reassurance that the work would be done correctly and to know whether any wall opening would be needed.

Step 2: Visual & Functional Check

Next, we visually checked the hose bib and surrounding wall, looking for:

  • Visible corrosion or mineral buildup on the faucet
  • Cracks or movement where the spigot meets the wall
  • Signs of past patching or DIY repairs
  • Any dampness on the interior side of the wall (if accessible)

We then operated the faucet several times, checking for leaks while water was flowing and again after shutting it off. This helps determine whether the leak is primarily in the valve mechanism, in the connection behind the wall, or further back in the supply line.

Step 3: Evaluating the Connection Behind the Wall

A key detail with hose bib replacements is what’s happening where the faucet connects to the home’s water piping. That connection is usually inside the wall or block. If the threaded connection or soldered joint is compromised, we may need access from the outside or inside to properly repair it.

Our job description for this project mentions an important point we always share with customers:

“On some occasions we need to open a hole in the wall or block to be able to replace the hose bib. We do not patch or repair concrete when done.”

That’s not unique to this home—it’s a standard consideration with hose bibs that are tightly set into masonry or block. At this Ruskin home, we carefully evaluated how the current faucet was installed and determined the safest way to remove and replace it.

Step-by-Step: How We Replaced the Hose Bib

With the problem confirmed and the homeowner on the same page about what might be involved, we moved forward with the Level 1 hose bib replacement. Here’s how a typical replacement unfolds.

1. Shutting Off and Securing the Water Supply

Before touching any piping, we shut off the water supply feeding that hose bib. Depending on how the home is plumbed, that can mean:

  • A local shutoff valve near the hose bib’s interior connection, or
  • The main water shutoff for the home, if a dedicated valve isn’t available.

Once shut off, we open the hose bib to relieve pressure and drain any remaining water from the line. This helps minimize water release when we disassemble the connection.

2. Removing the Old Hose Bib

Removing the old hose bib can be straightforward or challenging, depending on how it was installed and how long it has been in place. In many Florida homes, hose bibs are threaded into a fitting that’s anchored inside a block or framed wall.

We carefully loosened the existing faucet, taking care not to twist or damage the interior piping. If at any point we find that the pipe inside the wall is already cracked or corroded, it may require opening a small access area in the wall or block to make a proper repair. When that’s necessary, we always explain it clearly and get the homeowner’s approval before proceeding.

3. Inspecting the Interior Connection

With the old faucet removed, we inspect the exposed fitting and interior connection. We’re looking for:

  • Worn threads or stripped fittings that could cause future leaks
  • Corrosion or pitting on copper or galvanized piping
  • Any movement that suggests a loose or unsupported pipe in the wall

If the connection is sound, we can proceed with installing the new hose bib. If it’s compromised, we discuss repair options with the homeowner—this is where wall access may come into play.

4. Installing the New Hose Bib

Once the connection is ready, we install a new, high-quality hose bib designed for reliability and smooth operation. That typically involves:

  • Applying appropriate thread sealant or tape to ensure a watertight joint
  • Threading the new faucet into place to a snug, correct orientation
  • Securing the faucet against the wall so it doesn’t wiggle when hoses are attached or removed

We also make sure the hose bib is pitched correctly so water drains and doesn’t pool in unwanted areas around the connection.

5. Restoring Water and Checking for Leaks

After installation, we slowly restore water to the line and test the new hose bib under normal use. We check:

  • At the spout: that the faucet opens smoothly, shuts off cleanly, and doesn’t drip
  • At the wall: that there’s no seepage where the hose bib passes through the exterior
  • At the interior connection (if accessible): for any sign of moisture or weeping

We cycle the faucet several times and may leave it pressurized for a bit while we monitor. Once everything looks good, we clean up the work area and review the results with the homeowner.

Why This Fix Matters and What Could Have Happened Otherwise

It’s easy to think of a hose bib as a minor convenience, but it’s directly connected to your home’s pressurized water lines. A faulty outdoor faucet isn’t just a nuisance—it can turn into a significant water loss or hidden damage if ignored.

By replacing a worn or leaking hose bib promptly, our Ruskin client helped avoid:

  • Higher water bills: Even a slow drip can waste dozens of gallons per day.
  • Exterior damage: Constant moisture can discolor or damage siding, stucco, or block.
  • Hidden wall leaks: A failing connection inside the wall can lead to rot or mold.
  • Sudden failures: Under pressure, a weak fitting can eventually crack or separate.

When needed, we pair hose bib work with water pipe repair services to address any underlying issues in the line itself. For more complex situations, our team can also discuss water pipe replacement options if the piping is older or badly deteriorated.

Do We Patch Concrete or Walls After Opening Them?

One point we always clarify, and that we noted for this project, is our policy on wall and block openings. When a hose bib is tightly embedded in masonry or block, we may need to create a small access opening to safely reach the connection and perform a proper repair.

As our job description states:

“On some occasions we need to open a hole in the wall or block to be able to replace the hose bib. We do not patch or repair concrete when done.”

That means our licensed plumbers will handle all plumbing work, including creating any necessary access to reach pipes. However, the final cosmetic repair—for example, patching stucco, repainting, or redoing decorative finishes—is typically completed by a handyman, mason, or contractor chosen by the homeowner.

We always do our best to keep openings as small and neat as reasonably possible and to explain what you can expect so there are no surprises.

Tips to Prevent Hose Bib Problems in Ruskin, FL Homes

Ruskin, FL, with its warm, humid climate and frequent storms, puts extra stress on outdoor plumbing fixtures. Here are some simple steps homeowners can take to keep hose bibs in good shape:

1. Don’t Over-Tighten the Handle

Many dripping faucets get worse because we instinctively crank the handle harder. Over time, this can damage internal parts and wear out seals faster. Turn the handle firmly, but don’t force it.

2. Disconnect Hoses When Not in Use

Leaving a heavy hose attached puts constant strain on the faucet. It can also trap water in the hose and faucet body, encouraging corrosion. Make a habit of disconnecting hoses when not needed for a while.

3. Watch for Moisture Around the Wall

Occasionally check the wall around and under the hose bib, both outside and inside (if you know where the line runs). Any damp spots, peeling paint, or musty smells are worth checking out.

4. Schedule Professional Help Early

If you notice a drip that won’t go away, or see water where it shouldn’t be, it’s usually cheaper and safer to call a plumber sooner rather than later. Our team can provide other plumbing services at the same visit, such as checking nearby shutoff valves or inspecting exposed piping for additional issues.

5. Consider a Quick Plumbing Check-Up

If you’re already having work done at your Ruskin home, that can be a good time to ask about other fixtures—inside and out. Our plumbers can often spot early warning signs at faucets, toilets, and under-sink piping before they turn into leaks.

Why Choose Home Therapist for Plumbing in Ruskin, FL?

At Home Therapist Cooling, Heating, and Plumbing, we serve homeowners throughout the Tampa Bay area, including Ruskin, FL and the surrounding communities. Our approach is simple: clear communication, careful workmanship, and respect for your home.

Here’s what you can expect when you call us for hose bib replacement or other plumbing repair in Ruskin:

  • Clear explanations: We explain what we find in plain language, without pressure.
  • Upfront options: We provide estimates and talk through what’s necessary versus optional.
  • Licensed professionals: Our technicians are trained to work safely with your home’s plumbing system.
  • Local experience: We understand how Florida’s climate affects plumbing, from hose bibs to water heaters.

If you’d like to learn more about how we handle faucets and fixtures, take a look at our dedicated page for faucet installation and repair services in the Tampa Bay area.

Serving Homeowners in Ruskin and the Tampa Bay Area

Ruskin is a growing community along the eastern shore of Tampa Bay, known for its waterfront views and easy access to the rest of Hillsborough County. Whether you’re near the Little Manatee River, commuting into Tampa, or enjoying local spots like E.G. Simmons Regional Park, reliable plumbing helps keep home life running smoothly.

If you’re curious about the area, you can learn more about Ruskin on Wikipedia or see it on the map via Google Maps. Many of our plumbing and HVAC calls in Ruskin are for everyday needs—like hose bib replacements, faucet updates, and leak repairs—that keep homes safe and comfortable.

When to Call a Plumber for a Hose Bib or Garden Faucet Issue

Not every drip means you need immediate replacement, but some signs are worth a professional look. Consider calling a licensed plumber if:

  • The hose bib drips constantly and doesn’t improve with gentle tightening.
  • You see water staining, soft drywall, or mold inside near the hose bib location.
  • The faucet feels loose in the wall or moves when you attach a hose.
  • You hear water running inside the wall when the hose bib is off.
  • You’ve tried basic fixes (like a new washer) and the problem returns quickly.

Our team is happy to come out, diagnose the issue, and explain your options—whether that’s a straightforward replacement or a more involved repair. When emergencies arise, we can also assist through our emergency plumbing services in the Tampa Bay area.

Keeping Communication Clear During Plumbing Work

One thing this Ruskin project highlights is the importance of communication. The homeowner had previously received a report, took time to review it, and then let us know they were ready to move forward. Our office resent the estimate and scheduled the work in a way that fit their timing.

We know that plumbing repairs can be stressful, especially when there’s a possibility of opening walls or dealing with water damage. That’s why we make it a priority to review the scope of work with you before we start, answer your questions calmly, and keep you informed at each step. Our goal is for you to feel confident about what’s being done and why.

Ready for Help with Hose Bibs and Outdoor Plumbing in Ruskin, FL?

If your outdoor hose bib is leaking, stuck, or showing signs of age, it’s a good idea to have it checked before it leads to wasted water or damage to your home. Our team at Home Therapist Cooling, Heating, and Plumbing is here to help with hose bib replacement, faucet repair, and a full range of HVAC and plumbing services in Ruskin, FL.

Call Home Therapist or visit our website to schedule an appointment at a time that works for you. We’ll assess your situation, explain the options, and complete the work with care and attention to detail. Whether it’s a single garden faucet or a broader plumbing concern, we’re here to provide the therapy your home needs. #HomeTherapist #TheTherapyYourHomeNeeds

Carrier Control Board Replacement in Wesley Chapel, FL 33544

When a central air conditioner suddenly stops working the way it should, most homeowners in Wesley Chapel, FL start worrying about big-ticket replacements. In this case study, we walk through a real job where our team at Home Therapist Cooling, Heating, and Plumbing diagnosed a failed Carrier control board, navigated the part order and warranty process, and got a homeowner’s AC back on track in the 33544 area.

If you live in Wesley Chapel, FL, you know how quickly a cooling problem can turn a normal day into a stressful one. Our goal with every visit is to take that stress off your shoulders, clearly explain what’s going on, and recommend the most sensible path forward.

Customer Problem: AC Not Running Reliably in Wesley Chapel, FL

This homeowner in Wesley Chapel, FL 33544 contacted us because their air conditioner was no longer operating reliably. The system would not respond properly to thermostat calls, and the indoor comfort was dropping fast. In our experience providing AC repair services in the Tampa Bay area, those symptoms often point to an electrical or control issue, not just a simple thermostat setting problem.

From the internal notes on this visit, we knew a few key things before we even arrived:

  • The system was a Carrier unit using an HK50AA058 control board.
  • The existing board had failed and needed replacement.
  • The part was not immediately available locally and had to be transferred to a nearby Carrier supply location.
  • This job involved a warranty handling fee, indicating parts were being covered under manufacturer warranty while labor and logistics were handled by our team.

That background helped us set expectations clearly with the homeowner, including possible lead times for the board and what the visit would look like once the part was on hand.

Understanding the Job: Control/Defrost Board Replacement Under Warranty

The main scope of work was a Control/Defrost Board Install or Replacement. In simple terms, the control board is the “brain” of your air conditioner or heat pump. It coordinates key functions like:

  • Telling the compressor when to start and stop
  • Running the indoor and outdoor fan motors at the right time
  • Managing safety switches and sensors
  • Handling defrost cycles on heat pumps in heating mode

When that brain fails, the system can behave unpredictably or fail to run at all. That’s exactly what was happening here.

The project also included a warranty handling fee. This fee typically covers the time and coordination required to:

  • Source the correct OEM part.
  • Confirm compatibility with the existing system.
  • Work with the manufacturer or distributor on warranty coverage.
  • Arrange pickup or shipping and track the order.

In this case, the Carrier control board HK50AA058 had to be transferred from a different supply location to the Ybor City distribution point near Tampa. We were advised it would take about three to five business days to arrive.

Our Inspection & Diagnosis Process

Even when a part is known to be suspect, we don’t just “swap and hope.” We perform a methodical inspection to make sure we’re addressing the real problem and not just treating a symptom. That’s how we handle every AC not cooling service call in the Tampa area.

For a suspected control board failure, our diagnostic steps typically include:

  • Visual inspection: Checking for burnt spots, swollen components, loose connections, or corrosion on the board.
  • Power and voltage checks: Verifying that proper line voltage is reaching the board and that the board is sending correct control signals to other components.
  • Communication checks: On systems with communicating thermostats or outdoor units, confirming that data signals are present and stable.
  • Safety circuit review: Ensuring that pressure switches, float switches, and other safety devices are not tripping and causing the board to lock out.

In this Wesley Chapel home, those checks supported the original assessment: the electric control board was faulty and needed replacement. That’s why the job description clearly notes: “New electric control board replaced.”

Coordinating the Replacement Part

One of the most frustrating parts of an AC breakdown—especially in a place as warm and humid as Wesley Chapel, FL—is waiting on parts. Our internal notes show the part was not available immediately at the local supply house. Carrier confirmed they could transfer the HK50AA058 board from Orlando to the Ybor City location, but it would take approximately three to five business days.

Our team stayed on top of the order, confirming when the board was ready for pickup and coordinating with our dispatcher so a technician could retrieve it and return to complete the repair as quickly as possible. We kept the homeowner updated on timing so they weren’t left wondering what was happening in the background.

That kind of communication may not sound glamorous, but it’s a big part of why many homeowners in Wesley Chapel and the broader Tampa Bay area tell us they appreciate our service. Nobody likes surprises—especially when it’s hot and the AC is down.

Step-by-Step: How We Replaced the Carrier Control Board

Once the new control board arrived and our technician returned to the property, we followed a careful process to protect the equipment and the home:

1. Safety and Power Down

We began by shutting off power to the system at both the disconnect and breaker. This is essential whenever we work on any electrical controls, whether it’s a control board, relay, or thermostat. Working safely protects the system and everyone in the home.

2. Removing the Old Board

Next, we opened the unit’s electrical compartment and documented the existing wiring. On control board jobs, it’s common for us to:

  • Take clear reference photos of the wiring layout.
  • Label low-voltage and high-voltage conductors when needed.
  • Note any previous splices or non-standard modifications.

Once everything was documented, we carefully disconnected the wires and removed the failed board from its mounting position.

3. Installing the New Electric Control Board

The new Carrier HK50AA058 control board was then mounted securely in place. After confirming it was oriented correctly and properly supported, we reconnected each wire according to the manufacturer’s wiring diagram and our reference photos.

With modern HVAC equipment, small wiring errors can cause big headaches—anything from nuisance trips to total system failure. That’s why our technicians take their time during this step and double-check every connection.

4. Verifying Programming and Settings

Depending on the system, some control boards come pre-configured while others require specific jumper settings or programming options based on:

  • Indoor blower motor type (PSC vs. ECM)
  • Number of cooling stages
  • Presence of electric heat strips
  • Thermostat type and wiring

We verified that the board’s settings matched the installed equipment so the system could operate the way Carrier intended.

5. Restoring Power and Testing Operation

Once everything was in place, we restored power and ran the system through a full operational check. That included:

  • Confirming the outdoor unit and indoor air handler started correctly.
  • Listening for any unusual noises or short-cycling.
  • Verifying the thermostat could call for cooling and the system responded as expected.
  • Checking that safety circuits were intact and not bypassed.

Only after everything checked out did we consider the repair complete.

Why Replacing the Control Board Was the Right Fix

When a control board fails, homeowners sometimes wonder if they should replace just the board or consider a full system replacement. In this Wesley Chapel case, replacing the defective board was the most practical and cost-effective solution.

Here’s why that approach made sense:

  • Targeted repair: The rest of the system components were in acceptable condition, so there was no immediate need for a full replacement.
  • Warranty support: The part was being handled under a manufacturer warranty, lowering the overall cost burden for the homeowner.
  • Restored reliability: A new OEM board brings the system back to its designed operating logic, reducing nuisance breakdowns caused by intermittent control failures.

If you’re curious about how other electrical components can affect your AC, our blog on understanding your AC relay and why it matters is a helpful read. Control boards and relays often work hand-in-hand to keep your system running smoothly.

What Could Have Happened If the Issue Was Ignored

Some homeowners are tempted to “wait and see” when their AC acts up, especially if the system occasionally comes back on. Unfortunately, ignoring a failing control board can lead to more serious problems, such as:

  • Repeated short-cycling: The system starting and stopping too frequently, which can wear out compressors and fan motors.
  • Blown fuses or breakers: Electrical stress caused by faulty switching on the board.
  • Loss of safety protection: If the board stops correctly reading safety switches, it may allow the system to run in unsafe conditions.
  • Complete system failure: Eventually the system may refuse to start at all, usually on the hottest day of the week.

By tackling the control board issue promptly, this Wesley Chapel homeowner avoided those risks and got their cooling back to a dependable, everyday comfort level.

Why There Was a Warranty Handling Fee

One detail in this job was a warranty handling fee. Homeowners sometimes ask why there is still a cost when a part is under warranty. It’s a fair question, and we always want to be transparent.

Manufacturer warranties usually cover the cost of the part itself, not:

  • Diagnosing the problem.
  • Coordinating with suppliers and manufacturers.
  • Picking up and delivering the part.
  • Labor to remove the old component and install the new one.

The handling fee in this case helps cover those logistics and the time spent making sure the homeowner actually receives the benefit of the manufacturer’s part warranty.

Why the Homeowner Declined a Tune-Up—and Our Perspective

Our notes indicate that we offered a tune-up service during this project, but the homeowner declined because they felt it was too expensive at the time. We respect that decision. Budget is always part of the conversation, and our job is to provide options, not pressure.

That said, we do like to explain why proactive service can be valuable. A proper AC tune-up in a climate like Wesley Chapel’s can help with:

  • Earlier detection of failing parts (like relays, capacitors, or motors).
  • Improved energy efficiency through coil cleaning and airflow checks.
  • Better comfort and humidity control during the long cooling season.
  • Reducing the risk of surprise breakdowns when you need your system most.

If you’re curious about what’s included, you can read more about our AC tune-up services in the Tampa area and see if it might be a good fit for your home and budget in the future.

Tips to Prevent Future AC Problems in Wesley Chapel Homes

While some control board failures are simply age or defect related and can’t be fully prevented, there are several practical steps homeowners in Wesley Chapel, FL can take to reduce overall system stress and extend equipment life:

  • Change filters regularly: Dirty filters restrict airflow, add strain to the blower motor, and can indirectly stress electrical components over time.
  • Keep outdoor units clear: Make sure the condenser has at least a couple feet of clearance from plants, fences, and debris to maintain good airflow.
  • Address drainage issues early: Clogged drain lines can trigger float switches and cause the system to shut down unexpectedly.
  • Schedule periodic maintenance: Having a professional inspect electrical connections, capacitors, relays, and control boards can catch early signs of failure.
  • Watch for unusual behavior: If your AC starts short-cycling, making new noises, or not responding consistently to the thermostat, don’t ignore it—call for service.

Our broader guide on finding reliable air conditioning service and repair near you also offers tips on what to look for in an HVAC contractor in the Wesley Chapel and Tampa Bay area.

About Wesley Chapel, FL and Local AC Demands

Wesley Chapel, located in Pasco County north of Tampa, has grown rapidly in recent years. With popular destinations like Tampa Premium Outlets and easy access to Tampa via I-75, the area blends suburban living with busy daily commutes. The hot, humid climate means residential AC systems work hard almost year-round.

If you’re new to the area, you can learn more about the community on the Wesley Chapel, Florida Wikipedia page or see where we commonly serve homeowners on Google Maps for Wesley Chapel, FL 33544. No matter where you are in the region, we understand the pressure your cooling system is under and tailor our recommendations with that in mind.

Why Choose Home Therapist in Wesley Chapel, FL?

When your AC stops working, you don’t just need someone who can replace a part—you need a team that explains what’s going on, respects your home and budget, and stands behind their work.

Here’s how we approach HVAC and AC repair in Wesley Chapel, FL:

  • Clear communication: We explain your options, including repair vs. replacement, and help you decide what makes sense for you.
  • Thorough diagnostics: We don’t just swap parts; we verify the true cause of the problem.
  • Local expertise: We work on systems all across the Tampa Bay area, so we understand the unique demands of our climate.
  • Respect for your time: We coordinate part orders, pickups, and return visits as efficiently as possible.

If you’re dealing with an AC that’s not cooling or you suspect an electrical control issue, our team can help. Learn more about how we address air conditioner installation and repair concerns in the Tampa Bay area, or reach out directly to schedule a visit.

Need AC Control Board or AC Repair Help in Wesley Chapel?

Whether you’re facing a failed control board, frequent breaker trips, or an AC that just won’t keep up, you don’t have to troubleshoot it alone. Our technicians handle everything from targeted electrical repairs to full system diagnostics for homeowners across Wesley Chapel, FL 33544 and the surrounding Tampa Bay communities.

Call Home Therapist or visit our website to schedule AC repair service, request a second opinion, or ask questions about your system’s performance. We’re here to provide the therapy your home needs—calm, clear, and professional, every step of the way. #HomeTherapist #TheTherapyYourHomeNeeds

Premium Plumbing Inspection and Water Heater Flush in San Antonio, FL 33576

At a home in the San Antonio, FL 33576 area, our team was called out for a scheduled visit under our Premium Home Therapy Plan. This wasn’t an emergency call or a major leak—just a smart homeowner making sure their plumbing system and water heater stayed in great shape with routine maintenance.

#N/ASan Antonio, FL 33576

Even when nothing is visibly “wrong,” the plumbing system in a Florida home is always working in the background. Regular inspections and water heater flushes are one of the best ways to avoid surprise breakdowns, leaks, or cold showers down the road. In this visit, our technician Alejandro completed a full plumbing inspection and a professional water heater flush, and we were happy to confirm that everything was working exactly as it should.

If you live in San Antonio, FL or anywhere in the Tampa Bay area, this kind of proactive service is one of the easiest ways to protect your home, your comfort, and your wallet. #HomeTherapist #TheTherapyYourHomeNeeds

Customer Problem: Why We Were Called to This San Antonio, FL Home

This visit was part of the homeowner’s Premium Home Therapy Plan. They didn’t report any obvious issues—no leaks, clogs, or strange noises. Instead, their goal was simple:

  • Get a routine plumbing inspection to make sure everything was operating properly.
  • Have a professional water heater flush to maintain efficiency and extend the system’s life.

In our warm and humid Florida climate, especially in areas like San Antonio, FL, plumbing systems and water heaters work hard year-round. It’s very common for sediment to build up in water heaters and for small plumbing issues to start quietly in the background. This homeowner wanted peace of mind that everything was in good condition—and that’s exactly what regular maintenance is for.

Our Inspection & Diagnosis Process

When we arrive for a planned visit like this, we treat it with the same thoroughness we give an emergency call. A system that looks fine on the surface can still have early warning signs hiding in the details. Here’s how our technician Alejandro approached this Premium Home Therapy Plan plumbing visit in San Antonio, FL 33576.

1. Whole-Home Plumbing Inspection

First, we completed a full walkthrough of the home’s accessible plumbing. A typical whole-home plumbing inspection includes:

  • Checking visible supply lines and shut-off valves for corrosion, leaks, or damaged connections.
  • Inspecting faucets, sinks, showers, and tubs for slow drains, drips, or weak water flow.
  • Testing toilets for proper flushing, quiet refilling, and signs of running water.
  • Reviewing hose bibbs and outdoor fixtures to catch leaks or damage that often go unnoticed.
  • Looking for signs of hidden leaks such as soft spots, discoloration, or moisture around plumbing areas.

In this home, we found no active leaks, no drainage issues, and no water pressure concerns. Everything was operating smoothly, which is exactly what we like to see during a maintenance visit.

If you’d like to know what a typical inspection includes, you can read more in our guide on plumbing inspections in the Tampa Bay area.

2. Water Heater Evaluation Before the Flush

Before flushing a water heater, we always take time to evaluate the unit’s overall condition. Our technician:

  • Visually inspected the tank, connections, and valves for rust, corrosion, or leaks.
  • Checked the temperature setting to ensure it was safe and efficient.
  • Verified that the pressure relief valve and expansion tank (if present) were properly installed and showed no signs of trouble.

The water heater in this San Antonio, FL home was in good overall condition. There were no visible leaks, no unusual noises, and no signs of overheating or over-pressurization. That meant we could confidently move forward with the flush as part of regular maintenance.

3. Confirming There Were No Diagnostic Limitations

Sometimes, there are limits to what we can inspect due to access, age of the system, or safety concerns. In this case, there were no diagnostic limitations. We were able to inspect what we needed to see, test the fixtures we needed to test, and flush the water heater thoroughly.

Step-by-Step: How We Completed the Water Heater Flush

A professional water heater flush is one of the simplest and most effective ways to keep your hot water system efficient and reliable. Here’s what the process generally looks like when we perform a water heater flush in the San Antonio, FL area.

1. Safety First

We start by safely shutting down the system:

  • Turning off power to the water heater (for electric units) or setting gas control to “pilot” or “off” as appropriate.
  • Allowing the water temperature to lower slightly so there’s less risk of scalding.

Safety is always our first priority—for your home, your family, and our technicians.

2. Isolating and Draining the Tank

Next, we prepare the water heater for flushing:

  • Closing the cold water supply valve to the tank.
  • Attaching a hose to the drain valve and routing it to a safe drain point.
  • Opening the drain valve to allow the water and sediment to begin flowing out of the tank.

Over time, minerals in the water settle to the bottom of the tank. In our region, this sediment buildup can grow faster due to harder water conditions. Flushing helps remove that layer and reduce strain on the heater.

3. Flushing Out Sediment

Once the tank has drained, we perform a controlled flush by turning the cold water supply back on in short bursts. This stirs and rinses out any remaining sediment from the bottom of the tank. The technician continues this until the water runs clear and sediment-free.

This process helps the water heater operate more efficiently and can reduce:

  • Energy usage (because the heater doesn’t have to fight through a blanket of sediment).
  • Noise from popping, rumbling, or banging that often comes from heavy buildup.
  • Wear and tear on the tank and heating elements.

For more detail on why this is so important, you can check out our article on water heater maintenance in your home.

4. Refilling, Bleeding Air, and Restarting

After the flush, we:

  • Close the drain valve and disconnect the hose.
  • Turn the cold water supply back on and allow the tank to refill.
  • Open nearby hot water taps to let air escape from the lines until water flows steadily.
  • Restore power or gas to the unit and verify proper operation.

Once the system is fully refilled and reheating, we double-check for leaks at the drain valve, inlet, outlet, and any visible fittings.

5. Final Checks and Homeowner Update

To wrap up the visit, our technician:

The best part of this visit? We were able to tell the homeowner that their plumbing system and water heater were in excellent shape—with no repairs needed.

Why This Maintenance Visit Matters (Even When Nothing Is Broken)

It’s easy to think, “If it isn’t broken, don’t fix it.” But with plumbing and water heaters, waiting until something breaks can lead to expensive, stressful, and sometimes damaging situations in your home.

By scheduling regular visits like this one in San Antonio, FL, this homeowner is:

  • Reducing the risk of surprise leaks from aging pipes, valves, or water heater tanks.
  • Extending the life of their water heater by removing sediment and lowering strain on the system.
  • Maintaining good water pressure and drainage throughout the home.
  • Catching small issues early—before they turn into emergencies.

Preventive plumbing maintenance is a core part of what we offer through our plumbing maintenance plans and options. It’s the same mindset behind services like drain line cleaning and flushing and routine water heater care.

What Could Happen If You Skip Water Heater Flushes and Inspections?

Because this homeowner stayed ahead of the curve, their system was in great condition. But if routine maintenance gets skipped for years, a few common issues can show up:

  • Loss of efficiency: A thick layer of sediment at the bottom of the tank acts like insulation, making your water heater work harder and use more energy.
  • Noisy operation: Popping, banging, or rumbling noises are often signs of heavy mineral buildup.
  • Inconsistent hot water: Sediment can reduce the effective capacity of the tank, which means shorter hot showers.
  • Higher risk of leaks: Over time, corrosion can weaken the tank, fittings, or valves, leading to leaks that may damage floors, drywall, or belongings.
  • Unexpected breakdowns: Without inspections, small problems like a failing valve or deteriorating supply line can go unnoticed until they fail.

Regular visits like this one help prevent those outcomes and give homeowners confidence that their system is ready for everyday life—whether it’s a normal workday or a weekend with guests visiting popular local spots like the Mirada Lagoon near San Antonio, FL 33576.

Maintenance Tips for Plumbing and Water Heaters in San Antonio, FL

Whether you’re on a Premium Home Therapy Plan or just looking to be more proactive with your home, here are some simple tips to help take care of your plumbing system in the San Antonio, FL area.

1. Schedule Regular Plumbing Inspections

Having a professional look over your plumbing every year or two can:

  • Catch small leaks before they damage cabinets, floors, or walls.
  • Identify aging shut-off valves or hoses before they fail.
  • Spot slow drains or early clogs before they back up.

Our team performs thorough inspections similar to this San Antonio, FL visit all across the Tampa Bay region. You can learn more by reviewing some of our past plumbing inspection and water heater flush projects.

2. Flush Your Water Heater Regularly

Most manufacturers recommend flushing your water heater at least once a year, especially in areas with moderate to hard water. Doing so can:

  • Improve energy efficiency.
  • Help maintain consistent hot water supply.
  • Extend the overall life of the unit.

If you’re not sure when your water heater was last flushed, it might be time to schedule a visit.

3. Pay Attention to Little Changes

Even when a system is in great shape, it’s a good idea to keep an eye out for:

  • New noises from your water heater (popping, rumbling, or hissing).
  • Changes in water temperature or pressure.
  • Unexplained wet spots near plumbing fixtures, walls, or ceilings.
  • Toilets that begin to run periodically without being used.

These are often early clues that it’s time for a professional checkup. Addressing them early is almost always easier and less expensive.

4. Be Careful What Goes Down Your Drains

To protect your plumbing between professional visits:

  • Avoid pouring grease, oils, or food scraps down the kitchen sink.
  • Use drain screens to catch hair and debris in showers and tubs.
  • Only flush toilet paper—no wipes, paper towels, or hygiene products, even if they say “flushable.”

If you do notice slow drains or recurring clogs, our drain line cleaning and flushing services can help restore proper flow and prevent bigger backups.

Why Homeowners Choose Home Therapist in San Antonio, FL and the Tampa Bay Area

Whether we’re handling an emergency repair or a routine Premium Home Therapy Plan visit like this one, our goal is always the same: make your home feel safe, comfortable, and well cared for.

Homeowners in San Antonio, FL and across the Tampa Bay area choose our team because we:

  • Take time to explain what we’re doing in plain language—no jargon or pressure.
  • Treat maintenance visits seriously, not as “quick looks,” but as real opportunities to protect your home.
  • Document what we find and clearly share whether any repairs are needed—or, like in this visit, when everything looks great.
  • Offer maintenance plans designed to make it easy to stay on top of plumbing, HVAC, and water heater care.

We’re proud to serve communities all around the Tampa Bay region, from San Antonio, FL to surrounding areas. If you’re curious about setting up similar care for your plumbing system, our article on water heater maintenance plans and promotions is a great place to start.

When to Call for Plumbing Help in San Antonio, FL

This visit was all about prevention, and that’s ideal. But sometimes things do go wrong, and knowing when to call for help can save you from a much bigger mess.

You should contact a licensed plumber in the San Antonio, FL area if you notice:

  • Sudden loss of hot water or rapidly fluctuating temperatures.
  • Visible leaks around your water heater, under sinks, or near toilets.
  • Water stains on ceilings, walls, or floors that could indicate a hidden leak.
  • Consistently low water pressure in multiple fixtures.
  • Frequent drain clogs or sewer smells inside the home.

Our team at Home Therapist handles everything from quick fixes to larger plumbing projects throughout the Tampa Bay area. Whether it’s a concern with your water heater, drains, fixtures, or overall plumbing system, we’re here to help guide you through your options calmly and clearly.

Considering a Maintenance Plan for Your Home?

If you like the idea of having a professional check on your plumbing and water heater before problems show up, a maintenance plan might be a good fit. Our Premium Home Therapy Plan visit for this San Antonio, FL homeowner included exactly the kind of proactive service that helps prevent surprises.

With a maintenance plan, you can:

For more details, you can explore our plumbing services maintenance plans and options on our website.

Need Plumbing Inspection or Water Heater Service in San Antonio, FL?

If you’re in San Antonio, FL 33576 or the surrounding Tampa Bay area and you’re thinking, “I can’t remember the last time my plumbing was inspected or my water heater was flushed,” you’re not alone—and it’s not too late to start.

Whether you’re experiencing a specific issue or just want the peace of mind this homeowner received from their Premium Home Therapy Plan visit, our team is here to help.

Call Home Therapist or visit our website to schedule a plumbing inspection, water heater flush, or to ask about our maintenance plan options. We’ll walk you through everything in plain English, explain what we find, and help you make choices that fit your home and your budget.

Your home deserves consistent, thoughtful care—the therapy your home needs, right here in San Antonio, FL. #HomeTherapist #TheTherapyYourHomeNeeds

At a home in the San Antonio, FL 33576 area, our team was called out for a scheduled visit under our Premium Home Therapy Plan. This wasn’t an emergency call or a major leak—just a smart homeowner making sure their plumbing system and water heater stayed in great shape with routine maintenance.

Even when nothing is visibly “wrong,” the plumbing system in a Florida home is always working in the background. Regular inspections and water heater flushes are one of the best ways to avoid surprise breakdowns, leaks, or cold showers down the road. In this visit, our technician Alejandro completed a full plumbing inspection and a professional water heater flush, and we were happy to confirm that everything was working exactly as it should.

If you live in San Antonio, FL or anywhere in the Tampa Bay area, this kind of proactive service is one of the easiest ways to protect your home, your comfort, and your wallet. #HomeTherapist #TheTherapyYourHomeNeeds

Customer Problem: Why We Were Called to This San Antonio, FL Home

This visit was part of the homeowner’s Premium Home Therapy Plan. They didn’t report any obvious issues—no leaks, clogs, or strange noises. Instead, their goal was simple:

  • Get a routine plumbing inspection to make sure everything was operating properly.
  • Have a professional water heater flush to maintain efficiency and extend the system’s life.

In our warm and humid Florida climate, especially in areas like San Antonio, FL, plumbing systems and water heaters work hard year-round. It’s very common for sediment to build up in water heaters and for small plumbing issues to start quietly in the background. This homeowner wanted peace of mind that everything was in good condition—and that’s exactly what regular maintenance is for.

Our Inspection & Diagnosis Process

When we arrive for a planned visit like this, we treat it with the same thoroughness we give an emergency call. A system that looks fine on the surface can still have early warning signs hiding in the details. Here’s how our technician Alejandro approached this Premium Home Therapy Plan plumbing visit in San Antonio, FL 33576.

1. Whole-Home Plumbing Inspection

First, we completed a full walkthrough of the home’s accessible plumbing. A typical whole-home plumbing inspection includes:

  • Checking visible supply lines and shut-off valves for corrosion, leaks, or damaged connections.
  • Inspecting faucets, sinks, showers, and tubs for slow drains, drips, or weak water flow.
  • Testing toilets for proper flushing, quiet refilling, and signs of running water.
  • Reviewing hose bibbs and outdoor fixtures to catch leaks or damage that often go unnoticed.
  • Looking for signs of hidden leaks such as soft spots, discoloration, or moisture around plumbing areas.

In this home, we found no active leaks, no drainage issues, and no water pressure concerns. Everything was operating smoothly, which is exactly what we like to see during a maintenance visit.

If you’d like to know what a typical inspection includes, you can read more in our guide on plumbing inspections in the Tampa Bay area.

2. Water Heater Evaluation Before the Flush

Before flushing a water heater, we always take time to evaluate the unit’s overall condition. Our technician:

  • Visually inspected the tank, connections, and valves for rust, corrosion, or leaks.
  • Checked the temperature setting to ensure it was safe and efficient.
  • Verified that the pressure relief valve and expansion tank (if present) were properly installed and showed no signs of trouble.

The water heater in this San Antonio, FL home was in good overall condition. There were no visible leaks, no unusual noises, and no signs of overheating or over-pressurization. That meant we could confidently move forward with the flush as part of regular maintenance.

3. Confirming There Were No Diagnostic Limitations

Sometimes, there are limits to what we can inspect due to access, age of the system, or safety concerns. In this case, there were no diagnostic limitations. We were able to inspect what we needed to see, test the fixtures we needed to test, and flush the water heater thoroughly.

Step-by-Step: How We Completed the Water Heater Flush

A professional water heater flush is one of the simplest and most effective ways to keep your hot water system efficient and reliable. Here’s what the process generally looks like when we perform a water heater flush in the San Antonio, FL area.

1. Safety First

We start by safely shutting down the system:

  • Turning off power to the water heater (for electric units) or setting gas control to “pilot” or “off” as appropriate.
  • Allowing the water temperature to lower slightly so there’s less risk of scalding.

Safety is always our first priority—for your home, your family, and our technicians.

2. Isolating and Draining the Tank

Next, we prepare the water heater for flushing:

  • Closing the cold water supply valve to the tank.
  • Attaching a hose to the drain valve and routing it to a safe drain point.
  • Opening the drain valve to allow the water and sediment to begin flowing out of the tank.

Over time, minerals in the water settle to the bottom of the tank. In our region, this sediment buildup can grow faster due to harder water conditions. Flushing helps remove that layer and reduce strain on the heater.

3. Flushing Out Sediment

Once the tank has drained, we perform a controlled flush by turning the cold water supply back on in short bursts. This stirs and rinses out any remaining sediment from the bottom of the tank. The technician continues this until the water runs clear and sediment-free.

This process helps the water heater operate more efficiently and can reduce:

  • Energy usage (because the heater doesn’t have to fight through a blanket of sediment).
  • Noise from popping, rumbling, or banging that often comes from heavy buildup.
  • Wear and tear on the tank and heating elements.

For more detail on why this is so important, you can check out our article on water heater maintenance in your home.

4. Refilling, Bleeding Air, and Restarting

After the flush, we:

  • Close the drain valve and disconnect the hose.
  • Turn the cold water supply back on and allow the tank to refill.
  • Open nearby hot water taps to let air escape from the lines until water flows steadily.
  • Restore power or gas to the unit and verify proper operation.

Once the system is fully refilled and reheating, we double-check for leaks at the drain valve, inlet, outlet, and any visible fittings.

5. Final Checks and Homeowner Update

To wrap up the visit, our technician:

  • Re-tested key fixtures and plumbing components in the home.
  • Verified that the water heater was heating correctly and quietly.
  • Confirmed again that there were no concerns or repair needs at this time.

The best part of this visit? We were able to tell the homeowner that their plumbing system and water heater were in excellent shape—with no repairs needed.

Why This Maintenance Visit Matters (Even When Nothing Is Broken)

It’s easy to think, “If it isn’t broken, don’t fix it.” But with plumbing and water heaters, waiting until something breaks can lead to expensive, stressful, and sometimes damaging situations in your home.

By scheduling regular visits like this one in San Antonio, FL, this homeowner is:

  • Reducing the risk of surprise leaks from aging pipes, valves, or water heater tanks.
  • Extending the life of their water heater by removing sediment and lowering strain on the system.
  • Maintaining good water pressure and drainage throughout the home.
  • Catching small issues early—before they turn into emergencies.

Preventive plumbing maintenance is a core part of what we offer through our plumbing maintenance plans and options. It’s the same mindset behind services like drain line cleaning and flushing and routine water heater care.

What Could Happen If You Skip Water Heater Flushes and Inspections?

Because this homeowner stayed ahead of the curve, their system was in great condition. But if routine maintenance gets skipped for years, a few common issues can show up:

  • Loss of efficiency: A thick layer of sediment at the bottom of the tank acts like insulation, making your water heater work harder and use more energy.
  • Noisy operation: Popping, banging, or rumbling noises are often signs of heavy mineral buildup.
  • Inconsistent hot water: Sediment can reduce the effective capacity of the tank, which means shorter hot showers.
  • Higher risk of leaks: Over time, corrosion can weaken the tank, fittings, or valves, leading to leaks that may damage floors, drywall, or belongings.
  • Unexpected breakdowns: Without inspections, small problems like a failing valve or deteriorating supply line can go unnoticed until they fail.

Regular visits like this one help prevent those outcomes and give homeowners confidence that their system is ready for everyday life—whether it’s a normal workday or a weekend with guests visiting popular local spots like the Mirada Lagoon near San Antonio, FL 33576.

Maintenance Tips for Plumbing and Water Heaters in San Antonio, FL

Whether you’re on a Premium Home Therapy Plan or just looking to be more proactive with your home, here are some simple tips to help take care of your plumbing system in the San Antonio, FL area.

1. Schedule Regular Plumbing Inspections

Having a professional look over your plumbing every year or two can:

  • Catch small leaks before they damage cabinets, floors, or walls.
  • Identify aging shut-off valves or hoses before they fail.
  • Spot slow drains or early clogs before they back up.

Our team performs thorough inspections similar to this San Antonio, FL visit all across the Tampa Bay region. You can learn more by reviewing some of our past plumbing inspection and water heater flush projects.

2. Flush Your Water Heater Regularly

Most manufacturers recommend flushing your water heater at least once a year, especially in areas with moderate to hard water. Doing so can:

  • Improve energy efficiency.
  • Help maintain consistent hot water supply.
  • Extend the overall life of the unit.

If you’re not sure when your water heater was last flushed, it might be time to schedule a visit.

3. Pay Attention to Little Changes

Even when a system is in great shape, it’s a good idea to keep an eye out for:

  • New noises from your water heater (popping, rumbling, or hissing).
  • Changes in water temperature or pressure.
  • Unexplained wet spots near plumbing fixtures, walls, or ceilings.
  • Toilets that begin to run periodically without being used.

These are often early clues that it’s time for a professional checkup. Addressing them early is almost always easier and less expensive.

4. Be Careful What Goes Down Your Drains

To protect your plumbing between professional visits:

  • Avoid pouring grease, oils, or food scraps down the kitchen sink.
  • Use drain screens to catch hair and debris in showers and tubs.
  • Only flush toilet paper—no wipes, paper towels, or hygiene products, even if they say “flushable.”

If you do notice slow drains or recurring clogs, our drain line cleaning and flushing services can help restore proper flow and prevent bigger backups.

Why Homeowners Choose Home Therapist in San Antonio, FL and the Tampa Bay Area

Whether we’re handling an emergency repair or a routine Premium Home Therapy Plan visit like this one, our goal is always the same: make your home feel safe, comfortable, and well cared for.

Homeowners in San Antonio, FL and across the Tampa Bay area choose our team because we:

  • Take time to explain what we’re doing in plain language—no jargon or pressure.
  • Treat maintenance visits seriously, not as “quick looks,” but as real opportunities to protect your home.
  • Document what we find and clearly share whether any repairs are needed—or, like in this visit, when everything looks great.
  • Offer maintenance plans designed to make it easy to stay on top of plumbing, HVAC, and water heater care.

We’re proud to serve communities all around the Tampa Bay region, from San Antonio, FL to surrounding areas. If you’re curious about setting up similar care for your plumbing system, our article on water heater maintenance plans and promotions is a great place to start.

When to Call for Plumbing Help in San Antonio, FL

This visit was all about prevention, and that’s ideal. But sometimes things do go wrong, and knowing when to call for help can save you from a much bigger mess.

You should contact a licensed plumber in the San Antonio, FL area if you notice:

  • Sudden loss of hot water or rapidly fluctuating temperatures.
  • Visible leaks around your water heater, under sinks, or near toilets.
  • Water stains on ceilings, walls, or floors that could indicate a hidden leak.
  • Consistently low water pressure in multiple fixtures.
  • Frequent drain clogs or sewer smells inside the home.

Our team at Home Therapist handles everything from quick fixes to larger plumbing projects throughout the Tampa Bay area. Whether it’s a concern with your water heater, drains, fixtures, or overall plumbing system, we’re here to help guide you through your options calmly and clearly.

Considering a Maintenance Plan for Your Home?

If you like the idea of having a professional check on your plumbing and water heater before problems show up, a maintenance plan might be a good fit. Our Premium Home Therapy Plan visit for this San Antonio, FL homeowner included exactly the kind of proactive service that helps prevent surprises.

With a maintenance plan, you can:

  • Stay on track with regular inspections and water heater flushes.
  • Get professional eyes on your plumbing system on a routine basis.
  • Have a trusted team to call when you need help.

For more details, you can explore our plumbing services maintenance plans and options on our website.

Need Plumbing Inspection or Water Heater Service in San Antonio, FL?

If you’re in San Antonio, FL 33576 or the surrounding Tampa Bay area and you’re thinking, “I can’t remember the last time my plumbing was inspected or my water heater was flushed,” you’re not alone—and it’s not too late to start.

Whether you’re experiencing a specific issue or just want the peace of mind this homeowner received from their Premium Home Therapy Plan visit, our team is here to help.

Call Home Therapist or visit our website to schedule a plumbing inspection, water heater flush, or to ask about our maintenance plan options. We’ll walk you through everything in plain English, explain what we find, and help you make choices that fit your home and your budget.

Your home deserves consistent, thoughtful care—the therapy your home needs, right here in San Antonio, FL. #HomeTherapist #TheTherapyYourHomeNeeds

Heater Reconnection and Thermostat Configuration in New Port Richey, FL 34652

When cooler evenings roll into New Port Richey, FL 34652, you really feel it if your heater isn’t working the way it should. For this homeowner, a disconnected heater and a misconfigured thermostat meant their system wasn’t kicking on when they needed it most. Our team at Home Therapist Cooling, Heating, and Plumbing was called in to safely reconnect the heater, properly configure the thermostat, and help the homeowner prevent future issues with an ongoing maintenance plan.

In this case study, we’ll walk through what was happening at the home, how we diagnosed the situation, and the steps we took to get the heating system back online and running correctly. If you’re dealing with heater or thermostat problems in New Port Richey, FL, this story will give you a clear idea of what to expect and how we can help.

Customer Problem: What Was Happening at the Home

Our client in New Port Richey reached out because their heating system wasn’t turning on, even though the thermostat showed the right temperature settings. They were concerned that something was wrong with the heater itself, and they weren’t sure if it was safe to try to reset anything on their own.

From the job details, we knew two key things:

  • The heater needed reconnection.
  • The thermostat needed to be configured correctly.

This usually points to one of a few common scenarios we see in homes across the New Port Richey area:

  • The system was previously shut down for service or renovation and never fully brought back online.
  • Thermostat wiring or settings weren’t matched to the equipment (for example, heat pump vs. straight cool with electric heat).
  • A safety device or switch had been tripped, and the system was effectively offline.

Either way, the homeowner was left without reliable heat. In a place like New Port Richey—a growing city on Florida’s Gulf Coast just north of Tampa—that may not mean freezing temperatures, but it absolutely affects comfort, sleep, and health, especially for kids or older adults.

Our Inspection & Diagnosis Process

When our technician arrived, the first step was to listen to the homeowner. We always start by confirming:

  • What the system is (heat pump, gas furnace, electric air handler with heat strips, etc.).
  • What symptoms they’ve noticed (no heat at all, intermittent operation, thermostat going blank, etc.).
  • Any recent work done on the HVAC system or electrical system.

With that context, we moved into a systematic inspection of the heating and control system.

1. Safety and Power Checks

Before touching any equipment, we made sure everything was safe. That means checking:

A heater that has been disconnected can mean anything from a simple switched-off breaker to disconnected wiring that must be re-terminated correctly. We treat all of it as potentially hazardous until it’s verified otherwise.

2. Verifying the Heater Reconnection Points

Once power safety was confirmed, our technician inspected the heater connection points inside the air handler or furnace compartment. Common issues we look for include:

  • Loose or disconnected control wires to the heating elements or heat call terminal.
  • Disconnected high-voltage wiring to the heat strips (for electric systems).
  • Unplugged safety devices or float switches.
  • Evidence of prior work that was never fully completed or label tags left from a previous service call.

In this home, the heater had been left disconnected from normal operation. That meant even when the thermostat was calling for heat, the system wouldn’t respond. Our task was to restore that connection safely and in line with manufacturer wiring specifications.

3. Reviewing Thermostat Wiring & Equipment Settings

Next, we moved to the thermostat itself. Misconfigured thermostats are one of the most common reasons we’re called out for heating and cooling issues in New Port Richey and the surrounding areas.

We checked:

  • That the thermostat had proper power (C-wire or batteries as required).
  • That each wire was landed on the correct terminal (R, Y, G, W, O/B, C, etc.).
  • That the thermostat was programmed for the right type of system (for example, heat pump with auxiliary heat vs conventional furnace).
  • Temperature differentials and “cycle” settings that control how often the system starts and stops.

Even a great thermostat can cause a lot of frustration if it’s not set up for the specific HVAC equipment in your home. That’s why we often recommend reviewing resources like our guide to essential smart thermostat features if you’re considering an upgrade.

Step-By-Step: How We Fixed the Issue

Once we understood the full picture, our technician moved through a structured process to bring the heater safely back online and get the thermostat properly configured.

Step 1: Safely Reconnect the Heater

The first repair task was the heater reconnection. That included:

  • Verifying all disconnects were off and the system was safe to work on.
  • Inspecting the wiring to the heating elements or furnace controls for any damage, corrosion, or burning.
  • Reconnecting the appropriate control and power conductors according to the unit’s wiring diagram.
  • Ensuring all wire nuts, lugs, and terminals were tight and properly insulated.
  • Reinstating any safety switches or interlocks that protect the system from flooding or overheating.

We never simply “turn something back on” without verifying why it was off or disconnected in the first place. A safe reconnection means confirming the equipment is in good condition and that no one’s comfort or safety will be at risk when it starts operating again.

Step 2: Thermostat Configuration and Testing

With the heater reconnected, the next step was to properly configure the thermostat. This is where many DIY attempts get stuck, especially with programmable or smart thermostats.

Our technician:

  • Verified the thermostat model and menu options.
  • Set the thermostat to match the installed system type (for example, heat pump with electric backup heat).
  • Adjusted heating stages, fan control, and temperature differential settings for balanced comfort and efficiency.
  • Confirmed that the thermostat’s wiring matched both the control board at the air handler and the equipment’s configuration.

Once the configuration was complete, we ran the system through a full operational test:

  • Commanded a call for heat from the thermostat.
  • Verified that the indoor unit and heating elements (or furnace burner/heat pump) came on as expected.
  • Confirmed warm air was delivered through the supply registers.
  • Checked that the system shut off correctly when the thermostat reached the setpoint.

This kind of full test is essential. It’s not enough to see the thermostat display change; we want to be sure the heater responds the right way, every time.

Step 3: Enrolling the Home in Our Elite Therapy Plan

During the appointment, we also talked with the homeowner about long-term care for their HVAC system. They decided to enroll in our Elite Therapy Plan, which is our maintenance program designed to keep heating and cooling systems in top shape.

The Elite Therapy Plan offers ongoing benefits such as:

  • Regular system checkups and tune-ups to catch small issues early.
  • Priority scheduling for service calls.
  • Discounts on certain repairs and services.

For homeowners in New Port Richey and nearby areas, having a maintenance plan is one of the best ways to reduce surprise breakdowns and extend equipment life. It’s also a great way to make sure thermostats, safety controls, and heaters stay properly configured from season to season.

If you want to learn more about how consistent maintenance helps, you might find our article on how often you should service your AC in Florida especially helpful—many of those same principles apply to heating equipment as well.

Why This Fix Works and What Could Have Happened Otherwise

Reconnecting the heater and correctly configuring the thermostat may sound simple, but when it’s done thoroughly and safely, it prevents a whole list of potential problems.

Without Proper Heater Reconnection

If a heater remains disconnected, the obvious problem is lack of heat. But there are other risks too:

  • Constant thermostat cycling: The thermostat continues trying to call for heat, which can stress low-voltage controls and relays.
  • Incorrect DIY attempts: Homeowners sometimes attempt to reconnect wiring themselves and accidentally bypass safety devices or miswire components.
  • Hidden electrical issues: Disconnected wiring might be a sign of an underlying electrical or equipment problem that should be professionally evaluated.

Without Correct Thermostat Configuration

A misconfigured thermostat can create comfort problems and higher bills, even if the heater itself is technically operational. Common issues include:

  • The system never switching to the proper heating mode.
  • Short cycling (frequent on/off) that wears out components.
  • Overshooting the temperature, making the home uncomfortably warm or cool.
  • Backup or emergency heat running more than necessary, increasing energy costs.

By addressing both the physical reconnection of the heater and the thermostat’s logic and settings, we gave this New Port Richey homeowner a reliable, predictable heating system—exactly what you need when a cool front rolls through.

Tips to Prevent Thermostat and Heater Problems in New Port Richey Homes

Whether you live near downtown New Port Richey, close to Sims Park along the Cotee River, or in one of the surrounding neighborhoods, there are a few simple steps you can take to reduce heater and thermostat issues.

1. Don’t Ignore “Small” Thermostat Quirks

If your thermostat:

  • Has a display that flickers or goes blank.
  • Doesn’t always respond when you change the temperature.
  • Seems to run the system in the wrong mode (cool instead of heat or vice versa).

Those are all signs something isn’t quite right. It could be a wiring issue, a power problem, or simply incorrect settings. Getting it checked early is usually a quick, cost-effective visit.

2. Schedule Routine HVAC Maintenance

Regular system checkups help keep your heater, thermostat, and entire HVAC system working together smoothly. During a maintenance visit, our technicians:

  • Inspect electrical connections and tighten them where needed.
  • Check safety switches and controls.
  • Verify thermostat operation and system response.
  • Clean critical components that affect airflow and efficiency.

Our Elite Therapy Plan builds these services into an easy, predictable schedule so you don’t have to keep track of it yourself.

3. Be Careful with DIY Wiring or Renovations

It’s surprisingly common for heaters to get disconnected or miswired when other work is being done in the home, like electrical work, remodeling, or even painting and drywall repairs near the air handler closet.

If any work is done near your HVAC equipment or thermostat, it’s a smart idea to:

  • Verify the system works correctly afterward.
  • Call a licensed HVAC company if you notice anything unusual.

Our team is always available to review your system after home projects to make sure everything is still wired, configured, and operating safely.

4. Consider a Professional Thermostat Upgrade

If your thermostat is older or you’re interested in better comfort and control, upgrading with professional installation can make a big difference. Proper setup is critical, especially for smart thermostats and heat pump systems. You can explore some options in our overview of recommended smart thermostats, and we can help you choose one that fits your home and habits.

Why Choose Home Therapist in New Port Richey, FL?

Home Therapist Cooling, Heating, and Plumbing is proud to serve homeowners throughout New Port Richey, FL 34652 and the wider Tampa Bay region. Whether you’re right in town or just outside city limits, our goal is always the same: to make your home more comfortable, safe, and efficient, without confusion or pressure.

Here’s what sets our team apart when it comes to heater and thermostat issues:

We Focus on Clear Explanations

We know HVAC systems can feel complicated. Our technicians take the time to explain what’s going on in plain language—no jargon, no scare tactics. You’ll understand why your heater was disconnected, what your thermostat was doing, and what your options are going forward.

We Look at the Whole System

Instead of just flipping a breaker or pressing a reset button, we inspect the entire path from thermostat to air handler to outdoor unit (if applicable). That helps us spot issues that might cause trouble later. If we notice anything that could affect cooling performance in the warmer months, we’ll let you know that too and may recommend services like our air conditioning repair and service options.

We Offer Ongoing Support Through Maintenance Plans

The Elite Therapy Plan that this homeowner chose is just one example of how we help you stay ahead of problems. Instead of waiting for breakdowns, we work with you to keep everything tuned up. To better understand how regular care can impact your system and your budget, you may also find our article on avoiding automatic renewal pitfalls with maintenance plans helpful when you’re comparing options.

Local Comfort, Local Knowledge

New Port Richey’s climate is unique: mild winters, hot and humid summers, and lots of days where you might switch between AC and heat in the same week. Living in a Gulf Coast community like this, it’s essential that your HVAC system—including your thermostat—responds quickly and correctly when the weather changes.

Our technicians work all over the region, from New Port Richey and Port Richey to the wider Tampa Bay area. That local experience means we understand how coastal humidity, salt air, and seasonal temperature swings can affect your systems. If you’re curious where our service area falls on the map, you can always look up New Port Richey on Google Maps to see just how connected we are to the rest of the Tampa Bay community.

When to Call for Professional Help

You should consider calling a professional HVAC team like Home Therapist if:

  • Your heater doesn’t respond when you adjust the thermostat.
  • Your thermostat shows an error code or keeps restarting.
  • Only certain modes (heat, cool, or fan) seem to work properly.
  • You suspect wiring may have been changed or disconnected.
  • You want the peace of mind of a proper system check as seasons change.

Even if your system seems to be working most of the time, inconsistent performance is a sign that something may not be set up correctly. Catching and correcting those issues early is almost always less stressful than waiting for a full breakdown.

Need Heater or Thermostat Help in New Port Richey, FL?

If you’re in New Port Richey, FL 34652 and your heater isn’t turning on, or your thermostat just doesn’t seem to be doing what it should, our team is here for you. We can:

  • Safely reconnect heaters and verify that all electrical and control components are in good condition.
  • Configure and test your thermostat so it matches your equipment and your comfort needs.
  • Recommend ongoing maintenance options like our Elite Therapy Plan to keep your system reliable year-round.

Call Home Therapist Cooling, Heating, and Plumbing or visit our website to schedule your service. Whether you need a one-time repair, help with a thermostat upgrade, or ongoing HVAC care, we’re ready to provide the therapy your home needs. #HomeTherapist #TheTherapyYourHomeNeeds

Premium HVAC Maintenance Plan Tune-Up in Oldsmar, FL 34677

For homeowners in Oldsmar, FL 34677, staying ahead of Florida heat and humidity is all about prevention. On this visit, our Home Therapist team stopped by a longtime client’s home in Oldsmar for a scheduled HVAC maintenance appointment under our Premium Therapy Plan. The air conditioning system we installed back in 2021 is still running strong, and this routine tune-up was all about keeping it that way.

In this case study, we’ll walk through what a maintenance visit like this looks like, why it matters even when “everything is working perfectly,” and how an HVAC maintenance plan helps Oldsmar homeowners avoid surprise breakdowns during the hottest months of the year.

Customer Problem: A Routine Visit, Not an Emergency

This job was a great example of how things should go when a system is properly maintained. There was no emergency call, no AC not cooling, and no strange noises. The appointment was simply a scheduled visit (#7 on their plan) under our Premium Therapy Plan.

The homeowner had a firm date and time on the calendar, and our technician arrived ready to perform a thorough tune-up on the same HVAC system our team installed in 2021. According to the notes and our inspection:

  • The equipment was cooling properly.
  • Airflow throughout the home felt strong and even.
  • There were no active leaks, clogs, or error codes.
  • The thermostat was responding correctly and holding temperature.

Even though everything seemed fine, routine professional maintenance is still critical in a climate like Oldsmar, FL. Small issues can develop quietly over time, especially with systems working nearly year-round in Tampa Bay’s heat and humidity.

Our Inspection & Diagnosis Process During a Tune-Up

On a maintenance visit like this, our goal isn’t to “find something wrong” — it’s to confirm that everything is operating safely, cleanly, and efficiently, and to catch minor wear before it turns into an expensive repair.

Here’s what our technician did during this Premium Therapy Plan visit in Oldsmar:

1. Visual Inspection of Indoor and Outdoor Units

We started with a full visual check of both the indoor air handler and the outdoor condenser unit:

  • Checked for signs of corrosion, rust, or physical damage.
  • Verified that panels and electrical covers were secure.
  • Looked for oil stains or moisture that might indicate a refrigerant leak.
  • Confirmed there were no obstructions around the outdoor unit restricting airflow.

Everything looked clean, well-maintained, and in line with what we’d expect from a properly installed 2021 system that’s been regularly serviced.

2. Electrical and Safety Checks

Next, we verified that the electrical components and safety controls were in good condition:

  • Tightened electrical connections where needed.
  • Inspected the contactor, capacitors, and wiring for signs of overheating or wear.
  • Confirmed that safety switches (such as float switches on the drain line) were functional.

All readings were within normal range, and there were no warning signs of failing components.

3. Airflow, Filter, and Duct System Check

Because airflow is critical to both comfort and system longevity, we paid special attention to:

  • Filter condition – ensuring it was clean or recently replaced.
  • Return and supply vents – checking for obstructions or closed vents.
  • General duct condition – listening for whistling, rattling, or signs of leaks.

At this Oldsmar home, the airflow was strong and balanced. Filters were in good shape and sized properly for the system, helping keep the indoor coil and blower clean.

4. Refrigerant and Cooling Performance

We then checked system performance under normal operating conditions:

The system’s cooling performance was excellent, with temperatures falling right into the ideal range for a properly charged system. There were no signs of low refrigerant, frozen coils, or overworking components.

5. Condensate Drain and Moisture Control

In humid areas like Oldsmar and the greater Tampa Bay region, the condensate system is just as important as the cooling side:

A backed-up drain line can quickly cause water damage, ceiling stains, and even system shutdowns. On this visit, the drain was clear and working properly.

Step‑By‑Step: What We Did During This Premium Therapy Plan Visit

Because this visit was part of a Premium Therapy Plan, our technician followed a thorough maintenance checklist tailored to central AC systems in Florida homes. Here’s a simplified version of the steps we took at this Oldsmar property:

  • Confirmed system operation before starting any work, so we had a baseline for comparison.
  • Cleaned and inspected the outdoor unit cabinet and coils, removing debris and verifying proper airflow.
  • Inspected the indoor air handler, including coil condition, blower assembly, and electrical components.
  • Verified thermostat settings and basic programming, making sure the schedule matched the homeowner’s comfort needs.
  • Tested safety devices (like overflow switches) to prevent water damage in case of future drain issues.
  • Reviewed performance readings to confirm the system was operating efficiently and within manufacturer specifications.
  • Documented the visit, noting that the system is in great shape with no issues to report.

The result: the homeowner can head into another Oldsmar summer confident that their 2021 system is tuned up, clean, and ready to perform.

Why Routine HVAC Maintenance Matters Even When Everything Works

It’s easy to think, “If it’s not broken, don’t fix it.” But in the world of HVAC, especially in Florida, that approach can be expensive. Systems in Oldsmar, Tampa, and the surrounding area often run 9–10 months out of the year. That constant use creates wear and tear that may not be obvious until it causes a breakdown.

Regular tune-ups like this visit help:

If you’d like a deeper dive into the benefits of professional maintenance, you can explore our guide on why to schedule HVAC maintenance and our detailed HVAC maintenance guide for homeowners.

How Maintenance Plans Help Oldsmar, FL Homeowners

This visit was labeled as a Premium Therapy Plan discount visit and identified as Visit #7 on the client’s plan. That tells us two important things:

For busy families around Oldsmar and nearby areas like Tampa and Safety Harbor, having a plan in place means fewer surprises and fewer last-minute calls when the AC stops working on a 95°F day.

Our maintenance plans typically include:

  • Scheduled visits set well in advance, with firm dates and time windows.
  • Comprehensive tune-ups following a proven HVAC maintenance checklist.
  • Discounts on repairs or upgrades, depending on the plan level.
  • Priority scheduling if something does go wrong.

For homeowners wondering how often they should service their AC in Florida, our article on how often to schedule AC service is a great resource.

What Could Happen Without Regular HVAC Tune-Ups?

In this Oldsmar case, the system was in excellent shape because of consistent care. But if the same equipment went several years without proper maintenance, the story could be very different. Common issues we see in homes that skip tune-ups include:

Regular visits under a maintenance plan help us get ahead of these problems, instead of reacting to them after the fact.

Tips to Keep Your AC Running Smoothly in Oldsmar, FL

In between professional tune-ups, there are several simple steps homeowners in Oldsmar can take to support their HVAC system:

  • Replace air filters regularly – often every 1–3 months, depending on pets, allergies, and usage.
  • Keep vents and returns unblocked by furniture, rugs, or curtains.
  • Check your outdoor unit periodically and clear away leaves, grass clippings, and debris.
  • Use your thermostat wisely – avoid frequent large temperature swings that make the system work harder.
  • Pay attention to changes in noise, smells, or comfort level and call sooner rather than later.

For a more complete homeowner-friendly checklist, visit our air conditioning maintenance guide for Tampa Bay and our regular HVAC maintenance guide.

Why Choose Home Therapist for HVAC Maintenance in Oldsmar, FL?

There are plenty of HVAC companies serving Oldsmar and the greater Tampa Bay area, but our focus at Home Therapist Cooling, Heating, and Plumbing is long-term comfort. We don’t just show up when something breaks; we partner with you to keep your home comfortable year after year.

For this Oldsmar homeowner, we:

  • Installed their system back in 2021.
  • Maintained it consistently under a Premium Therapy Plan.
  • Confirmed during this visit that it’s still operating at a high level.

That’s the kind of long-term relationship and peace of mind a maintenance plan is designed to provide.

If you’re in Oldsmar, you’re in a great location near local spots like Tampa Bay Downs and just a short drive from Tampa itself. Our team regularly serves homeowners throughout the Oldsmar area and nearby communities, keeping systems ready for the season ahead.

To see more about how we approach tune-ups and system care, you can also check out our HVAC system tune-up and maintenance service project in Tampa, FL 33614.

Local Context: HVAC Needs in Oldsmar, FL 34677

Oldsmar sits along the northern edge of Tampa Bay, with hot, humid summers and mild winters. According to the city’s profile on Wikipedia, the area experiences the subtropical conditions that make a reliable, efficient air conditioning system almost a necessity rather than a luxury.

Because of this climate, AC systems in Oldsmar often run much more than the national average. That constant load makes professional maintenance even more important. If you’d like to get a feel for the local area and where we serve, you can view Oldsmar on Google Maps.

When to Call for Professional HVAC Help

Even with a great track record like this system has, it’s important to know when to bring in a professional between scheduled visits. You should call an HVAC pro if you notice:

  • Warm air blowing from the vents when the AC is set to cool.
  • Unusual noises like grinding, squealing, or loud buzzing.
  • Weak airflow or certain rooms that never quite cool down.
  • Higher-than-normal energy bills without a change in usage.
  • Water around the indoor unit, wet spots on ceilings, or musty smells.

Addressing these signs quickly can often prevent a small problem from turning into a major repair. Our team is always ready to help with diagnostics, repairs, and preventative air conditioning service and repair when you need it.

Ready to Keep Your Oldsmar Home Comfortable Year-Round?

This maintenance visit in Oldsmar, FL 34677 is exactly how we like them to go: on time, thorough, and with no surprises. The 2021 system we installed is performing beautifully, the homeowner is protected by a Premium Therapy Plan, and everything is ready for another long stretch of Florida heat.

If you’d like that same peace of mind for your home, our team at Home Therapist Cooling, Heating, and Plumbing is here to help with:

Call Home Therapist or visit our website to schedule your HVAC maintenance in Oldsmar, FL, or anywhere in the Tampa Bay area. Whether you’re interested in a one-time tune-up or a full maintenance plan, we’ll walk you through your options in plain English and help you choose what works best for your home and budget. #HomeTherapist #TheTherapyYourHomeNeeds

For homeowners in Oldsmar, FL 34677, staying ahead of Florida heat and humidity is all about prevention. On this visit, our Home Therapist team stopped by a longtime client’s home in Oldsmar for a scheduled HVAC maintenance appointment under our Premium Therapy Plan. The air conditioning system we installed back in 2021 is still running strong, and this routine tune-up was all about keeping it that way.

In this case study, we’ll walk through what a maintenance visit like this looks like, why it matters even when “everything is working perfectly,” and how an HVAC maintenance plan helps Oldsmar homeowners avoid surprise breakdowns during the hottest months of the year.

Customer Problem: A Routine Visit, Not an Emergency

This job was a great example of how things should go when a system is properly maintained. There was no emergency call, no AC not cooling, and no strange noises. The appointment was simply a scheduled visit (#7 on their plan) under our Premium Therapy Plan.

The homeowner had a firm date and time on the calendar, and our technician arrived ready to perform a thorough tune-up on the same HVAC system our team installed in 2021. According to the notes and our inspection:

  • The equipment was cooling properly.
  • Airflow throughout the home felt strong and even.
  • There were no active leaks, clogs, or error codes.
  • The thermostat was responding correctly and holding temperature.

Even though everything seemed fine, routine professional maintenance is still critical in a climate like Oldsmar, FL. Small issues can develop quietly over time, especially with systems working nearly year-round in Tampa Bay’s heat and humidity.

Our Inspection & Diagnosis Process During a Tune-Up

On a maintenance visit like this, our goal isn’t to “find something wrong” — it’s to confirm that everything is operating safely, cleanly, and efficiently, and to catch minor wear before it turns into an expensive repair.

Here’s what our technician did during this Premium Therapy Plan visit in Oldsmar:

1. Visual Inspection of Indoor and Outdoor Units

We started with a full visual check of both the indoor air handler and the outdoor condenser unit:

  • Checked for signs of corrosion, rust, or physical damage.
  • Verified that panels and electrical covers were secure.
  • Looked for oil stains or moisture that might indicate a refrigerant leak.
  • Confirmed there were no obstructions around the outdoor unit restricting airflow.

Everything looked clean, well-maintained, and in line with what we’d expect from a properly installed 2021 system that’s been regularly serviced.

2. Electrical and Safety Checks

Next, we verified that the electrical components and safety controls were in good condition:

  • Tightened electrical connections where needed.
  • Inspected the contactor, capacitors, and wiring for signs of overheating or wear.
  • Confirmed that safety switches (such as float switches on the drain line) were functional.

All readings were within normal range, and there were no warning signs of failing components.

3. Airflow, Filter, and Duct System Check

Because airflow is critical to both comfort and system longevity, we paid special attention to:

  • Filter condition – ensuring it was clean or recently replaced.
  • Return and supply vents – checking for obstructions or closed vents.
  • General duct condition – listening for whistling, rattling, or signs of leaks.

At this Oldsmar home, the airflow was strong and balanced. Filters were in good shape and sized properly for the system, helping keep the indoor coil and blower clean.

4. Refrigerant and Cooling Performance

We then checked system performance under normal operating conditions:

  • Measured temperature split between return and supply air.
  • Evaluated refrigerant pressures and performance trends.
  • Listened for any abnormal compressor or fan noises.

The system’s cooling performance was excellent, with temperatures falling right into the ideal range for a properly charged system. There were no signs of low refrigerant, frozen coils, or overworking components.

5. Condensate Drain and Moisture Control

In humid areas like Oldsmar and the greater Tampa Bay region, the condensate system is just as important as the cooling side:

  • We checked the condensate drain for clogs or slow draining.
  • Verified that the drain pan was clean and free of standing water.
  • Ensured any safety float switches were positioned and working correctly.

A backed-up drain line can quickly cause water damage, ceiling stains, and even system shutdowns. On this visit, the drain was clear and working properly.

Step‑By‑Step: What We Did During This Premium Therapy Plan Visit

Because this visit was part of a Premium Therapy Plan, our technician followed a thorough maintenance checklist tailored to central AC systems in Florida homes. Here’s a simplified version of the steps we took at this Oldsmar property:

  • Confirmed system operation before starting any work, so we had a baseline for comparison.
  • Cleaned and inspected the outdoor unit cabinet and coils, removing debris and verifying proper airflow.
  • Inspected the indoor air handler, including coil condition, blower assembly, and electrical components.
  • Verified thermostat settings and basic programming, making sure the schedule matched the homeowner’s comfort needs.
  • Tested safety devices (like overflow switches) to prevent water damage in case of future drain issues.
  • Reviewed performance readings to confirm the system was operating efficiently and within manufacturer specifications.
  • Documented the visit, noting that the system is in great shape with no issues to report.

The result: the homeowner can head into another Oldsmar summer confident that their 2021 system is tuned up, clean, and ready to perform.

Why Routine HVAC Maintenance Matters Even When Everything Works

It’s easy to think, “If it’s not broken, don’t fix it.” But in the world of HVAC, especially in Florida, that approach can be expensive. Systems in Oldsmar, Tampa, and the surrounding area often run 9–10 months out of the year. That constant use creates wear and tear that may not be obvious until it causes a breakdown.

Regular tune-ups like this visit help:

If you’d like a deeper dive into the benefits of professional maintenance, you can explore our guide on why to schedule HVAC maintenance and our detailed HVAC maintenance guide for homeowners.

How Maintenance Plans Help Oldsmar, FL Homeowners

This visit was labeled as a Premium Therapy Plan discount visit and identified as Visit #7 on the client’s plan. That tells us two important things:

For busy families around Oldsmar and nearby areas like Tampa and Safety Harbor, having a plan in place means fewer surprises and fewer last-minute calls when the AC stops working on a 95°F day.

Our maintenance plans typically include:

  • Scheduled visits set well in advance, with firm dates and time windows.
  • Comprehensive tune-ups following a proven HVAC maintenance checklist.
  • Discounts on repairs or upgrades, depending on the plan level.
  • Priority scheduling if something does go wrong.

For homeowners wondering how often they should service their AC in Florida, our article on how often to schedule AC service is a great resource.

What Could Happen Without Regular HVAC Tune-Ups?

In this Oldsmar case, the system was in excellent shape because of consistent care. But if the same equipment went several years without proper maintenance, the story could be very different. Common issues we see in homes that skip tune-ups include:

  • Clogged condensate lines leading to water leaks, ceiling damage, or system shutdowns.
  • Dirty coils that reduce efficiency, strain the compressor, and cause longer run times.
  • Weak capacitors and worn electrical components that eventually fail, often on the hottest days.
  • Airflow problems from dirty filters or duct issues, which can cause uneven temperatures and hot spots.
  • Undetected refrigerant leaks that quietly hurt performance for months before a full breakdown.

Regular visits under a maintenance plan help us get ahead of these problems, instead of reacting to them after the fact.

Tips to Keep Your AC Running Smoothly in Oldsmar, FL

In between professional tune-ups, there are several simple steps homeowners in Oldsmar can take to support their HVAC system:

  • Replace air filters regularly – often every 1–3 months, depending on pets, allergies, and usage.
  • Keep vents and returns unblocked by furniture, rugs, or curtains.
  • Check your outdoor unit periodically and clear away leaves, grass clippings, and debris.
  • Use your thermostat wisely – avoid frequent large temperature swings that make the system work harder.
  • Pay attention to changes in noise, smells, or comfort level and call sooner rather than later.

For a more complete homeowner-friendly checklist, visit our air conditioning maintenance guide for Tampa Bay and our regular HVAC maintenance guide.

Why Choose Home Therapist for HVAC Maintenance in Oldsmar, FL?

There are plenty of HVAC companies serving Oldsmar and the greater Tampa Bay area, but our focus at Home Therapist Cooling, Heating, and Plumbing is long-term comfort. We don’t just show up when something breaks; we partner with you to keep your home comfortable year after year.

For this Oldsmar homeowner, we:

  • Installed their system back in 2021.
  • Maintained it consistently under a Premium Therapy Plan.
  • Confirmed during this visit that it’s still operating at a high level.

That’s the kind of long-term relationship and peace of mind a maintenance plan is designed to provide.

If you’re in Oldsmar, you’re in a great location near local spots like Tampa Bay Downs and just a short drive from Tampa itself. Our team regularly serves homeowners throughout the Oldsmar area and nearby communities, keeping systems ready for the season ahead.

To see more about how we approach tune-ups and system care, you can also check out our HVAC system tune-up and maintenance service project in Tampa, FL 33614.

Local Context: HVAC Needs in Oldsmar, FL 34677

Oldsmar sits along the northern edge of Tampa Bay, with hot, humid summers and mild winters. According to the city’s profile on Wikipedia, the area experiences the subtropical conditions that make a reliable, efficient air conditioning system almost a necessity rather than a luxury.

Because of this climate, AC systems in Oldsmar often run much more than the national average. That constant load makes professional maintenance even more important. If you’d like to get a feel for the local area and where we serve, you can view Oldsmar on Google Maps.

When to Call for Professional HVAC Help

Even with a great track record like this system has, it’s important to know when to bring in a professional between scheduled visits. You should call an HVAC pro if you notice:

  • Warm air blowing from the vents when the AC is set to cool.
  • Unusual noises like grinding, squealing, or loud buzzing.
  • Weak airflow or certain rooms that never quite cool down.
  • Higher-than-normal energy bills without a change in usage.
  • Water around the indoor unit, wet spots on ceilings, or musty smells.

Addressing these signs quickly can often prevent a small problem from turning into a major repair. Our team is always ready to help with diagnostics, repairs, and preventative air conditioning service and repair when you need it.

Ready to Keep Your Oldsmar Home Comfortable Year-Round?

This maintenance visit in Oldsmar, FL 34677 is exactly how we like them to go: on time, thorough, and with no surprises. The 2021 system we installed is performing beautifully, the homeowner is protected by a Premium Therapy Plan, and everything is ready for another long stretch of Florida heat.

If you’d like that same peace of mind for your home, our team at Home Therapist Cooling, Heating, and Plumbing is here to help with:

Call Home Therapist or visit our website to schedule your HVAC maintenance in Oldsmar, FL, or anywhere in the Tampa Bay area. Whether you’re interested in a one-time tune-up or a full maintenance plan, we’ll walk you through your options in plain English and help you choose what works best for your home and budget. #HomeTherapist #TheTherapyYourHomeNeeds

Condenser Fan Motor Replacement in Valrico, FL 33596 Under Warranty

When your air conditioner suddenly stops keeping up with the Florida heat, it can turn an otherwise normal day into a stressful one. At a home in Valrico, FL 33596, our team at Home Therapist was called in to address a problem with an outdoor AC condenser that needed a new fan motor and related parts under warranty. In situations like this, homeowners often have questions about why parts fail, what “under warranty” really means, and what that warranty handling fee on the invoice is all about.

In this case study, we’ll walk through how our technician handled a condenser fan motor replacement in Valrico, FL, what was included, and how we help our clients understand their options in clear, simple terms.

Customer Problem: What Was Happening at the Home

Our client in Valrico reached out because their air conditioner’s outdoor unit (the condenser) was no longer running properly. A failing or failed condenser fan motor can cause symptoms like:

  • Warm air blowing from the vents inside the home
  • Outdoor unit humming but the fan blade not spinning
  • Breaker tripping or system shutting off unexpectedly
  • Very hot air coming from the top of the outdoor unit

While the job record for this visit focuses on the repair details and warranty items, these are the most common complaints we hear when a condenser fan motor is on its way out. In the Job notes, we documented the part order through the manufacturer’s supplier in Clearwater so we could complete the repair with the correct OEM motor for the system.

For homeowners in Valrico, FL, this is a fairly typical AC repair. The combination of heat, humidity, and long cooling seasons means outdoor units work hard most of the year. Over time, moving parts like fan motors and capacitors can wear down.

Our Inspection & Diagnosis Process

Before we replace any parts, our technician carefully confirms the diagnosis. On a condenser fan motor job like this, our general process looks like this:

  • Visual inspection of the condenser: Checking for obvious damage, burnt wiring, or debris around the fan.
  • Manually testing the fan blade: Determining whether the blade spins freely or feels stiff and seized.
  • Electrical testing: Verifying that power is reaching the fan motor and that the capacitor readings are within manufacturer specifications.
  • Checking for other issues: Examining contactor, wiring, and refrigerant pressures to be sure the motor is the true root cause.

In this Valrico project, the line item “System repair Lv.2 – Condenser Fan Motor Replacement (Labor Only)” tells us that the main repair was the motor itself. The description also notes that labor for a possible new capacitor was included, if needed. This is important because a weak or failed capacitor is one of the top reasons a fan motor burns out prematurely.

Once the technician confirmed that the fan motor was indeed failed or failing, and that the motor was covered under the manufacturer’s parts warranty, we proceeded with ordering and installing the new component.

Understanding the Warranty Handling Fee and Parts

One of the most common questions we hear during AC repair in Valrico, FL is:

“If the part is under warranty, why is there still a charge on my invoice?”

This job is a good example. The work order includes:

  • Condenser fan motor replacement (labor only) – The time, tools, and expertise required for our technician to safely remove the old motor and install the new one.
  • Cost of parts – The new fan motor itself was covered under the manufacturer’s warranty.
  • Miscellaneous – Warranty Handling Fee – A small fee from the supplier to process and handle the manufacturer’s warranty claim and part logistics.
  • Elite Therapy Plan discount – A discount applied through our maintenance plan, helping reduce the homeowner’s out-of-pocket cost.

The warranty handling fee is not the cost of the part itself. Instead, it reflects the behind-the-scenes work and processing required to validate the warranty, order the correct part, and coordinate delivery through the approved supplier. In this case, our notes show the motor was ordered through the Trane supplier in Clearwater to make sure the replacement met factory specifications.

We always strive to explain these charges clearly, so homeowners understand exactly what they are paying for: expert labor, safe installation, and proper handling of the warranty process so their system remains compliant with manufacturer guidelines.

Step-by-Step: How We Replaced the Condenser Fan Motor

For a typical condenser fan motor replacement in Valrico, FL, our step-by-step process is designed for safety, reliability, and long-term performance. Here’s how a job like this generally goes:

1. Power Off and Safety Check

Our technician shuts off power at both the outdoor disconnect and the main breaker panel, then verifies that the unit is fully de-energized. This protects the equipment and, more importantly, keeps everyone safe.

2. Accessing the Existing Motor

The top grille of the condenser is removed so we can access the motor and fan blade assembly. We check for:

  • Signs of overheating or burnt insulation on the wires
  • Rust or corrosion on mounting hardware
  • Physical damage to the fan blades

If the fan blade is in good condition, we carefully transfer it to the new motor. If it is warped, cracked, or badly rusted, we’ll recommend replacement to avoid vibration and noise issues.

3. Removing the Old Fan Motor

Next, we disconnect the motor wiring from the control board or contactor, carefully label our connections, and unbolt the old motor from the top grille. This step must be done carefully to avoid bending the grille or damaging the fan blade.

4. Installing the New Motor and Capacitor (If Needed)

Once the new OEM motor arrives from the supplier, we mount it to the grille and set the fan blade at the manufacturer-recommended height for proper airflow. As the job description for this Valrico project notes, labor also covered installing a new capacitor if needed. If our readings show the existing capacitor is out of spec, we replace it at the same time. This helps prevent the new motor from being stressed by a weak capacitor.

We then:

  • Reconnect all wiring according to the wiring diagram
  • Secure connections with proper wire nuts and protective covers
  • Check for any rubbing or interference when the fan spins

5. Final Testing and System Check

Once everything is reassembled, we restore power and run the system through a full cooling cycle. During this check, we look for:

  • Smooth, quiet operation of the outdoor fan
  • Proper airflow out of the top of the condenser
  • Normal amperage draw on the new motor
  • Strong, cool air blowing from the indoor vents

Only after all readings look good do we consider the repair complete. We then review the work with the homeowner, answer questions about the warranty, and provide tips to help extend the life of the new motor.

Why Fixing a Condenser Fan Motor Promptly Matters

A failing condenser fan motor is more than just an inconvenience. If left unaddressed, it can lead to larger, more expensive problems. Here’s why timely AC repair in Valrico, FL is so important:

  • Prevents compressor damage: Without proper airflow across the outdoor coil, system pressures rise and the compressor can overheat and fail.
  • Reduces energy waste: A struggling fan motor can draw high amperage and run inefficiently, driving up power bills.
  • Improves indoor comfort: With the fan working correctly, your system can remove more heat and humidity from the home.
  • Protects your warranty: Using approved parts and proper installation helps maintain manufacturer warranty coverage.

In this Valrico project, the homeowner was proactive and allowed us to replace the motor under warranty before additional components were damaged. That decision helped keep the total cost lower and restored reliable cooling faster.

How Our Maintenance Plan Helped This Homeowner

This job also included an Elite Therapy Plan discount, which tells us the homeowner was enrolled in our maintenance plan. For many of our clients, a plan like this offers real-world benefits, including:

  • Discounts on repairs and service calls
  • Priority scheduling during peak seasons
  • Regular tune-ups that catch problems early
  • Documentation that supports warranty claims

In a climate like Valrico, FL, where air conditioners run most of the year, a maintenance plan can be the difference between a sudden breakdown and a quick, planned repair. During routine visits, our technicians often spot early signs of motor or capacitor issues, giving homeowners a chance to plan ahead instead of facing an emergency in the middle of a heat wave.

If you’re curious about what’s included in our maintenance options, you can learn more about our AC maintenance plans and services on our website.

Tips to Prevent Future Condenser Fan Motor Problems in Valrico Homes

While no component lasts forever, there are several things homeowners in Valrico, FL can do to help extend the life of a condenser fan motor and keep their system running smoothly.

  • Keep the area around the condenser clear: Maintain at least two feet of clearance around the outdoor unit. Trim back bushes and remove leaves and debris.
  • Change air filters regularly: Restrictive filters can cause your system to work harder, which increases strain on multiple components, including the fan motor.
  • Schedule yearly tune-ups: Professional inspections let us check capacitors, motor bearings, and electrical connections before they become serious problems.
  • Listen for changes: If your outdoor unit starts sounding louder than usual, rattles, or hums without the fan spinning, shut it down and call for service.
  • Protect your system from power issues: Whole-home surge protection or dedicated HVAC surge protectors can help protect motors and electronics from voltage spikes.

For a deeper dive into what to expect when your AC is not cooling properly, we also recommend reading our article on air conditioner repair services and non-cooling issues.

Local Context: AC Systems in Valrico, FL

Valrico is part of the greater Tampa Bay area, known for long, hot summers and high humidity levels. According to Valrico’s local profile, the community has grown quickly, with a mix of older homes and newer developments. That mix means we see a wide variety of HVAC systems in the 33596 area—from older units nearing the end of their lifespan to newer, high-efficiency systems still under full manufacturer warranty.

Because air conditioning is essential here for much of the year, even a “small” component failure like a fan motor can quickly affect daily comfort. Being proactive with service and choosing experienced local technicians can make a big difference. If you’re curious where Valrico sits within the Tampa Bay region, you can see it on Google Maps.

Related Services We Offer in the Tampa Bay Area

Condenser fan motor replacement is just one of many AC repair services we provide. Homeowners in Valrico and across the Tampa Bay area often reach out to us for:

We also have a case study covering another condenser motor replacement project on a rooftop unit in the Tampa area, which can help you see how we approach similar repairs from start to finish.

Why Choose Home Therapist for AC Repair in Valrico, FL?

When you’re dealing with an AC problem—especially in the middle of a hot, humid day—you don’t just want a quick fix. You want a team that treats your home like their own and takes the time to explain what’s going on.

Here’s what our clients in Valrico and throughout Tampa Bay can expect from us:

  • Clear communication: We explain the problem, the options, and the costs in plain language.
  • Factory-approved repairs: We use parts and methods that align with manufacturer guidelines, especially when a warranty is involved.
  • Respect for your time and home: We show up prepared, work efficiently, and leave the work area clean.
  • Long-term mindset: We don’t just swap parts; we look for underlying causes so the same issue is less likely to come back.

In this Valrico condenser fan motor project, that meant coordinating with the Trane supplier, honoring the parts warranty, explaining the warranty handling fee, and applying the Elite Therapy Plan discount to help our client save money.

When to Call for Help

If you notice any of these signs at your home in Valrico, FL or the surrounding area, it’s a good idea to reach out to a professional:

  • Outdoor unit hums but the fan blade doesn’t spin.
  • Warm air is blowing from your vents even though the thermostat is set to cool.
  • Your AC runs continuously but never seems to catch up.
  • You hear grinding, screeching, or rattling from the outdoor unit.

Shutting the system off and calling for service can prevent additional damage and keep repair costs more manageable.

Need AC Repair in Valrico, FL? We’re Here to Help.

Whether you’re dealing with a failing condenser fan motor, a system that’s not cooling, or just want to keep your AC in top shape with regular maintenance, our team at Home Therapist is ready to help.

We proudly serve Valrico, FL 33596 and the greater Tampa Bay area with honest, professional HVAC and plumbing services. Call Home Therapist or visit our website to schedule service, learn more about our Elite Therapy Plan, or ask questions about your system. We’re here to provide the therapy your home needs. #HomeTherapist #TheTherapyYourHomeNeeds

17-Year-Old AC System in Tampa, FL 33610: When Maintenance Reveals It’s Time for HVAC Replacement

During a recent quarterly HVAC maintenance visit at a home in the 33610 area of Tampa, FL, our team at Home Therapist Cooling, Heating, and Plumbing found something we see often in older systems: an air conditioner that has simply reached the end of its safe and efficient life. What started as a routine service agreement visit turned into an important conversation about safety, comfort, and when it’s the right time to replace an aging HVAC system.

Living in Tampa, FL means your air conditioner works hard almost all year. When a system is 17 years old and showing repeated electrical and airflow problems, it’s more than just an inconvenience—it can affect your comfort, your energy bills, and even the safety of your home’s electrical system.

Customer Problem: What Was Happening at the Home

This visit was part of a Quarterly Service Agreement for a homeowner in Tampa, FL 33610. Because they’re on a maintenance plan, we visit on a regular schedule to inspect, clean, test, and document the health of their HVAC system.

The client didn’t call with a single emergency complaint this time; instead, this was a planned maintenance visit—Visit #9 under their agreement. That said, from earlier visits we already knew this system was struggling. The homeowner had been dealing with:

There were also some access notes on the account: entry to the property is remote, and our technician needs to call the client upon arrival. We always pay attention to these details so we can respect the customer’s preferences and keep the visit smooth and stress-free.

What Our Technician Found During the Quarterly Service Visit

Our technician, Jandiel, completed a thorough checkup as part of the Quarterly Service Agreement visit. Even though this was a routine maintenance appointment, we always approach it as an opportunity to catch safety and performance issues early.

Here’s what we found during this visit in Tampa, FL 33610:

1. The System Is 17 Years Old and in Very Poor Condition

Seventeen years is beyond the average life expectancy for most residential HVAC systems in Florida’s climate. Between heat, humidity, and heavy usage, many systems in Tampa need replacement around the 10–15 year mark. At 17 years, this system had:

  • Noticeable wear on major components
  • Ongoing reliability issues documented from previous visits
  • Inefficient performance compared to modern equipment

At this point, even if we can keep it running with repairs, it usually isn’t the smartest or safest long-term investment for the homeowner.

2. Electrical Safety Concern: Condenser and Air Handler Sharing a Single Breaker

One of the most serious findings was an electrical configuration problem: the outdoor condenser and indoor air handler were both tied to a single breaker. This was not new information—we had noted it on a previous visit—but the condition continued without correction.

Why is this a problem?

  • Frequent breaker tripping: Both major components draw significant power. Putting them on one breaker overloads the circuit.
  • Potential safety risk: Breakers constantly tripping is a sign that something isn’t right electrically. Over time, this can lead to overheating, nuisance outages, and stress on wiring and equipment.
  • Code and best-practice concerns: Current standards typically call for separate dedicated circuits for the condenser and the air handler.

3. No Electrical Disconnect on the Air Handler

We also noted that the air handler did not have its own electrical disconnect switch within line of sight. A disconnect is important for:

  • Technician safety: It allows us to safely shut off power for service and repairs.
  • Emergency shutoff: In a problem situation, it provides a quick way to kill power to that part of the system.
  • Compliance: It’s part of following modern electrical and mechanical codes.

While homeowners don’t always see this component or think about it, it’s a basic safety and serviceability feature we take seriously.

4. Ductwork in Poor Condition

In addition to the equipment and electrical issues, the ductwork in this Tampa home was in poor shape. Damaged, leaky, or poorly designed ductwork can:

  • Waste cooled air into the attic or crawlspaces
  • Create hot and cold spots throughout the home
  • Increase dust and affect indoor air quality
  • Force the HVAC system to work harder and run longer

We’ve seen similar issues in other homes in this area—if you’d like a deeper dive into duct projects, you can see another case study at our air duct repair and replacement project in Tampa, FL 33610.

Our Recommended Options for This Tampa, FL Home

After documenting the condition of the 17-year-old system and the electrical and ductwork problems, we walked the homeowner through several clear, straightforward recommendations. Because they’re on a maintenance plan, they already understand the value of regular HVAC care—but there comes a point where maintenance is keeping an old system afloat rather than helping it perform well.

Recommended Option 1: Replace the Entire HVAC System

We recommended replacing both the outdoor condenser and the indoor air handler. A full system replacement allows us to:

  • Match equipment properly for better performance and efficiency
  • Install a system that meets current efficiency standards
  • Correct old installation or sizing issues
  • Provide more reliable cooling in Tampa’s hot, humid climate

For homeowners researching this decision, our blog on the HVAC replacement checklist for homeowners is a helpful guide to what to expect and what questions to ask.

Recommended Option 2: Add a Proper Electrical Disconnect for the Air Handler

We also recommended adding a dedicated electrical disconnect for the air handler. This is a relatively small component, but it’s an important part of a safe, code-compliant installation. With a proper disconnect, both homeowners and technicians have a safer way to control power during service or emergencies.

Recommended Option 3: Separate the Electrical Circuits

Next, we advised separating the electrical circuits so the condenser and air handler no longer share a single breaker. Instead, each would have its own dedicated circuit sized appropriately for the equipment.

This helps to:

  • Reduce or eliminate nuisance breaker trips
  • Protect the equipment from electrical stress
  • Bring the installation closer to current code and best practices

Recommended Option 4: Replace or Redesign the Ductwork

Finally, we recommended either replacing or redesigning the existing duct system. In some Tampa homes, this means sealing, repairing, and resizing certain runs. In others, it makes more sense to replace large portions of the ductwork entirely.

Good ductwork design can dramatically improve:

  • Room-to-room comfort and balanced temperatures
  • System efficiency and run times
  • Noise levels and airflow
  • Indoor air quality and dust control

We also pointed the homeowner toward our educational article on why upgrading your HVAC system can be a smart move, which explains how modern equipment and properly designed ductwork work together.

Why We Recommended Replacement Instead of More Repairs

When we talk to homeowners in Tampa, we try to be very open about the repair-versus-replace decision. We’re not here to push a new system on anyone; our job is to share honest observations and help you make an informed choice.

In this case, we recommended replacing the system for a few key reasons:

1. Age and Condition

At 17 years old, this HVAC system was already beyond the typical life span for Florida. Components wear down, parts become less available, and efficiency drops compared to newer systems. Investing in major repairs on a system this old often becomes a short-term patch rather than a long-term solution.

2. Repeated Electrical Problems

The shared breaker issue had been noted before. While we can sometimes make improvements to wiring and controls, there is a limit to how far we can take an older, compromised installation before it makes more sense to start fresh with a properly designed system.

3. Safety and Code Compliance

Missing disconnects and improper circuiting are red flags from a safety standpoint. When we replace a system, we have the opportunity to bring the entire installation into alignment with modern codes and best practices, which is a big benefit for long-term peace of mind.

4. Ductwork Problems and Efficiency

Even the best new equipment will struggle if it’s tied to poor ductwork. By addressing the duct issues at the same time as the equipment replacement, we help ensure that the homeowner actually feels the full benefit of the upgrade. For more tips on getting the most value out of your system, our guide to HVAC maintenance for homeowners is a great resource.

5. Long-Term Cost and Comfort

Continuing to repair an aging, inefficient system can become like pouring money into an old car that’s breaking down every few months. A properly sized, modern system with good ductwork typically offers:

  • Lower energy usage
  • More consistent comfort throughout the home
  • Quieter operation
  • Fewer surprise breakdowns in the middle of a Tampa summer

After reviewing all of this, we prepared detailed estimates and sent them to the homeowner for their consideration so they could make a decision on their own timeline.

Step-by-Step: How We Handle This Kind of Project in Tampa, FL

Every home and every system is a little different, but for a job like this—full system replacement, electrical corrections, and ductwork improvements—our process generally looks like this:

1. Initial Inspection and Documentation

We start with a thorough inspection, documenting:

  • Existing equipment model, age, and condition
  • Electrical setup including breakers, disconnects, and wiring
  • Duct layout, sizing, and visible damage
  • Airflow and comfort concerns in different rooms

This step was already largely complete because of the homeowner’s Quarterly Service Agreement, which gives us a clear service history.

2. Load Calculation and System Sizing

When the client decides to move forward, we perform proper sizing to make sure the new system is neither too small nor too large. In Tampa’s climate, correct sizing is critical for managing humidity and ensuring energy efficiency.

Our resources on how to choose an HVAC system in Tampa Bay can help homeowners understand what goes into this step.

3. Electrical Corrections

We coordinate necessary electrical work, which can include:

  • Installing a dedicated breaker and circuit for the air handler
  • Ensuring the condenser has its own properly sized circuit
  • Adding required disconnects within line of sight of the equipment

These upgrades are not just for compliance—they help protect the system and keep your home safer.

4. Ductwork Repair or Redesign

Depending on what we find, we may:

We know air distribution is just as important as the unit itself. That’s especially true in older homes in areas like Tampa, FL 33610, where ductwork may have been patched over the years.

5. Installing and Commissioning the New System

Once the electrical and ductwork are addressed, we install the new HVAC equipment. We then commission the system—meaning we test, measure, and adjust to ensure it’s operating as designed.

If you’re curious about this part of the process, our article on what HVAC commissioning is and why it matters goes into more detail.

6. Ongoing Maintenance

Finally, we always recommend staying on a maintenance schedule. This homeowner was already ahead of the game with a Quarterly Service Agreement, which helped us catch these issues and start the replacement conversation before something failed completely in the middle of summer.

What Could Have Happened If Nothing Changed

If the homeowner chose to continue running this 17-year-old system without making any upgrades or corrections, a few outcomes were likely:

  • More frequent breakdowns during high-demand days in Tampa’s heat
  • Continued breaker trips, which are annoying at best and potentially risky at worst
  • Higher energy bills from an inefficient system and leaky ductwork
  • Uneven comfort with hot spots and humidity issues throughout the home

Our job isn’t to scare anyone, but to be honest. Older systems don’t fail on a convenient schedule, and addressing these issues proactively gives the homeowner more control and more options.

Tips to Prevent Similar Problems in Tampa, FL Homes

Whether you’re in Tampa, FL 33610 or elsewhere in the Tampa Bay area, there are a few practical steps you can take to reduce the chances of finding yourself in a similar situation:

  • Stay on a regular maintenance plan. Routine visits allow us to catch electrical, mechanical, and duct issues early. Our maintenance-focused blogs, like the regular HVAC maintenance guide, explain what should be checked each season.
  • Pay attention to breaker trips. If your AC or air handler is tripping the breaker more than once in a blue moon, it’s worth a professional inspection.
  • Watch for uneven temperatures and weak airflow. These can be signs of duct problems, not just equipment issues.
  • Know your system’s age. If your system is 12–15+ years old, start planning ahead. Reading resources like our why upgrade your HVAC system guide can help you prepare before an emergency hits.
  • Use trusted local pros. HVAC systems in coastal and humid climates like Tampa have unique demands. Local experience matters.

Why Choose Home Therapist for HVAC and Ductwork in Tampa, FL?

Our team at Home Therapist Cooling, Heating, and Plumbing focuses on clear communication, thorough inspections, and practical recommendations—never pressure. On maintenance agreement visits like this one, our goal is to:

  • Document the true condition of your system
  • Explain safety and comfort concerns in plain language
  • Offer options that match your budget and priorities
  • Respect your schedule and access preferences

We serve homeowners throughout Tampa, FL and the greater Tampa Bay area, helping them stay comfortable in our hot, humid climate. If you’d like to understand more about how regular service helps, check out our article on why you should schedule regular HVAC maintenance.

For a bit of local context, Tampa isn’t just hot—it’s a vibrant city with attractions like downtown Tampa, the Tampa Riverwalk, and nearby destinations like Busch Gardens. But when you come home from a day out, you want to walk into cool, dry, comfortable air—without worrying if your 17-year-old AC will make it through another season.

Serving Homeowners Across Tampa, FL 33610 and Beyond

We understand the specific demands of HVAC systems in communities across Tampa, including the 33610 area. If you’re curious where you are on the map, you can see the area on Google Maps for Tampa, FL 33610. Whether you’re closer to downtown, the riverfront, or the outer neighborhoods, your AC works hard almost year-round—and it deserves proper care.

Thinking About Replacing an Old AC in Tampa, FL?

If you’re in a similar situation—an older system, recurring electrical issues, duct problems, or just a feeling that your AC isn’t keeping up—it might be time to start exploring replacement options. You don’t have to make the decision alone. Our team can inspect your current system, discuss what we see, and give you straightforward recommendations.

Call Home Therapist or visit our website to schedule an evaluation or ask about our maintenance agreements and replacement options for HVAC and ductwork in Tampa, FL. We’ll walk you through each step, from inspection to estimates to installation, in clear, simple terms.

When your home needs reliable cooling, safe electrical configurations, and solid ductwork, we’re here to provide #HomeTherapist and #TheTherapyYourHomeNeeds.

During a recent quarterly HVAC maintenance visit at a home in the 33610 area of Tampa, FL, our team at Home Therapist Cooling, Heating, and Plumbing found something we see often in older systems: an air conditioner that has simply reached the end of its safe and efficient life. What started as a routine service agreement visit turned into an important conversation about safety, comfort, and when it’s the right time to replace an aging HVAC system.

Living in Tampa, FL means your air conditioner works hard almost all year. When a system is 17 years old and showing repeated electrical and airflow problems, it’s more than just an inconvenience—it can affect your comfort, your energy bills, and even the safety of your home’s electrical system.

Customer Problem: What Was Happening at the Home

This visit was part of a Quarterly Service Agreement for a homeowner in Tampa, FL 33610. Because they’re on a maintenance plan, we visit on a regular schedule to inspect, clean, test, and document the health of their HVAC system.

The client didn’t call with a single emergency complaint this time; instead, this was a planned maintenance visit—Visit #9 under their agreement. That said, from earlier visits we already knew this system was struggling. The homeowner had been dealing with:

  • Frequent breaker trips when the AC ran
  • Inconsistent cooling in different rooms
  • Concerns about the age and reliability of the system

There were also some access notes on the account: entry to the property is remote, and our technician needs to call the client upon arrival. We always pay attention to these details so we can respect the customer’s preferences and keep the visit smooth and stress-free.

What Our Technician Found During the Quarterly Service Visit

Our technician, Jandiel, completed a thorough checkup as part of the Quarterly Service Agreement visit. Even though this was a routine maintenance appointment, we always approach it as an opportunity to catch safety and performance issues early.

Here’s what we found during this visit in Tampa, FL 33610:

1. The System Is 17 Years Old and in Very Poor Condition

Seventeen years is beyond the average life expectancy for most residential HVAC systems in Florida’s climate. Between heat, humidity, and heavy usage, many systems in Tampa need replacement around the 10–15 year mark. At 17 years, this system had:

  • Noticeable wear on major components
  • Ongoing reliability issues documented from previous visits
  • Inefficient performance compared to modern equipment

At this point, even if we can keep it running with repairs, it usually isn’t the smartest or safest long-term investment for the homeowner.

2. Electrical Safety Concern: Condenser and Air Handler Sharing a Single Breaker

One of the most serious findings was an electrical configuration problem: the outdoor condenser and indoor air handler were both tied to a single breaker. This was not new information—we had noted it on a previous visit—but the condition continued without correction.

Why is this a problem?

  • Frequent breaker tripping: Both major components draw significant power. Putting them on one breaker overloads the circuit.
  • Potential safety risk: Breakers constantly tripping is a sign that something isn’t right electrically. Over time, this can lead to overheating, nuisance outages, and stress on wiring and equipment.
  • Code and best-practice concerns: Current standards typically call for separate dedicated circuits for the condenser and the air handler.

3. No Electrical Disconnect on the Air Handler

We also noted that the air handler did not have its own electrical disconnect switch within line of sight. A disconnect is important for:

  • Technician safety: It allows us to safely shut off power for service and repairs.
  • Emergency shutoff: In a problem situation, it provides a quick way to kill power to that part of the system.
  • Compliance: It’s part of following modern electrical and mechanical codes.

While homeowners don’t always see this component or think about it, it’s a basic safety and serviceability feature we take seriously.

4. Ductwork in Poor Condition

In addition to the equipment and electrical issues, the ductwork in this Tampa home was in poor shape. Damaged, leaky, or poorly designed ductwork can:

  • Waste cooled air into the attic or crawlspaces
  • Create hot and cold spots throughout the home
  • Increase dust and affect indoor air quality
  • Force the HVAC system to work harder and run longer

We’ve seen similar issues in other homes in this area—if you’d like a deeper dive into duct projects, you can see another case study at our air duct repair and replacement project in Tampa, FL 33610.

Our Recommended Options for This Tampa, FL Home

After documenting the condition of the 17-year-old system and the electrical and ductwork problems, we walked the homeowner through several clear, straightforward recommendations. Because they’re on a maintenance plan, they already understand the value of regular HVAC care—but there comes a point where maintenance is keeping an old system afloat rather than helping it perform well.

Recommended Option 1: Replace the Entire HVAC System

We recommended replacing both the outdoor condenser and the indoor air handler. A full system replacement allows us to:

  • Match equipment properly for better performance and efficiency
  • Install a system that meets current efficiency standards
  • Correct old installation or sizing issues
  • Provide more reliable cooling in Tampa’s hot, humid climate

For homeowners researching this decision, our blog on the HVAC replacement checklist for homeowners is a helpful guide to what to expect and what questions to ask.

Recommended Option 2: Add a Proper Electrical Disconnect for the Air Handler

We also recommended adding a dedicated electrical disconnect for the air handler. This is a relatively small component, but it’s an important part of a safe, code-compliant installation. With a proper disconnect, both homeowners and technicians have a safer way to control power during service or emergencies.

Recommended Option 3: Separate the Electrical Circuits

Next, we advised separating the electrical circuits so the condenser and air handler no longer share a single breaker. Instead, each would have its own dedicated circuit sized appropriately for the equipment.

This helps to:

  • Reduce or eliminate nuisance breaker trips
  • Protect the equipment from electrical stress
  • Bring the installation closer to current code and best practices

Recommended Option 4: Replace or Redesign the Ductwork

Finally, we recommended either replacing or redesigning the existing duct system. In some Tampa homes, this means sealing, repairing, and resizing certain runs. In others, it makes more sense to replace large portions of the ductwork entirely.

Good ductwork design can dramatically improve:

  • Room-to-room comfort and balanced temperatures
  • System efficiency and run times
  • Noise levels and airflow
  • Indoor air quality and dust control

We also pointed the homeowner toward our educational article on why upgrading your HVAC system can be a smart move, which explains how modern equipment and properly designed ductwork work together.

Why We Recommended Replacement Instead of More Repairs

When we talk to homeowners in Tampa, we try to be very open about the repair-versus-replace decision. We’re not here to push a new system on anyone; our job is to share honest observations and help you make an informed choice.

In this case, we recommended replacing the system for a few key reasons:

1. Age and Condition

At 17 years old, this HVAC system was already beyond the typical life span for Florida. Components wear down, parts become less available, and efficiency drops compared to newer systems. Investing in major repairs on a system this old often becomes a short-term patch rather than a long-term solution.

2. Repeated Electrical Problems

The shared breaker issue had been noted before. While we can sometimes make improvements to wiring and controls, there is a limit to how far we can take an older, compromised installation before it makes more sense to start fresh with a properly designed system.

3. Safety and Code Compliance

Missing disconnects and improper circuiting are red flags from a safety standpoint. When we replace a system, we have the opportunity to bring the entire installation into alignment with modern codes and best practices, which is a big benefit for long-term peace of mind.

4. Ductwork Problems and Efficiency

Even the best new equipment will struggle if it’s tied to poor ductwork. By addressing the duct issues at the same time as the equipment replacement, we help ensure that the homeowner actually feels the full benefit of the upgrade. For more tips on getting the most value out of your system, our guide to HVAC maintenance for homeowners is a great resource.

5. Long-Term Cost and Comfort

Continuing to repair an aging, inefficient system can become like pouring money into an old car that’s breaking down every few months. A properly sized, modern system with good ductwork typically offers:

  • Lower energy usage
  • More consistent comfort throughout the home
  • Quieter operation
  • Fewer surprise breakdowns in the middle of a Tampa summer

After reviewing all of this, we prepared detailed estimates and sent them to the homeowner for their consideration so they could make a decision on their own timeline.

Step-by-Step: How We Handle This Kind of Project in Tampa, FL

Every home and every system is a little different, but for a job like this—full system replacement, electrical corrections, and ductwork improvements—our process generally looks like this:

1. Initial Inspection and Documentation

We start with a thorough inspection, documenting:

  • Existing equipment model, age, and condition
  • Electrical setup including breakers, disconnects, and wiring
  • Duct layout, sizing, and visible damage
  • Airflow and comfort concerns in different rooms

This step was already largely complete because of the homeowner’s Quarterly Service Agreement, which gives us a clear service history.

2. Load Calculation and System Sizing

When the client decides to move forward, we perform proper sizing to make sure the new system is neither too small nor too large. In Tampa’s climate, correct sizing is critical for managing humidity and ensuring energy efficiency.

Our resources on how to choose an HVAC system in Tampa Bay can help homeowners understand what goes into this step.

3. Electrical Corrections

We coordinate necessary electrical work, which can include:

  • Installing a dedicated breaker and circuit for the air handler
  • Ensuring the condenser has its own properly sized circuit
  • Adding required disconnects within line of sight of the equipment

These upgrades are not just for compliance—they help protect the system and keep your home safer.

4. Ductwork Repair or Redesign

Depending on what we find, we may:

  • Seal leaky joints and connections
  • Replace damaged or undersized runs
  • Rebalance airflow to problem rooms
  • Replace sections of duct that are beyond repair

We know air distribution is just as important as the unit itself. That’s especially true in older homes in areas like Tampa, FL 33610, where ductwork may have been patched over the years.

5. Installing and Commissioning the New System

Once the electrical and ductwork are addressed, we install the new HVAC equipment. We then commission the system—meaning we test, measure, and adjust to ensure it’s operating as designed.

If you’re curious about this part of the process, our article on what HVAC commissioning is and why it matters goes into more detail.

6. Ongoing Maintenance

Finally, we always recommend staying on a maintenance schedule. This homeowner was already ahead of the game with a Quarterly Service Agreement, which helped us catch these issues and start the replacement conversation before something failed completely in the middle of summer.

What Could Have Happened If Nothing Changed

If the homeowner chose to continue running this 17-year-old system without making any upgrades or corrections, a few outcomes were likely:

  • More frequent breakdowns during high-demand days in Tampa’s heat
  • Continued breaker trips, which are annoying at best and potentially risky at worst
  • Higher energy bills from an inefficient system and leaky ductwork
  • Uneven comfort with hot spots and humidity issues throughout the home

Our job isn’t to scare anyone, but to be honest. Older systems don’t fail on a convenient schedule, and addressing these issues proactively gives the homeowner more control and more options.

Tips to Prevent Similar Problems in Tampa, FL Homes

Whether you’re in Tampa, FL 33610 or elsewhere in the Tampa Bay area, there are a few practical steps you can take to reduce the chances of finding yourself in a similar situation:

  • Stay on a regular maintenance plan. Routine visits allow us to catch electrical, mechanical, and duct issues early. Our maintenance-focused blogs, like the regular HVAC maintenance guide, explain what should be checked each season.
  • Pay attention to breaker trips. If your AC or air handler is tripping the breaker more than once in a blue moon, it’s worth a professional inspection.
  • Watch for uneven temperatures and weak airflow. These can be signs of duct problems, not just equipment issues.
  • Know your system’s age. If your system is 12–15+ years old, start planning ahead. Reading resources like our why upgrade your HVAC system guide can help you prepare before an emergency hits.
  • Use trusted local pros. HVAC systems in coastal and humid climates like Tampa have unique demands. Local experience matters.

Why Choose Home Therapist for HVAC and Ductwork in Tampa, FL?

Our team at Home Therapist Cooling, Heating, and Plumbing focuses on clear communication, thorough inspections, and practical recommendations—never pressure. On maintenance agreement visits like this one, our goal is to:

  • Document the true condition of your system
  • Explain safety and comfort concerns in plain language
  • Offer options that match your budget and priorities
  • Respect your schedule and access preferences

We serve homeowners throughout Tampa, FL and the greater Tampa Bay area, helping them stay comfortable in our hot, humid climate. If you’d like to understand more about how regular service helps, check out our article on why you should schedule regular HVAC maintenance.

For a bit of local context, Tampa isn’t just hot—it’s a vibrant city with attractions like downtown Tampa, the Tampa Riverwalk, and nearby destinations like Busch Gardens. But when you come home from a day out, you want to walk into cool, dry, comfortable air—without worrying if your 17-year-old AC will make it through another season.

Serving Homeowners Across Tampa, FL 33610 and Beyond

We understand the specific demands of HVAC systems in communities across Tampa, including the 33610 area. If you’re curious where you are on the map, you can see the area on Google Maps for Tampa, FL 33610. Whether you’re closer to downtown, the riverfront, or the outer neighborhoods, your AC works hard almost year-round—and it deserves proper care.

Thinking About Replacing an Old AC in Tampa, FL?

If you’re in a similar situation—an older system, recurring electrical issues, duct problems, or just a feeling that your AC isn’t keeping up—it might be time to start exploring replacement options. You don’t have to make the decision alone. Our team can inspect your current system, discuss what we see, and give you straightforward recommendations.

Call Home Therapist or visit our website to schedule an evaluation or ask about our maintenance agreements and replacement options for HVAC and ductwork in Tampa, FL. We’ll walk you through each step, from inspection to estimates to installation, in clear, simple terms.

When your home needs reliable cooling, safe electrical configurations, and solid ductwork, we’re here to provide #HomeTherapist and #TheTherapyYourHomeNeeds.

Quarterly HVAC Maintenance Visit Uncovers Aging System & Safety Concerns in Tampa, FL 33610

For homeowners in Tampa, FL 33610, a reliable air conditioning system isn’t a luxury—it’s a necessity. During a recent quarterly maintenance visit at a home in the 33610 area, our team at Home Therapist Cooling, Heating, and Plumbing found an aging HVAC system in very poor condition, with ongoing electrical problems and worn-out ductwork. The system was still limping along, but it was becoming less safe, less efficient, and more stressful for the homeowner.

In this case study, we’ll walk through what we found, why the issues matter, and the options we recommended. If you live in Tampa or nearby areas and your AC system is 15–20 years old, this story will sound familiar—and it may help you decide what to do next.

Customer Problem: What Was Happening at the Home

This visit was part of the homeowner’s ongoing quarterly maintenance agreement with us. They’ve been proactive about keeping their HVAC system checked, which is especially important in a hot, humid area like Tampa, Florida.

The key details from this visit:

Our technician also needed remote access to the property, so we coordinated arrival by calling the client when we got there. That’s a small detail, but for many Tampa homeowners who work long hours or manage rental properties, flexible access and clear communication can make a big difference.

Our Inspection & Diagnosis Process

Because this was a scheduled maintenance visit under a quarterly service agreement, our team followed a thorough, repeatable process. We don’t just do a quick visual check and leave; we use these visits to spot early warning signs before they become expensive emergencies.

For this visit in Tampa, FL 33610, our technician’s checklist included:

  • Inspecting the outdoor condenser unit.
  • Inspecting the indoor air handler.
  • Checking electrical connections and breaker configuration.
  • Assessing the condition of the ductwork.
  • Reviewing notes from previous visits to see ongoing patterns.

Key Finding #1: Shared Breaker Between Condenser and Air Handler

One of the biggest red flags we confirmed again on this visit was that the condenser and the air handler are sharing a single breaker. This is not how a modern HVAC system should be wired.

Why this is a problem:

  • Breaker trips: When both the indoor and outdoor units pull power from the same breaker, it’s easier to overload that circuit.
  • Safety concerns: Breakers are meant to protect wiring from overheating. Constantly tripping isn’t just annoying—it’s a sign the system is working too hard or wired improperly.
  • Code and inspection issues: This type of setup may not meet current electrical code, and it certainly doesn’t match best practice for modern HVAC systems.

Key Finding #2: No Electrical Disconnect at the Air Handler

Our technician also confirmed that there is no dedicated electrical disconnect switch installed at the air handler. That means there’s no simple, local way to cut power to the unit while performing service.

This matters because:

  • Technicians should be able to shut power off right at the equipment for safe service.
  • Future repairs or replacements can take longer and be more complicated without a proper disconnect.
  • Local codes often expect a disconnect near major equipment like air handlers and condensers.

Key Finding #3: Very Poor Overall System Condition

At 17 years old, this AC system has given the homeowner many years of service, but it is now clearly at the end of its useful life. We noted:

  • Worn components and outdated technology.
  • Ongoing electrical issues that have been documented on previous visits.
  • Likely reduced efficiency compared to current high-efficiency models.

Even with regular maintenance, there comes a point where the system’s design and age limit what we can realistically improve. That’s where honest recommendations become important.

Key Finding #4: Ductwork in Poor Condition

We also found that the ductwork in this Tampa home is in poor shape. Damaged, leaky, or poorly designed ducts can create a long list of comfort and efficiency problems:

  • Uneven temperatures from room to room.
  • Higher energy bills as the system runs longer to keep up.
  • Potential dust and debris being pulled into the system.
  • Extra wear and tear on the equipment.

We’ve documented similar duct issues in other nearby projects, like the air duct repair, replacement, and cleaning project we completed in Tampa, FL 33610. When ducts are neglected, they can quietly undo a lot of the benefit of even a brand-new HVAC system.

Recommended Options for the Homeowner

After reviewing the findings, we provided the homeowner with straightforward, practical options—backed by written estimates for their consideration. Here’s what we recommended:

1. Replace the Entire HVAC System (Condenser and Air Handler)

Given the age (17 years) and poor condition of the existing system, our primary recommendation was a full system replacement.

Benefits of a new system include:

  • Improved energy efficiency: Today’s systems use less energy to provide the same or better comfort.
  • Better comfort control: More consistent temperatures and better humidity control—especially important in Tampa’s climate.
  • Fewer surprise breakdowns: While no system is trouble-free, a new installation removes a lot of the risk that comes with an aging unit.
  • Updated to current codes: Electrical and safety features can be properly designed from the ground up.

For homeowners exploring this option, we also have more general information about our air conditioner installation and repair services in the Tampa Bay area.

2. Install a Proper Electrical Disconnect for the Air Handler

We strongly recommended installing a dedicated electrical disconnect at the air handler. This is a relatively straightforward upgrade but an important one.

With a proper disconnect in place:

  • Technicians can safely service or replace the unit.
  • The installation aligns better with modern safety expectations.
  • Future troubleshooting and repairs are faster and safer.

3. Separate Electrical Circuits for the Condenser and Air Handler

The shared breaker issue is at the heart of the recurring electrical problems. Our recommendation was to separate the electrical circuits so that the condenser and air handler each have their own properly sized breaker.

This helps to:

  • Reduce or eliminate nuisance breaker trips.
  • Lower stress on the wiring and equipment.
  • Bring the system closer to code-compliant standards.

4. Replace or Redesign the Existing Ductwork

Finally, we recommended addressing the duct issues. Depending on the exact condition of each run, that could mean:

  • Repairing damaged sections.
  • Replacing old or undersized ducts.
  • Redesigning parts of the duct layout to improve airflow.

Clean, well-designed ductwork is just as important as the equipment itself. We’ve written more about duct and air quality work in projects like our duct sanitation and UV light installation in Tampa, FL 33618.

Why We Recommended Replacement Over More Repairs

One of the most common questions we get from Tampa homeowners is: “Should I keep fixing this system, or is it finally time to replace it?” In this case, we leaned strongly toward replacement, and here’s why.

Age of the System

At around 17 years old, this system is already beyond the typical 10–15 year range we expect for many residential AC systems in Florida’s climate. Our heat, humidity, and long cooling season put extra stress on equipment, so systems here often age faster than in cooler regions.

Recurring Electrical Issues

When the same types of electrical problems show up visit after visit—like breaker trips and shared circuits—it’s usually a sign that we’re treating symptoms, not the core problem. Resets, temporary fixes, or minor component swaps can only go so far when the wiring design and overall system condition are working against you.

Safety and Code Concerns

Issues like missing disconnects and shared breakers aren’t just technical details. They directly impact safety for both the homeowner and anyone who works on the equipment. Bringing the system up to modern standards is often easier and more reliable when done as part of a full replacement.

Efficiency and Operating Costs

Older systems generally cost more to run. Between lower SEER ratings, worn parts, and leaky ductwork, many homeowners end up spending more on monthly energy bills than they realize. A properly installed new system, paired with solid ductwork, can make a noticeable difference over time.

What Could Happen If These Issues Are Ignored?

Not every homeowner is ready to replace a system immediately, and we completely understand that. Our job is to explain what’s going on and what the risks are so you can make an informed decision.

If issues like these are left unaddressed, you may see:

  • More frequent breakdowns: Especially during the peak of summer when the system is under maximum load.
  • Potential damage to electrical components: From repeated breaker trips and overheating.
  • Uneven comfort: Hot and cold spots in the home due to poor ductwork and declining system performance.
  • Higher long-term costs: More service calls, higher power bills, and eventually replacement anyway.

The goal of our quarterly maintenance visits is to catch these problems early, explain them clearly, and give you time to plan. In this visit, we sent detailed estimates so the homeowner can budget and choose the right timing for their upgrades.

How Quarterly Maintenance Helped Catch These Problems

This situation is a perfect example of why a maintenance plan matters. Because we’ve been visiting this Tampa property regularly, we’ve been able to:

  • Track recurring electrical symptoms over multiple visits.
  • Document changes in system performance and condition.
  • Give the homeowner consistent, updated recommendations—not just a one-time snapshot.

We’ve shared more about what to expect from a service visit in our article on air conditioner repair services in Tampa when your AC is not cooling. A planned visit is always better than an emergency call in the middle of a heatwave.

Tips to Prevent Similar HVAC Problems in Tampa, FL Homes

Whether your system is brand-new or approaching retirement age, there are several steps you can take to avoid situations like this:

  • Schedule regular maintenance: Twice-yearly or quarterly visits help catch issues early and keep your system clean and tuned.
  • Listen to your breakers: If you notice breakers tripping more than once, don’t ignore it. It’s a sign something needs attention.
  • Watch your energy bills: A sudden jump in power usage can mean the system is working harder than it should.
  • Check airflow: Rooms that never seem to reach the right temperature may point to duct problems.
  • Plan ahead for replacement: If your system is 12–15 years old, it’s smart to start exploring options and setting a budget before an emergency hits.

Tampa’s climate, with long cooling seasons and high humidity, puts extra stress on HVAC systems. Local resources like the Tampa, FL 33610 area map and attractions such as Busch Gardens Tampa Bay remind us how much we rely on cool, comfortable indoor spaces after a long, hot day outside.

Why Choose Home Therapist for HVAC and Ductwork Projects in Tampa, FL?

Our team at Home Therapist Cooling, Heating, and Plumbing focuses on clear communication, honest recommendations, and careful work. We approach every visit—whether it’s a quick tune-up or a full system replacement—with the same mindset: treat the home like it’s our own.

When you work with us for HVAC installation and repair in Tampa, FL, you can expect:

  • Detailed inspections and clear explanations in plain language.
  • Options, not pressure—for repair, upgrade, or replacement.
  • Attention to safety, electrical configuration, and code requirements.
  • Guidance on duct repairs, indoor air quality, and long-term system health.

We’ve helped many homeowners in and around Tampa, FL 33610 with projects ranging from routine maintenance to air duct repair and replacement and full system upgrades.

Next Steps for This Tampa Homeowner

For this particular home, we wrapped up the quarterly service visit, documented all findings, and sent estimates covering:

  • Full system replacement (condenser and air handler).
  • Adding a proper electrical disconnect at the air handler.
  • Separating the electrical circuits for the condenser and air handler.
  • Addressing the aging, damaged ductwork.

We didn’t pressure the homeowner to make an immediate decision. Instead, we gave them the information, pricing, and context they need to decide what’s best for their home and budget.

Need HVAC Help in Tampa, FL 33610?

If your system is older, tripping breakers, or just not keeping up with the Tampa heat, our team is here to help. Whether you need a one-time inspection, a maintenance plan, or a quote for a new system, we’ll walk you through your options step by step.

Call Home Therapist Cooling, Heating, and Plumbing or visit our website to schedule your HVAC service in Tampa, FL and the surrounding areas. We’ll help you understand what’s going on with your system and what it will take to get your home comfortable, safe, and efficient again. #HomeTherapist #TheTherapyYourHomeNeeds

For homeowners in Tampa, FL 33610, a reliable air conditioning system isn’t a luxury—it’s a necessity. During a recent quarterly maintenance visit at a home in the 33610 area, our team at Home Therapist Cooling, Heating, and Plumbing found an aging HVAC system in very poor condition, with ongoing electrical problems and worn-out ductwork. The system was still limping along, but it was becoming less safe, less efficient, and more stressful for the homeowner.

In this case study, we’ll walk through what we found, why the issues matter, and the options we recommended. If you live in Tampa or nearby areas and your AC system is 15–20 years old, this story will sound familiar—and it may help you decide what to do next.

Customer Problem: What Was Happening at the Home

This visit was part of the homeowner’s ongoing quarterly maintenance agreement with us. They’ve been proactive about keeping their HVAC system checked, which is especially important in a hot, humid area like Tampa, Florida.

The key details from this visit:

  • It was the ninth scheduled maintenance visit under their service agreement.
  • The HVAC system is about 17 years old—well past typical lifespan expectations.
  • The homeowner has been dealing with recurring electrical problems, including breaker trips.
  • Ductwork throughout the home is in visibly poor shape.
  • There is no dedicated electrical disconnect at the air handler, which is a safety and code concern.

Our technician also needed remote access to the property, so we coordinated arrival by calling the client when we got there. That’s a small detail, but for many Tampa homeowners who work long hours or manage rental properties, flexible access and clear communication can make a big difference.

Our Inspection & Diagnosis Process

Because this was a scheduled maintenance visit under a quarterly service agreement, our team followed a thorough, repeatable process. We don’t just do a quick visual check and leave; we use these visits to spot early warning signs before they become expensive emergencies.

For this visit in Tampa, FL 33610, our technician’s checklist included:

  • Inspecting the outdoor condenser unit.
  • Inspecting the indoor air handler.
  • Checking electrical connections and breaker configuration.
  • Assessing the condition of the ductwork.
  • Reviewing notes from previous visits to see ongoing patterns.

Key Finding #1: Shared Breaker Between Condenser and Air Handler

One of the biggest red flags we confirmed again on this visit was that the condenser and the air handler are sharing a single breaker. This is not how a modern HVAC system should be wired.

Why this is a problem:

  • Breaker trips: When both the indoor and outdoor units pull power from the same breaker, it’s easier to overload that circuit.
  • Safety concerns: Breakers are meant to protect wiring from overheating. Constantly tripping isn’t just annoying—it’s a sign the system is working too hard or wired improperly.
  • Code and inspection issues: This type of setup may not meet current electrical code, and it certainly doesn’t match best practice for modern HVAC systems.

Key Finding #2: No Electrical Disconnect at the Air Handler

Our technician also confirmed that there is no dedicated electrical disconnect switch installed at the air handler. That means there’s no simple, local way to cut power to the unit while performing service.

This matters because:

  • Technicians should be able to shut power off right at the equipment for safe service.
  • Future repairs or replacements can take longer and be more complicated without a proper disconnect.
  • Local codes often expect a disconnect near major equipment like air handlers and condensers.

Key Finding #3: Very Poor Overall System Condition

At 17 years old, this AC system has given the homeowner many years of service, but it is now clearly at the end of its useful life. We noted:

  • Worn components and outdated technology.
  • Ongoing electrical issues that have been documented on previous visits.
  • Likely reduced efficiency compared to current high-efficiency models.

Even with regular maintenance, there comes a point where the system’s design and age limit what we can realistically improve. That’s where honest recommendations become important.

Key Finding #4: Ductwork in Poor Condition

We also found that the ductwork in this Tampa home is in poor shape. Damaged, leaky, or poorly designed ducts can create a long list of comfort and efficiency problems:

  • Uneven temperatures from room to room.
  • Higher energy bills as the system runs longer to keep up.
  • Potential dust and debris being pulled into the system.
  • Extra wear and tear on the equipment.

We’ve documented similar duct issues in other nearby projects, like the air duct repair, replacement, and cleaning project we completed in Tampa, FL 33610. When ducts are neglected, they can quietly undo a lot of the benefit of even a brand-new HVAC system.

Recommended Options for the Homeowner

After reviewing the findings, we provided the homeowner with straightforward, practical options—backed by written estimates for their consideration. Here’s what we recommended:

1. Replace the Entire HVAC System (Condenser and Air Handler)

Given the age (17 years) and poor condition of the existing system, our primary recommendation was a full system replacement.

Benefits of a new system include:

  • Improved energy efficiency: Today’s systems use less energy to provide the same or better comfort.
  • Better comfort control: More consistent temperatures and better humidity control—especially important in Tampa’s climate.
  • Fewer surprise breakdowns: While no system is trouble-free, a new installation removes a lot of the risk that comes with an aging unit.
  • Updated to current codes: Electrical and safety features can be properly designed from the ground up.

For homeowners exploring this option, we also have more general information about our air conditioner installation and repair services in the Tampa Bay area.

2. Install a Proper Electrical Disconnect for the Air Handler

We strongly recommended installing a dedicated electrical disconnect at the air handler. This is a relatively straightforward upgrade but an important one.

With a proper disconnect in place:

  • Technicians can safely service or replace the unit.
  • The installation aligns better with modern safety expectations.
  • Future troubleshooting and repairs are faster and safer.

3. Separate Electrical Circuits for the Condenser and Air Handler

The shared breaker issue is at the heart of the recurring electrical problems. Our recommendation was to separate the electrical circuits so that the condenser and air handler each have their own properly sized breaker.

This helps to:

  • Reduce or eliminate nuisance breaker trips.
  • Lower stress on the wiring and equipment.
  • Bring the system closer to code-compliant standards.

4. Replace or Redesign the Existing Ductwork

Finally, we recommended addressing the duct issues. Depending on the exact condition of each run, that could mean:

  • Repairing damaged sections.
  • Replacing old or undersized ducts.
  • Redesigning parts of the duct layout to improve airflow.

Clean, well-designed ductwork is just as important as the equipment itself. We’ve written more about duct and air quality work in projects like our duct sanitation and UV light installation in Tampa, FL 33618.

Why We Recommended Replacement Over More Repairs

One of the most common questions we get from Tampa homeowners is: “Should I keep fixing this system, or is it finally time to replace it?” In this case, we leaned strongly toward replacement, and here’s why.

Age of the System

At around 17 years old, this system is already beyond the typical 10–15 year range we expect for many residential AC systems in Florida’s climate. Our heat, humidity, and long cooling season put extra stress on equipment, so systems here often age faster than in cooler regions.

Recurring Electrical Issues

When the same types of electrical problems show up visit after visit—like breaker trips and shared circuits—it’s usually a sign that we’re treating symptoms, not the core problem. Resets, temporary fixes, or minor component swaps can only go so far when the wiring design and overall system condition are working against you.

Safety and Code Concerns

Issues like missing disconnects and shared breakers aren’t just technical details. They directly impact safety for both the homeowner and anyone who works on the equipment. Bringing the system up to modern standards is often easier and more reliable when done as part of a full replacement.

Efficiency and Operating Costs

Older systems generally cost more to run. Between lower SEER ratings, worn parts, and leaky ductwork, many homeowners end up spending more on monthly energy bills than they realize. A properly installed new system, paired with solid ductwork, can make a noticeable difference over time.

What Could Happen If These Issues Are Ignored?

Not every homeowner is ready to replace a system immediately, and we completely understand that. Our job is to explain what’s going on and what the risks are so you can make an informed decision.

If issues like these are left unaddressed, you may see:

  • More frequent breakdowns: Especially during the peak of summer when the system is under maximum load.
  • Potential damage to electrical components: From repeated breaker trips and overheating.
  • Uneven comfort: Hot and cold spots in the home due to poor ductwork and declining system performance.
  • Higher long-term costs: More service calls, higher power bills, and eventually replacement anyway.

The goal of our quarterly maintenance visits is to catch these problems early, explain them clearly, and give you time to plan. In this visit, we sent detailed estimates so the homeowner can budget and choose the right timing for their upgrades.

How Quarterly Maintenance Helped Catch These Problems

This situation is a perfect example of why a maintenance plan matters. Because we’ve been visiting this Tampa property regularly, we’ve been able to:

  • Track recurring electrical symptoms over multiple visits.
  • Document changes in system performance and condition.
  • Give the homeowner consistent, updated recommendations—not just a one-time snapshot.

We’ve shared more about what to expect from a service visit in our article on air conditioner repair services in Tampa when your AC is not cooling. A planned visit is always better than an emergency call in the middle of a heatwave.

Tips to Prevent Similar HVAC Problems in Tampa, FL Homes

Whether your system is brand-new or approaching retirement age, there are several steps you can take to avoid situations like this:

  • Schedule regular maintenance: Twice-yearly or quarterly visits help catch issues early and keep your system clean and tuned.
  • Listen to your breakers: If you notice breakers tripping more than once, don’t ignore it. It’s a sign something needs attention.
  • Watch your energy bills: A sudden jump in power usage can mean the system is working harder than it should.
  • Check airflow: Rooms that never seem to reach the right temperature may point to duct problems.
  • Plan ahead for replacement: If your system is 12–15 years old, it’s smart to start exploring options and setting a budget before an emergency hits.

Tampa’s climate, with long cooling seasons and high humidity, puts extra stress on HVAC systems. Local resources like the Tampa, FL 33610 area map and attractions such as Busch Gardens Tampa Bay remind us how much we rely on cool, comfortable indoor spaces after a long, hot day outside.

Why Choose Home Therapist for HVAC and Ductwork Projects in Tampa, FL?

Our team at Home Therapist Cooling, Heating, and Plumbing focuses on clear communication, honest recommendations, and careful work. We approach every visit—whether it’s a quick tune-up or a full system replacement—with the same mindset: treat the home like it’s our own.

When you work with us for HVAC installation and repair in Tampa, FL, you can expect:

  • Detailed inspections and clear explanations in plain language.
  • Options, not pressure—for repair, upgrade, or replacement.
  • Attention to safety, electrical configuration, and code requirements.
  • Guidance on duct repairs, indoor air quality, and long-term system health.

We’ve helped many homeowners in and around Tampa, FL 33610 with projects ranging from routine maintenance to air duct repair and replacement and full system upgrades.

Next Steps for This Tampa Homeowner

For this particular home, we wrapped up the quarterly service visit, documented all findings, and sent estimates covering:

  • Full system replacement (condenser and air handler).
  • Adding a proper electrical disconnect at the air handler.
  • Separating the electrical circuits for the condenser and air handler.
  • Addressing the aging, damaged ductwork.

We didn’t pressure the homeowner to make an immediate decision. Instead, we gave them the information, pricing, and context they need to decide what’s best for their home and budget.

Need HVAC Help in Tampa, FL 33610?

If your system is older, tripping breakers, or just not keeping up with the Tampa heat, our team is here to help. Whether you need a one-time inspection, a maintenance plan, or a quote for a new system, we’ll walk you through your options step by step.

Call Home Therapist Cooling, Heating, and Plumbing or visit our website to schedule your HVAC service in Tampa, FL and the surrounding areas. We’ll help you understand what’s going on with your system and what it will take to get your home comfortable, safe, and efficient again. #HomeTherapist #TheTherapyYourHomeNeeds

Tankless Water Heater Maintenance in Wesley Chapel, FL: Why Flushing and Inspection Matter

In a Wesley Chapel, FL 33543 home, our team was called out to perform routine tankless water heater maintenance. There wasn’t an emergency—hot water was still working—but the homeowner wanted to protect their investment and avoid surprise cold showers down the line. That’s exactly the kind of proactive care that keeps systems running safely and efficiently for years.

If you have a tankless water heater in Wesley Chapel, taking care of it with regular flushing, testing, and inspection is just as important as maintaining your AC or car. In this article, we’ll walk through what we did on this tankless water heater maintenance visit, why each step matters, and how you can keep your own system in great shape.

Customer Problem: Protecting a Tankless Water Heater Before Problems Start

For this visit in Wesley Chapel, FL 33543, the homeowner wasn’t dealing with a total loss of hot water or visible leaks. Their main concern was long-term performance. They understood that tankless water heaters aren’t “set it and forget it” systems and reached out to our team at Home Therapist to:

  • Have the tankless water heater flushed with descaler
  • Make sure the ignition system and heating components were working correctly
  • Confirm key safety devices, like the TPR (temperature and pressure relief) valve, were functioning
  • Catch any early signs of rust, leaks, or loose connections

In the Tampa Bay area, including Wesley Chapel, our water often has minerals that can build up inside water heaters over time. Even tankless systems—which don’t store large volumes of water like traditional tanks—can suffer from internal scale and sediment buildup. Without maintenance, that buildup can reduce efficiency, stress components, and shorten the life of the heater.

We always appreciate when homeowners call us for preventative water heater maintenance instead of waiting until there’s no hot water at all. It’s usually less stressful, less costly, and better for the equipment.

Our Inspection & Diagnosis Process

When our technician arrived at this Wesley Chapel home, the first step was to talk with the homeowner. Even for maintenance visits, we like to ask:

  • Have you noticed any changes in water temperature or pressure?
  • Is the hot water taking longer than usual to arrive at fixtures?
  • Have you heard any strange sounds when using hot water?
  • Do you know when the last maintenance or flush was performed?

After this quick conversation, we moved into the technical side of the visit. For this tankless water heater, our maintenance plan included:

Each of these steps helps us build a full picture of the water heater’s health. If we find worn or failing parts, we can recommend repairs before they turn into a cold-shower emergency.

Why Isolation Valves Matter

One of the first things we check on a tankless water heater is whether it has proper isolation valves installed. Isolation valves allow us to safely disconnect the unit from the home’s water lines and run a cleaning solution (descaler) through the heater without affecting the rest of the plumbing.

On this visit, we reviewed the valve setup and verified that the system was prepared for proper flushing. Whenever we don’t see isolation valves, we recommend installing them so future maintenance is safer, faster, and more effective. It’s a simple upgrade that can make a big difference in the long-term care of your water heater.

Step-by-Step: How We Serviced This Tankless Water Heater

Tankless water heater maintenance is detailed work, but from a homeowner’s perspective, it can be broken down into a clear, understandable process. Here’s how our team handled this visit in Wesley Chapel, FL.

1. System Safety Check and Shutoff

Before we do anything else, we make sure the system is safe to work on. That means:

  • Shutting off power or gas supply to the unit (depending on the model)
  • Closing water valves as needed
  • Verifying there are no active leaks or obvious hazards

Safety is always our starting point—for the homeowner, the property, and our technicians.

2. Flushing the System with Descaler

Next, we flushed the tankless water heater with a descaling solution. Over time, minerals from the water supply can coat the inside of the heat exchanger and piping inside the unit. This buildup:

  • Makes it harder for the unit to transfer heat to the water
  • Can cause temperature fluctuations (water getting too hot or not hot enough)
  • Forces the unit to work harder, which can shorten its lifespan

During the flush, we circulate a manufacturer-approved descaler through the heater for a set period of time, then rinse the system thoroughly. For many homes in areas like Wesley Chapel and the greater Tampa Bay region, this should be done about once a year, depending on water hardness and how often you use hot water.

If you’re curious about what this process generally involves, we discuss it in more depth in our water heater maintenance FAQ.

3. Testing the Heating Elements or Ignition System

After flushing, we test the components that actually heat your water. Depending on whether the unit is electric or gas, this means:

  • Electric tankless heaters: Testing heating elements, checking for proper electrical draw, and looking for signs of wear or failure.
  • Gas tankless heaters: Testing the ignition system, burner performance, and combustion safety (including flame appearance and stability).

On this job, our technician verified that the heating system was operating within expected ranges. If we ever find anything concerning—like a slow-to-ignite burner or an element that’s not performing as it should—we let the homeowner know and recommend replacement before it becomes a bigger issue.

4. Testing the TPR Valve

The TPR (temperature and pressure relief) valve is a critical safety component on any water heater. Its job is to relieve excess pressure or temperature inside the unit. If it fails, pressure can build up, creating a dangerous situation.

As part of this maintenance visit, we:

  • Located the TPR valve and inspected it visually
  • Tested its operation according to manufacturer guidelines
  • Checked for signs of leaks, corrosion, or blockage around the discharge line

If a TPR valve doesn’t operate properly or shows signs of failing, we recommend replacement. It’s a small component with a very big job, and one we never overlook during water heater flush and inspection visits in Wesley Chapel.

5. Inspecting for Rust, Leaks, or Loose Connections

With the internal components checked, we move around the exterior and connections of the unit, looking for:

  • Rust on the cabinet or connection points
  • Signs of past or active leaks (water staining, corrosion, moisture)
  • Loose fittings, unions, or electrical connections
  • Improper venting or clearance issues (for gas units)

Even small drips or minor corrosion can be early warning signs. Catching them during a maintenance visit gives the homeowner time to plan repairs instead of waking up to an unexpected leak or damage to surrounding walls, floors, or cabinets.

Why This Maintenance Matters for Wesley Chapel Homes

Regular tankless water heater maintenance might not be as exciting as a brand-new installation, but it’s one of the smartest investments you can make in your home’s comfort system. For homeowners in Wesley Chapel, FL, there are a few specific reasons this kind of service is especially important:

  • Mineral content in local water: Our region’s water tends to leave behind scale inside plumbing equipment. Flushing helps keep the heat exchanger clean.
  • High hot water usage: Busy households, large families, and frequent laundry/dishwasher use all mean more run-time on your tankless heater.
  • Heat and humidity: Florida’s climate can be tough on all mechanical equipment, including water heaters. Inspections help spot corrosion and moisture-related issues early.

Without this type of maintenance, homeowners may eventually see:

  • Longer wait times for hot water
  • Fluctuating water temperatures during showers
  • Higher energy bills for the same amount of hot water
  • Unexpected shutdowns and error codes on the water heater
  • Leaks or damage around the unit

On the other hand, a well-maintained tankless water heater can run efficiently for many years, providing reliable hot water while keeping operating costs under control.

What Could Have Happened Without Maintenance?

It’s easy to put off water heater maintenance when everything seems to be working “just fine.” But waiting too long can turn small, manageable issues into big problems. If this Wesley Chapel homeowner had skipped regular maintenance, they might eventually have faced:

  • Severe scale buildup: Making the unit noisy, inefficient, and more prone to overheating.
  • Overstressed components: Heating elements or burners forced to work harder, wearing out sooner.
  • TPR valve issues: A stuck or failing valve is a serious safety concern.
  • Leaks and water damage: Small, slow leaks often go unnoticed until they’ve damaged walls, floors, or cabinets.

When we’re doing maintenance, our goal isn’t just to check boxes on a list. It’s to help prevent those surprise breakdowns and make sure the system is operating safely and reliably.

Tips to Keep Your Tankless Water Heater Healthy in Wesley Chapel

Whether you live near The Shops at Wiregrass, in a newer subdivision, or anywhere else around Wesley Chapel, FL, there are a few simple habits that can help extend the life of your tankless water heater:

  • Schedule annual maintenance: In many Tampa Bay homes, a yearly flush and inspection is the right starting point. Some high-use homes may benefit from more frequent service.
  • Install or maintain proper isolation valves: If your unit doesn’t have them, consider having them installed. They make future maintenance faster and safer.
  • Watch for warning signs: Temperature swings, odd noises, or error codes are all signals to call for service.
  • Consider water treatment: If your home has very hard water, a water softener or conditioning system can reduce scale buildup inside your tankless heater.
  • Don’t ignore small drips: A tiny leak today can become a big headache tomorrow. Have it checked as soon as you notice it.

For more guidance on repair vs. replacement decisions, you can explore our resources on tankless water heater installations and quotes and other water heater replacement options if your unit is nearing the end of its life.

Why Choose Home Therapist for Water Heater Services in Wesley Chapel, FL?

There are plenty of plumbing companies in the Tampa Bay area, but our approach at Home Therapist is simple: treat your home systems the way we’d want ours treated—thoroughly, honestly, and with as little stress as possible.

When you call us for tankless water heater maintenance in Wesley Chapel, FL, you can expect:

  • Clear communication: We explain what we’re doing and why, in plain language.
  • Transparent recommendations: If we see something that needs attention—like a worn TPR valve or failing ignition component—we’ll show you what we’ve found and talk through your options.
  • Local experience: We work on water heaters throughout Wesley Chapel and the greater Tampa Bay area, so we understand our local water conditions and home construction styles.
  • Respect for your time and home: We arrive prepared, work efficiently, and clean up when we’re done.

Wesley Chapel continues to grow quickly, as you can see from local maps and resources like Google Maps for Wesley Chapel, FL 33543 and the community overview on Wikipedia. With more families moving into the area, reliable hot water is a must—and regular maintenance is the best way to keep it that way.

Thinking About Your Own Water Heater?

If you’re reading this and wondering when your tankless water heater was last flushed or inspected, you’re not alone. Many homeowners aren’t sure how often it’s been serviced, especially if they inherited the system when they bought the home.

Here are a few questions to help you decide if it’s time to schedule maintenance:

  • Has it been more than a year since your last water heater service?
  • Do you get occasional bursts of very hot or lukewarm water?
  • Does your water heater make unusual noises when hot water is running?
  • Have you seen any water around the base of the unit?
  • Do you live in a hard-water area and use hot water heavily?

If you answered “yes” to any of these, it’s a good idea to have a professional take a look. Regular care can help you avoid surprise breakdowns and keep your energy bills more predictable.

Schedule Tankless Water Heater Maintenance in Wesley Chapel, FL

Our team at Home Therapist is here to help with tankless water heater maintenance, flushing, repairs, and replacement options throughout Wesley Chapel, FL 33543 and the surrounding Tampa Bay area. Whether you’re staying ahead of problems with routine service or dealing with a specific issue, we’ll walk you through what we find and the best next steps for your home.

Call Home Therapist or visit our website to schedule your water heater maintenance visit. We’ll take the time to inspect, test, and clean your system so you can enjoy reliable hot water with fewer surprises. #HomeTherapist #TheTherapyYourHomeNeeds

Air Duct Cleaning and Premium Therapy Plan for a Lutz, FL Home

In a home in Lutz, FL 33558, a homeowner reached out to our team at Home Therapist because they wanted cleaner air and a fresher feeling throughout their house. Between Florida’s humidity, dust, and allergy season, it’s easy for vents and ductwork to build up debris over time. This client decided it was time to tackle their air ducts and also protect their HVAC system long term with our Premium Therapy Plan.

In this case study, we’ll walk through what our air duct cleaning visit involved, how this service can help improve indoor air quality in Lutz homes, and why pairing duct cleaning with an HVAC maintenance plan is such a smart move.

Customer Problem: Wanting Cleaner, Healthier Air at Home

Our client in Lutz contacted us with a clear goal: they wanted their vents and air ducts professionally cleaned and were interested in getting set up on our Premium Therapy Plan for ongoing HVAC maintenance.

Over time, it’s normal for dust, pet hair, pollen, and other particles to travel through your HVAC system and settle inside the ductwork. Even if your system is running, the air can feel a little stale, and you may notice buildup on vent covers around the home.

From the notes on this job, we know:

  • The homeowner approved the work by message and chose a specific day that worked around their schedule.
  • They understood our arrival window in the morning and that we’d be wrapped up by early afternoon.
  • They were planning around the holidays and requested rescheduling around Thanksgiving, which we accommodated.
  • Payment was handled by check at the completion of the work.

The main service they selected was our Value Air Duct Cleaning Package, which focuses on cleaning each supply vent from the register into the duct using our air duct cleaning machine. At the same time, the client was enrolled in our Premium Therapy Plan, our top-tier maintenance plan designed to keep their HVAC system running efficiently year-round.

What Our Value Air Duct Cleaning Package Includes

For this home in Lutz, FL, our technician Barbaro completed our Value Air Duct Cleaning Package. This visit included:

  • Removing every vent cover in the home.
  • Using our air duct cleaning equipment to clean from each vent into the duct line.
  • Dusting off and wiping down the vent covers before reinstallation.
  • Cleaning every vent around the home at a per-vent price, with a minimum of 12 vents to qualify for the package rate.

This style of duct cleaning is often a great fit for homeowners who:

  • See visible dust buildup on vents or surrounding ceilings and walls.
  • Want to reduce dust in the air and on furniture.
  • Have pets that shed, adding hair and dander to the system.
  • Struggle with allergies or respiratory sensitivities.

If you’re curious about how a full air duct cleaning visit looks in different Tampa Bay neighborhoods, you can also see one of our other real-world projects where we performed air duct cleaning services in Tampa and a similar air duct cleaning project in Zephyrhills, FL.

Our Inspection & Preparation Before Duct Cleaning

Before starting any air duct cleaning in Lutz, FL homes, our team goes through a quick but important checklist. For this home, we:

  • Confirmed the scope of work: We reviewed the number of vents to be cleaned and made sure the homeowner understood that the price is per vent and is only valid when cleaning all ducts, with a minimum of 12 vents.
  • Walked through expectations: Our technician explained there is always a possibility that older or fragile ducts can be more susceptible to damage during cleaning. This is especially important in homes with original ductwork or visible wear.
  • Discussed light dusting concerns: We let the homeowner know there may be some dust that falls onto nearby furniture or appliances as we remove and clean vents. We always do our best to wipe things down, but it’s normal for homeowners to need a little extra dusting afterwards.
  • Protected the space: We used drop cloths and took care around furniture and flooring to minimize any mess during the duct cleaning process.

If we ever see anything unusual during this pre-cleaning check—such as crushed duct runs, heavy mold growth, or disconnected lines—we stop and talk with the homeowner about next steps. In some cases, a better long-term fix might be air duct and insulation replacement instead of just cleaning.

Step-By-Step: How We Cleaned the Vents and Ducts

Once everything was explained and approved, our technician got to work on the Value Air Duct Cleaning Package at this Lutz home.

1. Removing and Labeling Vent Covers

The first step is carefully removing each vent cover throughout the home. In many houses, there are vents in bedrooms, hallways, living areas, and sometimes in bathrooms or closets. We make sure we’re not scratching walls or ceilings as we remove them.

Where needed, we’ll keep mental notes or simple labels so every vent cover is reinstalled in the correct location and orientation once cleaning is complete.

2. Cleaning Inside Each Vent Opening

With the vents removed, we use our professional air duct cleaning machine to clean from each vent opening into the duct line. This approach focuses on the areas where dust and debris tend to accumulate most heavily:

  • Right behind the vent opening.
  • In corners and joints where airflow can slow down.
  • On surfaces where particles naturally settle.

We work methodically around the home, vent by vent. The goal is to loosen and remove built-up dust, cobwebs, and light debris, improving the general cleanliness of the duct system and helping air flow more freely.

3. Dusting and Cleaning the Vent Covers

Vent covers themselves can get surprisingly dirty over time. You may have noticed black streaks, gray dust buildup, or pet hair clinging to the grilles. As part of this package, we dust off and clean each air vent cover before putting it back in place.

In many cases, just this step alone makes a noticeable difference in how fresh and clean the room looks, especially against light-colored walls or ceilings.

4. Reinstalling Vents and Final Walkthrough

After the ducts and vent covers are cleaned, we reinstall every register, making sure everything is snug and aligned properly. Then we do a quick walkthrough with the homeowner to confirm that:

  • All vents have been cleaned and reinstalled.
  • Any visible dust around the vents has been wiped down as much as possible.
  • There are no concerns about loose vents or unusual noises.

We also take a moment to recap what was done, answer any questions, and talk through what to expect over the next few days. Sometimes, after duct cleaning, homeowners may notice a little residual dust as things settle, which is why a quick light cleaning afterwards is normal and expected.

Adding Long-Term Protection: The Premium Therapy Plan

Along with air duct cleaning, this homeowner in Lutz, FL chose to enroll in our Premium Therapy Plan, our top HVAC maintenance plan. This is a smart way to protect the investment they’ve made in cleaner air and more efficient airflow.

While duct cleaning deals with buildup inside the ductwork, a maintenance plan keeps the heart of the system—your air handler, condenser, blower, and coils—in good shape. That means:

We’ve written more about how our maintenance plans work and what to consider if you’re adjusting your coverage in our guide on changing or downgrading your AC maintenance plan in Tampa. For many families, the Premium Therapy Plan offers the right balance of peace of mind, regular care, and priority support.

Why This Combination Works: Duct Cleaning + Maintenance

Pairing duct cleaning with an HVAC maintenance plan is a great strategy for homeowners in Lutz and across the Tampa Bay area. Here’s why:

  • Cleaner air plus better airflow: Removing dust and debris from vents and ducts helps your system move air more freely. Maintenance keeps fans, coils, and filters in good shape to support that cleaner airflow.
  • Less dust on surfaces: While no service can completely eliminate dust, cleaning vents and ducts can reduce the amount that blows back into the home, meaning fewer dust bunnies and less frequent cleaning for many homeowners.
  • Support for allergy and asthma sufferers: If anyone in the home struggles with allergies, every bit of help matters. Keeping the system and ducts clean, along with using a quality filter, can make the indoor environment more comfortable.
  • System longevity: Equipment that’s kept clean and maintained properly doesn’t have to work as hard. That can help reduce wear and tear I and may lower the risk of surprise breakdowns.

For homeowners who want to go even further with indoor air quality, we sometimes recommend additional solutions like duct sanitation or UV light installation, similar to what we performed in a duct sanitation and UV light project in Fish Hawk, FL. Those services can help reduce microbial growth and keep certain contaminants under tighter control.

What Could Happen If Ducts and Systems Are Never Cleaned

Skipping duct cleaning and regular HVAC maintenance doesn’t guarantee you’ll have problems right away, but over time, some common issues can start to show up:

  • More visible dust and dirt: You might notice dark streaks or rings forming around your vents, or find yourself dusting more often than you’d like.
  • Uneven temperatures: Restricted airflow from dirty ducts, clogged filters, or a dirty blower wheel can make some rooms feel warmer or cooler than others.
  • Musty or stale odors: When dust and debris sit in a humid duct system for years, it can create a noticeable odor when the AC or heat turns on.
  • Higher energy bills: A system that has to push air through dirty ducts or past clogged components often uses more energy to do the same job.
  • More frequent repairs: Lack of maintenance can lead to overlooked issues—like clogged drain lines, dirty coils, or weak capacitors—that could have been caught early during routine visits.

By taking a proactive approach, as this Lutz homeowner did, you give your HVAC system a better chance to operate smoothly and comfortably across our long Florida cooling season.

Tips to Keep Your Air Cleaner in Lutz, FL Homes

Whether you’re in Lutz, Tampa, or anywhere in the Tampa Bay area, the combination of heat, humidity, and pollen can make indoor air quality a challenge. Here are some practical tips we often share with our clients:

  • Change filters regularly: For most homes, changing the air filter every 1–3 months is a good rule of thumb. If you have pets or allergies, you may need to change them more often.
  • Keep supply and return vents clear: Avoid blocking vents with furniture, curtains, or rugs. Good airflow helps your system work efficiently and circulate air properly.
  • Dust and vacuum consistently: Regular cleaning helps keep dust from getting pulled back into the ducts. Use a vacuum with a HEPA filter if possible.
  • Consider periodic duct cleaning: You don’t necessarily need duct cleaning every year, but in homes with heavy dust, pets, or after remodeling, it can make a real difference.
  • Schedule regular maintenance: Routine tune-ups are one of the best ways to protect your system and keep the air moving cleanly through your home. Our maintenance visits are similar to what we describe in our AC cleaning and maintenance projects across Tampa Bay.

Lutz, FL is a beautiful community, with easy access to spots like the Tampa Premium Outlets and local parks, but our warm climate means air conditioning runs a lot. If your home is in the Lutz, FL 33558 area, keeping your ducts and system in good shape is especially important for comfort and efficiency.

Why Choose Home Therapist for Air Duct Cleaning in Lutz, FL?

Homeowners across Lutz and the greater Tampa Bay area trust our team at Home Therapist Cooling, Heating, and Plumbing because we approach every visit with a mix of technical expertise and clear, honest communication. For this job in Lutz, that meant:

  • Explaining exactly what the Value Air Duct Cleaning Package included.
  • Being upfront about limitations and risks, such as older ductwork being more fragile.
  • Setting a clear arrival window and estimated completion time.
  • Respecting the client’s preferred scheduling around the holidays.
  • Leaving the home as tidy as possible after the job.

We don’t believe in scare tactics or pressure. Instead, we take the time to educate homeowners so they can make informed decisions about what’s best for their home, their budget, and their comfort.

If you’d like to learn more about how we handle other projects in the Tampa Bay area, you can read another case study where we combined blower wheel cleaning and duct work in a blower wheel and duct cleaning project in Zephyrhills. Each project gives a real-world look at how our team works and the care we take in every home.

Living and Breathing Comfortable in Lutz, FL

Lutz is a growing community just north of Tampa, known for its quiet neighborhoods and convenient access to the greater Tampa Bay area. You can learn more about the area on Lutz, Florida’s Wikipedia page, but one thing locals all share is the need for reliable cooling and clean indoor air most of the year.

Between pollen from nearby greenery, dust tracked in from daily life, and the long AC season, it’s easy for HVAC systems to collect buildup. That’s why services like duct cleaning, tune-ups, and maintenance plans matter so much in this part of Florida.

Thinking About Air Duct Cleaning or a Maintenance Plan?

If you’re noticing dusty vents, uneven airflow, or you simply haven’t had your system and ducts looked at in a while, it may be time to schedule a professional visit. Our team can help you decide if you’d benefit most from:

  • Basic duct and vent cleaning.
  • Deeper cleaning and sanitation options.
  • A maintenance plan like our Premium Therapy Plan.
  • Or a combination of services tailored to your home.

Every home is a little different, and our technicians take the time to listen to your concerns—whether that’s allergies, dust, energy bills, or just wanting your home to feel fresher.

Schedule Air Duct Cleaning in Lutz, FL with Home Therapist

If you’re in Lutz, FL 33558 or the surrounding Tampa Bay communities and you’re ready for cleaner vents, better airflow, and a more comfortable home, our team is here to help.

Call Home Therapist or visit our website to schedule your air duct cleaning or to ask about our Premium Therapy Plan. We’ll walk you through your options, answer your questions in plain English, and help you choose the services that fit your home best.

When your home needs a little extra care, we’re here to provide the therapy your home needs. #HomeTherapist #TheTherapyYourHomeNeeds

In a home in Lutz, FL 33558, a homeowner reached out to our team at Home Therapist because they wanted cleaner air and a fresher feeling throughout their house. Between Florida’s humidity, dust, and allergy season, it’s easy for vents and ductwork to build up debris over time. This client decided it was time to tackle their air ducts and also protect their HVAC system long term with our Premium Therapy Plan.

In this case study, we’ll walk through what our air duct cleaning visit involved, how this service can help improve indoor air quality in Lutz homes, and why pairing duct cleaning with an HVAC maintenance plan is such a smart move.

Customer Problem: Wanting Cleaner, Healthier Air at Home

Our client in Lutz contacted us with a clear goal: they wanted their vents and air ducts professionally cleaned and were interested in getting set up on our Premium Therapy Plan for ongoing HVAC maintenance.

Over time, it’s normal for dust, pet hair, pollen, and other particles to travel through your HVAC system and settle inside the ductwork. Even if your system is running, the air can feel a little stale, and you may notice buildup on vent covers around the home.

From the notes on this job, we know:

  • The homeowner approved the work by message and chose a specific day that worked around their schedule.
  • They understood our arrival window in the morning and that we’d be wrapped up by early afternoon.
  • They were planning around the holidays and requested rescheduling around Thanksgiving, which we accommodated.
  • Payment was handled by check at the completion of the work.

The main service they selected was our Value Air Duct Cleaning Package, which focuses on cleaning each supply vent from the register into the duct using our air duct cleaning machine. At the same time, the client was enrolled in our Premium Therapy Plan, our top-tier maintenance plan designed to keep their HVAC system running efficiently year-round.

What Our Value Air Duct Cleaning Package Includes

For this home in Lutz, FL, our technician Barbaro completed our Value Air Duct Cleaning Package. This visit included:

  • Removing every vent cover in the home.
  • Using our air duct cleaning equipment to clean from each vent into the duct line.
  • Dusting off and wiping down the vent covers before reinstallation.
  • Cleaning every vent around the home at a per-vent price, with a minimum of 12 vents to qualify for the package rate.

This style of duct cleaning is often a great fit for homeowners who:

  • See visible dust buildup on vents or surrounding ceilings and walls.
  • Want to reduce dust in the air and on furniture.
  • Have pets that shed, adding hair and dander to the system.
  • Struggle with allergies or respiratory sensitivities.

If you’re curious about how a full air duct cleaning visit looks in different Tampa Bay neighborhoods, you can also see one of our other real-world projects where we performed air duct cleaning services in Tampa and a similar air duct cleaning project in Zephyrhills, FL.

Our Inspection & Preparation Before Duct Cleaning

Before starting any air duct cleaning in Lutz, FL homes, our team goes through a quick but important checklist. For this home, we:

  • Confirmed the scope of work: We reviewed the number of vents to be cleaned and made sure the homeowner understood that the price is per vent and is only valid when cleaning all ducts, with a minimum of 12 vents.
  • Walked through expectations: Our technician explained there is always a possibility that older or fragile ducts can be more susceptible to damage during cleaning. This is especially important in homes with original ductwork or visible wear.
  • Discussed light dusting concerns: We let the homeowner know there may be some dust that falls onto nearby furniture or appliances as we remove and clean vents. We always do our best to wipe things down, but it’s normal for homeowners to need a little extra dusting afterwards.
  • Protected the space: We used drop cloths and took care around furniture and flooring to minimize any mess during the duct cleaning process.

If we ever see anything unusual during this pre-cleaning check—such as crushed duct runs, heavy mold growth, or disconnected lines—we stop and talk with the homeowner about next steps. In some cases, a better long-term fix might be air duct and insulation replacement instead of just cleaning.

Step-By-Step: How We Cleaned the Vents and Ducts

Once everything was explained and approved, our technician got to work on the Value Air Duct Cleaning Package at this Lutz home.

1. Removing and Labeling Vent Covers

The first step is carefully removing each vent cover throughout the home. In many houses, there are vents in bedrooms, hallways, living areas, and sometimes in bathrooms or closets. We make sure we’re not scratching walls or ceilings as we remove them.

Where needed, we’ll keep mental notes or simple labels so every vent cover is reinstalled in the correct location and orientation once cleaning is complete.

2. Cleaning Inside Each Vent Opening

With the vents removed, we use our professional air duct cleaning machine to clean from each vent opening into the duct line. This approach focuses on the areas where dust and debris tend to accumulate most heavily:

  • Right behind the vent opening.
  • In corners and joints where airflow can slow down.
  • On surfaces where particles naturally settle.

We work methodically around the home, vent by vent. The goal is to loosen and remove built-up dust, cobwebs, and light debris, improving the general cleanliness of the duct system and helping air flow more freely.

3. Dusting and Cleaning the Vent Covers

Vent covers themselves can get surprisingly dirty over time. You may have noticed black streaks, gray dust buildup, or pet hair clinging to the grilles. As part of this package, we dust off and clean each air vent cover before putting it back in place.

In many cases, just this step alone makes a noticeable difference in how fresh and clean the room looks, especially against light-colored walls or ceilings.

4. Reinstalling Vents and Final Walkthrough

After the ducts and vent covers are cleaned, we reinstall every register, making sure everything is snug and aligned properly. Then we do a quick walkthrough with the homeowner to confirm that:

  • All vents have been cleaned and reinstalled.
  • Any visible dust around the vents has been wiped down as much as possible.
  • There are no concerns about loose vents or unusual noises.

We also take a moment to recap what was done, answer any questions, and talk through what to expect over the next few days. Sometimes, after duct cleaning, homeowners may notice a little residual dust as things settle, which is why a quick light cleaning afterwards is normal and expected.

Adding Long-Term Protection: The Premium Therapy Plan

Along with air duct cleaning, this homeowner in Lutz, FL chose to enroll in our Premium Therapy Plan, our top HVAC maintenance plan. This is a smart way to protect the investment they’ve made in cleaner air and more efficient airflow.

While duct cleaning deals with buildup inside the ductwork, a maintenance plan keeps the heart of the system—your air handler, condenser, blower, and coils—in good shape. That means:

  • Regular tune-ups to keep the system running efficiently.
  • Professional checks that can catch issues early.
  • Better airflow and comfort throughout the home.
  • Less strain on the equipment, which can help extend its life.

We’ve written more about how our maintenance plans work and what to consider if you’re adjusting your coverage in our guide on changing or downgrading your AC maintenance plan in Tampa. For many families, the Premium Therapy Plan offers the right balance of peace of mind, regular care, and priority support.

Why This Combination Works: Duct Cleaning + Maintenance

Pairing duct cleaning with an HVAC maintenance plan is a great strategy for homeowners in Lutz and across the Tampa Bay area. Here’s why:

  • Cleaner air plus better airflow: Removing dust and debris from vents and ducts helps your system move air more freely. Maintenance keeps fans, coils, and filters in good shape to support that cleaner airflow.
  • Less dust on surfaces: While no service can completely eliminate dust, cleaning vents and ducts can reduce the amount that blows back into the home, meaning fewer dust bunnies and less frequent cleaning for many homeowners.
  • Support for allergy and asthma sufferers: If anyone in the home struggles with allergies, every bit of help matters. Keeping the system and ducts clean, along with using a quality filter, can make the indoor environment more comfortable.
  • System longevity: Equipment that’s kept clean and maintained properly doesn’t have to work as hard. That can help reduce wear and tear I and may lower the risk of surprise breakdowns.

For homeowners who want to go even further with indoor air quality, we sometimes recommend additional solutions like duct sanitation or UV light installation, similar to what we performed in a duct sanitation and UV light project in Fish Hawk, FL. Those services can help reduce microbial growth and keep certain contaminants under tighter control.

What Could Happen If Ducts and Systems Are Never Cleaned

Skipping duct cleaning and regular HVAC maintenance doesn’t guarantee you’ll have problems right away, but over time, some common issues can start to show up:

  • More visible dust and dirt: You might notice dark streaks or rings forming around your vents, or find yourself dusting more often than you’d like.
  • Uneven temperatures: Restricted airflow from dirty ducts, clogged filters, or a dirty blower wheel can make some rooms feel warmer or cooler than others.
  • Musty or stale odors: When dust and debris sit in a humid duct system for years, it can create a noticeable odor when the AC or heat turns on.
  • Higher energy bills: A system that has to push air through dirty ducts or past clogged components often uses more energy to do the same job.
  • More frequent repairs: Lack of maintenance can lead to overlooked issues—like clogged drain lines, dirty coils, or weak capacitors—that could have been caught early during routine visits.

By taking a proactive approach, as this Lutz homeowner did, you give your HVAC system a better chance to operate smoothly and comfortably across our long Florida cooling season.

Tips to Keep Your Air Cleaner in Lutz, FL Homes

Whether you’re in Lutz, Tampa, or anywhere in the Tampa Bay area, the combination of heat, humidity, and pollen can make indoor air quality a challenge. Here are some practical tips we often share with our clients:

  • Change filters regularly: For most homes, changing the air filter every 1–3 months is a good rule of thumb. If you have pets or allergies, you may need to change them more often.
  • Keep supply and return vents clear: Avoid blocking vents with furniture, curtains, or rugs. Good airflow helps your system work efficiently and circulate air properly.
  • Dust and vacuum consistently: Regular cleaning helps keep dust from getting pulled back into the ducts. Use a vacuum with a HEPA filter if possible.
  • Consider periodic duct cleaning: You don’t necessarily need duct cleaning every year, but in homes with heavy dust, pets, or after remodeling, it can make a real difference.
  • Schedule regular maintenance: Routine tune-ups are one of the best ways to protect your system and keep the air moving cleanly through your home. Our maintenance visits are similar to what we describe in our AC cleaning and maintenance projects across Tampa Bay.

Lutz, FL is a beautiful community, with easy access to spots like the Tampa Premium Outlets and local parks, but our warm climate means air conditioning runs a lot. If your home is in the Lutz, FL 33558 area, keeping your ducts and system in good shape is especially important for comfort and efficiency.

Why Choose Home Therapist for Air Duct Cleaning in Lutz, FL?

Homeowners across Lutz and the greater Tampa Bay area trust our team at Home Therapist Cooling, Heating, and Plumbing because we approach every visit with a mix of technical expertise and clear, honest communication. For this job in Lutz, that meant:

  • Explaining exactly what the Value Air Duct Cleaning Package included.
  • Being upfront about limitations and risks, such as older ductwork being more fragile.
  • Setting a clear arrival window and estimated completion time.
  • Respecting the client’s preferred scheduling around the holidays.
  • Leaving the home as tidy as possible after the job.

We don’t believe in scare tactics or pressure. Instead, we take the time to educate homeowners so they can make informed decisions about what’s best for their home, their budget, and their comfort.

If you’d like to learn more about how we handle other projects in the Tampa Bay area, you can read another case study where we combined blower wheel cleaning and duct work in a blower wheel and duct cleaning project in Zephyrhills. Each project gives a real-world look at how our team works and the care we take in every home.

Living and Breathing Comfortable in Lutz, FL

Lutz is a growing community just north of Tampa, known for its quiet neighborhoods and convenient access to the greater Tampa Bay area. You can learn more about the area on Lutz, Florida’s Wikipedia page, but one thing locals all share is the need for reliable cooling and clean indoor air most of the year.

Between pollen from nearby greenery, dust tracked in from daily life, and the long AC season, it’s easy for HVAC systems to collect buildup. That’s why services like duct cleaning, tune-ups, and maintenance plans matter so much in this part of Florida.

Thinking About Air Duct Cleaning or a Maintenance Plan?

If you’re noticing dusty vents, uneven airflow, or you simply haven’t had your system and ducts looked at in a while, it may be time to schedule a professional visit. Our team can help you decide if you’d benefit most from:

  • Basic duct and vent cleaning.
  • Deeper cleaning and sanitation options.
  • A maintenance plan like our Premium Therapy Plan.
  • Or a combination of services tailored to your home.

Every home is a little different, and our technicians take the time to listen to your concerns—whether that’s allergies, dust, energy bills, or just wanting your home to feel fresher.

Schedule Air Duct Cleaning in Lutz, FL with Home Therapist

If you’re in Lutz, FL 33558 or the surrounding Tampa Bay communities and you’re ready for cleaner vents, better airflow, and a more comfortable home, our team is here to help.

Call Home Therapist or visit our website to schedule your air duct cleaning or to ask about our Premium Therapy Plan. We’ll walk you through your options, answer your questions in plain English, and help you choose the services that fit your home best.

When your home needs a little extra care, we’re here to provide the therapy your home needs. #HomeTherapist #TheTherapyYourHomeNeeds

Adding Safe Server Closet Ventilation with New R6 Flex Ductwork in Gulfport, FL

When most people in Gulfport, FL 33707 think about their air conditioning, they picture staying comfortable in the living room or bedroom. But in today’s homes, there’s another area that quietly needs cooling: the server or equipment closet. On this project, our team was called out for routine HVAC maintenance at a home in Gulfport and ended up designing a simple, reliable ventilation solution to protect sensitive server equipment from overheating.

If you’re planning to store computers, networking gear, or servers in a small enclosed space, this story will walk you through why proper ventilation matters, how we add a dedicated duct and vent, and what you can do to keep your electronics safe in our hot, humid Gulfport climate.

Customer Problem: Preparing a Server Closet with No Ventilation

During a scheduled HVAC maintenance visit at a home in Gulfport, FL, the homeowner mentioned a future project: they wanted to set up server equipment inside a closet. The concern was simple and very valid — the closet had no ductwork, no vent, and no air circulation at all.

Servers, network switches, and other electronics generate a surprising amount of heat. Put them in an enclosed closet with no airflow, especially in Florida, and you can run into problems like:

  • Overheating and shutdowns of your server or router
  • Shortened lifespan of electronic components
  • Inconsistent performance or unexpected restarts
  • Excessive heat building up and radiating into nearby rooms

The homeowner wanted something straightforward: a way to get conditioned air into that closet so the equipment could stay within a safe temperature range, without installing a separate system or using noisy portable fans.

Our Initial Inspection & What We Found

Because we were already on site for HVAC maintenance, our technician Bryan took a closer look at the closet and the existing ductwork layout. As part of our visit, we:

We confirmed what the homeowner suspected: the closet was completely sealed off from the HVAC system. With the door closed, any heat generated by the servers would be trapped, causing the internal temperature to climb quickly.

From there, our job was to design a simple, cost-effective way to bring conditioned air into that space, using the existing HVAC system without overloading it or compromising comfort in the rest of the home.

The Recommended Solution: New Flexible Duct and Round Vent

After the inspection, we recommended installing a small dedicated supply duct line specifically to serve the closet. The solution had three main parts:

1. Install a New R6 Flexible Duct Line

We proposed adding a new insulated flexible duct run (R6 rating) from the existing supply system to the closet. On this job, the plan was to run a flexible duct, sized appropriately (a small-diameter flex, such as a 3-inch, is often ideal for a low-load closet), to gently introduce cooled air into the space without over-supplying it.

The duct materials we recommended come with important benefits:

  • Johns Manville Formaldehyde-free™ fiberglass insulation – helps improve indoor air quality and reduces potential off-gassing concerns.
  • GREENGUARD® certified insulated products – tested for low chemical emissions, a plus for health-conscious homeowners.
  • Quietflex Rip Stop Silver Jacket – includes a metalized polyester vapor barrier with a special rip-stop scrim reinforcement, helping resist tears and damage in the attic space.

These materials are designed for long-term performance in Florida attics, where high temperatures and humidity can be tough on lower-quality ducts.

2. Add a Round Supply Vent in the Closet

To actually deliver air into the closet, we planned to install a round supply vent (grill) on the closet ceiling or upper wall. This vent would be connected to the new R6 flexible duct so that cool, conditioned air from the main system can circulate into the server closet.

In the job notes, our team confirmed the use of a round vent that had already been sourced, with coordination between our technicians and office to make sure the correct size and style were available for the install. The goal was a clean, unobtrusive vent that blends with the space but provides consistent airflow.

3. One New Supply Drop Dedicated to the Closet

The design called for one new supply drop — essentially one new branch of ductwork terminating at the closet. A single drop is usually enough for a small equipment closet if the system is sized correctly overall. Too much airflow could make the closet uncomfortably cold and waste energy, while too little would fail to protect the electronics. Getting that balance right is where a trained HVAC technician really matters.

How We Approach This Type of Ductwork Installation

Every home is a little different, but our process for adding a supply vent to a closet in a Gulfport, FL home generally follows these steps:

Step 1: Planning the Duct Route

First, we identify where the main duct trunk or nearby supply branch is located in relation to the closet. We look for the most direct route that:

  • Maintains proper duct slope and support
  • Avoids sharp bends that restrict airflow
  • Stays clear of electrical, plumbing, and structural elements

We also consider attic height. The disclaimers provided to the homeowner explain that work in very low attics (under about 4 feet) is significantly harder, which can affect labor and feasibility. In extremely tight spaces, some duct runs simply aren’t safe or practical.

Step 2: Protecting the Home Before Work Starts

Ductwork installation often takes place above living areas, and we want to keep the home as clean and safe as possible. We encourage homeowners to:

  • Move or cover furniture located below supply vents or in work areas
  • Cover electronics, baby items, clothing, and food to protect from dust
  • Give our crew space to work safely and efficiently

We do our best to cover critical areas and we always clean up at the end of the workday, but any attic work can potentially disturb some insulation or dust. Preparing the space in advance makes the process smoother.

Step 3: Running and Securing the R6 Flex Duct

Once we’ve planned the route, we run the new R6 flexible duct from the source to the closet location. Key best practices we follow include:

  • Keeping duct runs as straight and as short as practical
  • Properly supporting the duct to prevent sagging
  • Sealing all connections with appropriate mastic or tape to reduce air leaks
  • Ensuring the insulation stays intact and continuous

Using quality materials like the Quietflex Rip Stop jacket helps the duct withstand movement, occasional access traffic, and general attic conditions over time.

Step 4: Cutting the Vent Opening and Installing the Grill

To bring air into the closet, we cut the opening for the new round vent. As noted in our disclaimers to the homeowner, it’s sometimes necessary to open small holes in sheetrock to run ducts or install vents. When that’s required, we always:

  • Discuss it with the homeowner beforehand
  • Explain where the access will be and why it’s needed
  • Clarify that while we can open the access, we do not perform sheetrock repair or painting

After the opening is prepared, we mount the vent and connect it securely to the new flexible duct, making sure the airflow direction and fit are correct.

Step 5: Testing Airflow and Final Checks

With the duct and vent in place, we run the system and verify:

  • Airflow is reaching the closet as expected
  • There are no noticeable air leaks along the new duct
  • The new supply doesn’t negatively impact comfort in other rooms

For a server closet, our goal is not to turn it into a cold room, but to keep temperatures stable enough so equipment can run reliably.

Why This Fix Works for Server Closets in Gulfport Homes

Adding a small, dedicated supply vent fed by R6 insulated flex duct is a highly effective way to manage heat from electronics in a Gulfport, FL home. Here’s why:

  • Direct cooling where it’s needed – Conditioned air goes right into the closet instead of relying on open doors or portable fans.
  • Better protection for expensive equipment – Servers and network hardware stay within a healthier temperature range, reducing the risk of failure.
  • Efficient use of the existing HVAC system – No need for a separate mini split or portable AC in many cases.
  • Improved comfort nearby – Excess heat is removed before it radiates into hallways or adjacent rooms.

Of course, this approach assumes that the home’s existing HVAC system is properly sized and in good condition. If the system is already struggling to cool the home, adding extra load may not be ideal without further upgrades or adjustments.

Important Homeowner Disclaimers and Expectations

We believe in being transparent about what’s involved when we add new ductwork in a Gulfport, FL home. For this type of project, we discuss a few key points up front:

Attic Height and Accessibility

Work in attics under four feet tall is more demanding and, in some cases, not feasible. Extremely tight spaces may limit where ducts can be run, or in rare cases, make a proposed supply drop impossible or unsafe. We’ll always review this with you on site and propose alternatives when needed.

Dust, Insulation, and Jobsite Cleanliness

Even with protective coverings, attic work can disturb insulation and dust. We:

  • Cover and protect critical areas as much as possible
  • Clean up at the end of our workday

But we also strongly recommend that homeowners prepare the home: move furniture, cover electronics, and secure sensitive belongings in the work zones.

Sheetrock Access Holes

Sometimes, to run ducts or set a new vent, we must open small access holes in walls or ceilings. We always notify you before we cut anything. Our work includes opening the necessary area and installing the duct or vent, but we do not perform drywall repair or painting. Many homeowners prefer to have their painter or handyman handle the final cosmetic touch-ups.

Warranty and Limitations

On ductwork projects like this, we typically provide a one-year parts and labor warranty from The AC Therapist/Home Therapist, with some limitations. The warranty does not cover:

  • Damage from rodents or pests chewing or tearing the duct
  • Accidental damage from people stepping on, crushing, or cutting the duct
  • Internal dirt buildup caused by lack of regular system maintenance

We stand behind our workmanship, but like all reputable contractors, we can’t warranty against things outside our control.

Tips to Keep Your Server Closet Safe and Cool in Gulfport, FL

If you’re considering a similar setup in your Gulfport home, here are some practical tips:

Why Choose Home Therapist for Ductwork and Ventilation Projects Near Gulfport

Homes in and around Gulfport, FL, especially near the waterfront and areas like the Gulfport Beach Recreation Area, face unique heat and humidity challenges. Our team understands how Gulfport’s climate affects not only comfort but also sensitive equipment and building materials.

When you work with Home Therapist for ductwork and ventilation upgrades, you get:

  • Experienced technicians who understand both comfort and equipment protection
  • Quality materials like GREENGUARD® certified insulation and durable duct jackets
  • Clear communication about options, limitations, and what to expect during the job
  • Local expertise serving homes throughout the Tampa Bay and Pinellas County area

For larger duct upgrades or replacements, we also offer dedicated ductwork replacement services and higher R-value duct upgrades for improved efficiency.

Serving Gulfport, FL and the Greater Tampa Bay Area

Gulfport is a unique and vibrant community on the shores of Boca Ciega Bay, just southwest of St. Petersburg. With our hot summers and long cooling season, making sure your HVAC system is designed for both comfort and special needs spaces—like server closets, workshops, or home offices—is especially important. You can learn more about the city itself on the Gulfport, Florida Wikipedia page or see where we work on Google Maps.

Whether you’re in Gulfport, nearby Treasure Island, or elsewhere in Pinellas County, our team is here to help you get the most out of your HVAC system, from routine tune-ups to specialized ductwork and ventilation projects.

Thinking About Ventilating a Closet or Equipment Room?

If you’re planning to build a home server closet, AV rack, or network closet in Gulfport, FL 33707, now is the perfect time to think about ventilation. Adding a properly sized duct and vent is often a small project compared to the cost of the equipment you’re protecting.

Our team at Home Therapist can:

  • Review your current HVAC setup
  • Recommend the right duct size and vent style
  • Install new R6 or R8 insulated ductwork as needed
  • Help you plan long-term maintenance to keep everything running smoothly

If you’re curious about broader system upgrades or have comfort issues in other rooms, we can also evaluate whether you’d benefit from zoning or additional duct changes. You can explore some of those options on our HVAC zoning system installation page.

Ready to Cool and Protect Your Server Closet in Gulfport, FL?

You don’t have to guess whether your equipment is safe from overheating. If you’re in Gulfport, FL or the surrounding Tampa Bay area and are planning a server closet, media closet, or any small enclosed space with electronics, our team is ready to help.

Call Home Therapist or visit our website to schedule an appointment. We’ll take a look at your existing system, walk you through your options, and design a solution that balances comfort, efficiency, and equipment protection — without the pressure or confusing jargon.

#HomeTherapist #TheTherapyYourHomeNeeds

When most people in Gulfport, FL 33707 think about their air conditioning, they picture staying comfortable in the living room or bedroom. But in today’s homes, there’s another area that quietly needs cooling: the server or equipment closet. On this project, our team was called out for routine HVAC maintenance at a home in Gulfport and ended up designing a simple, reliable ventilation solution to protect sensitive server equipment from overheating.

If you’re planning to store computers, networking gear, or servers in a small enclosed space, this story will walk you through why proper ventilation matters, how we add a dedicated duct and vent, and what you can do to keep your electronics safe in our hot, humid Gulfport climate.

Customer Problem: Preparing a Server Closet with No Ventilation

During a scheduled HVAC maintenance visit at a home in Gulfport, FL, the homeowner mentioned a future project: they wanted to set up server equipment inside a closet. The concern was simple and very valid — the closet had no ductwork, no vent, and no air circulation at all.

Servers, network switches, and other electronics generate a surprising amount of heat. Put them in an enclosed closet with no airflow, especially in Florida, and you can run into problems like:

  • Overheating and shutdowns of your server or router
  • Shortened lifespan of electronic components
  • Inconsistent performance or unexpected restarts
  • Excessive heat building up and radiating into nearby rooms

The homeowner wanted something straightforward: a way to get conditioned air into that closet so the equipment could stay within a safe temperature range, without installing a separate system or using noisy portable fans.

Our Initial Inspection & What We Found

Because we were already on site for HVAC maintenance, our technician Bryan took a closer look at the closet and the existing ductwork layout. As part of our visit, we:

  • Visually inspected the closet space where the server equipment would be installed
  • Confirmed there was no existing supply or return vent in the closet
  • Reviewed nearby supply ducts and trunk lines that could feed a new drop
  • Checked attic access and heights to understand installation difficulty

We confirmed what the homeowner suspected: the closet was completely sealed off from the HVAC system. With the door closed, any heat generated by the servers would be trapped, causing the internal temperature to climb quickly.

From there, our job was to design a simple, cost-effective way to bring conditioned air into that space, using the existing HVAC system without overloading it or compromising comfort in the rest of the home.

The Recommended Solution: New Flexible Duct and Round Vent

After the inspection, we recommended installing a small dedicated supply duct line specifically to serve the closet. The solution had three main parts:

1. Install a New R6 Flexible Duct Line

We proposed adding a new insulated flexible duct run (R6 rating) from the existing supply system to the closet. On this job, the plan was to run a flexible duct, sized appropriately (a small-diameter flex, such as a 3-inch, is often ideal for a low-load closet), to gently introduce cooled air into the space without over-supplying it.

The duct materials we recommended come with important benefits:

  • Johns Manville Formaldehyde-free™ fiberglass insulation – helps improve indoor air quality and reduces potential off-gassing concerns.
  • GREENGUARD® certified insulated products – tested for low chemical emissions, a plus for health-conscious homeowners.
  • Quietflex Rip Stop Silver Jacket – includes a metalized polyester vapor barrier with a special rip-stop scrim reinforcement, helping resist tears and damage in the attic space.

These materials are designed for long-term performance in Florida attics, where high temperatures and humidity can be tough on lower-quality ducts.

2. Add a Round Supply Vent in the Closet

To actually deliver air into the closet, we planned to install a round supply vent (grill) on the closet ceiling or upper wall. This vent would be connected to the new R6 flexible duct so that cool, conditioned air from the main system can circulate into the server closet.

In the job notes, our team confirmed the use of a round vent that had already been sourced, with coordination between our technicians and office to make sure the correct size and style were available for the install. The goal was a clean, unobtrusive vent that blends with the space but provides consistent airflow.

3. One New Supply Drop Dedicated to the Closet

The design called for one new supply drop — essentially one new branch of ductwork terminating at the closet. A single drop is usually enough for a small equipment closet if the system is sized correctly overall. Too much airflow could make the closet uncomfortably cold and waste energy, while too little would fail to protect the electronics. Getting that balance right is where a trained HVAC technician really matters.

How We Approach This Type of Ductwork Installation

Every home is a little different, but our process for adding a supply vent to a closet in a Gulfport, FL home generally follows these steps:

Step 1: Planning the Duct Route

First, we identify where the main duct trunk or nearby supply branch is located in relation to the closet. We look for the most direct route that:

  • Maintains proper duct slope and support
  • Avoids sharp bends that restrict airflow
  • Stays clear of electrical, plumbing, and structural elements

We also consider attic height. The disclaimers provided to the homeowner explain that work in very low attics (under about 4 feet) is significantly harder, which can affect labor and feasibility. In extremely tight spaces, some duct runs simply aren’t safe or practical.

Step 2: Protecting the Home Before Work Starts

Ductwork installation often takes place above living areas, and we want to keep the home as clean and safe as possible. We encourage homeowners to:

  • Move or cover furniture located below supply vents or in work areas
  • Cover electronics, baby items, clothing, and food to protect from dust
  • Give our crew space to work safely and efficiently

We do our best to cover critical areas and we always clean up at the end of the workday, but any attic work can potentially disturb some insulation or dust. Preparing the space in advance makes the process smoother.

Step 3: Running and Securing the R6 Flex Duct

Once we’ve planned the route, we run the new R6 flexible duct from the source to the closet location. Key best practices we follow include:

  • Keeping duct runs as straight and as short as practical
  • Properly supporting the duct to prevent sagging
  • Sealing all connections with appropriate mastic or tape to reduce air leaks
  • Ensuring the insulation stays intact and continuous

Using quality materials like the Quietflex Rip Stop jacket helps the duct withstand movement, occasional access traffic, and general attic conditions over time.

Step 4: Cutting the Vent Opening and Installing the Grill

To bring air into the closet, we cut the opening for the new round vent. As noted in our disclaimers to the homeowner, it’s sometimes necessary to open small holes in sheetrock to run ducts or install vents. When that’s required, we always:

  • Discuss it with the homeowner beforehand
  • Explain where the access will be and why it’s needed
  • Clarify that while we can open the access, we do not perform sheetrock repair or painting

After the opening is prepared, we mount the vent and connect it securely to the new flexible duct, making sure the airflow direction and fit are correct.

Step 5: Testing Airflow and Final Checks

With the duct and vent in place, we run the system and verify:

  • Airflow is reaching the closet as expected
  • There are no noticeable air leaks along the new duct
  • The new supply doesn’t negatively impact comfort in other rooms

For a server closet, our goal is not to turn it into a cold room, but to keep temperatures stable enough so equipment can run reliably.

Why This Fix Works for Server Closets in Gulfport Homes

Adding a small, dedicated supply vent fed by R6 insulated flex duct is a highly effective way to manage heat from electronics in a Gulfport, FL home. Here’s why:

  • Direct cooling where it’s needed – Conditioned air goes right into the closet instead of relying on open doors or portable fans.
  • Better protection for expensive equipment – Servers and network hardware stay within a healthier temperature range, reducing the risk of failure.
  • Efficient use of the existing HVAC system – No need for a separate mini split or portable AC in many cases.
  • Improved comfort nearby – Excess heat is removed before it radiates into hallways or adjacent rooms.

Of course, this approach assumes that the home’s existing HVAC system is properly sized and in good condition. If the system is already struggling to cool the home, adding extra load may not be ideal without further upgrades or adjustments.

Important Homeowner Disclaimers and Expectations

We believe in being transparent about what’s involved when we add new ductwork in a Gulfport, FL home. For this type of project, we discuss a few key points up front:

Attic Height and Accessibility

Work in attics under four feet tall is more demanding and, in some cases, not feasible. Extremely tight spaces may limit where ducts can be run, or in rare cases, make a proposed supply drop impossible or unsafe. We’ll always review this with you on site and propose alternatives when needed.

Dust, Insulation, and Jobsite Cleanliness

Even with protective coverings, attic work can disturb insulation and dust. We:

  • Cover and protect critical areas as much as possible
  • Clean up at the end of our workday

But we also strongly recommend that homeowners prepare the home: move furniture, cover electronics, and secure sensitive belongings in the work zones.

Sheetrock Access Holes

Sometimes, to run ducts or set a new vent, we must open small access holes in walls or ceilings. We always notify you before we cut anything. Our work includes opening the necessary area and installing the duct or vent, but we do not perform drywall repair or painting. Many homeowners prefer to have their painter or handyman handle the final cosmetic touch-ups.

Warranty and Limitations

On ductwork projects like this, we typically provide a one-year parts and labor warranty from The AC Therapist/Home Therapist, with some limitations. The warranty does not cover:

  • Damage from rodents or pests chewing or tearing the duct
  • Accidental damage from people stepping on, crushing, or cutting the duct
  • Internal dirt buildup caused by lack of regular system maintenance

We stand behind our workmanship, but like all reputable contractors, we can’t warranty against things outside our control.

Tips to Keep Your Server Closet Safe and Cool in Gulfport, FL

If you’re considering a similar setup in your Gulfport home, here are some practical tips:

  • Plan ventilation before you load the closet with equipment. It’s much easier to add ductwork before the space is full of racks, cables, and hardware.
  • Avoid sealing the closet too tightly. A little undercut on the door or a return path helps air circulate back to the main space.
  • Monitor temperatures. A simple digital thermometer in the closet can tell you if the new vent is doing its job.
  • Keep the HVAC system maintained. Annual maintenance helps ensure your system can handle additional small loads like a server closet. Learn more about our AC maintenance services in the Tampa Bay area.
  • Consider air quality. Sensitive electronics and humans both benefit from cleaner air. If you’re concerned about dust, check out our indoor air quality solutions.

Why Choose Home Therapist for Ductwork and Ventilation Projects Near Gulfport

Homes in and around Gulfport, FL, especially near the waterfront and areas like the Gulfport Beach Recreation Area, face unique heat and humidity challenges. Our team understands how Gulfport’s climate affects not only comfort but also sensitive equipment and building materials.

When you work with Home Therapist for ductwork and ventilation upgrades, you get:

  • Experienced technicians who understand both comfort and equipment protection
  • Quality materials like GREENGUARD® certified insulation and durable duct jackets
  • Clear communication about options, limitations, and what to expect during the job
  • Local expertise serving homes throughout the Tampa Bay and Pinellas County area

For larger duct upgrades or replacements, we also offer dedicated ductwork replacement services and higher R-value duct upgrades for improved efficiency.

Serving Gulfport, FL and the Greater Tampa Bay Area

Gulfport is a unique and vibrant community on the shores of Boca Ciega Bay, just southwest of St. Petersburg. With our hot summers and long cooling season, making sure your HVAC system is designed for both comfort and special needs spaces—like server closets, workshops, or home offices—is especially important. You can learn more about the city itself on the Gulfport, Florida Wikipedia page or see where we work on Google Maps.

Whether you’re in Gulfport, nearby Treasure Island, or elsewhere in Pinellas County, our team is here to help you get the most out of your HVAC system, from routine tune-ups to specialized ductwork and ventilation projects.

Thinking About Ventilating a Closet or Equipment Room?

If you’re planning to build a home server closet, AV rack, or network closet in Gulfport, FL 33707, now is the perfect time to think about ventilation. Adding a properly sized duct and vent is often a small project compared to the cost of the equipment you’re protecting.

Our team at Home Therapist can:

  • Review your current HVAC setup
  • Recommend the right duct size and vent style
  • Install new R6 or R8 insulated ductwork as needed
  • Help you plan long-term maintenance to keep everything running smoothly

If you’re curious about broader system upgrades or have comfort issues in other rooms, we can also evaluate whether you’d benefit from zoning or additional duct changes. You can explore some of those options on our HVAC zoning system installation page.

Ready to Cool and Protect Your Server Closet in Gulfport, FL?

You don’t have to guess whether your equipment is safe from overheating. If you’re in Gulfport, FL or the surrounding Tampa Bay area and are planning a server closet, media closet, or any small enclosed space with electronics, our team is ready to help.

Call Home Therapist or visit our website to schedule an appointment. We’ll take a look at your existing system, walk you through your options, and design a solution that balances comfort, efficiency, and equipment protection — without the pressure or confusing jargon.

#HomeTherapist #TheTherapyYourHomeNeeds

Hydro Jet Sewer Drain Unclogging and Camera Inspection in Tampa, FL 33603

When a main sewer line clogs at a home in Tampa, FL 33603, everything in the house can grind to a halt. Drains back up, toilets gurgle, and there’s always that worry about sewage coming back into the home. Our plumbing team was called to a property in central Tampa that was dealing with exactly this kind of stressful situation: a main sewer line packed with paper and debris, and no easy way to tell what else might be going on inside the pipe.

In this project, our technician Adalberto used a combination of hydro jet sewer drain unclogging and sewer camera inspection to clear the blockage and visually confirm the condition of the line. Below, we’ll walk through what we found, how we fixed it, and what homeowners in Tampa can do to prevent similar issues in their own sewer pipes.

Customer Problem: A Backed-Up Main Sewer Line in Tampa, FL

Our client contacted us because the main sewer line at their Tampa, FL 33603 home had stopped flowing properly. Drains were slow, and there were signs that wastewater was not moving out to the city main the way it should.

From our experience serving homeowners throughout Tampa, Florida, this kind of problem often points to a blockage somewhere in the main sewer pipe. In this case, we were told that the main sewer line was full of paper. That’s a red flag that the pipe may be collecting debris or has a defect where materials tend to snag and build up.

Common symptoms of a main sewer clog include:

  • Multiple drains in the home running slow at the same time
  • Toilets gurgling or bubbling when other fixtures are used
  • Water backing up in a tub or shower when a toilet is flushed
  • Strong sewer odors near drains or outside where the main pipe runs

Because a main sewer issue can turn into a messy backup quickly, the homeowner made the right call by reaching out for professional plumbing help instead of trying to handle this with just a store-bought drain cleaner.

Step One: Gaining Access to the Sewer Line

Before we can clear a stubborn clog in the main line, we need proper access to the pipe. Our job description for this project included digging a trench outside to access the sewer line so we could hydro jet the pipe.

Depending on how the original plumbing was installed, there may or may not be an accessible cleanout in a convenient location. When a home doesn’t have a usable cleanout, or when the line is too deep or obstructed, we sometimes have to:

  • Dig a trench to expose the section of pipe we need to work on
  • Cut into the line carefully to create access
  • Add a new cleanout for future maintenance

On this project, our team dug outside to reach the sewer pipe. We always note to homeowners that if a pipe needs to be cut or a new cleanout added, that’s a separate charge from the unclogging itself, because it involves extra materials and labor. Being clear up front about what’s included and what’s additional is a big part of how our team does plumbing services in Tampa.

For more details on how we approach clogged drains and main line issues, you can review our drain line cleaning and flushing services page on our website.

Step Two: Hydro Jet Sewer Drain Unclogging

Once we had access to the main sewer line, the next step was to clear the clog safely and thoroughly. For a line that’s “full of paper,” hydro jetting is often one of the most effective tools we can use.

Hydro jetting uses a specialized nozzle attached to a high-pressure hose. Water is sent through the hose at high pressure, and the nozzle is designed to:

  • Blast through heavy paper and debris clogs
  • Scrub built-up grease and sludge off the pipe walls
  • Flush the loosened material down the line and out to the city main

This is different from a basic “snake” or auger, which mainly pokes a hole through the blockage. A snake can get water moving again, but it often leaves a lot of buildup on the pipe walls, which means clogs come back sooner. Hydro jetting, when used correctly, provides a more complete cleaning.

On this job, we hydro jetted the entire sewer pipe run to make sure we weren’t just clearing one spot. If one part of the pipe is full of paper, other parts are often in similar condition. Thorough cleaning gives the homeowner a better shot at long-term reliability.

If you’re curious about how often you should schedule professional drain cleaning during renovations or heavy usage periods, we have a helpful article about drain cleaning services in Tampa, FL that goes into more detail.

Step Three: Sewer Camera Inspection for Peace of Mind

Clearing the clog is only part of the job. The other key piece is understanding why the clog formed in the first place. That’s where our sewer camera inspection comes in.

After hydro jetting the line, our technician ran a video camera through the sewer pipe. A sewer camera inspection helps us:

  • Pinpoint the exact location of any remaining trouble spots
  • Check for cracks, offsets, bellies, or root intrusion
  • Confirm that the line is fully open and flowing

There are many reasons a sewer line can clog repeatedly, including:

  • Roots penetrating joints or cracks in older pipes
  • Low spots or “bellies” where waste and paper collect
  • Improper slope, causing slow flow and buildup
  • Foreign objects that were accidentally flushed

With the camera, we can visually confirm what’s going on rather than guessing. The video feed also gives homeowners a clear picture of their underground plumbing. In some cases, camera inspections have even helped locate lost jewelry and other valuables that accidentally went down a drain or toilet.

For homeowners who want a broader look at all their plumbing, not just the sewer line, our team also provides whole-home plumbing inspections. You can read more about that in our plumbing services FAQ for Tampa homeowners.

Why This Combination of Hydro Jetting and Camera Inspection Works

Hydro jetting and camera inspection complement each other perfectly for main sewer line problems:

  • Hydro jetting restores flow and scrubs away debris.
  • Camera inspection confirms that the line is clear and identifies any hidden defects.

By doing both on this Tampa job, we were able to:

  • Clear the heavy paper buildup that had filled the main sewer line
  • Verify that water was moving freely all the way to the city main
  • Give the homeowner real information about the condition of their pipe

If we had only cleared the clog without inspecting the line, there’s a chance a hidden crack, offset joint, or sag could have remained undetected. That can lead to:

  • Frequent repeat clogs in the same area
  • Gradual pipe deterioration, eventually leading to collapse
  • Unexpected sewage backups inside the home

In Tampa’s older neighborhoods, including parts of the 33603 area near landmarks like the Tampa Riverwalk and Armature Works, sewer lines can be decades old. That makes it especially important to understand the true condition of those pipes, not just clear them temporarily.

What Could Have Happened If the Problem Was Ignored

When a main sewer line is full of paper and not draining properly, it’s tempting to hope it will “work itself out.” Unfortunately, that usually doesn’t happen. Without professional cleaning and inspection, homeowners risk:

  • Complete sewer backup – sewage can back up into tubs, showers, and floor drains.
  • Water damage and contamination – cleanup can be extensive and costly.
  • Structural risk – chronic leaks underground can erode soil and affect foundations.
  • Health concerns – exposure to wastewater is never something you want inside the home.

By addressing this sewer issue promptly, our Tampa client avoided a much larger mess and gained clarity on what was happening under their yard.

Tips to Prevent Sewer Clogs in Tampa, FL Homes

While no one can completely eliminate the risk of a sewer clog, there are several practical steps homeowners in Tampa can take to reduce their chances of dealing with a backup.

1. Be Careful What You Flush

Paper-filled sewer lines are often the result of flushing products that don’t break down well. To protect your sewer pipe:

  • Only flush toilet paper and human waste – nothing else
  • Avoid “flushable” wipes; they often stay intact and cause clogs
  • Never flush feminine products, cotton swabs, dental floss, or paper towels

2. Watch for Early Warning Signs

Call a plumber if you notice:

  • Multiple fixtures draining slowly at the same time
  • Gurgling noises when you use sinks, tubs, or toilets
  • Water backing up into lower-level drains when you run water upstairs

Addressing these signs early can sometimes allow for simpler cleaning before the line is completely blocked.

3. Schedule Preventive Drain Cleaning

For homes with older sewer lines, big trees in the yard, or a history of clogs, preventive drain cleaning can be a smart investment. A controlled hydro jet cleaning or professional snaking can remove buildup before it becomes a full blockage.

To learn more about the benefits of this kind of maintenance, check out our blog on the benefits of choosing drain cleaning services in Tampa, FL.

4. Consider a Sewer Camera Inspection for Peace of Mind

If you’ve recently bought a home in Tampa or are planning major landscaping or renovations, a sewer camera inspection can give you valuable information about your buried plumbing. It’s especially helpful if you:

  • Have an older home with original pipes
  • Notice recurring slow drains or clogs
  • See signs of settling, sinkholes, or unusual wet spots in the yard

Knowing the condition of your sewer line helps you plan repairs or replacements on your terms, instead of reacting to an emergency backup.

Why Homeowners in Tampa, FL Trust Home Therapist

Our team at Home Therapist Cooling, Heating, and Plumbing focuses on practical, honest solutions for sewer and drain problems in Tampa and the surrounding Bay Area. On this hydro jet and camera inspection project in Tampa, FL 33603, we:

  • Explained the situation clearly and answered the homeowner’s questions
  • Gained proper access to the sewer line with careful trenching
  • Used professional-grade hydro jetting equipment to clear and clean the pipe
  • Verified our work with a detailed sewer camera inspection

We handle a wide range of drain and sewer issues, from simple clogs to more complex pipe problems. If you live in a duplex, townhome, or single-family property, our drain cleaning services for Tampa properties can be tailored to your specific setup and usage.

For readers who want to see another example of our work, you can also review a recent drain line unclogging project in the Tampa Bay area on our blog.

Serving Tampa, FL 33603 and the Greater Bay Area

Tampa is a vibrant, growing city with a mix of historic homes and newer construction. That means we see everything from older cast iron lines to modern PVC sewer systems. Each type of pipe has its own quirks and maintenance needs.

If you’re in the 33603 area or nearby neighborhoods and are dealing with slow drains, gurgling toilets, or suspected sewer issues, our team is familiar with the local conditions – from heavy rains to mature trees and older infrastructure. You can even see exactly where your neighborhood sits on the map using Google Maps for Tampa, FL 33603.

When to Call a Professional for Sewer Problems

You don’t need to wait for sewage to back up into your home to call a plumber. It’s worth reaching out to a professional when:

  • You’ve tried a plunger or small household snake and the issue returns quickly
  • Multiple fixtures are affected at once, not just one sink or toilet
  • You smell strong sewer odors around your home or yard
  • You notice wet patches or sinkholes forming near where the sewer line runs

Our goal on every call is to diagnose the problem thoroughly and then walk you through your options in plain English. Sometimes the right answer is a focused hydro jet cleaning and camera inspection, like this job. Other times, we may recommend spot repairs or, in more severe cases, pipe replacement. We’ll always explain the “why” behind our recommendations so you can make an informed decision.

How This Tampa Homeowner Benefited from the Service

By the time we wrapped up this project, the homeowner in Tampa, FL 33603 had:

  • A fully cleared and cleaned main sewer line
  • Camera footage confirming the condition of the pipe
  • A better understanding of what had caused the clog
  • Practical tips for preventing similar issues in the future

Most importantly, they had peace of mind knowing that their drains were flowing properly again and that a professional had inspected the system thoroughly.

Need Sewer Hydro Jetting or Camera Inspection in Tampa, FL?

If you’re experiencing slow drains, repeat clogs, or suspect issues in your main sewer line, our team at Home Therapist Cooling, Heating, and Plumbing is here to help. We service Tampa, FL and the surrounding Bay Area with expert hydro jetting, sewer camera inspections, and comprehensive plumbing diagnostics.

Call Home Therapist or visit our website to schedule your sewer and drain service. We’ll listen carefully to what’s going on, explain your options clearly, and recommend a plan that makes sense for your home and your budget. #HomeTherapist #TheTherapyYourHomeNeeds

Labor-Only Water Heater Installation & County Inspection in Tampa, FL 33647

When you’re planning a water heater replacement in Tampa, FL 33647, there are a lot of moving parts to coordinate — especially if you’re providing your own equipment and managing the project from out of town. Our team recently prepared a detailed estimate for a labor-only water heater installation at a home in the New Tampa area, and it’s a great example of what homeowners can expect when they want a professional installation while supplying their own tank.

If you’re in a similar situation, maybe out of town or juggling a busy schedule, the last thing you want to worry about is whether your hot water will be safe, up to code, and ready when you get back. That’s exactly the kind of stress we aim to take off your plate.

Customer Problem: Planning a Water Heater Replacement While Out of Town

For this Tampa, FL 33647 home, the homeowner reached out to us online to get an estimate for a labor-only water heater installation. They planned to provide the new water heater and drain pan themselves but wanted a licensed plumbing team to handle:

  • Professional installation of the new water heater
  • All necessary water line connections and accessories
  • Required county inspection fees and scheduling
  • Compliance items like an expansion tank

To make things a little more complex, the homeowner let us know they would be on a cruise until later in the week. They asked us to coordinate access with their agent on-site, providing:

  • Gate codes for the community
  • A lockbox code for the key
  • Payment timing expectations for after their return

Situations like this are common in the greater Tampa, Florida area, especially with busy professionals, snowbirds, or homeowners who travel frequently. Our goal is to make the process smooth, even when you can’t be at the house yourself.

What the Estimate Included: Labor-Only Water Heater Installation

The main line item for this project was listed as Cost of Labor Only – Water Heater Installation. That means the homeowner is responsible for buying the actual water heater and the drain pan, while our team provides the expert installation and any necessary plumbing materials to hook everything up safely.

On our side, that typically includes:

  • Disconnecting and removing the old water heater (if present)
  • Positioning the new customer-supplied water heater and drain pan
  • Providing and installing water line connections and shutoff valves as needed
  • Connecting the hot and cold lines to the new tank
  • Installing or tying into the temperature and pressure relief (T&P) discharge line
  • Checking for proper venting or electrical/gas connections as applicable (within scope)
  • Testing the new water heater for leaks and proper operation

On this estimate, we clearly explained that we supply the water line connections and accessories needed to complete the install. The homeowner doesn’t have to guess which fittings, connectors, or valves to buy — we bring what’s necessary and make sure everything is done to current standards.

Important Note About Walls, Floors, and Finishes

As part of setting expectations, our estimate also included a standard disclaimer that we do not repair finishes such as:

  • Sheetrock (drywall)
  • Concrete
  • Stucco
  • Tile or similar surfaces

If our plumbers need to open a wall, ceiling, or floor to run pipes or access connections, we’ll absolutely explain what’s needed and why. However, patching or cosmetic repairs are the homeowner’s responsibility. This keeps your costs transparent and allows you to choose the contractor or handyman you prefer for cosmetic work after the plumbing is complete.

County Fee Inspection: Why It Matters in Tampa, FL

The second line item on this project was County fee inspection. In many parts of Hillsborough County and the wider Tampa Bay area, water heater replacements are permit and inspection items. That means:

In the job notes, our team documented that the county inspection fee would be charged once we schedule and complete the installation. We also informed the homeowner that an expansion tank would be included in the project.

What Is an Expansion Tank and Why Do You Need One?

An expansion tank is a small tank that connects to your water heater’s cold water supply line. It’s designed to absorb the extra volume and pressure that builds up when water is heated and expands. In many Tampa homes, particularly where there’s a pressure-reducing valve or backflow device, current plumbing codes require an expansion tank for safety.

Without a properly sized and installed expansion tank, you can experience:

  • Unnecessary stress on your water heater tank
  • Increased risk of leaks at fixtures and connections
  • Premature wear on plumbing components

By including the expansion tank in the estimate from the start, we help ensure the installation will pass inspection and protect the system long-term. For more details on how we handle these types of projects, you can also explore our article on water heater replacement services and invoices.

Coordinating Access: Working with Agents and Gate Codes

Another key part of this Tampa, FL 33647 project was coordination. The homeowner let us know that:

  • They would be on a cruise until Friday
  • They preferred that we communicate with their agent for on-site access
  • They provided a gate code for the community and a lockbox code for the house key
  • Payment would likely be made after their return at the end of the week

Our office team documented those details carefully so our technician, Alejandro, and the scheduling staff are fully prepared. When we arrive for the installation, we’ll already know:

  • How to enter the community
  • Where to find the key
  • Who to contact on-site if we have questions

That kind of planning is especially important in gated communities and for homeowners who can’t be present. It reduces delays, prevents confusion, and ensures your water heater installation stays on schedule.

Step-by-Step: What Will Happen on Installation Day

Even though this particular project was still at the estimate stage when we created this case study, the process we plan to follow is typical for a customer-supplied water heater install in Tampa, FL:

1. Arrival and Site Review

Our technician will arrive during the scheduled window, use the gate and lockbox information provided, and connect with the homeowner’s agent if needed. Once inside, we’ll:

  • Locate the existing water heater (garage, closet, attic, or utility room)
  • Confirm the model and size of the new customer-supplied water heater
  • Verify the drain pan and any required clearances

2. Shut Off Utilities and Drain the Old Tank

Before any work begins, we’ll safely shut off the necessary utilities:

  • Water supply to the water heater
  • Power at the breaker panel (for electric units)
  • Gas supply and gas shutoff (for gas units, within scope)

We’ll then drain the old tank, disconnect the water lines, and prepare the area for the new installation.

3. Set the New Water Heater and Drain Pan

Next, we’ll place the new drain pan supplied by the homeowner, making sure it is properly aligned and connected to a drain line if needed. The new water heater is carefully positioned in the pan, with attention to:

  • Clearances around the unit
  • Accessibility for future maintenance
  • Code requirements for elevation or strapping (where applicable)

4. Connect Water Lines and Install the Expansion Tank

This is where our labor and provided materials come into play. We’ll:

  • Install new water line connections, valves, and fittings as needed
  • Connect the hot and cold water lines securely to the new tank
  • Install the required expansion tank on the cold water line, properly supported
  • Reconnect or install the T&P relief valve discharge line

Our goal is a clean, code-compliant installation that’s easy to service in the future.

5. Restore Power or Gas and Test the System

Once everything is connected, we’ll slowly restore water to the system, bleed air from the lines, and check all connections for leaks. Then we’ll:

  • Turn the breaker back on (for electric heaters)
  • Relight or start the burner and check combustion (for gas heaters, within scope)
  • Verify that the thermostat is set to a safe temperature

Before we leave, we’ll take one last look at every connection point and confirm that the heater is heating as expected.

6. Preparing for County Inspection

If a county inspection is required, we’ll coordinate the scheduling as part of the project. This includes:

  • Ensuring all visible components meet local code requirements
  • Providing any necessary documentation
  • Alerting the homeowner or their agent about the inspection window

For homeowners who want to understand more about water heater upkeep after install day, we also recommend reviewing our guide on water heater maintenance services in Tampa, FL.

Why This Approach Works — Especially for Remote or Busy Homeowners

For this Tampa 33647 homeowner, the biggest challenges weren’t just technical; they were logistical:

  • Coordinating timing around a cruise
  • Ensuring access in a gated community
  • Making sure the installation would meet county requirements
  • Handling payment once they returned from their trip

By clearly outlining what we provide (labor, materials for connections, expansion tank, coordination with county) and what the homeowner provides (the water heater, drain pan, and any cosmetic repairs after the fact), everyone goes into the project with the same expectations.

This clarity is one of the reasons many Tampa residents choose local professionals instead of attempting DIY installation, especially when permitting, inspection, or gas connections are involved.

Tips to Prepare for a Water Heater Installation in Tampa, FL

If you’re planning a similar project — whether you’re home or out of town — here are some practical tips from our plumbing team:

  • Confirm the right size and type of water heater. Make sure the replacement matches your home’s hot water needs and fuel type (electric or gas).
  • Purchase a quality drain pan. In many Florida homes, especially when the unit is in an attic or upstairs closet, a drain pan is essential for leak protection.
  • Ask about expansion tank requirements. If your home has a backflow device or pressure-reducing valve, you’ll likely need an expansion tank.
  • Clear the workspace. Remove stored items around the water heater so the technician has safe access.
  • Plan for patching if access is tight. If walls, ceilings, or other finishes need to be opened, line up someone to patch them afterward.
  • Coordinate early if you’re not local. Provide gate codes, lockbox info, and contact details for an on-site contact, just like this homeowner did.

Taking these steps ahead of time can help your installation go more smoothly and reduce the risk of surprises on the day of service.

Why Choose Home Therapist for Water Heater and Plumbing Services in Tampa, FL?

There are a lot of plumbing companies in Tampa, but homeowners call our team when they want a combination of clear communication, solid technical work, and respect for their time and property. Whether you’re near New Tampa, close to attractions like Tampa, FL 33647 on Google Maps, or visiting local favorites like Busch Gardens Tampa Bay, we’re here to keep your home’s plumbing running the way it should.

When you work with Home Therapist Cooling, Heating, and Plumbing, you can expect:

  • Licensed, experienced plumbers who understand local codes and inspection requirements
  • Transparent estimates that explain what’s included and what’s not
  • Respect for your schedule, including remote coordination with agents or property managers
  • Friendly, easy-to-understand explanations of your options before any work begins

We also offer a full range of plumbing services beyond water heaters. If you’re dealing with leaks, fixture replacements, or other concerns, our overview of plumbing services in Tampa, FL is a helpful place to start.

Thinking About Replacing Your Water Heater in Tampa, FL?

Whether you’re providing your own water heater or want us to supply a complete, turn-key replacement, our team is here to help you make a confident, informed decision. We’ll walk you through:

  • Which type and size of water heater makes sense for your home
  • What’s required by local codes and inspectors
  • How to prepare your space before installation day
  • What to expect for timing, access, and payment

If you’d like to dive deeper into planning your project, you can also read our post on requesting written estimates for water heater replacement services so you know exactly what questions to ask.

Schedule Water Heater Service in Tampa, FL 33647

If you’re in Tampa, FL 33647 or anywhere in the Tampa Bay area and your water heater is due for replacement, our team at Home Therapist Cooling, Heating, and Plumbing is ready to help. Whether you’re home, at work, or out of town, we’ll coordinate with you (and your agent, if needed) to make sure the job is done safely and professionally.

Need water heater installation or plumbing services in Tampa, FL? Call Home Therapist or visit our website to schedule your appointment and get the therapy your home needs. #HomeTherapist #TheTherapyYourHomeNeeds

When you’re planning a water heater replacement in Tampa, FL 33647, there are a lot of moving parts to coordinate — especially if you’re providing your own equipment and managing the project from out of town. Our team recently prepared a detailed estimate for a labor-only water heater installation at a home in the New Tampa area, and it’s a great example of what homeowners can expect when they want a professional installation while supplying their own tank.

If you’re in a similar situation, maybe out of town or juggling a busy schedule, the last thing you want to worry about is whether your hot water will be safe, up to code, and ready when you get back. That’s exactly the kind of stress we aim to take off your plate.

Customer Problem: Planning a Water Heater Replacement While Out of Town

For this Tampa, FL 33647 home, the homeowner reached out to us online to get an estimate for a labor-only water heater installation. They planned to provide the new water heater and drain pan themselves but wanted a licensed plumbing team to handle:

  • Professional installation of the new water heater
  • All necessary water line connections and accessories
  • Required county inspection fees and scheduling
  • Compliance items like an expansion tank

To make things a little more complex, the homeowner let us know they would be on a cruise until later in the week. They asked us to coordinate access with their agent on-site, providing:

  • Gate codes for the community
  • A lockbox code for the key
  • Payment timing expectations for after their return

Situations like this are common in the greater Tampa, Florida area, especially with busy professionals, snowbirds, or homeowners who travel frequently. Our goal is to make the process smooth, even when you can’t be at the house yourself.

What the Estimate Included: Labor-Only Water Heater Installation

The main line item for this project was listed as Cost of Labor Only – Water Heater Installation. That means the homeowner is responsible for buying the actual water heater and the drain pan, while our team provides the expert installation and any necessary plumbing materials to hook everything up safely.

On our side, that typically includes:

  • Disconnecting and removing the old water heater (if present)
  • Positioning the new customer-supplied water heater and drain pan
  • Providing and installing water line connections and shutoff valves as needed
  • Connecting the hot and cold lines to the new tank
  • Installing or tying into the temperature and pressure relief (T&P) discharge line
  • Checking for proper venting or electrical/gas connections as applicable (within scope)
  • Testing the new water heater for leaks and proper operation

On this estimate, we clearly explained that we supply the water line connections and accessories needed to complete the install. The homeowner doesn’t have to guess which fittings, connectors, or valves to buy — we bring what’s necessary and make sure everything is done to current standards.

Important Note About Walls, Floors, and Finishes

As part of setting expectations, our estimate also included a standard disclaimer that we do not repair finishes such as:

  • Sheetrock (drywall)
  • Concrete
  • Stucco
  • Tile or similar surfaces

If our plumbers need to open a wall, ceiling, or floor to run pipes or access connections, we’ll absolutely explain what’s needed and why. However, patching or cosmetic repairs are the homeowner’s responsibility. This keeps your costs transparent and allows you to choose the contractor or handyman you prefer for cosmetic work after the plumbing is complete.

County Fee Inspection: Why It Matters in Tampa, FL

The second line item on this project was County fee inspection. In many parts of Hillsborough County and the wider Tampa Bay area, water heater replacements are permit and inspection items. That means:

  • A permit may be required for the replacement
  • An inspector may need to visit the home
  • The installation must meet current plumbing and safety codes

In the job notes, our team documented that the county inspection fee would be charged once we schedule and complete the installation. We also informed the homeowner that an expansion tank would be included in the project.

What Is an Expansion Tank and Why Do You Need One?

An expansion tank is a small tank that connects to your water heater’s cold water supply line. It’s designed to absorb the extra volume and pressure that builds up when water is heated and expands. In many Tampa homes, particularly where there’s a pressure-reducing valve or backflow device, current plumbing codes require an expansion tank for safety.

Without a properly sized and installed expansion tank, you can experience:

  • Unnecessary stress on your water heater tank
  • Increased risk of leaks at fixtures and connections
  • Premature wear on plumbing components

By including the expansion tank in the estimate from the start, we help ensure the installation will pass inspection and protect the system long-term. For more details on how we handle these types of projects, you can also explore our article on water heater replacement services and invoices.

Coordinating Access: Working with Agents and Gate Codes

Another key part of this Tampa, FL 33647 project was coordination. The homeowner let us know that:

  • They would be on a cruise until Friday
  • They preferred that we communicate with their agent for on-site access
  • They provided a gate code for the community and a lockbox code for the house key
  • Payment would likely be made after their return at the end of the week

Our office team documented those details carefully so our technician, Alejandro, and the scheduling staff are fully prepared. When we arrive for the installation, we’ll already know:

  • How to enter the community
  • Where to find the key
  • Who to contact on-site if we have questions

That kind of planning is especially important in gated communities and for homeowners who can’t be present. It reduces delays, prevents confusion, and ensures your water heater installation stays on schedule.

Step-by-Step: What Will Happen on Installation Day

Even though this particular project was still at the estimate stage when we created this case study, the process we plan to follow is typical for a customer-supplied water heater install in Tampa, FL:

1. Arrival and Site Review

Our technician will arrive during the scheduled window, use the gate and lockbox information provided, and connect with the homeowner’s agent if needed. Once inside, we’ll:

  • Locate the existing water heater (garage, closet, attic, or utility room)
  • Confirm the model and size of the new customer-supplied water heater
  • Verify the drain pan and any required clearances

2. Shut Off Utilities and Drain the Old Tank

Before any work begins, we’ll safely shut off the necessary utilities:

  • Water supply to the water heater
  • Power at the breaker panel (for electric units)
  • Gas supply and gas shutoff (for gas units, within scope)

We’ll then drain the old tank, disconnect the water lines, and prepare the area for the new installation.

3. Set the New Water Heater and Drain Pan

Next, we’ll place the new drain pan supplied by the homeowner, making sure it is properly aligned and connected to a drain line if needed. The new water heater is carefully positioned in the pan, with attention to:

  • Clearances around the unit
  • Accessibility for future maintenance
  • Code requirements for elevation or strapping (where applicable)

4. Connect Water Lines and Install the Expansion Tank

This is where our labor and provided materials come into play. We’ll:

  • Install new water line connections, valves, and fittings as needed
  • Connect the hot and cold water lines securely to the new tank
  • Install the required expansion tank on the cold water line, properly supported
  • Reconnect or install the T&P relief valve discharge line

Our goal is a clean, code-compliant installation that’s easy to service in the future.

5. Restore Power or Gas and Test the System

Once everything is connected, we’ll slowly restore water to the system, bleed air from the lines, and check all connections for leaks. Then we’ll:

  • Turn the breaker back on (for electric heaters)
  • Relight or start the burner and check combustion (for gas heaters, within scope)
  • Verify that the thermostat is set to a safe temperature

Before we leave, we’ll take one last look at every connection point and confirm that the heater is heating as expected.

6. Preparing for County Inspection

If a county inspection is required, we’ll coordinate the scheduling as part of the project. This includes:

  • Ensuring all visible components meet local code requirements
  • Providing any necessary documentation
  • Alerting the homeowner or their agent about the inspection window

For homeowners who want to understand more about water heater upkeep after install day, we also recommend reviewing our guide on water heater maintenance services in Tampa, FL.

Why This Approach Works — Especially for Remote or Busy Homeowners

For this Tampa 33647 homeowner, the biggest challenges weren’t just technical; they were logistical:

  • Coordinating timing around a cruise
  • Ensuring access in a gated community
  • Making sure the installation would meet county requirements
  • Handling payment once they returned from their trip

By clearly outlining what we provide (labor, materials for connections, expansion tank, coordination with county) and what the homeowner provides (the water heater, drain pan, and any cosmetic repairs after the fact), everyone goes into the project with the same expectations.

This clarity is one of the reasons many Tampa residents choose local professionals instead of attempting DIY installation, especially when permitting, inspection, or gas connections are involved.

Tips to Prepare for a Water Heater Installation in Tampa, FL

If you’re planning a similar project — whether you’re home or out of town — here are some practical tips from our plumbing team:

  • Confirm the right size and type of water heater. Make sure the replacement matches your home’s hot water needs and fuel type (electric or gas).
  • Purchase a quality drain pan. In many Florida homes, especially when the unit is in an attic or upstairs closet, a drain pan is essential for leak protection.
  • Ask about expansion tank requirements. If your home has a backflow device or pressure-reducing valve, you’ll likely need an expansion tank.
  • Clear the workspace. Remove stored items around the water heater so the technician has safe access.
  • Plan for patching if access is tight. If walls, ceilings, or other finishes need to be opened, line up someone to patch them afterward.
  • Coordinate early if you’re not local. Provide gate codes, lockbox info, and contact details for an on-site contact, just like this homeowner did.

Taking these steps ahead of time can help your installation go more smoothly and reduce the risk of surprises on the day of service.

Why Choose Home Therapist for Water Heater and Plumbing Services in Tampa, FL?

There are a lot of plumbing companies in Tampa, but homeowners call our team when they want a combination of clear communication, solid technical work, and respect for their time and property. Whether you’re near New Tampa, close to attractions like Tampa, FL 33647 on Google Maps, or visiting local favorites like Busch Gardens Tampa Bay, we’re here to keep your home’s plumbing running the way it should.

When you work with Home Therapist Cooling, Heating, and Plumbing, you can expect:

  • Licensed, experienced plumbers who understand local codes and inspection requirements
  • Transparent estimates that explain what’s included and what’s not
  • Respect for your schedule, including remote coordination with agents or property managers
  • Friendly, easy-to-understand explanations of your options before any work begins

We also offer a full range of plumbing services beyond water heaters. If you’re dealing with leaks, fixture replacements, or other concerns, our overview of plumbing services in Tampa, FL is a helpful place to start.

Thinking About Replacing Your Water Heater in Tampa, FL?

Whether you’re providing your own water heater or want us to supply a complete, turn-key replacement, our team is here to help you make a confident, informed decision. We’ll walk you through:

  • Which type and size of water heater makes sense for your home
  • What’s required by local codes and inspectors
  • How to prepare your space before installation day
  • What to expect for timing, access, and payment

If you’d like to dive deeper into planning your project, you can also read our post on requesting written estimates for water heater replacement services so you know exactly what questions to ask.

Schedule Water Heater Service in Tampa, FL 33647

If you’re in Tampa, FL 33647 or anywhere in the Tampa Bay area and your water heater is due for replacement, our team at Home Therapist Cooling, Heating, and Plumbing is ready to help. Whether you’re home, at work, or out of town, we’ll coordinate with you (and your agent, if needed) to make sure the job is done safely and professionally.

Need water heater installation or plumbing services in Tampa, FL? Call Home Therapist or visit our website to schedule your appointment and get the therapy your home needs. #HomeTherapist #TheTherapyYourHomeNeeds

Condenser Fan Motor Replacement in Valrico, FL 33596

When your air conditioner’s outdoor unit stops doing its job in the middle of a warm Valrico, FL afternoon, it can go from uncomfortable to stressful very quickly. That’s exactly what happened at a home in the 33596 area, where the condenser fan motor was failing and putting the entire system at risk.

Our team at Home Therapist Cooling, Heating, and Plumbing was called out to take care of a condenser fan motor replacement under parts warranty, along with handling the necessary warranty processing and making sure the system was set up for reliable operation moving forward.

In this case study, we’ll walk through what was going on with the system, how we diagnosed the issue, what’s involved in a condenser fan motor replacement, and how homeowners in Valrico, FL can prevent similar problems in the future.

Customer Problem: What Was Happening at the Home

Our client in Valrico, FL 33596 reached out because their air conditioner’s outdoor unit wasn’t operating properly. While the internal notes focused on the repair details and parts ordering, the symptoms that usually lead to this kind of service include:

  • Warm air or not enough cool air coming from the vents
  • Outdoor unit running loudly, humming, or buzzing
  • Fan on the outdoor unit not spinning or starting slowly
  • AC shutting off on high-pressure or safety switches

In Florida’s heat and humidity, issues with the outdoor condenser can quickly become serious if they’re not addressed. The condenser fan motor’s job is to move air across the outdoor coil to release heat. When that motor fails or weakens, the system can overheat, efficiency drops, and major components like the compressor can be damaged.

The good news for this homeowner was that the fan motor was still under the manufacturer’s warranty. Our team coordinated the new condenser fan motor, processed the warranty handling fee with the supplier, and scheduled the return visit to get everything installed correctly.

Our Inspection & Diagnosis Process

Before replacing any part, we always start with a careful inspection. For condenser fan motor issues at homes in Valrico and the greater Tampa Bay area, our technicians typically follow a step-by-step process:

  • Visual inspection of the outdoor unit: We check the fan blades, motor, wiring, and capacitor for visible damage, burning, or wear.
  • Listen for startup behavior: Is the compressor running but the fan not turning? Is there a humming sound from the motor?
  • Test the capacitor: A weak or failed capacitor can prevent the motor from starting correctly, so we check its readings with a meter.
  • Check electrical connections: Loose or burnt connections can cause intermittent fan operation or complete failure.
  • Verify motor condition: We test the motor windings and confirm whether the motor itself has failed.

In this project, the diagnostic work confirmed that the condenser fan motor needed to be replaced. The job was set up as a System Repair Level 2 – Condenser Fan Motor Replacement (labor), with the fan motor covered under warranty and a new capacitor added if needed to ensure a reliable start-up and long-term performance.

Our internal note also shows that the motor was ordered through a Trane supplier in Clearwater, which is a common step when we make sure homeowners get genuine, compatible parts that meet the manufacturer’s specifications.

Step-By-Step: How We Replaced the Condenser Fan Motor

Once the new, warranty-covered condenser fan motor arrived, our technician returned to the Valrico home to complete the repair. Here’s what a typical condenser fan motor replacement looks like from a homeowner’s perspective:

1. Safety and System Shutdown

We always begin by turning off power to the outdoor unit at both the thermostat and the disconnect near the condenser. This protects both the homeowner and the technician and prevents accidental shorts or damage to the equipment while we’re working.

2. Accessing the Fan Motor Assembly

The fan motor is usually mounted on the top grille of the condenser unit. Our technician:

  • Removed the screws holding the top panel/fan assembly in place
  • Carefully lifted and supported the fan assembly so that no wires were strained
  • Documented the existing wiring configuration and routing to ensure a correct reinstallation

3. Disconnecting the Old Motor and Capacitor

Next, we disconnected the wiring from the existing condenser fan motor and, if present, from the dual capacitor that serves both the compressor and fan. When the original capacitor is weak or out of spec, it can shorten the life of a new motor, so this job was quoted with a new capacitor if needed. Our tech:

  • Tested the old capacitor with a meter to compare actual microfarads to the rating on the label
  • Verified whether the capacitor should be replaced to protect the new motor
  • Safely discharged the capacitor before removal to avoid any shock risk

4. Removing the Old Motor

With power off and wiring documented, we removed the fan blades and then unbolted the old motor from the top grille. This step is more delicate than it looks: bending the fan blades can cause vibration and noise, and improper alignment can reduce efficiency.

5. Installing the New Warranty Motor

For this Valrico project, the replacement fan motor was covered under warranty, which helped minimize the homeowner’s cost. The parts cost itself was handled separately from labor, along with a warranty handling fee charged by the brand’s supplier to process the claim and ship the part.

Our technician then:

  • Mounted the new motor to the condenser top panel with proper hardware
  • Reinstalled and carefully balanced the fan blade on the new motor shaft
  • Secured all wiring with correct routing to avoid rubbing or contact with sharp edges

6. Wiring the Motor and Capacitor

Correct wiring is critical to safe operation. Our tech followed the manufacturer’s wiring diagram for the exact motor model being installed. This typically includes:

  • Connecting common, fan, and line wires to the appropriate terminals
  • Making sure the capacitor values match the new motor’s requirements
  • Using rated connectors and securing any splices in a way that keeps out moisture

At this stage, we also inspected the rest of the outdoor unit for any signs of stress from the failing motor, such as discoloration on the coil or signs of past overheating.

7. Reassembly and Testing

After everything was wired and secured, we carefully set the top panel and fan assembly back onto the condenser, tightened all screws, and restored power. We then:

  • Started the system from the thermostat
  • Confirmed that the outdoor condenser fan came on promptly and ran smoothly
  • Listened for unusual noises or vibration
  • Checked refrigerant pressures and temperatures as needed
  • Verified proper airflow and cooling performance inside the home

The result: a quiet, properly functioning fan motor, improved heat rejection at the outdoor unit, and a more reliable air conditioning system for this Valrico homeowner.

Why This Fix Works and What Could Have Happened Otherwise

The condenser fan motor is one of the hardest-working components in your AC system. It runs every time the compressor does, often for hours at a time during hot Florida days. Replacing a failing motor and its supporting components (like the capacitor) is more than just a quick fix — it protects the entire system.

Here’s why taking care of this repair promptly matters:

  • Protects the compressor: Without adequate airflow across the outdoor coil, the compressor can overheat and trip safety devices or, in worst cases, fail completely. Compressor replacement is far more expensive than a fan motor.
  • Improves efficiency: A weak or slow fan means your AC has to work harder for the same cooling. Replacing the motor restores proper heat rejection and helps the system run more efficiently.
  • Reduces noise and vibration: Failing motors often buzz, hum, or rattle. A new motor runs smoother and quieter, making your outdoor area more pleasant.
  • Extends system life: Running with a compromised component stresses everything else. Completing the repair under warranty helps extend the life of the entire system.

If this Valrico homeowner had delayed the repair, they could have faced:

  • Repeated nuisance shutdowns
  • Significantly higher electric bills
  • Major component damage, especially to the compressor
  • A full system replacement much sooner than necessary

Understanding Warranty Handling Fees and Parts Costs

One question that often comes up during projects like this is, “If my part is under warranty, why is there still a cost?”

In this job, the line items included:

Most manufacturer warranties cover the part itself, not the labor to diagnose the problem, handle paperwork, pick up parts, or perform the installation. Some suppliers also charge a small fee for processing warranty claims and shipping the part. We aim to be as transparent as possible about these items so homeowners know exactly what they’re paying for.

If you’d like to learn more about how AC repair estimates are structured in the Tampa Bay area, we go into more detail in our blog on understanding air conditioner repair estimates in Tampa Bay, FL.

The Role of Maintenance Plans, Like Our Elite Therapy Plan

This Valrico homeowner received an Elite Therapy Plan discount on the work, which helped reduce the overall cost of the repair. Maintenance and membership plans can provide several benefits:

  • Seasonal inspections and tune-ups to catch failing parts early
  • Priority scheduling during peak seasons
  • Discounts on repairs and additional services
  • Better documentation for warranty support

We discuss these benefits in more depth in our guide to AC maintenance plans and service costs. For many homeowners in Valrico and the wider Tampa Bay area, a plan like this helps avoid surprise breakdowns and keeps the system running as efficiently as possible throughout our long cooling season.

Tips to Prevent Condenser Fan Motor Issues in Valrico Homes

Arizona and Nevada may be famous for dry heat, but here in Florida, our combination of heat, humidity, and storms is uniquely tough on HVAC equipment. If you live in Valrico or nearby areas around Tampa Bay, here are a few practical tips to help extend the life of your condenser fan motor and the entire system:

  • Schedule regular AC maintenance: During a tune-up, we check motor amp draws, capacitors, and overall operation. Catching a weak capacitor early can save your fan motor.
  • Keep vegetation away from the outdoor unit: Maintain at least 2–3 feet of clearance around the condenser so it can breathe and stay cool.
  • Rinse off the outdoor coil gently: Dirt and debris make the system work harder. A light rinse with a garden hose (from the outside in, with power off) can help in between professional cleanings.
  • Listen for changes: If your outdoor unit starts to sound different — louder, humming, or rattling — call for service before it fails completely.
  • Use a surge protector: Frequent thunderstorms in the Valrico and Tampa area can send power surges through your system. A properly installed surge protector can help protect sensitive electronics and motors.

We also have a helpful case study on another condenser motor replacement project in the Tampa, FL area that shows how similar these repairs can be across different types of properties.

AC Repair Services in the Greater Tampa Bay Area

Valrico is part of the larger Tampa Bay community, and our team regularly provides AC repair services throughout the region. Whether you’re near local spots like Buckhorn Springs Golf & Country Club or closer to downtown Tampa, we’re here to help keep your home comfortable.

If you’re curious about how AC repairs work in general, our service overview for air conditioner installation and repair in the Tampa Bay area is a good place to start. We also dive deeper into what to expect when your AC is not cooling, from diagnosis to solution options.

For more background on AC repair and condenser-related issues, you may also find our article on condenser coil replacement and what to expect helpful, even if your specific issue is with the fan motor rather than the coil itself.

About Valrico, FL and Local Conditions

Valrico, FL is a growing community east of Tampa, with hot, humid summers that put air conditioning systems to the test. You can learn more about the area on Wikipedia’s Valrico, Florida page or explore the town’s location and surroundings via Google Maps.

Local weather patterns — from high humidity to frequent thunderstorms — mean that homeowners in Valrico depend heavily on their HVAC systems almost year-round. That’s why prompt repairs, like this condenser fan motor replacement, and regular maintenance are so important for comfort and peace of mind.

Why Choose Home Therapist in Valrico, FL?

When something goes wrong with your AC, you don’t just want a quick fix — you want someone who will explain what’s going on in plain language and take care of your home like it’s their own.

Here’s how our team approaches jobs like this condenser fan motor replacement in Valrico:

  • Clear communication: We walk you through what we found, what needs to be done, and why.
  • Warranty coordination: We help handle manufacturer warranty processing so you’re not stuck on hold or guessing about coverage.
  • Options explained: When there are choices — repair vs. replace, standard vs. upgraded parts — we talk through them honestly so you can decide what fits your home and budget.
  • Respect for your home: We arrive prepared, work neatly, and clean up after ourselves.
  • Local expertise: We understand how Tampa Bay’s climate affects HVAC equipment and tailor our recommendations accordingly.

Whether it’s a condenser fan motor, a blower motor, a thermostat issue, or a full system replacement, our goal is the same: restore your comfort and give you confidence in your system.

Need AC Repair in Valrico, FL 33596?

If your outdoor unit isn’t running, the fan isn’t spinning, or your AC simply isn’t keeping up, don’t wait for a full breakdown. Our team at Home Therapist Cooling, Heating, and Plumbing is here to help with AC repair and condenser motor replacement in Valrico, FL and throughout the Tampa Bay area.

Call Home Therapist or visit our website to schedule service. We’ll diagnose the issue, explain your options, and help you choose the solution that makes the most sense for your home.

#HomeTherapist #TheTherapyYourHomeNeeds

R410A Refrigerant Recharge and Full AC Tune-Up in Tampa, FL 33624

When your air conditioner in Tampa, FL 33624 stops cooling the way it should, the heat and humidity can make your home uncomfortable fast. Recently, our team at Home Therapist Cooling, Heating, and Plumbing was called to a home in the Tampa 33624 area to check on an AC system that wasn’t keeping up. During our visit, we diagnosed a low R410A refrigerant issue, discussed the possibility of a leak, and performed a full AC and heating tune-up to get the system operating as safely and efficiently as possible.

In this case study, we’ll walk through what we found, how we fixed it, and what homeowners in Tampa can do to protect their systems from similar problems.

Customer Problem: Why We Were Called Out

This Tampa homeowner reached out because their air conditioner wasn’t cooling like it used to. The home never really felt comfortable, the system seemed to run longer than normal, and the electric bill had been creeping up. That combination of symptoms often points to one of a few common issues: dirty components, restricted airflow, thermostat problems, or low refrigerant.

Because the system was still running but underperforming, our team scheduled a diagnostic visit, with the understanding that the standard service call fee would be waived or discounted if we were hired to complete the recommended repairs. This is our normal process for new service calls and helps keep the experience straightforward and predictable for homeowners.

If you’re in a similar position—AC running but not cooling well—our emergency AC repair services in Tampa follow this same transparent diagnostic approach.

Our Step-by-Step Diagnostic Process

On every HVAC diagnosis, we follow a structured process so nothing important gets overlooked. Our report to the homeowner always answers these questions:

  • Why were we called?
  • What did we find?
  • What options do we recommend?
  • Why do we recommend these options?

At this Tampa, FL 33624 home, our technician started with a full system check:

  • Visual inspection: Checked the outdoor condenser, indoor air handler, electrical connections, and refrigerant lines for obvious signs of damage or wear.
  • Airflow and filter: Confirmed the filter condition and basic airflow through the return and supply vents.
  • Thermostat operations: Verified that the thermostat was calling for cooling and communicating properly with the system.
  • Refrigerant levels and pressures: Measured R410A refrigerant pressures to see if they were within manufacturer specifications.

The pressure readings confirmed what the symptoms suggested: the system was low on R410A refrigerant.

What We Found: Low R410A and Potential Leak Concerns

R410A is the refrigerant commonly used in newer residential AC systems. It doesn’t “get used up” like gasoline in a car; if your system is low, it usually means there’s a leak somewhere in the refrigerant circuit. At this home, the system needed more than 3 pounds of R410A to bring pressures back into a safe operating range.

Whenever we see a system that needs more than 2 pounds of refrigerant added, we take time to explain a critical point to the homeowner: adding refrigerant alone may not be a long-term solution. It strongly suggests there is an underlying leak that needs to be addressed, otherwise the refrigerant can gradually escape again.

In this job, our recommendations were:

  • Add the necessary R410A to get the system cooling again and prevent further stress on the compressor.
  • Discuss leak detection options and possible next steps, depending on the age, condition, and value of the system.
  • Perform a full AC and heating tune-up to clean, optimize, and thoroughly inspect the system for any additional red flags.

We also clearly explained that when a system is very low on refrigerant, some issues only become apparent after the system is recharged and operating more normally. For example, high electrical demand, weak components, or airflow problems might not fully show until the system is under proper load. In those cases, we prepare our clients that additional recommendations may follow once the primary issue is corrected.

Step-by-Step: How We Fixed the AC in This Tampa Home

1. Restoring Refrigerant Levels

The first priority was protecting the equipment. Running with low refrigerant can cause the evaporator coil to freeze, damage the compressor, and increase energy use. Our technician carefully added R410A to the system, monitoring pressures and temperatures to reach manufacturer-recommended levels.

We always charge by the pound with clear pricing, so the homeowner knows exactly how much refrigerant was added and why. Once the levels were corrected, we verified that the system was producing a healthy temperature split (the difference between return air and supply air temperatures) and that the coil was not icing up.

2. Full AC and Heating Tune-Up

With the refrigerant restored, we moved on to a complete tune-up of both the cooling and heating functions. In Tampa, you might not think much about heating until a cold front moves through, but keeping both modes in good condition protects your equipment year-round.

Our tune-up at this home included:

  • Acid washing and sanitizing the evaporator coil: A dirty coil can dramatically reduce cooling efficiency and cause uneven temperatures. Cleaning the coil helps improve airflow and system performance.
  • Acid washing and sanitizing the condenser coil: Outdoor units in Tampa deal with salt air, pollen, and debris. A clean condenser coil allows heat to leave the system more easily, which lowers energy use and helps your AC cool more effectively.
  • Flushing and sanitizing the drain line: We cleared and treated the condensate drain line to reduce clogs and algae growth. On this service, we provided a 60-day guarantee on the drain line flush.
  • Inspecting refrigerant levels and pressures: After cleaning and tuning the system, we re-checked refrigerant pressures to confirm that everything was still in the proper range.
  • Checking and adjusting the thermostat: We verified temperature calibration and settings to ensure the thermostat was giving accurate readings and commanding the system properly.
  • Tightening wiring, contacts, capacitors, and relays: Loose electrical connections can cause nuisance breakdowns or even safety concerns. We tightened and inspected key components for signs of wear.
  • Securing the outdoor disconnect and condenser fan components: We confirmed that the electrical disconnect, fan motor, and fan blades were secure and operating smoothly.
  • Inspecting the compressor at startup: Starting amperage was checked to see how hard the compressor had to work. Excessive strain can signal developing problems.
  • Filter replacement: Whenever a client provides filters, we replace them as part of the tune-up. If they prefer, we can also supply filters at an additional cost, based on size and quantity.

At the end of the tune-up, we provided a clear list of any additional maintenance or repairs we would recommend, along with our reasoning. In this case, ongoing observation of refrigerant levels and possible leak detection was at the top of that list.

If your system is due for service, learn more about our dedicated AC maintenance in Tampa and our seasonal AC tune-up services.

Why This Fix Works—and Its Limits

Adding R410A and performing a thorough tune-up gave this Tampa homeowner immediate benefits:

However, we always stress one important point: when a system needs more than a couple of pounds of refrigerant, it’s usually a symptom, not the root cause. The underlying leak might be small or intermittent, but it should be investigated and addressed if the homeowner wants a long-term solution.

Our technician talked through different scenarios with the homeowner, including:

  • Leak search and repair: In some cases, finding and repairing a leak is cost-effective and extends the life of the system.
  • Monitoring refrigerant levels: For older systems nearing the end of their life, some homeowners choose to recharge and monitor while planning for eventual replacement.
  • System replacement planning: If the unit is very old, inefficient, or has multiple issues, putting repair money toward a new system can be the smarter long-term move.

We never pressure our clients into a particular choice. Our job is to present the facts, explain the pros and cons, and help families in Tampa make the decision that best fits their home, budget, and comfort goals.

What Could Happen If Low Refrigerant Is Ignored?

It can be tempting to ignore a system that is “still running,” but low R410A levels can cause a number of serious problems over time:

  • Frozen evaporator coil: Low refrigerant can cause the indoor coil to ice over, blocking airflow completely and shutting down cooling.
  • Compressor damage: The compressor is the heart of your AC system. Operating with low refrigerant makes it run hotter and longer, increasing the risk of failure.
  • Higher energy bills: A struggling system often uses more electricity but delivers less cooling.
  • Uneven temperatures and humidity issues: Rooms may never reach setpoint, and the system may fail to pull enough moisture out of the air—especially noticeable in humid Tampa summers.

Addressing refrigerant issues promptly, along with regular maintenance, is one of the best ways to keep your AC running smoothly in the Tampa, FL 33624 area.

Tips to Prevent AC Problems in Tampa Homes

While no system is completely problem-proof, there are several steps homeowners in Tampa can take to reduce the risk of refrigerant issues and major breakdowns:

  • Schedule annual tune-ups: A yearly AC inspection and cleaning helps catch small issues before they become expensive repairs.
  • Change filters regularly: Most homes should change filters every 1–3 months, depending on filter type, pets, and dust levels.
  • Keep the outdoor unit clear: Maintain at least 2 feet of clearance around the outdoor condenser, trimming back plants and removing debris.
  • Watch for warning signs: Warm air from vents, ice on refrigerant lines, hissing noises, or sudden spikes in utility bills are all signals to call for service.
  • Consider a maintenance plan: Enrolling in a maintenance plan helps you stay on schedule with tune-ups and may offer additional benefits like priority scheduling.

Home Therapist offers convenient Therapy Maintenance Plans that help Tampa homeowners keep their HVAC systems in top shape with regular visits and professional care.

Why Choose Home Therapist in Tampa, FL 33624?

The 33624 area of Tampa sits near some of the most convenient parts of the city, with quick access to Carrollwood, local shopping, and Tampa attractions. Whether you’re spending the day at Busch Gardens Tampa Bay or exploring the city, you deserve to come home to a cool, comfortable house.

Our team at Home Therapist Cooling, Heating, and Plumbing is proud to serve homeowners throughout Tampa and nearby communities. We bring the same calm, step-by-step approach to every call—whether it’s a simple tune-up or a late-night AC emergency.

When you work with us, you can expect:

  • Clear communication: We explain what we’re doing, what we find, and why we recommend certain options.
  • No pressure: You get honest information and practical choices, not pushy sales tactics.
  • Local expertise: We understand how Tampa’s heat, humidity, and coastal environment affect HVAC systems.
  • Full-service care: From tune-ups and repairs to new installations and indoor air quality, we handle it all.

If you’d like to see the range of work we perform beyond this particular project, you can explore our HVAC and plumbing services in Carrollwood and Tampa.

Serving the Tampa Bay Area

Tampa is a vibrant, fast-growing city known for its warm climate, waterfront views, and unique neighborhoods. You can learn more about the city itself on Tampa’s Wikipedia page or explore the 33624 area on Google Maps. Our team regularly works throughout Tampa Bay, from single-family homes to townhomes and condos, helping families stay comfortable in every season.

When to Call for AC Service in Tampa

It’s time to call a professional if you notice any of the following:

  • AC runs constantly but the home never cools down
  • Some rooms are much warmer than others
  • Visible ice on the refrigerant lines or indoor coil
  • Unusual noises from the indoor or outdoor unit
  • Higher-than-normal electric bills without a clear reason

Addressing these signs early can often turn a major breakdown into a smaller, more manageable repair. Our emergency AC repair team in Tampa is here to help when your system can’t wait.

Ready to Get Your AC Back in Shape?

If your AC in Tampa, FL 33624 isn’t cooling like it used to, our team is here to help. Whether you need a refrigerant check, a full AC tune-up, or a second opinion on a repair, we’ll walk you through the process and provide clear, honest recommendations.

Call Home Therapist or visit our website to schedule service. We’ll treat your home with the same care and attention we brought to this R410A recharge and tune-up visit—making sure you understand your options and feel confident in every decision.

#HomeTherapist #TheTherapyYourHomeNeeds

Is Grandaire a Good HVAC Brand for Homeowners Today?

Choosing the right heating and cooling system is a big decision for any homeowner. It can affect your comfort, your monthly bills, and even the air you breathe. With so many HVAC brands on the market, finding one you can trust might feel overwhelming. That’s why it helps to take a closer look at specific brands—and one name that often comes up is Grandaire.

Grandaire may not be as well-known as some bigger brands, but it has built a solid reputation for quality, value, and dependable performance. Whether you need to cool your home during hot summers or stay warm in the winter, Grandaire offers systems that do the job without breaking your budget.

Let’s break down what makes Grandaire a reliable choice for your HVAC needs.

A Quick Look at Grandaire’s Background

Grandaire focuses on offering simple, reliable heating and cooling systems for homes and small businesses. While they don’t always pack in the latest flashy tech, their products are built to get the job done. Their systems are known for being cost-effective, easy to install, and easy to service. This makes Grandaire a popular choice for homeowners who want comfort without overpaying for fancy extras they may never use.

What Grandaire Offers

Grandaire sells a range of HVAC products designed for different types of homes and climates. Their lineup includes air conditioners, heat pumps, furnaces, and air handlers.

Their air conditioners come in various sizes and efficiency levels, so you can find one that fits your home and your energy needs. Their heat pumps are a great solution for areas with mild winters, providing both heating and cooling in one system. For colder areas, Grandaire also offers reliable gas furnaces that can handle freezing temperatures. They also provide packaged units and indoor air quality tools to complete your HVAC setup.

Key Features of Grandaire Systems

Even though Grandaire focuses on affordability, they don’t skimp on features that matter. Here are a few highlights:

  • Energy Efficiency: Many Grandaire models have high SEER ratings, which means they use less energy to keep your home comfortable. This can lead to lower utility bills and a smaller impact on the environment.

  • Quiet Operation: Their units are designed with features like insulated compressor compartments that help reduce noise. That means fewer loud hums and more peace and quiet at home.

  • Durable Components: Grandaire units are built with tough materials that can stand up to tough weather and long-term use. This helps reduce the need for repairs and replacements.

  • Smart Thermostat Compatibility: Some Grandaire models work with programmable or smart thermostats, allowing you to manage your heating and cooling from your phone or on a schedule.

  • Eco-Friendly Refrigerants: Many Grandaire systems use refrigerants that are safer for the ozone layer and have a lower environmental impact.

Why Homeowners Like Grandaire

Grandaire might not have all the bells and whistles of luxury brands, but it offers several key advantages for homeowners:

  • Affordability: Grandaire systems tend to be more budget-friendly than many well-known brands, making them a smart choice for families or first-time homeowners.

  • Dependability: These systems are built to perform. With regular maintenance, many Grandaire units will last for years without major problems.

  • Simple Maintenance: The straightforward design of Grandaire equipment makes maintenance and repairs easier, which can save you time and money down the road.

  • Good Warranty Coverage: Grandaire offers solid warranty protection on many of its products, giving homeowners peace of mind in case something goes wrong.

  • Options for All Home Sizes: Whether you live in a small house or a multi-level home, there’s a Grandaire system that fits your space and budget.

Installation and Service Matter Too

Even the best HVAC system won’t perform well if it’s installed incorrectly. That’s why it’s important to work with licensed professionals who understand how to size and install your equipment properly. A poorly installed system can cause higher energy bills, poor airflow, and frequent breakdowns.

Grandaire systems are especially popular among HVAC professionals because they’re straightforward to install and service. This can make the installation process smoother and reduce your labor costs.

Once your system is up and running, regular maintenance is key. Simple steps like changing filters, cleaning coils, and checking refrigerant levels can extend the life of your system. Many HVAC companies offer affordable service plans to help homeowners stay on top of yearly maintenance.

How Grandaire Compares to Other HVAC Brands

It’s natural to wonder how Grandaire stacks up against more popular names. Here’s a quick comparison:

  • Versus Trane and Carrier: These brands are known for premium features and long-lasting systems, but they also come with high price tags. Grandaire offers solid performance for a lower cost, making it more budget-friendly.

  • Versus Goodman and Rheem: These brands are close competitors. All three focus on offering good value and efficiency. Grandaire may win on simplicity, while others offer more high-tech features.

  • Versus Bryant and Lennox: These brands offer more advanced options, but if you’re looking for a dependable system without all the extras, Grandaire can be a better fit for your needs and wallet.

In short, Grandaire may not be the flashiest name on the list, but it’s a smart choice for homeowners who want a dependable, easy-to-maintain system at a reasonable price.

Is Grandaire the Right Choice for You?

If you’re building a new home, replacing an old HVAC unit, or just trying to lower your monthly energy bills, Grandaire is worth considering. It’s a brand that focuses on what really matters—comfort, efficiency, and reliability—without charging extra for features you may never use.

That said, choosing an HVAC system isn’t a one-size-fits-all decision. The best system for your home depends on your location, your home size, your energy goals, and your budget. That’s why it helps to talk to a trusted HVAC professional who can guide you through the options and help you pick the right fit.

At Home Therapist Cooling, Heating, and Plumbing, we work with homeowners every day to install and maintain systems like Grandaire. Our team can help you decide whether it’s the right choice for your home and make sure your system is installed correctly for long-lasting comfort.

If you’re looking for a balance between cost, performance, and peace of mind, Grandaire may be the perfect fit. Reach out to our team today and let’s explore the right solution to keep your home comfortable year-round.