

Step-by-step furnace cleaning guide for Tampa Bay homeowners
TL;DR:
- Regular DIY furnace cleaning helps Tampa Bay homeowners improve efficiency, reduce energy costs, and prolong system lifespan. Proper safety precautions, including shutting off power and gas and verifying no voltage, are essential before maintenance. Routine inspections and professional services complement DIY efforts, ensuring safety and optimal performance year-round.
Rising heating bills and dusty vents are frustrating, especially when your system is supposed to be keeping you comfortable. For Tampa Bay homeowners, HVAC systems run hard almost year-round, juggling humidity, heat, and the occasional cool spell that kicks the furnace into gear. Regular DIY furnace cleaning is one of the most effective things you can do to keep your unit running efficiently, lower your energy costs, and extend the life of your system. This guide walks you through every step, every tool, and every safety check you need to do it right.
Table of Contents
- What you need for safe, effective furnace cleaning
- Step-by-step furnace cleaning process
- Troubleshooting and common furnace cleaning mistakes
- How often should you clean your furnace?
- The uncomfortable truth about DIY furnace cleaning: What Tampa Bay homeowners should know
- Next steps: Get expert furnace and HVAC help in Tampa Bay
- Frequently asked questions
Key Takeaways
| Point | Details |
|---|---|
| Safety is critical | Always shut down power and gas supply before cleaning your furnace. |
| Regular filter changes | Check and replace filters every 1–3 months to avoid dust buildup and efficiency loss. |
| Annual deep cleaning | Plan a full furnace cleaning before each heating season to extend system life. |
| Know your limits | DIY maintenance works well, but call a pro for repairs or signs of serious trouble. |
What you need for safe, effective furnace cleaning
Before you start cleaning, it’s vital to have the right tools and know key safety steps. Walking into this job unprepared is how small maintenance tasks turn into expensive service calls.
Tools and materials checklist
Here’s a breakdown of what you’ll need before you even open the furnace cabinet:
| Tool/Material | Recommended or Optional | Notes |
|---|---|---|
| Screwdriver set | Recommended | Flathead and Phillips for panel removal |
| Shop vacuum with hose | Recommended | Better reach than standard household vacs |
| Soft brush or toothbrush | Recommended | Great for tight corners and burner slots |
| Non-contact voltage tester | Recommended | Critical for safety verification |
| Replacement filter | Recommended | Check your furnace size before buying |
| Flashlight or headlamp | Recommended | Essential for visibility inside the cabinet |
| Gloves and safety goggles | Recommended | Protect against dust and sharp edges |
| Compressed air can | Optional | Useful for sensors and tight electronics |
| Camera or phone | Optional | Photo the wiring before disconnecting anything |
Prep steps before you begin
Don’t skip these. Every one matters.
- Locate your furnace’s gas shutoff valve and switch it to the “off” position
- Turn off the furnace at the thermostat first, then cut power at the circuit breaker
- Wait at least 10 minutes after shutting down before opening the cabinet; components stay hot longer than you’d expect
- Gather all tools listed above in one place before you open anything
- Clear the area around the furnace so you have room to work safely
- Take a photo of wiring configurations inside the panel if you plan to disconnect anything
For a broader picture of what to prep before tackling any HVAC system, our duct cleaning checklist covers the full process, and our beginner HVAC maintenance guide is a great starting point if you’re just getting comfortable with DIY work.
Pro Tip: A non-contact voltage tester costs about $15 at any hardware store and can prevent a serious shock. Hold it near any wires inside the cabinet before touching anything. If it beeps or lights up, power is still present.
Safety warning: Safety shutdown steps are not optional. Gas furnaces require turning off the gas valve and waiting before opening the cabinet. Always use a voltage tester to confirm no power before reaching inside.
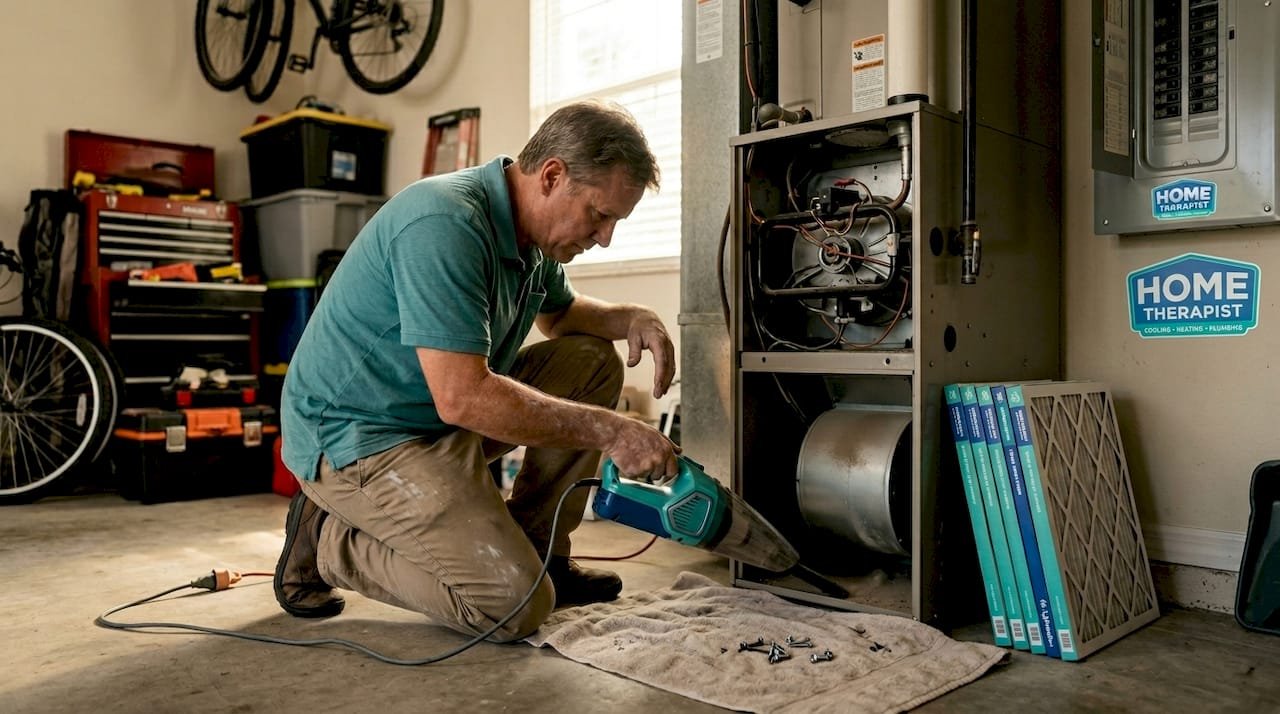
Step-by-step furnace cleaning process
Now that you’re set up for safety, let’s tackle each cleaning step in detail. This is where most homeowners feel uncertain, but the process is more straightforward than it looks once you break it down.
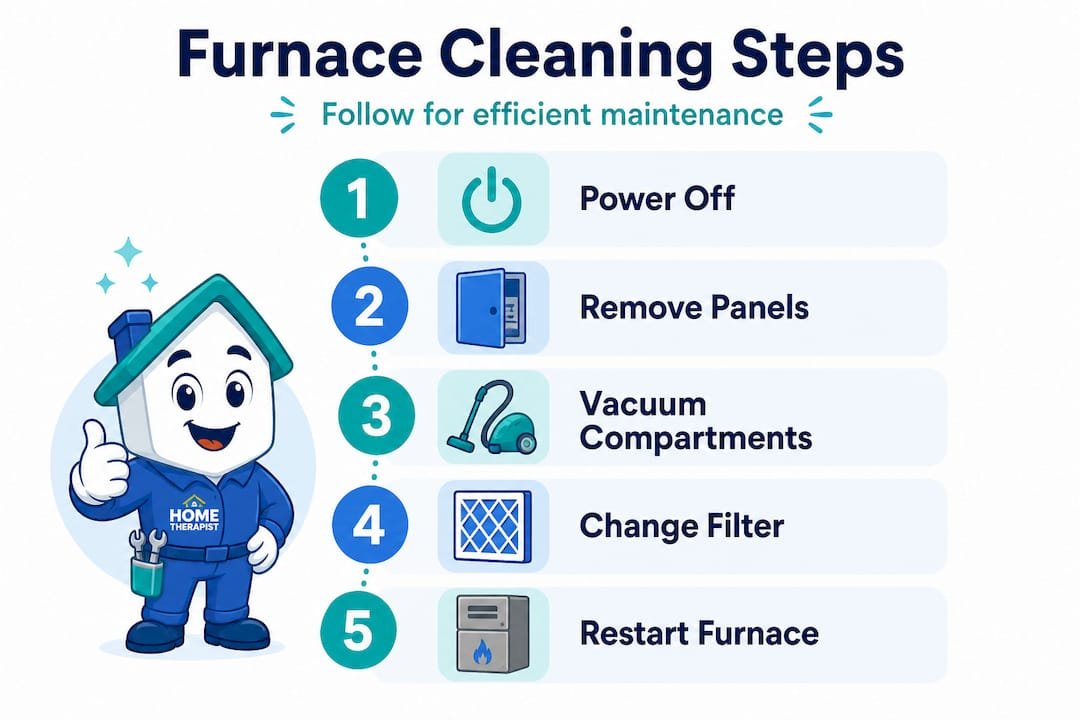
The full cleaning sequence
- Shut down the system completely. Gas off, power off at the breaker, thermostat set to “off.” Wait at least 10 minutes.
- Remove the furnace cabinet panels. Most panels lift off or are held by two screws. Set them aside where they won’t get scratched or block your workspace.
- Pull out and inspect the filter. If it’s gray and clogged, replace it. If it’s a reusable filter, clean it per the manufacturer’s instructions and let it dry completely before reinstalling.
- Vacuum the blower compartment. Use the hose attachment to pull out dust from the blower wheel, fan housing, and surrounding area. This is the step most homeowners skip, and it makes the biggest difference.
- Clean the burners. Use a soft brush to gently loosen dust from burner ports. Vacuum away the loosened debris. Do not use water or liquid cleaners inside the furnace.
- Wipe down the flame sensor. Use a fine steel wool pad or emery cloth to very lightly polish the metal rod of the flame sensor. Dust or oxidation here is a common cause of system shutdowns.
- Inspect and clean the heat exchanger surfaces (visible). With your flashlight, look for cracks, rust, or corrosion. If you see any, stop and call a professional. If the surfaces look clean but dusty, brush them lightly.
- Reassemble the cabinet. Replace all panels, make sure they’re secure, and confirm the filter is properly seated.
- Restore power and gas. Turn on the breaker, then the gas valve, then set your thermostat to “heat” and run the system for a few minutes while you watch for unusual behavior.
Manual cleaning vs. specialized tools
| Method | Best For | Limitations |
|---|---|---|
| Shop vacuum + brush | General dust removal, blower, filter housing | May miss tight corners |
| Compressed air | Sensors, electronics, hard-to-reach slots | Pushes dust into the air temporarily |
| Professional steam/jet cleaning | Carbon deposits, burner deep clean | Requires drying time, best left to pros |
| Microfiber cloths | Exterior surfaces, cabinet panels | Not for interior mechanical parts |
According to filter replacement schedules, a practical cadence for homeowners is to replace or check filters every 1 to 3 months during heating season, and to plan at least one full furnace cleaning per year, ideally before heating season begins.
For a deeper walkthrough of related tasks, check out our full HVAC cleaning steps guide or brush up on general HVAC maintenance practices.
Pro Tip: The blower compartment is the single most impactful area to clean. A clogged blower wheel forces your motor to work harder, drives up your electric bill, and is the leading cause of overheating shutdowns in residential furnaces. Spend extra time here.
Troubleshooting and common furnace cleaning mistakes
Even with clear instructions, homeowners often run into common setbacks. Knowing what to watch for before and after the job can save you a lot of stress.
Common DIY mistakes to avoid
- Skipping the safety shutdown. This is the most dangerous mistake. Gas and electricity are both present in a furnace cabinet. Never assume the unit is safe to touch without verifying.
- Installing the wrong filter size or type. Filters are not universal. A filter that’s too small will leave gaps; one that’s too thick can restrict airflow. Always check your furnace’s manual or the current filter label for exact sizing.
- Using liquid cleaners inside the cabinet. Water inside a furnace can cause corrosion, short circuits, and rust. Stick to dry cleaning methods only.
- Forcing the cabinet panels. If a panel doesn’t come off easily, look for a hidden screw or clip. Forcing it can bend the sheet metal and affect the seal.
- Forgetting to check the drain line. High-efficiency furnaces have a condensate drain that can clog with algae and debris. A quick flush with water prevents backups.
- Neglecting the area around the furnace. Boxes, clutter, or stored items near the unit are fire hazards and restrict airflow. Clear a 3-foot radius around your furnace.
When to call a professional
Some things are beyond DIY territory, and recognizing the line is important. Call a professional if:
- You notice cracks or rust on the heat exchanger
- The furnace produces a yellow or orange flame instead of blue
- You find heavy carbon buildup on the burners
- The unit cycles on and off repeatedly without reaching temperature
- You see or smell signs of electrical burning
Our guide on HVAC warning signs covers the most important red flags in detail. And if you want a seasonal overview of what to look for, the HVAC maintenance checklist is a useful reference to keep on hand.
For situations that need a pro, our professional furnace cleaning service is available across the Tampa Bay area.
Pro Tip: If you smell gas after turning the system back on, do not try to find the source yourself. Leave the house immediately, leave doors open as you go, and call your gas company from outside. This is not a situation to investigate on your own.
Critical reminder: Proper verification before opening the cabinet is essential every single time, even if you’ve cleaned the furnace before. Habits can get sloppy. Always test before you touch.
How often should you clean your furnace?
Consistency matters, so let’s define how often you should tackle furnace cleaning. A reliable schedule is the difference between a system that lasts 20 years and one that fails at the worst possible time.
Recommended cleaning frequency
Based on annual cleaning schedules for residential systems, here’s what works best for most Tampa Bay homeowners:
- Every 1 to 3 months: Check or replace the air filter. Move toward the shorter end of that range if you have pets, allergies, or anyone in the home with respiratory concerns.
- Once per year: Complete a full furnace cleaning, including the blower, burners, flame sensor, and filter housing. Schedule this before heating season kicks in, typically in October or November for Tampa Bay.
- After any major renovation: Drywall dust, insulation particles, and construction debris can clog filters and coat interior components fast. Clean immediately after any major work in the home.
- After prolonged non-use: If your furnace sat idle through a long summer with the system running mostly in air conditioning mode, dust settles in the cabinet. A quick inspection before you fire it up for the season is always worth it.
Tampa Bay specifics that affect your schedule
Tampa Bay’s environment adds a few wrinkles that homeowners in drier climates don’t have to think about. Humidity is the big one. High indoor humidity encourages dust to clump and stick to surfaces inside the furnace, making buildup worse and harder to vacuum out compared to dry climates.
Salt air from the Gulf and Tampa Bay coastlines can also accelerate corrosion on metal components. If your home is within a few miles of the water, it’s worth doing a visual inspection of burner and heat exchanger surfaces every time you change the filter, not just during the annual deep clean.
Homes with pets face an accelerated filter schedule too. Pet dander and fur can clog a filter in as little as 30 days during heavy shedding seasons.
For more on making your system work efficiently in Tampa Bay’s unique conditions, our HVAC filter tips guide covers filter selection and maintenance in depth.
Stat callout: A well-maintained furnace can last 15 to 20 years or more. Skipping regular cleaning is one of the top reasons systems fail before the 12-year mark. Annual cleaning is a small time investment against a potential $3,000 to $5,000 replacement cost.
The uncomfortable truth about DIY furnace cleaning: What Tampa Bay homeowners should know
Now that you know the steps, let’s cut through the hype about DIY furnace care. We see a lot of homeowners come to us after something went wrong during a DIY cleaning, and almost every time, it wasn’t the cleaning that caused the problem. It was the overconfidence that came after it.
DIY furnace cleaning is genuinely valuable for maintenance. Changing filters, vacuuming the blower, and keeping the cabinet clear are real tasks with real impact. Done consistently, they extend system life, improve air quality, and reduce your energy bill. We’re not here to talk you out of any of that.
But here’s what most DIY guides leave out: cleaning a furnace is not the same as servicing one. When a certified technician visits your home, they’re not just cleaning. They’re checking gas pressure, testing the heat exchanger for cracks that can leak carbon monoxide, calibrating the thermostat, and testing the ignition sequence. These aren’t things a homeowner can easily replicate with a vacuum and a brush.
Tampa Bay’s mix of humidity and proximity to salt water makes this especially important. Corrosion on internal components can be invisible to the untrained eye. A heat exchanger crack that looks like a surface scratch to you might be a safety hazard that a technician spots immediately. We’ve seen it.
The gray area is this: a homeowner who cleans their furnace every year and never has it professionally inspected might feel like everything is fine, right up until it isn’t. A relationship with a trusted local HVAC technician doesn’t have to mean monthly service calls. An annual inspection alongside your DIY cleaning gives you the best of both approaches.
Pro Tip: Build a relationship with your HVAC technician before something breaks. Homeowners who call us mid-winter for the first time during an emergency face longer wait times and higher stress. A quick annual visit creates the kind of familiarity that makes urgent calls easier to handle.
For homeowners who want the full picture on what professional service covers, our professional furnace services page breaks it down clearly.
Next steps: Get expert furnace and HVAC help in Tampa Bay
If you’re ready for expert support or want ongoing peace of mind, here are your best options.
Home Therapist Cooling, Heating, and Plumbing is a family-owned HVAC company serving Tampa Bay homeowners with certified technicians who know the local climate inside and out. Whether you’re comfortable doing most of the maintenance yourself and just need a yearly professional inspection, or you’d rather hand the whole job off to someone you trust, we’ve got you covered.
Start with our HVAC basics for Tampa Bay page if you’re newer to system ownership, or jump into our HVAC troubleshooting guide if something already feels off. And if you’re building your maintenance routine from scratch, our full beginner HVAC guide is the place to start. When you’re ready to schedule service or just want to talk through what your system needs, give us a call. We’re here to make HVAC less overwhelming, one home at a time.
Frequently asked questions
Is it safe to clean a gas furnace myself?
Yes, it is safe if you follow the right protocols, including shutting off both power and gas and verifying with a voltage tester before touching anything inside the cabinet.
How often should I clean or replace my furnace filter?
Check or replace your filter every 1 to 3 months during heating season, moving closer to monthly if you have pets or high dust levels in your home.
What signs mean I need professional furnace cleaning?
If your unit smells like gas, short-cycles, or produces excessive soot after a DIY cleaning, stop using it and contact a professional right away.
Should I clean my furnace before or after heating season?
Experts recommend scheduling a full cleaning before heating season begins so your system is ready to run efficiently from the first cold night.
Recommended
- Furnace Cleaning in Tampa Bay, FL | Home Therapist
- Air Conditioning Maintenance Guide for Tampa Bay Homes Home Therapist Cooling, Heating, and Plumbing
- 7 Steps to a Complete HVAC Replacement Checklist for Homeowners Home Therapist Cooling, Heating, and Plumbing
- Indoor Air Quality and Ductwork FAQ for Tampa Bay Homeowners | Home Therapist
- Step by Step HVAC Repair Guide for Homeowners – Lucas Air Conditioning and Heating
More Heating & Heat Pumps Articles
- How Two-Stage Furnaces Boost Comfort and Efficiency
- A $89 Tune-Up on Indigo Oasis Ct: Cooling and Heating Maintenance in Gibsonton, FL 33534
- Best 5 Heat Pumps 2025 for Efficient Heating Solutions
- Heat Pump Vs Air Conditioner: Costs, Efficiency & Best Fit
- Rental Property Heat Pump Replacement in Tampa: Repair or Replace?


